Dennis Lacy
-
Posts
2,487 -
Joined
-
Last visited
Content Type
Profiles
Forums
Events
Gallery
Everything posted by Dennis Lacy
-
I am going to use the kits optional bucket seats and roll bar with a few kit bashed items like steering wheel and, shifter, etc. Lots of detail painting.
-
You mean I converted you? LOL!
-
I took your advice and problem solved. I guess old habits are hard to break!
-
Screwed up, all better now!
-
That is the link that Fotki provides for forums. It's what I have put for years and years, literally thousands of pictures. When I try to remove the tags it still shows the text underlined and clickable just as you show above. No picture.
-
Place looks nicer! However, I just updated one of my WIP threads and inserted Fotki photo links as I've always done and once posted it shows the link text, not the pictures. The initial pictures from last weekend are linked exactly the same way and show up fine? Here's an example: [URL=https://public.fotki.com/deucepu/57-chevy-bel-air-st/1619410454759.html][IMG]https://images34.fotki.com/v1605/photos/7/2740157/16353125/1619410454759-vi.jpg[/IMG][/URL]
-
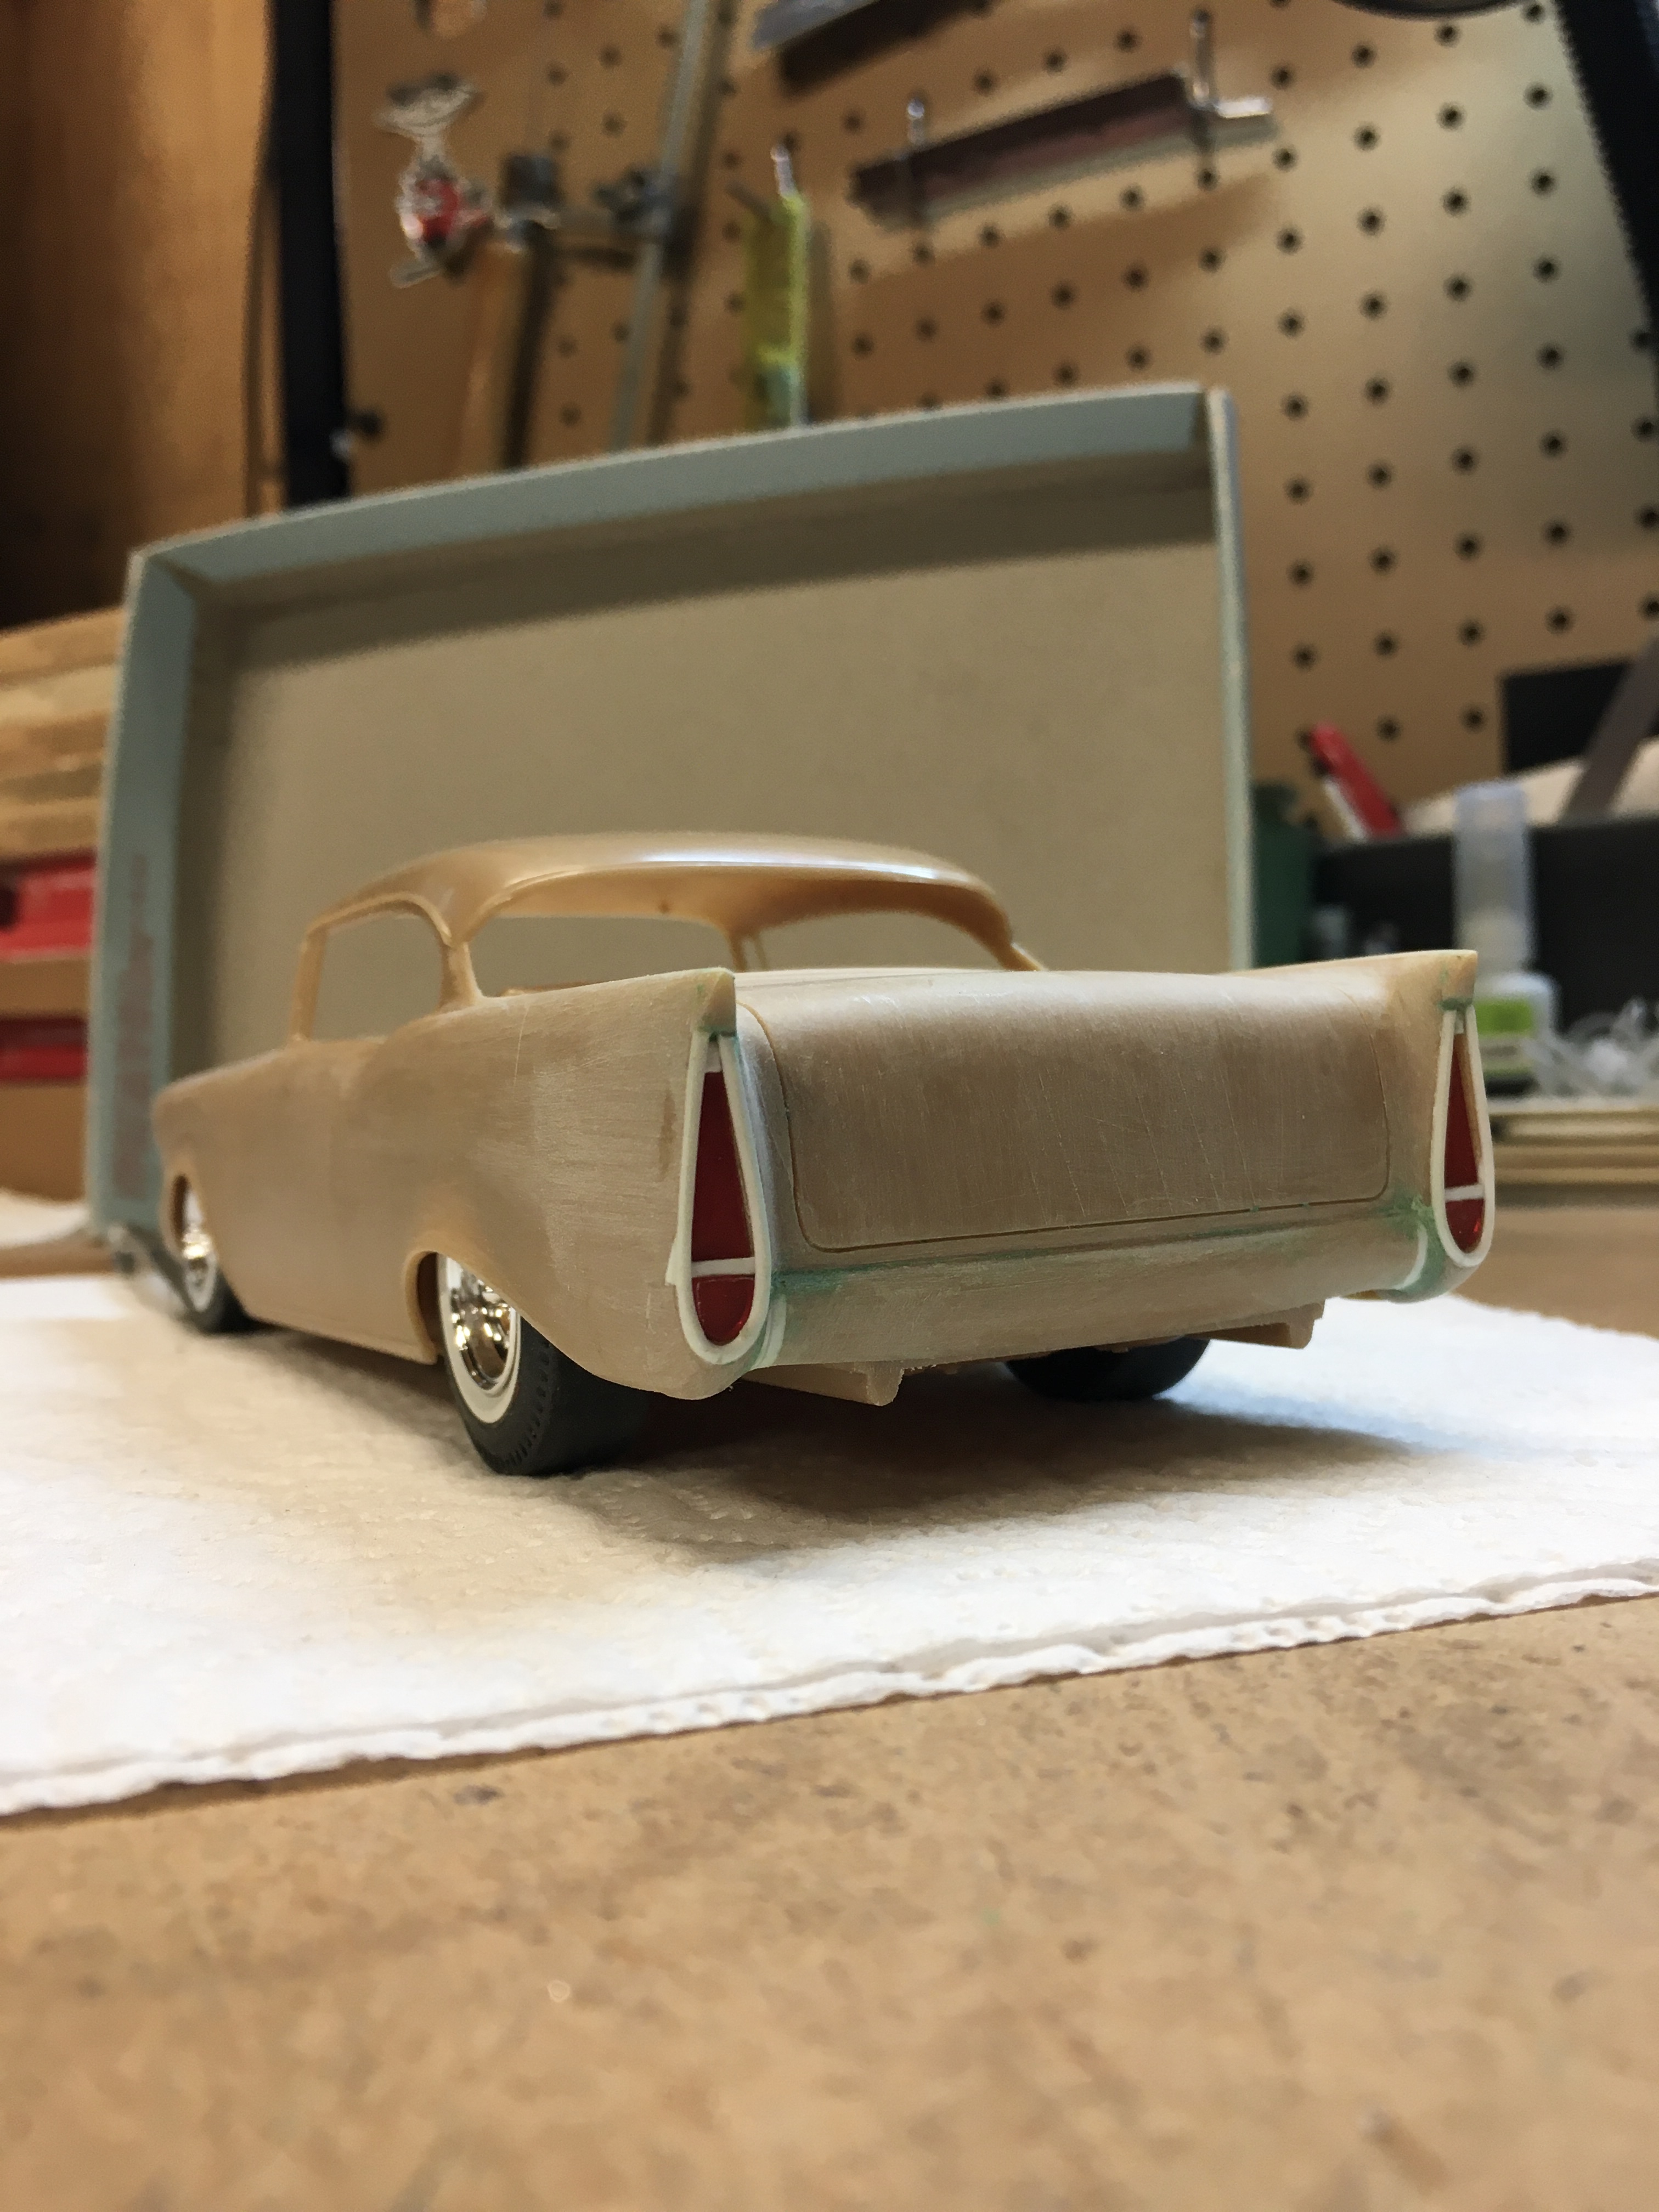
Thanks to everyone who has commented. These 50's cars are really not in my wheelhouse so I'm hoping I make it by faking it here. I'm really surprised how overwhelmingly positive the opinions have been on how I started modifying the rear end. I figured the kits front treatment would go over good but out back I was expecting quite the opposite. UPDATE! I don't have a lot of resources when it comes to customizing fodder for a 50's car and after completing the initial work last weekend I have been stumped all week on what to do for some kind of grill treatment. For the rolled pan the kit provides a very basic tooth grill and a couple of chrome bullets but the grill isn't very exciting IMO. Today I had an "Ah Ha!" moment. I ended up removing the bulky crest area from the original grill bar turning it into a smooth/peaked floating bar and then thinned down the bullets from behind which both decreased their diameter and made them shorter. I then made it so the bar and bullets pin to the roll pan which will make final assembly a breeze. I also knocked down the peaks on the headlight surrounds so they're a little more curved. Moving out back I made some refinements. I added some material to the tips of the fins to create an eyebrow that ties in with the eyebrows on the headlights. I then filled the little voids above the light lenses and then wrapped the light surrounds in .040" half round to give the blunt edges and finished look and also make the lenses recessed rather than flush. I also did some more work to further blend everything together with some green filler here and there. I did the basic set up to the Chevy 409 using the kit provided block/trans and then adding to it the heads, Offenhauser valve covers, dual 4bbl hi-rise intake, carbs, timing cover and belt drive from AMT's '62 Impala kit. The nice generator with tensioning arm is from a Revell small block Chevy and the little chrome air filers are from Revell's '70 Nova. I'll also be using the '62 Impala exhaust manifolds (forgot to tack them on for a pic!) And here's the latest mock up... So the extent of the customized front and rear ends are basically done and I'm very happy with the look. The only major body mod left is to recess a license plate frame into the trunk lid and add some exhaust tips with little scallops in the rolled pan for them.

-

another '32 sedan -update 4/26/21
Dennis Lacy replied to Rocking Rodney Rat's topic in WIP: Model Cars
Sorry Ed can't get to it quicker (I want one too!) but you've chopped enough 32's that you should whip through it in no time! That green sedan by Steadfast is so killer just like everything else they build. I've done some business with Henry, super cool dude! -
60's Banger Geek '27 T Touring - Updated 10/13/18
Dennis Lacy replied to Dennis Lacy's topic in WIP: Model Cars
It's a great color. I'm really glad I went with it! I'm also really happy with the way the wheels turned out, especially seeing them against the green body. -
It was a fun journey watching Kit build the Saltster some years ago on the smaller niche forum Traditional Rod & Kustom In Scale. The project spanned a few years and it was a monumental occasion when he completed it. I’m also proud to call him my friend and he continues to teach and inspire me. Congrats, Brother!
-
Man, this looks bad ass and set on KILL! Awesome work Triple R!!!
-
60's Banger Geek '27 T Touring - Updated 10/13/18
Dennis Lacy replied to Dennis Lacy's topic in WIP: Model Cars
UPDATE! Yesterday I successfully sprayed the body, frame and related small parts in Tamiya "Cobalt Green". Tonight I couldn't resist sneaking out to the garage for a quick mock up. To say that I'm happy with the color choice is an extreme understatement! I'm also very pleased with the Champagne Gold accent color I chose. I still need to clear coat and then mask and spray the inside of the body flat black but it feels good to see this LONG project in color. -
“Joker Is Wild” - AMT / Revell 32 Roadster Kitbash for DSC
Dennis Lacy replied to OldNYJim's topic in WIP: Model Cars
Very cool! I like the simple flame pattern this time around and the lettering on the deck lid turned out awesome. Can't wait to see it sealed in shiny clear! -
Since returning to model car building in 2008 I have built nothing but late 20's and 30's Hot Rods with the exception of a "curbside" 1953 Ford Pickup Custom a couple of years back, I'm in the process of wrapping up a 1927 T Hot Rod currently but I'm stuck on that project until I paint and clear it in the coming week. With that I decided to start a new project this weekend and I also decided I would take a break from the early Ford's and try something out of my comfort zone, a '57 Chevy! I built the classic AMT kit as a teen in the 90's and was given another a couple of years ago from a friend. That first one is long gone so I thought it would be fun to revisit and it's a pretty simple kit so I won't bog myself down on going crazy with the details. In fact, I'm not even going to bother detailing the chassis. Instead I'll focus on the body and interior but it won't be a true curbside as it will have an engine as well. After brainstorming for several days I settled on a plan and with the weekend finally here it was time to get started... The first step was to smooth out the body shell. This meant removing all of the side trim, hood and trunk emblems, the trim from the tops of the tail fins and the molded-in windshield wipers. I also scribed the door and trunk panel lines deeper as in some spots they were barely visible and overall probably would have ended up being very faint after body work, primer and paint. Up front I am using the kit supplied custom headlight housings and front rolled pan/grill surround. Time was spent making sure these pieces dry fit nicely before permanently attaching making the blending easier and minimizing the need for any filler afterwards. I also decided to fill the hood "gunsights" with pieces of the kits parts sprue and blend the filler pieces into the existing hood bumps. The kit also provides a custom rear rolled pan and custom taillight housings but they end up extending the already LONG quarters so I didn't care to use them, not as-is at least. Instead I decided to make use of the existing cavities in the rear of the fins and blend the rolled pan in so that it didn't stick out. To start I cut off the back edge of the fins vertical... I then cut the "pods" off the ends of the rolled pan pieces, trimmed them down and then attached them flush... I then added some material to the ends of the rolled pan and permanently installed it between the two "pods" so that it blends into them. I added some partitions separating the taillight lenses into 4 pieces. That crescent shaped lenses come in the kit and are meant to go in the rolled pan. The triangle shaped lenses are also found in the kit and are remnants from some other custom body options from the original issue that are no longer in the kit. I sanded those red triangles slightly and fit them into the cavities in the ends of the fins. (I still need to fill the little voids above them.) I selected the rolling stock. The shallow & deep chrome wheels are from The Modelhaus while the tires and slicks are AMT Parts Pack items. And finally some crude mock up pics. This is the stance I'm going for. The kit gives you the option of slamming the front like this so I'll just have to lower the rear which is easy. The idea here is a customized '57 with a really healthy 409 (more on that kit-bashed engine next time!) that not only looks good rolling down the road but can also throw down with some whoop-ass when needed. So a cross between a custom and a street machine all in early 60's flavor. That's all for now but plenty more to come. Let me know what you think. I know a lot of you '57 Chevy purists are gonna hate that I cut off the angled fins and that's fine! I like it so that's what matters, LOL!
-
Glad I could help, LOL! This is coming along nicely. I’ll never understand why they made the engine so undersized in this kit. Everything else about is a huge improvement over the original but then the motor kills it. The most upsetting part is if it had been properly sized think how awesome it would be for kit bashing! Oh well...
-
@BullysCustomModelParts Pro Street, I freaking love it! I also love the use of the Auto Drag wheels. They were such a staple of the 80’s, people put them on everything. Are you going to fill in the fenders around the upper A arms? I’ve actually seen that done a few times in the full scale world when people would fit Pinto front suspension into an early car.
-
60's Banger Geek '27 T Touring - Updated 10/13/18
Dennis Lacy replied to Dennis Lacy's topic in WIP: Model Cars
UPDATE! Still chipping away. This past Sunday I assembled and wired the flathead and permanently assembled the wheels & tires. The red wire is from Parts By Parks while the little dividers are from Model Car Garage. As usual, I couldn't resist a mock up! The body is in its first round of primer and also got its first round of tune up and awaits a new coat to see where its at. When you multiple raw plastic colors going on it's always exciting to finally see a project all in one color and really get a sense of how it looks. I couldn't be happier with the stance and proportions and man am I glad I decided to swap in the V8. -
Just following up that my truck is posted in the finished section for trucks. If you haven't ventured over there yet here's a link. Check it out!
-
I've never had this kit but I keep thinking I should for the wheels, if nothing else. I'm a sucker for 80's and 90's billet wheels! I buy distributor wire by Parts By Parks from a seller on eBay. Detail Master packages it, too, but theirs is ever so slightly smaller gauge. I justify the postage because you get enough to do 3 or 4 engines so I'm really only spending about $1 on postage per model.
-
@tim boyd It would be absolutely epic to have all of the Modelers Corner columns in one book! My dad still has his entire collection of Street Rodder but it’s not very handy to have to have all those issues on hand. I hope someday that idea pans out...
-
A couple of years ago I did this AMT '53 as a curbside so no engine or chassis detail. Quite a few external mods though such as moving the front wheel openings forward 4.5 scale inches, molding the front roll pan and bumper delete, smoothing the stock grill and modifying it to take separate headlight reflectors, grafted 6 rows of louvers into the hood, scraped off the molded windshield wipers and installed separate chrome wipers, made a flush fit bed cover, molded in the kits rear rolled pan and grafted 1948 Ford taillights into the rear fenders. Resin tuck & roll interior set from Drag City Casting and a 1950 Ford steering wheel. Wheels and side pipes from AMT's 1936 Ford Coupe/Roadster with their double stripe Parts Pack tires & slicks.
-
60's Banger Geek '27 T Touring - Updated 10/13/18
Dennis Lacy replied to Dennis Lacy's topic in WIP: Model Cars
Thanks for all of that, Alan! I couldn't tell you how many times I've thrown these wheels out thinking I'd never use them. It's amazing how much better (crisper) they look with the heavy plating removed. Then you realize they have no lug detail and after that you realize Halibrand supplied them with push-in wing nuts. I'm very happy with how they turned out. I remove kit plating from almost everything I do these days. I find that it's too thick and too toy-like. I also don't generally like full scale hot rods bathed in chrome. There's a lot of nice engraving in a lot of these kits that gets washed out with the plating so uncovering that detail and careful painting goes a long way. -
60's Banger Geek '27 T Touring - Updated 10/13/18
Dennis Lacy replied to Dennis Lacy's topic in WIP: Model Cars
Thanks, Tim! I think the color combo should look pretty good, too. I was looking for something similar to the color the body is molded in. -
Looks like you're getting there on the hood sides. Not an easy way to go about it! Then again I don't know that there IS an easy way? I did a hood top very similar not too long back for a '32 5-Window. Next time I do a louvered hood top I'll be setting in individual rows as opposed to one big chunk because if you look close you can see the shape of the piece I grafted in.
-
Freakin’ RAD! Killer details and perfect stance & proportions.