Dennis Lacy
-
Posts
2,487 -
Joined
-
Last visited
Content Type
Profiles
Forums
Events
Gallery
Everything posted by Dennis Lacy
-
Congrats on the new ride, Dan! Perfect family car and the perfect mild project that you can personalize without having to tear it down to a bare frame. I’m with you on the white brake drums, those gotta go. I’ve seen several examples where people have painted them a cast gray or gun metal and that looks really nice. You can also put some chrome closed end lug nuts and chrome dust caps on the front to dress them up a bit. Man, those 40’s sedans have HUGE booty, don’t they?! ?
-
 What a fantastic idea! Nice work reworking the roof and very nice work cutting out the seat and scratch building all of the bed structure. Can’t wait to see more!
 -
Thanks a bunch, Steve! I really surprised the hell out of myself with the foil job. But, I sat down at the bench with the only goal for the afternoon being to foil the trim and I took my time. I used a brand new #11 blade and found it easier to control the trimming by holding the blade with my fingers rather than in a handle. I went non-alcoholic on the ice cold drink this time as my nerves felt relaxed enough. When I do want spiked punch the recipe is very simple, though: Glass, Ice, Jack Daniels #7 and Diet Coke. ?
-
Yes, Tamiya clear right out of the rattle can! And, yes, got to eat while the can sun bathed. ?
-
58 Ferrari Testarossa....now hear me out....
Dennis Lacy replied to chris chabre's topic in WIP: Drag Racing Models
The second to last wheel mock up is what I like best. -
UPDATE! I successfully clear coated the body, hood, dash and some other small parts on my lunch hour at work today.

-
@Dhgfx4 That looks a million times better!!!
-
Excellent work on the body flip mount, that’s more detail than you showed me yesterday. Firewall is so neat with the rounded magneto relief and you’re the master at making those big drag car wheel wells. I also love the fitted hood hole. This thing is gonna be so killer!
-
Thanks so much!
-
Thanks! It wasn’t as bad as I was anticipating and I did it all on the first try. About halfway through I got into a good groove and cruised through.
-
UPDATE! Today was finally the day… BMF! I put on one of my favorite podcasts, poured an ice cold drink, sat down at my work bench and took a deep breath. It did not turn out perfect but for my first time ever doing any significant foil work I’m certainly pleased with the results. And I did the whole job in one attempt! Next step will be to spray on the clear coat to seal everything. I finally detail painted the molded belts on the front seats then glued them in along with the roll bar. I also detail painted the dashboard and now need to seal it all in with clear as well. That’s all for now.
-
They have terrible headlights, too!
-
I’ve had the very same idea. My daily driver is a 1987 GT and I would love to build a model of it but the front end on this old AMT/MPC kit makes me want to vomit! ? Very interested in seeing how this turns out for you to get insights on my own upgrade. If it were me I’d also definitely be using the complete correct engine from the ‘90 LX kit. Probably the whole chassis, too! ?
-
Eddie Van Halen Van Hauler
Dennis Lacy replied to avidinha's topic in Model Trucks: Pickups, Vans, SUVs, Light Commercial
Very cool! I’ve always loved the truck and felt it was a shame when they repainted it with the very abbreviated graphics. Is this kit a curbside or full detail? The real truck had a ‘96 Corvette LT4 330hp engine and independent rear suspension. Curious if it has those details? -
58 Ferrari Testarossa....now hear me out....
Dennis Lacy replied to chris chabre's topic in WIP: Drag Racing Models
Excellent idea! -
What a great idea! For some reason I thought the Smoothster kit was 1:25 but I must be wrong because it looks like the wheelbase is perfect. I especially like how you integrated the rear filler pan and scalloped the body for the exhaust.
-
1963 Chevy Nova Wagon Street Rod FINISHED 3/20/22
Dennis Lacy replied to Dennis Lacy's topic in WIP: Model Cars
The original release of the ‘29 Roadster did have the Buick engine. Recent reissue of the Roadster has the small block Chevy that was in the original issue of the ‘30 Coupe. Upcoming reissue of the Coupe will get the Buick engine. -
1963 Chevy Nova Wagon Street Rod FINISHED 3/20/22
Dennis Lacy replied to Dennis Lacy's topic in WIP: Model Cars
Thanks! And, absolutely not! ? -
40 Willys Pickup street drags build
Dennis Lacy replied to OldNYJim's topic in WIP: Drag Racing Models
The pinstripe paint job is awesome! -
1963 Chevy Nova Wagon Street Rod FINISHED 3/20/22
Dennis Lacy replied to Dennis Lacy's topic in WIP: Model Cars
Unless of course the driver gets apprehended for exhibition of speed on the way home! ? -
1963 Chevy Nova Wagon Street Rod FINISHED 3/20/22
Dennis Lacy replied to Dennis Lacy's topic in WIP: Model Cars
Thanks! I do know just enough about these that they need a special front sump oil pan and do have one from the same ‘66 Nova Pro Street kit that I took the valve covers from but then I decided since it’s a curbside undercarriage that I don’t care and will just use a standard pan. ? -
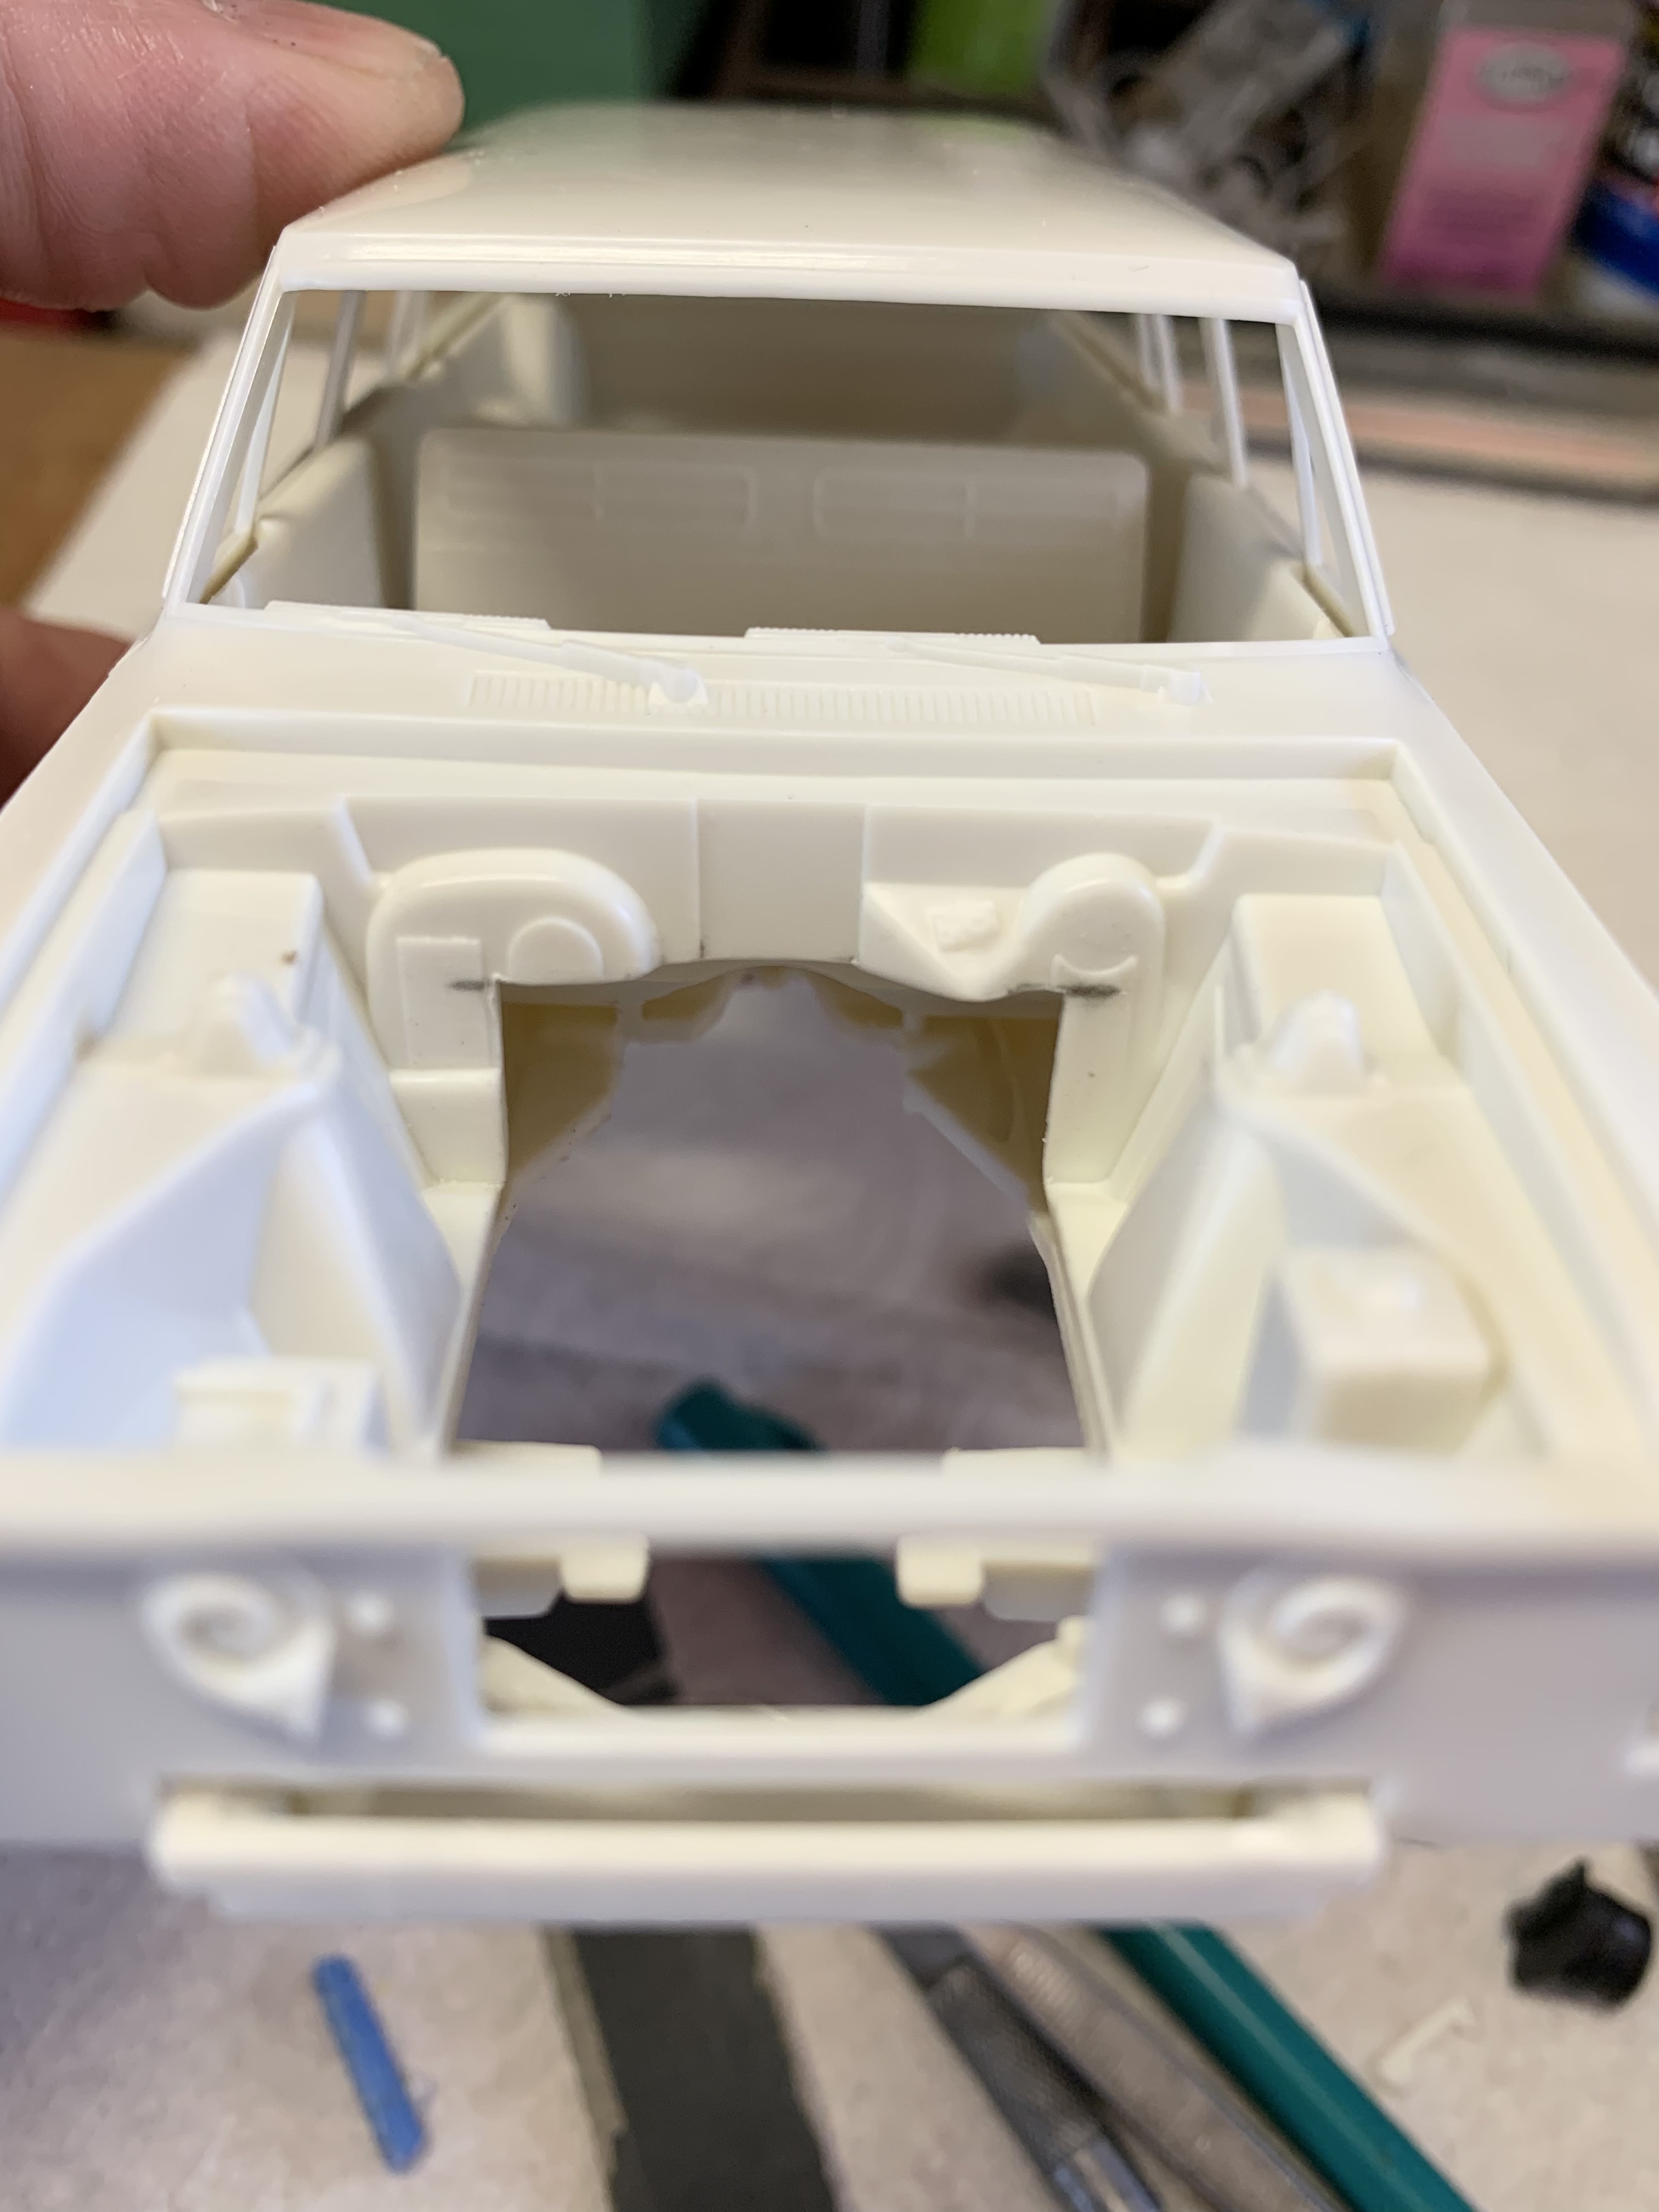
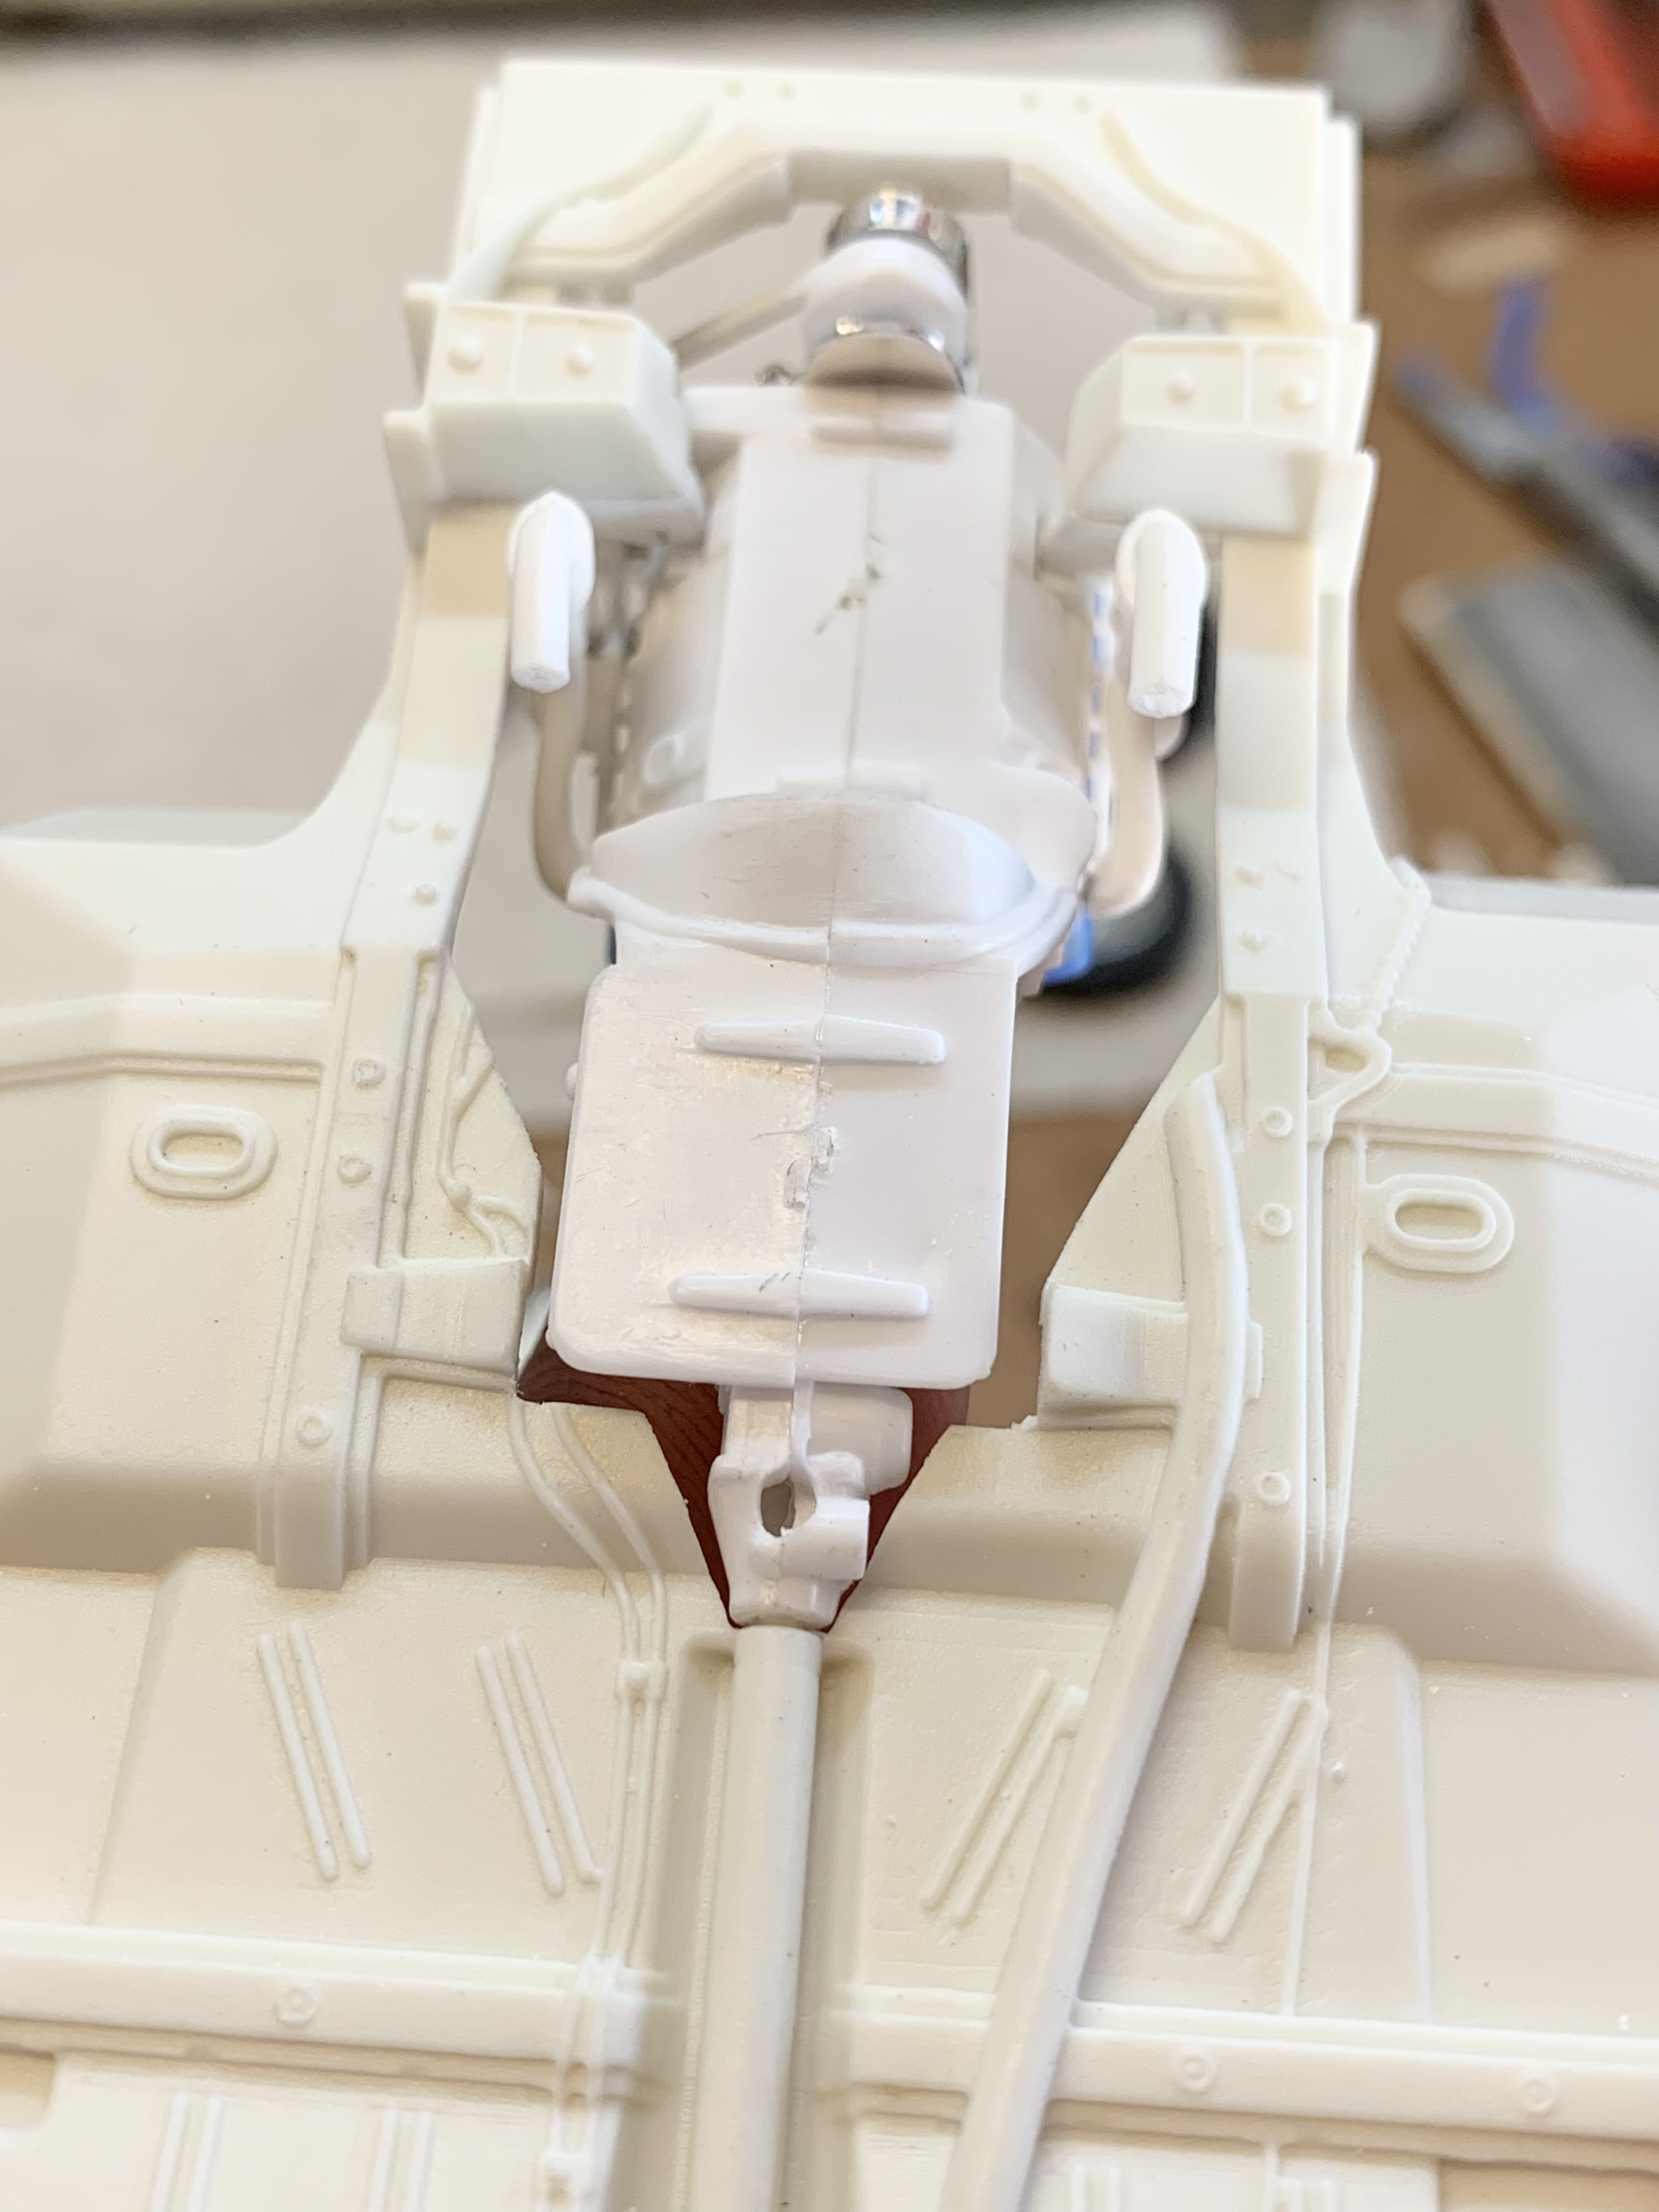
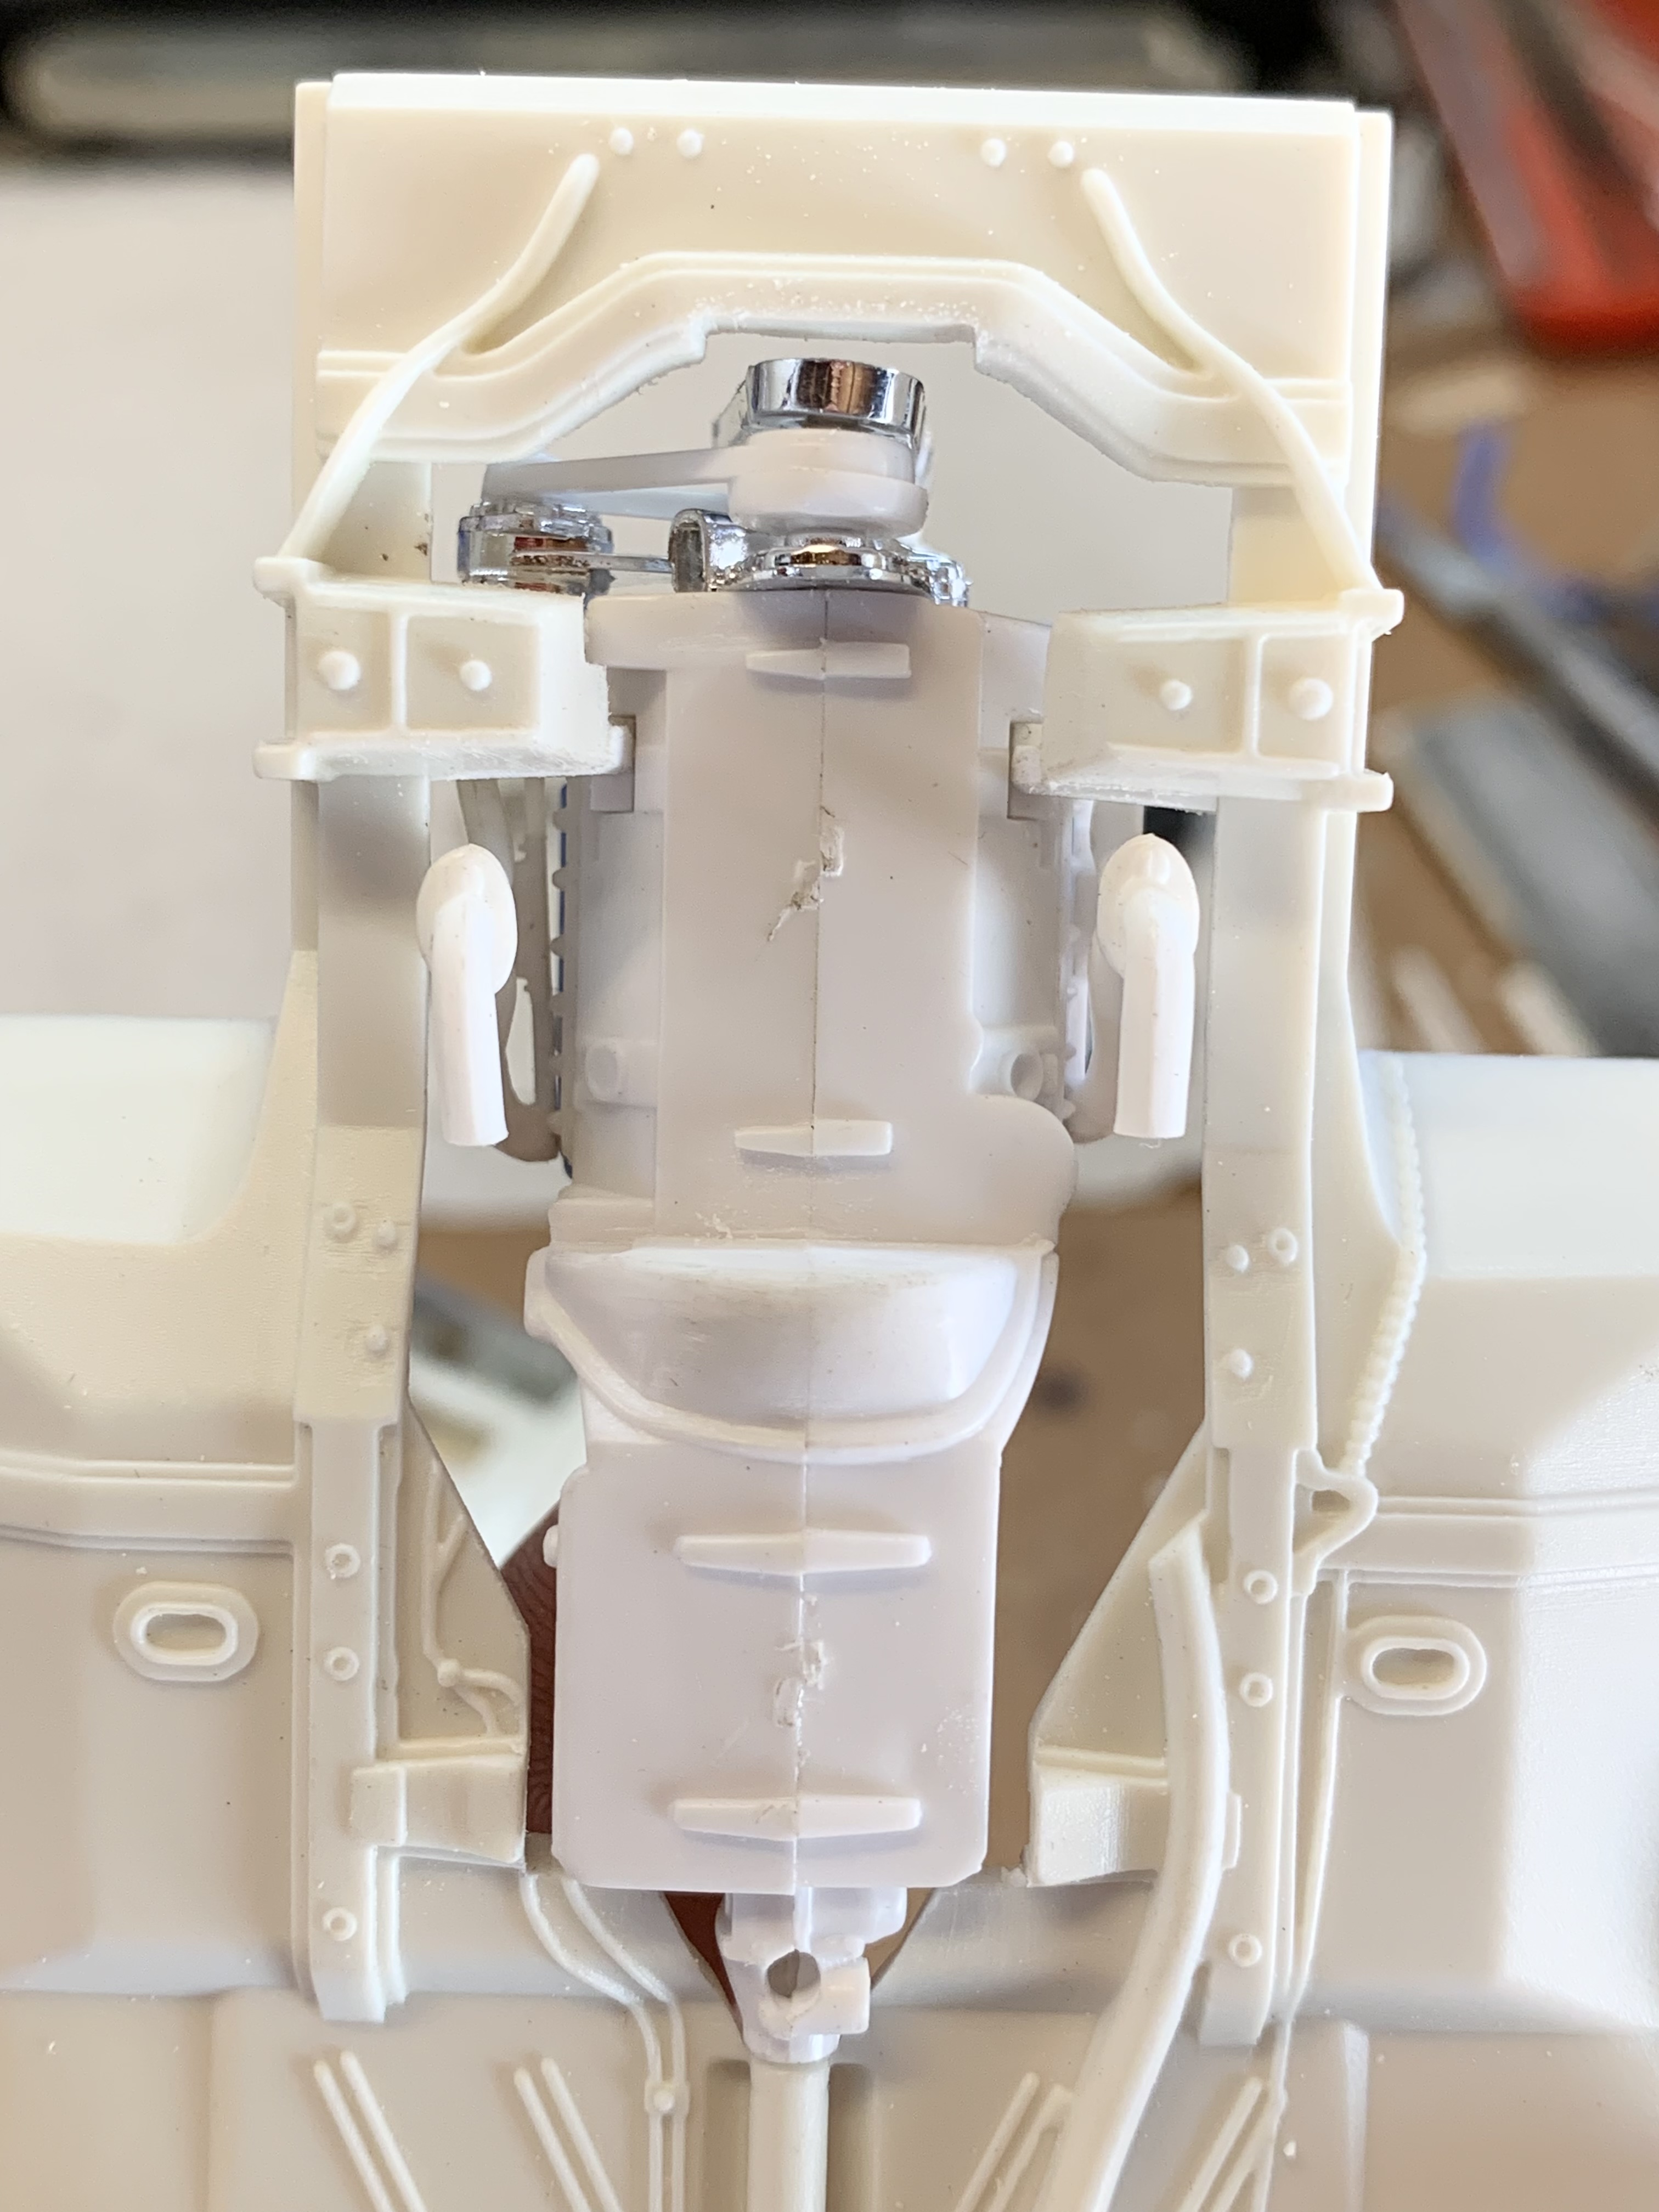
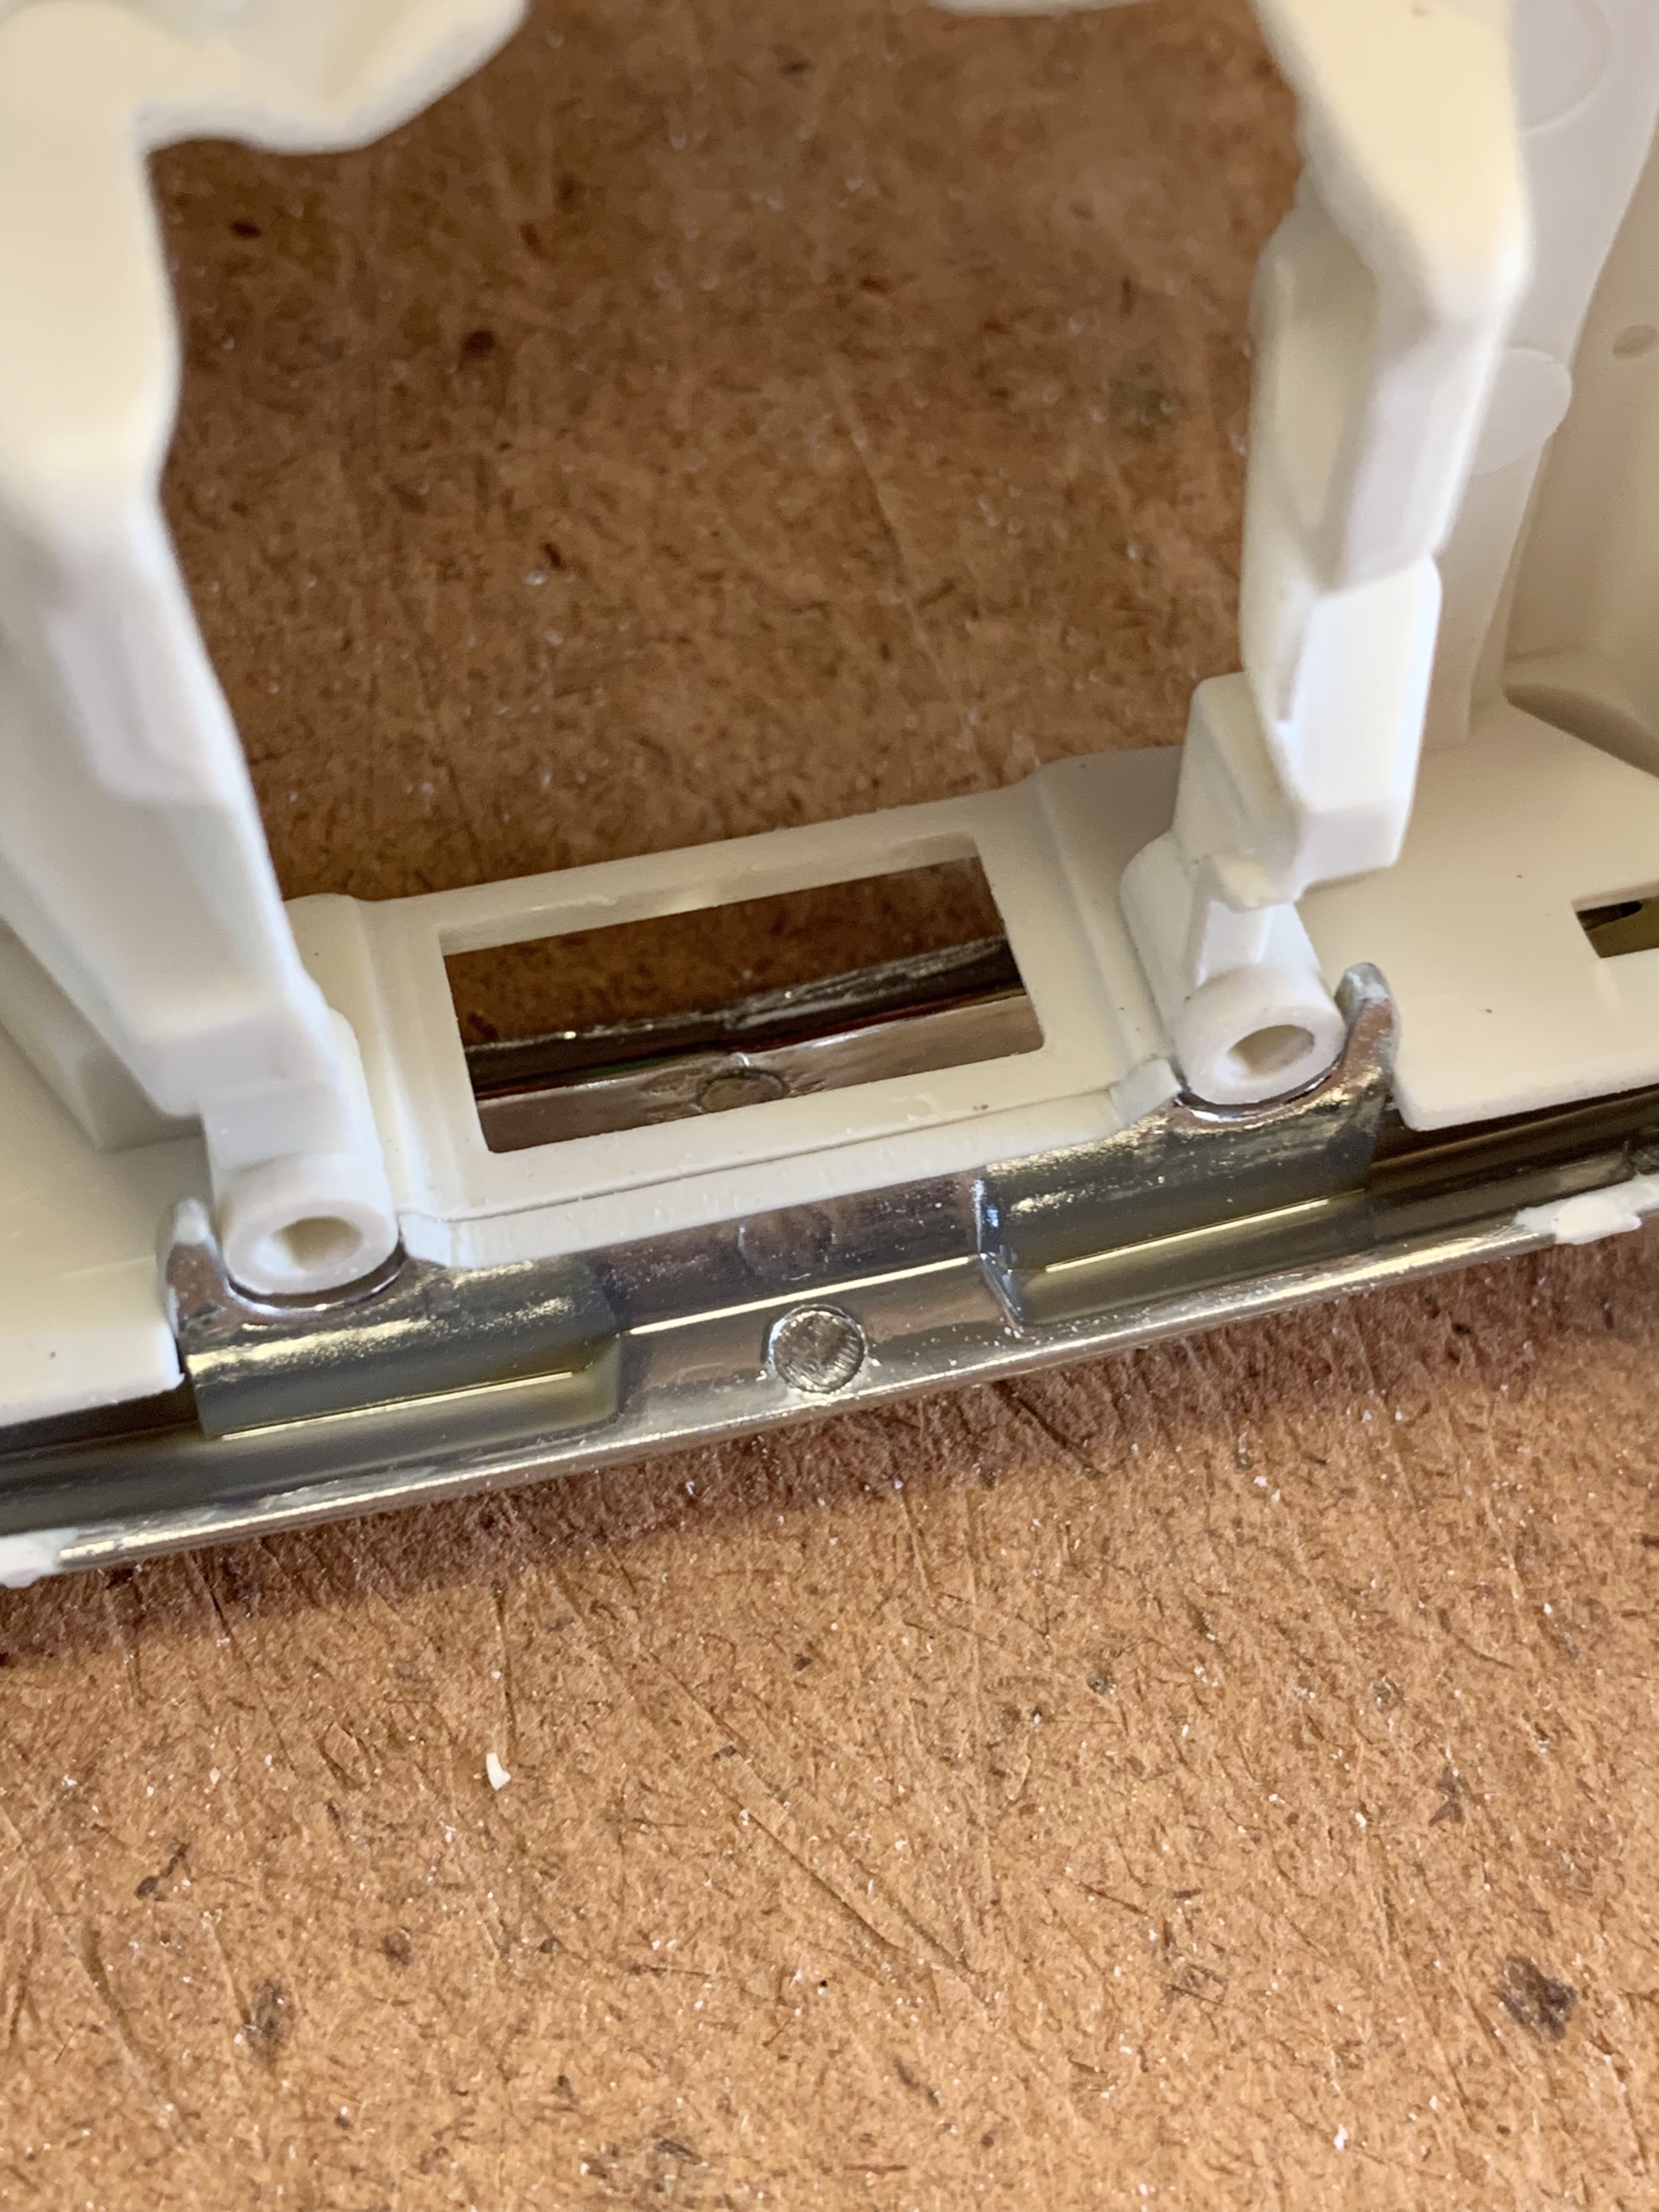
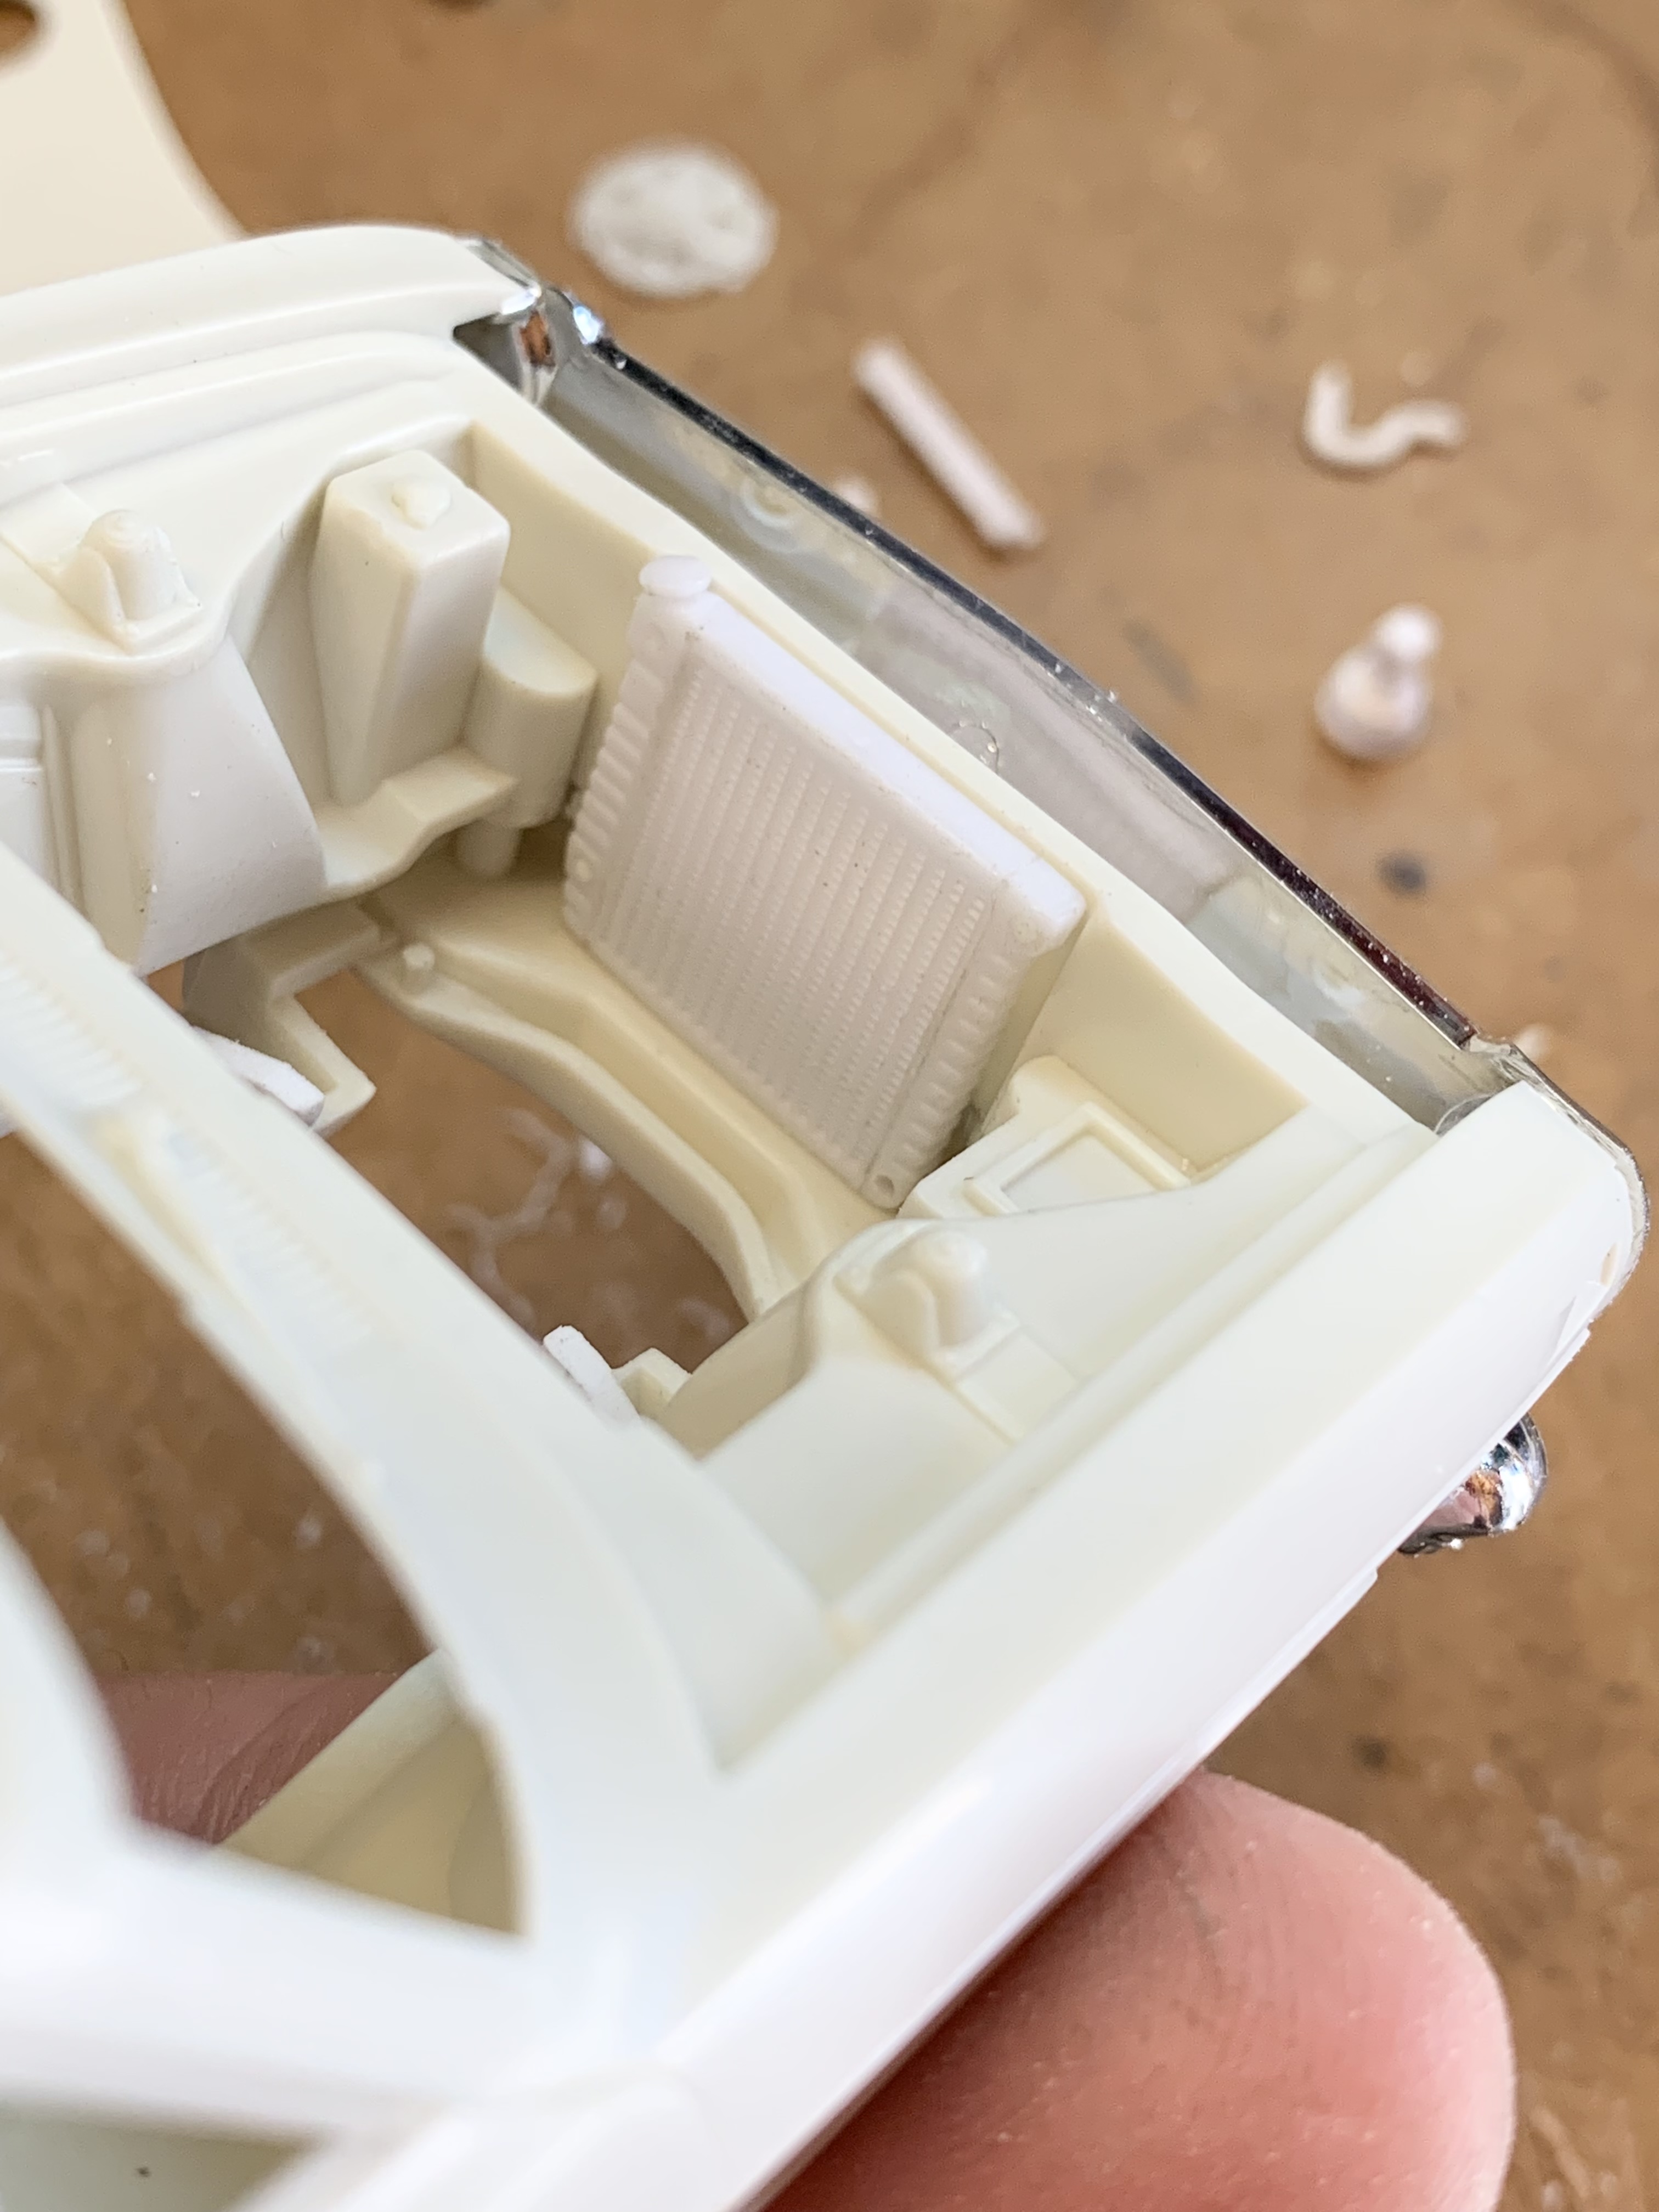
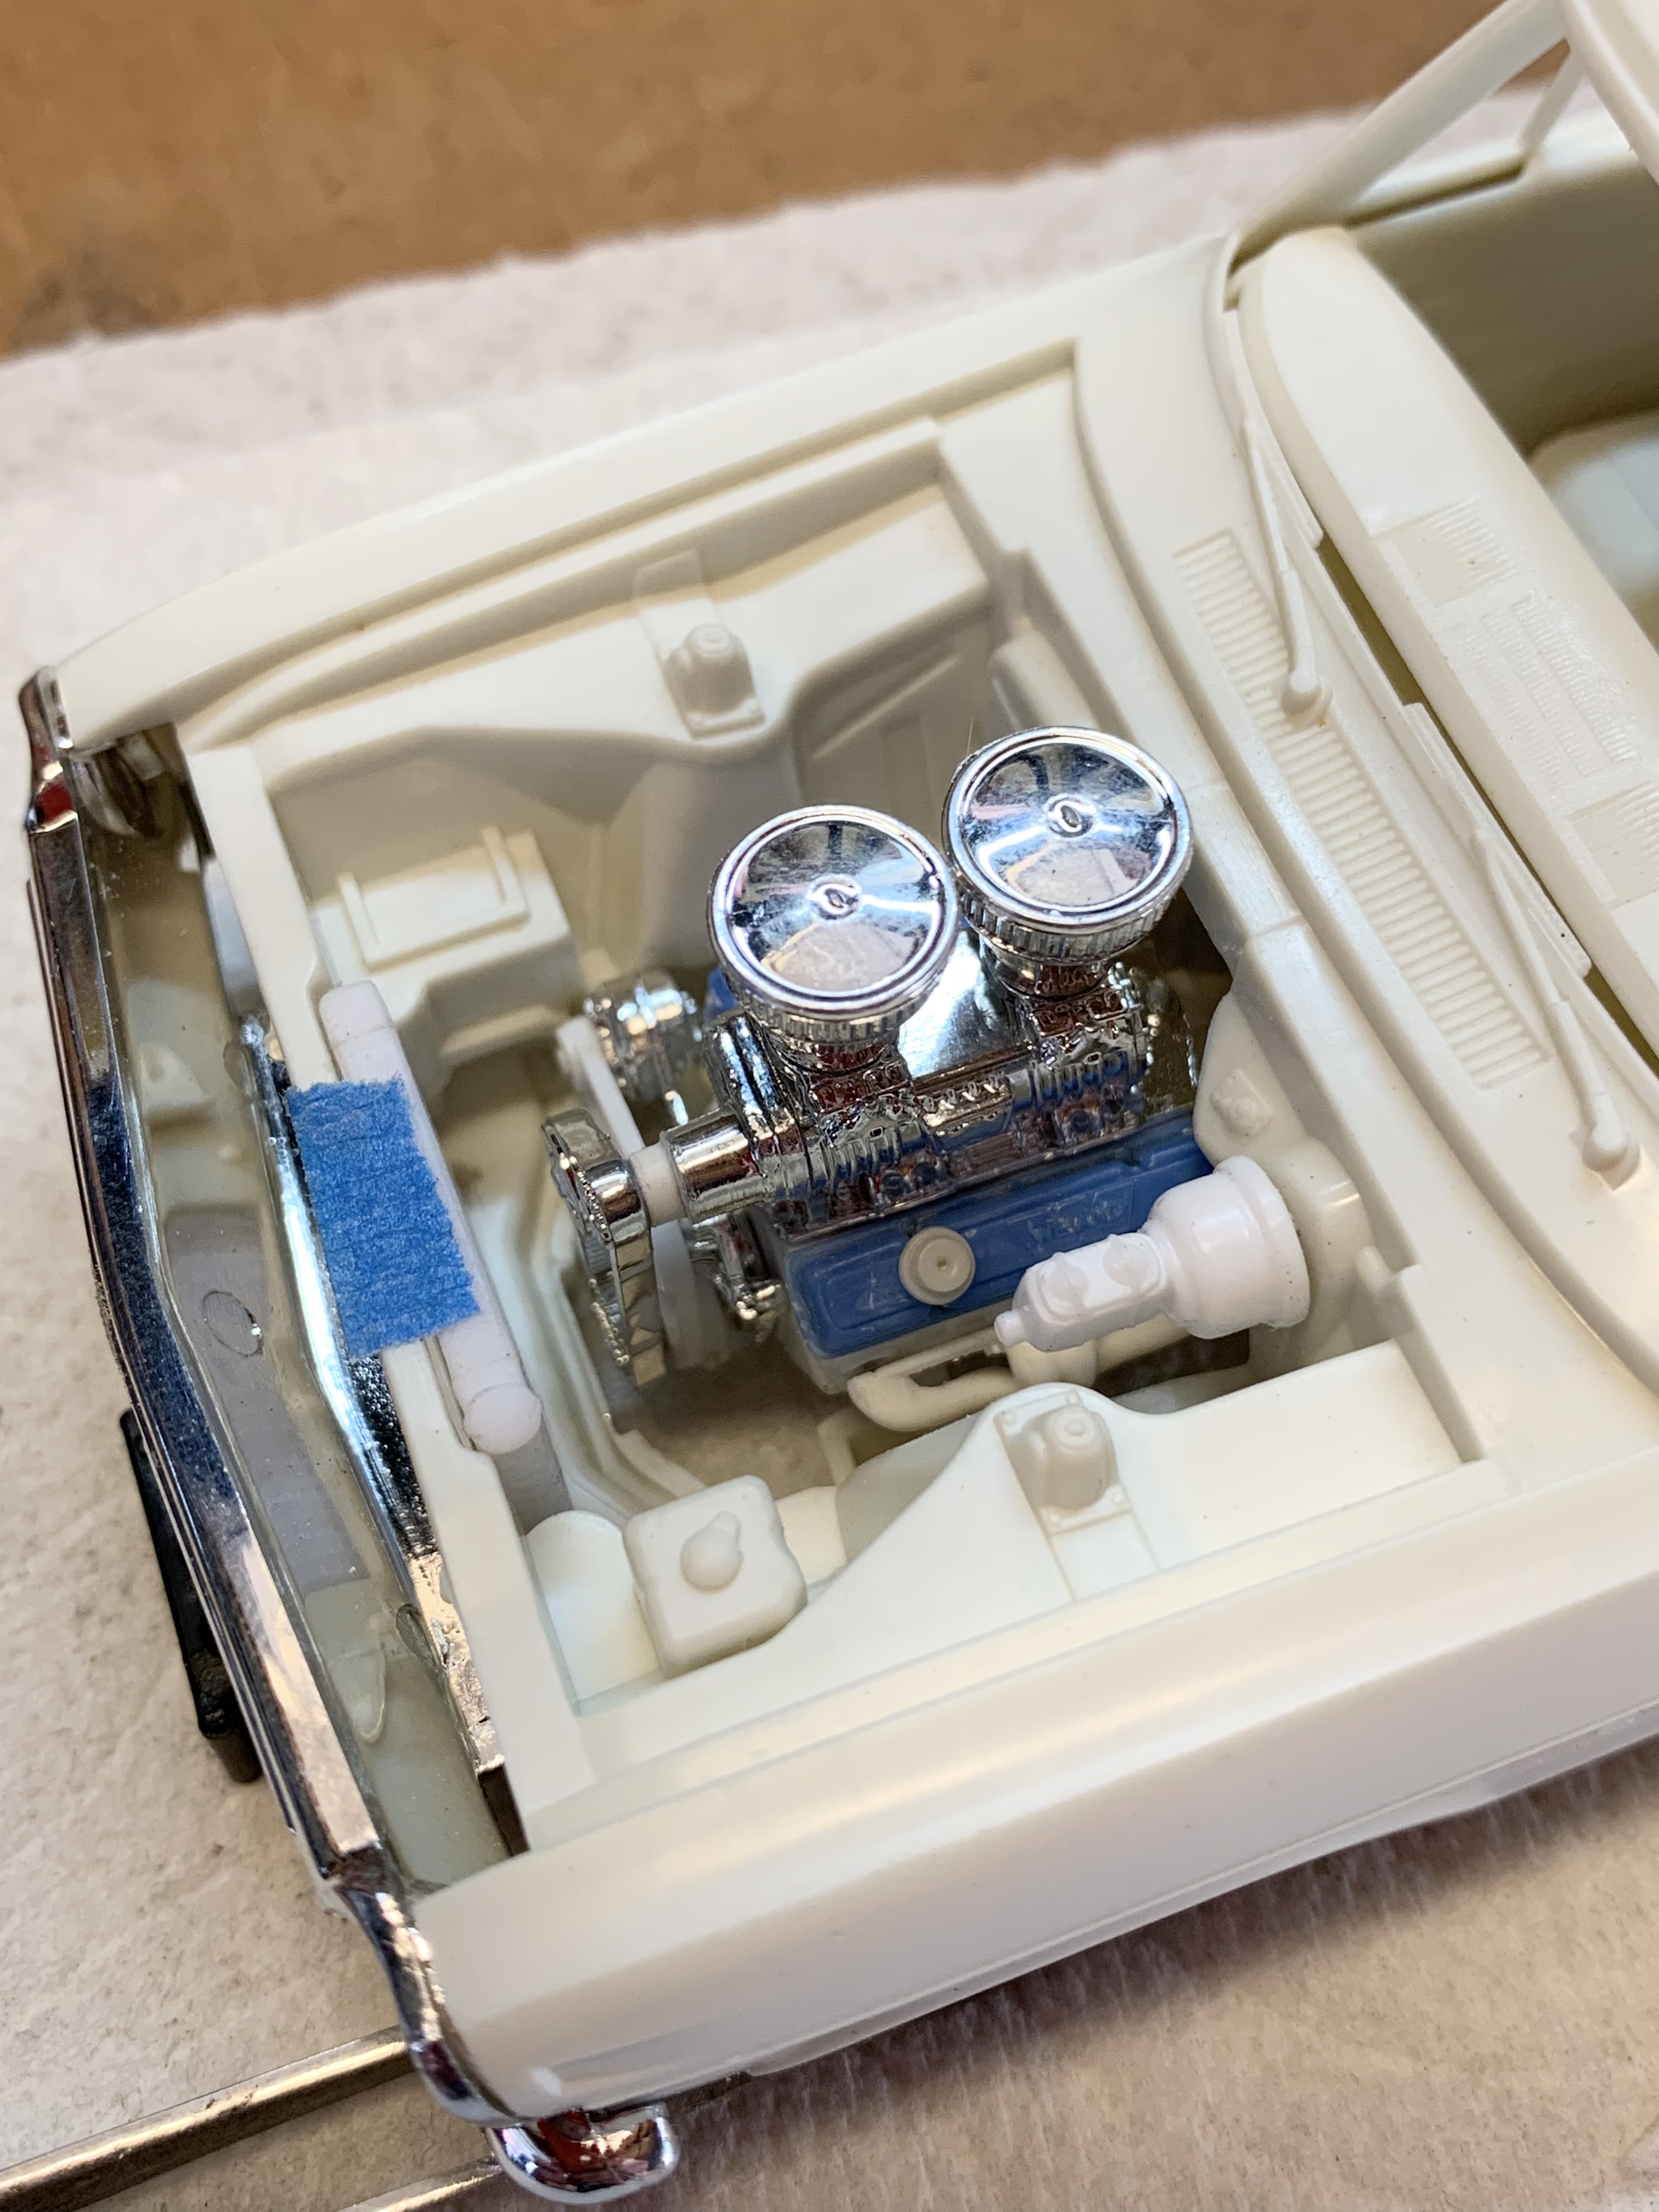
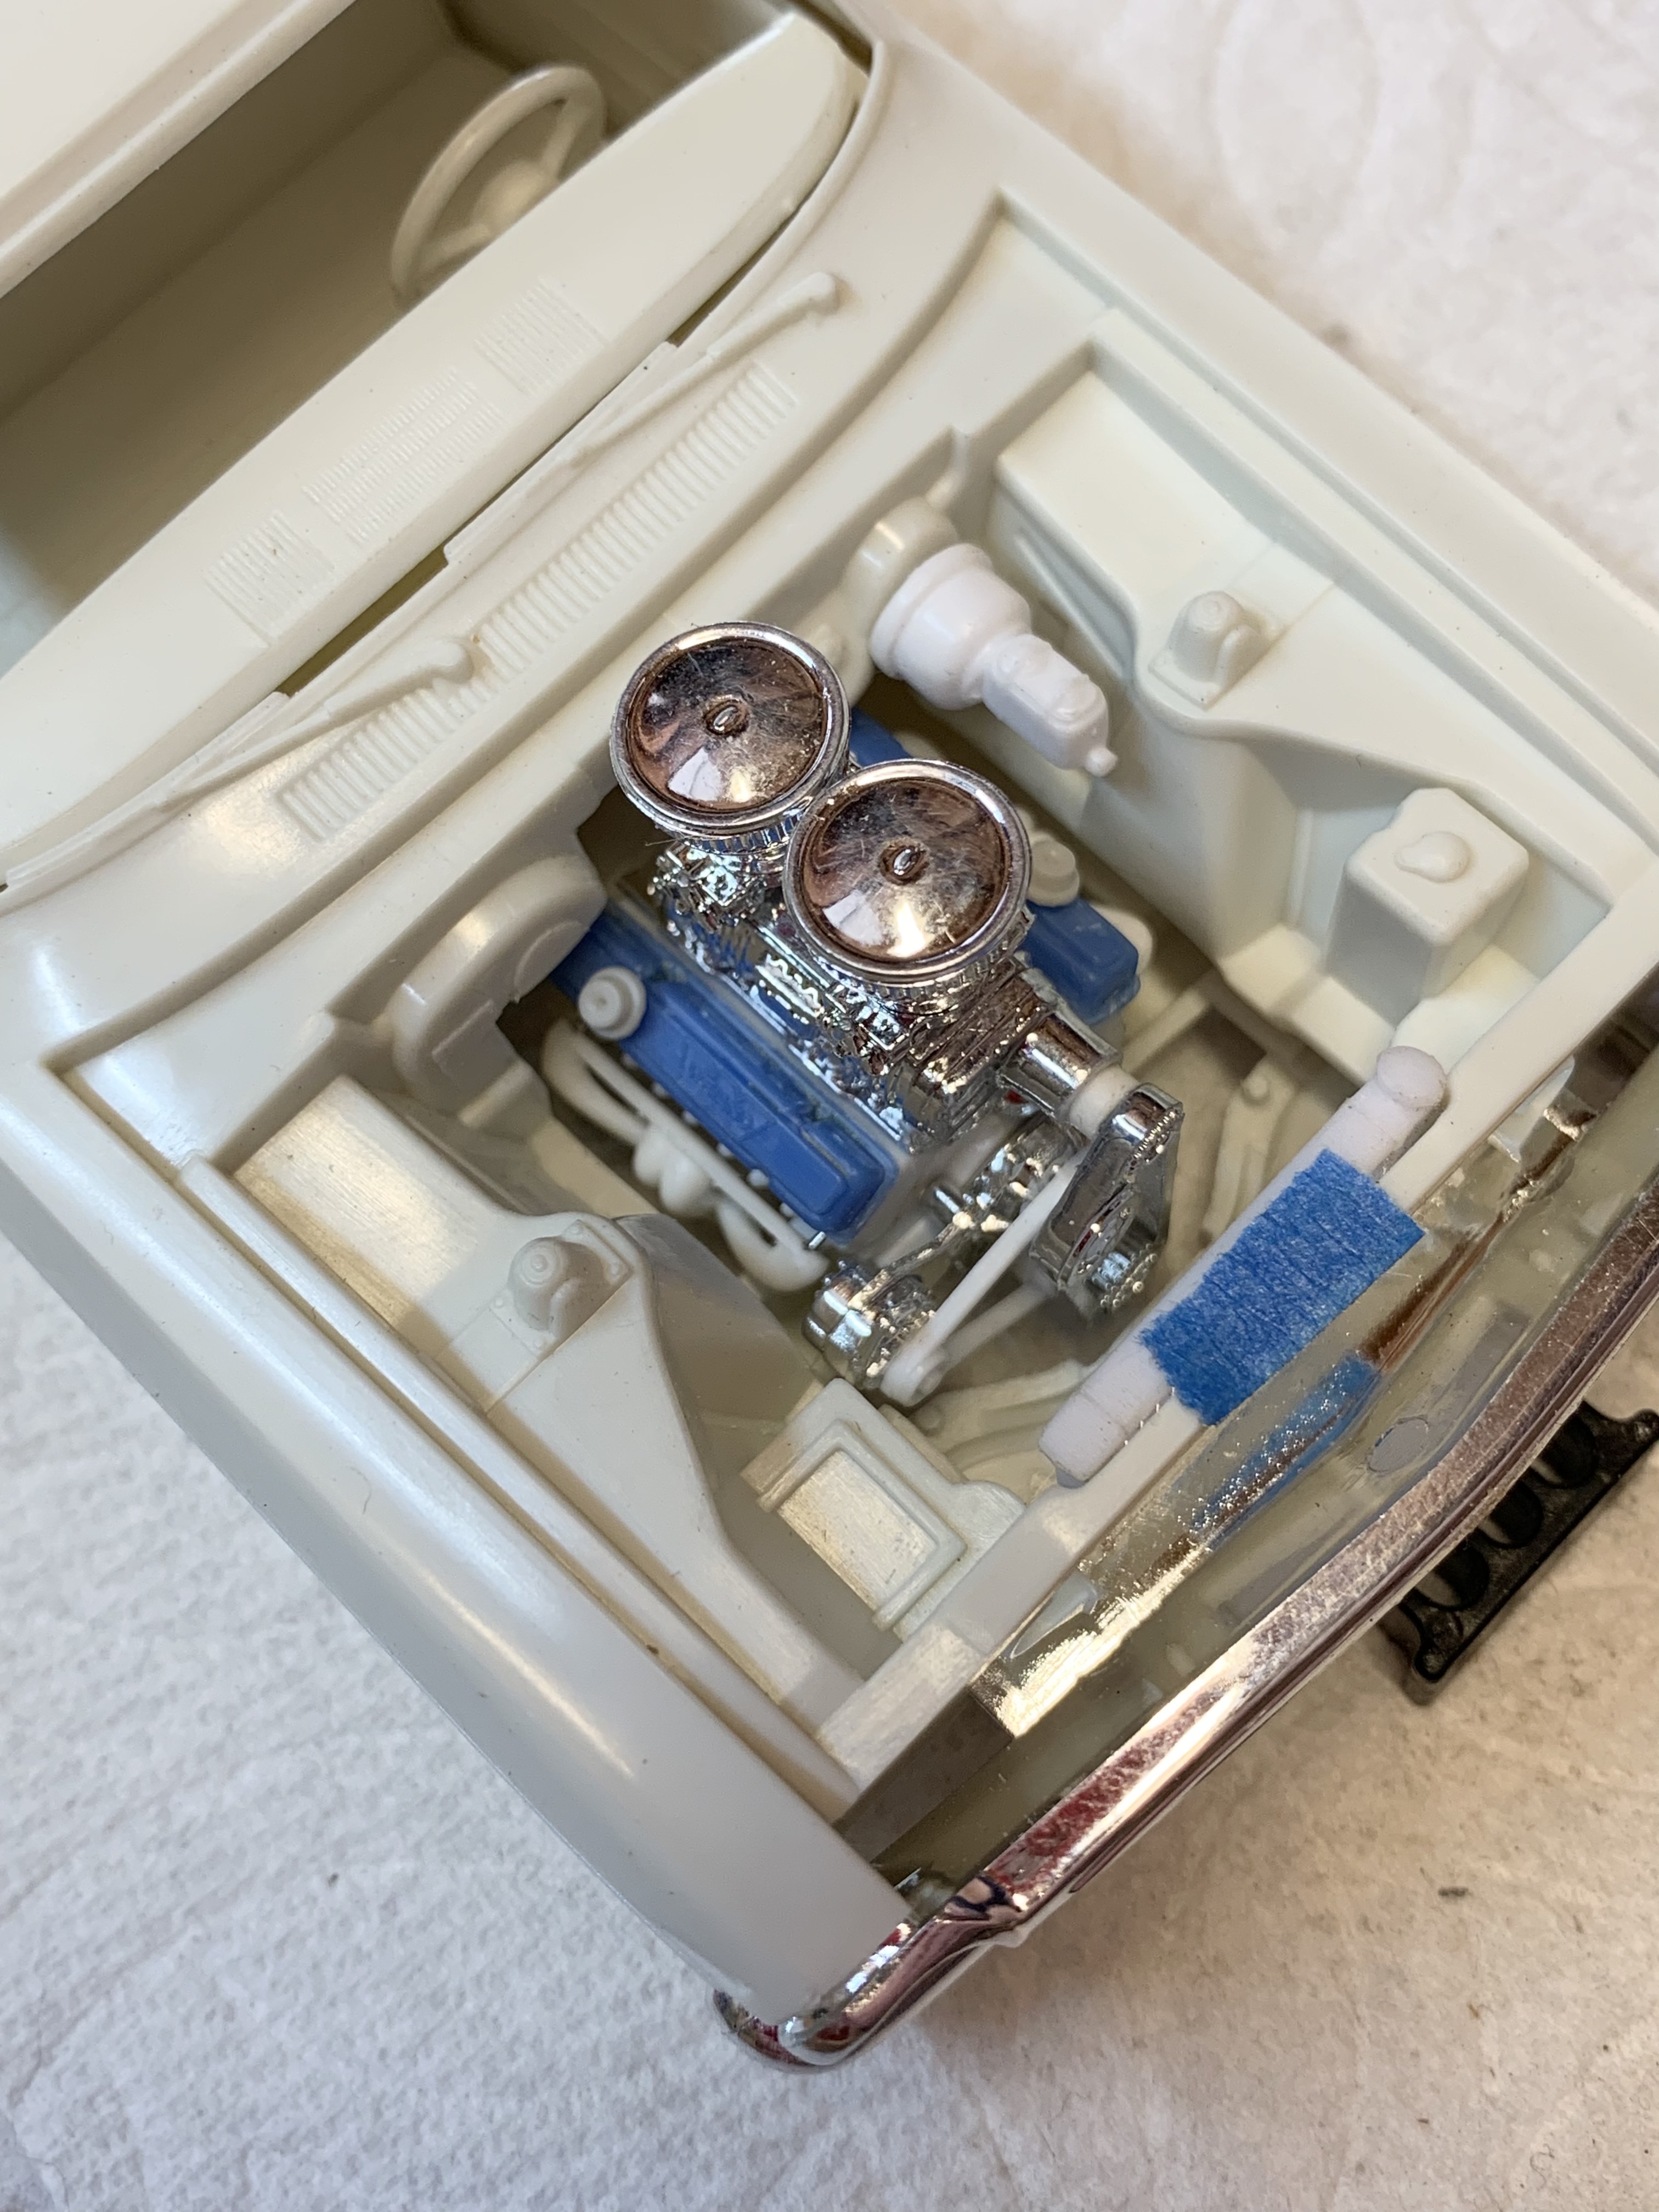
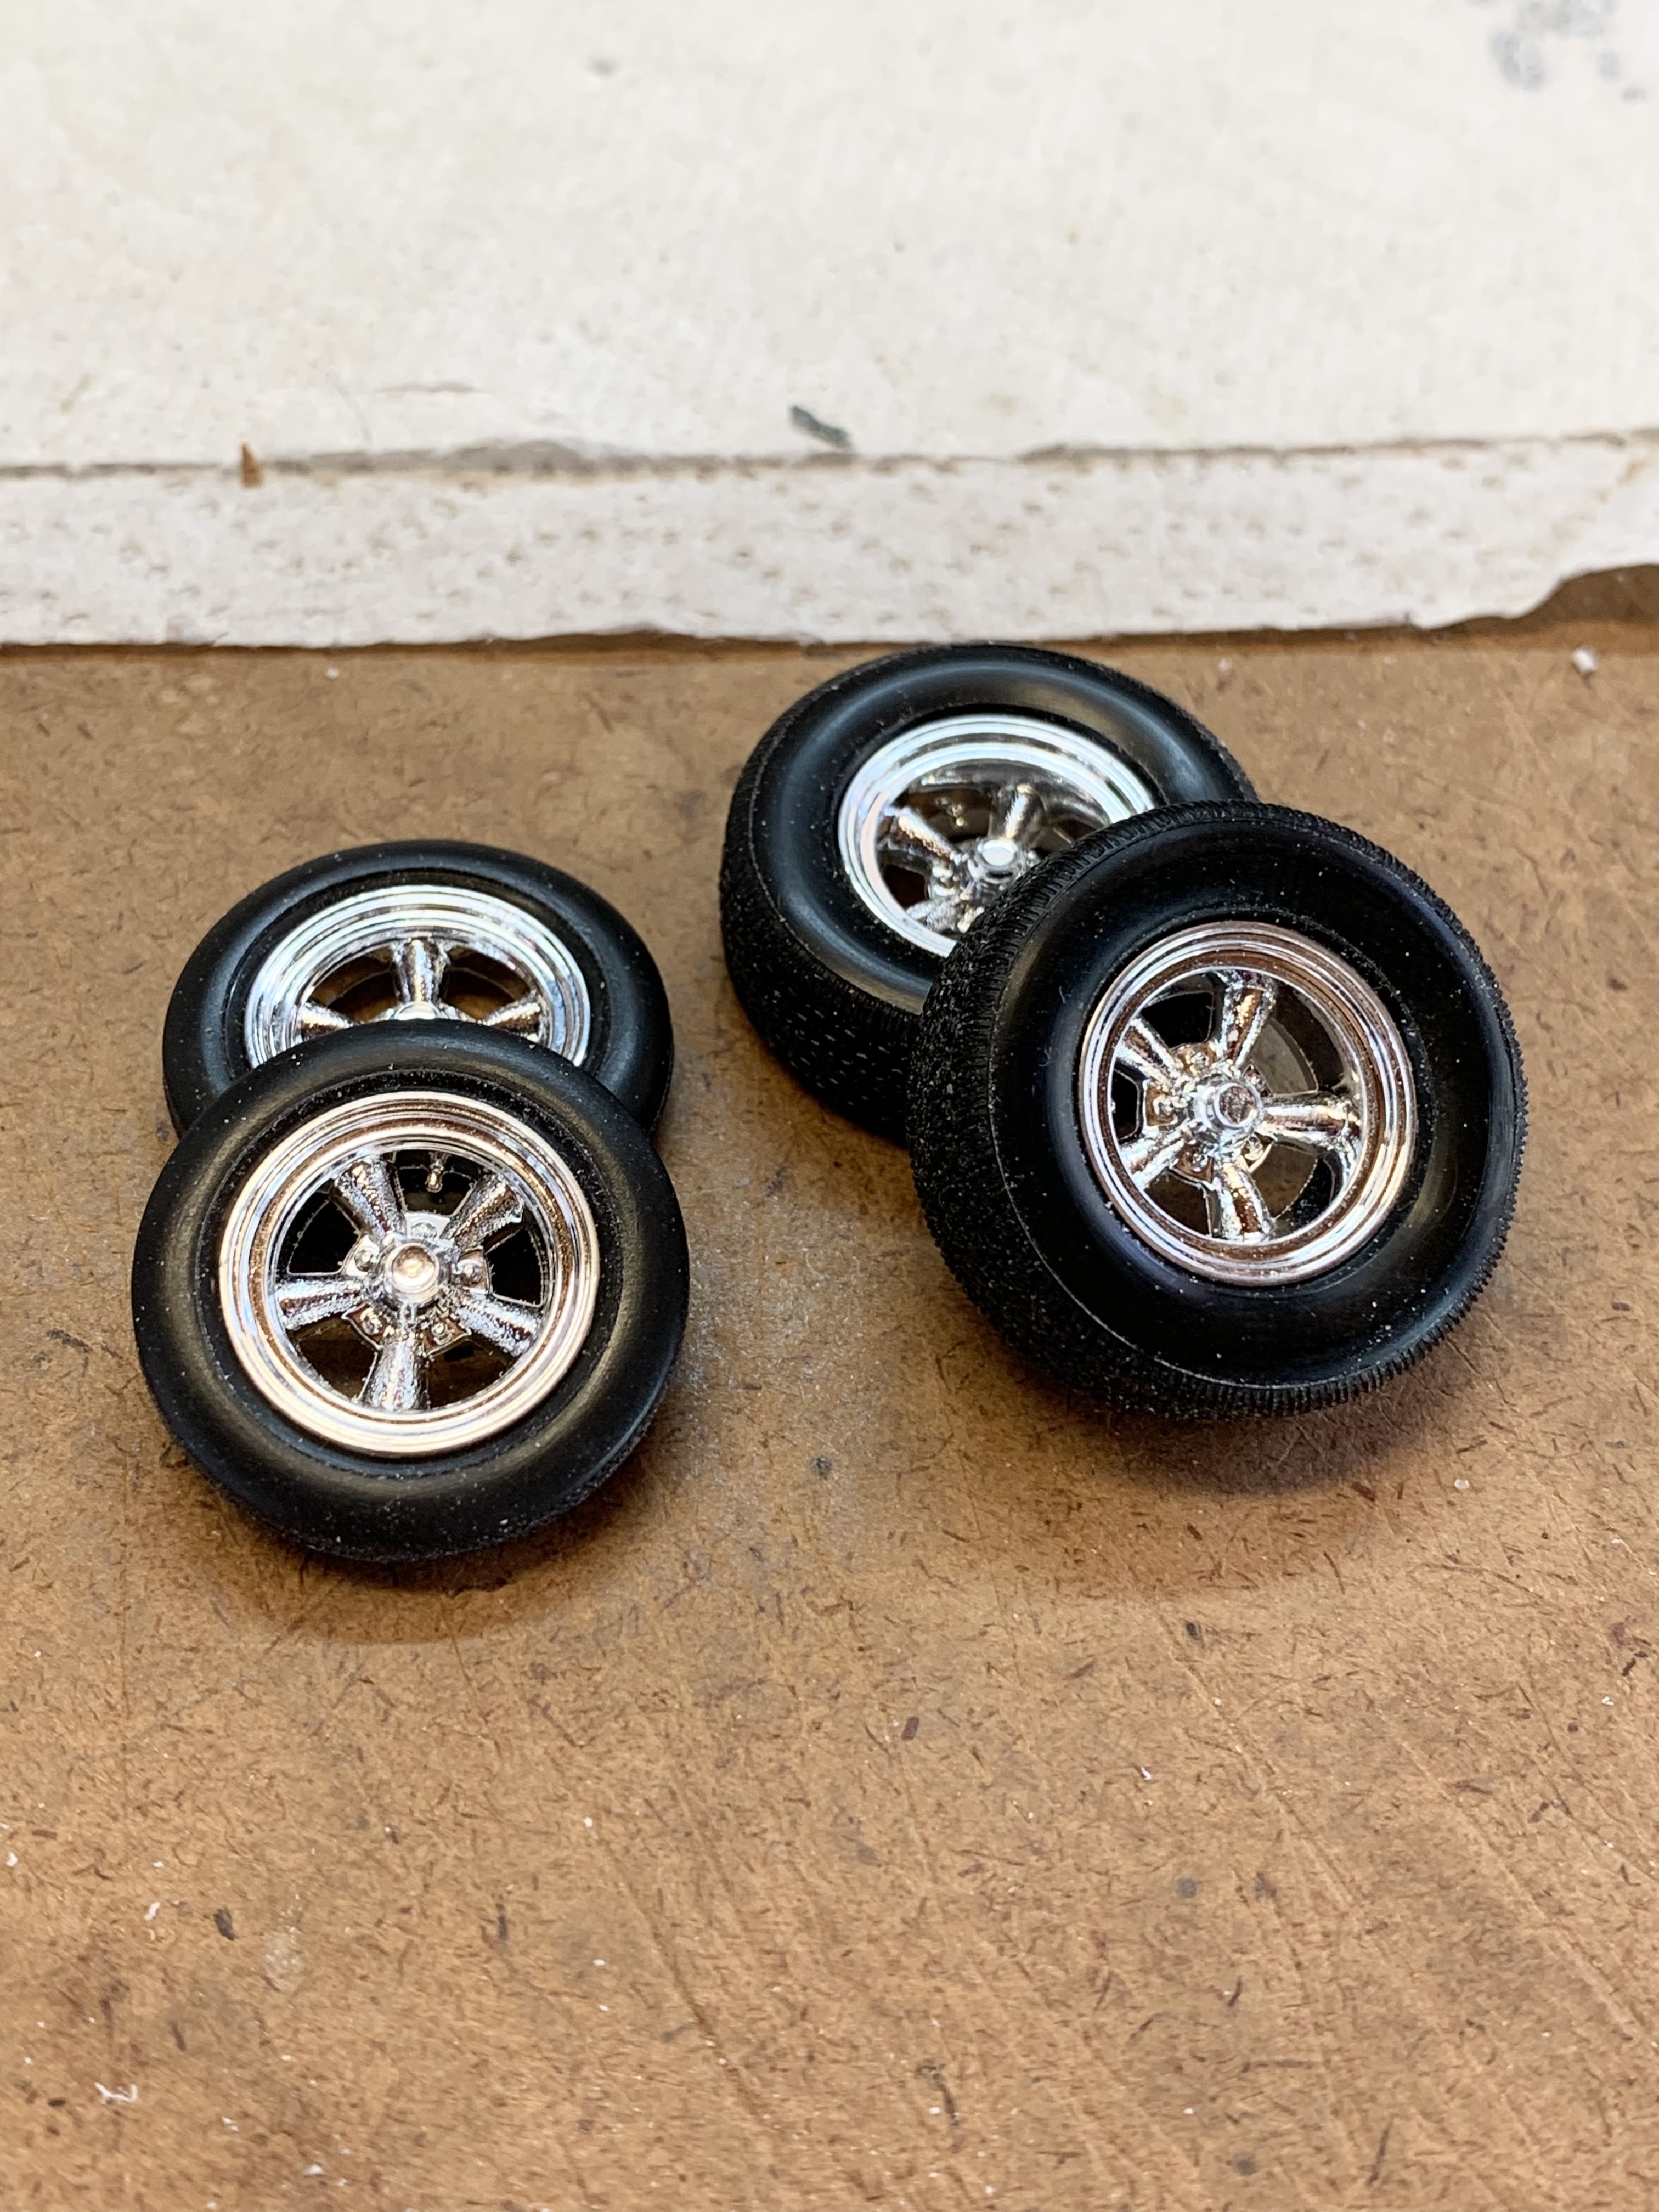
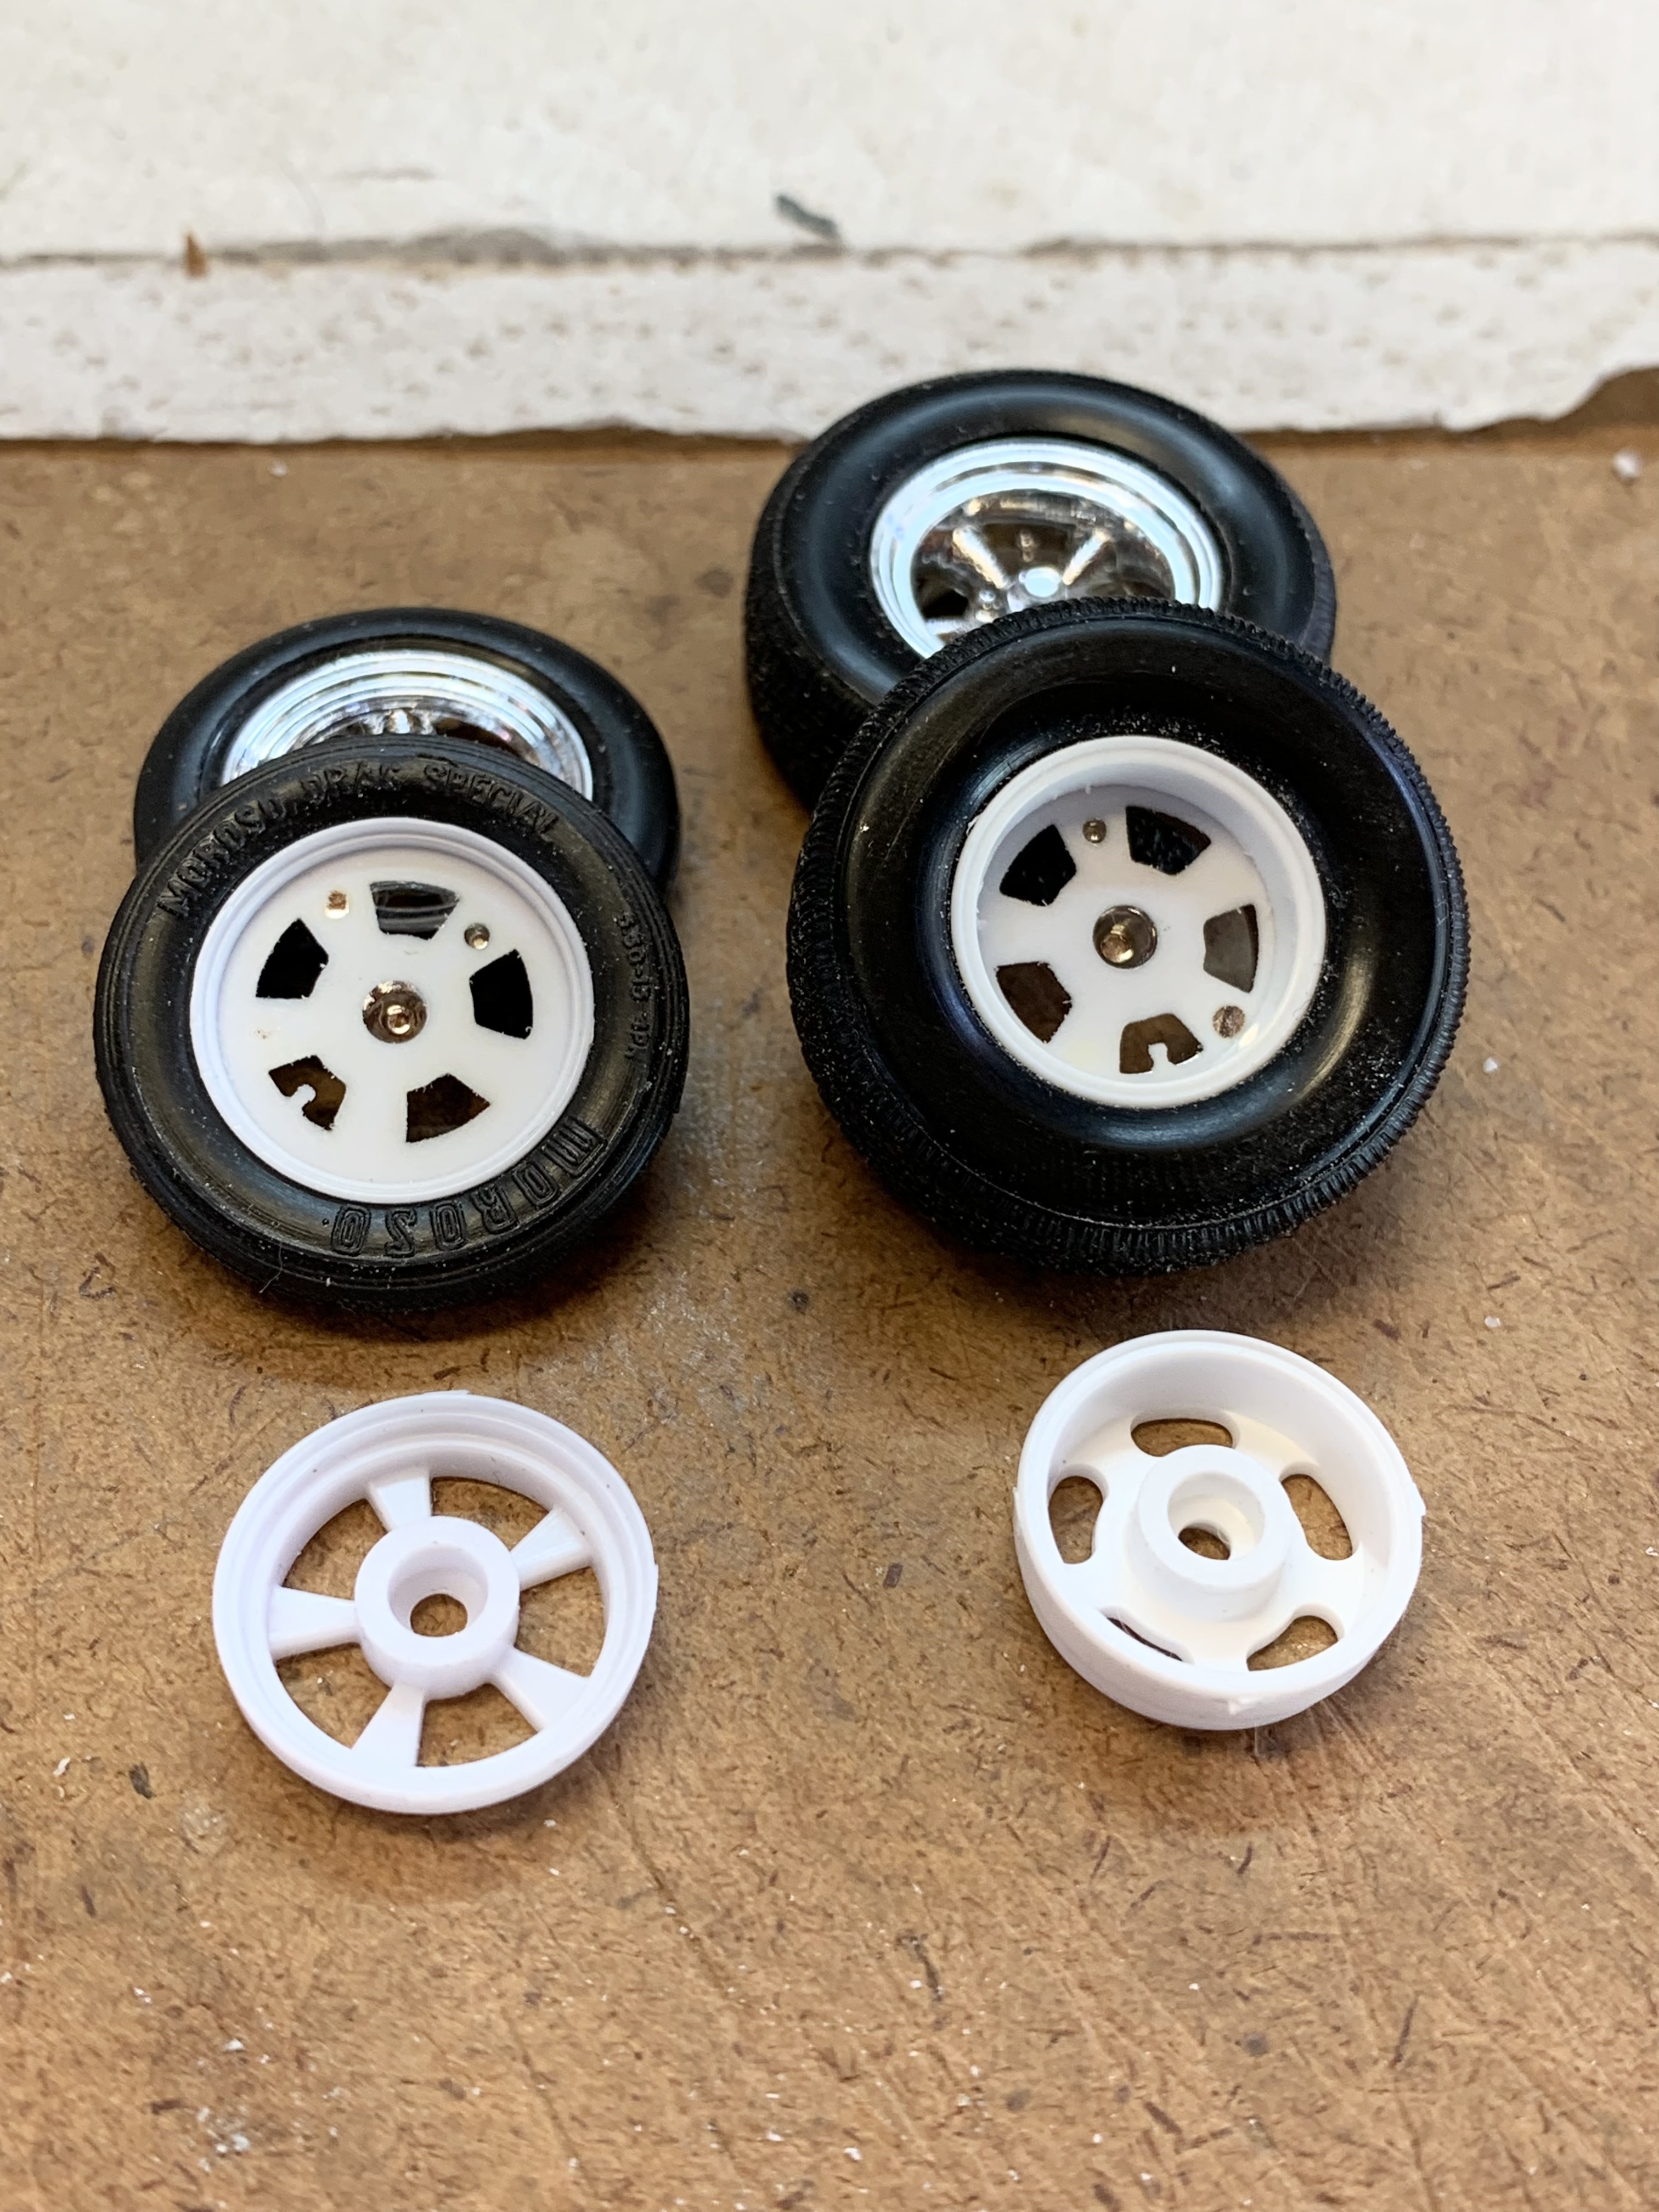
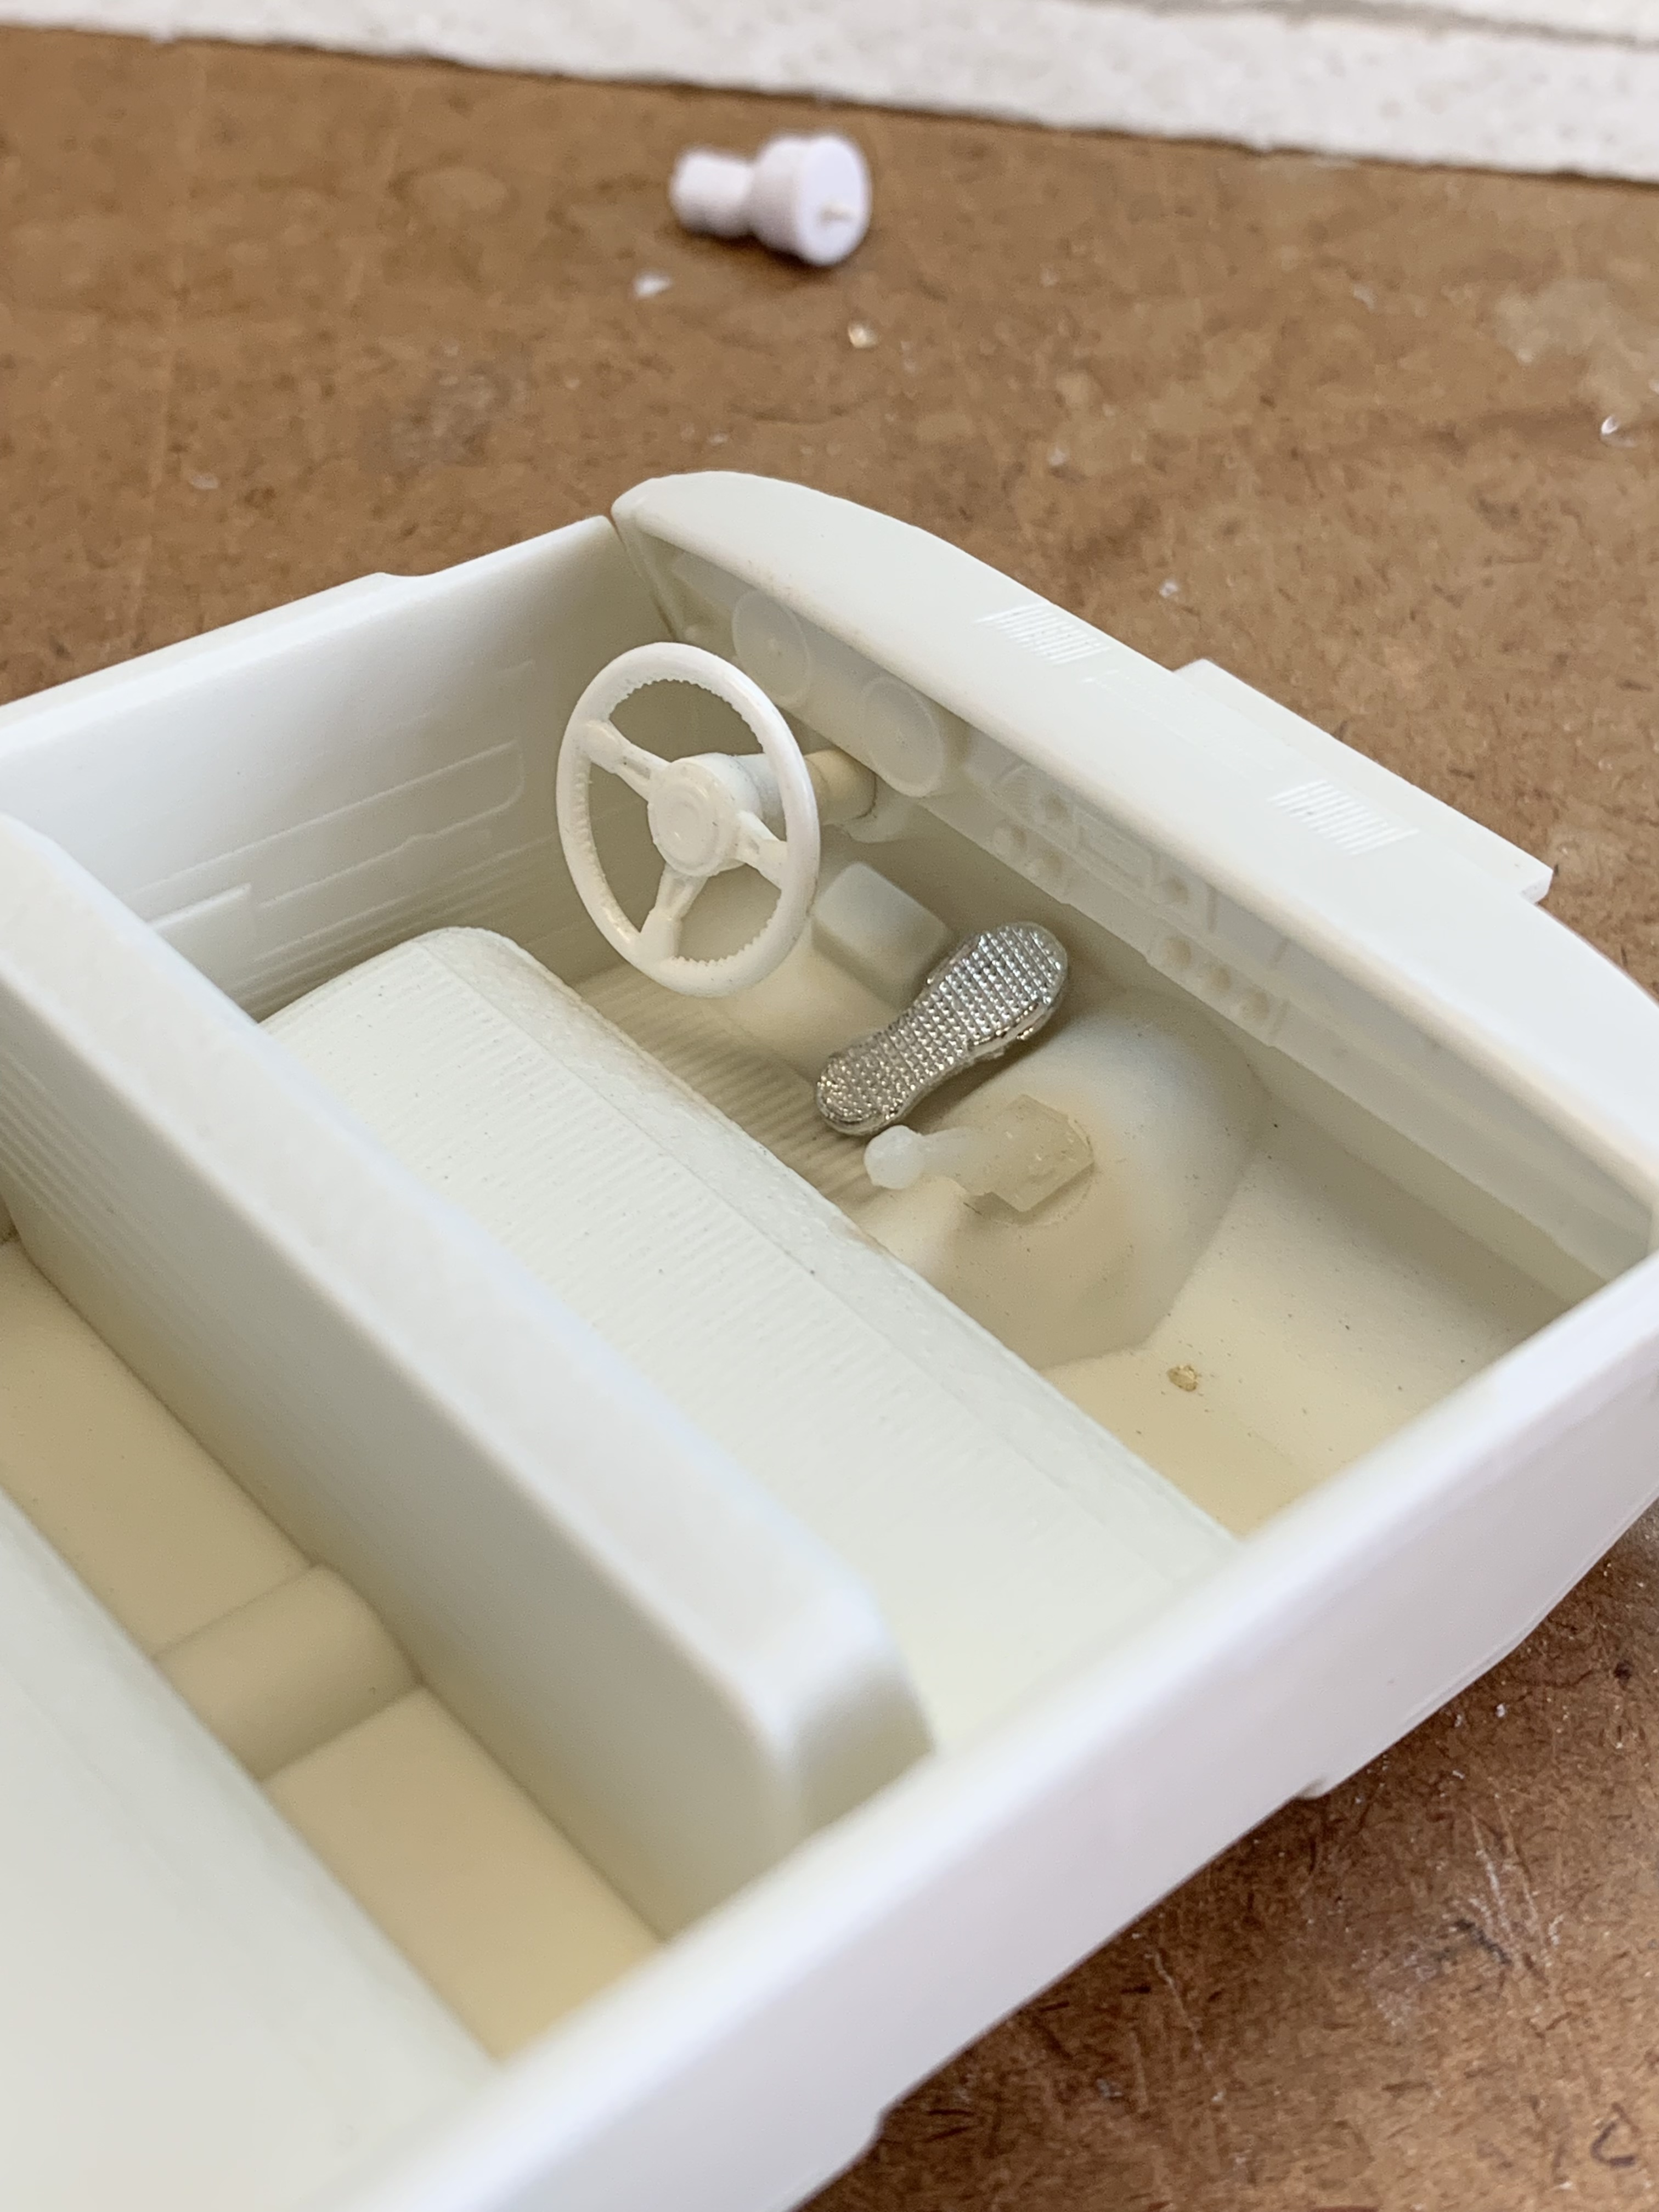
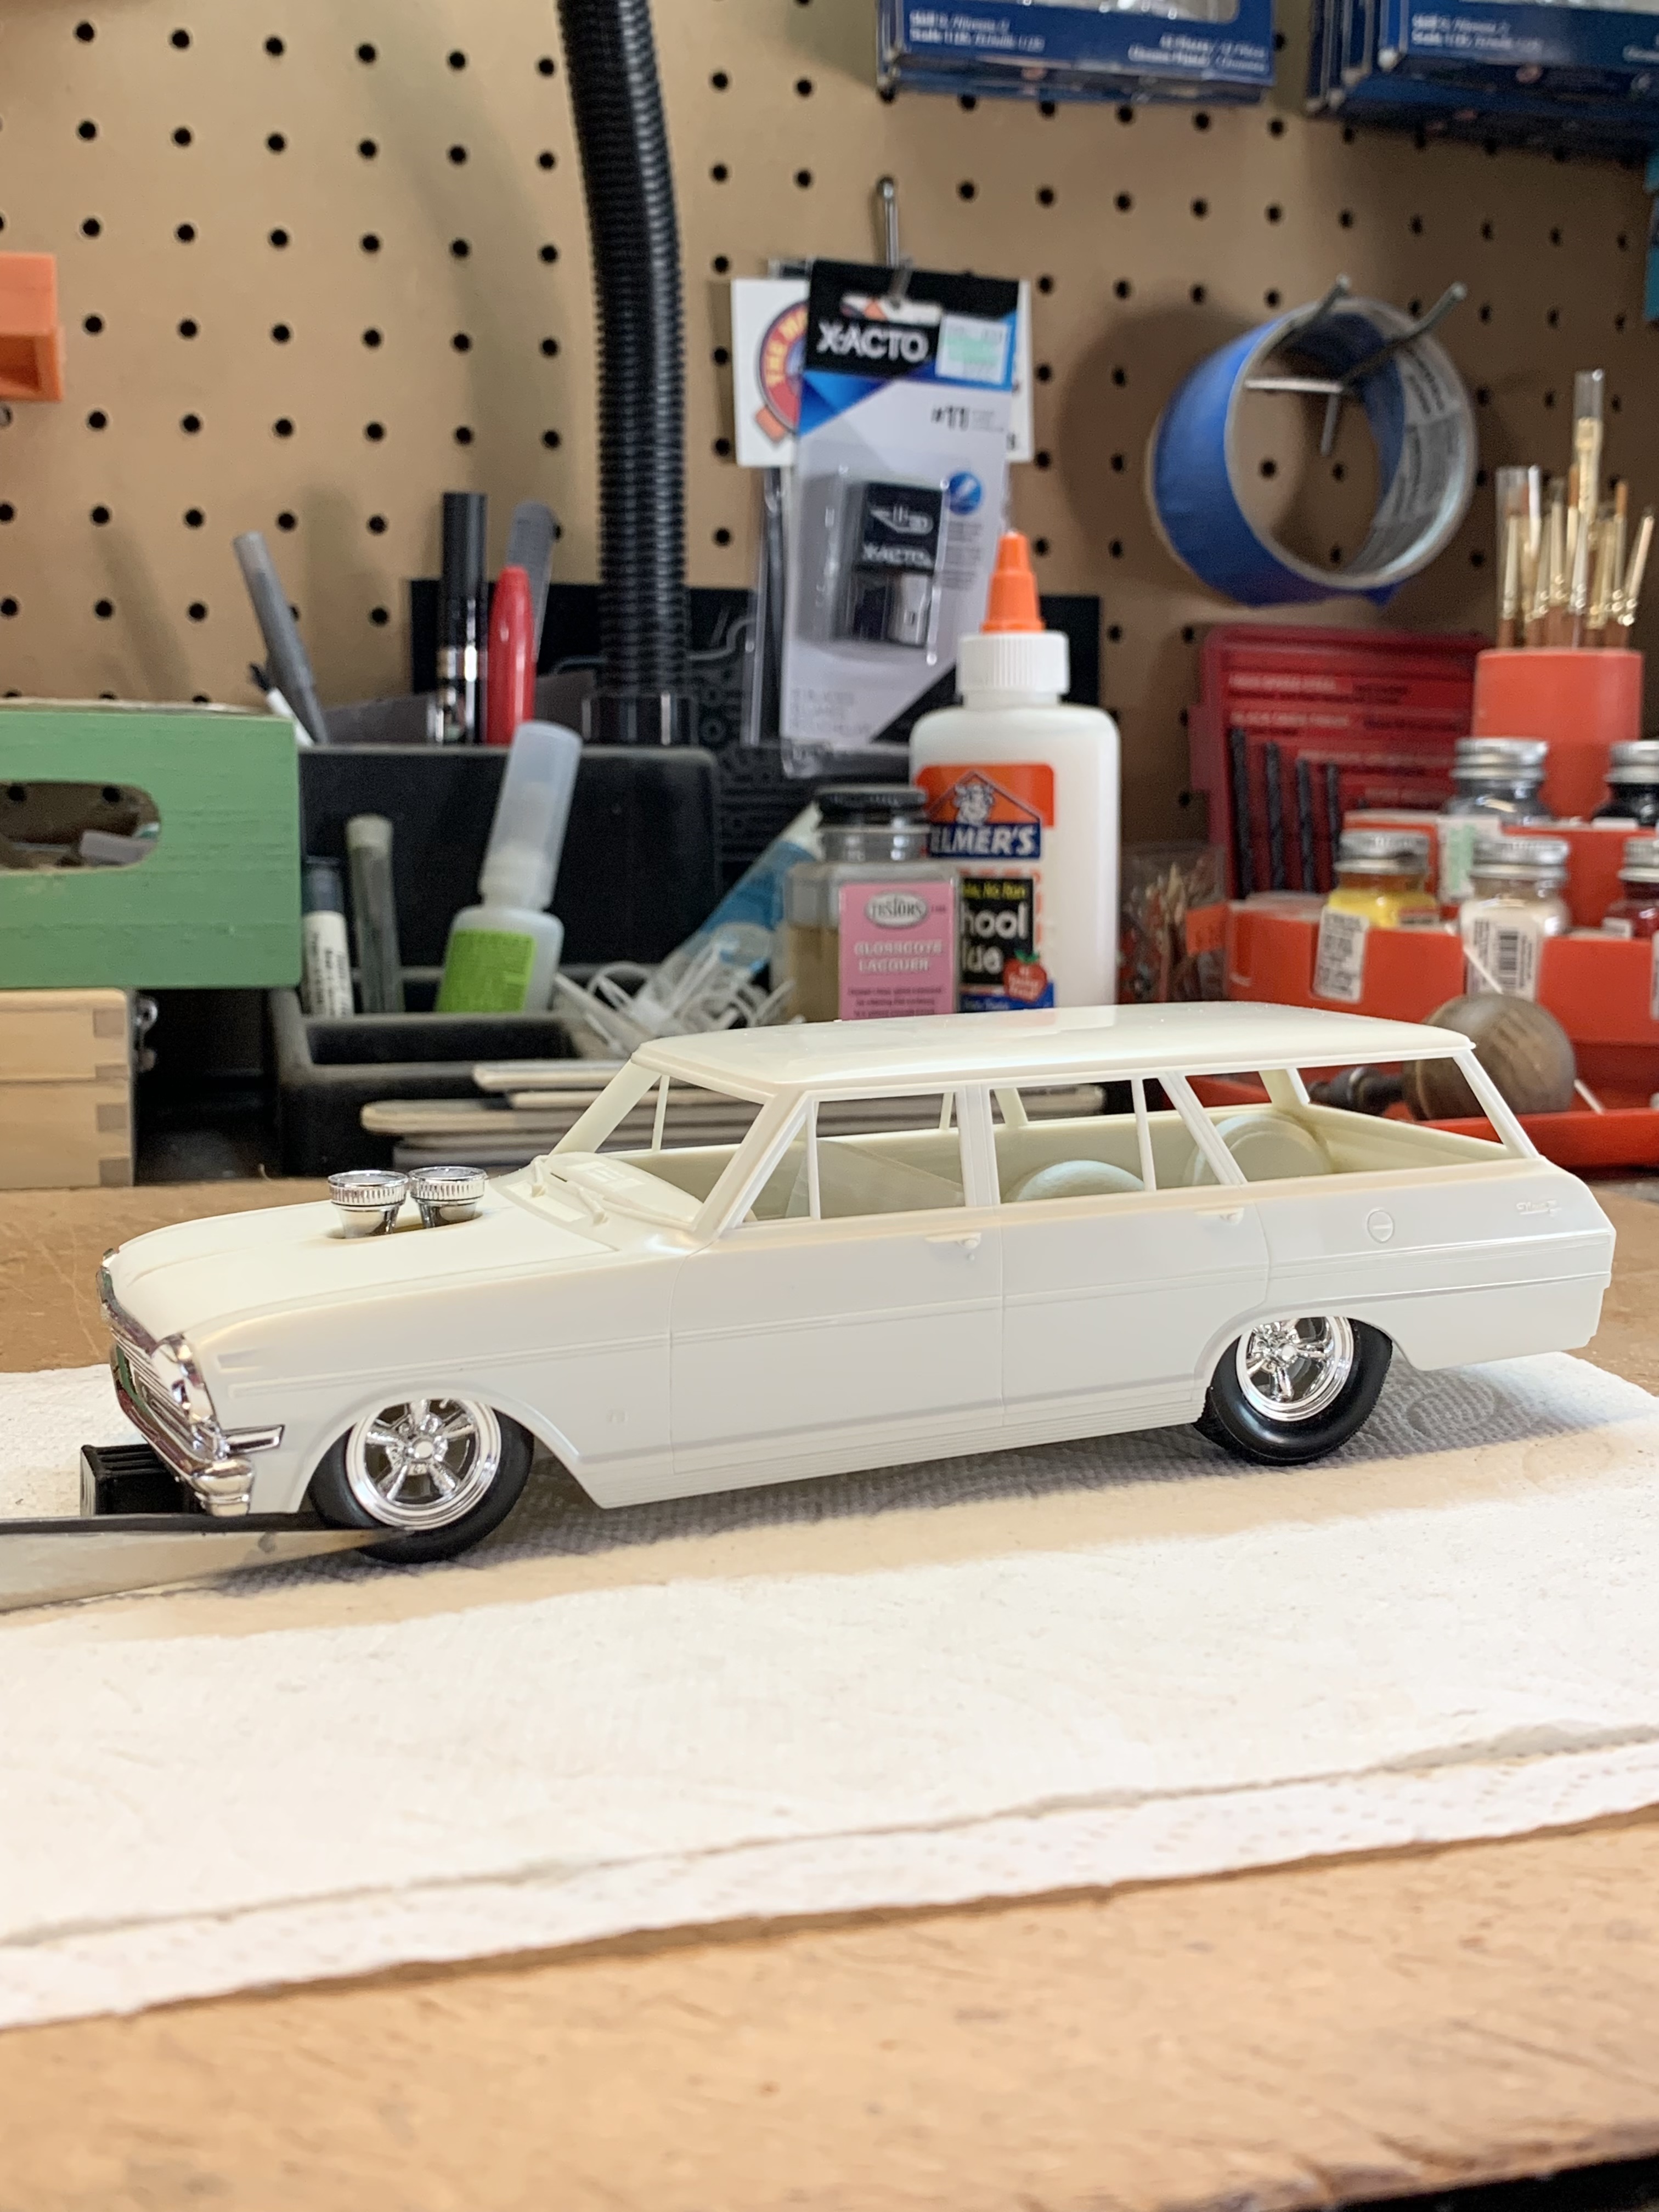
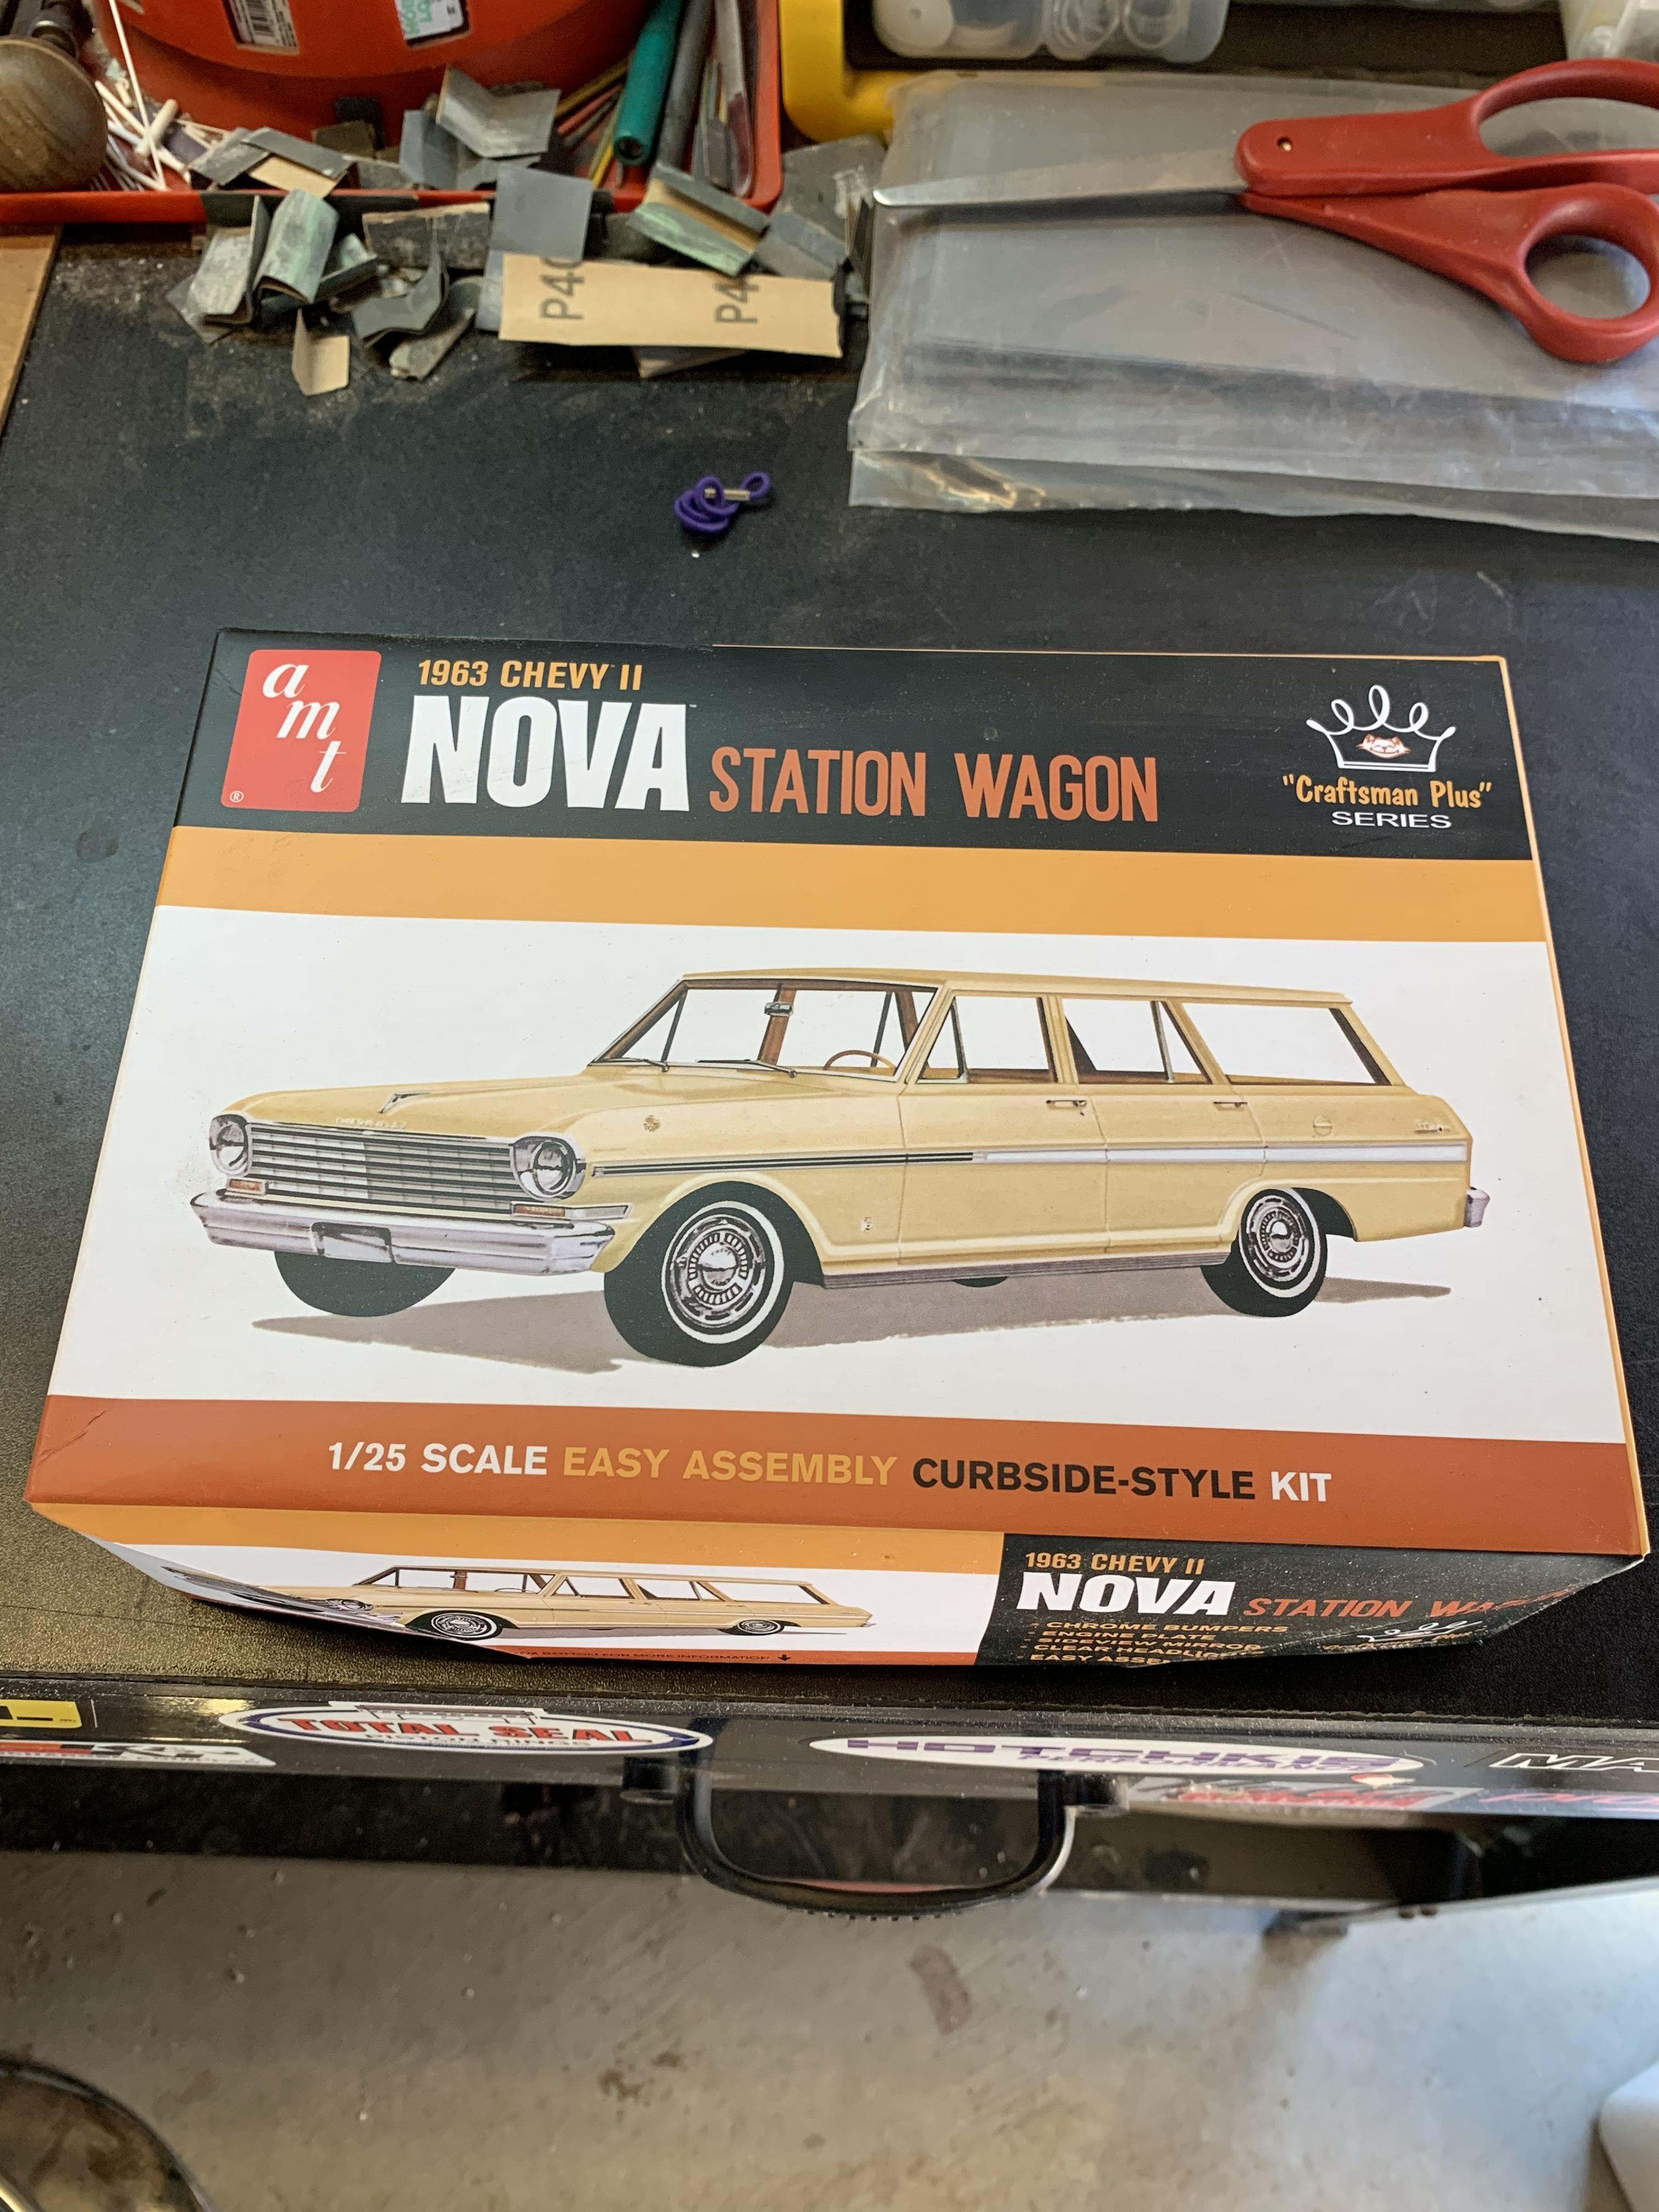
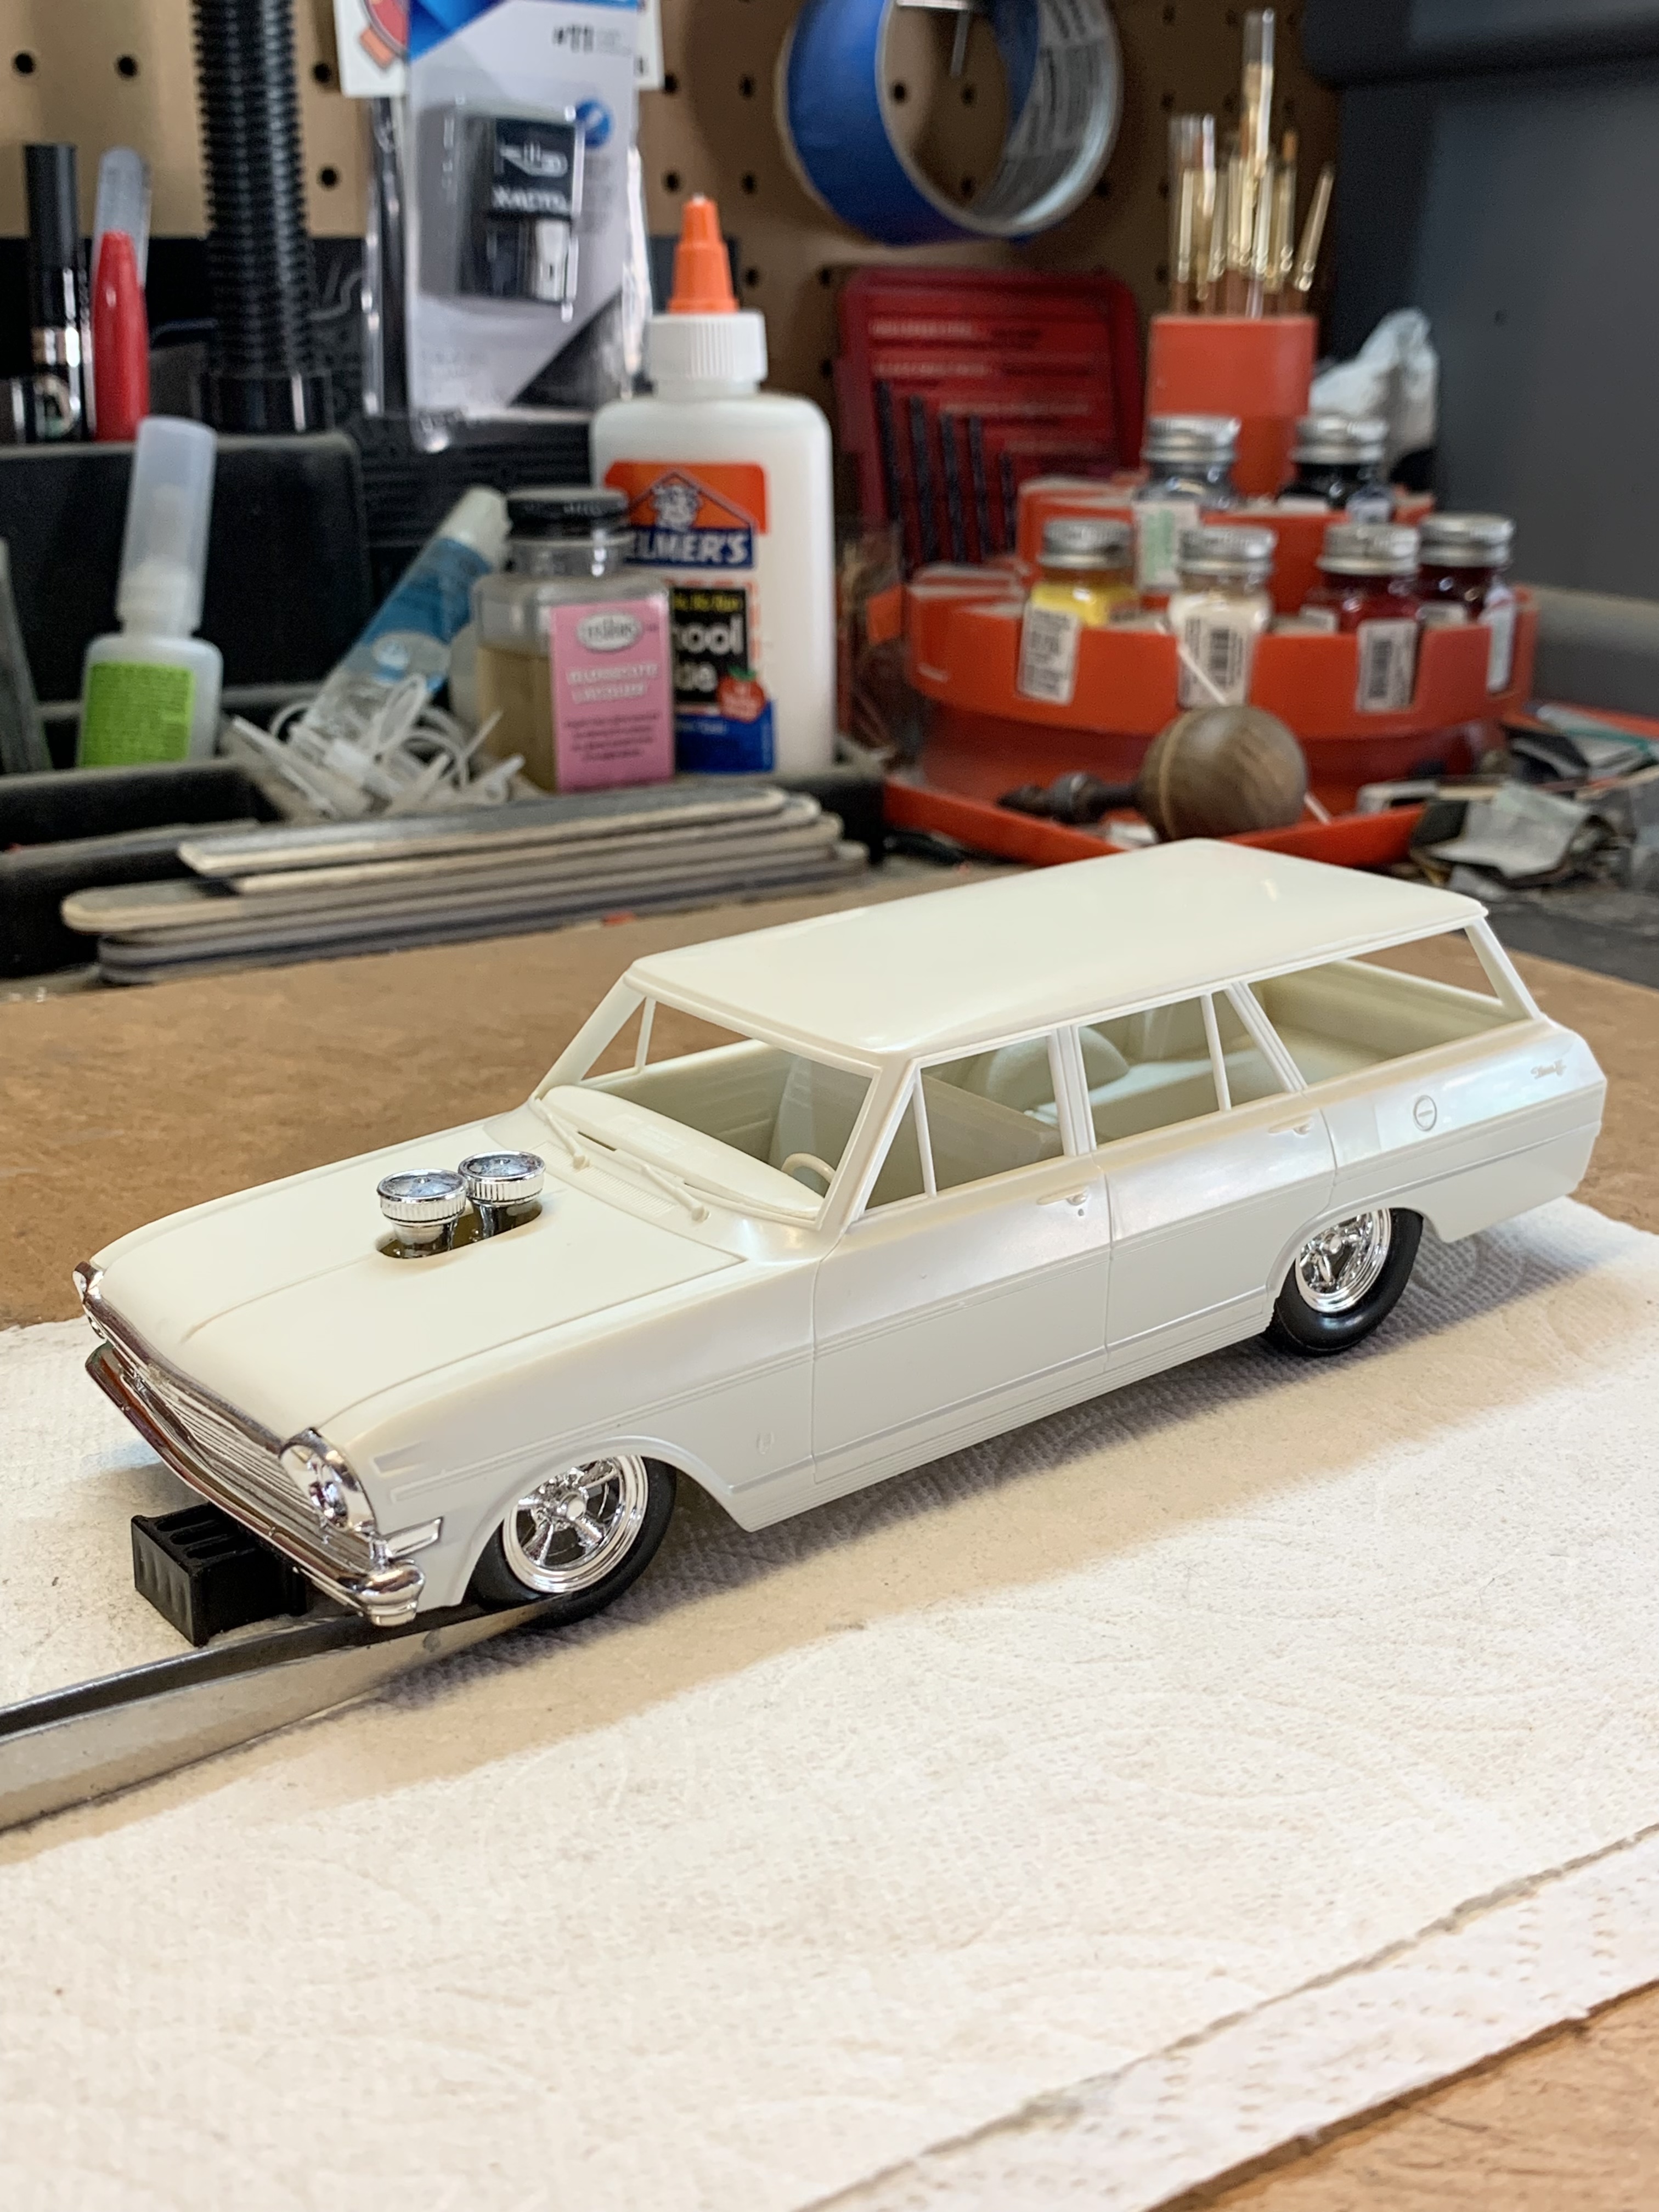
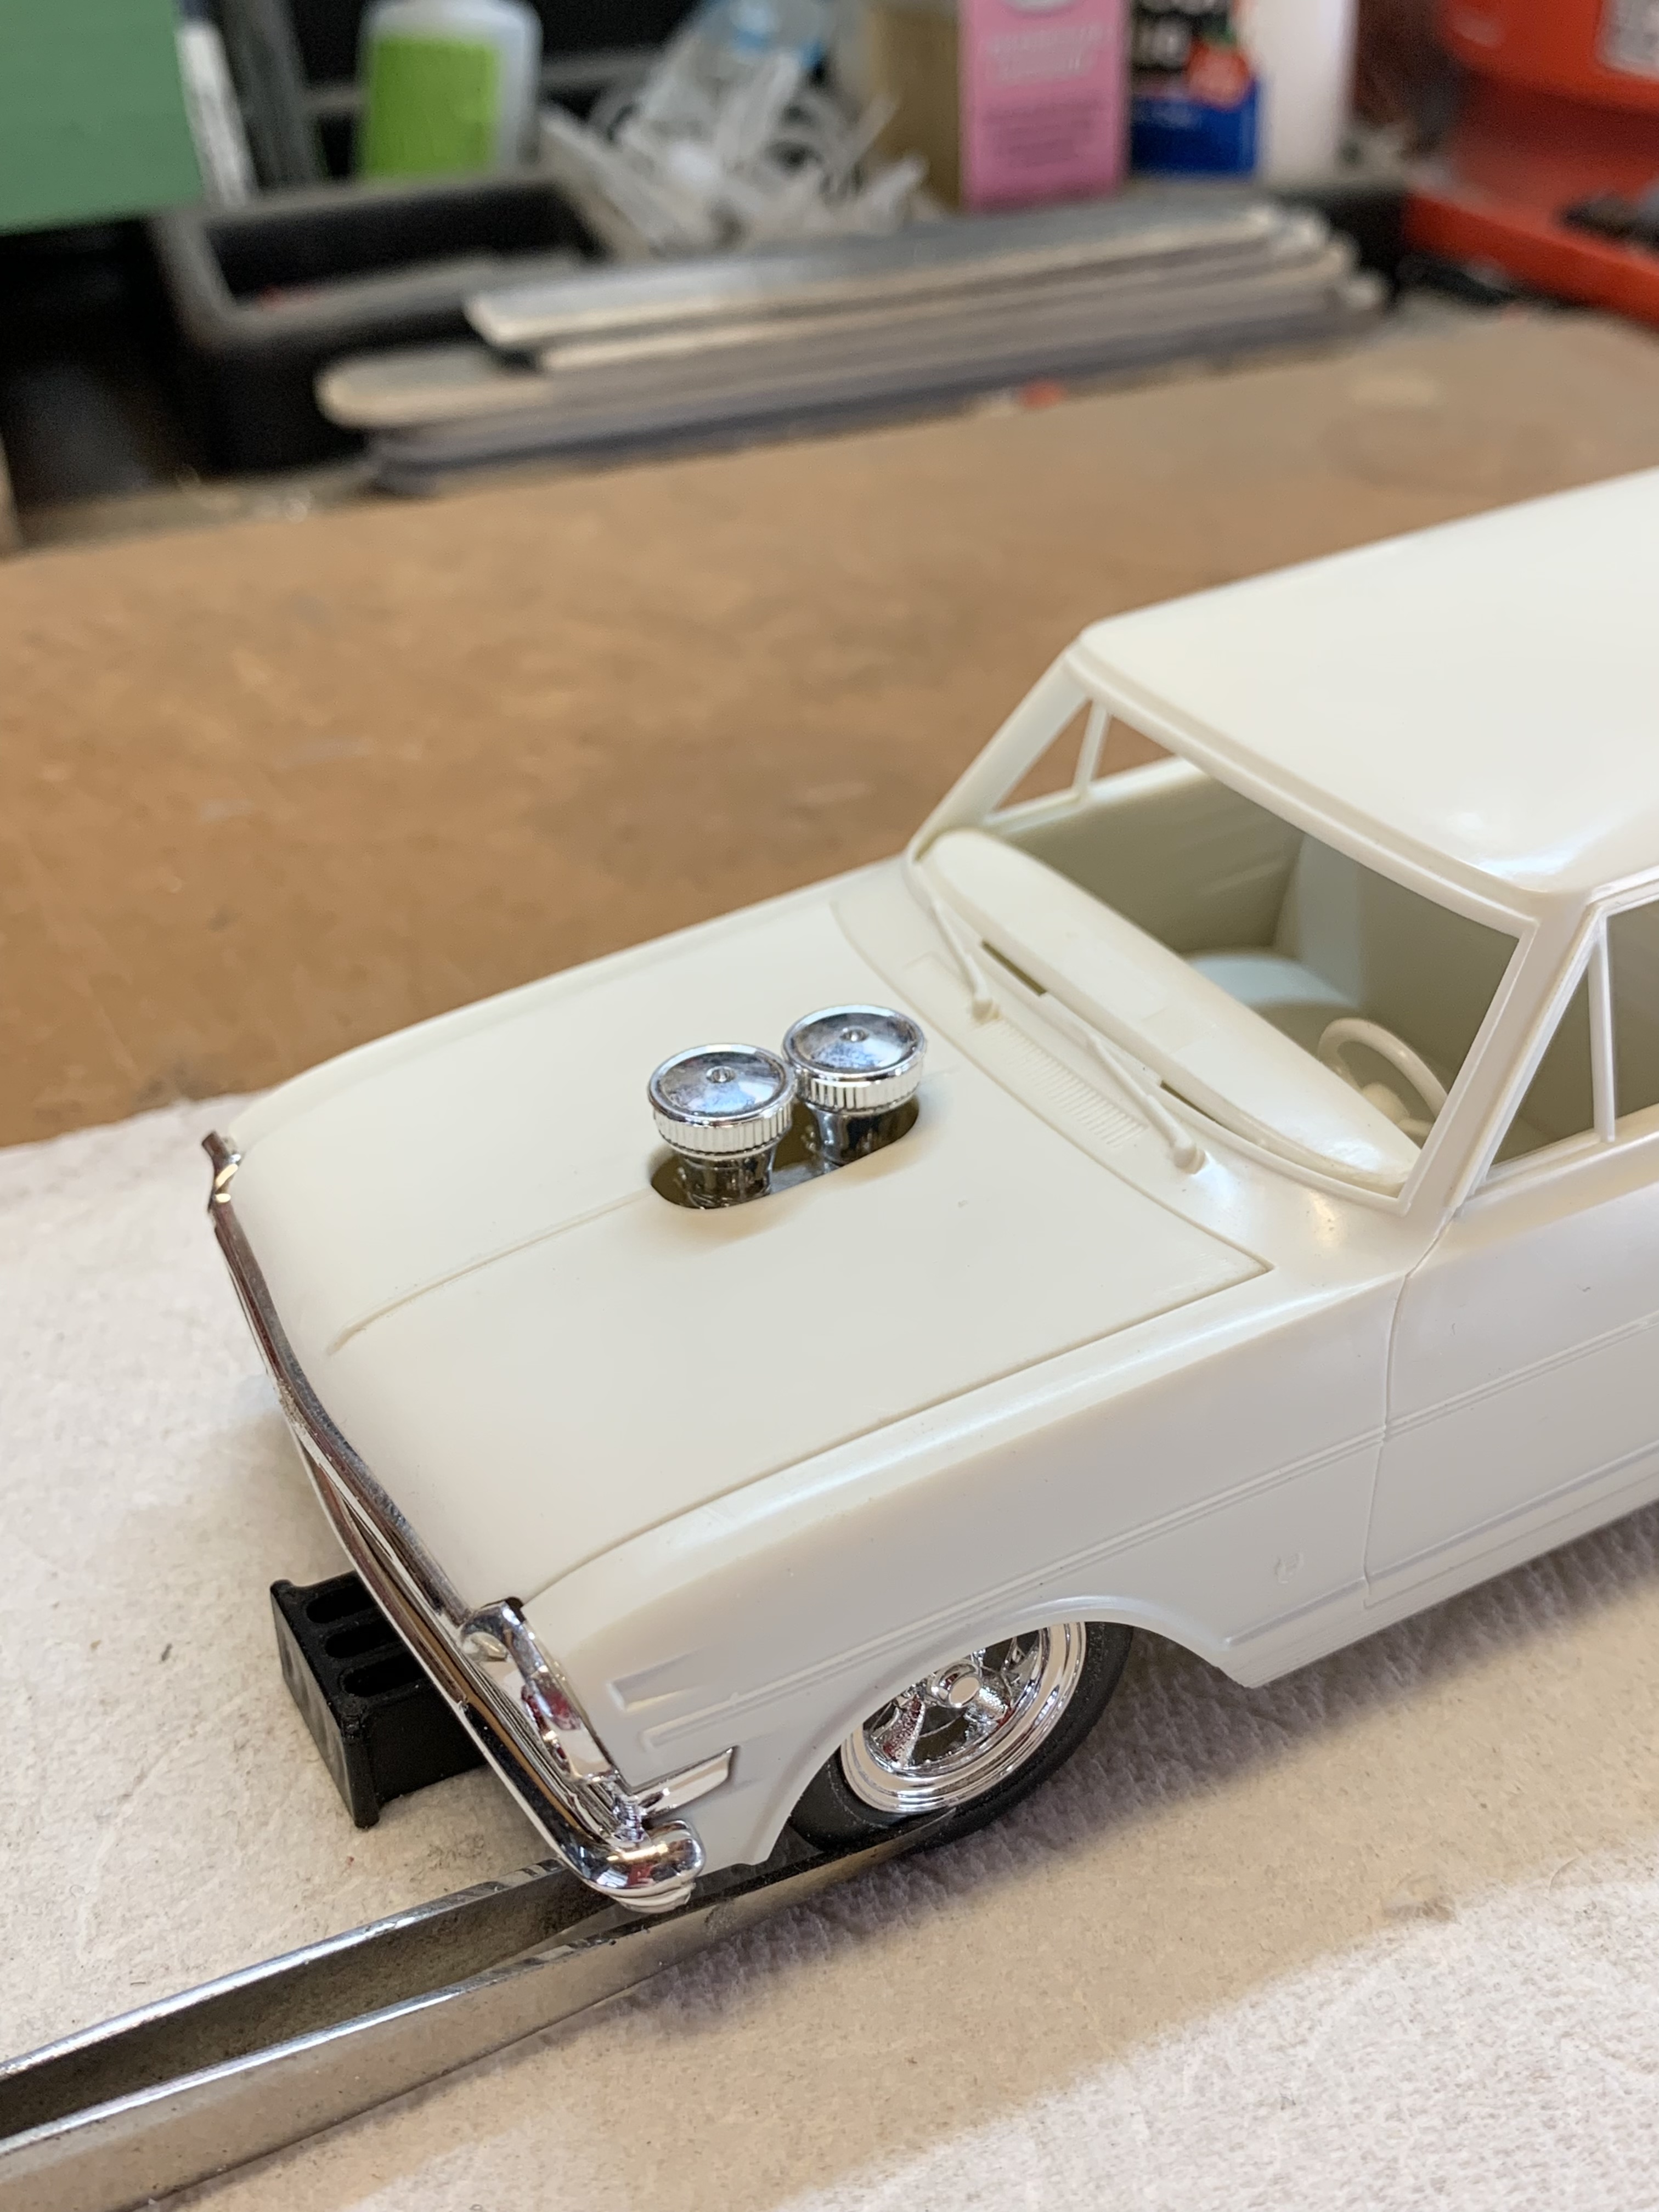
I’m not big into 1960’s cars but after following the lengthy thread here on MCM in the kit reviews section about AMT completely re tooling it’s ‘63 Nova Wagon kit back to its original, stock configuration I found myself oddly drawn to this kit and knew I had to get one. I actually started getting ideas for how I’d build it before the kit was out. Now that I have one and have played with it some my opinion is that it’s a great little kit even in its simplistic “curbside” form. The details are crisp and everything fits together excellent. It’s a terrific foundation for some fun kit bashing without having to sweat a bunch of details. Let’s get started! Even though it’s basically a “curbside” model AMT did provide it with a separate hood and simple engine bay. Evidently a version with a stock inline 6 cylinder engine will follow later on as there are motor mounts and spots for a radiator, battery and brake master cylinder. I have no desire to use a 6 so I immediately started offering up a few different small block V8’s to see what it would take to fit one in here. I know people put them in the full scale 63’s all the time but there are probably some architectural discrepancies with the model that make things an extremely tight fit. Also, the small block I’m putting in this thing is going to be supercharged so I need even more room for the blower drive which means setting the engine back. Bellow you can see that I trimmed out the middle of the firewall, trimmed away the floor pan and original transmission cross member around the auto trans and built up some basic front motor mounts. I also shortened the tail housing on the trans a bit. I had to do some additional clearance at the front of the frame to clear the blower belt and around the fuel pump boss at the right front of the engine. After all this I did a little bit more refinement trimming on the firewall and other spots just to make sure the engine fit nicely without any tight spots. The beauty of a curbside model! One of my favorite parts of any model project is kit bashing together an engine. I knew I wanted a supercharged small block so it was a matter of playing around with different parts until I landed on a happy combination. The engine block/auto trans, heads, front cover/water pump, belt drive, alternator and oil pan (not shown) are from Revell’s recently reissued ‘29 Roadster hot rod. The Weiand supercharger, intake, blower belt, carbs and air filters are from Revell’s Stacy David ‘32 Roadster. The matching Weiand valve covers are from AMT’s ‘66 Nova Pro Street with separate breathers added. The block hugger shorty headers are from Revell’s 1937 Ford street rod kits. I got lucky in that the blower drive belt was exactly the correct length from the center of the blower snout to the center of the crank pulley. It doesn’t always work out that way! The only thing I had to do was add some length to the blower snout. The kit has an open spot for a radiator but doesn’t provide one so I had to get creative. My resources for a late model radiator are a little thin but I ultimately came up with using one from Revell’s 1990 Mustang LX. I narrowed it almost .250” by cutting the tanks off, removing some core from each end then reattaching the tanks. After that I filled the two original hose holes and made new ones in the proper layout. I also realized the big flange on the front bumper intrudes on this area so I trimmed it to match the shape of the core support. Here’s a look at the engine mocked up in the bay with the radiator. I also fit a power brake booster/master cylinder from any of Revell’s ‘32 Ford’s. I plan to add a few more detail parts before all is said and done. Wheels and tires. The American 5-spokes are from Revell’s ‘32 Ford’s. The front inner rims are heavily thinned down from the same. The inner rear rims are thinned down fronts from Revell’s ‘32 HiBoy Roadster. The front tires are the skinny Moroso front runners from Revell’s ‘67 Malibu or Beretta Pro Street kits and the rears are from the street rod versions of Revell’s 1940 Ford’s. Lastly I started some basic interior mods by installing a shifter, Moon gas pedal and steering wheel. The original steering wheel and column are made as one piece so I cut the wheel away and fit this 80’s/90’s piece. Finally, some mock ups! This is about the stance the car is going to have. The rear for sure but the front may come up just a touch. You can also see that I cut an oval hole in the hood for the air filters to poke through which is a look I’ve always liked, especially as a kid. That’s it so far. Let me know what you think!
-
Thanks, Steve! A drink or two always loosens me up and allows me to shoot a game of pool better. It’s when I get into drink three, four and beyond that it becomes counterproductive really fast! ?
-
I’m really happy with the color. It will darken slightly after clear based on a couple of the smaller finished parts. I used it as the accent on the T Touring hot rod I just previously finished and thought at the time it would be a great color for a whole car. Probably not on an early rod, though.
-
Well, when you put it that way… ?