Dennis Lacy
-
Posts
2,487 -
Joined
-
Last visited
Content Type
Profiles
Forums
Events
Gallery
Everything posted by Dennis Lacy
-

!950's style 1/2 top 49 Ford full custom.
Dennis Lacy replied to carbuilder1950's topic in Model Cars
This might be the nicest custom AMT ‘50 Ford I’ve ever seen. Both the execution and workmanship look first rate. The color choices and interior pattern are perfectly suited to it. The narrowed Caddy rear bumper is not only a unique idea, it also looks totally rad! Very nice! -
Killer! I really like the colors and color scheme. Stance is perfect and the integration of the Smoothster chassis and engine is totally rad. Nice work!
-
@Kit Karson This project of yours has turned into quite the epic!
-
@alan barton I just re-read all of the text. I know exactly the T Roadster he was inspired by although the full size car is maroon and powered by a Y-block. I’ll also add that the parts choice and execution of this model is even more impressive considering he’s generally not a hot rod builder!
-
This might be the only one of those bodies I think I’ve seen built and your friend did a killer job of it!
-
'53 Studebaker funny car
Dennis Lacy replied to Rocking Rodney Rat's topic in WIP: Drag Racing Models
@Kit Karson Are those photo leaks authorized or unauthorized? ? -
1963 Chevy Nova Wagon Street Rod FINISHED 3/20/22
Dennis Lacy replied to Dennis Lacy's topic in WIP: Model Cars
Absolutely agree! In that regard I’m very pleased with AMT for restoring or all out recreating these old kits because there’s no original issue that I want so bad that I’d pay hundreds of dollars for it. But, if I lucked into a rare original issue in decent condition on the cheap or having it given to me I’d have no reservations cutting and kit bashing it. ? -
1963 Chevy Nova Wagon Street Rod FINISHED 3/20/22
Dennis Lacy replied to Dennis Lacy's topic in WIP: Model Cars
I’m having a blast! The original kit wasn’t even on my radar until the big thread got going here leading up to the new tools release. By the time it hit the shelves I had read all the hype and knew I had to get one. That said, had I had an original prior to AMT recreating it I wouldn’t have hesitated to build it the same way if that’s what I wanted. Did you ever see what I did with my mint AMT/MPC ‘28 Ford Sedan? It’s only plastic! -
1963 Chevy Nova Wagon Street Rod FINISHED 3/20/22
Dennis Lacy replied to Dennis Lacy's topic in WIP: Model Cars
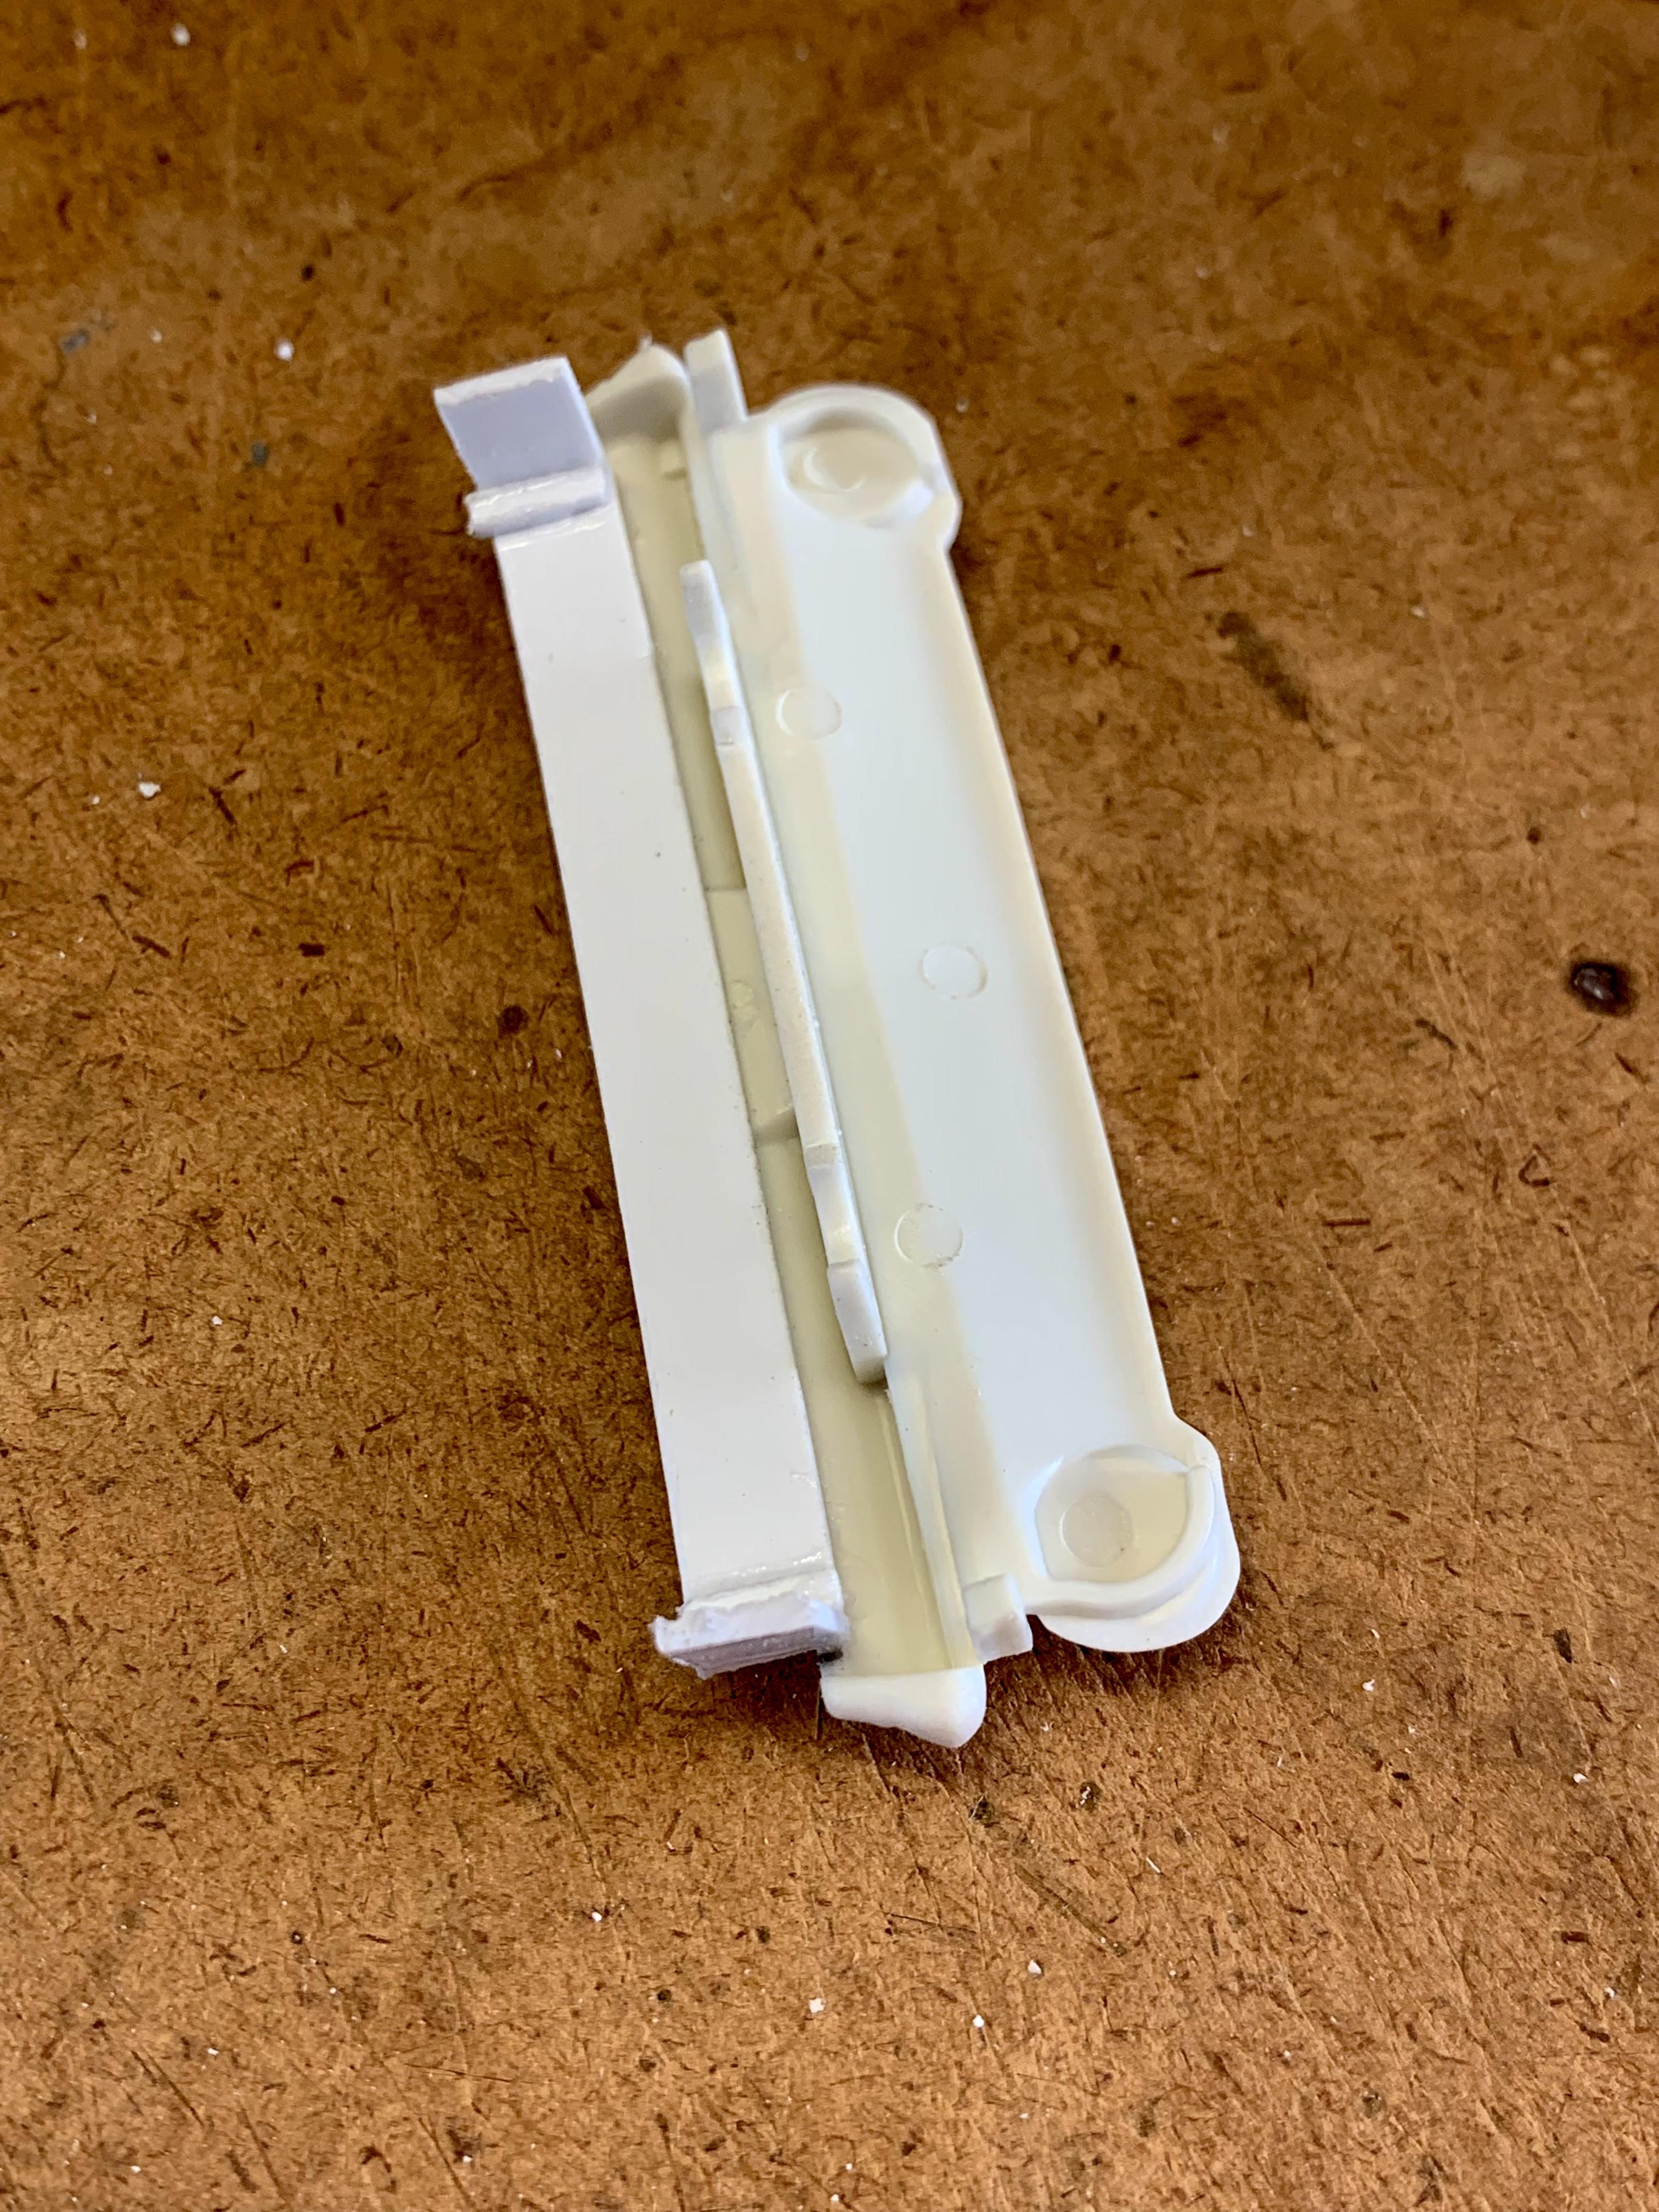
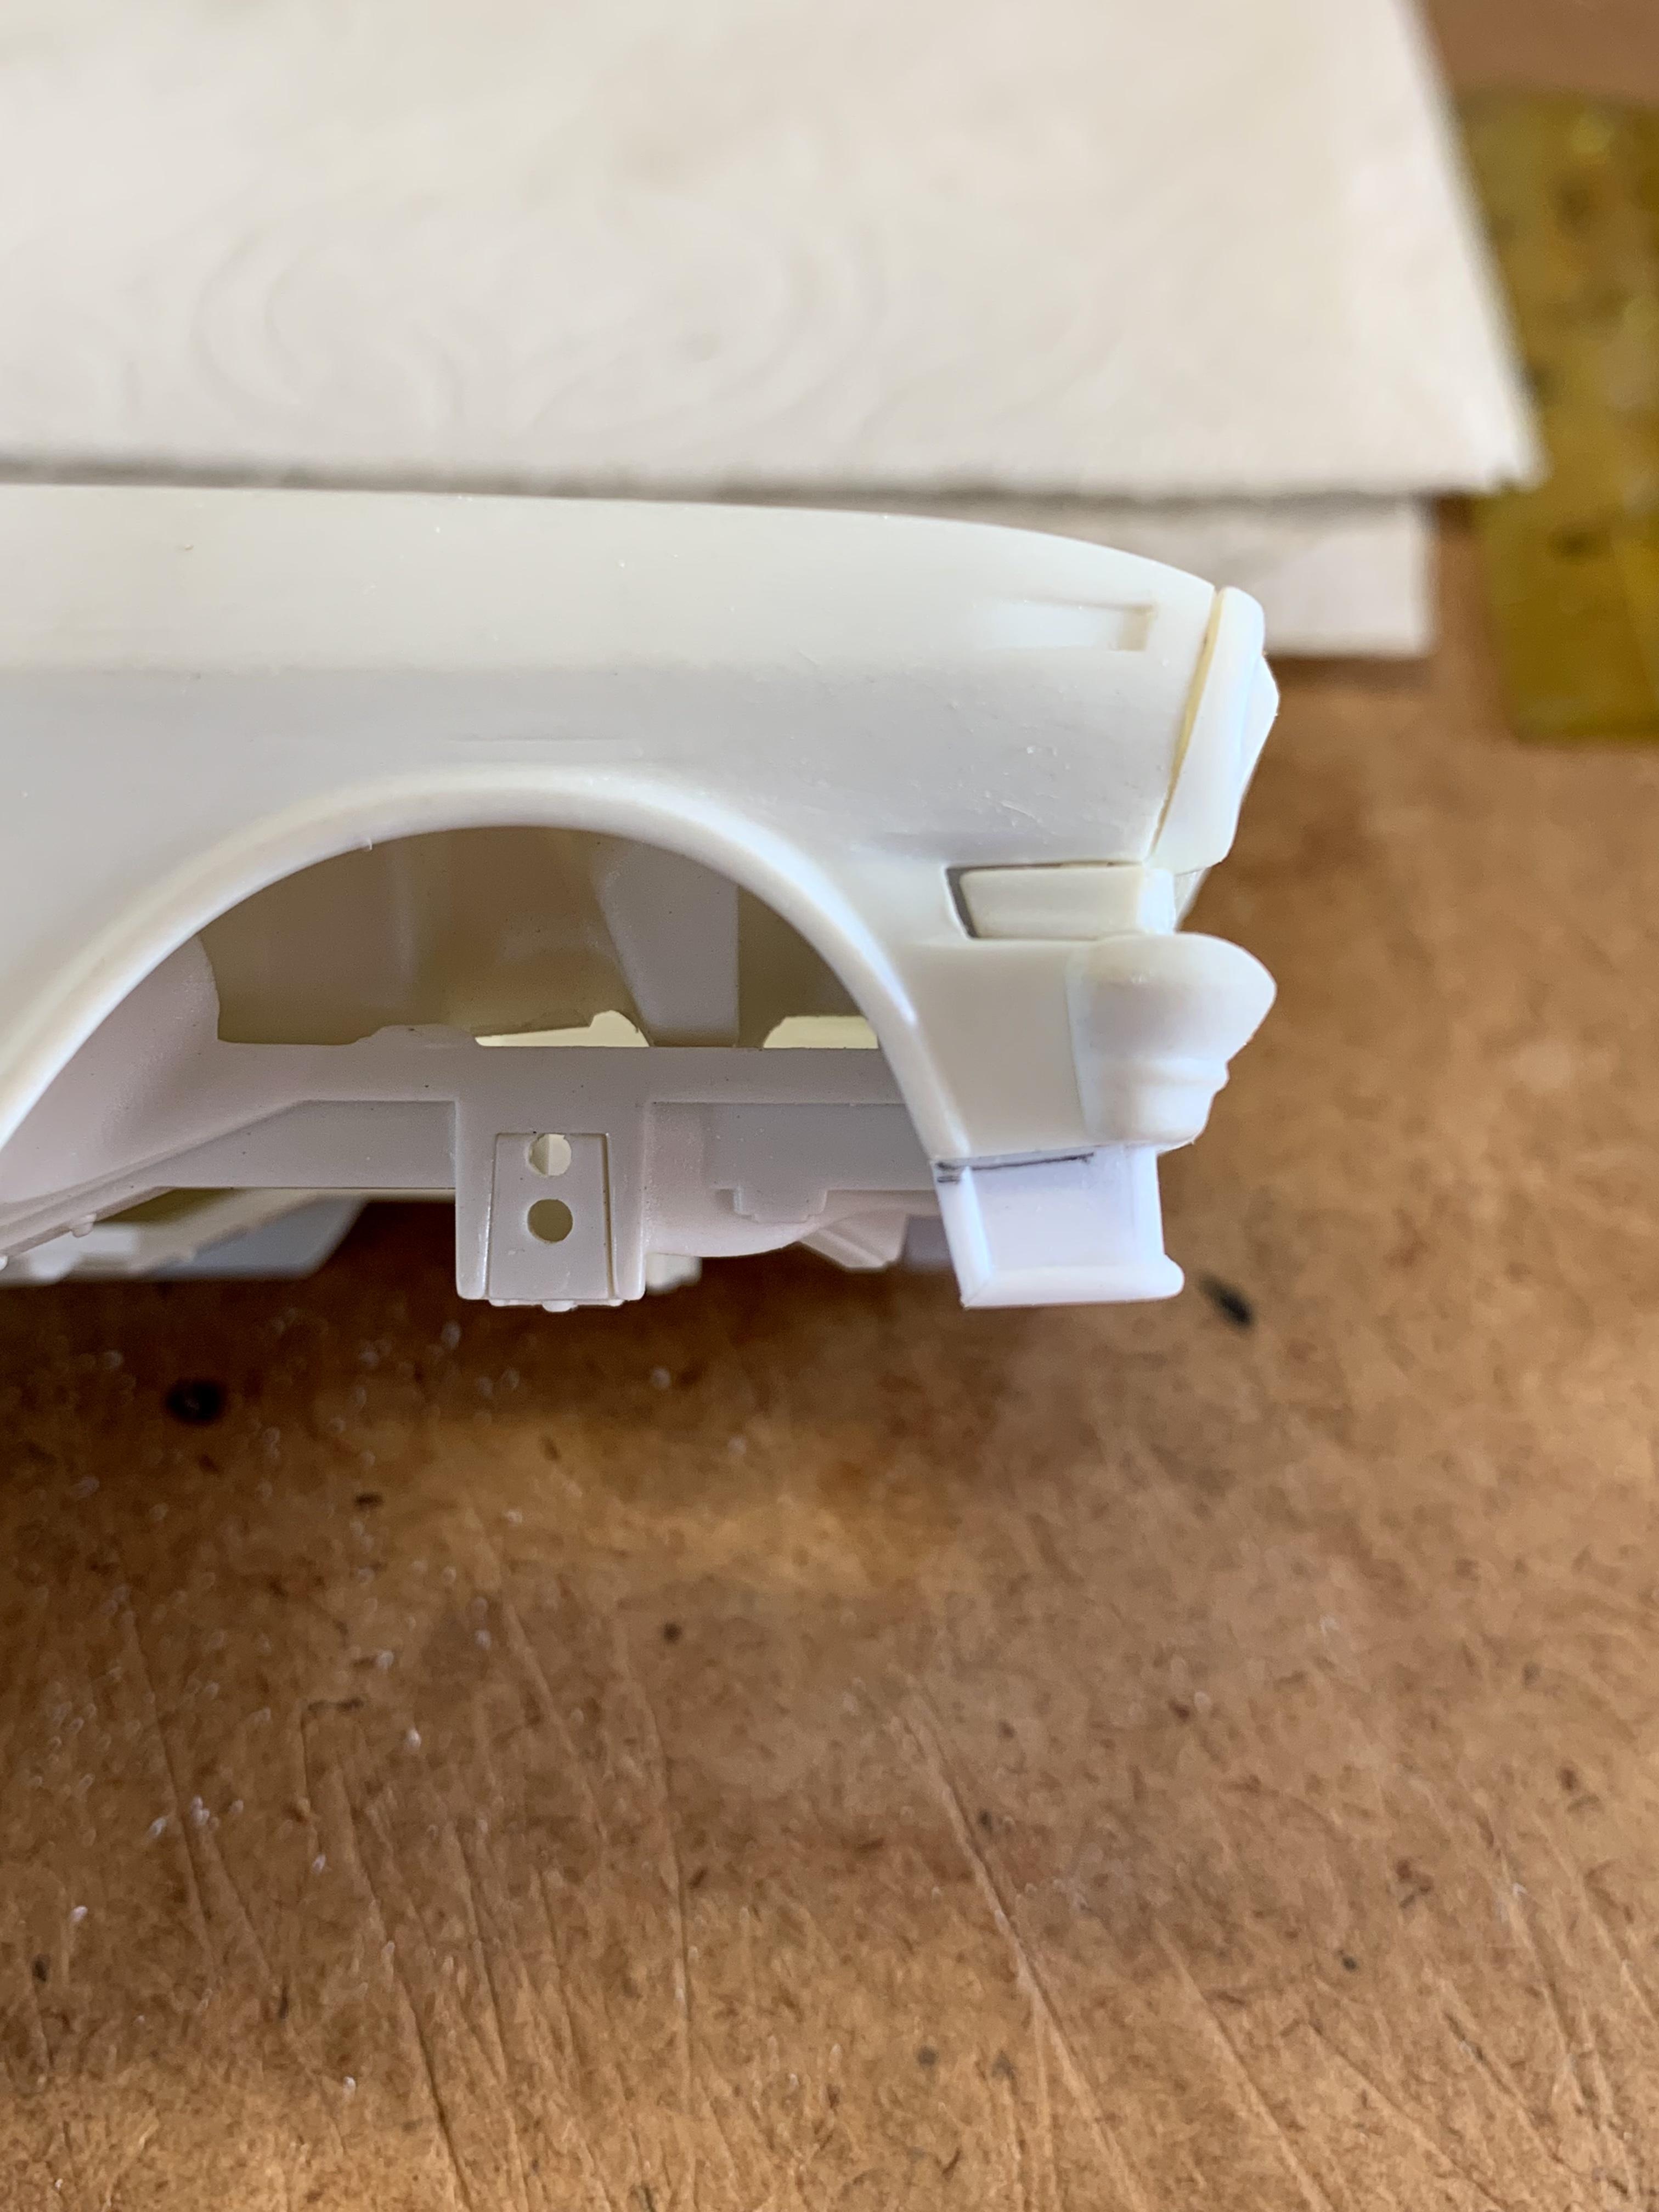
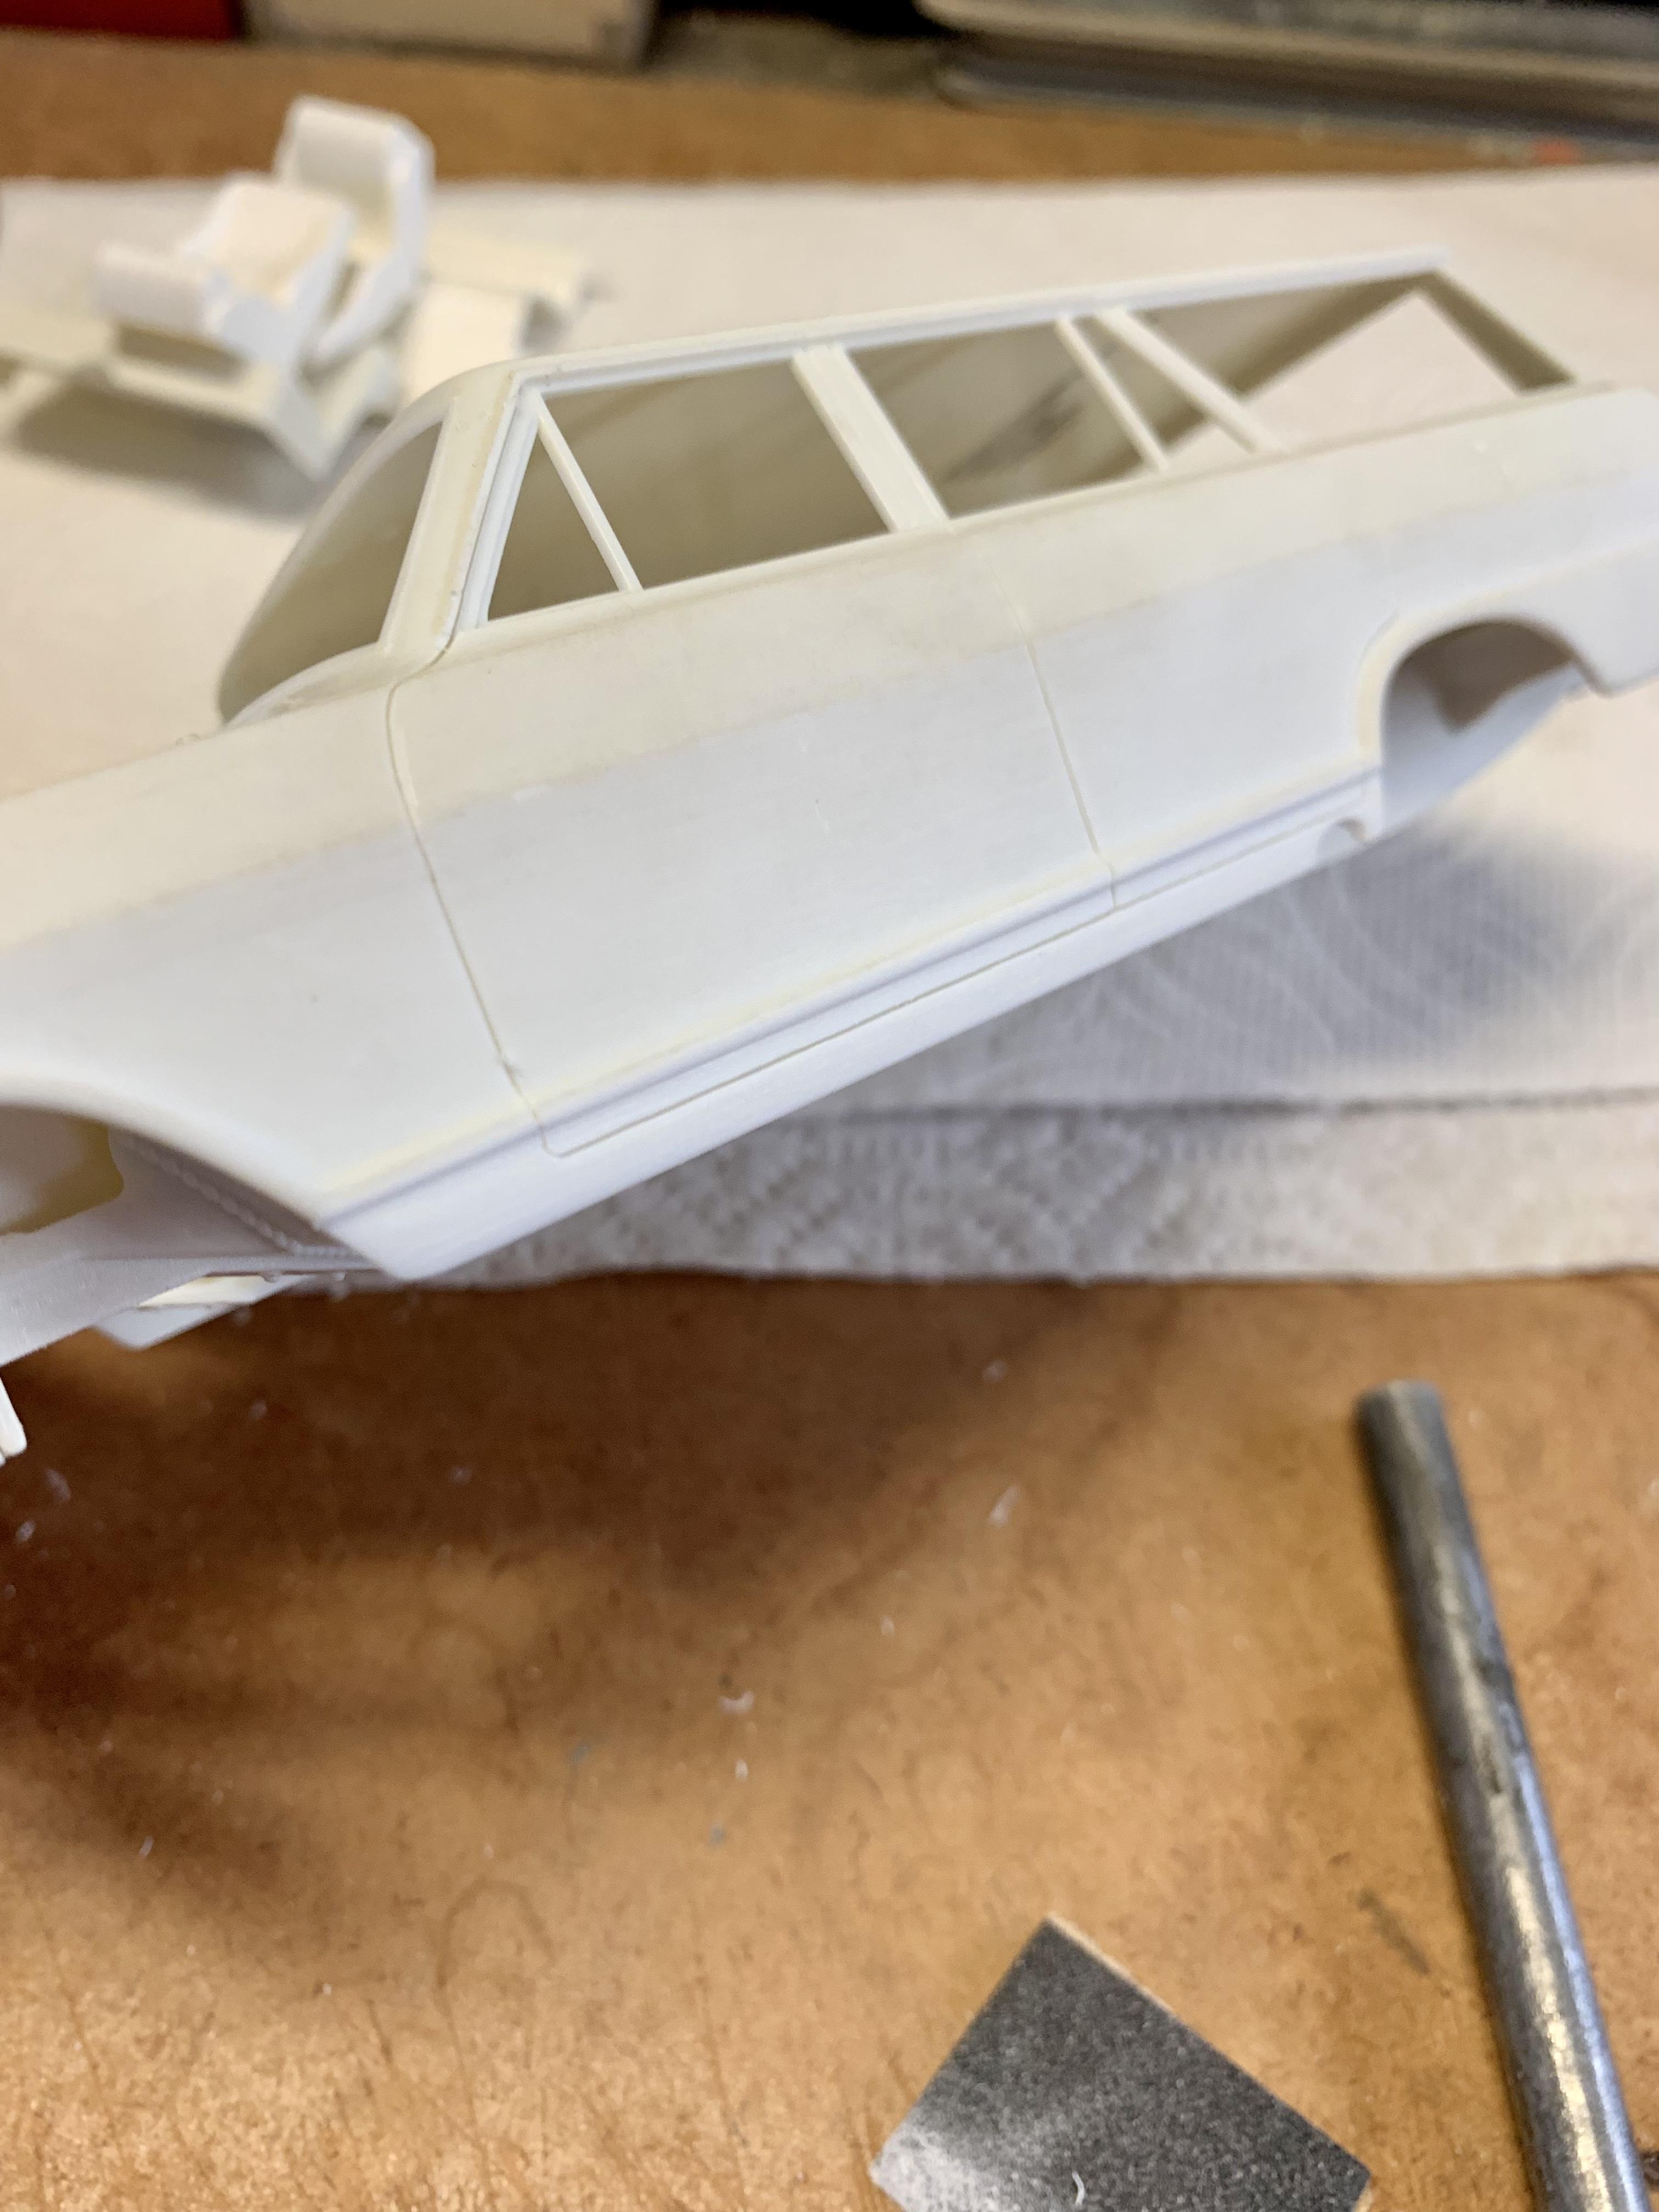
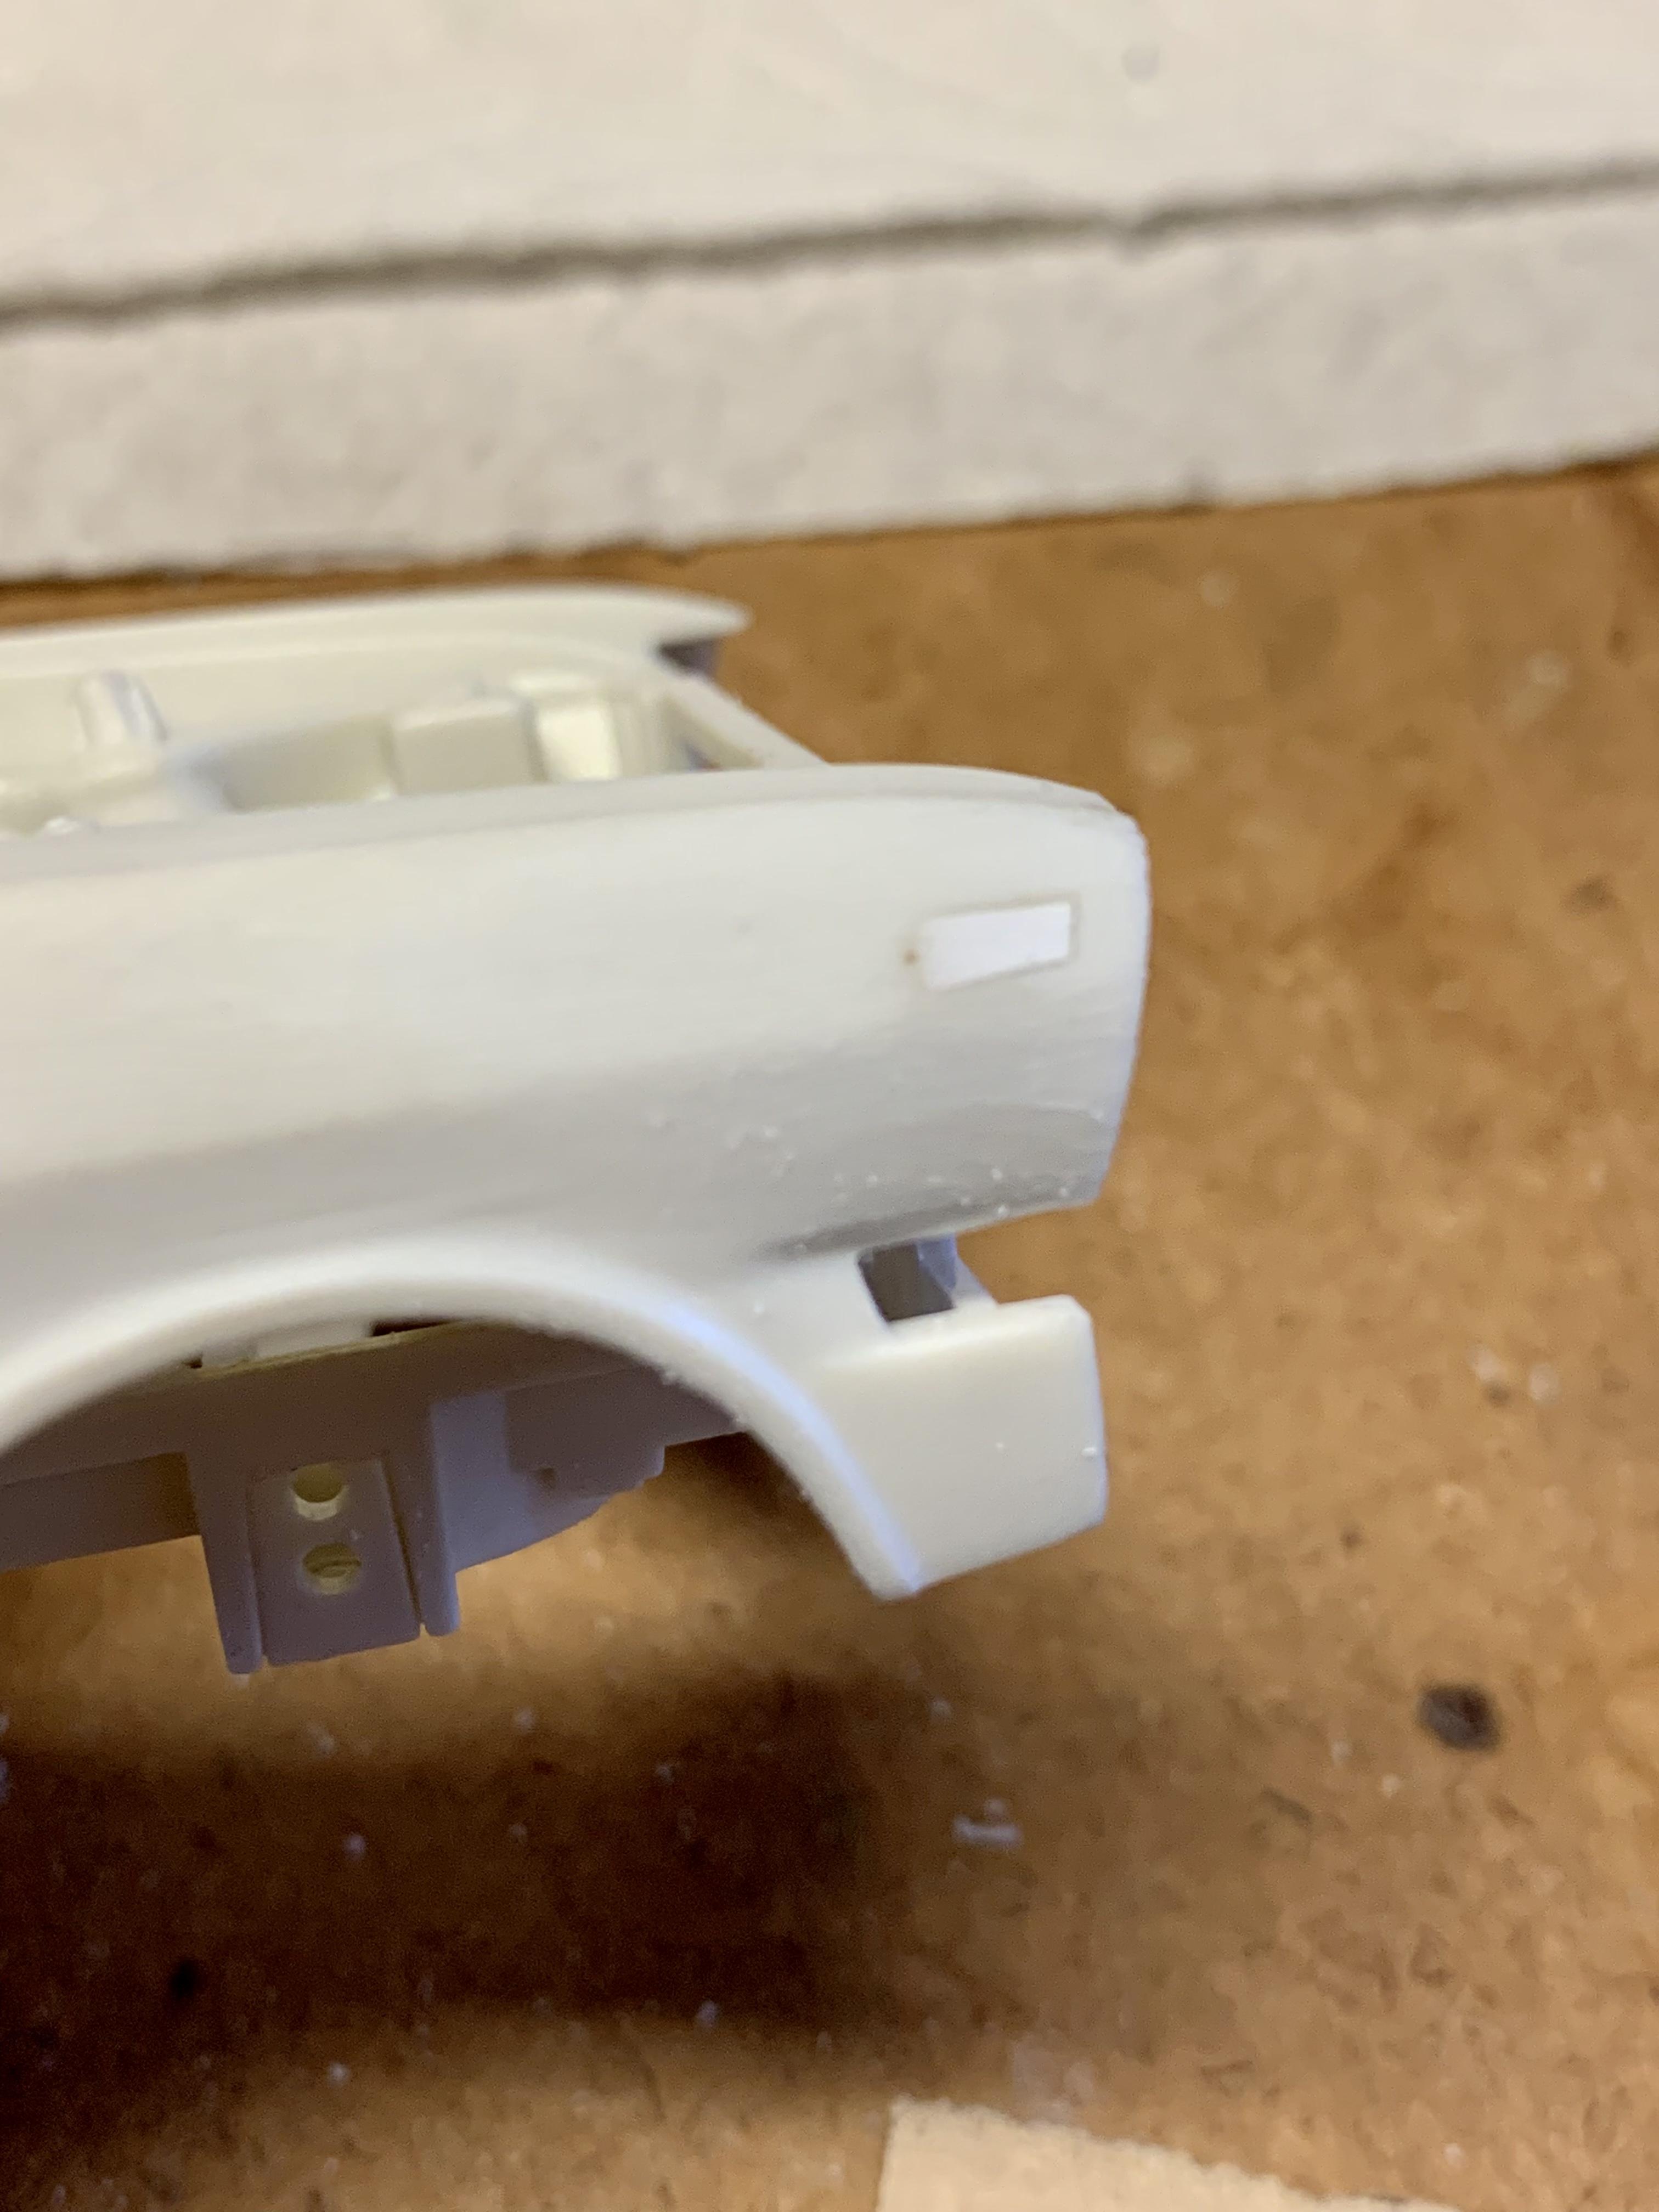
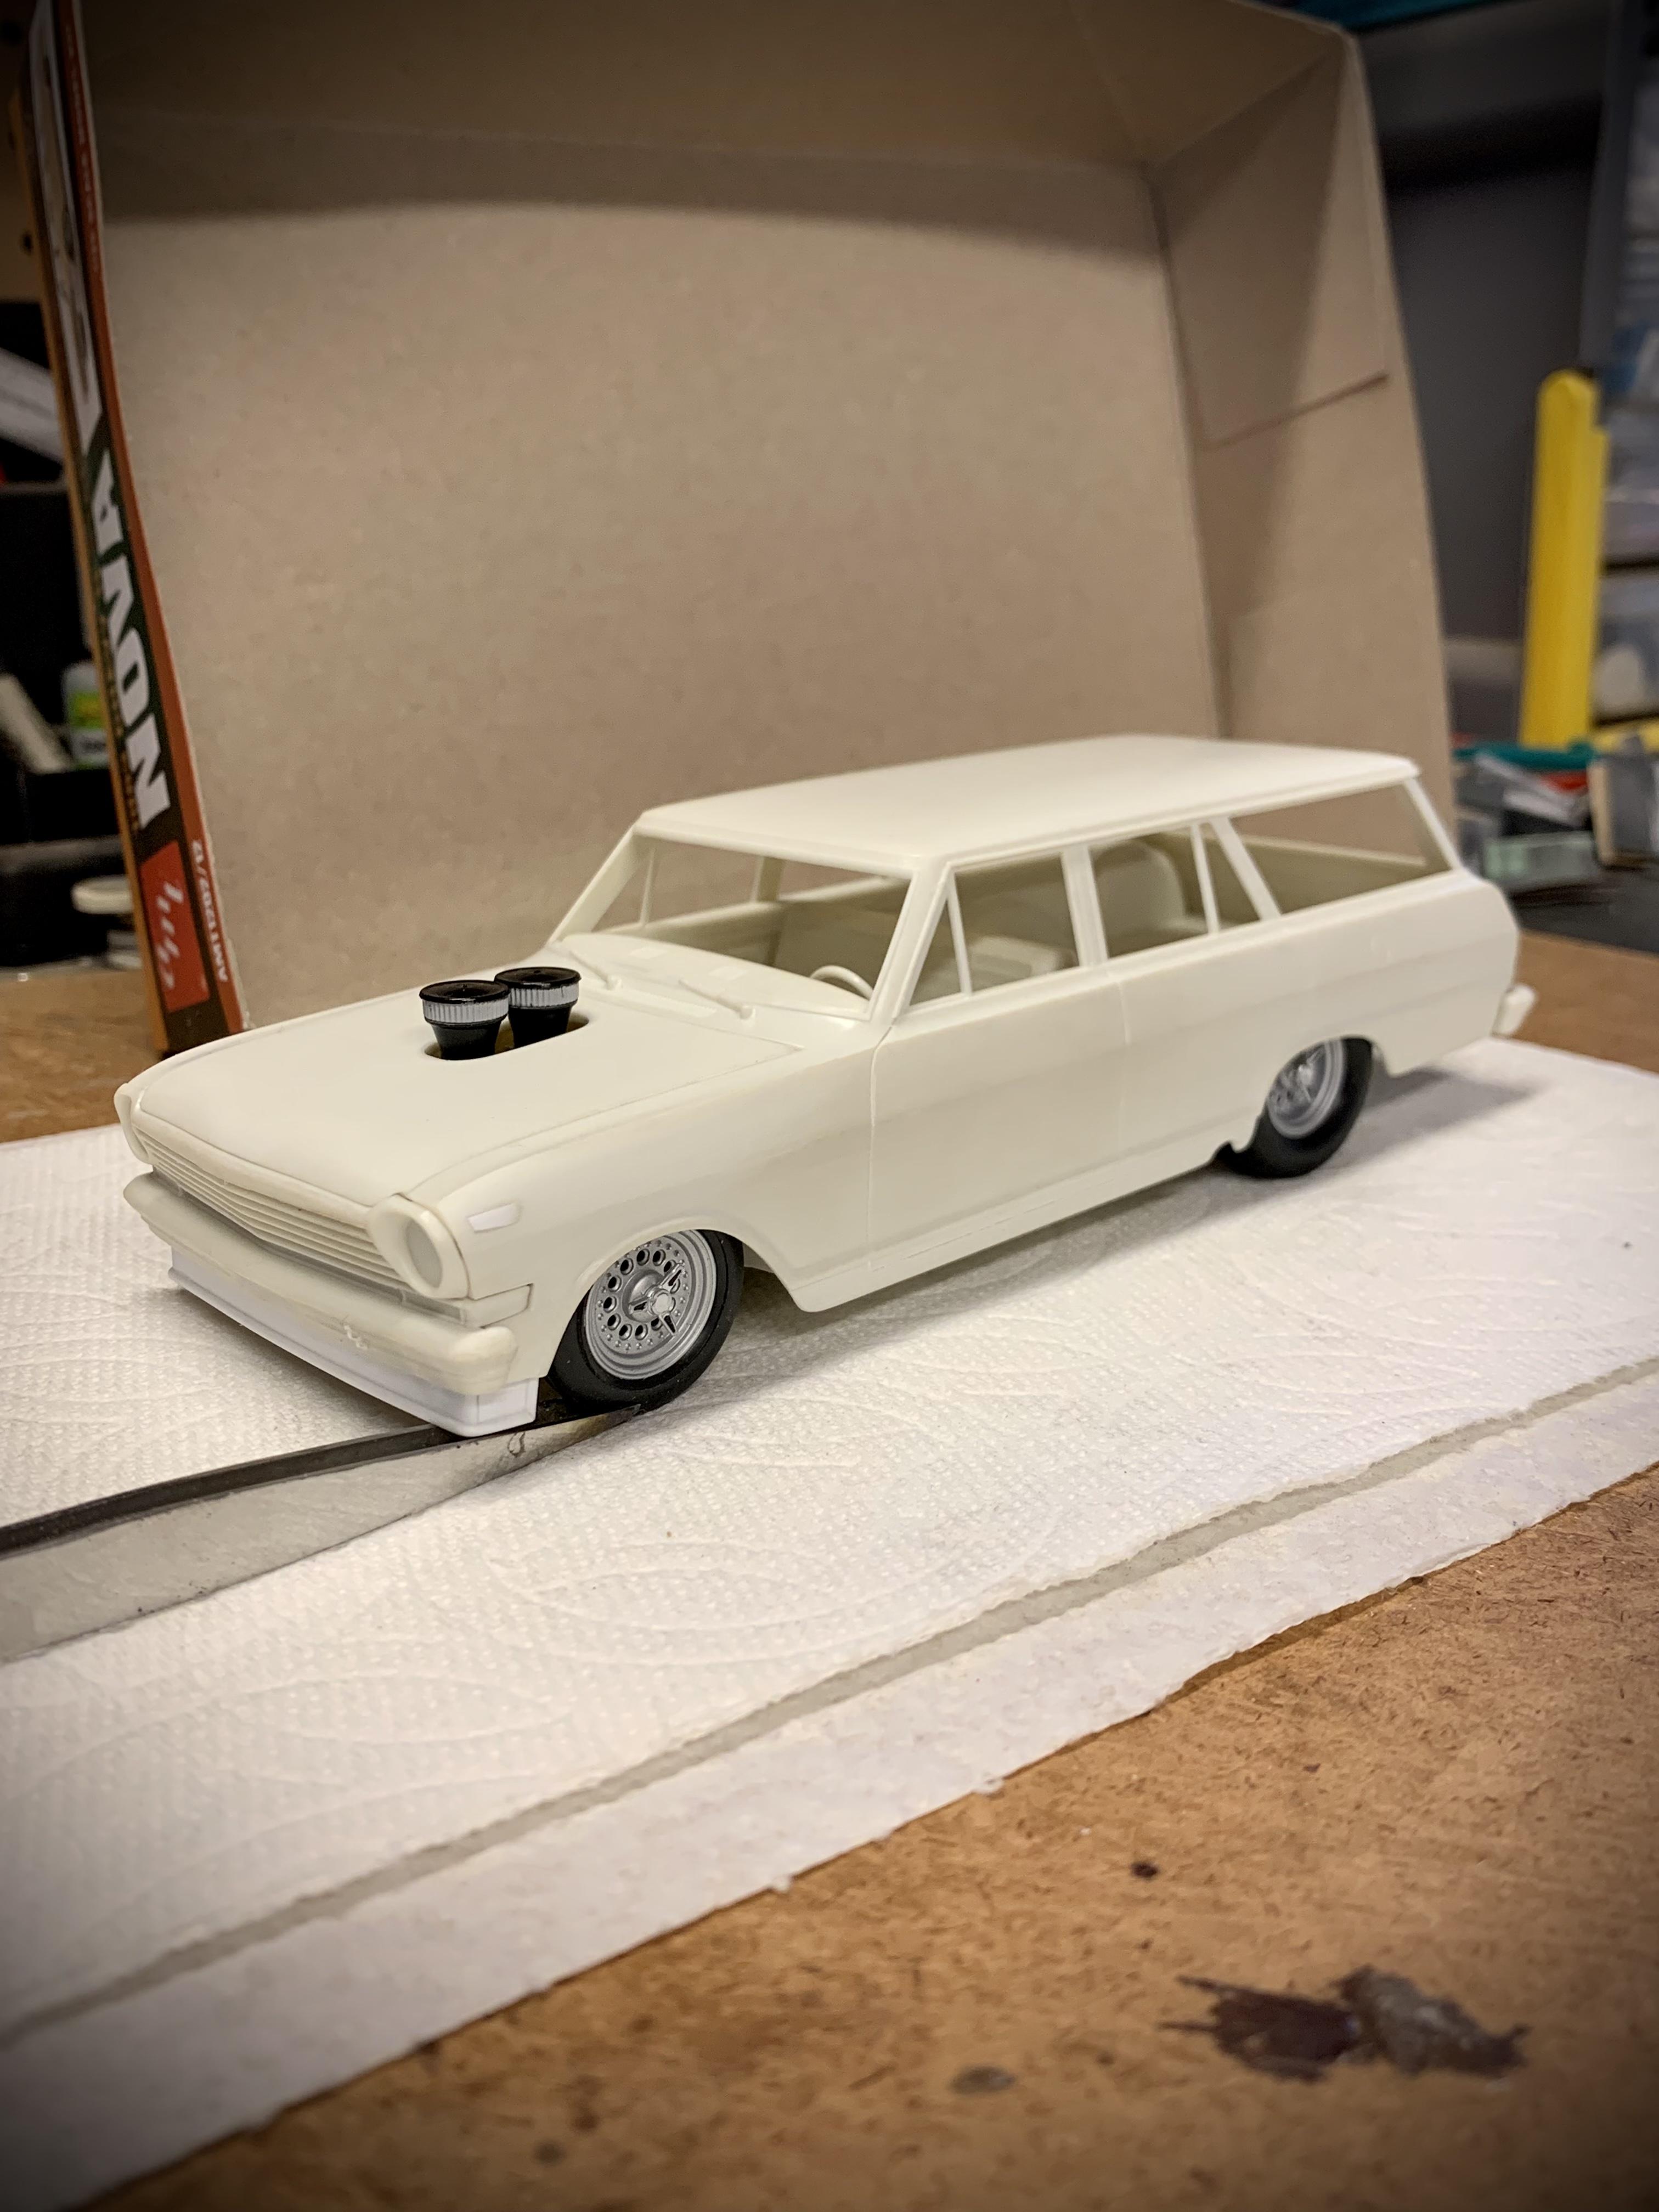
UPDATE! I had just enough time at the bench today to finish the rest of the exterior modifications. Every time I’ve had this model mocked up it’s occurred to me that there’s a lot of air below the front bumper, which is considerably higher relative to the rocker areas down the sides of the body. I decided that what the front end needed was an air dam to close the gap between the bumper and the table top. I started out with some .040” Evergreen sheet cut into a long enough strip that was 1/4” wide. I drew a line across the strip 1/16” down from one of the long edges and glued it the back edge of the bumper leaving 3/16” hanging down which is about 4.5” in scale. I then glued some 1/4” wide side extensions to the back edges of the dam, again with 1/16” up inside the front fender edges but I did not glue them to the fenders. This allows the air dam to come off with the bumper. I then added some strips to the inside corners for support. With the basic shape and structure roughed in I trimmed the edges of the extensions even with the wheel wells, rounded the front corners (another reason for the support strips in the corners) and then added a strip of .060” half round rod around the bottom edge and up the back edges of the extensions to match up with the raised bead on the wheel opening of the fenders. From there I scribed all of the door lines deeper with the back of a #11 blade then sanded away all of the ribbed rocker trim. Lastly I filled the little depressions in the fenders behind the headlights since the rear of the body is smoothed out. And some final mock ups with the finished exterior modifications. I set the finished engine in because the air filters sticking through the hood are a significant design element. I really wish I had hung the exhaust system for the full effect. I’m very happy with the addition of the air dam and how much aggression it adds to the car. At this point the body and other exterior parts are ready for final clean up and onto primer. Next I’ll be focusing on a major update to the interior to bring it into the early 90’s with the rest of the car. Stay tuned!
-
The Grape Crate - a (mostly) scratchbuilt Model A Woody
Dennis Lacy replied to OldNYJim's topic in WIP: Model Cars
Very promising start. The stance is right-on and the proportions look good. The wedge shaped door wood is an interesting idea, I think I like it. -
Beautiful color! Much better than than the root beer (IMO).
-
It doesn’t look like the top that I made for Ed. Similar shape but the details are different.
-
Very cool, Tom! I like the reworked door panels and dashboard. Are the Edelbrock valve covers from the AMT ‘55 Chevy as well?
-
McBurnie Coachcraft 'Ferrari' Daytona Replica - 'Miami Vice Style'...
Dennis Lacy replied to crowe-t's topic in Model Cars
Excellent work! A model like this (for the builder) is a tough one because you know how much work you had to put in to make it an accurate replica but to the casual observer it looks like it’s basically box stock. Definitely a labor of love project. I find it ironic that your replica is of a full scale aftermarket facsimile of a Ferrari and Monogram actually made it too accurate to an actual Ferrari! ? I had not seen your WIP thread yet but followed your link above and went through the whole thing. Not only is your correction work really well done but I also learned a ton about the McBurnie Daytona’s so thank you for the great information! I was 4 years old in 1984 when Miami Vice first aired. My mom was a huge fan of it and I always tried to watch it with her through the years. She was worried it wasn’t kid-appropriate but I didn’t care about the story lines, I just loved the cars and the music! I had the Music Soundtrack with all those cool Jan Hammer instrumentals and played it all the time. I agree with you that the Daytona was better suited to the Sonny Crocket character but as a kid I just loved the Testarossa that replaced it. -
Thank you so much for your post. As I stated in my original post, I really don’t have a deep knowledge of traditional custom cars. My main passion is traditional hot rods but in that I’ve picked up bits and pieces of the customs as they sometimes intermingle. I’m aware of some of the more famous cars but generally I’m a total novice in that world. Somehow I managed to pull off a totally traditional, yet original design that is still immediately recognizable as a ‘57 Chevy. I was really expecting a lot of negative feedback about the fin and taillight treatment and to my surprise the feedback has been overwhelmingly positive. I also wanted a color that was period appropriate but not run of the mill and the quality of the paint exceeded my expectations. I’m quite proud of this model.
-
Thanks! For the first time ever I polished the “glass”. LOL! It was necessary as both pieces had some scuffs from being loose in the box. It does look remarkably clear in the pics. I used Adam’s Finishing Polish (Adam’s makes a huge line of full scale car care products) on a cheap microfiber towel. Super simple and I’ll be polishing all the kit “glass” that I use on future projects. On a side note, there’s a picture or two where the objects through the windshield looks like a fun house mirror as the vent window on the passenger side looks all distorted. Good old AMT glass, hahaha! ?
-
Nice! You might consider chopping off those macaroni elbows from the ends of the headers then opening up the ends. They look better that way (at least I think so.)
-
1963 Chevy Nova Wagon Street Rod FINISHED 3/20/22
Dennis Lacy replied to Dennis Lacy's topic in WIP: Model Cars
Quiet, you! -
1963 Chevy Nova Wagon Street Rod FINISHED 3/20/22
Dennis Lacy replied to Dennis Lacy's topic in WIP: Model Cars
Glad I could help! ? -
Double post…
-
Will definitely be grabbing several of these!!!
-
Thank you so much, Tim. All very nice of you. Nobody ever uses the little mascots so I had to include the Gator!
-
The customized body has a nice shape and lines to it! This looks every bit the part of a 60’s bubble top show rod. Awesome!
-
This is one of the most creative show rod models I’ve seen in a while. To look at the Comet body and see this speaks to how creative you are. Absolutely fantastic in every way! So glad you added the construction and interior pics. The interior is awesome! If this car was lined up with Roth’s other creations you’d swear it was one of his. Just bad ass!!!
-
'53 Studebaker funny car
Dennis Lacy replied to Rocking Rodney Rat's topic in WIP: Drag Racing Models
Love the interior structure you created!