Dennis Lacy
-
Posts
2,487 -
Joined
-
Last visited
Content Type
Profiles
Forums
Events
Gallery
Everything posted by Dennis Lacy
-
 Thanks for taking the time to put this very thorough preview together, Tim. This kit looks absolutely fantastic!
 -
Rat removed from the Roaster: '32 roadster
Dennis Lacy replied to Rocking Rodney Rat's topic in Model Cars
Your Un-Ratted Roadster turned out beautiful, RRR. You kit-bashed it into something that I would actually want to be seen in! ? I especially like the headlight bar. The paint turned out awesome, too. Looks like I could dip my finger in it! -
'36 Ford 5ive window coupe, old build being resurrected.
Dennis Lacy replied to Rocking Rodney Rat's topic in WIP: Model Cars
You always make floor pans and other large panel fabrication look easy. The reinforcement ribs make it look very realistic. -
1990 Mustang LX - SVT Cobra DOHC Powered! UPDATE! 1/22/23
Dennis Lacy replied to Dennis Lacy's topic in WIP: Model Cars
Thanks for joining in and glad you like my project, Tim! The body proportion mishaps aside this is a really nice kit with some really neat optional parts that would be good for kit-bashing all kinds of vehicles. I’m glad I finally grabbed a couple. I’m definitely going to have to find something to put the very nicely done 5-liter pushrod into. Man, I’d love to be able to a have good BS session and geek-out with you on your time on the SVT team. Some truly cool stuff including some killer one-off factory hot rods came through the shop during those years.
-
Good looking mock up. I built the master body for Ed so it’s always neat for me to see one getting used. Looking forward to following along!
-
Some neat ideas here. Man, you’re on a roll with these hot rod builds new and old. Get ‘em done!
-
'36 Ford 5ive window coupe, old build being resurrected.
Dennis Lacy replied to Rocking Rodney Rat's topic in WIP: Model Cars
Definitely looking forward to seeing this one come together. Kind of like my ‘37 “Taxicab” Sedan. Traditional looking on the outside with all modern running gear underneath. -
1990 Mustang LX - SVT Cobra DOHC Powered! UPDATE! 1/22/23
Dennis Lacy replied to Dennis Lacy's topic in WIP: Model Cars
Thanks! I thought about doing that with the side bolsters but they end up buried down in there so when everything is put together you’d never know they are undercut. -
1990 Mustang LX - SVT Cobra DOHC Powered! UPDATE! 1/22/23
Dennis Lacy replied to Dennis Lacy's topic in WIP: Model Cars
Thanks, man! And good to hear from you! I believe they are identical wheels and tires in the Series 1. Somewhere in this thread a fellow said as much. -
1990 Mustang LX - SVT Cobra DOHC Powered! UPDATE! 1/22/23
Dennis Lacy replied to Dennis Lacy's topic in WIP: Model Cars
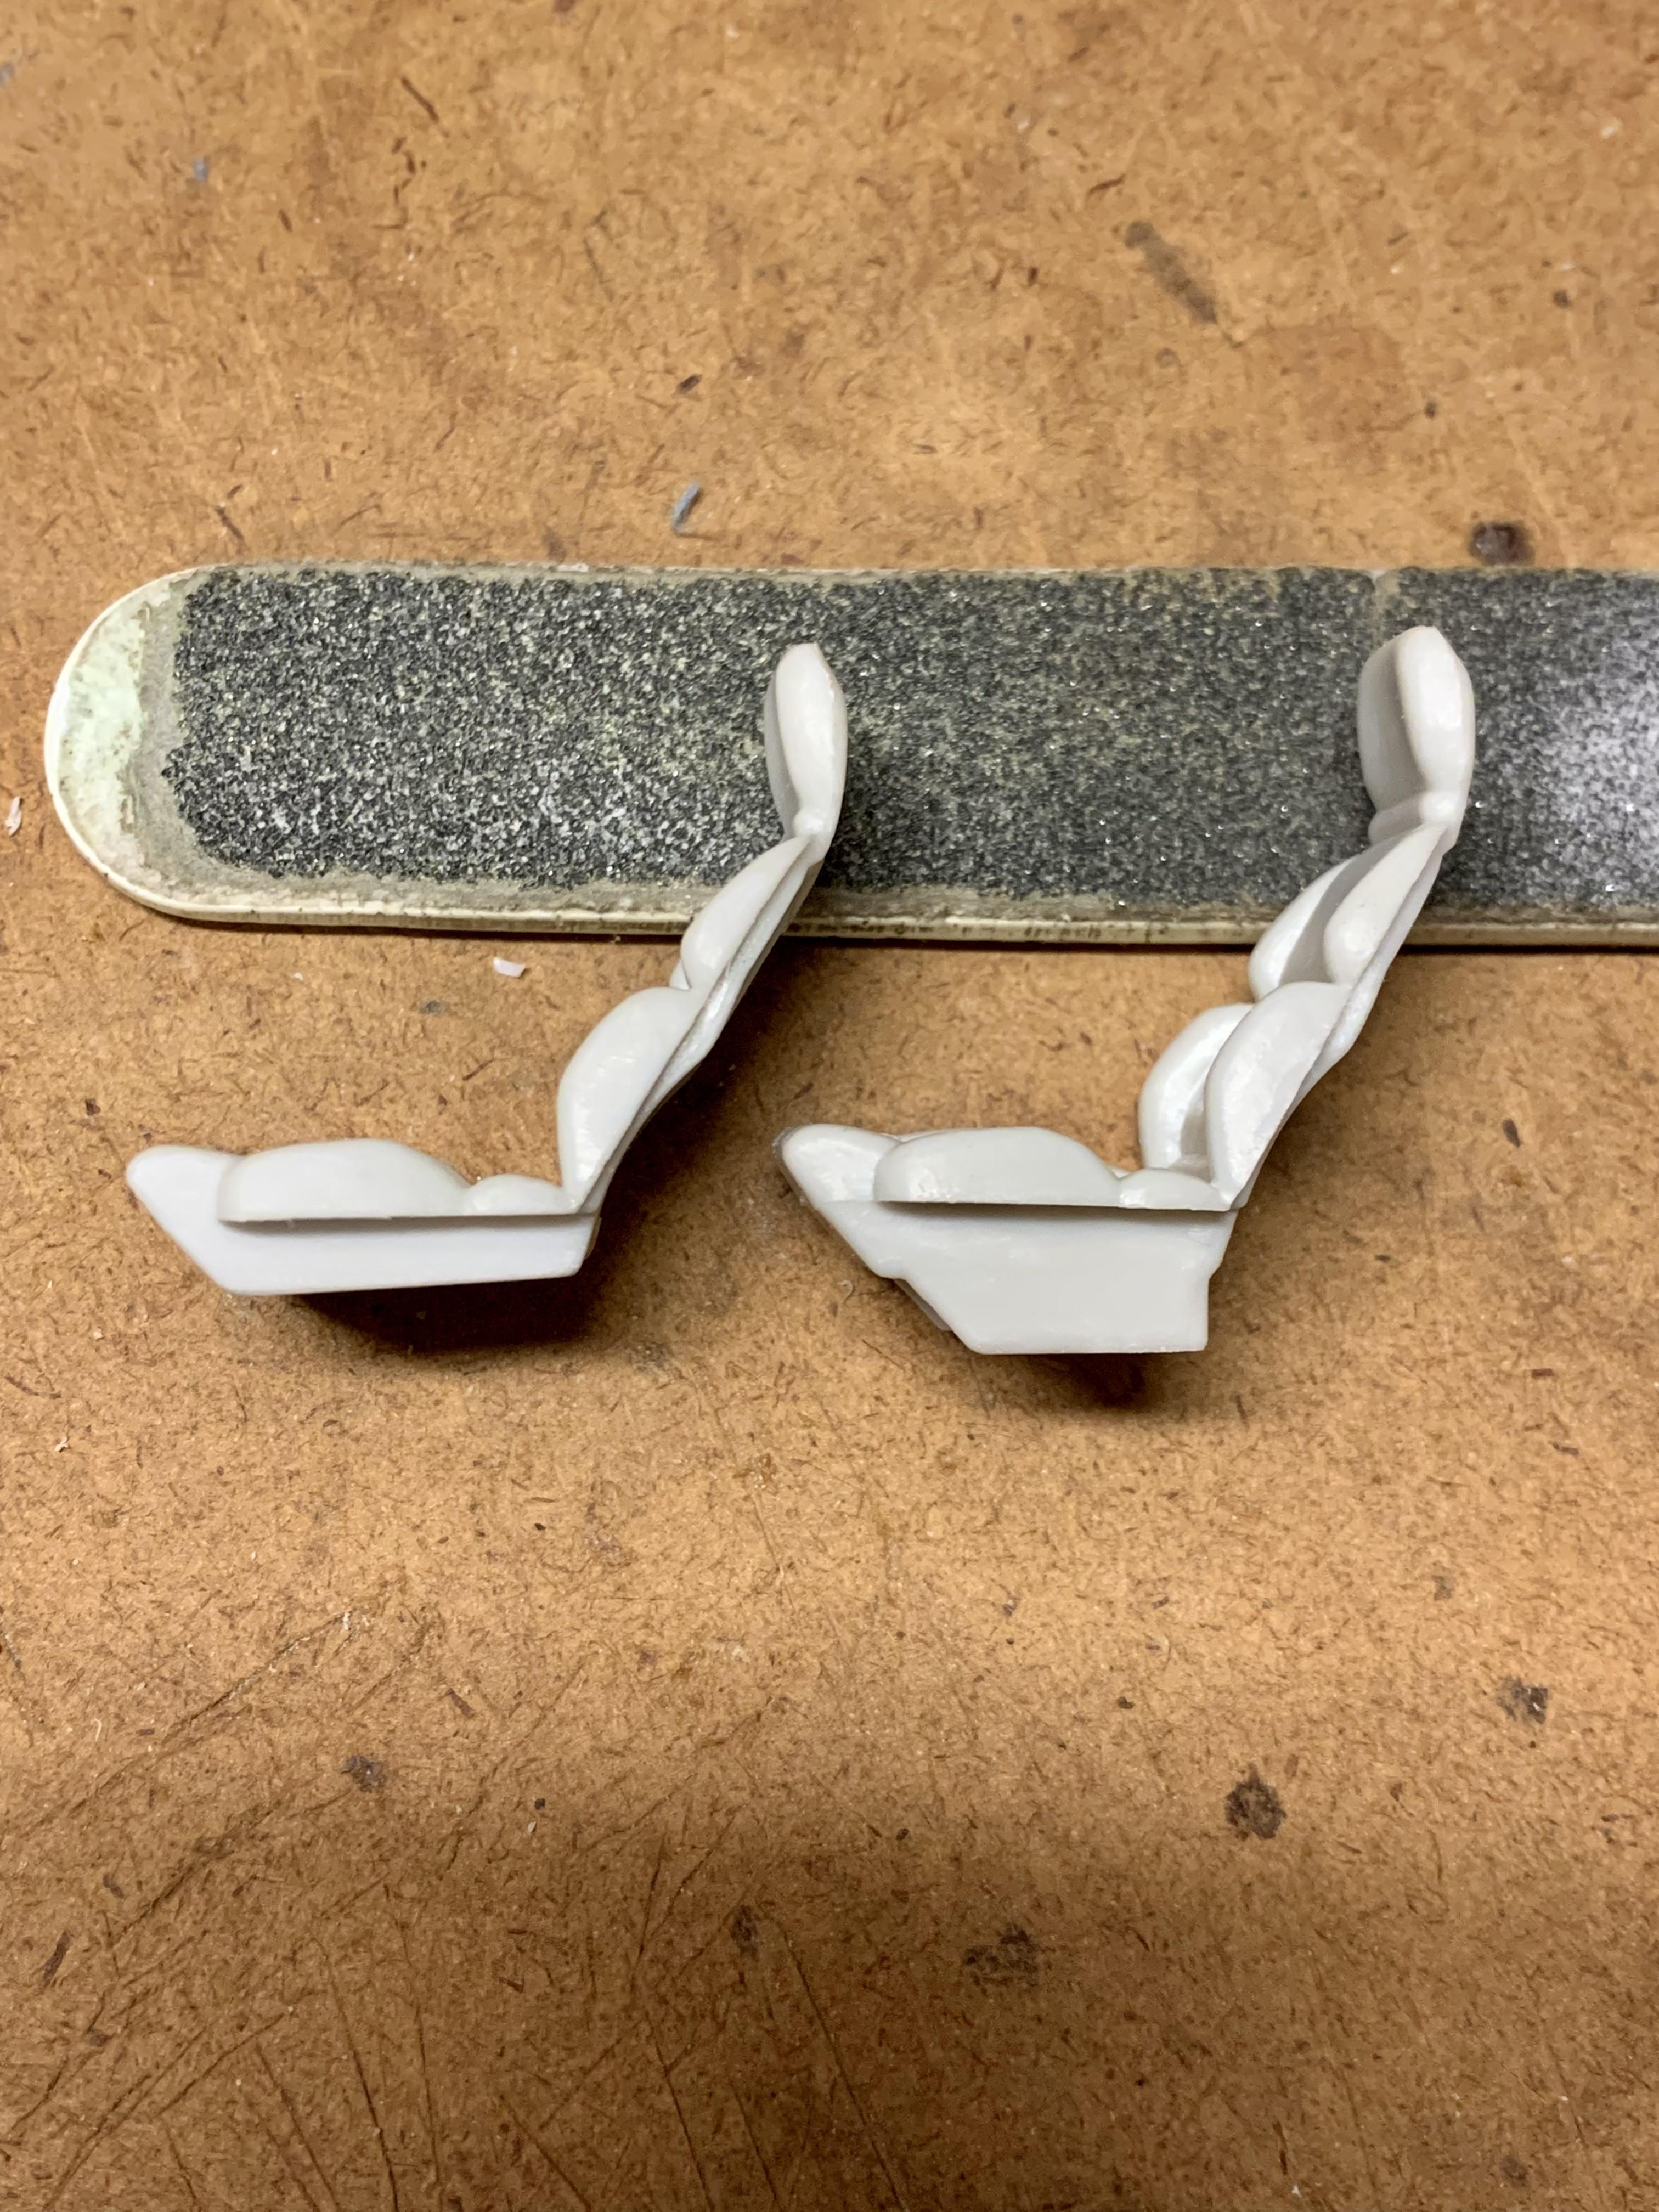
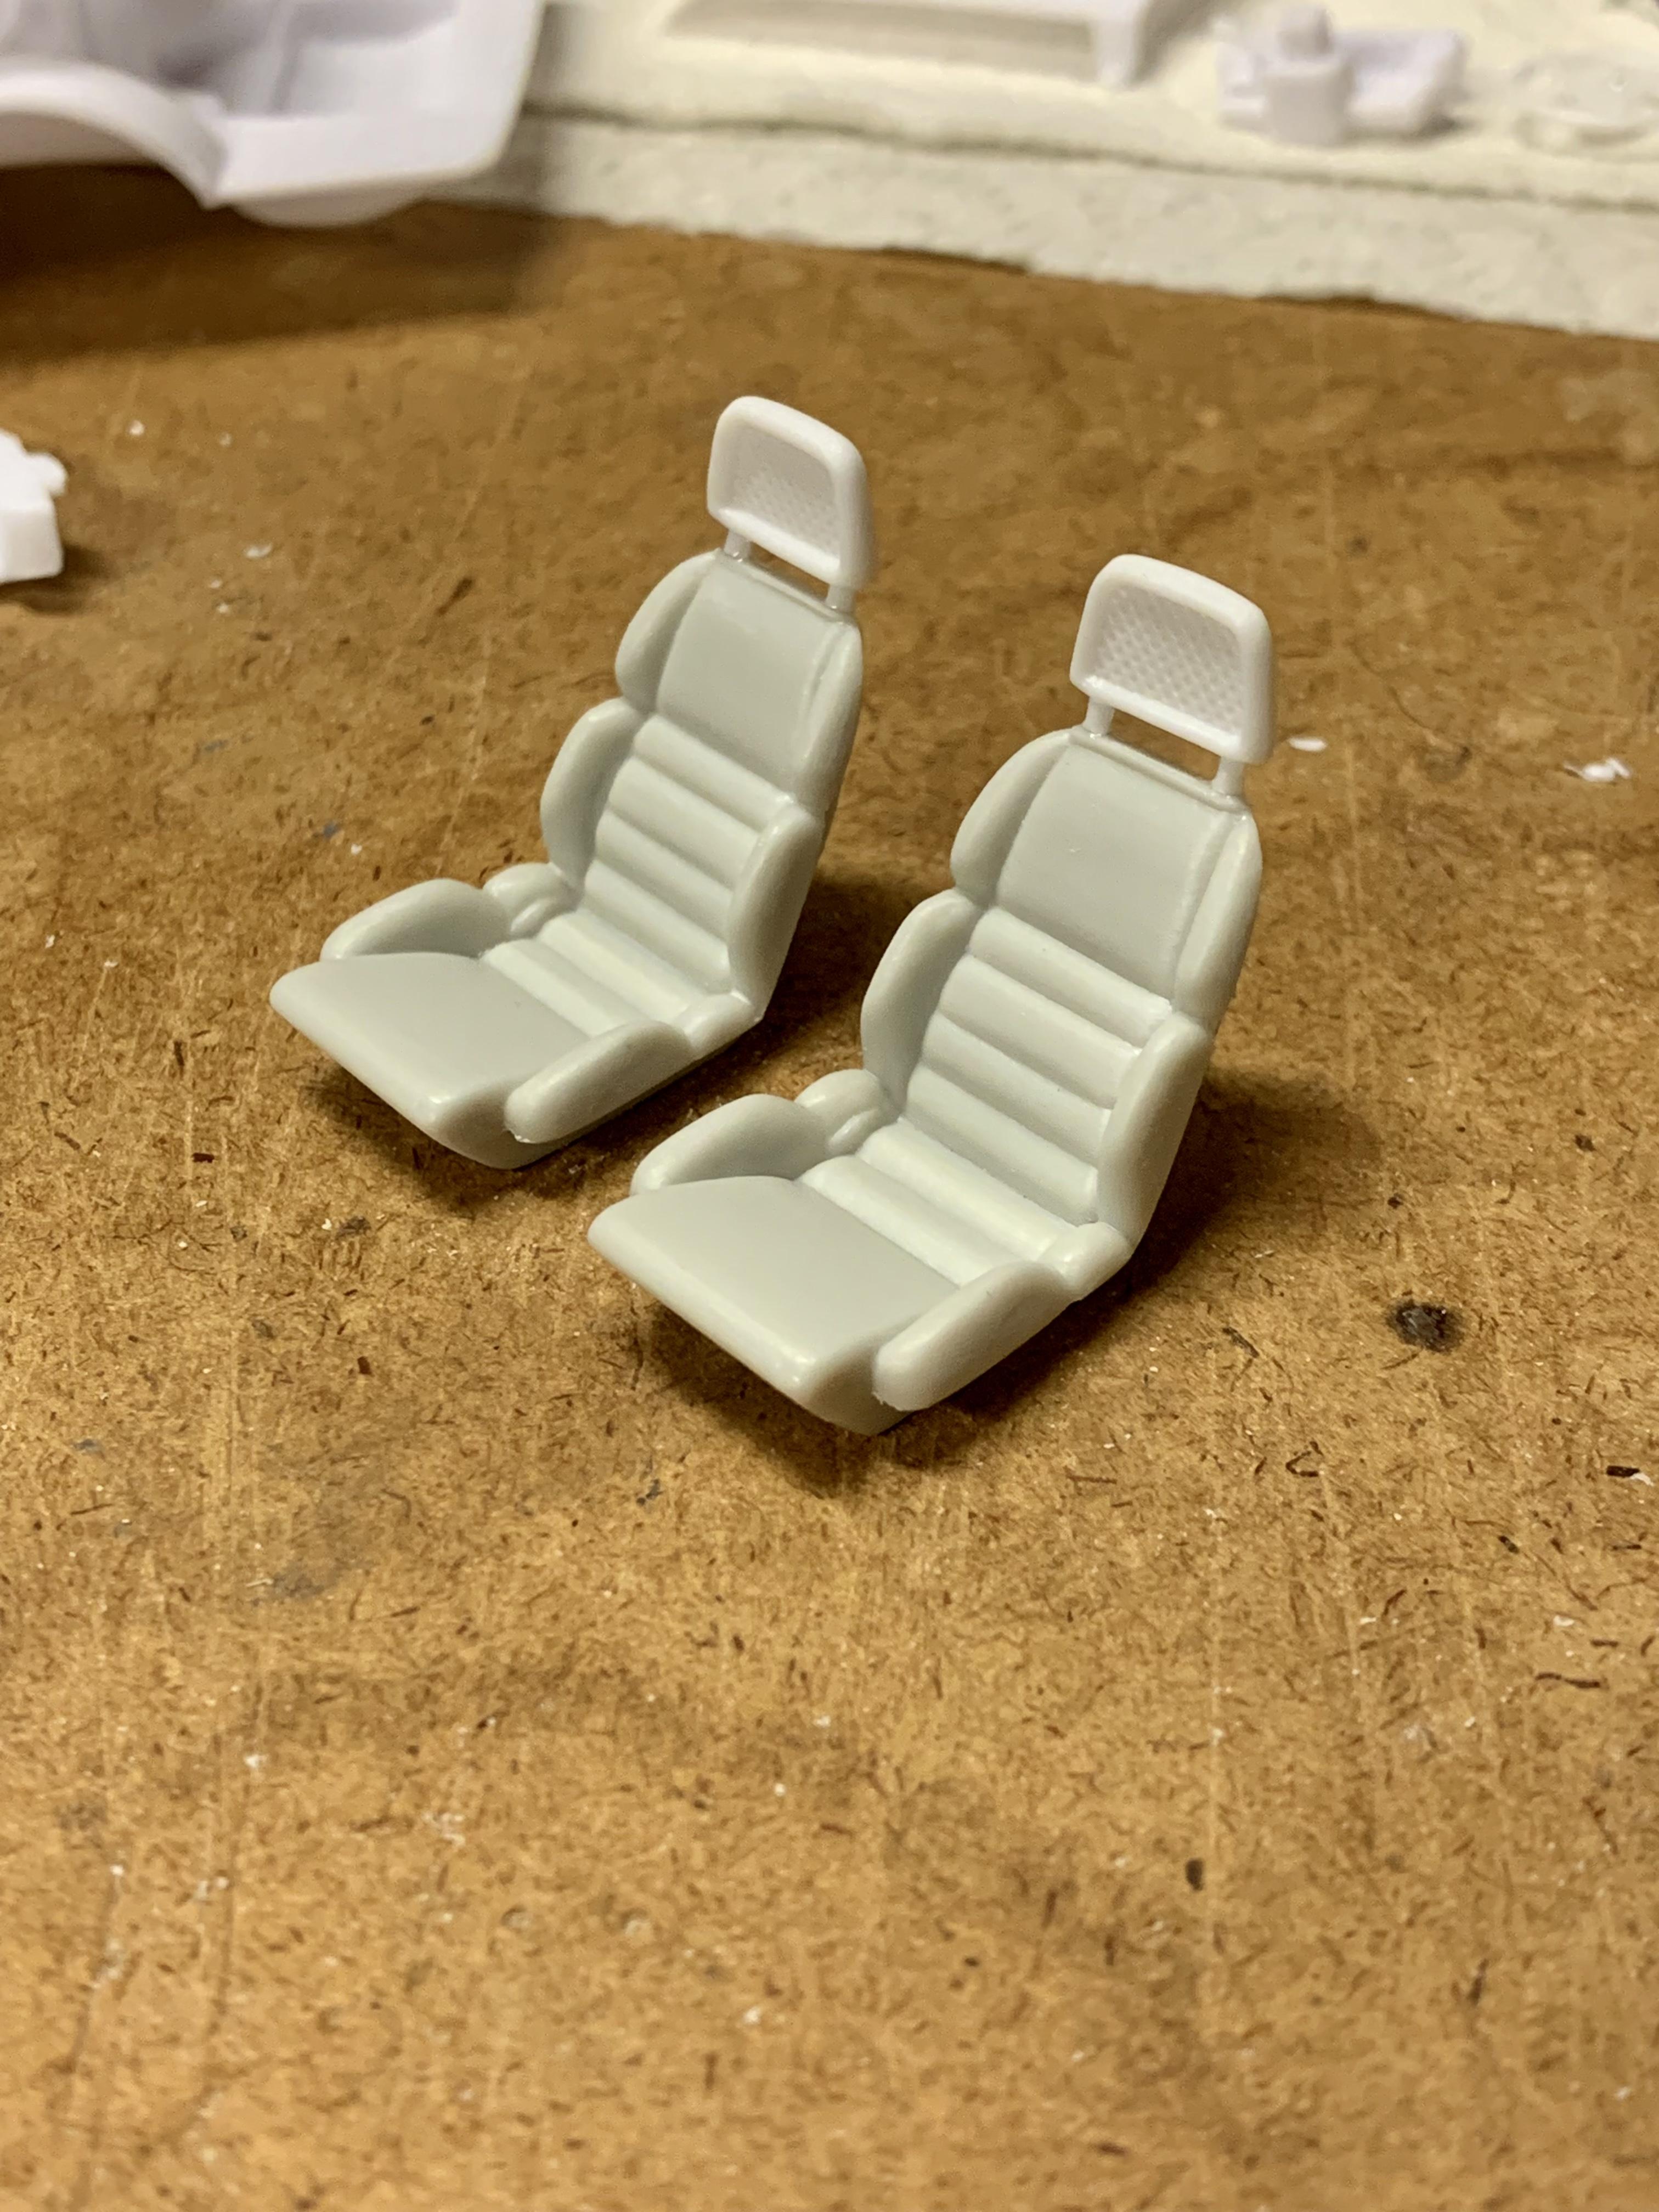
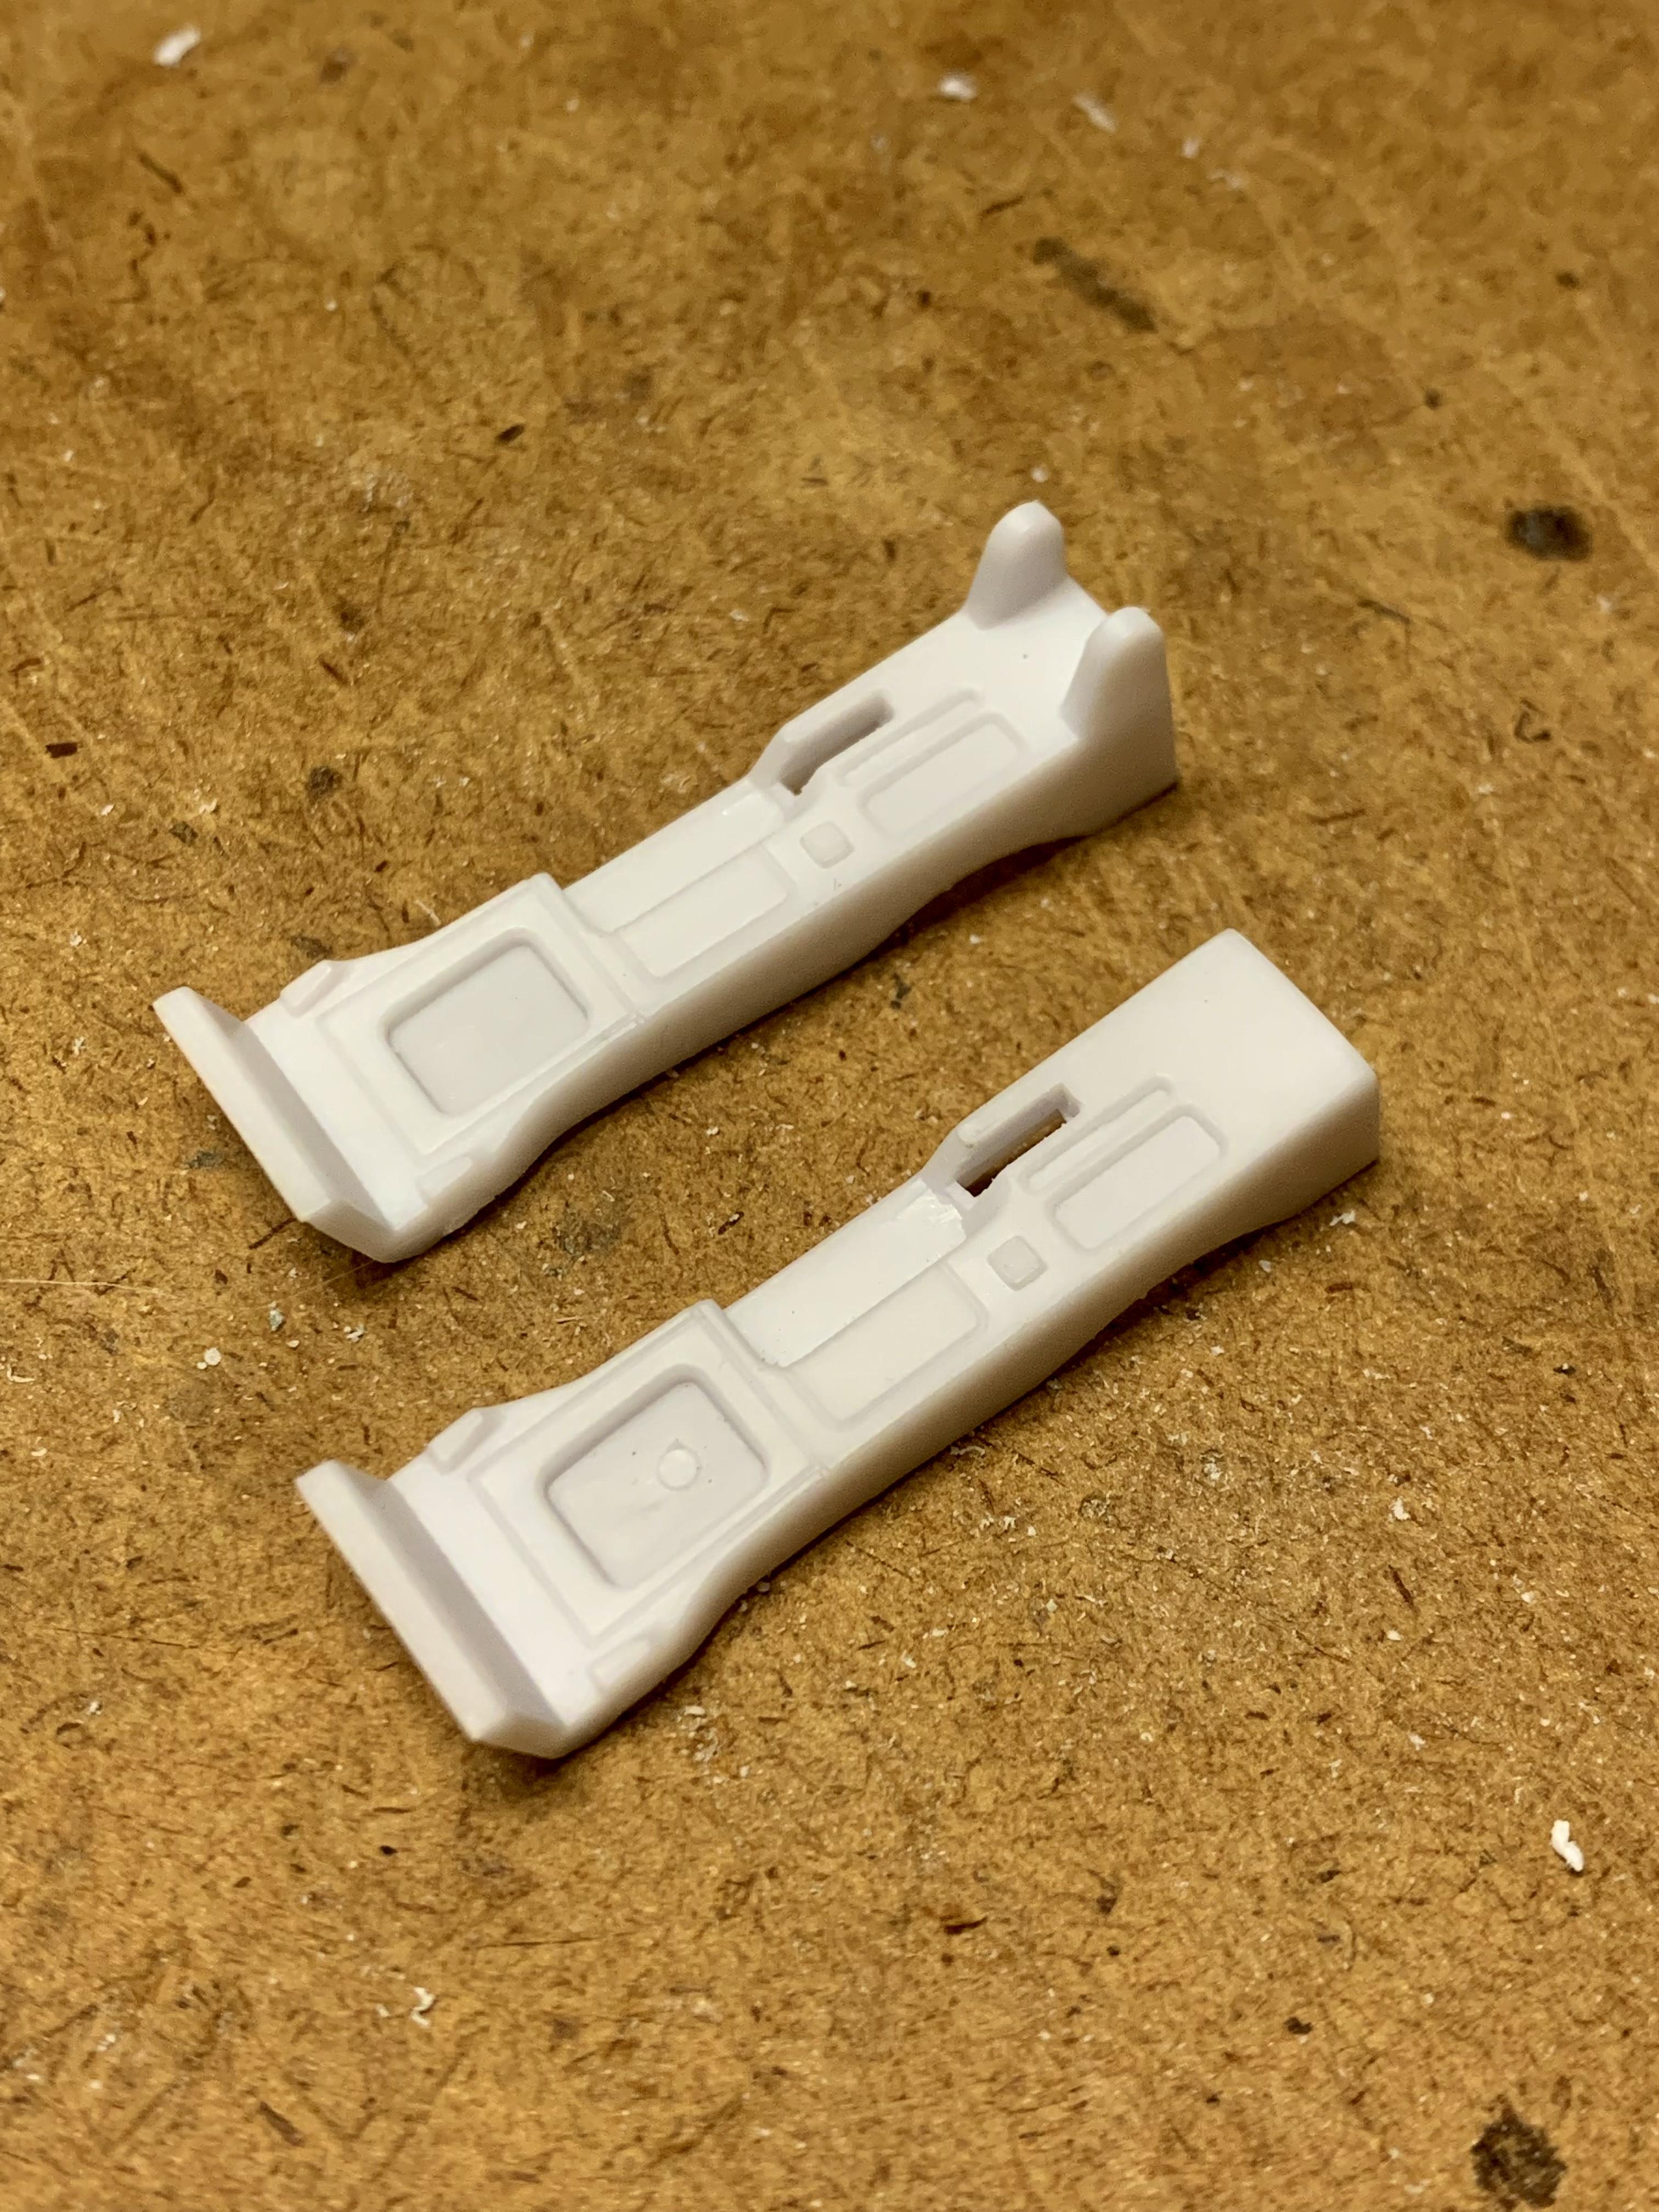
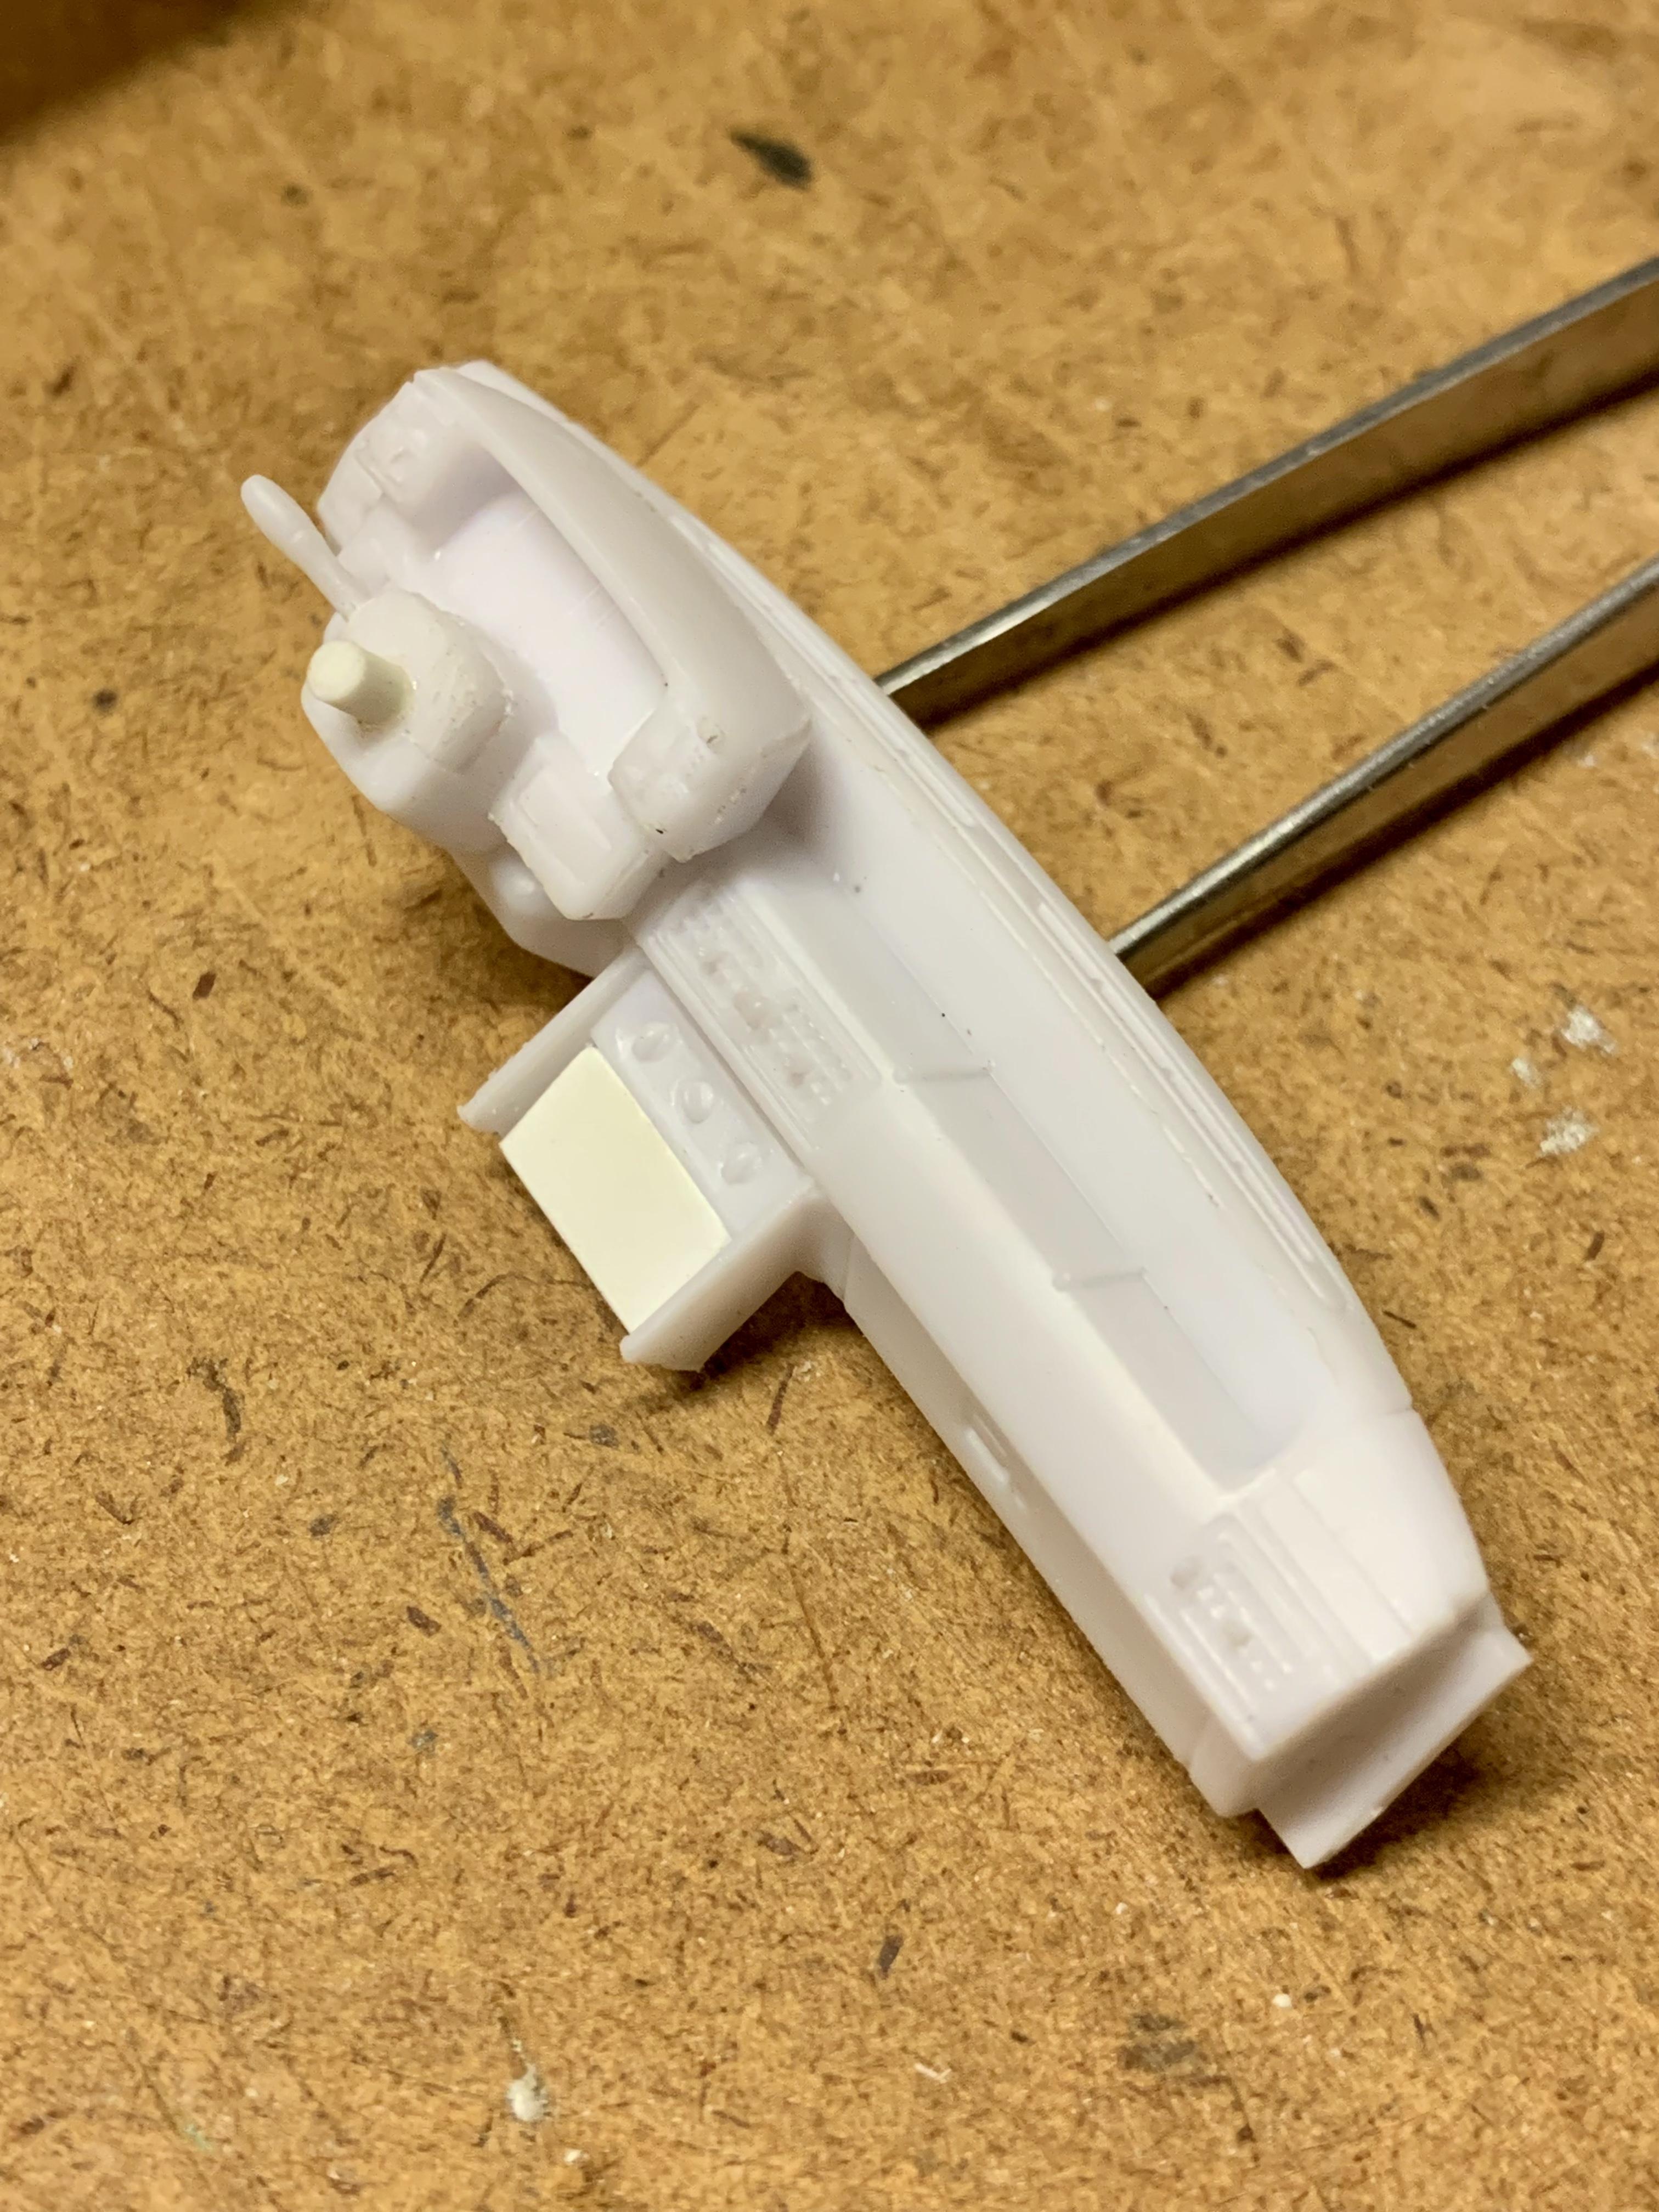
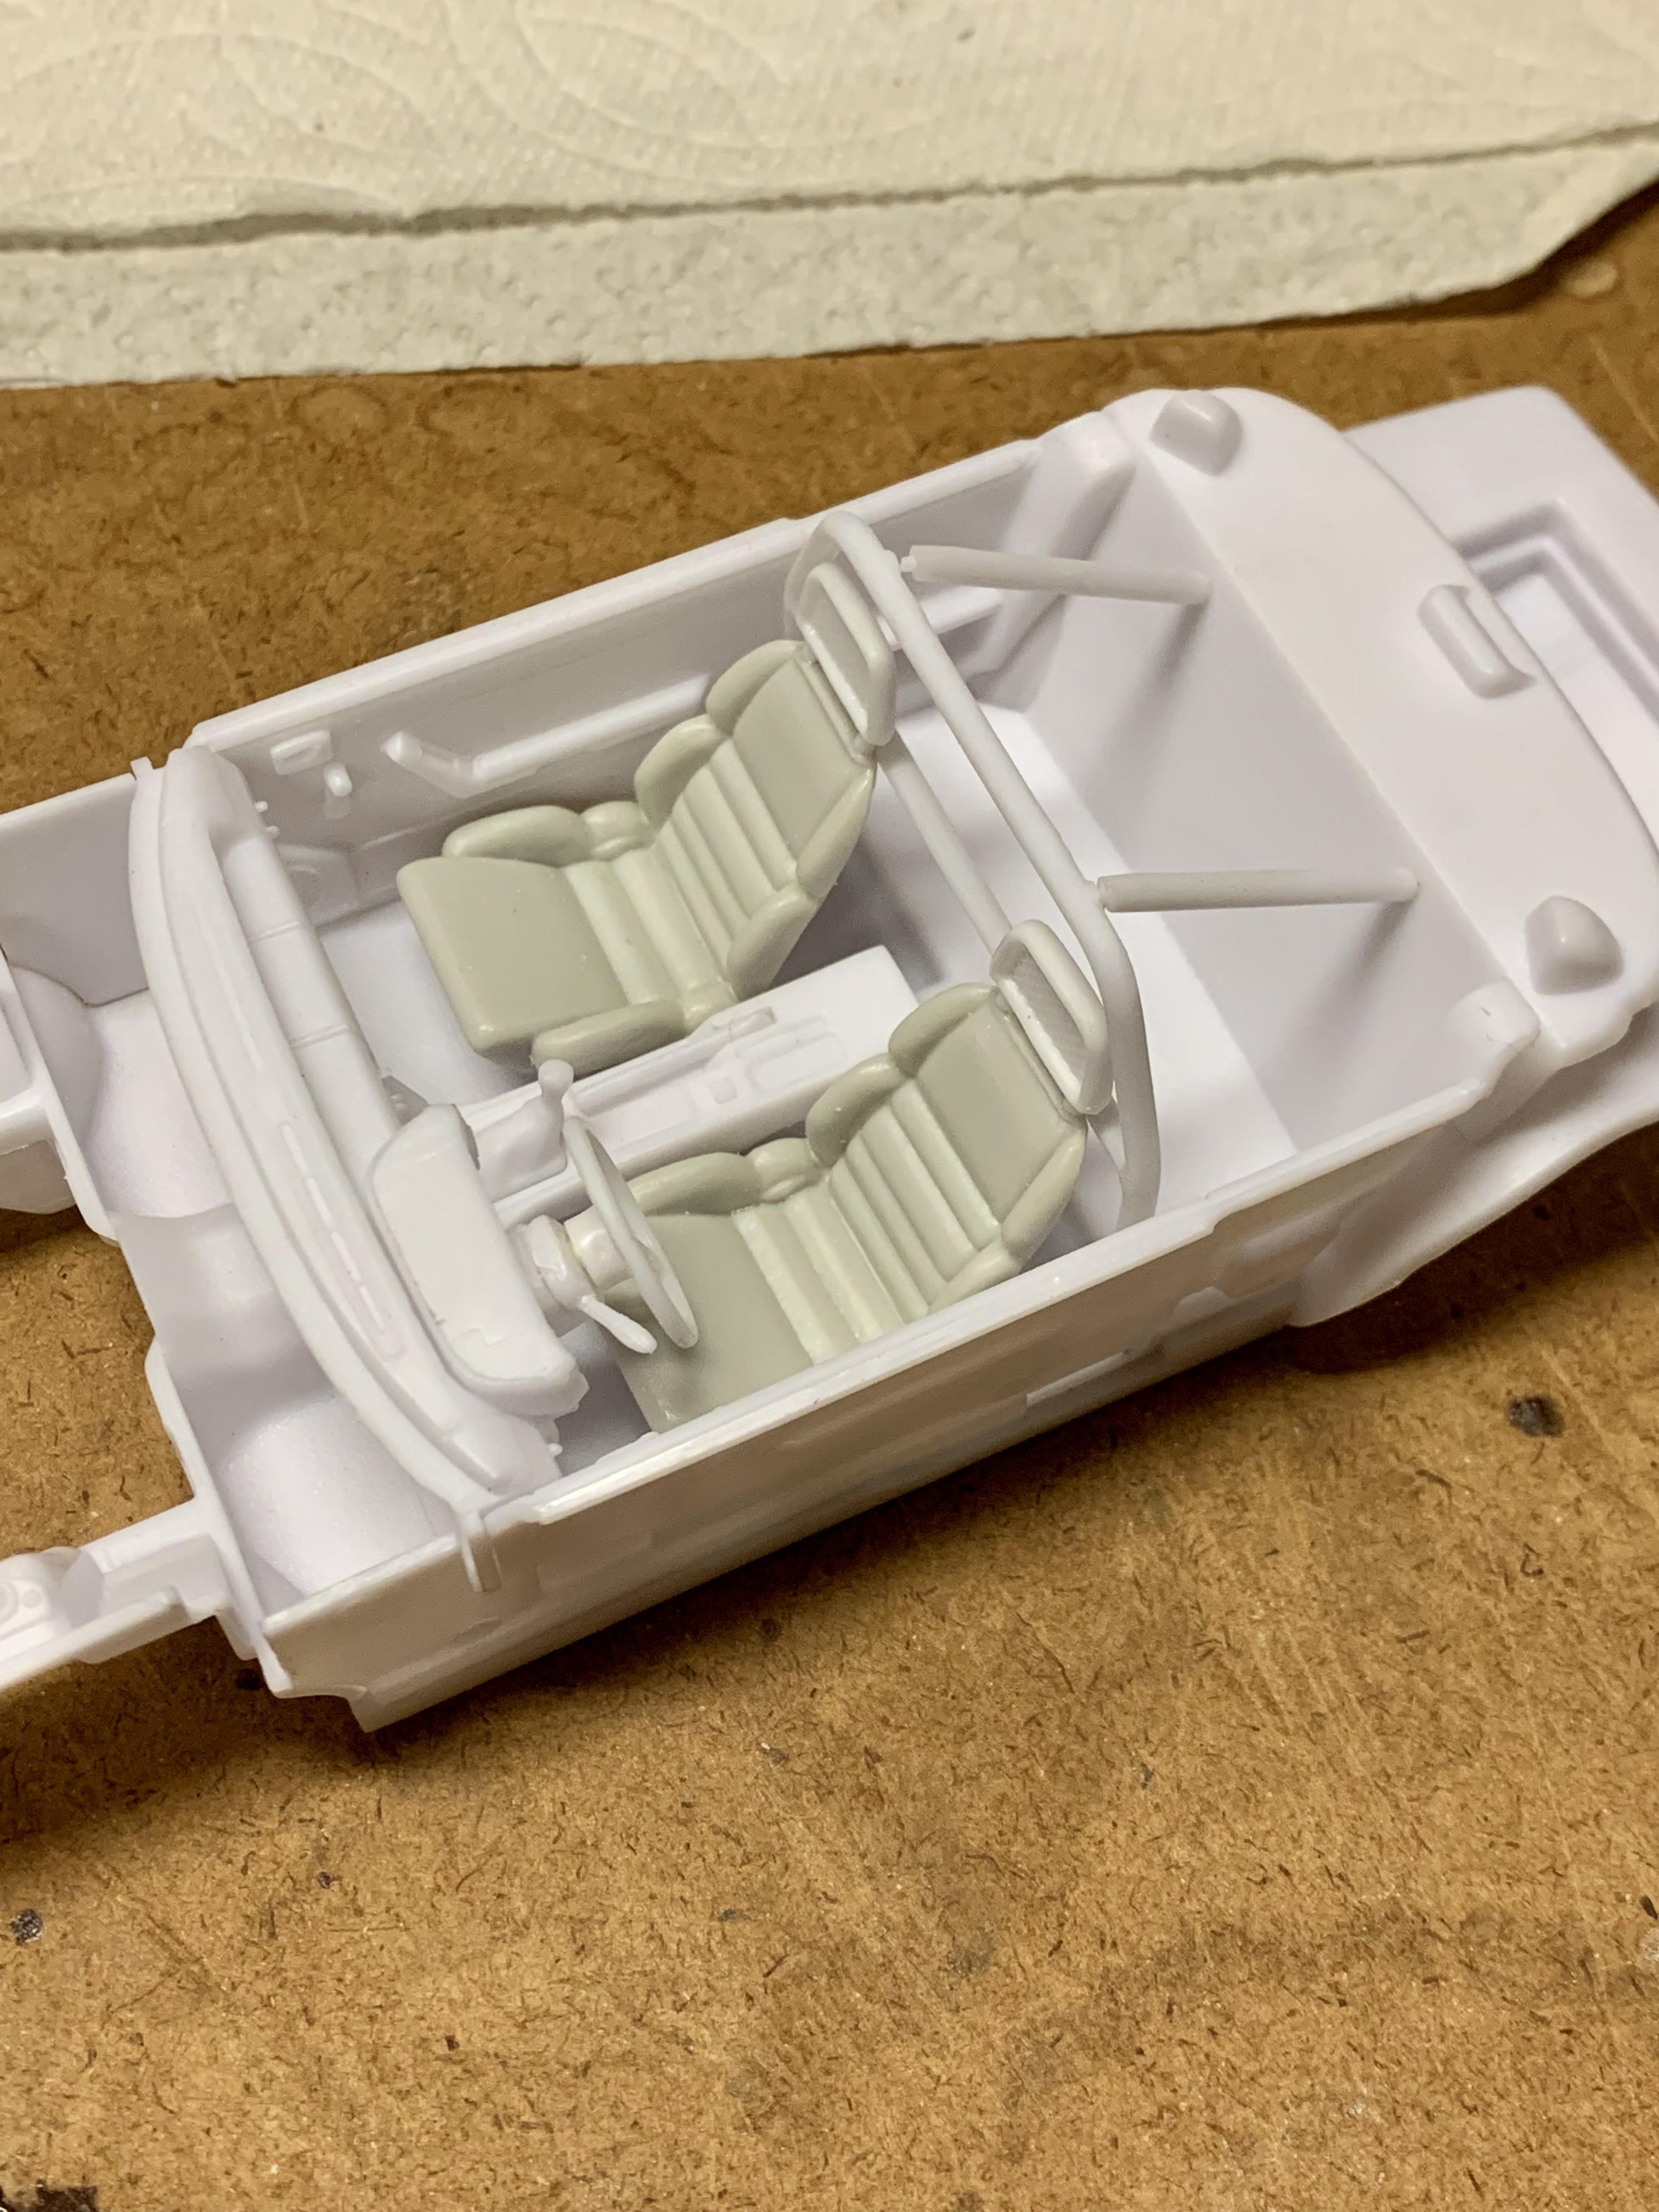
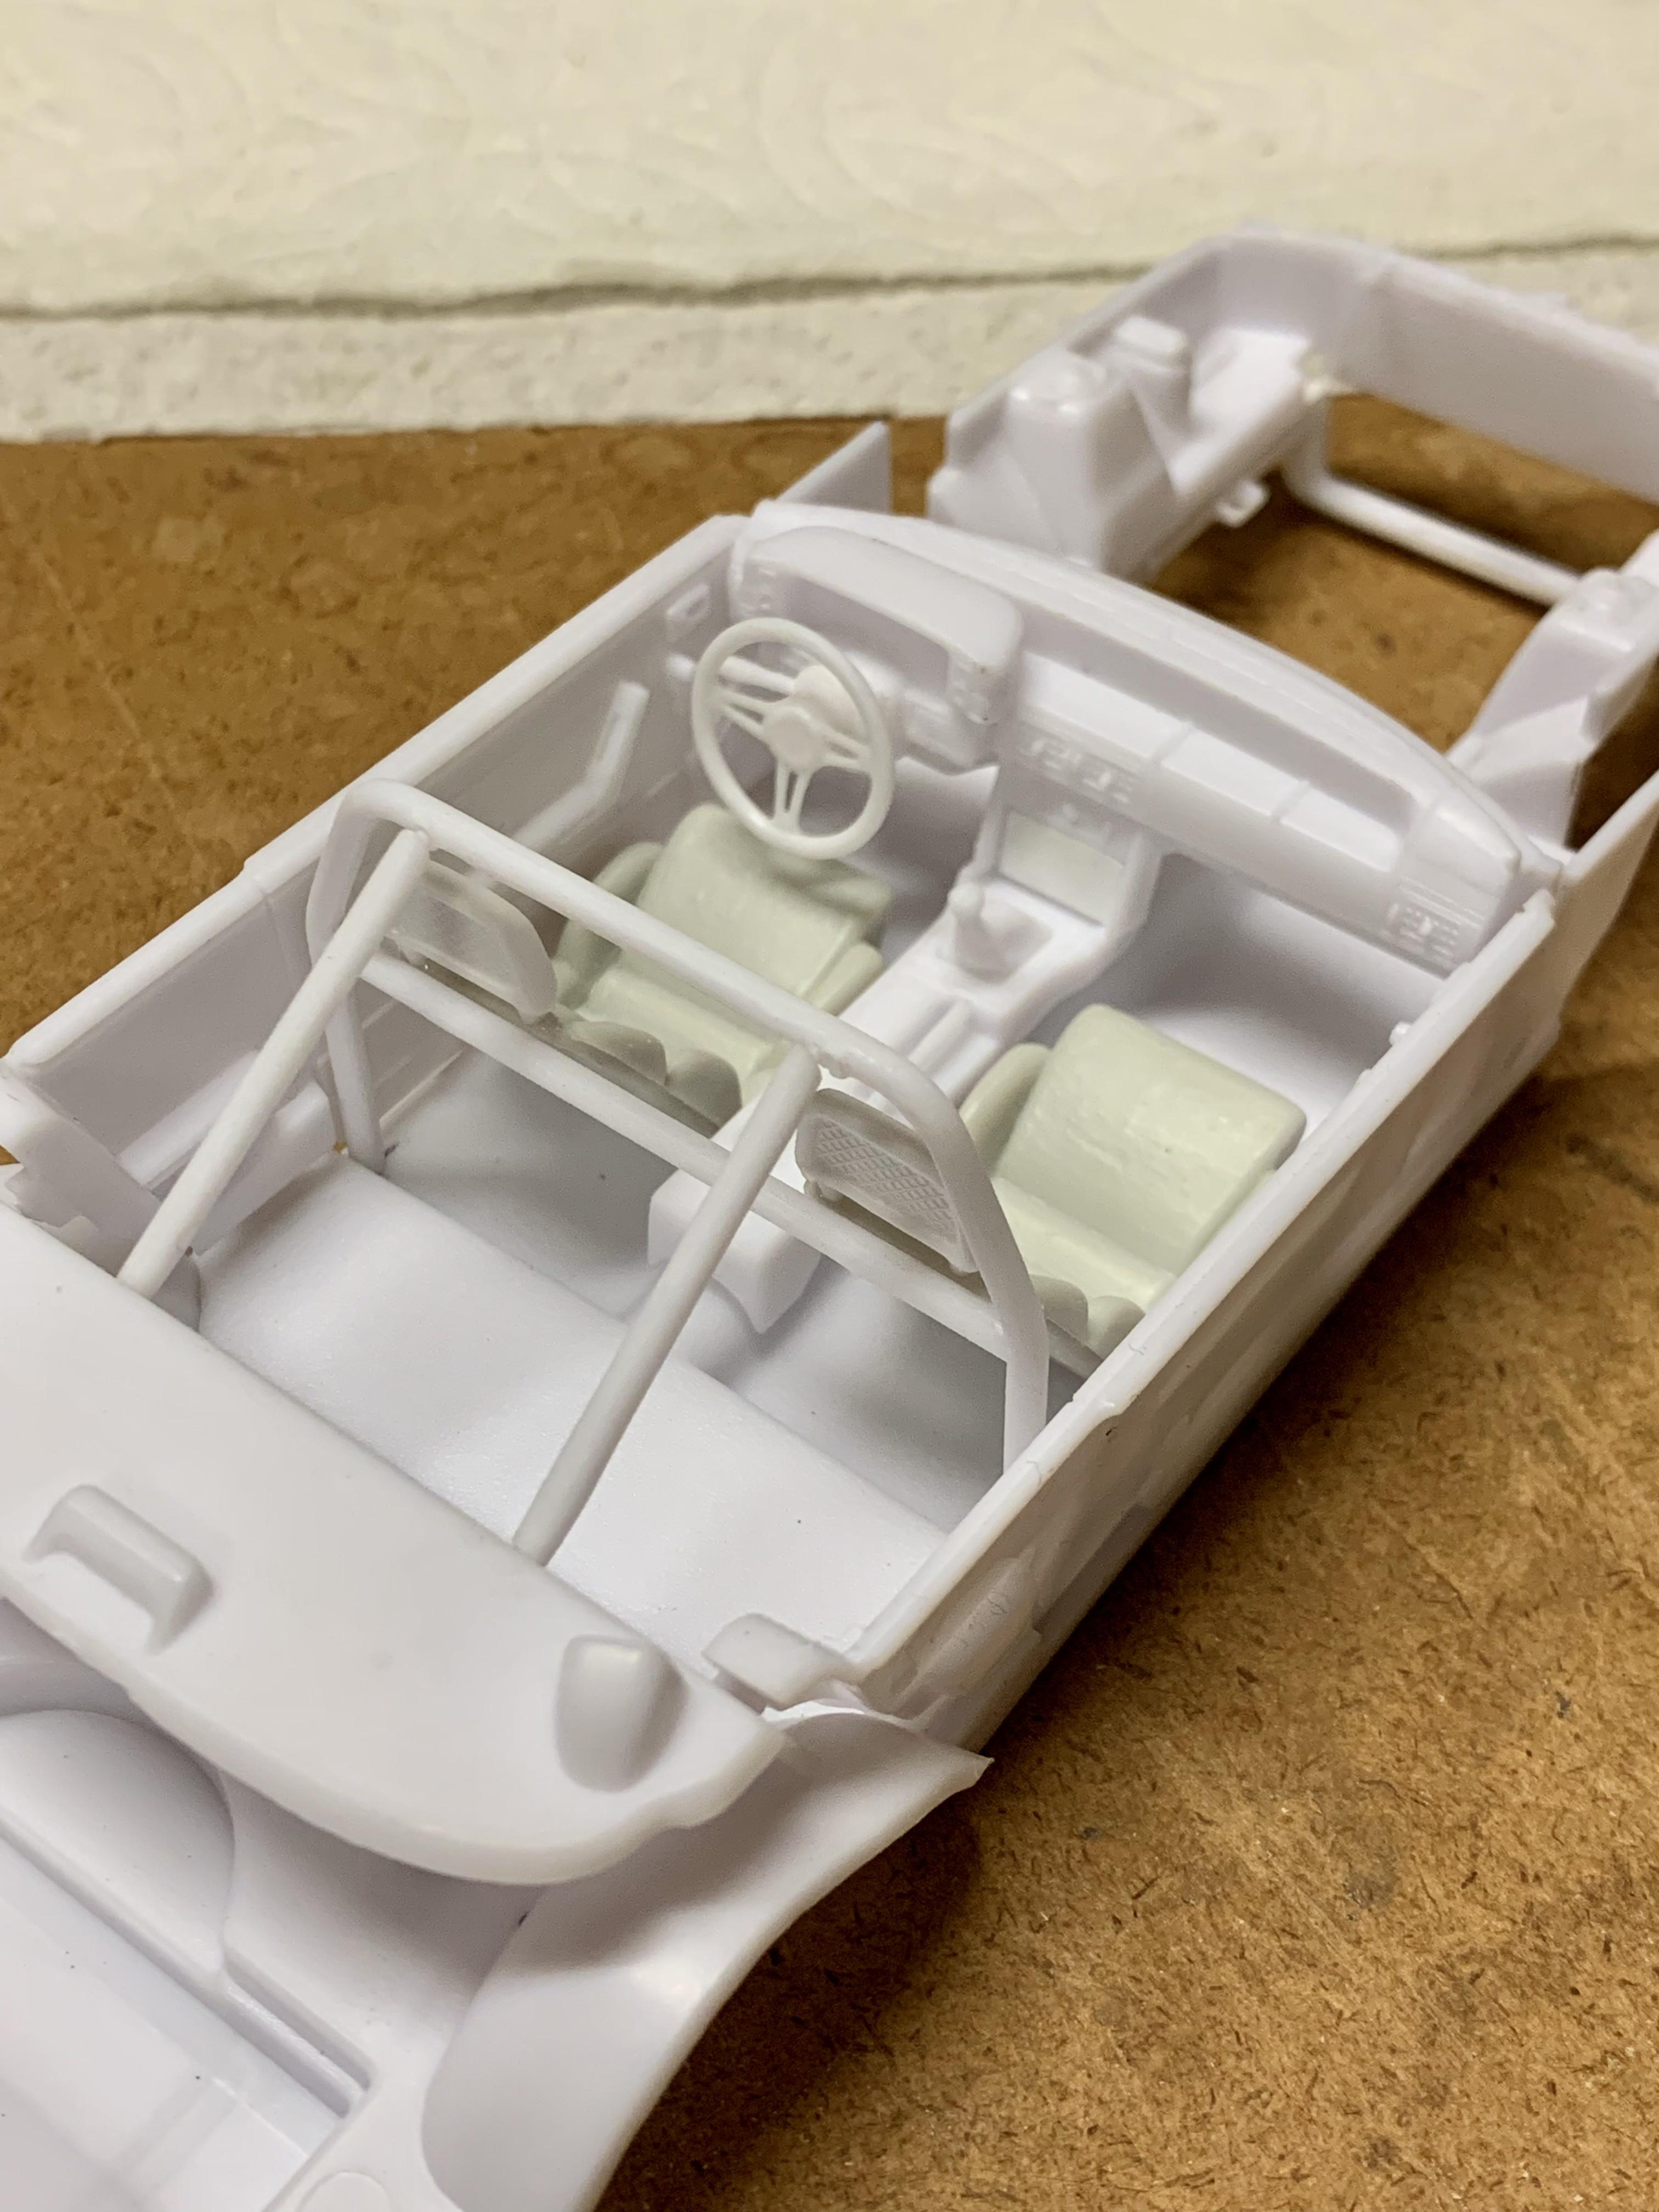
UPDATE! Got a late start at the workbench today, didn’t sit down until nearly 4pm! Despite that I still managed to get some good stuff done. Although there is more chassis work to do I wasn’t feeling it so I jumped over to the interior. For anyone that has ever sat in an ‘87-‘93 LX with base model seats then you know how soft and unsupportive they are. With all of the performance mods this car is getting it would definitely benefit from a sportier pair of seats. In the 90’s you basically had two aftermarket seat options: Flofit or Recarro. With my modern parts options very limited I remembered that the 90’s and newer issues of AMT’s 1940 Ford Sedan Delivery included a set of modern sport seats that kind of look like a mix of the two mentioned brands so I grabbed a pair. I liked them except for the headrests. As luck would have it I just got the most recent issue of AMT’s 1988 Mustang GT (for my birthday last week) which happens to include a pair of custom front seats with very 80’s and 90’s netted headrests. I cut the original headrests off, did a little clean up and shaping then cut off and grafted the netted headrests on. I also had to trim off the bottoms to make them sit down into the interior properly. And a look with the seats setting in the basic interior. A quick modification to the center console was to smooth off the supports at the back for the armrest (which also had a flip top that opened with cassette tape storage inside.) In 1990 it was a one-year only option to delete the armrest portion and a plain plastic cap piece was installed at the back end in its place. Next I pulled out the optional roll cage from the LX kit. As it comes it also has forward bars making it a 6-point cage. Having rode in several of these cars over the years with 6-point cages I can say they are a pain in the ass for just driving around so I decided to delete the front bars making it a more practical 4-point cage for the street. I also installed mounting pins where the rear “down bars” go into the rear interior wall to located them positively. This kit is rendered to look like it has a rear seat delete setup when you leave the rear seat cushion uninstalled which is a pretty common modification in these coupes so I’m gonna go with it. Luckily the new seats just barely fit with the cage! Lastly a couple of tweaks to the dash. I cut off the original steering wheel stub and installed a piece of .080” rod to mount a new wheel. I also installed a blank .020” plate over the original radio area as I’ll be using a photo-etched radio face. Here’s a mock up of the interior so far. The steering wheel is from any of Revell’s 1932 Ford kits. That’s as far as I got today. I’m really pleased with how the interior is looking so far. I say “so far” as I’m sure I’ll think of a few more things to do in there. Plenty more to come!
-
Looking really good! I love the custom interior and chopped top. Those mods really bring this car as a street rod into current times.
-
The weathered bare metal appearance looks absolutely fantastic! You nailed it. Stance and wheel/tire choice look great, too!
-
Very nicely built ‘32 Sedan. Looks great in that color and the fit and finish looks excellent.
-
Nice! So the body can be installed as one unit?
-
Killer work correcting all the details, Jim! I bet it’s gonna turn out awesome.
-
Nice job on your first ‘32 Ford. The top chop looks cleanly done and I especially like the interior with the two toned grays and purple piping!
-
Darn, I got all excited when I saw the ZR1 LT5 engine. Stock they were 405hp and there is a company called Doug Rippy Motorsports who used to make a “DRM650” upgrade package for those that would bring them up to 650hp with ported heads, ported intake, more aggressive cams headers and exhaust.
-
Nice work on the headlight mounting. These kits are a pain to build full fendered with all the separate pieces. It makes for a more accurate model but a pain nonetheless. Looks like you got the fronts of the fenders glued down to the frame nicely, too. A ton of people don’t and then there’s a huge gap that looks terrible. Nice work on the chop, too!
-
Very cool project idea. It had not yet (I say “yet” because it might have sooner or later, haha) occurred to me to take advantage of the narrowed Model A kit ‘32 frame on a full fender street rod model. Brilliant! Looks like the makings of a sweet modern street rod. For the engine how about an LT5 from a C4 Corvette ZR1? Dual Over Head Cam and 405hp would make for a trick looking and plenty powerful motor to move a Deuce Vicky. Aside from the obvious Corvette kits there is also a very nice one in AMT’s ‘39 Chevy Wagon Rod.
-
1990 Mustang LX - SVT Cobra DOHC Powered! UPDATE! 1/22/23
Dennis Lacy replied to Dennis Lacy's topic in WIP: Model Cars
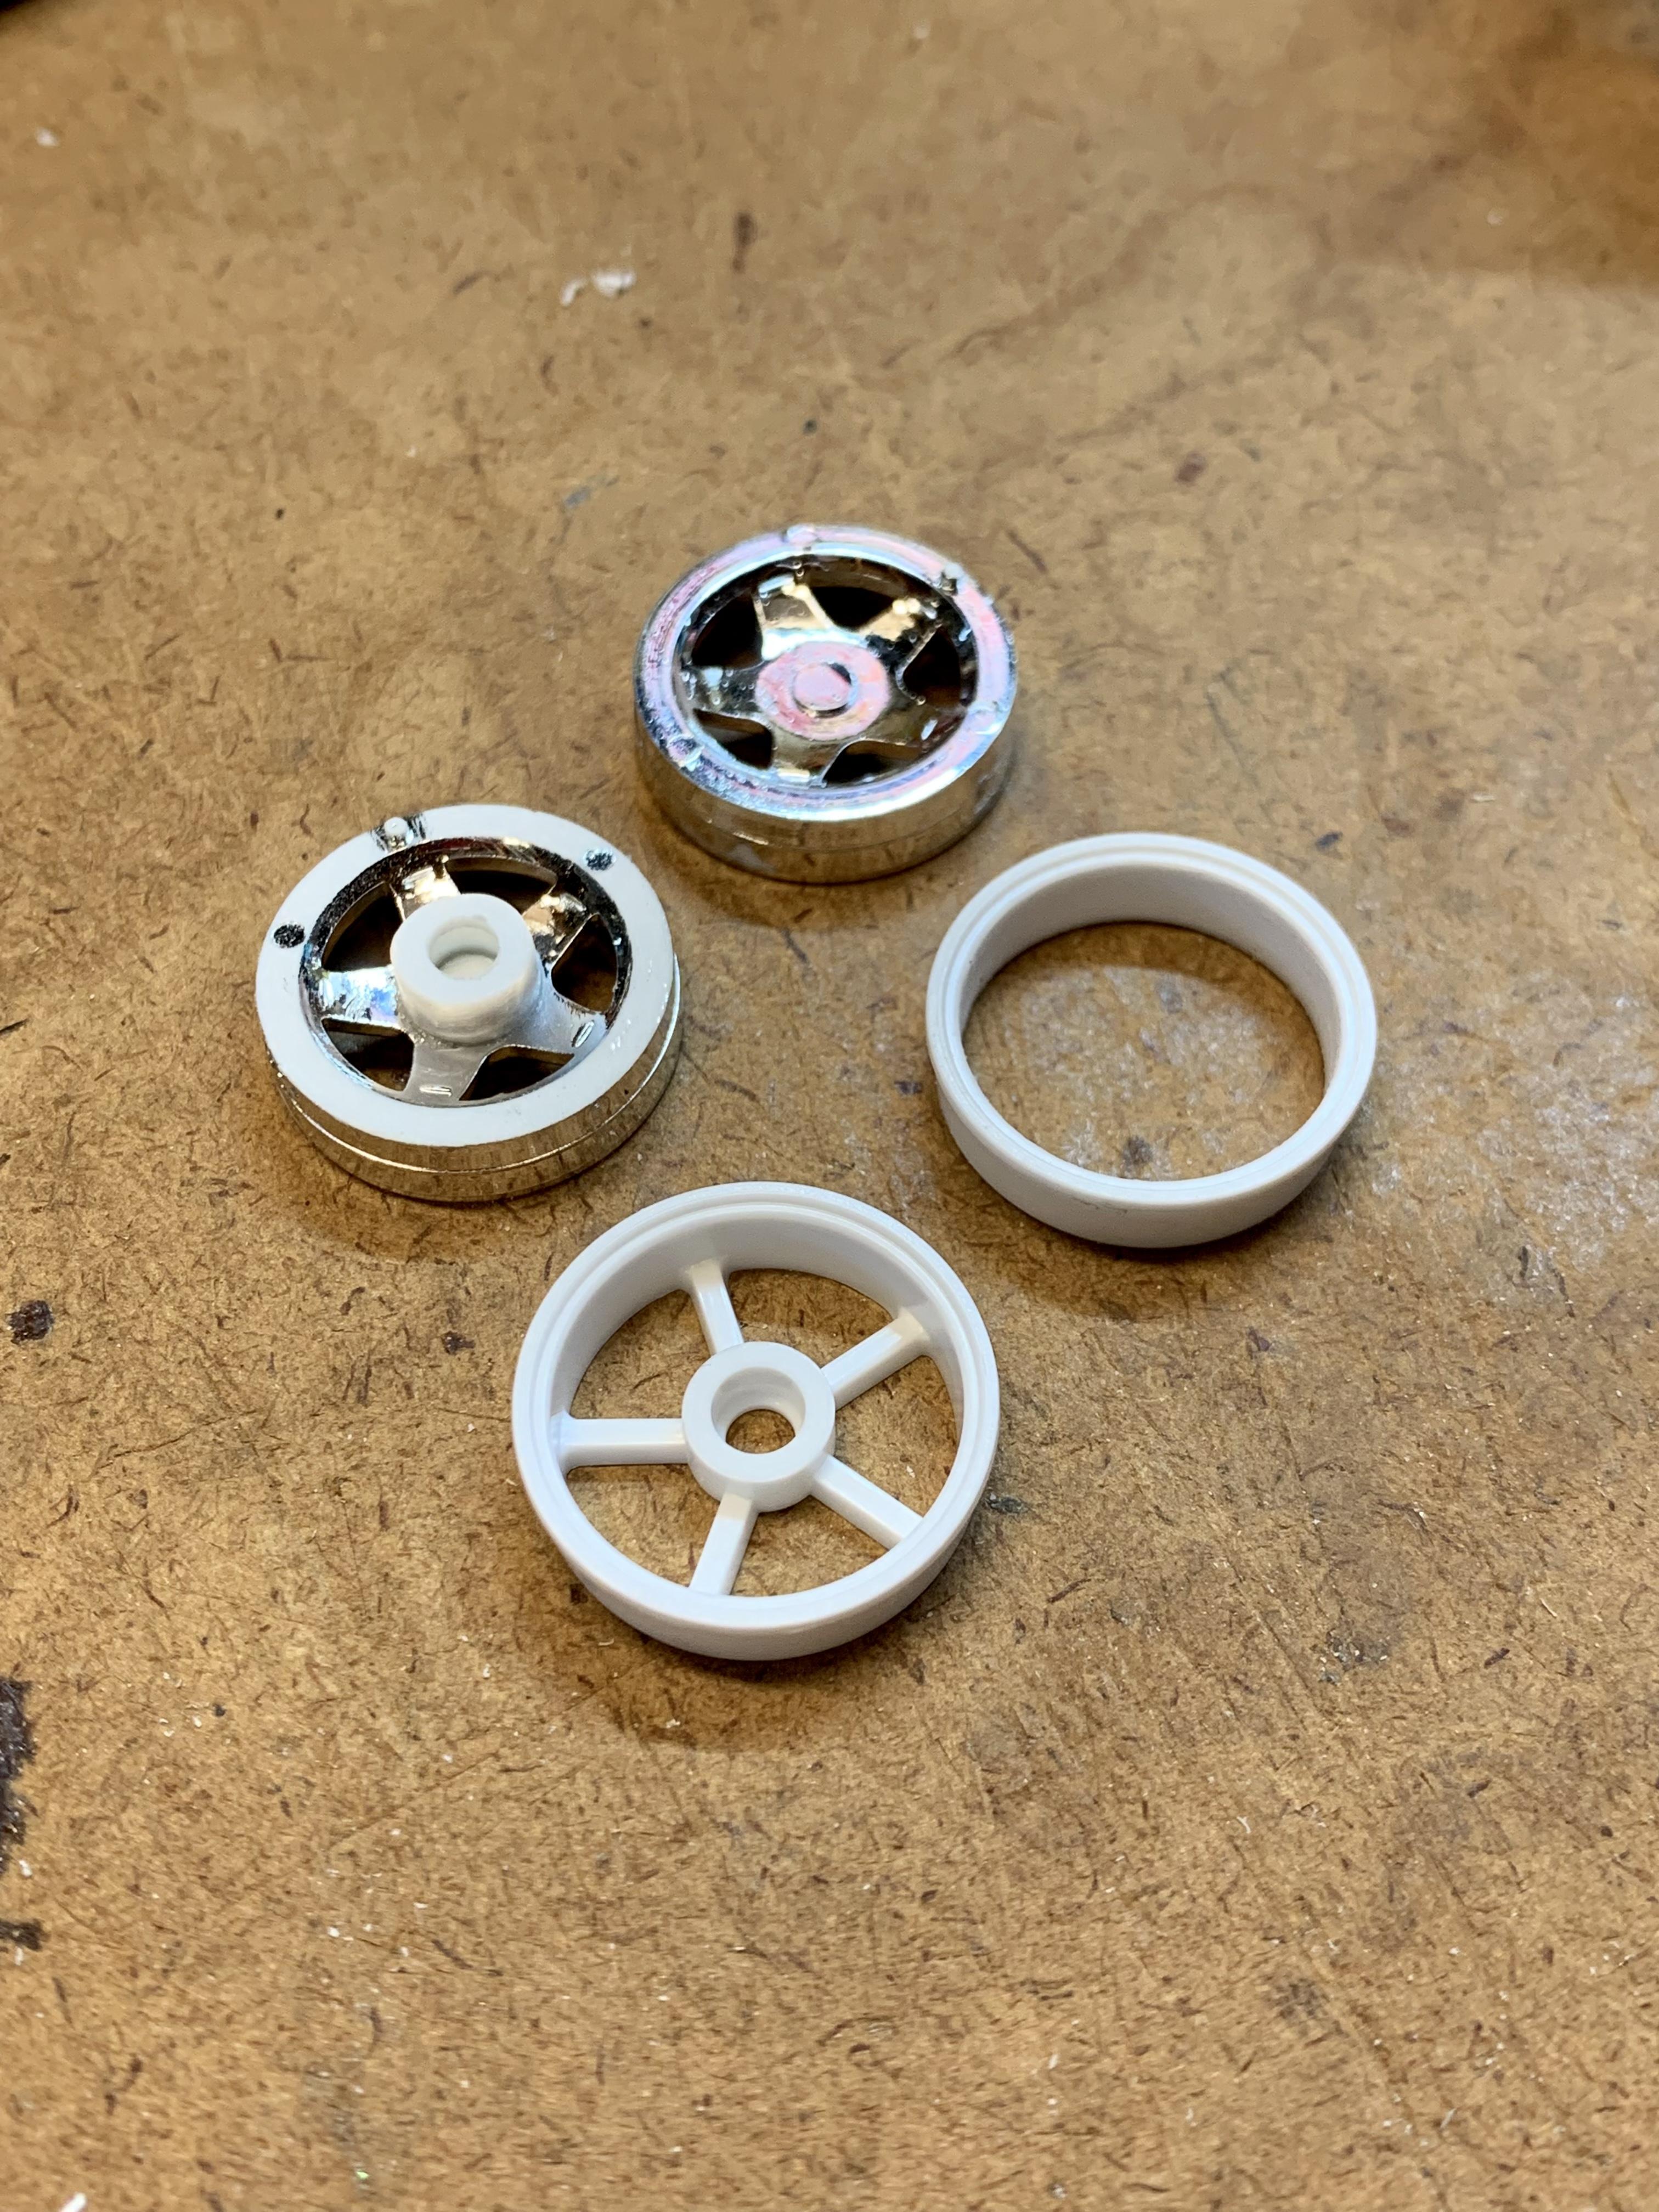
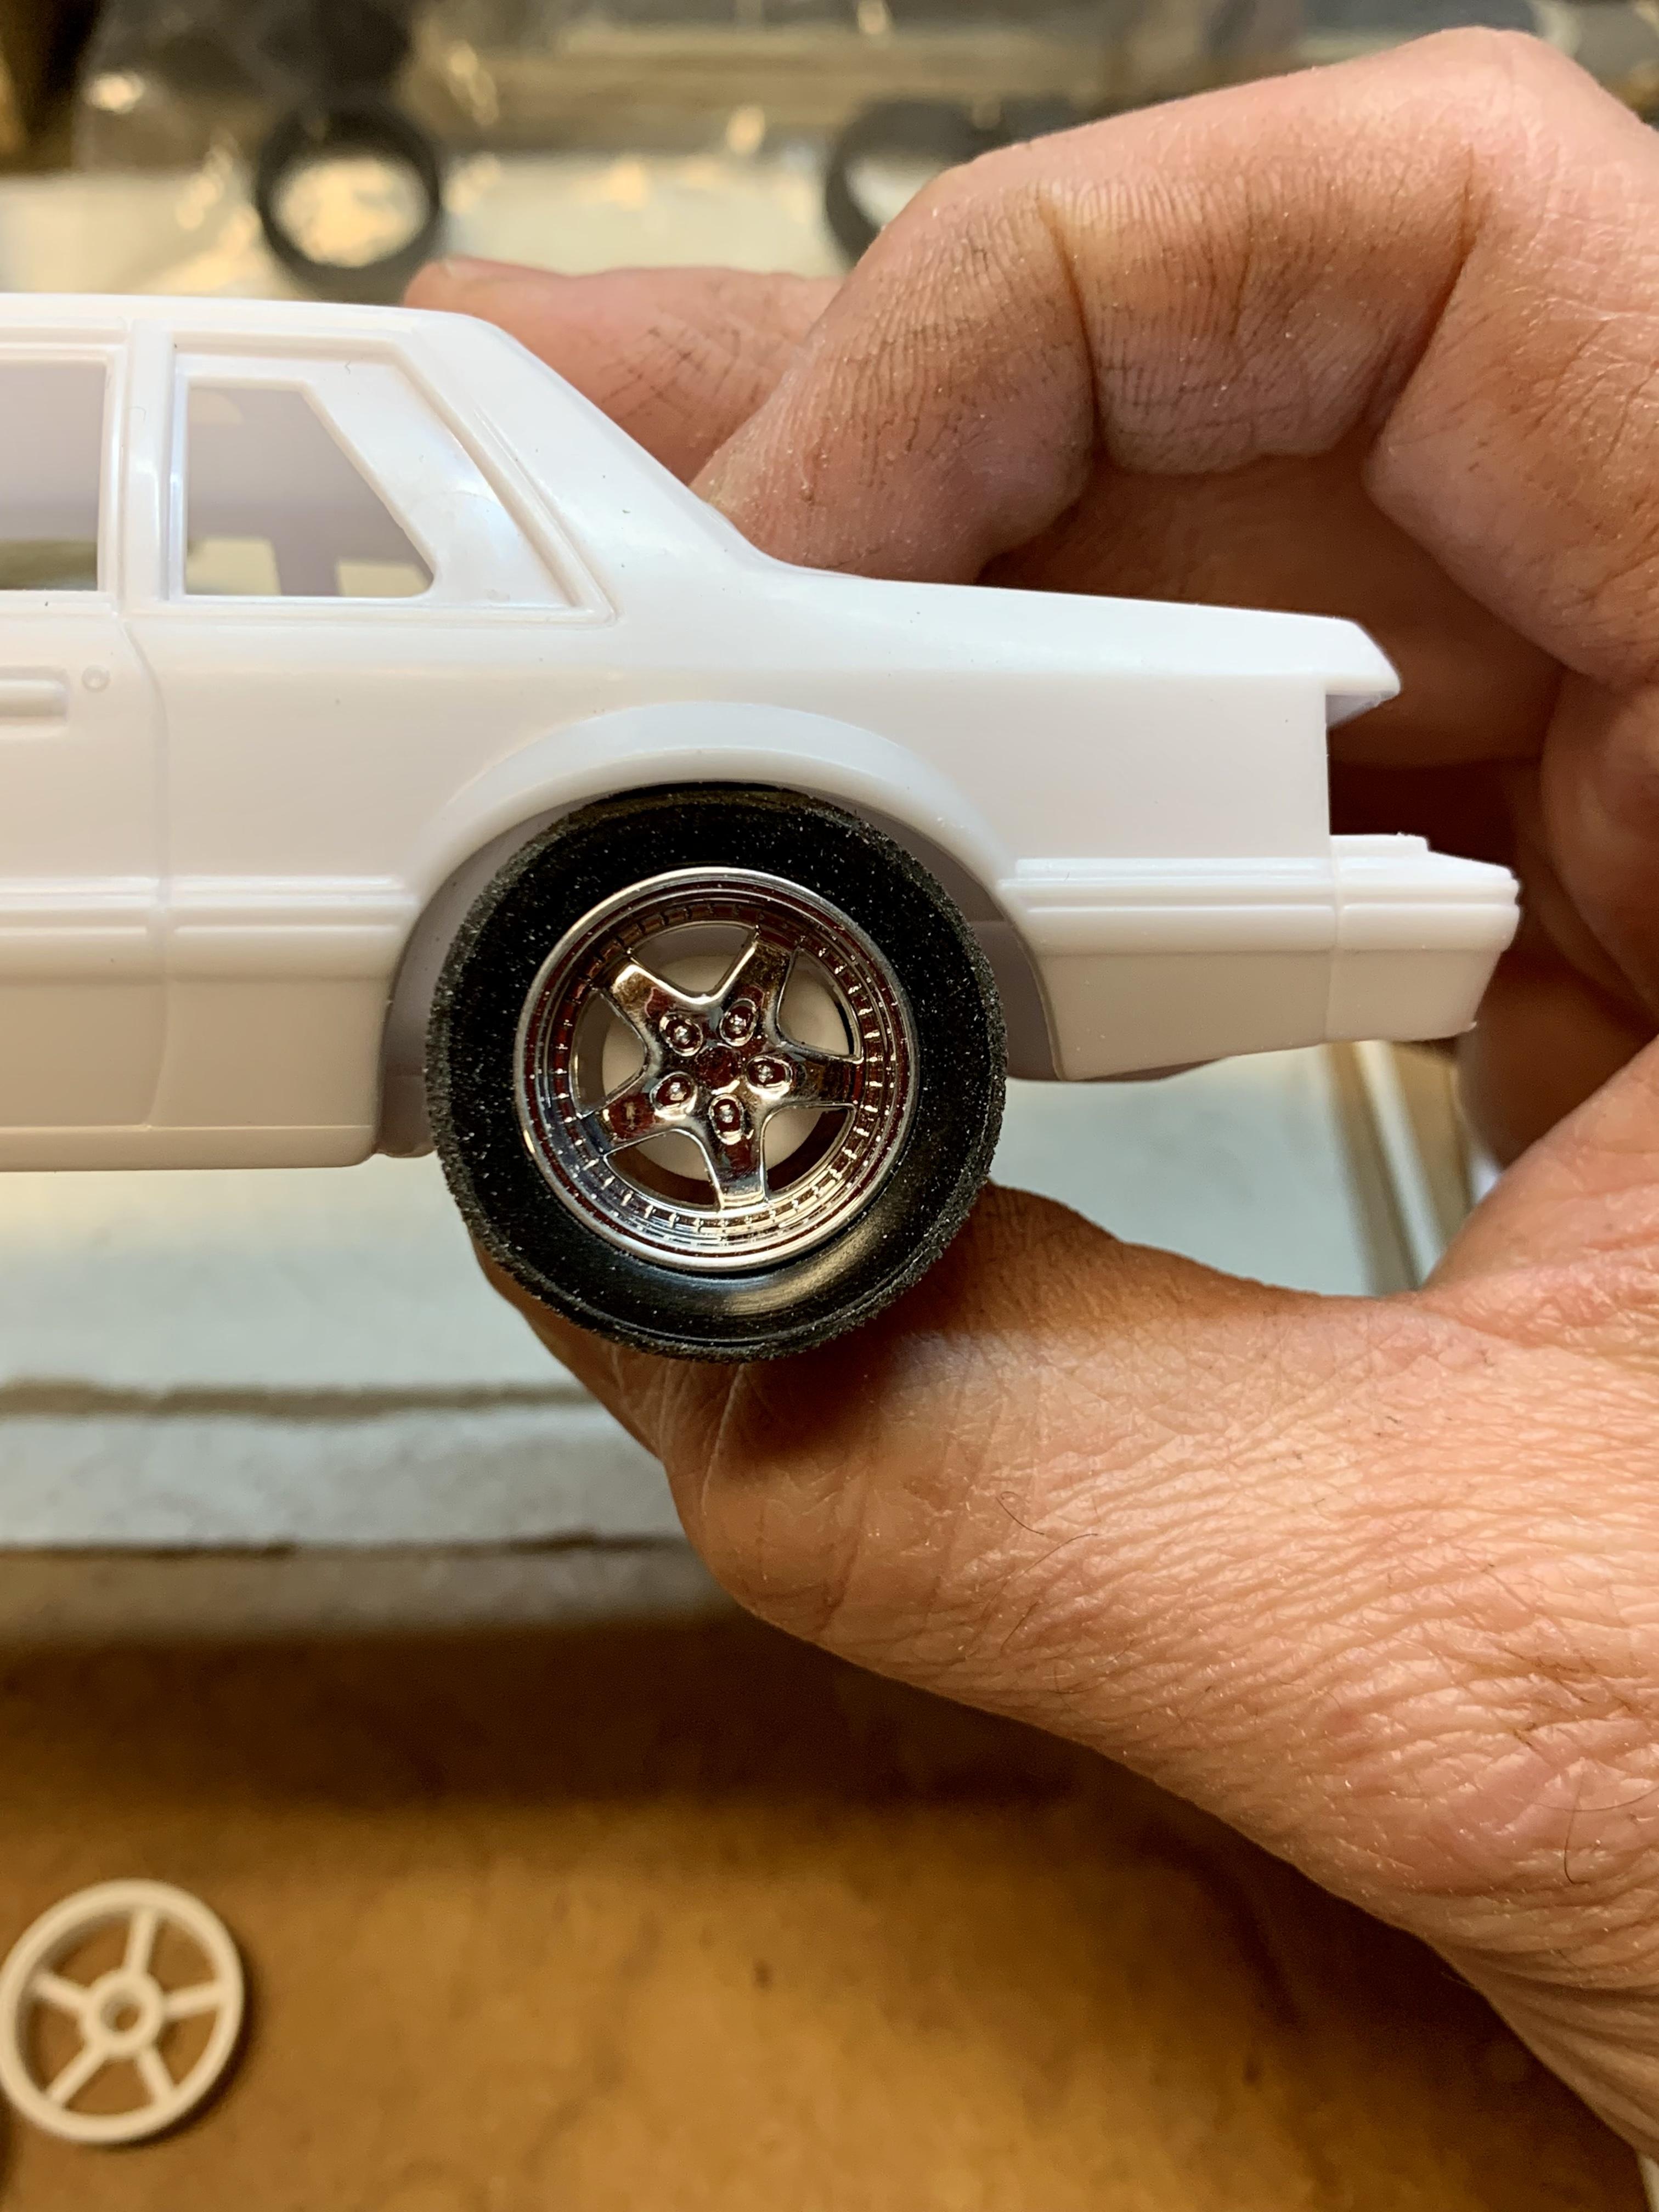
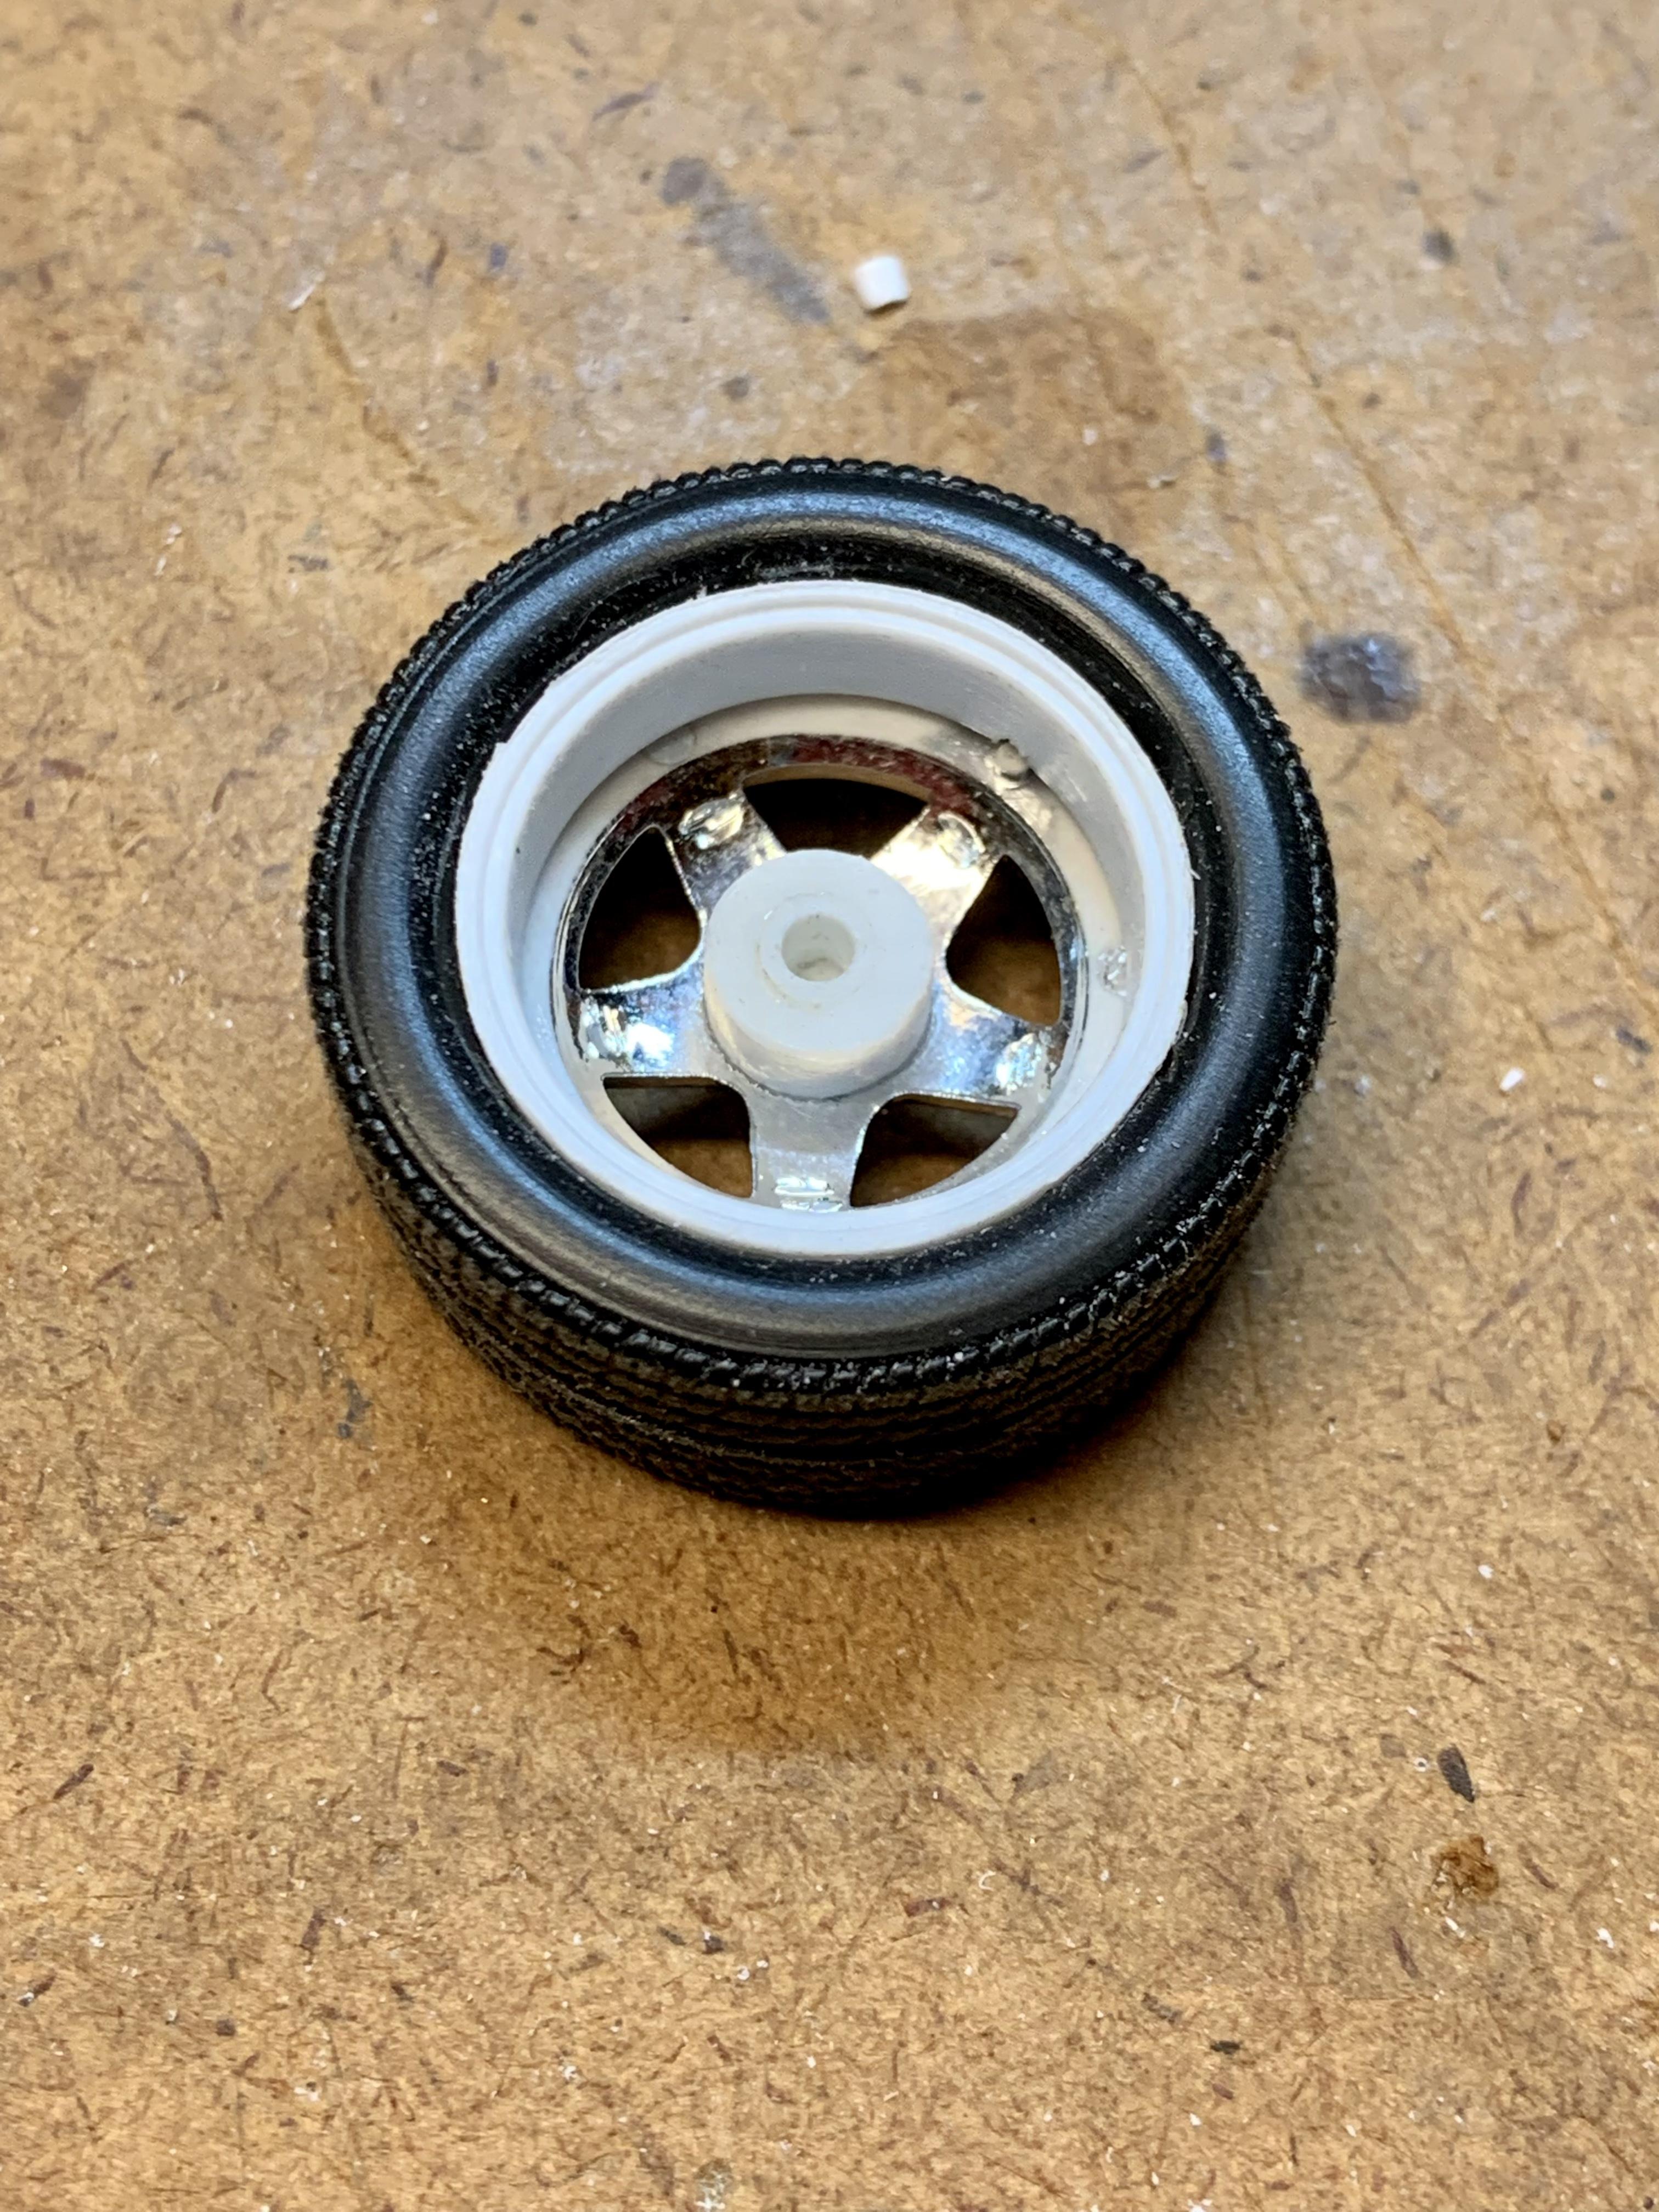
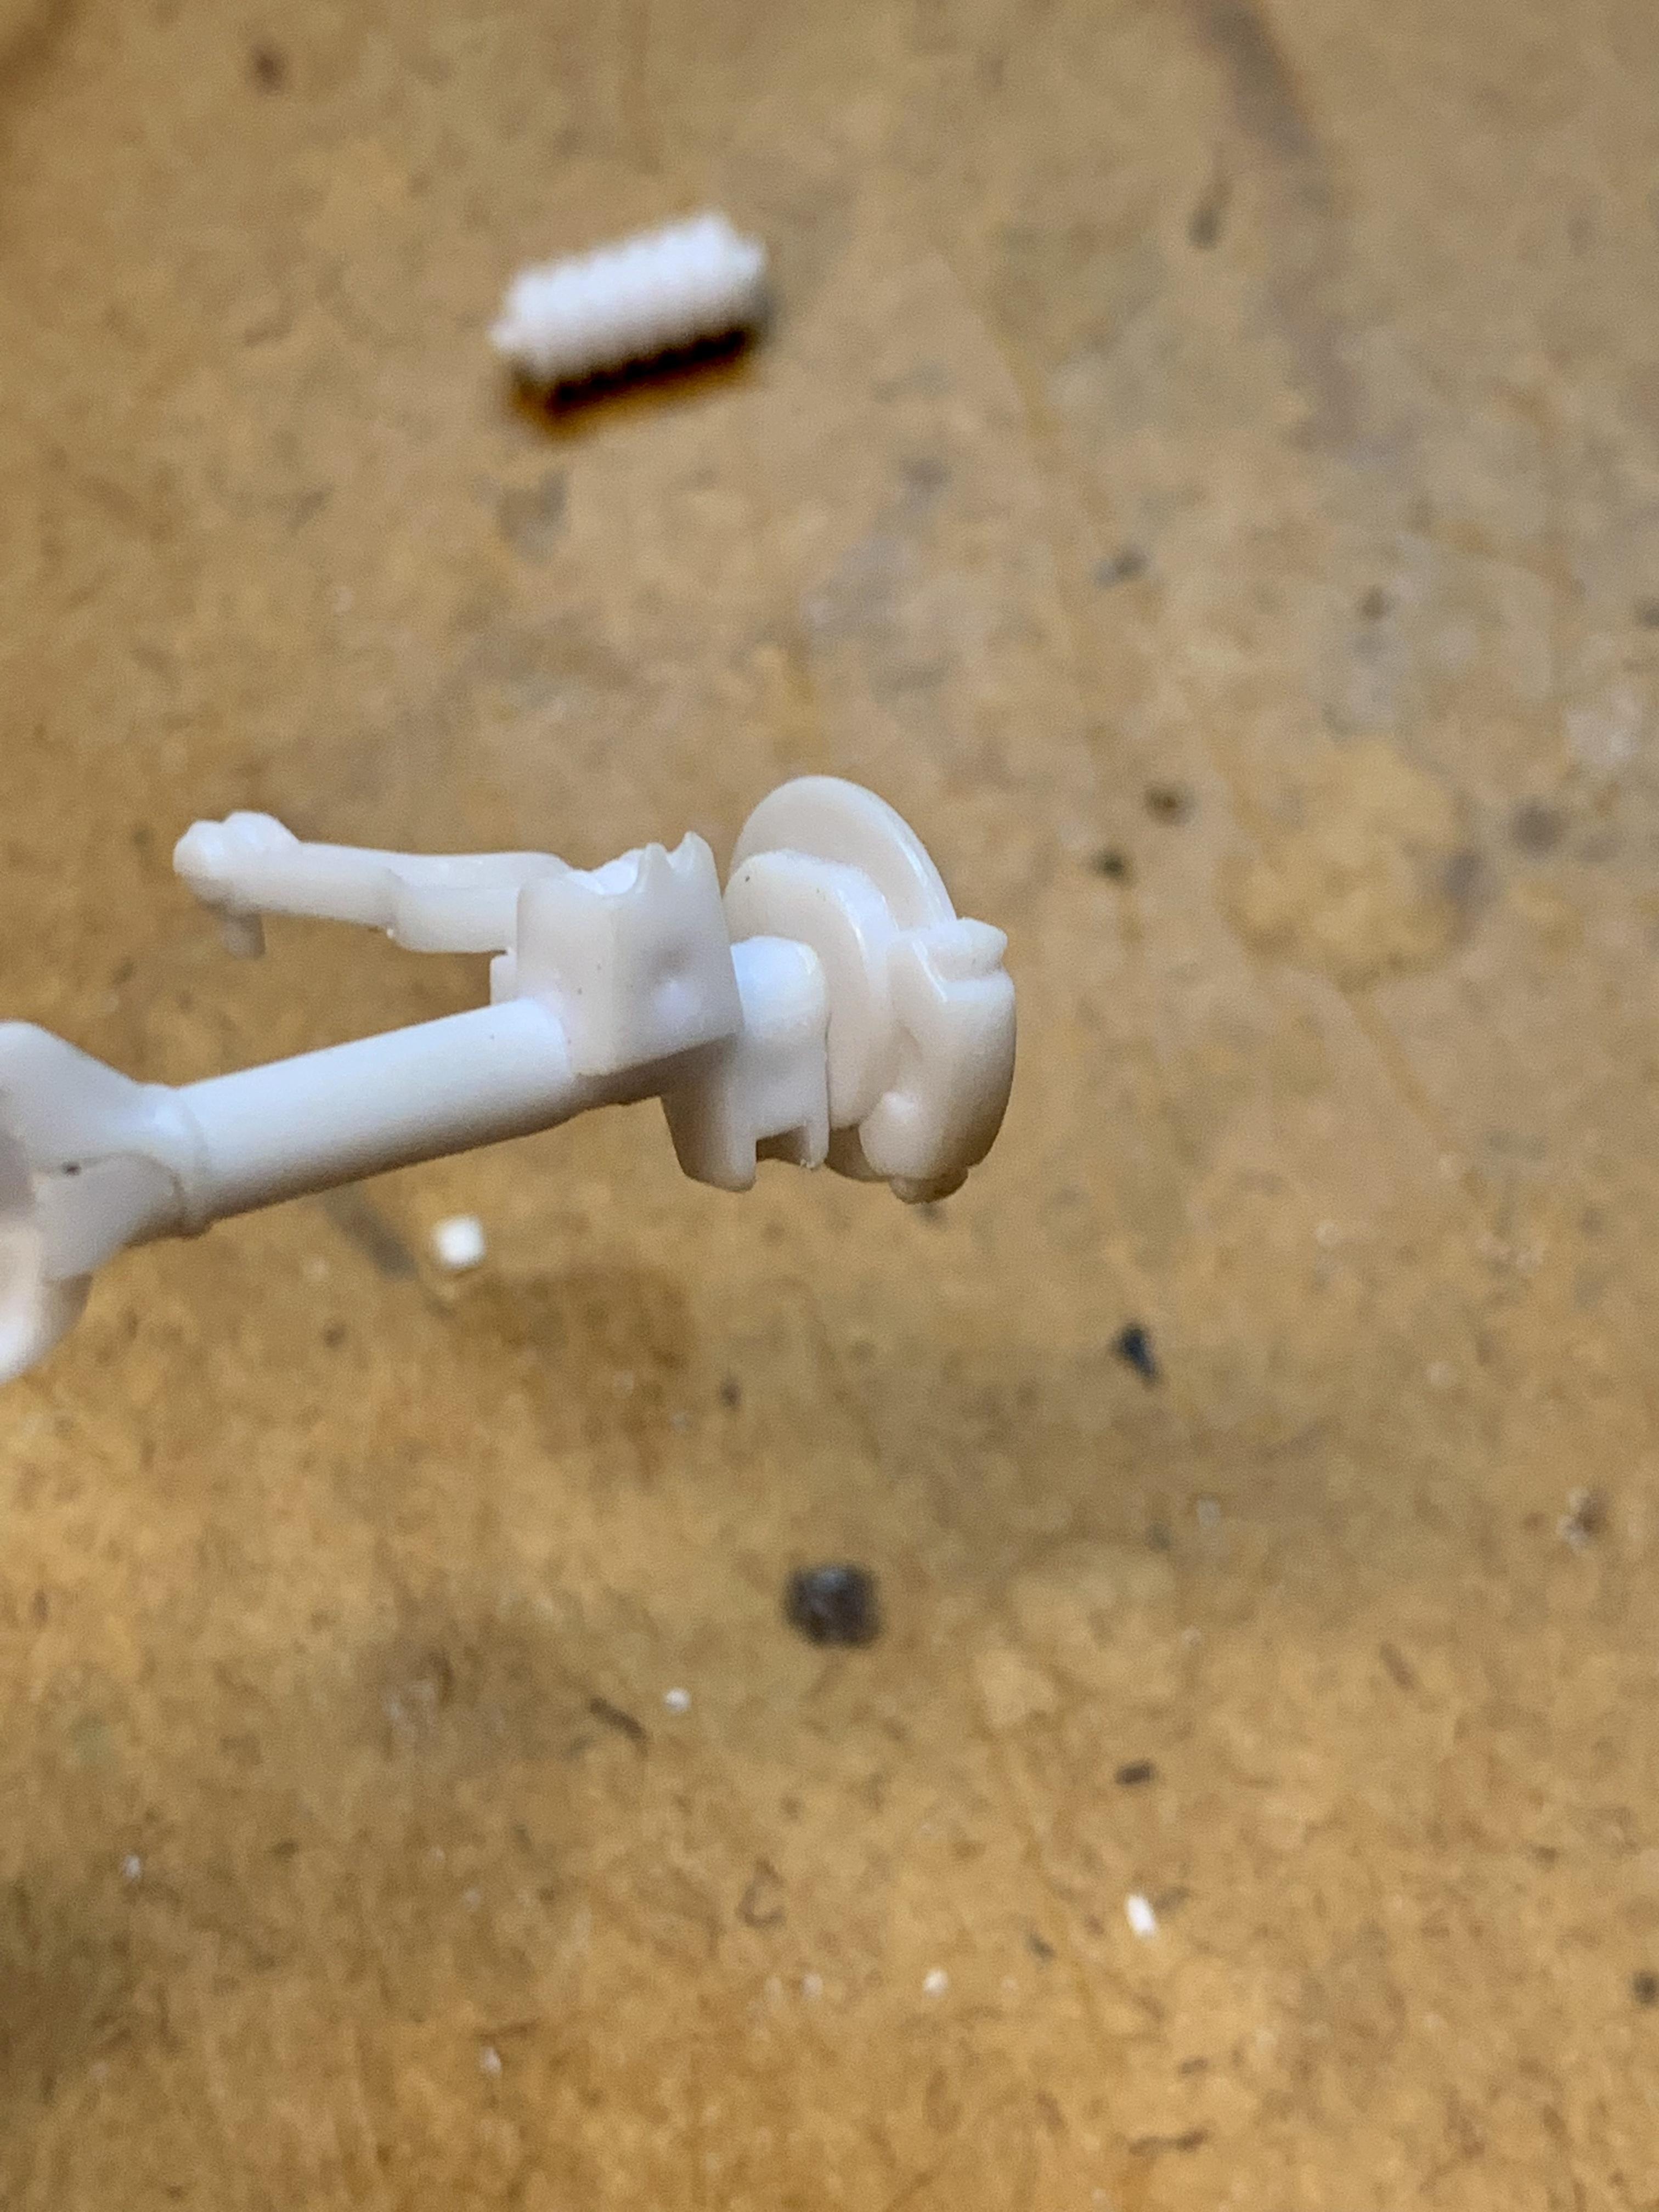
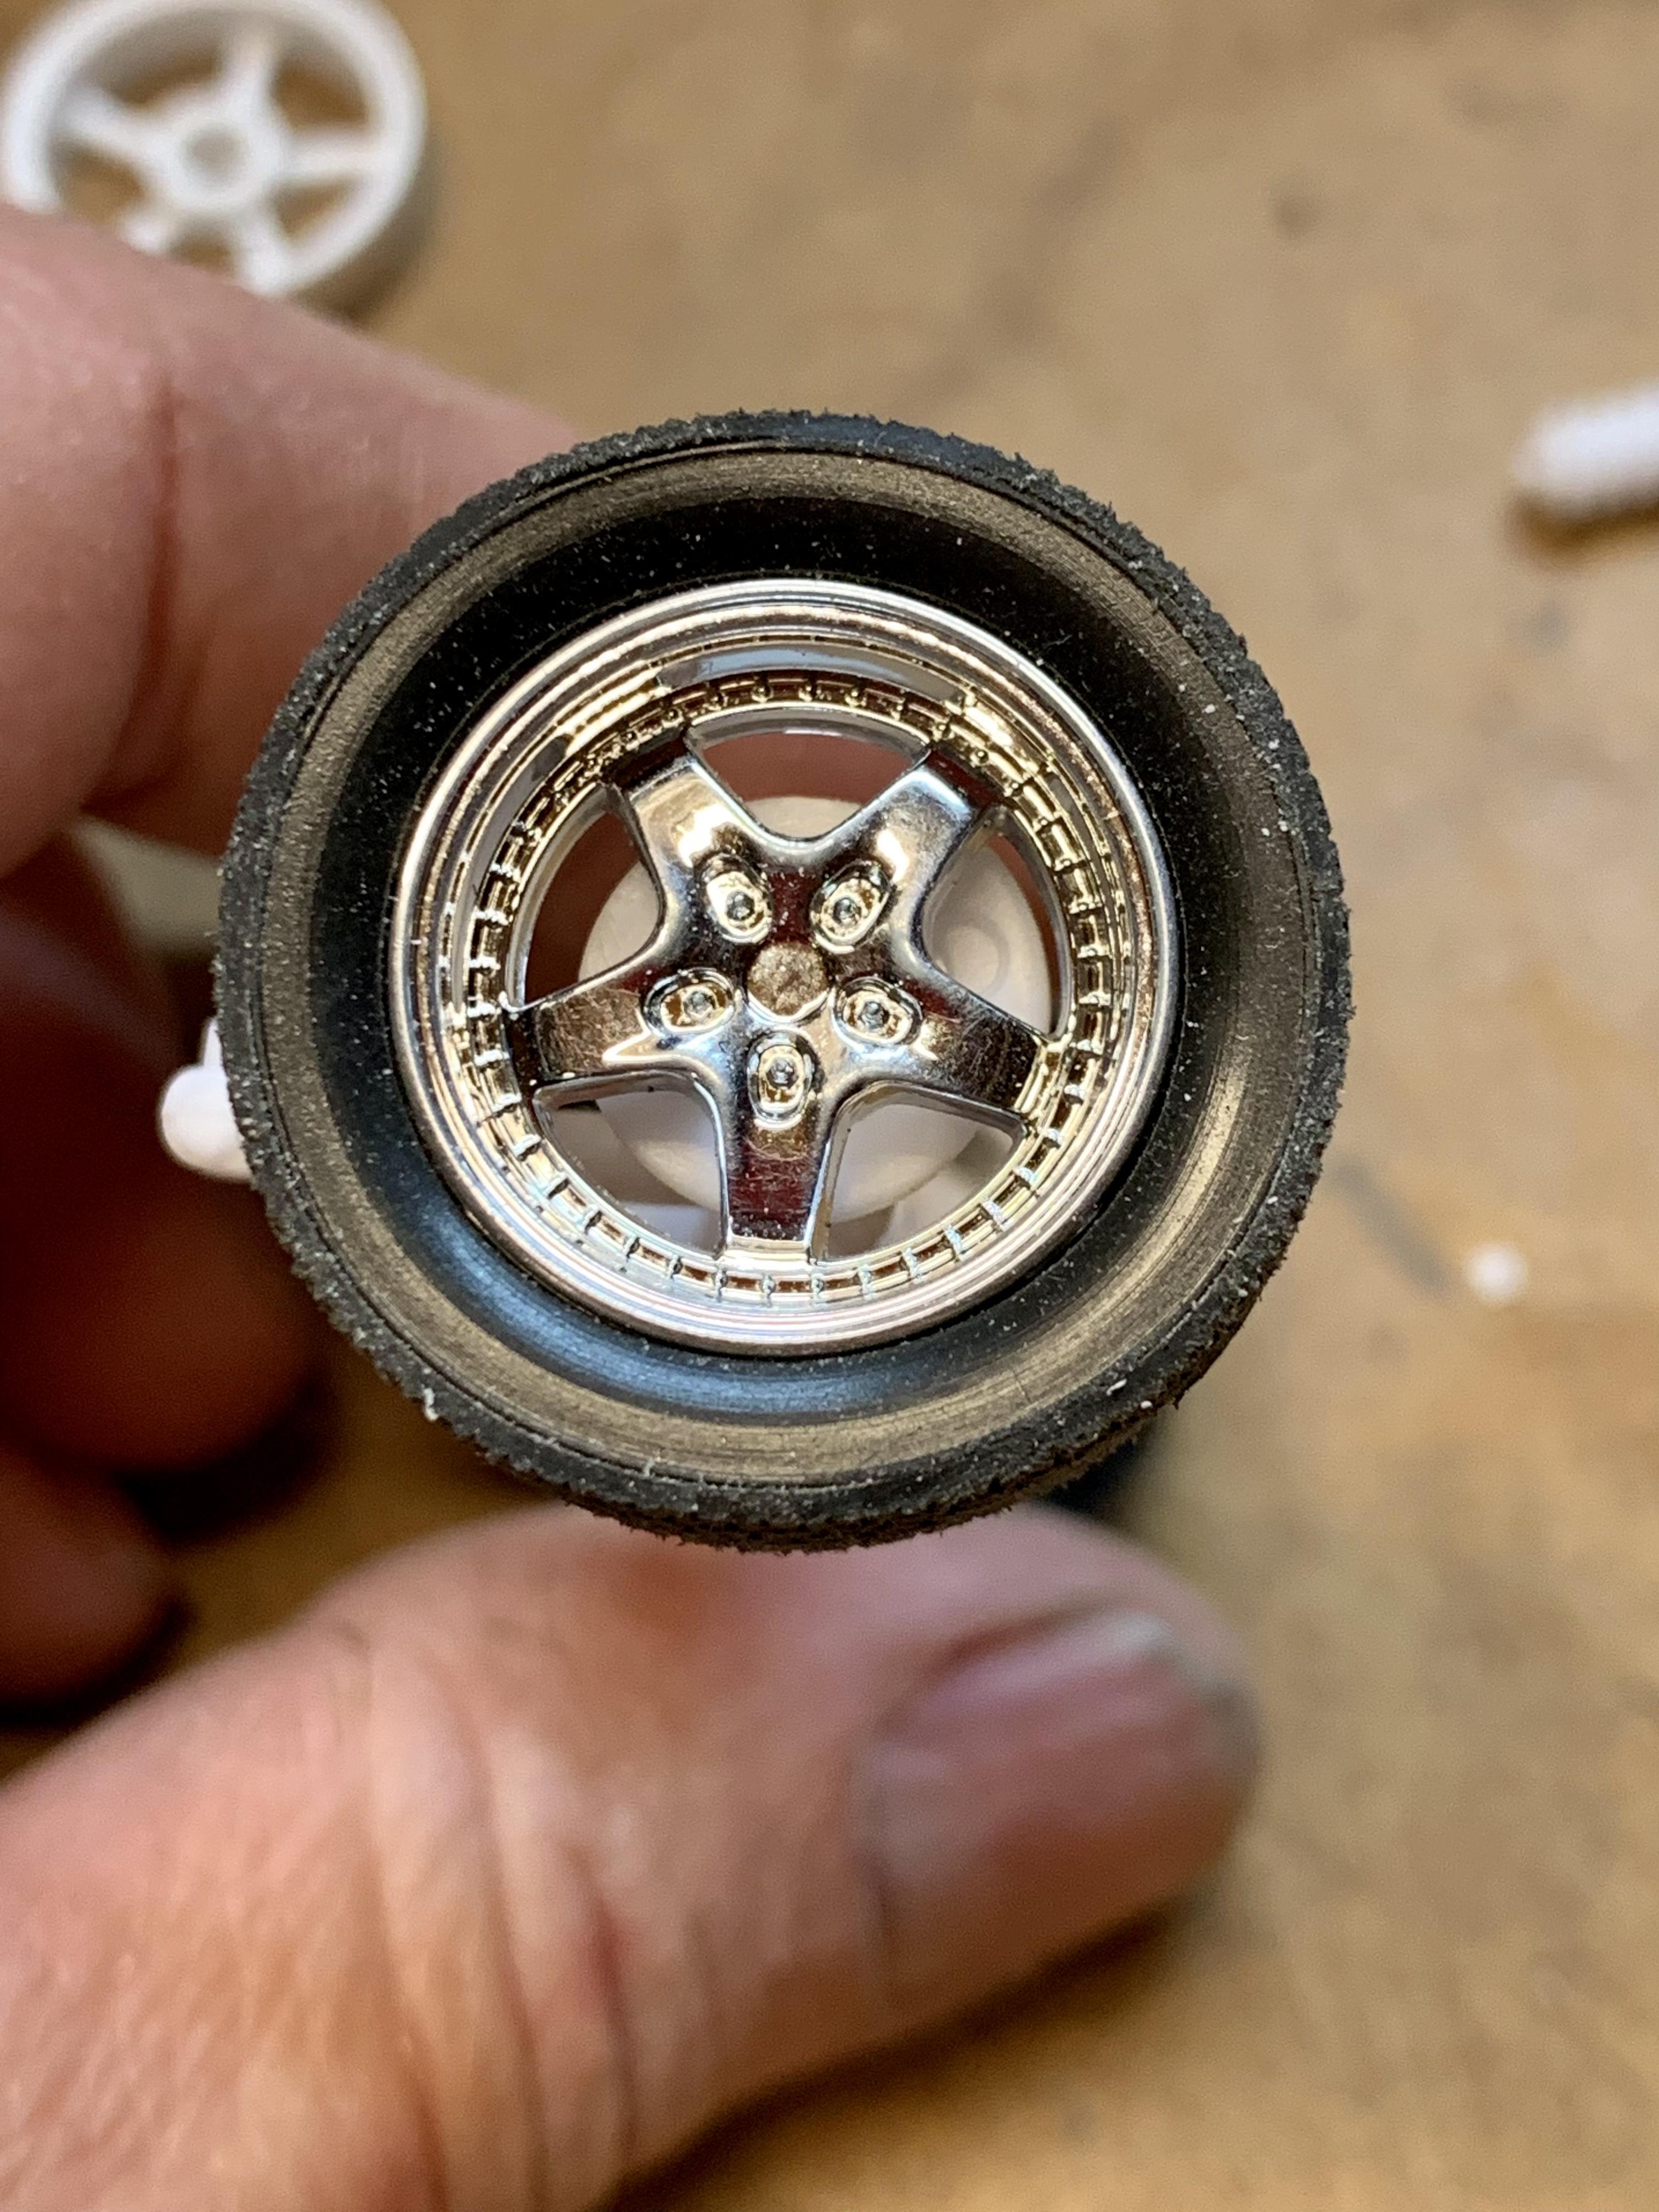
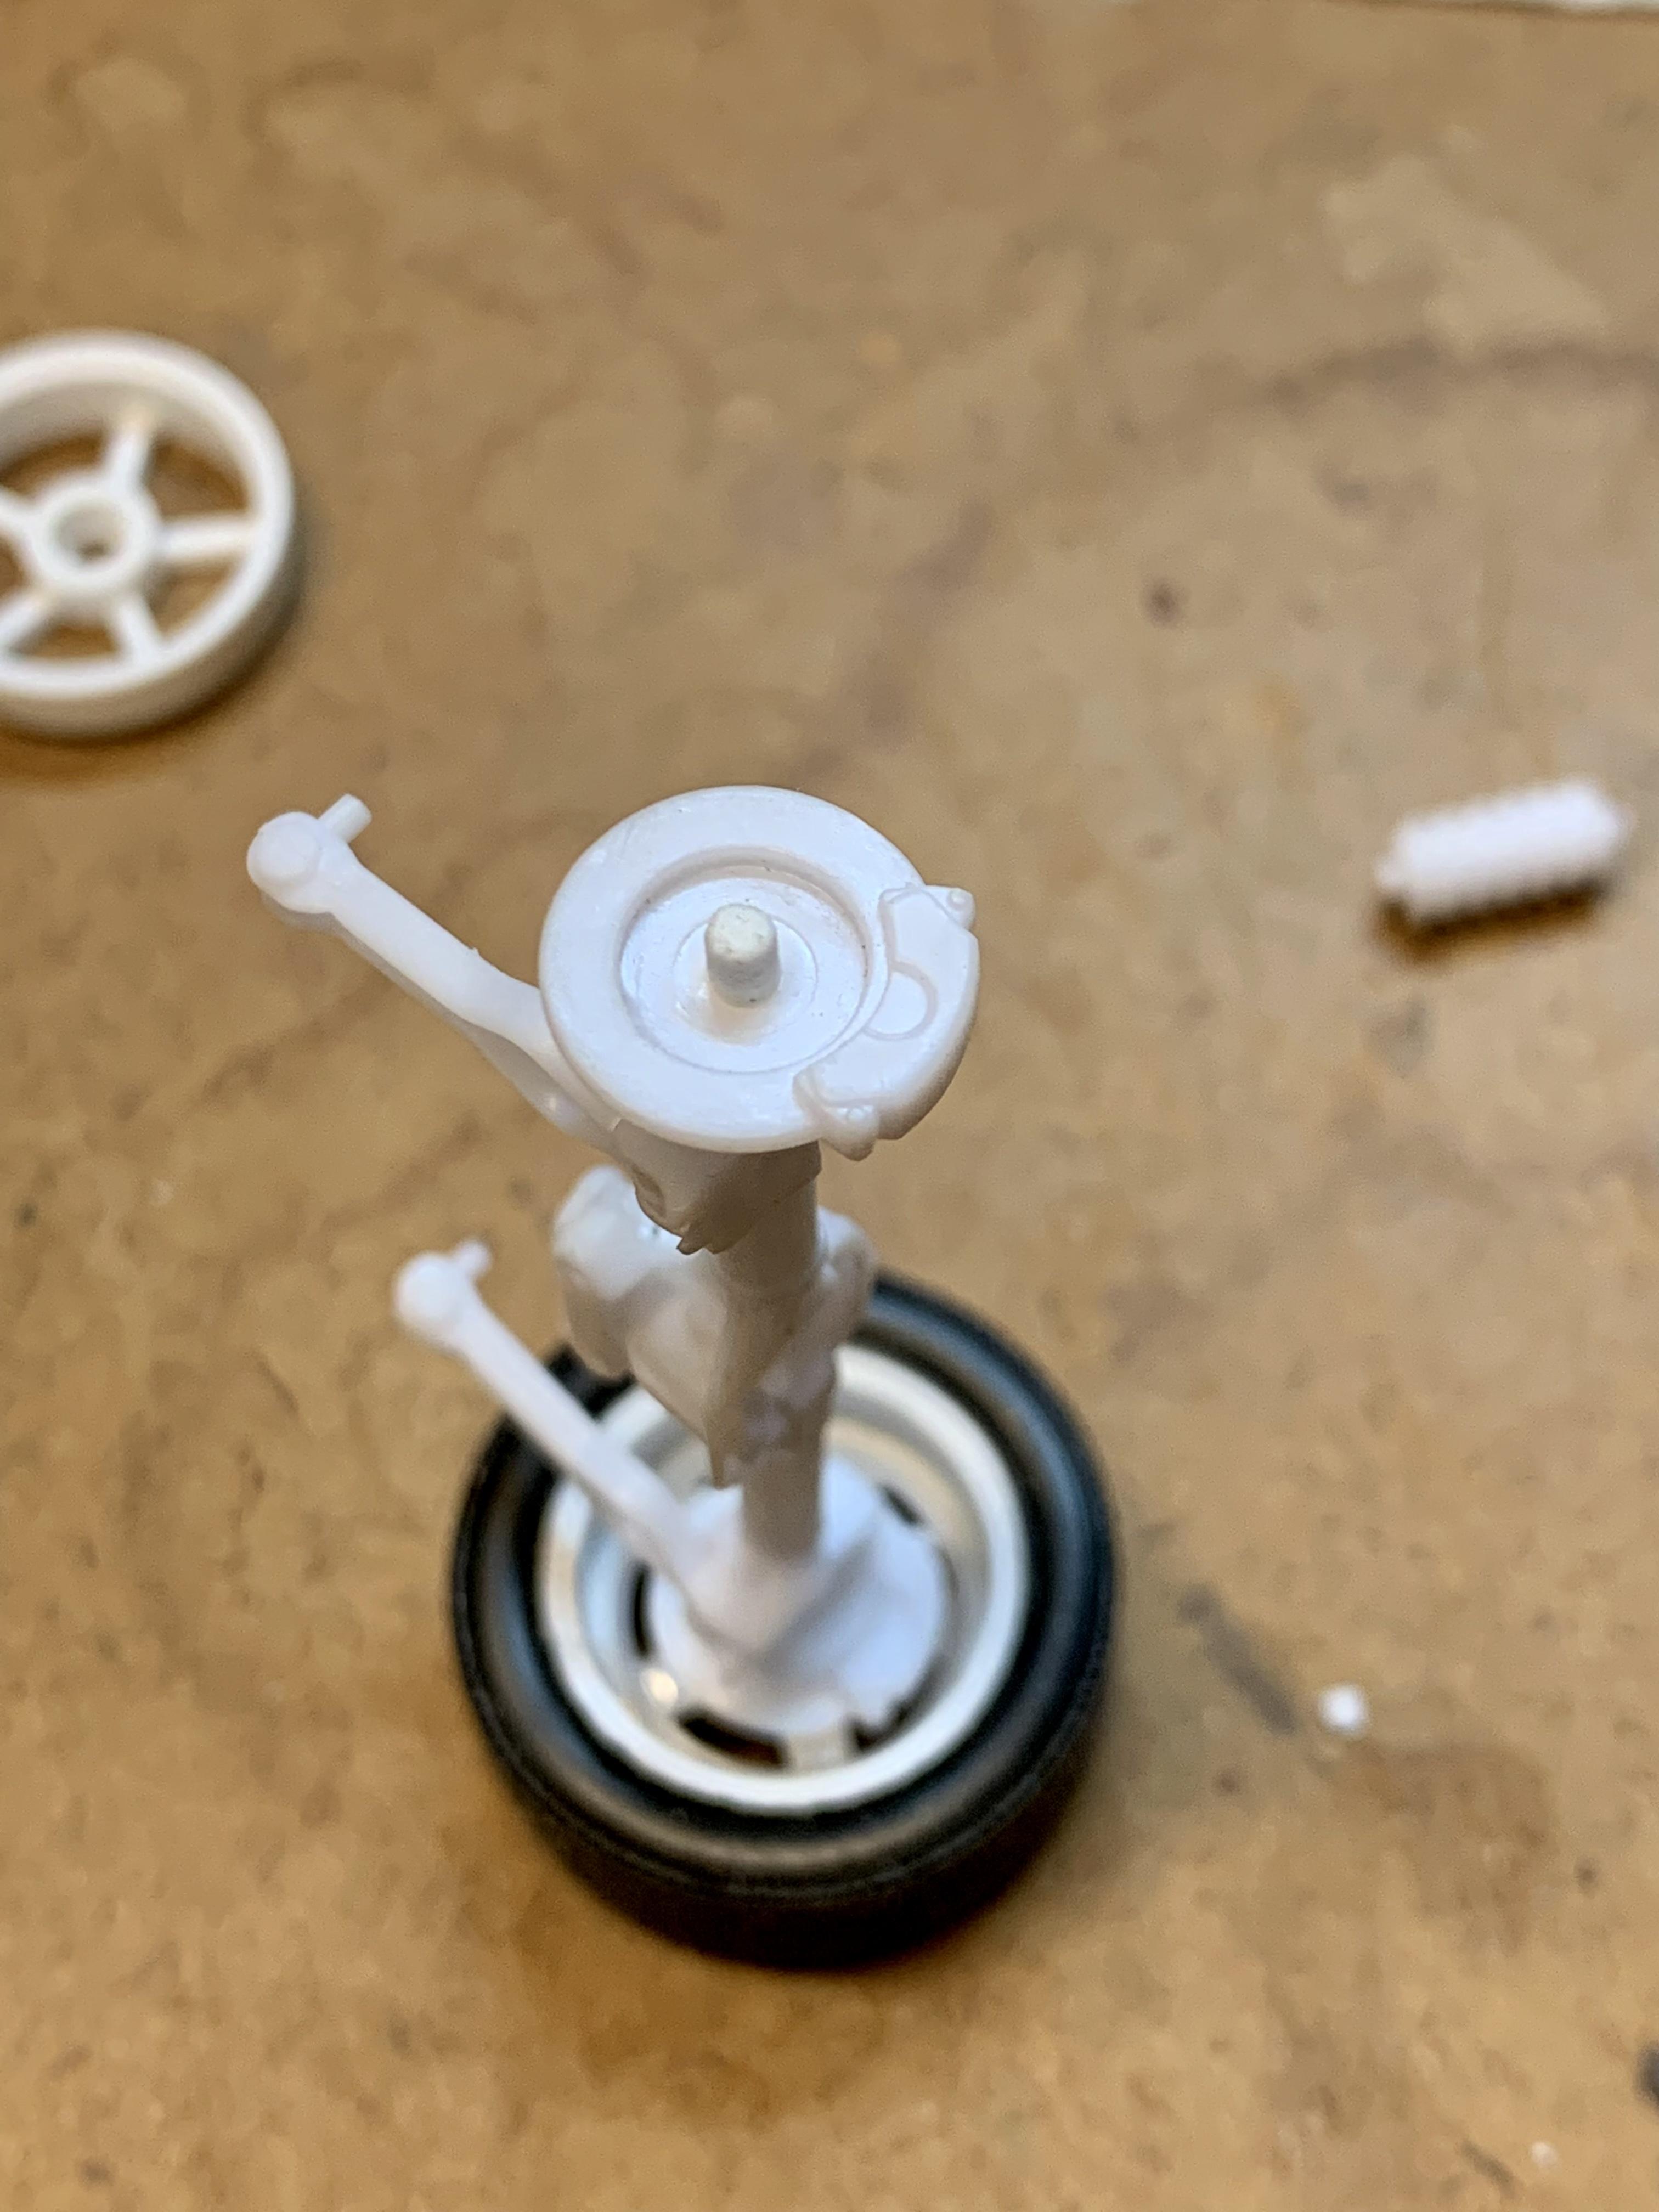
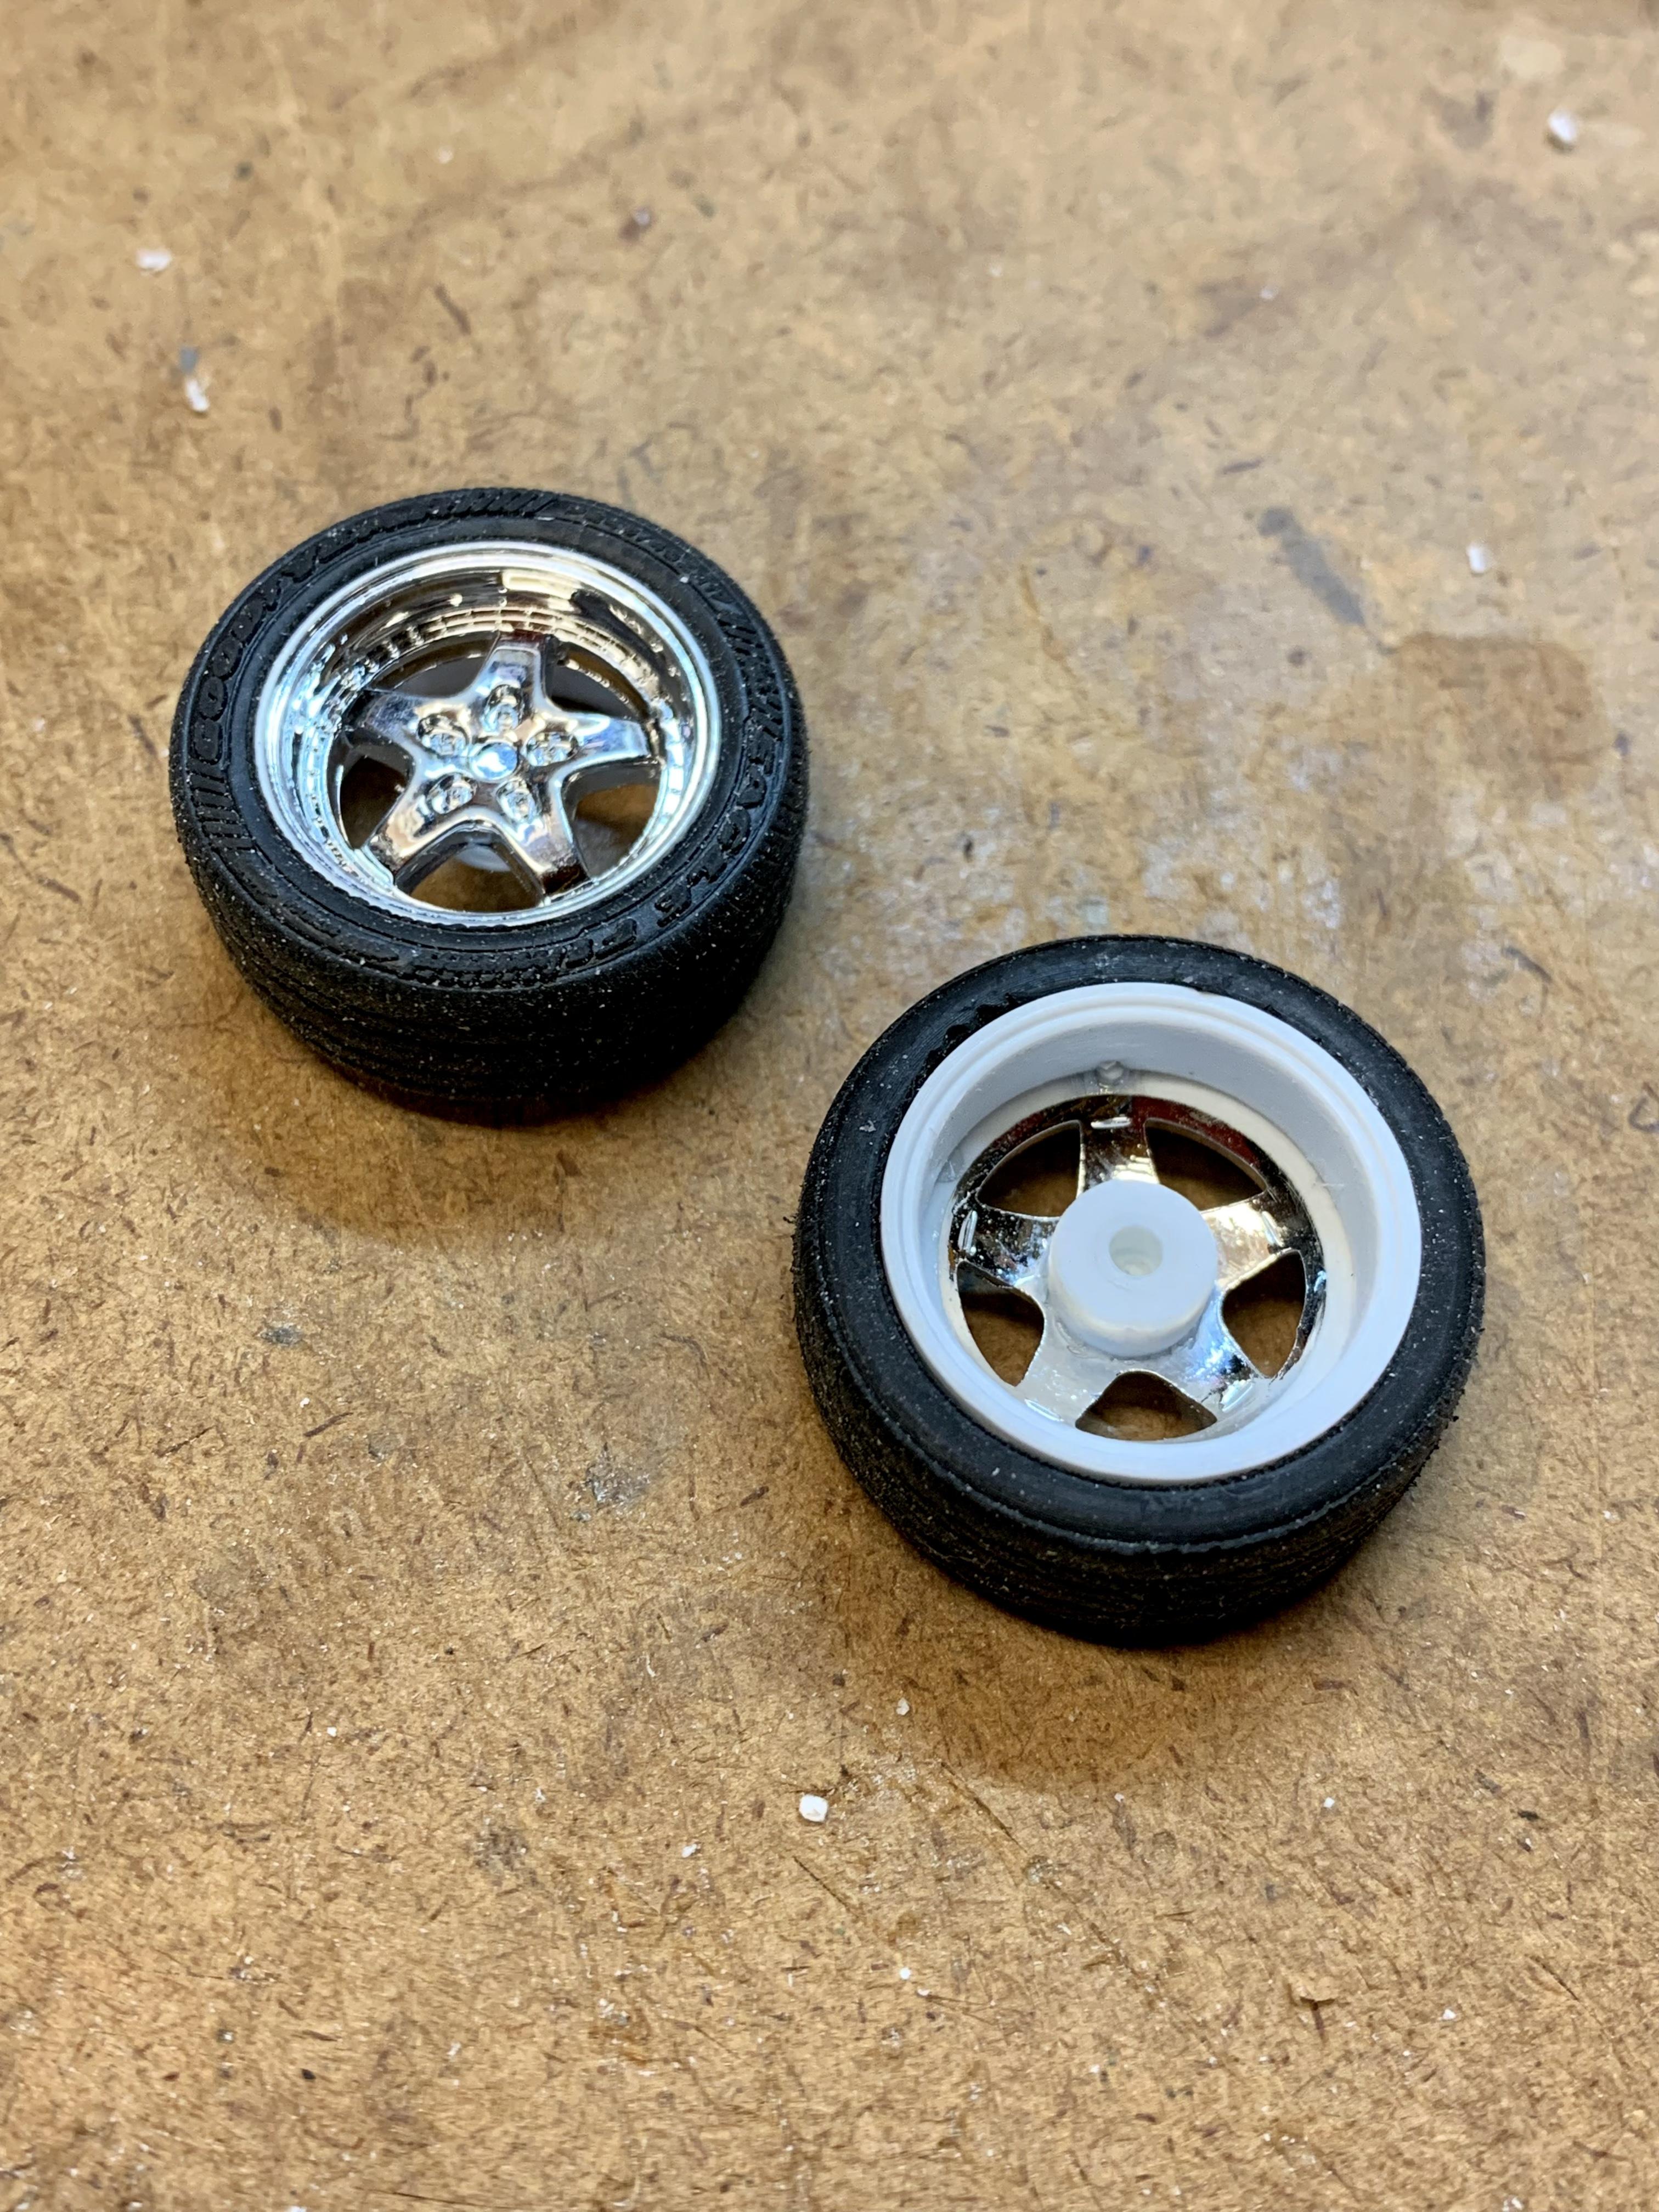
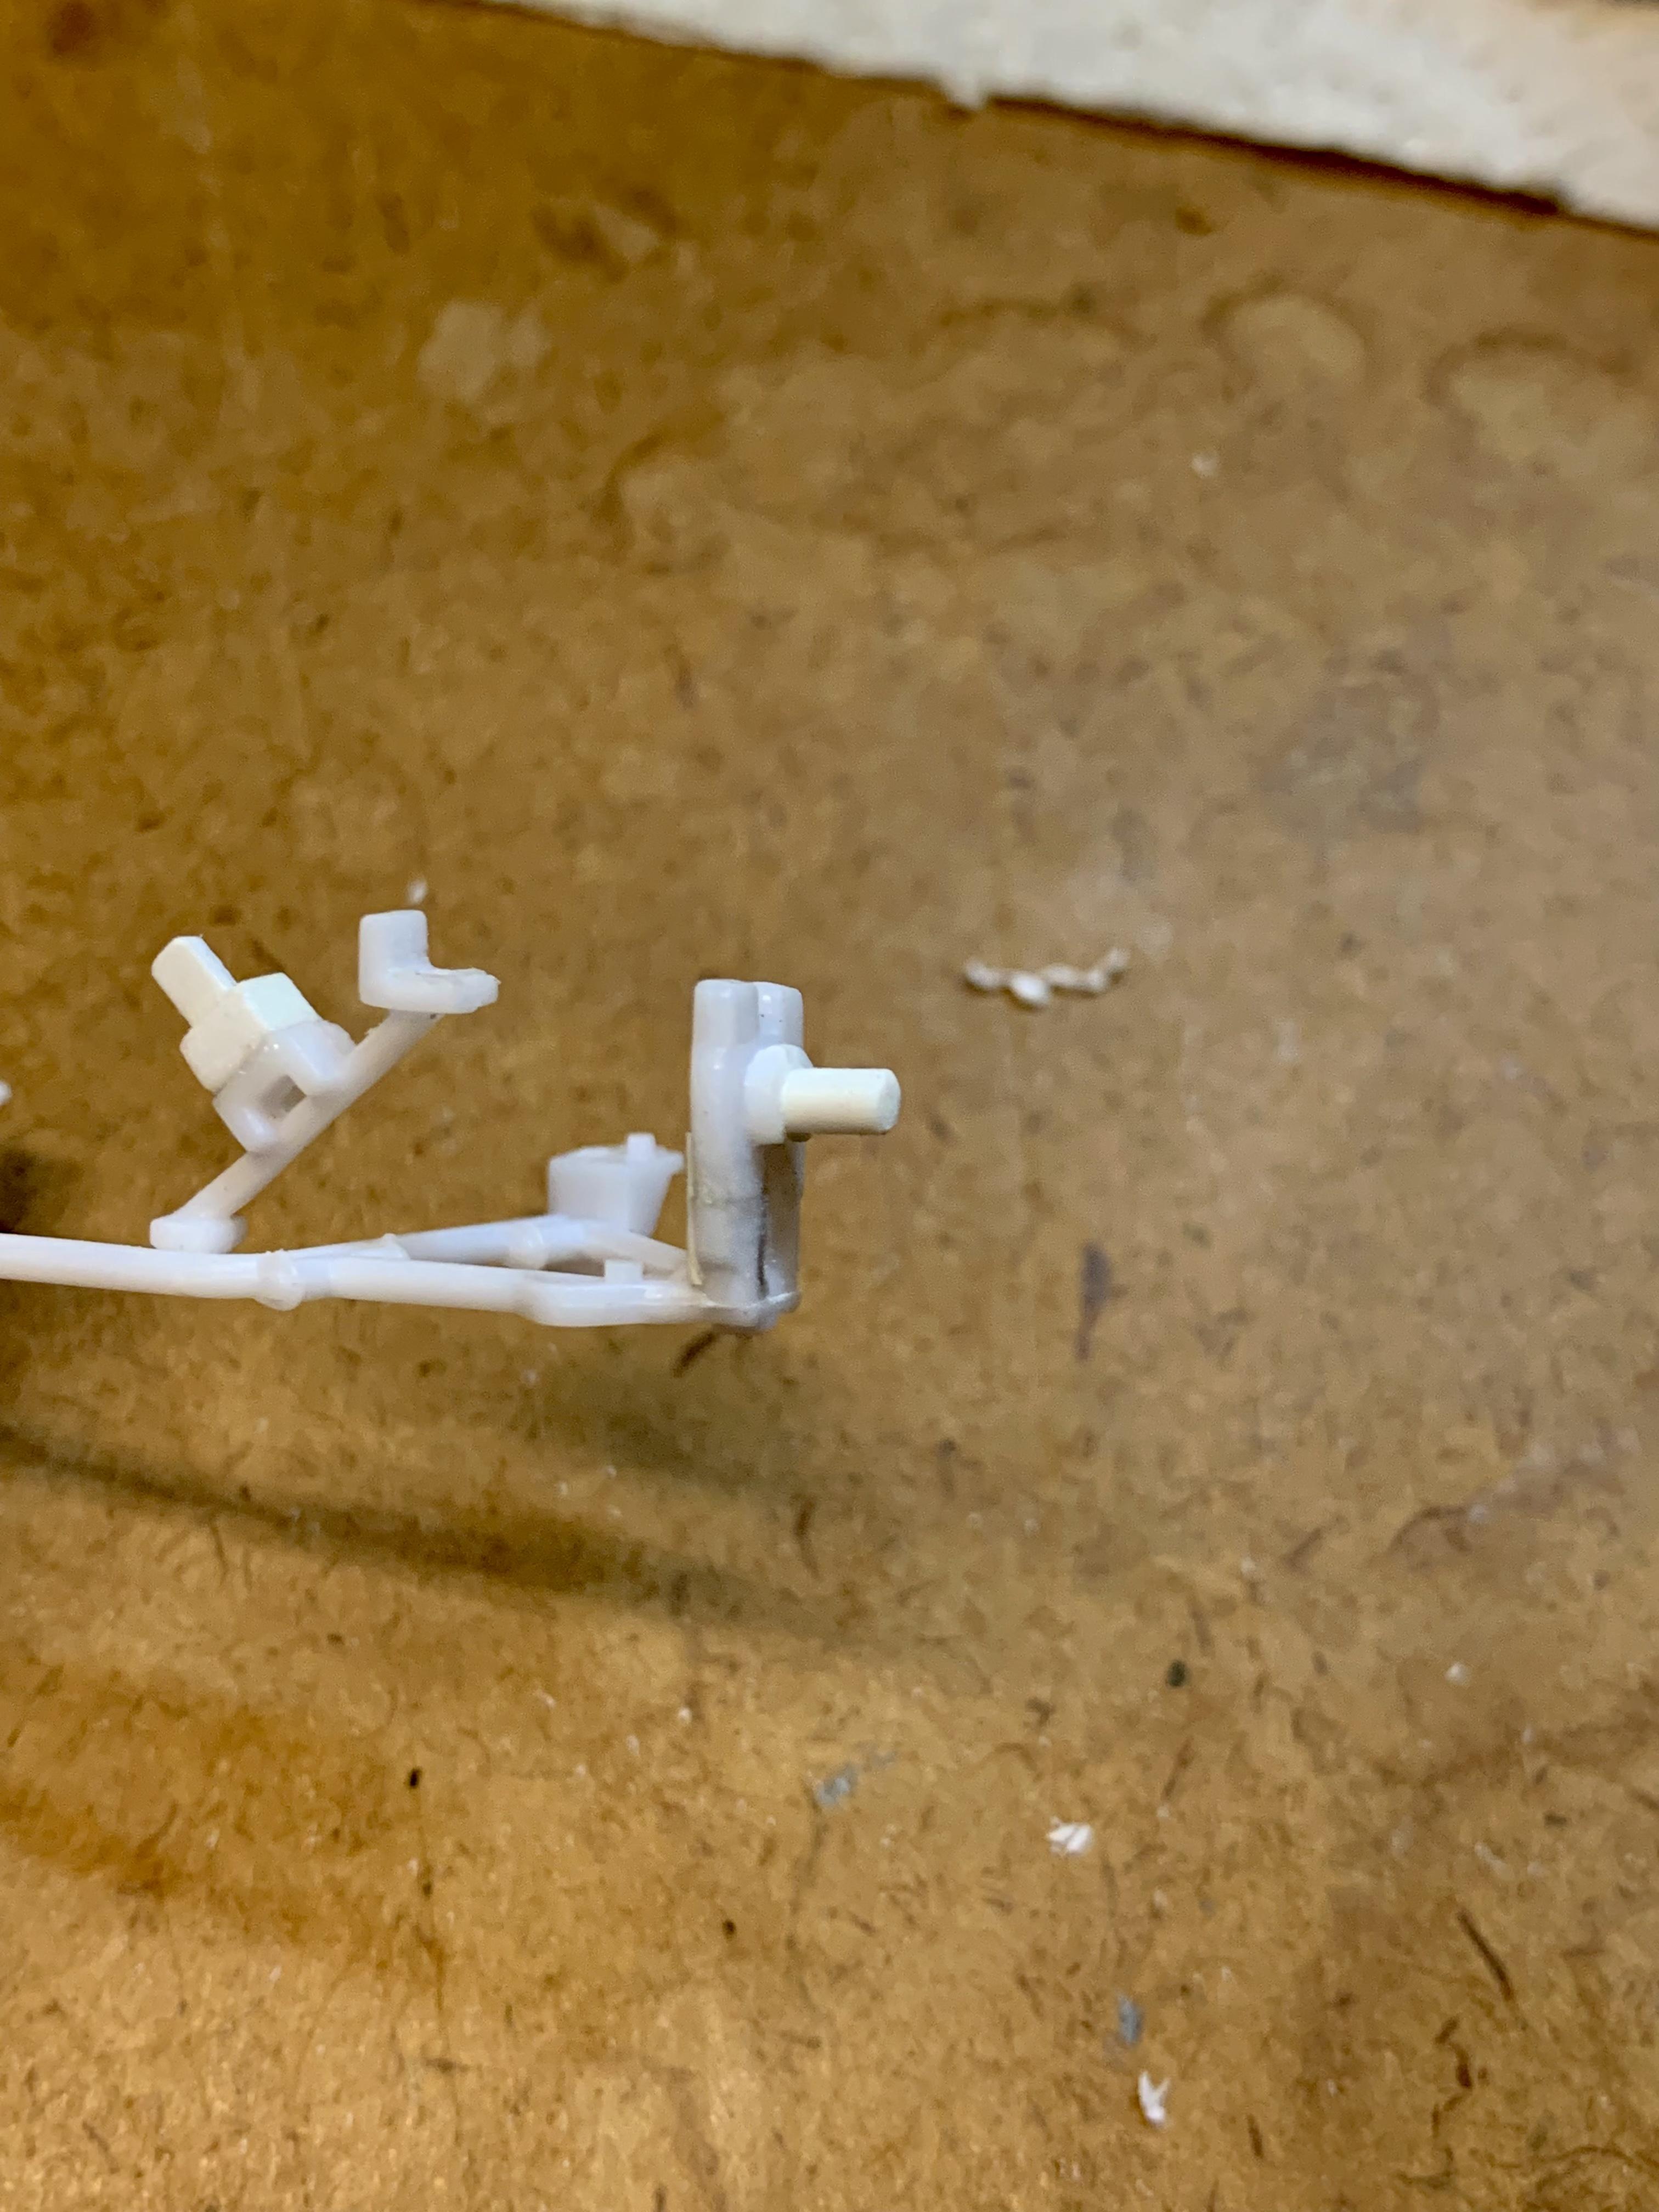
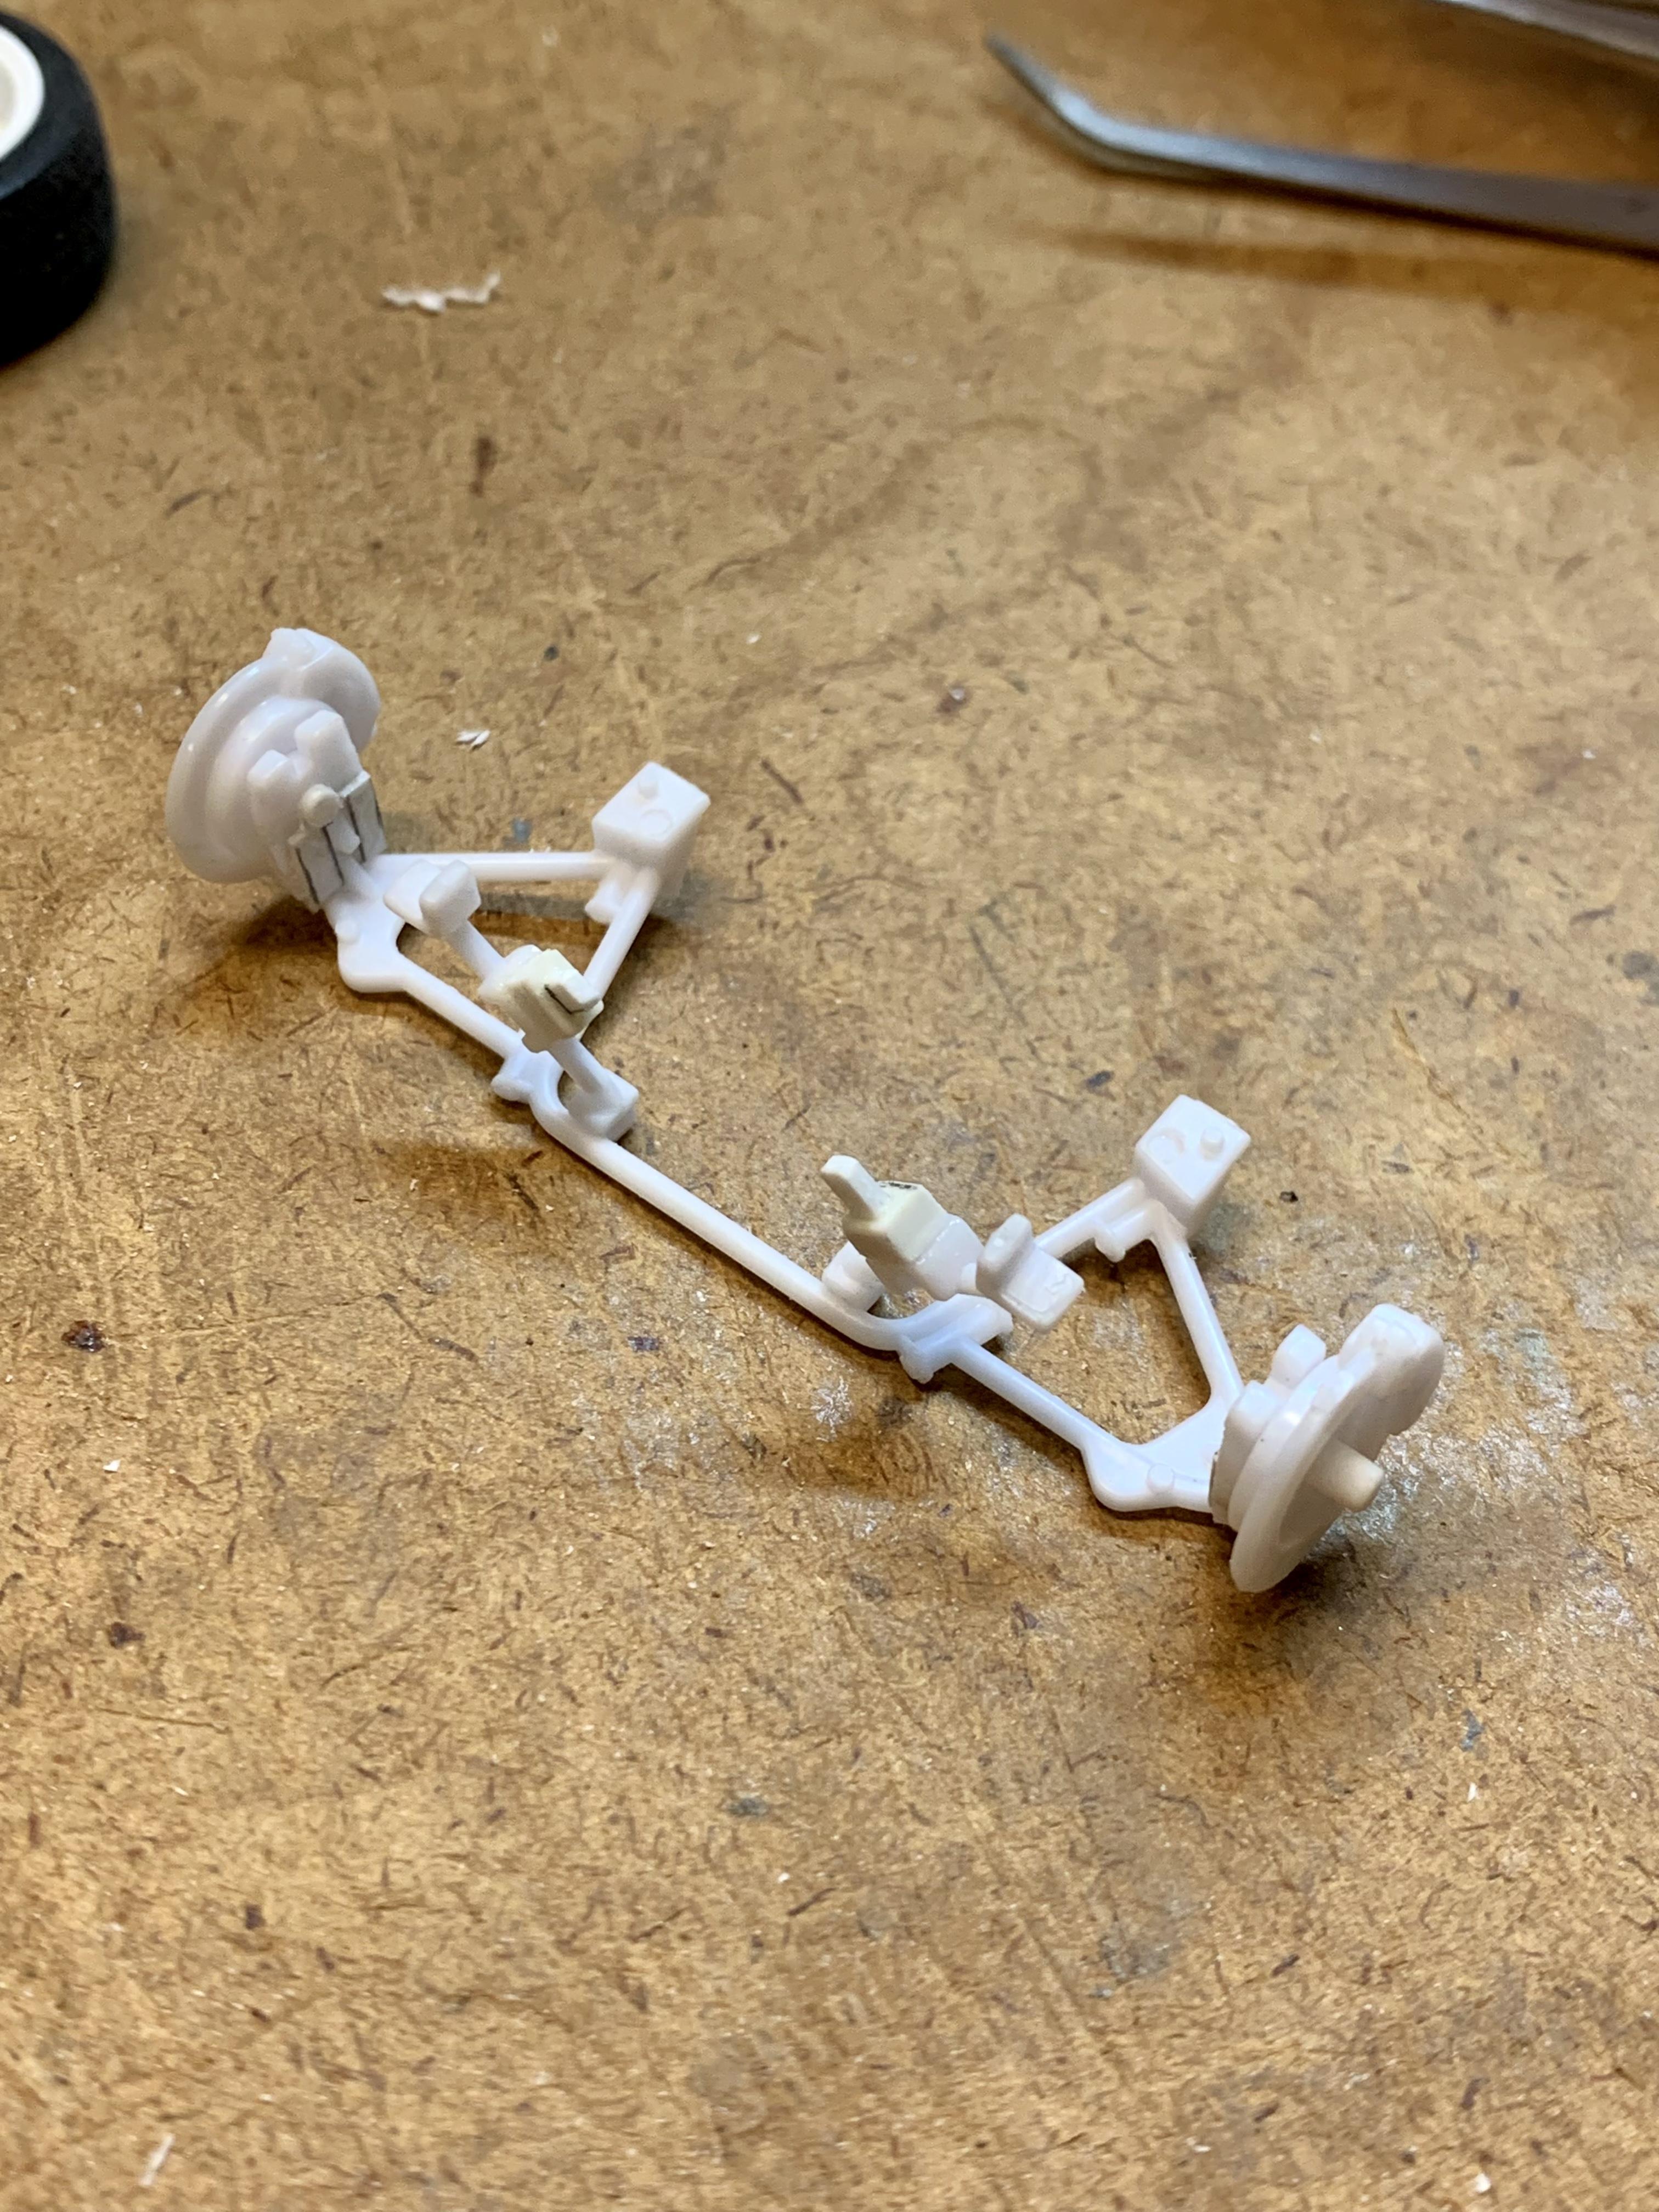
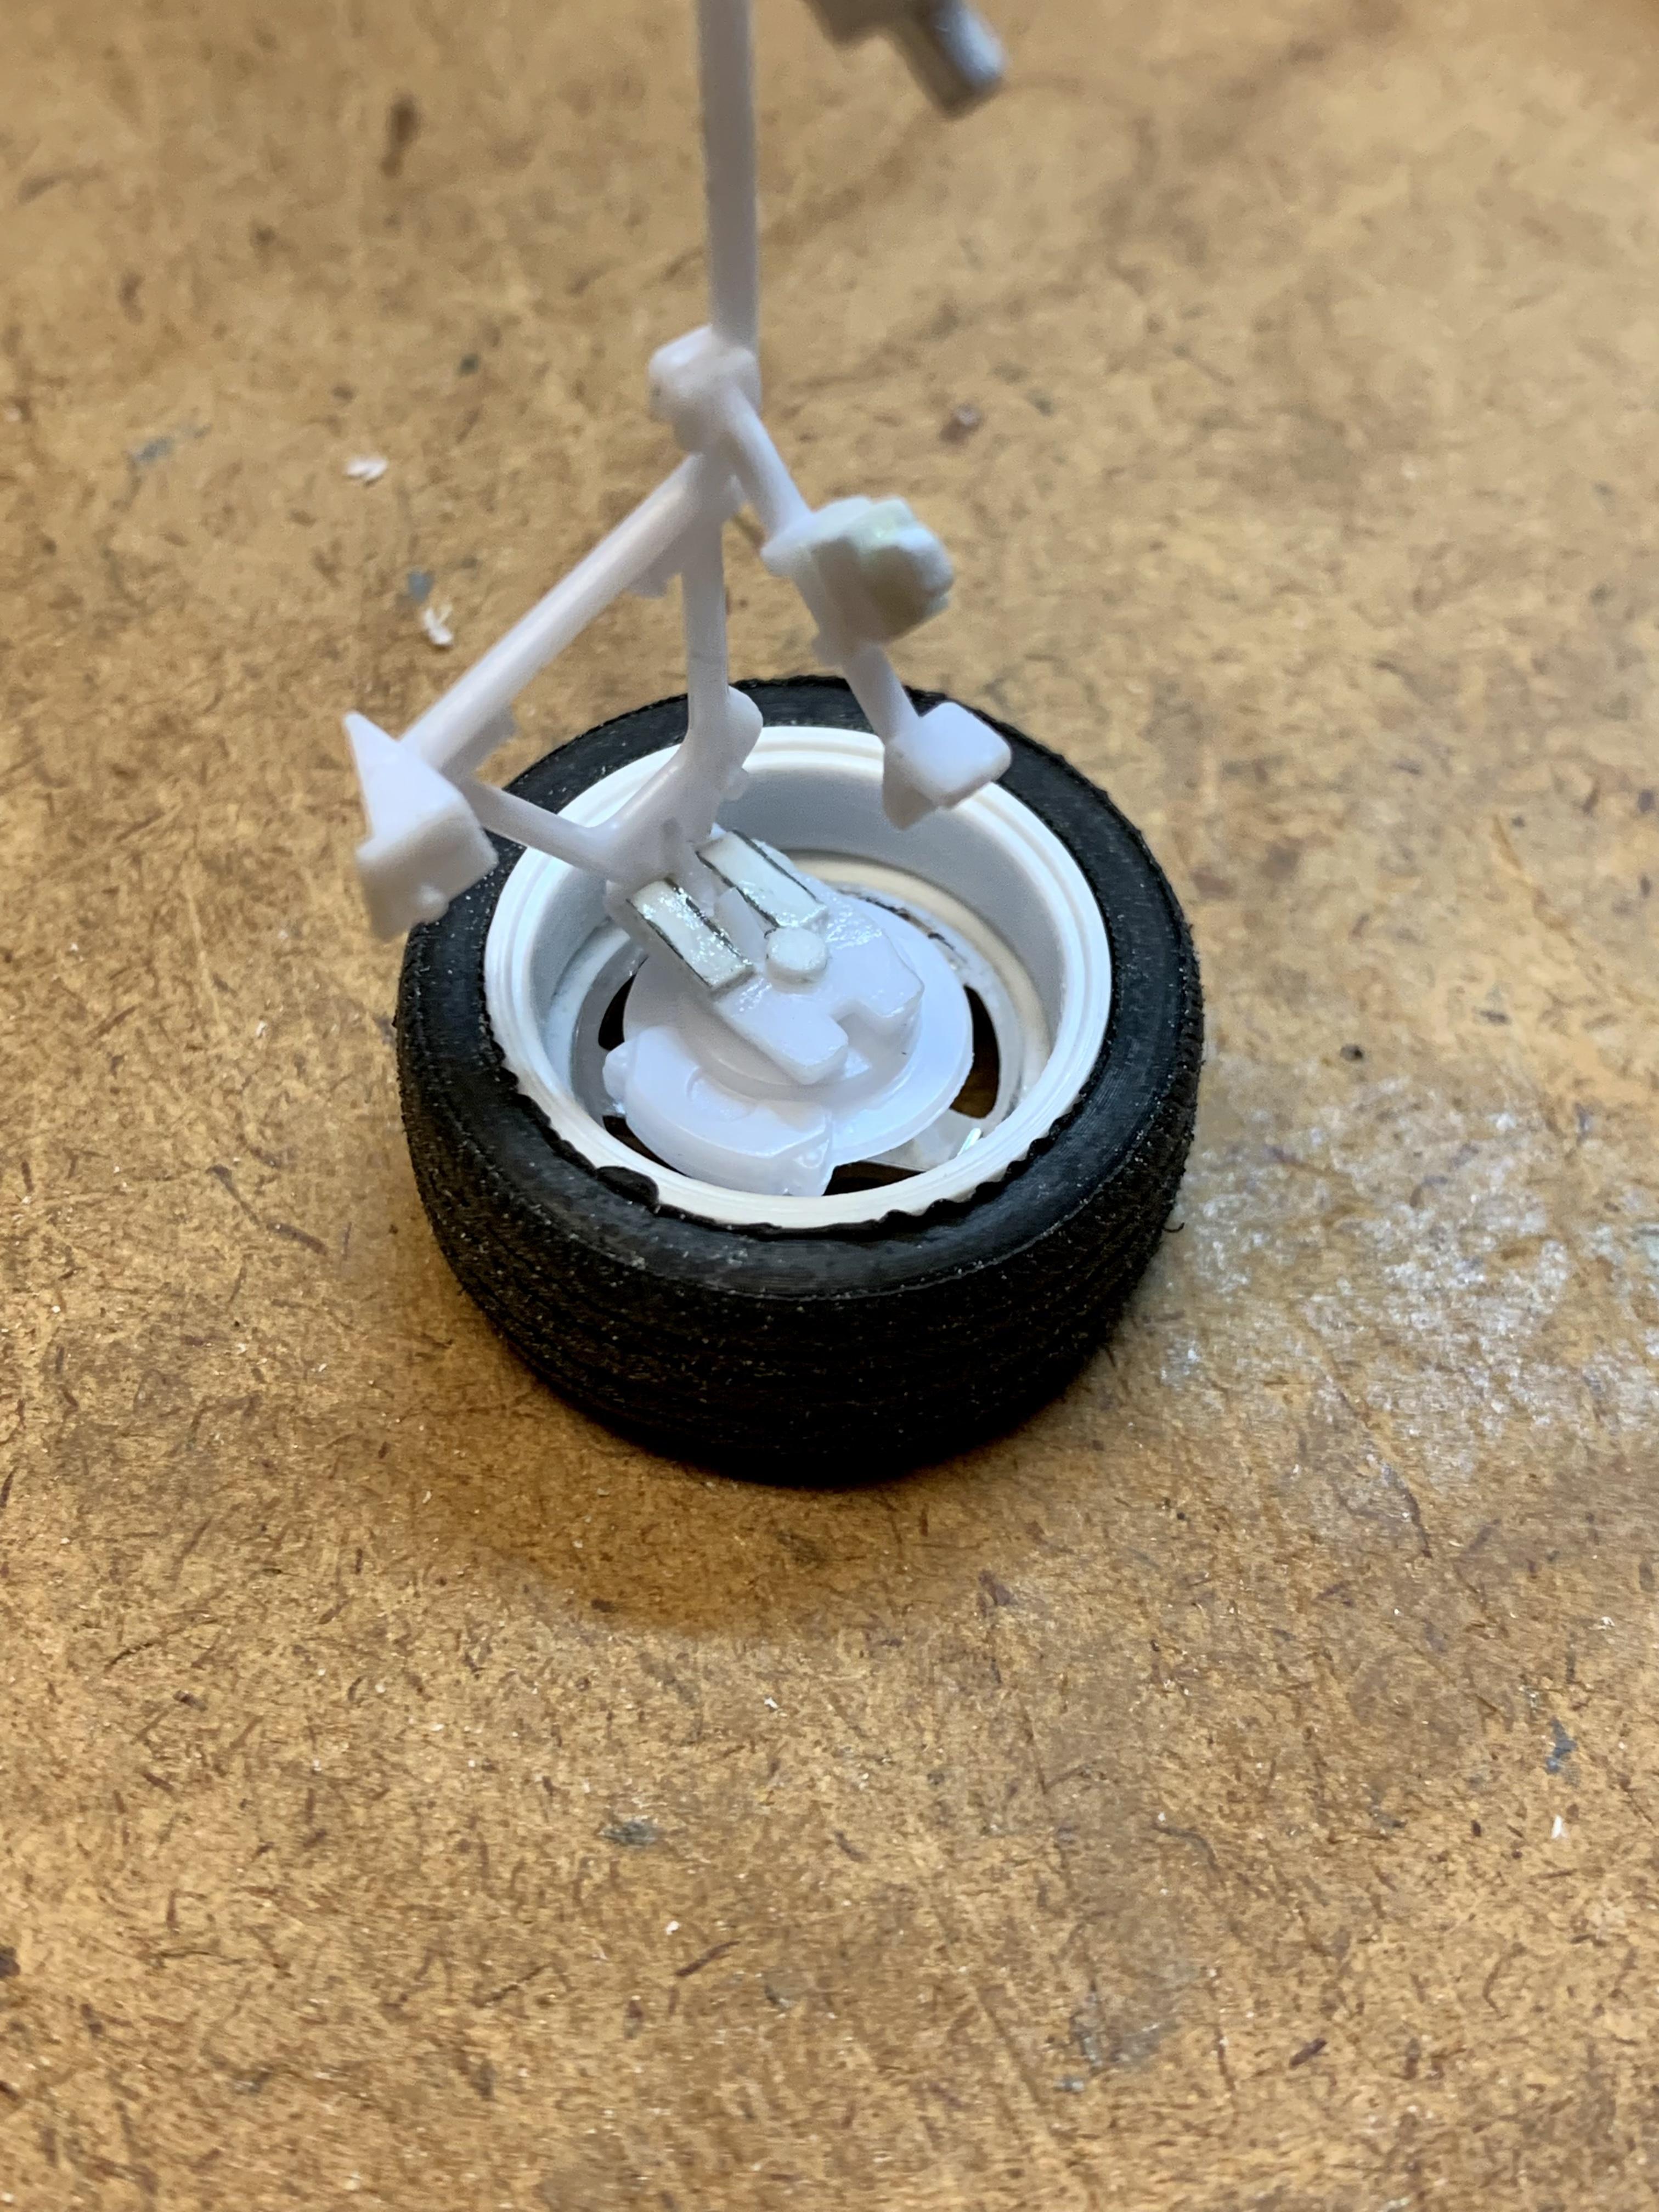
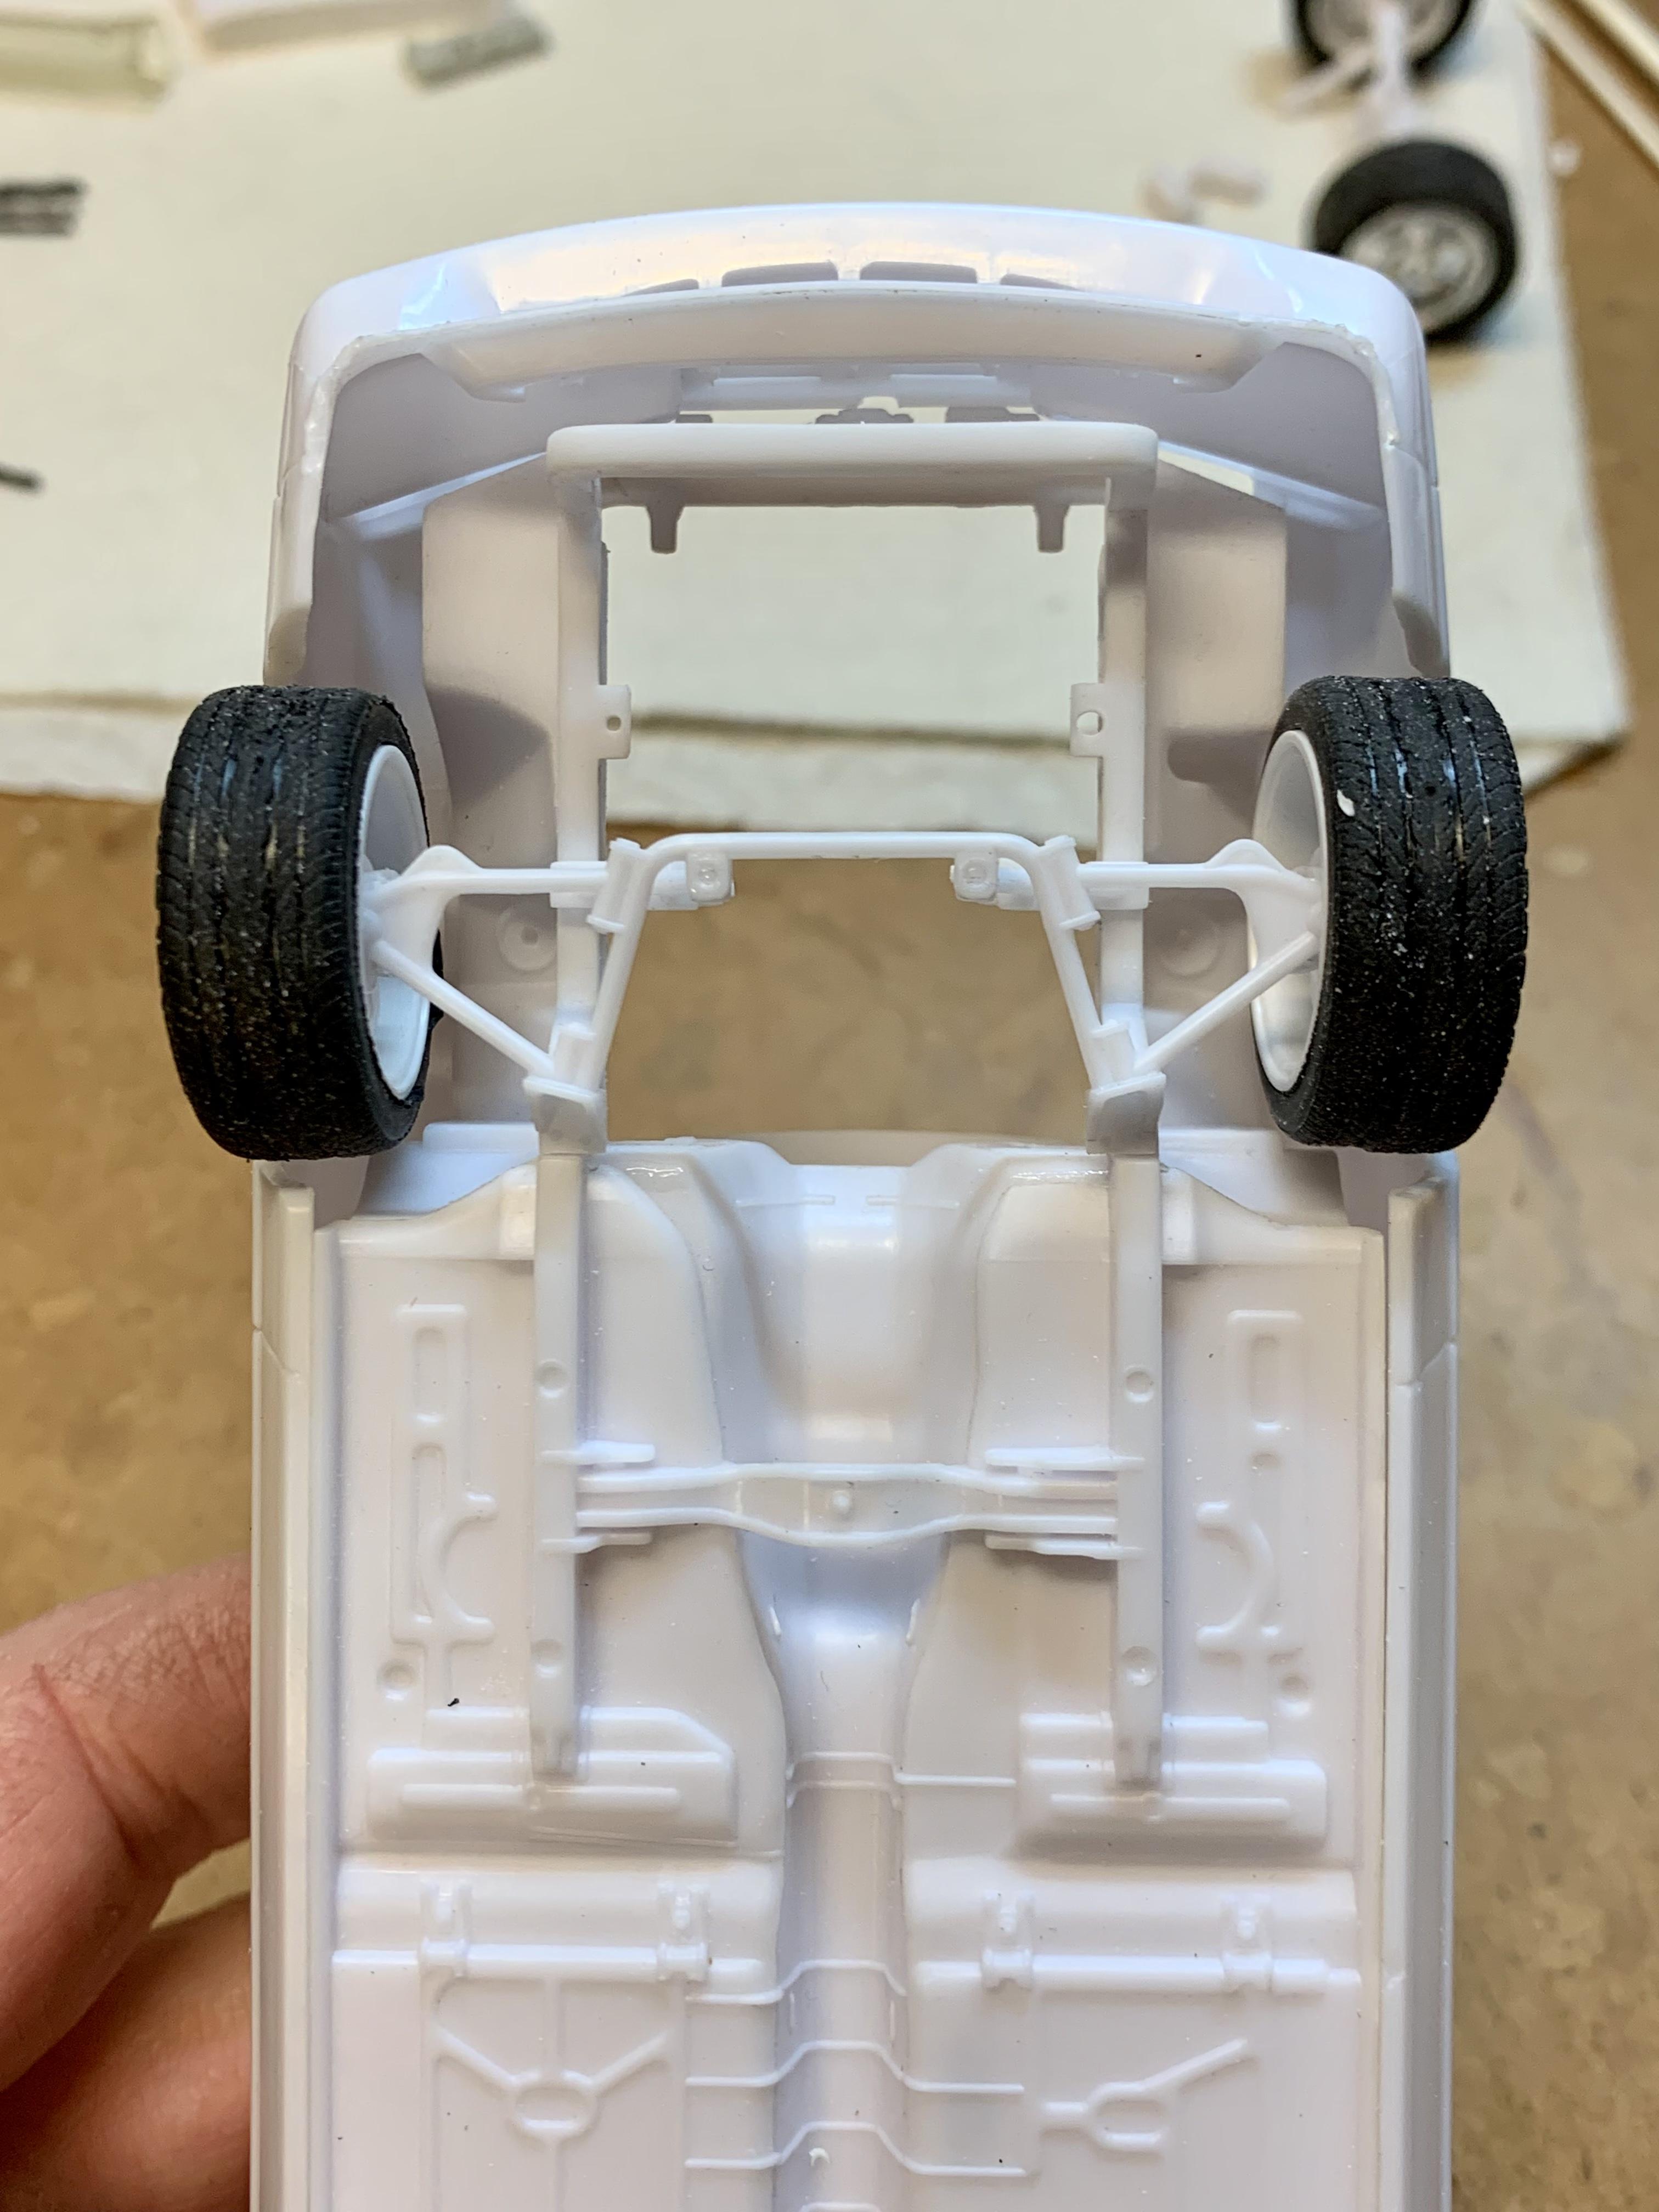
UPDATE! I didn’t have a full afternoon at the bench today (spent the earlier part of the afternoon procuring a Christmas tree, setting it up and hanging stuff) but at least I had a few hours to sit down and work on the Mustang. Despite my late start I did get some important boxes checked: mocking up the rear axle & springs to check ride height, rear disc brake conversion and adapting the front and rear wheels. After some thought and offering up other possibilities I decided to grab another pair of front brakes from a second Mustang LX kit and adapt them to the axle. This was easy as all I had to do was file the end flanges of the axle into a “D” shape to fit the depressions in the brake hubs. You can also see a stub sticking out of the end of the axle. I drilled the axle ends and brake hubs out to .080” and inserted pieces of Evergreen rod of the same size. To adapt the wheels I cut the center spokes and hubs out of the wheel backs for the Speedline wheels, cut the spokes away from the hubs, turned the hubs upside down (one end has a bigger hole than the other) and glued them to the insides of the wheels. I enlarged the hole in the hubs with a 1/8” drill bit then glued in a piece of Evergreen 1/8” tube. Once the glue was dry I trimmed the tube off flush with the hub and then drilled the inside of the tube to .080” which will now push onto the .080” rod I glued into the axle ends. Here’s a finished rear wheel and tire with the inner rim fit. Rear axle and springs mocked up with the disc brake conversion and rear wheels and tires fit. Here’s a view of the rear disc through the wheel. Here’s the stance out of the box. Can’t beat that! Needless to say, I won’t be lowering the rear. With the rear wheels adapted I moved to the front and decided to simply repeat the process since it worked so well. I glued .080” rods into the “spindles”. I then went ahead and modified the front wheels the exact same way. Here’s a view of how the brake fits down into the wheel and how the A-arm clears the inner rim no problem even with the “dropped spindles”. Full mock up with the tubular k-member and wheels adapted. And lastly, a front stance double check. That’s all for this go around.
-
1963 Chevy Nova Wagon Street Rod FINISHED 3/20/22
Dennis Lacy replied to Dennis Lacy's topic in WIP: Model Cars
Luckily that squirrel is the owners, kids stuffed animal. No harm will come to the audio equipment! Haha -
1990 Mustang LX - SVT Cobra DOHC Powered! UPDATE! 1/22/23
Dennis Lacy replied to Dennis Lacy's topic in WIP: Model Cars
Thanks and THANKS! ? -
1990 Mustang LX - SVT Cobra DOHC Powered! UPDATE! 1/22/23
Dennis Lacy replied to Dennis Lacy's topic in WIP: Model Cars
I can appreciate the idea and workmanship if it was done cleanly BUT that doesn’t excite me in the slightest. My neighbor has a 2020 Ecoboost Mustang with cat-less exhaust and other mods. It may be fast but it’s one of the worst and obnoxious sounding cars I’ve ever heard! ? -
1990 Mustang LX - SVT Cobra DOHC Powered! UPDATE! 1/22/23
Dennis Lacy replied to Dennis Lacy's topic in WIP: Model Cars
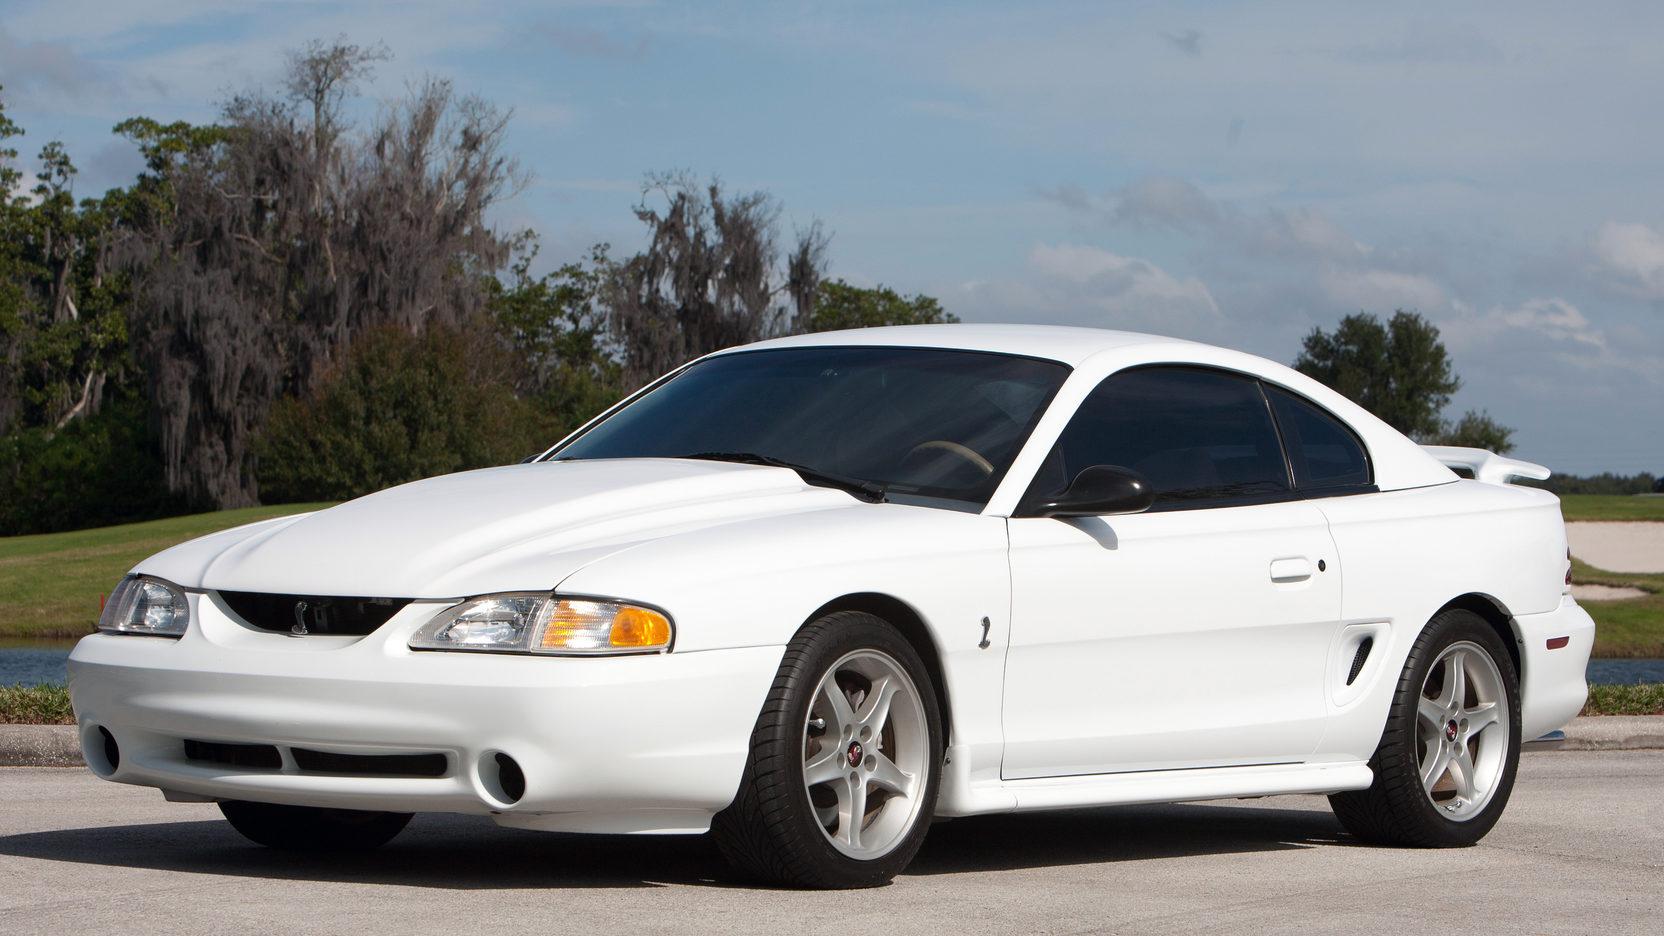
Thanks, Craig! The major issue is that the greenhouse is several scale inches too short, and there’s no argument there. I forget how many years ago the original issue came out which only had factory stock and SSP (Highway Patrol) goodies but it’s taken me all this time to warm up to building one. One of the other issues is that the radius of the rear wheel openings is enlarged. They did this because of the drag race version but unfortunately with there being just one body tool then we are stuck with it for any version we might build unless major corrective work was done. I’ve decided to just roll with the inaccuracies because in the end it will still look like a Mustang and I think I can pull off a pretty cool take on it. One things for sure, despite the body many other aspects of the kit are very well done and if anything could serve to improve some of the other Fox Body Mustang kits that have been around for decades. -
1990 Mustang LX - SVT Cobra DOHC Powered! UPDATE! 1/22/23
Dennis Lacy replied to Dennis Lacy's topic in WIP: Model Cars
Thanks! I always thought the Cobra engine swaps were really cool back when they were a new yet fairly uncommon thing in the late 90’s. Nowadays every other one of these Mustang’s are getting later model engine swaps, in particular the 5-liter Coyote engines. To me, it’s honestly getting kinda boring…