Dennis Lacy
-
Posts
2,487 -
Joined
-
Last visited
Content Type
Profiles
Forums
Events
Gallery
Everything posted by Dennis Lacy
-

1963 Chevy Nova Wagon Street Rod FINISHED 3/20/22
Dennis Lacy replied to Dennis Lacy's topic in WIP: Model Cars
Thanks a bunch, Steve! -
1963 Chevy Nova Wagon Street Rod FINISHED 3/20/22
Dennis Lacy replied to Dennis Lacy's topic in WIP: Model Cars
Thanks! I’m really pleased with how the amps turned out. They look darn near just like the amps in your diagram! -
1963 Chevy Nova Wagon Street Rod FINISHED 3/20/22
Dennis Lacy replied to Dennis Lacy's topic in WIP: Model Cars
Thanks! Just after posting this update tonight I ordered Detail Master speaker grills and radio faces. Not sure how I’m going to lay out the speakers yet and it didn’t occur to me to put any in the console, but I could… -
1963 Chevy Nova Wagon Street Rod FINISHED 3/20/22
Dennis Lacy replied to Dennis Lacy's topic in WIP: Model Cars
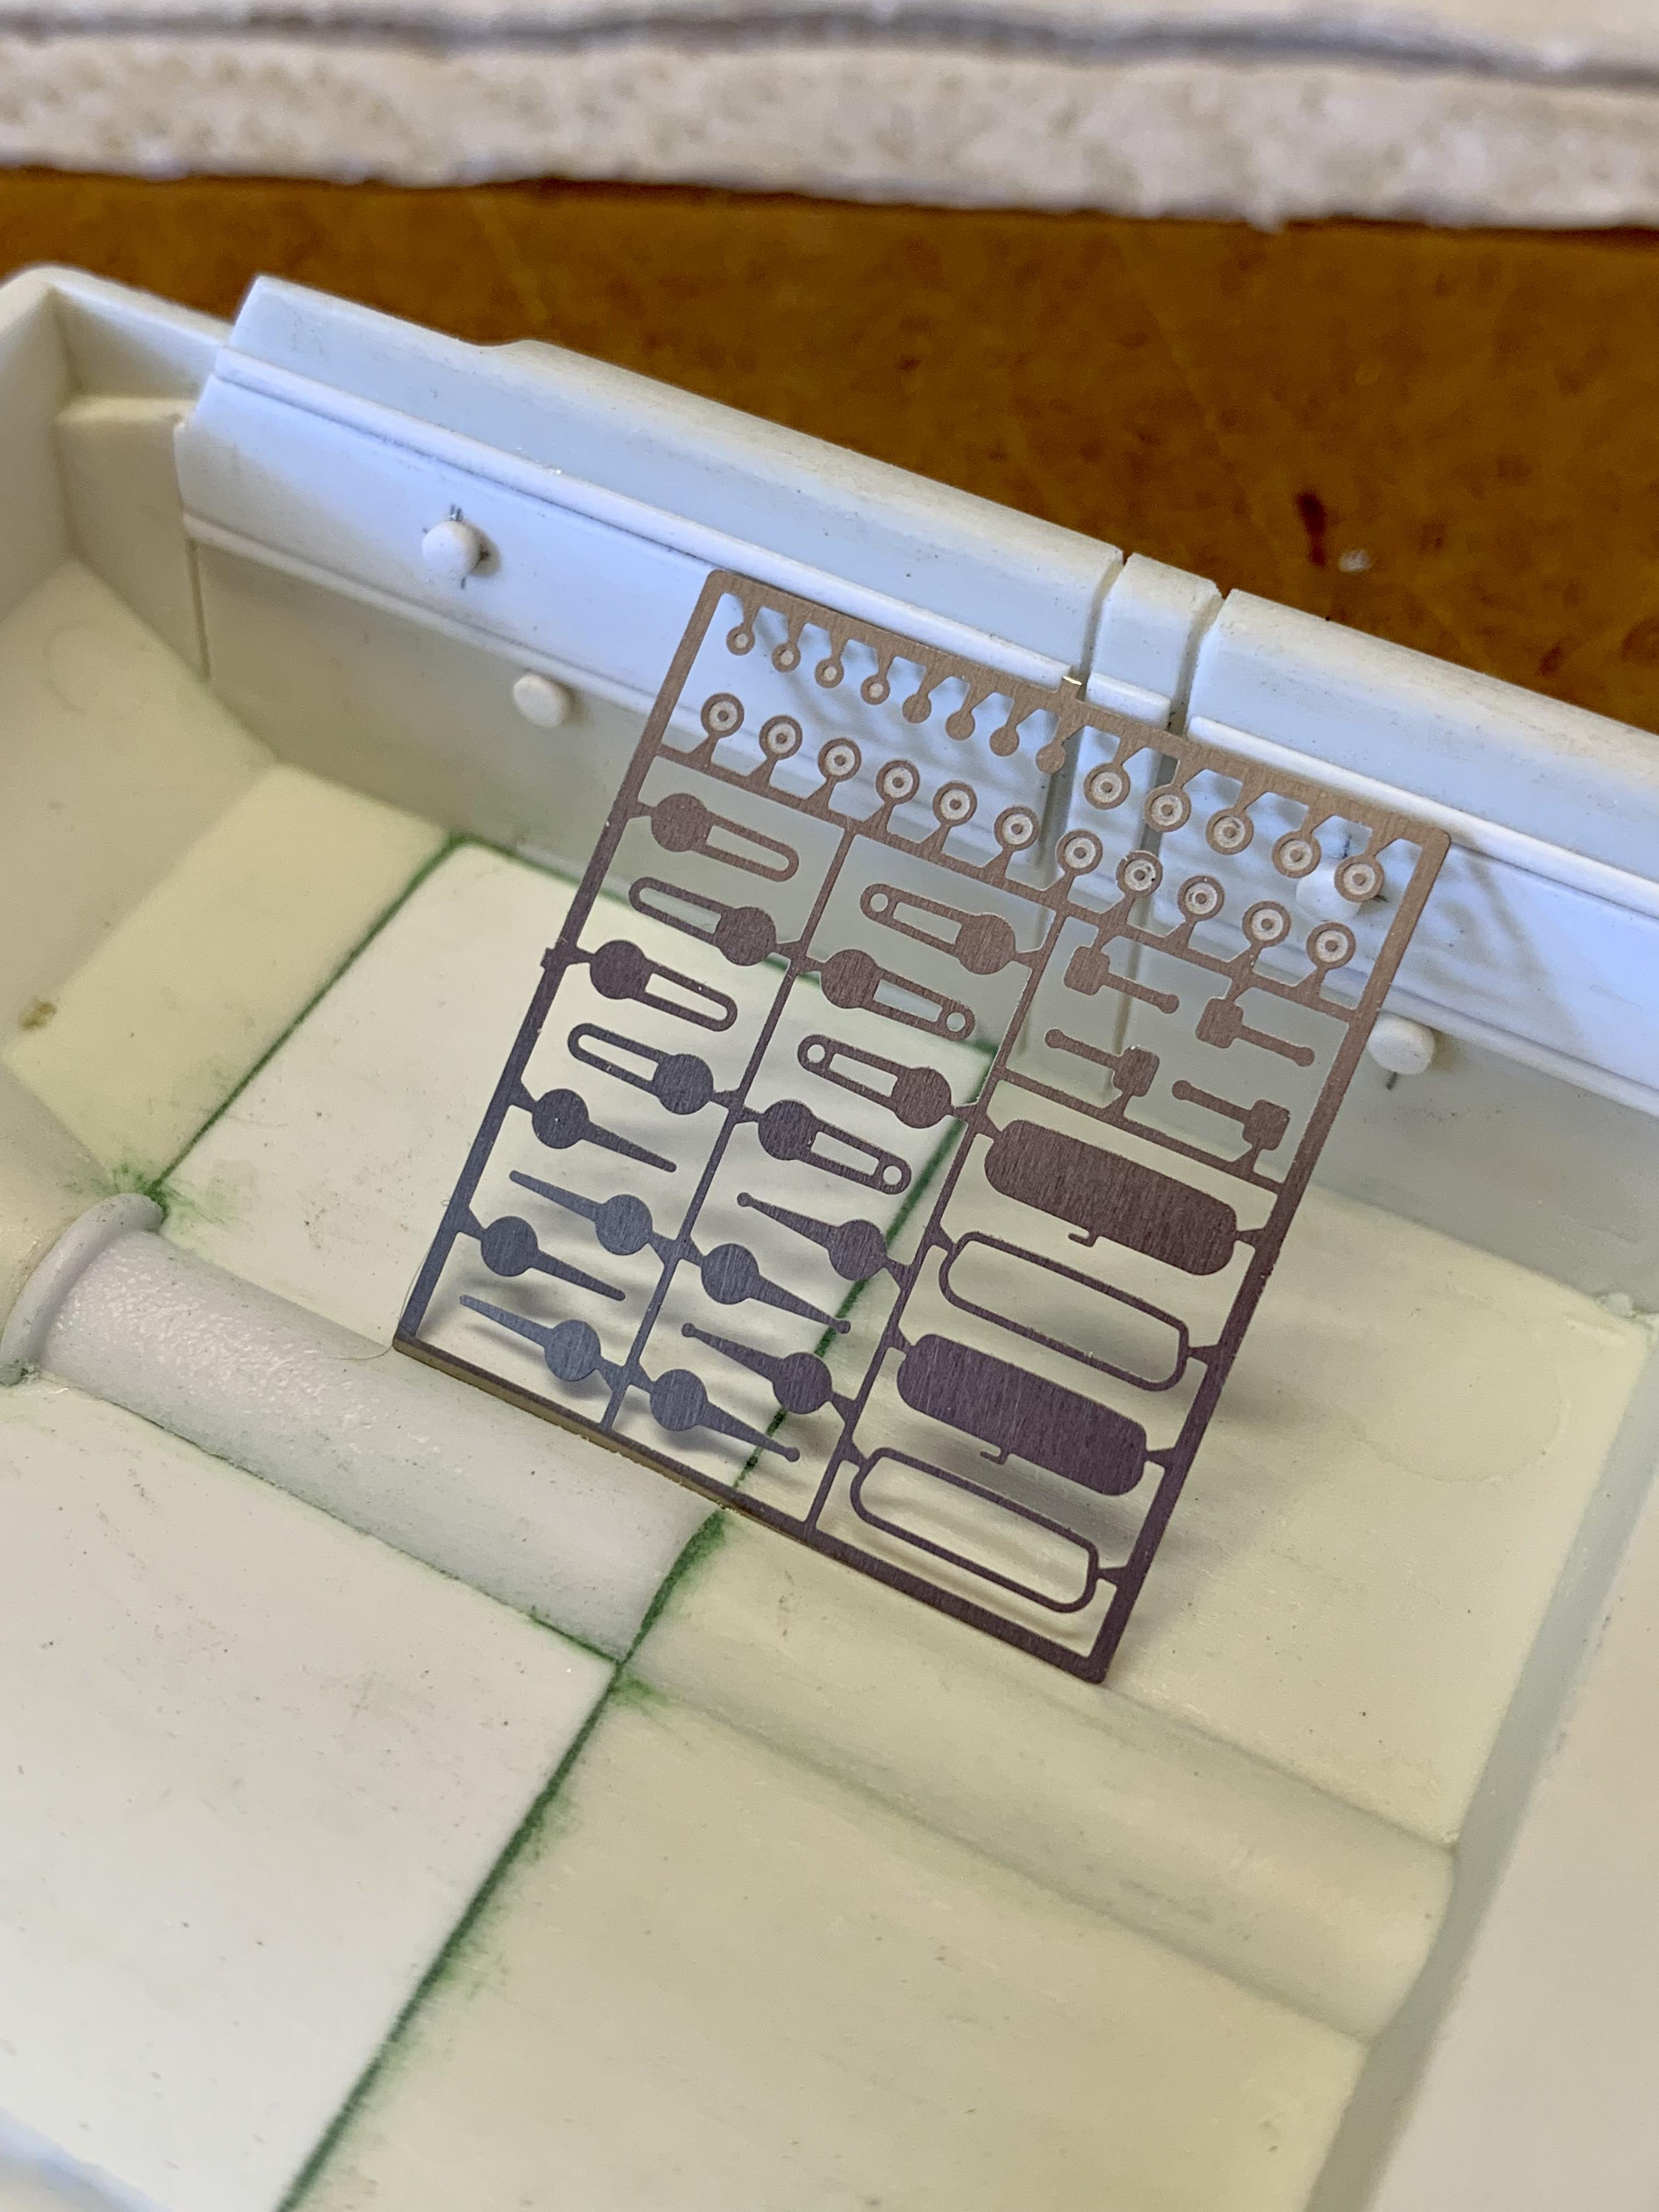
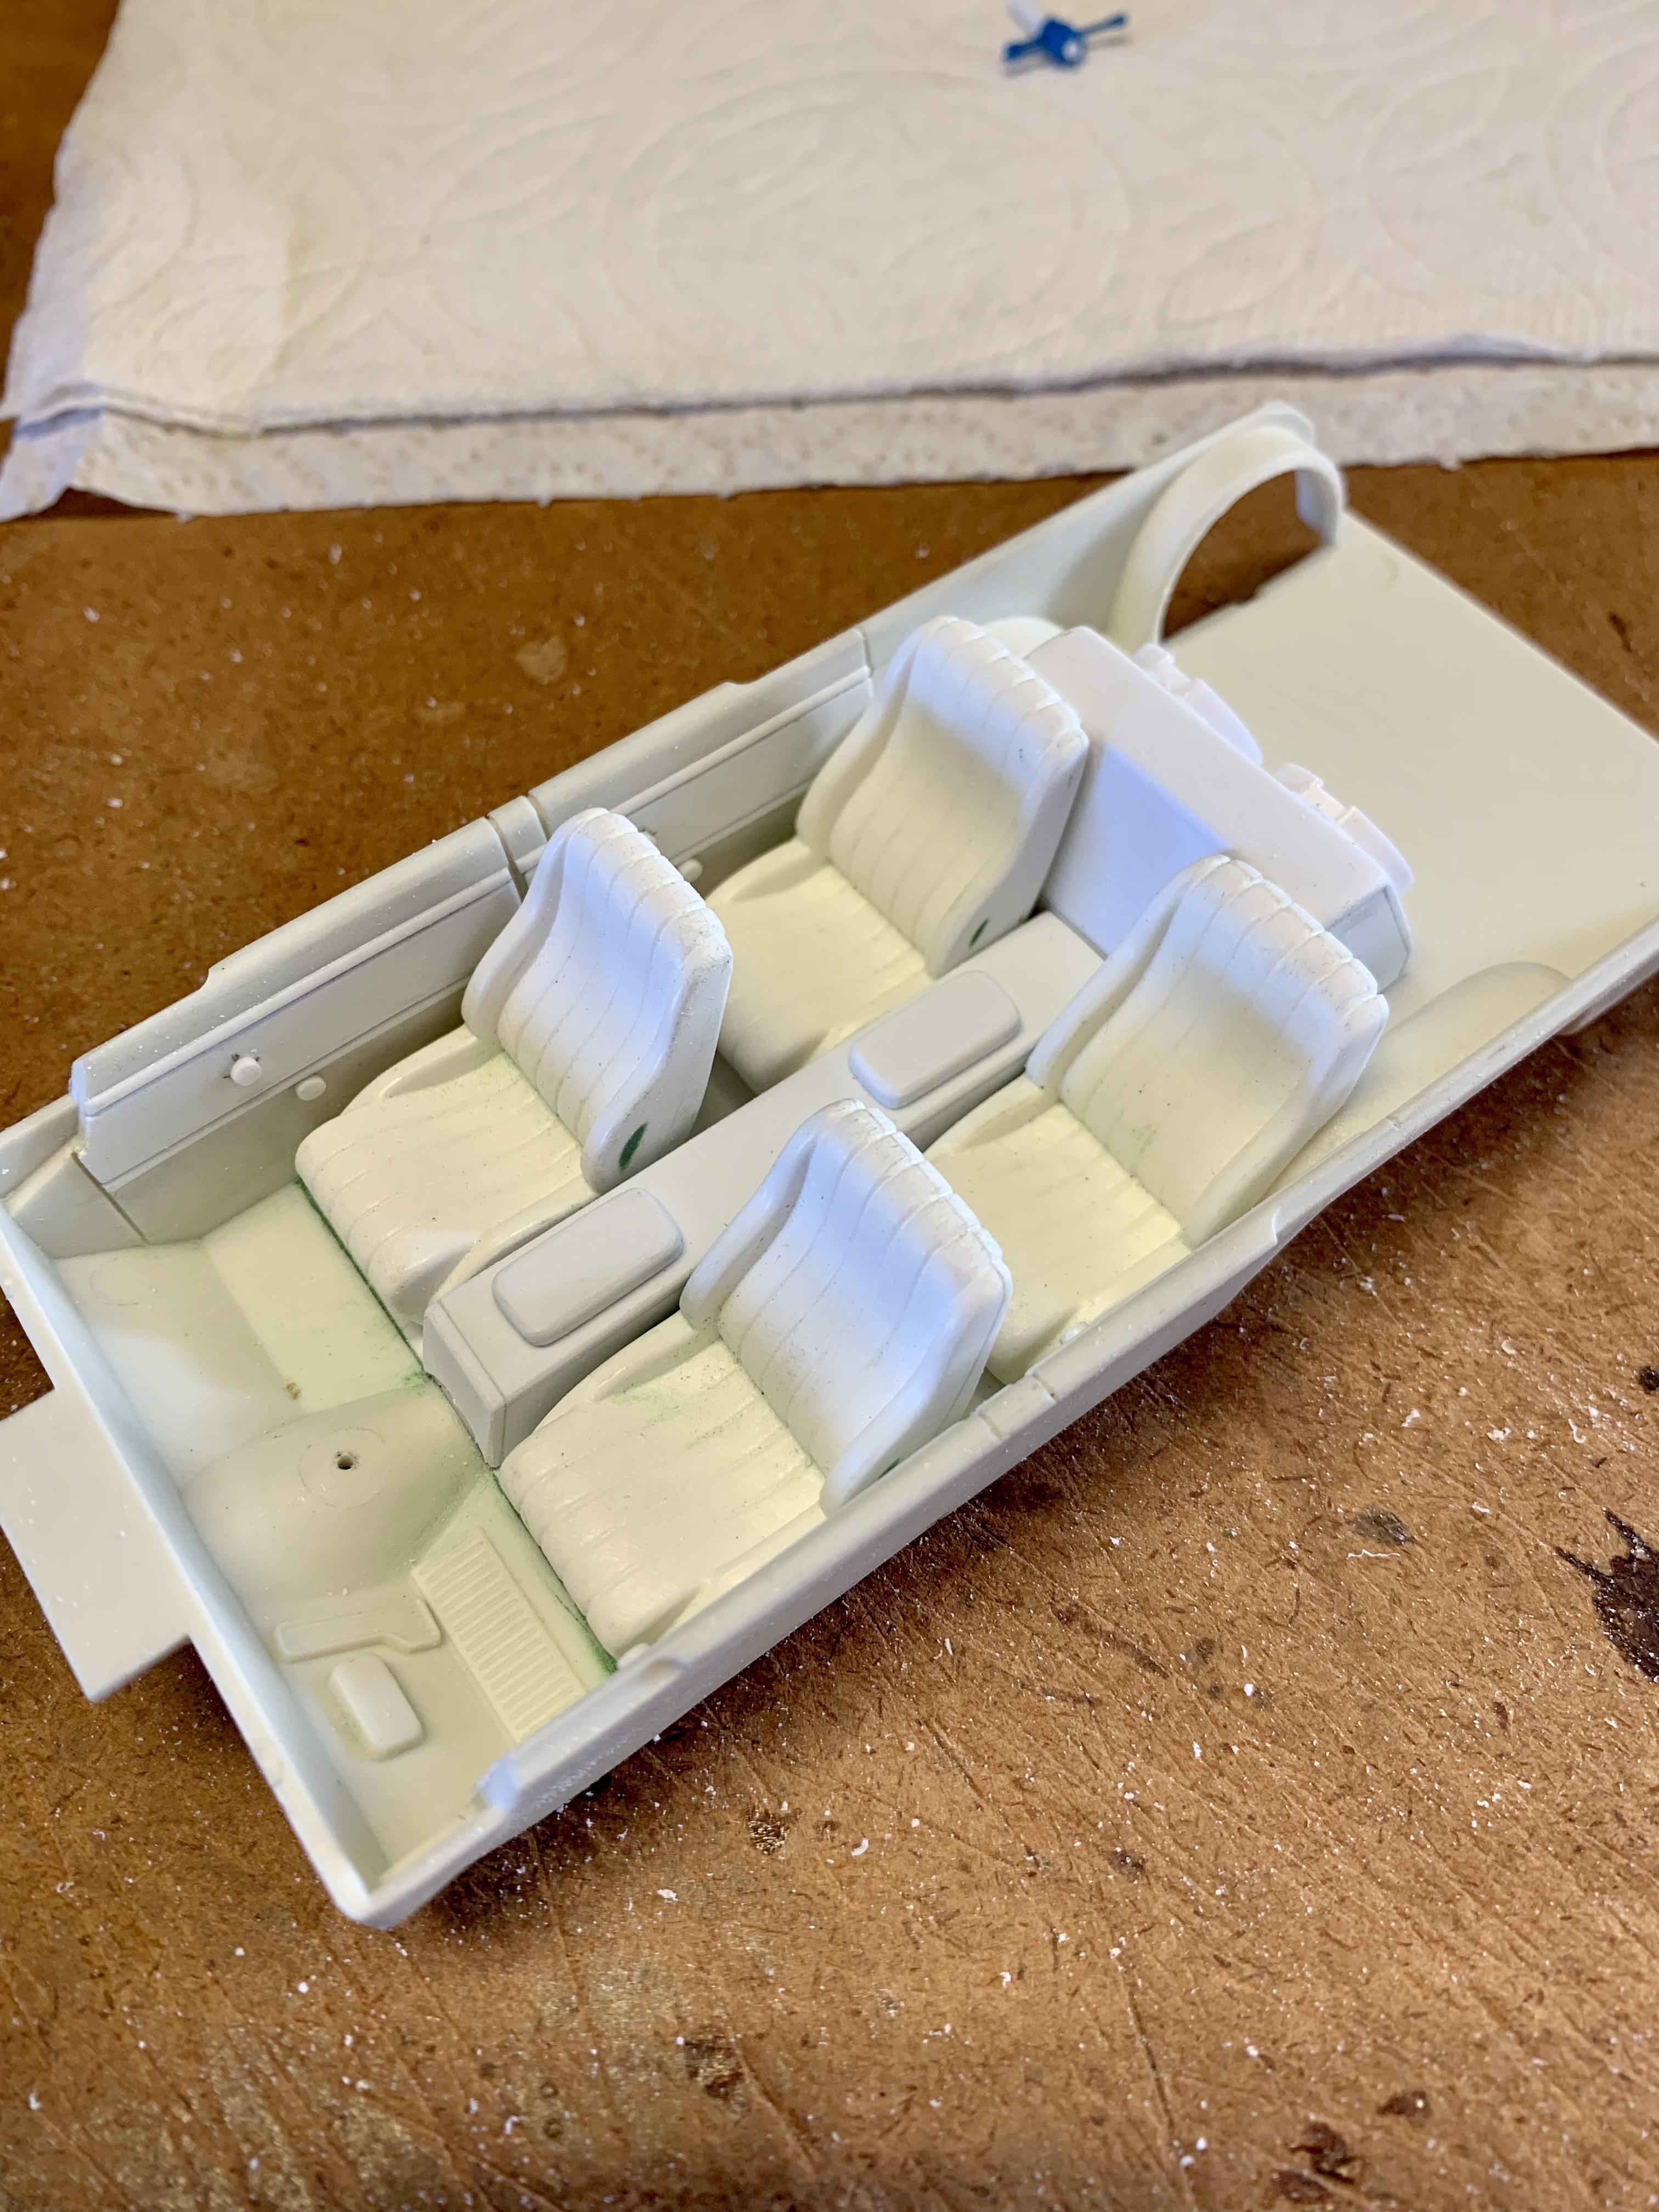
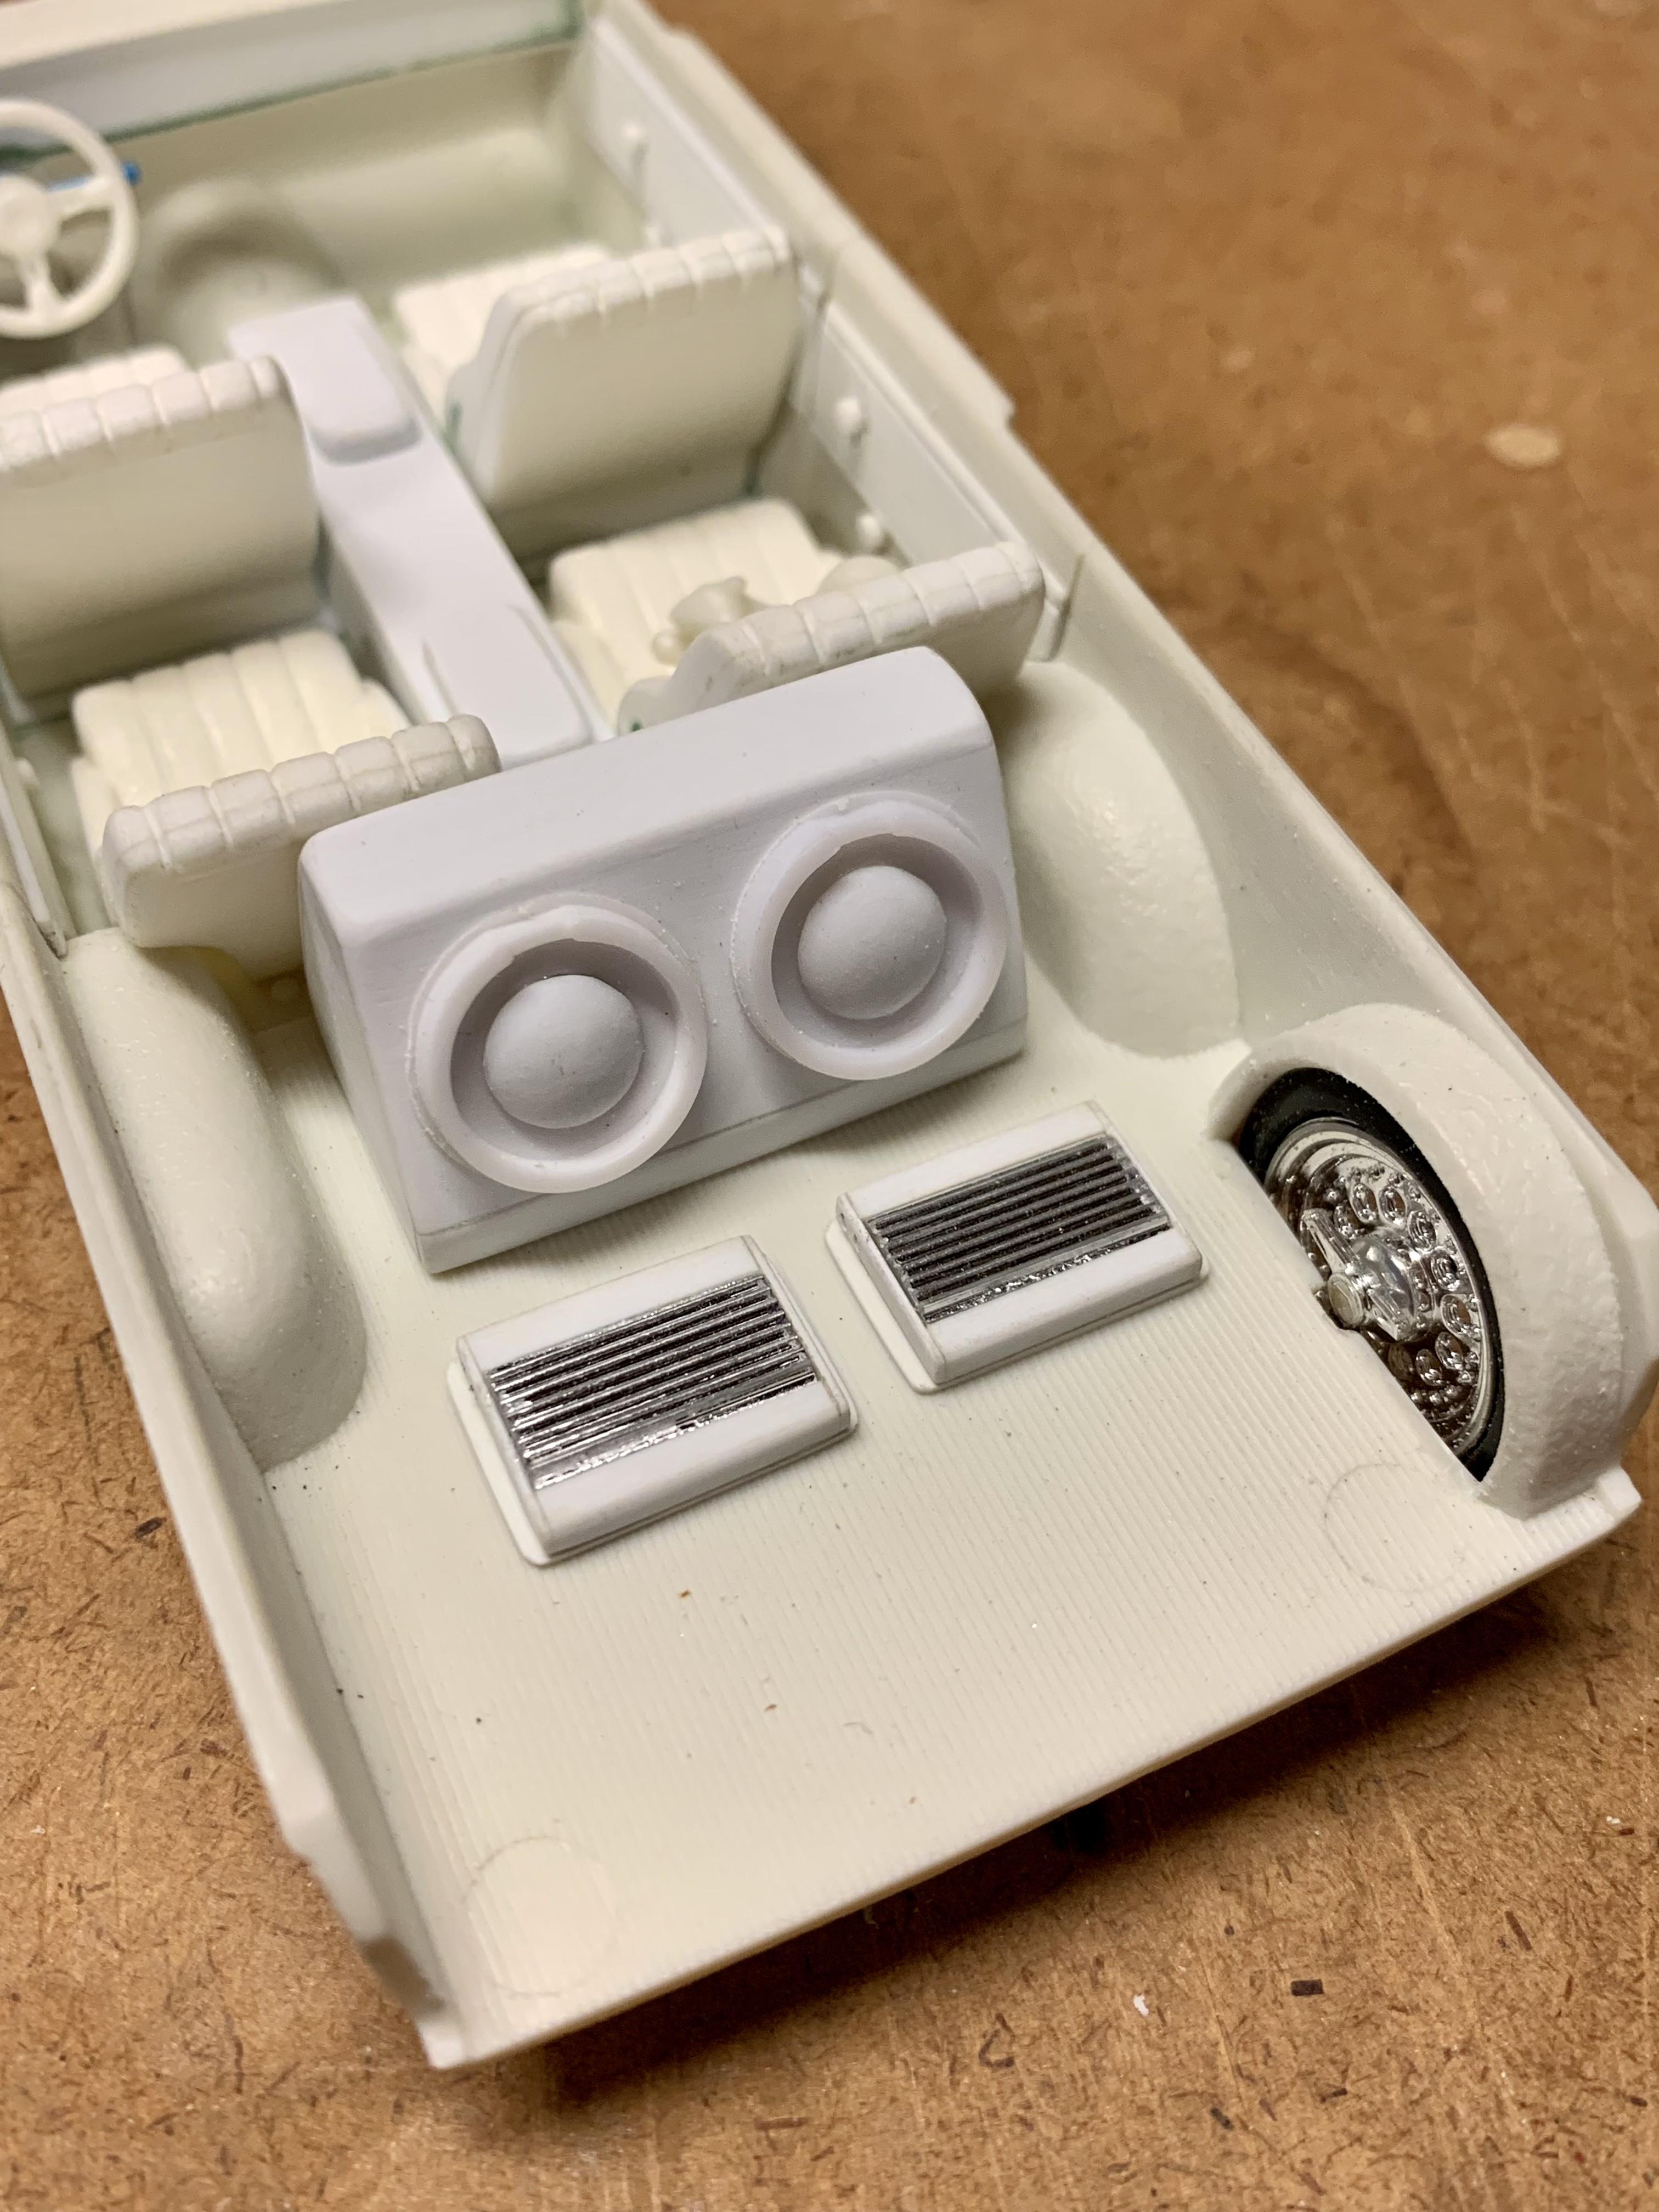
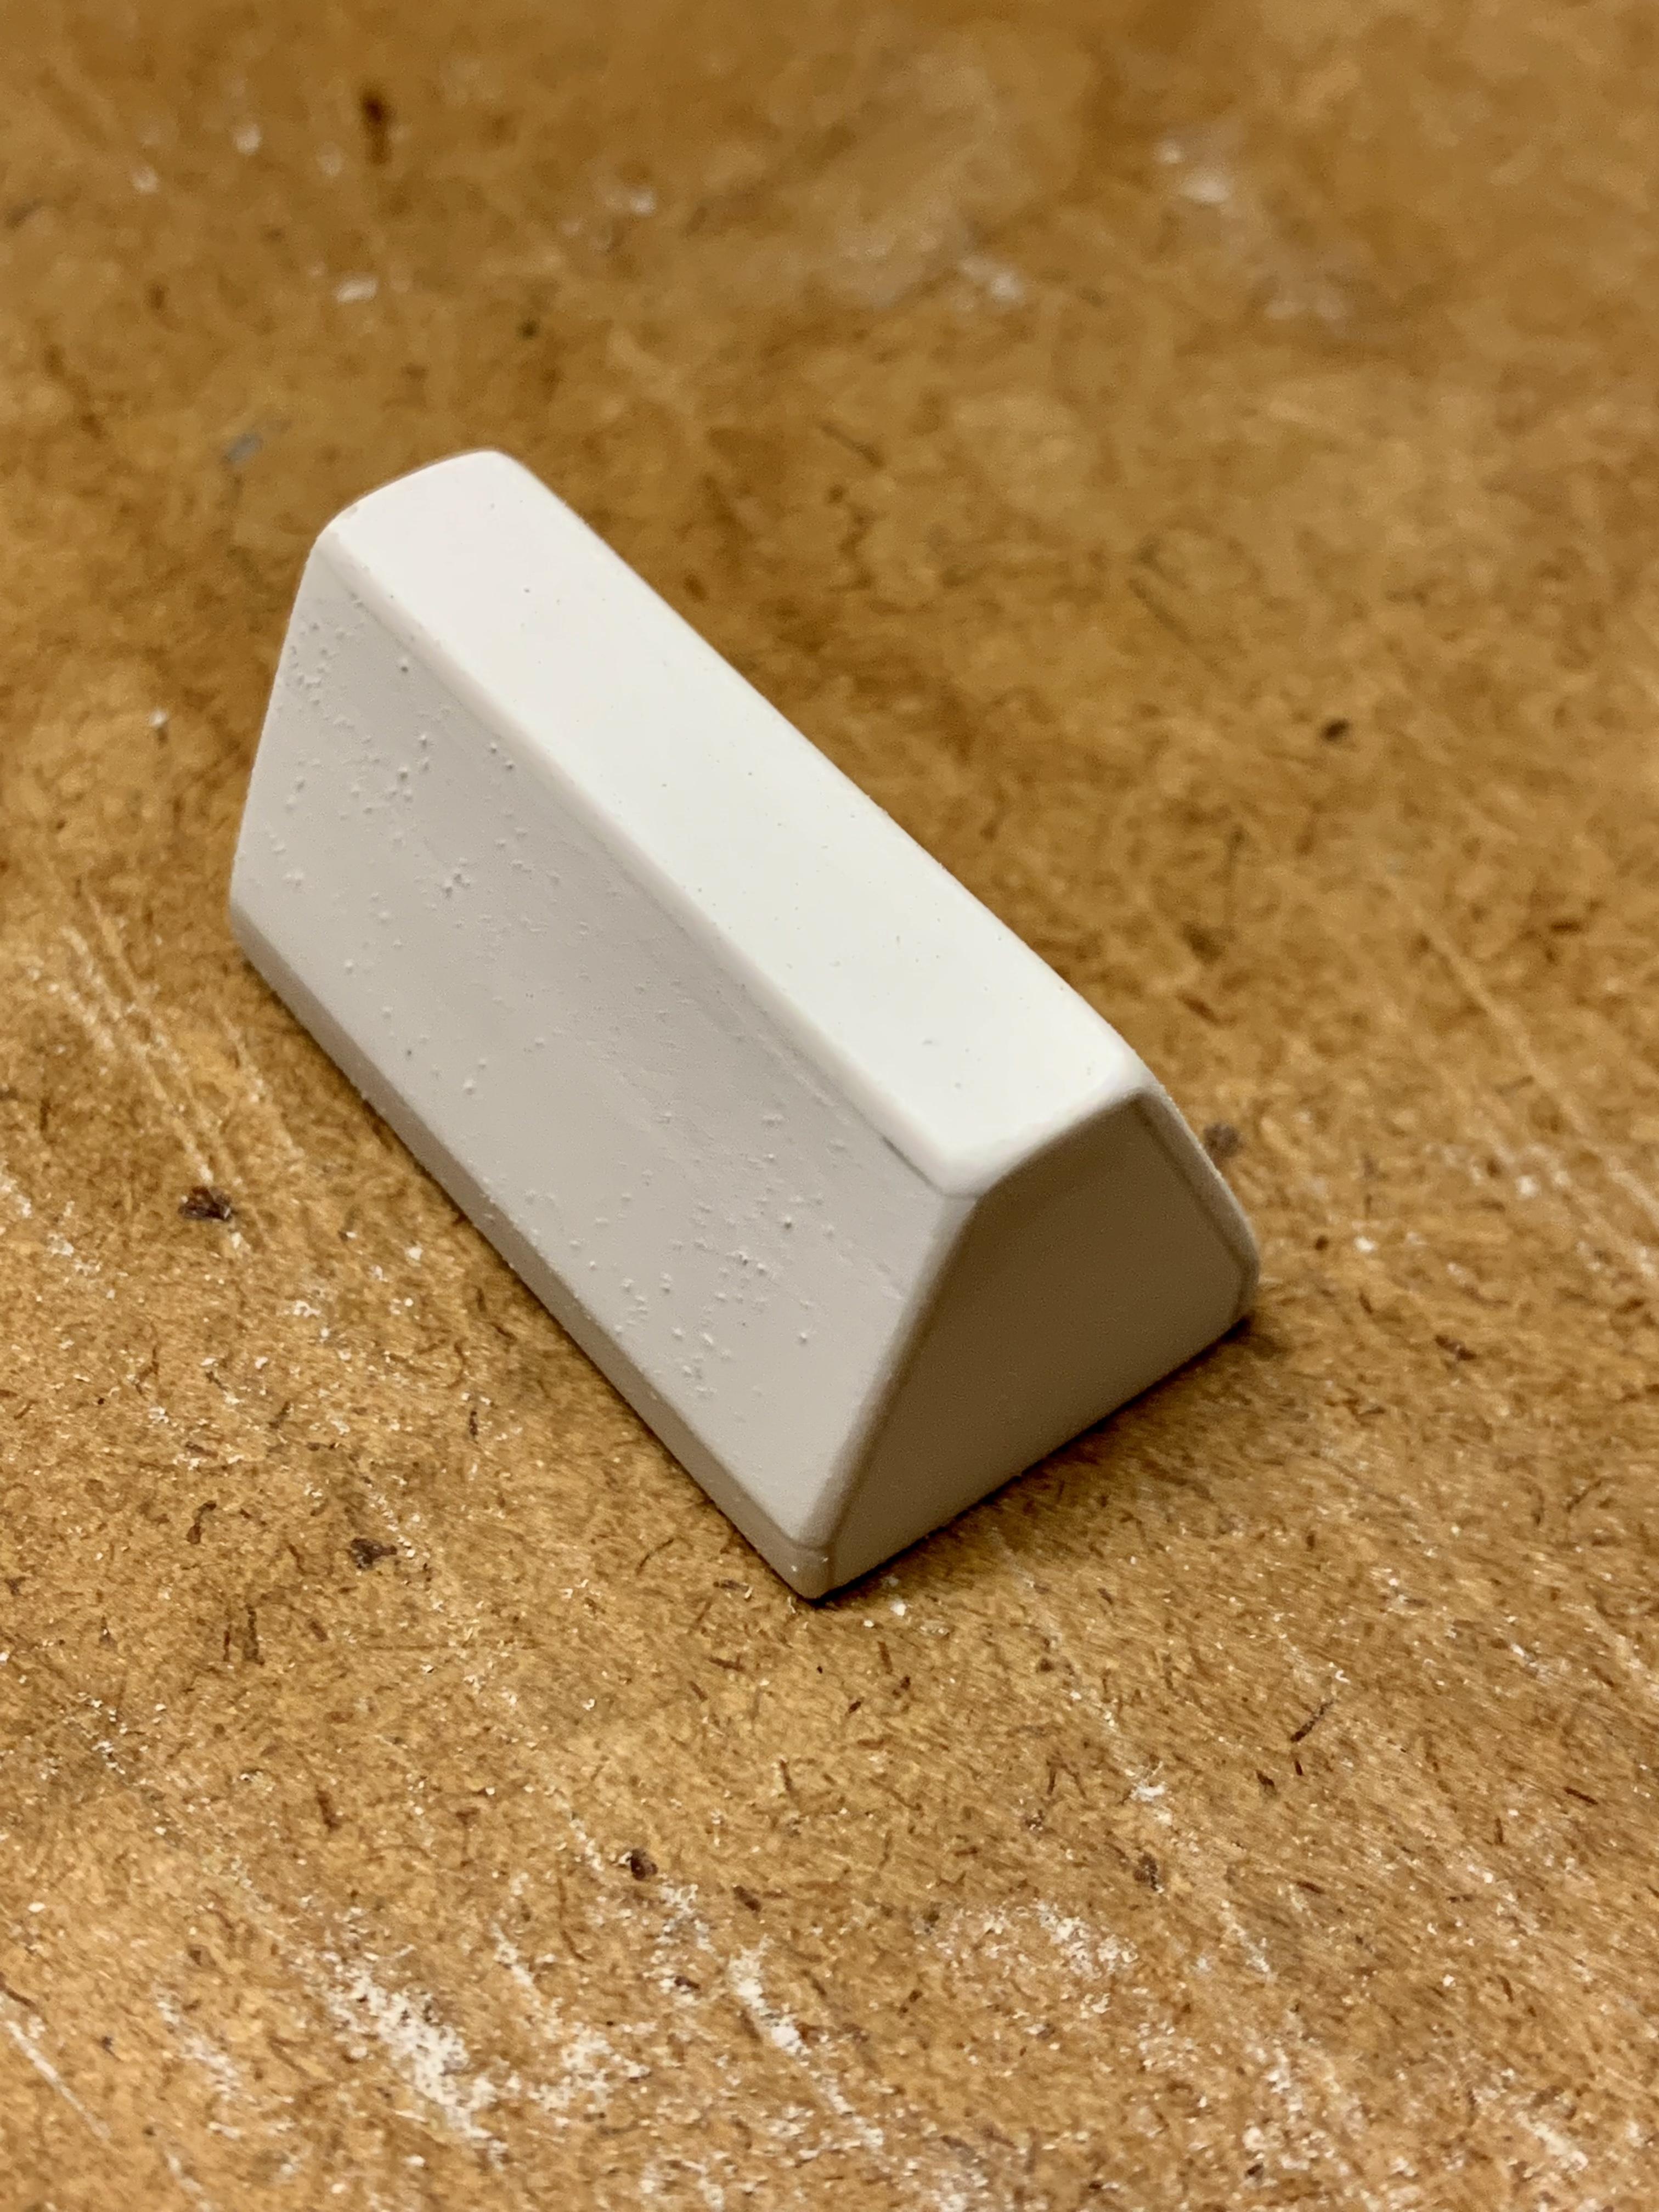
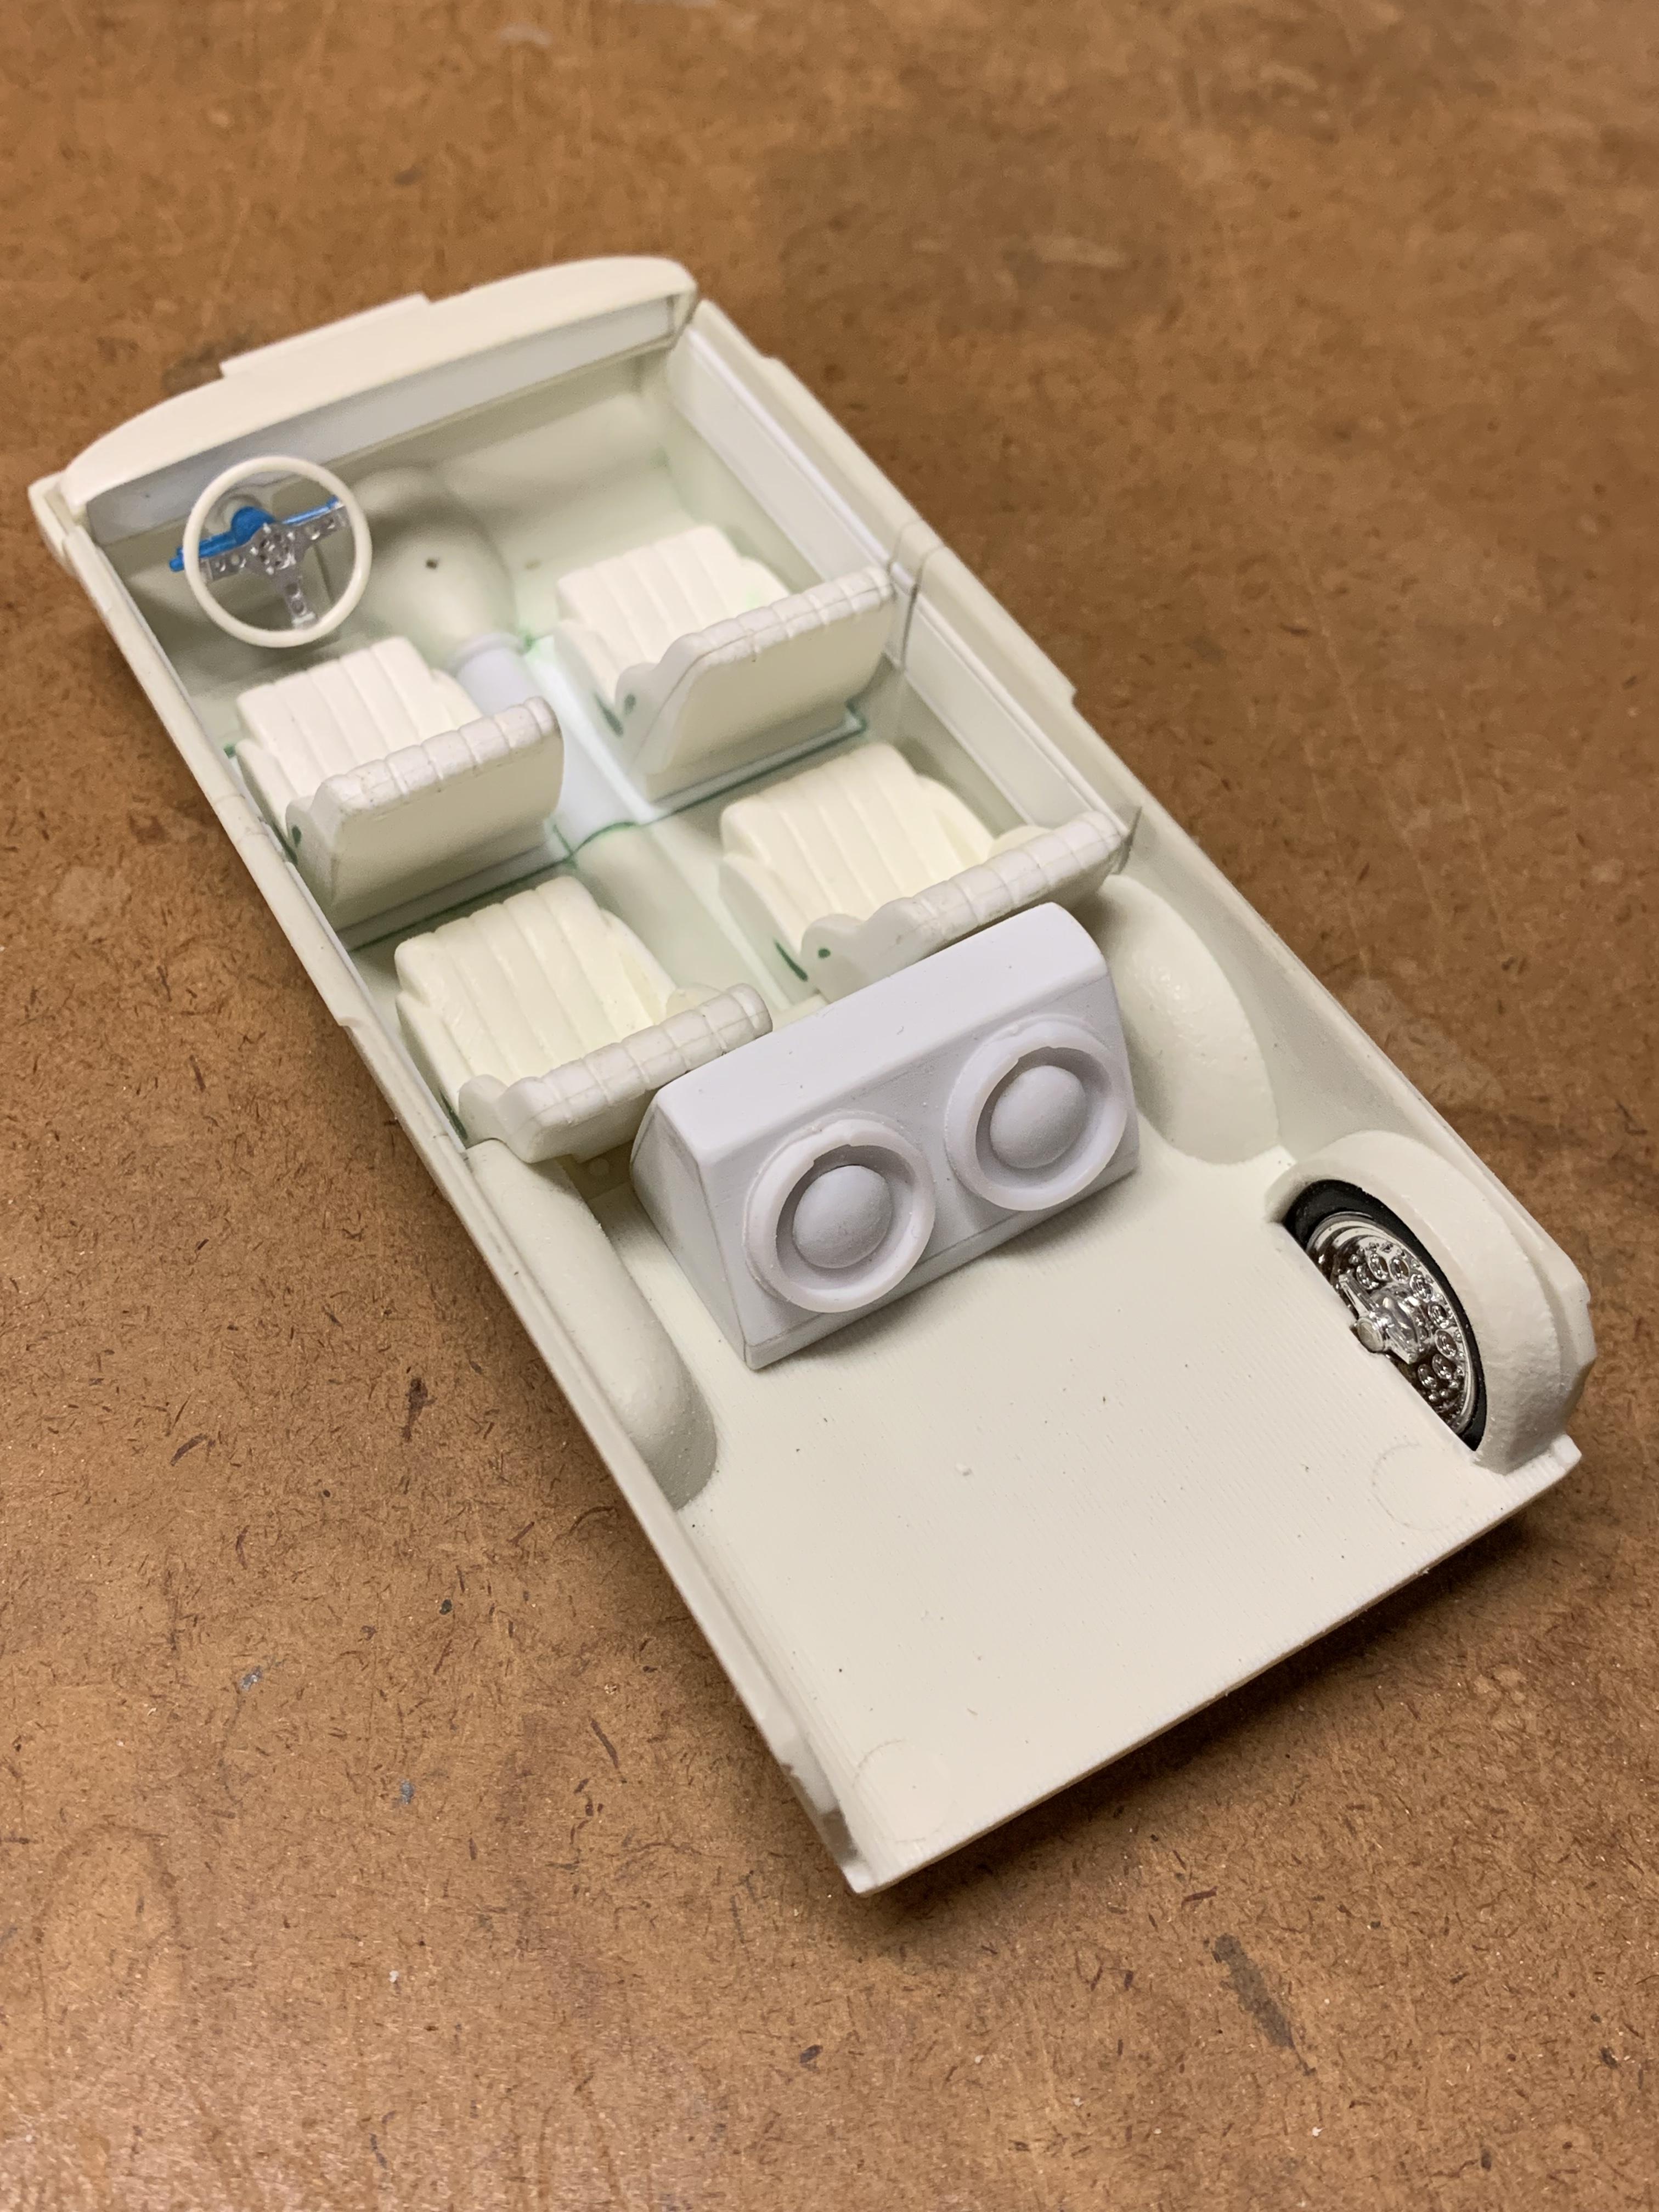
UPDATE: Today was a good day at the bench. Happy to say that the interior fabrication is complete, finally! Stubs were installed on the door panels made from .080” Evergreen rod to space the photo etched window and door handles and give them a surface to mount on. I decided that there definitely needed to be a center console so I build one from .040” Evergreen sheet then made some armrest pads from some of their rectangle stock. Lastly, to complete the stereo components in the cargo area I needed to come up with a pair of amplifiers. I put my biggest thinking cap on and then it hit me. I grabbed a pair of the custom finned air filters from an AMT ‘53 Ford Pickup, cut the rounded ends off so that they were a 1/2” long, thinned down the backside some, glued some rectangle stock to the top and bottom edges, glued some .020” thick strips to cap the ends, trimmed and shaped as desired then added a .020” thick base plate with material left at each end for mounting flanges. I think the results are actually pretty darn convincing! Here is the final interior mock up. It sure has come a long way from stock! The amps will get some basic power and ground cables routed to better bring them to life. If you look close at the picture with a red circle you’ll see that I also included the little squirrel mascot that comes in the kit. Like the ‘57 Chevy Custom I recently finished I’m gonna make it a point to use these little guys when provided because no one ever does! In this case, since the car is a 4-seater I’ll say that the scale owner has a young daughter that takes her squirrel stuffed animal everywhere she goes. Next step, primer and paint!
-
1/25 Atlantis H1223 Mooneyes Dragster
Dennis Lacy replied to Casey's topic in Car Kit News & Reviews
I found one local yesterday and it followed me home. Very pleased with the contents and looking forward to digging in very soon. -
1963 Chevy Nova Wagon Street Rod FINISHED 3/20/22
Dennis Lacy replied to Dennis Lacy's topic in WIP: Model Cars
Thanks Alan! I’m having a lot of fun building this wagon. It’s been pushing my creativity because I have never built a model of a 60’s car before so I’m totally winging it here! That’s an interesting idea for the speakers that I could see working. Especially on something with limited visibility into the interior. -
Wow, at this stage in the game I would never have expected a body correction. This is awesome! I never said anything about the window height being short when everyone else was frothing at the mouth, it wasn’t gonna keep me from buying and building one so I stayed out of it. But, I could definitely see it and was prepared to help it using Tim Boyd’s suggestion. Now I won’t have to! Big applause to you for stepping up and correcting it. You just guaranteed a TON more sales.
-
Thanks, Tim! I’m still smiling about it!
-
I actually get that reference!
-
I got mine yesterday and was absolutely blown away to see a 2 page spread with HUGE pictures on my ‘27 T Touring hot rod. First ink I’ve ever had. Whoever made that decision, THANK YOU!!! ?
-
1963 Chevy Nova Wagon Street Rod FINISHED 3/20/22
Dennis Lacy replied to Dennis Lacy's topic in WIP: Model Cars
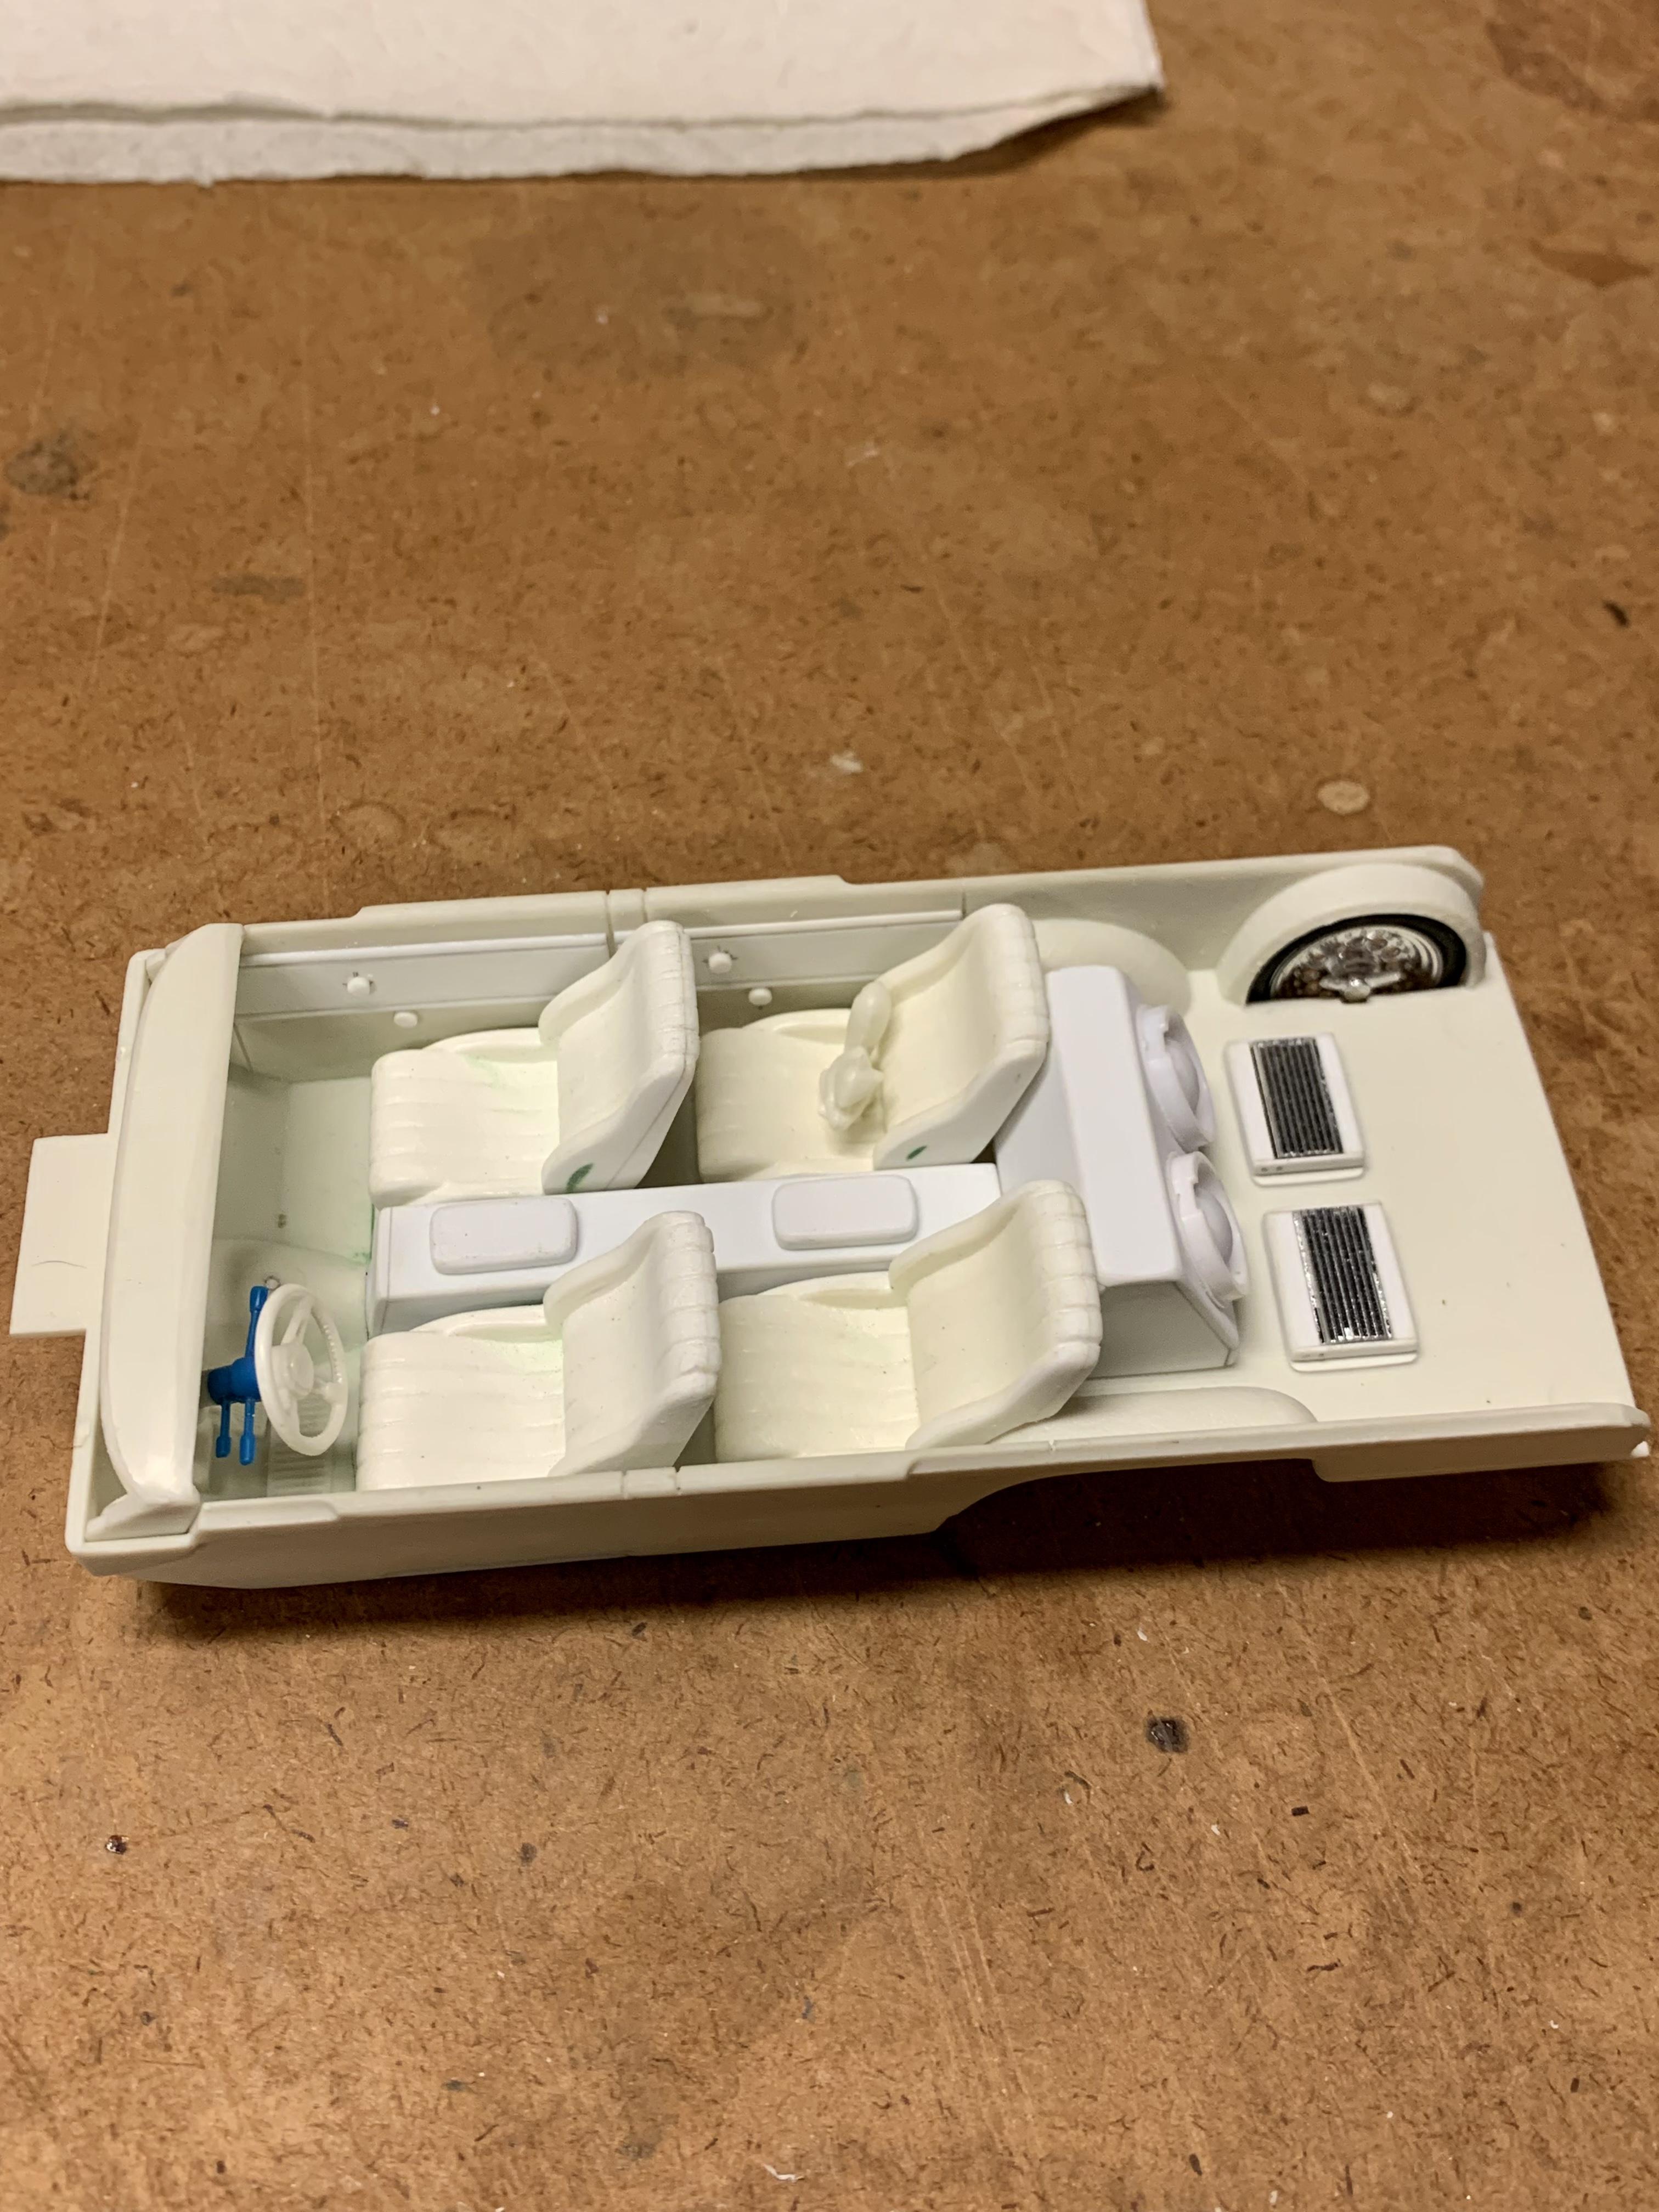
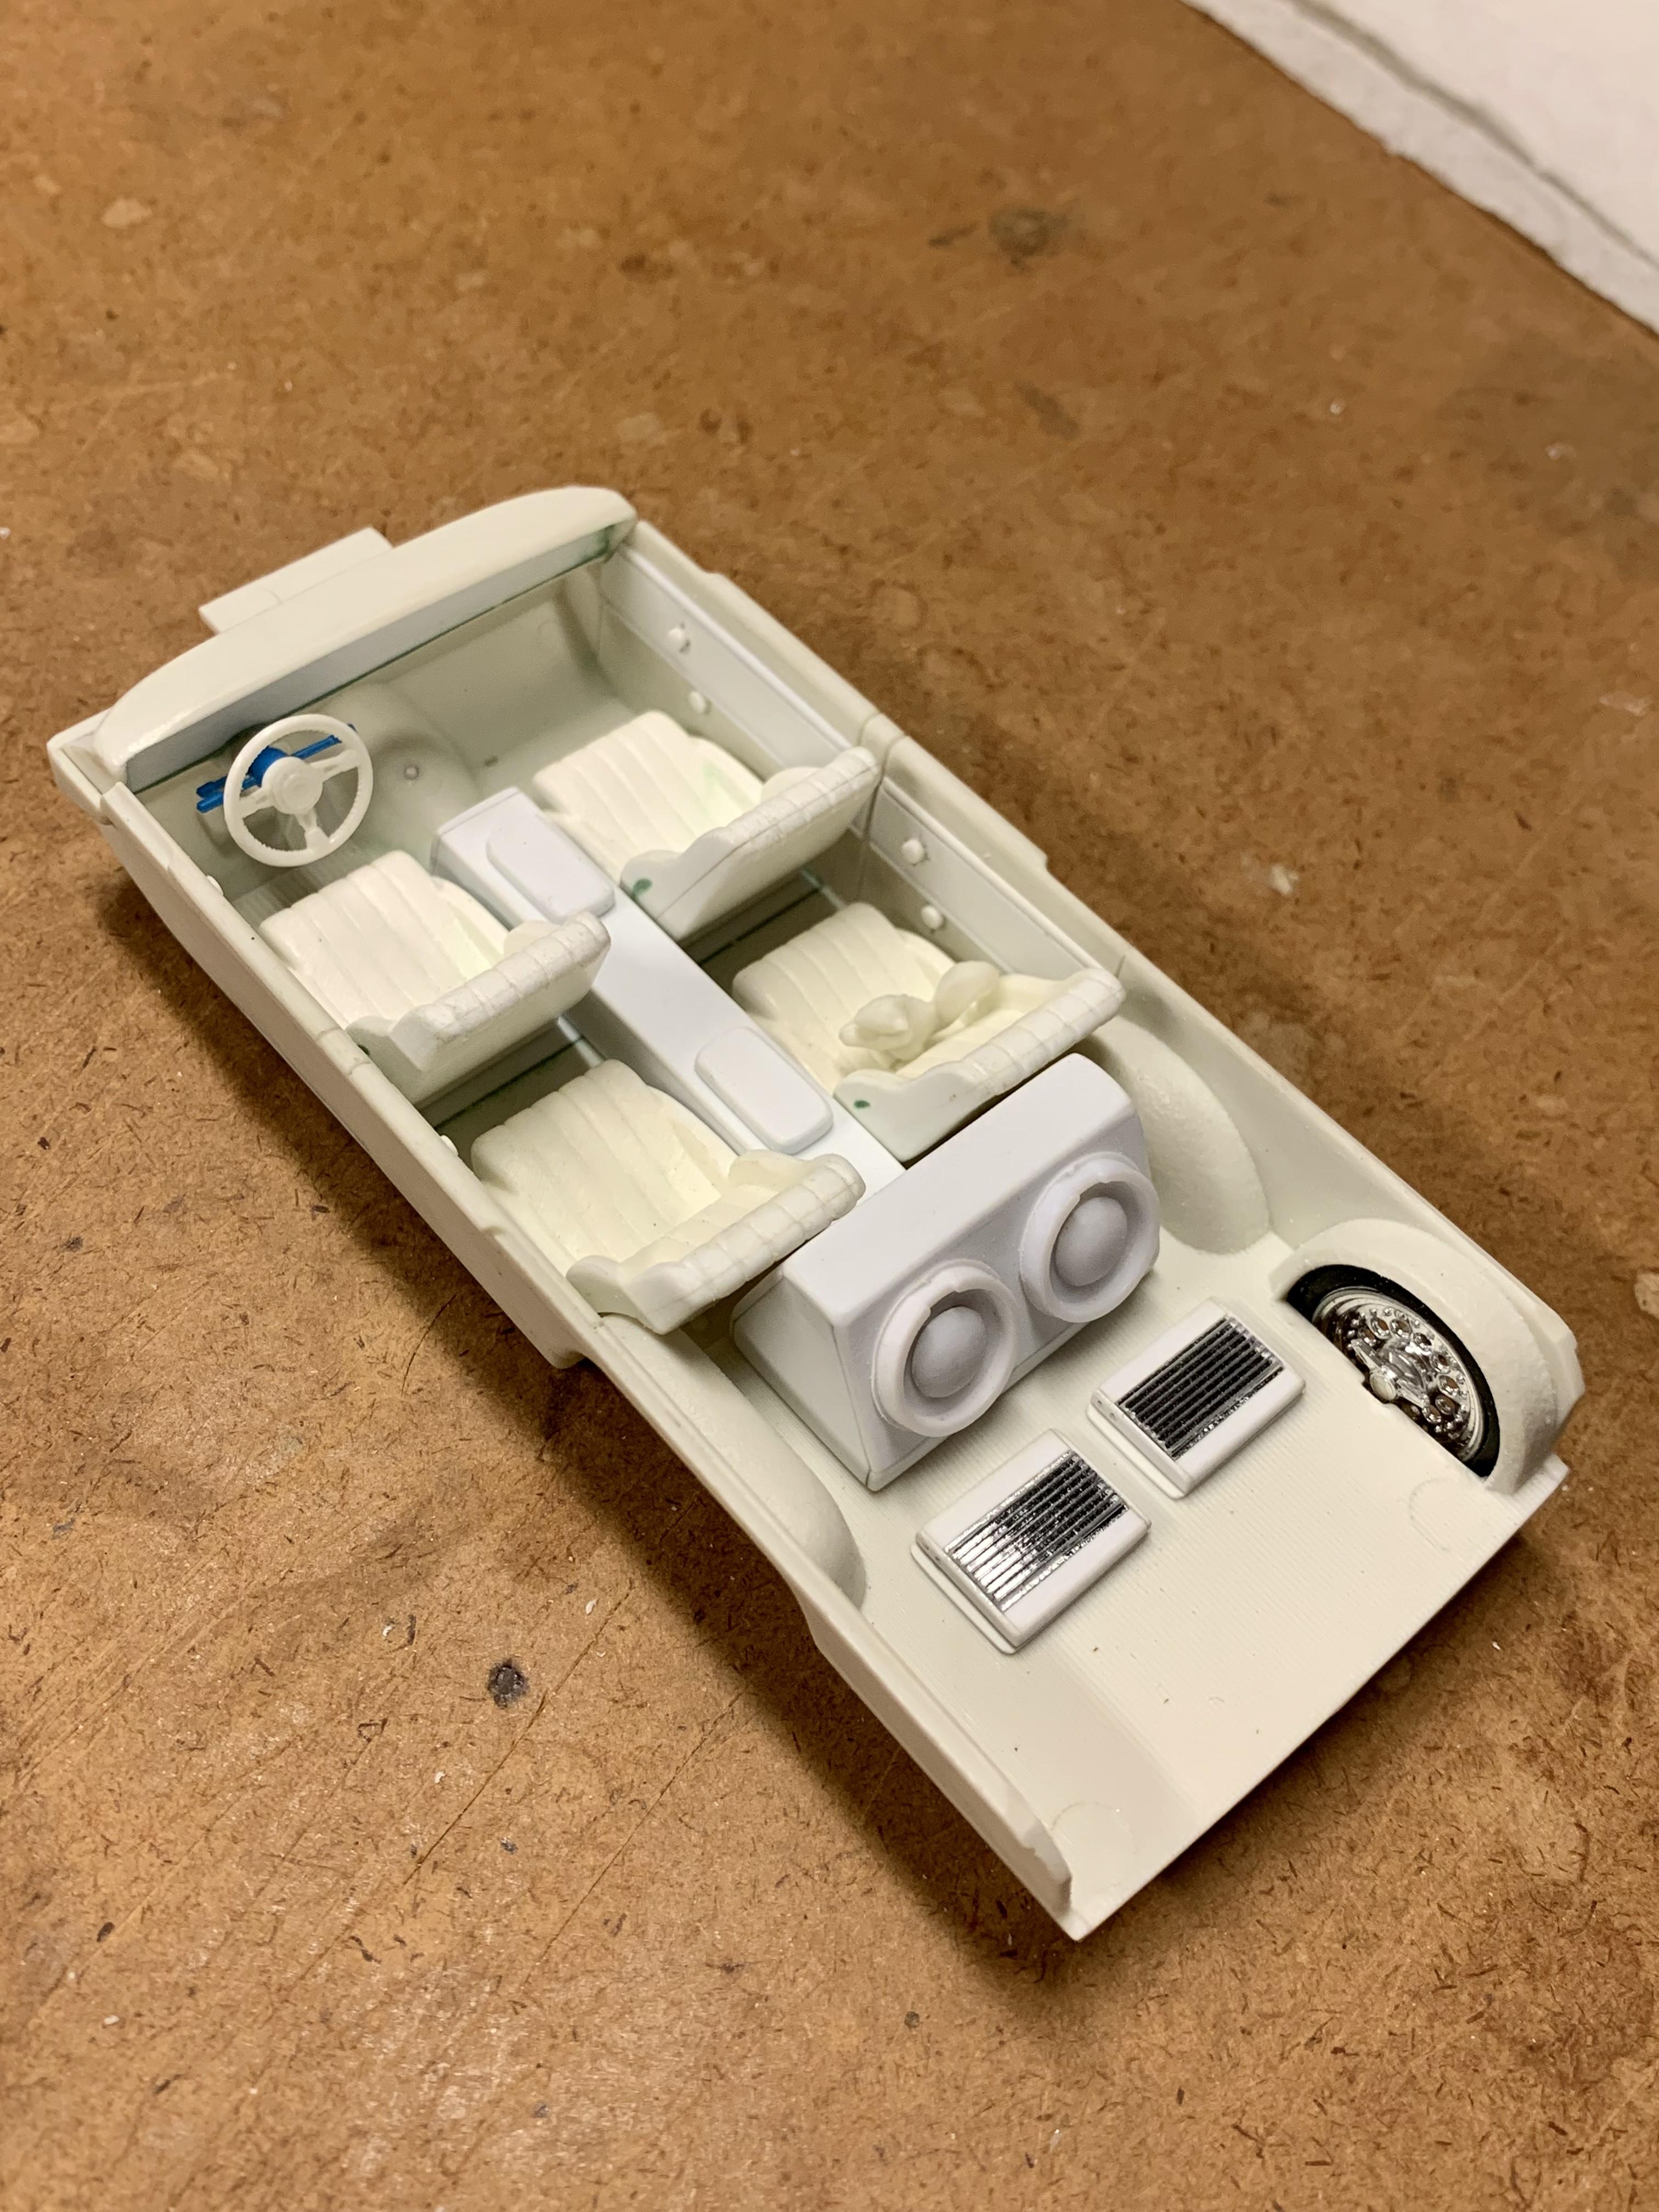
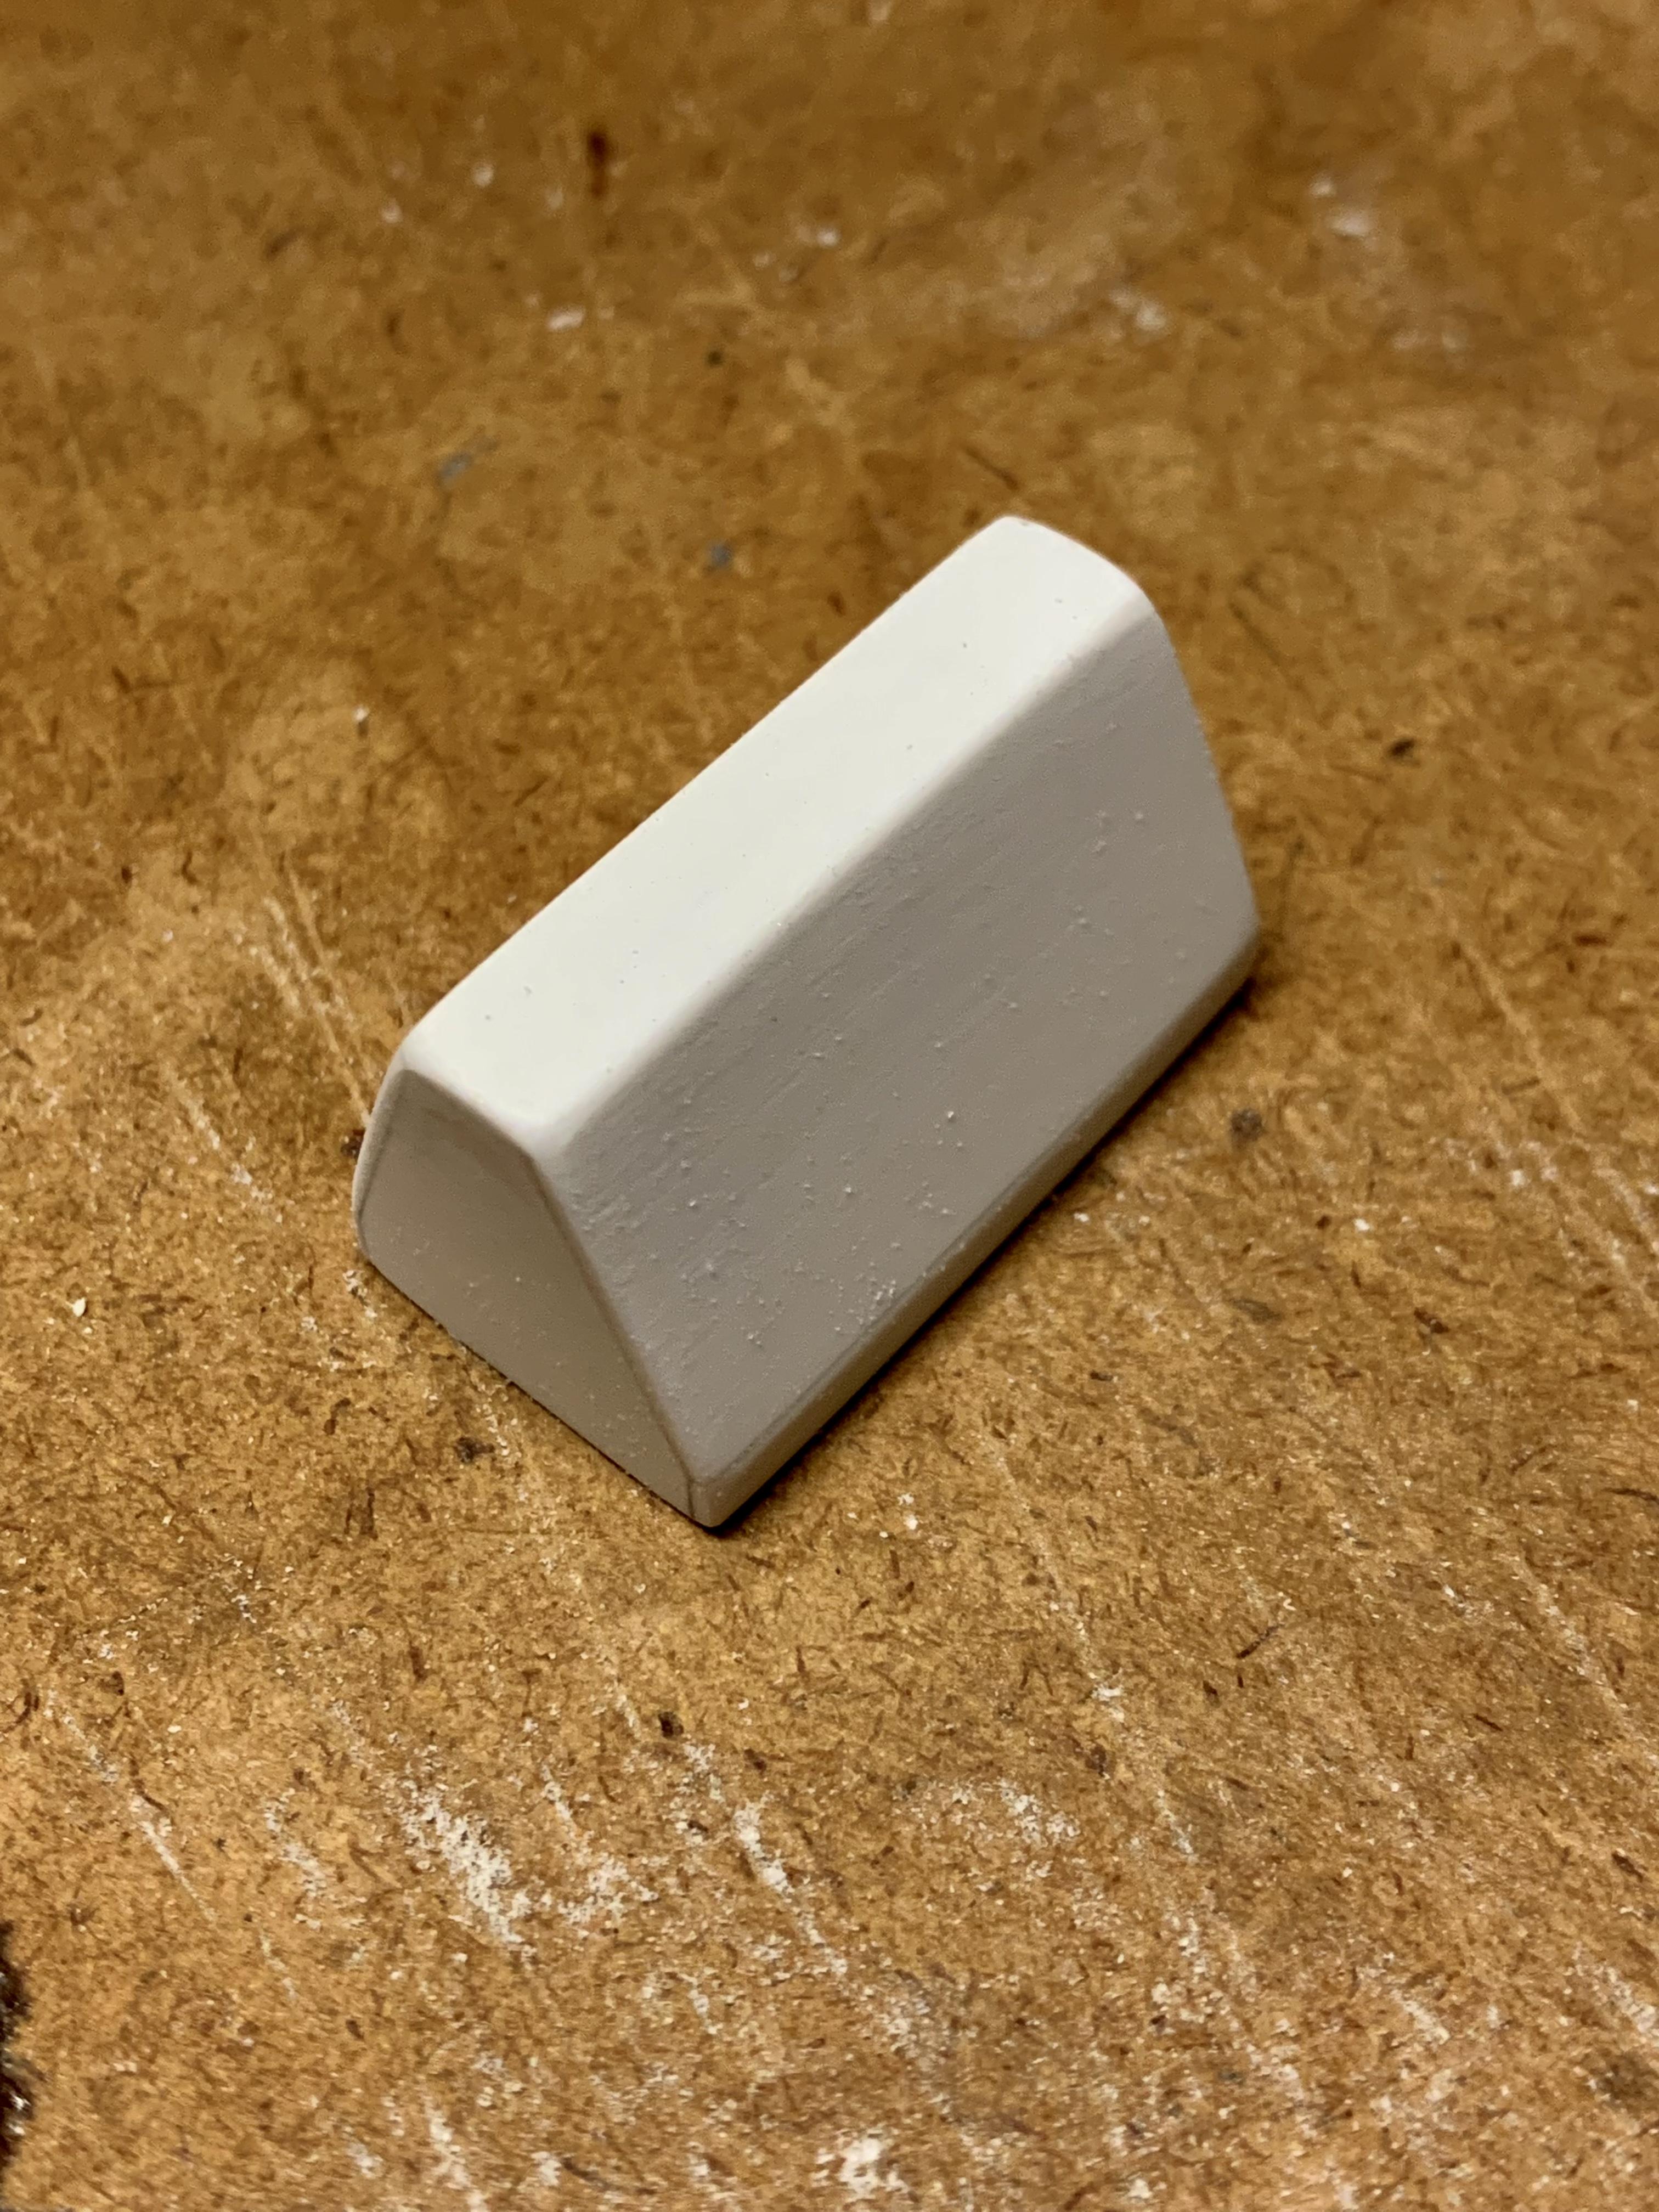
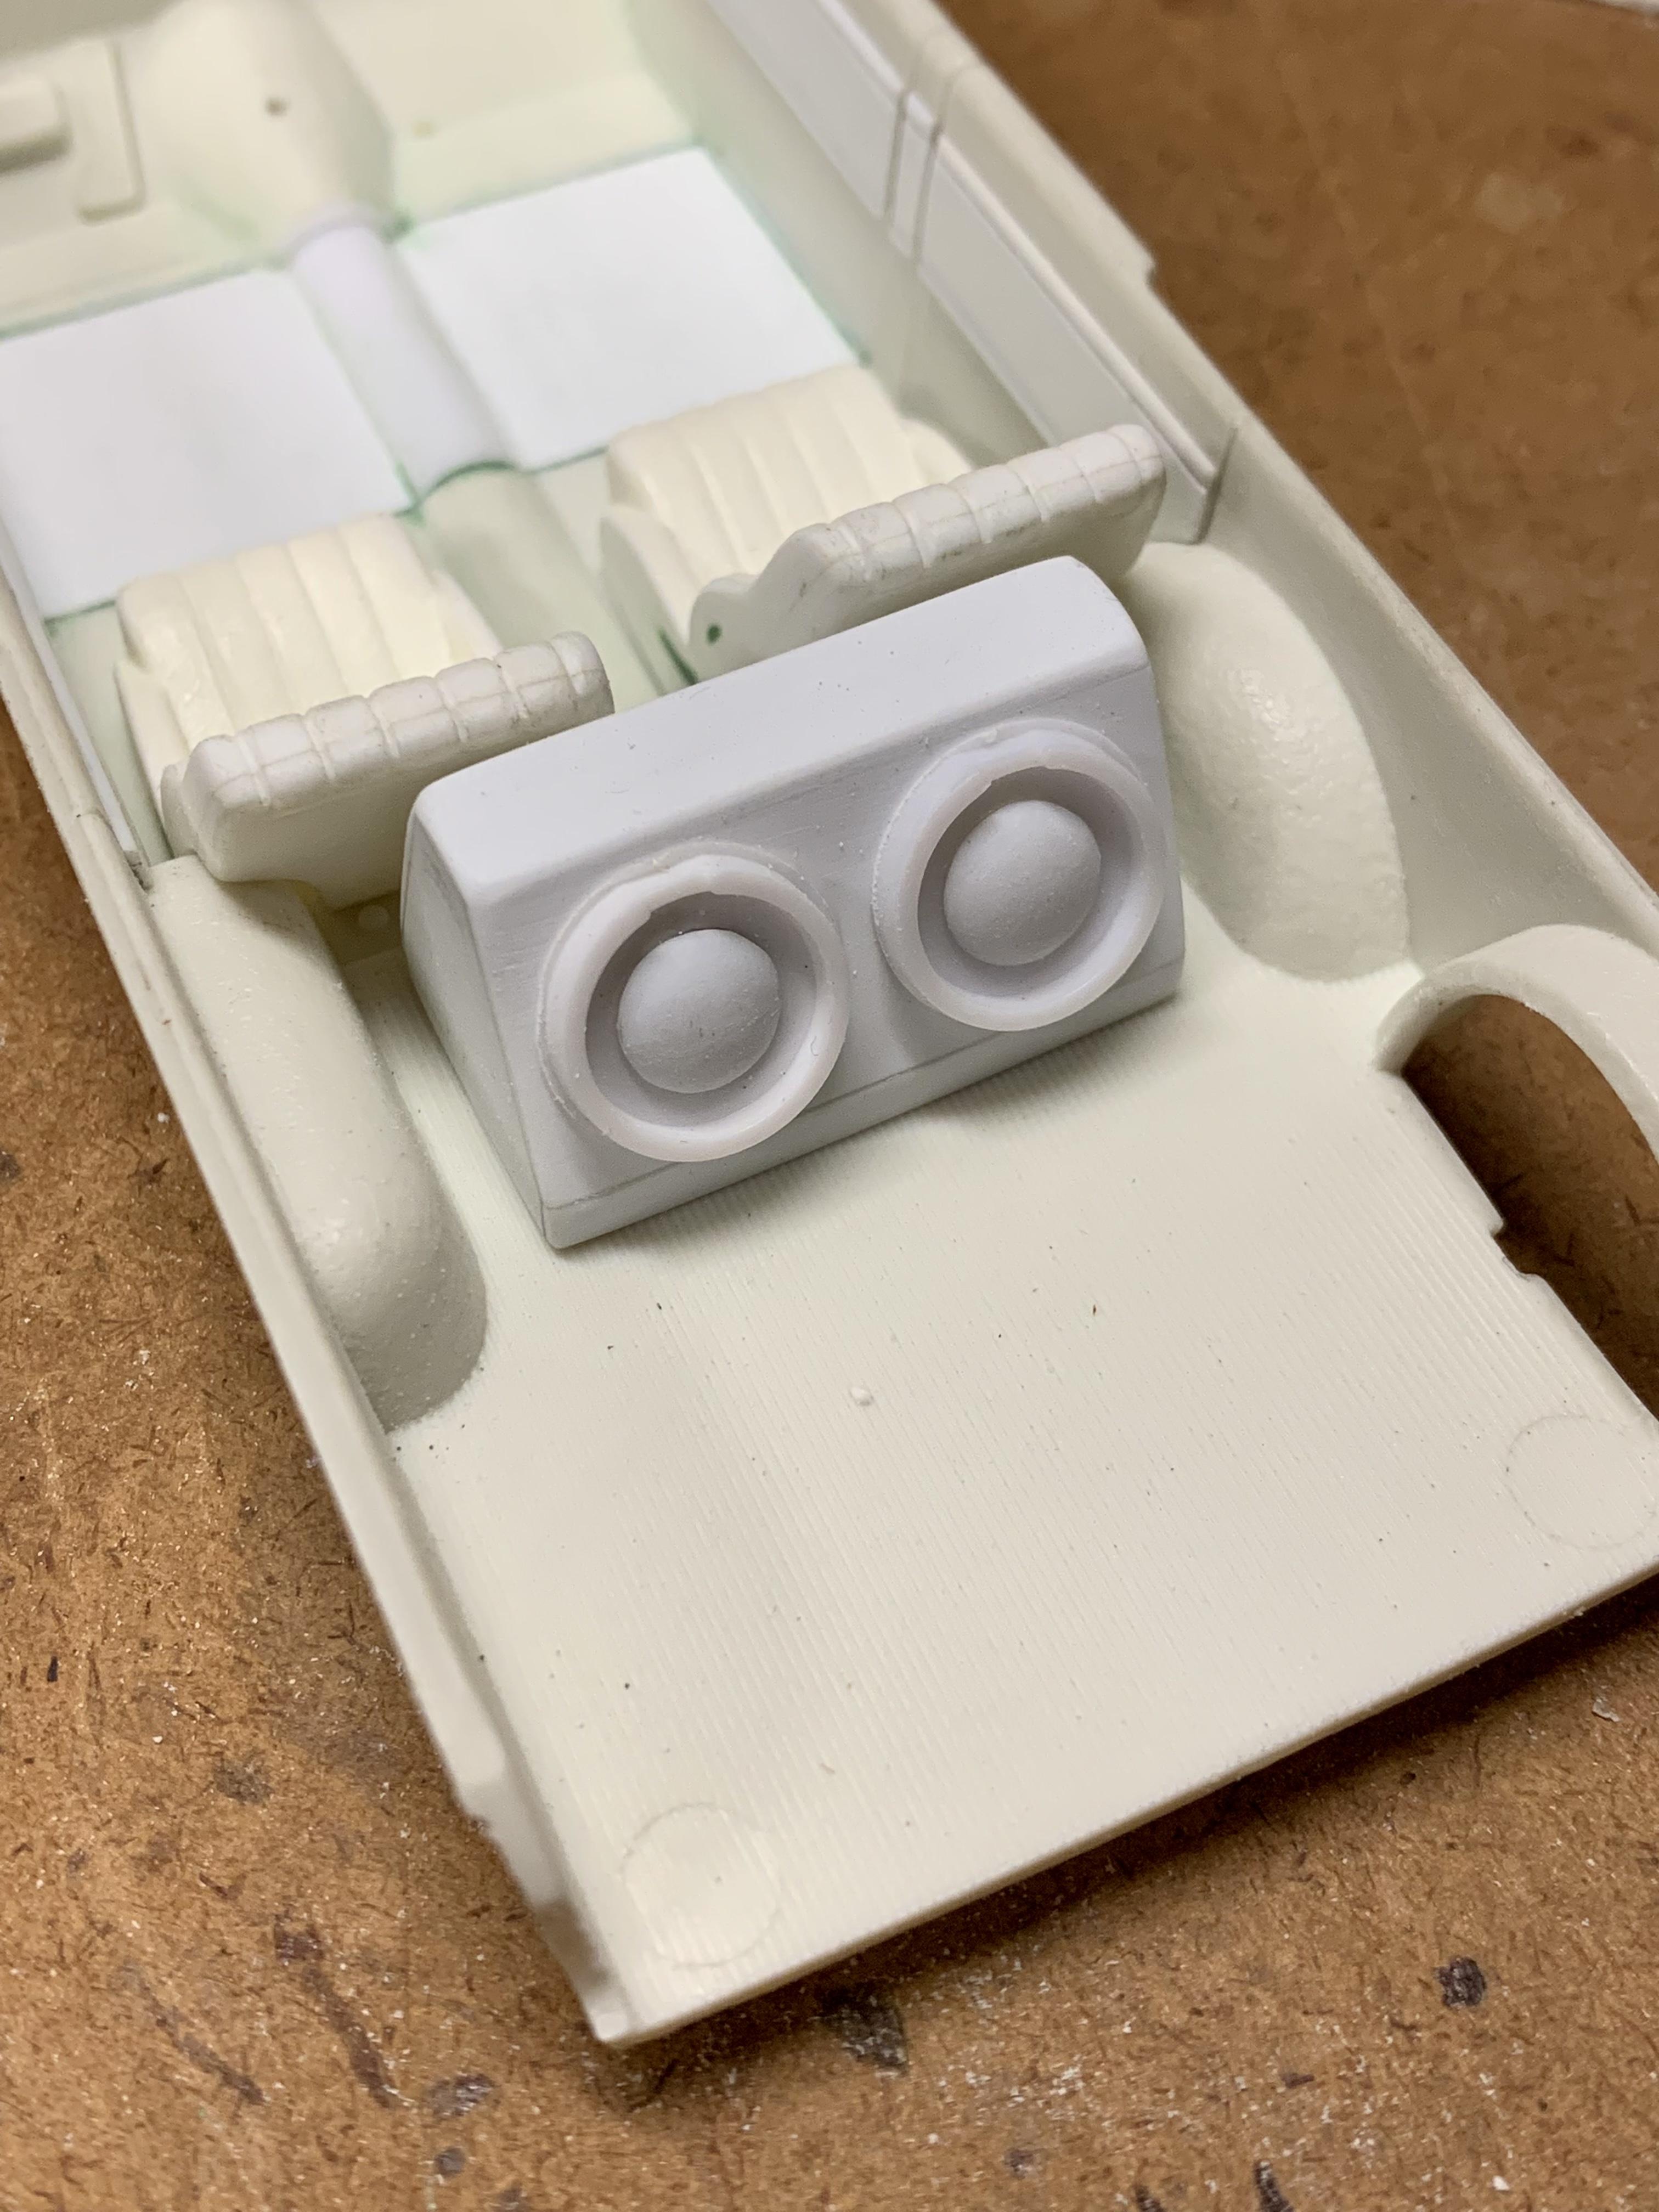
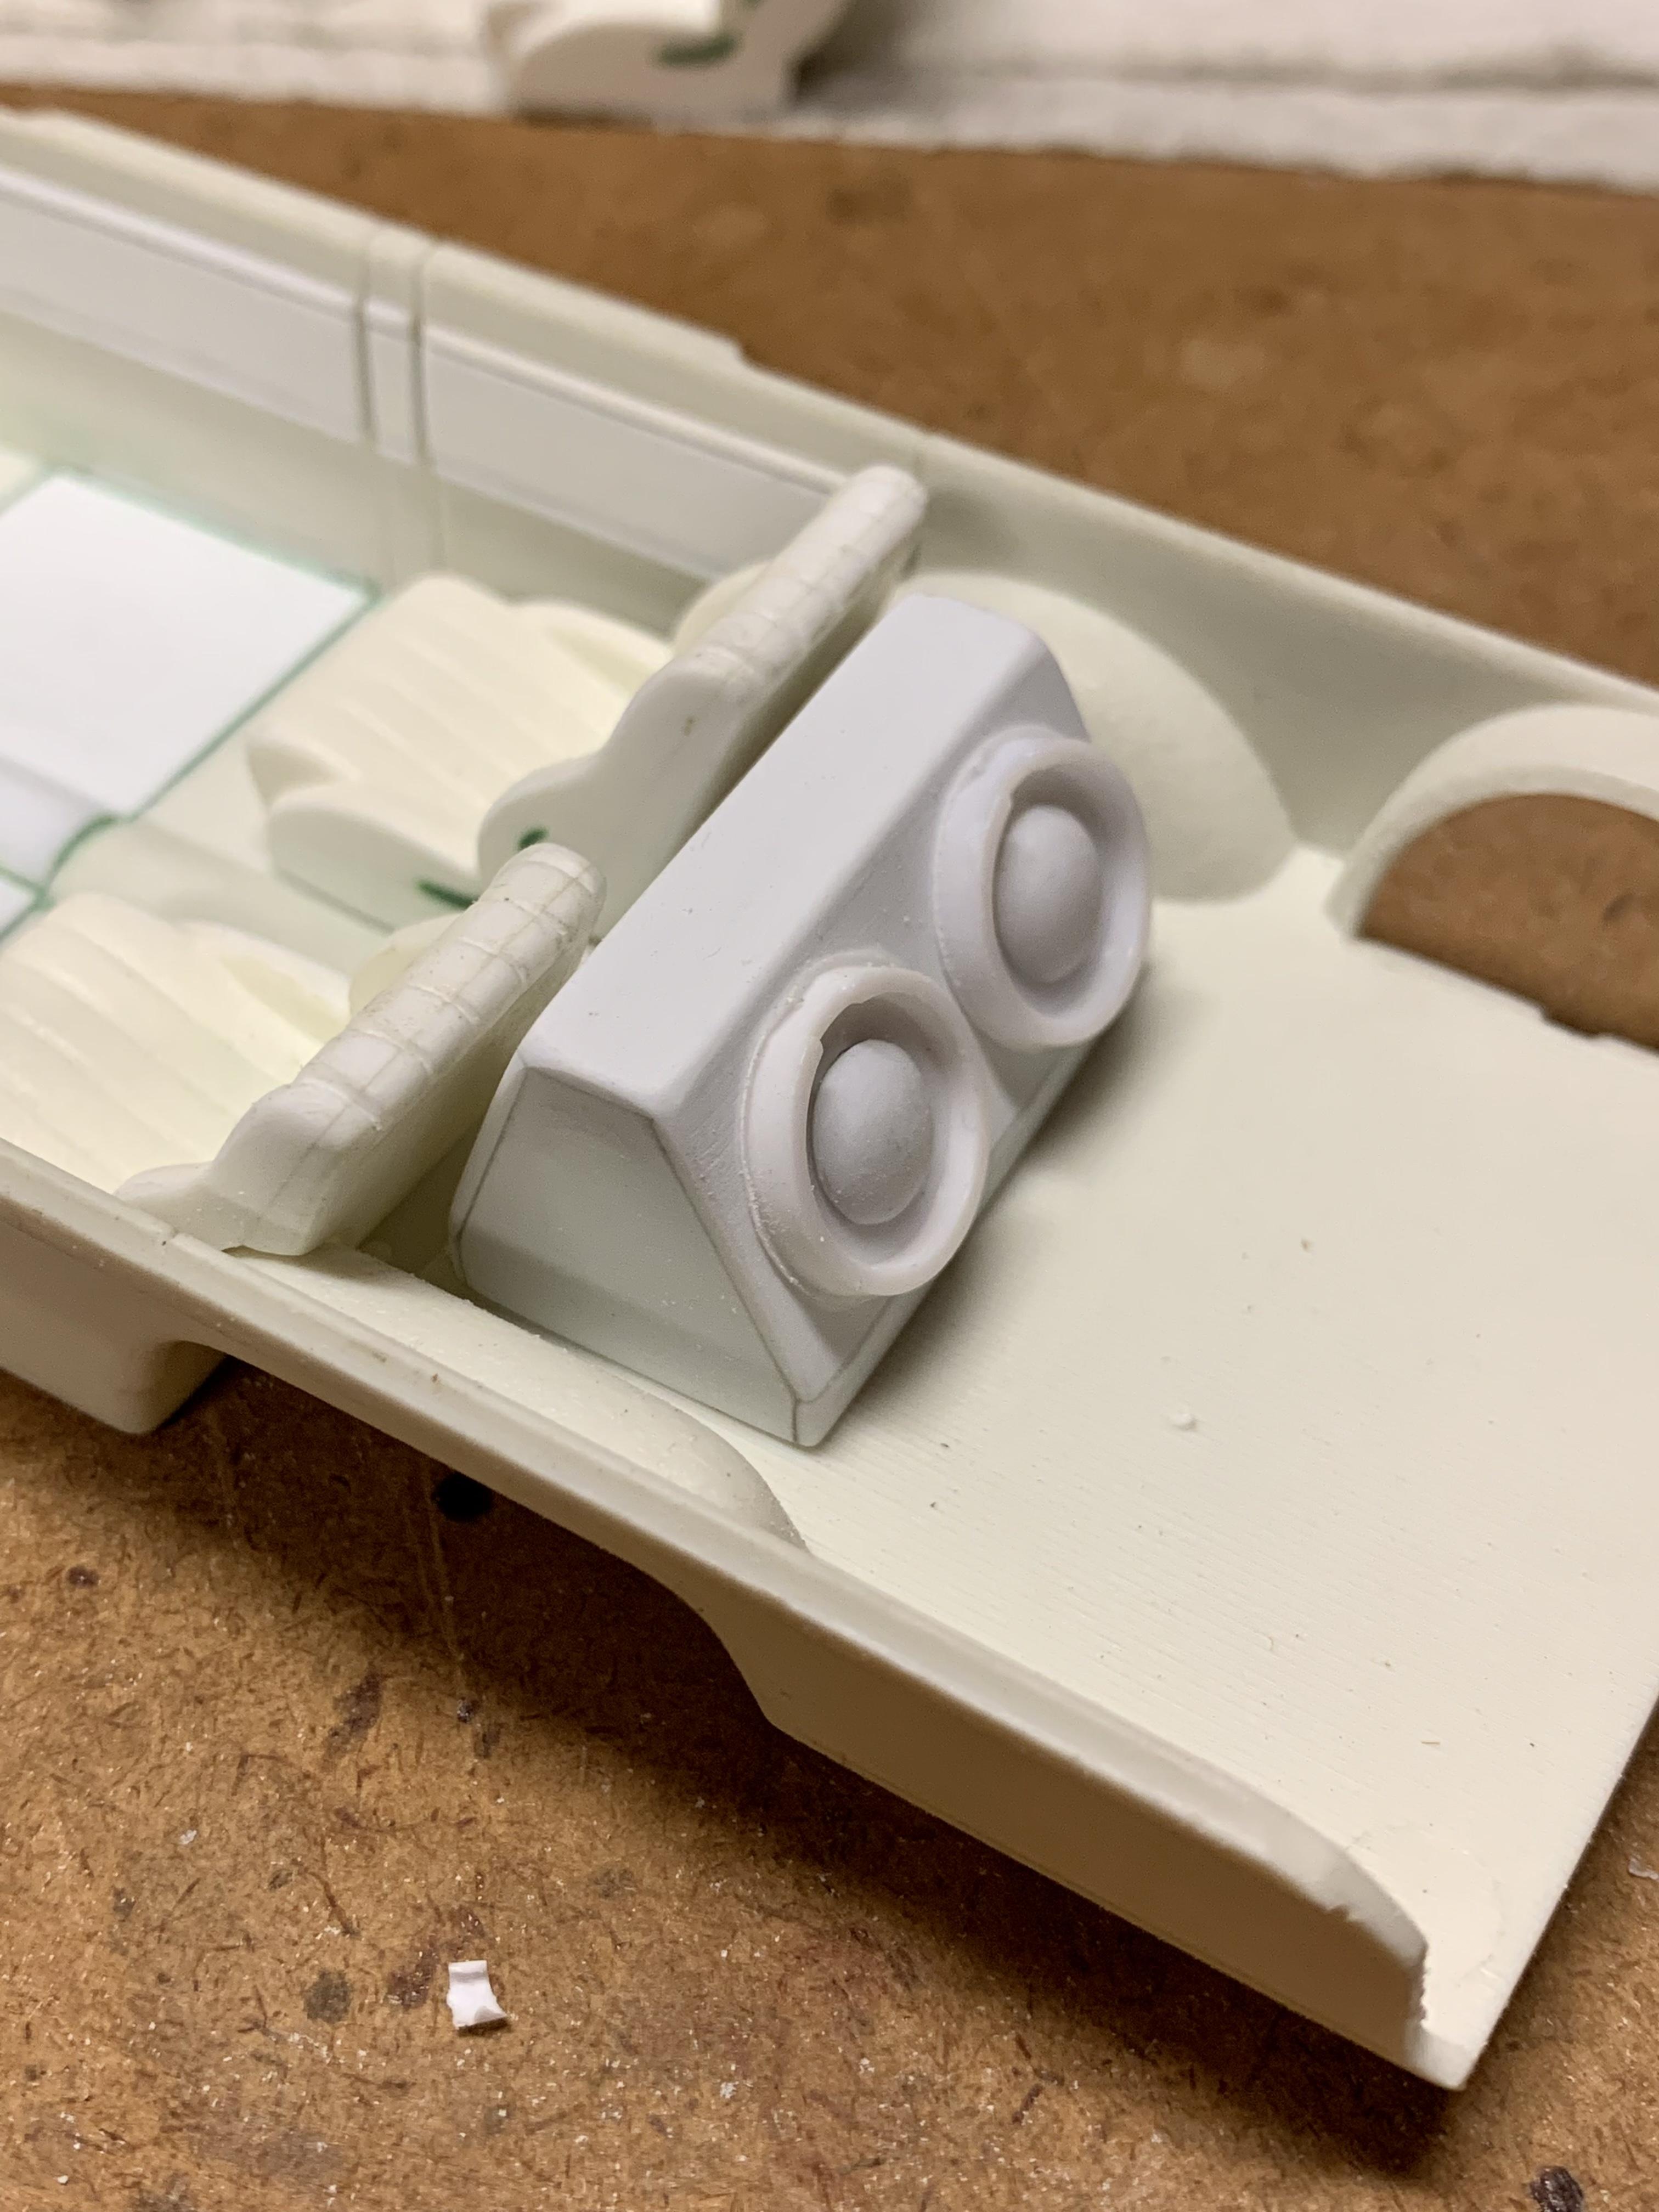
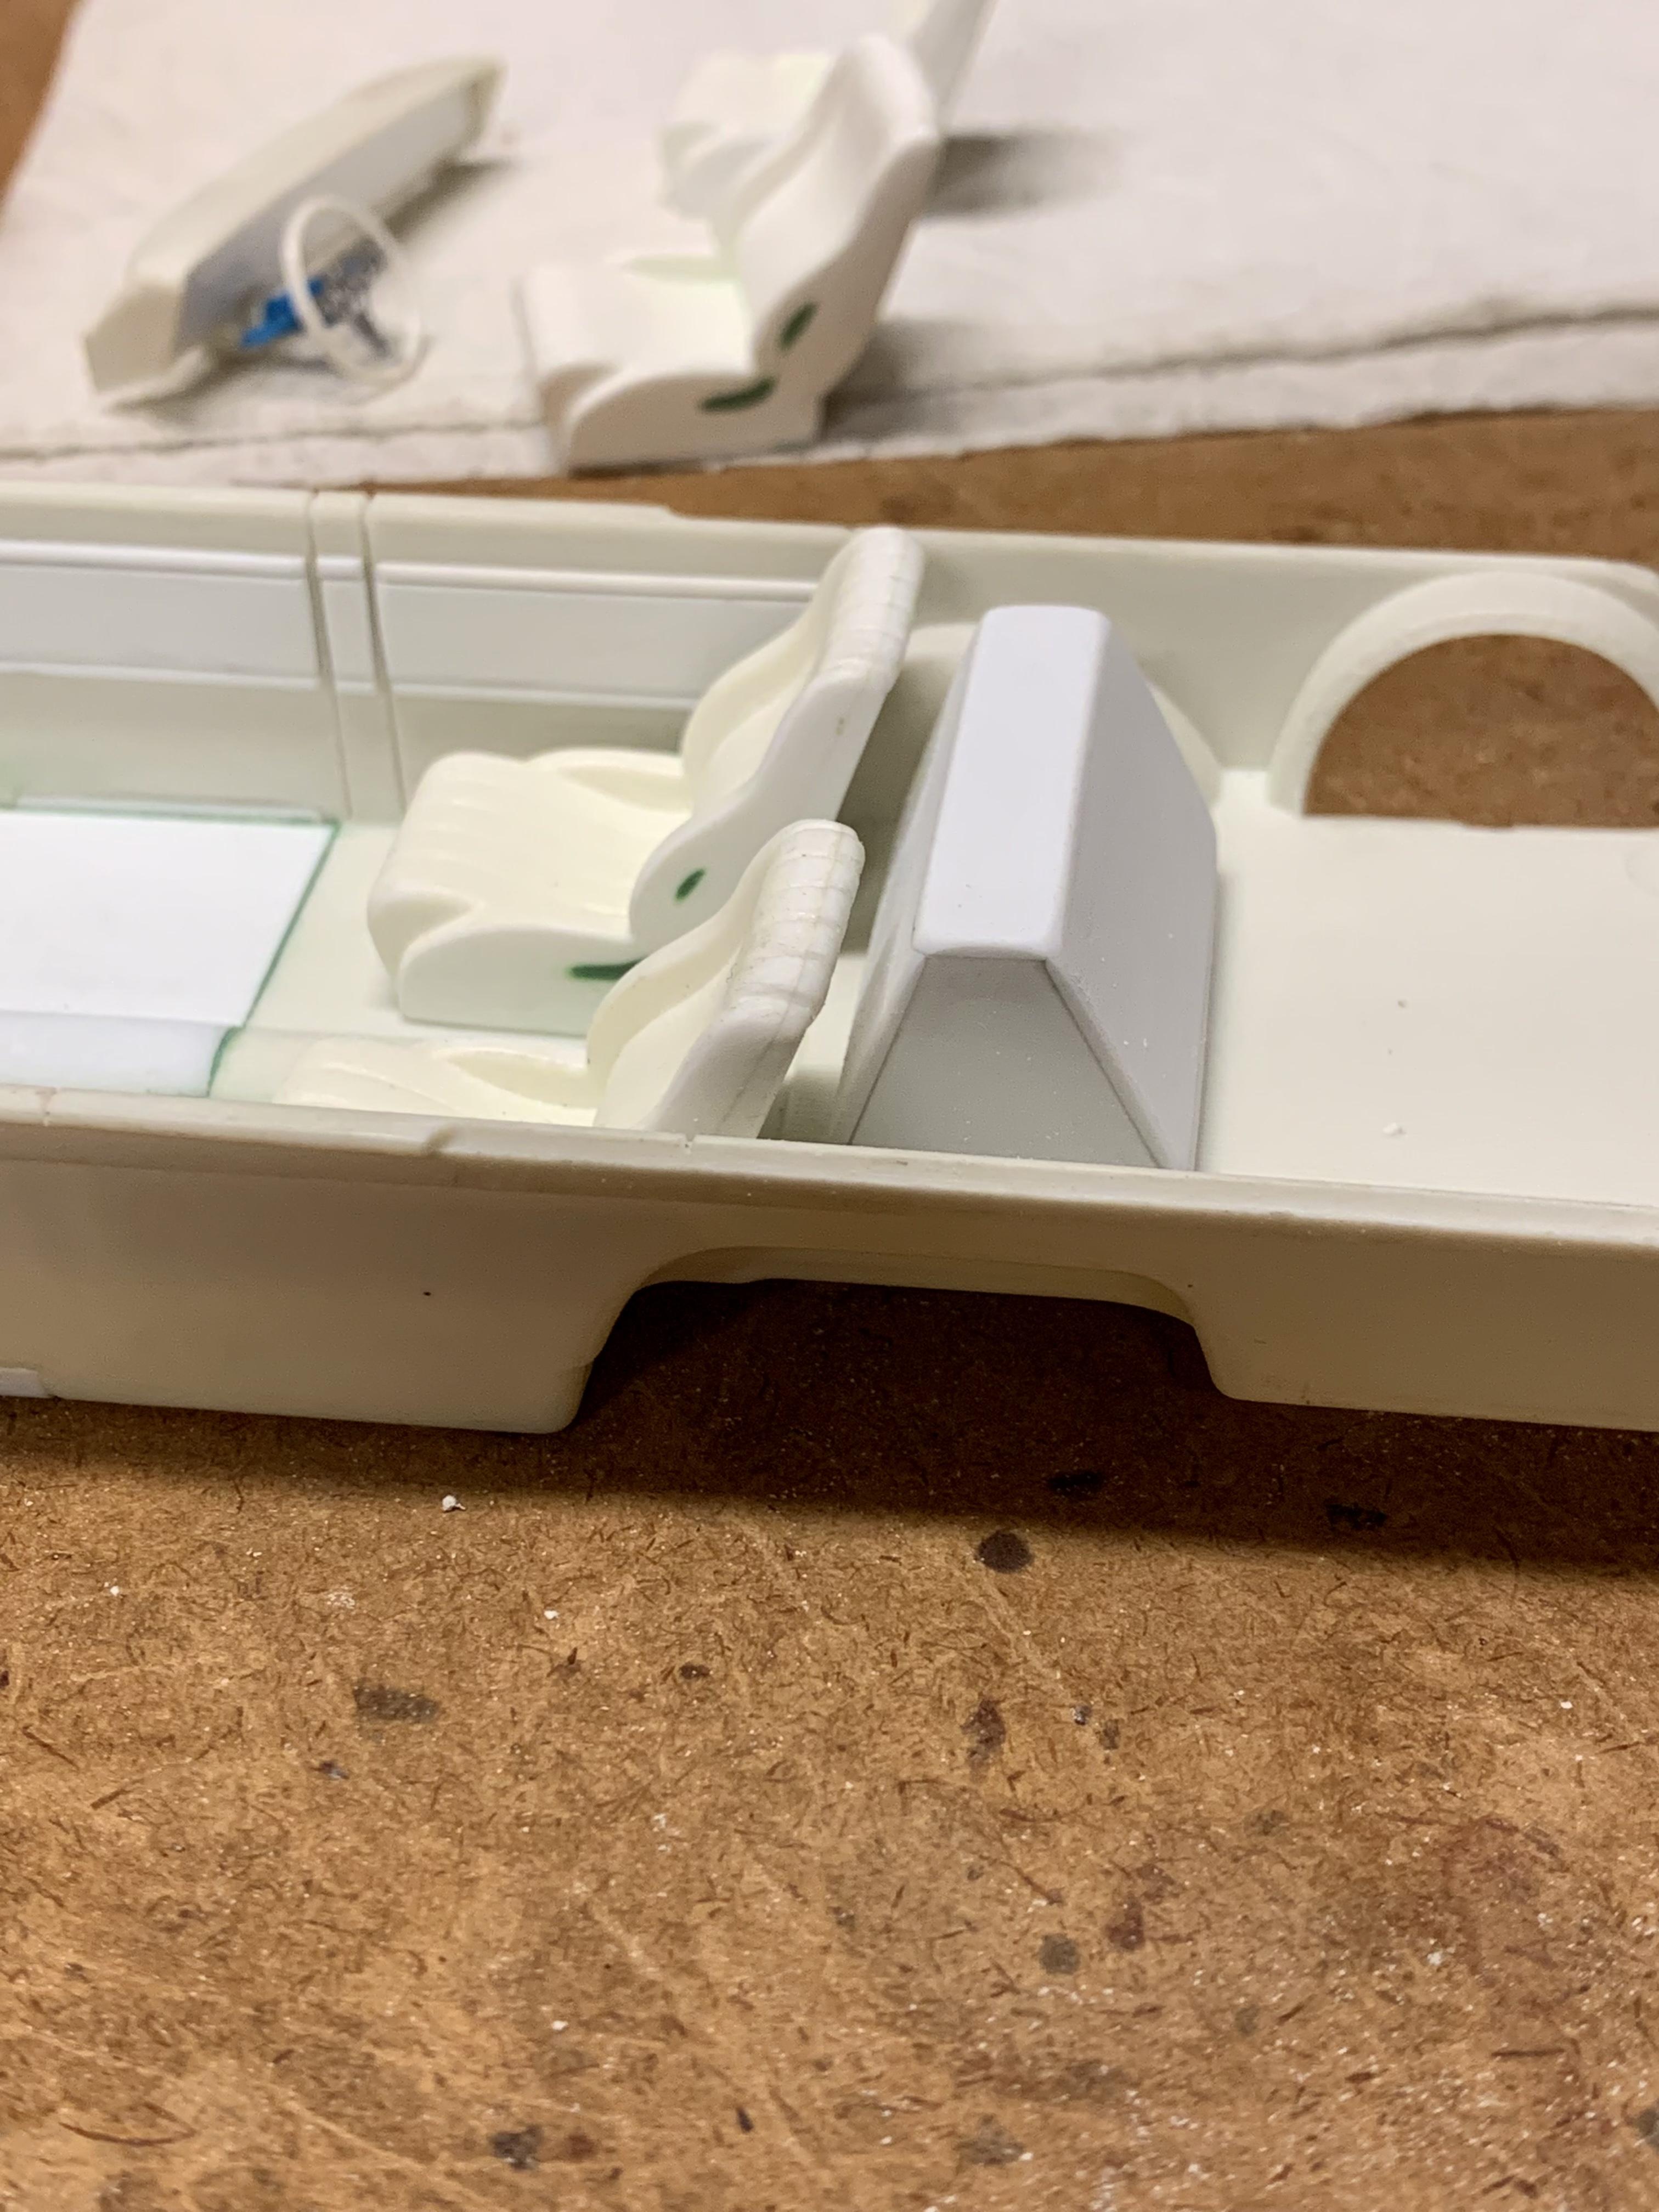
UPDATE! Another constructive Sunday afternoon at the work bench. Added a modern tilt steering column from Revell’s 1937 Ford street rods. Added raised design to the door panels made from .020” styrene sheet and .040” half round rod. This took a lot longer than you might think considering it’s simple design. Actually, a good amount of the time was spend staring at it trying to decide what to do. Put a little notch in the floor next to the spare wheel opening so that I could fit the wing nut. Lastly, I created the subwoofer box out of .040” sheet. The back of it was made to match the angle of the rear seat backs. The sub faces were made from a pair of trimmed down Revell ‘57 Chevy air filters and a pair of Revell ‘37 Ford Pickup hubcaps of all things! Not 100% accurate but they do the job. Here’s the interior all mocked up. Very happy with how it’s turning out! One more afternoon should get it done. Left to do is to create a pair of convincing stereo amps, build a full length center console and add some little circular nubs to the door panels to mount the photo etched handles to.
-
Drag City Castings...
Dennis Lacy replied to chris chabre's topic in Car Aftermarket / Resin / 3D Printed
Wow, that’s a huge order! What Ed considers “blemished” to most would look like a perfectly viable production part. He has very high standards for his products. I created the masters for the ‘32 3-Window and 4-Door bodies for him (also a 5-Window) so I hope to see them get built here on the forum. It’s funny, he was apprehensive about casting the 4-Door because they are typically less popular and if I’m not mistaken it turned out to be the best seller of the three ‘32 bodies we collaborated on. The 4-door IS chopped a scale 3” as it comes, BTW. ? -
Brian’s 1995 Mitsubishi Eclipse from (The Fast and the Furious)
Dennis Lacy replied to adamelvis's topic in WIP: Model Cars
This looks like it will be an interesting model to watch come together. I never knew that AMT had their own O’Connor Eclipse. Did they do any of the other movie cars? I’m not a F&F fanboy but I was 21 when the original movie came out and I saw it in the theater with my friends (and we left making non-stop fun of it because of the awful dialogue and we were all 5.0 Mustang guys!) ? Now 20 years later I look back on the first movie with some nostalgia and enjoy watching it from time to time. These tuner cars had a certain style and charm in the late 90’s and early 2000’s that I enjoy now too (but also made fun of at the time!) A few months ago I randomly came across Craig Leiberman’s channel on YouTube and have watched almost every episode. Getting the back story on all of the original Hero cars and the movie in general was really fascinating. -
"DrAgTiMe" 1953 Studebaker funny car
Dennis Lacy replied to Rocking Rodney Rat's topic in Drag Racing
Your creativity when it comes to nostalgia drag cars never disappoints. This thing looks bad ass from any angle!!! ? -
1/25 Atlantis H1223 Mooneyes Dragster
Dennis Lacy replied to Casey's topic in Car Kit News & Reviews
No. The engine also includes a dual 4 barrel carburetor intake, carbs, small round air filters, standard timing cover with water pump, belt drive and fan. -
1963 Chevy Nova Wagon Street Rod FINISHED 3/20/22
Dennis Lacy replied to Dennis Lacy's topic in WIP: Model Cars
Thanks man! For such a simple kit I sure keep finding a whole lot more work to do on it! ? -
I’m really surprised you got that engine in there without carving on the firewall!
-
@ModelcarJR The Hemi engine in the Revell ‘32 5-Window IS a first generation Chrysler (a very accurate one at that) which had the distributor in the back. They can’t call it a Chrysler unless they are willing to pay Big $$$ for licensing. The big 4-speed attached to it is also Chrysler.
-
1963 Chevy Nova Wagon Street Rod FINISHED 3/20/22
Dennis Lacy replied to Dennis Lacy's topic in WIP: Model Cars
I did mention it in the previous update but a picture is worth a thousand words.
-
1963 Chevy Nova Wagon Street Rod FINISHED 3/20/22
Dennis Lacy replied to Dennis Lacy's topic in WIP: Model Cars
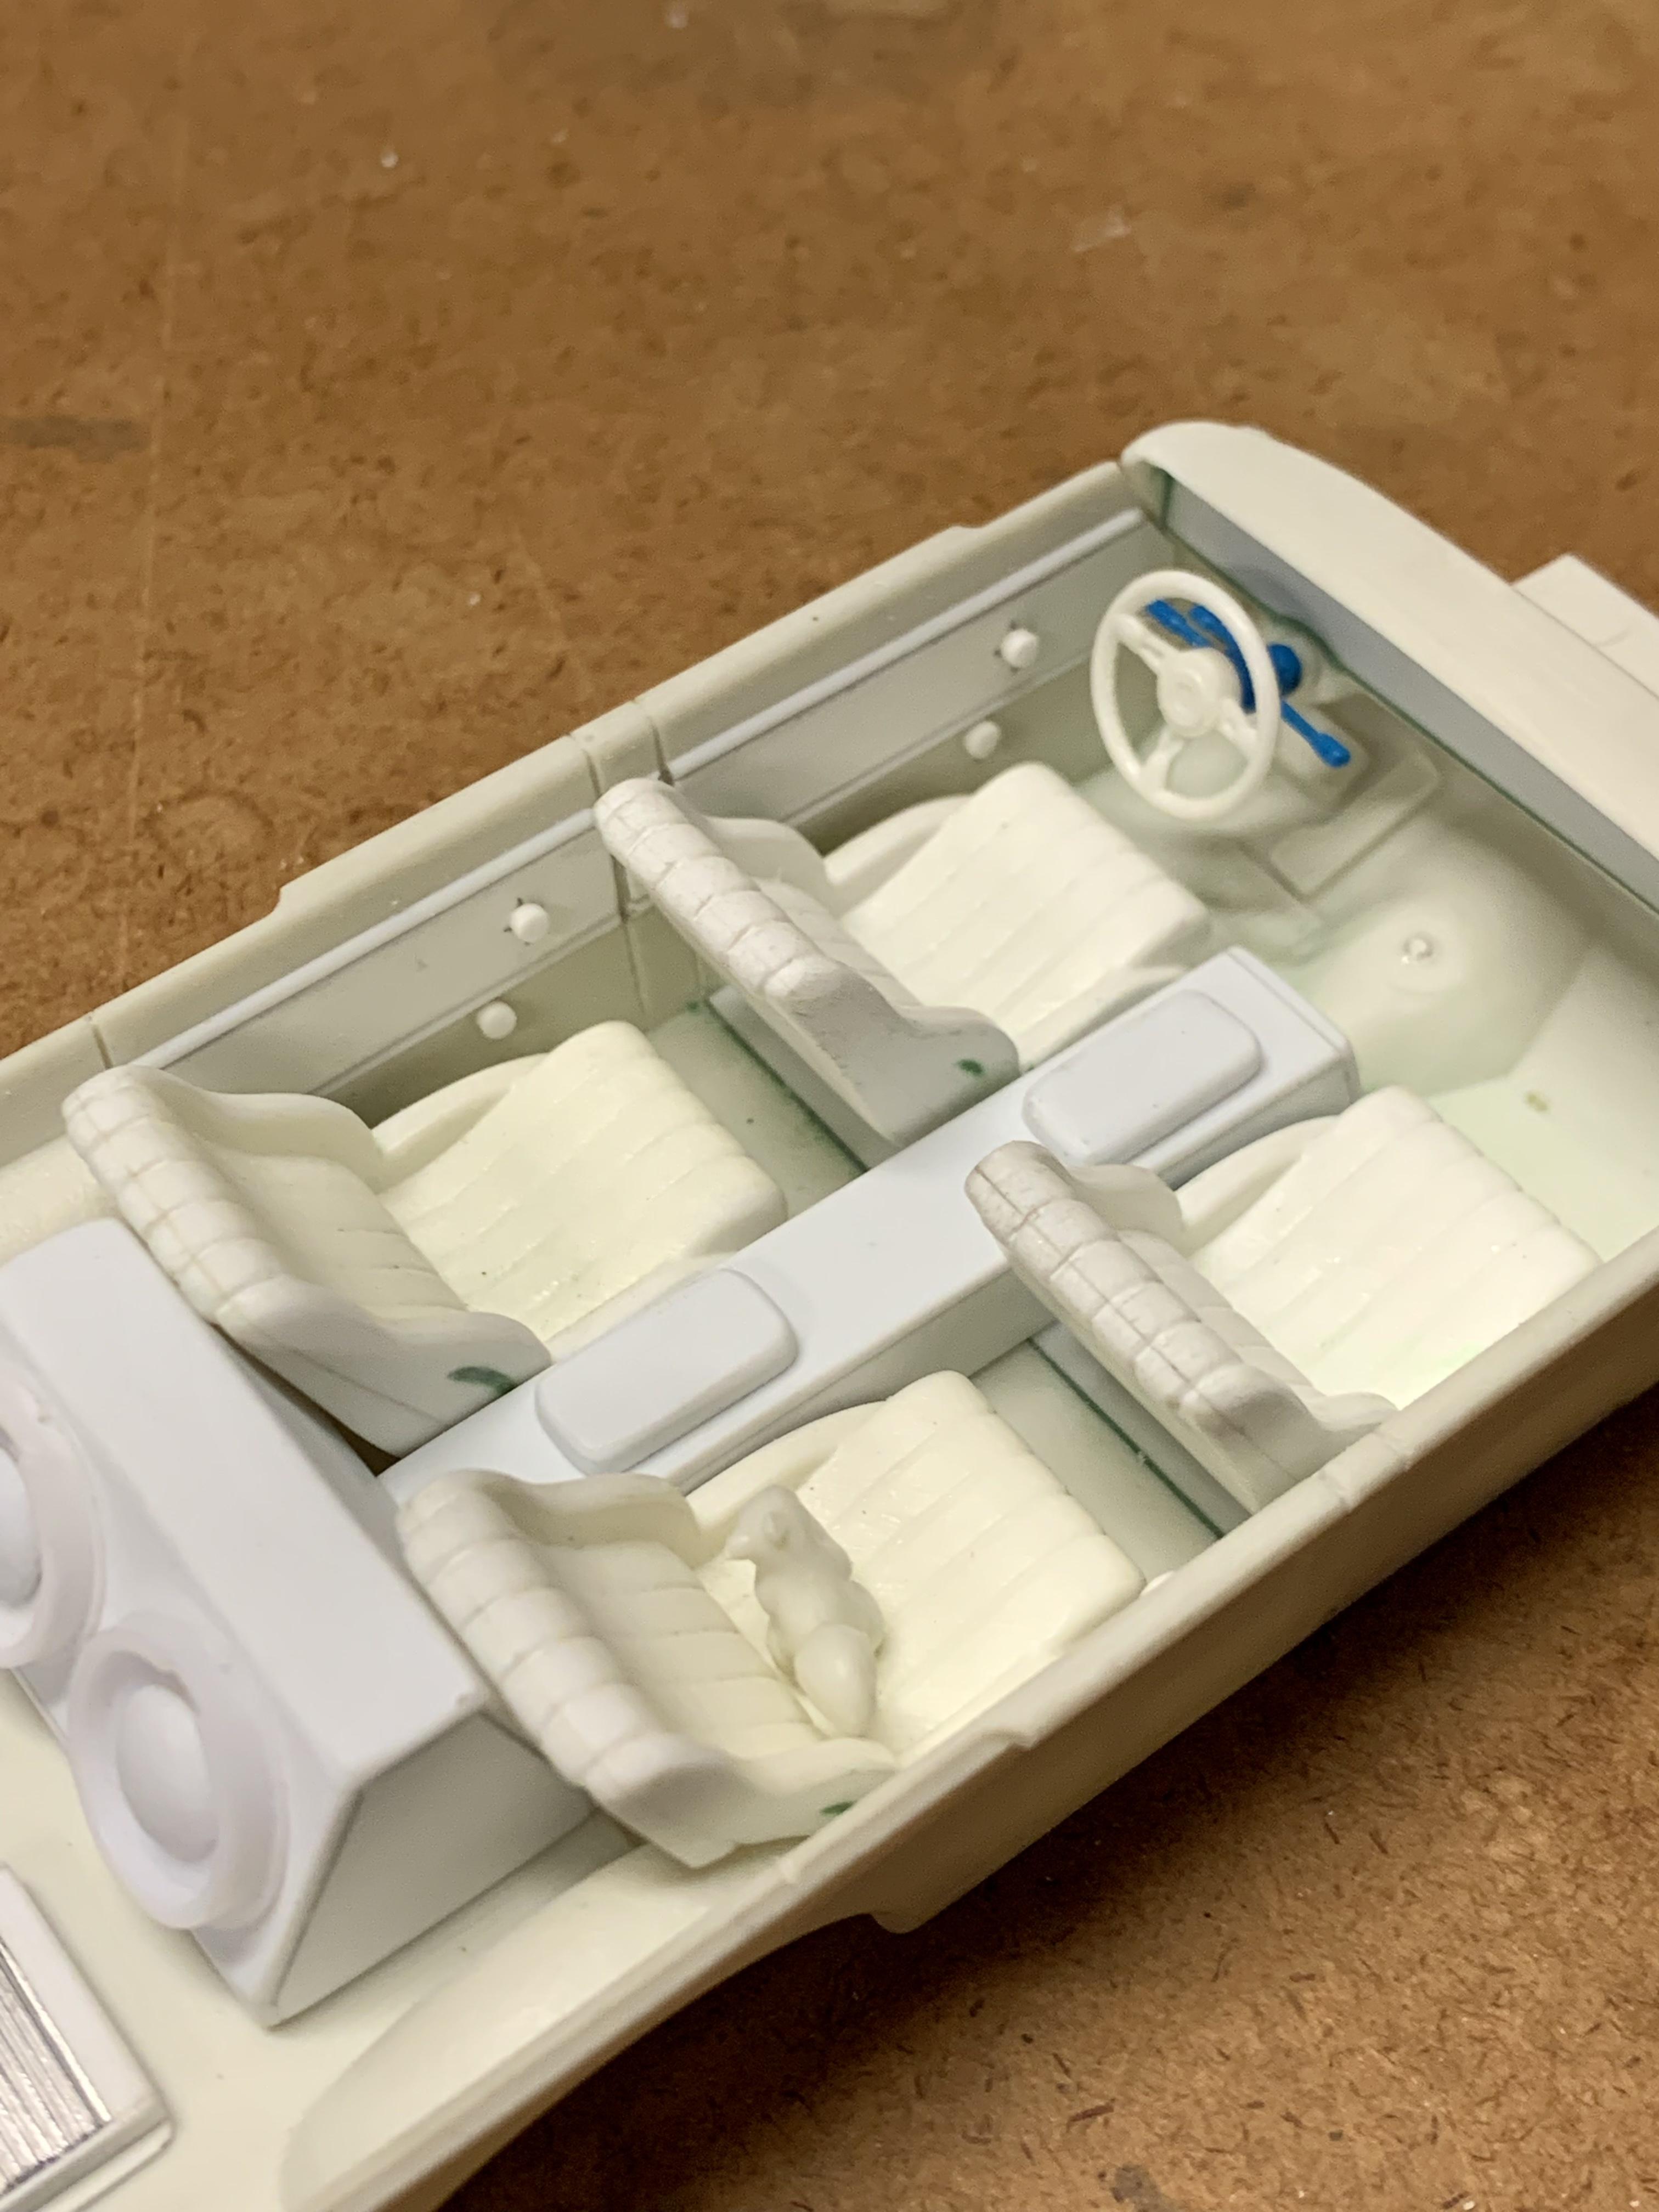
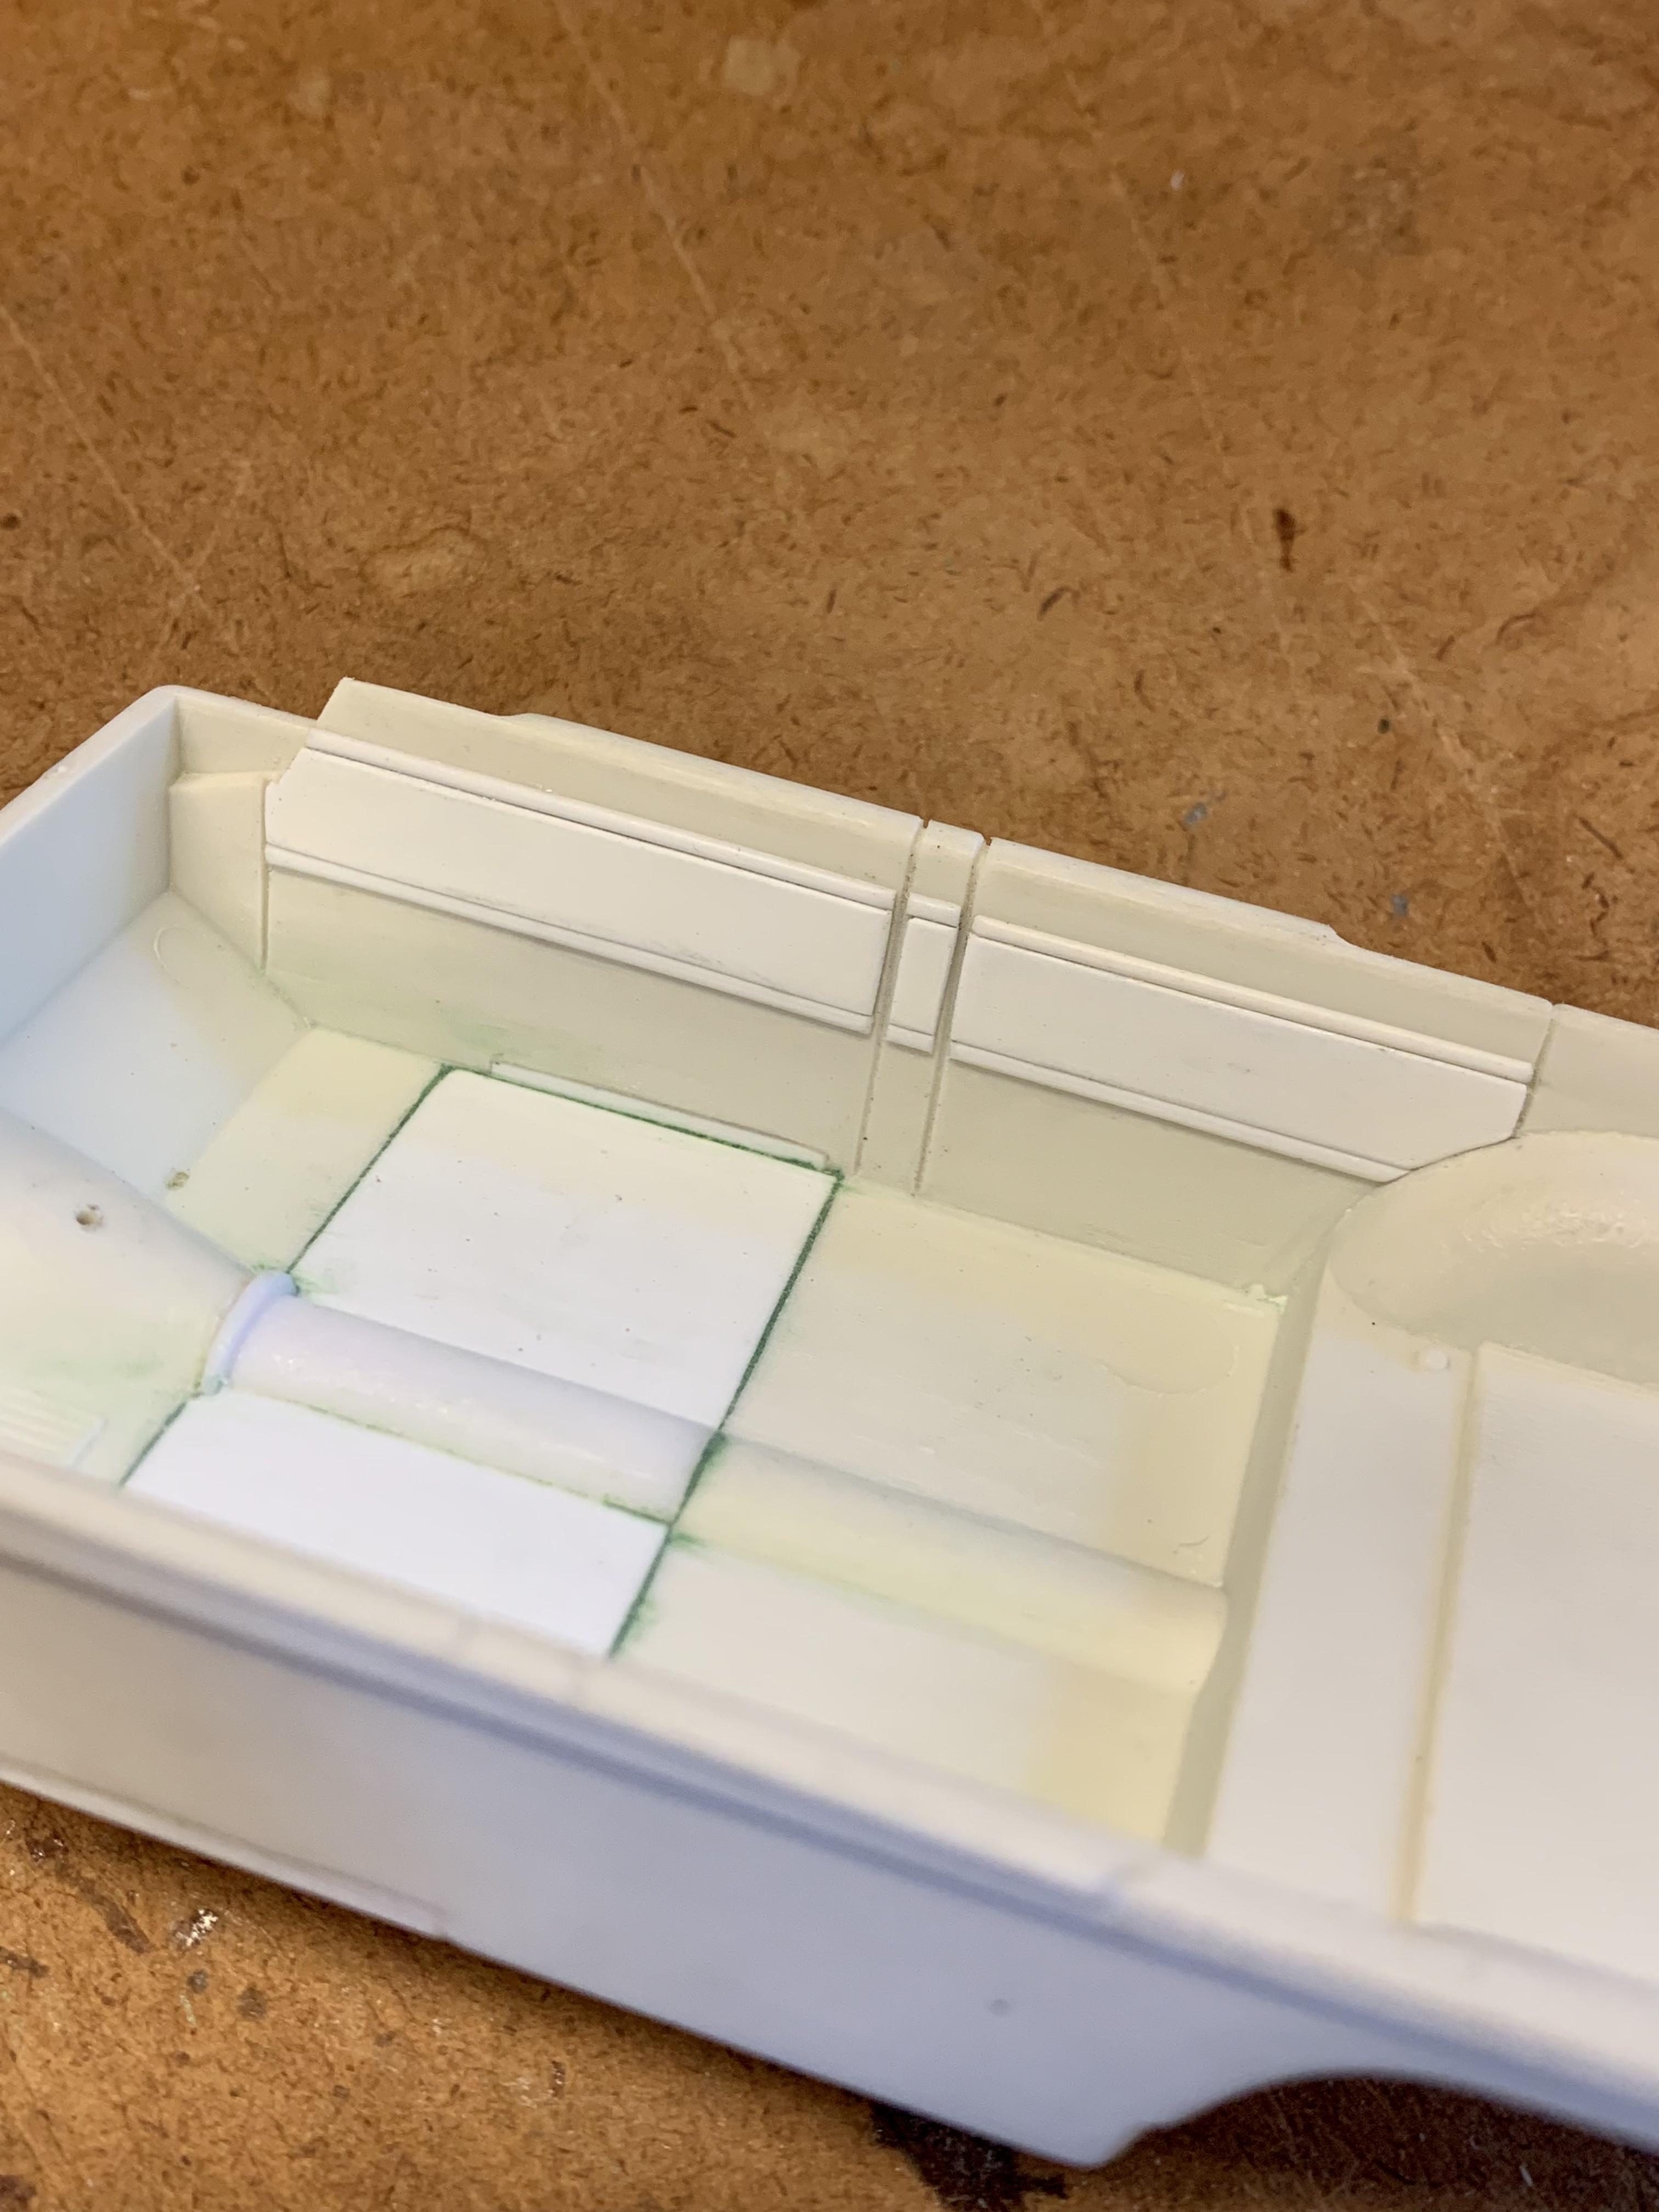
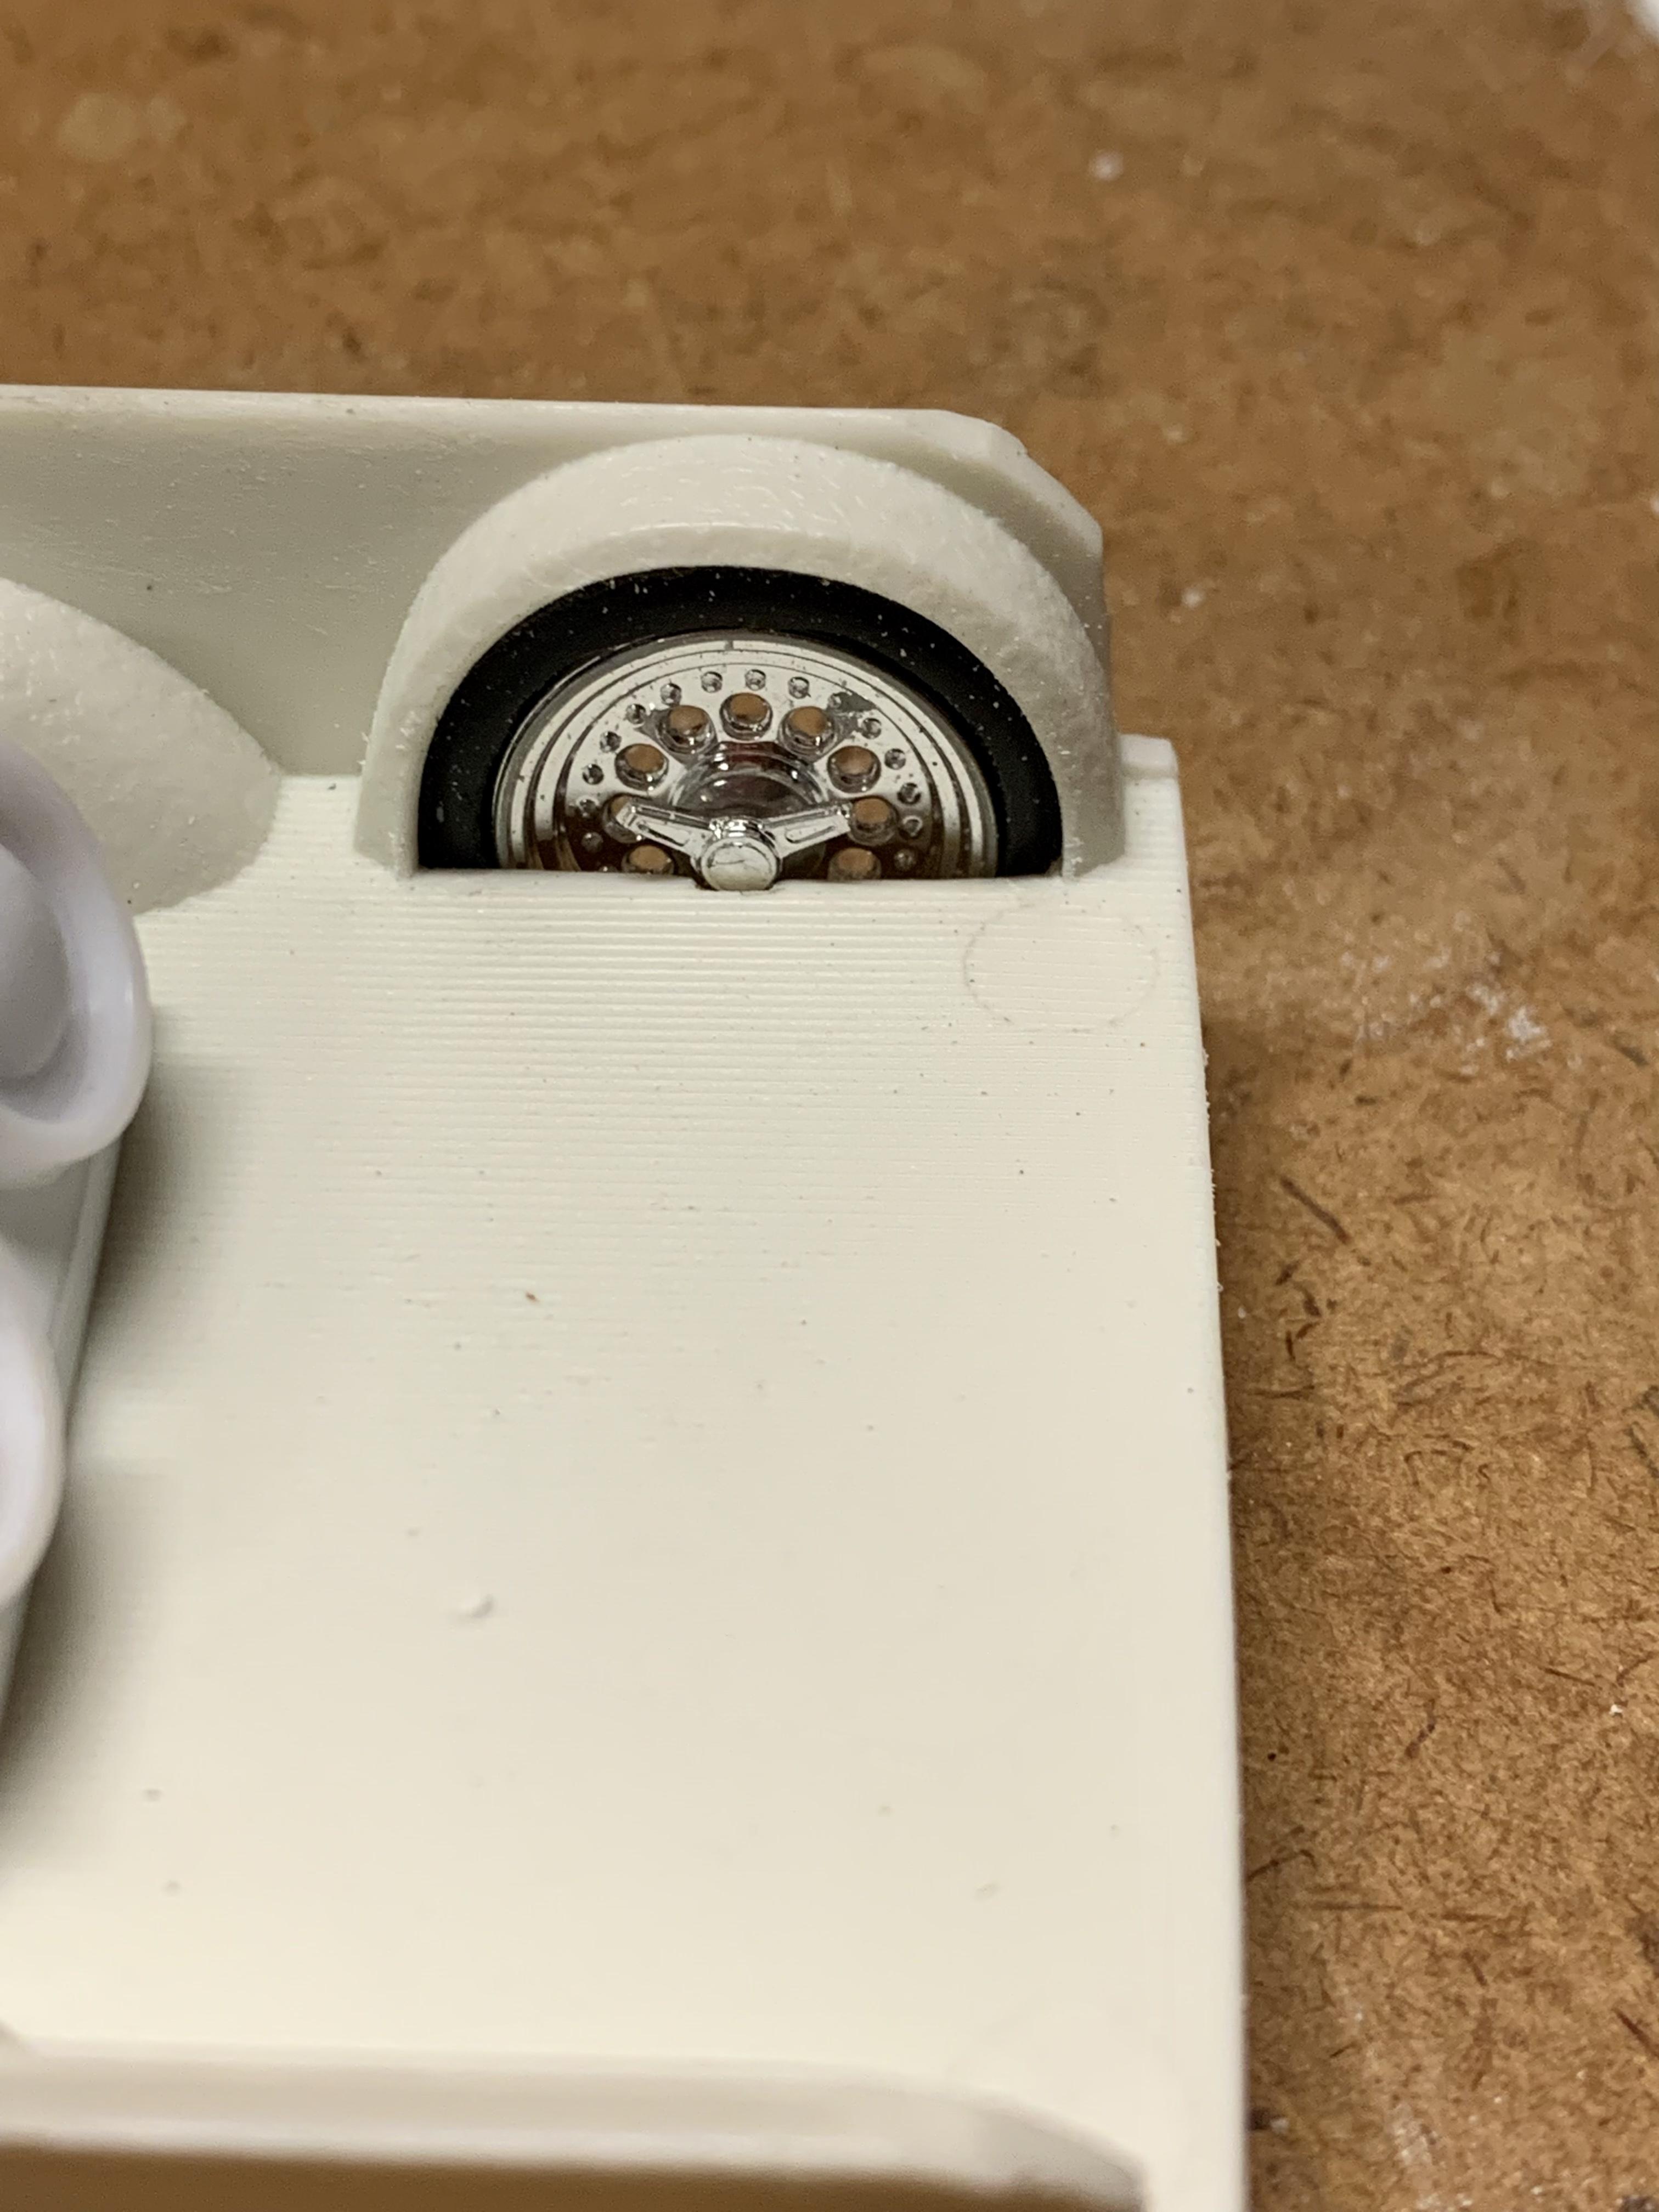
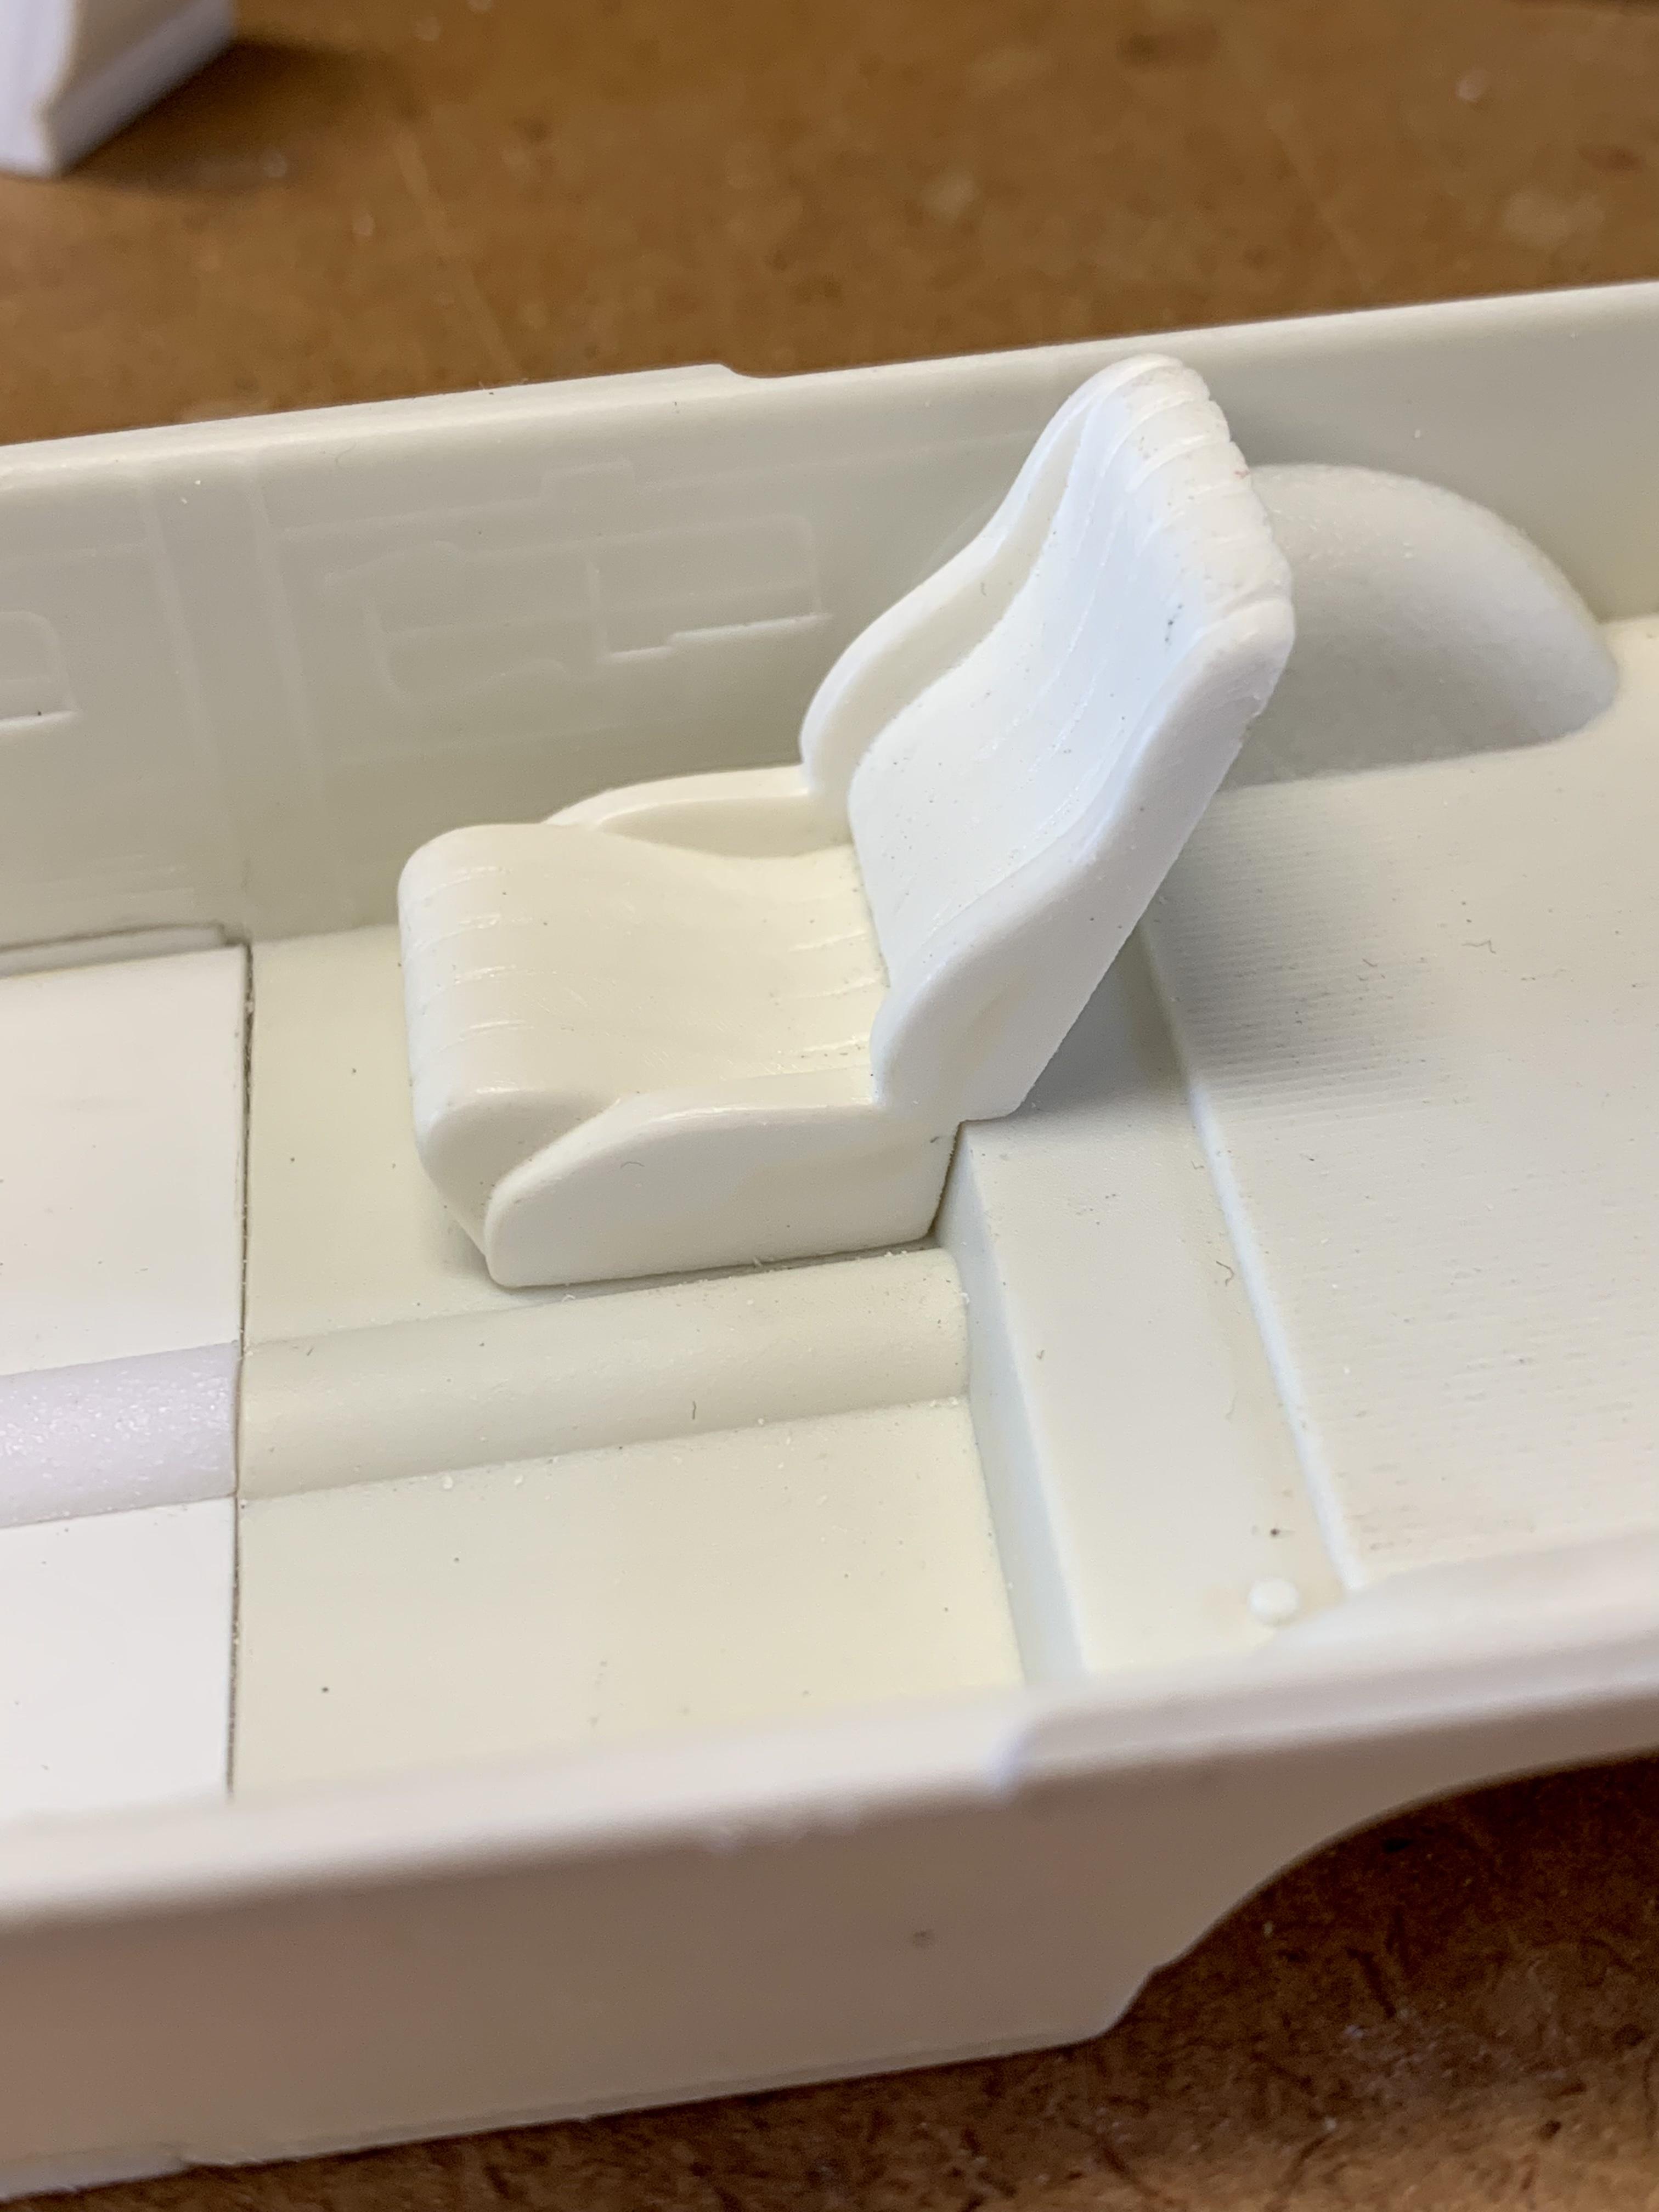
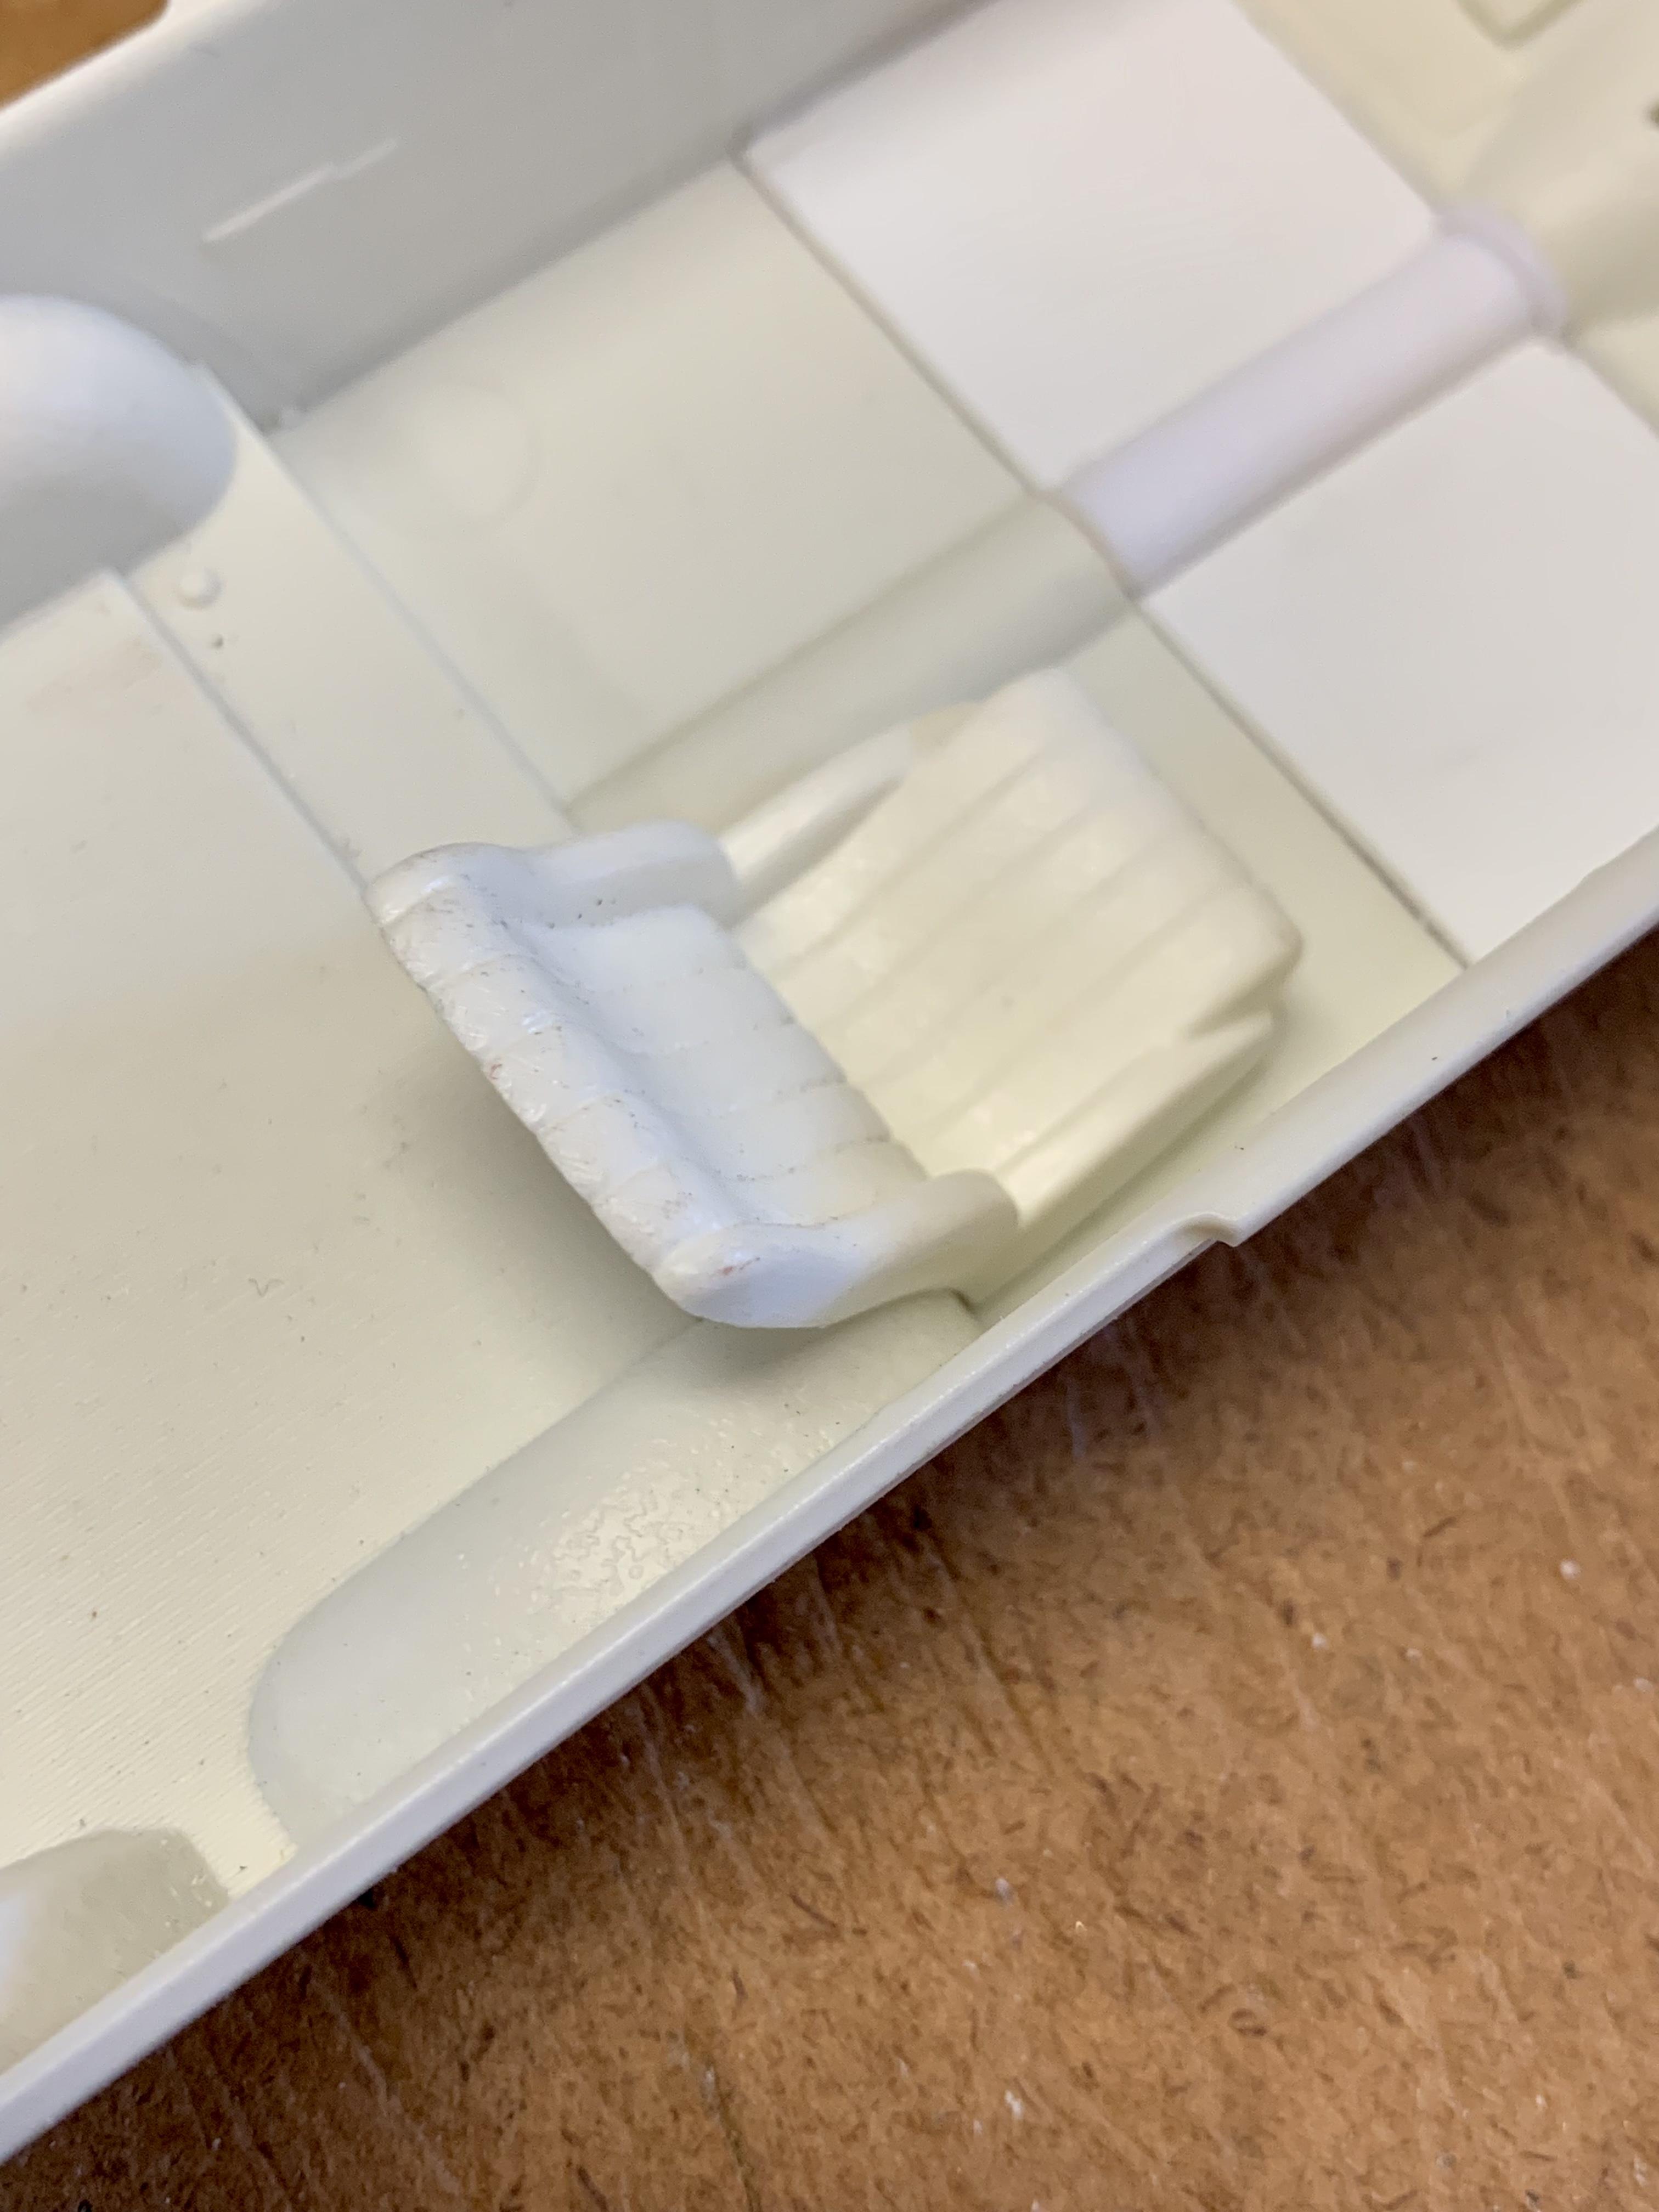
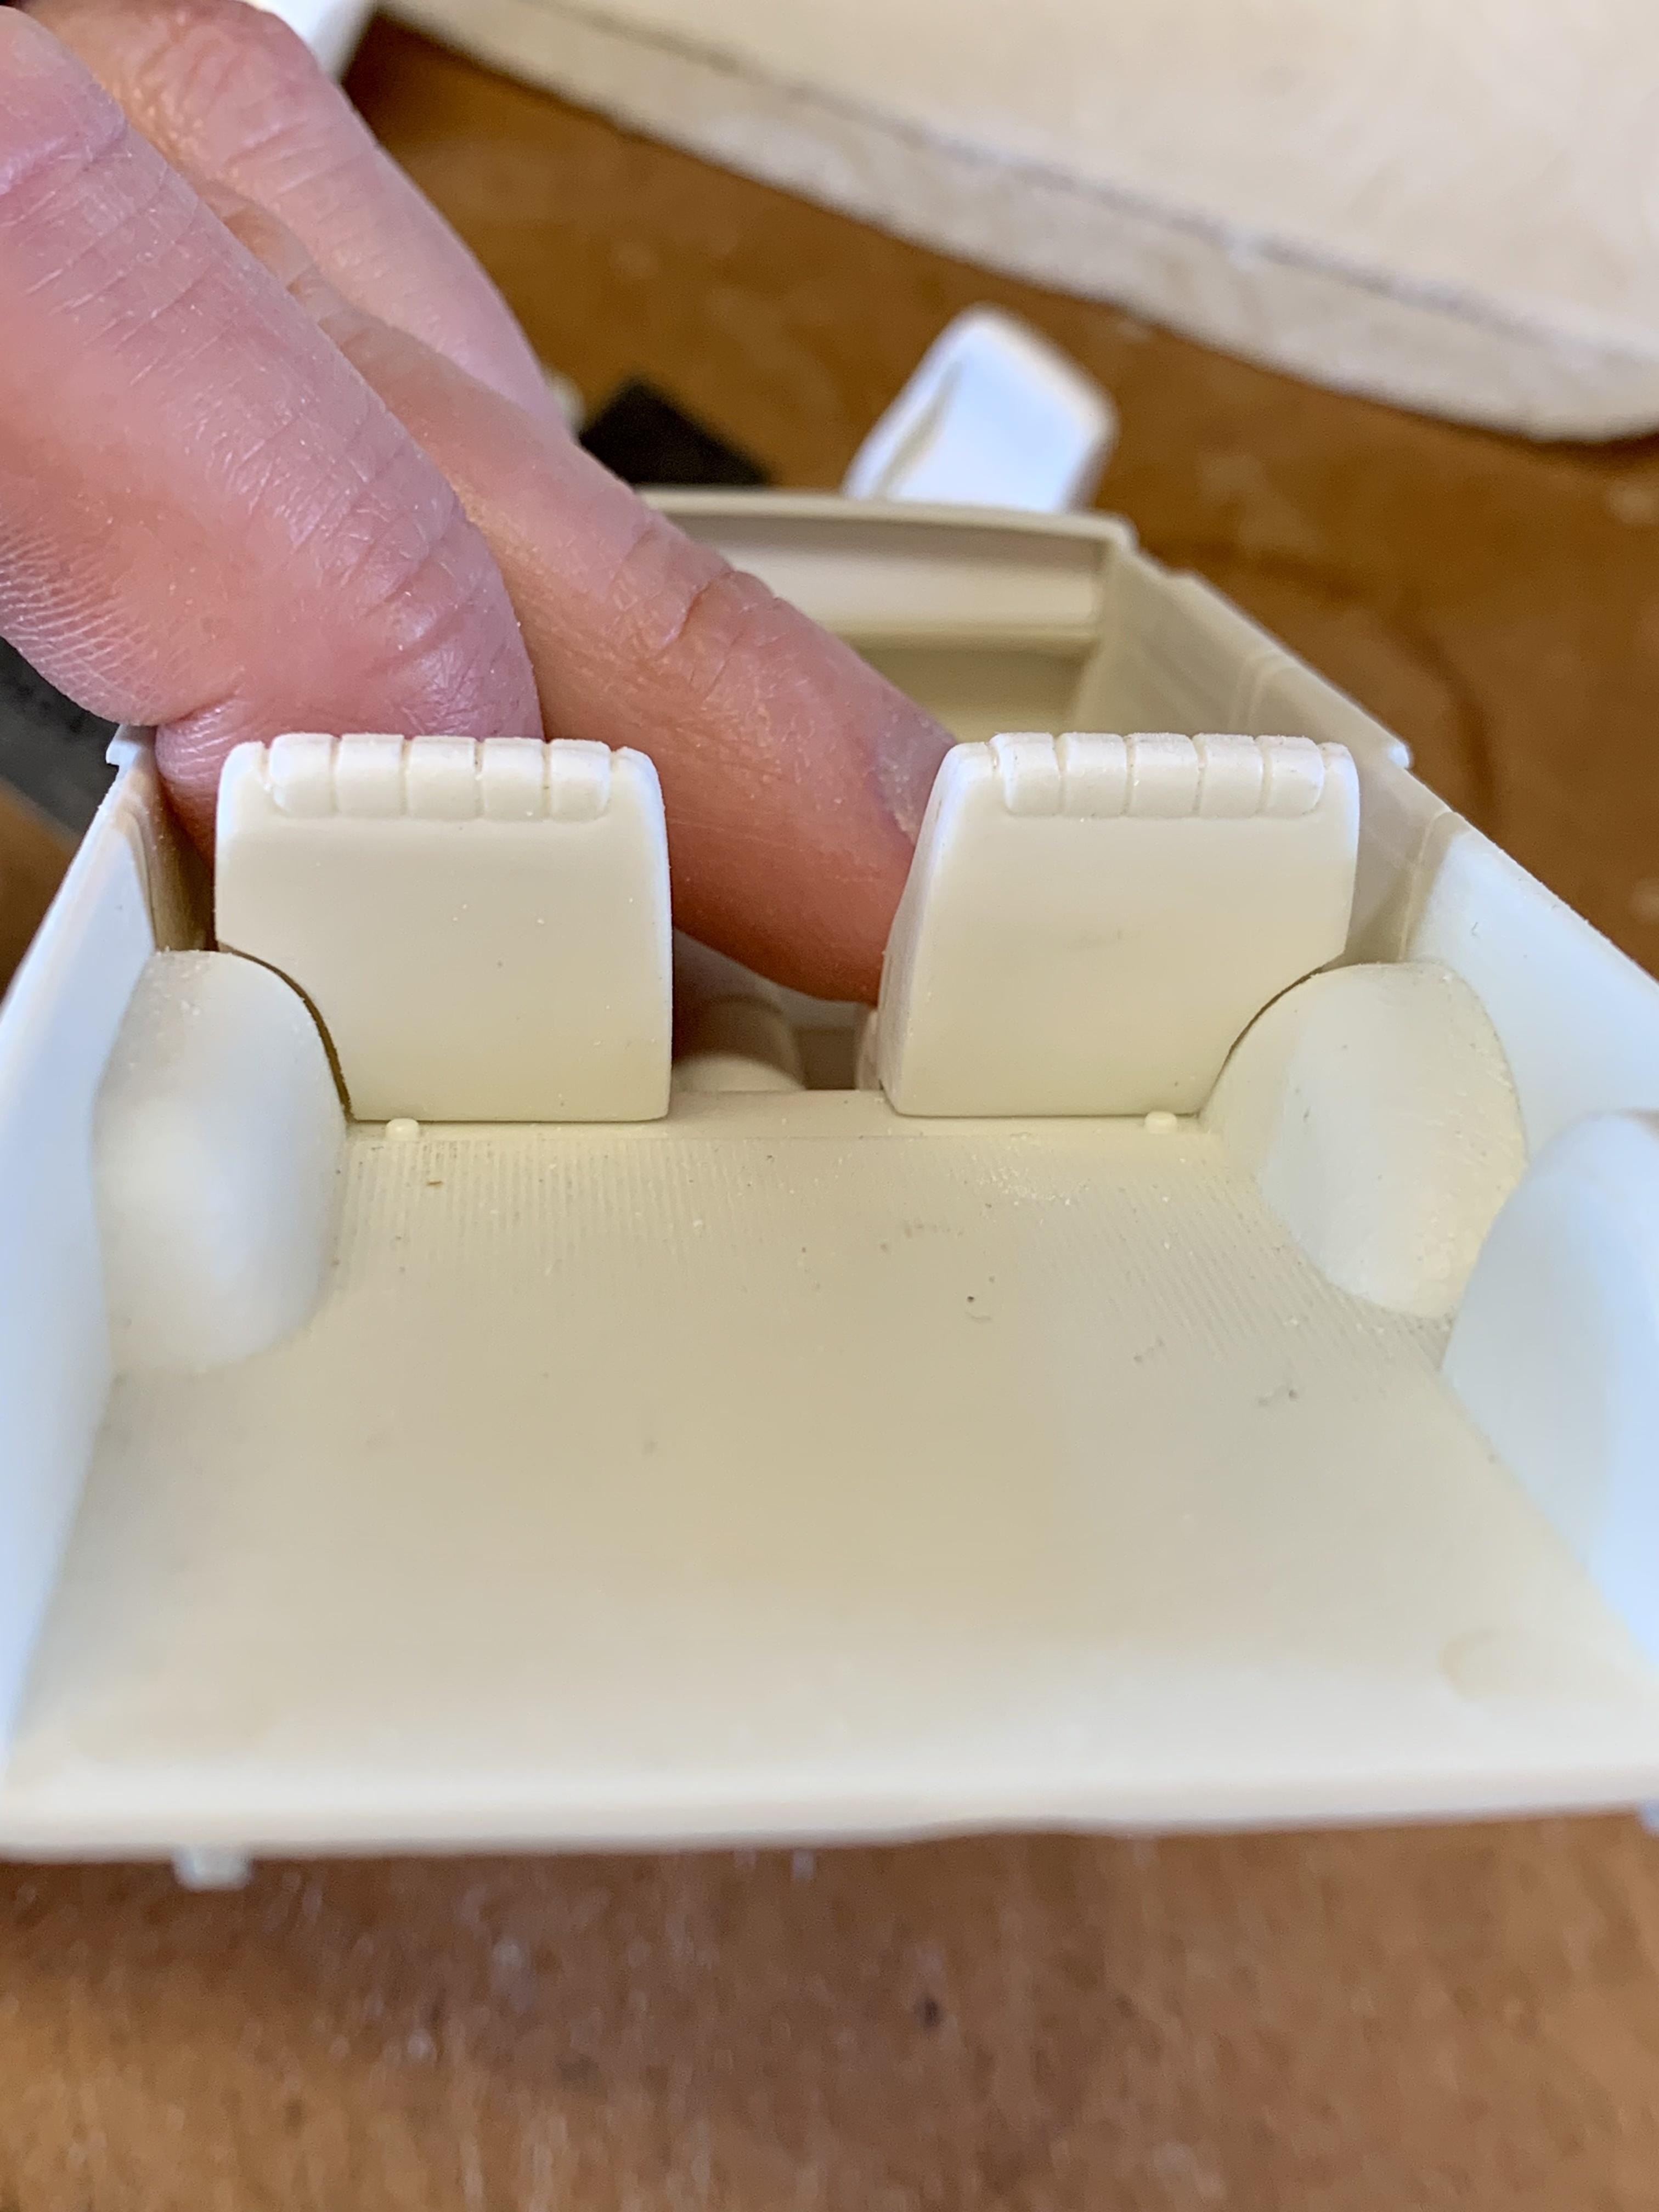
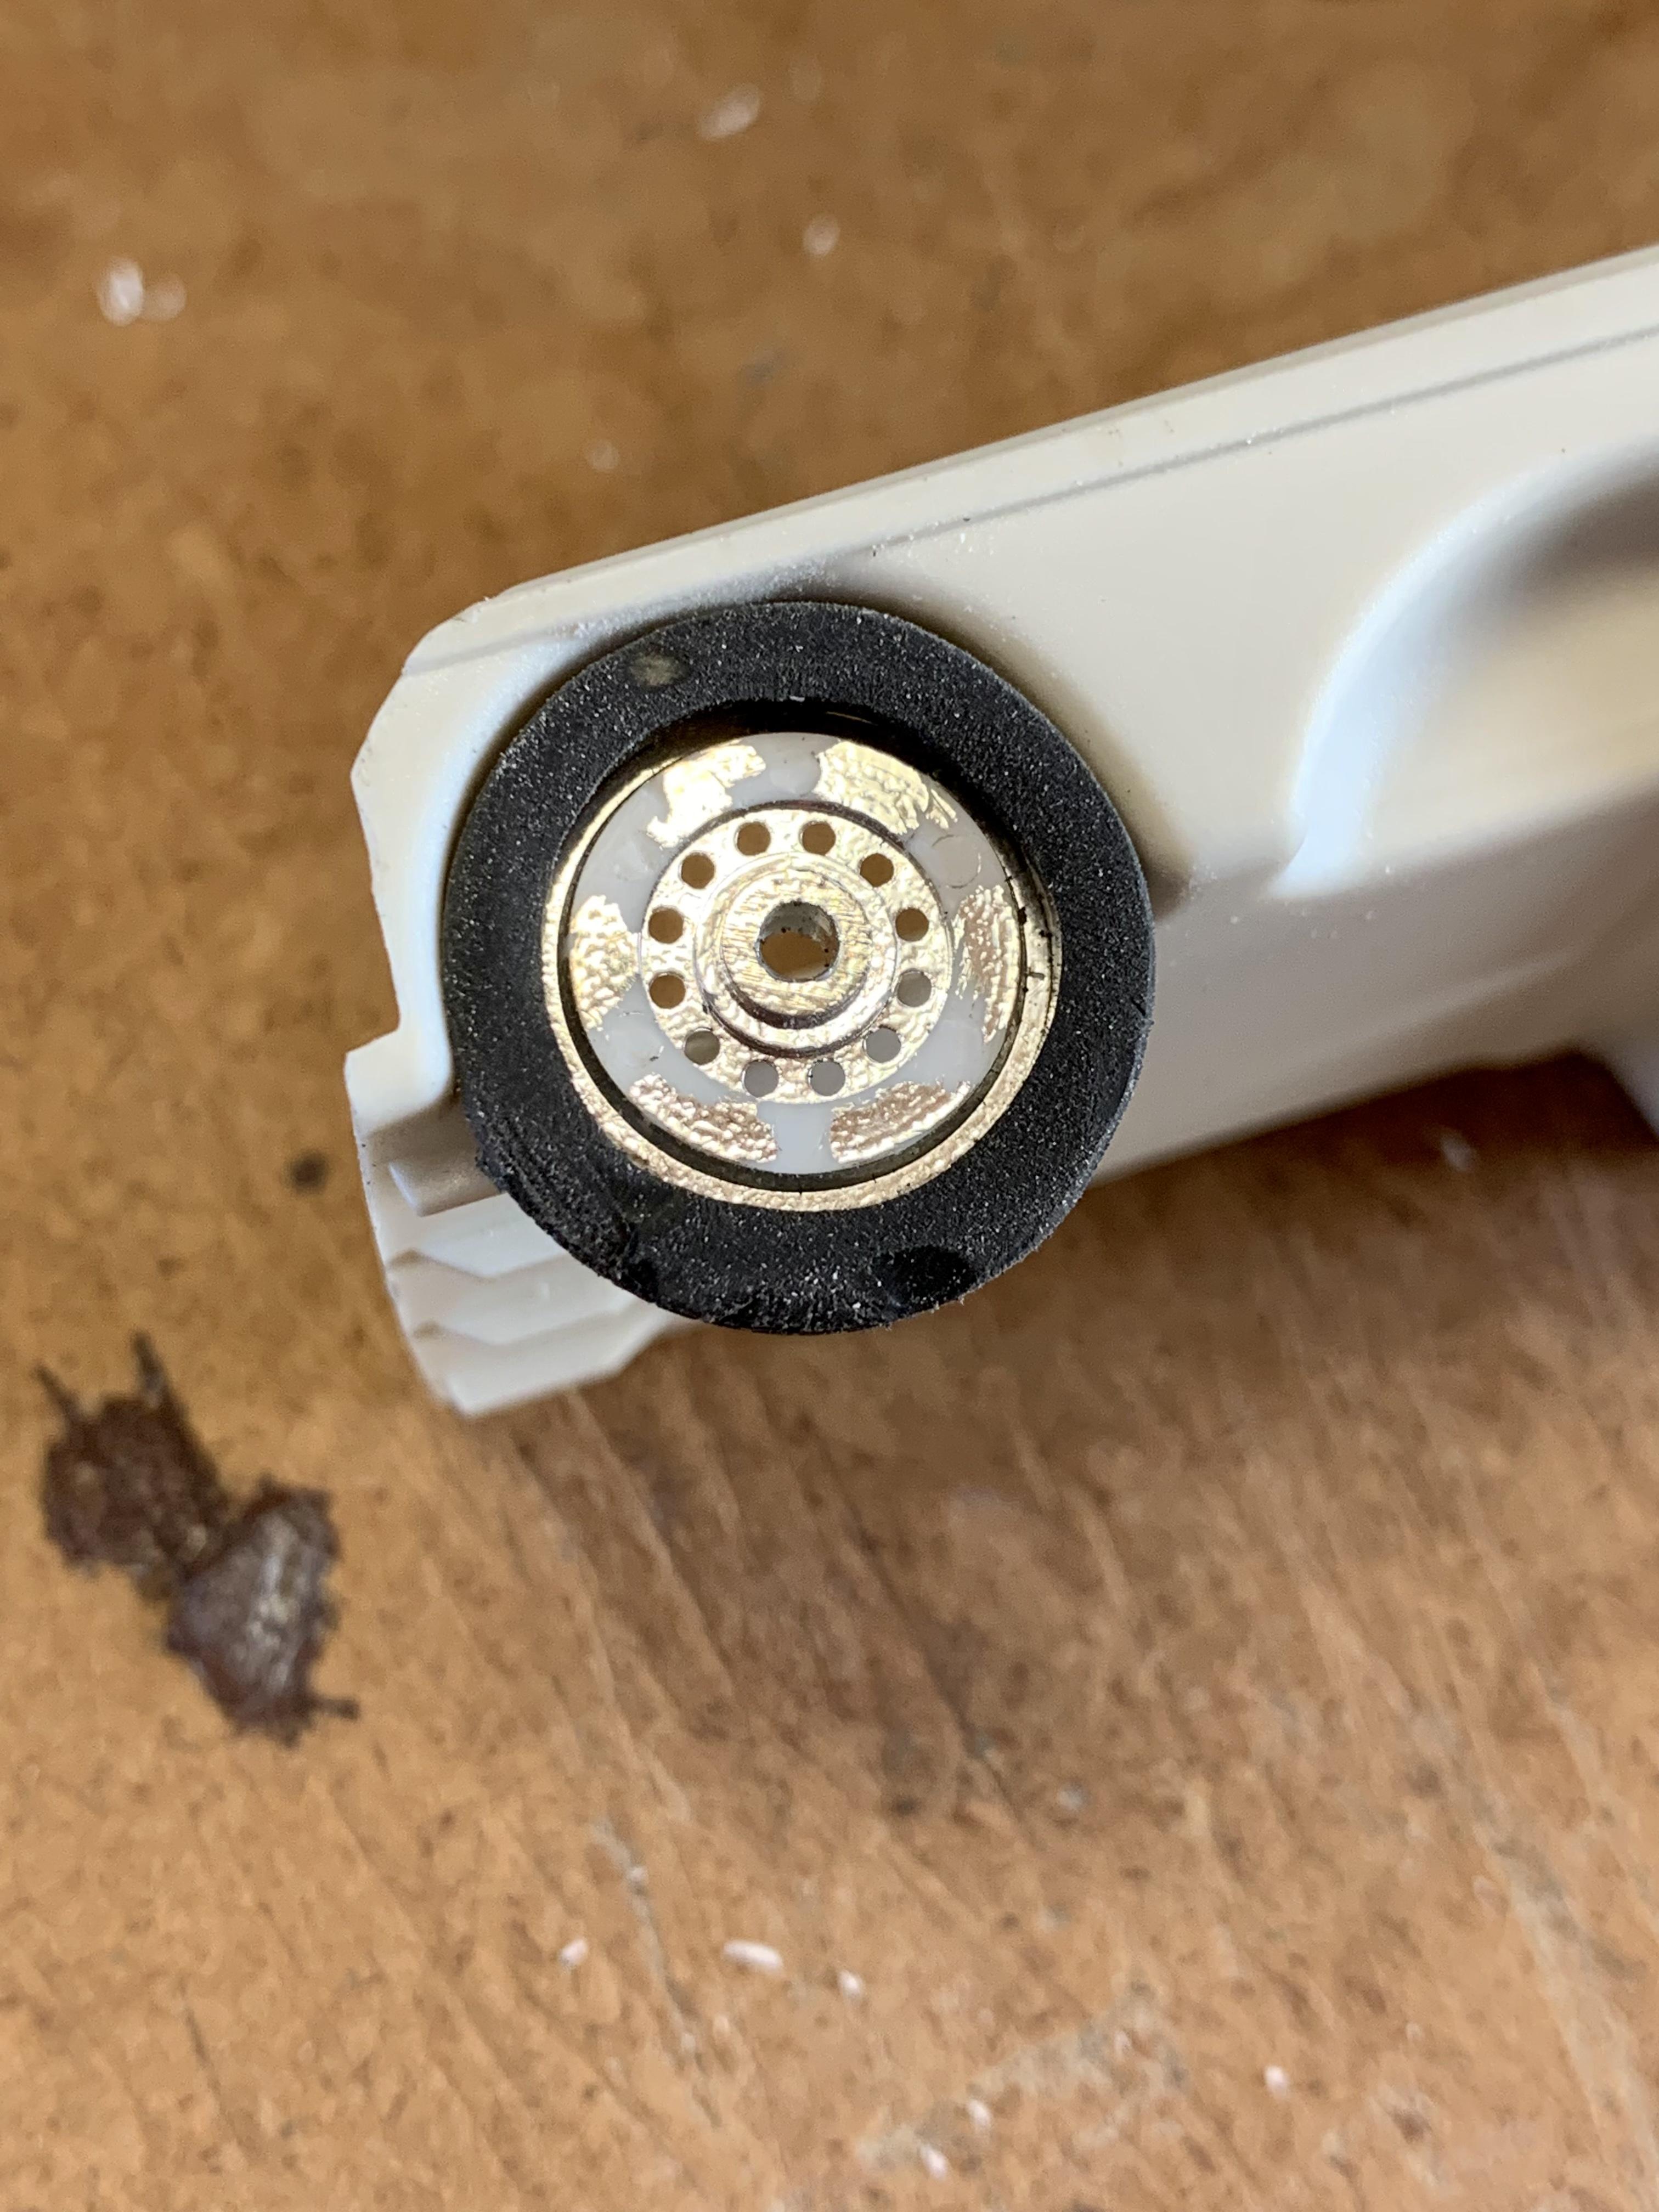
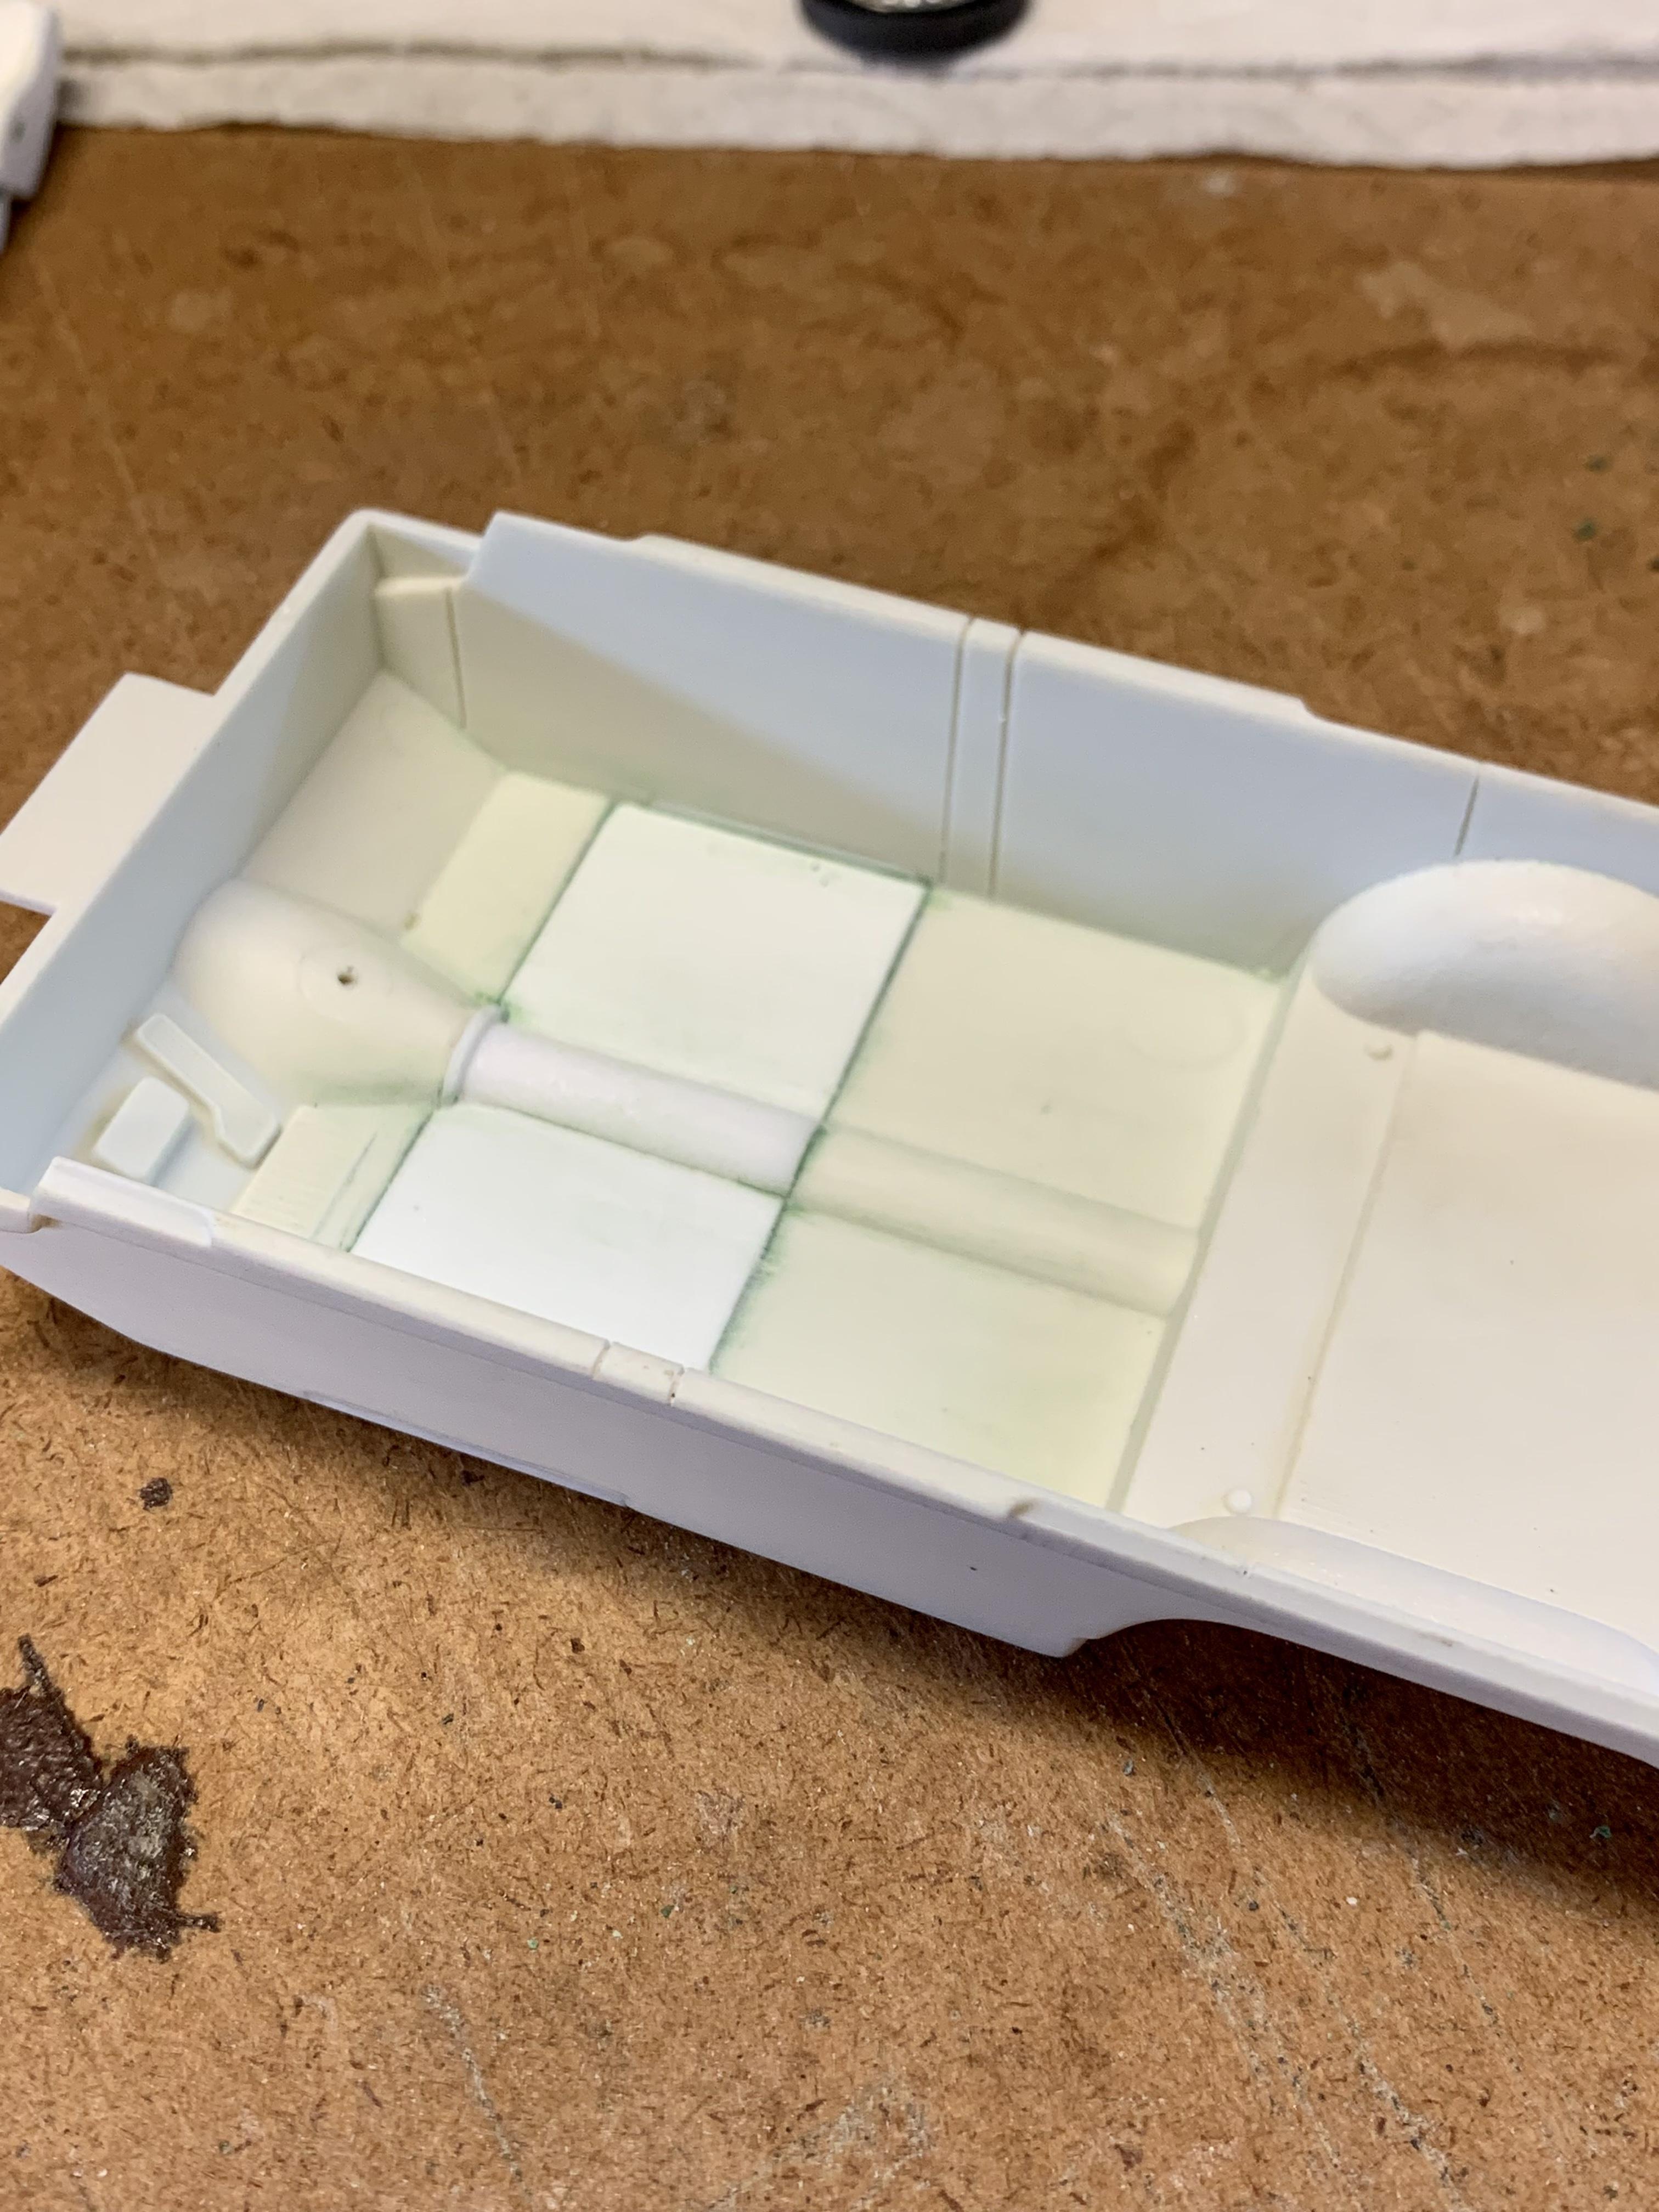
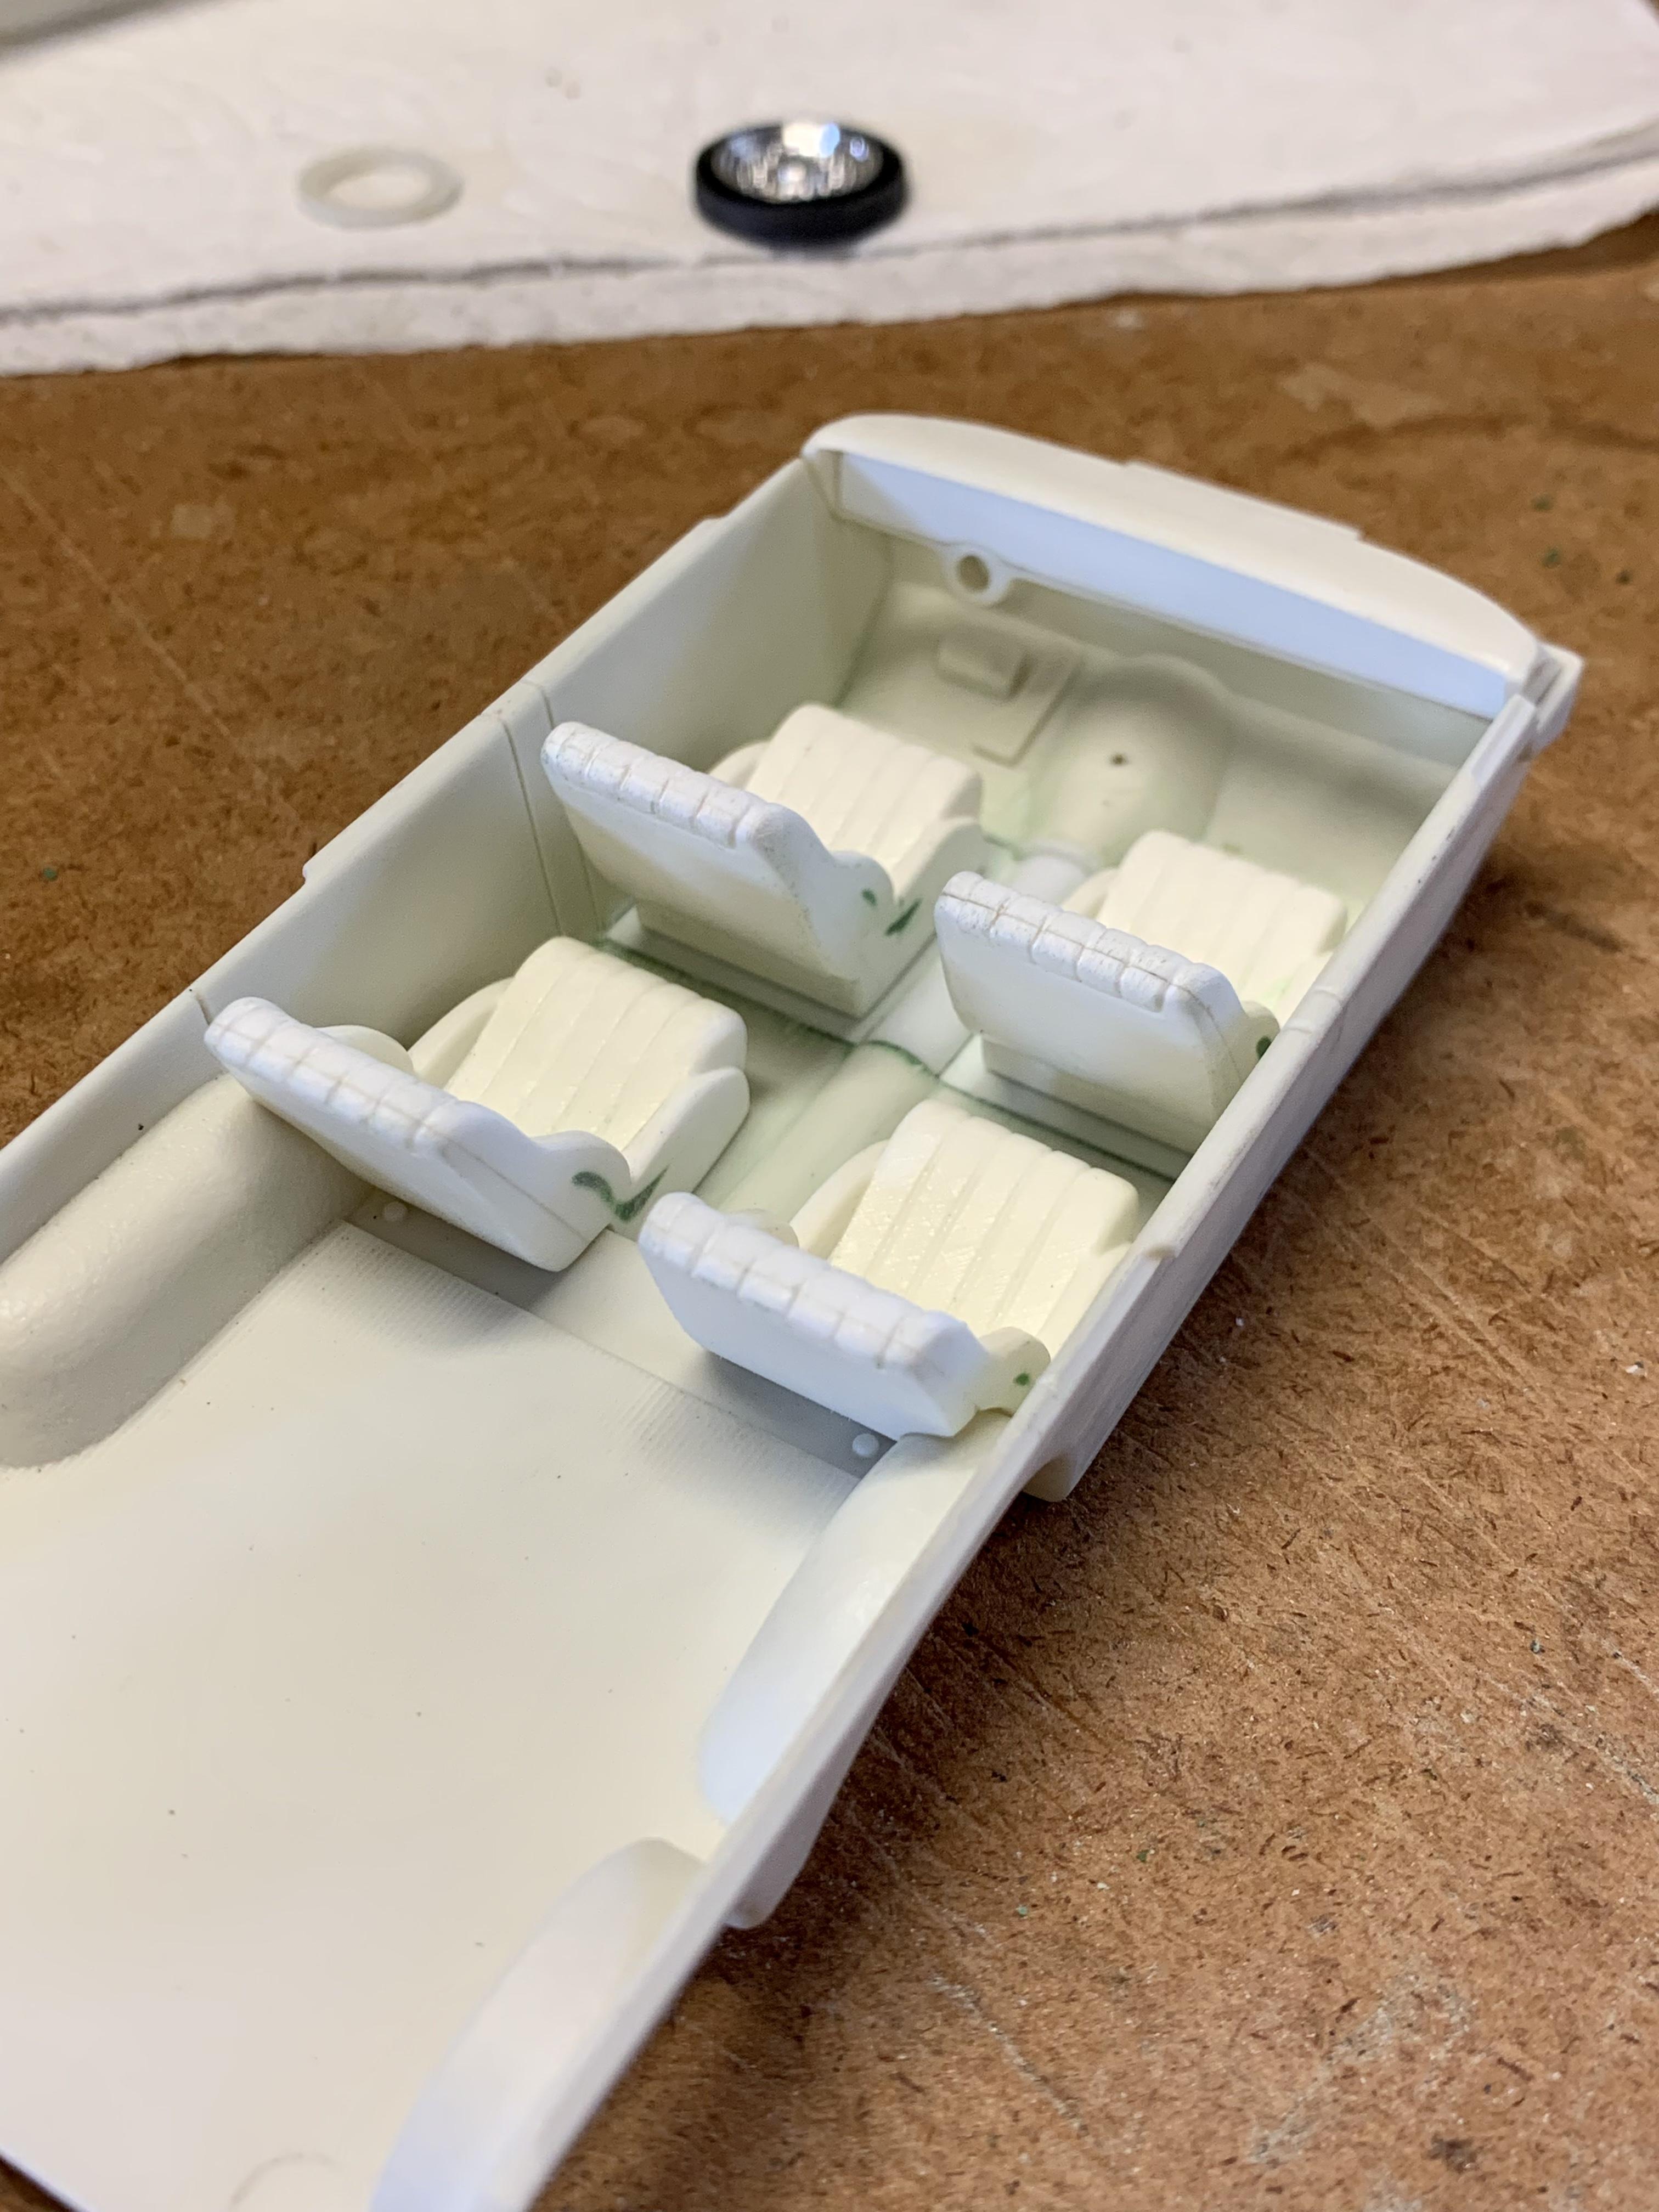
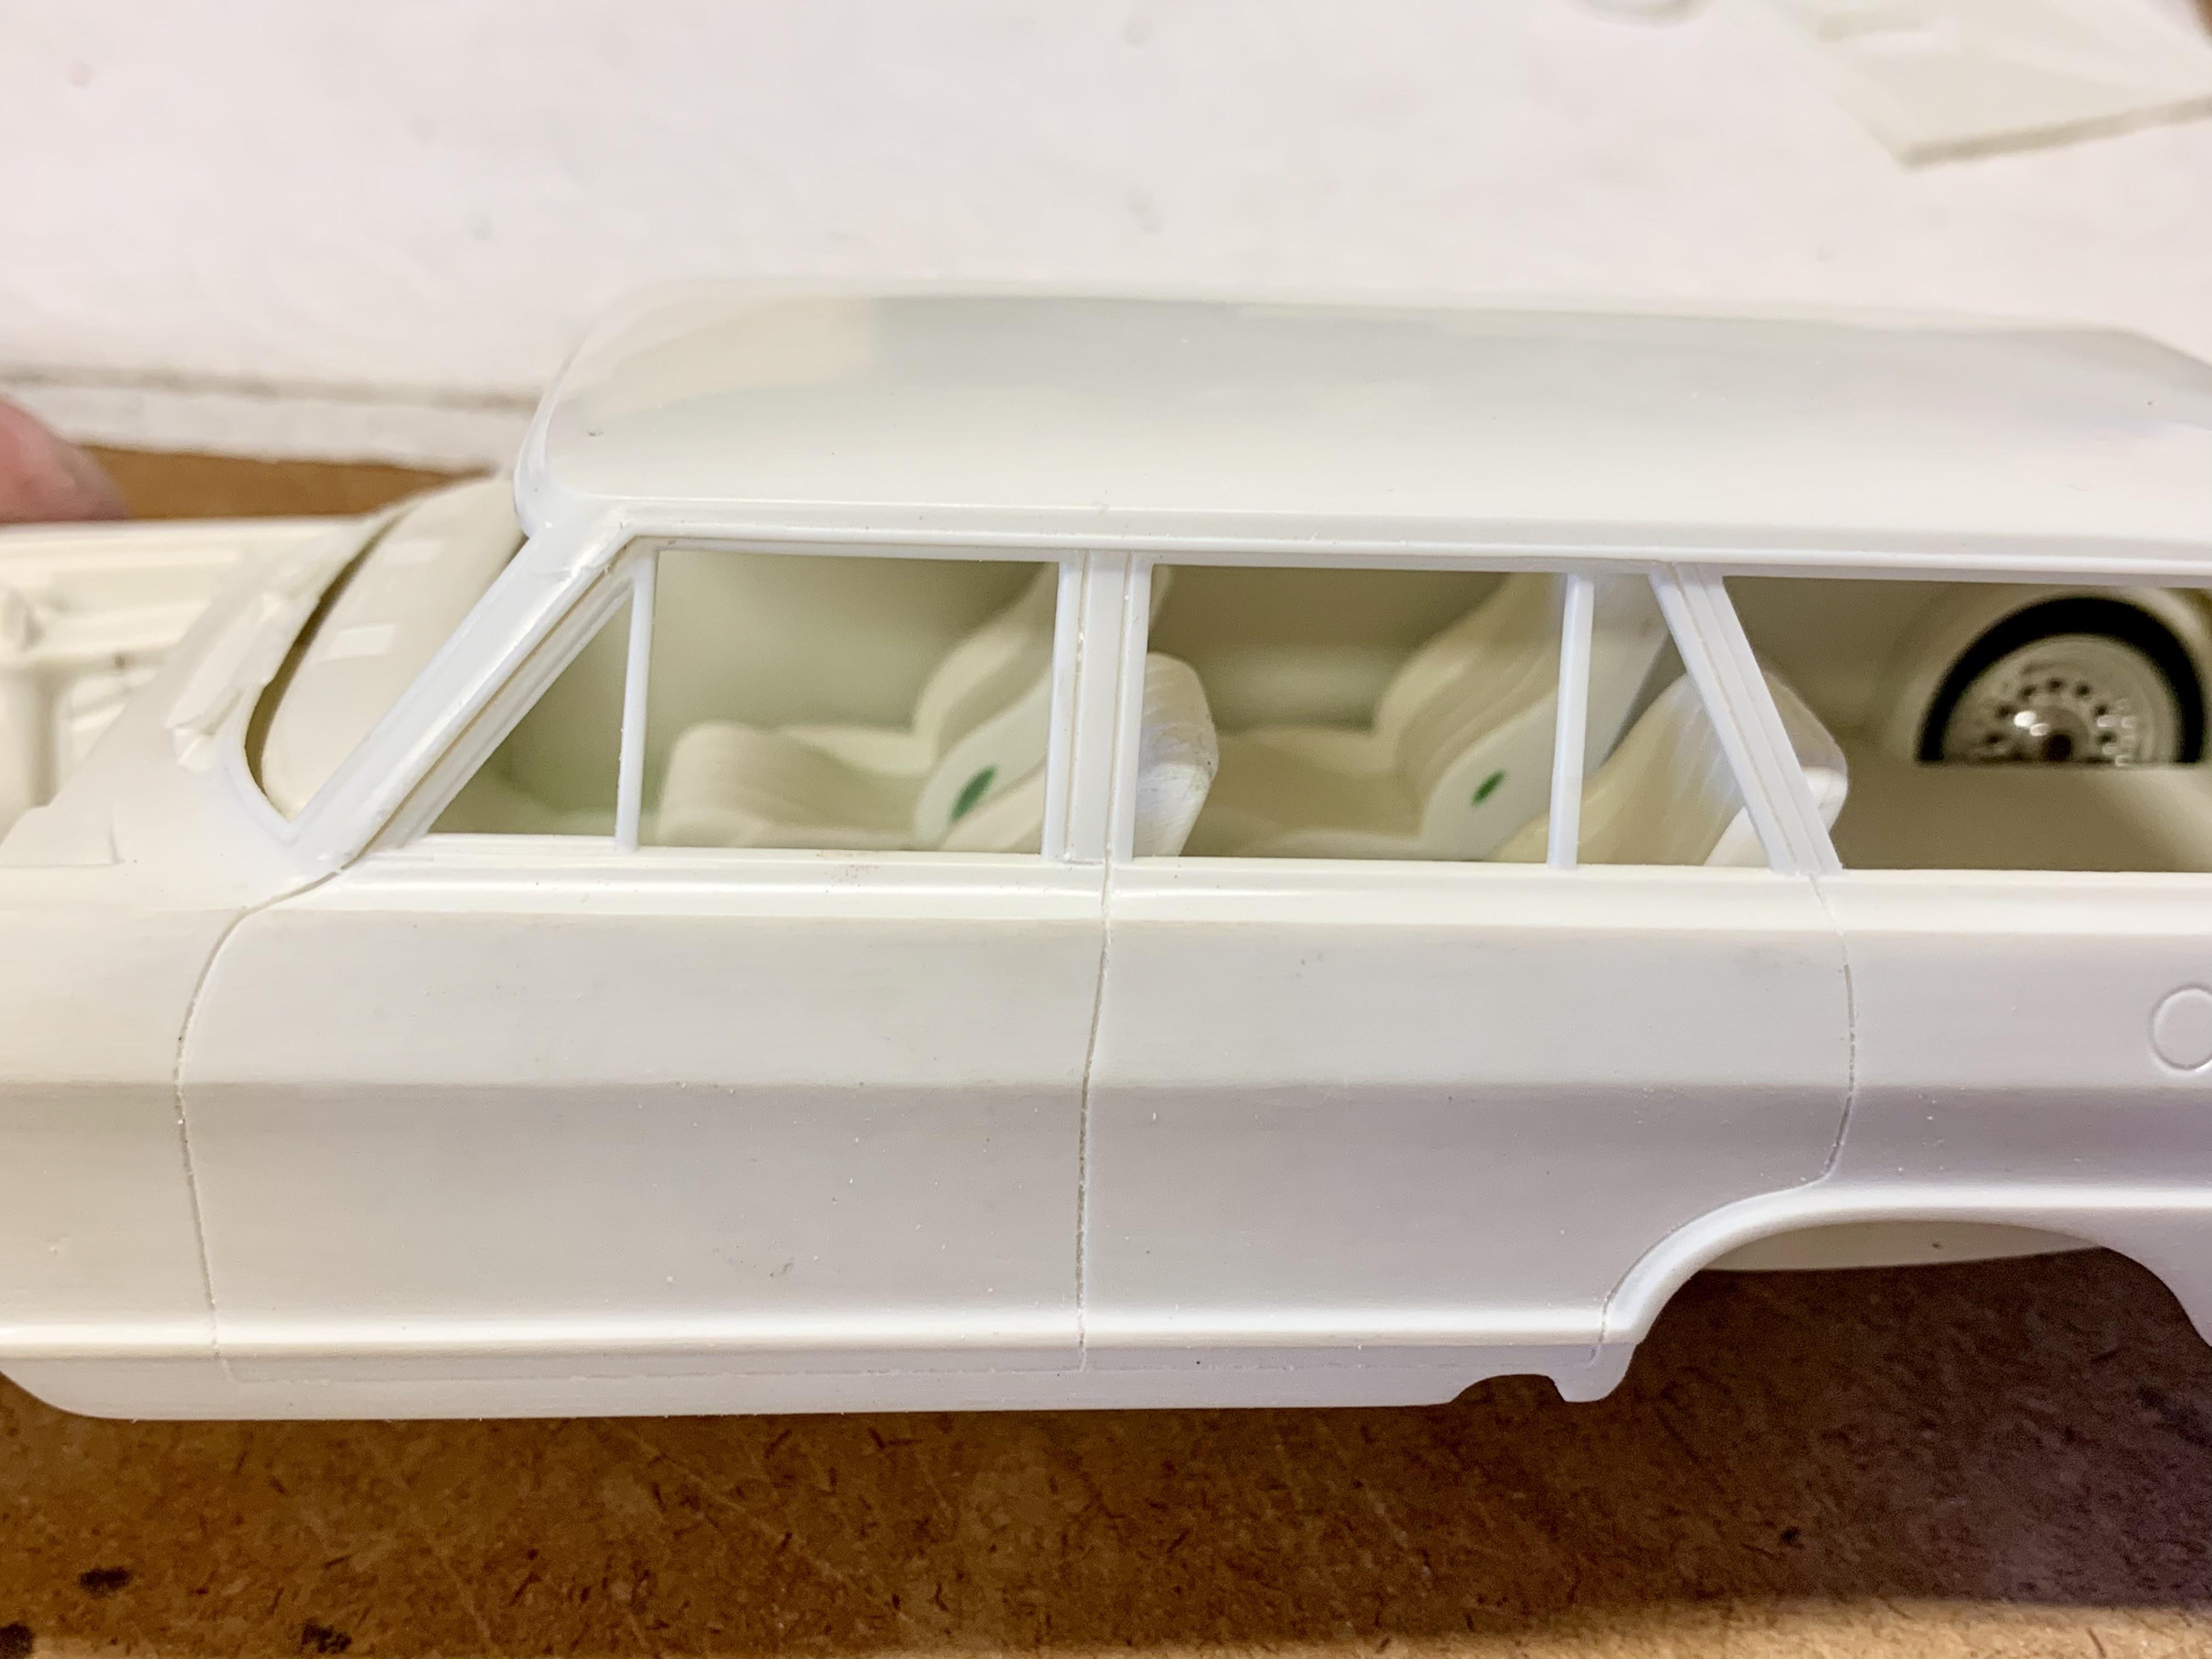
UPDATE! Happy Halloween everyone! Before taking the kiddos Trick or Treating tonight I had a productive afternoon at the workbench. The first order of business was to come up with a solution for the rear seat. I don’t have anything that would make a proper looking bench that would match the front buckets in any kind of way which is why I mentioned in my last update the idea of replacing the rear seat with a custom stereo enclosure. If the car was a 2-door I would have done that no problem but given it’s a 4-door I really wanted it to have rear seating. Digging through my bin of interior parts I came across another pair of Speedwagon front seats. I grabbed them then spent some time studying how to best make them fit with the step in the floor and around the wheel wells. After some careful carving I made them fit nicely. Continuing on, out of the box the door panels have some almost indiscernible engraving “detail” which worked to my advantage since it was easy to sand smooth. Before doing that I scribed all of the door panel gap lines that didn’t exist. I also filled then sanded all of the seams for the floor patch. Borrowing a detail from @Katsusauce recently finished and very cool ‘63 Wagon, I opened the spare wheel cover in the cargo area to display a matching Centerline Champ wheel. I used a small Dunlop tire from Revell’s 32 HiBoy Roadster which I had to cut in half and then sand down around 3/4 of its circumference to fit. Here’s some mock up shots with all four seats in place. I tacked them in so that I could also get a look with the interior up into the body. I’m very happy with how the seats worked out. Next will be to finish the door panels with some 90’s looking inserts, billet handles & cranks and making a subwoofer box for the cargo area.
-
Man, this came out awesome! Love the paint scheme (just now noticed it carries over onto the frame side rails) and the car looks super aggressive thanks to the stance, wheels & tires and injected Nailhead.
-
@Kit Karson Nice work on the sectioned header pipes! Shame about the paint job but at least now you’ve had some warming up and the new paint will go better.
-
427-powered ‘34 truck
Dennis Lacy replied to OldNYJim's topic in WIP: Model Trucks: Pickups, Vans, SUVs, Light Commercial
I’ve always loved the ‘34 Pickup kit. The possibilities are endless! Will be following along for sure. -
1963 Chevy Nova Wagon Street Rod FINISHED 3/20/22
Dennis Lacy replied to Dennis Lacy's topic in WIP: Model Cars
Thanks for the nice words, brother! -
1963 Chevy Nova Wagon Street Rod FINISHED 3/20/22
Dennis Lacy replied to Dennis Lacy's topic in WIP: Model Cars
Thanks a bunch! This project took a hard turn away from its original direction of just sticking an engine in, lowered with some American 5-spokes. I’m really having a lot of fun with it. I find now as I’ve entered my 40’s that I’m feeling very nostalgic about the 80’s and early 90’s street rod trends that I remember so fondly back as a kid.