Dennis Lacy
-
Posts
2,487 -
Joined
-
Last visited
Content Type
Profiles
Forums
Events
Gallery
Everything posted by Dennis Lacy
-

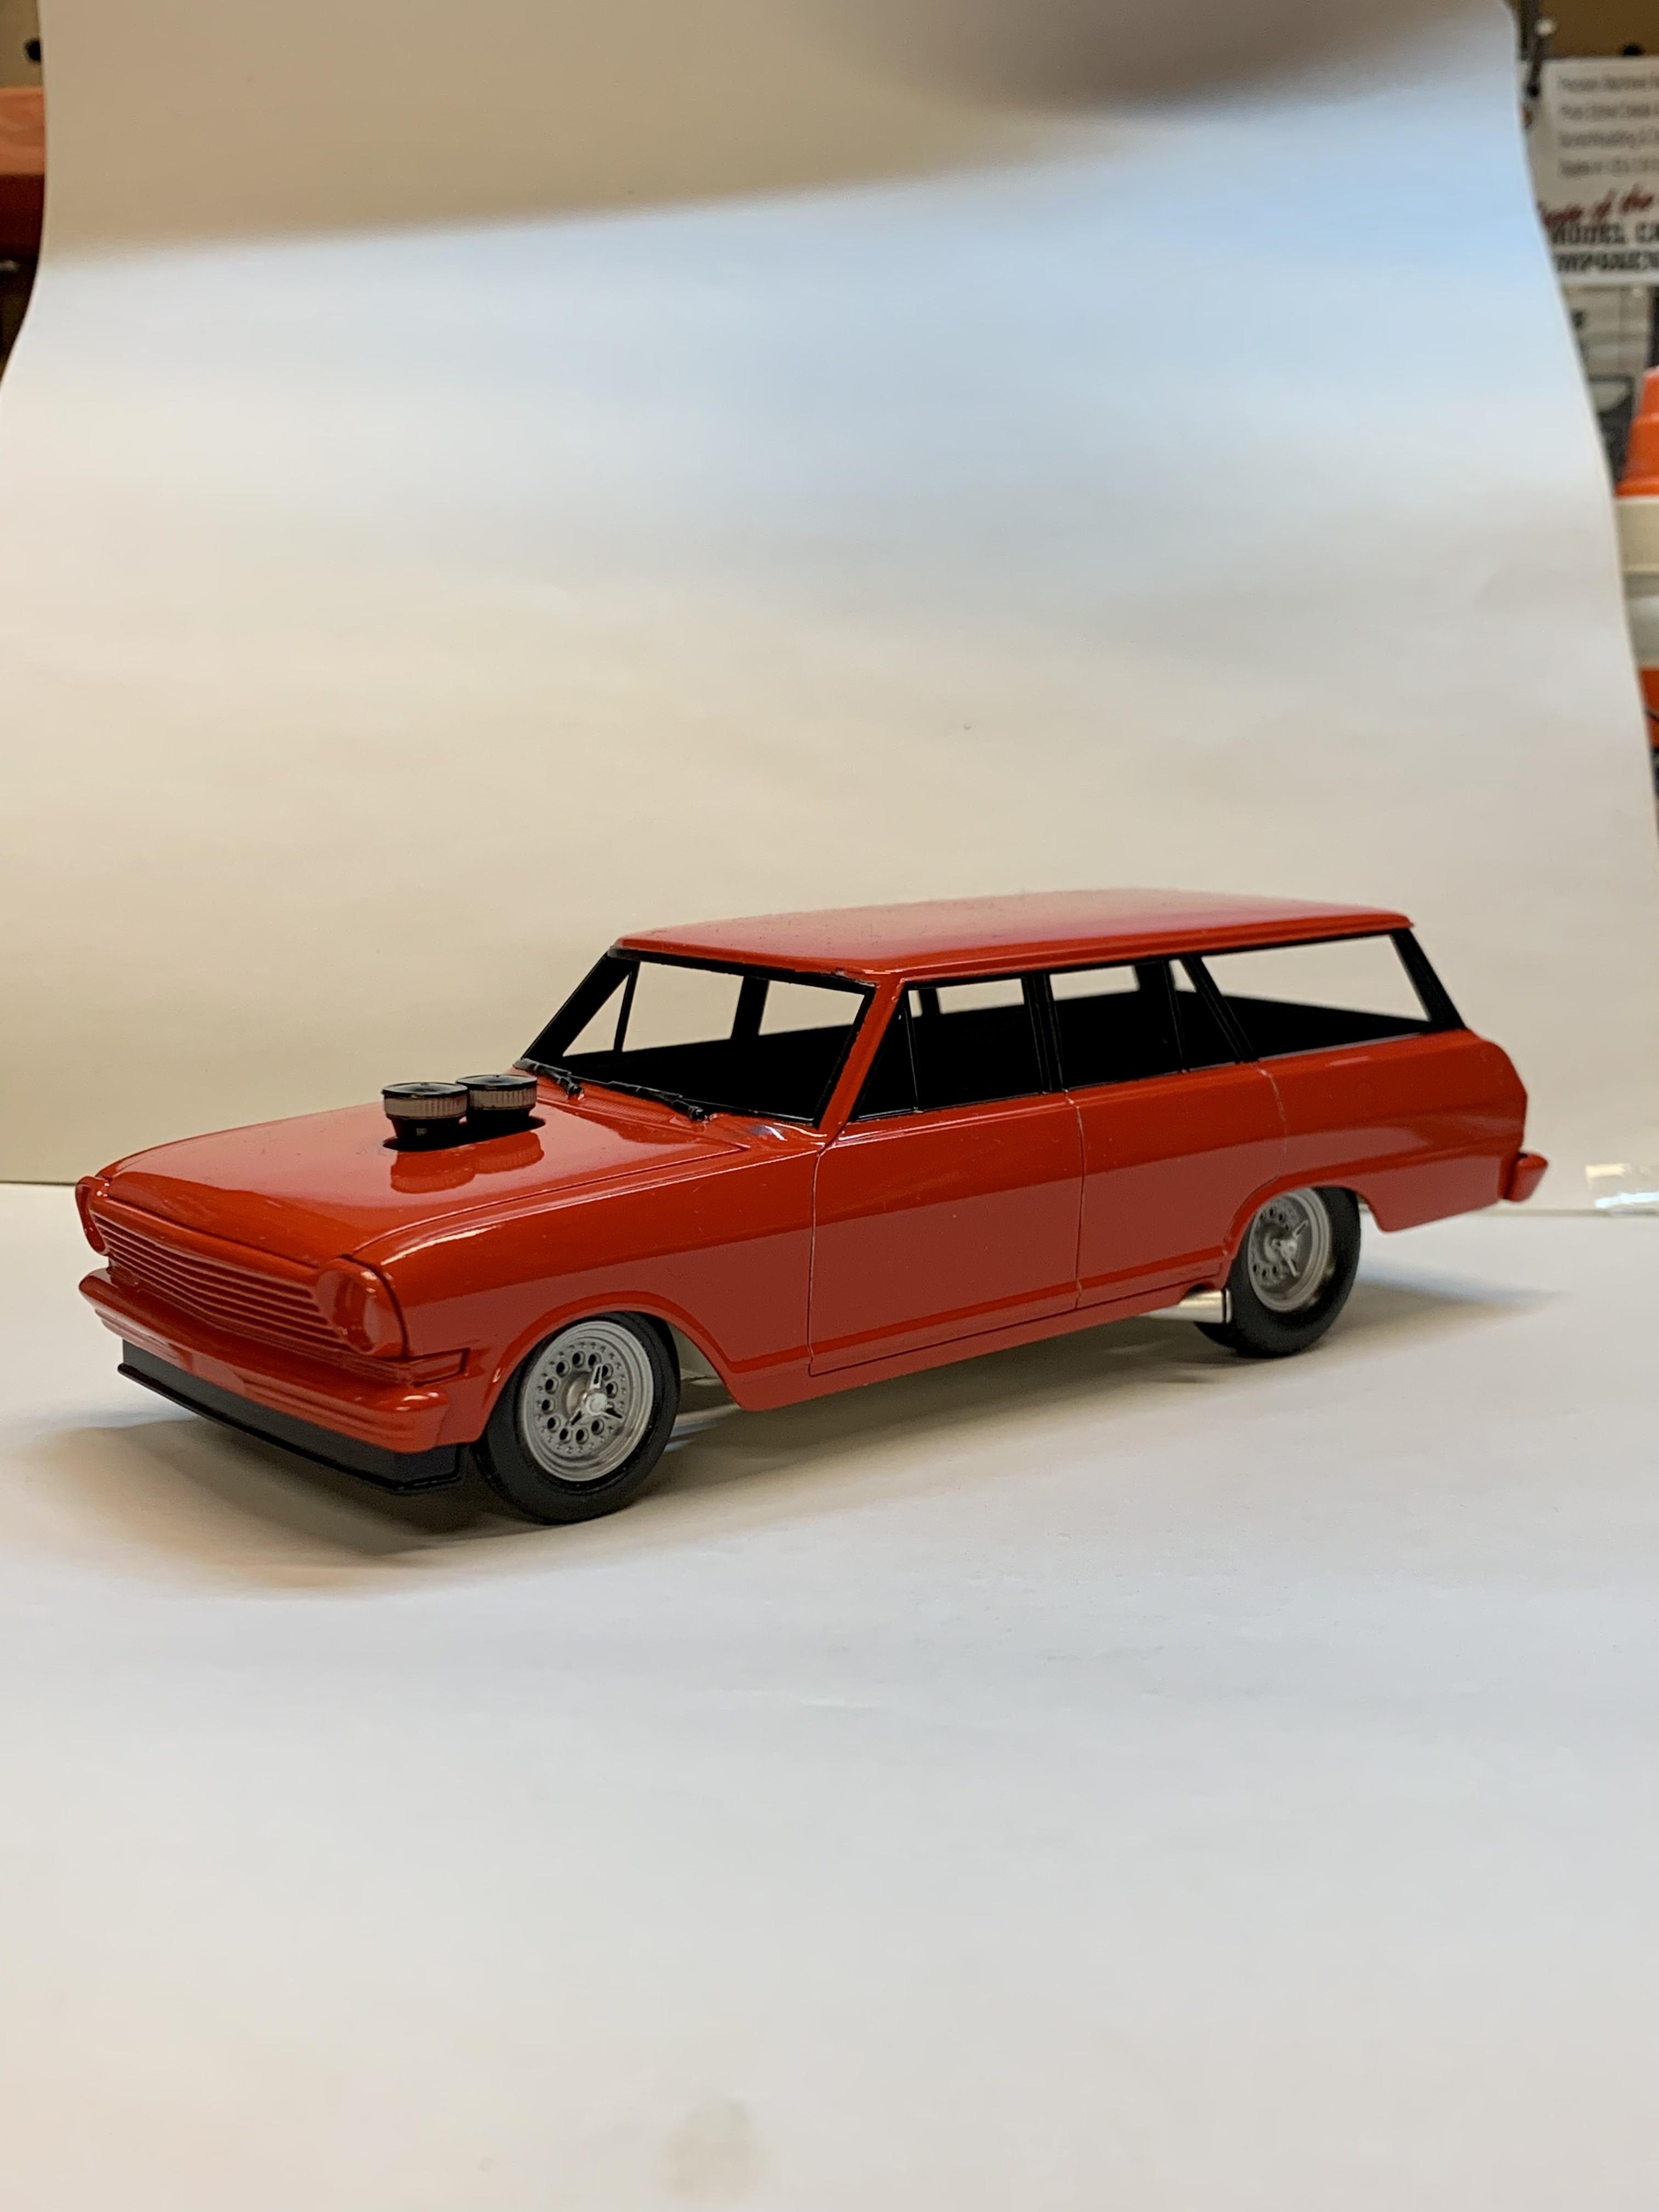
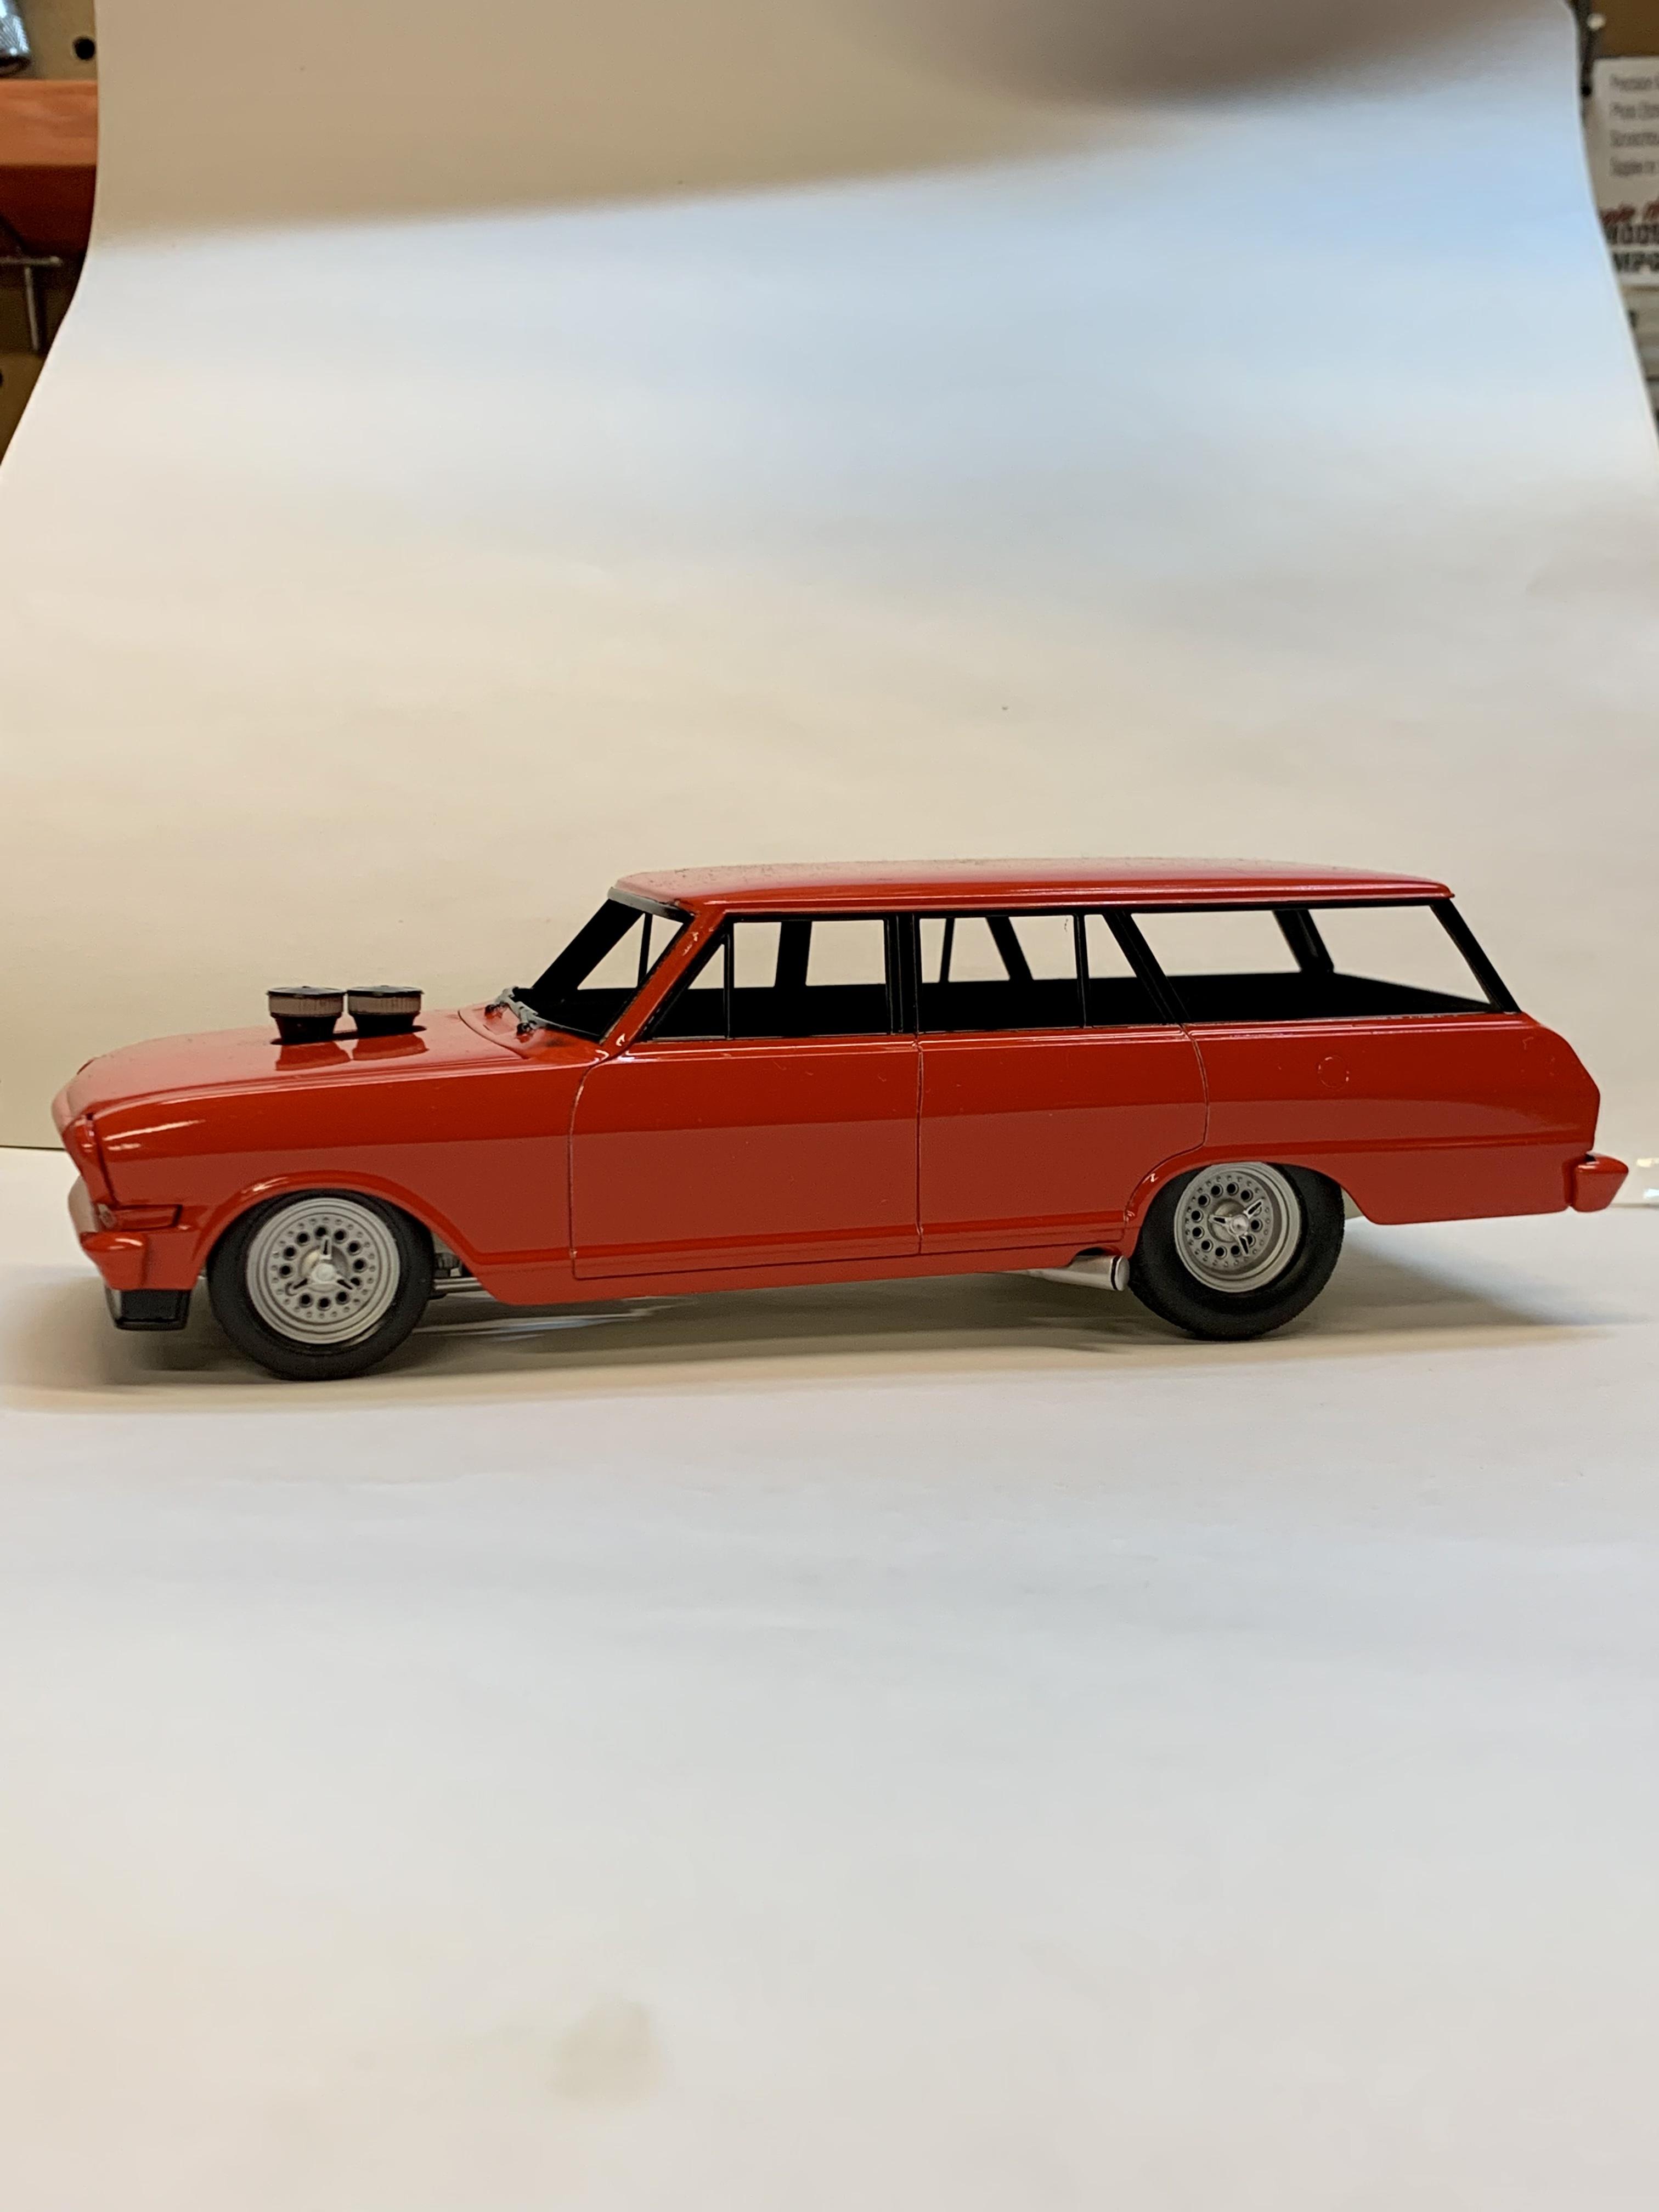
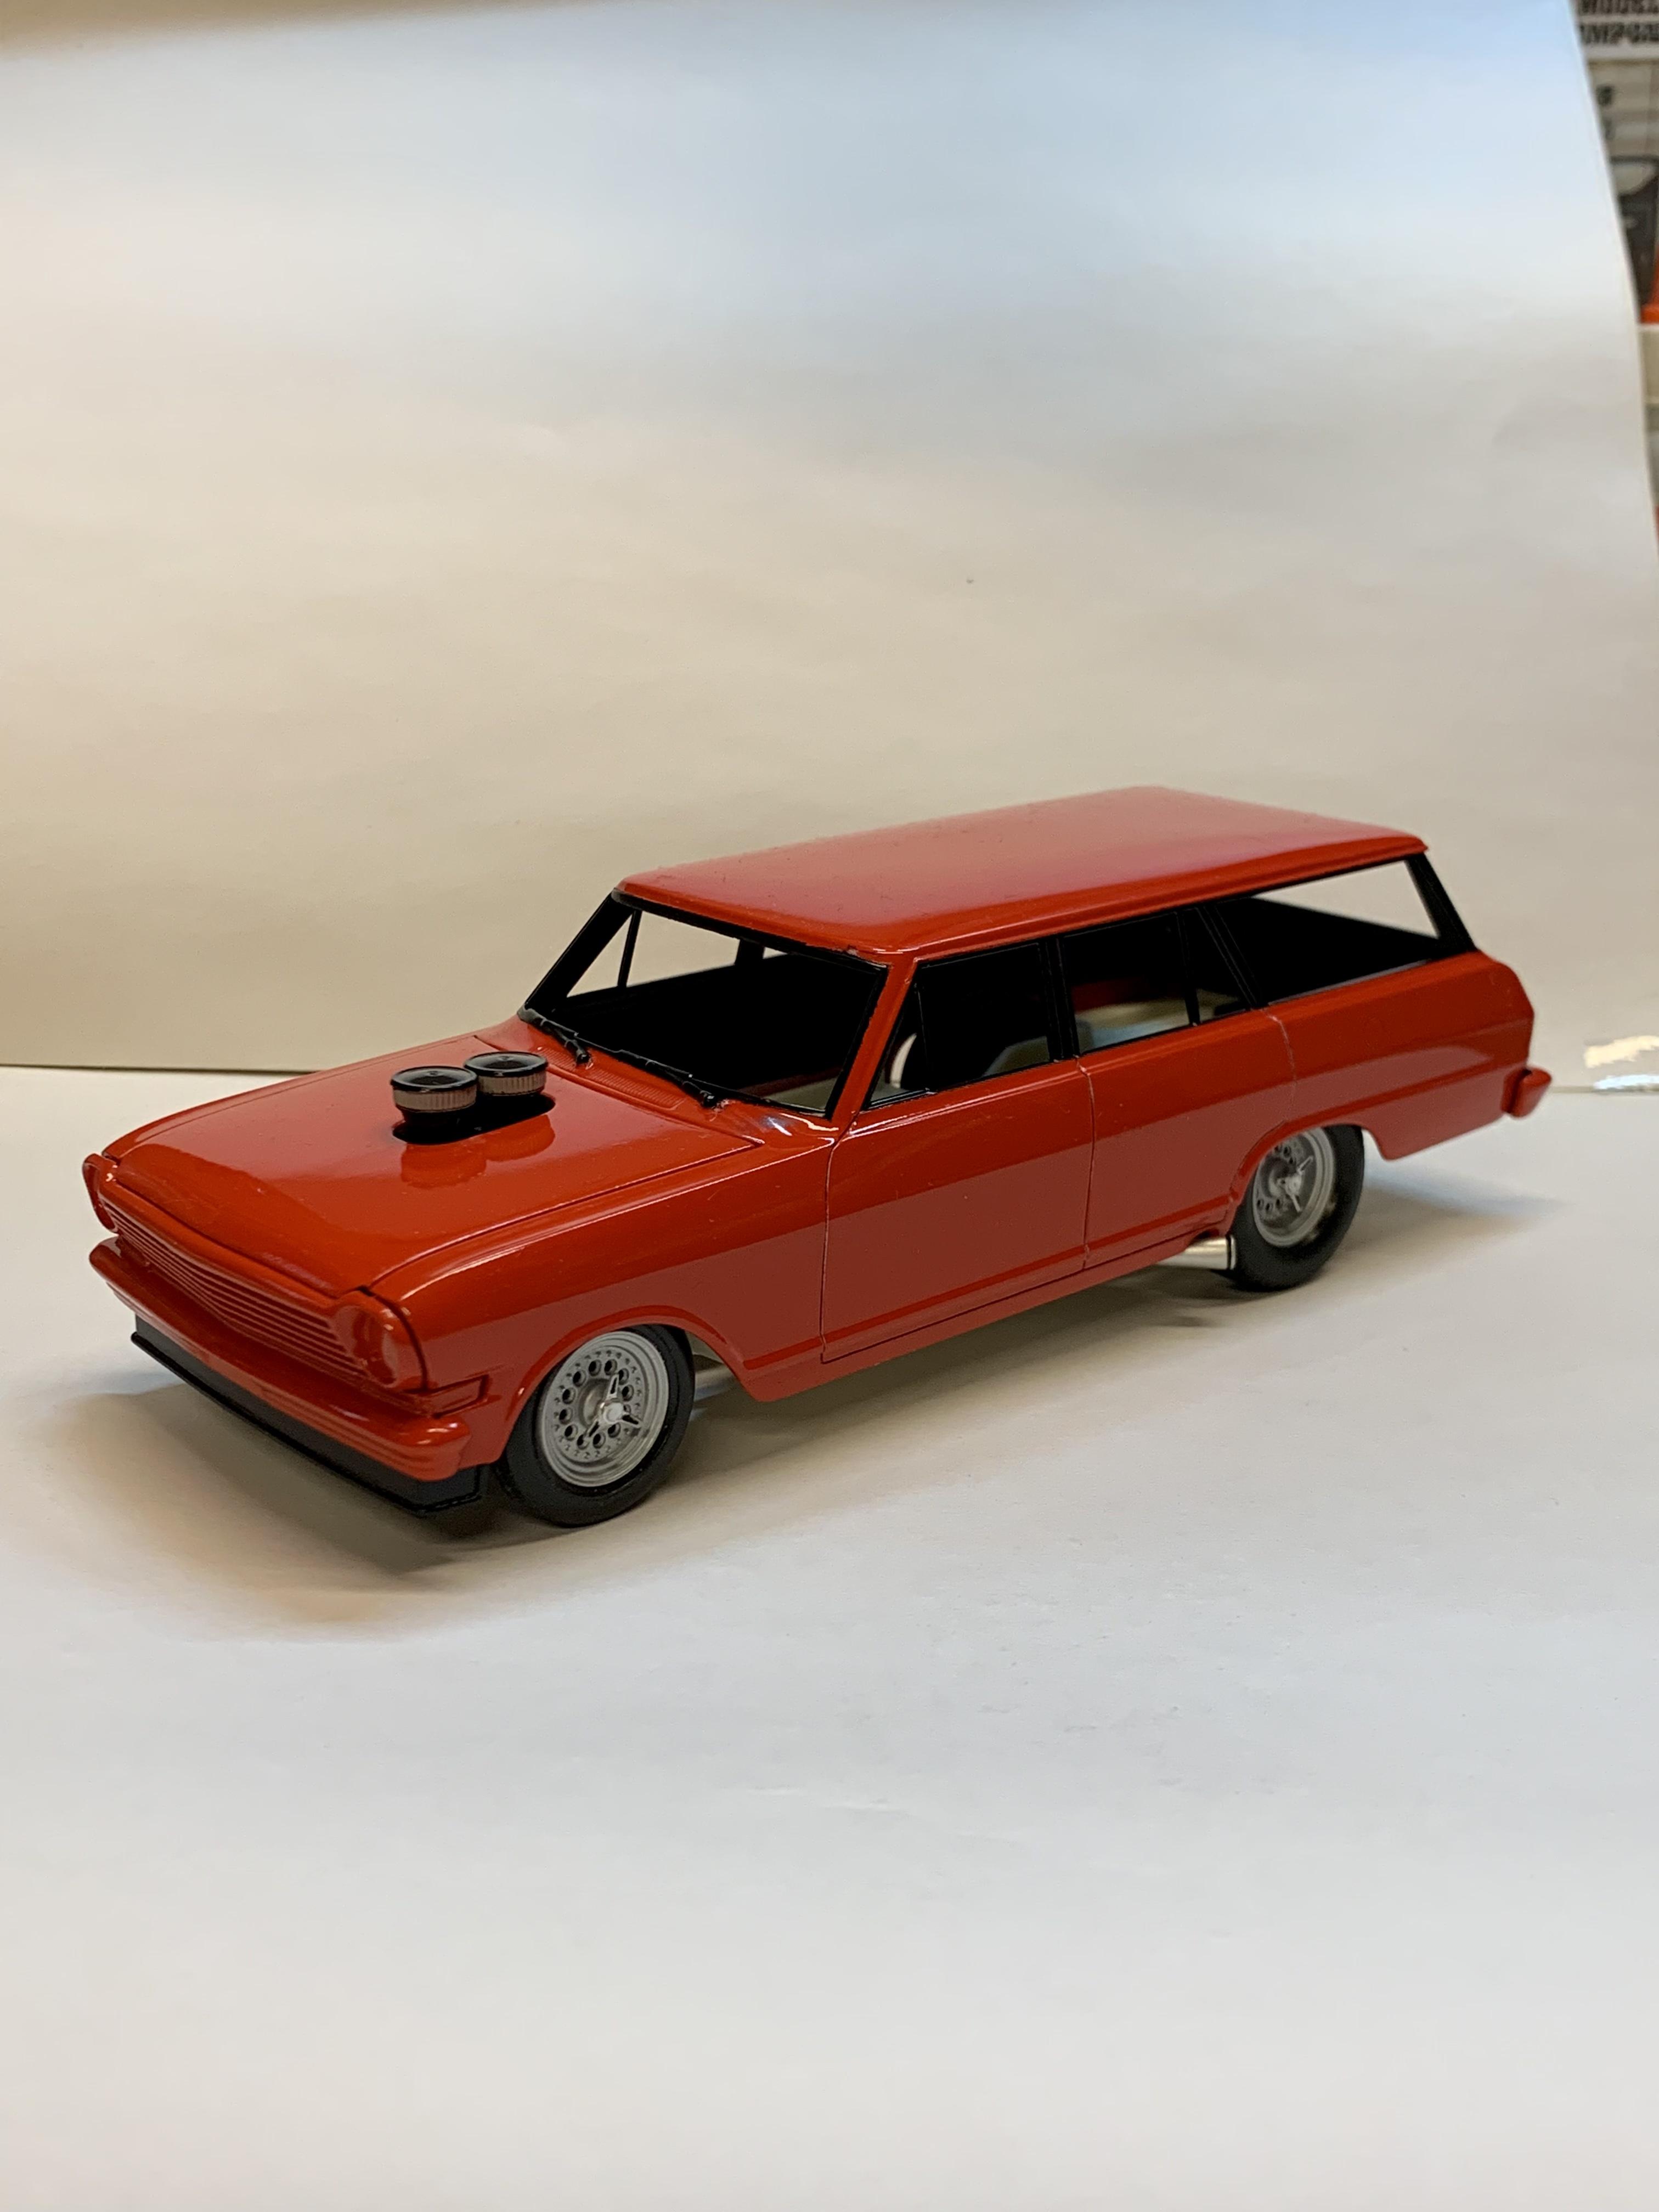
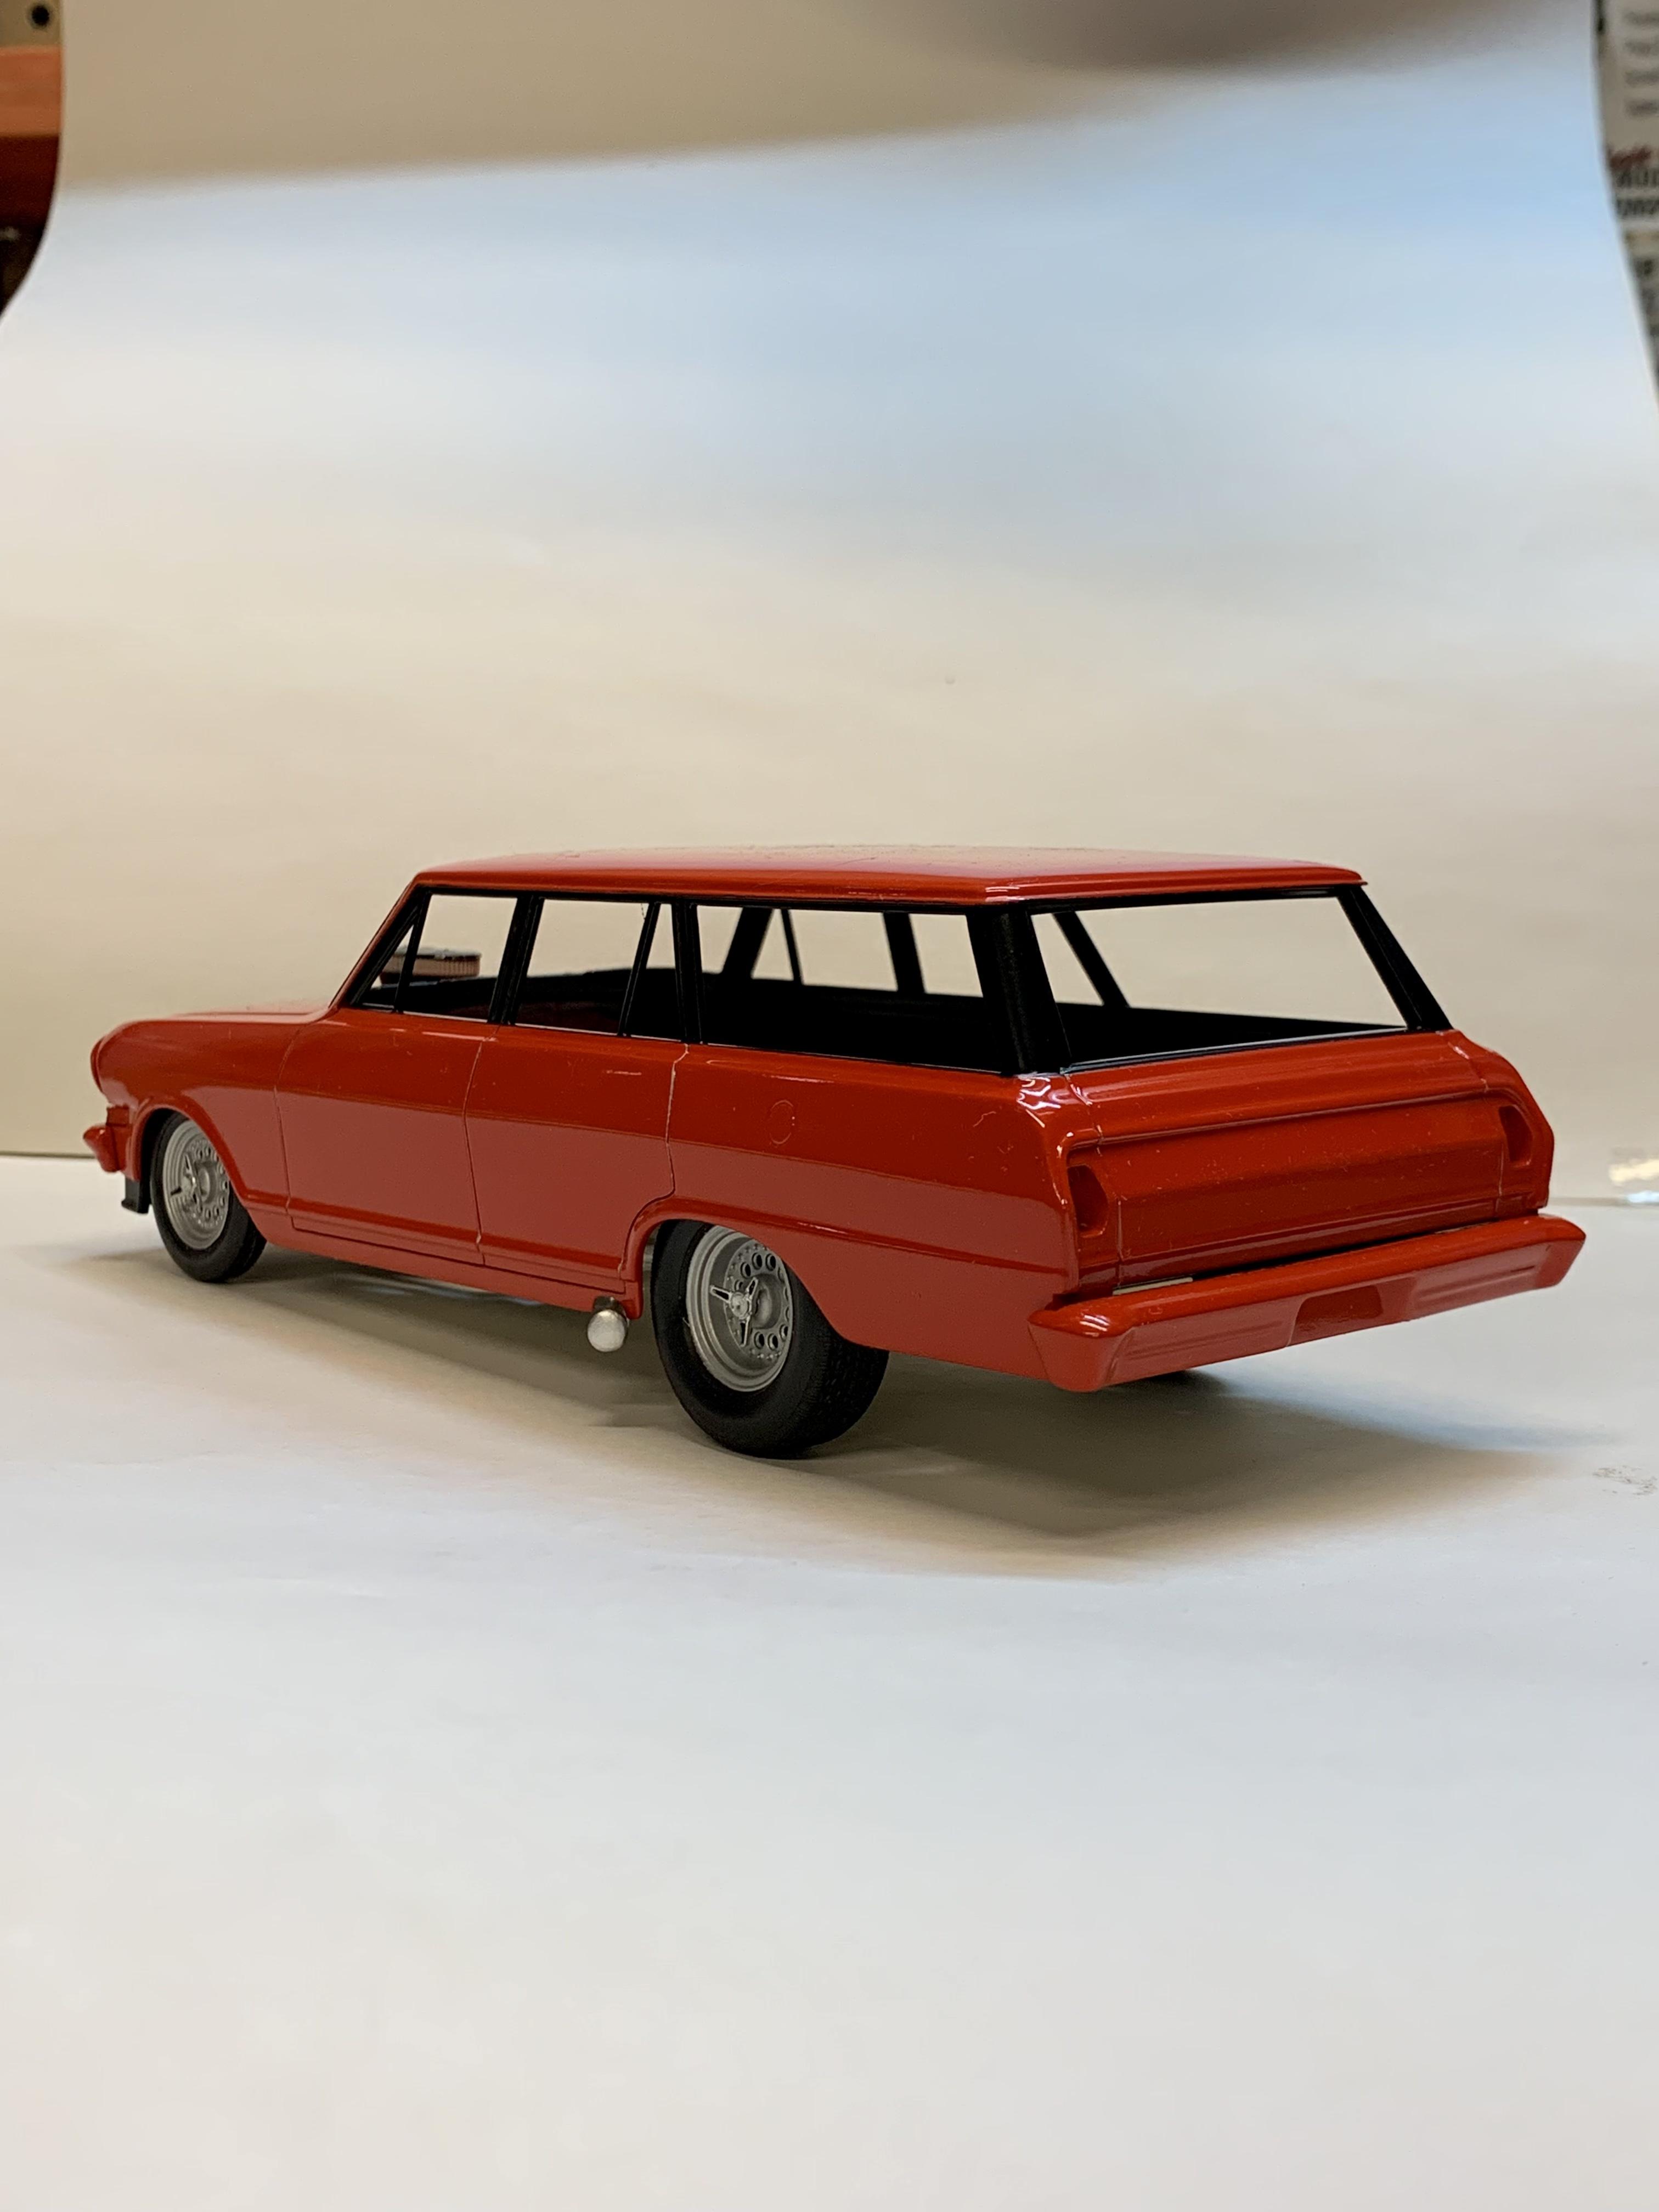
1963 Chevy Nova Wagon Street Rod FINISHED 3/20/22
Dennis Lacy replied to Dennis Lacy's topic in WIP: Model Cars
Thanks! I chose bright red because the wheels came from the ZZ Top Eliminator Coupe kit. Thought it would be a nice nod to the source. ? -
Can’t wait to watch the belly pan come together. I remember our friend RRR made one years ago for a T Roadster and he used pieces from the Revell Kurtis Midget’s because they have louvers on the vertical areas.
-
I already told you this but that interior is RAD! I’ve used those panels and seats before in a ‘32 5W but it never occurred to me to splice two pairs together to make longer doors for a coupe. I just left them as-is. Wish I would have thought of this!
-
1963 Chevy Nova Wagon Street Rod FINISHED 3/20/22
Dennis Lacy replied to Dennis Lacy's topic in WIP: Model Cars
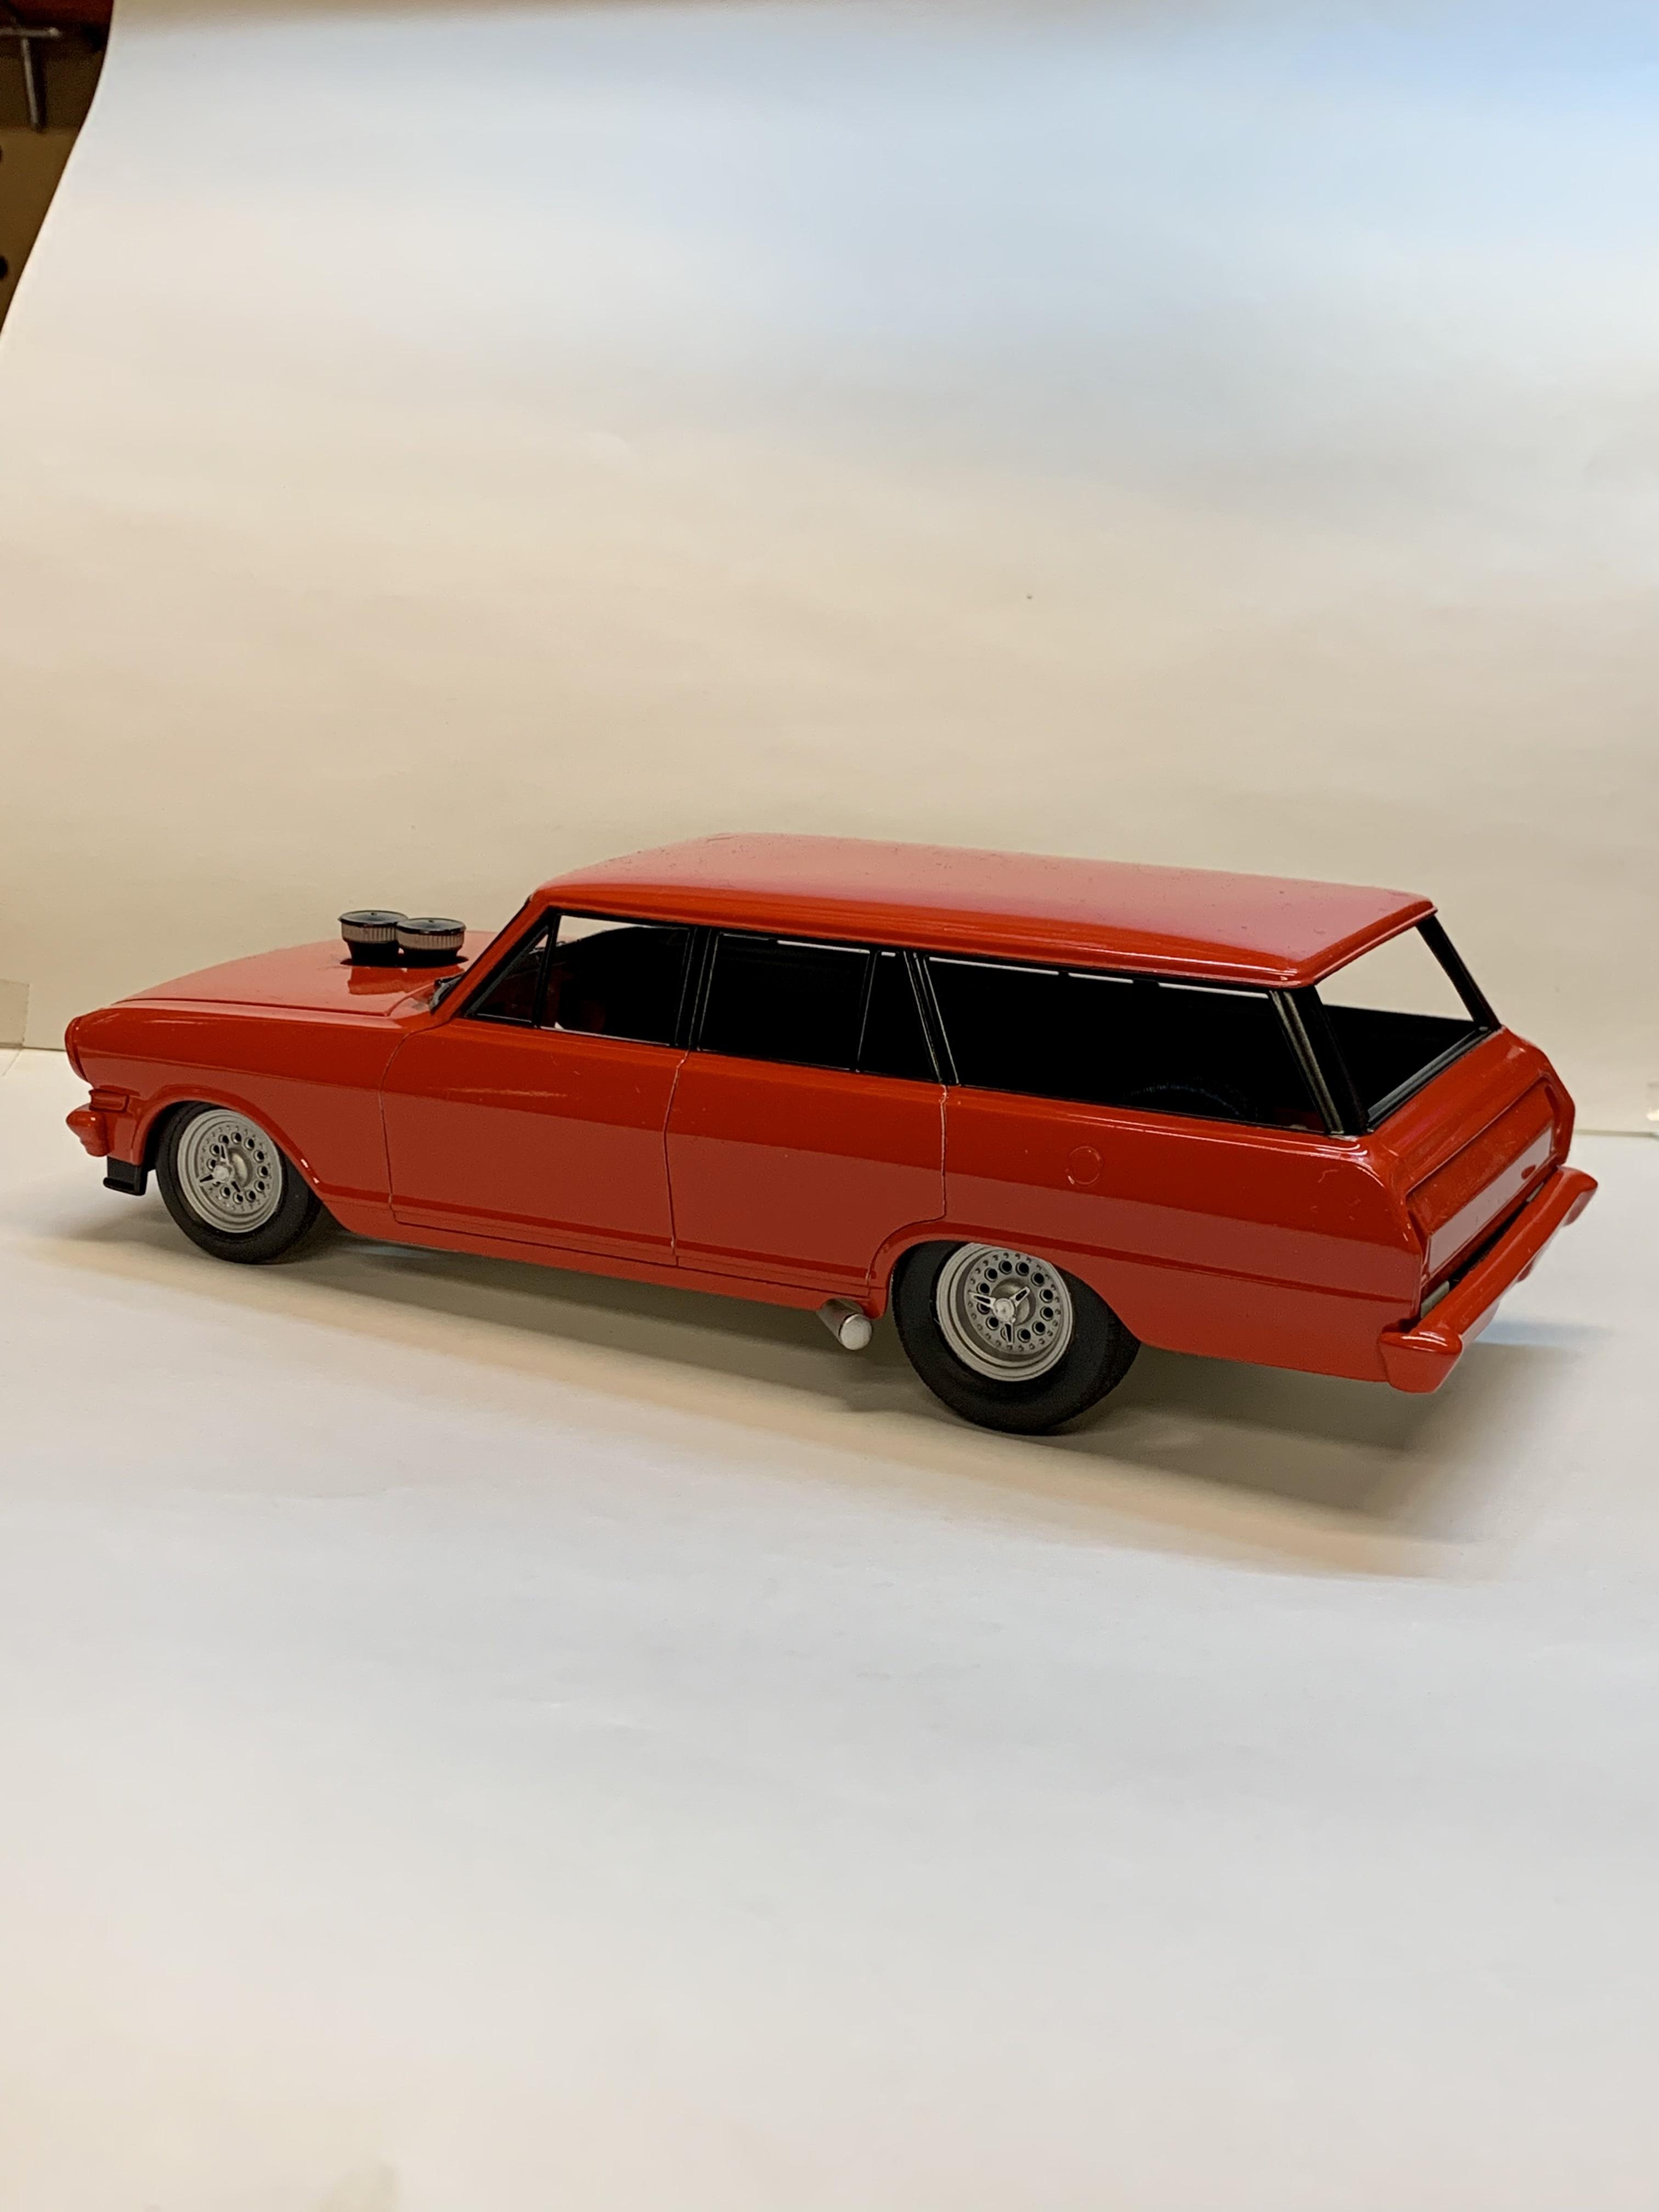
UPDATE! This week I was able to get all of the black trim painted. Now I’m going to let all of the red parts sit for a few weeks then they will get a polish and wax. Here is the car mocked up and for the first time on its axles so this is the actual stance. It looked neat lower but the oil pan is just clear of dragging on the ground as it is. I would say that the final stance is more realistic for a driver. I made use of the upper axle holes at the front and the lower axle holes in the rear that are provided.
-
KK is one of the finest “plastic surgeons” you’ll find. ?
-
The design of the body is excellent. It flows nicely and looks every bit the part of 60’s made show rod. Great color choice, too!
-
So Atlantis makes the effort to refurbish tooling so they can release these kits after having not been seen in almost 60 years, kits that Revell NEVER would have brought back leaving the only previous option to step up at HUNDREDS of dollars a piece and some of you are gonna complain about the company’s logo? Unfreaking believable…
-
My continually updated thread with fresh HOT ROD mock ups.
Dennis Lacy replied to chris chabre's topic in WIP: Model Cars
I know I already told you this but that is so awesome. (My actual reaction is against the rules, LOL!) Truly some great people in this hobby. The mock up with the properly proportioned Revell body looks killer. Especially with the slicks and forward rake. It also looks way better with the chrome-reverse wheels instead of those fugly ones the kit came with. -
I don’t think you can ever have too many Model A Coupe hot rods. Love the way you reworked the roof insert into the stock shape and that now it has texture to it. Definitely a detail that will make this one stand out in a crowd. Too bad the Mustang floor pan didn’t work out but that’s still a great looking driveline tunnel to graft into a new floor.
-
Nice work squeezing the frame! Instead of stretching the frame, shove the engine under the cowl. ?
-
My continually updated thread with fresh HOT ROD mock ups.
Dennis Lacy replied to chris chabre's topic in WIP: Model Cars
Early mock up might be my favorite part of any project. Holding up a dozen different wheel & tire combos, hunting through bins and kits for just the right parts. Leaving it set up and checking it out as I randomly pass by the bench. Good stuff! -
1963 Chevy Nova Wagon Street Rod FINISHED 3/20/22
Dennis Lacy replied to Dennis Lacy's topic in WIP: Model Cars
Thanks! To be fair the interior started out extremely simple and then I happened to it! ? -
Nice!
-
1963 Chevy Nova Wagon Street Rod FINISHED 3/20/22
Dennis Lacy replied to Dennis Lacy's topic in WIP: Model Cars
Slightly darker is what I would want if I used this paint again. But, I’m plenty happy with the shade of red for this project. -
What is the front axle from? I don’t recognize it.
-
1963 Chevy Nova Wagon Street Rod FINISHED 3/20/22
Dennis Lacy replied to Dennis Lacy's topic in WIP: Model Cars
It’s definitely RED! I’m totally happy with it but if I were to use it again I’d probably use brown primer instead of light gray. I don’t like spraying large objects like bodies when the temp is under 70 degrees. Smaller stuff I’ll go down into the 60’s but I’m not taking any chances on bodies. I have no interest in dealing with purple ponds! I do all my spray painting at work and a while back our water heater went out and my dad is too cheap to replace it so I have to warm my spray cans with solar energy. ? -
1963 Chevy Nova Wagon Street Rod FINISHED 3/20/22
Dennis Lacy replied to Dennis Lacy's topic in WIP: Model Cars
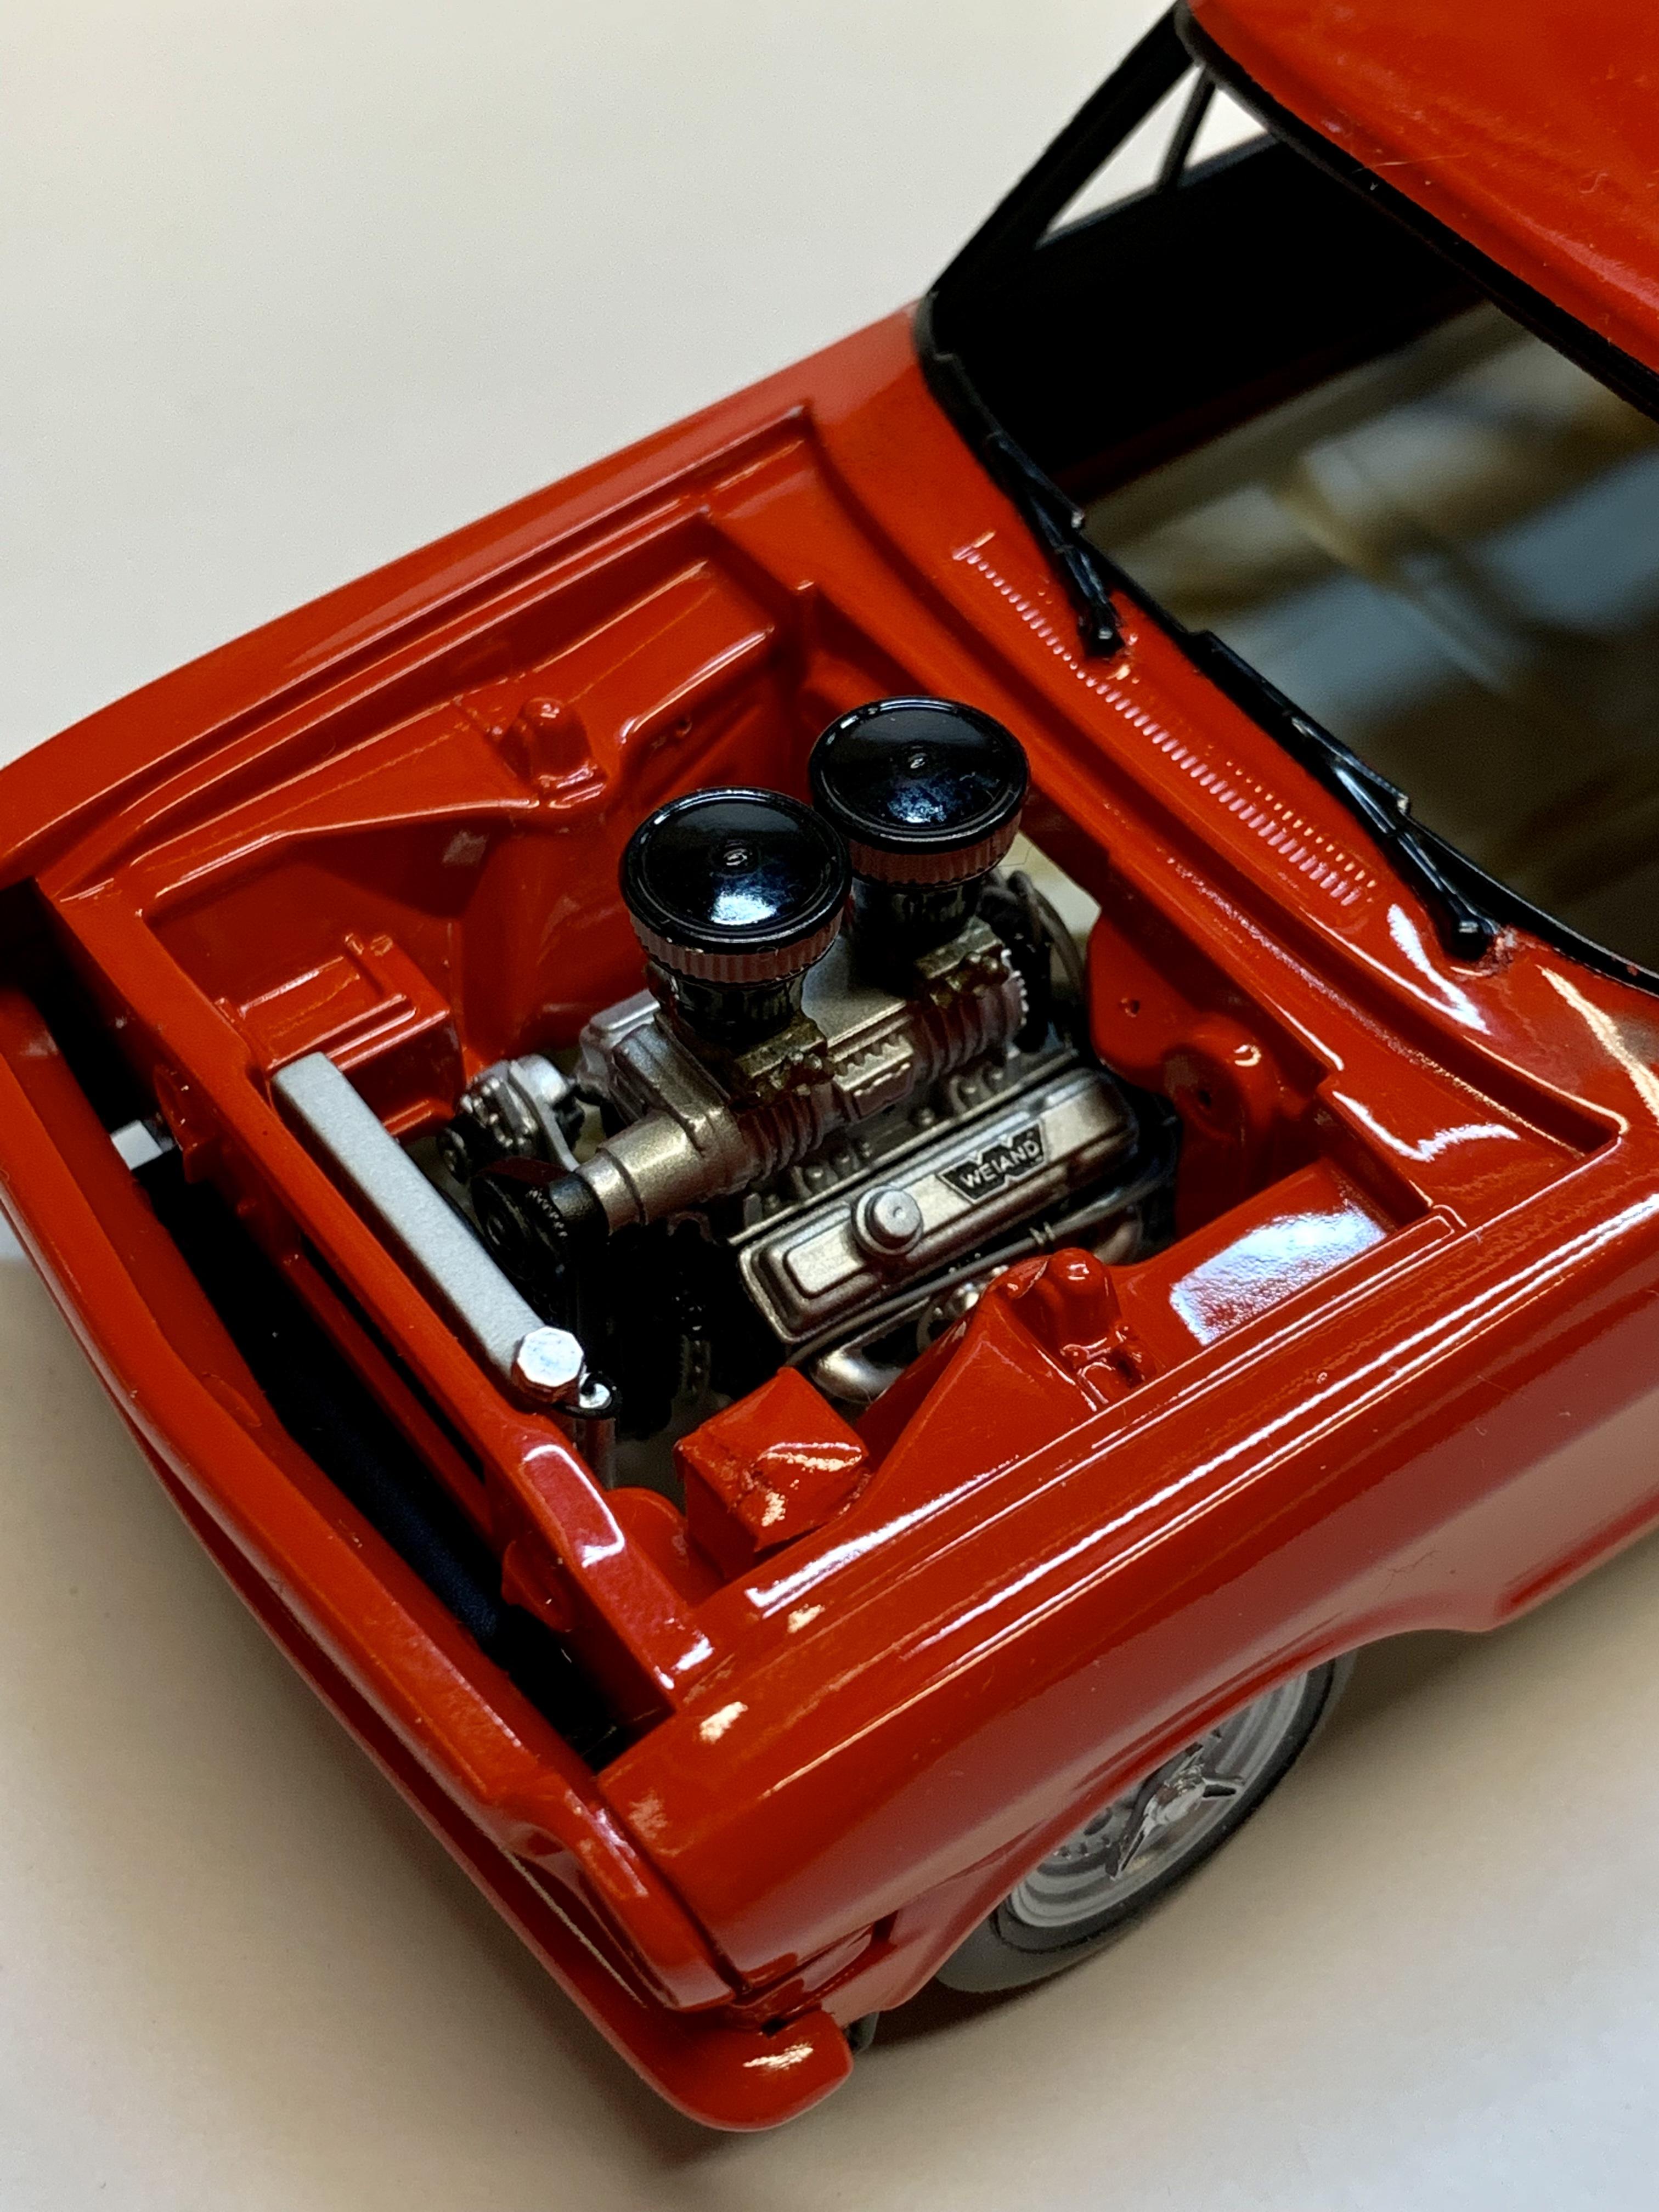
UPDATE! I absolutely haven’t forgotten or gotten lazy on this project. Even though I live in sunny Southern California it’s been the better part of a month since we’ve had weather I’d want to paint in. Finally, this week it’s back in the mid 70’s with sunshine so yesterday I sprayed color and today I sprayed clear. It already has a good shine so I can’t wait to see this body polished and waxed in a few weeks! I still have to mask and spray the window trim and a couple other areas satin black and I’ll probably let it sit and chill until next week before I do that. No sense in taking chances Here’s a sneak peek. Tamiya TS92 Pure Red and their clear.
-
Right on! Now you have the motor sitting right where it belongs. Didn’t know you were going with the ARDUN setup. Looks great with the hard chopped 3W body.
-
'36 Ford 5ive window coupe, old build being resurrected.
Dennis Lacy replied to Rocking Rodney Rat's topic in WIP: Model Cars
There’s nothing wrong with sitting in your hot rod at a car show and having a cold brew! ? -
Understood. I went through the thread and that wasn’t explained so I had assumed you changed your plans for the engine and trans.
-
Looks good with the rear spring added. Has the classic quick change and high arch spring that looks tuff from behind. I would stick with the torque tube and radius rods. In the rear world it’s the best design for a freely articulating/non binding axle & suspension. That, and you integrated the parts so nicely. Looking at the engine placement, do you have enough room for the belt drive? Looks like the engine is right up against the front cross member. In the picture with the body on there’s a bunch of space between the back of the engine and firewall. Plenty of room to scoot it back.
-
1990 Mustang LX - SVT Cobra DOHC Powered! UPDATE! 1/22/23
Dennis Lacy replied to Dennis Lacy's topic in WIP: Model Cars
Thanks Steve! It’s tough when you really want to be at the bench and you can’t be. I might not have made it another week! ? -
1990 Mustang LX - SVT Cobra DOHC Powered! UPDATE! 1/22/23
Dennis Lacy replied to Dennis Lacy's topic in WIP: Model Cars
Most definitely! The kit doesn’t have them so I’ll be making my own. That’s probably the next step. -
'36 Ford 5ive window coupe, old build being resurrected.
Dennis Lacy replied to Rocking Rodney Rat's topic in WIP: Model Cars
Got any cold beverages to put in that cup holder? -
1990 Mustang LX - SVT Cobra DOHC Powered! UPDATE! 1/22/23
Dennis Lacy replied to Dennis Lacy's topic in WIP: Model Cars
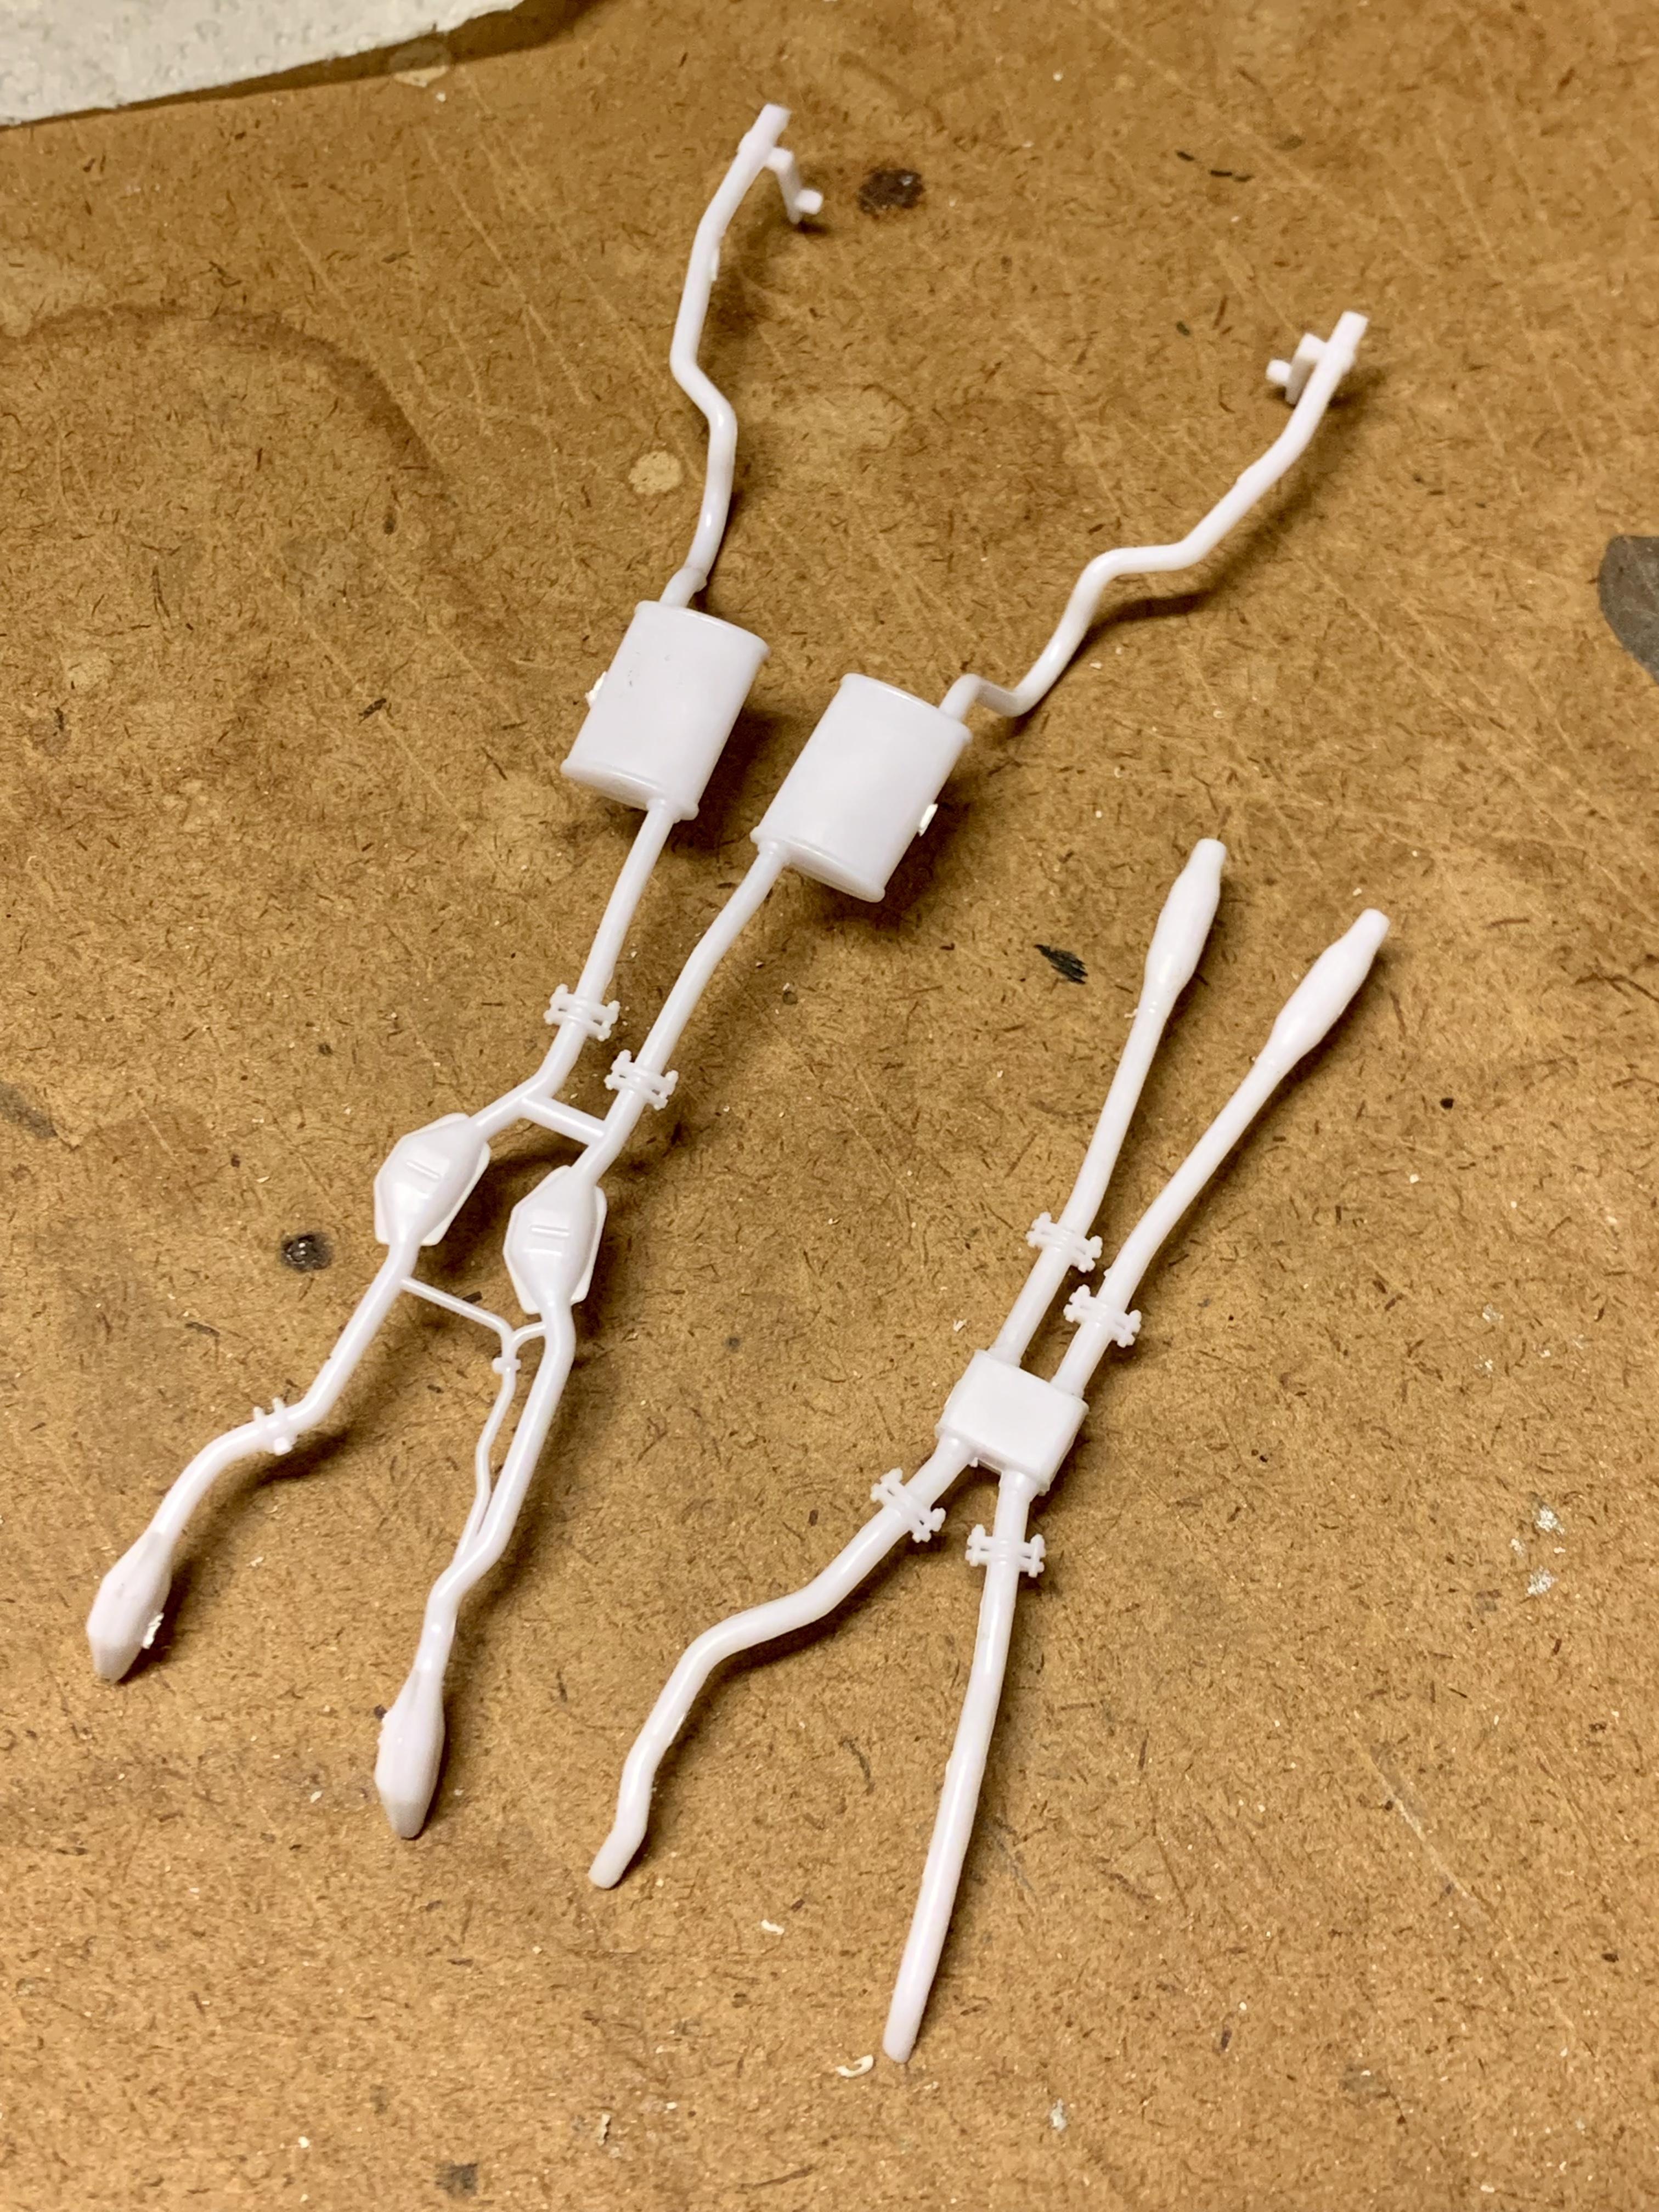
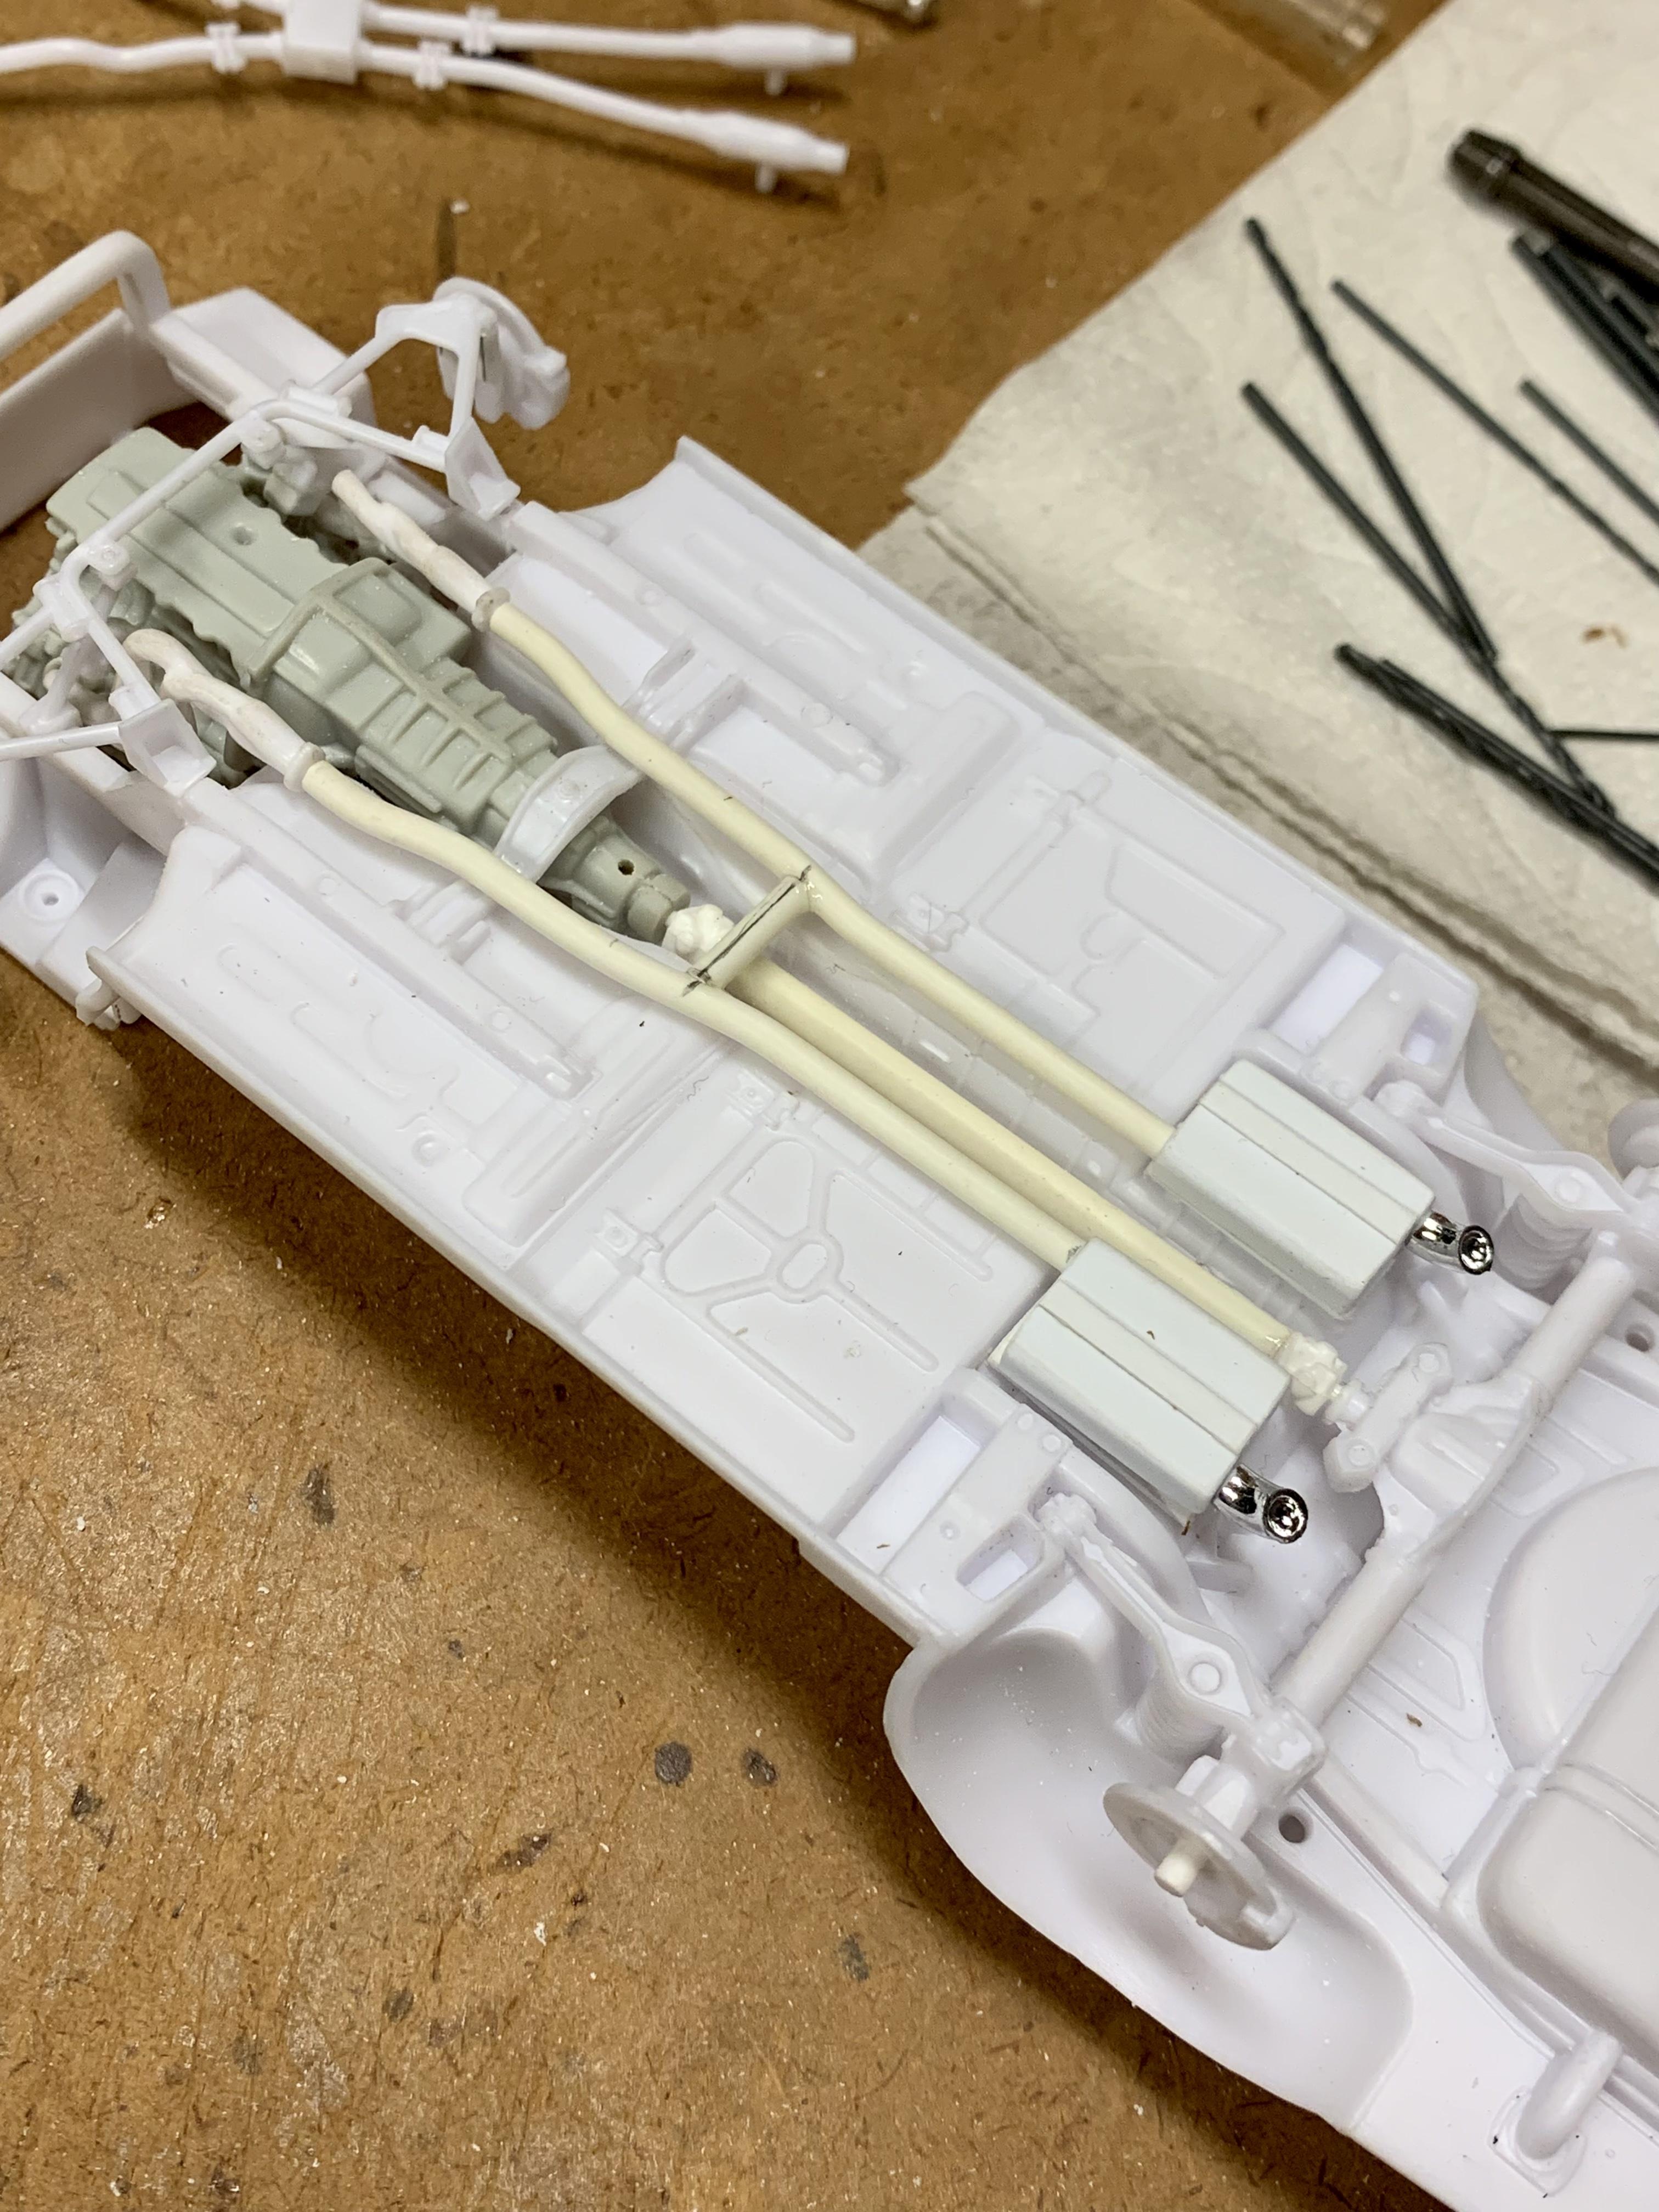
UPDATE! I’m back! I haven’t been able to have a Sunday afternoon at my workbench for a month worth of Sundays. And not for lack of desire. The weekend before Christmas we were visiting another state and for the rest it’s been just cold enough (and rainy) to make it uncomfortable to sit out in the garage. Finally, today it all worked out! Since it had been a while I had forgotten what I wanted to do next so to get the juices flowing I messed around with some easy drilling and pinning of various engine parts to make mock ups and final assembly easier. Then I got compelled to mock up the engine, tube k-member and rear axle upside down for a look. This caused me to start messing around with exhaust ideas… Below is what the kit gives you. On the left is stock system and on the right is the optional drag race system which consists of MAC Pro-Chamber mid section and some bullet style mufflers that are disappointingly simplified. Not even turn down tips behind the mufflers. Hokey! I don’t like the looks of either system, the pipe size looks a little small and wimpy and both would need modifications to mate up with the new SVT Cobra engine and long tube headers. After giving it some serious thought I decided this car needed Flowmaster mufflers like every proper 90’s Mustang. Only catch is that I didn’t have any and I’m not even sure if there are any available in scale? No problem, I’ll make my own! I started with laminating some chunks of plastic together, cut them into the basic dimension, finished shaped them then added the seam strip. A couple of robust looking turn-down tips were made from the ends of the headers found in Revell’s recent reissued ‘29 Roadster or their original issue of the ‘30 Coupe. I then made new exhaust pipes from Evergreen 3/32” tubing which is a size bigger than the kit pipes which (IMO) give a much more aggressive appearance. It’s like the difference between stock the 2.25” pipes and proper aftermarket 2.50” pipes on the full scale cars. Once the pipes were fitted I then trimmed a crossover pipe to fit between creating a classic Fox Body Mustang “H-pipe” mid-section. The mufflers have alignment pins which fit into the pipes and the front ends of the pipes were drilled out bigger to fit over the little alignment nipples on the headers. I also made a new driveshaft since the kit piece was now too long. I used larger 1/8” Evergreen tube and heavier U-joints from Revell’s ‘32 Ford kits to replicate the bigger diameter aluminum HD driveshaft that was offered in the old Ford Motorsport SVO caltalogs (and is still available from the current version of the brand, Ford Performance.) Now the exhaust system can get crossed off the to-do list. Always a big deal! Some people will probably call cop out for not doing full tailpipes but SO MANY of these cars ran dumped Flowmaster’s back in 90’s, one of mine included for a while!