Dennis Lacy
-
Posts
2,487 -
Joined
-
Last visited
Content Type
Profiles
Forums
Events
Gallery
Everything posted by Dennis Lacy
-

1990 Mustang LX - SVT Cobra DOHC Powered! UPDATE! 1/22/23
Dennis Lacy replied to Dennis Lacy's topic in WIP: Model Cars
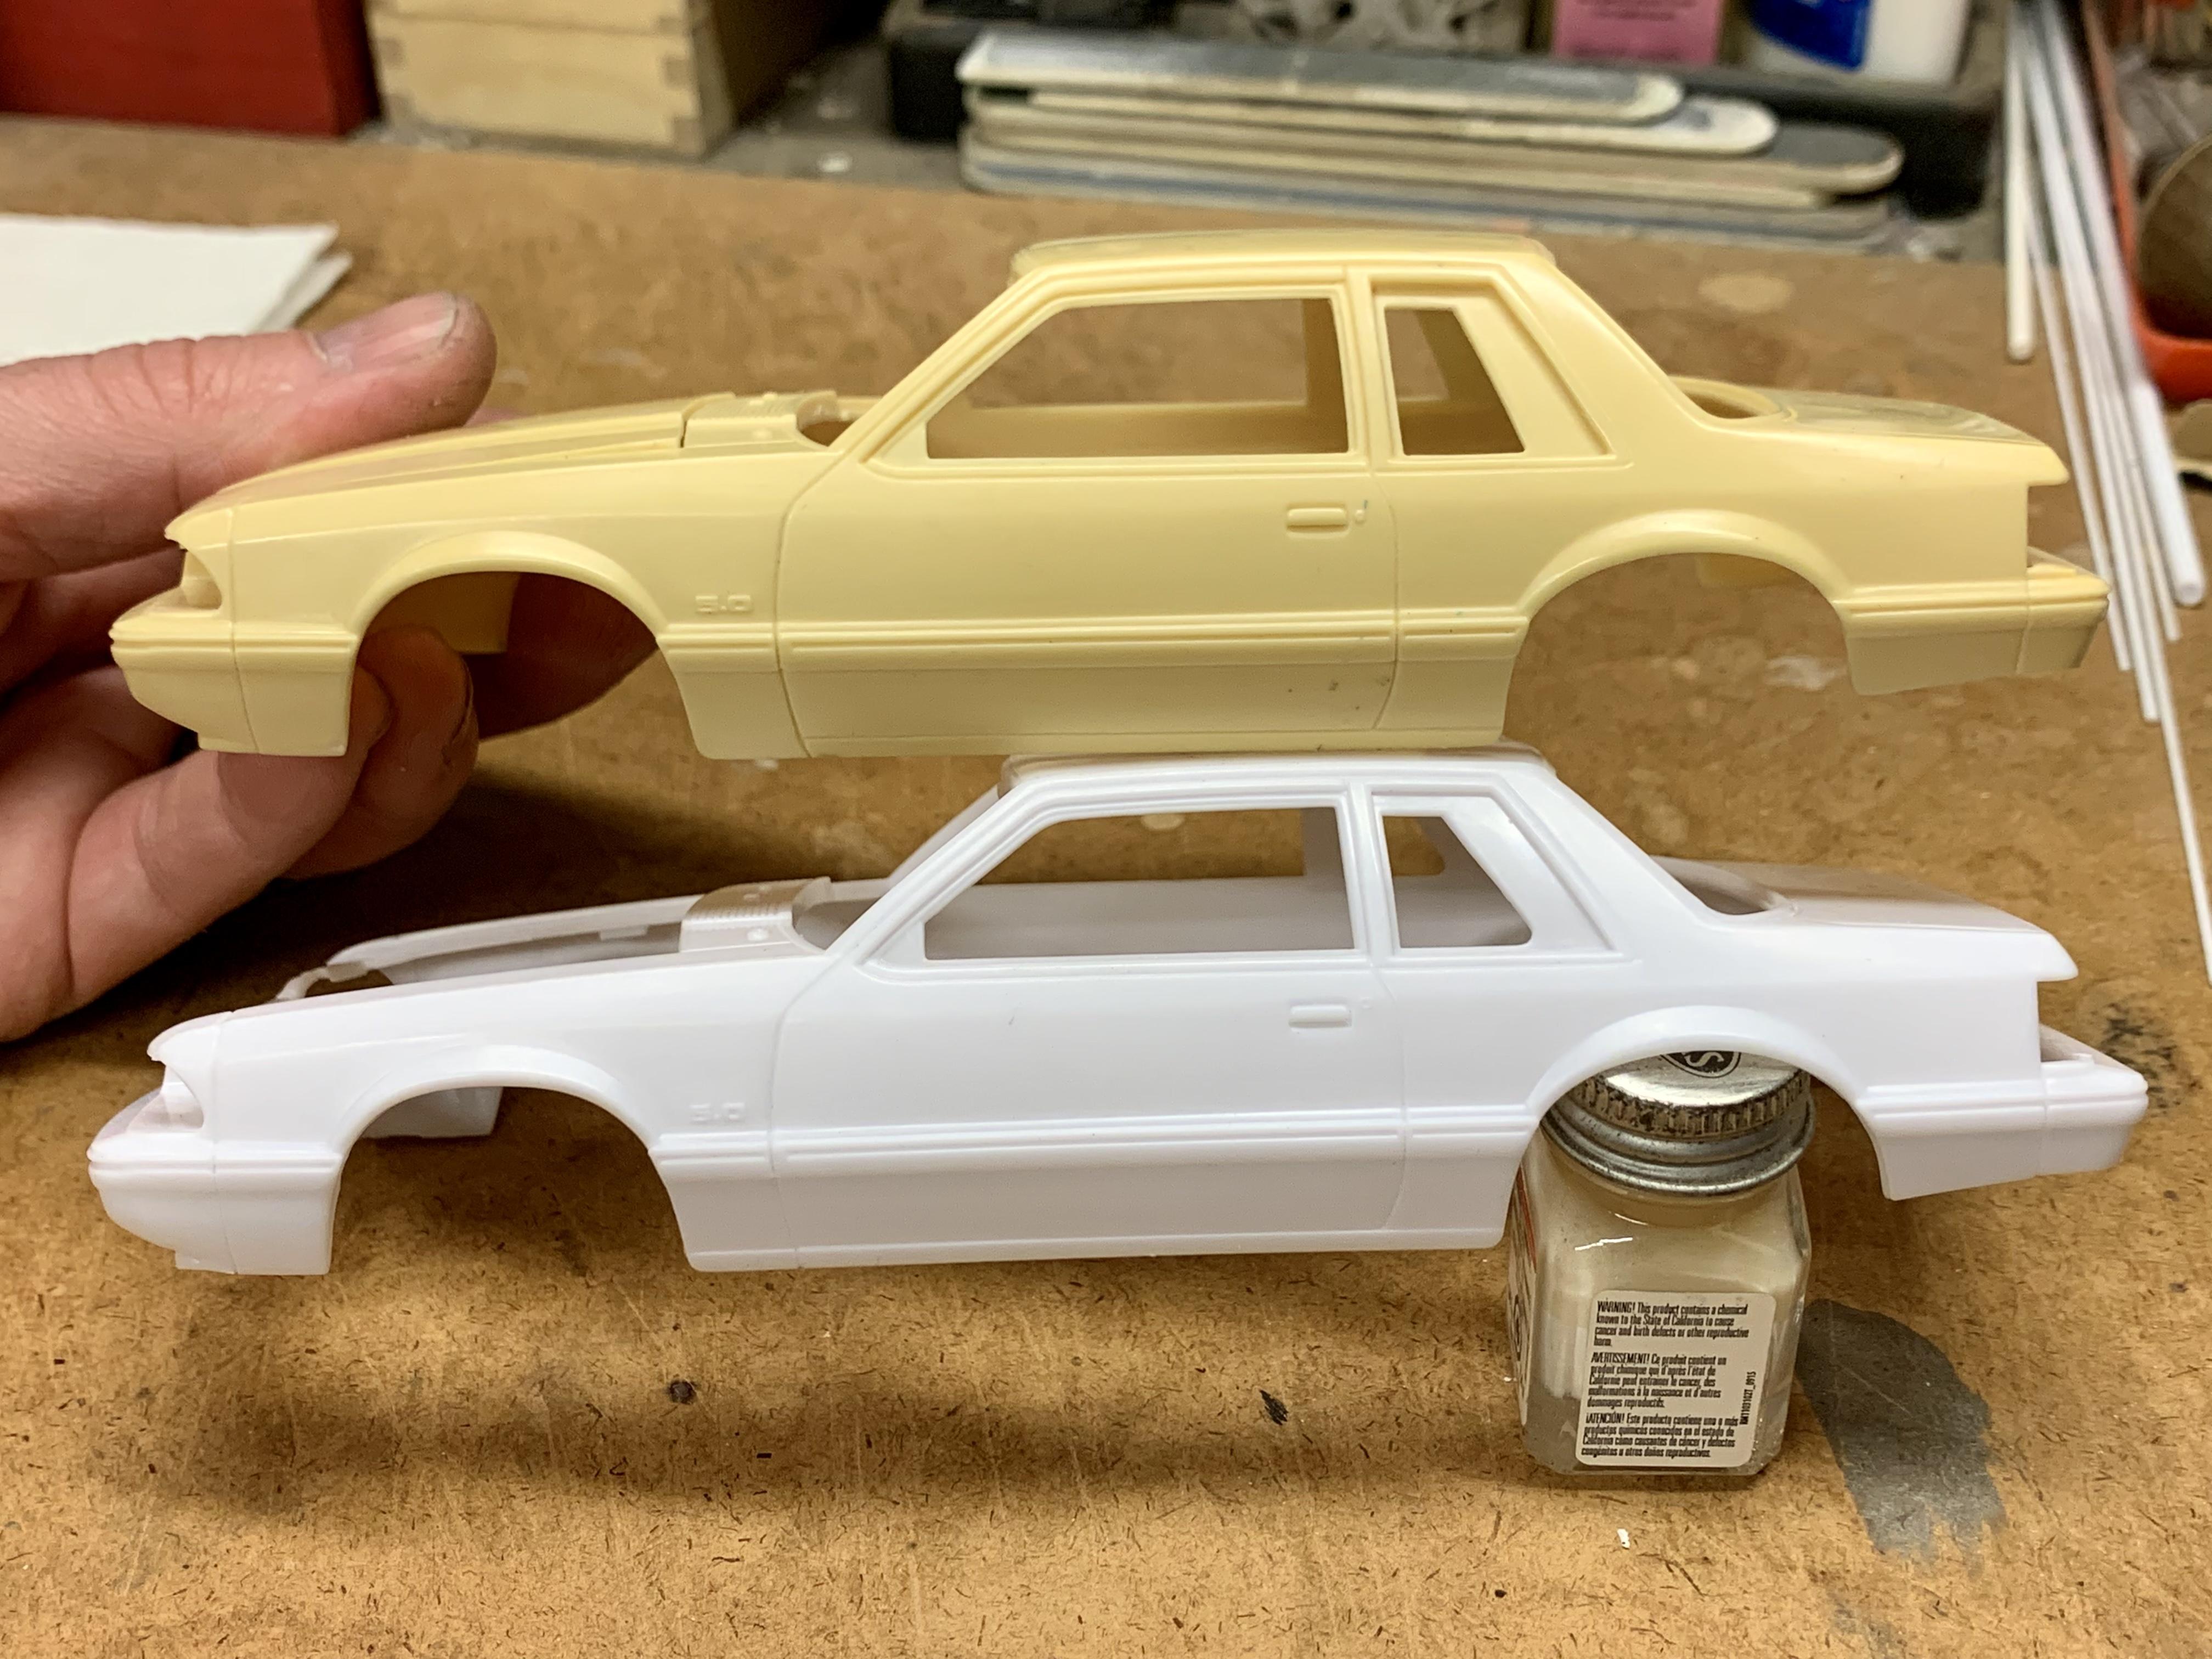
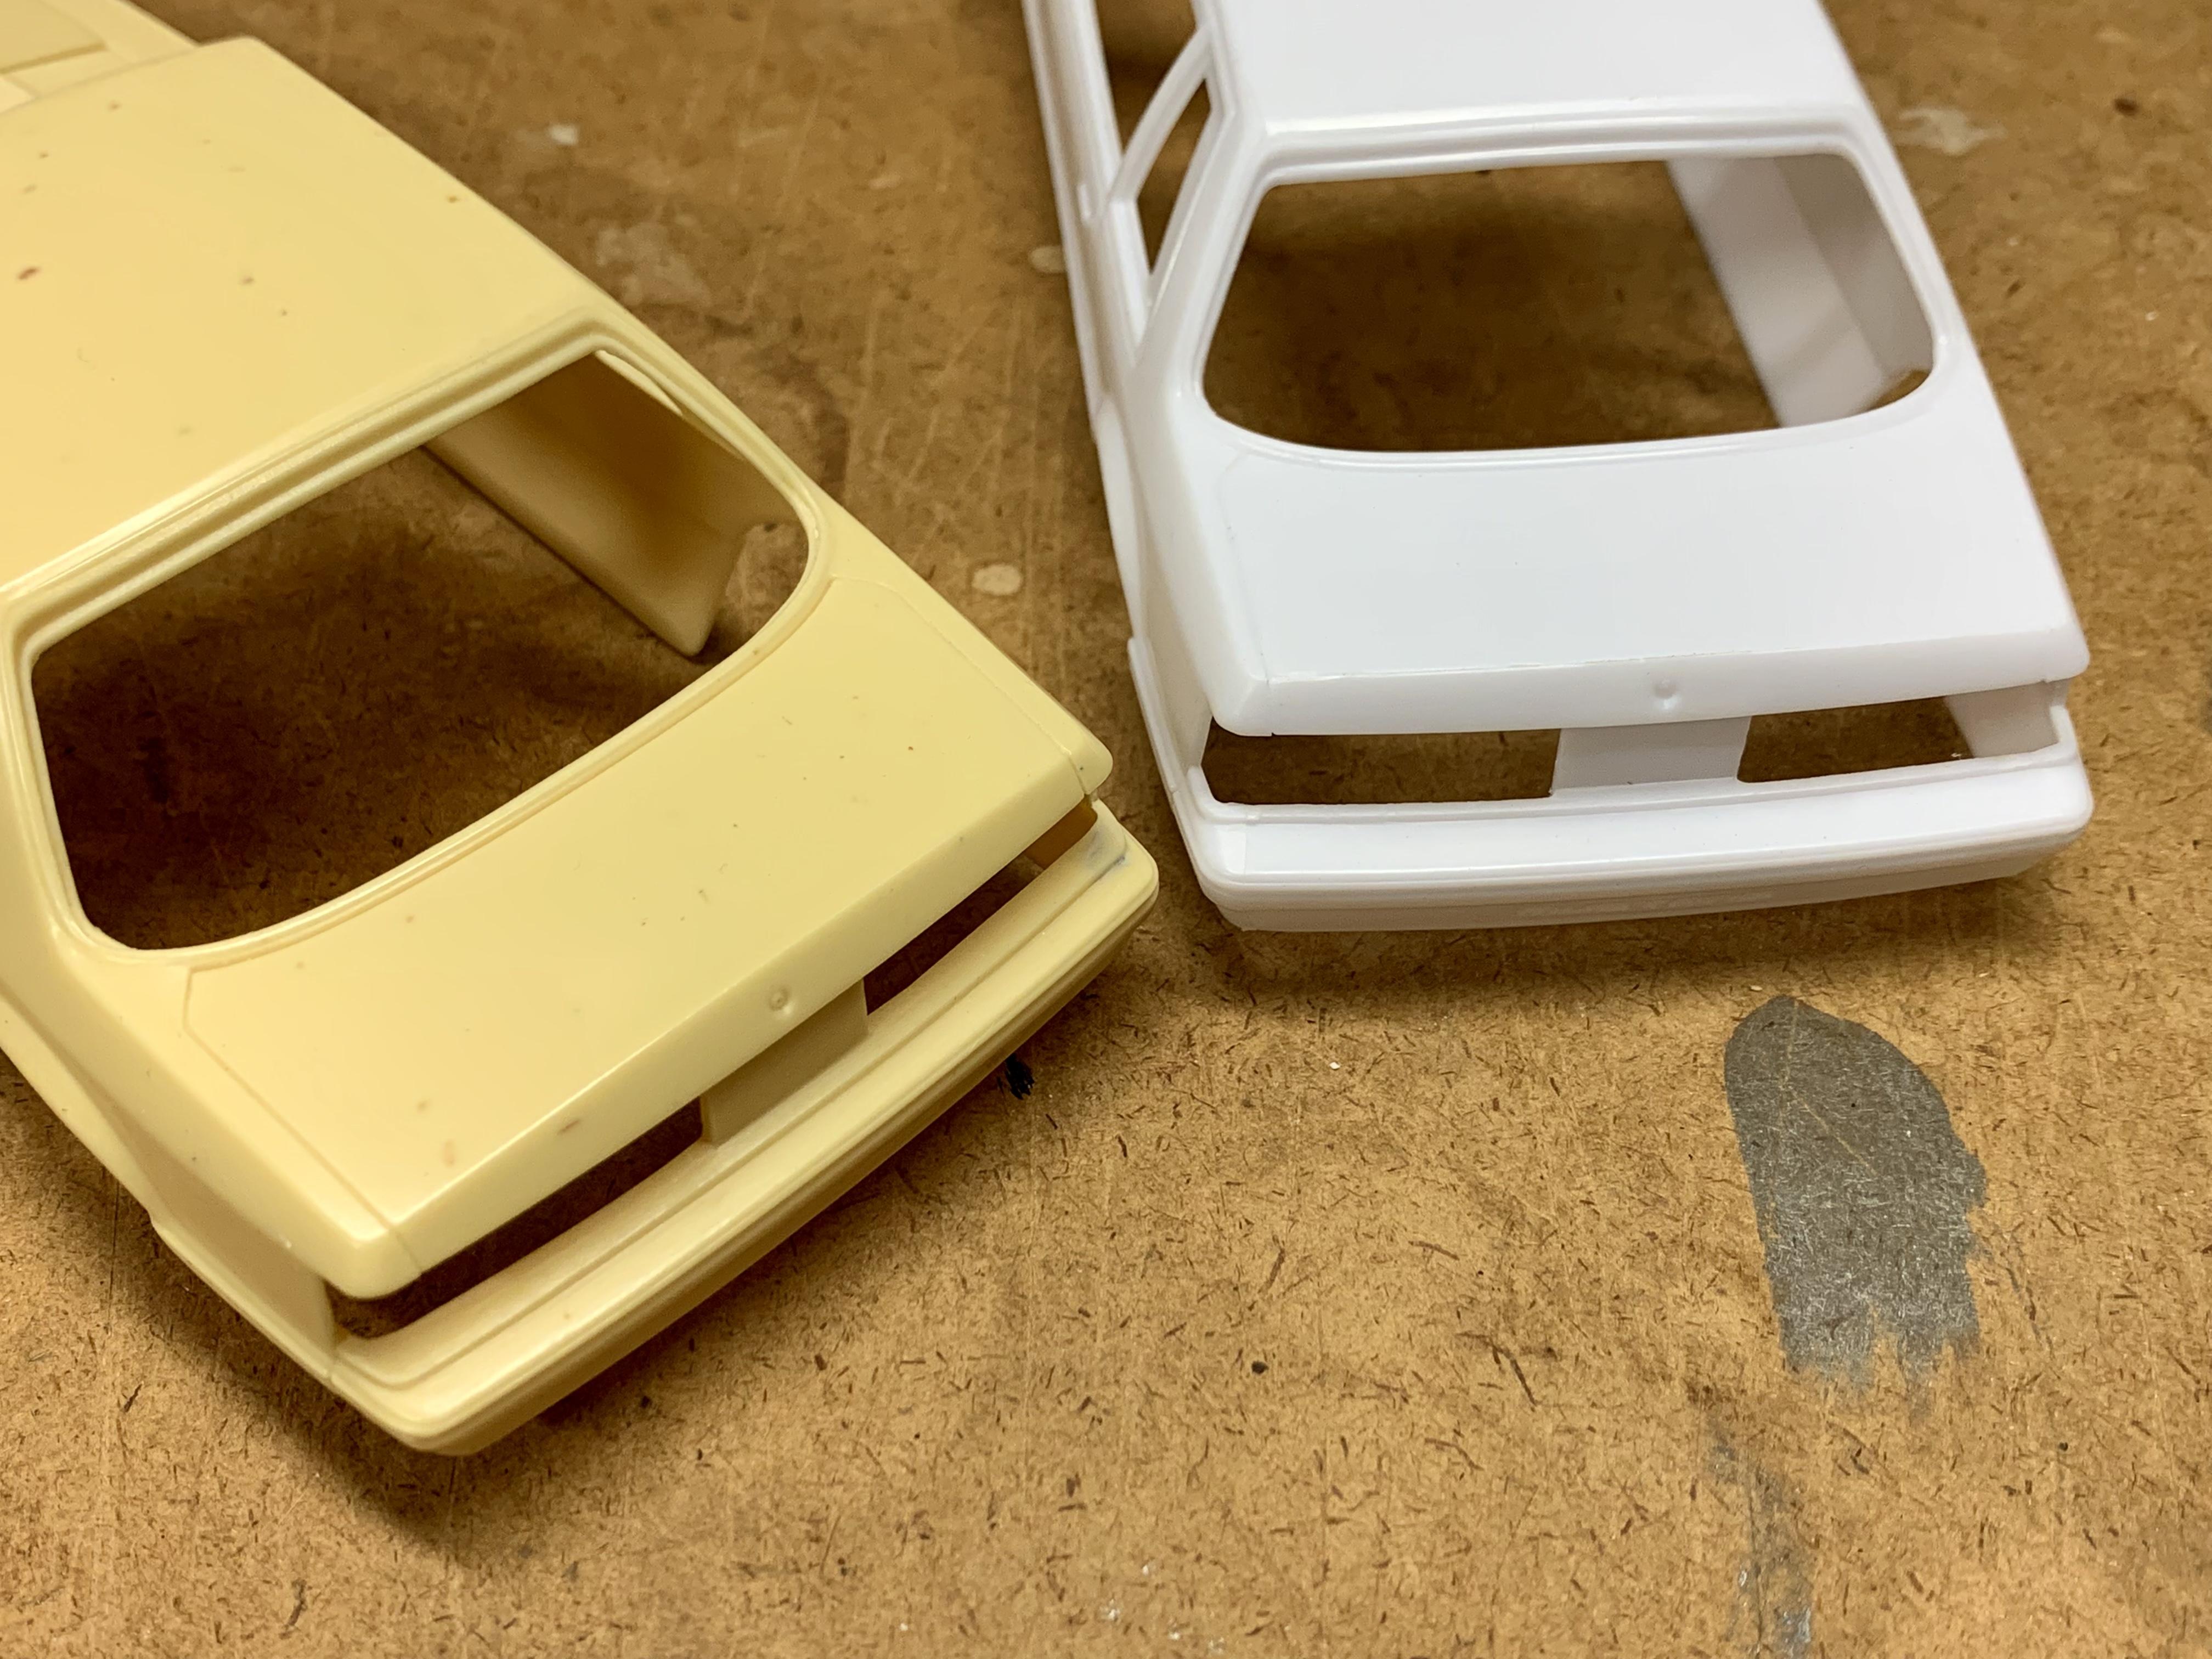
UPDATE! I have exceptionally good news. As of today I have in my possession one of the corrected LX Coupe bodies. A HUGE shout out to @Maindrian Pace for hooking it up so that this model can be everything it should be. For those who don’t know, he’s the one who built the master body that these are cast from. Here’s a few comparison pics with the kit body. Not only did he correct the very incorrect roof height, he also corrected the rear wheel openings to stock size (Revell made them oversized for the big drag slicks), the edge of the trunk lid so it has the correct little lip to it and the rear bumper which stuck out too far beyond the taillights. The workmanship is superb and the quality of the casting is excellent! Onward!!! ?
- 190 replies
-
- 10
-

-
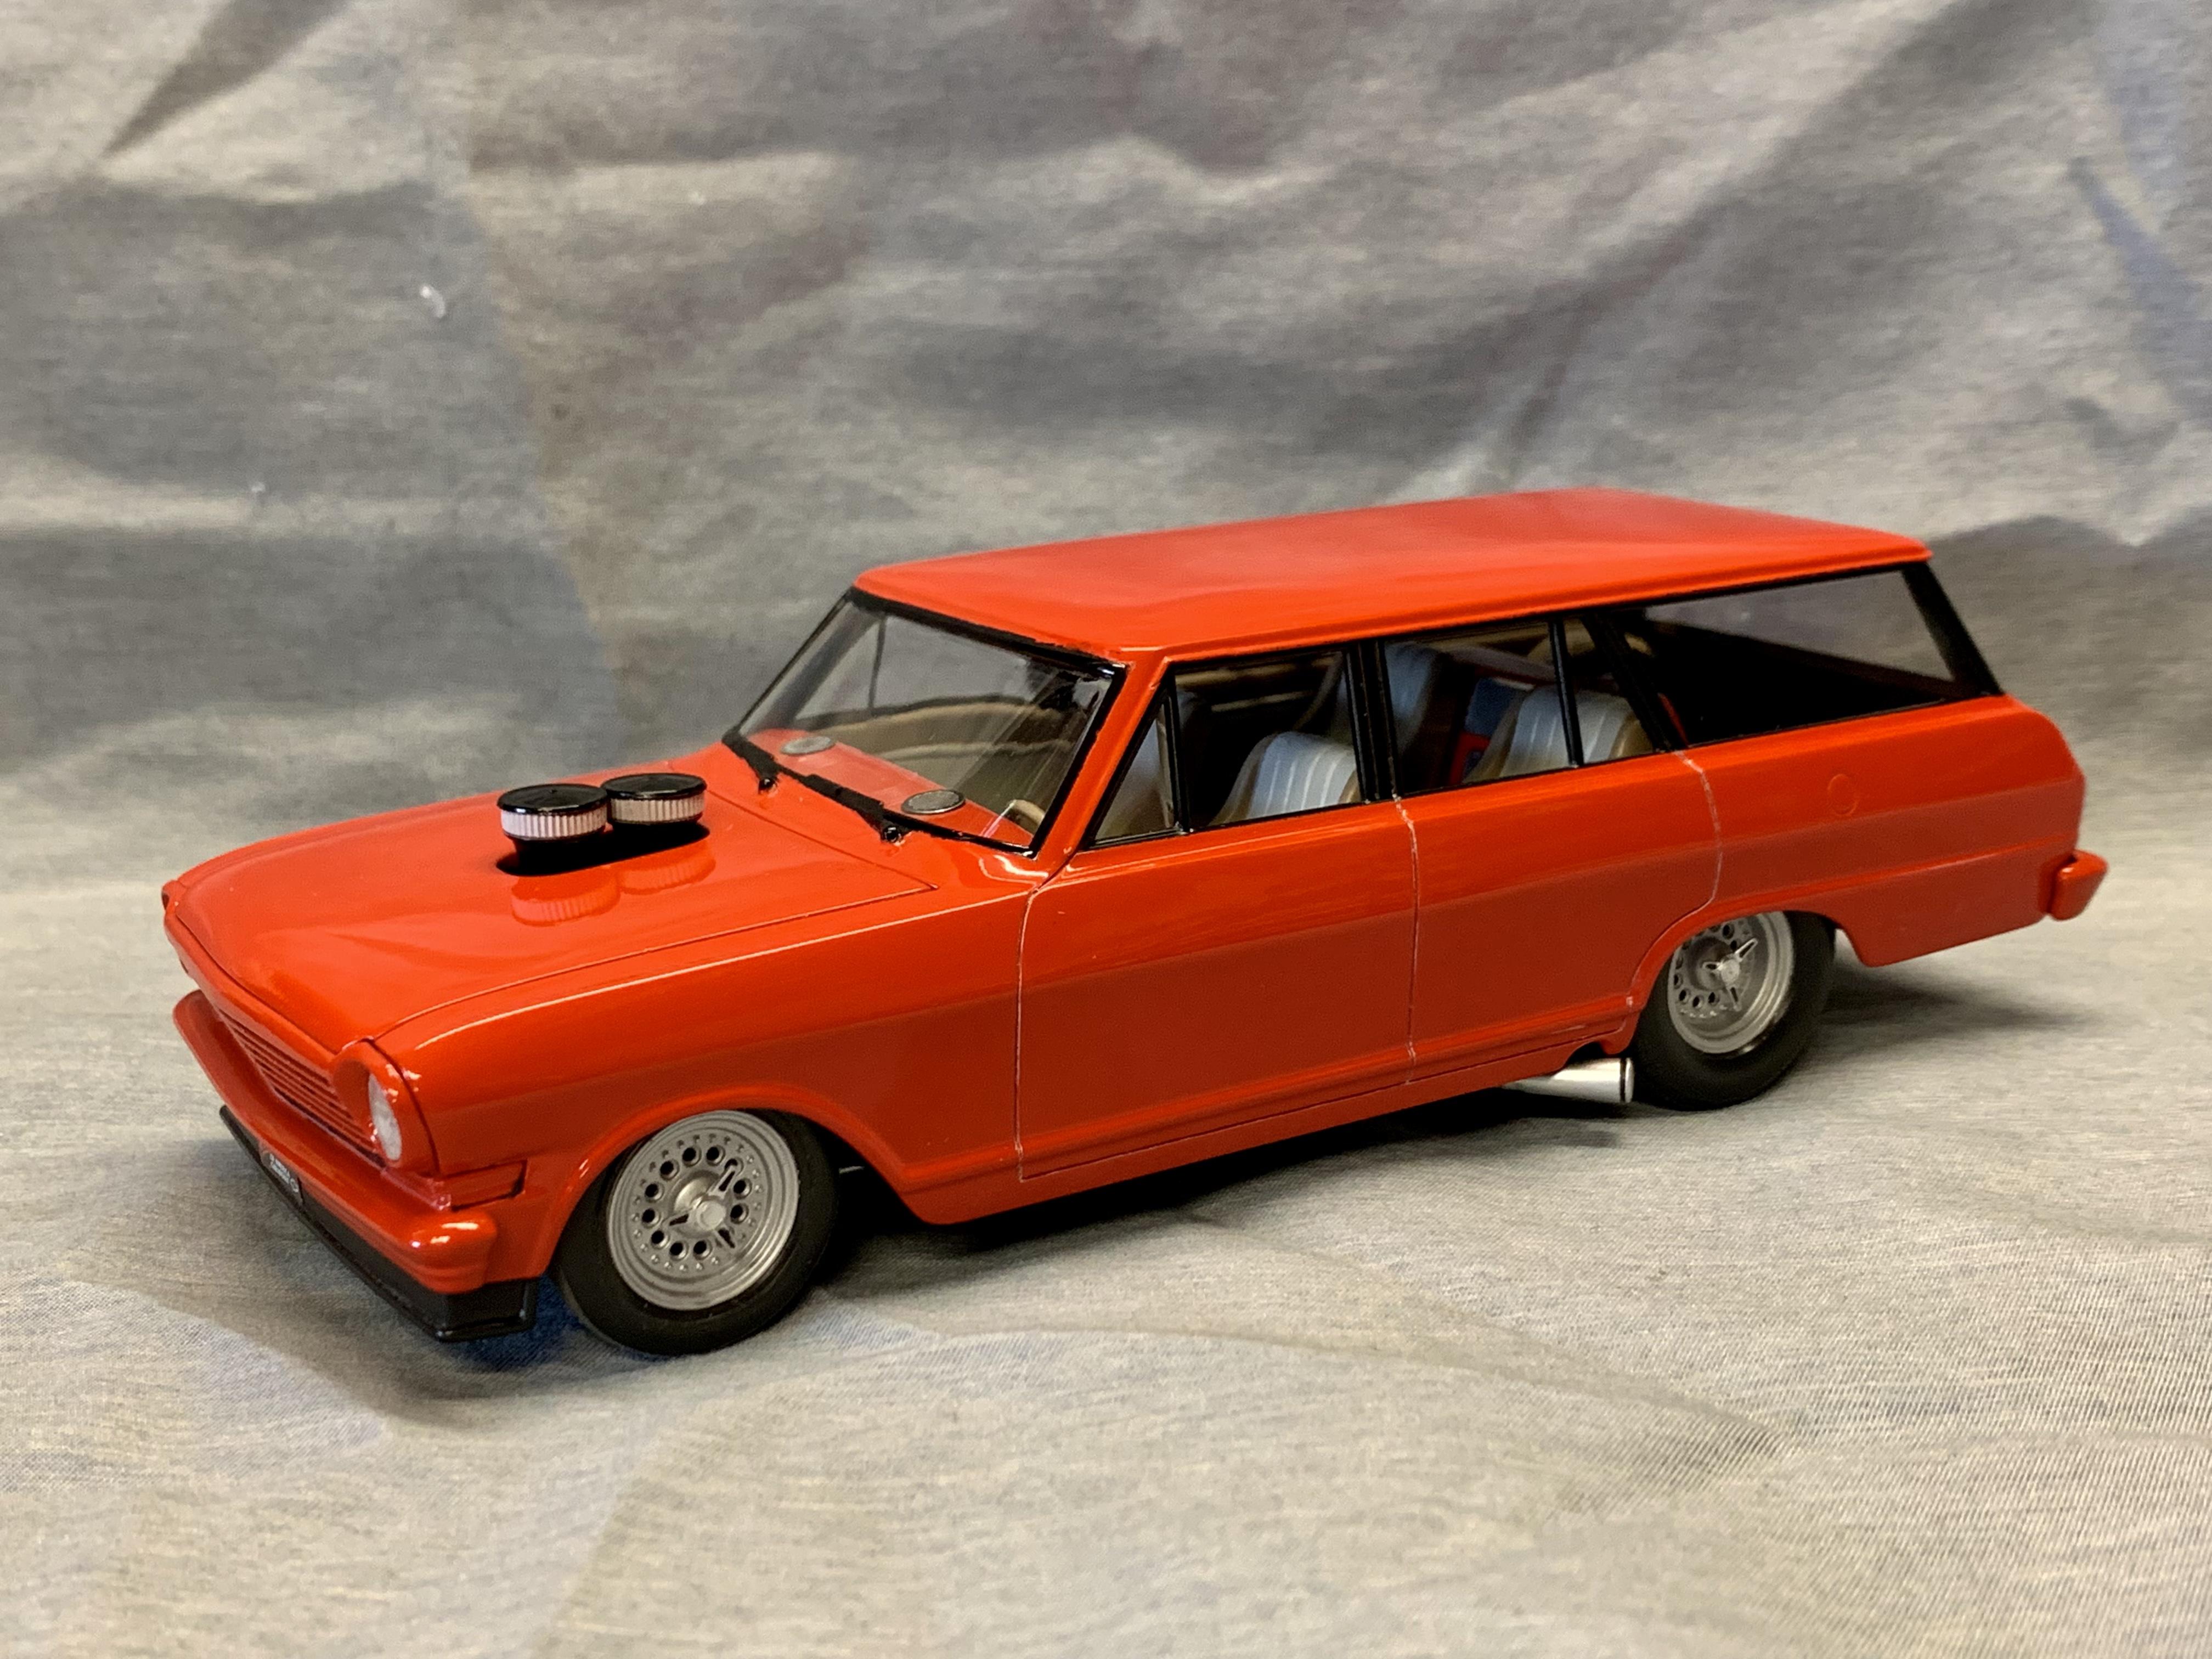
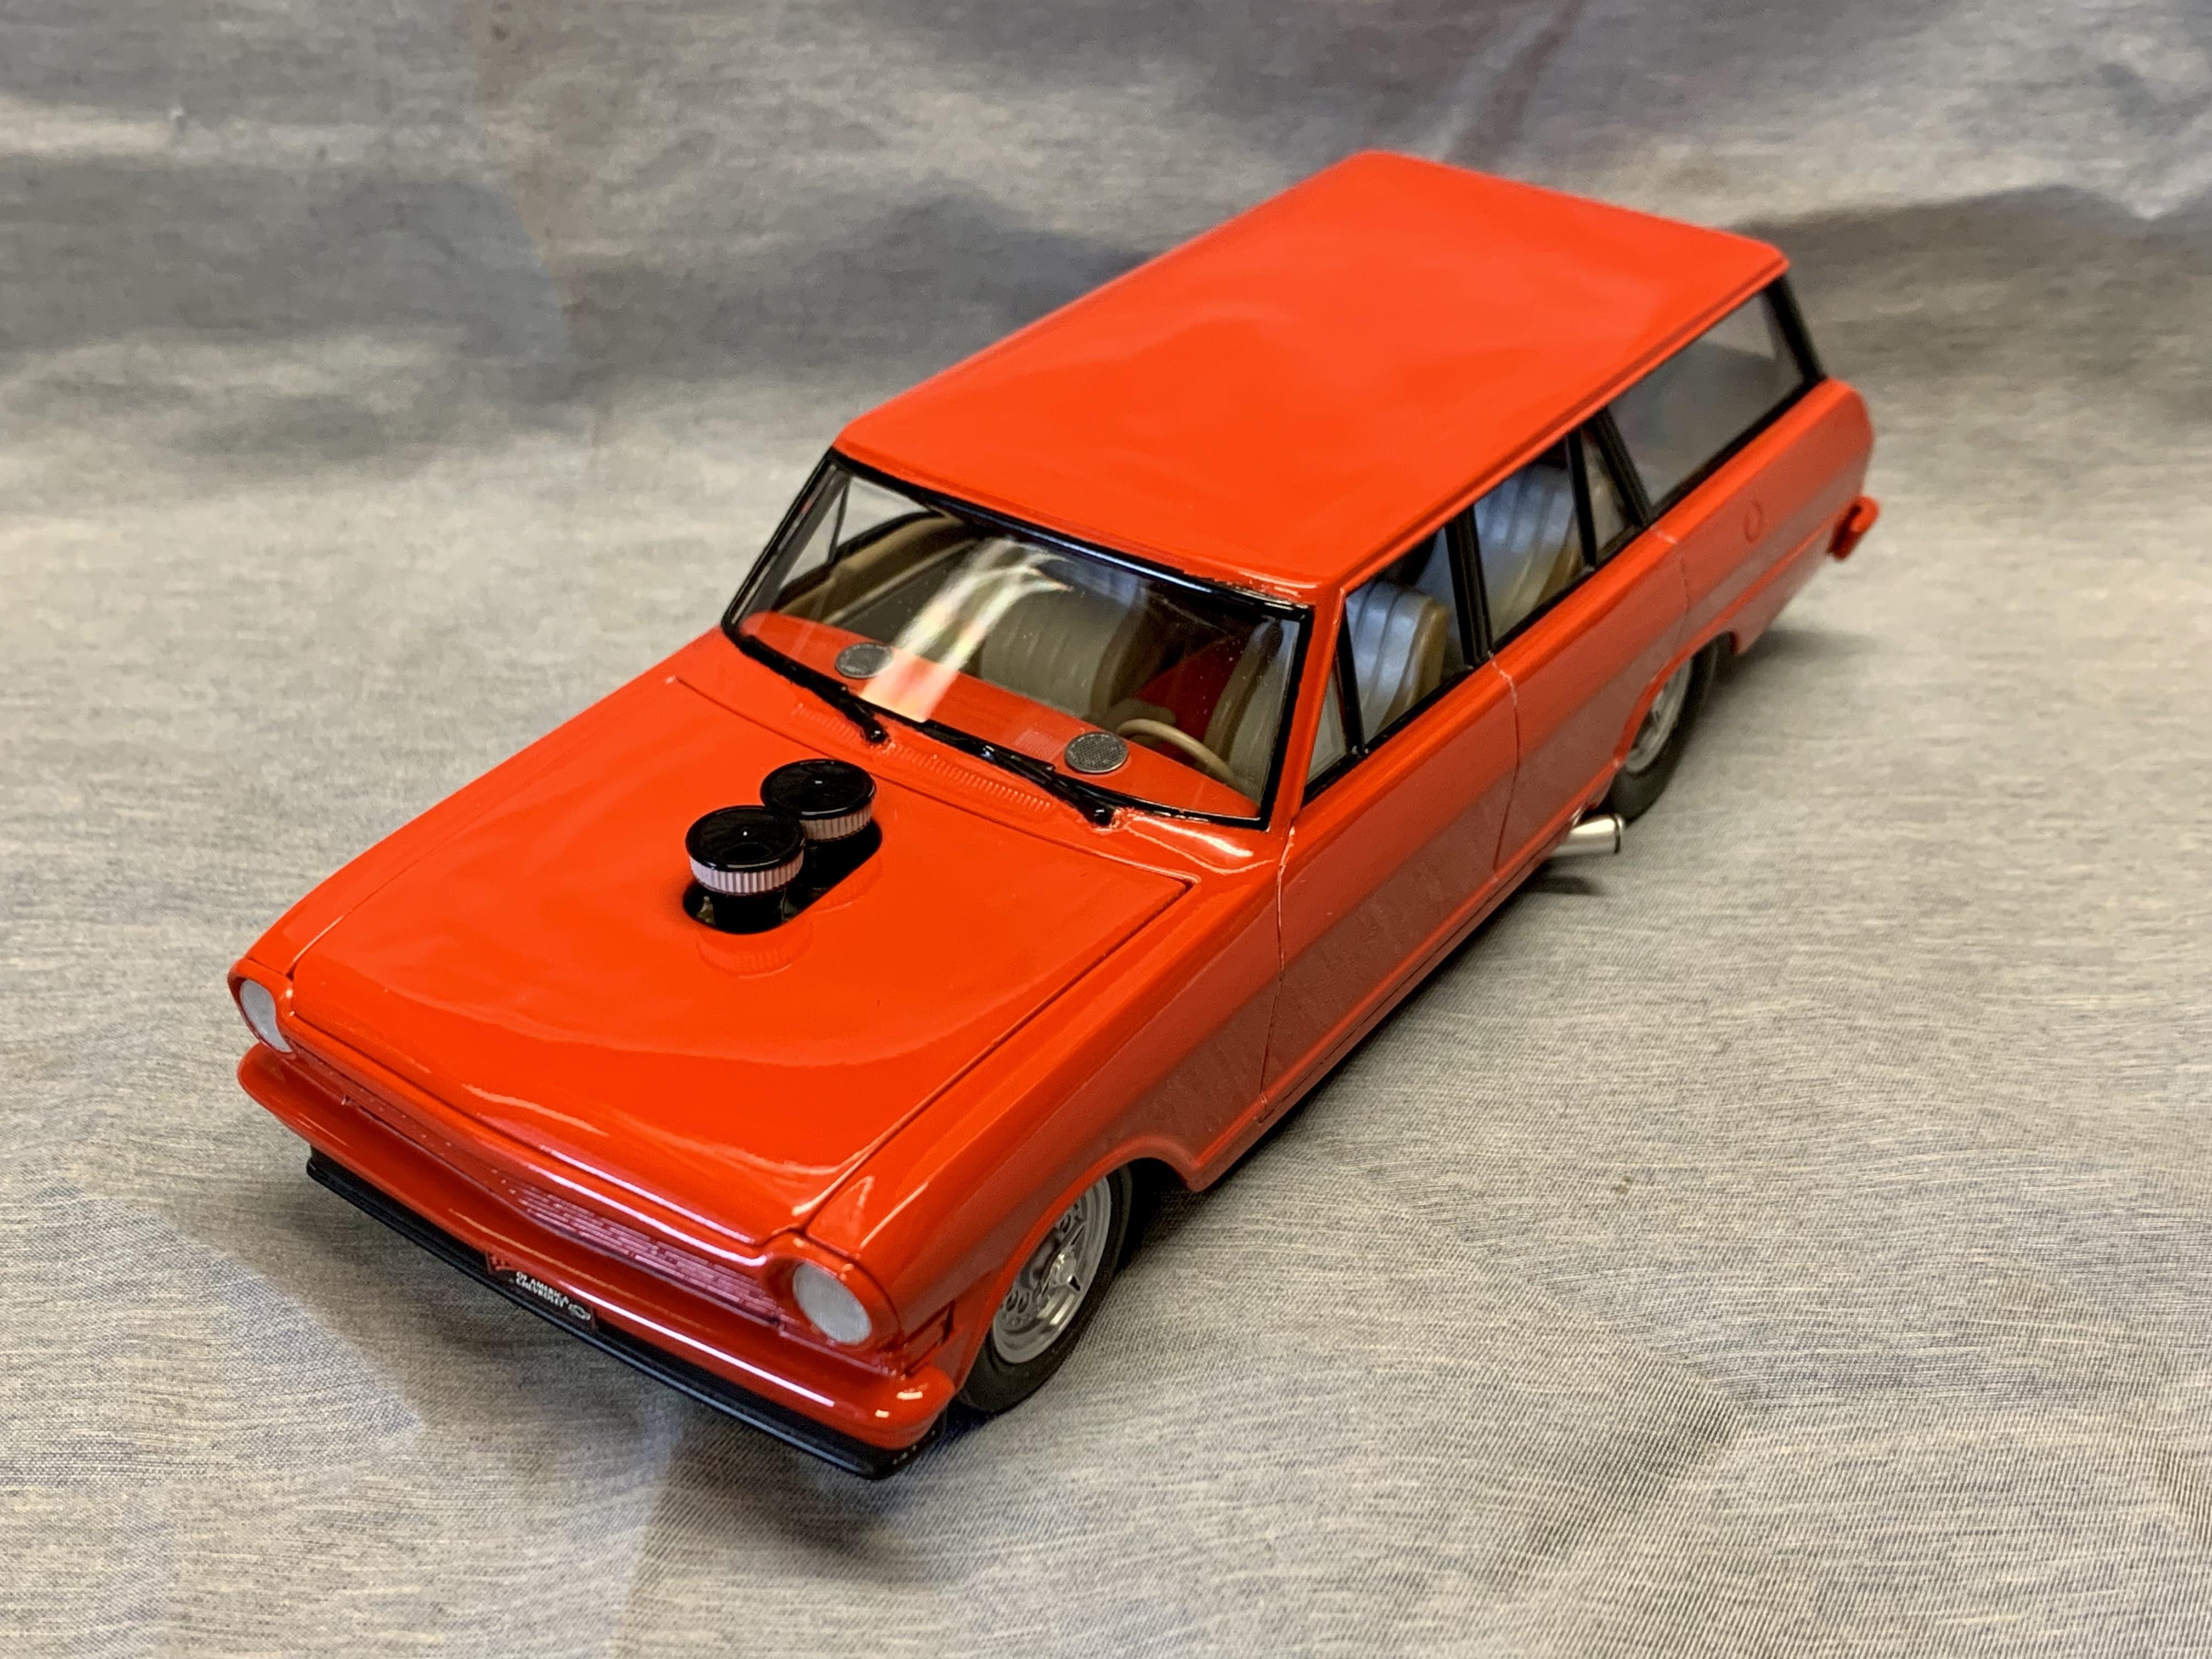
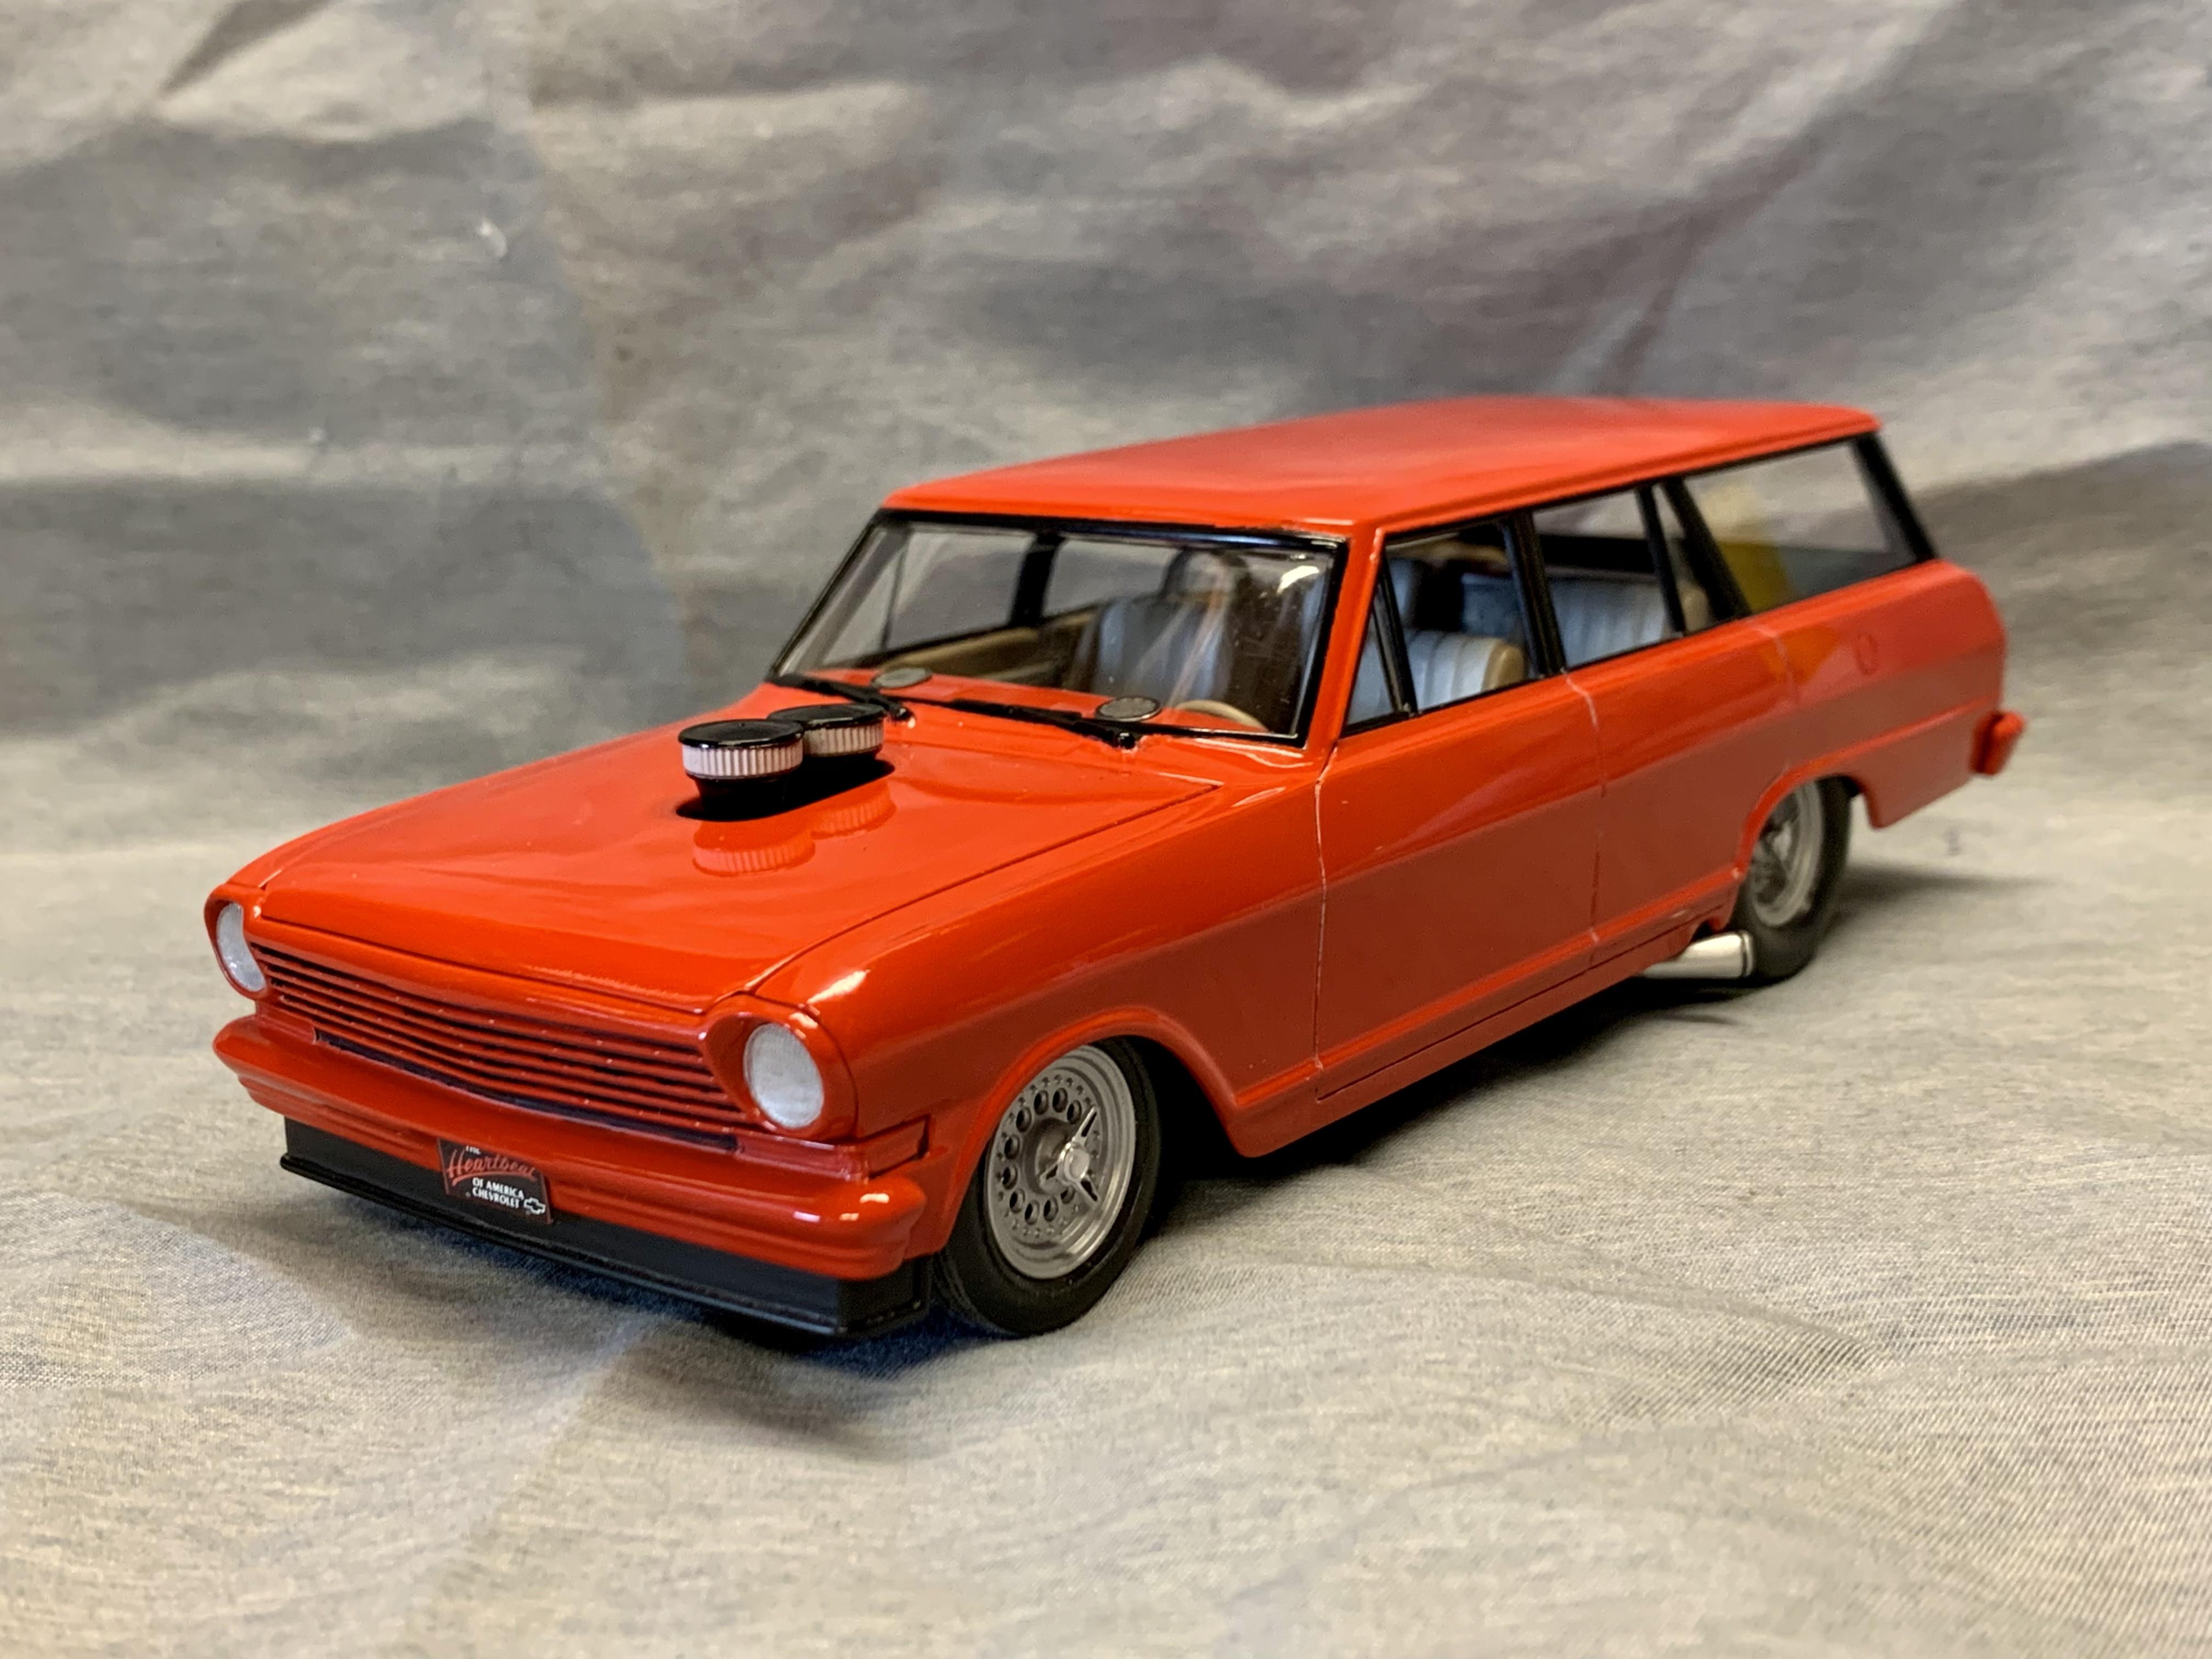
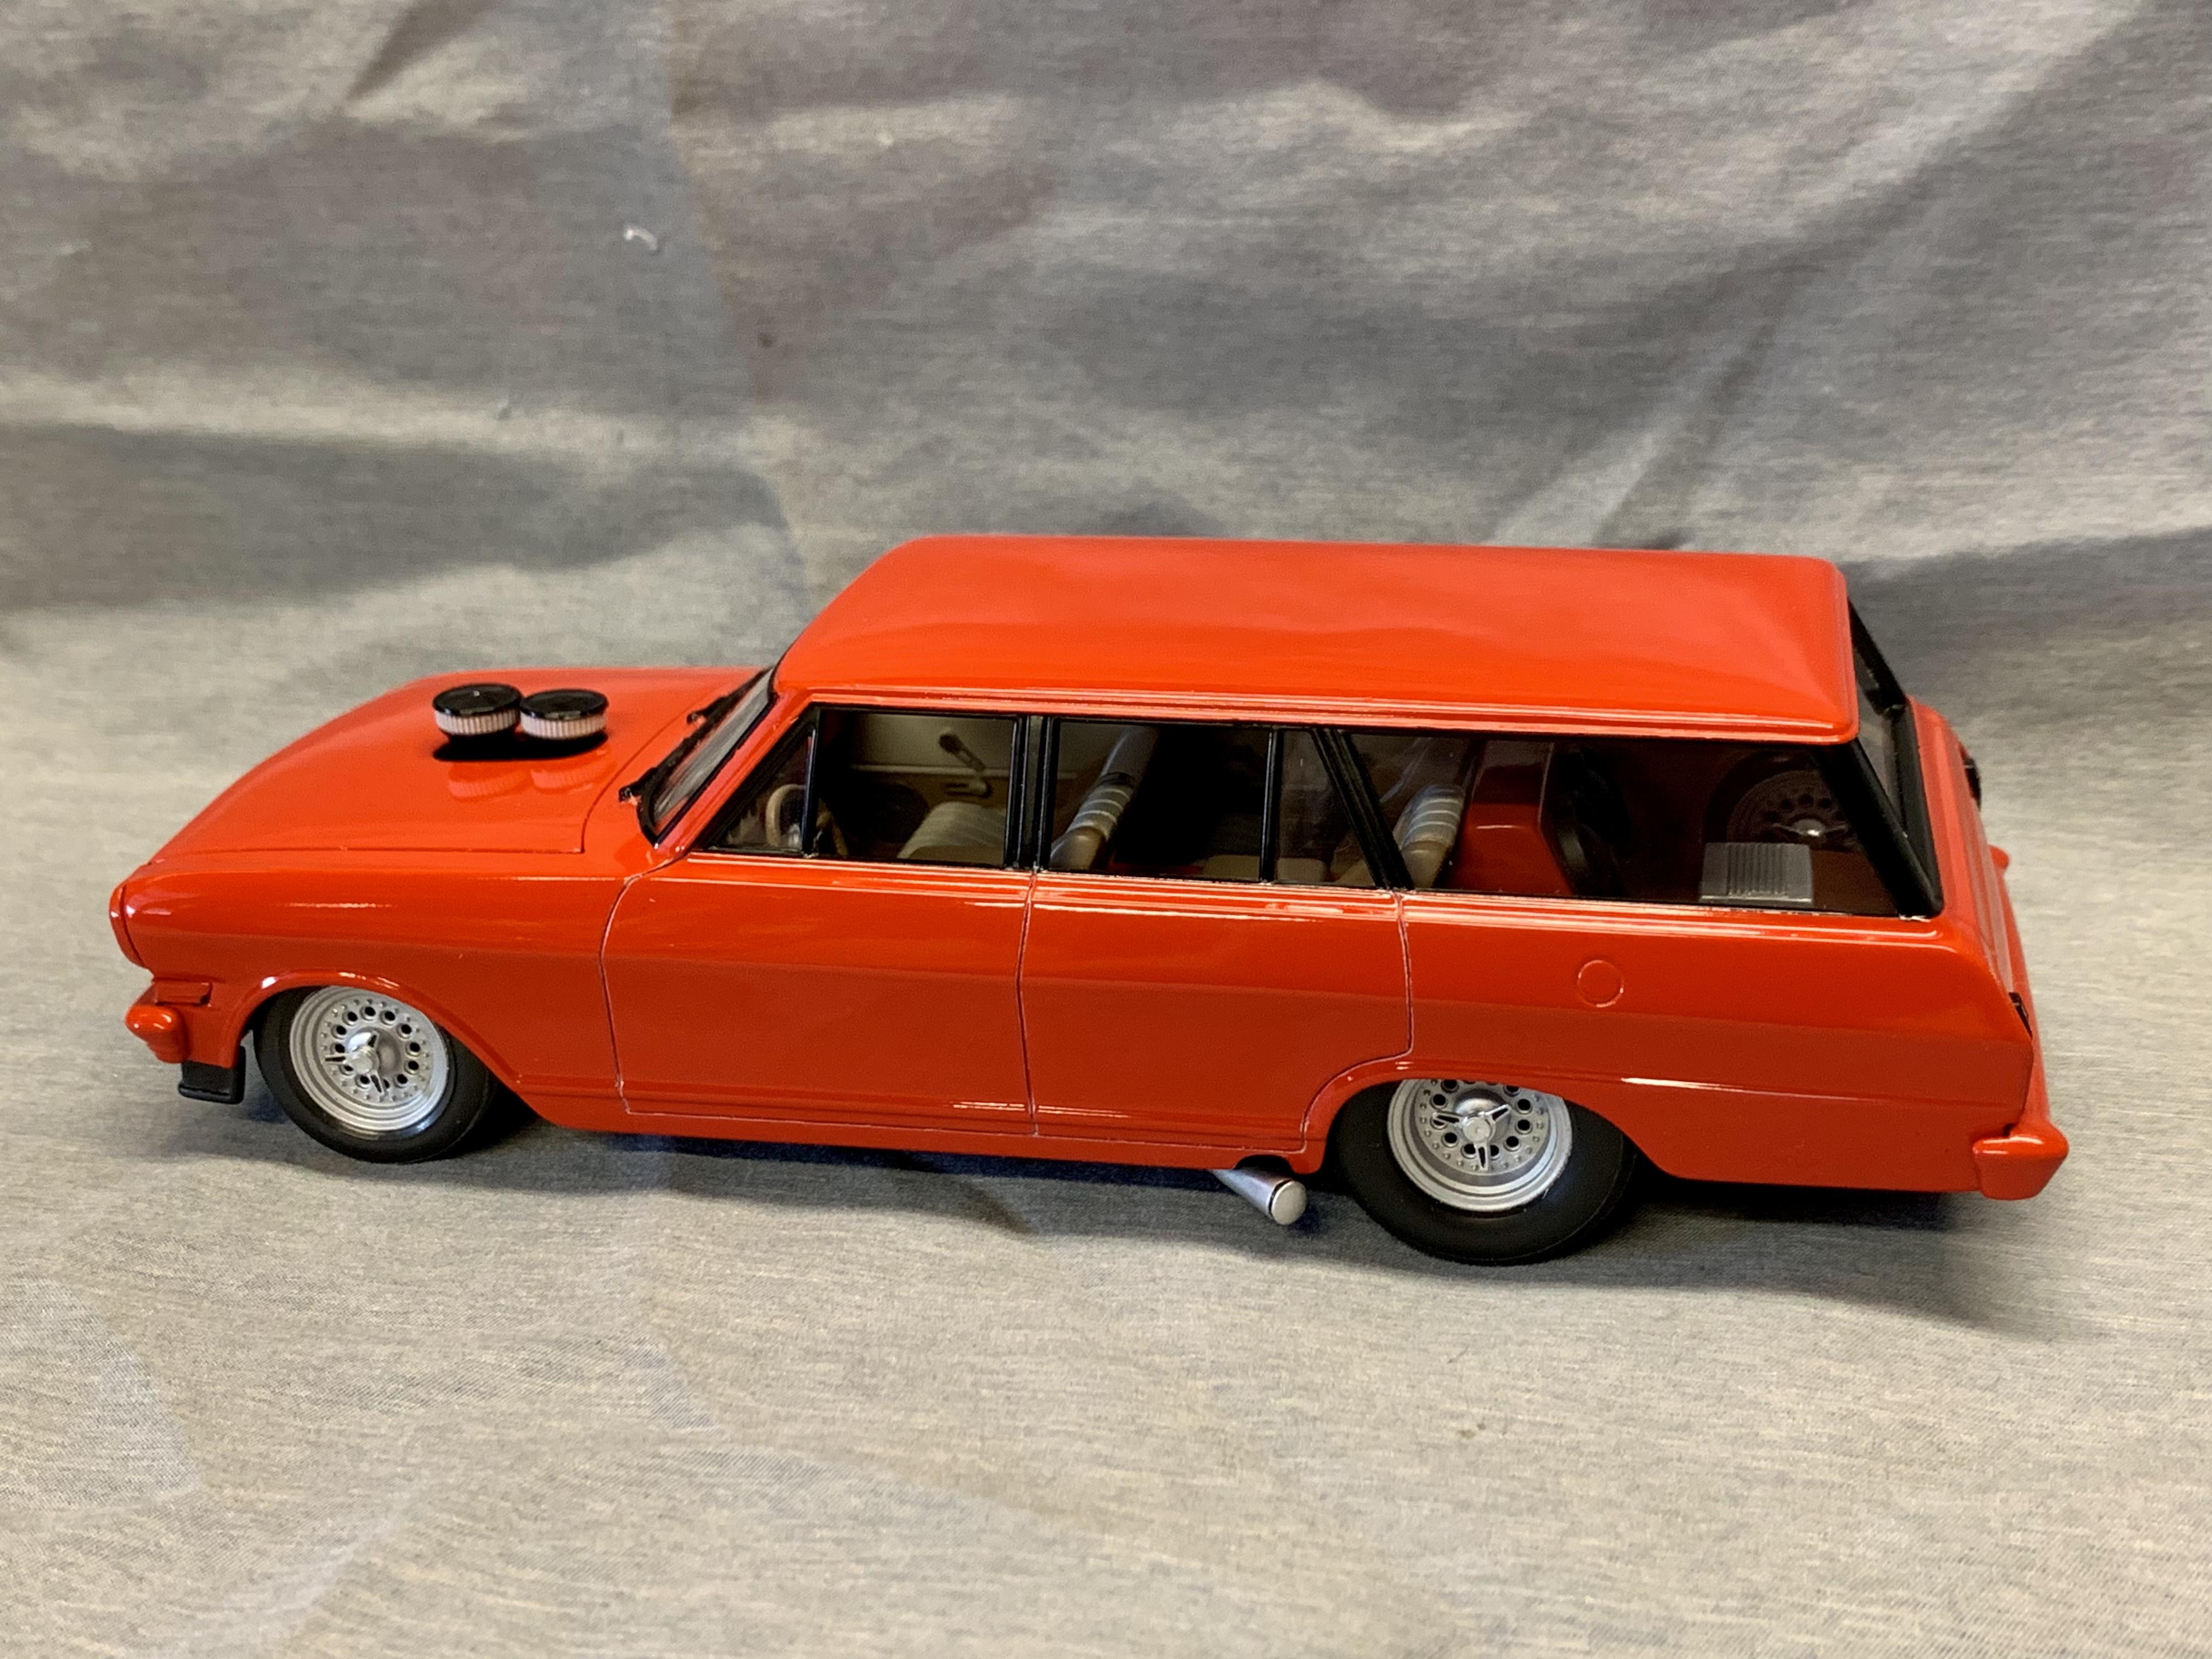
1963 Chevy Nova Wagon: Early 90’s Street Machine
Dennis Lacy replied to Dennis Lacy's topic in Model Cars
I don’t know about that but thank you! Then my mission was accomplished! ? Ha! I don’t know about that but thanks, Phil! Not sure I can picture that color scheme on one of these, interesting… Thank you so very much! LS engines wouldn’t exist for another 7 years when this car was built. Paint definitely isn’t flawless, I just took pictures at the right angles! ? Pounding out that ZZ Top Afterburner album! Do The Velcro Fly! ? -
Your wagon looks fantastic in TS58. Perfect kind of color for one of these.
-
As far as I’m concerned the Tim Burton Batmobile is THE Batmobile and you did it great justice. The finish is right-on. ?
-
Ditto! That’s a perfect color for the wagon.
-
Leaving no stone unturned, those dash rail caps are a nice finishing touch! Belly pan is shaping out awesome, too. I like your title update, hahaha. Be sure and leave room for paint. That seems to get you, me and RRR almost every time!
-
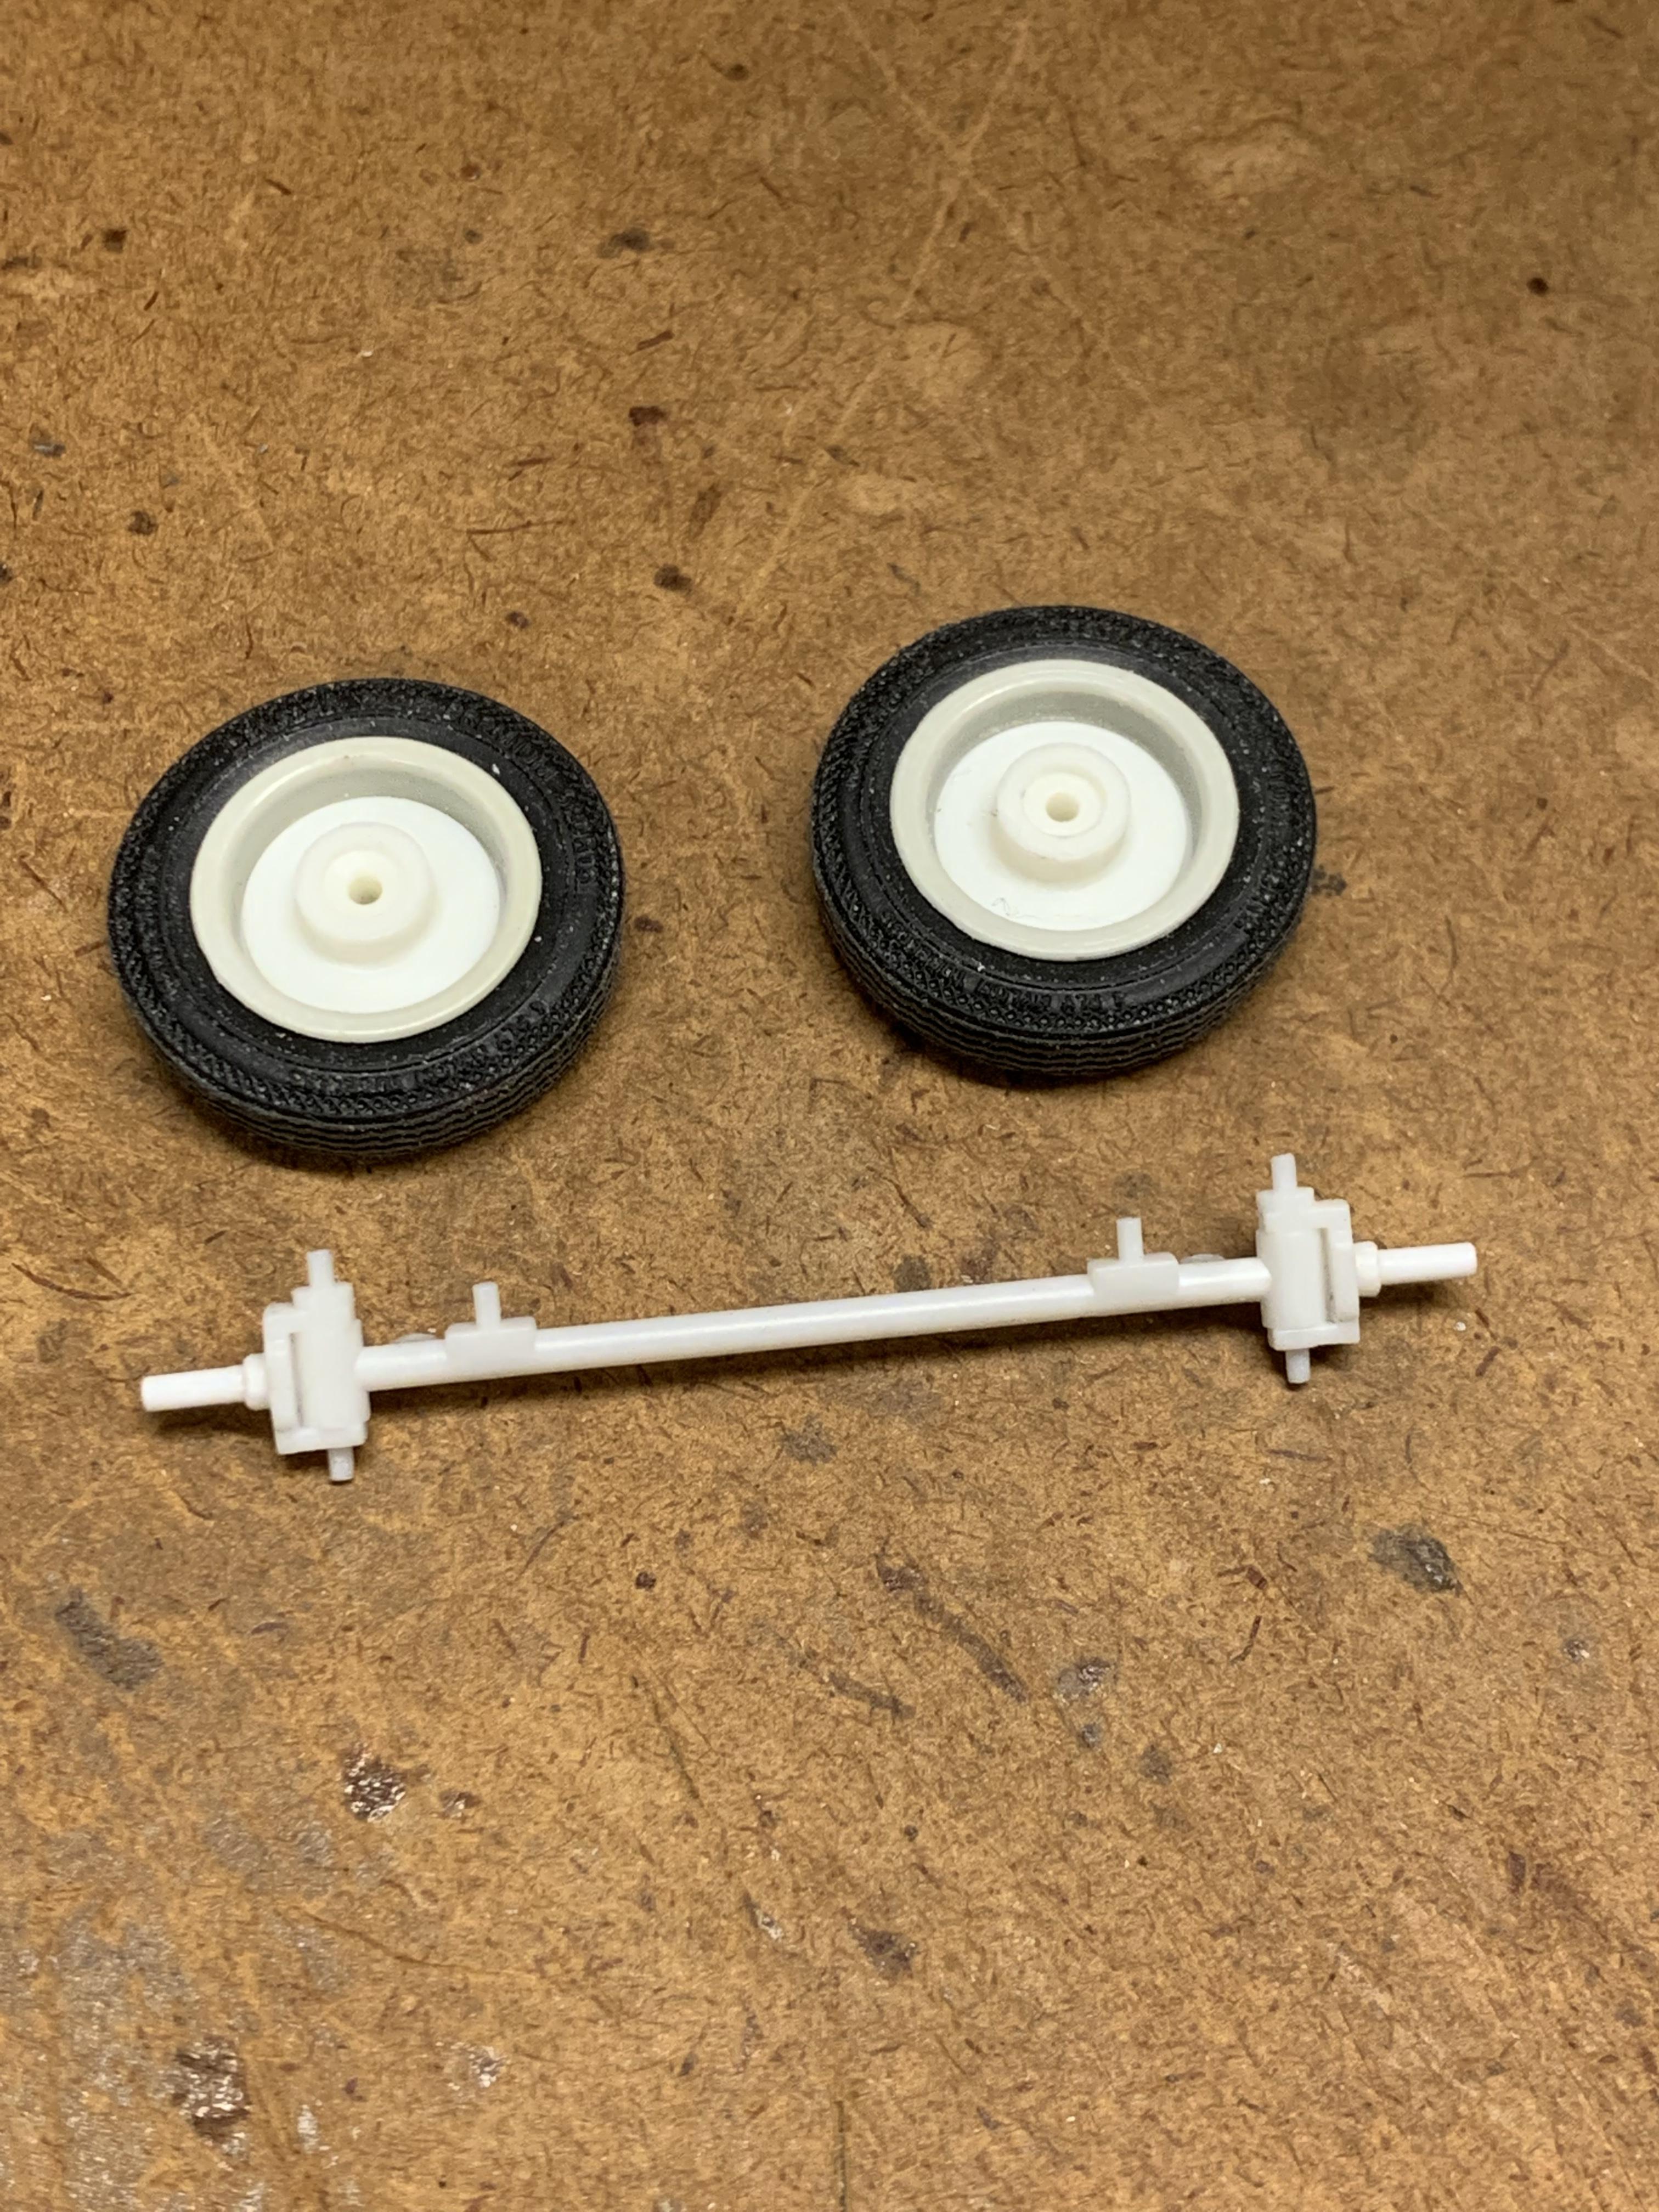
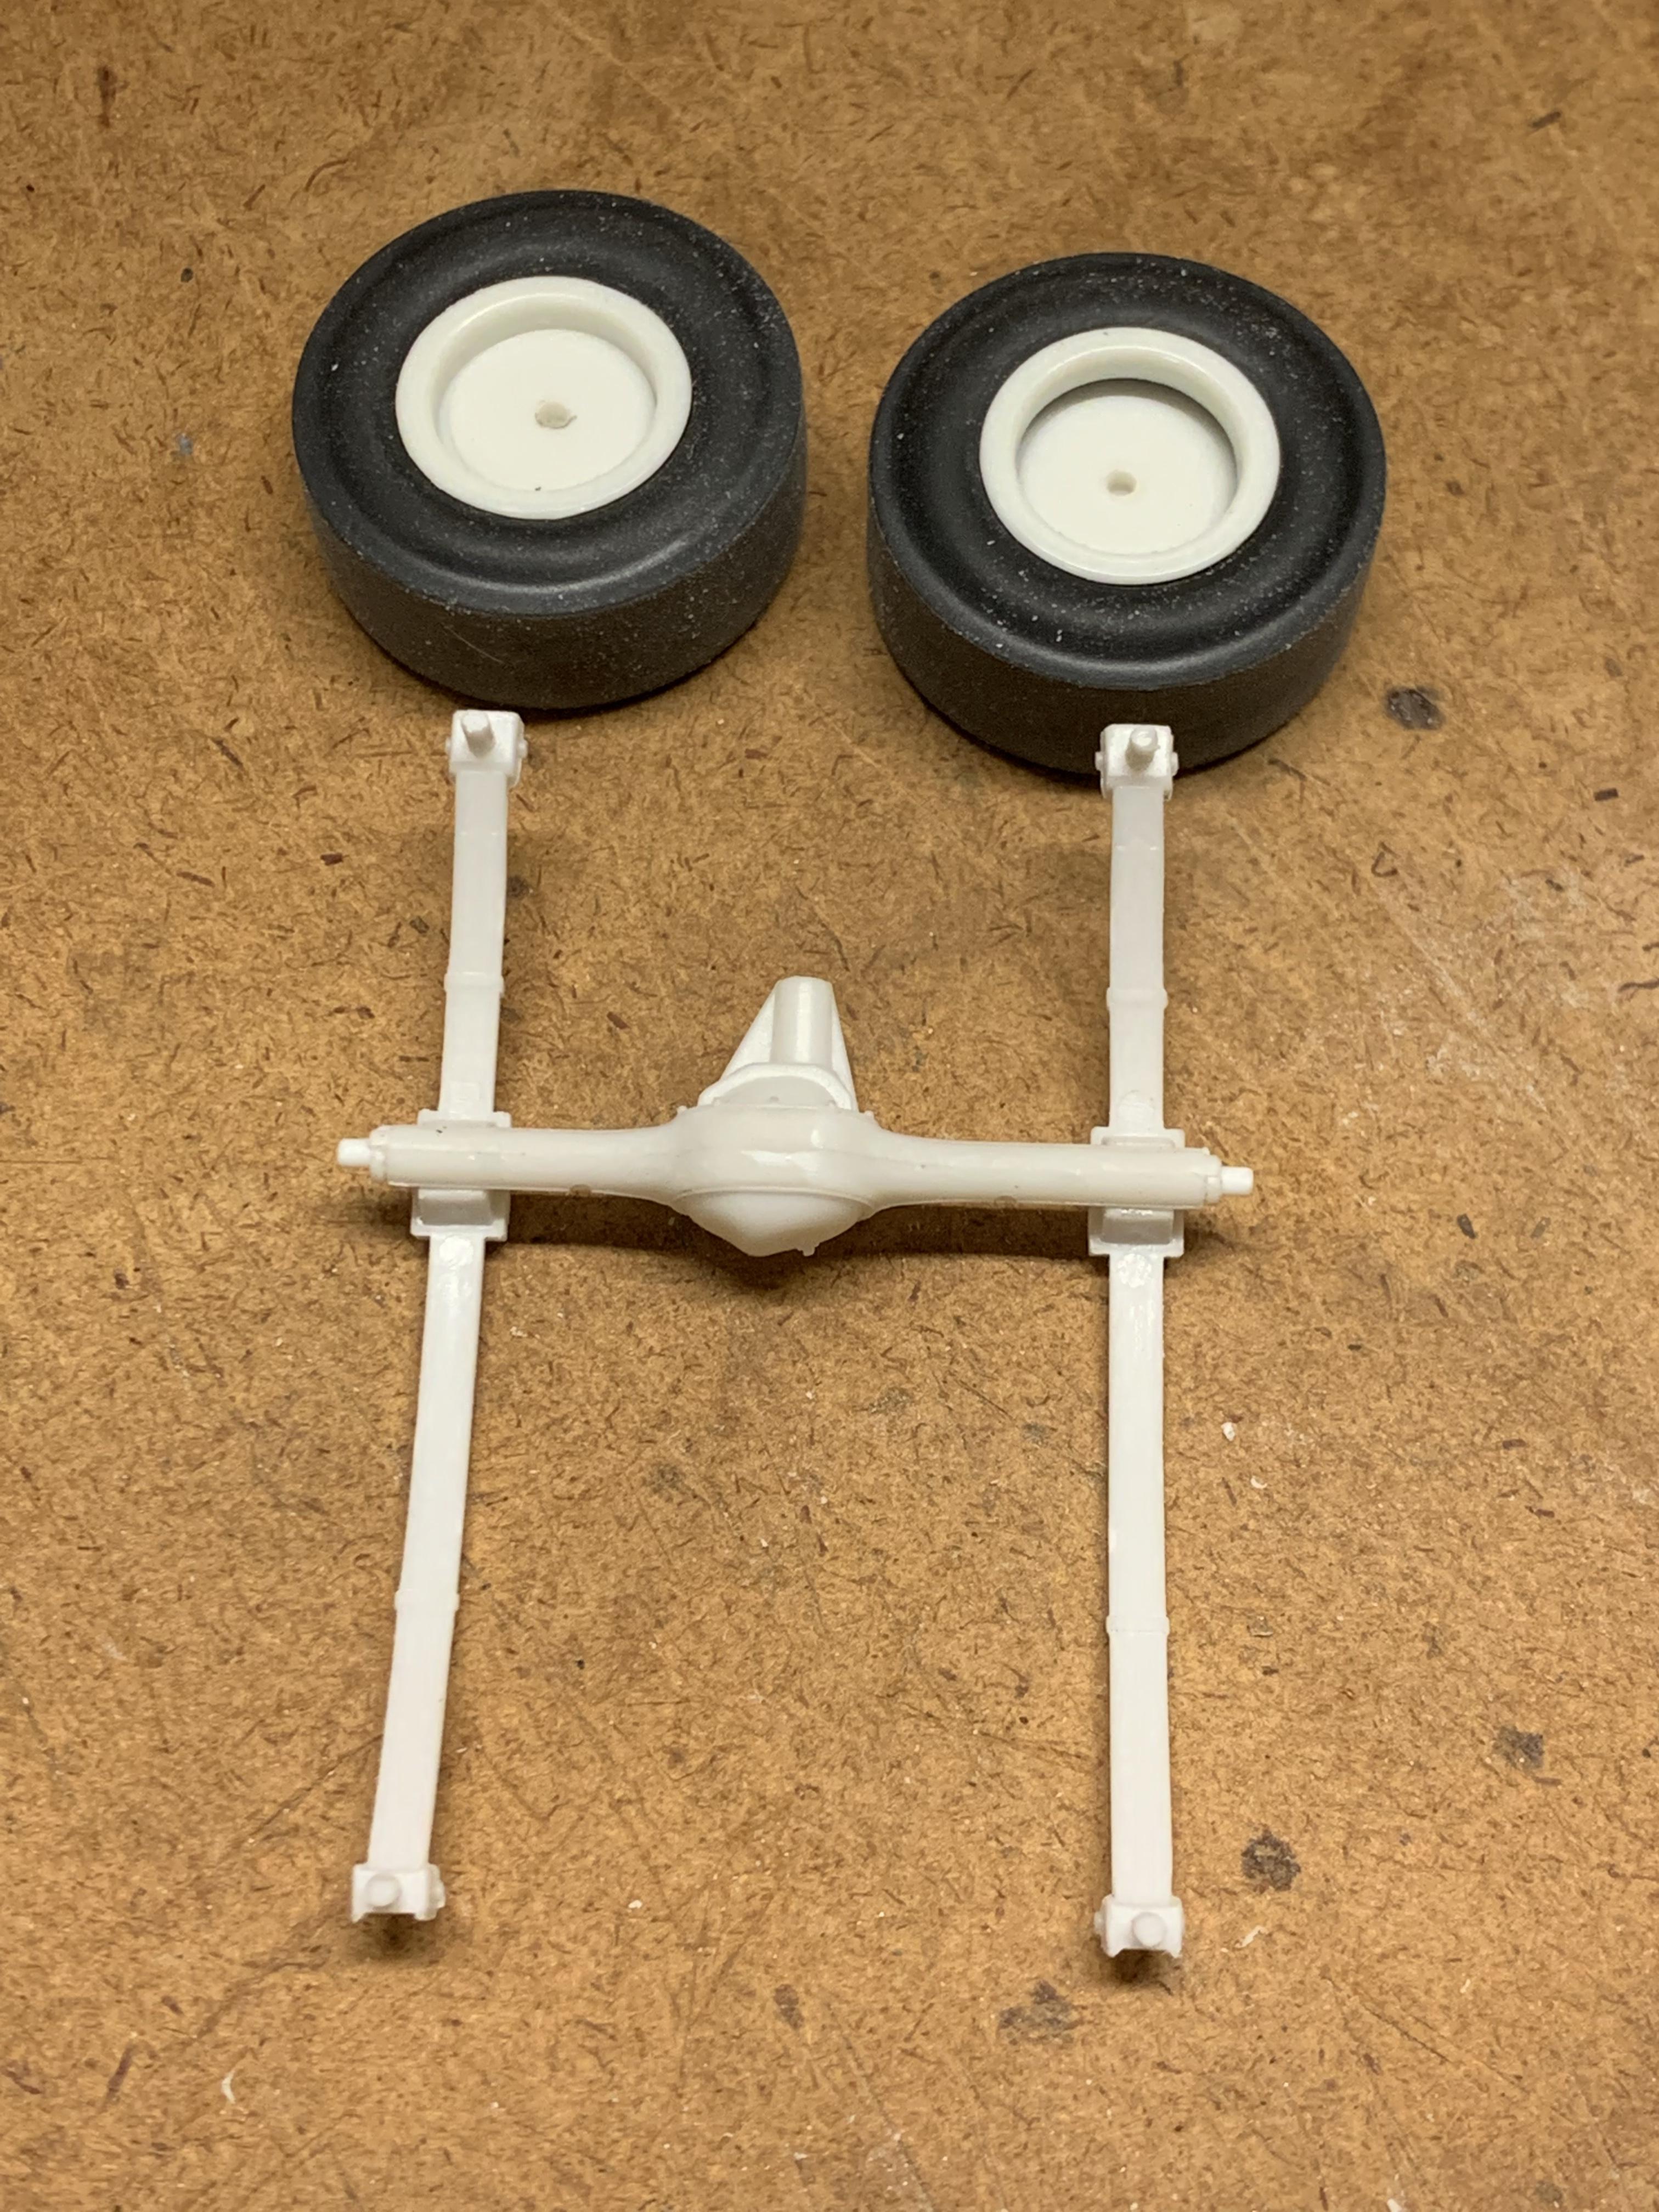
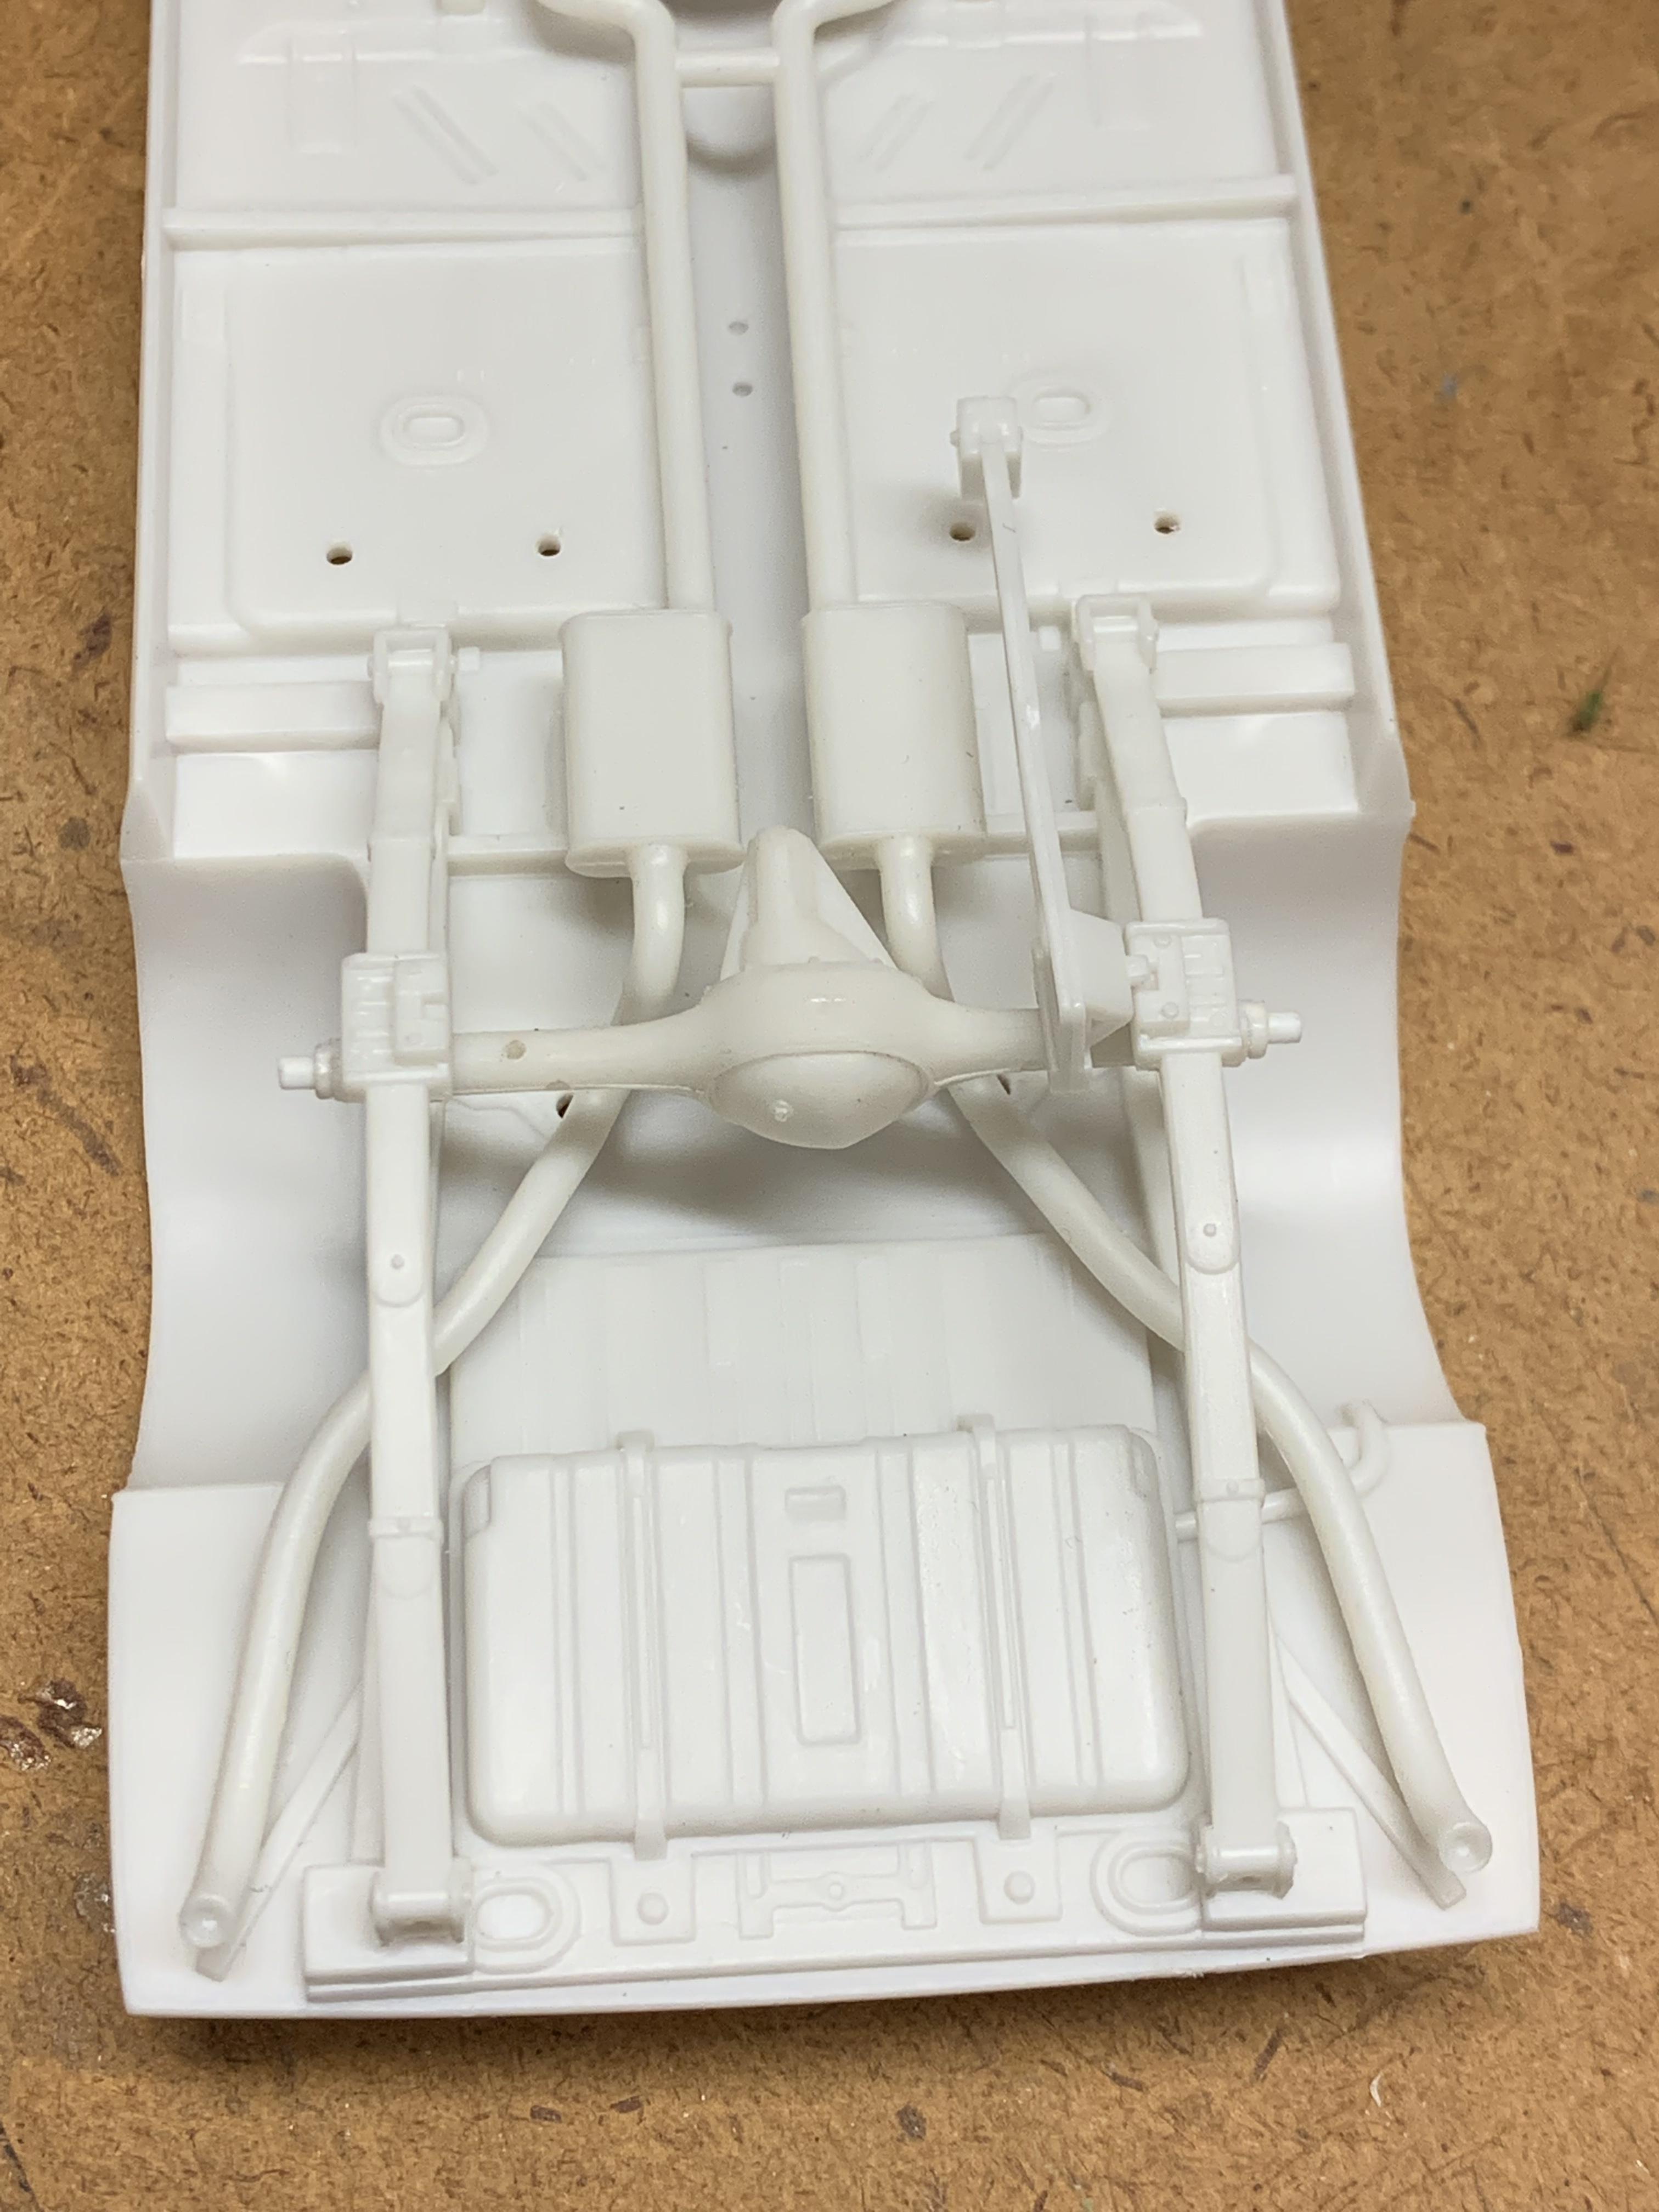
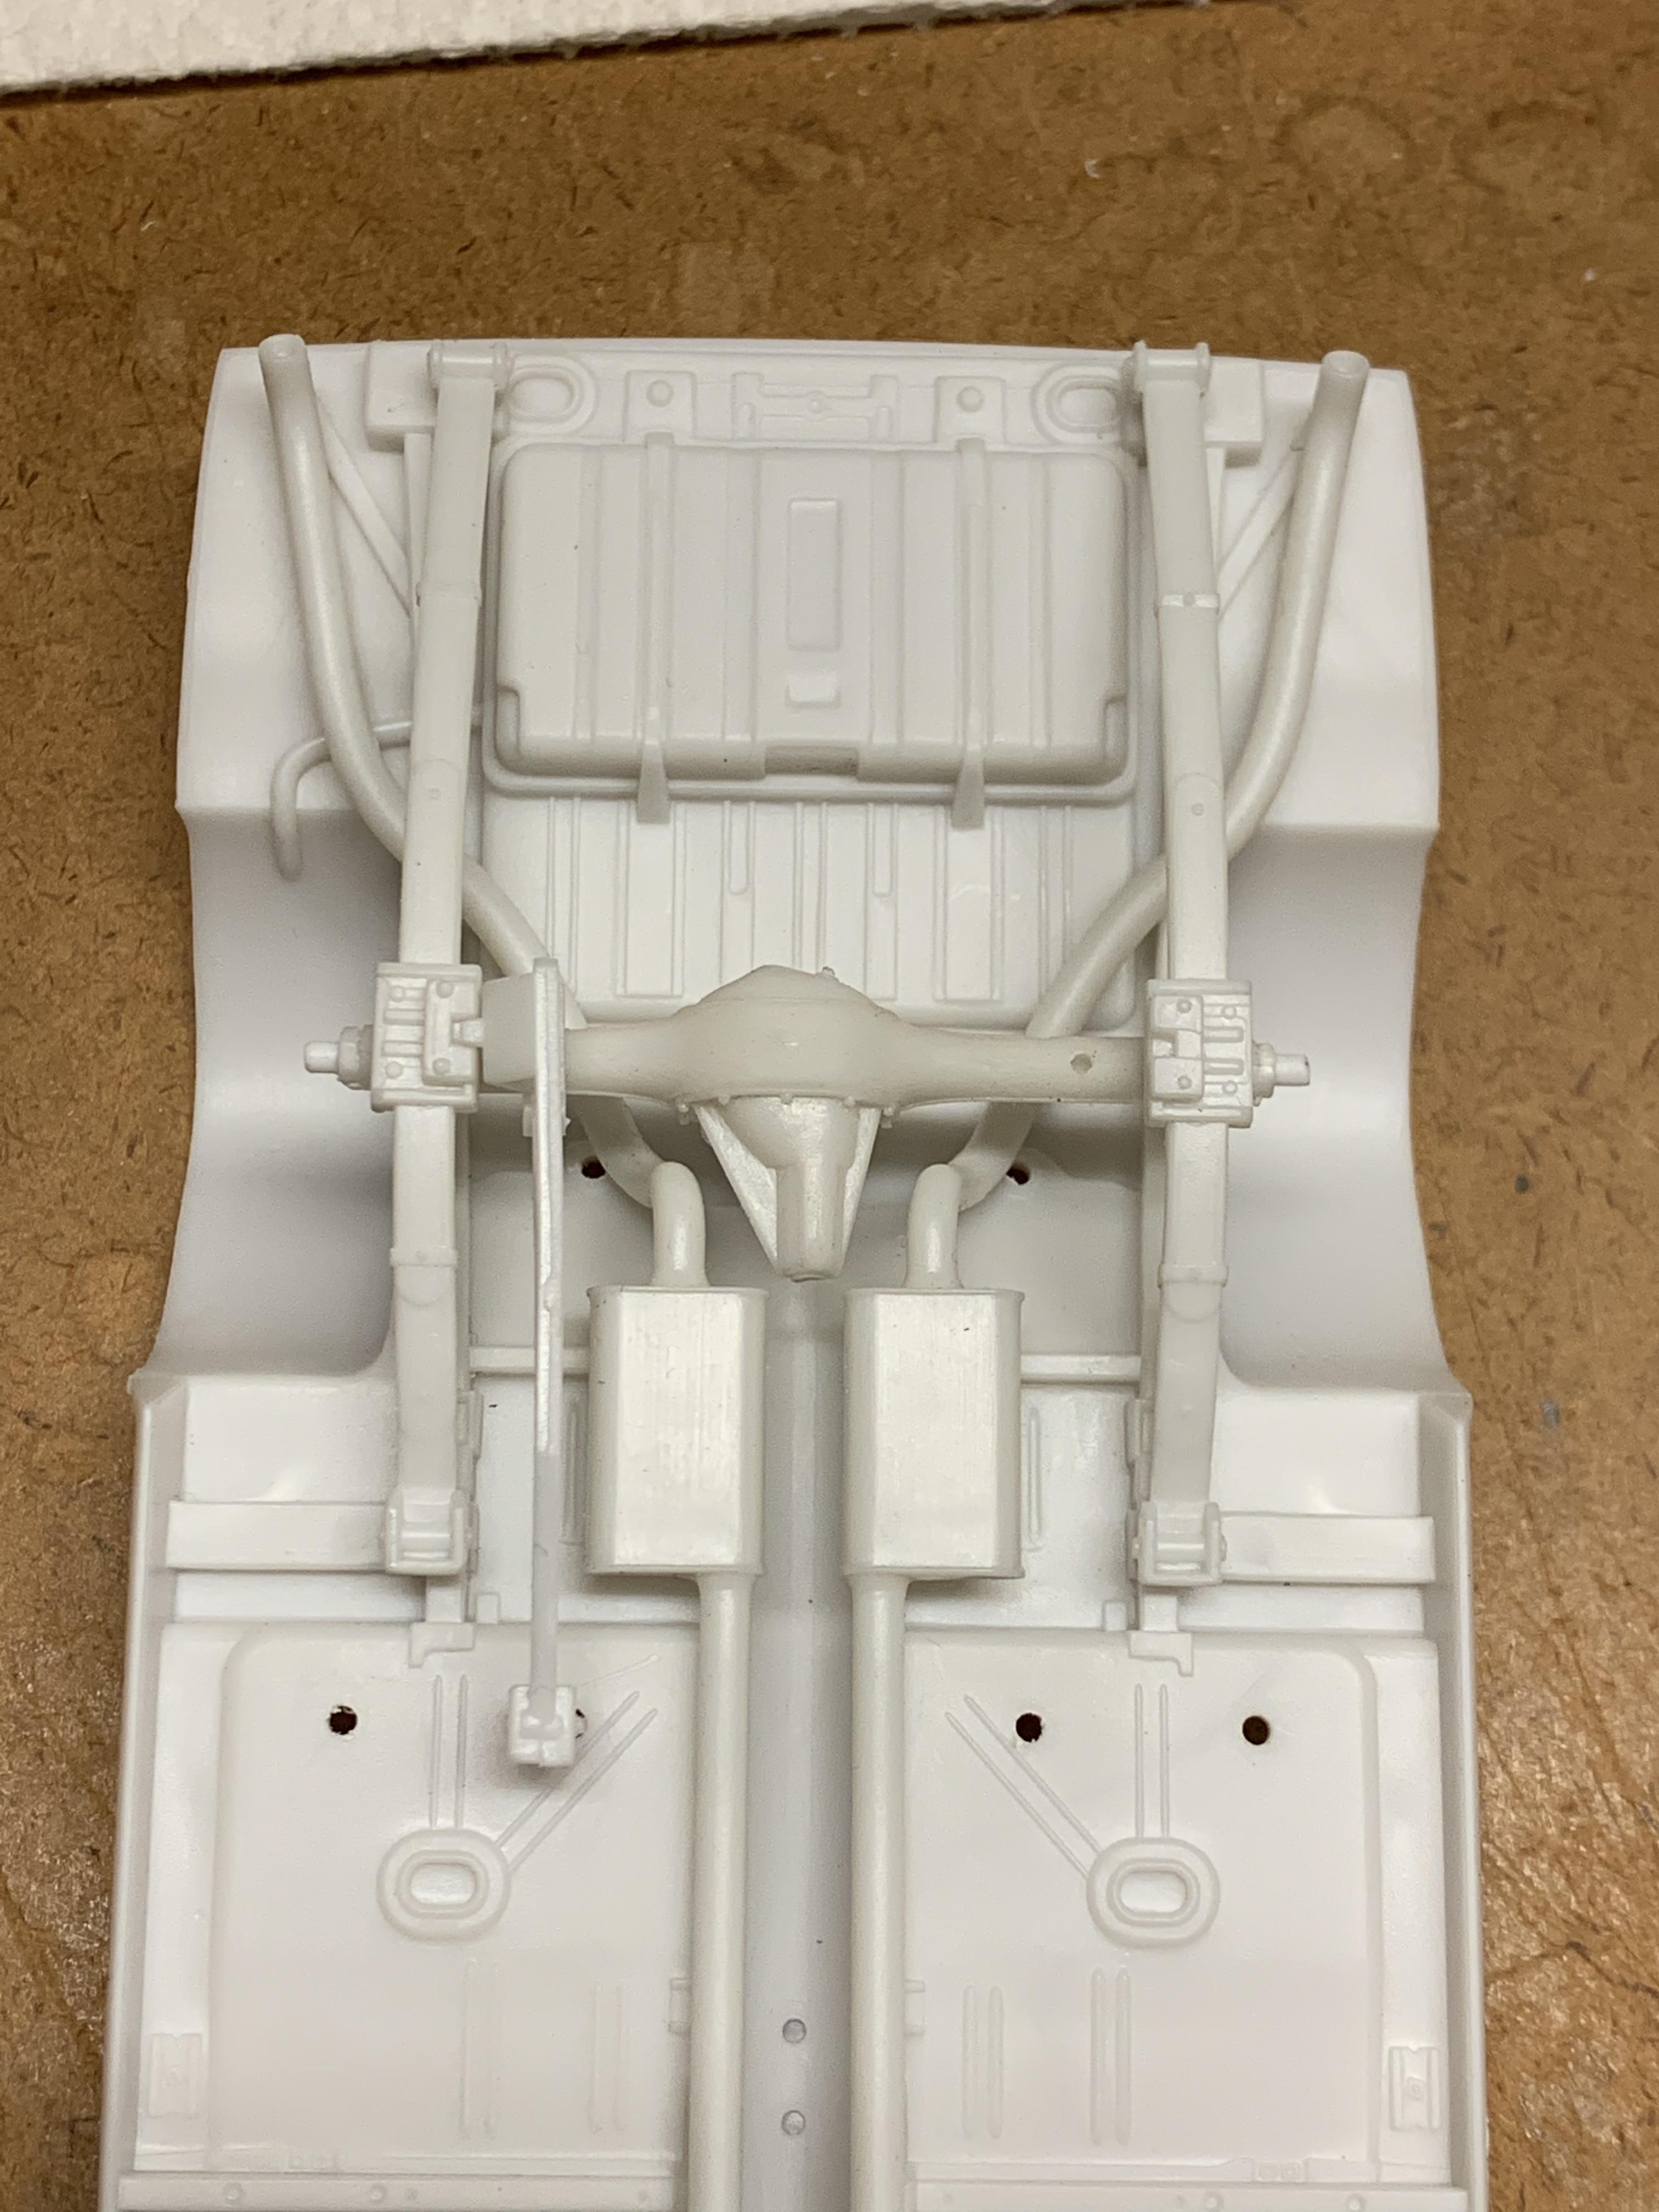
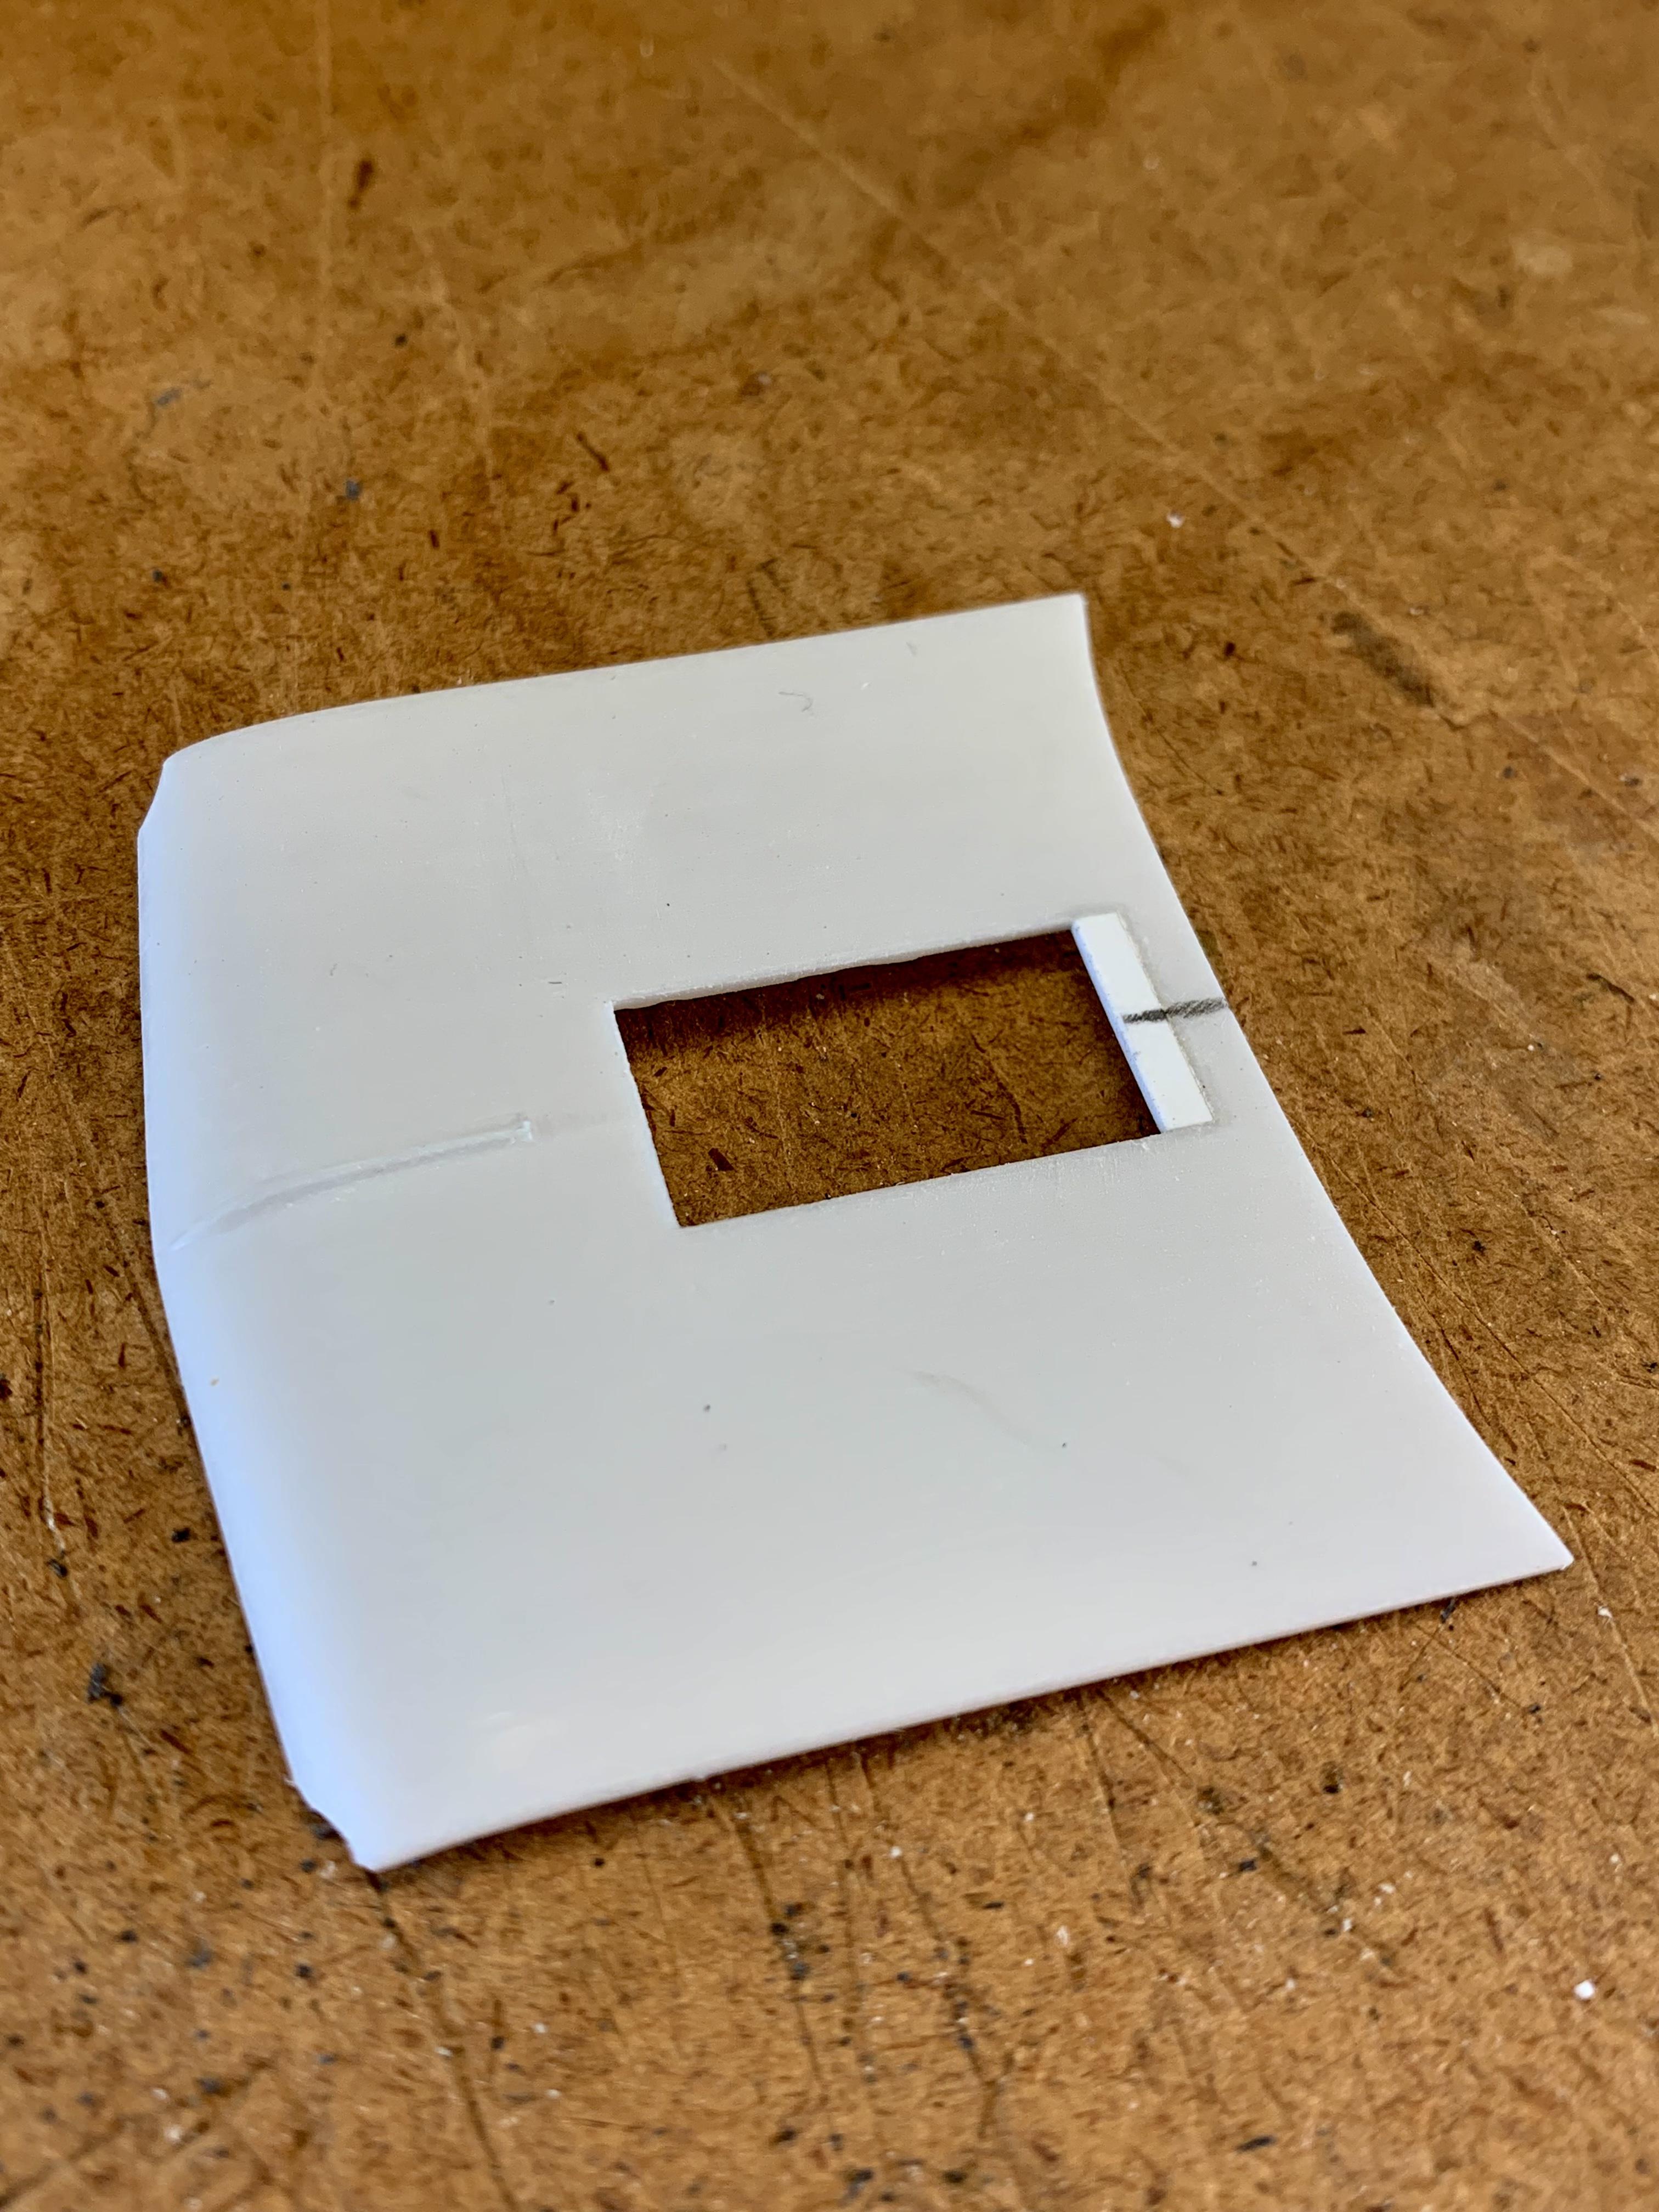
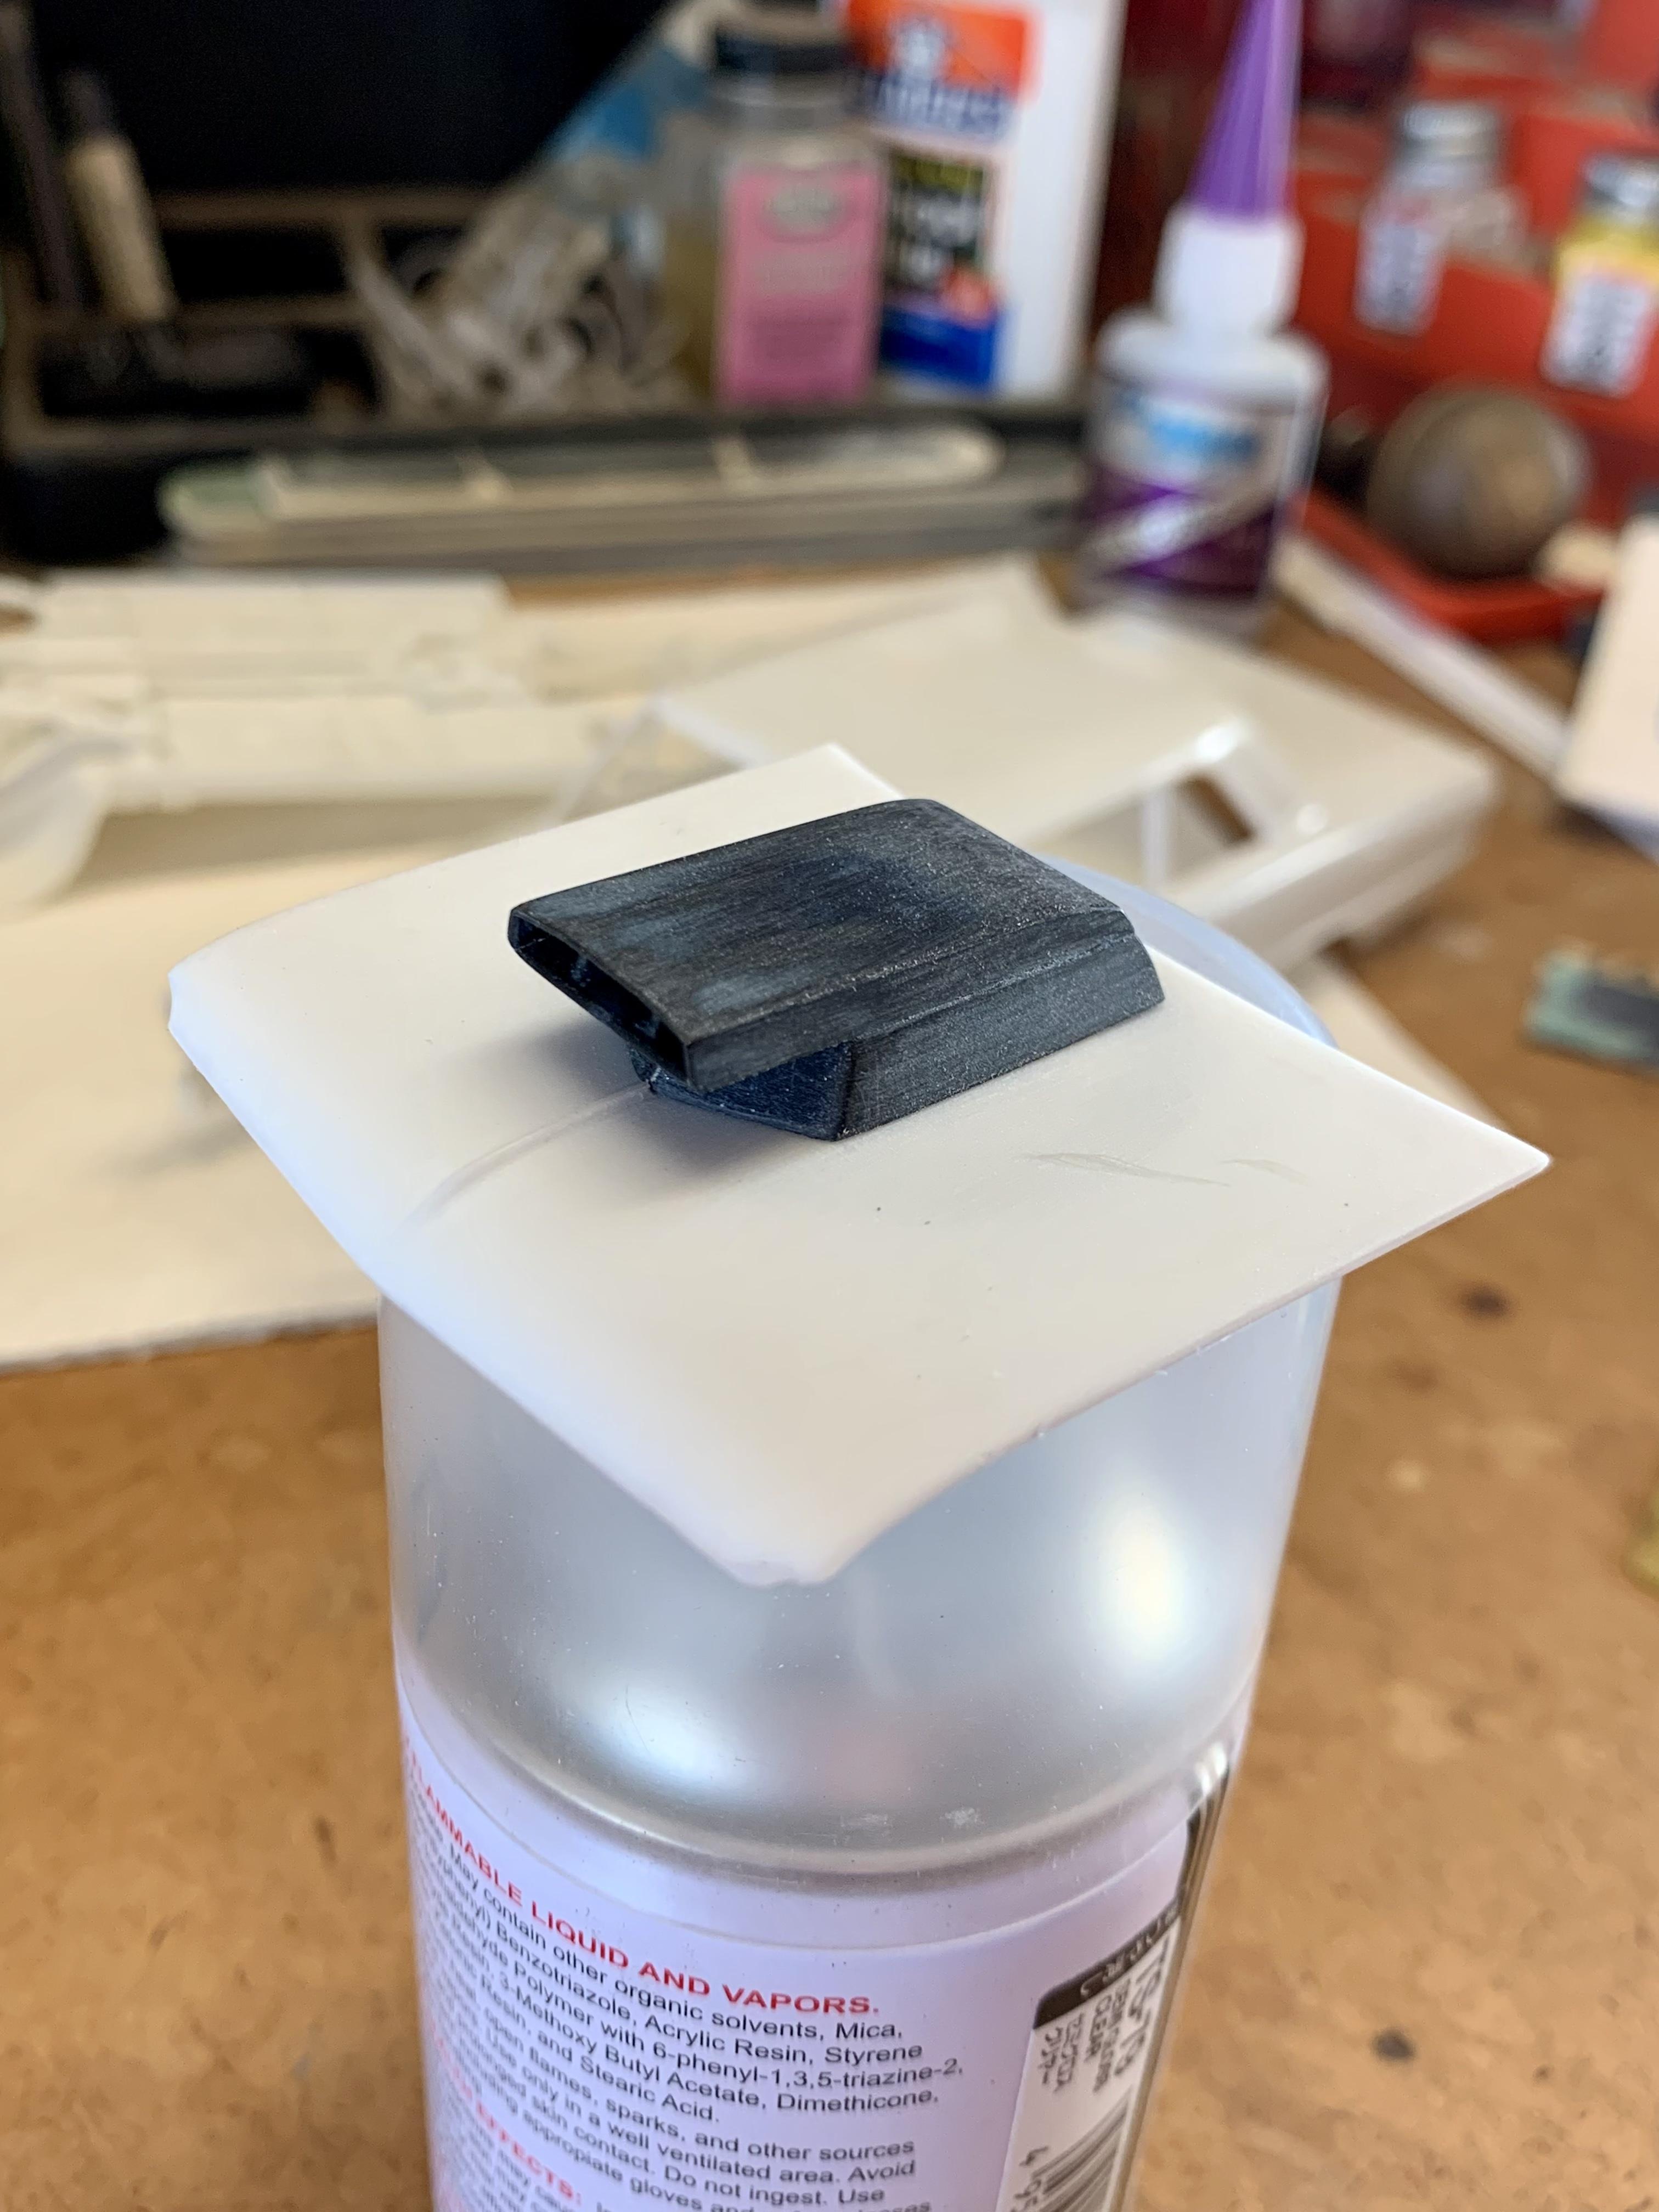
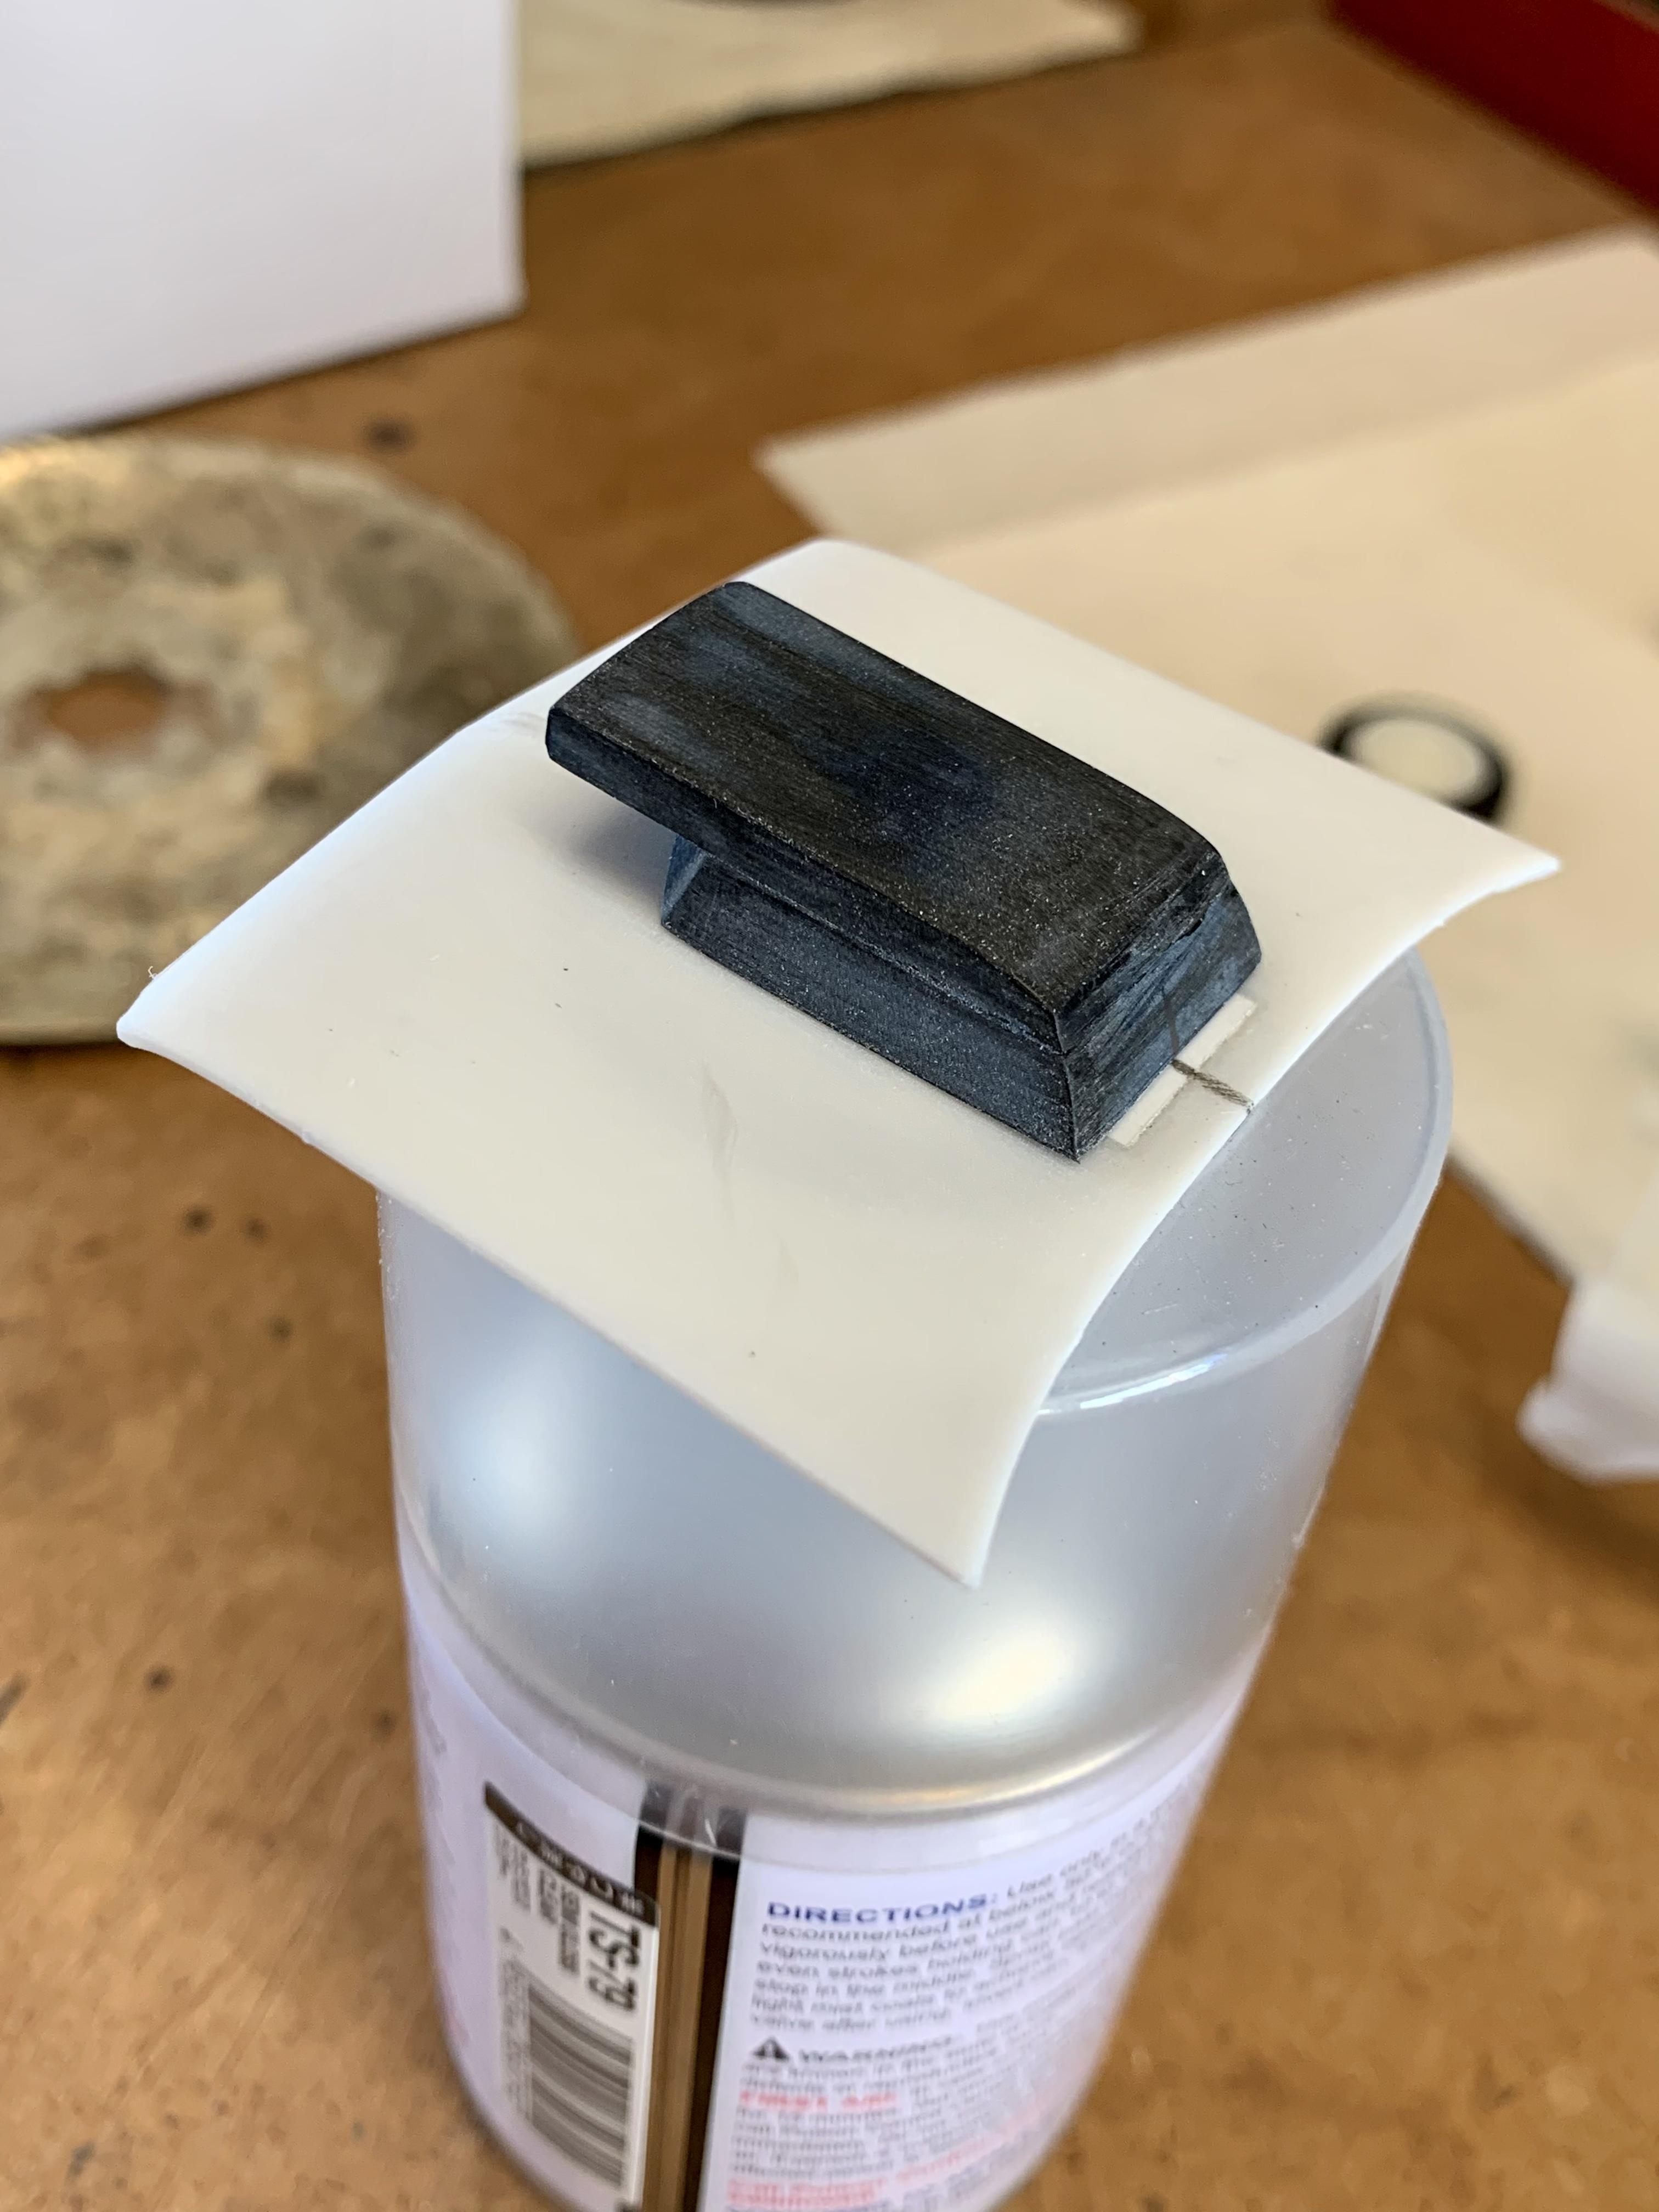
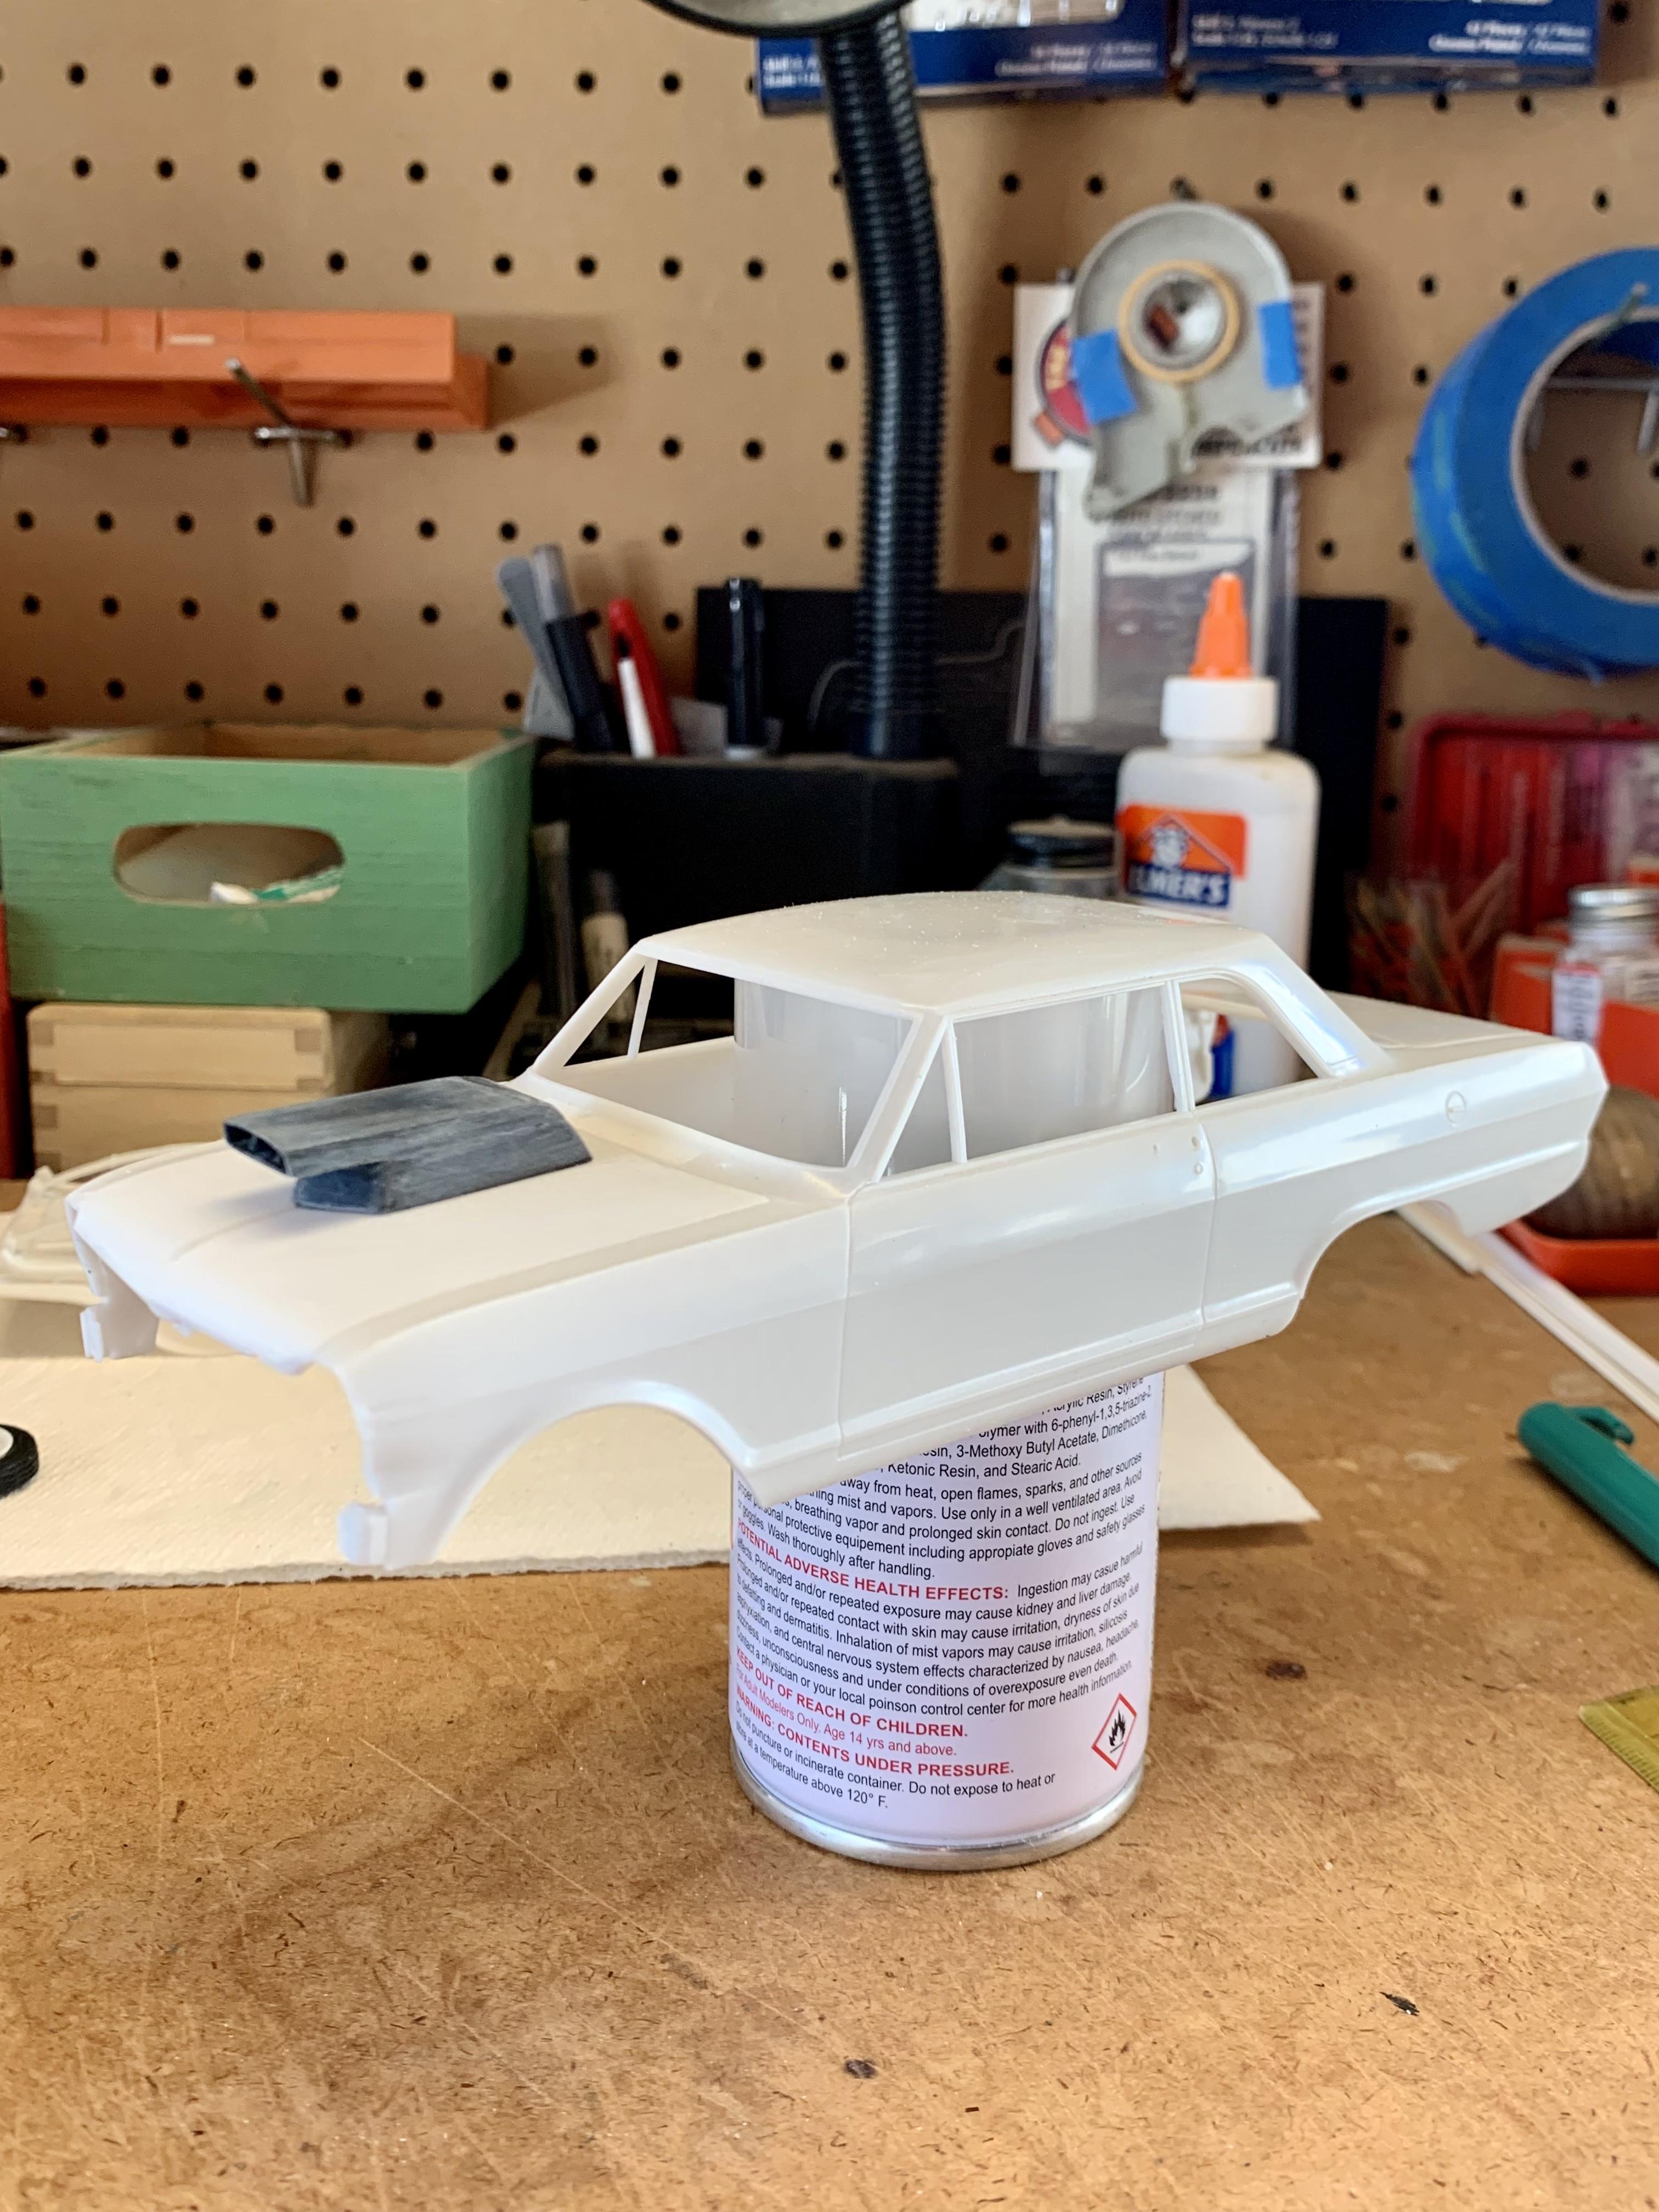
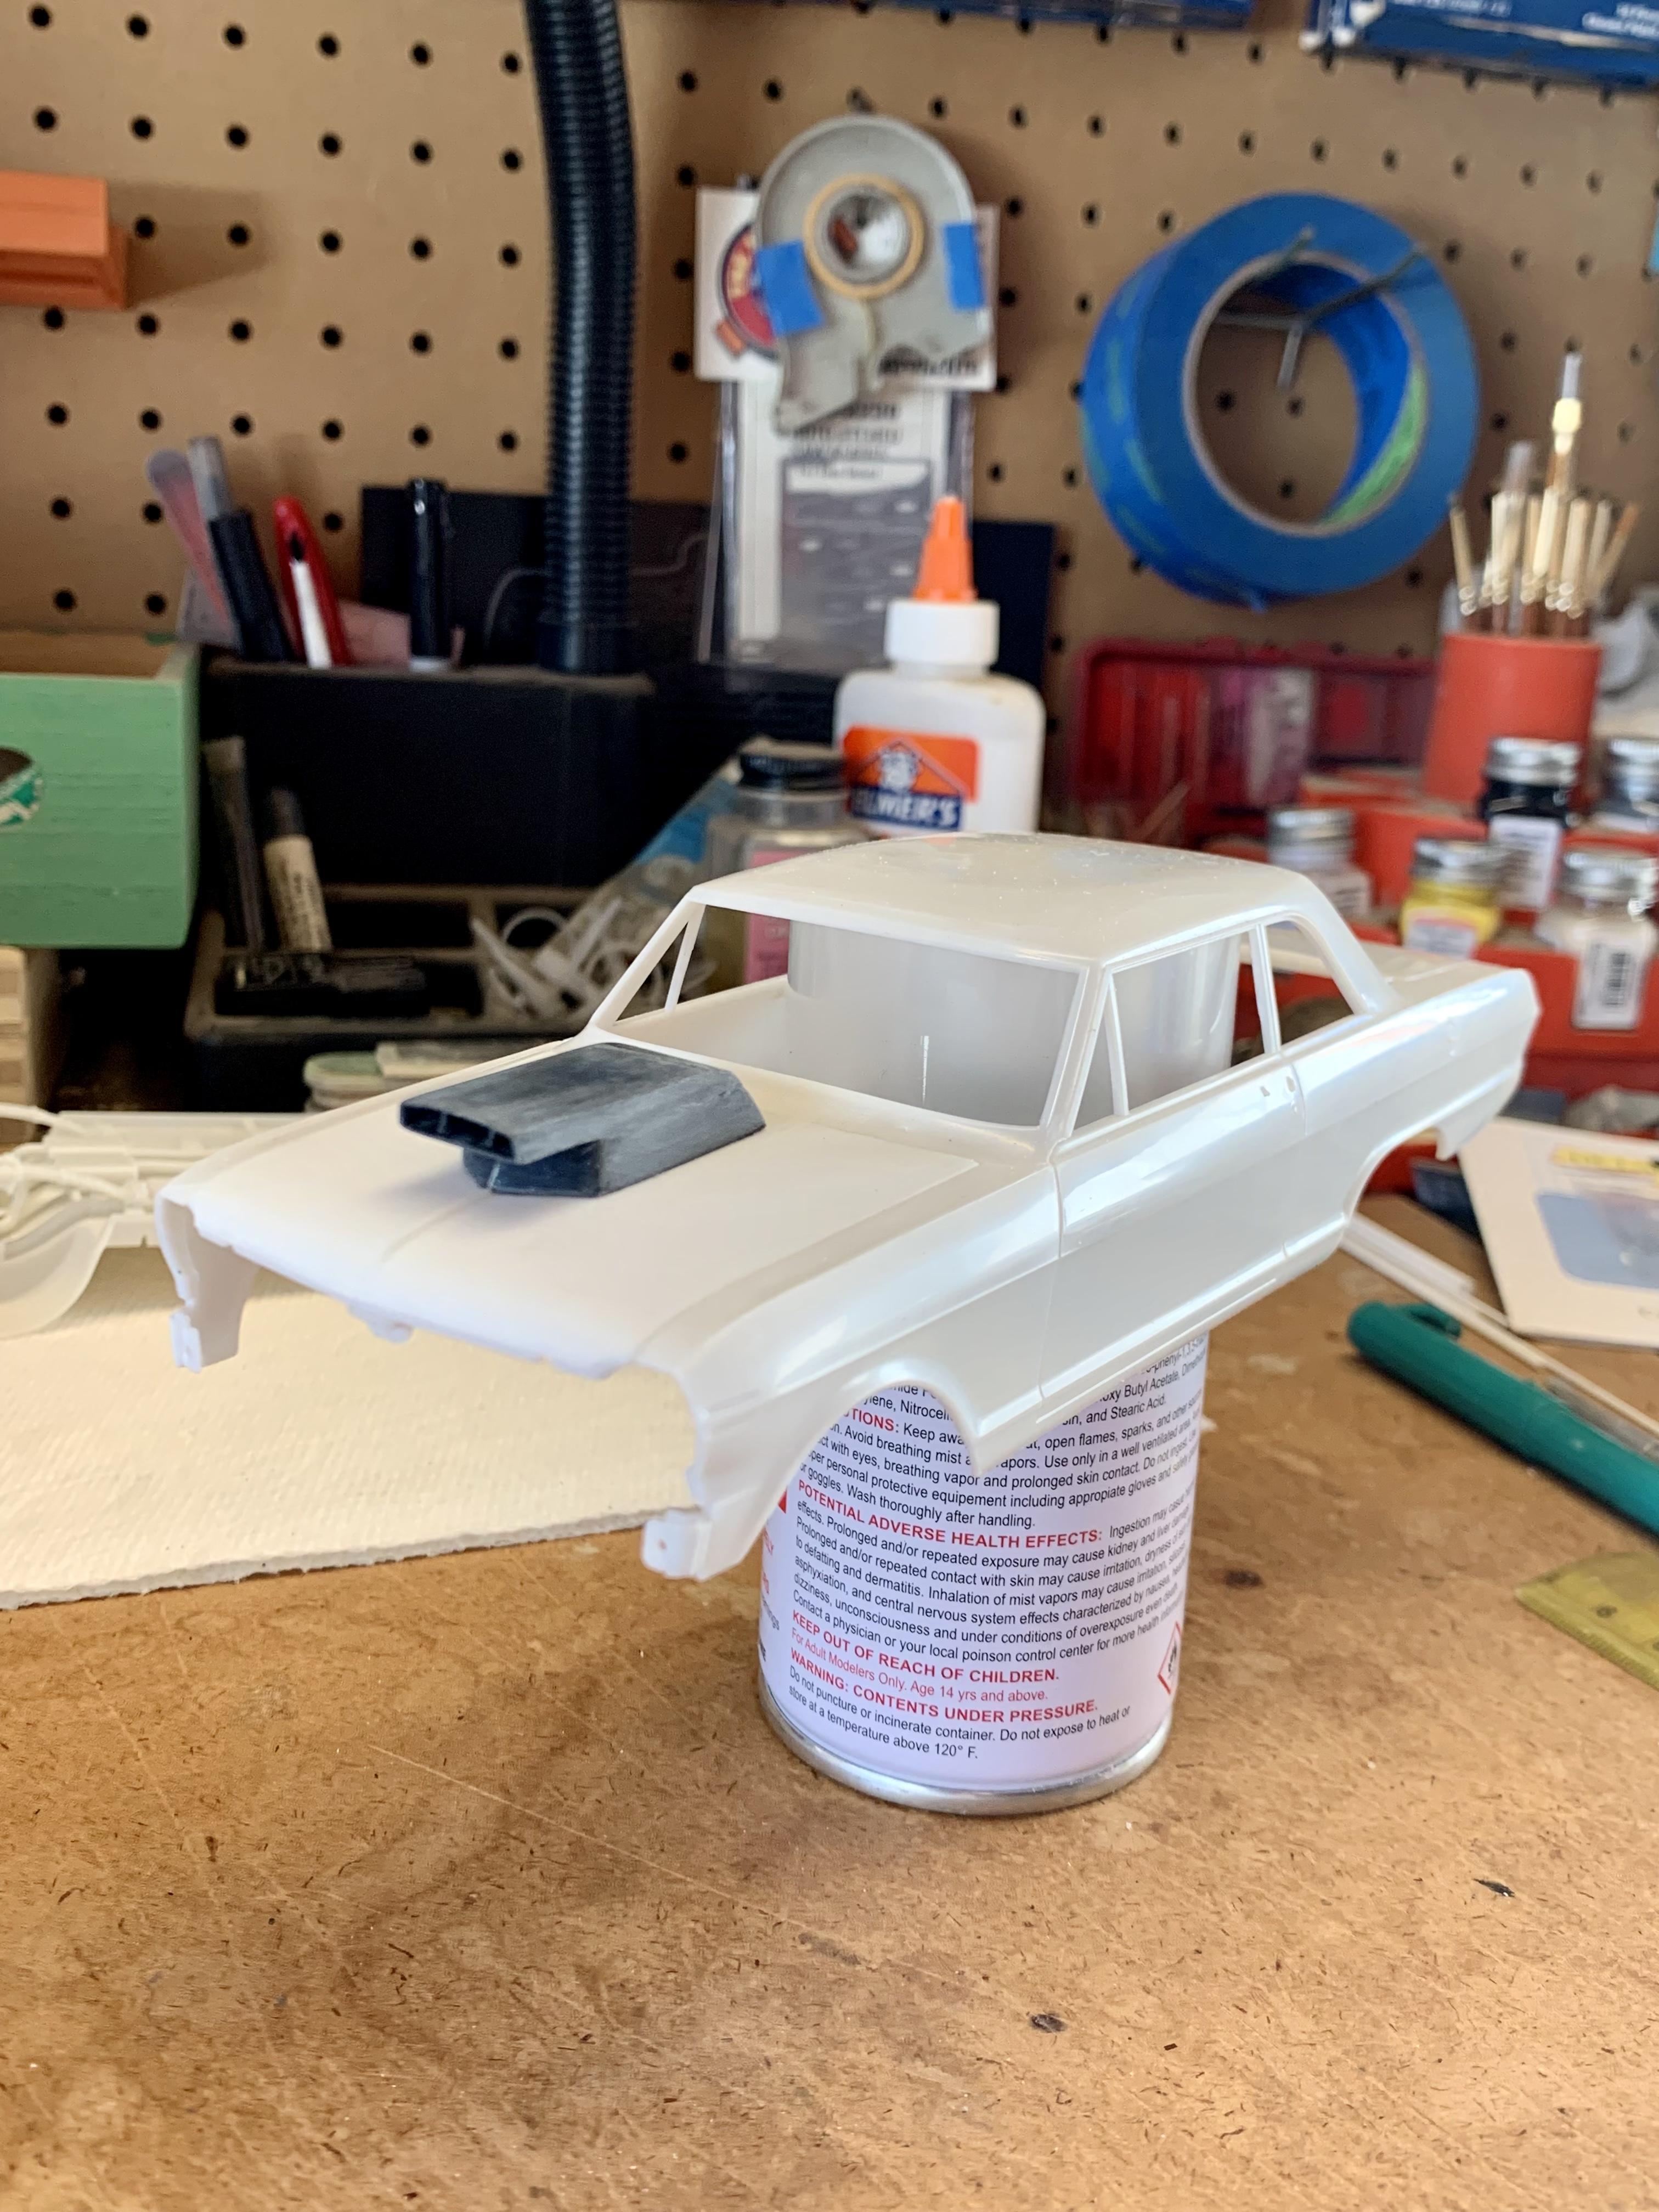
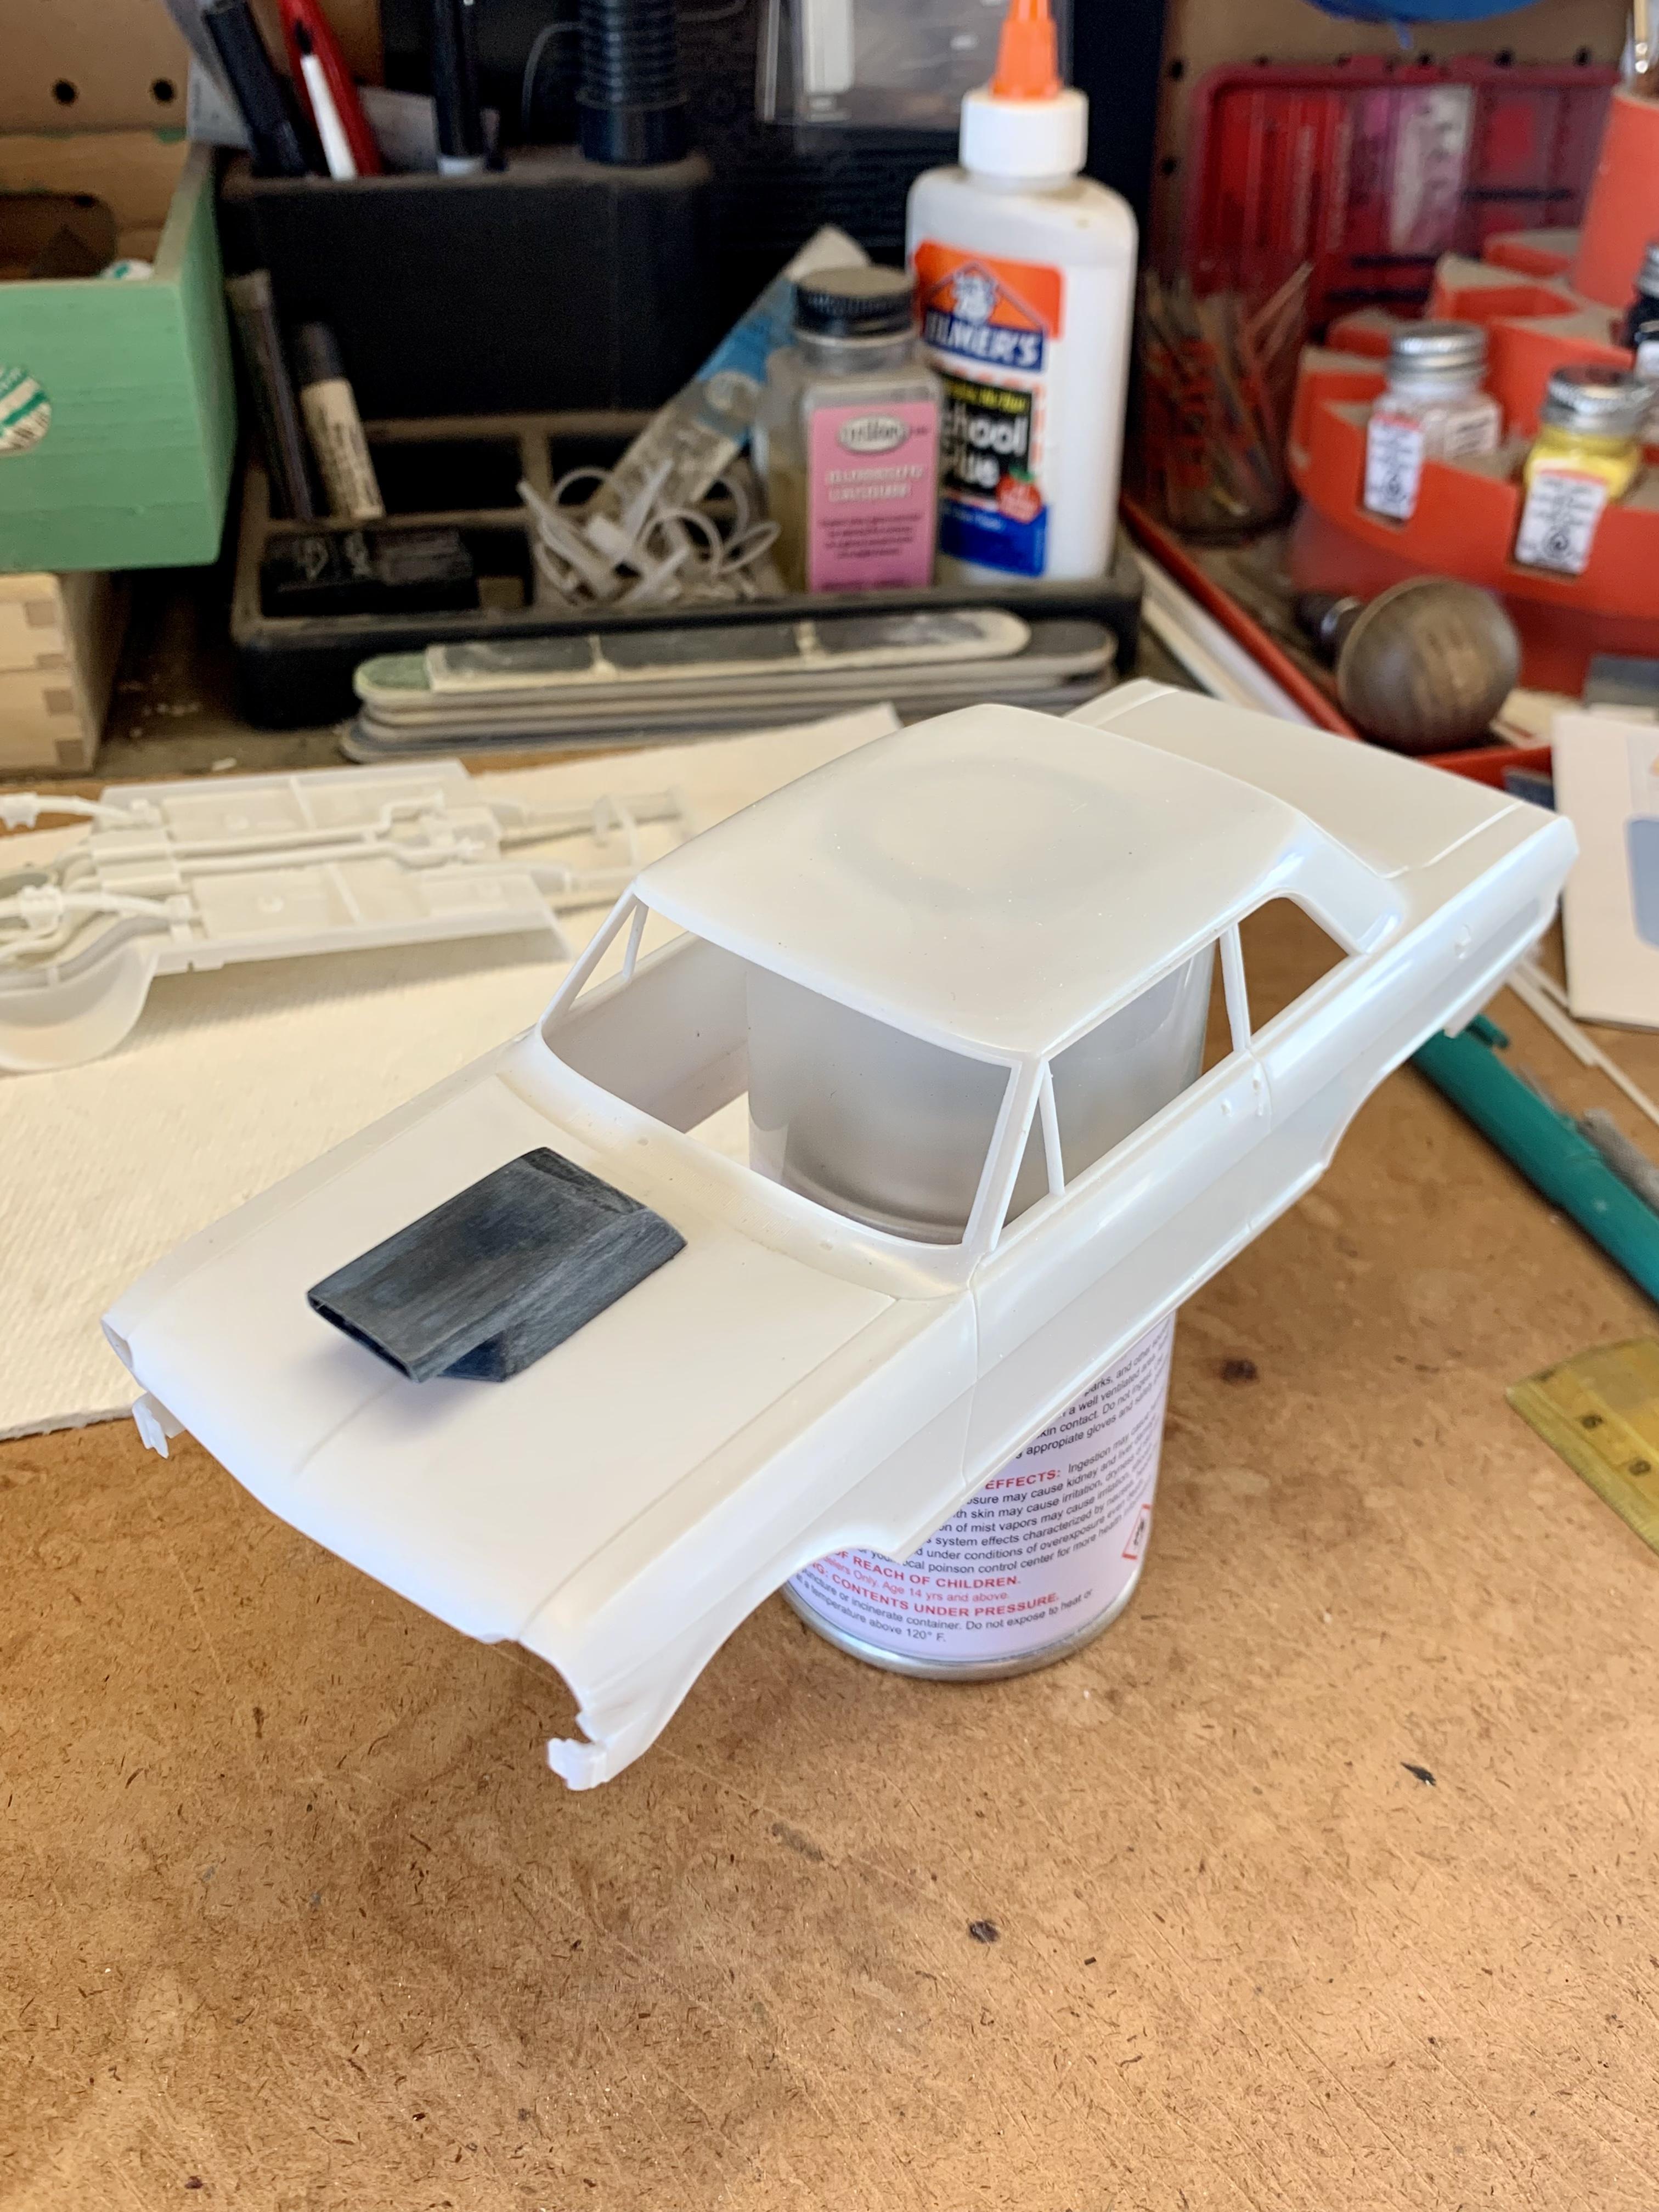
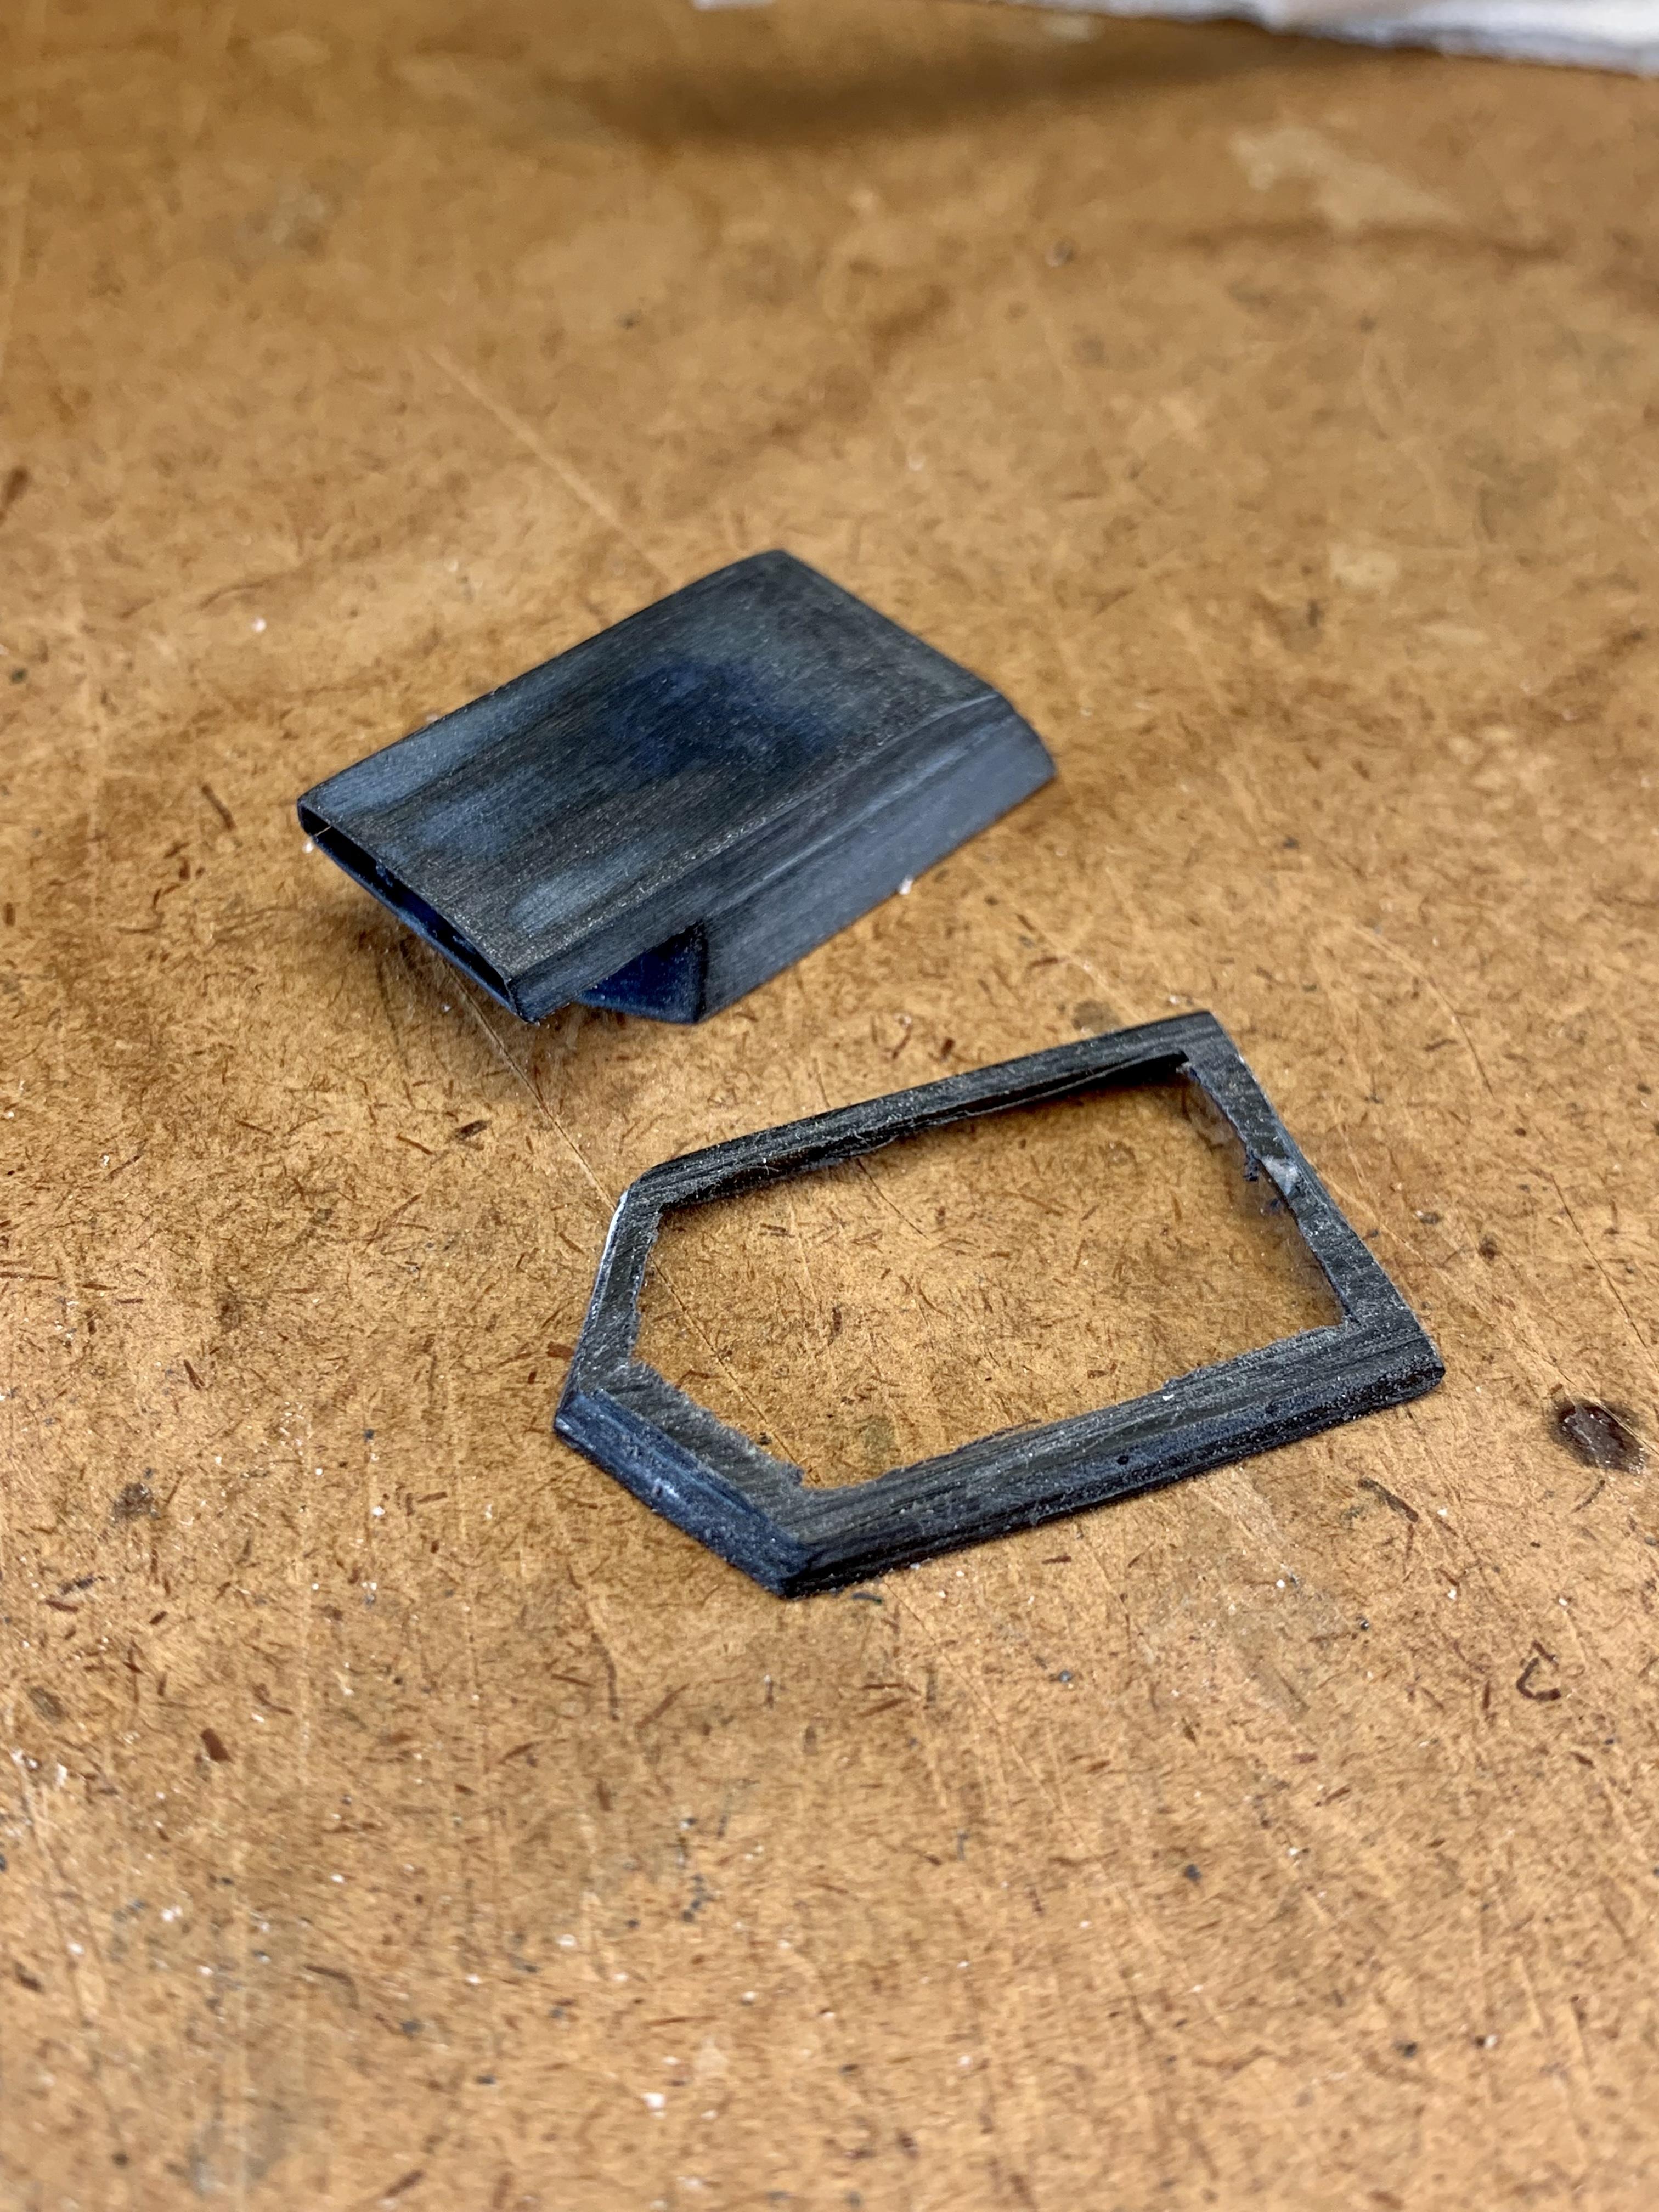
UPDATE! The priority this weekend was finishing my ‘63 Nova Wagon, which I did. Then I got some unexpected extra bench time so I decided to get some more done on this ‘65. I filled the front frame rails with strips of .040” Evergreen. This isn’t necessary on the ‘64 kit because the inner fender panels cover the top of the frame but on the ‘65 the panels are deleted leaving the top of the frame in plain sight. I made the inner wheel rims from generic AMT pieces and adapted the wheels to the kit axle by cutting the ends of the axle off and inserting .060” pins which fit the wheels perfect. Out back I glued the axle halves together then cleaned up the seams along with the mold seams on the springs. The springs were glued to the axle. Like the front, I made some inner wheel rims from more generic AMT pieces, cut off the ends of the axle and inserted .060” rod. After getting the springs glued to the axle I realized that I am going to need to build some spacers into the insides of the wheel that are flush with the edges of the rims (which is how that kit wheels are done) because as things are now the insides of the slicks hit the springs before the wheels are fully on. I will do this in a way that looks like brake drums. I mocked up the rear axle, springs and one of the ladder bars to show that everything fits with the “aftermarket” exhaust from the sister ‘64 SS kit. The only issue I’m seeing is that the pipes are going to interfere with the shocks so I’ll have to tweak where they mount to the floor. After mentioning to my pal @Rocking Rodney Rat that I needed to find a proper looking hood scoop he dug through his junk and found the perfect one and put it in the mail. After getting it I stripped the blue paint off with a bath in Dot 3 brake fluid and today got it fit to the hood. I trimmed off the bulky base of the scoop and had to add a strip of plastic across the rear of the hood hole. I also removed a section of the hood center peak so the scoop would sit flush and this also gave me an alignment point front to back. That’s where I’m at now. Some solid progress considering I did t expect to be able to work on this project this weekend. Next will be trying to get this thing mocked up onto its wheels and tires and some big block detail work.
-
Roof looks good to me!
-
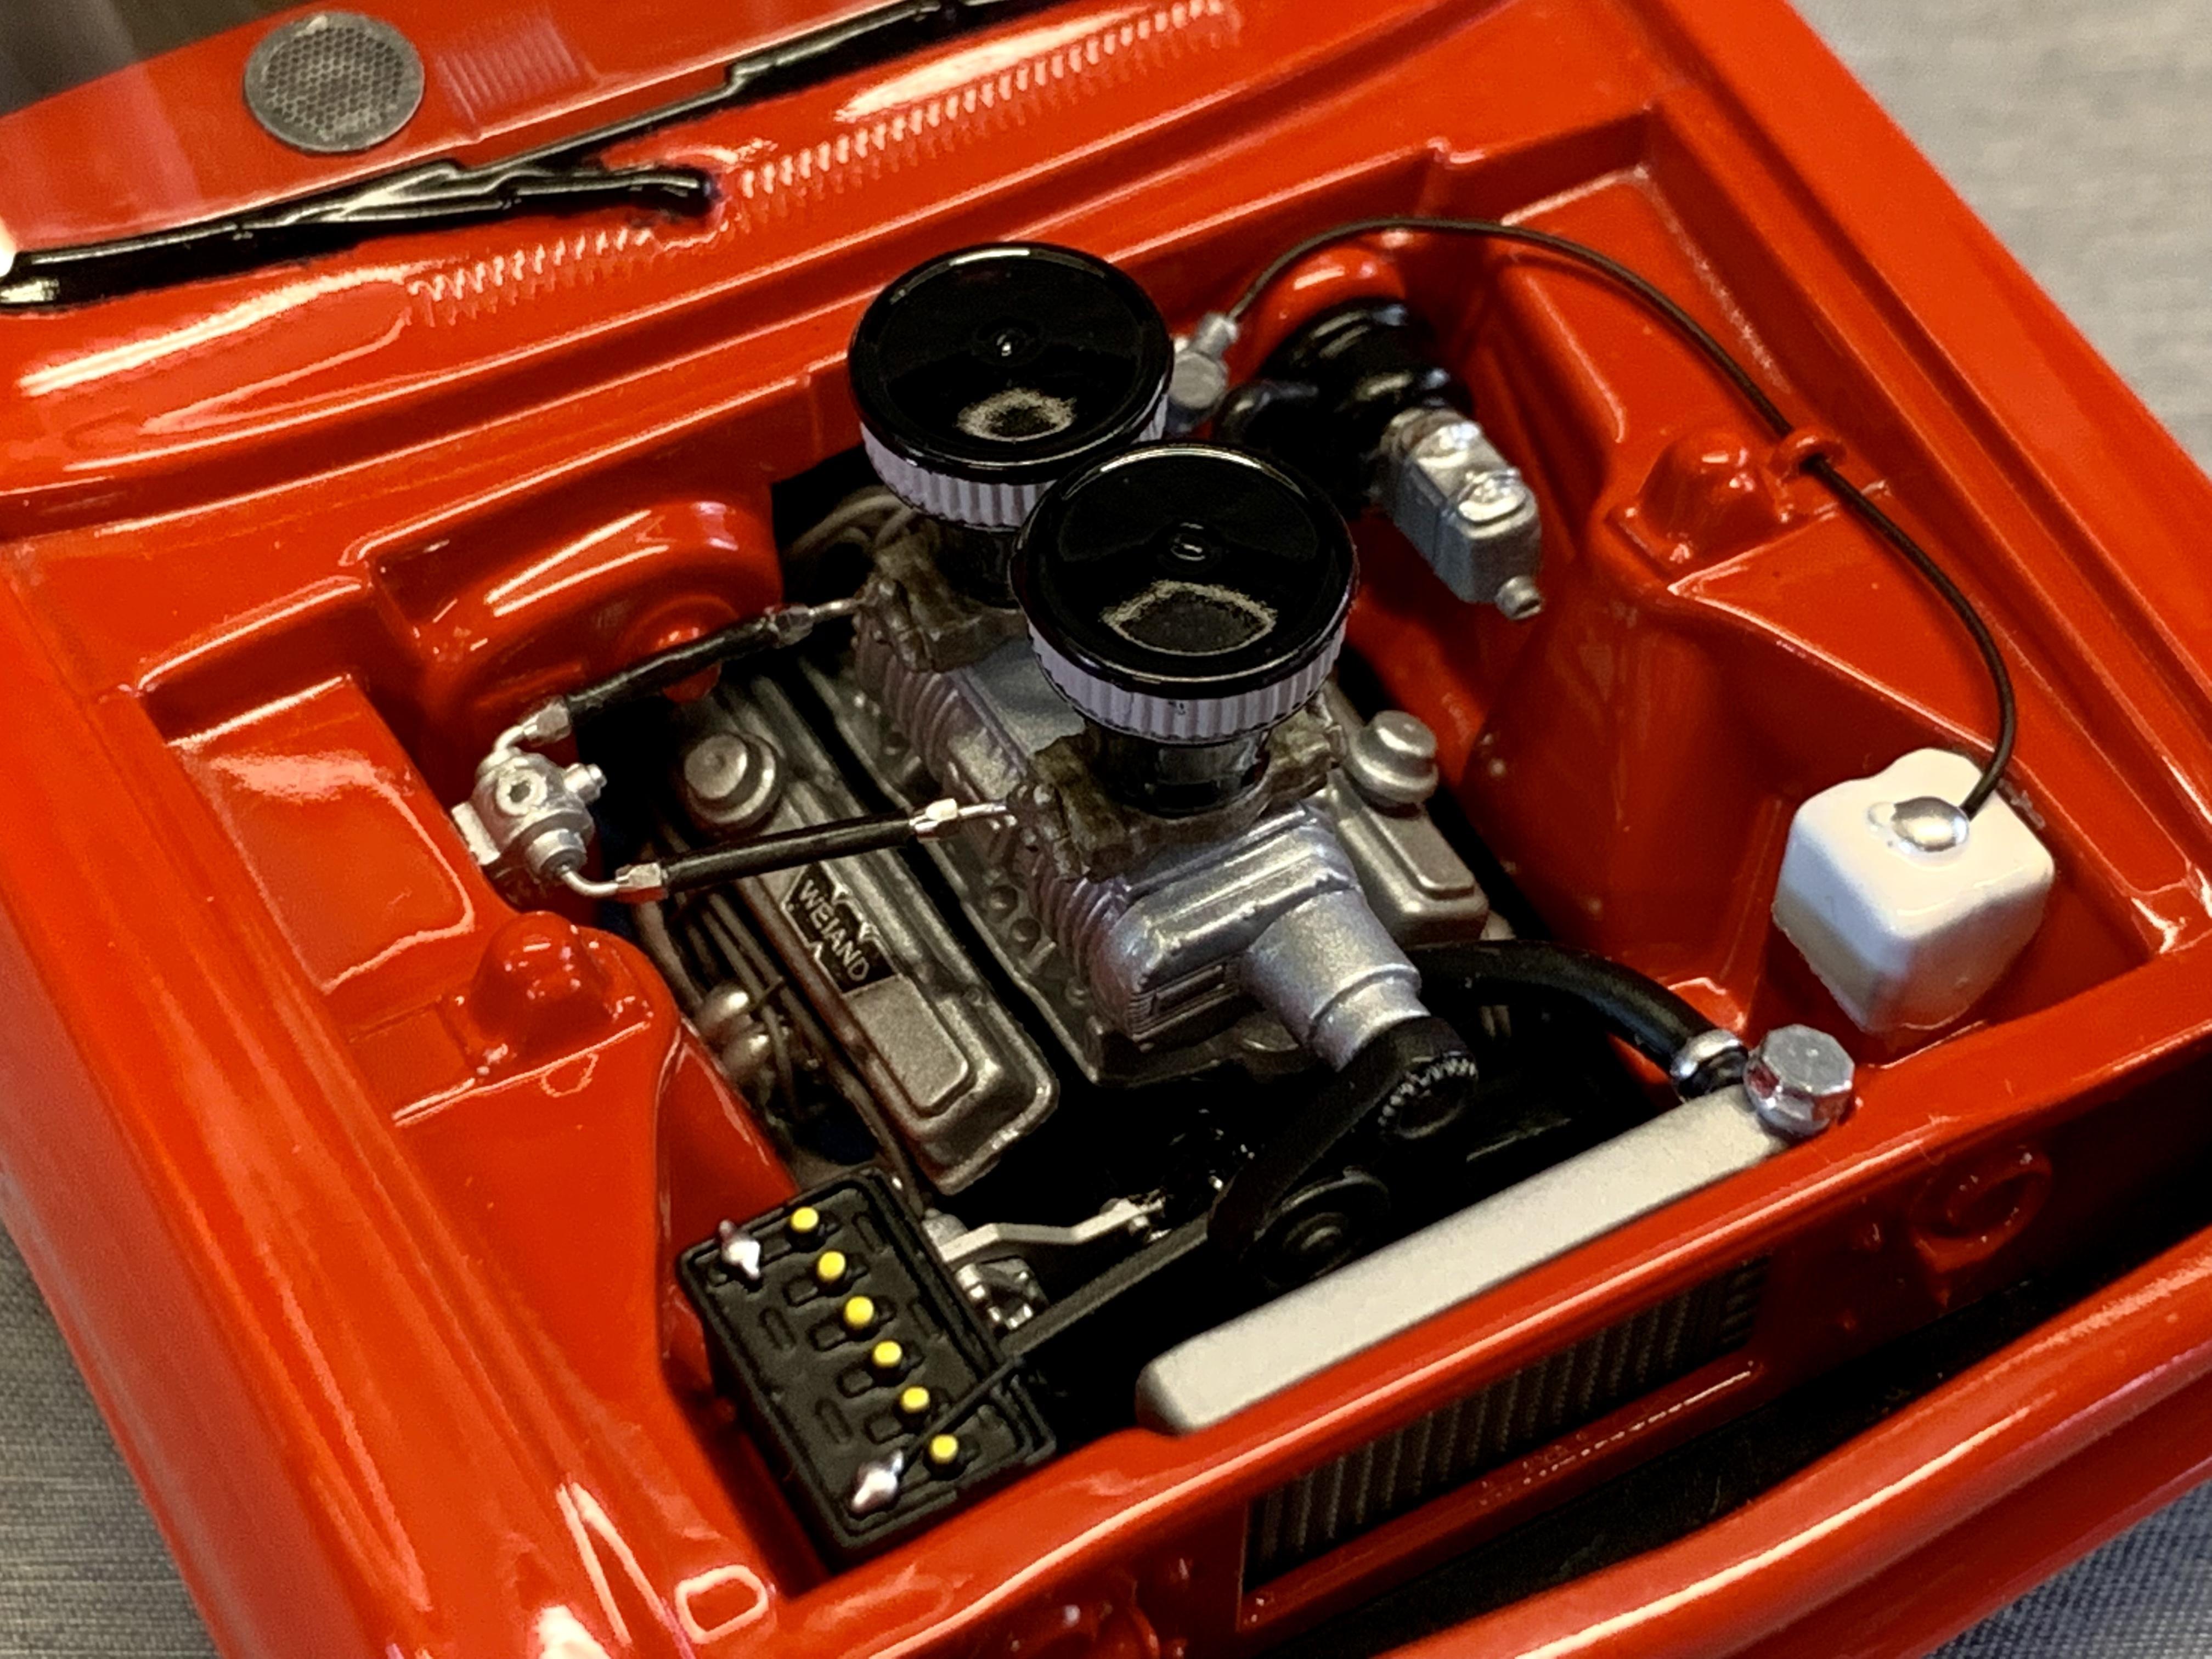
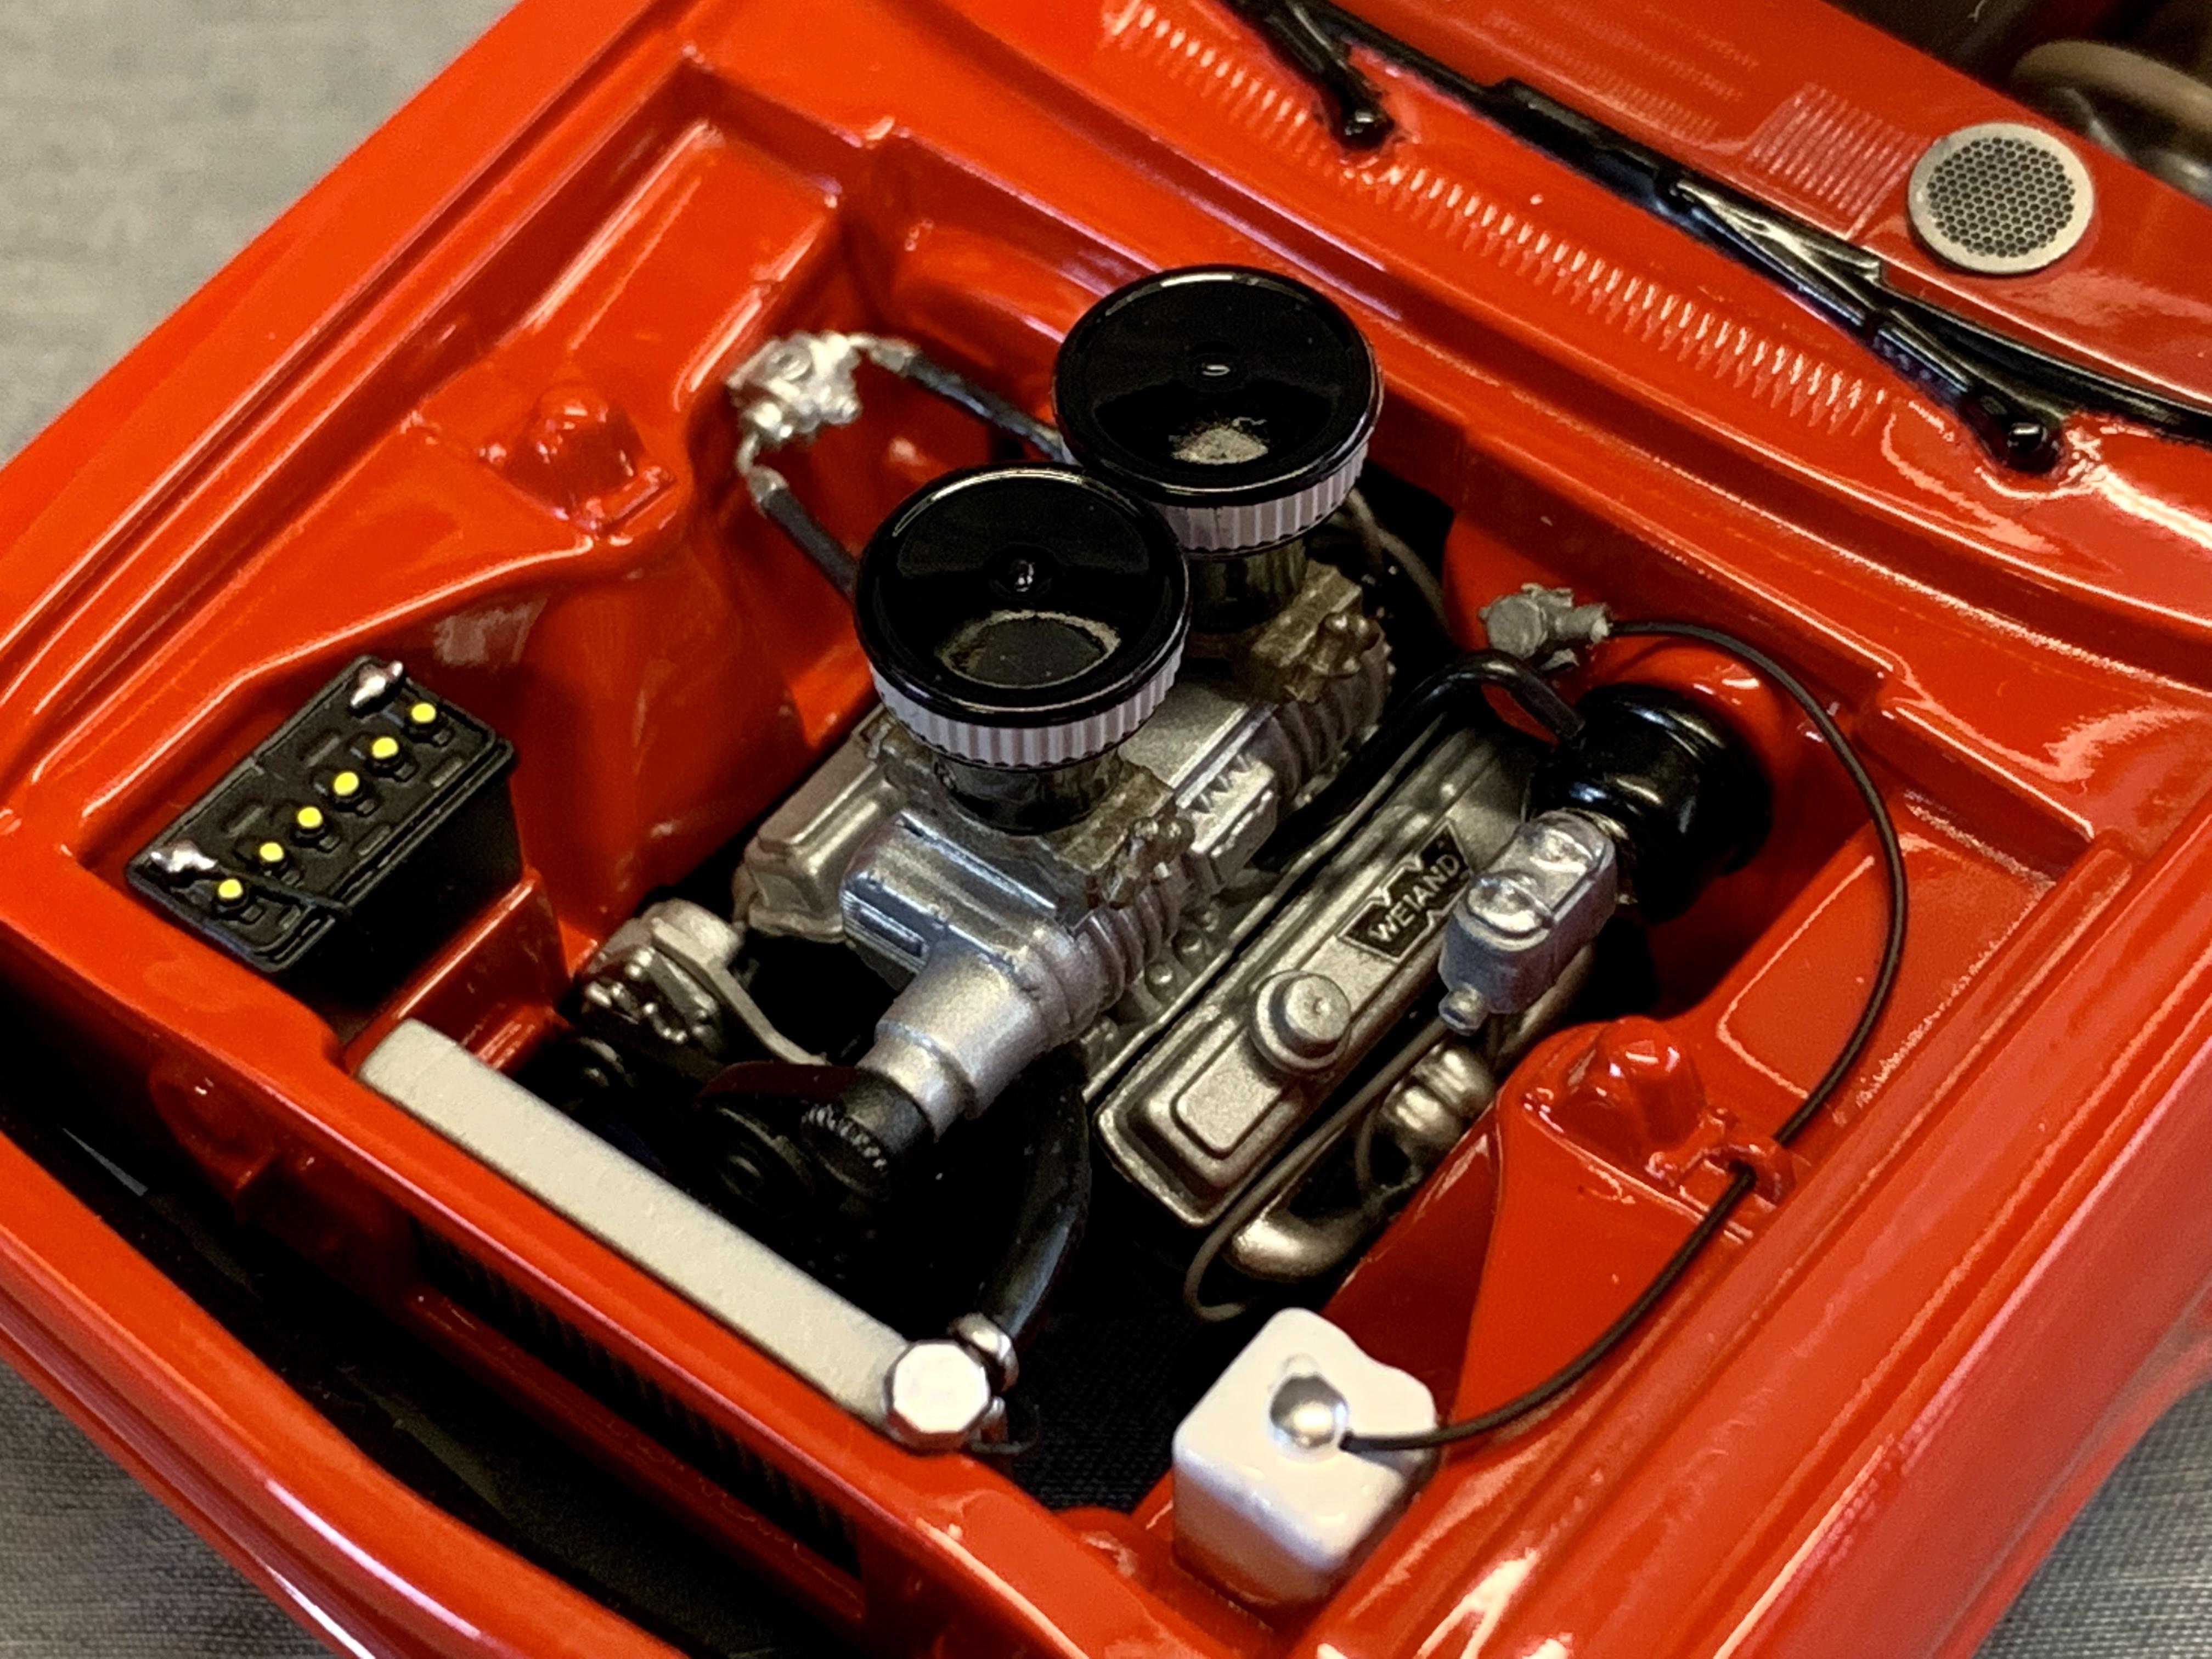
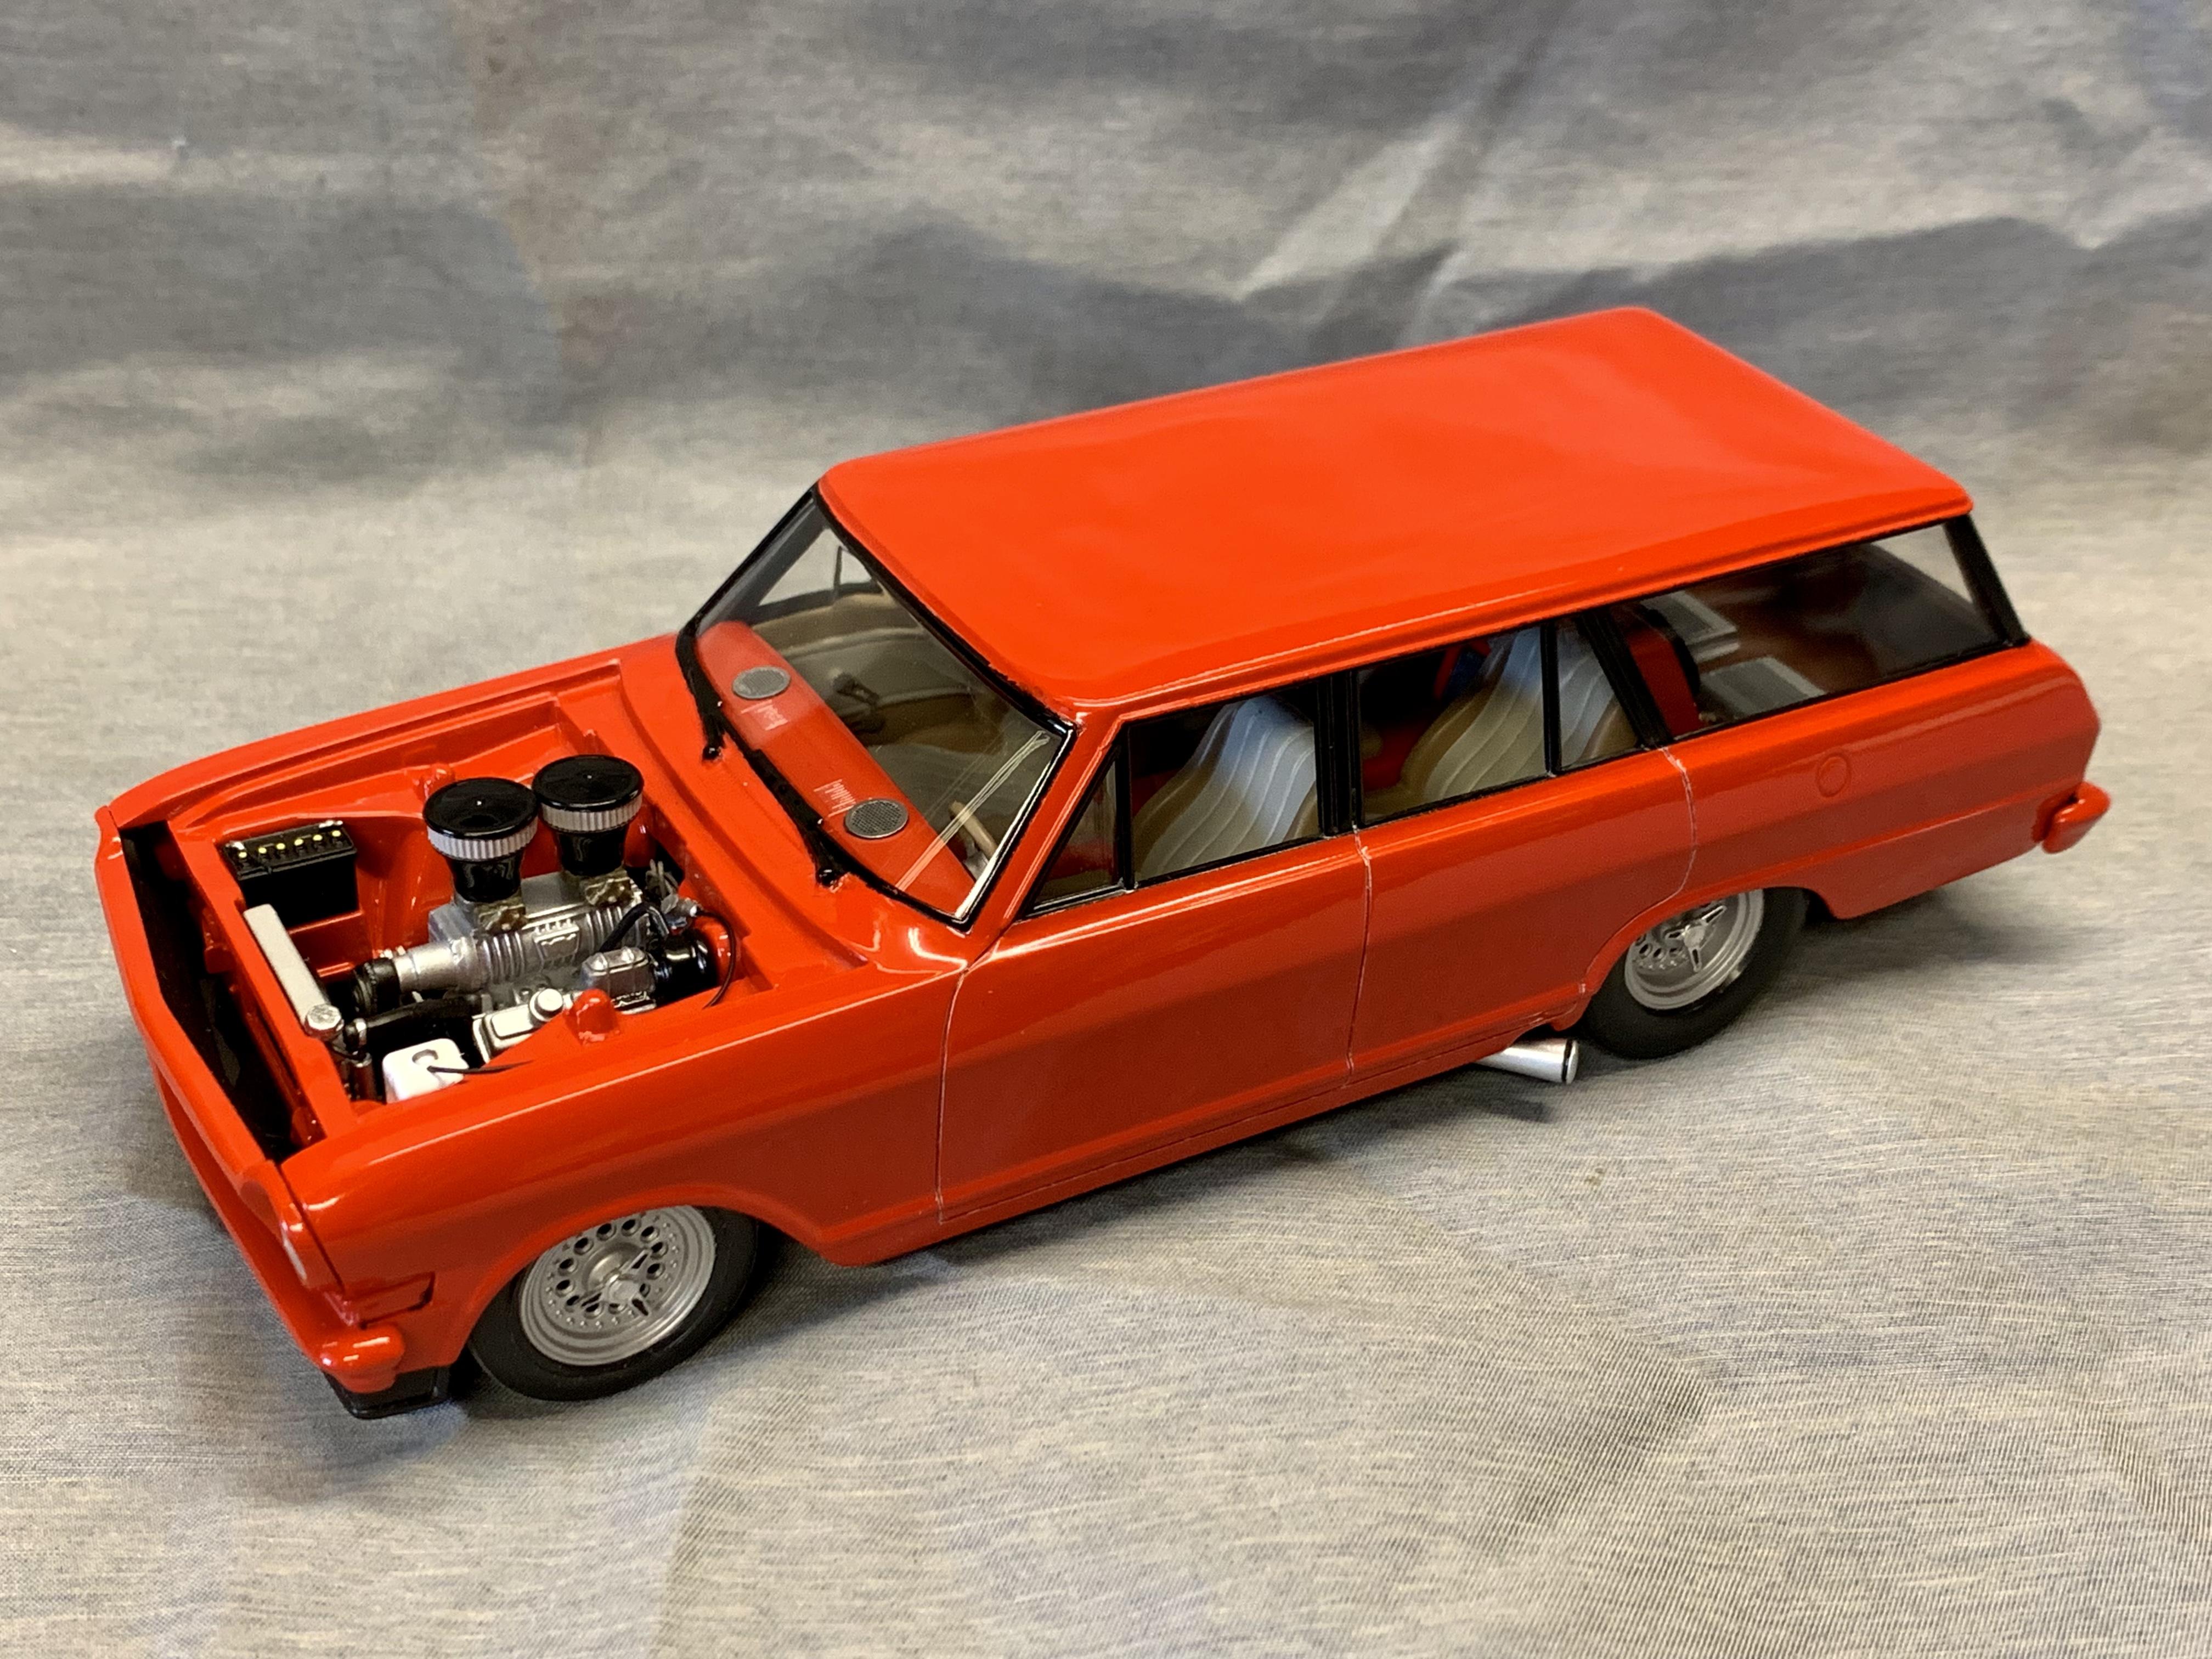
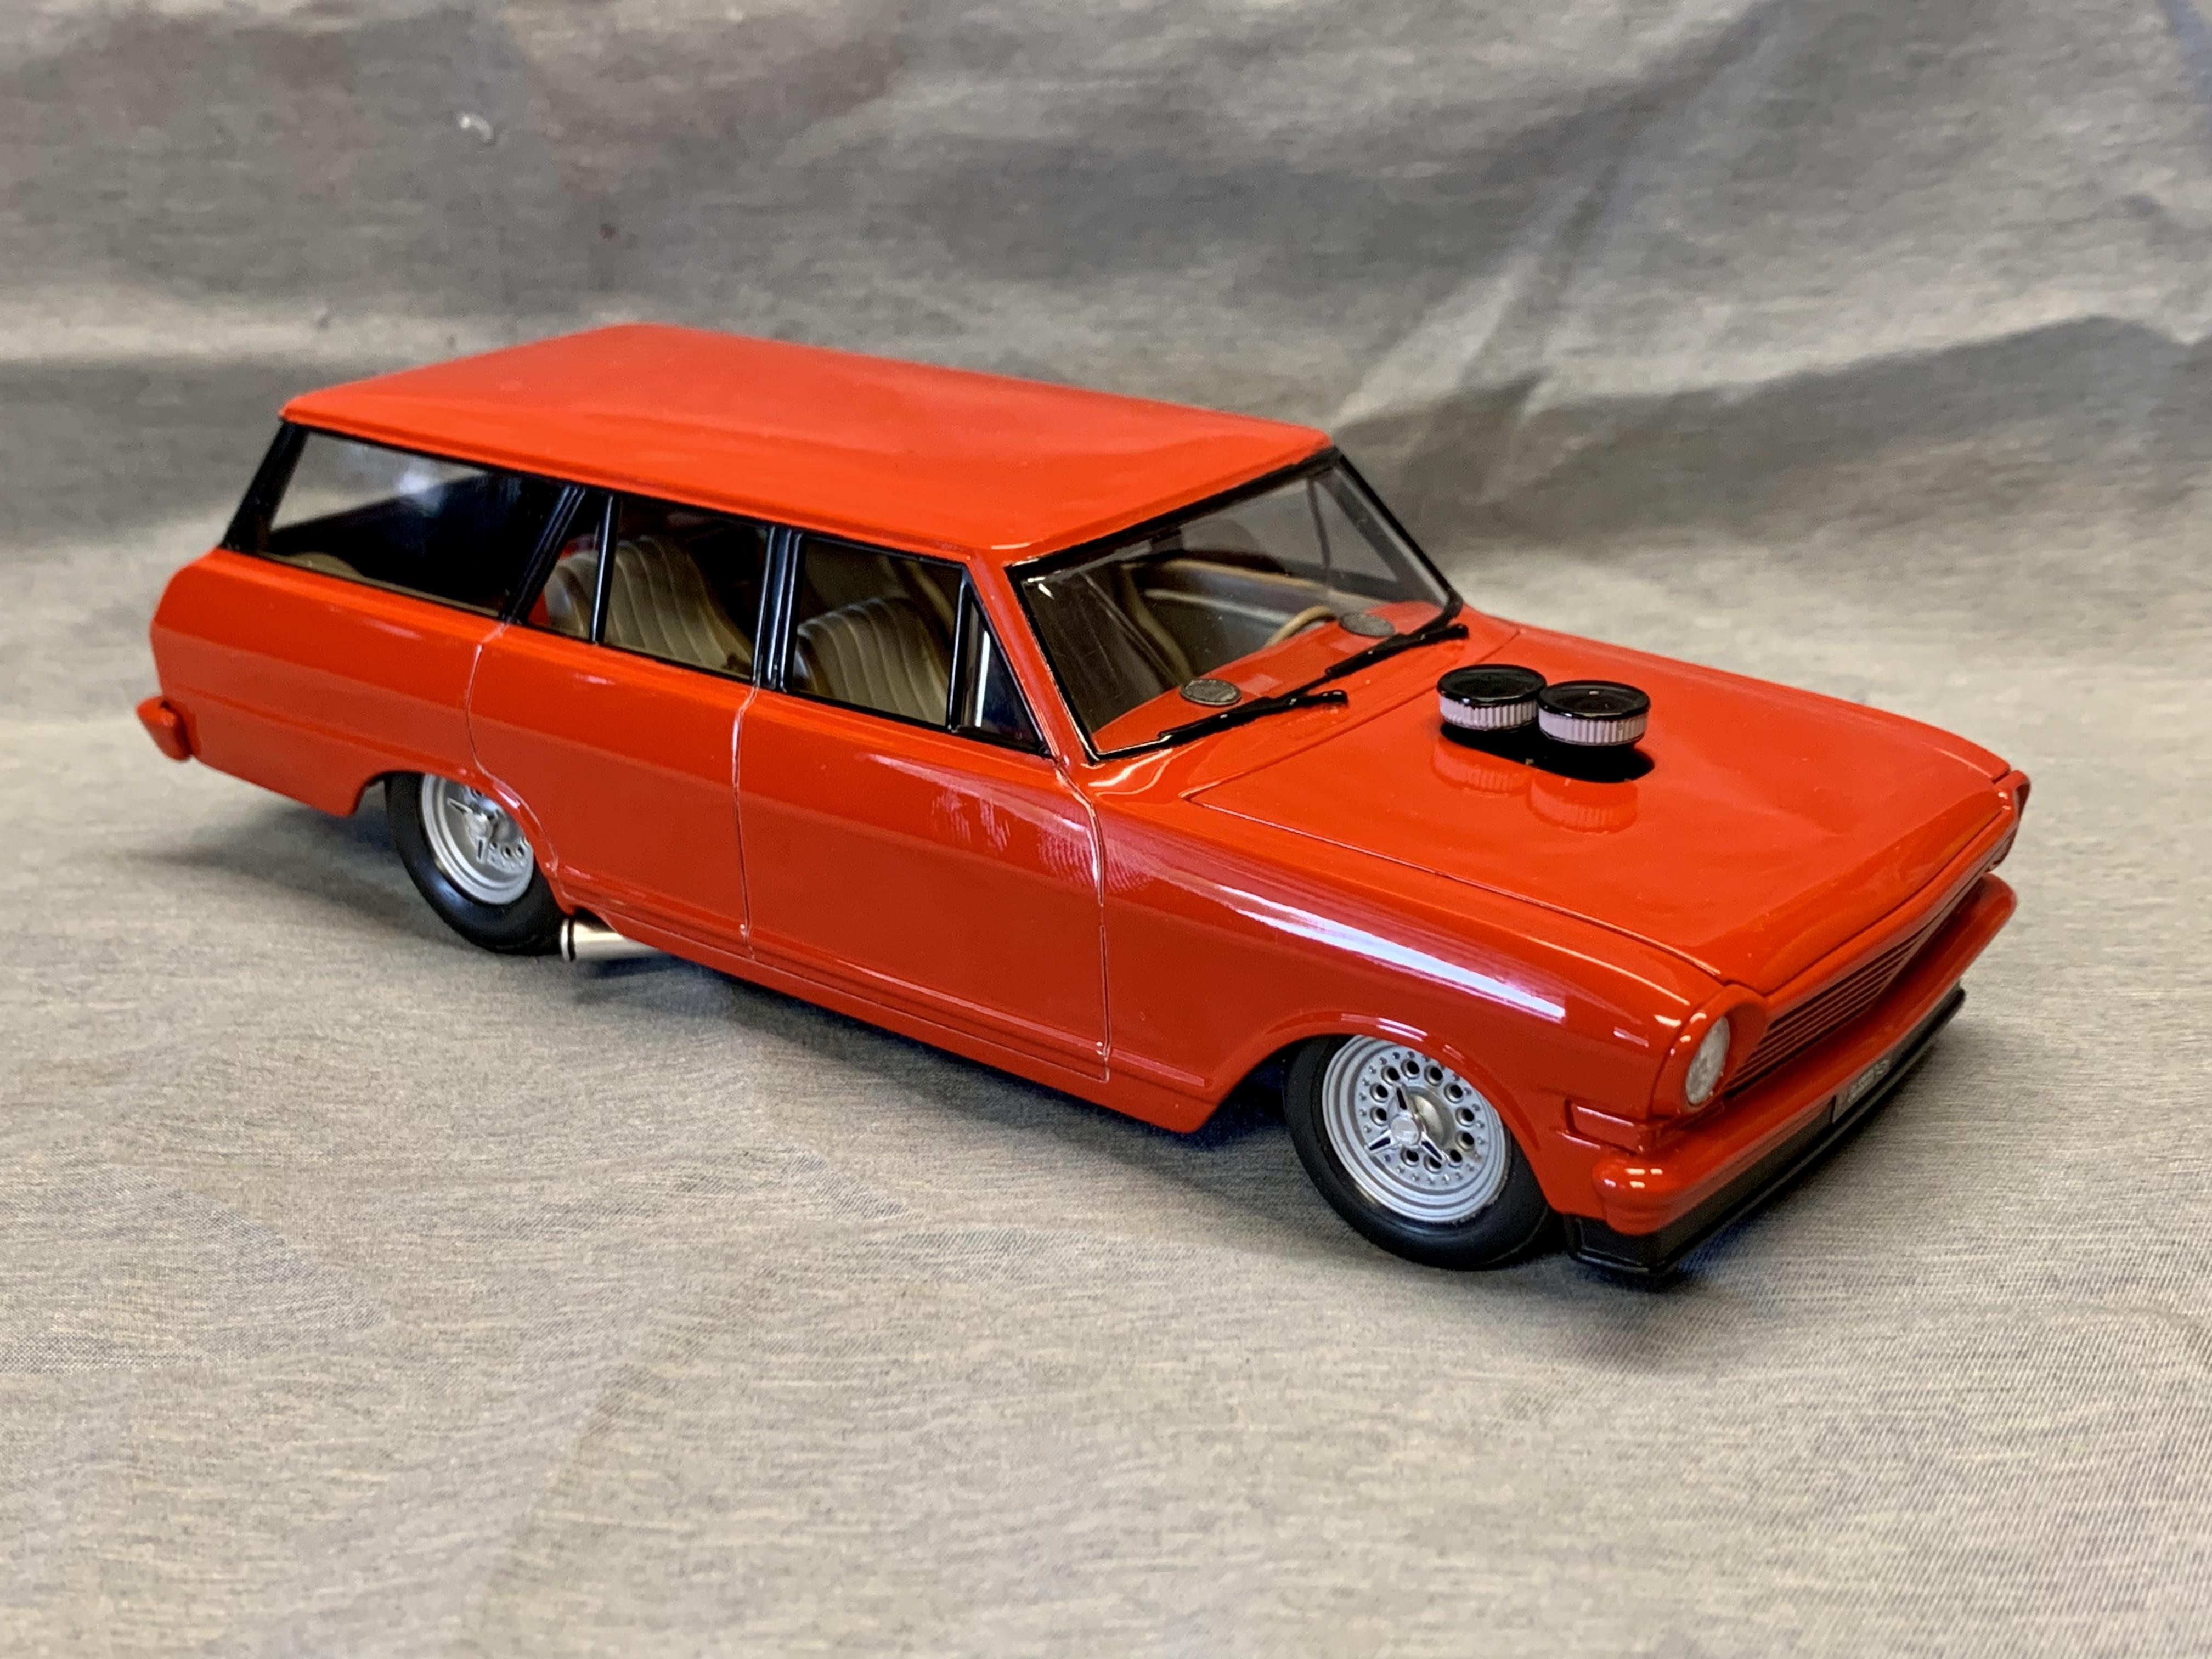
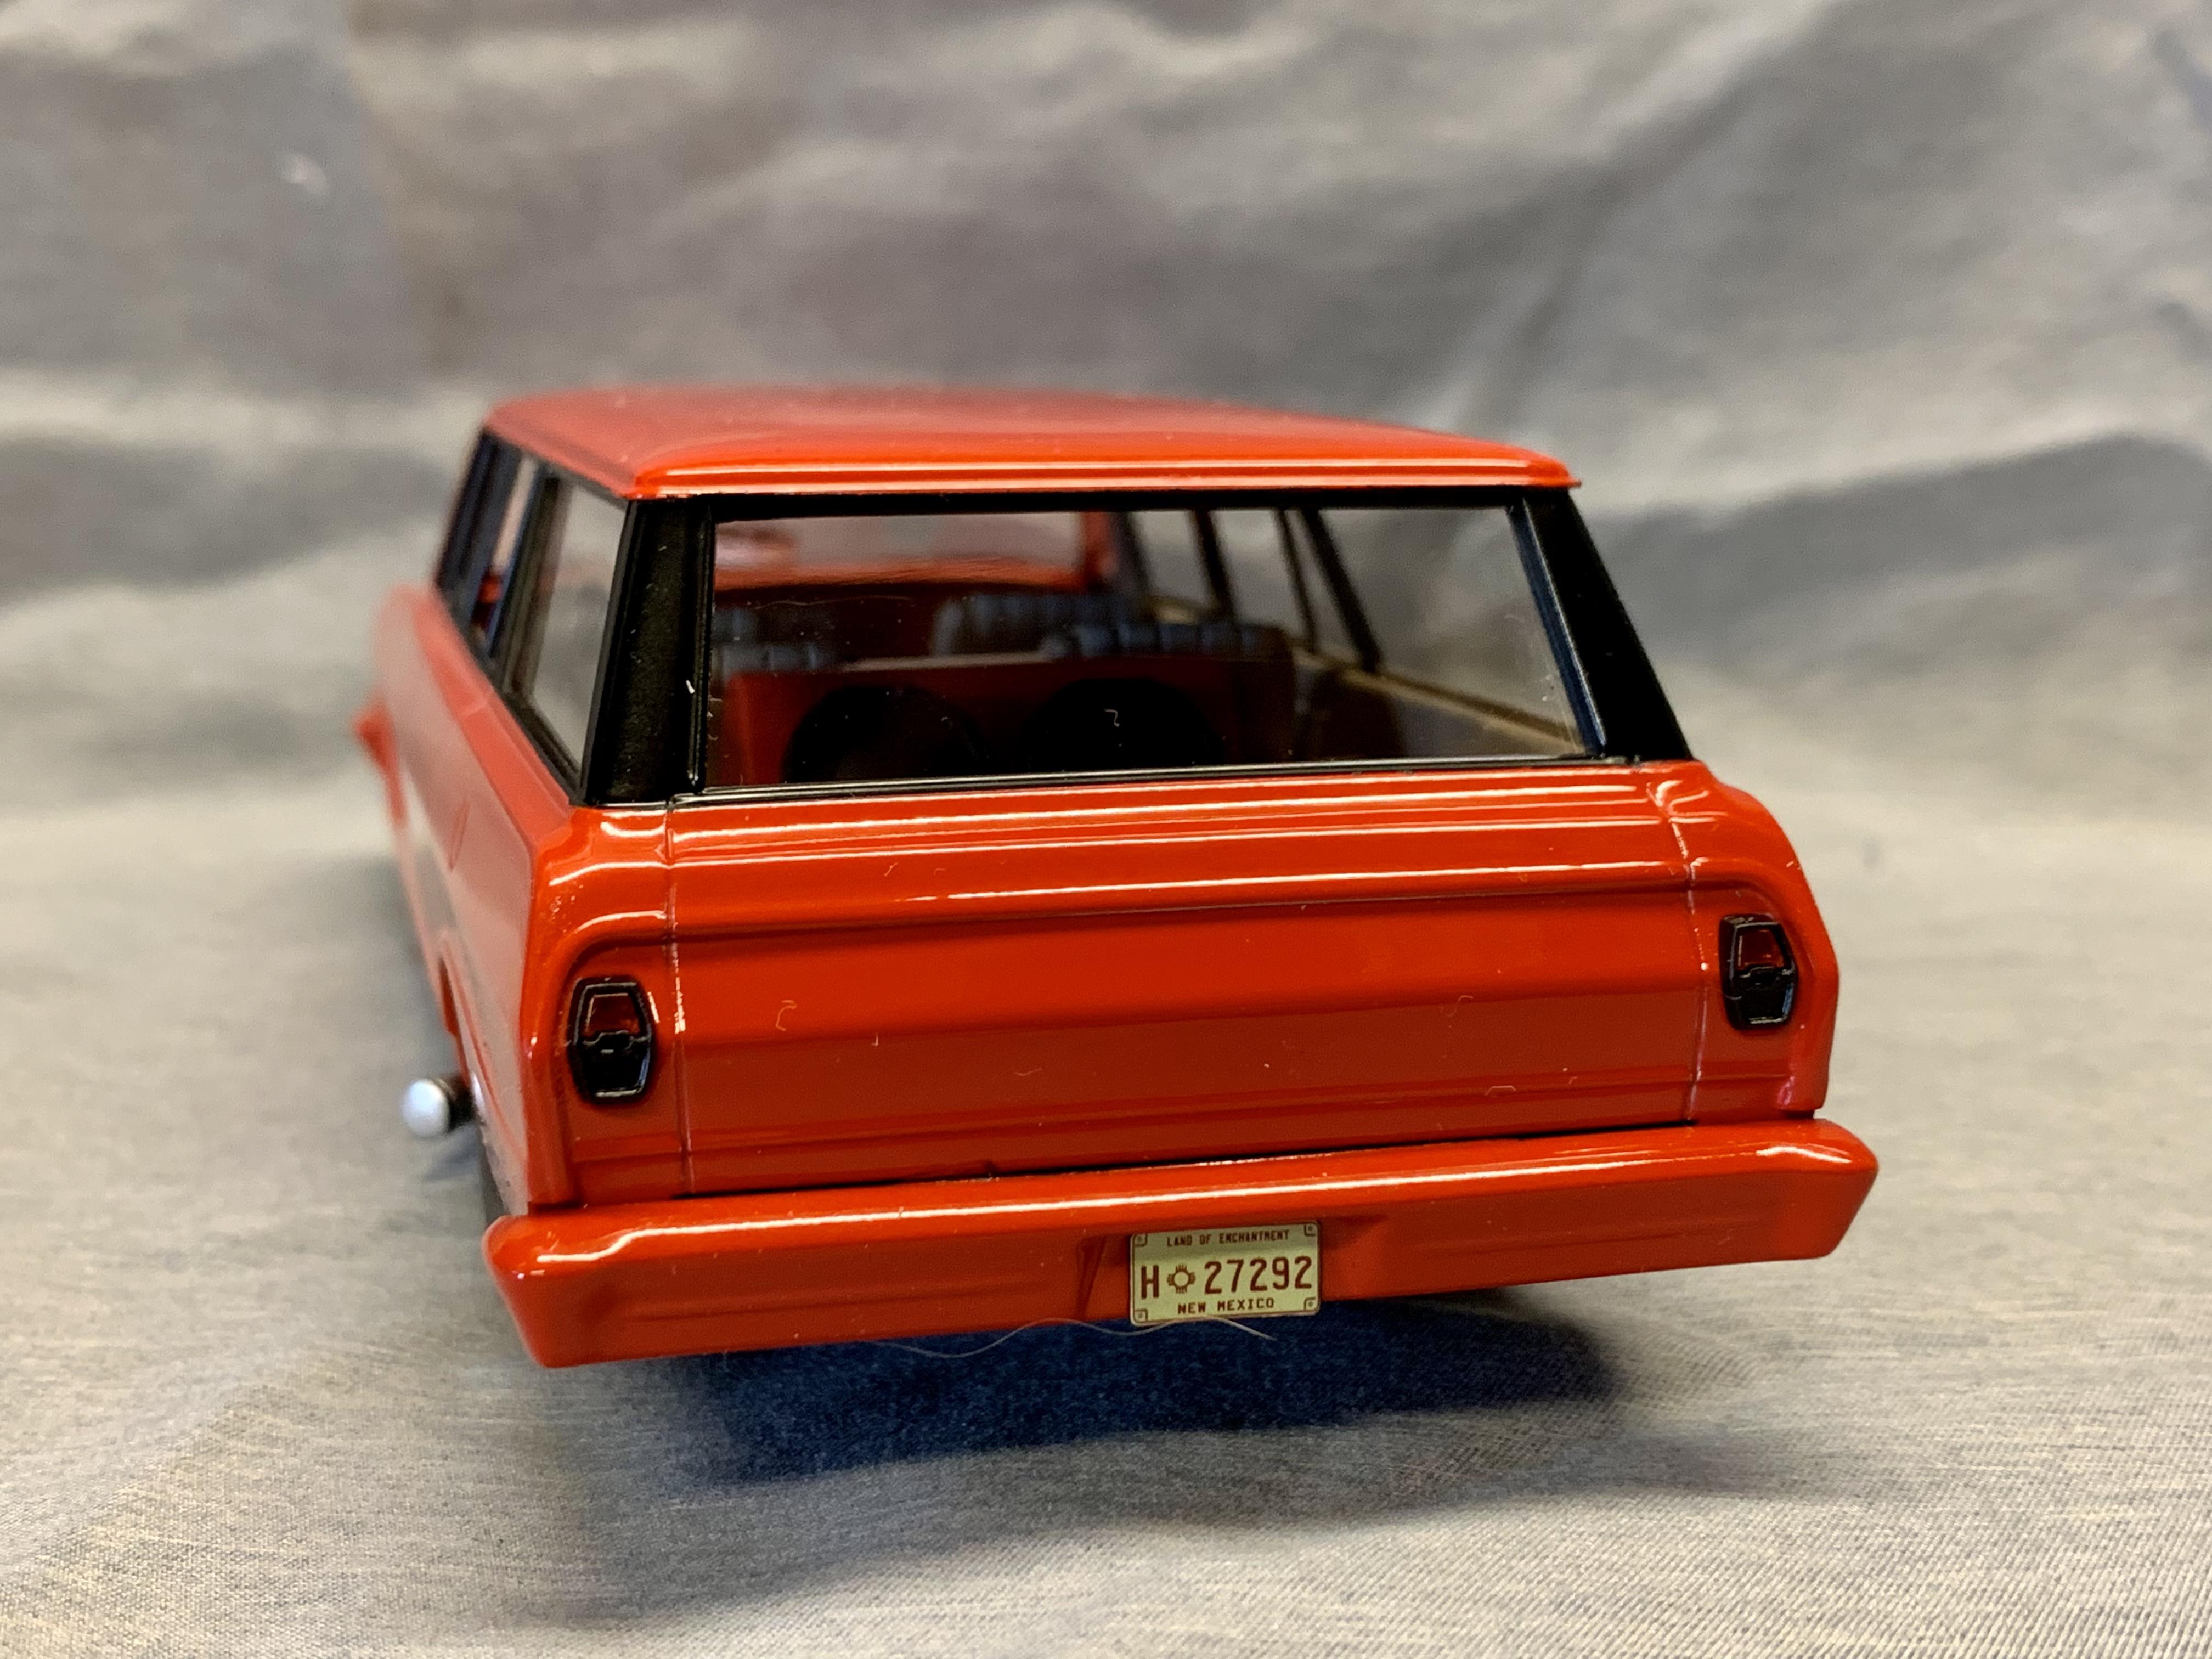
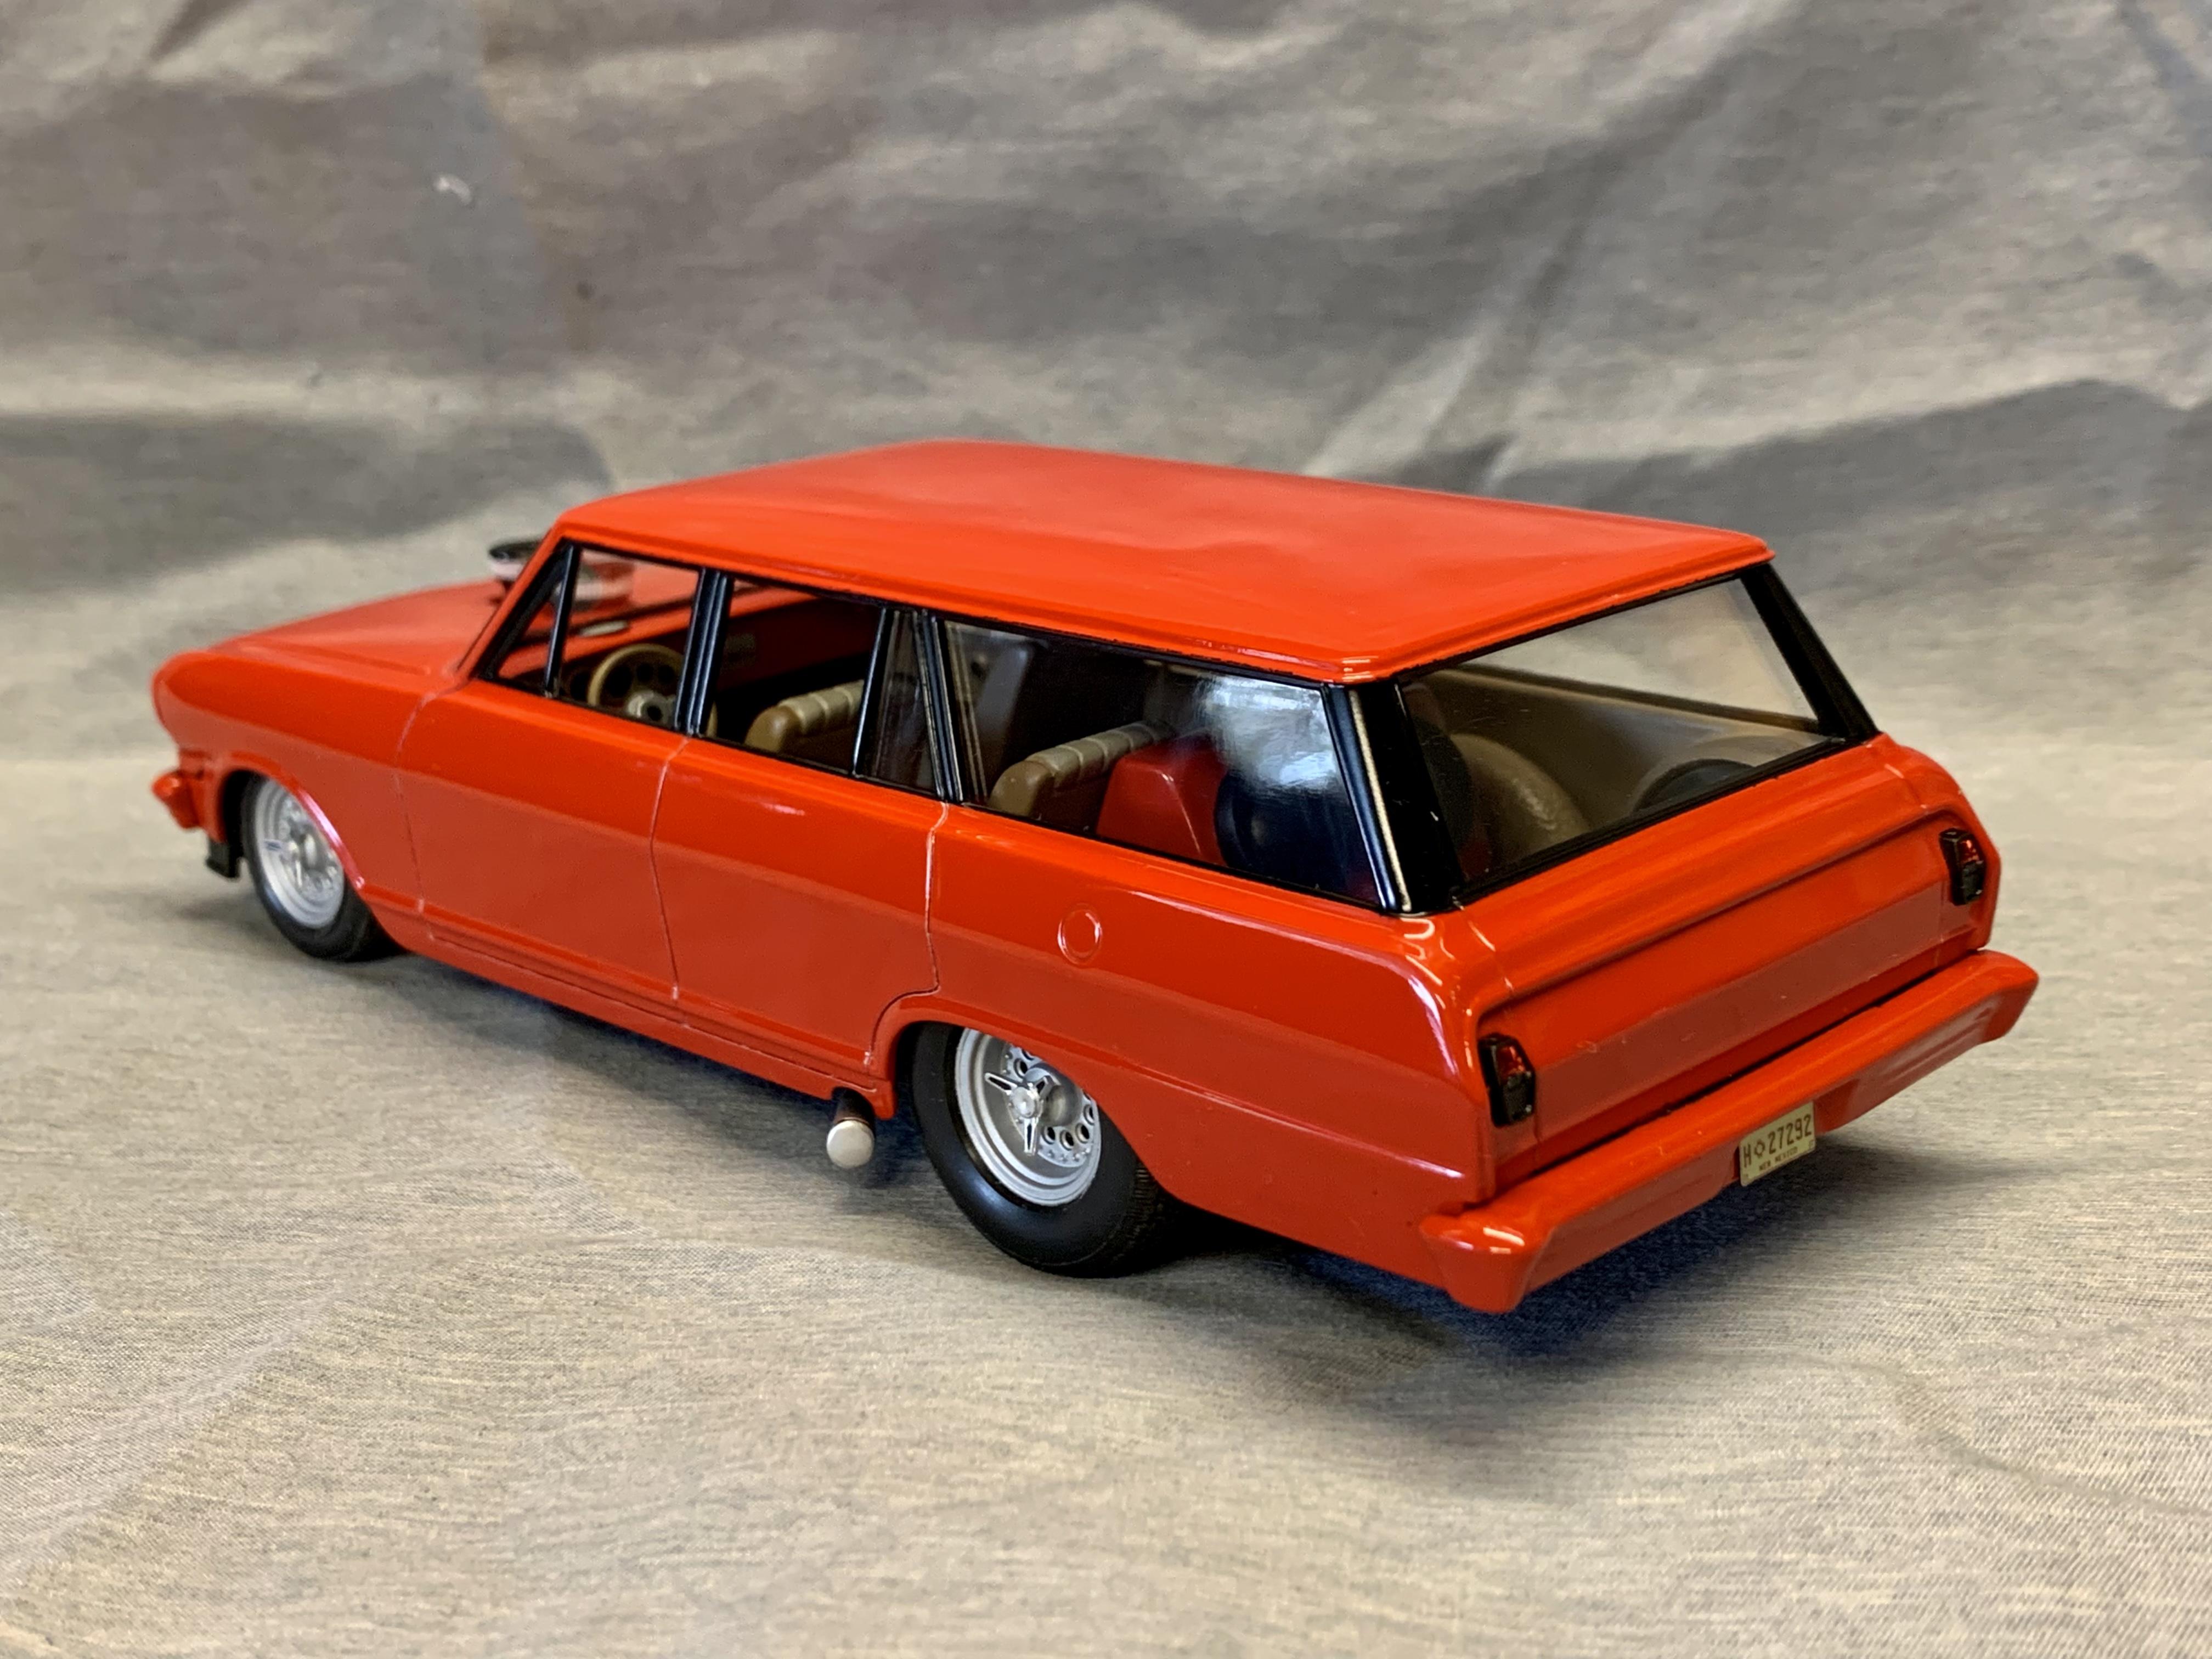
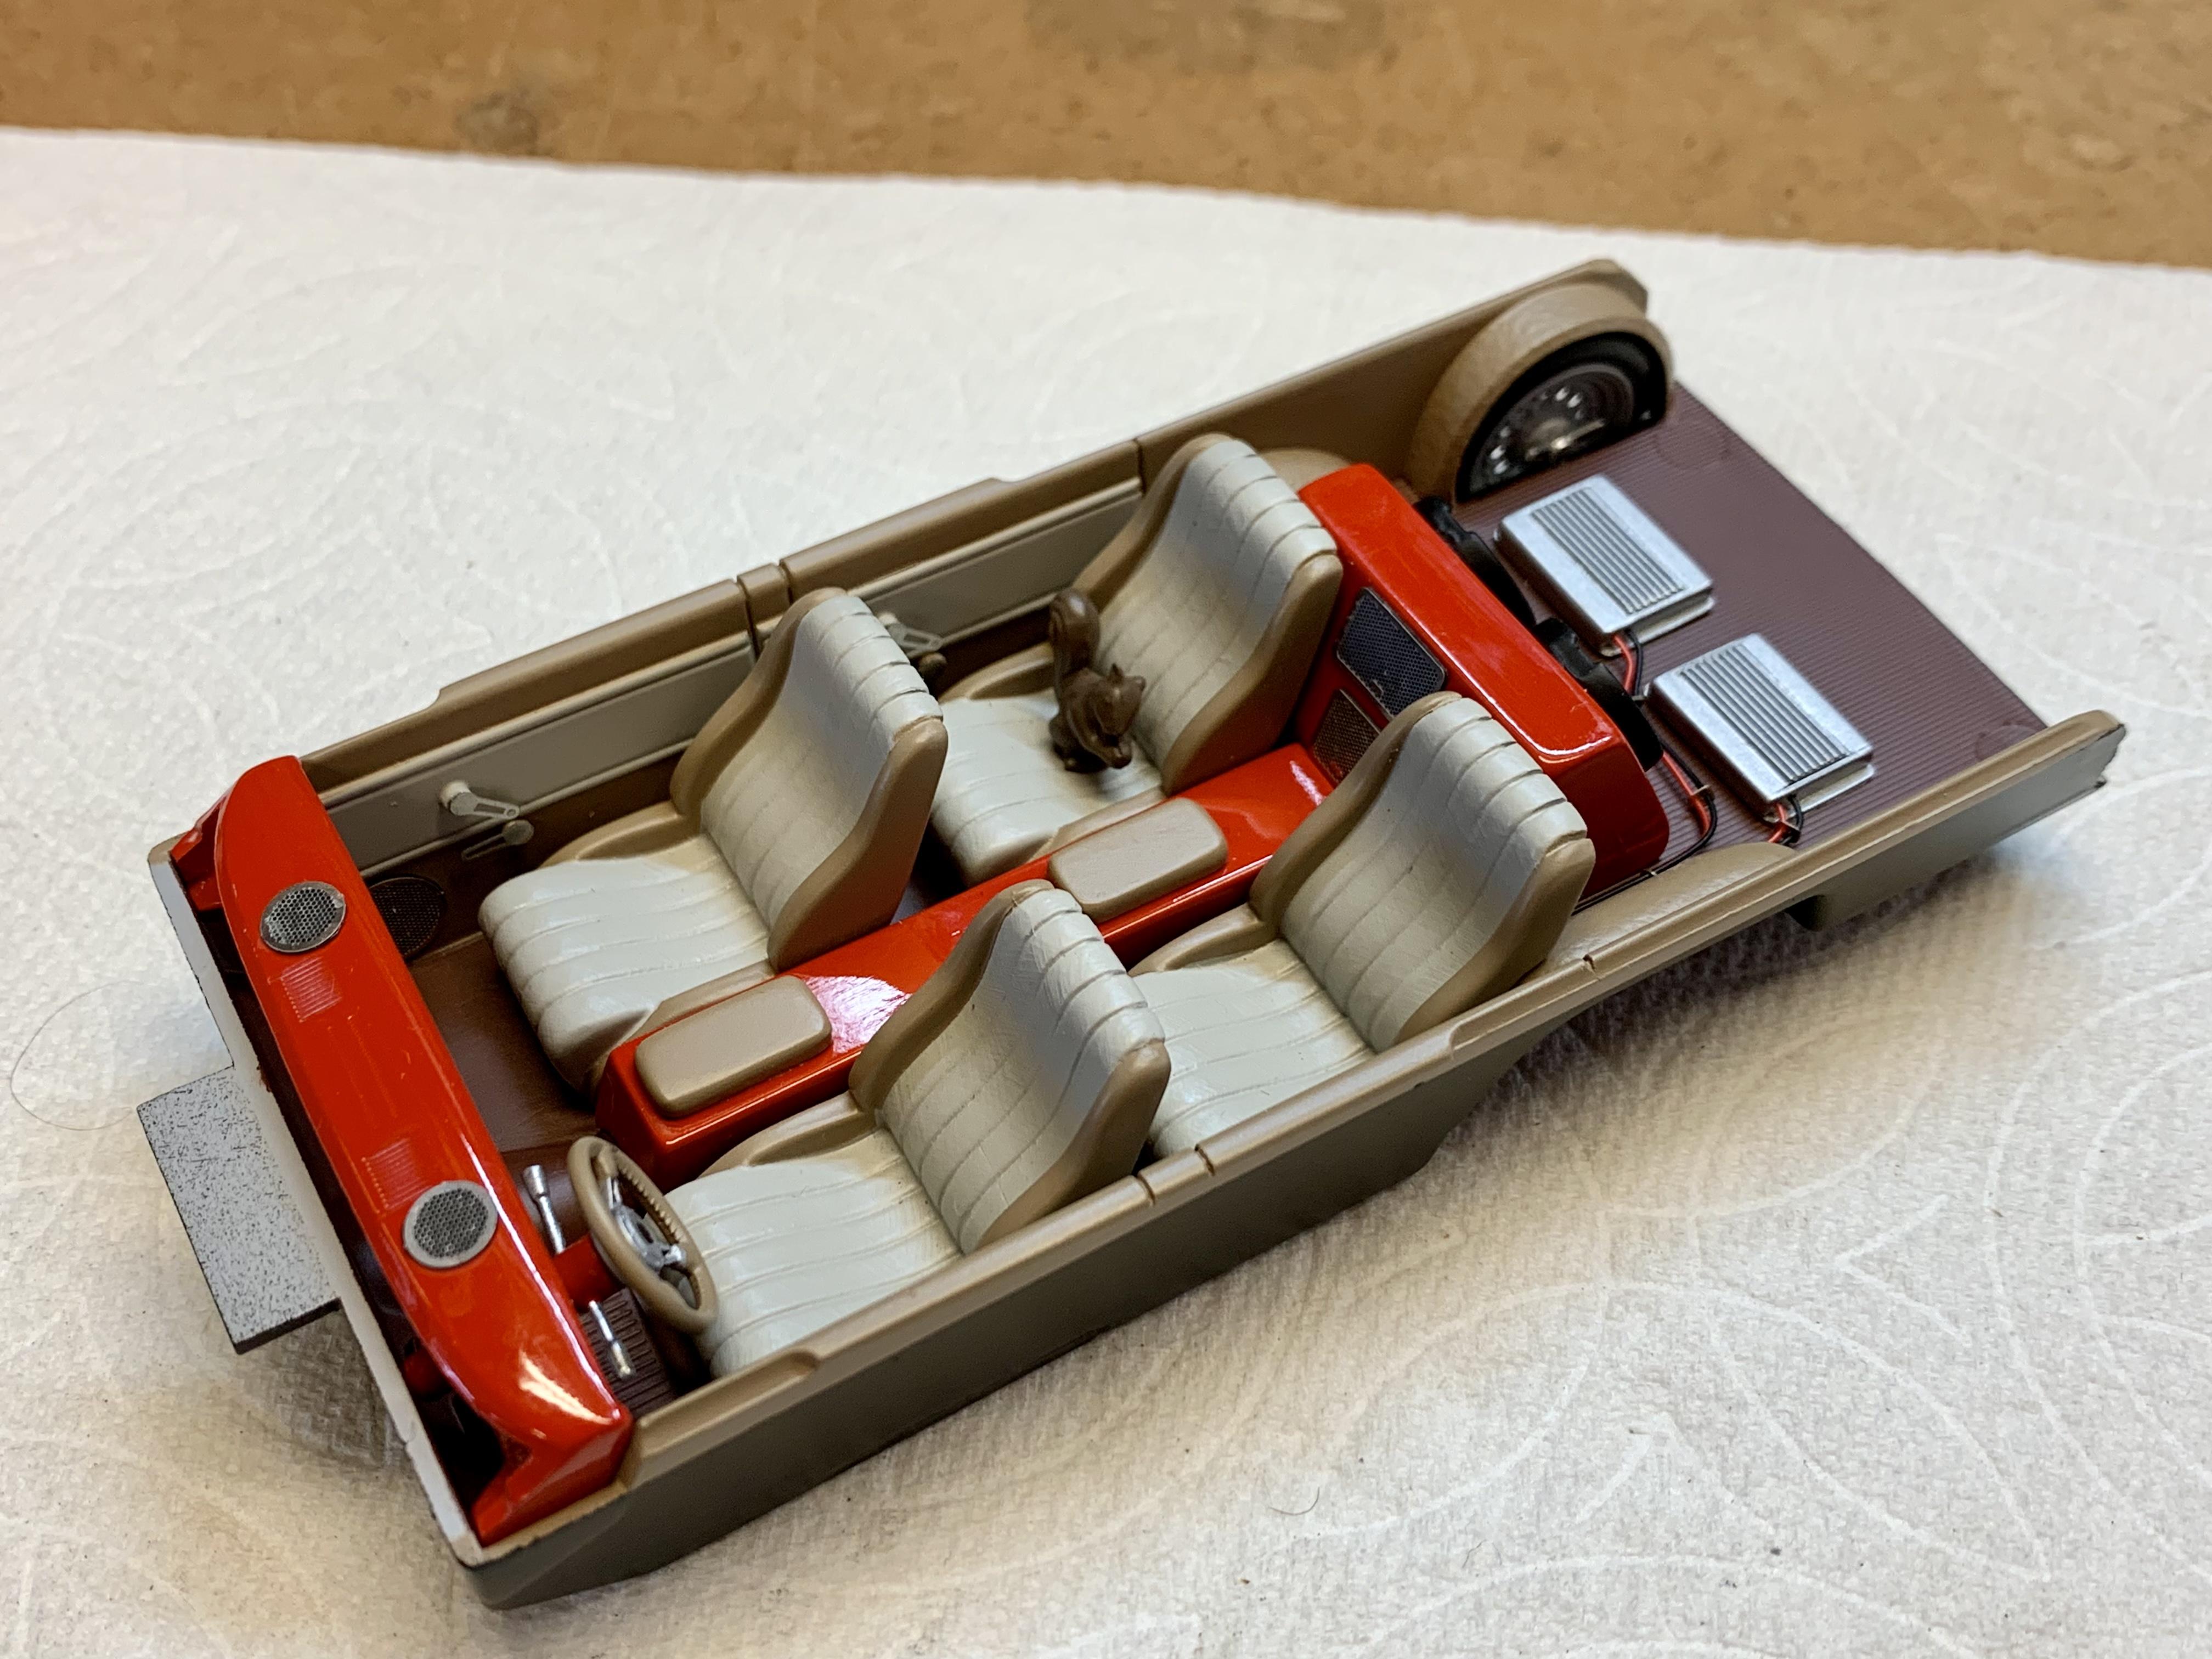
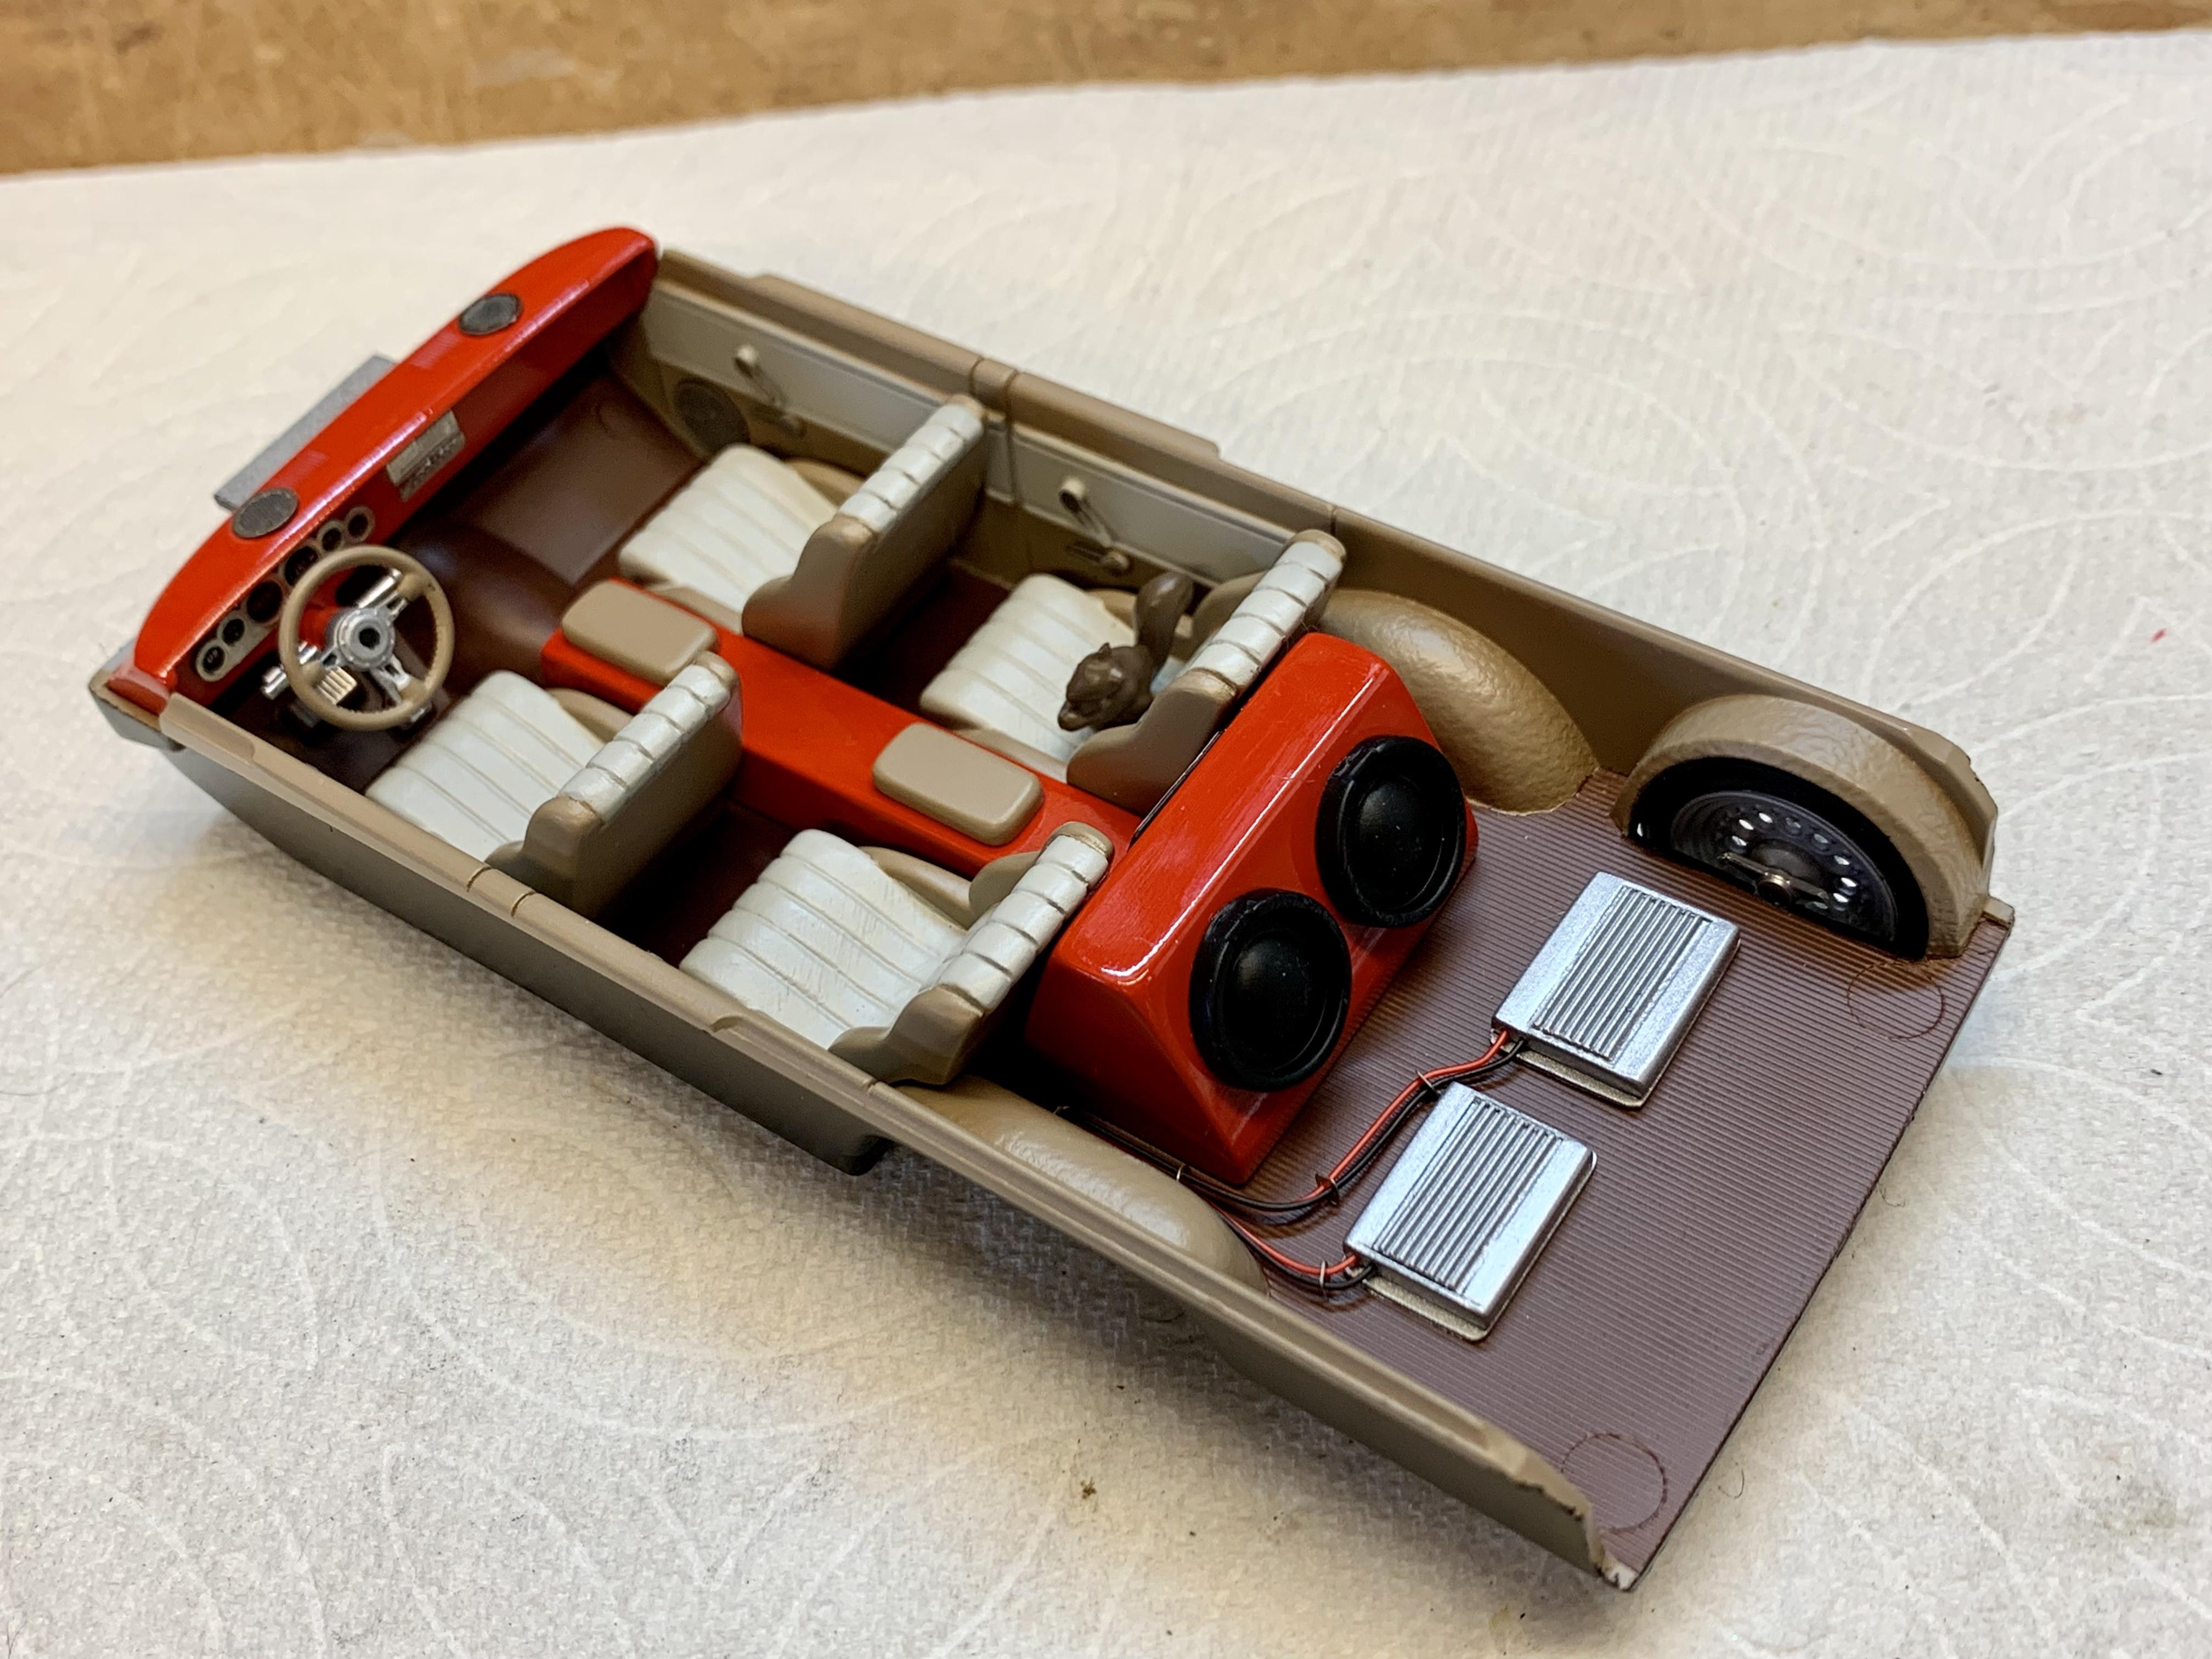
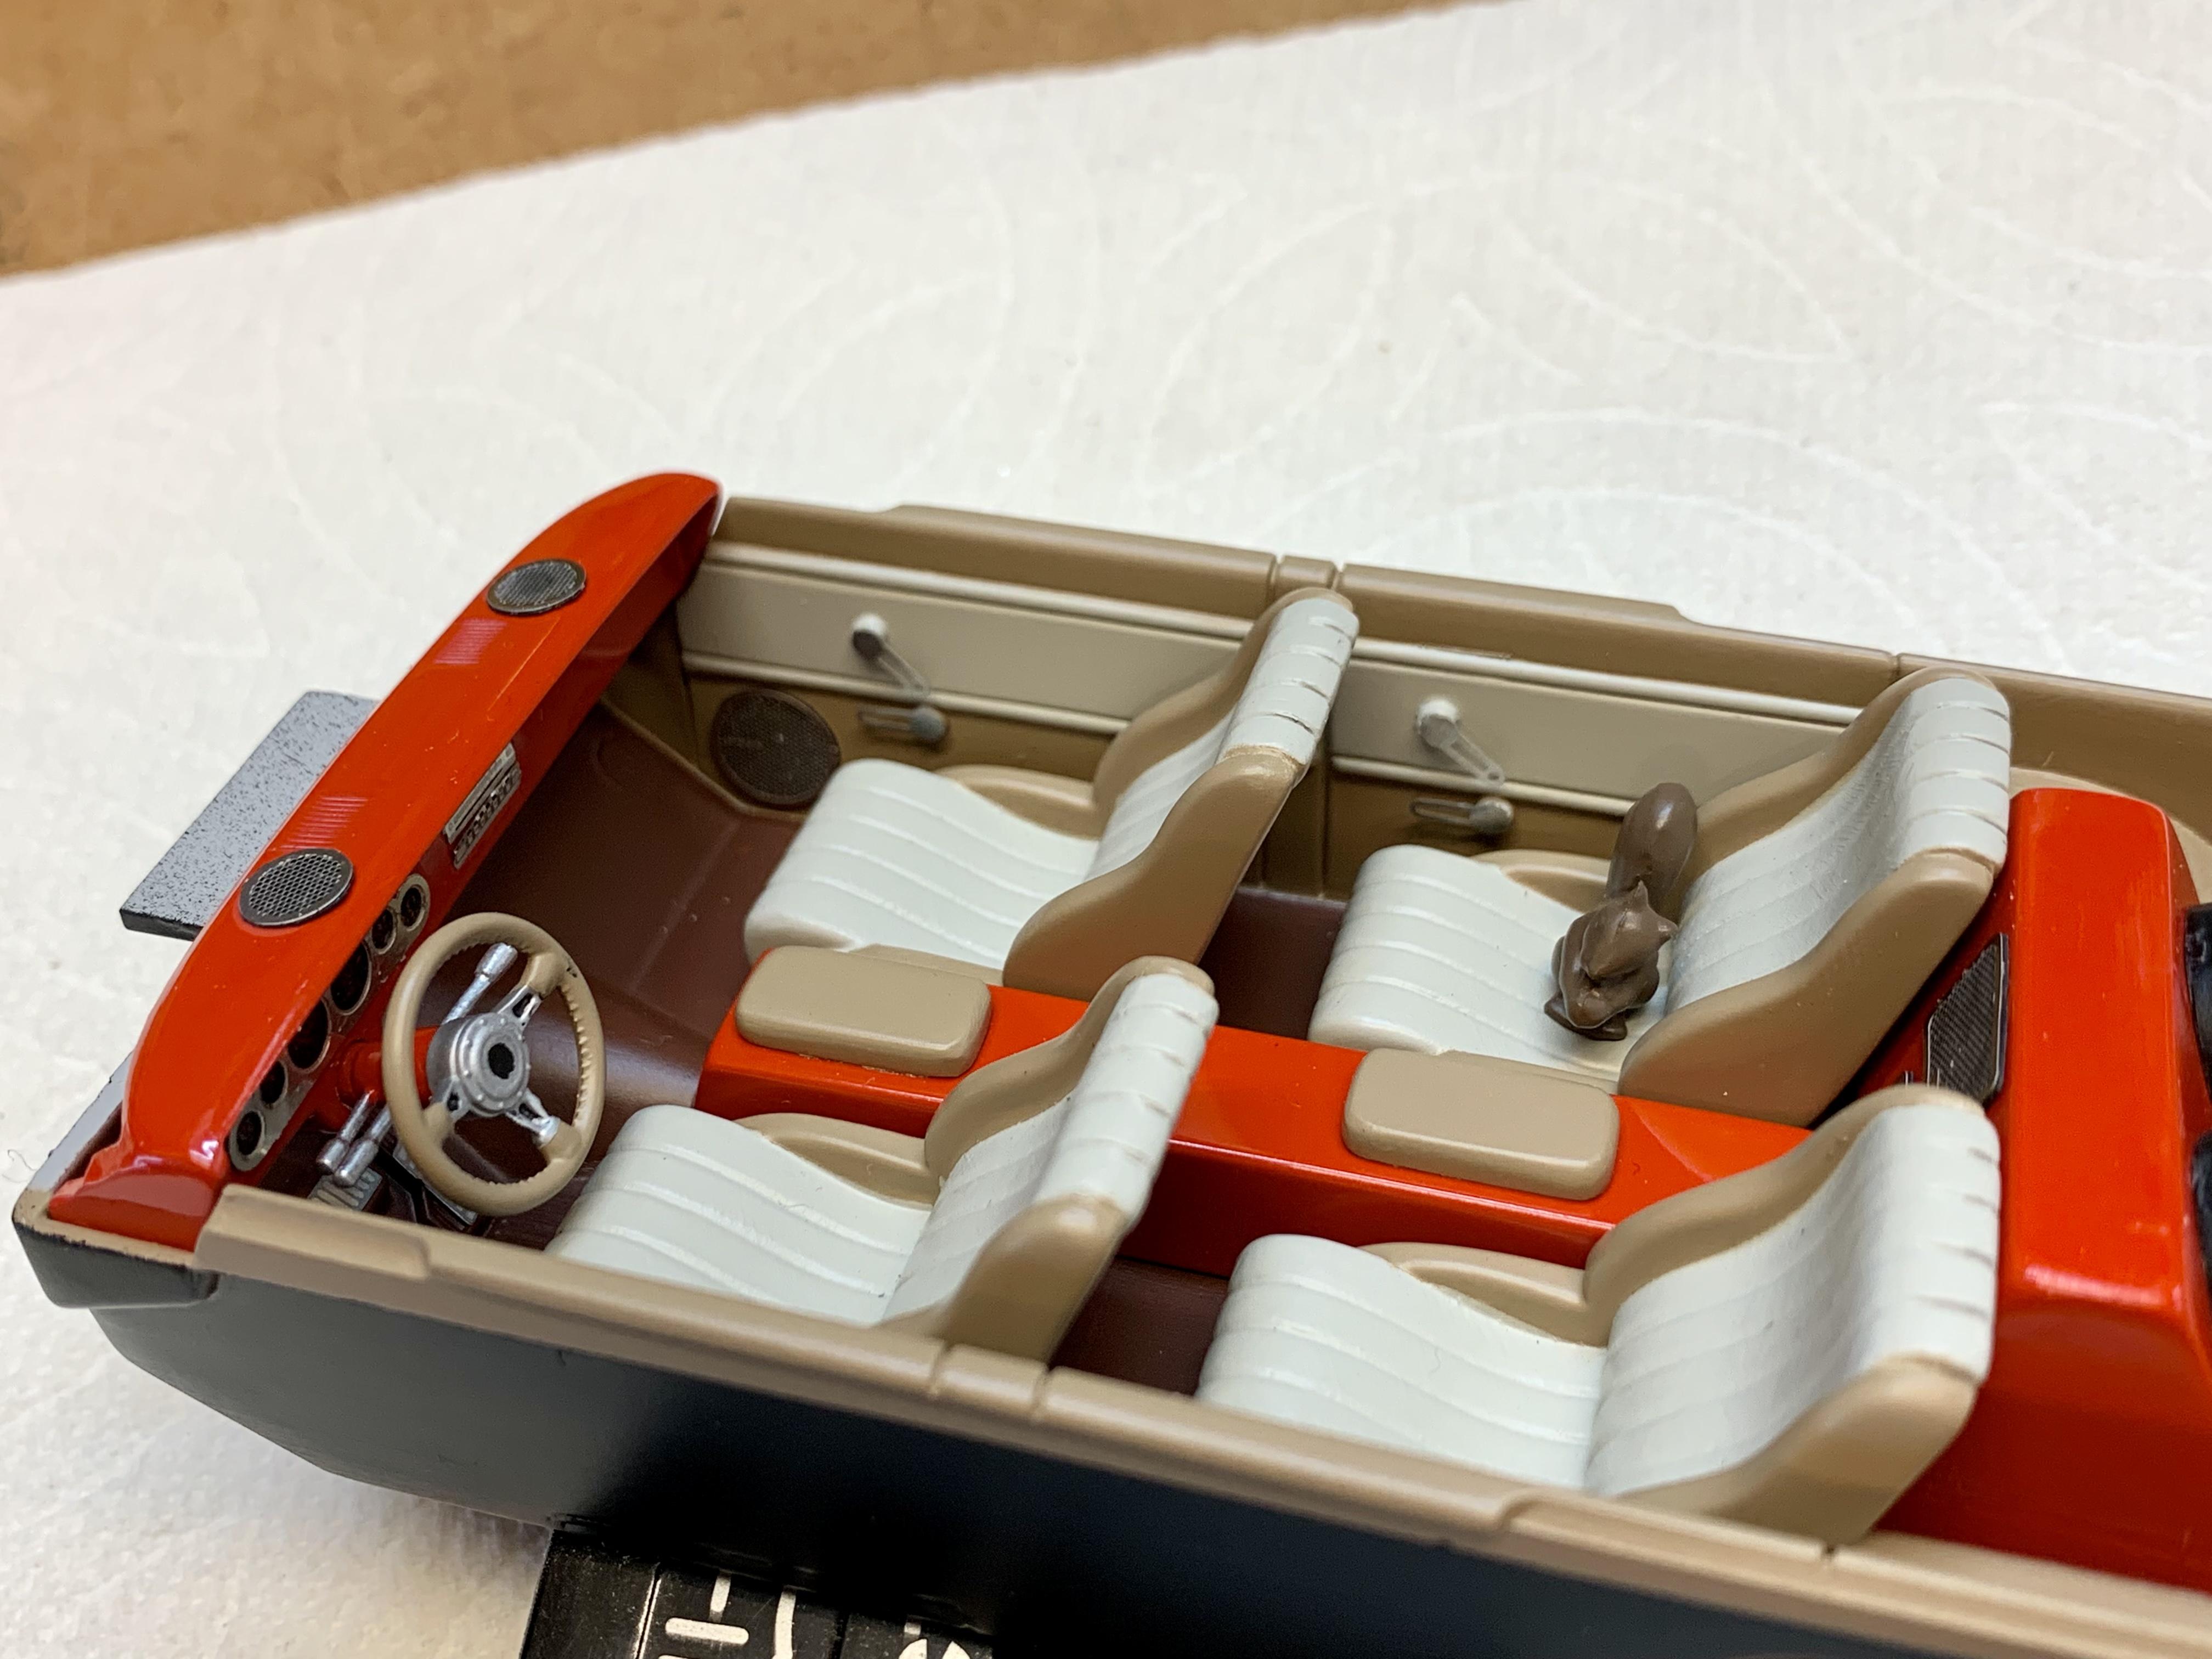
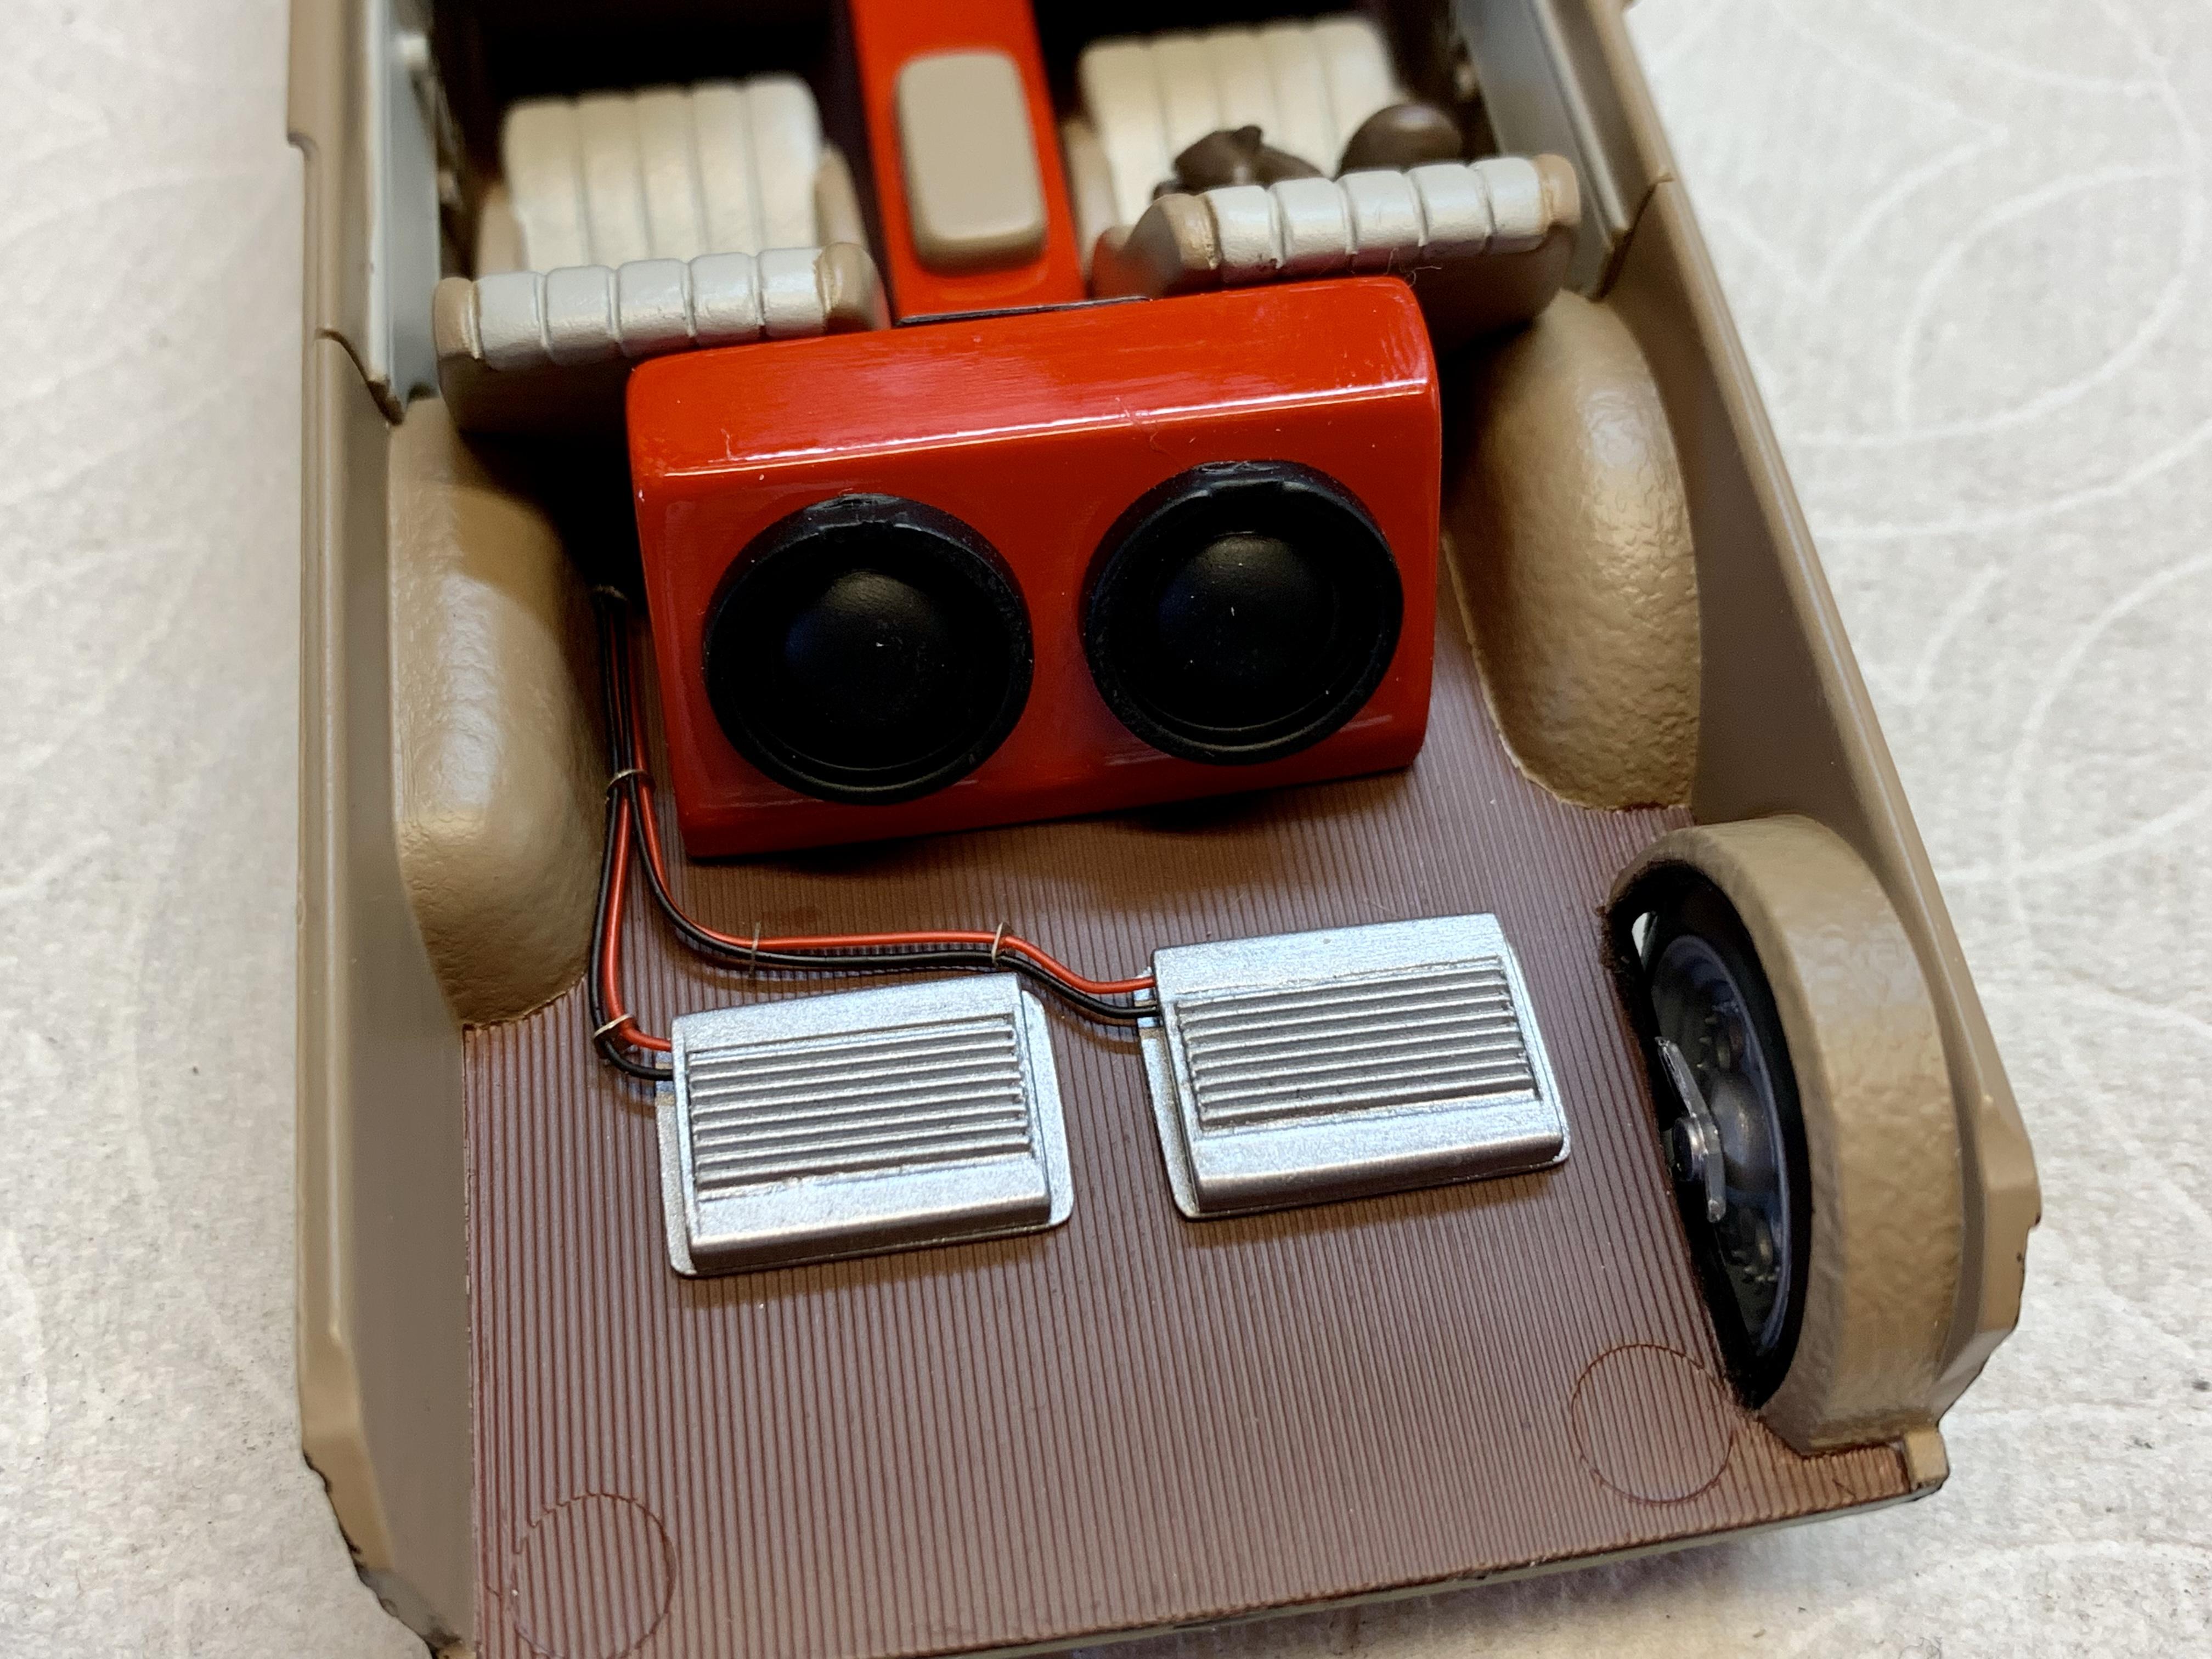
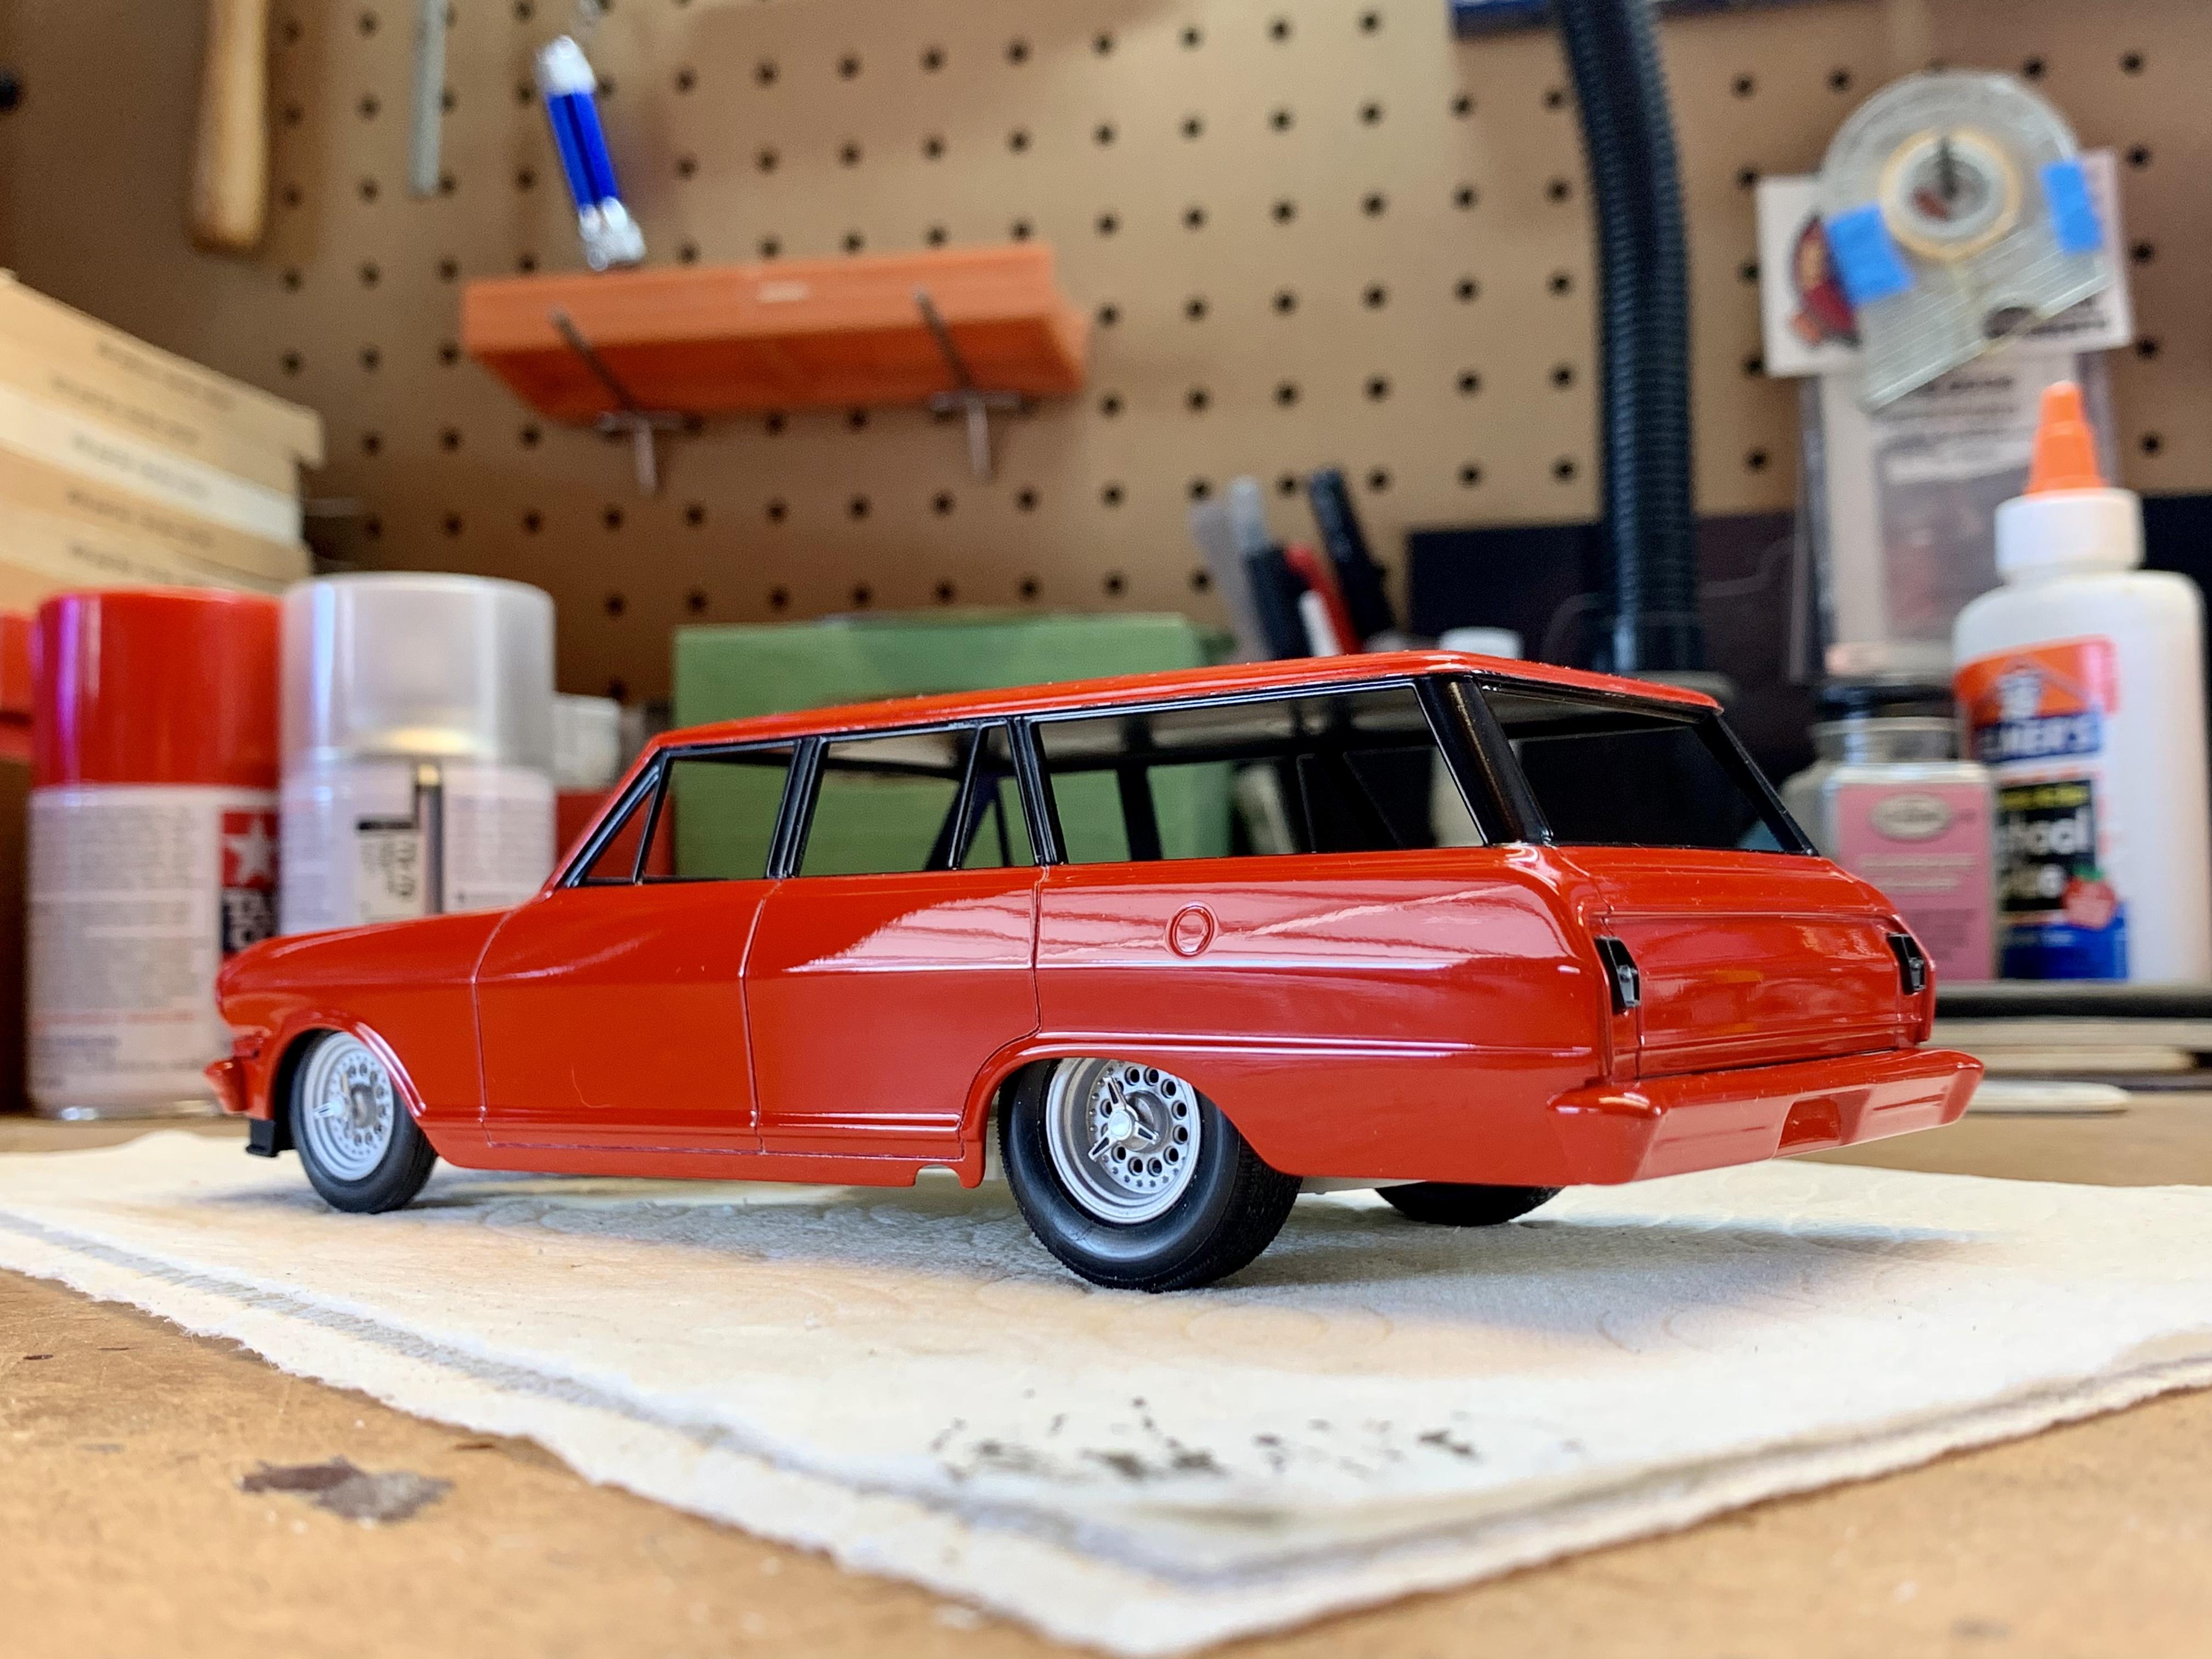
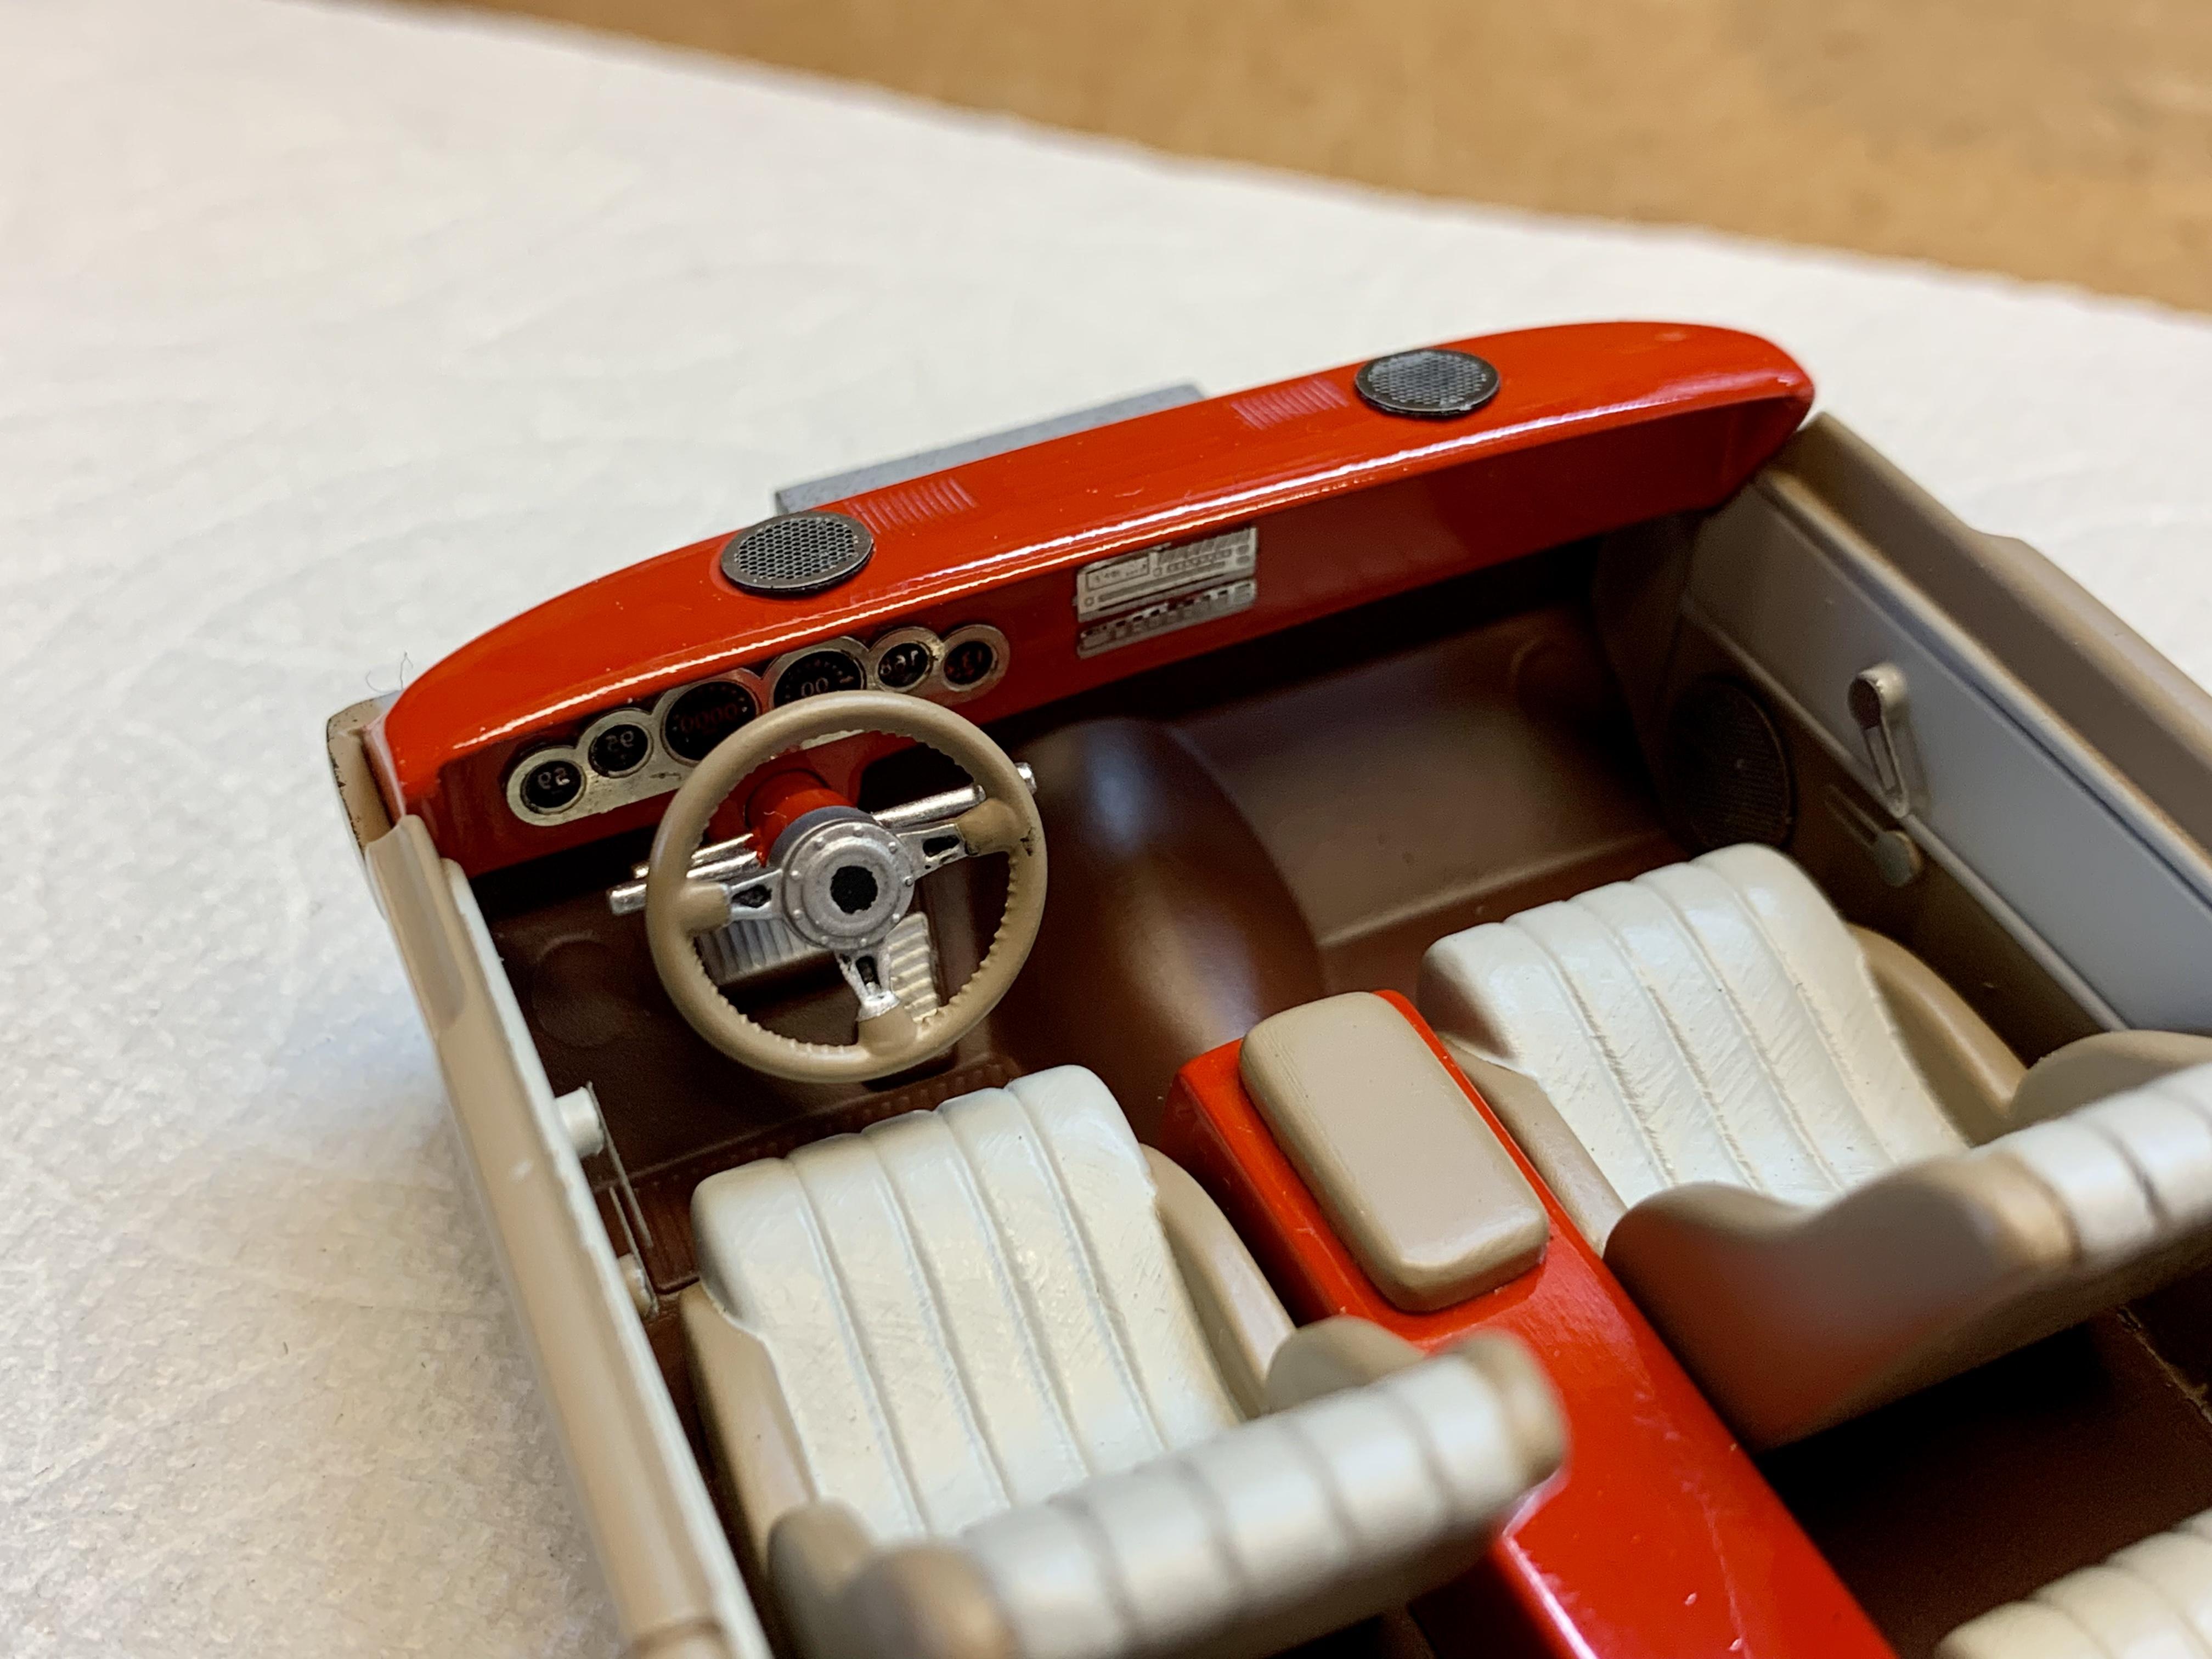
Starting with AMT’s 1963 Nova Wagon “Craftsman” low detail curbside kit, the original plan was to put a motor in it, set a lowered & raked stance and put some big & little rubber with American 5-spokes. It was supposed to be a simple project as a breather between heavier projects and then it snowballed into what you see here, set into motion by a simple wheel change! Born in 1979, this is the predominant build style I grew up with at car shows in the 80’s and early 90’s, the Smooth Billet era. Now in my early 40’s, over the last couple of years I’ve developed a nostalgia towards the style and decided I needed to “bring billet back” in scale. - AMT ‘63 Nova Wagon body with all side trim deleted, bumpers and grill chrome stripped and oval hole cut in hood for air filters to poke through. Front fender depressions filled. Scratch built air dam. - Under hood detail added including brake booster/master cylinder from Revell ‘32 Ford series with vacuum hose to engine, windshield wiper motor with washer fluid line to reservoir, fuel pressure regulator with Detail Master plumbing, battery from full-detail Customizing release of Nova Wagon. Radiator heavily modified from Revell ‘90 Mustang LX with scratch built overflow tank and electric fan from Revell ‘32 Ford series. - Revell ‘29 Roadster Chevy block, auto trans, heads, timing cover, belt drive and alternator. Revell Stacy David ‘32 Roadster Weiand supercharger, dual Holley carbs, tall air filters and blower belt drive. AMT ‘66 Nova Pro Street Weiand valve covers with breathers added. Revell ‘37 Ford Sedan block hugger headers. Revell ‘67 Chevelle Pro Street exhaust pipes and Supertrapp mufflers. Detail Master wired distributor and wire dividers. - Revell ZZ Top Eliminator Coupe wheels. Revell ‘40 Ford street rod rear tires. Revell ‘67 Chevelle Pro Street skinny front tires. - Interior HEAVILY modified. Molded-in front bench seat cut out and floor filled in its place. Entire face of dashboard cut out and replaced with flat panel. Sides panels smoothed, door lines cut and raised detail panels scratch built. Two pairs of buckets seats fit from Revell Dan Fink ‘32 Speedwagon Woodie. Revell ‘37 Ford Sedan tilt column. Revell ZZ Top Eliminator Coupe steering wheel. Center console, subwoofer box, subwoofer faces and amplifiers scratch built. Detail Master dash panel with digital gauges, stereo head unit and graphic equalizer, door handles, pedal pads and speaker grills. Spare tire cover opened and matching spare wheel added. Squirrel stuffed animal from kit. - Tamiya TS92 Pure Red over their fine gray primer with their gloss clear on top. Polished and waxed with Adam’s products. Interior colors: Tamiya AS15 Tan, AS16 Light Gray and TS62 NATO Brown.
- 36 replies
-
- 13
-
-
1963 Chevy Nova Wagon Street Rod FINISHED 3/20/22
Dennis Lacy replied to Dennis Lacy's topic in WIP: Model Cars
And that’s a wrap! Keep an eye out Under Glass, finished photo thread coming soon. Under Glass thread here:
-
That’s a great color!
-
1963 Chevy Nova Wagon Street Rod FINISHED 3/20/22
Dennis Lacy replied to Dennis Lacy's topic in WIP: Model Cars
Thanks! Those rear 3/4 shots with the quarters shining make me smile. Not bad for a spray can job, eh? ? -
On those Tri-5’s the radiator position with the inline 6 engine was in front of the core support and that’s exactly what people do when fitting a Big Block so what you’ve done is prototypical.
-
1963 Chevy Nova Wagon Street Rod FINISHED 3/20/22
Dennis Lacy replied to Dennis Lacy's topic in WIP: Model Cars
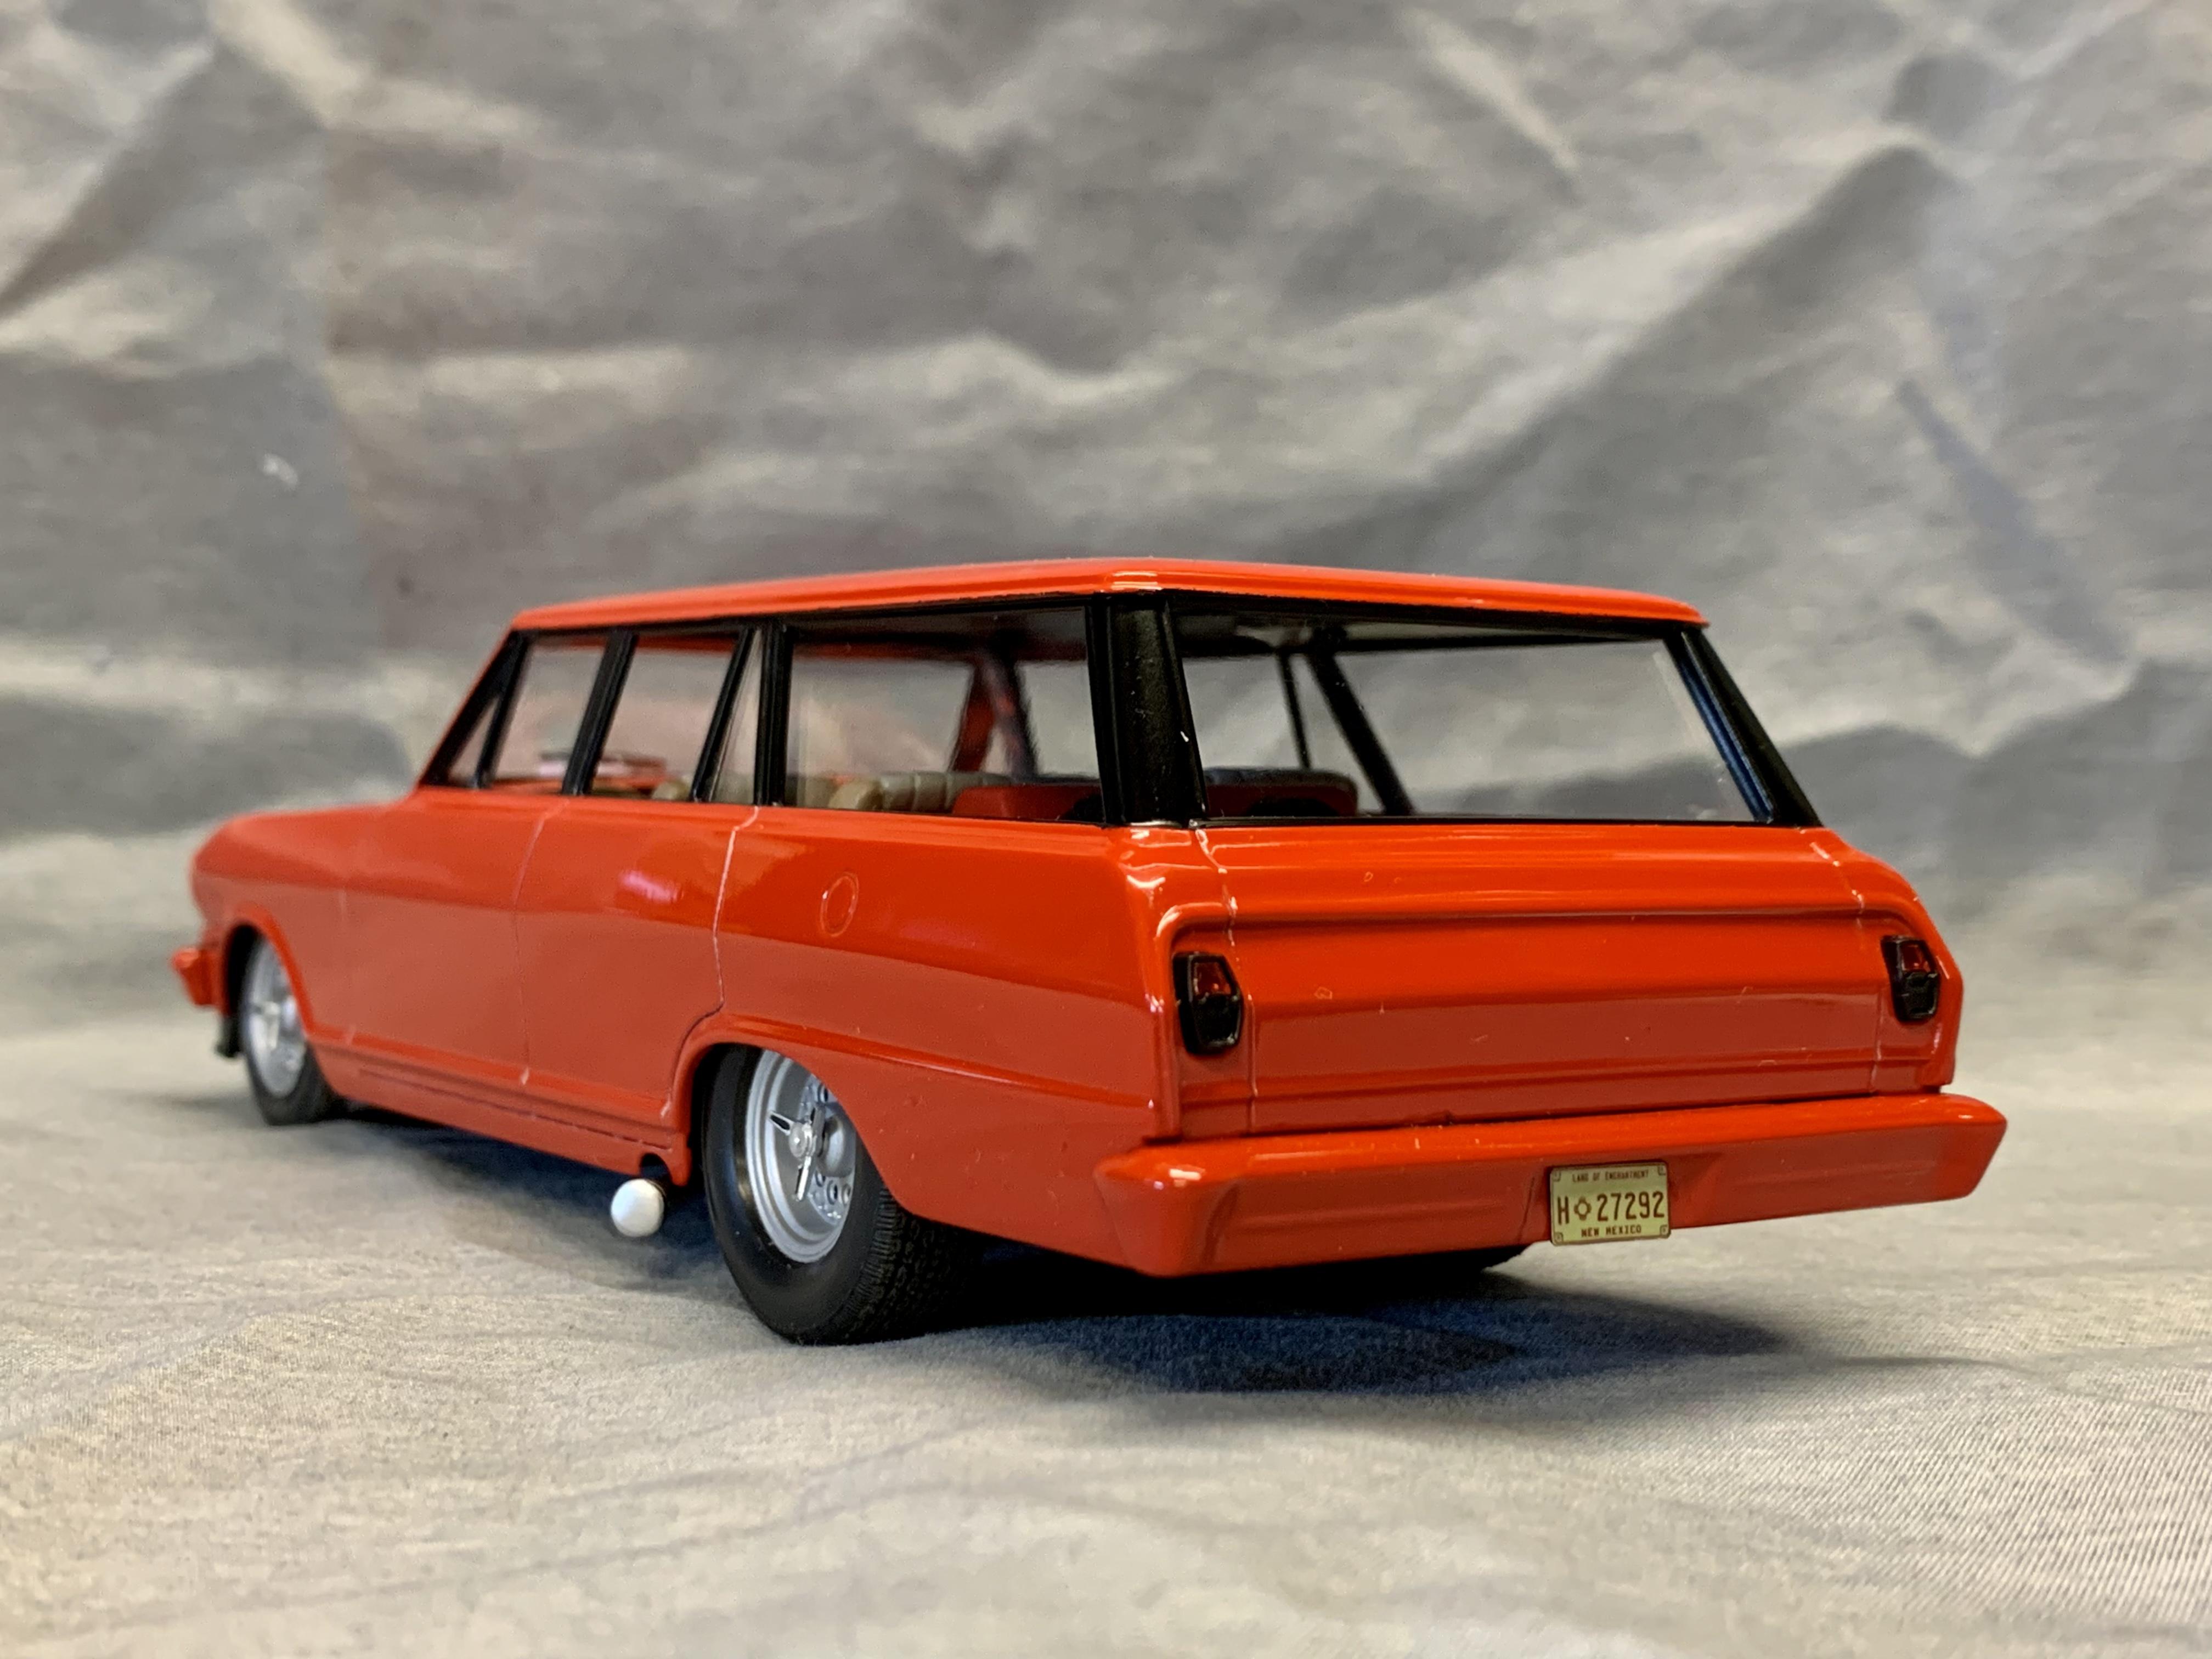
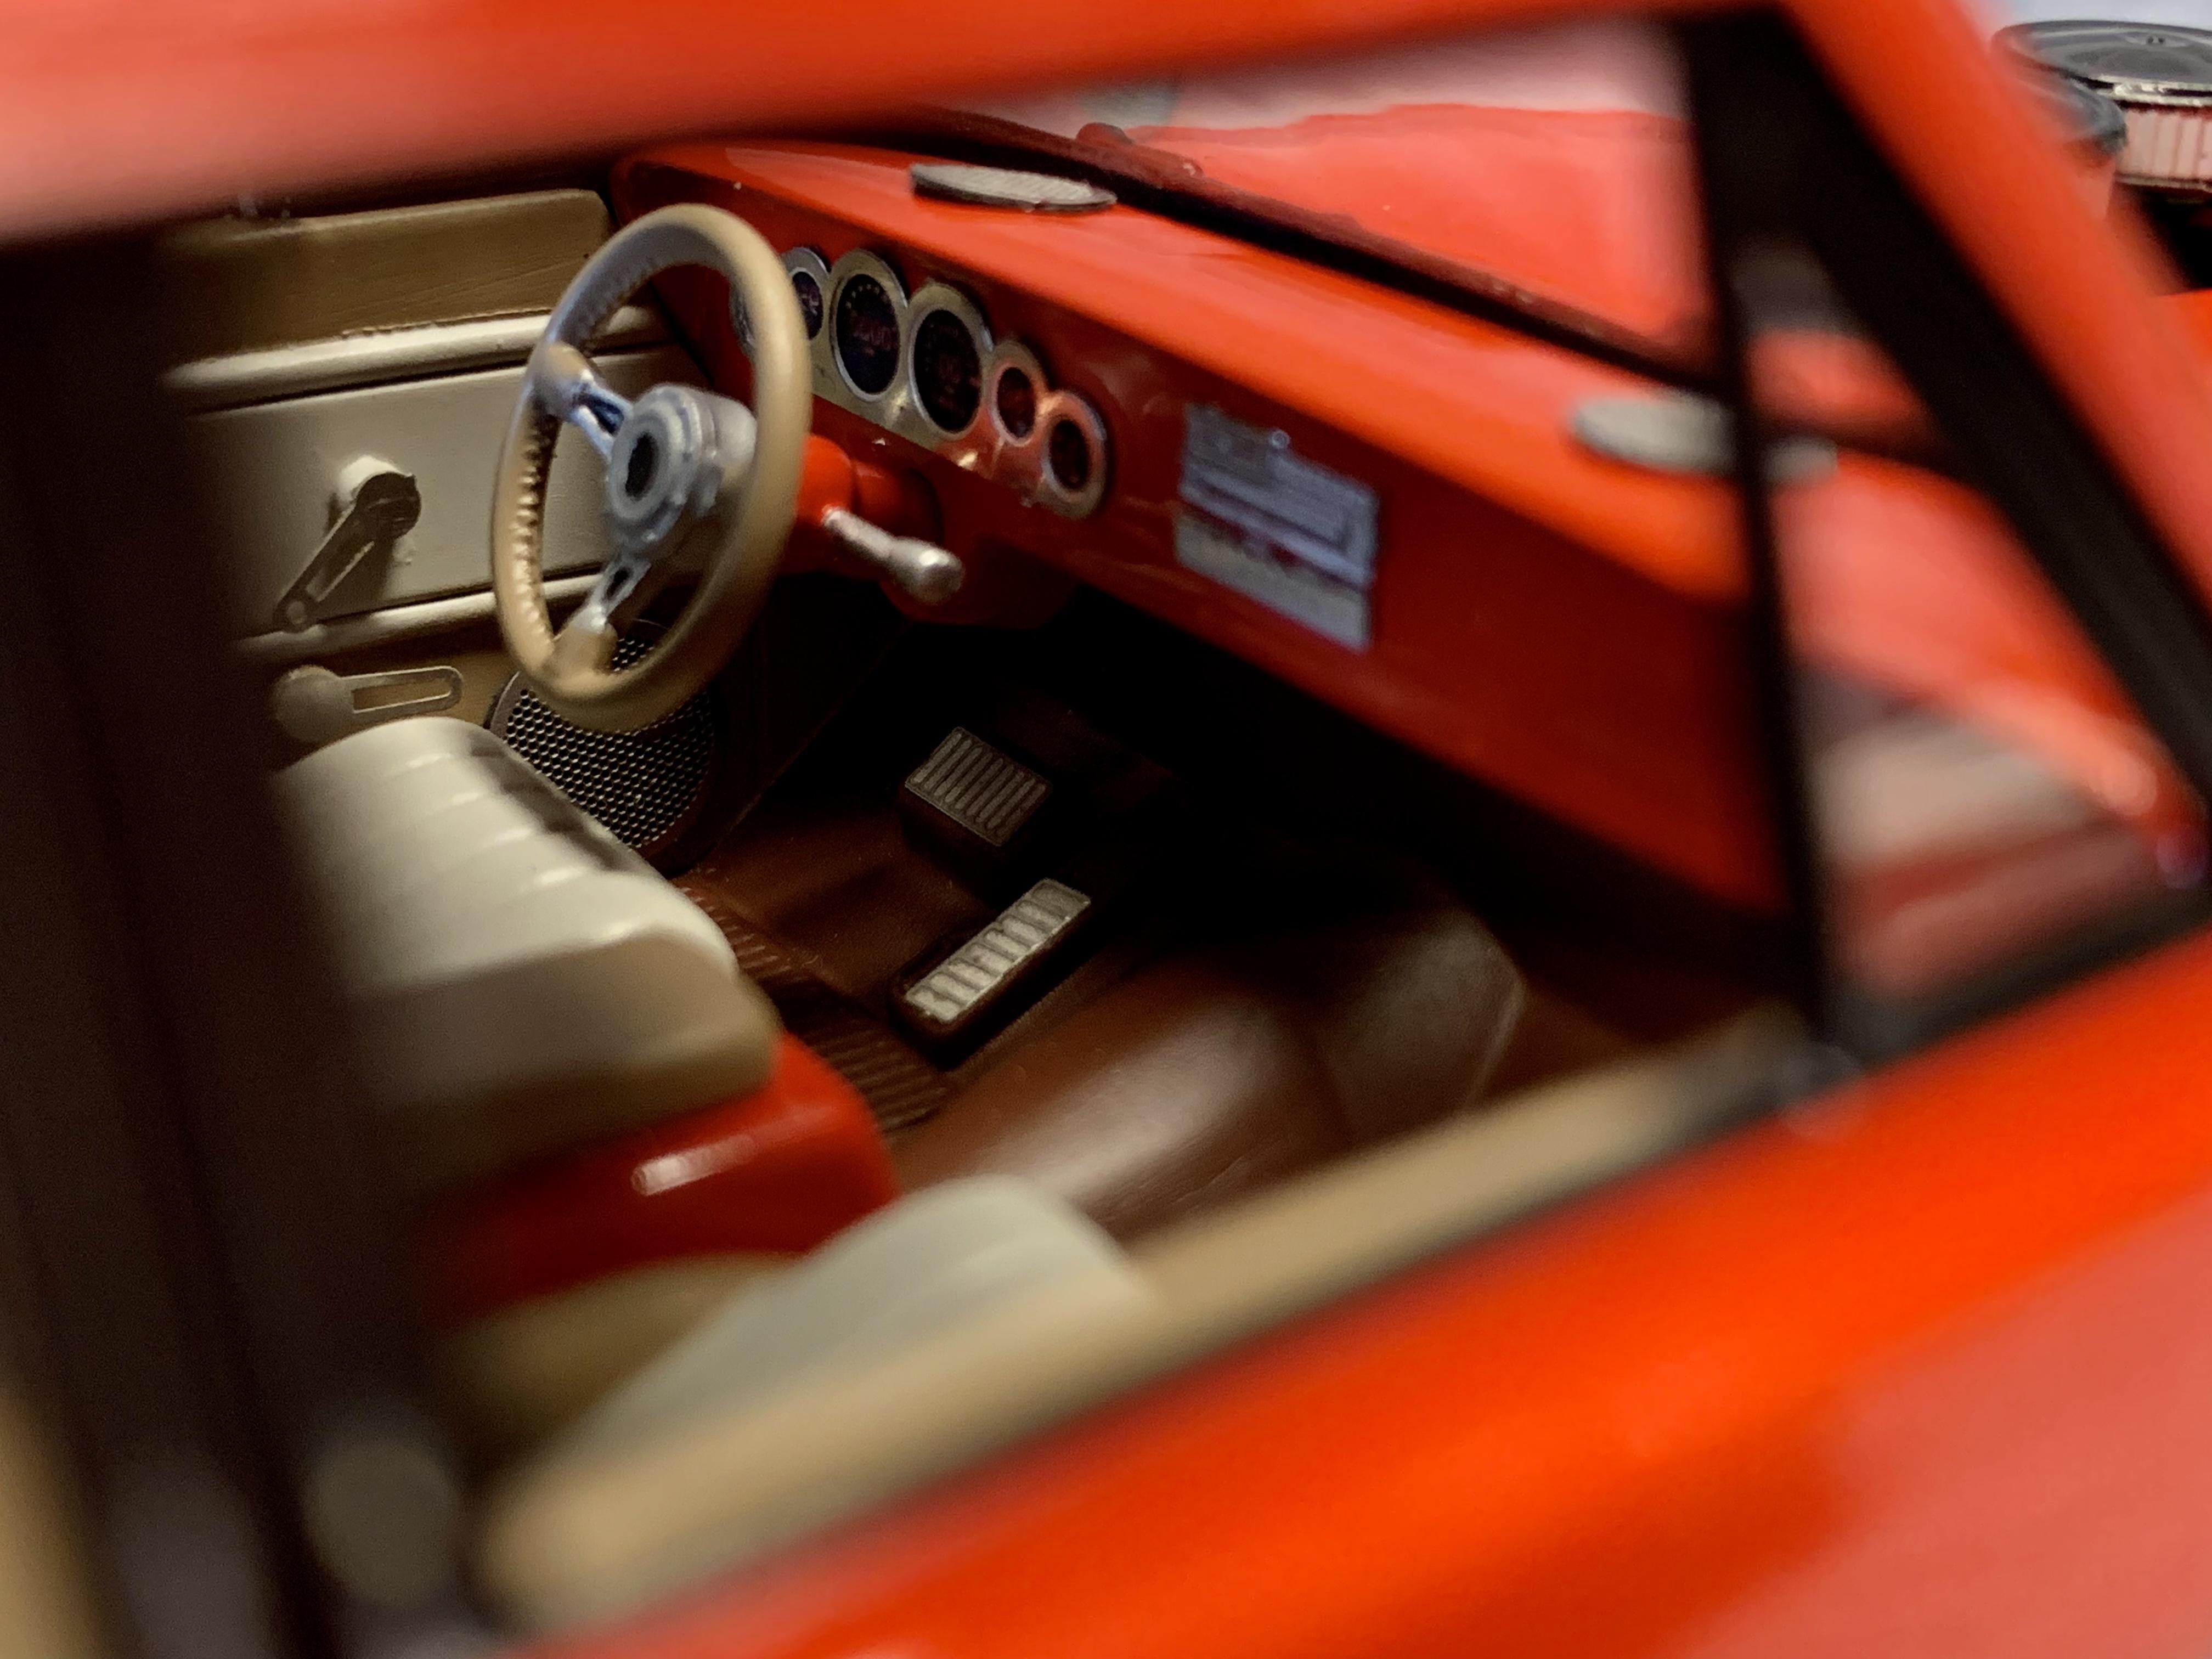
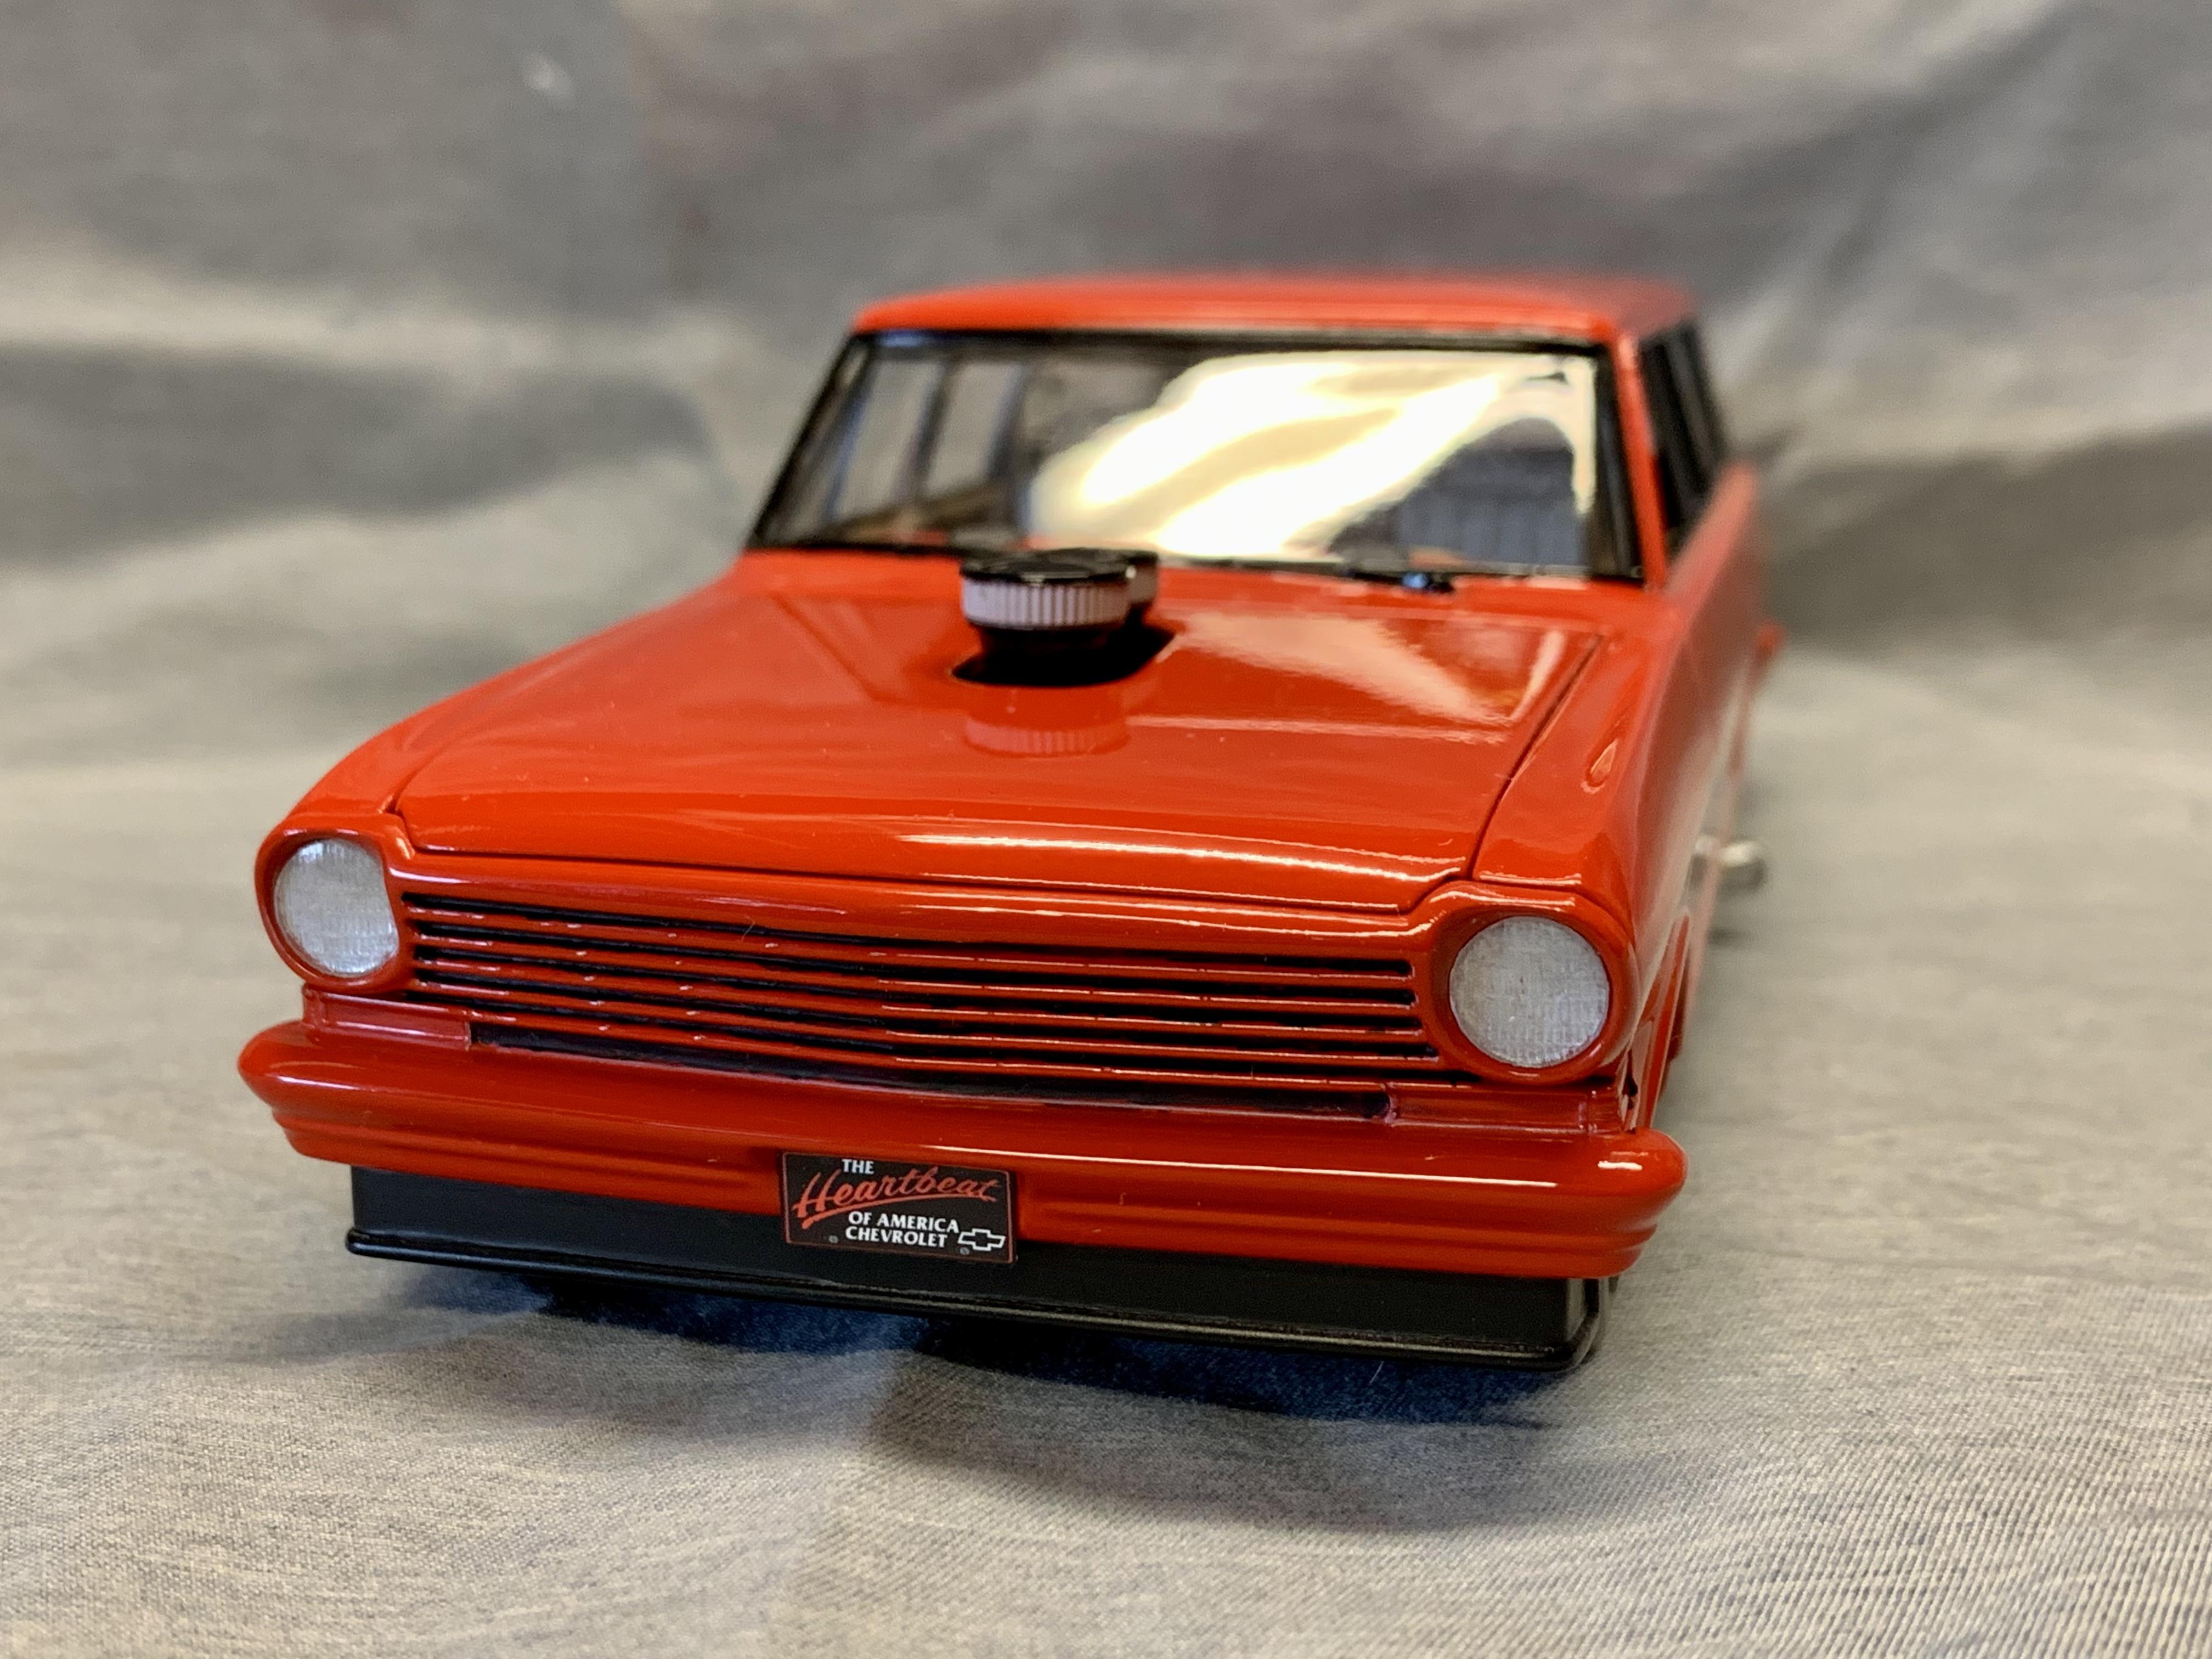
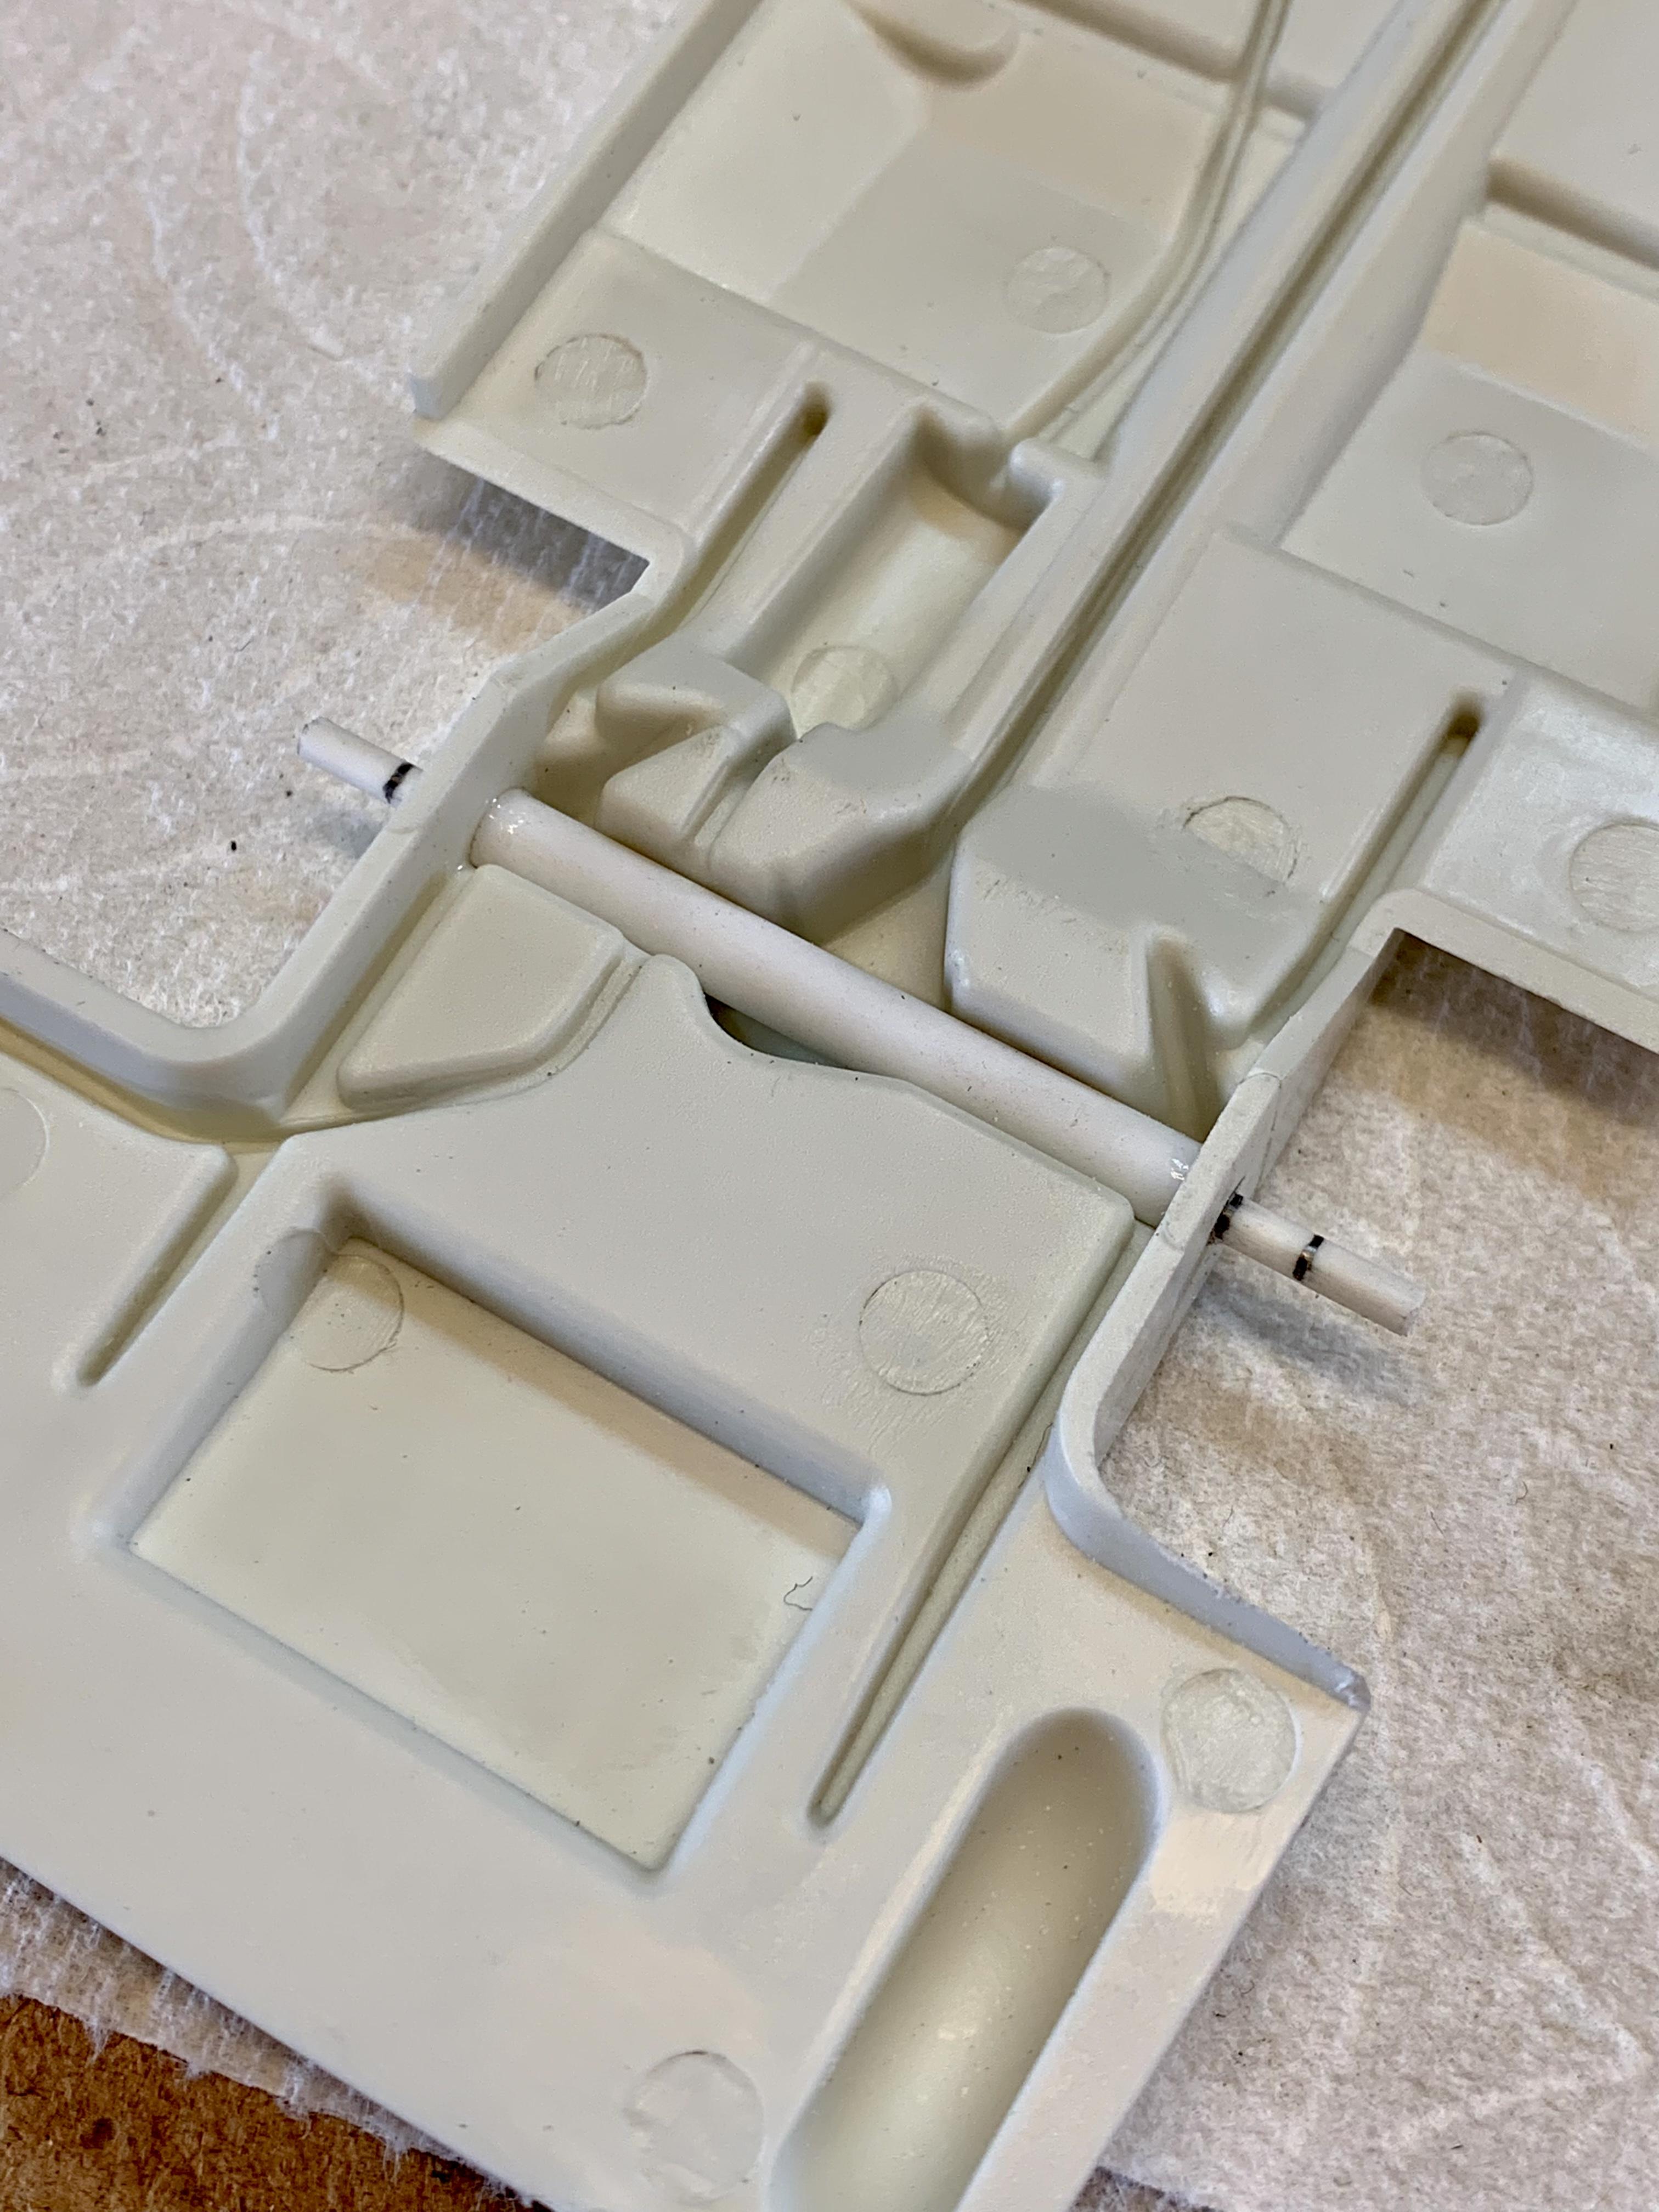
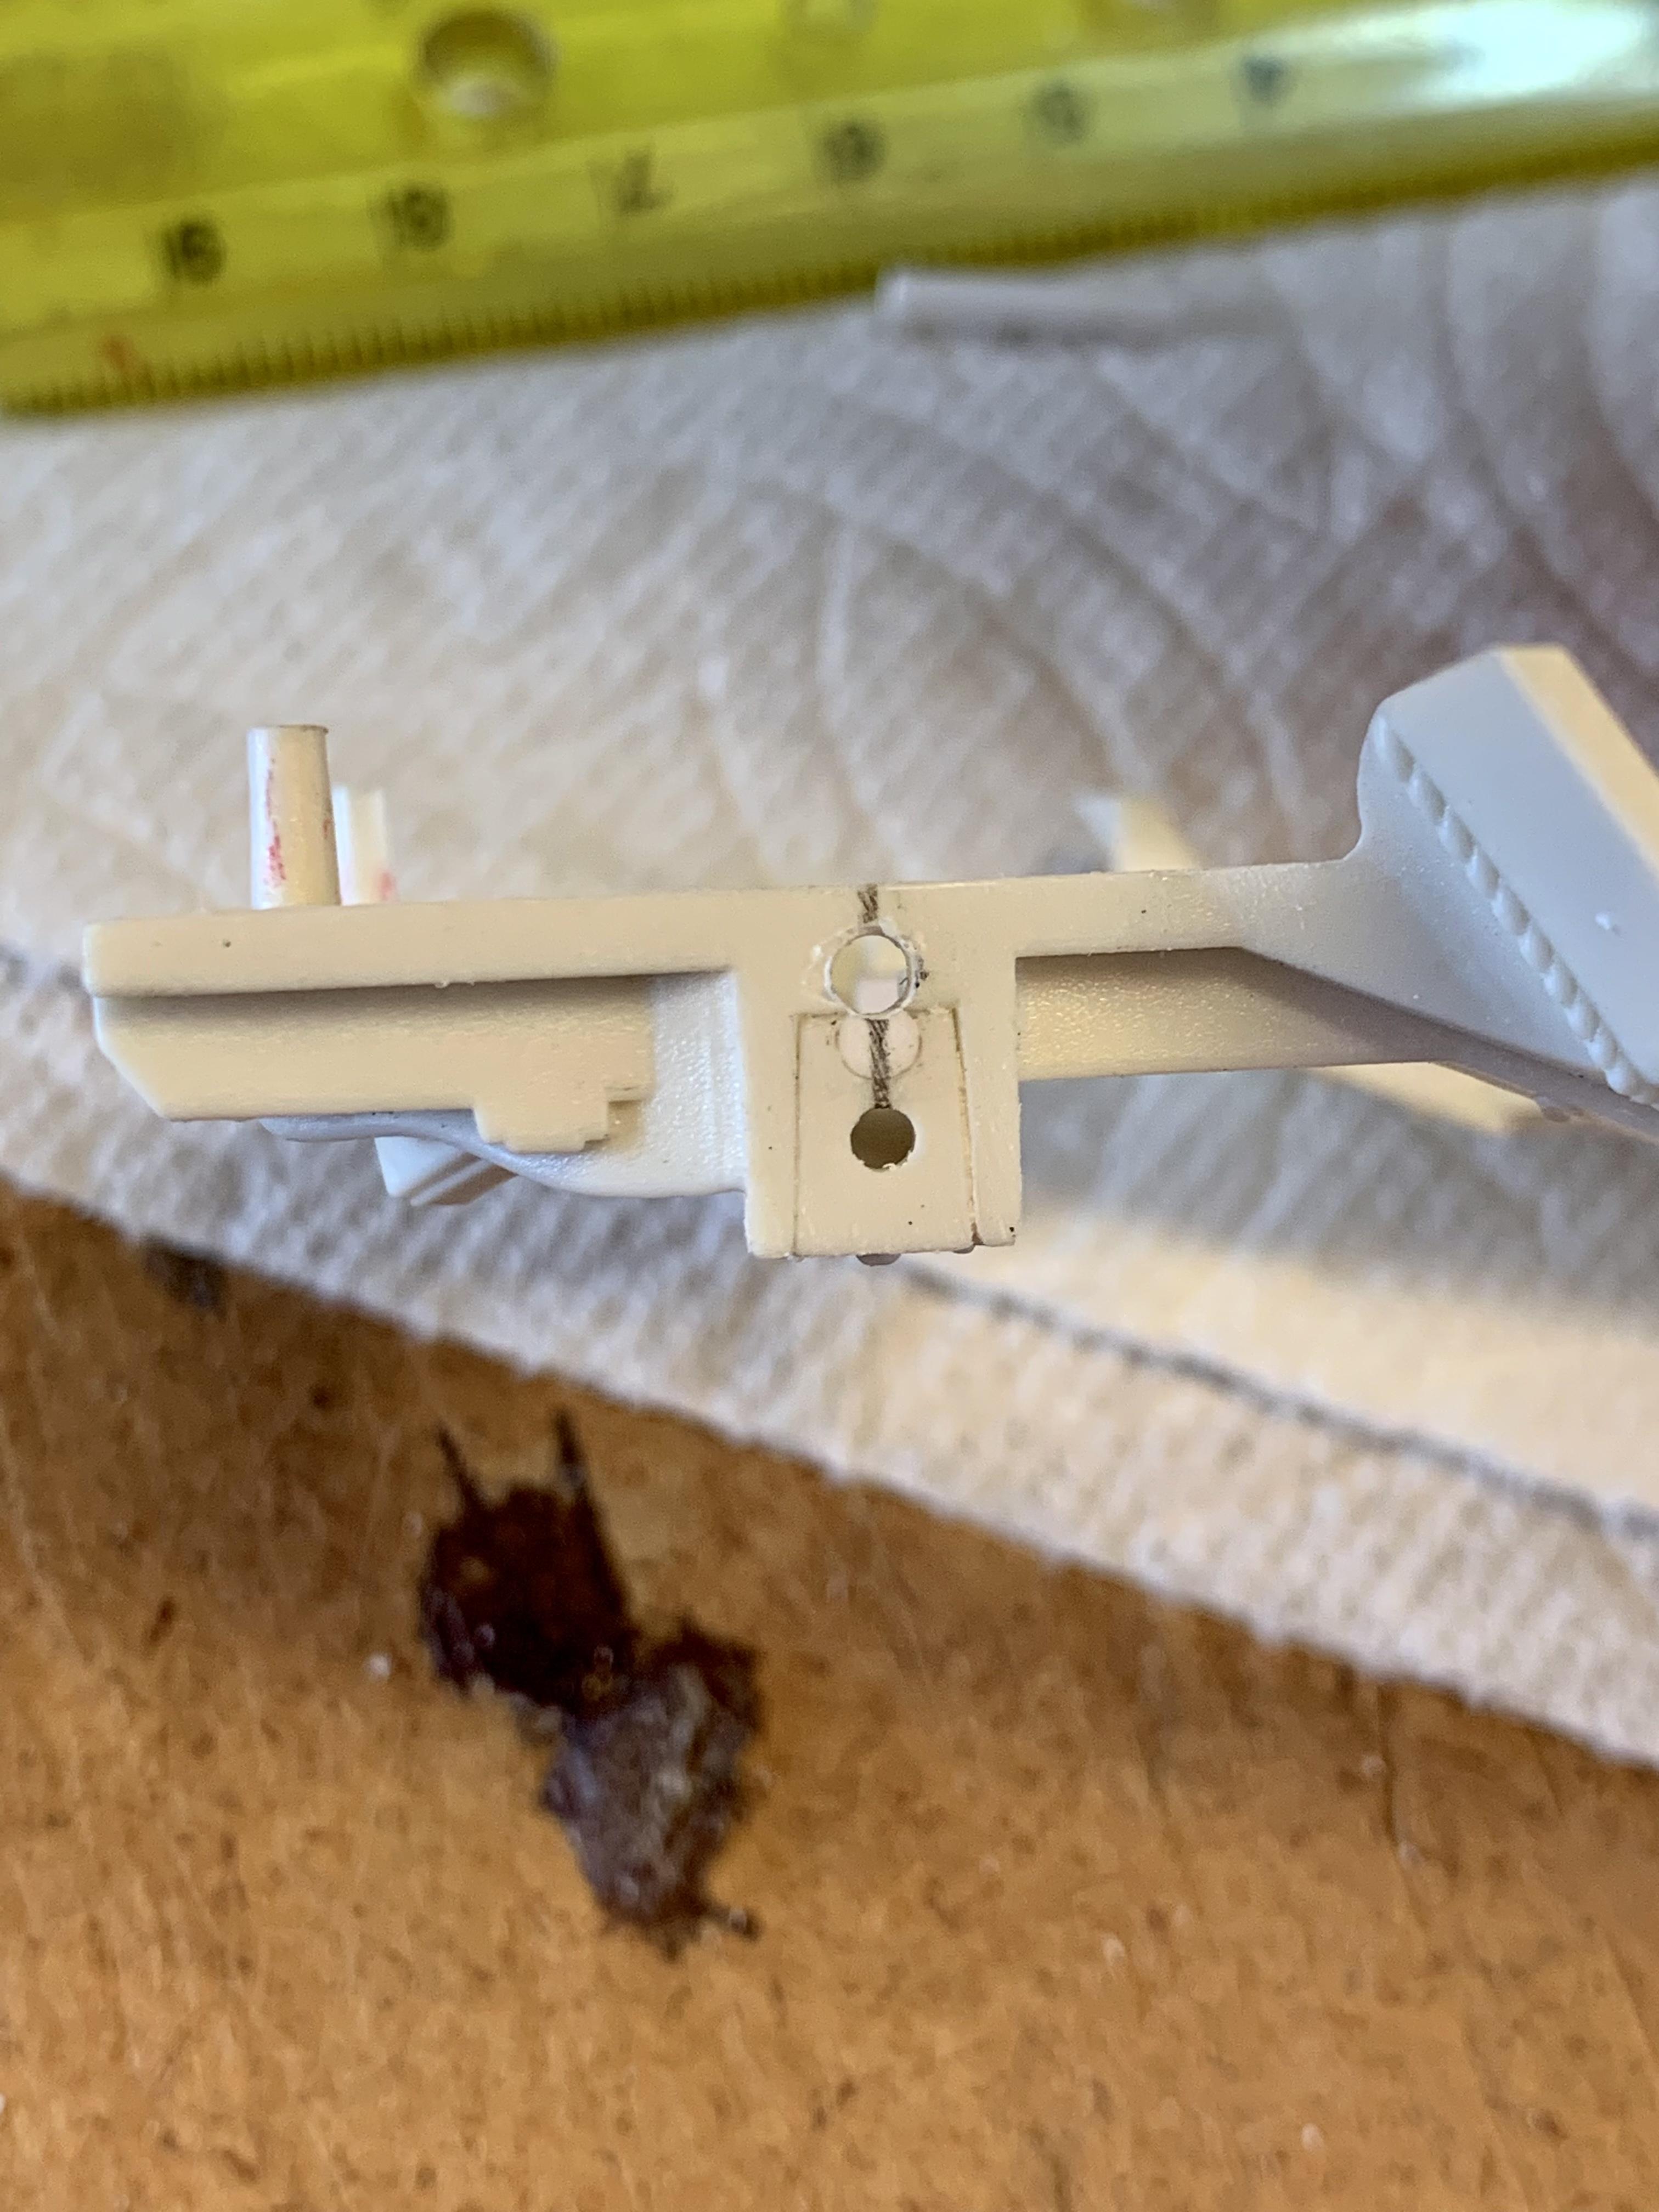
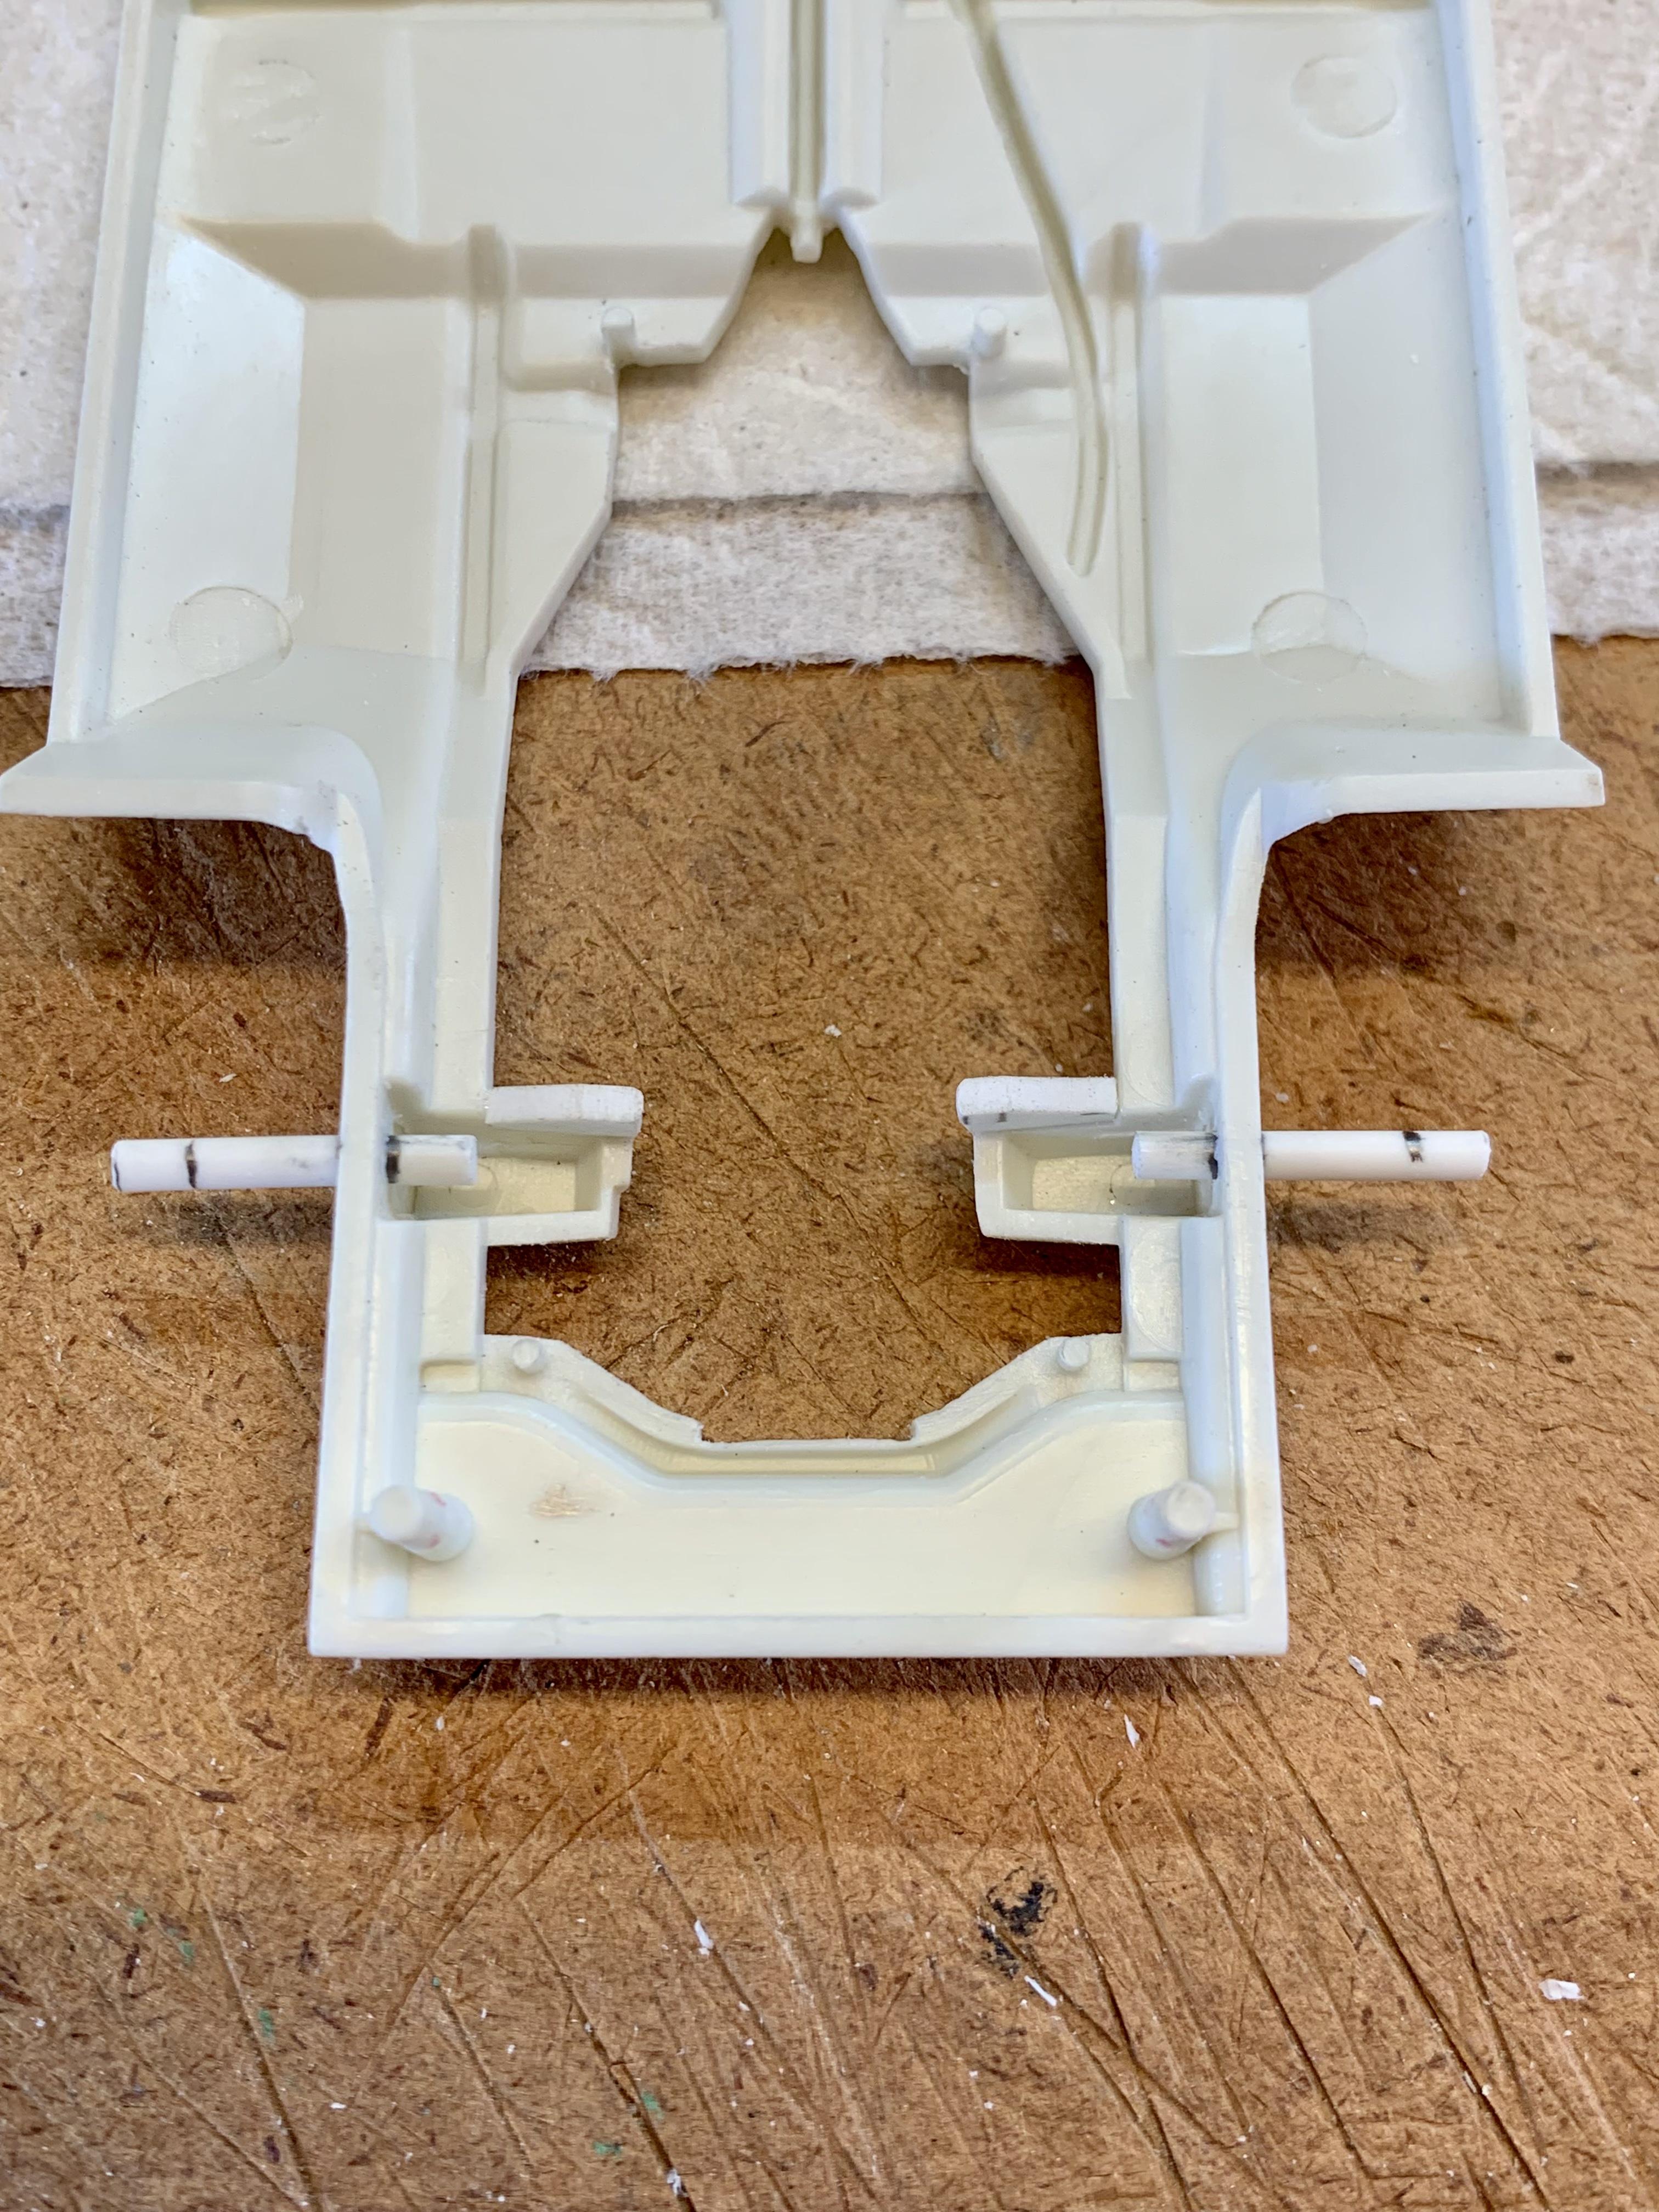
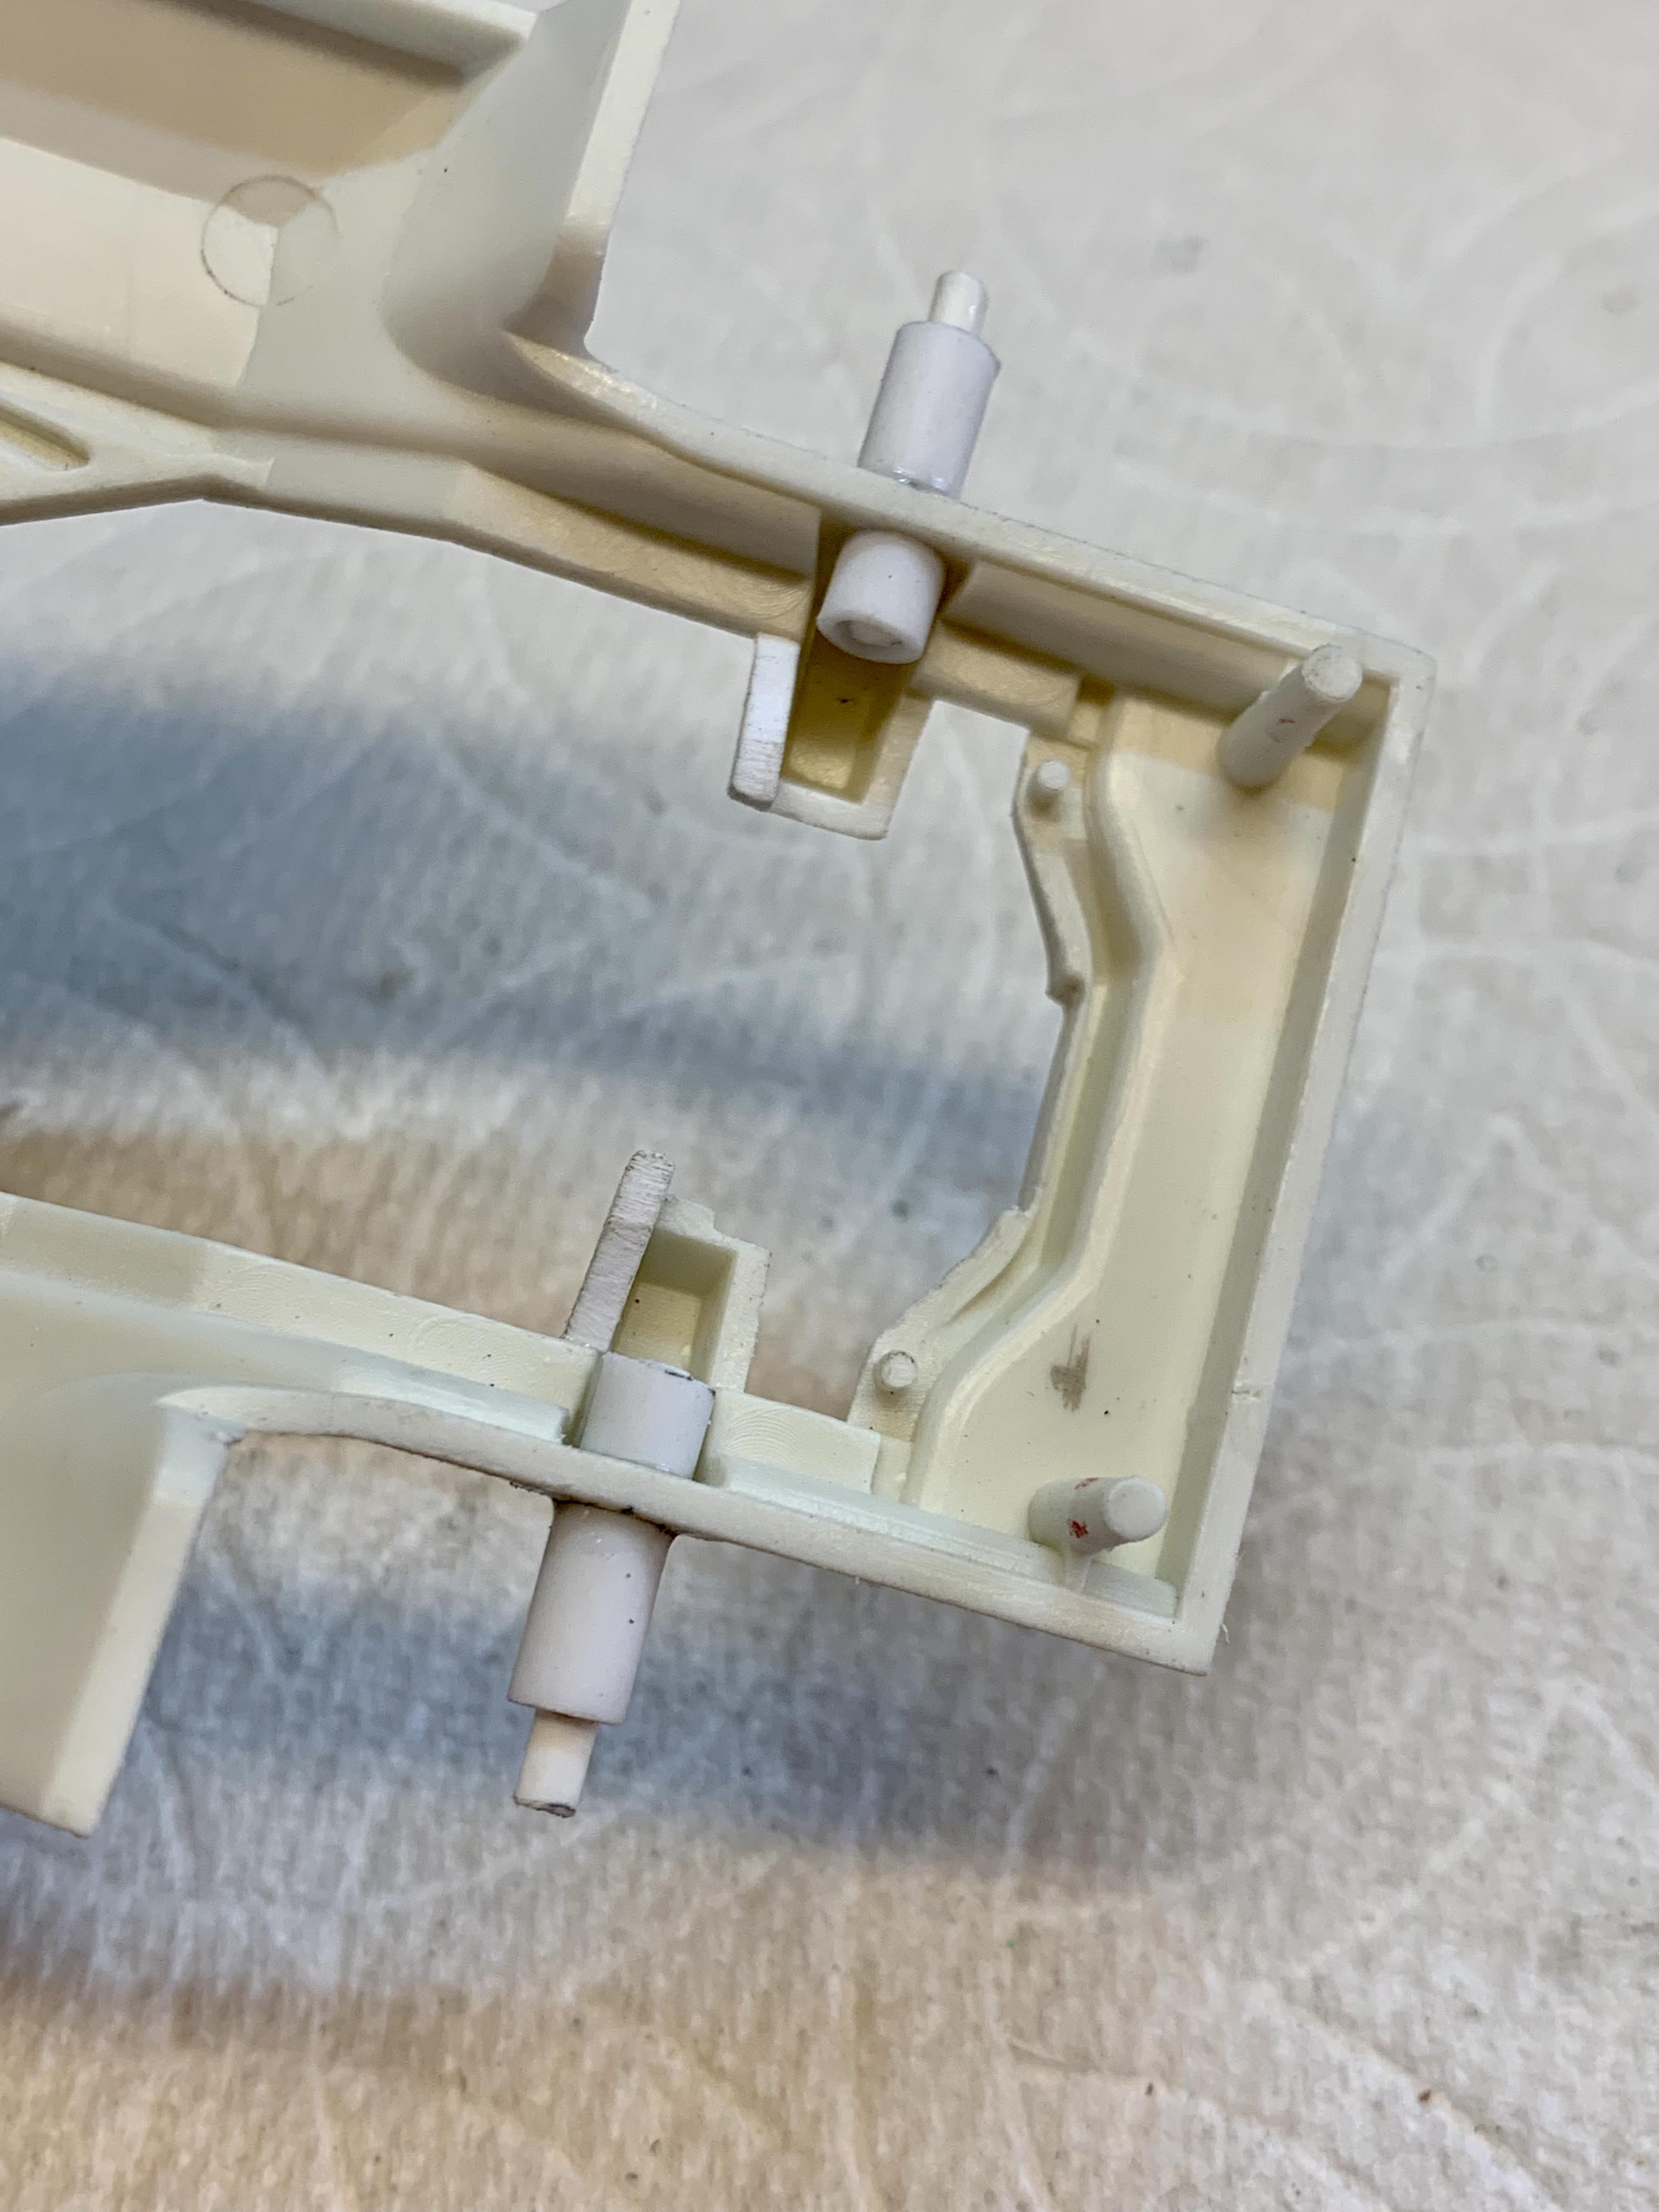
UPDATE! I had fully intended to do all of the following work last Sunday until I got distracted by my shiny new Moebius ‘64 and ‘65 Nova kits and started the ‘65! ? The last bit of fabrication left to do on this project (and long overdue) is to finalize the wheel installation so that I could paint the chassis pan. I also wasn’t happy with the stance in the last update. It was higher than what I was wanting using the upper axle position in front and lower position out back. I could have set the rear wheels in the upper position but it would have made the stance too flat. So the issue was that the front needed to be lower than what the kit provides. In the rear I went ahead with the upper position. I added a thru-axle made from .080” Evergreen rod and fit a support sleeve made from 5/32” Evergreen tube sunk down between the frame rails and two outer support sleeves which also space the wheels out properly. In the front I filled the upper axle holes and then drilled new holes 1/16” up higher on center. I installed two .080” rod stub axles then installed inner and outer support sleeves made from 5/32” tube with the outer sleeves also acting as wheel spacers. With the wheel mounting finally finished it was time to install the wheels and chassis pan into the body to check the new stance. (The front is as low as it can practically be while keeping the oil pan off the ground.) Now I’m happy! Next it was time to finish some exterior details. Out back I installed the taillights and New Mexico license plate which comes in the kit. Up front I painted the headlight reflector areas bright silver and after drying installed the lenses with white glue. I also added the Heartbeat of America decorative plate which comes in both of Moebius’ new Nova kits and the single biggest reason I was looking forward to getting them because I have decal sheets with white Heartbeat of America plates but I really, really wanted the black one! Lastly I put the finishing touches on the interior and it is now totally finished. I added the photo etched speaker grills to the dash, front doors and front of the sub box. So the red and tan wouldn’t show through I glued the grills to black scrap booking paper swiped from my wife’s craft supplies. I also added power cables to the amps which run off out of sight into a hole in the base of the sub box hidden by the left rear seat. With those details done the seats were glued down. I’m very pleased with the custom interior I created. I really pushed myself on it. At this point all that’s left is to spray the chassis pan flat black and to paint and detail a battery which I pulled out of the full detail customizing version of this kit today. I looked in my battery department but everything was either too big or too small. If all goes right look for this model Under Glass next Sunday night! ?
-
1963 Chevy Nova Wagon Street Rod FINISHED 3/20/22
Dennis Lacy replied to Dennis Lacy's topic in WIP: Model Cars
Wes and Jon hold you in high regard (and from what I’ve seen rightly so) so your comment means a lot! -
Simple and effective solutions for dropping the ride height. The stance looks perfect!
-
Well, Tom’s a pretty chill guy and I’m a familiar face as I’ve been going there on the regular for 15 years. I mentioned the extra parts in the ‘64 and that’s when he freely said there will be a street machine version and a factory stock ‘65. I think we all figured as much. I also commended him on fixing the proportions of the top (which he said wasn’t cheap considering the tool was basically production ready) and he told me he was grateful for the feedback in the other thread of yours. I told him it’s unfortunate that the conversation devolved like it did and he said it didn’t bother him at all. He wanted brutal honesty.
-
Last weekend I walked into Pegasus Hobbies and bought my pair of new Nova kits. I got to talking with the owner (who also owns Moebius) and he confirmed there is a Street Machine version of the ‘64 (that the additional parts apply to + more on separate trees not seen yet) and a Stock version of the ‘65 coming later. He also said these two kits have been selling like crazy in just the few weeks they’ve been out.
-
And then there were two! Nice to see another one of these pop up. I’ll be following along. Filling the front frame rails is definitely on the agenda for my own project. Looks so much better.
-
Much, MUCH better stance for the channeled version than how it builds box-stock. I like the tunnel ram intake, too. They don’t get enough love these days.
-
1990 Mustang LX - SVT Cobra DOHC Powered! UPDATE! 1/22/23
Dennis Lacy replied to Dennis Lacy's topic in WIP: Model Cars
UPDATE! This project is going to have to get put on hold for a bit. I’m to the point where all that’s left is to paint the body and chassis/floor pan. With all of the work I’ve put into this model, and the fact that one of these LX Coupes was my daily driver/weekend warrior for 14 years (making me intimately familiar with them) I just can’t bring myself to use the highly inaccurate body. I’m on the hunt for one of the excellent Greg Wann corrected bodies and as soon as I get ahold of one then this project will resume. My latest attempts to contact Greg have gone without response so if any of you have one of his corrected bodies that you’d be willing to part with please send me a message. -
I think going forward with the cleaned up resin block is the right move. Neat work fitting a belt drive between the front mount plate and the blower. I’ll let someone else guess where the trans adapter came from because I already know the answer!
-
Exhaust cut-outs have been on my mind since doing the initial work Sunday. ?
-
The trans is definitely starting to look like a ‘37 La Salle. I love all the plastic shrapnel in the background. ?
-
If the u-joints actually articulated I do believe you are right. But the long-time solution on a back yard build has always been to take a ball peen to it! ?