Dennis Lacy
-
Posts
2,487 -
Joined
-
Last visited
Content Type
Profiles
Forums
Events
Gallery
Everything posted by Dennis Lacy
-
In all my experience those Extreme Lacquers cover fully on the first coat but I’ve never used the turquoise. In fact, I didn’t realize they had this color in the line up. Must be a newer addition? Anyways, it’s gonna be perfect for a 50’s style A Coupe. Also, very cool of Hobby Lobby to replace the kit for you.
-
My dilemma with mixing in machined aluminum parts on a mostly otherwise plastic model is that’s exactly what it looks like. Especially larger pieces. Thing is every glass packed muffler I’ve ever seen comes painted. Look at “Smithy” mufflers. They come in a light metallic blue and Tamiya TS58 is a really good match. Paint them and they’ll blend in nicely. ?
-
One of the nicest builds of the MPC ‘32 Chevy I’ve seen. Good color choice, too!
-
Dude, this turned out freaking kick ass! I love every bit of it. What really stands out to me is how well-planned out the whole car looks. Nothing looks like an afterthought.
-
 This is off to a good start. Just goes to show there are many ways to approach traditionally backdating the chassis. The chopped 3W is a great choice!
 -
Ha, I told him the same thing when he showed me that picture a couple of weeks ago! ?
-
The Thunderbird right away brings back memories of one very similar looking that used to be seen in the later 90’s Ford Motorsport SVO catalogs and advertisements.
-
Man, the ‘65 Impala Custom is AWESOME!
-
I really like the AMT ‘32 “Snakeyes” box art model. You got the look just right! The Lindberg “Devil Drag” is really neat, too. I didn’t know of its existence before now.
-
Dang Phil, you had one helluva good year! They’re all awesome but I really love the Ed Roth decals applied to the Foose FD100. That’s so bitchin!
-
Some killer looking finished models and a great looking group of projects. I love the Model A Coupe, in particular the panel paint scheme. The ‘37 Sedan is also awesome. Perfect stance, beautiful paint, and I like the sunken taillights.
-
Great to hear from you, Glenn, and thank you so much! I’ve always appreciated your support. Happy New Year to you, too!
-
Wow, thank you so much! Very generous of you to say.
-
I made it from the stock grill bar. I cut away the big center crest area then added material to the ends and shaped them to make it the full width of the opening. The “chrome” is Molotow pen.
-
Thanks, Claude! You are correct, the door panels and front seats were used from the ‘26 T Sedan. If you go to the link below there is extensive build coverage of this model and several others that joined in with their own versions.
-
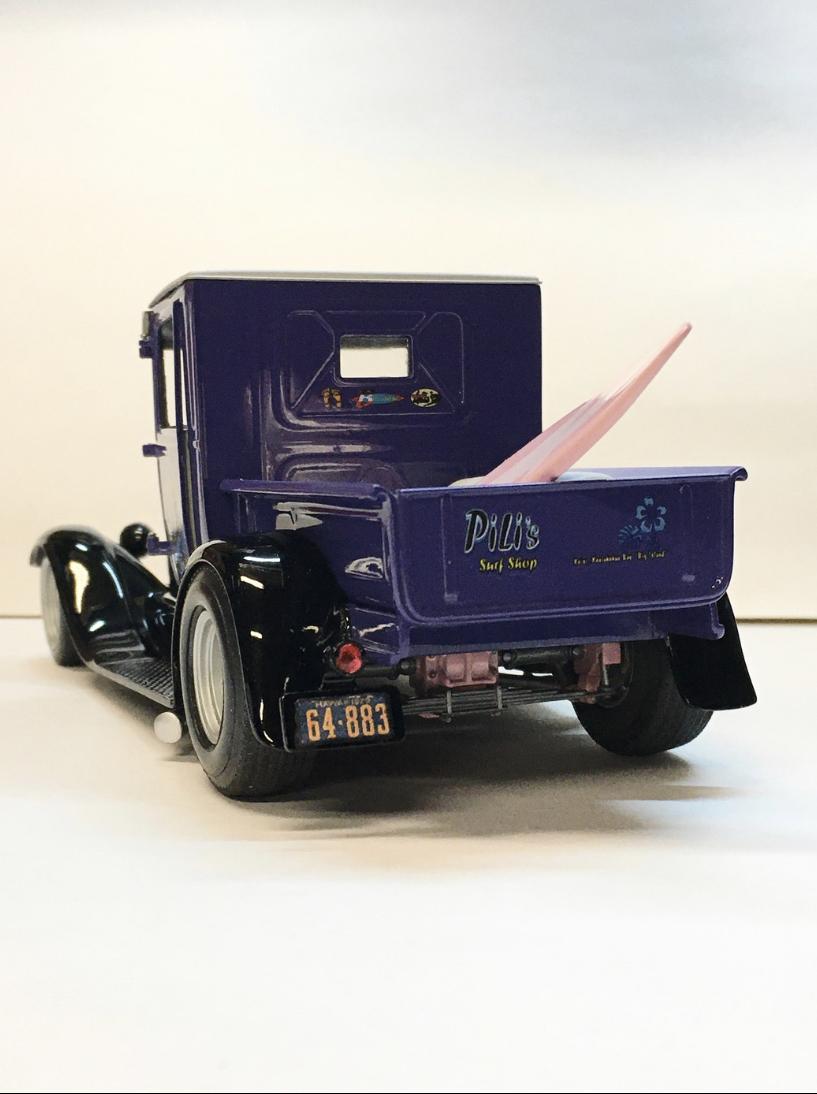
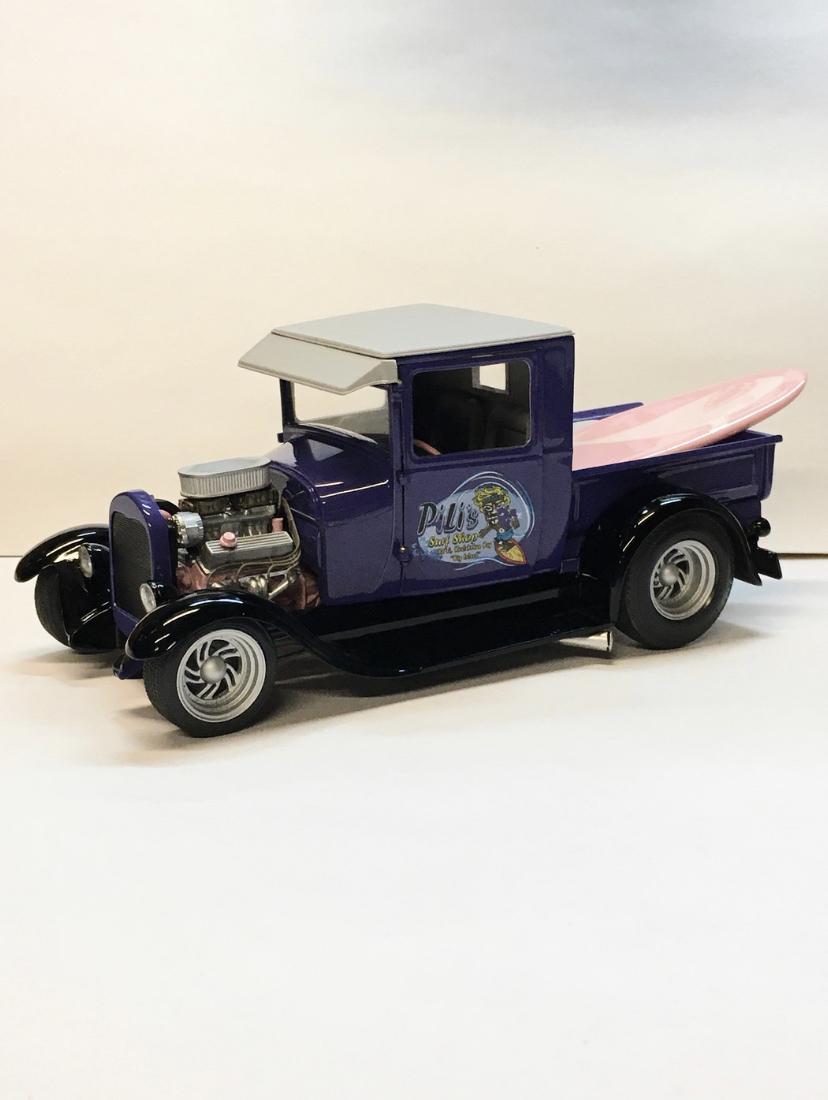
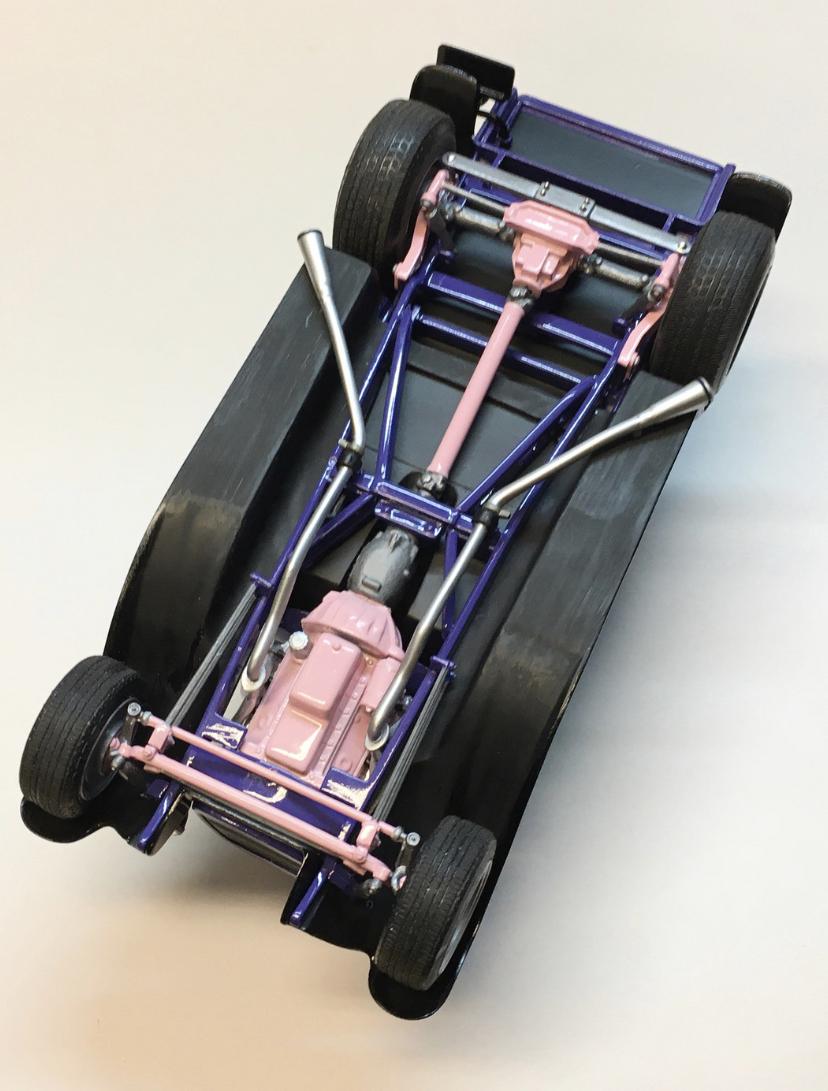
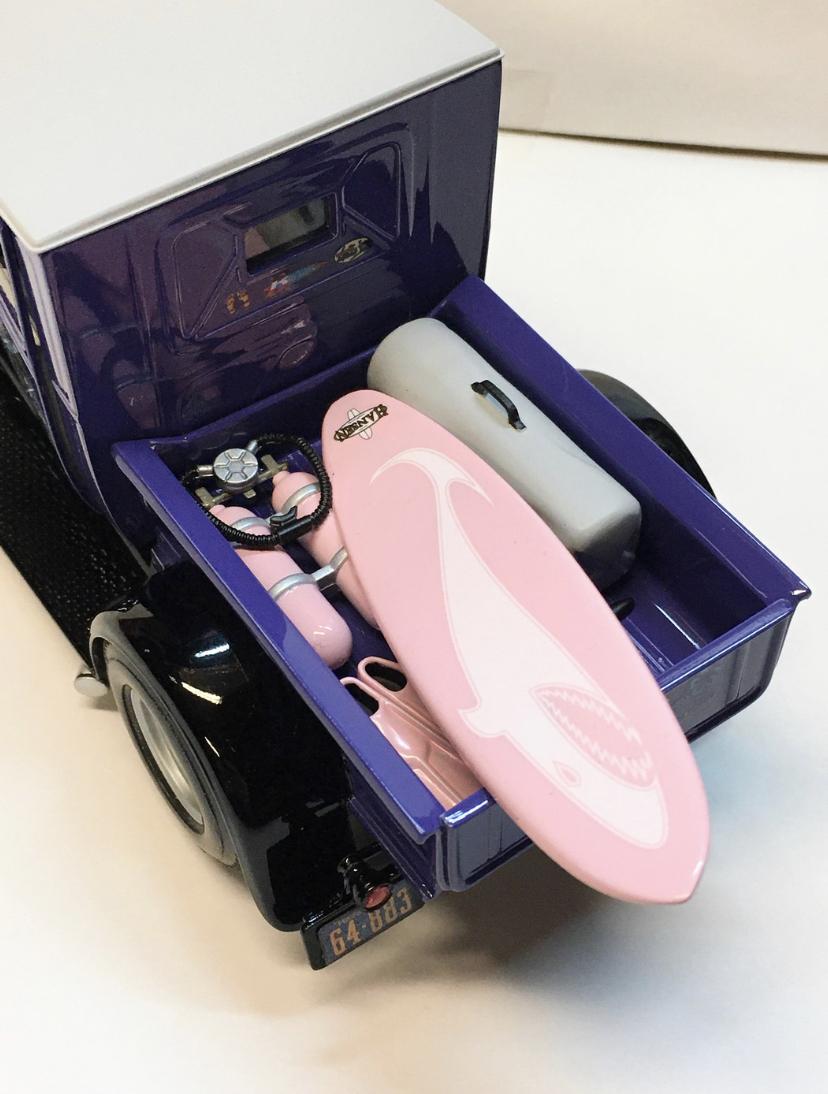
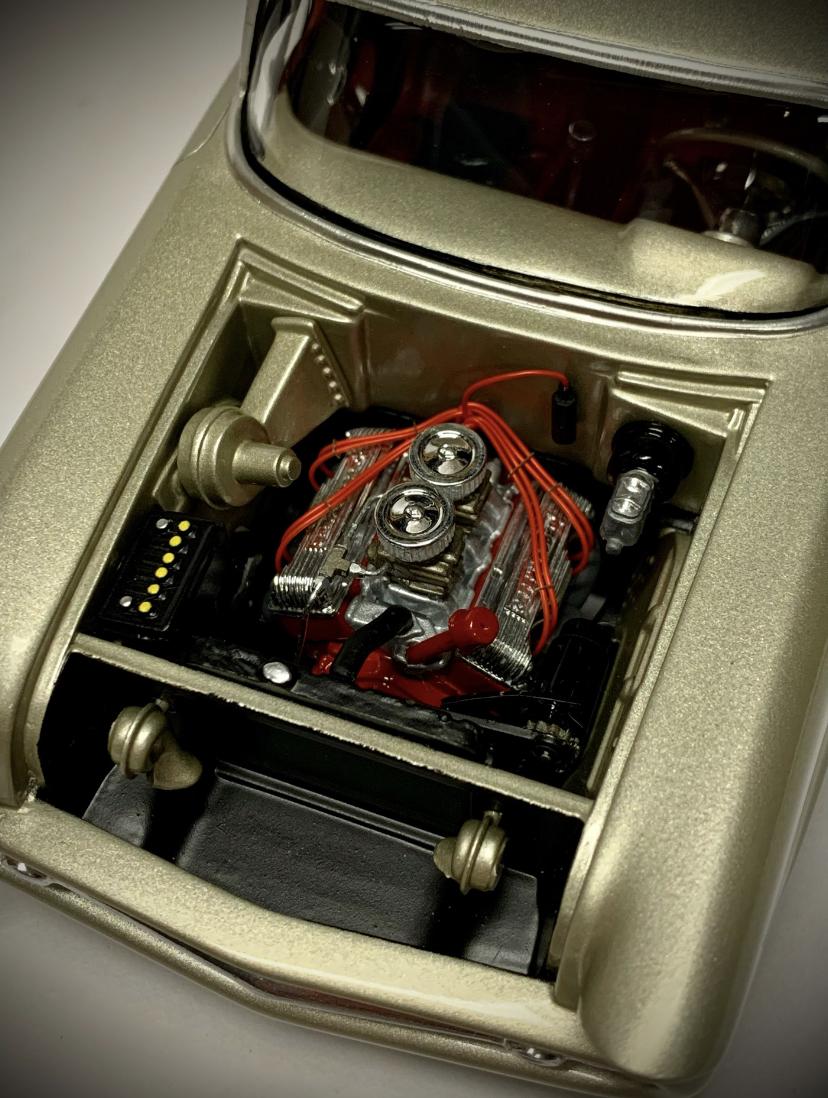
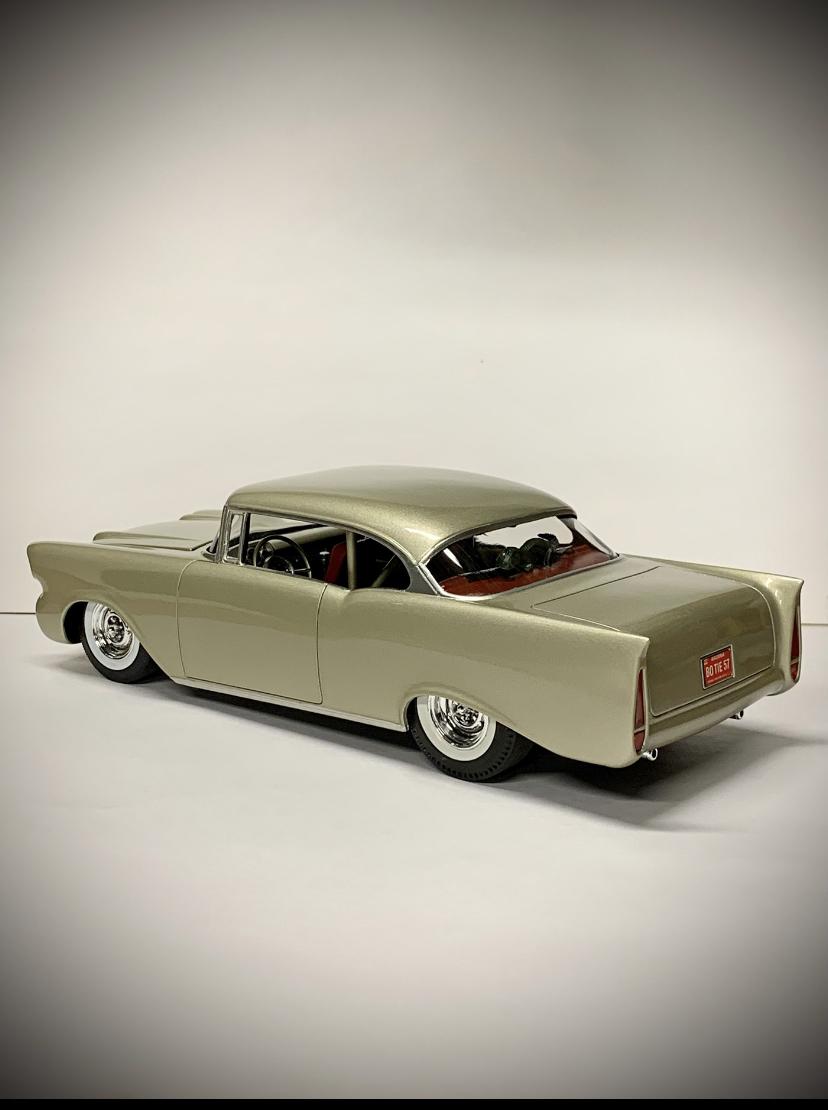
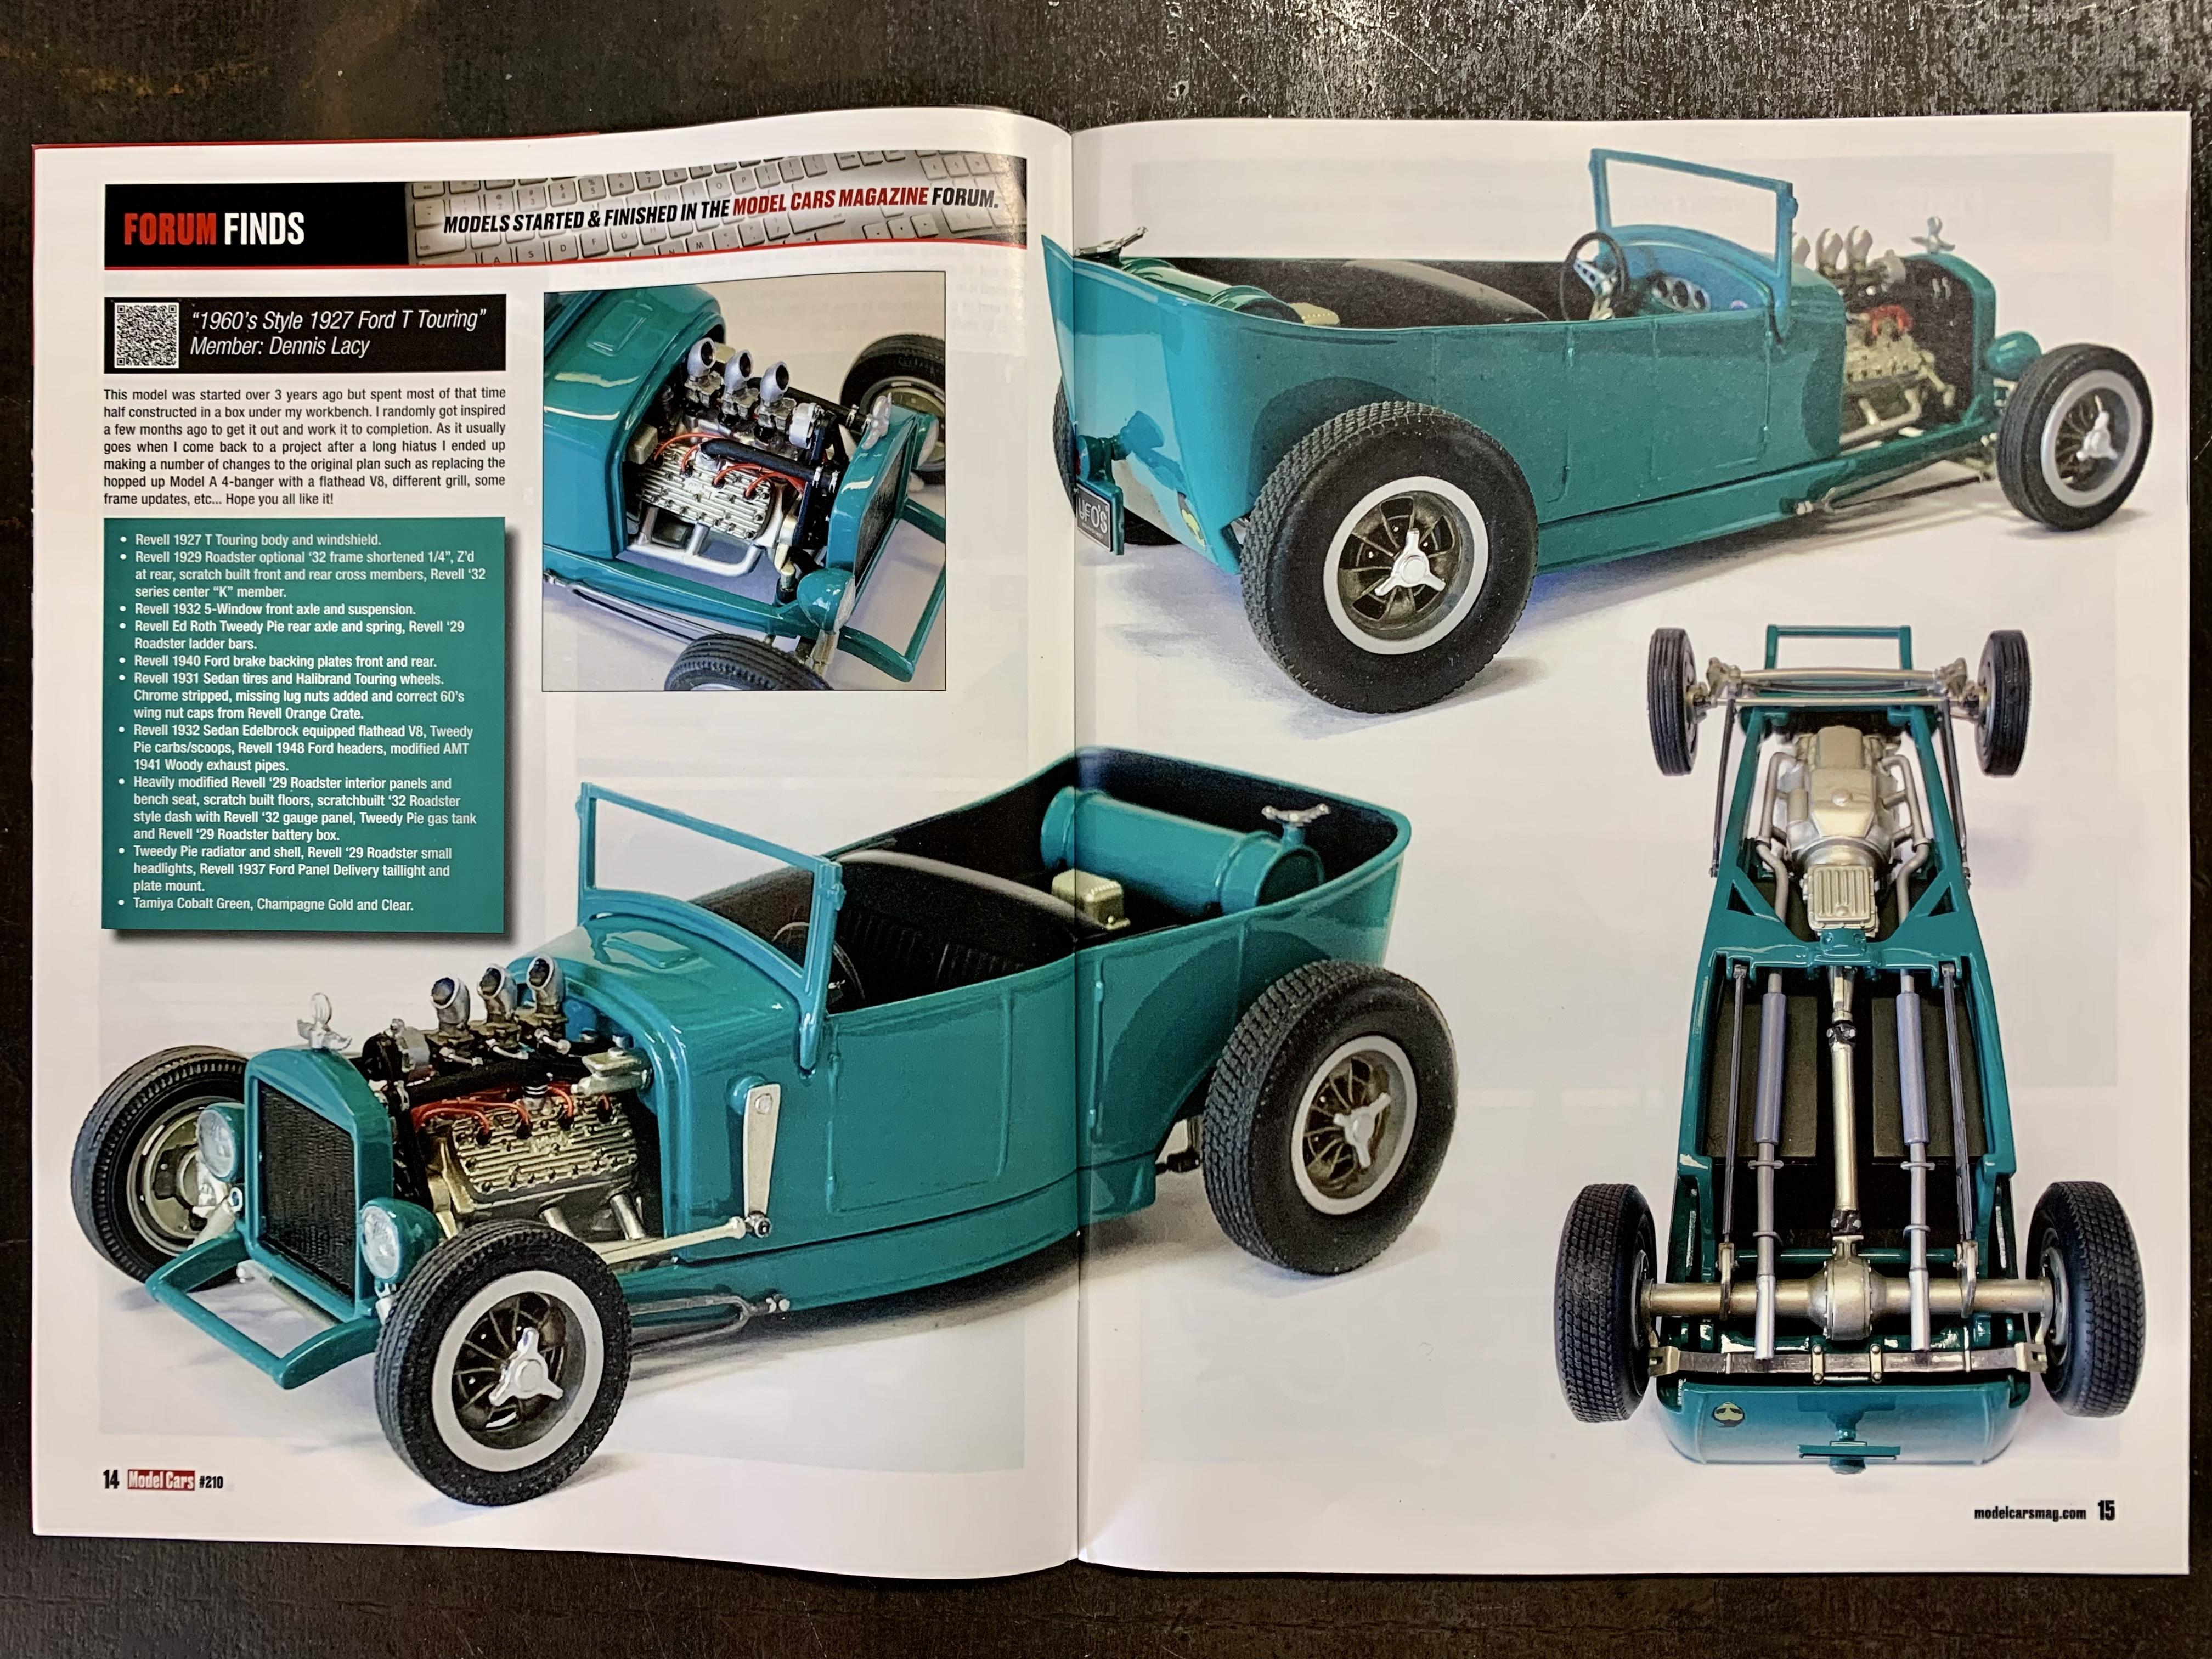
I only finished 3 models this year but I’m very happy with them. I was also beyond surprised to see a prominent feature on my ‘27 T Touring in the last issue of MCM. The ‘29 Surf Shop truck was done as a tribute to Tim Boyd and a how-to article that he did in Street Rodder Magazine’s Modelers Corner column back in 1990 which showed from start to finish how to kit-bash Revell’s 29 Pickup into a modern street rod. The ‘57 Chevy was built from the old tool AMT kit and is my first attempt at a full custom with grill, rear fin and taillight treatment of my own design. See you in 2022!

-
Nice to see an update. The in/out box is bitchin!
-
'36 Ford 5ive window coupe, old build being resurrected.
Dennis Lacy replied to Rocking Rodney Rat's topic in WIP: Model Cars
Chassis is looking awesome! Love all the bolt head detail, rear spring shackles and a nicely fab’d exhaust as usual. -
*1956 Ford Truck Pro Street*
Dennis Lacy replied to Zippi's topic in Model Trucks: Pickups, Vans, SUVs, Light Commercial
This is my favorite take on the Foose FD100 that I’ve seen yet! I grew up in the 80’s and 90’s so I have a fondness for Pro Street. ? I love the white with black trim, the use of the 80’s billet wheels from the AMT ‘67 Chevelle Pro Street and the stance is WICKED. The truck as a whole just looks bad ass! -
Thank you once again, @tim boyd for another stellar kit review. Everything in the final version somehow looks “crisper” compared to the test shot you built not too long back. The revised body looks terrific and I love the inclusion of that blower belt tensioner bracket. I can’t wait to get a few of these and build one with my touches. Dang, Between AMT’s recent efforts with their ‘63 Wagon kits (just got the follow up Customizing kit for Christmas yesterday!) and now these Moebius efforts on the horizon I can’t believe how excited I am about Chevy II’s!
-
@Speedpro Nice update! The rear chassis revisions look great, especially the fab work for the panhard. Really looking forward to seeing this back in color. And you’re right, the trailer Kit built really is bitchin.
-
That would be good to check out. Thanks, Tim and same to you!
-
@tim boyd Based on the picture of the gasser version you shared it doesn’t look to me like the custom pipes have enough zig or zag in them to mate up with those headers.
-
The Sandbagger -sand rail
Dennis Lacy replied to Rocking Rodney Rat's topic in WIP: Drag Racing Models
Your drag models always turn out killer so a “sand drag” rail should be no different. -
I went back and took my time studying all of @tim boyd photos closely. It looks like there is a nice amount of optional parts in this kit that are ready to use such as the 2 additional sets of valve covers and single plane intake, Holley carb and chrome triangle air filter. I also see the very nice looking (and noticeably bigger diameter) aftermarket style exhaust system which after looking at it closer compared to the stock pipes it is clearly designed to mate with a pair of long-tube headers which is the one pair of bonus parts that doesn’t seem to be included so in order to use it the builder will have to find a pair of headers in another kit that would fit or extend the pipes up to the stock ram horn manifolds. Not a complaint, just an observation as clearly there is another variation of the kit planned for future issue and we aren’t getting the full scope of the custom parts in what is intended as a factory stock-only kit this go around.