
Scott Colmer
-
Posts
1,665 -
Joined
-
Last visited
Content Type
Profiles
Forums
Events
Gallery
Everything posted by Scott Colmer
-
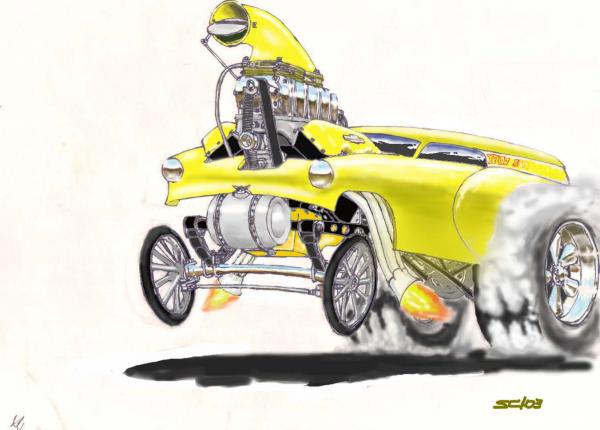
FUN THREAD! My favorite type of racing. I thought I will throw something a little different at y'all. Still on the need to finish list, but you should get the idea. Hosted on Fotki Hosted on Fotki Hosted on Fotki
-
 Thanks Christian. That will work. Good idea Harry. Give me a couple days.
 -
So I whipped up a remote oil filter for the Orange Crate, but I can not figure out where to run the lines. I think the engine is a 50s"olds. It was punched out to 417 ci. I am guessing the lines would go to an adapter located where the oil filter would attach, but I can not even find that point. Any help wold be greatly appreciated. Scott
-
Rommel! What a great idea on the coil overs. They look fantastic! What did you use for the adjusting nut? Scott
-
Aluminum Beehive Oil filter - no lathe
Scott Colmer replied to Scott Colmer's topic in Tips, Tricks, and Tutorials
"I dare say your finished part is as good if not better than a machined version. Personally I like the delicateness of yours. While machining would be an option, your parts breakdown is how I would go at it now... " Thanks Mark! Coming from a skilled machinist such as yourself, that says a lot. The funny thing was when I reached my frustration level I thought of you easily turning one up our your lathe. True story! Scott -
What Type of Modeler are you??
Scott Colmer replied to Romell R's topic in General Automotive Talk (Trucks and Cars)
Seems like a lot of my builds start as # 1(ish) then end up as #3 with some #2 and #4 mixed in. I really like making stuff. Scott -
Aluminum Beehive Oil filter - no lathe
Scott Colmer replied to Scott Colmer's topic in Tips, Tricks, and Tutorials
Right-O Phil - Micro Mark. - It's identified in the fine print at the beginning of the how to. Once you get one of those punches, you will find a million uses for it. Don't skimp and get a hand one. Get a punch set and the plastic head hammer. (Thanks for the good advice Mr. Keck.) In fact MicroMarks is like the Sears Christmas catalogue for modelers. Scott -
OK, I am detailing an Orange Crate engine. It has a remote oil filter. Where is the outlet on the block? So far the internet is not helping. Muchos thanks for whoever can show me a picture. Scott
-
Aluminum Beehive Oil filter - no lathe
Scott Colmer replied to Scott Colmer's topic in Tips, Tricks, and Tutorials
Part two. I used the number 11 blade to open up a tiny hole in each disk. Using the blade allowed me to keep the best visual center I could. After the pilot hole was made, I used a drill bit to create a round hole. The hole is still pretty small, but large enough to let me use the tip of the rat tail file to open it up. At this point I was using a piece of styrene rod to stack the disks on. I had to work each one, one - at - a - time. 22 times. The caps were made from even thicker aluminum sheet. This time the hole was drilled first. One of the punched disks that was already drilled was used to as a guide to file the thicker disk to round. Then the top was shaped with files and sanding sticks.The bottom was made in the same manner. Hosted on Fotki After the disks and ends were finished, I decided that aluminum rod was the best option for a guide tube. So I had to go back through the process of opening up all the center holes. This time I added tape to the rat tail file to tell me how deep i needed to go. That worked very well. All the disks were very snug on the aluminum rod. I also used this time to round the edges of the thicker disks on a sanding stick. I tried to be as consistent as possible on angle and number of rotations. Hosted on Fotki For final assembly I scuffed the center of the thicker disks and all of the thinner disks. I stacked them bottom, thin, thick, thin, thick thin until I got to the top. A tiny bit of 5 minute epoxy was applied to the center of each layer. Once the sandwich was complete I lined it up in a mini vice making sure it was square, put a little pressure on and let it sit overnight. I did have to do some additional truing by chucking up up the tail in a pin vice and carefully stroking it with a flat jeweler's file. The depth of the ridges was trued by turning it against 800 sand paper draped over the beveled end of a safety blade. The whole piece was spun against polishing sanding cloth until I reached a finish I liked. The bung is just more tube the I epoxied into a hole drilled to the right size. The bracket is some of the thin sheet bent to shape and epoxied in the between some of the ribs. Sorry I didn't take more pics. I almost gave up on this one. It took at least 6 hours. over three nights. Hosted on Fotki -
I wanted to see if this could be done. It can, but it is not easy. This was the first attempt. I figured a tutorial could be a launching point for someone else. I may not try this again. You need: A Mico Mark punch, small drill, two thicknesses of aluminum sheet, some K&S aluminum tube and a rat tail file jeweler's file and a flat jeweler's file. Start by finding the type of filter you want to replicate. There are a few different styles on the internet. I wanted to replicate the filter in the Orange Crate. I found some that were a little close. Mine is going to be a cross between these two. Hosted on Fotki Hosted on Fotki Count the number of ribs in the filter and then get out the punch. I had to punch out 11 larger disks of the thicker sheet and 12 smaller disks of thinner sheet. You can see the Orange Crate item sitting on the punch. Hosted on Fotki. That's all for now. More TK tomorrow. Scott
-
After I made a ginormous pile of tree cuttings, sat down and finished the Beehive oil filter. I'll do be doing this again. Way too much work. Next is to finalize the hatch hinges and latch. Hosted on Fotki Here you can see the hinge supports and the oil filter before the disks were epoxied together. Hosted on Fotki Scott
-
anyone seen this ? WOW !!!!!!!!!!!
Scott Colmer replied to ANDY'S's topic in WIP: Drag Racing Models
They have been getting the same posts over at the showrods site under the name 57 Chevy. -
Great builds DJ. I have always liked that Attempt kit. It good to see one built. The photography is excellent. Great stuff all around. Don't be shy about showing more detail on each of these models. Scott Colmer.
-
Seeing if I can replicate the Orange Crate beehive oil filter using aluminum sheet and a punch. Hosted on Fotki
-
those loving wives.
Scott Colmer replied to DRG's topic in General Automotive Talk (Trucks and Cars)
I got lucky this time around too. Yes, my wife Nani likes to tease me and call me "Model Boy", but she does support my hobby and never complains about the time I spend in the garage. Gifts are usually in the form of micromark or hobby shop gift cards. She has gone to a lot of shows and likes to interact with the same people I do. For my birthday we took a trip to the GSL two years ago. We both had a great time. Nani has even has picked one of my builds that she wanted me to recreate in 1 to 1. Maybe someday. She has started a couple builds, but looses interest. I put them aside in case she ever wants to pick the up again. Here is one of her stalled projects. Hmmm. Here's to the good wives! Scott Hosted on Fotki -
Like all your WIPs John, I followed this one beginning to end. It was a treat to watch it all come together. This is a wonderful model that has entertaining surprises at every turn. The execution is top notch as usual. I think you have reached the point where some of us build vicariously though your efforts. When we see some element that is not just right, we want to point out - not to call you out, but to have at least one of us closer to that perfect build. Just a theory. Can't wait to see what you do next. Always the fan, Scott
-
Two more box stock whatabouts: 1) How about sending parts to be rechromed to make up for poor chrome? 2) How about joining two parts and having them rechromed to eliminate the seam (Blower scoops) or having parts rechromed to correct sprue cut off marks? Scott
-
Looking for input. I've been saving MM gift certificates for almost two years and I now have enough to buy the MicroMark PE kit. But before I put down the cash I was hoping to hear from anyone who bought one. What did you think? Thanks Scott
-
Well, as usual progress is slow. I am going to move the shifter outside the frame. (Thanks for the input on the shifter. Stoneman - WOW! That is a great interior shot! A splined steering shaft. Nuts) The shifter is going on the right because the actuator is on the right. I'll have to put a British flag on it somewhere. I had to start over on the seat because despite lots of reworking it did not fit well and there was no way to reattach the head rest part. New seat-new plan. I have also come to a grim realization. I can get to all of the interior right now because the roof is not attached. Hosted on Fotki However, once the lid is on, things get tricky. I am going to cut open a hatch (gotta show off all that interior work somehow), but the roof will be glued and molded on place before the chassis goes in. Hosted on Fotki I did open up the underneath so the chassis just barely fits by the lip with just a bit of coaxing. But the shifter and friends will have to go on after the chassis goes in. This will require some planning and tweezer work. Hosted on Fotki More TK Scott
-
Hey Steve, I've been watching this one from the start. It's really coming together nicely. The scratchbuilding is top notch! Can't wait to see this one all warped up! Scott
-
'Lil Pearl - '32 Ford Tudor Show Rod - 10-05 Added daylight pics
Scott Colmer replied to Bernard Kron's topic in Model Cars
This looks really good Bernard! The stance is right on to me. Low, and mean, but not over the top. You did a great job with this one. One of my favorites. Scott -
Well, the shifter is built and in place for a mock up. I also got the steering assembly mock up in place too. The trans is a hyrostick so it is a straight up throw. I think the T handle is the reverse. I matched the Orange Crate set up. Here's the question: The shifter looks pretty close in there and a little funny behind the steering wheel. Should I move it to be mounted outside the chassis? Scott Hosted on Fotki Hosted on Fotki
-
Hey Bernard, Sorry, I did not document the bodywork process. It was the first time I tried this approach. Here is what I can tell you. Get some kits that have shapes close to what you want. In my case I used a Hawk Alky Seltzer for the basic front fenders and another T'rantula for other shapes. Also get a couple sheets of styrene, varying thickness. You'll need liquid cement, a medium thickness CA glue and an accelerant. One thing I did was try to form the basic shapes of the both front fenders before I attached them. I used the liquid glue to join the majority of the surfaces and the CA to lock them in place. I always made the shape thicker than I needed, then I cut it back and refined it with a dremmel loaded with a sanding drum or a grinding bit. For straight areas I used a pretty heavy file or sanding stick. It felt like sculpting. Build it up then grind it down. If you grind through, just fill the hole and have at it again. Once I got the shape on one side, I would match it on the other. Have fun. Scott
-
Thanks to everyone for the encouragement!!!!! I am making progress on the shifter. What you see is is based on a thread found on the HAMB board. I learned that most applications were angle pan. The shifter is made from aluminum and stainless. The brackets and rod ends are aluminum. The reverser cables was some wire I pulled from a speaker or something. I modified the rear scatter shield to act as a bracket. Should all be together soon. OH, I also made a quick filler tube. Pretend the dip stick is in the knurled cap. Scott ps. The Vette streamliner is not dead, just in line. It's cool that some of you remember that. Hosted on Fotki
-
Hey Buddy, I really like the original direction of the build. Your design and work are very clean and tight. EXCELLENT concept and execution. Keep going. I'll be watching. Take care my friend. Scott