my66s55
-
Posts
1,395 -
Joined
-
Last visited
Content Type
Profiles
Forums
Events
Gallery
Everything posted by my66s55
-
 So then your rant is mute. By the way, how much an hour are you paid to use that cad software? Is you time worthless? If files are free, find someone who will print them for you. If you created a file you'd have to have someone to print it. The sellers on Shapeways are much like you. They don't want to be involved with the printing aspect either. They offer files of parts that some people desire, so they put them on Shapeways as a means to make them available to the public. You don't want to be involved in the printing process, but others who feel the same should do it because you want to buy cheap parts. That says a lot about you.
 -
Ok. You say the files are free. So I suggest you do what many have done over the past few years. Buy a 3d printer, spend the time and money to learn how to use it. Make your own parts and learn a cad software to create your own files.
-
Thanks for the info, it's greatly appreciated. I passed your info to Dan for his correction.
-
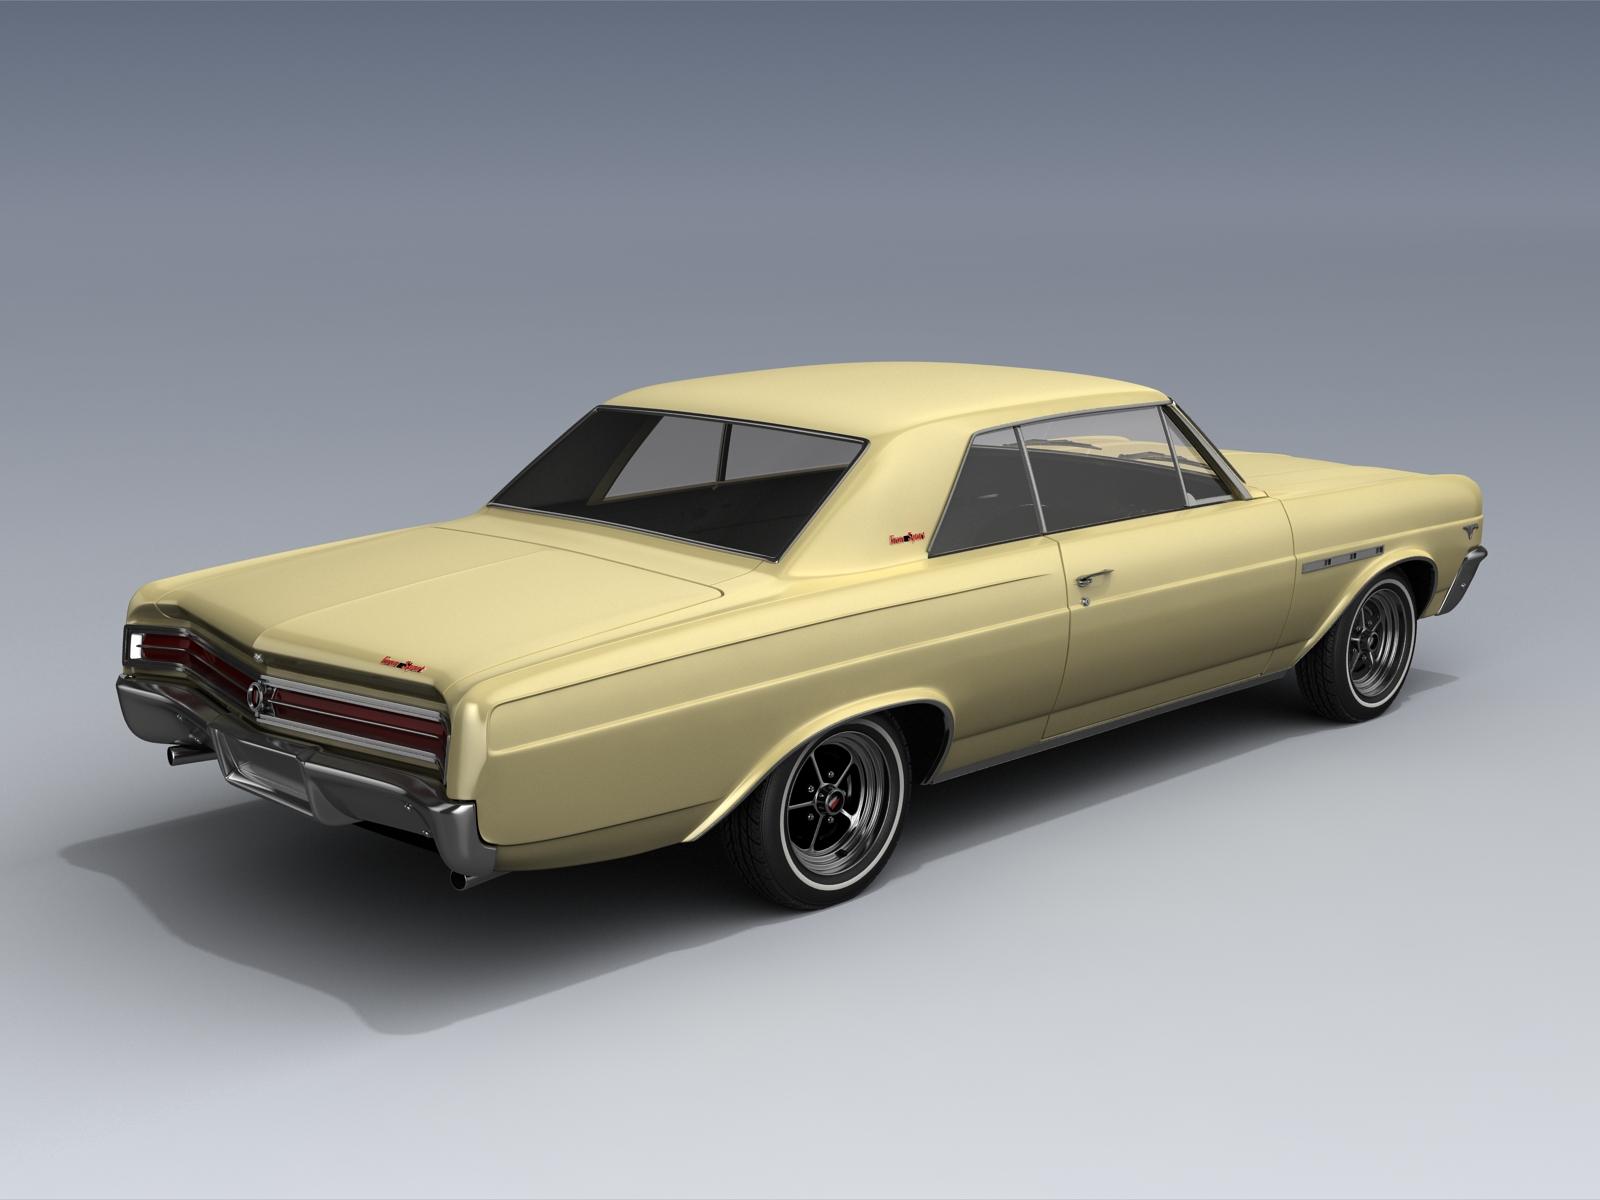
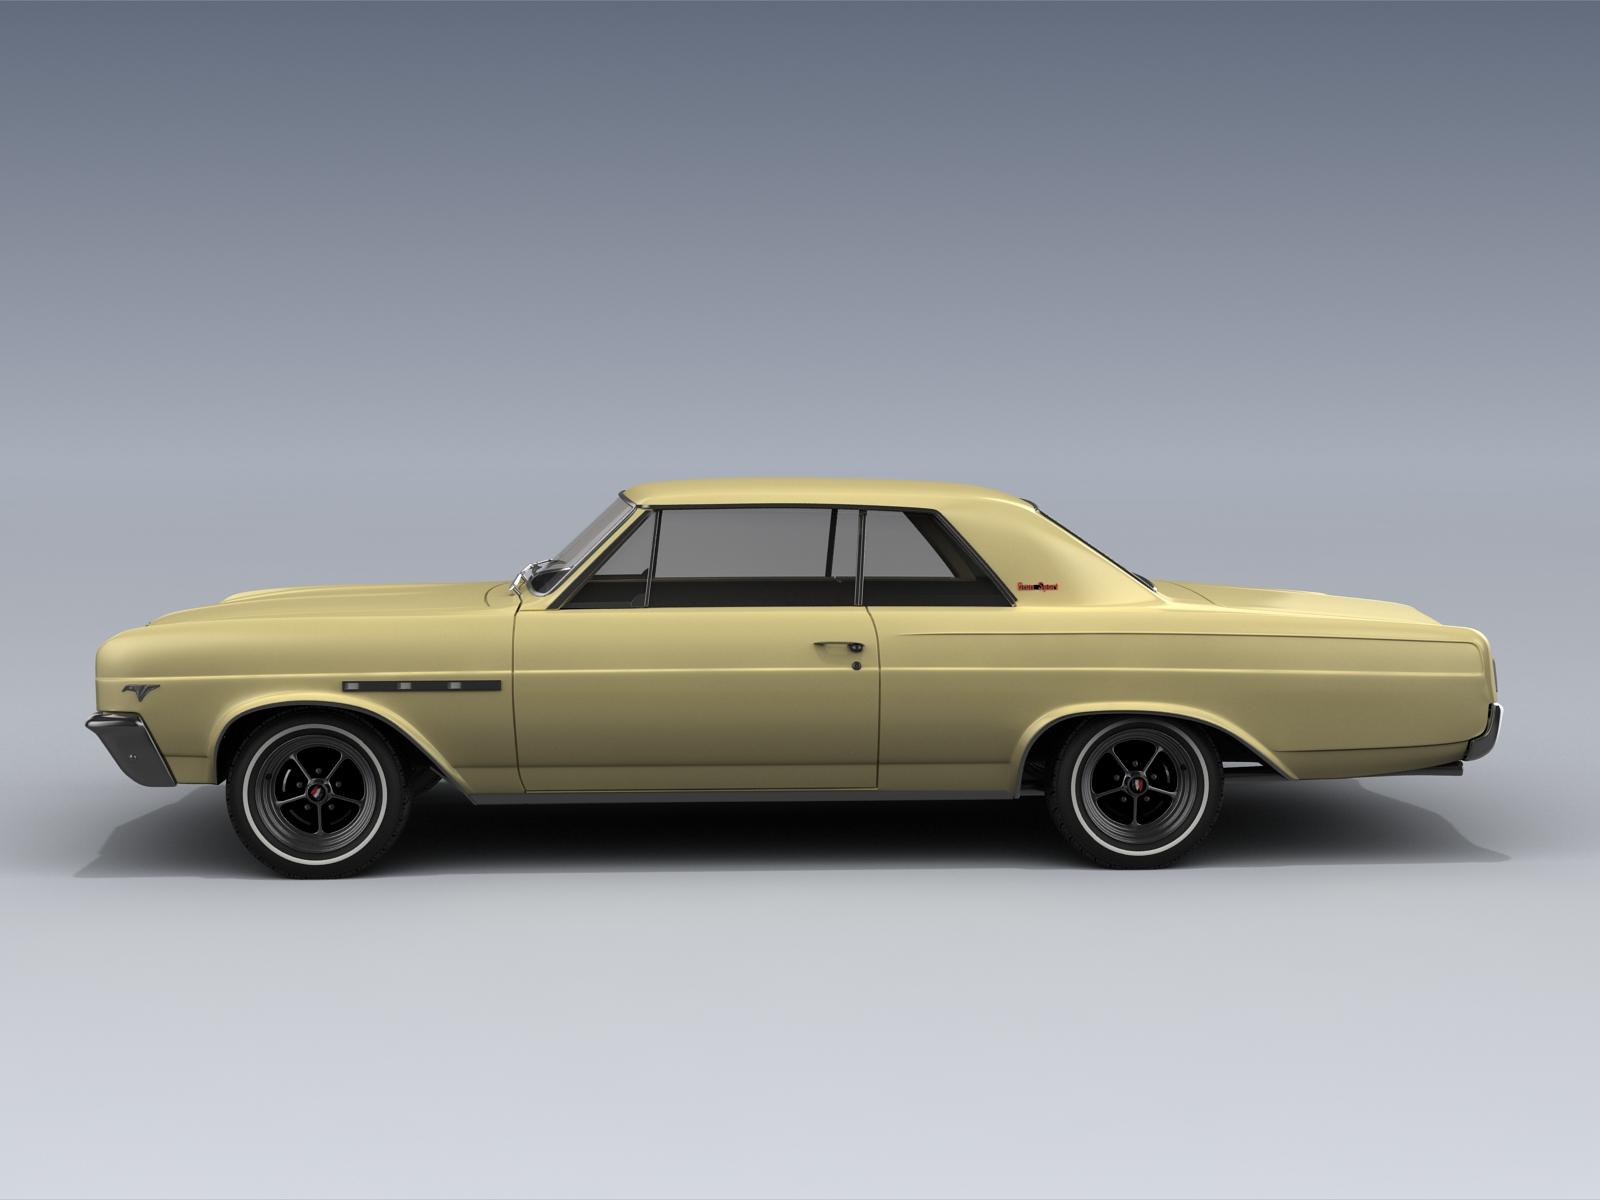
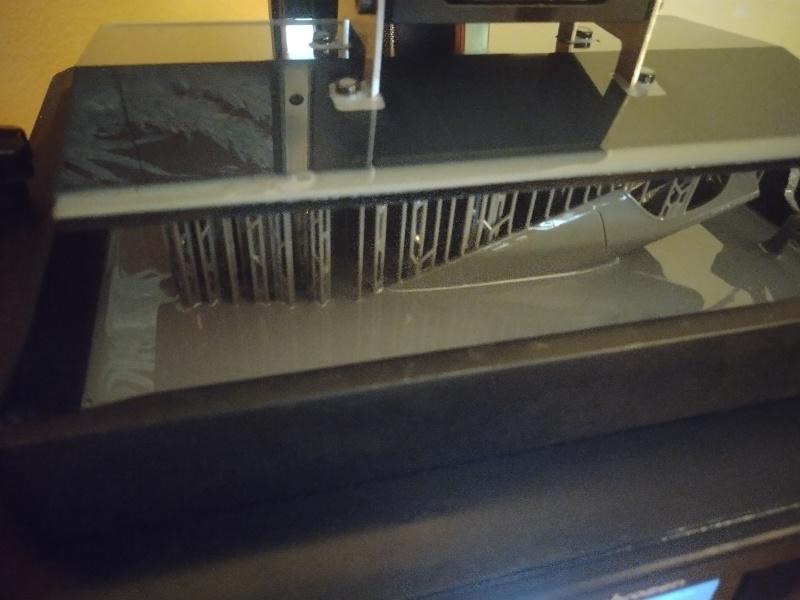
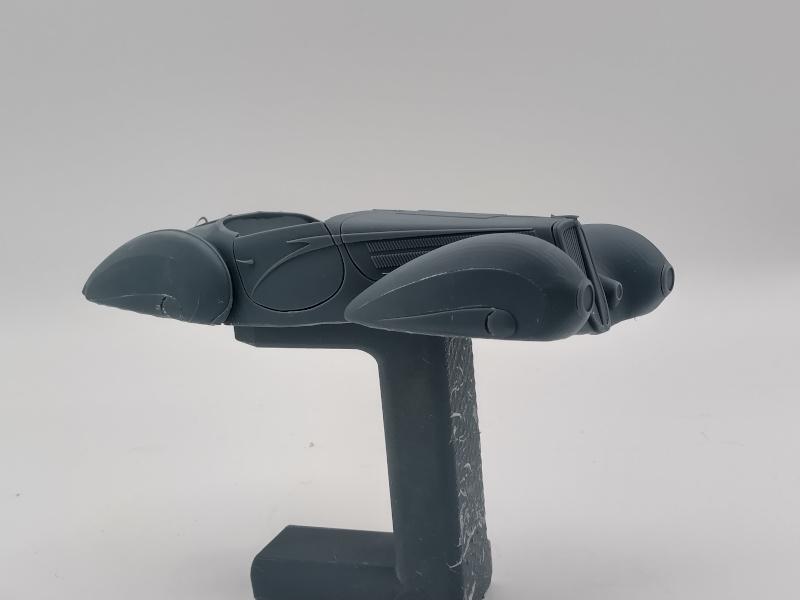
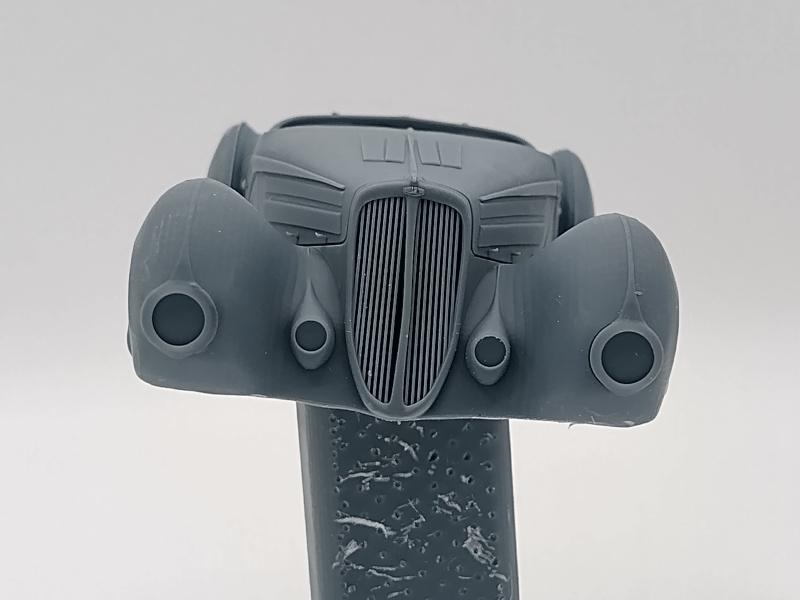
New update of the 65 Grand Sport Dan is doing for me. I have tested the new to 3D printing ACF vat film. The current fastest speed is 300. The standard speed is 60. Because the resin does't stick to the film, I lowered the lift from 6 to 4. The normal speed to 11 plus hours to print. The 300 speed took 3 hours 30 minutes to print. Phrozen is working on the software upgrade to increase the speed to 600. This will put the print time to under 2 hrs. Check the print times on these pics of the print being done. The first of the last two pics is the 57 Dodge I printed last month. The second is the one I printed at 300 speed that's shown in these pics below

-
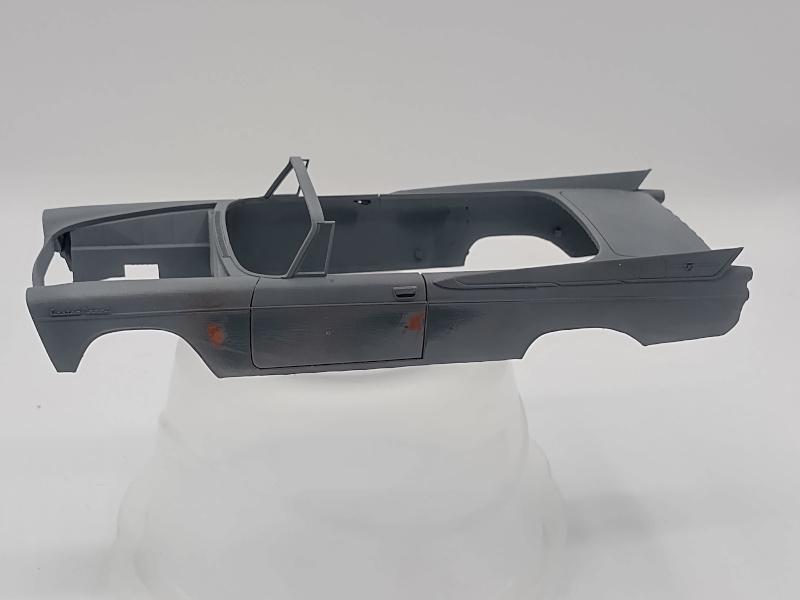
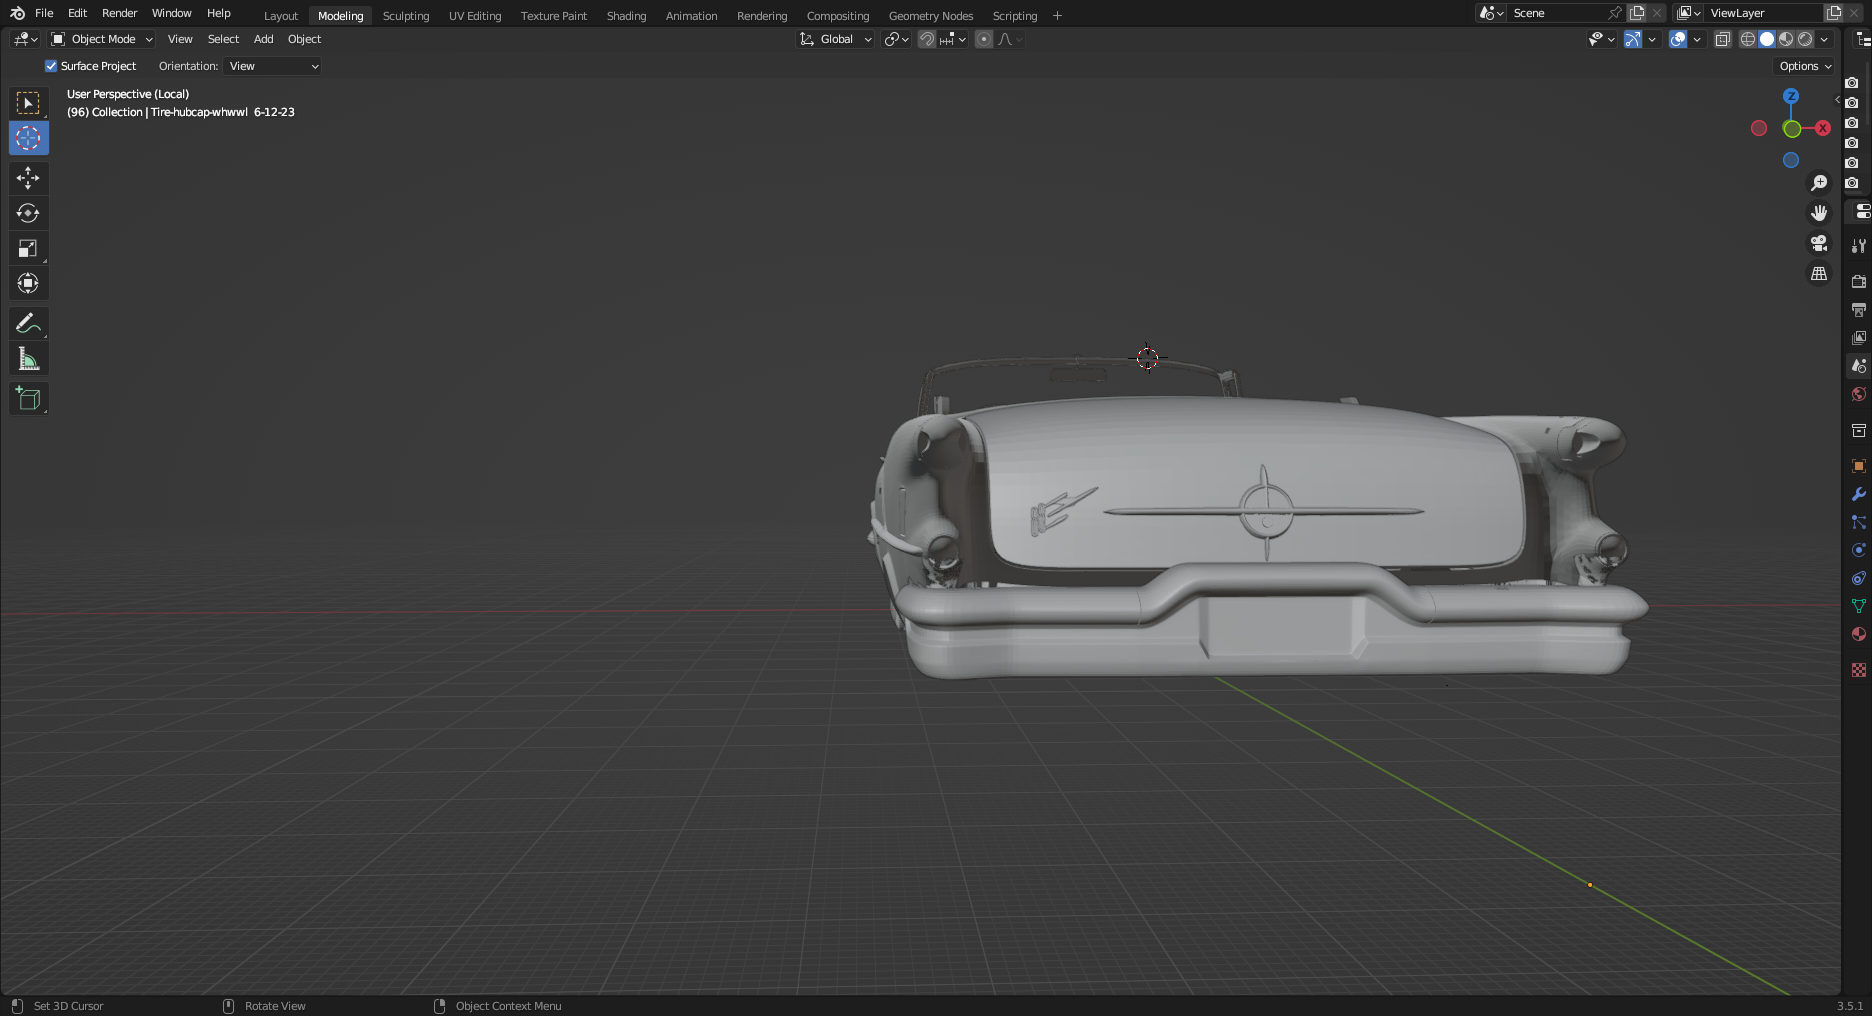
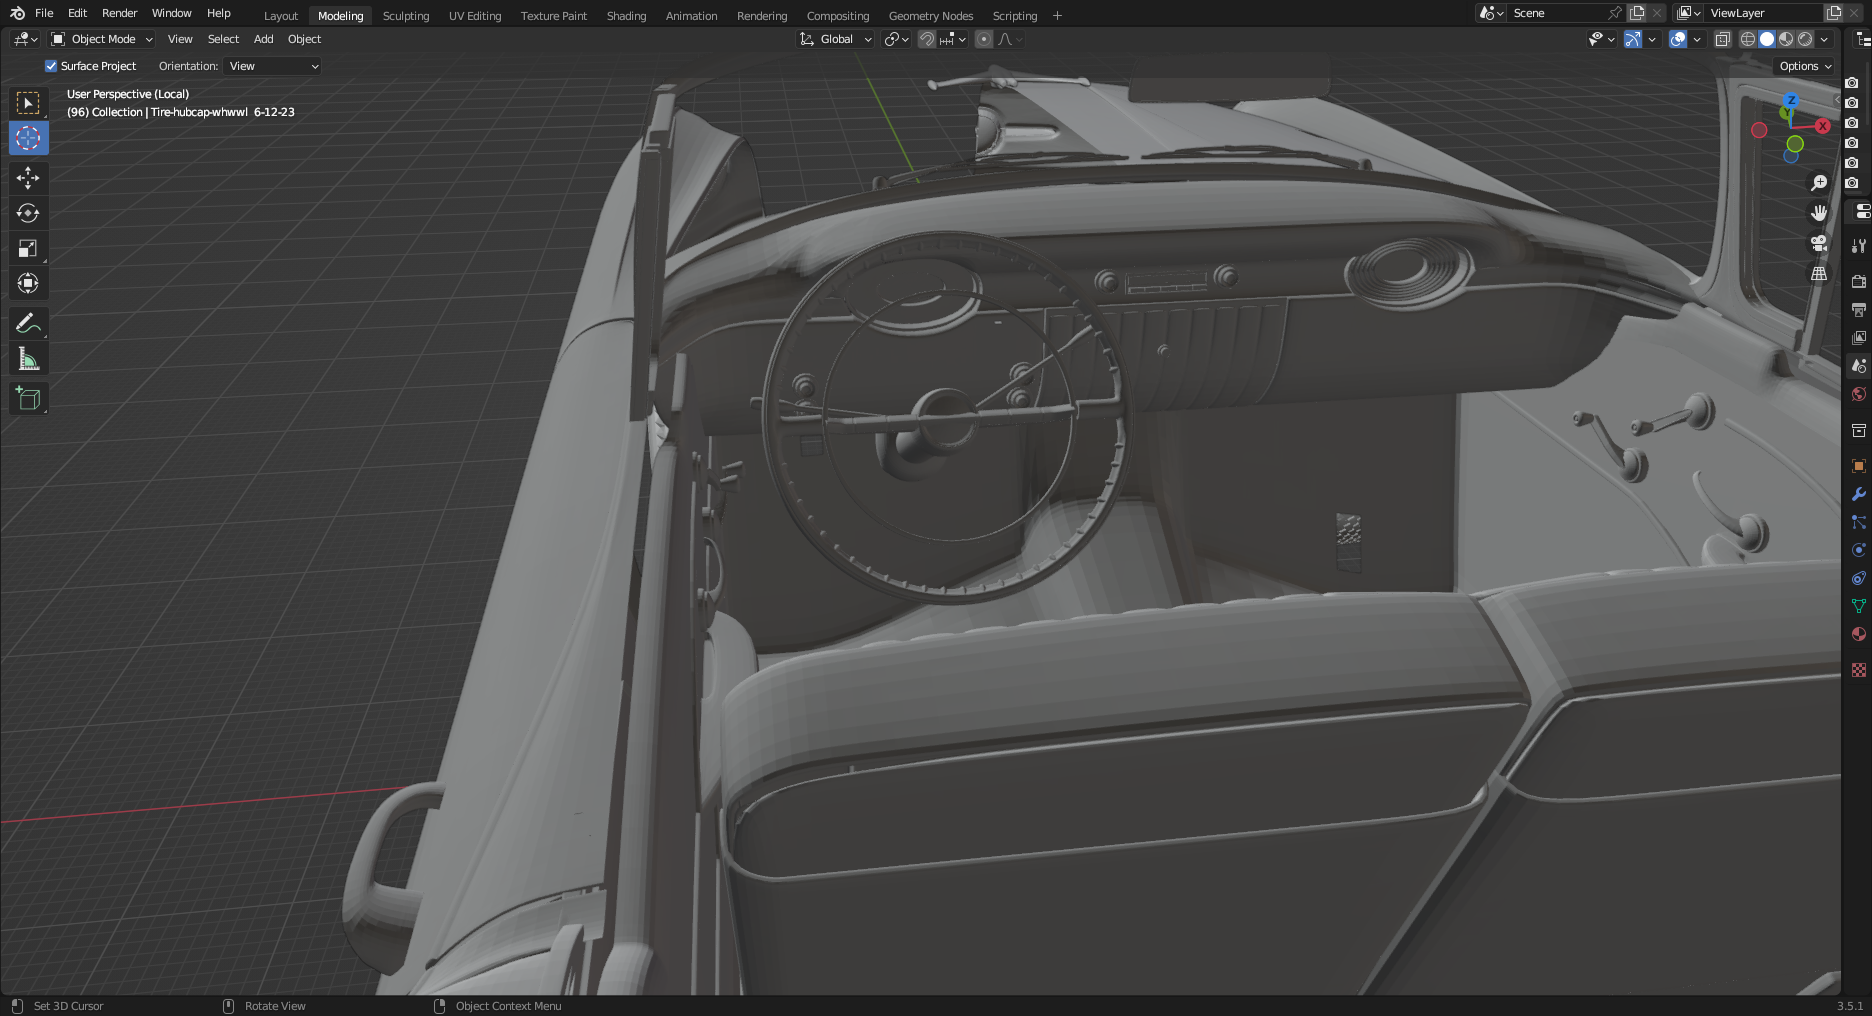
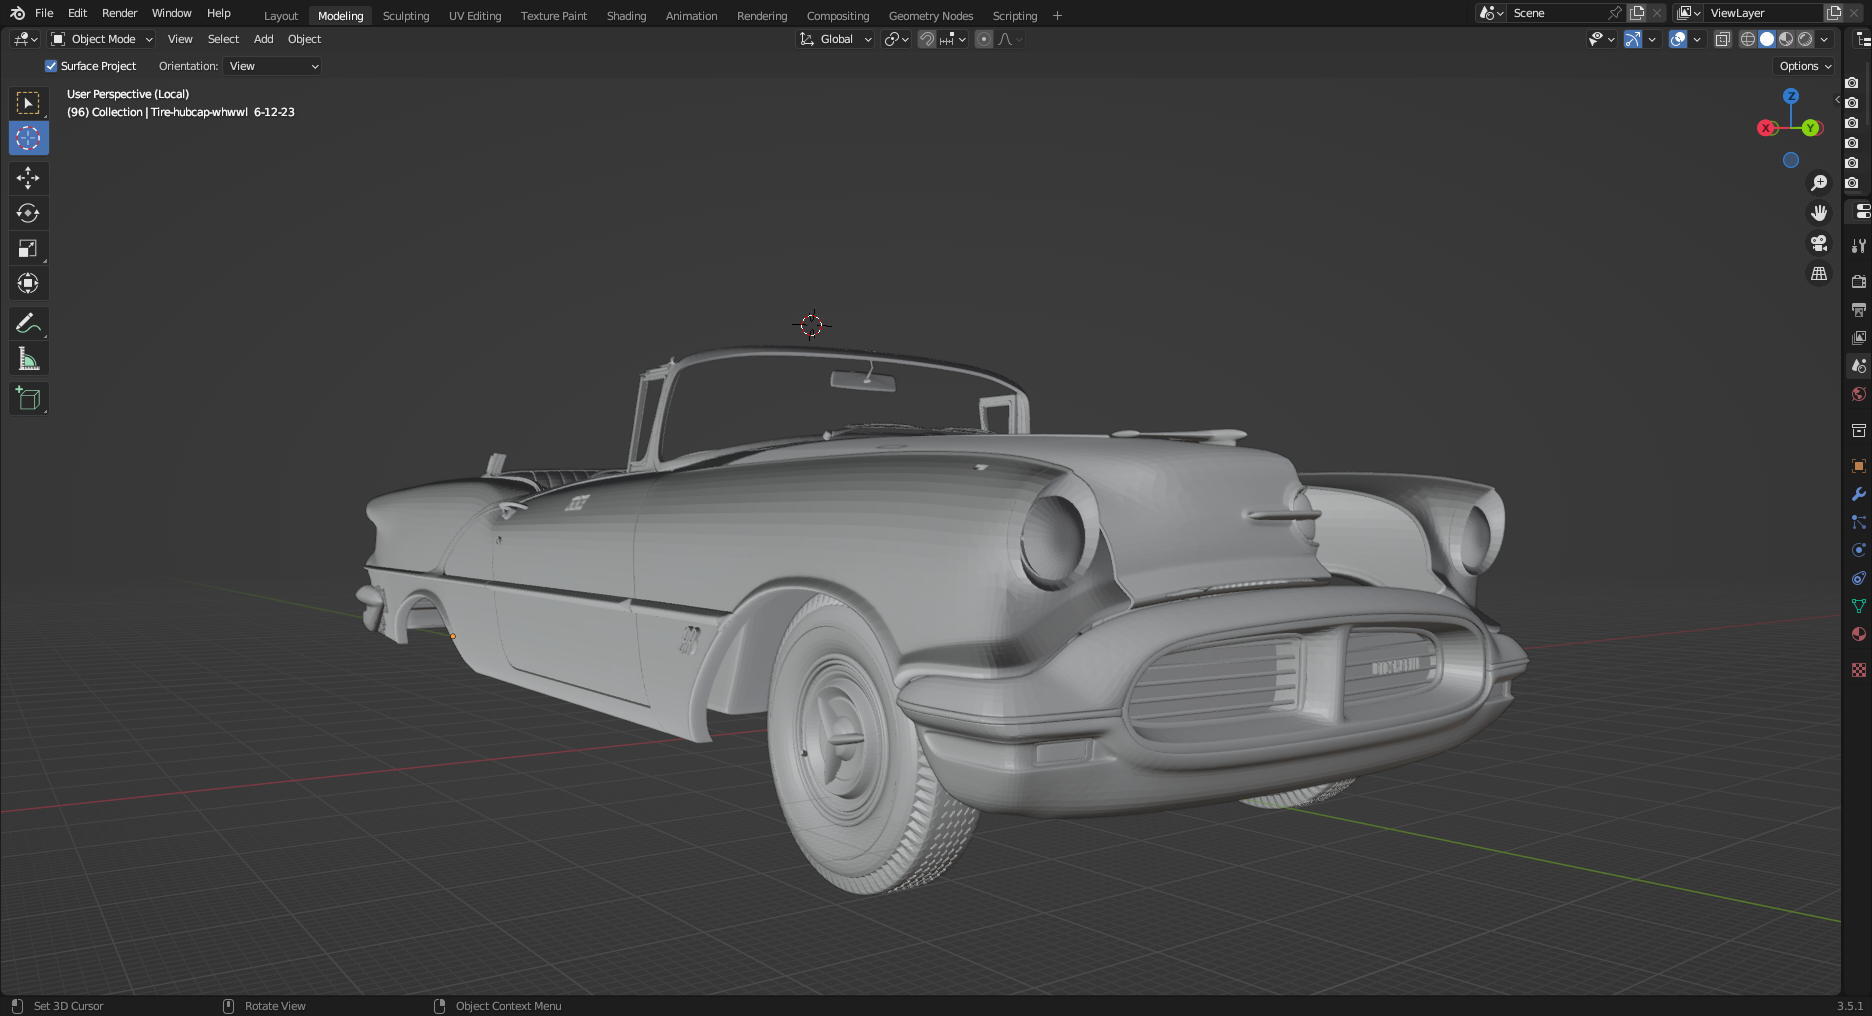
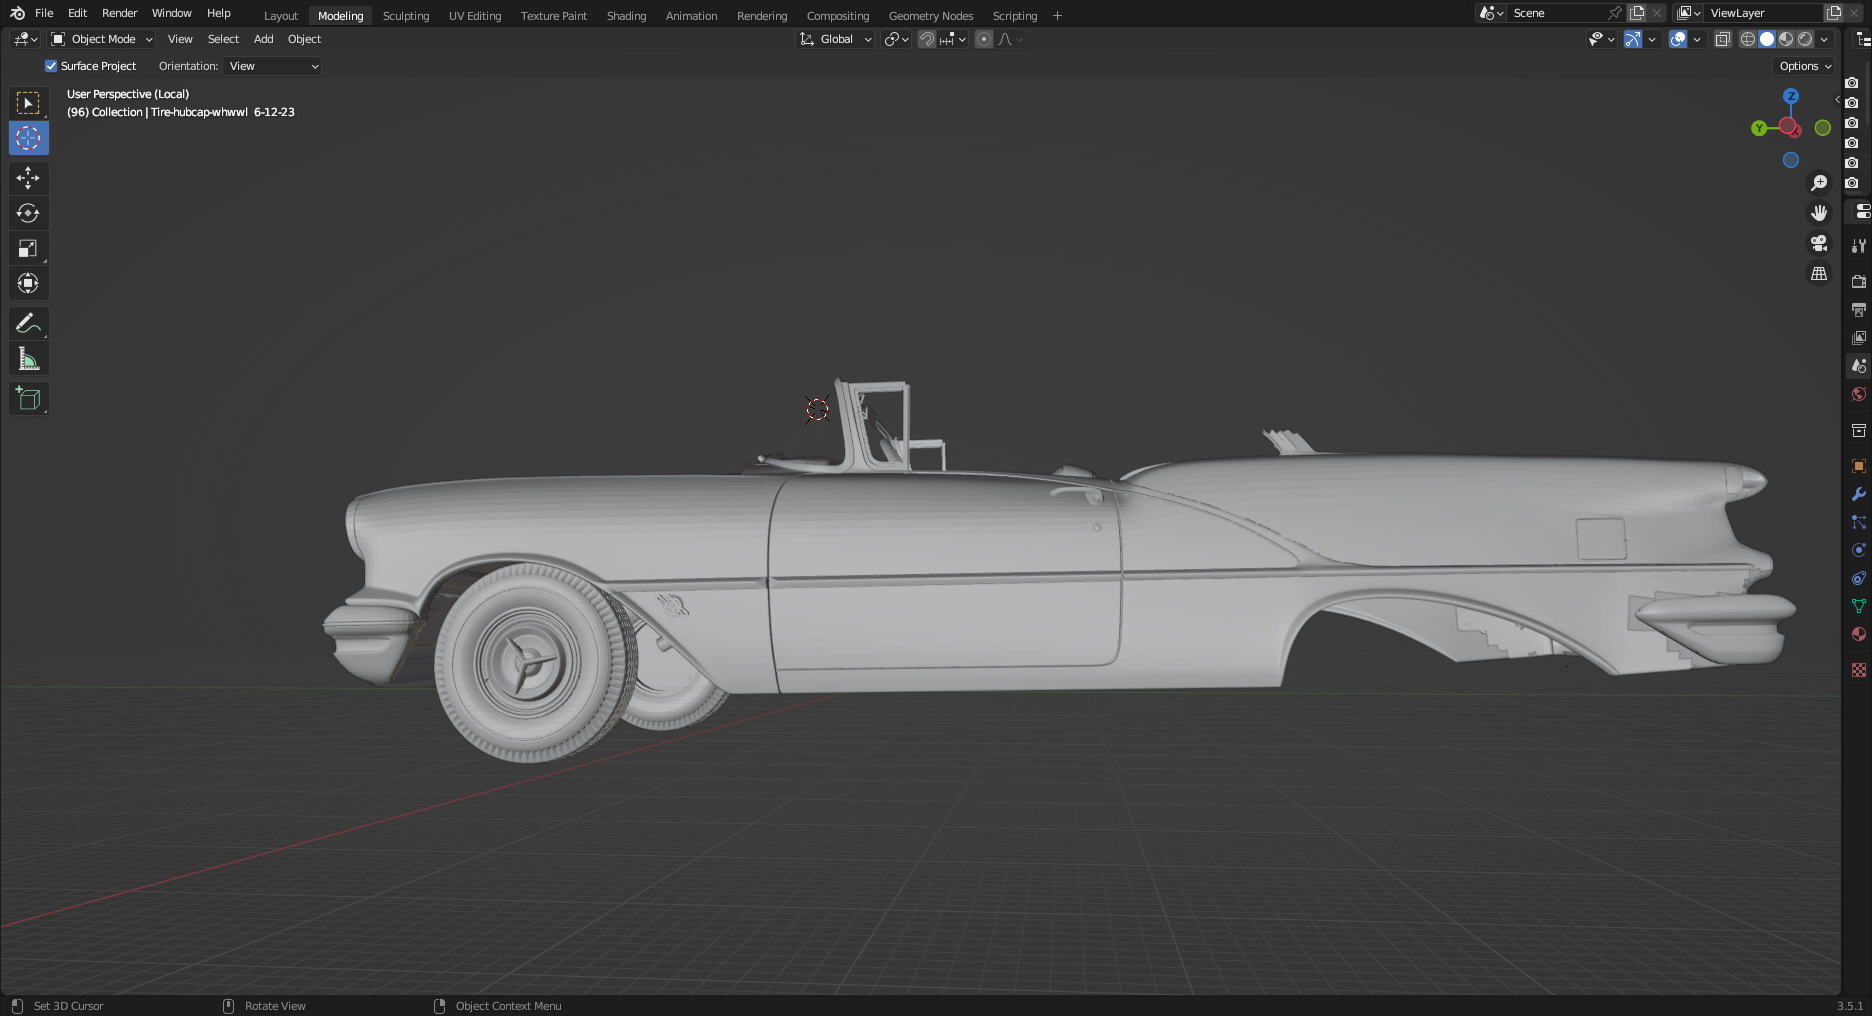
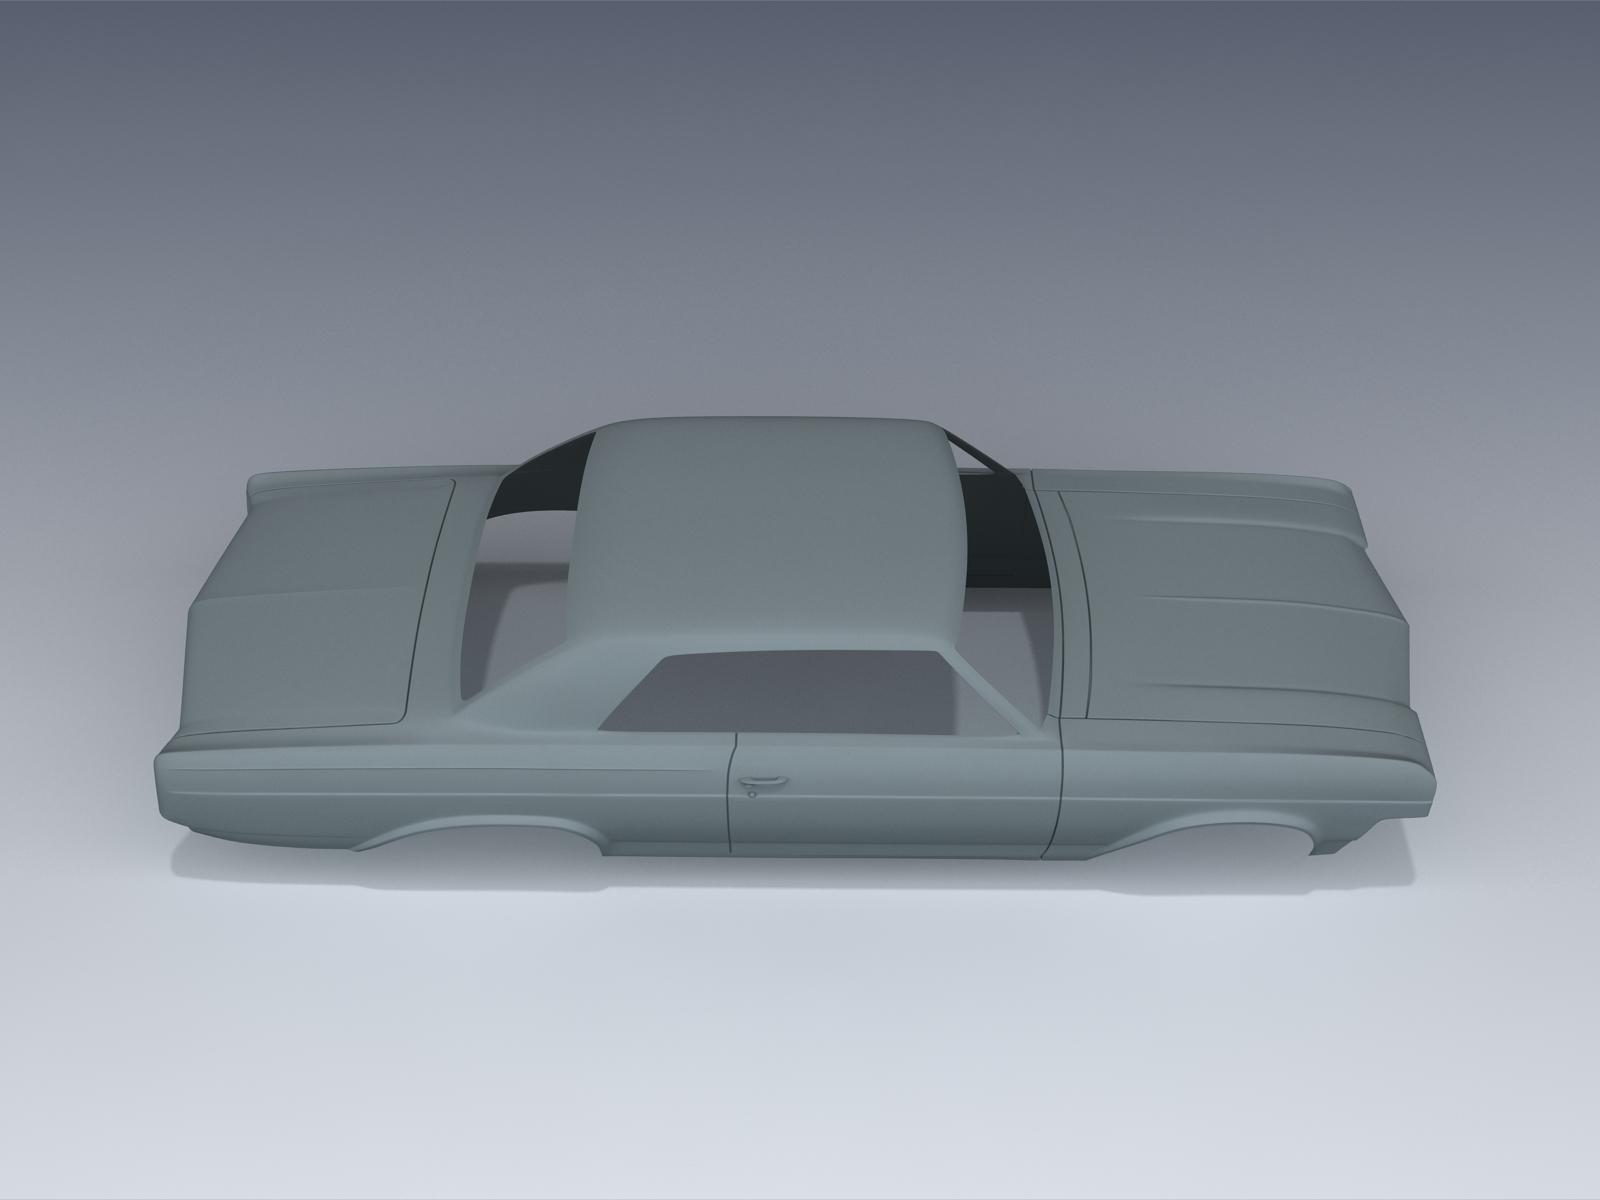
Got a lot of adjustments done on the 57 Dodge and just have a short list to do to finish it. I'm currently working on the duel quad intake manifold and only have part of the bottom to do to finish it. I'll adjust the air cleaner to fit the Carter wcfb carbs next. There aren't many reference pics of this manifold available, so it took quite awhile to work on it. I finally searched for a 57 Dodge D500 manifold a couple of days ago and found the pics I needed. Dan finished the 56 Olds and It's a beauty. I've started sectioning off the parts so I can make it solid. White parts are the separated ones. As soon as I got the Olds file, I asked Dan to do a 65 Skylark Grand Sport. I have a decent raw scan of a junk yard 65 and furnished him with reference pics to make it easier. He responded within a few days. Pic below.
-
3d printing is entering a new phase. Fast print speeds.
my66s55 replied to my66s55's topic in Tips, Tricks, and Tutorials
It's not a new generation of printers that's creating this fast speed, it's the ACF film and fast resin. Creality is just another printer like any other. -
3d printing suppliers are offering a new transparent film for resin vats. It's called ACF film and is stronger and more transparent than FEP and NFEP. As most know, the build platform has to rise and retract into the resin vat for each layer to be cured. This can't be done fast with FEP or NEFP film as the cured resin adheres to to the film and has to be pulled off. This takes time to do, thus creating long print cycles which lead to long print times. The resin doesn't appear to stick to the ACF film. This allows for speed of the build plate to increase up to 60% percent faster. A resin with a thin viscosity is also needed. I ordered a sheet of ACF film and a bottle of fast resin from Amazon today. I also have a spare vat for my Phrozen Mighty 8k. All this is what I'll use to test this out. The effect should greatly improve the quality of 3d prints as lower print heights can be used in the same time as it takes for higher ones. Simply put, a print that is created at 50 um can be created at 20 um in approximately the same time.This means that those ridges people see will be eliminated. Here's a little blip on what I'm talking about.
-
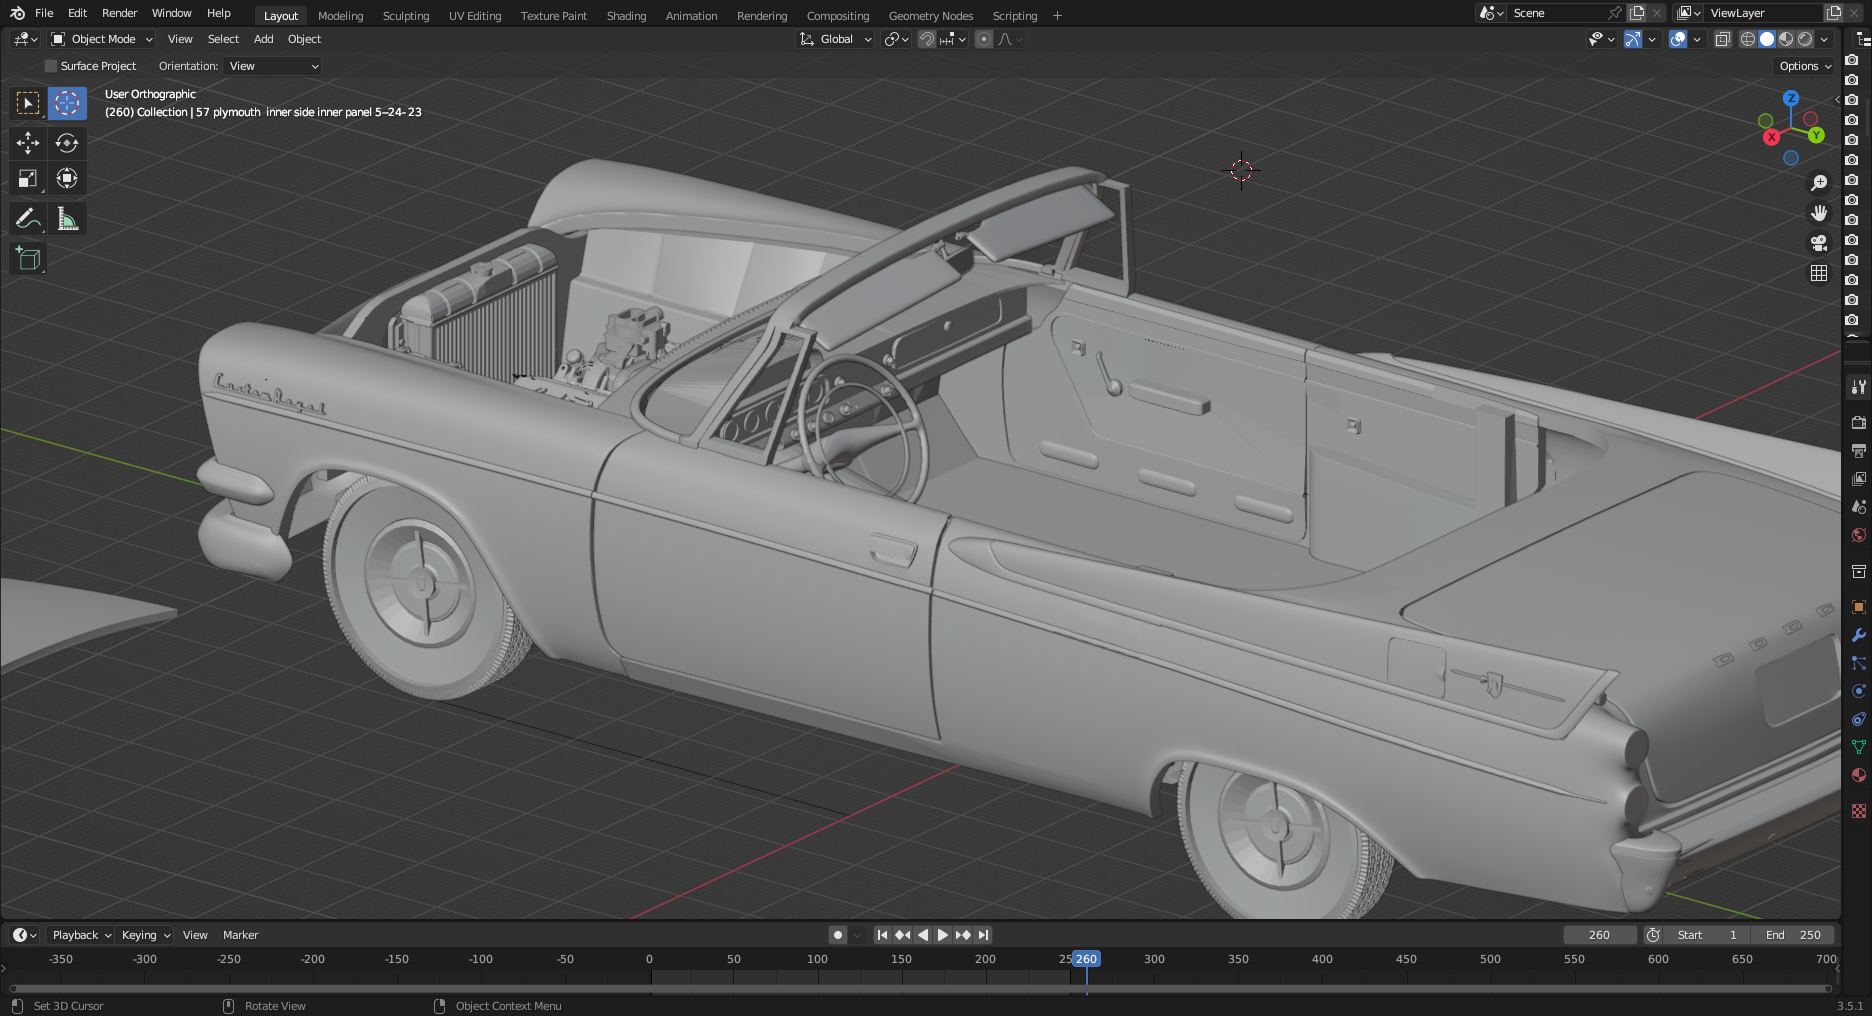
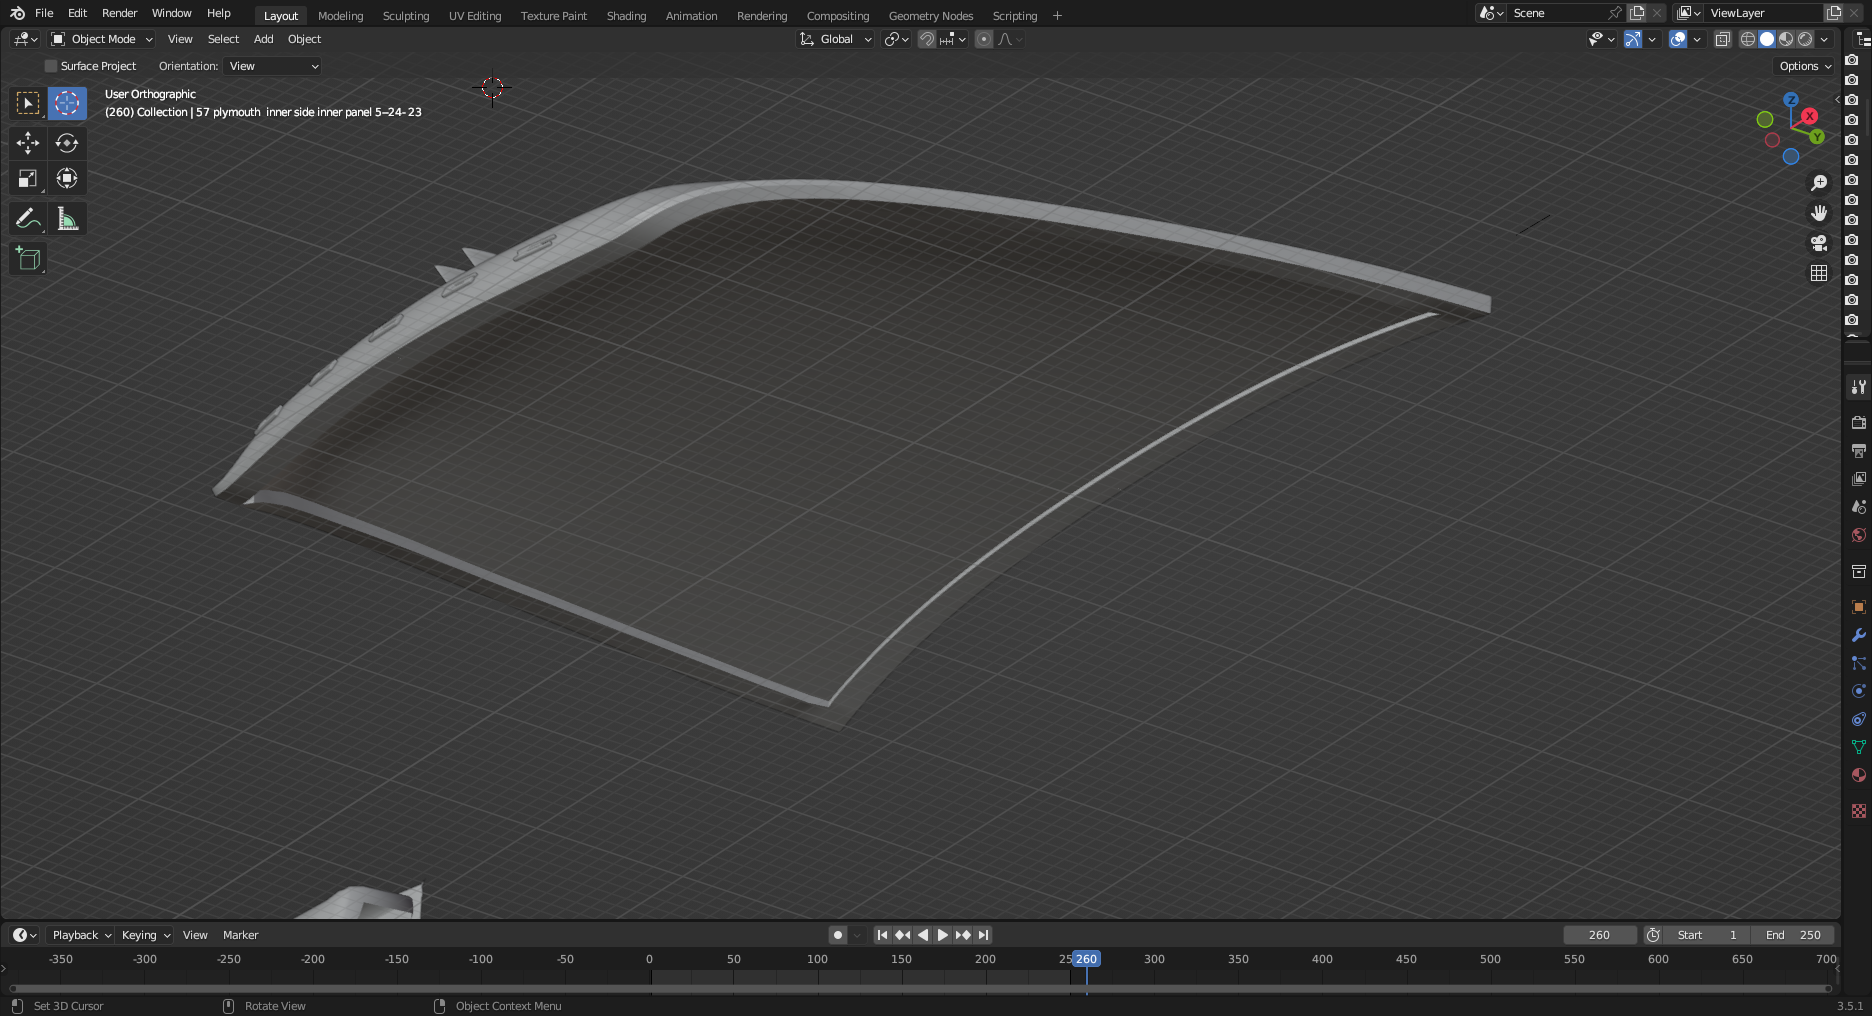
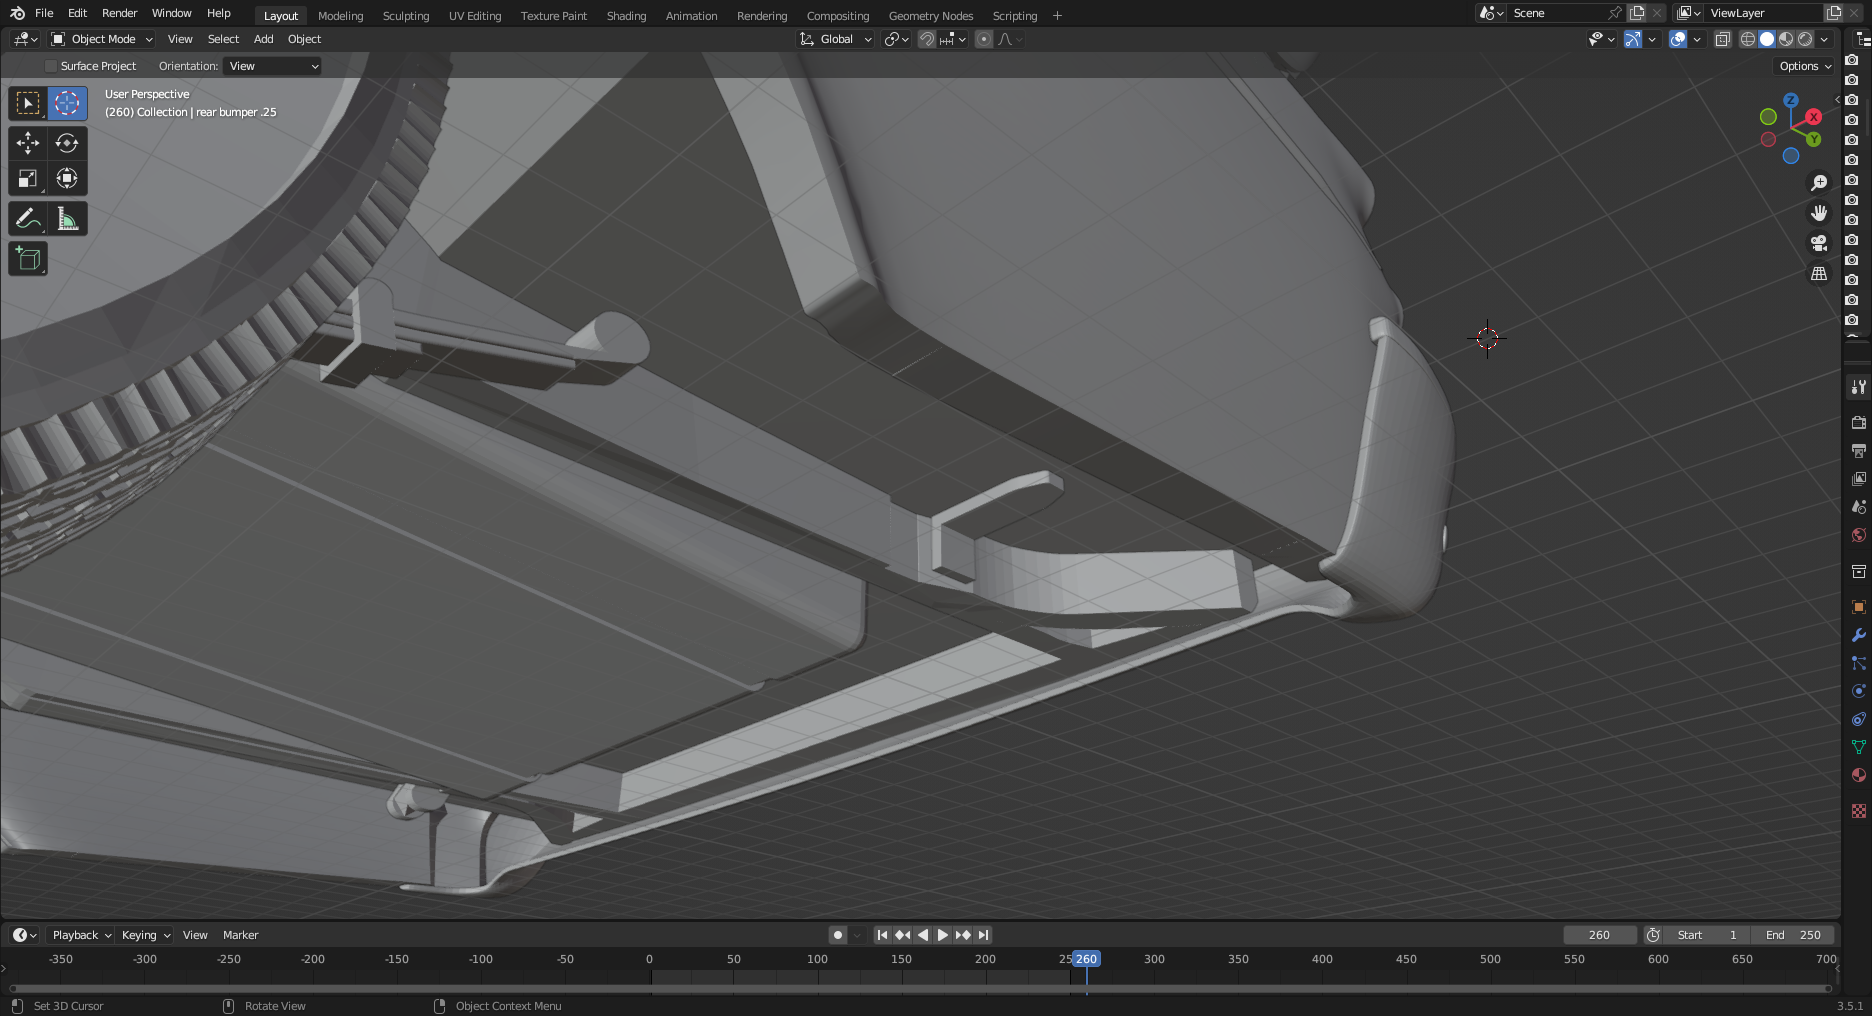
About 2 more weeks and I should be done. I've done the interior side panels, rear axle, horse collar and radiator, modified the floor and firewall to fit nicely, worked on finishing the frame, plus more. Notice on the bottom of the hood that only the edges have been printed at 150 um. I generally will make parts totally 150 um thick. this prevents warping. I came to the conclusion that I only needed the edges at that thickness and printed the rest at an unthinkable 70 um thickness. The 7th pic shows the rear bumper. It'ts printed at 50 um and is flexible, but still solid. Printing at lower level thickness allows to get a more realistic appearance and more room under the hood. The floor is 100 um thick.
-
I have a 58 Promo with slight warping. There isn't any interior.
-
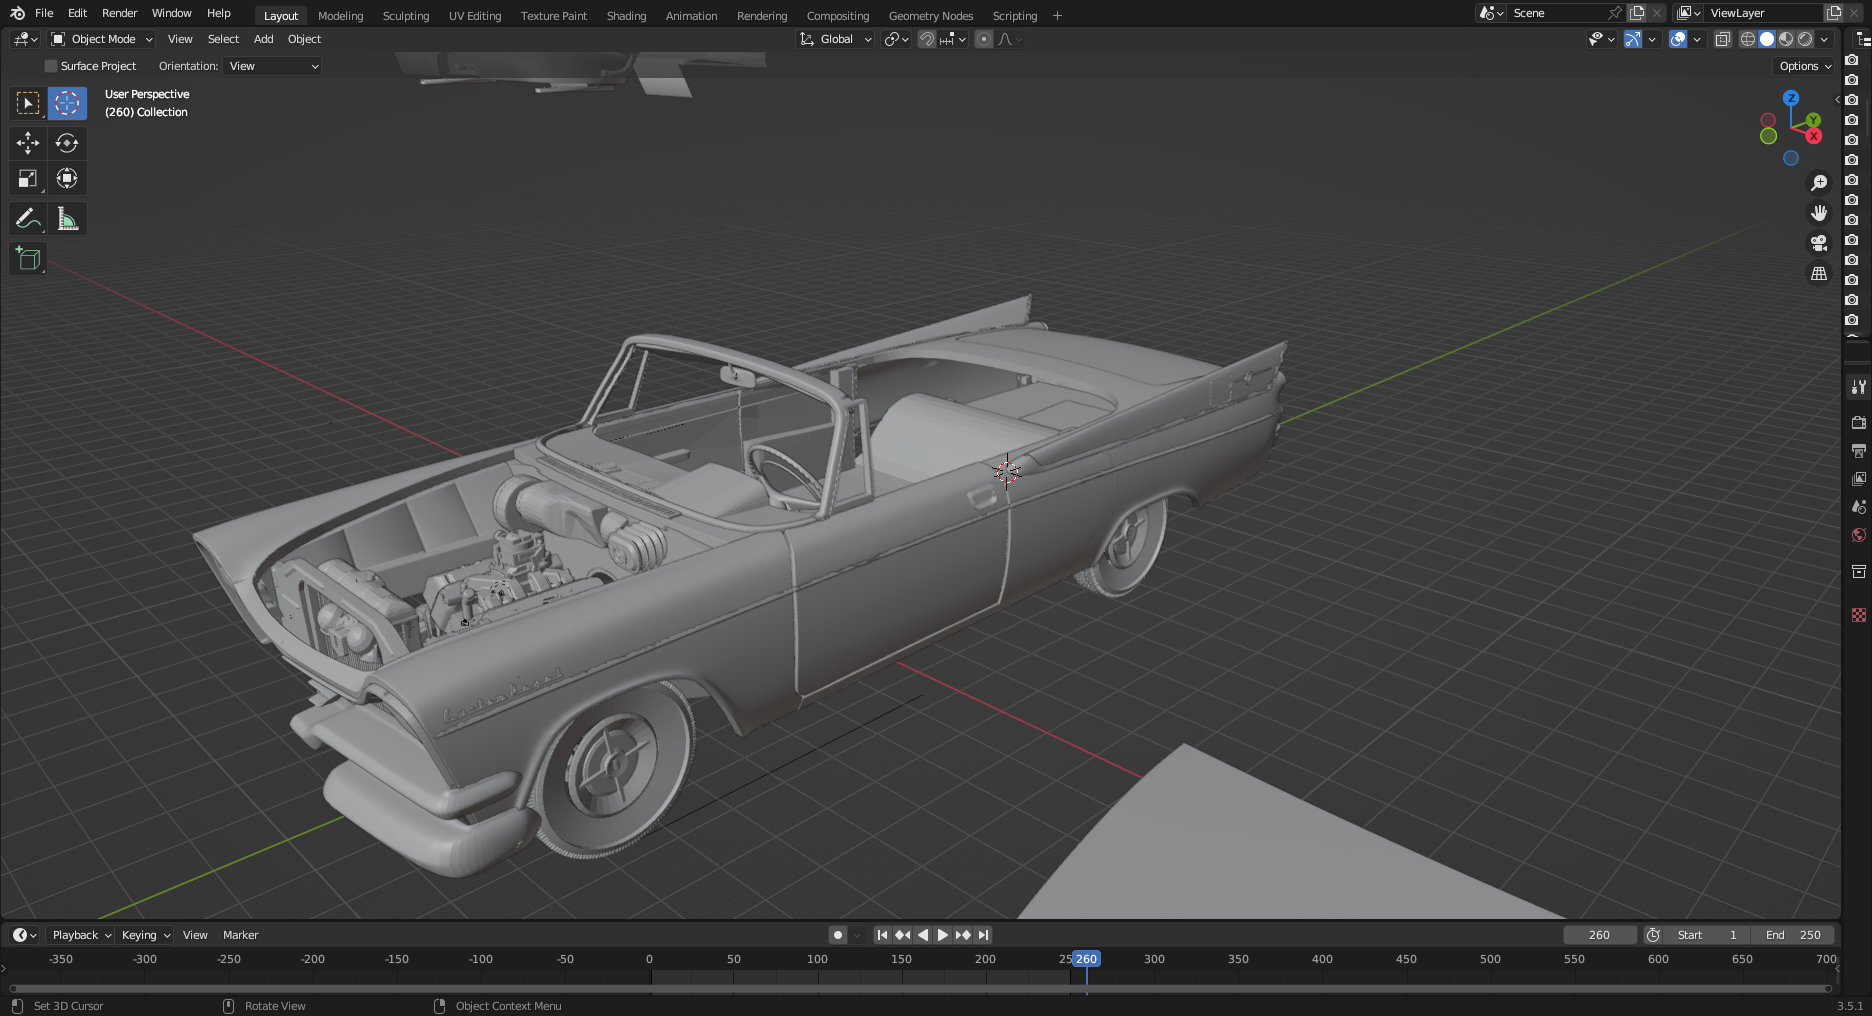
The dash is done. This is my first 3d file dash creation of a complex dash. The other 2 were flat, simple dashes for the 35 LaSalle a 37 Delehaye f & f. This 57 Dodge was a Hum3d file of a 57 Dodge coronet 4 dr sedan. Here's my creation. Keep in mind that this car is a 57 Dodge Royal Lancer D500 with a 3 speed stick transmission, as depicted.
-
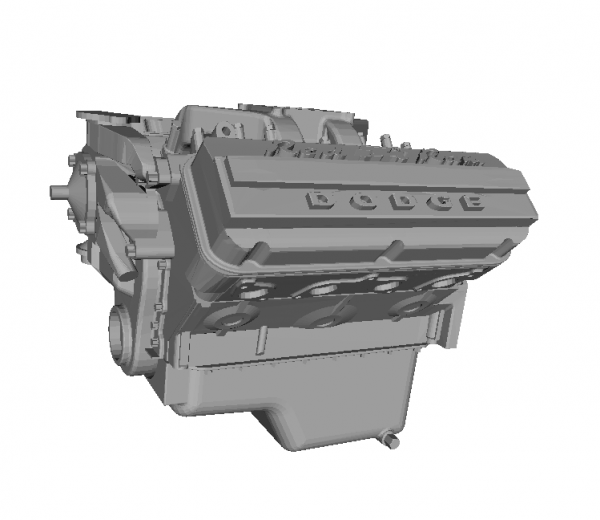
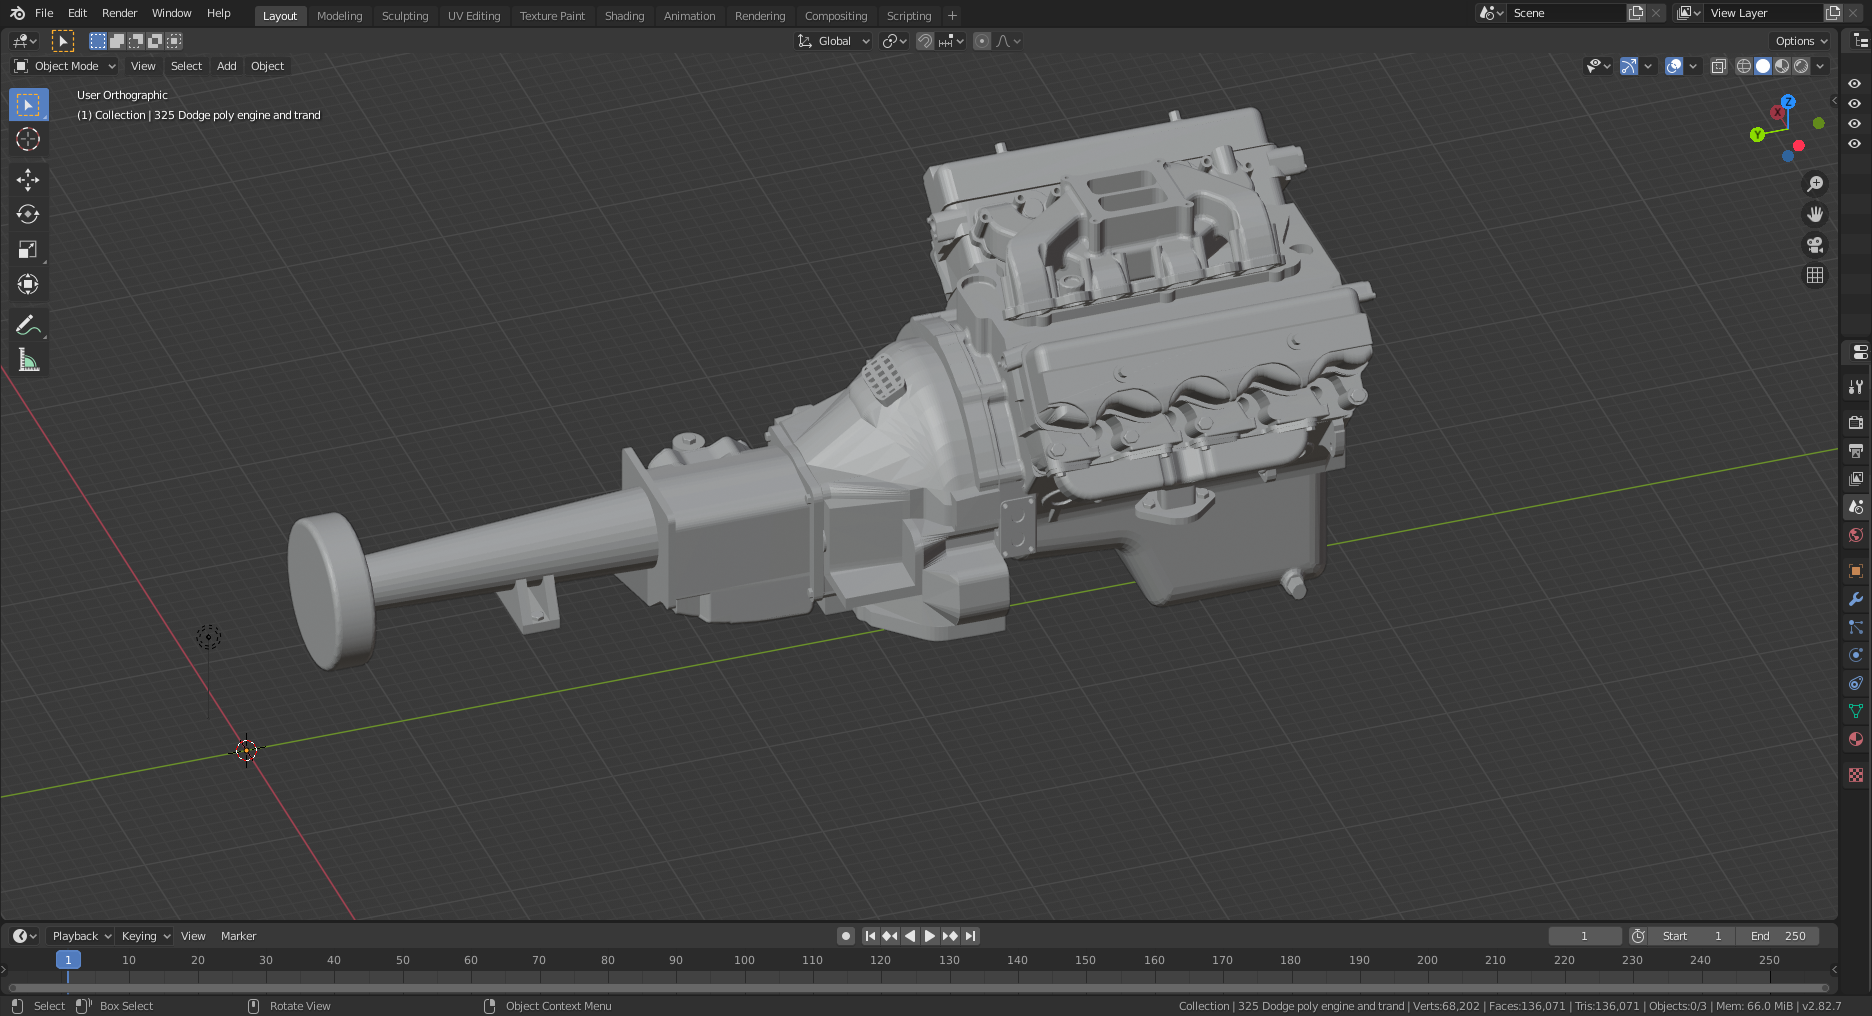
The 325 Dodge poly head engine for my 57 Dodge Royal Lancer D500 convertible with a 3 speed stick transmission. ck trans. The on;y reference material I had to work with was from Dodge service manuals.
-
I think it comes down to what you are trying to create. I've been building model cars as long as you have, maybe longer. Having grown up in suburban Detroit, I am totally aware of what the underside of an auto looked like as delivered from the dealer.The undercoating put on by the dealer would need a flat black color to make it right as delivered in certain area of the country. Straight from the factory to the dealer would be the body color.
-
Another Olds in the works. This makes 7 over 6 years. 1954-56-3 for 57-58-59. Dan is doing this one. This time i'm sending him pic's to help him. The last ones were for the side chrome on top of the door which he will fix. Dan's doing his usual excellent work.
-
Another resin 3D printer question
my66s55 replied to V8tiger's topic in Model Building Questions and Answers
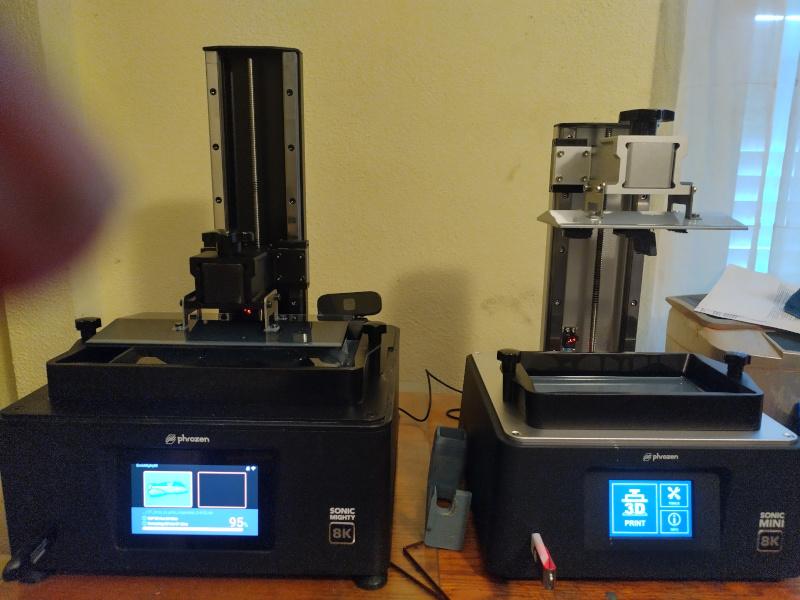
You might want to re-think that. I only by Phrozen printers because there a cut above all other printers in the price range. The above printers are all 4k. Phrozen currently has the sonic 8k mini on Amazon for $399. 8k is the newest technology It produces finer detail thank 4k. Here's my wire wheel. Here are the Elegoo and the Phrozen printers. The Phrozen has duel linear rails on the z axis to ensure accuracy of the print. It has a touch panel on the front that gives you control of the machine. It shows the progress and time of the print as to how long long it will take, how much is printed and time left to finish. Also, other features that give you controls that you need such as a visual of each layer the part as it is printed. Phrozen has a very good support team and a Face Book page for each of there printers. The build quality is top notch. It's so quiet that you can't hear it running. Phrozen 8k resin gives better prints, even on a 4k machine. Phrozen has a reputation it established in early 2018 of producing very good quality printers.
-
I'm at that stage where I'm starting to finalized some files for cars and advance them into the build process. The 35 LaSalle and 37 F & F Delehaye 135 are being currently built. Next up are the 53 Cadillac Eldorado convertible that I showed above and the 57 Dodge Custom Royal Lancer D 500. Both have the engine done. I'm currently creating a 55-56 Dodge/ Plymouth stick shift trans and bell housing. The D 500 generally had a manual trans. What I do is create a file in blender that is used the join all the parts car parts in order to organize them for fit. The Dodge is well on it's way. Some of these files need modification as they came from other cars. The dash is from the 56 Dodge. The seats, the horse collar, radiator and horns. are from the 58 Plymouth. I've printed a test body and the frame and floor are in the 2 big printers. I'll use these parts to start checking fitment. I forgot to out the front cowling in front of the windshield on the print.
-
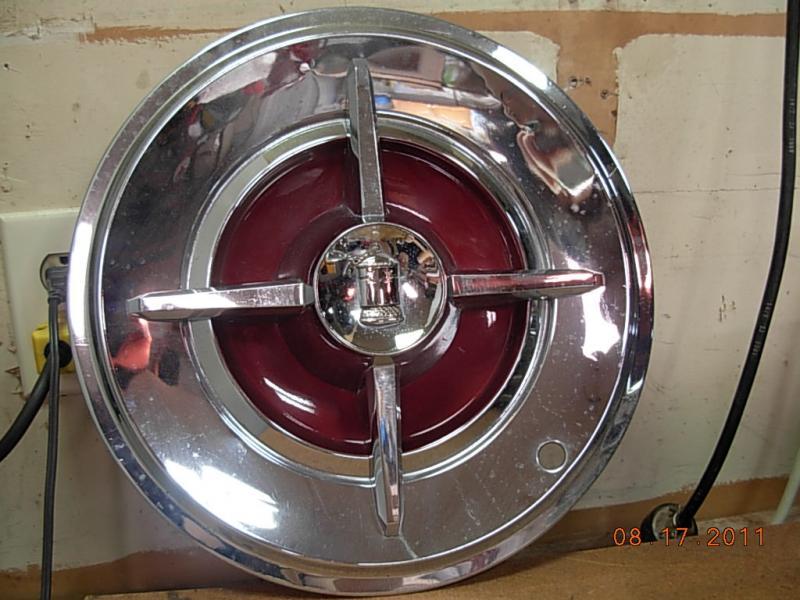
Does any one make 1957 Dodge Lancer hub caps?
my66s55 replied to herbertb's topic in Model Building Questions and Answers
If it's a Lancer, you'll need a different hubcap. I'll be making a cad file for a set of these within the next month.
-
My two Phrozen 8k printers at work. The Soni Mini with a 7" l.c.d. and 22 um xy resolution and the Sonic Mighty with a 10" l.c.d. and 28 un xy resolution. A sheet of copier paper is 100 um. in thickness. Here's the result. The 1937 Delehaye 135 by F&F custom build.
-
The best way I've found to do 3d printed parts is to take a piece of masking tape and stick it to the part. If it sticks, its ready to paint. If the part won't stick to the tape, soak it about 5 minutes i IPA. Just because it's not sticky doesn't mean its ready to paint.
-
I have Printed many bodies, but I do more than bodies. Check out "my 3d printed projects" in the W. I. P.
-
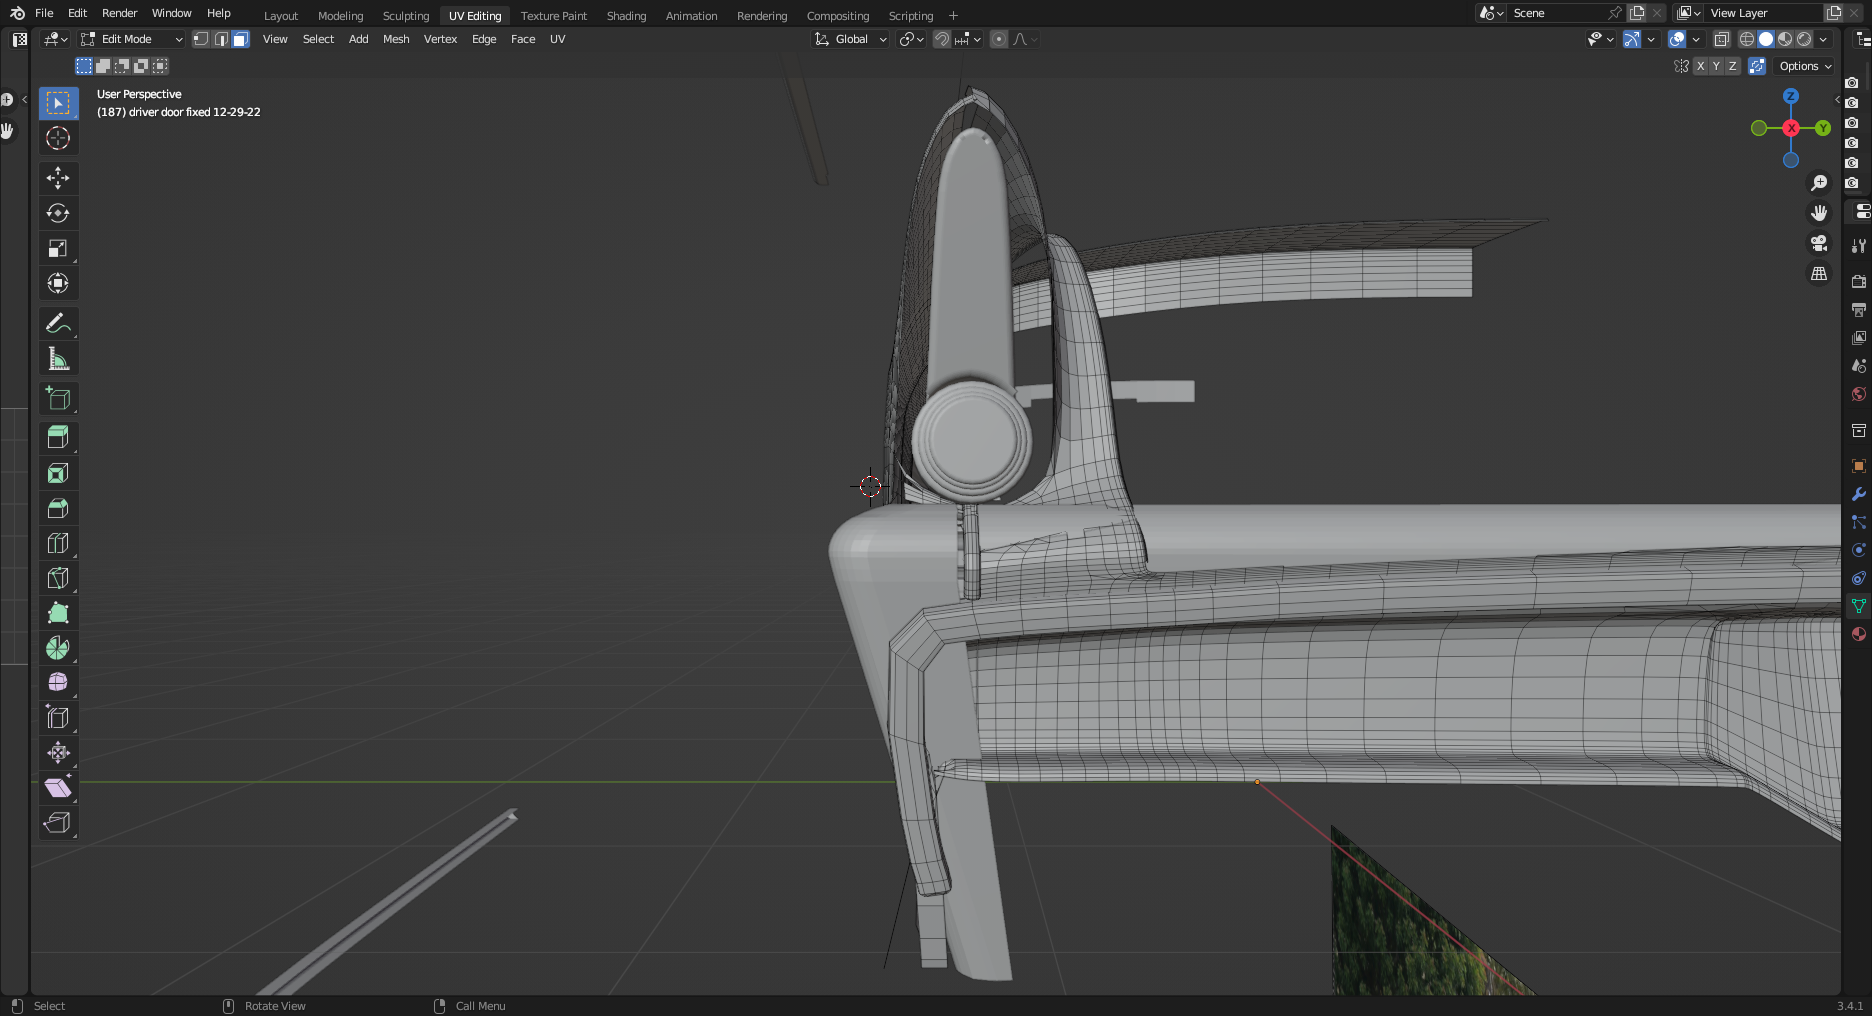
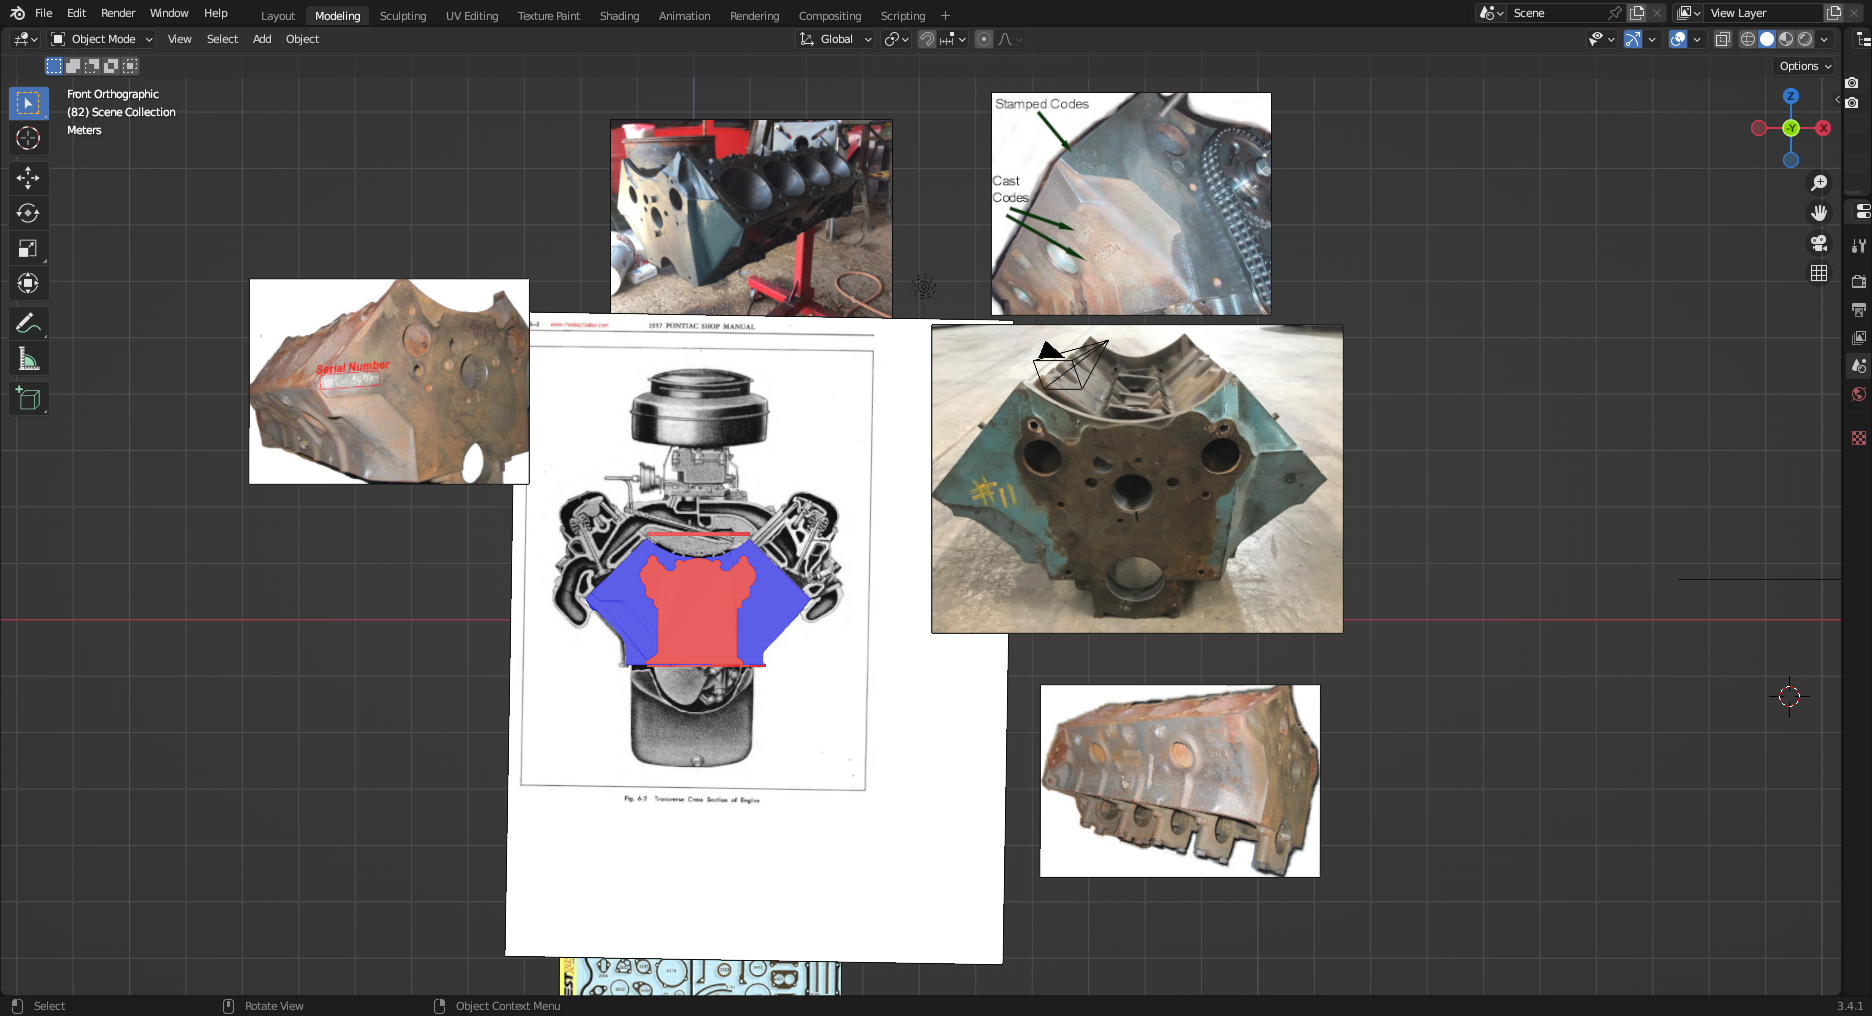
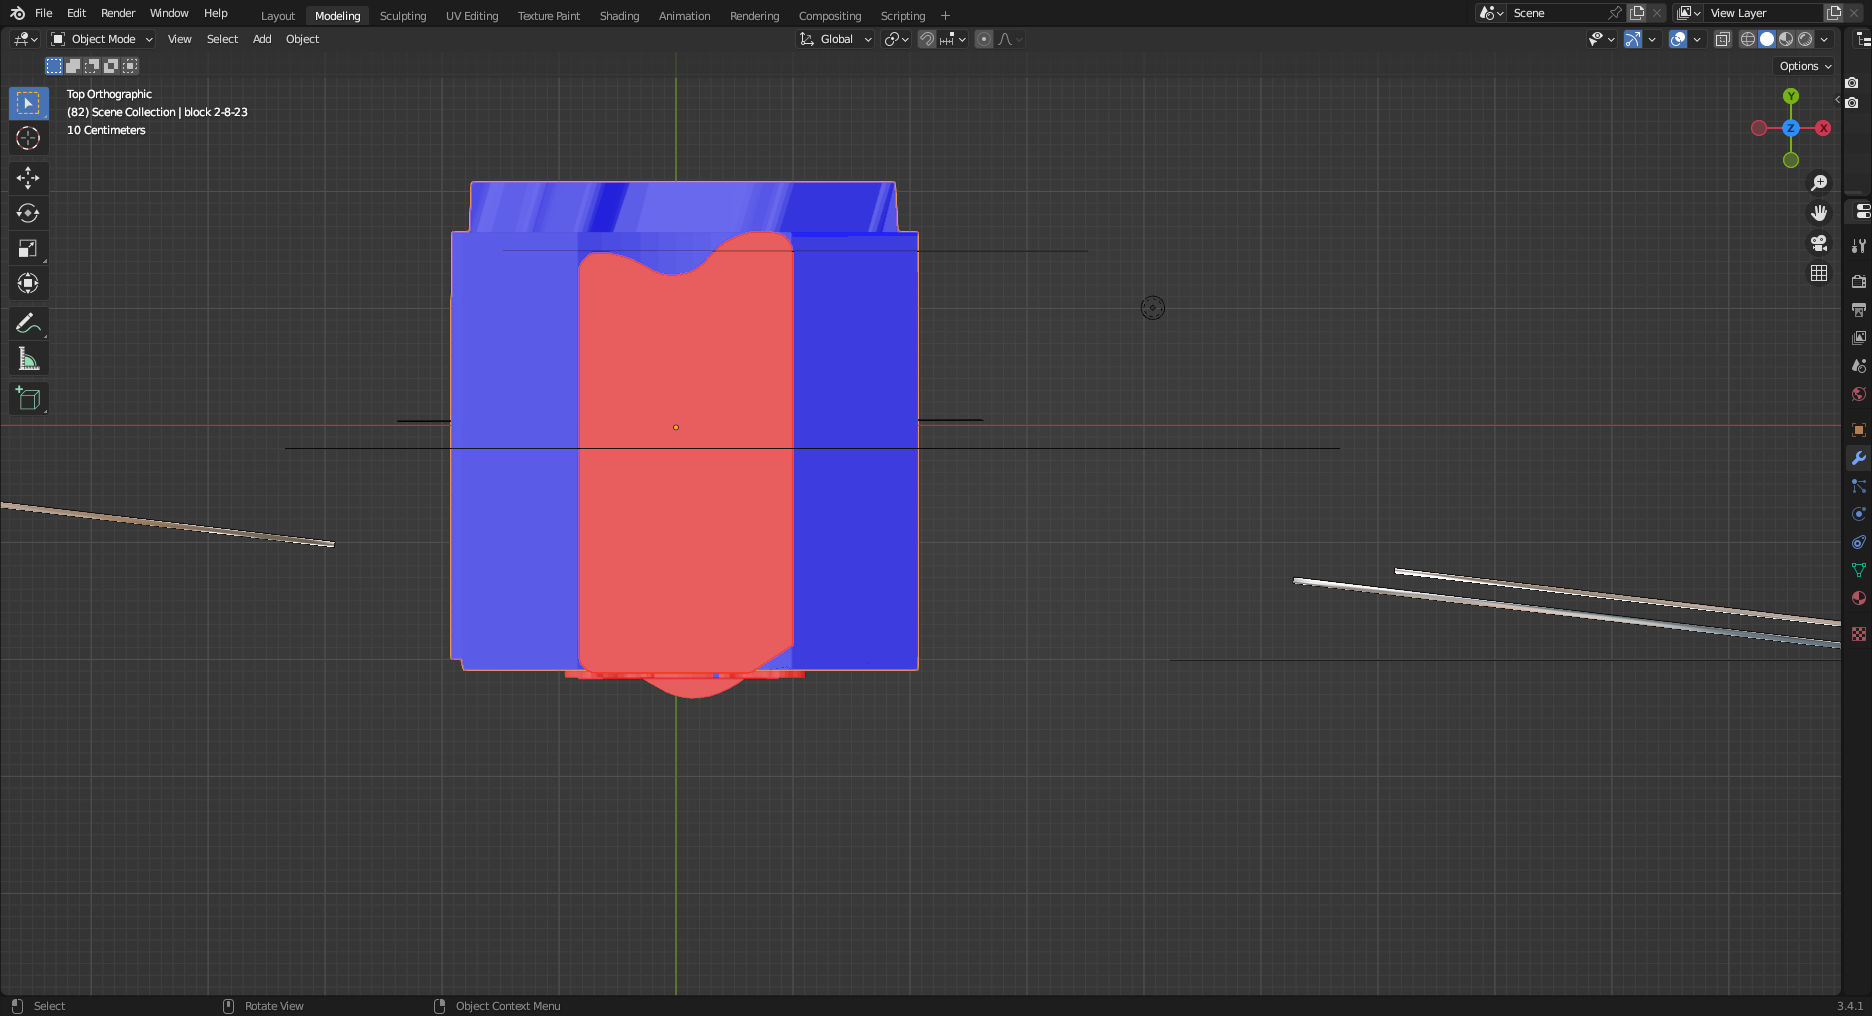
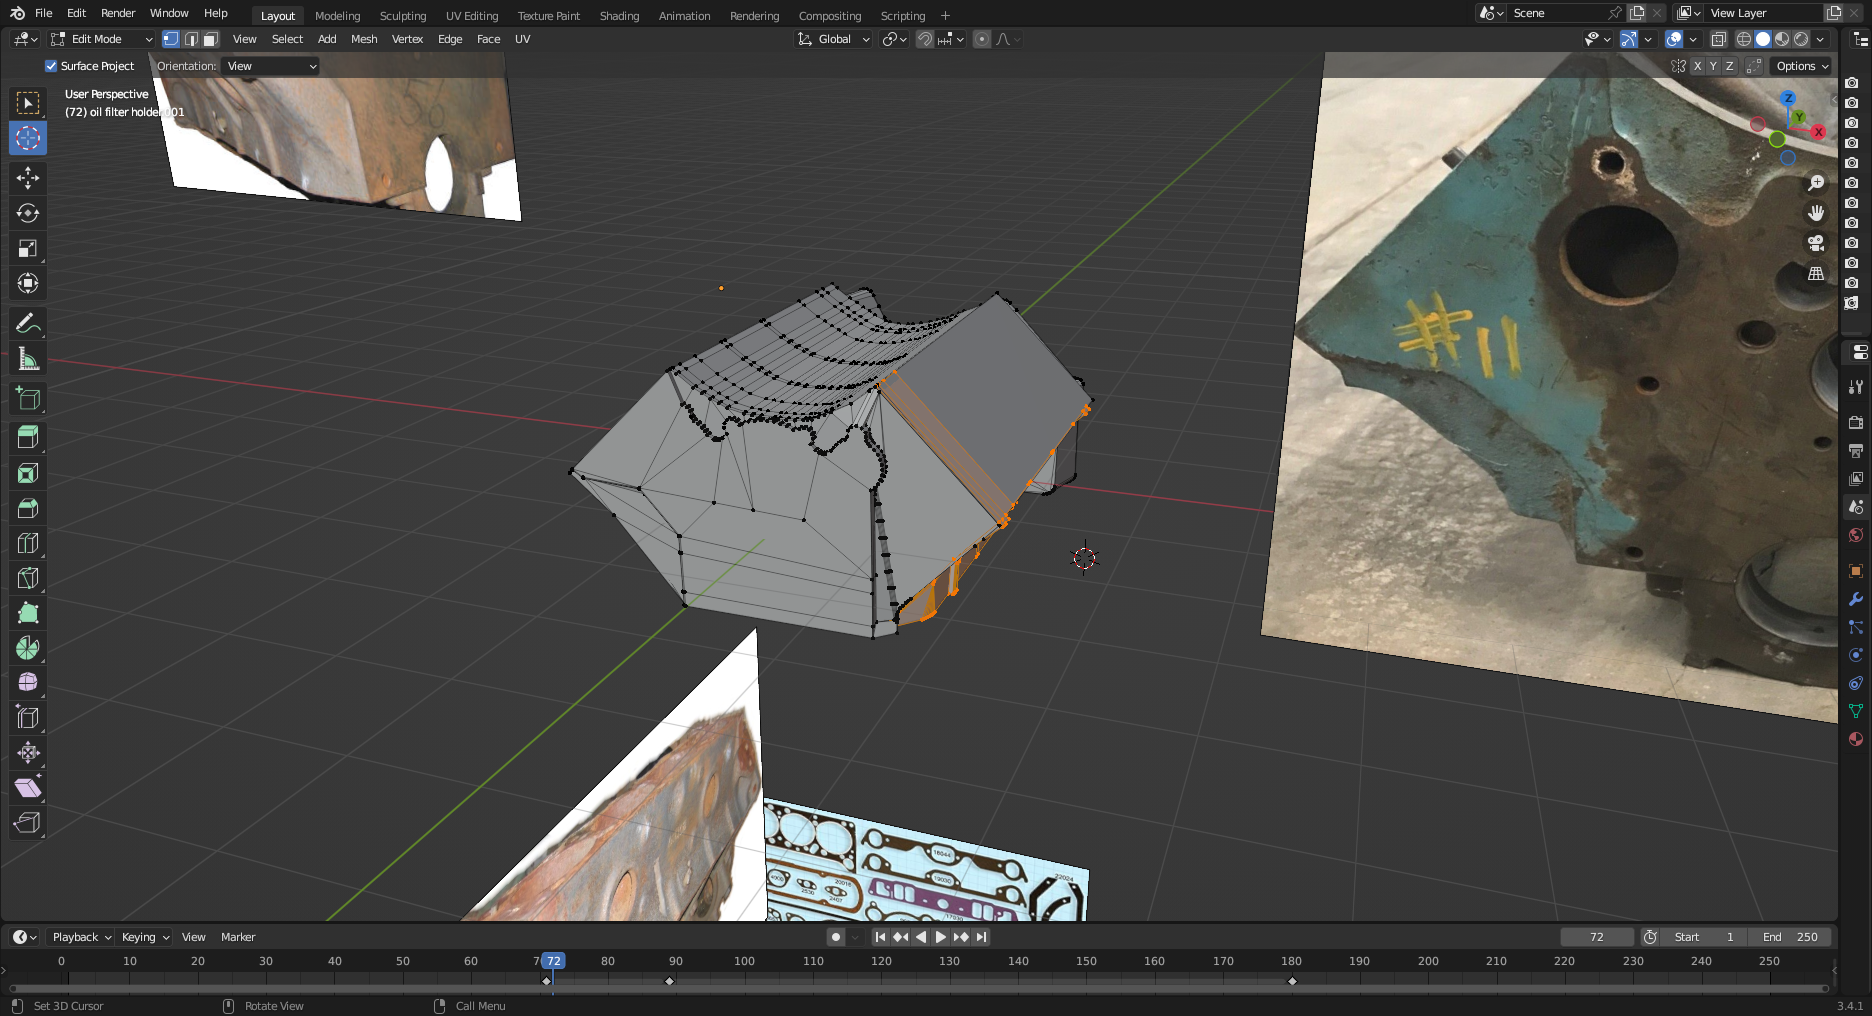
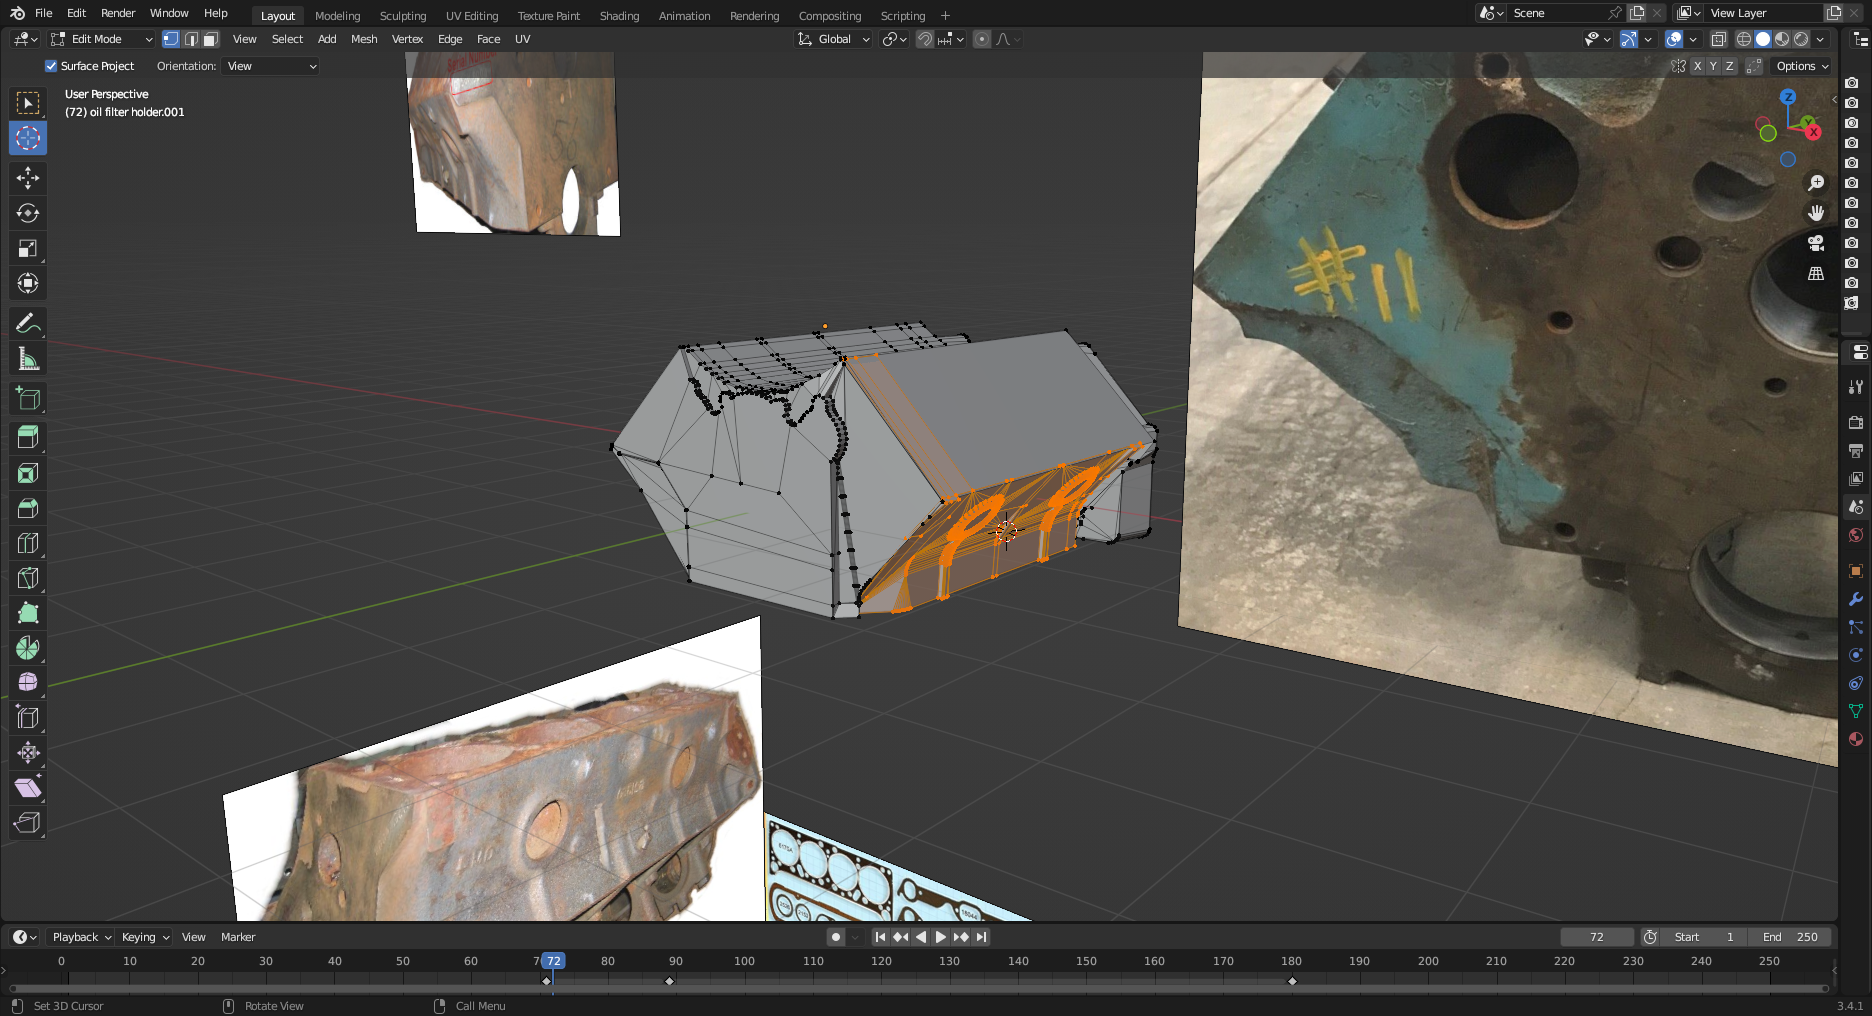
I have a lot that I'm working on right now, but I'll post some pic when I'm done with them. I don't post every time I do something to a file, create some thing or print some thing because It would take up time that I can use doing those things. In this post I'll show you how and what I use to create new parts. I'm creating a Pontiac first generation that covers 1955-1960. I need this engine as I have a 56, 57 and 59 convertibles. First, I search the web for anything I can use to create what I need. I place images I've found as background for what I'm creating. Below you will see it's the engine block. There's not a lot that I found on this engine for these years. What I found will get me by. I download a gasket series for the engine and use that to create wheres the part that goes on the engine. What you see in red is where the timing chain/water pump goes, and the intake manifold goes. The intake manifold gasket helps to determine the offset. What didn't show is the oil pan gaskets that show the how the bottom of the block is. I need to finish the back end.
-
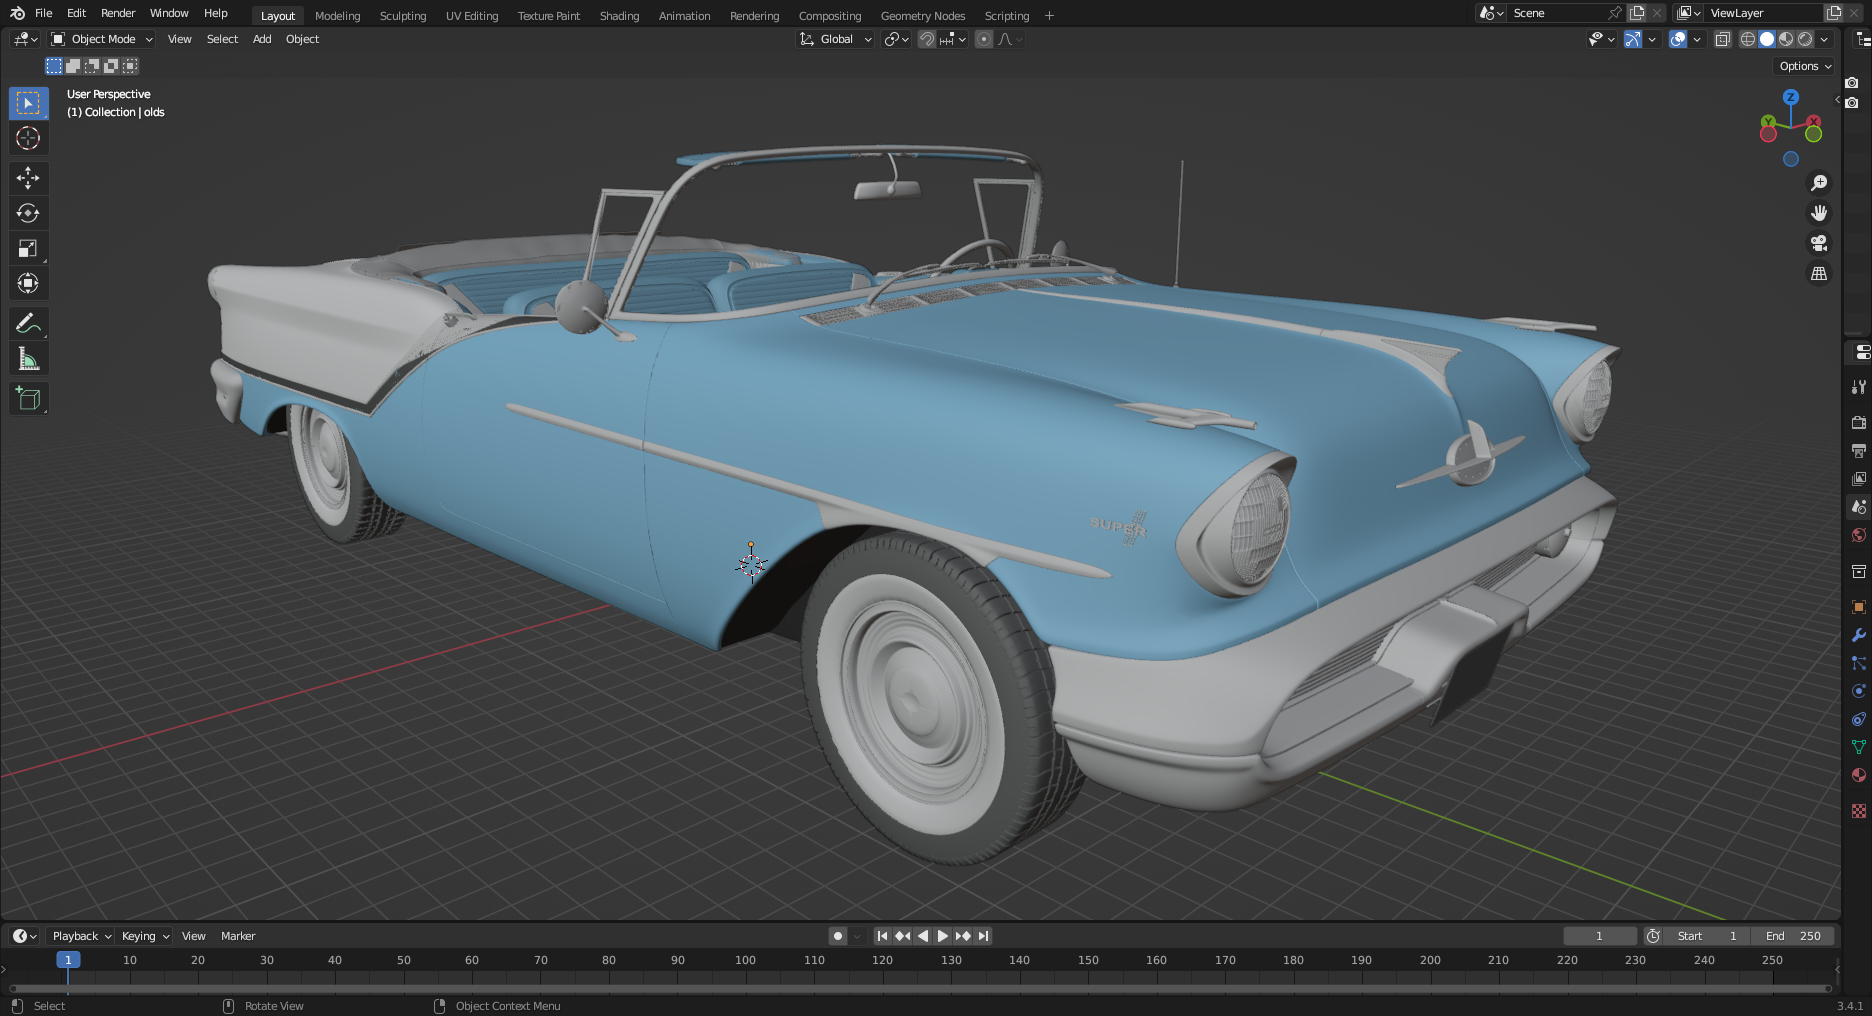
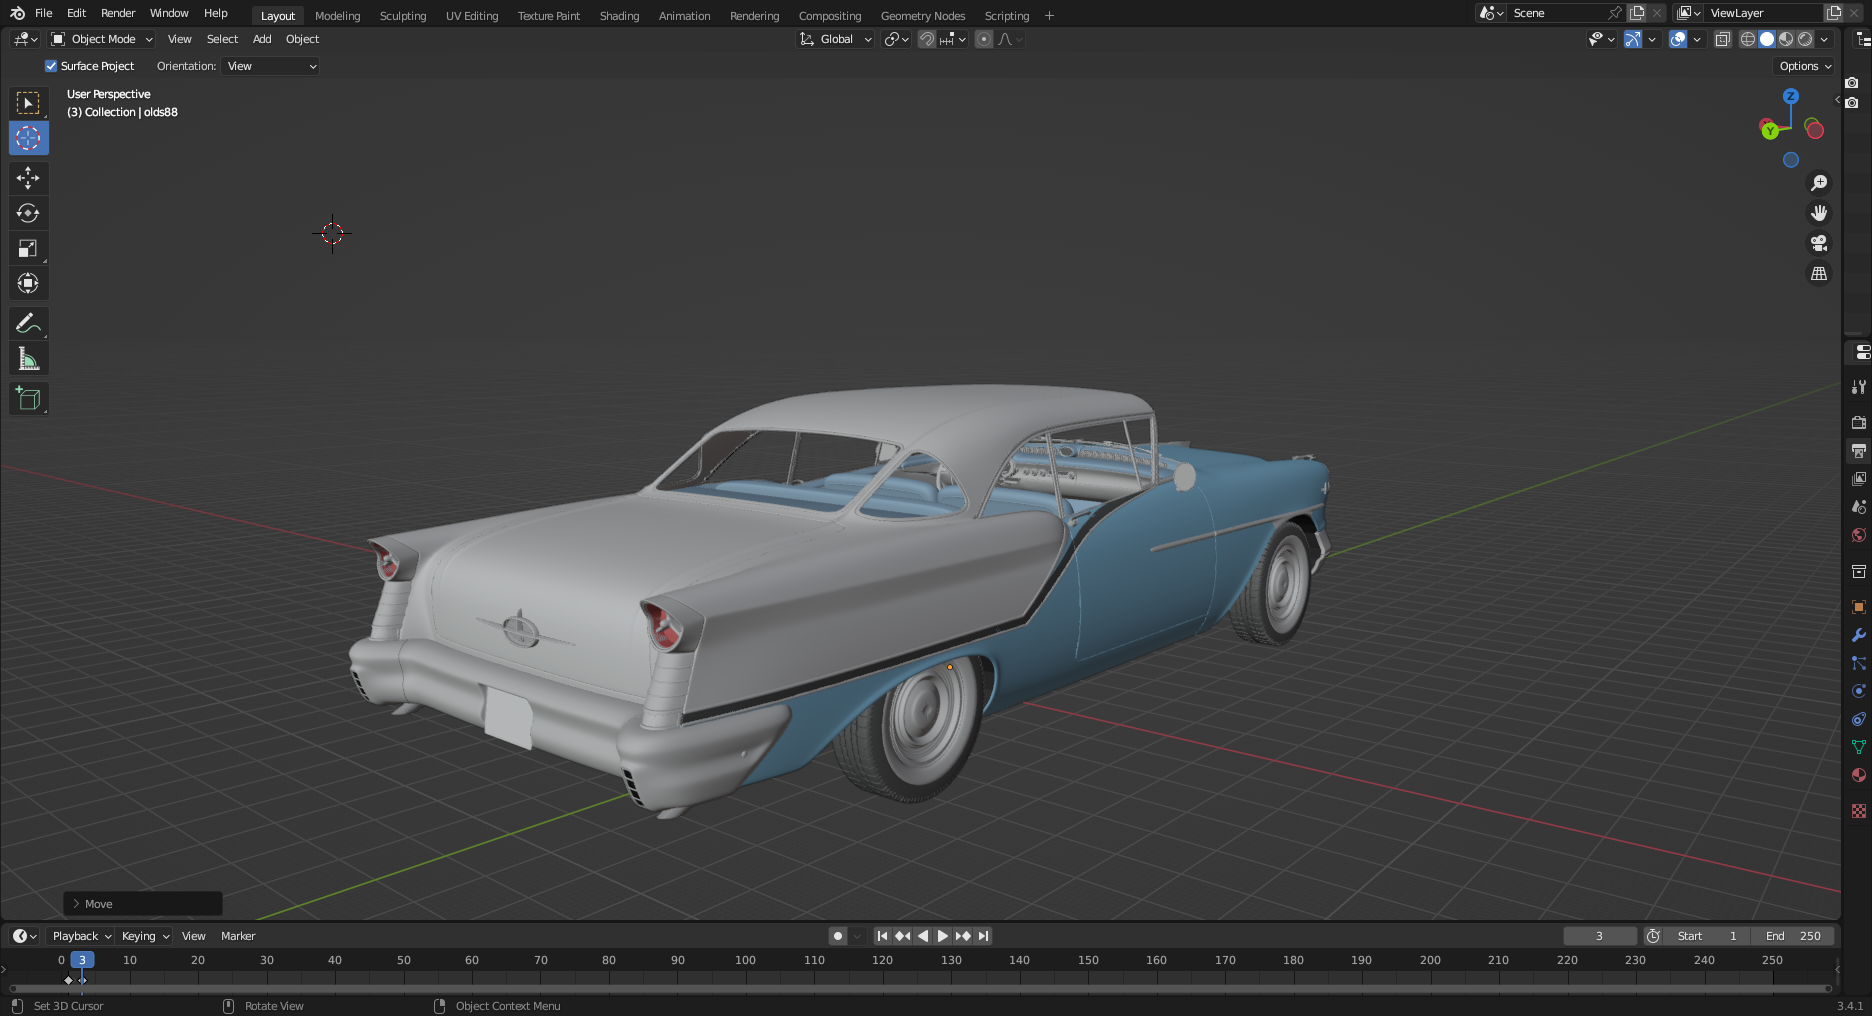
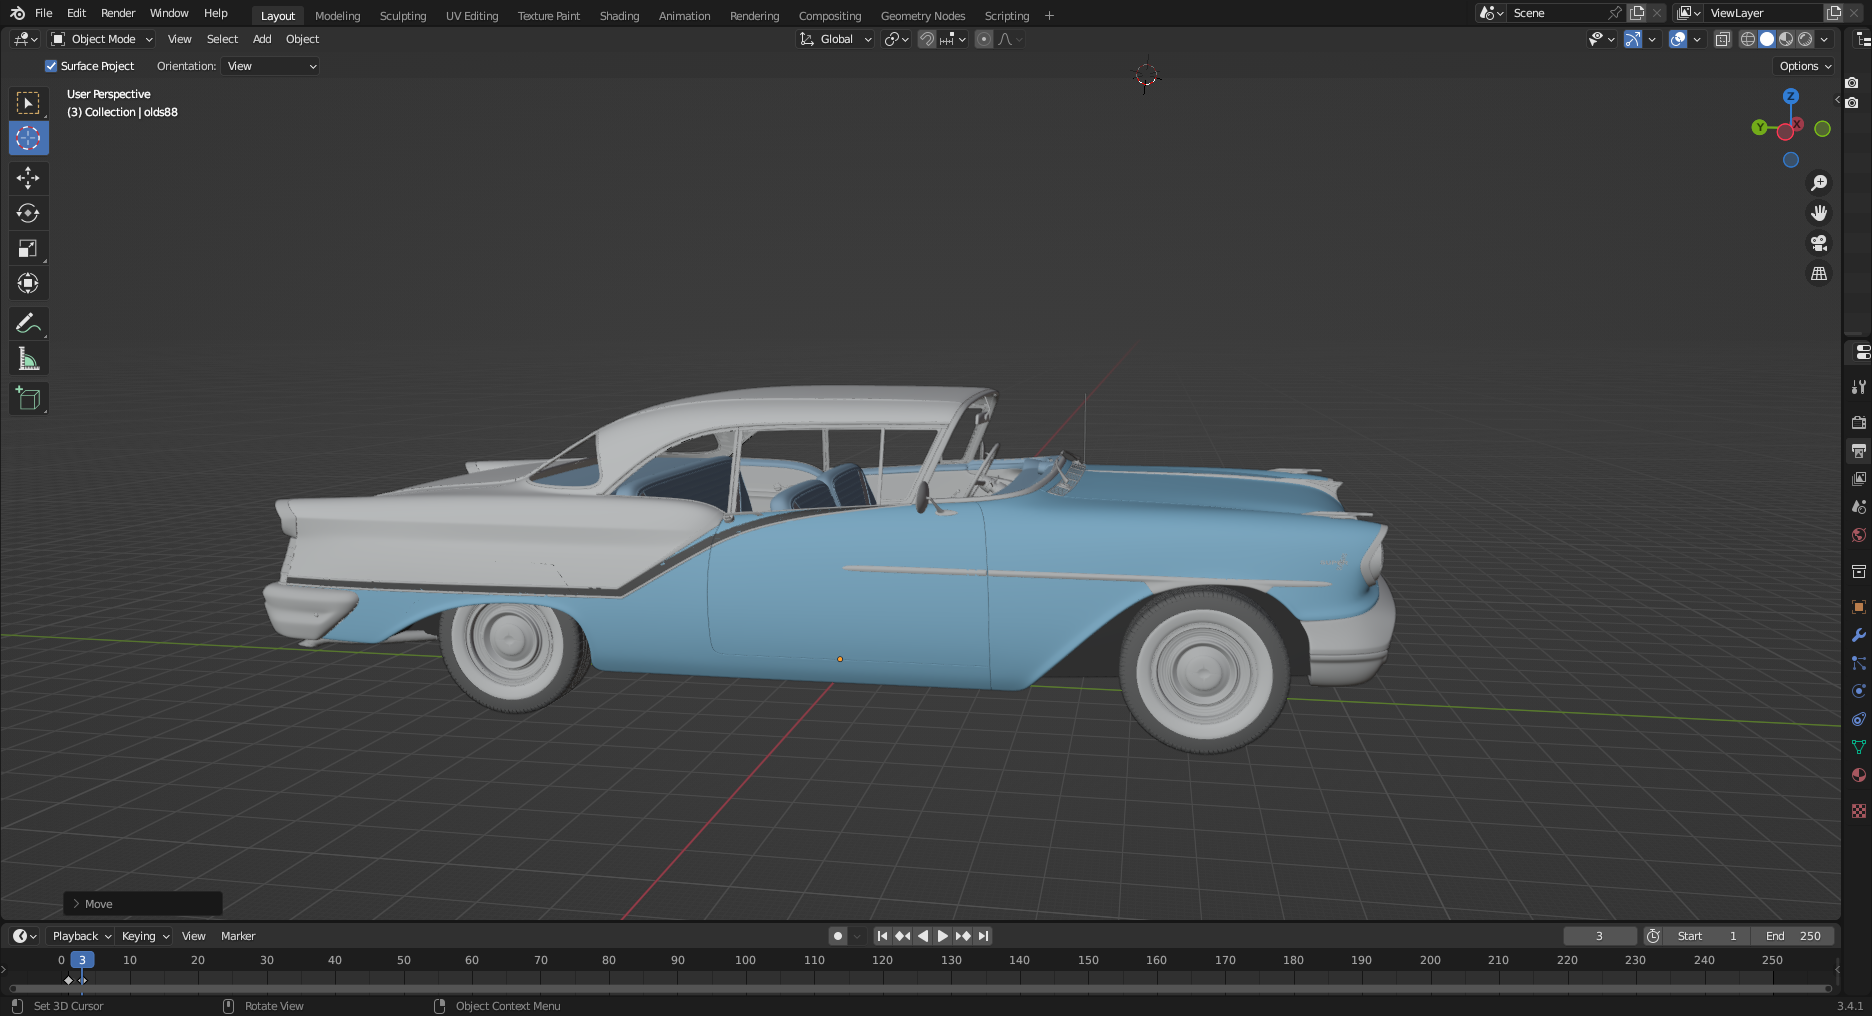
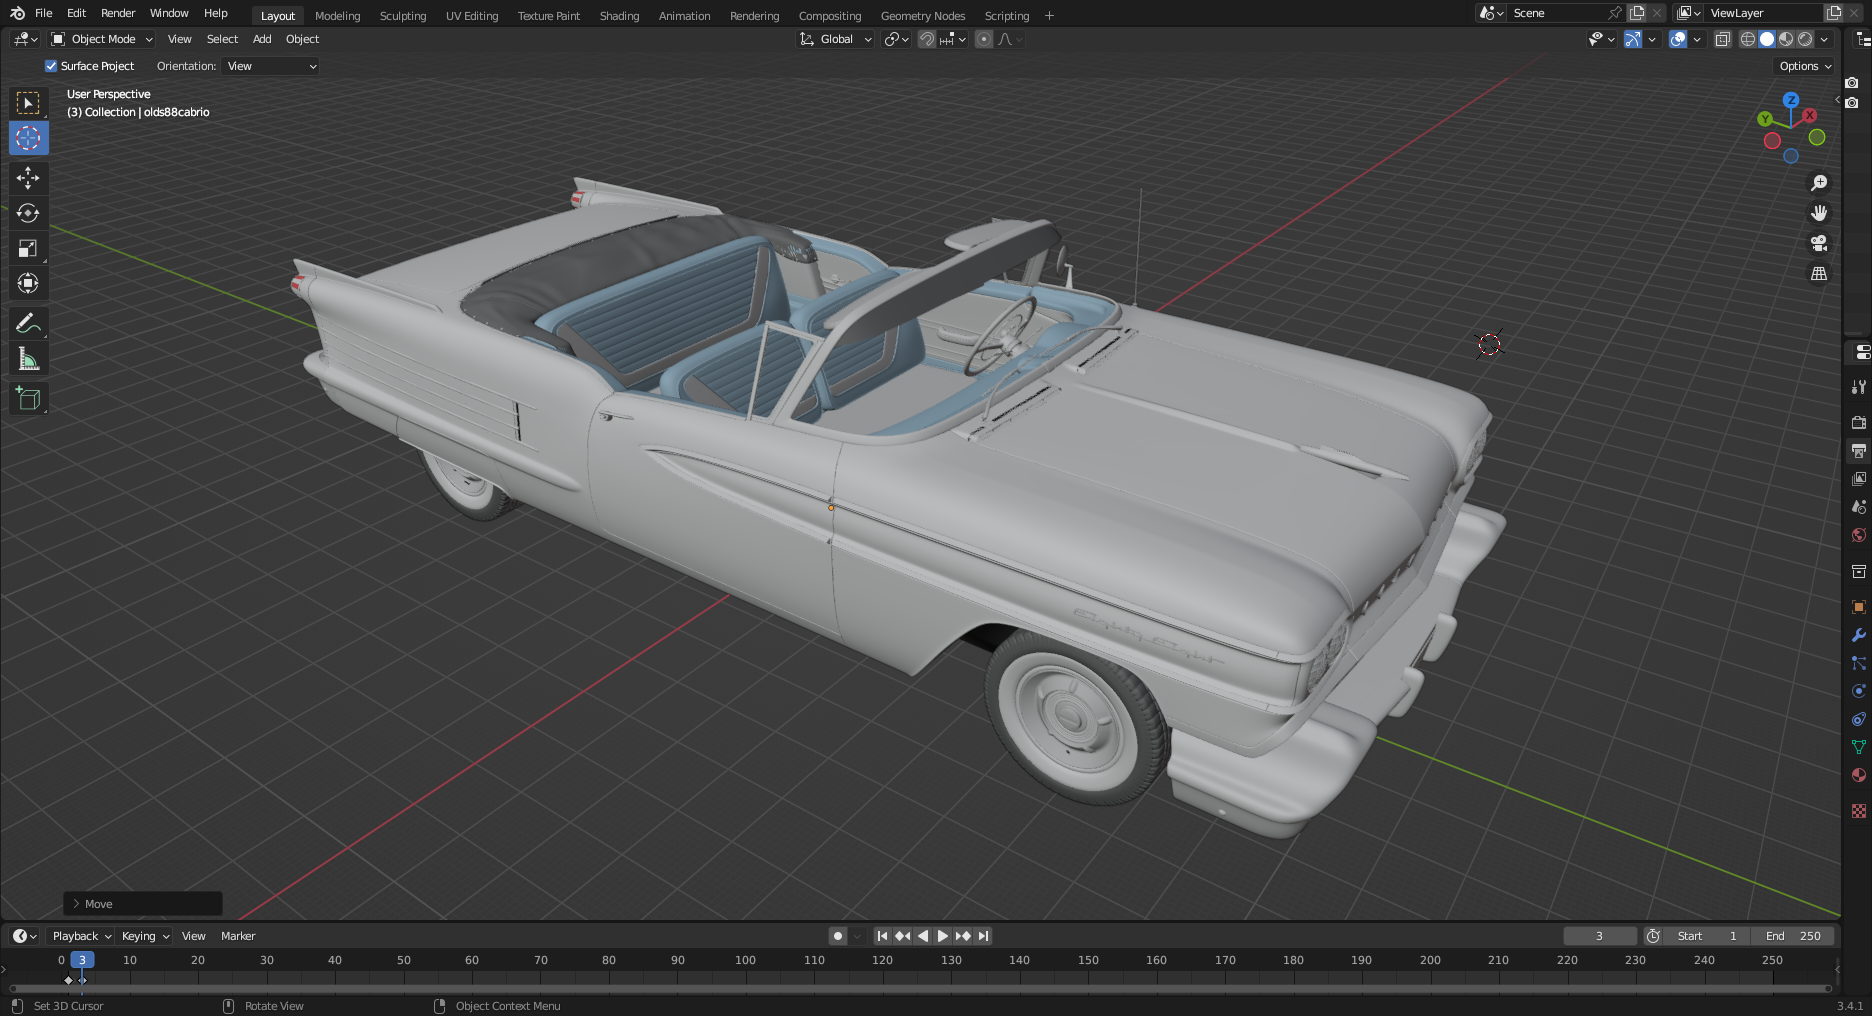
Of all of the cars of the 50's era, I think I like Olds the most. My latest additions. This gives my a 54 88, 57 98 convertible, 57 88 convertible, 57 2 dr hardtop and 58 convertible and a 59 convertible. I'll convert the 54 into a 56 at a later date. The 57 88 also gives me a dash for the 57 98 plus, I can use it as a starting for the 54 and 59.
-
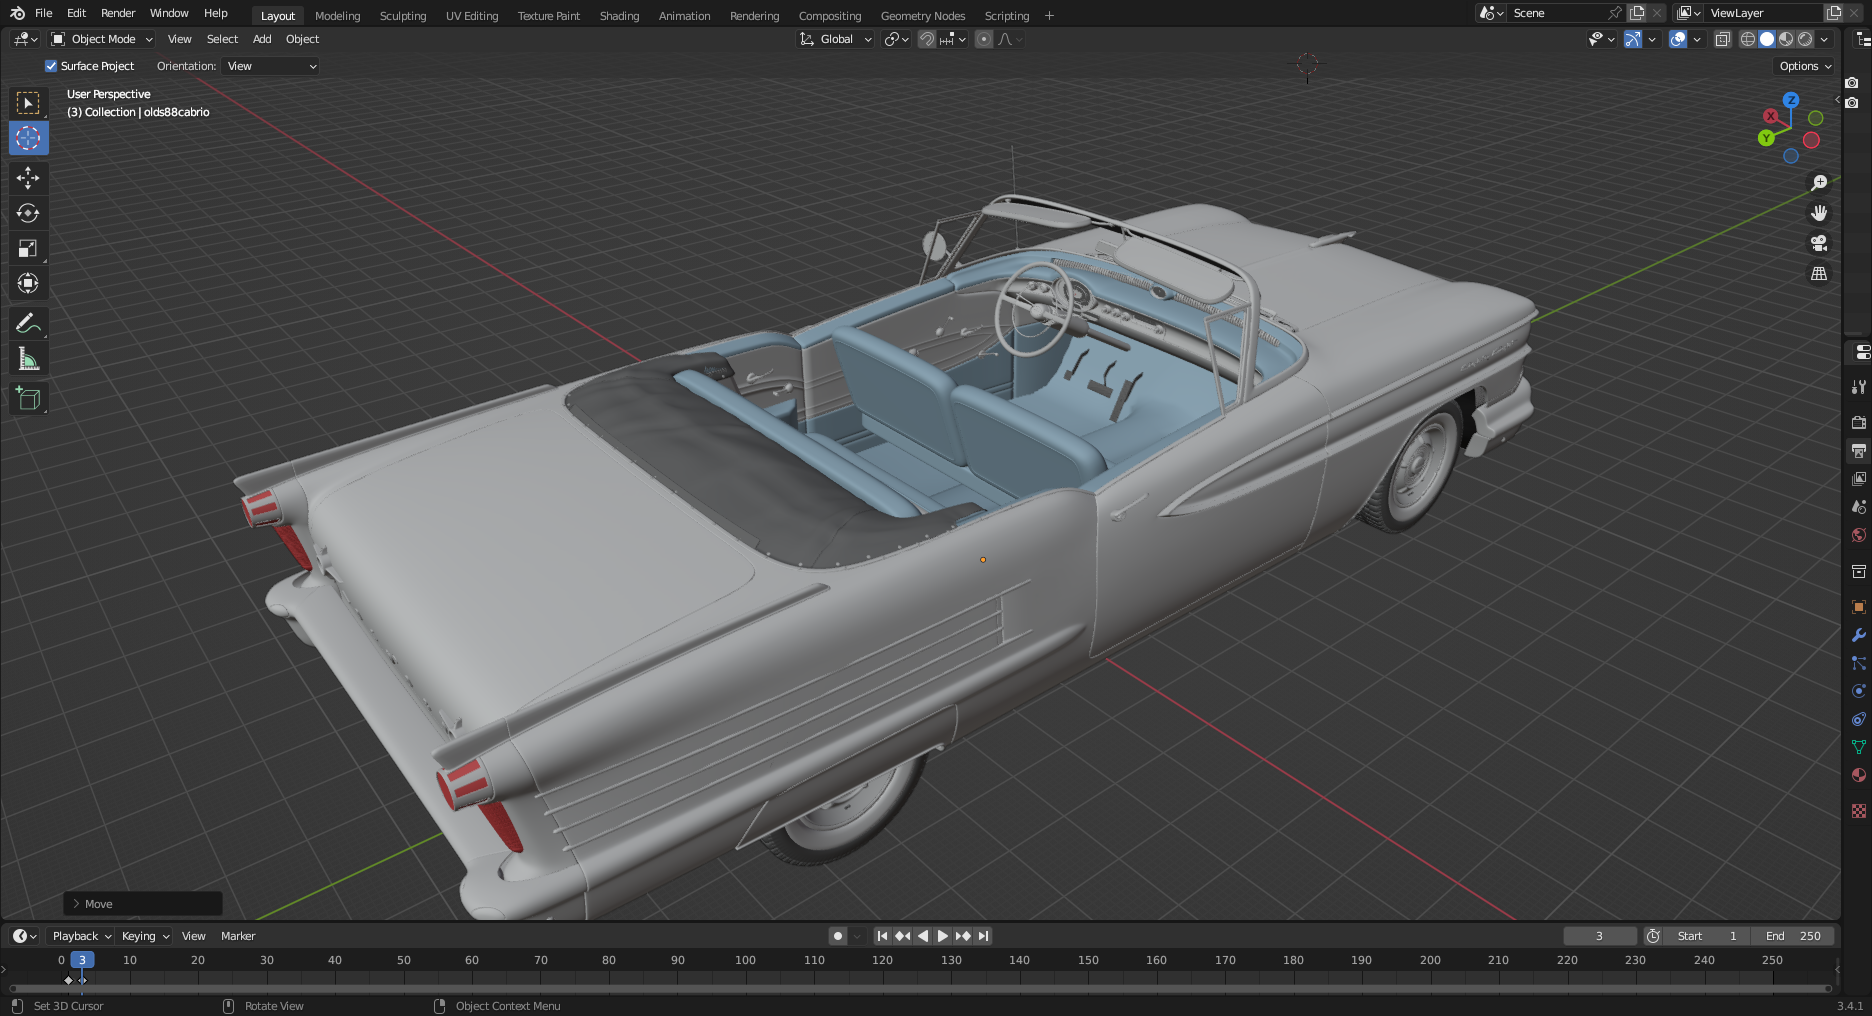
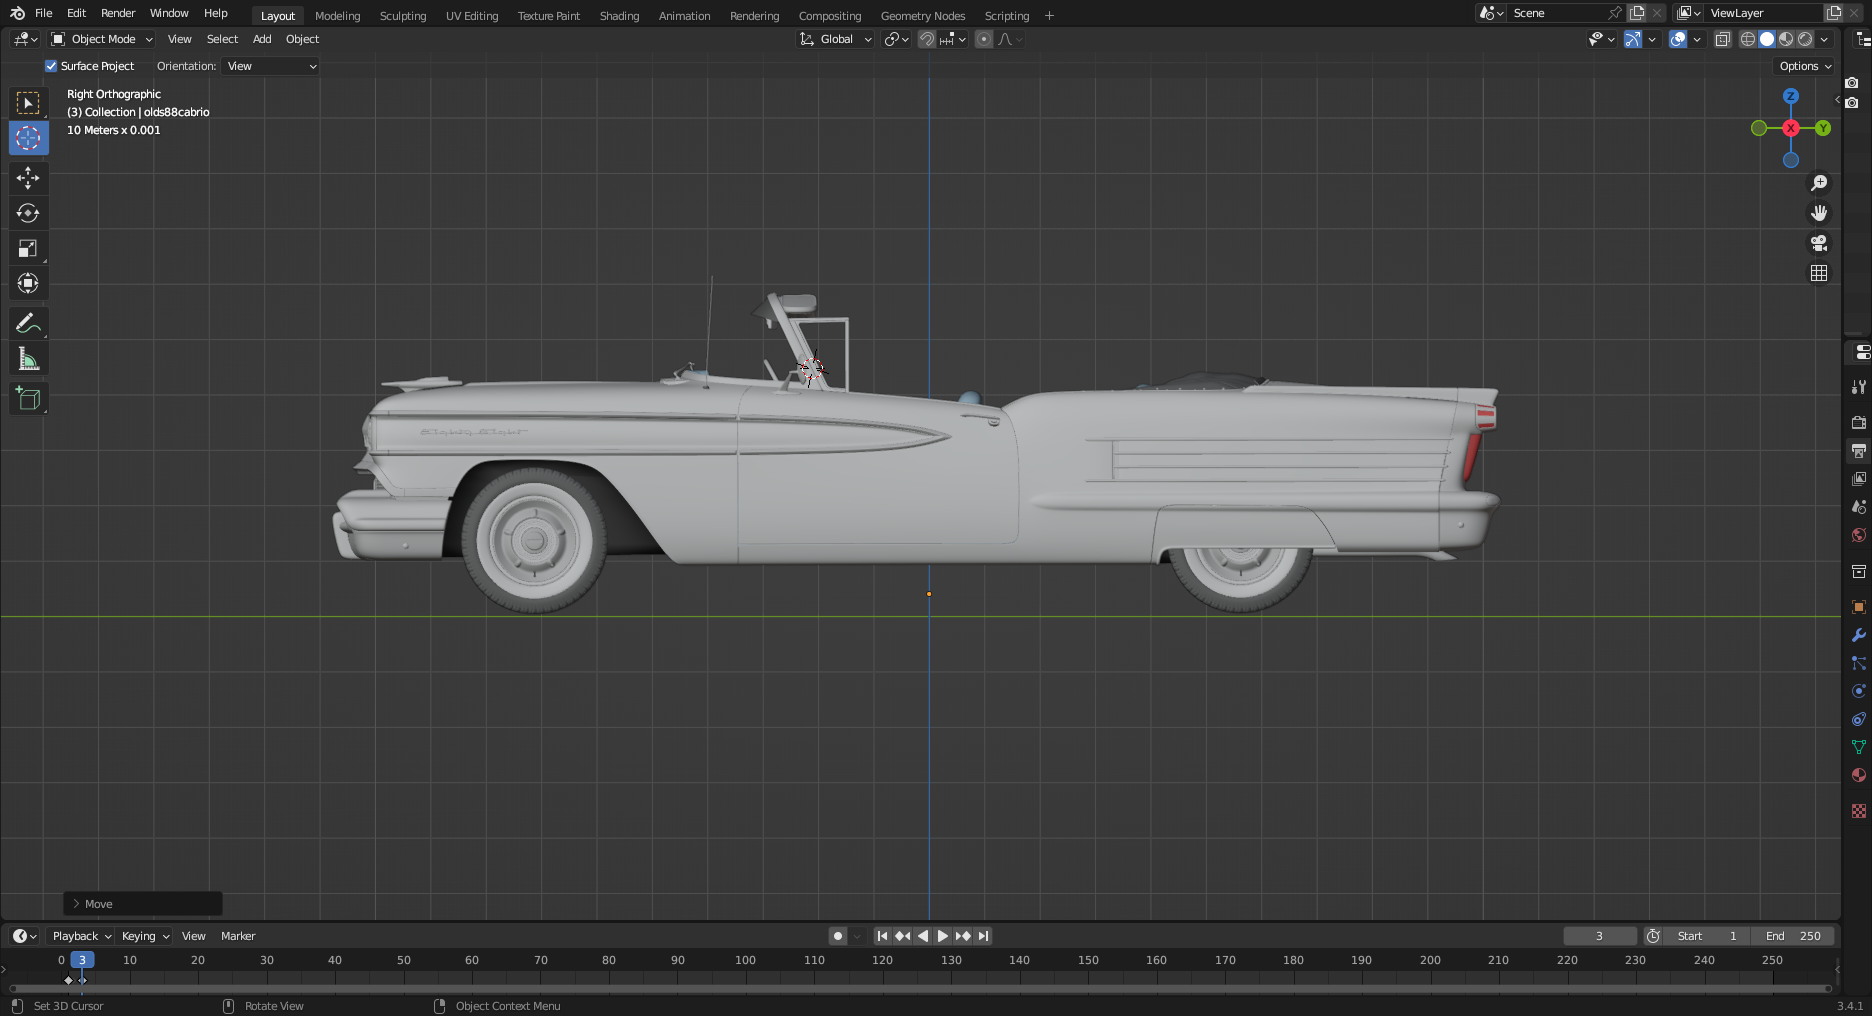
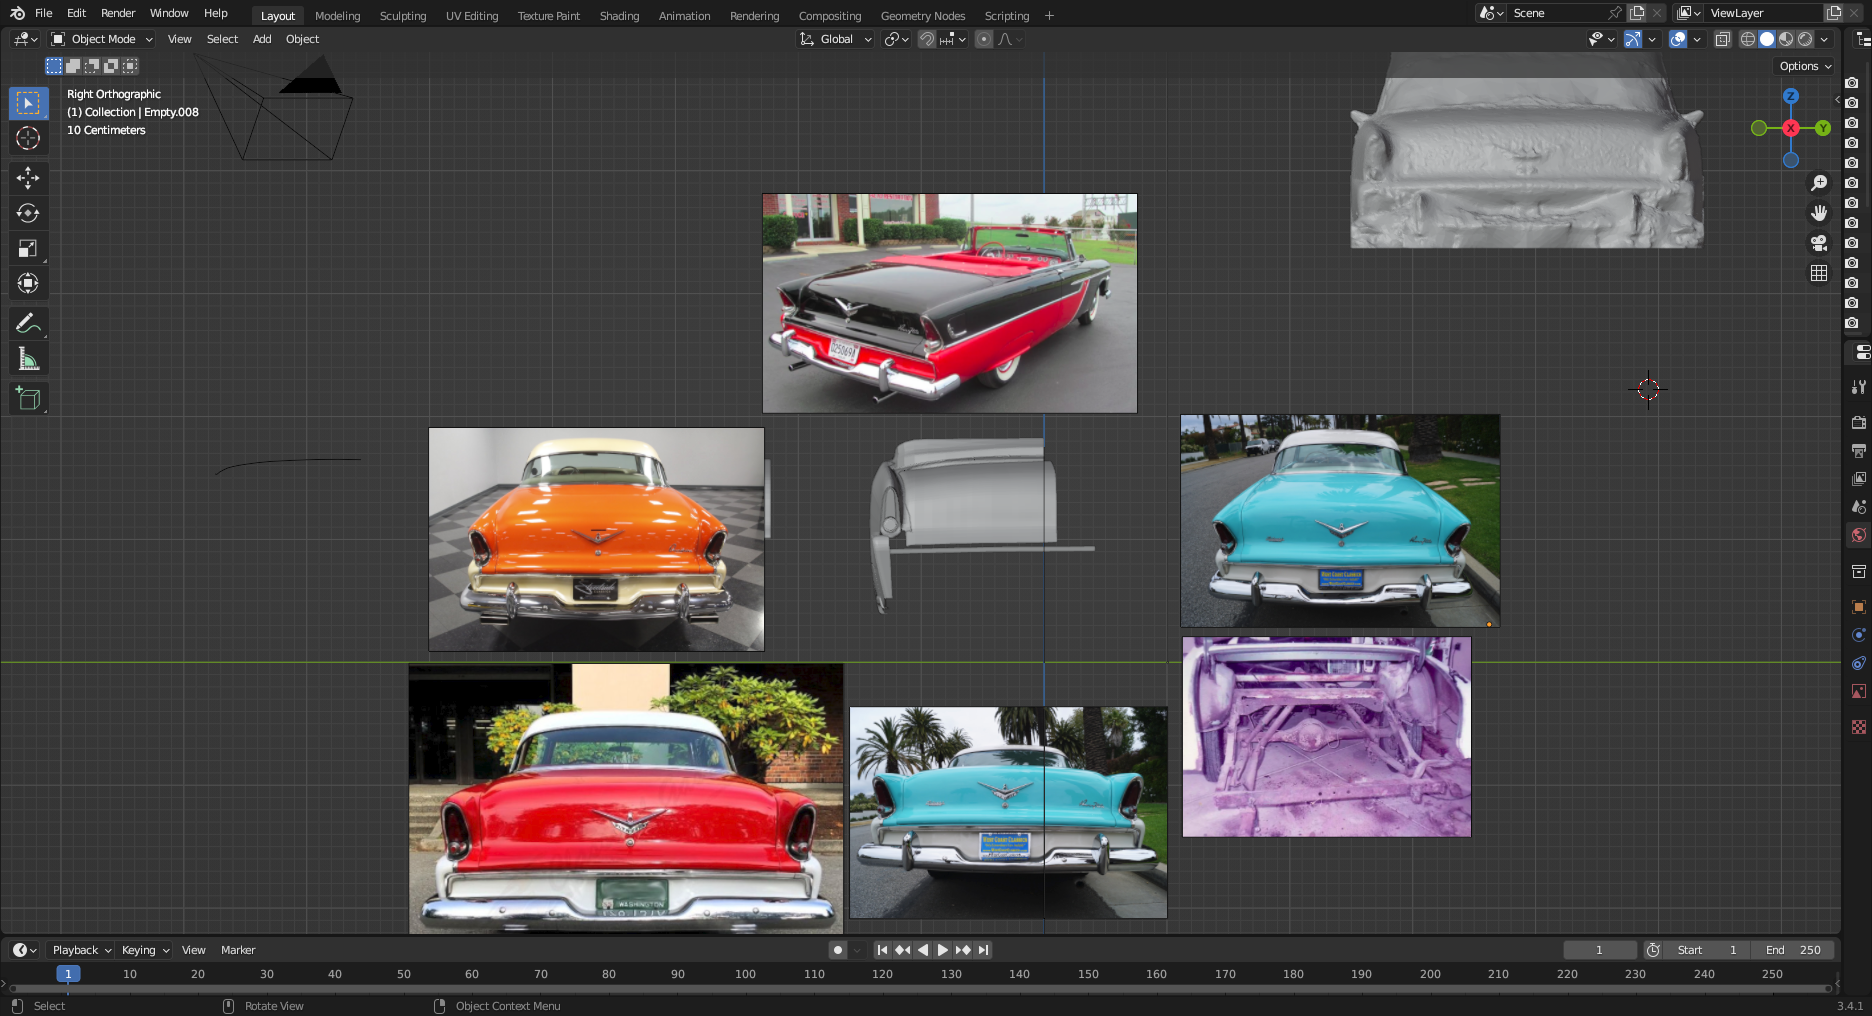
Update on the 56 Dodge 215 hemi and Plymouth 260 poly engines. A little more work to be done to complete. Note the difference in th driver side exhaust manifold. The generator was mounted on it. Even the passenger side had a slight difference.Work has continued on correcting the back end of the 55 Plymouth file. F you look closely at the reference photos I'm using, you can see that the trunk deck is almost flat. There were other problems with it so I selected it with the rest of the lower parts to start over. I had started to do this file back in 2018, but opted to use Dan to speed up the process. In the upper right hand corner of the rear end photos, you can see a brough scan of a real 55 Plymouth. I also have a rough scan that's a little better than the 55 scan. I had used it to create the trunk image in 2019. I ha taken it and using it to correct the trunk.
-
My current project is creating the 55 Plymouth 301 semi hemi poly head and Dodge 325 poly head engines. The Plymouth engine is the same as the Dodge poly's but has different exhaust manifolds which have the generator mounted on the exhaust manifold. It's mounted on the intake manifold and timing chain cover on all other semi hemi poly engines. I haven't gotten to the 2 details yet. I have the poly heads and valve covers done. Also, the 57-58-59 325 simi hemi poly engine has a different timing chain cover. I need all three of these engines. The 301 Plymouth, 55 315, and 325 Dodge. All 3 have differences. I do already have the 270, 315 Dodge hemi that I did 4 years ago done. Since I am doing the 56-57 Dodges as D-500's, I'm going to create the bell housing for the stick shift trans. I'll also put it in the 55 Plymouth. The exhaust manifolds pictured are from my A block Plymouth 318 poly engine and not the Dodge hemi. I'm working on replacing these as they are similar to the semi hemi poly with with a few changes.
-
Bodies can be difficult at times. Make sure that the thickness is at least 1.5 mm thick. I print flat parts on the build plate. When cleaning, make sure it is completely clean. It should feel and look as it would after uv curing. Leave flat pieces on the build plate to clean and uv cure. Leave supported pieces on the supports until completely cured. I run tubular rods between between body panels to keep them straight. Leave them on until the body is cleaned and completely cured. Cut them with off when done and sand the stubs off.
-
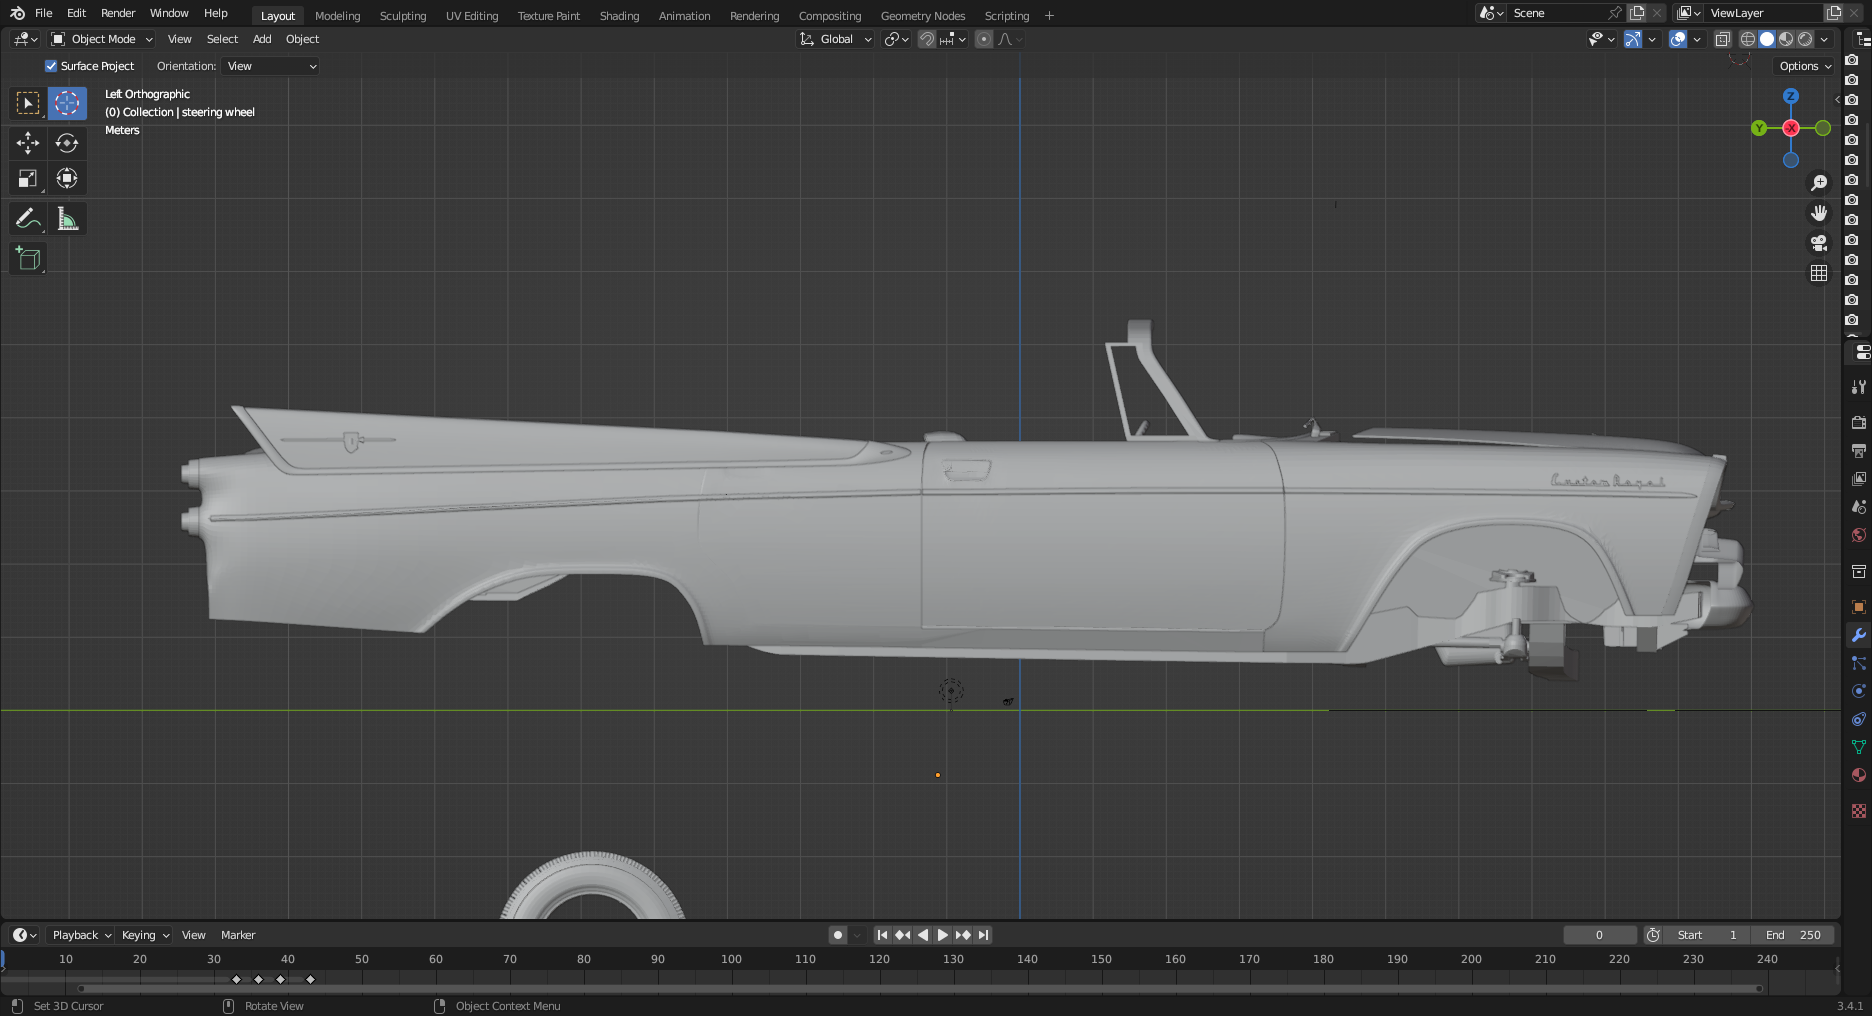
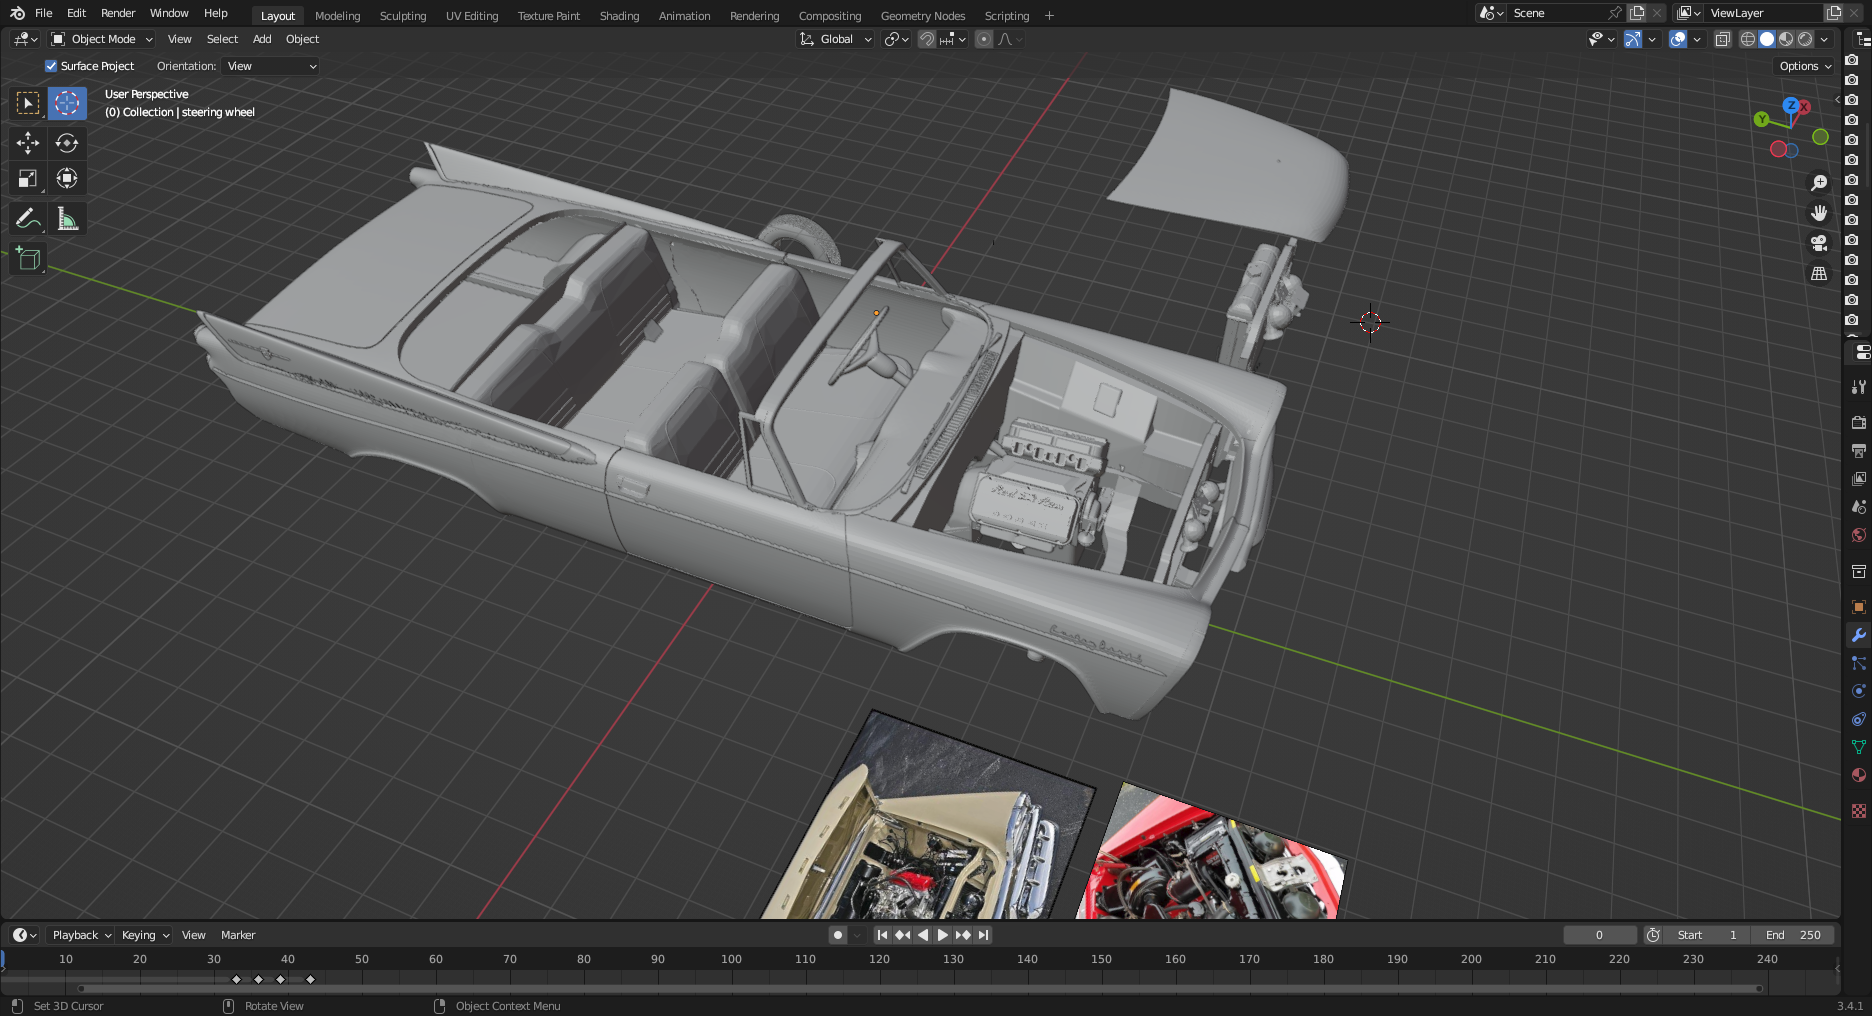
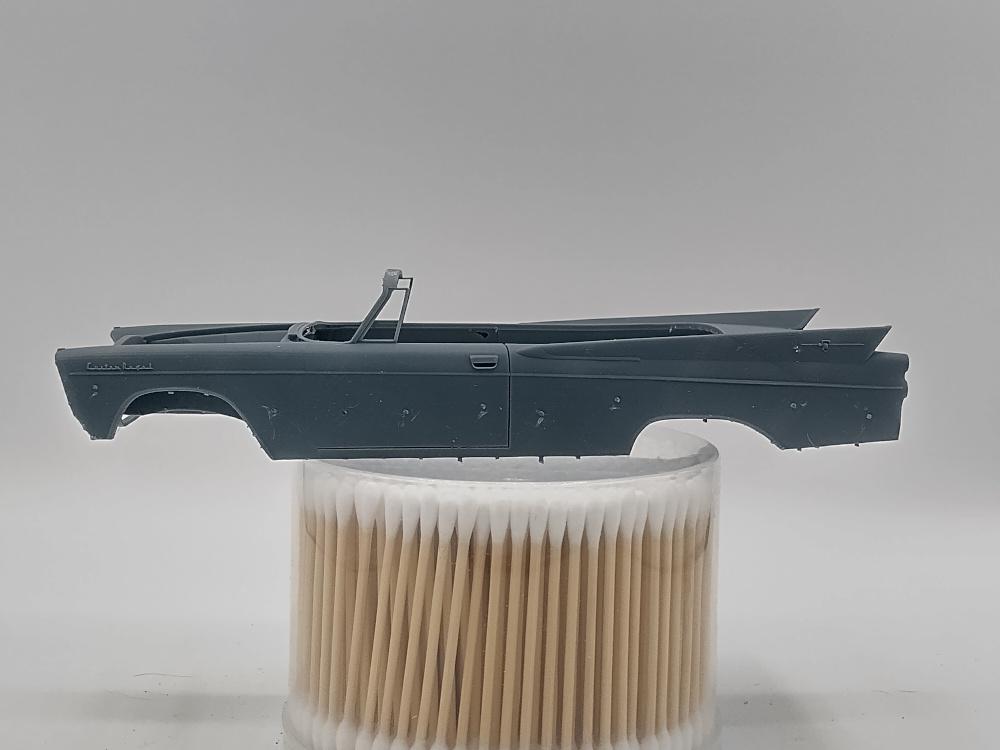
I finally got around to working on the 55 Belvedere convertible. Unfortunately I didn't look closely at it as it has major flaws on the side, trunk, tail light and the whole back end in general. I've got the door, some of the rear fender outside, the piece to extend the outside fender bottom and tail light lens fixed. The side of the car had been curved out too much. I can't really fault Dan for the errors as this is a difficult car to create the file for. Pictures of the back end do show the parts though. I have an advantage as I have a promo of this car that shows me everything. It has the usual warping that squats the rear end I'll just take a lot of work. I've also started working on the poly heads and valve covers to covert my Dodge hemi in my avatar to the right engine to go in this car.


.png.84927cd4977fb0afdcef4c486b0b9524.png)
.png.c0ad42e9e3a29767971f95b7104876b0.png)


.png.b1c33cdfb820b0d6f7da4c5cf9ea7042.png)
.png.983615b7f882c94a904030db58ceaaef.png)


.png.8b71fb1c6606e5614c051928c67fee81.png)
.png.4a2f5f4e3315e2617c46abe581fd5ce1.png)
.png.b2bad4aa7ad96c51b1236af16e8dd864.png)
.png.7e5b8d777a52406c8d90d2be5d9067ed.png)
.png.bc80e6a8858e72960fa12913a1fd58d8.png)
.png.0189a1dfd42c7c36d81ffa4c74b719c8.png)