my66s55
-
Posts
1,395 -
Joined
-
Last visited
Content Type
Profiles
Forums
Events
Gallery
Everything posted by my66s55
-
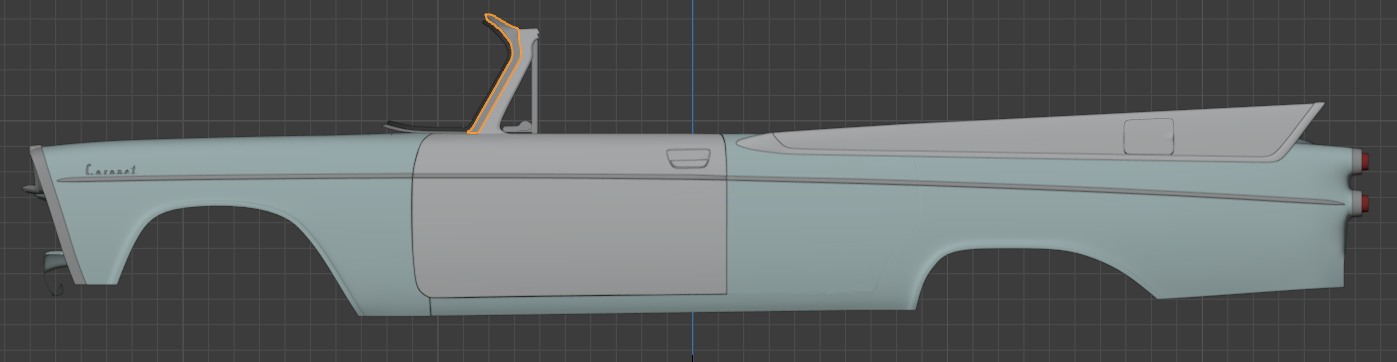
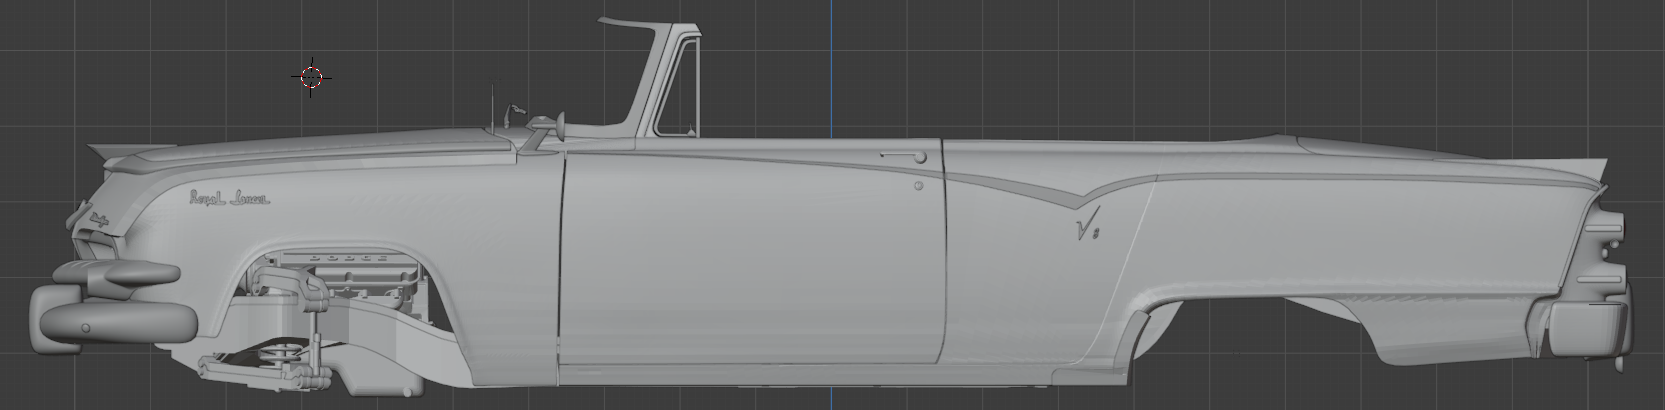
The engine is swimming around in the engine bay. Sensing something is wrong, i load the 56 3d blueprint file into Blender for verification. The whole front end is seriously wrong. My first project is the front fender slant. I still have to fix the front wheel opening. The front end is totally off on this thing. The windshield is set too far back The front of the hood and hood chrome is off Corrections underway

-
One problem I've found with these files is that there not in scale. The 55 Dodge was too long and not high enough. I fix that by finding the correct measurements and using the measurement function in Blender. I change the measurements and verify the look with a good side view photo.
-
Time to look at some builds. The 37 Delehaye 135 Competition Roadster by F & F. It will be 2 tone blue. The hood pieces are just laying in place and are a bit off on the fit. They actually fit perfect. There won't be any engine. The frame. There were 3 of the 9 that were shorter wheel based. They were called Geo Ham's. I may be off on the spelling. I found a frame chart of this frame and used it. The inner and outer door panels are separate as this type of resin doesn't scribe well. The door and hood handles are also separate. Here's the 35 LaSalle getting a paint job. It's light yellow.
-
I haven't even thought of anything like this. Keep in mind that it takes 11 hours to print a 57 DeSoto body. After printing, it has to be post processed. I will make them available, but I'm not interested in doing it on a large scale.
-
I use the 2018 XL for larger prints and the mini 4k for smaller.
-
I will make any one of the cars available as I finish them.
-
I've had the Paasche H, Neo and Badger. Wasn't happy with any of them. I bought the .05 version of The Mr. Hobby trigger air brush last Fall and two months ago I bought the 275 3.5 one. I use cheap acrylics fro Hobby lobby and Walmart. These air brushes are amazing. Perfect paint job every time.
-
The 58 Ford Skyliner has an up top. I.m glad you enjoy watching.
-
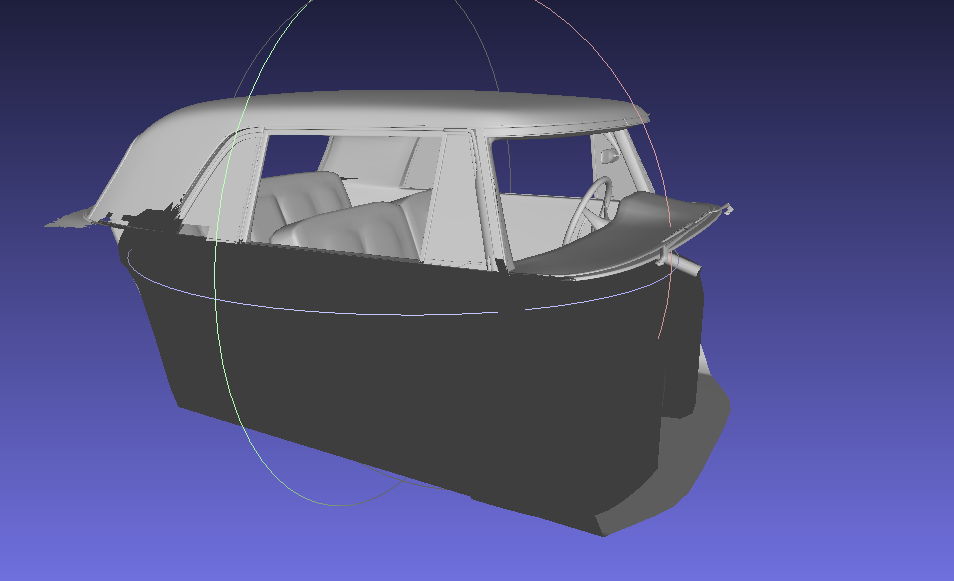
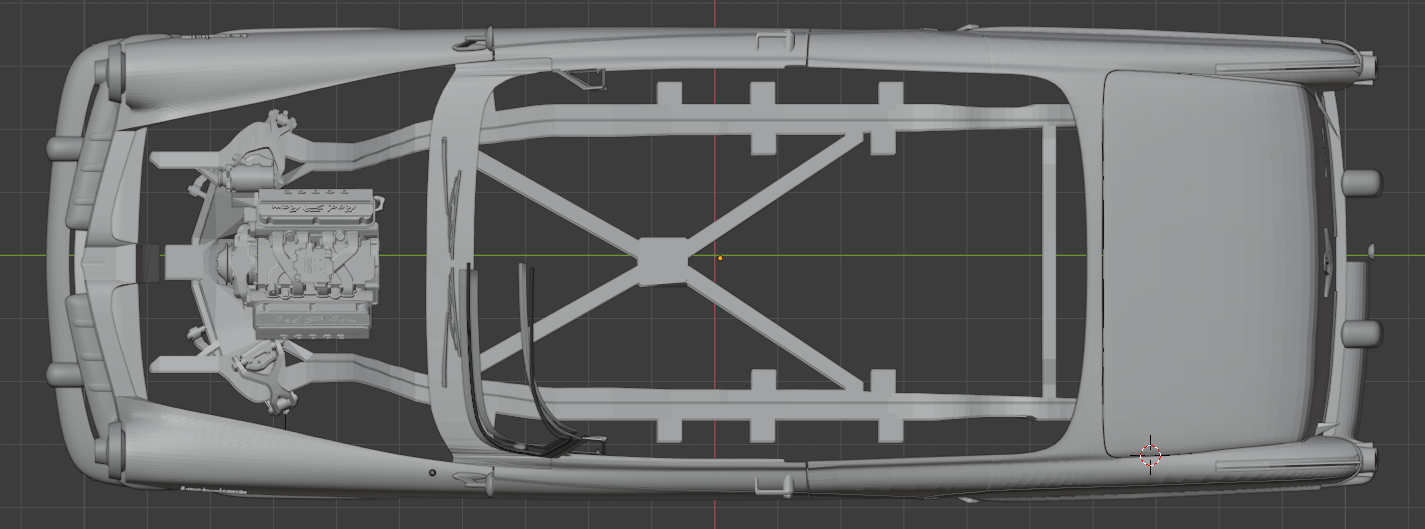
Back to the 55 Dodge. Now working on the inner fender wells and firewall. Drivers side for now.
-
First off, there are few 3d printable files in the categories you want. Grabcad might have something you want. 3d files need to be manifold i.e no holes, reversed triangles or other irregularities. That's why you need to learn a Cad software. I was on a site today that allowed downloading of many Hum3 files. While there, I found these 2 hot rods. They come apart so that you can pull off a part and print it. They would give you experience with Cad and printing. If you would like these files' message me.
-
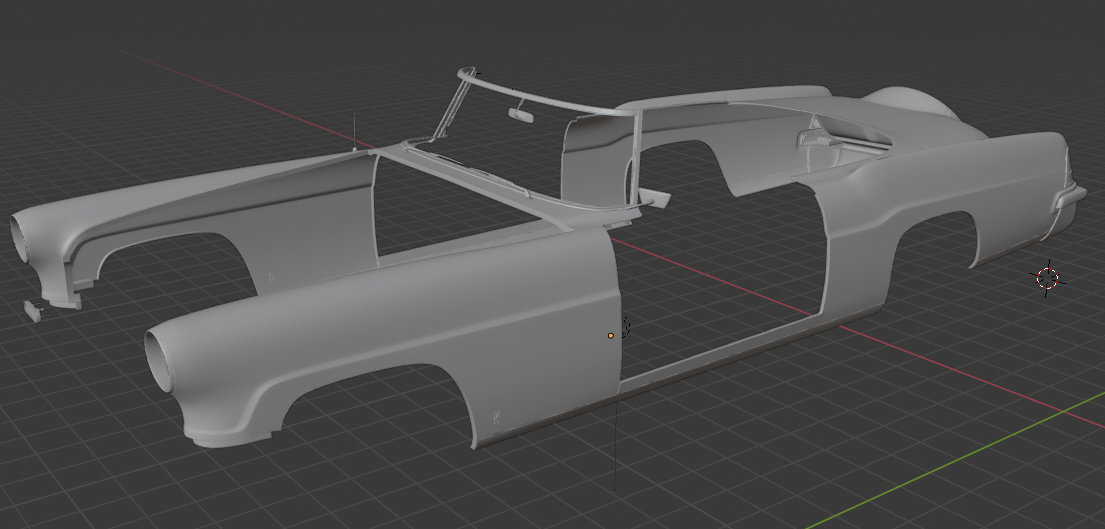
As you may have figured out by now, I switch between projects to keep from going stale on any one. There is one more file I needed to complete my wants. The 4th of July I found it for the price I love most. Free. A Hum3d 1956 Lincoln Continental Mark II. I've been busy doing other thing to other projects. Add to that, a member of this forum requested one of my Chrysler A block 318 engines with trans and I had to print one out to send to him. Back to the Lincoln. When you buy direct from Hum3d, the file separates into the individual parts. Not the case with this one. I've had to separate them. Here's the complete file. the front bumper the hood and grill the interior the tire and wheel, hubcap and finally. the body for print. Notice it's a convertible. That's because: a- I like convertibles and b- they print easier, better. Yes, there is a file for the doors.
-
Now that I've shown how I reworked the body on the 55 Dodge, have a look at another Hum3d file of the 57 Dodge 4 dr. This is what I want to create. A Custom Royal Lancer D500 convertible. Of coarse the top and back door had to go.
-
Yes and I don't get air bubbles.
-
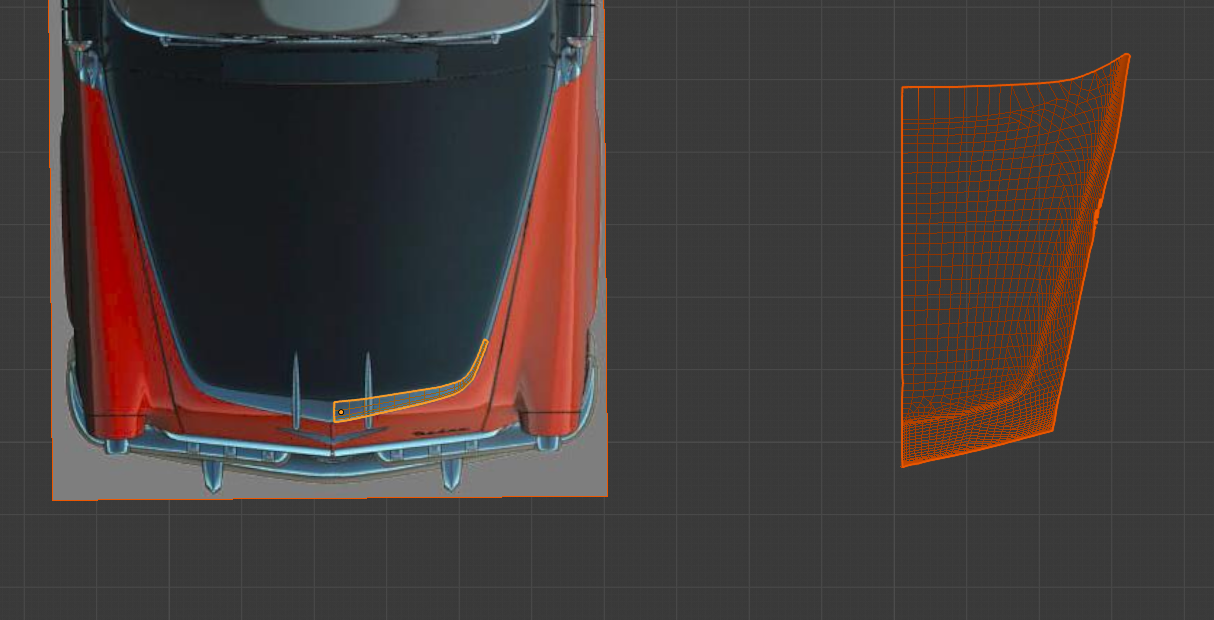
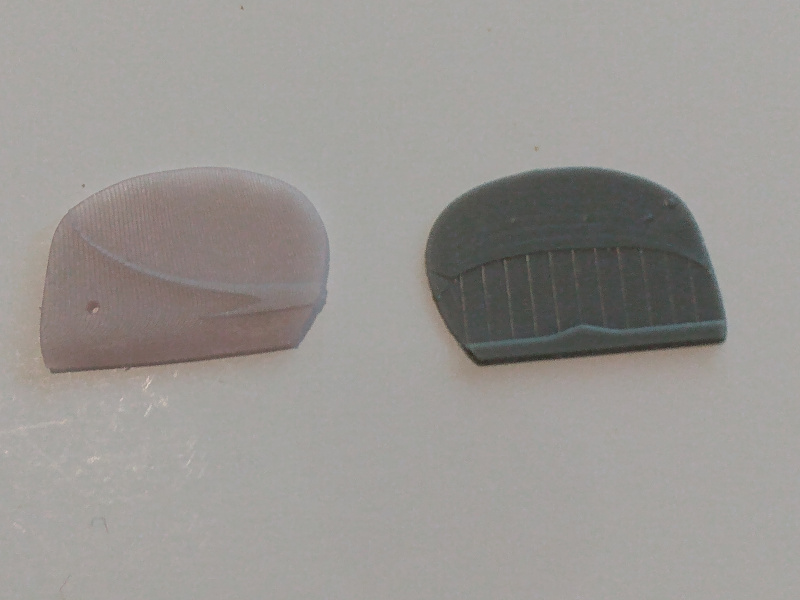
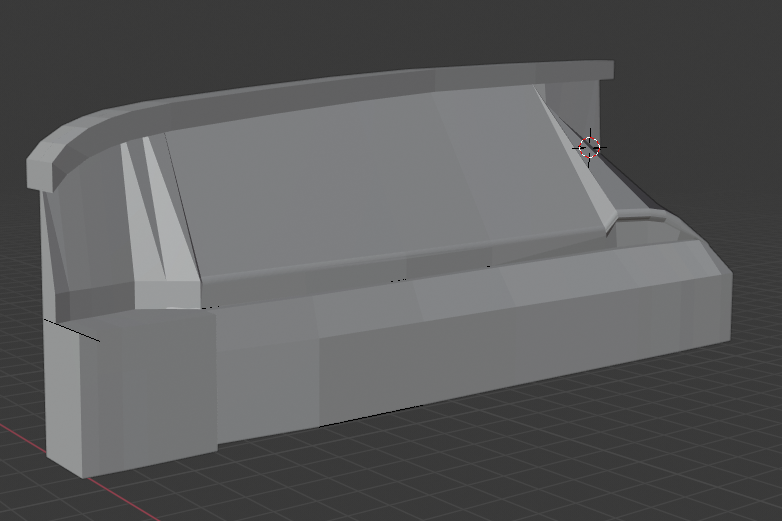
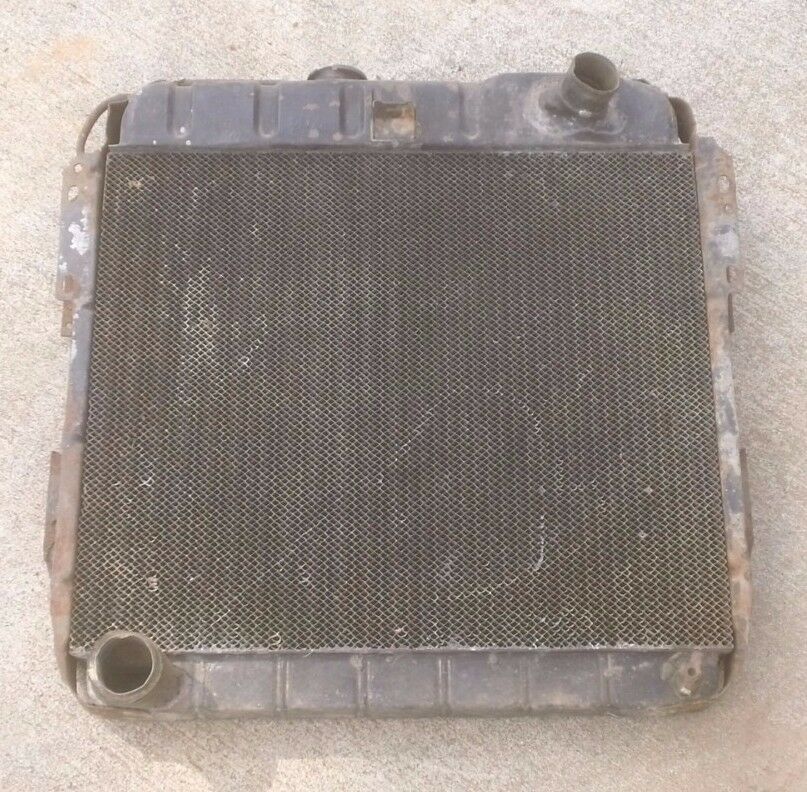
So now I have a basic horse collar. Now I need a radiator. I need the real thing and not a replacement part.
-

3D Printed Honda N400 Drift Car
my66s55 replied to shucky's topic in Car Aftermarket / Resin / 3D Printed
What? No lines? no need to use filler primer to make it usable? No sanding? Understand people. This is the reality of 3d printing today. It's not going to decay in a few years. It's here and now. -
So here's what I worked on today. I have a free file of a 53 Cadillac Eldorado convertible that is one of the best files I have ever found. There is a body and a beautifully detailed interior, but no engine. There for, I'm creating a 1953 Cadillac 331 engine. I'm currently working on the heads.
-
I have only said "Blender" without any clarification. Blender is an open source program created by people who use it. I'm a Linux user and not a big fan of Windows. Blender has been mentioned on the Shapeways website as a good source for checking your files for 3d print ability. I started learning Blender in 2013 when I built my first 3d printer.
-
Thank you very much. Any help is graciously appreciated. There isn't enough pics on the internet to fully cover this subject.
-
2021 AMG GT Black Series-An Adventure in 3D Printing
my66s55 replied to Jhedir6's topic in WIP: Model Cars
Been right here. Are you following my "3d printed" posts? Message me any time. I'm here to help. -
2021 AMG GT Black Series-An Adventure in 3D Printing
my66s55 replied to Jhedir6's topic in WIP: Model Cars
It's a simple fix. Load the car into your cad software. Then load your wheel, tire and brake into the software. Position them into the general location of the wheel well and scale them to fit. Things like this you learn with time and experience. Check the width of the tire to make sure it's not too wide. Your doing fine so far. -
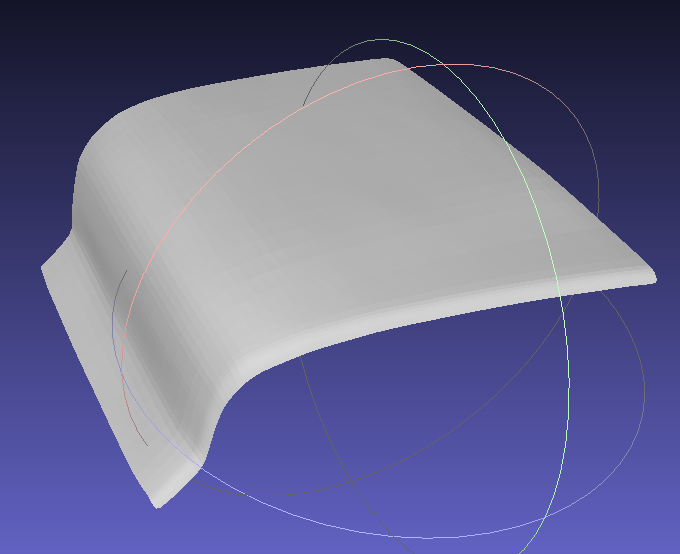
Of all the cars I have files for, I don't have one for a 55 Plymouth. I did find a raw scan for a 56 4 dr that I'm using that to create some parts for the 55. This is what I did over the last few days. Take the scan. Cut out that area to make the trunk lid. Trace the needed part. Subdivide it, smooth it and you get this. It's only half,but that's all I need. Thus, you can see how I'll create the above Skylark.
-
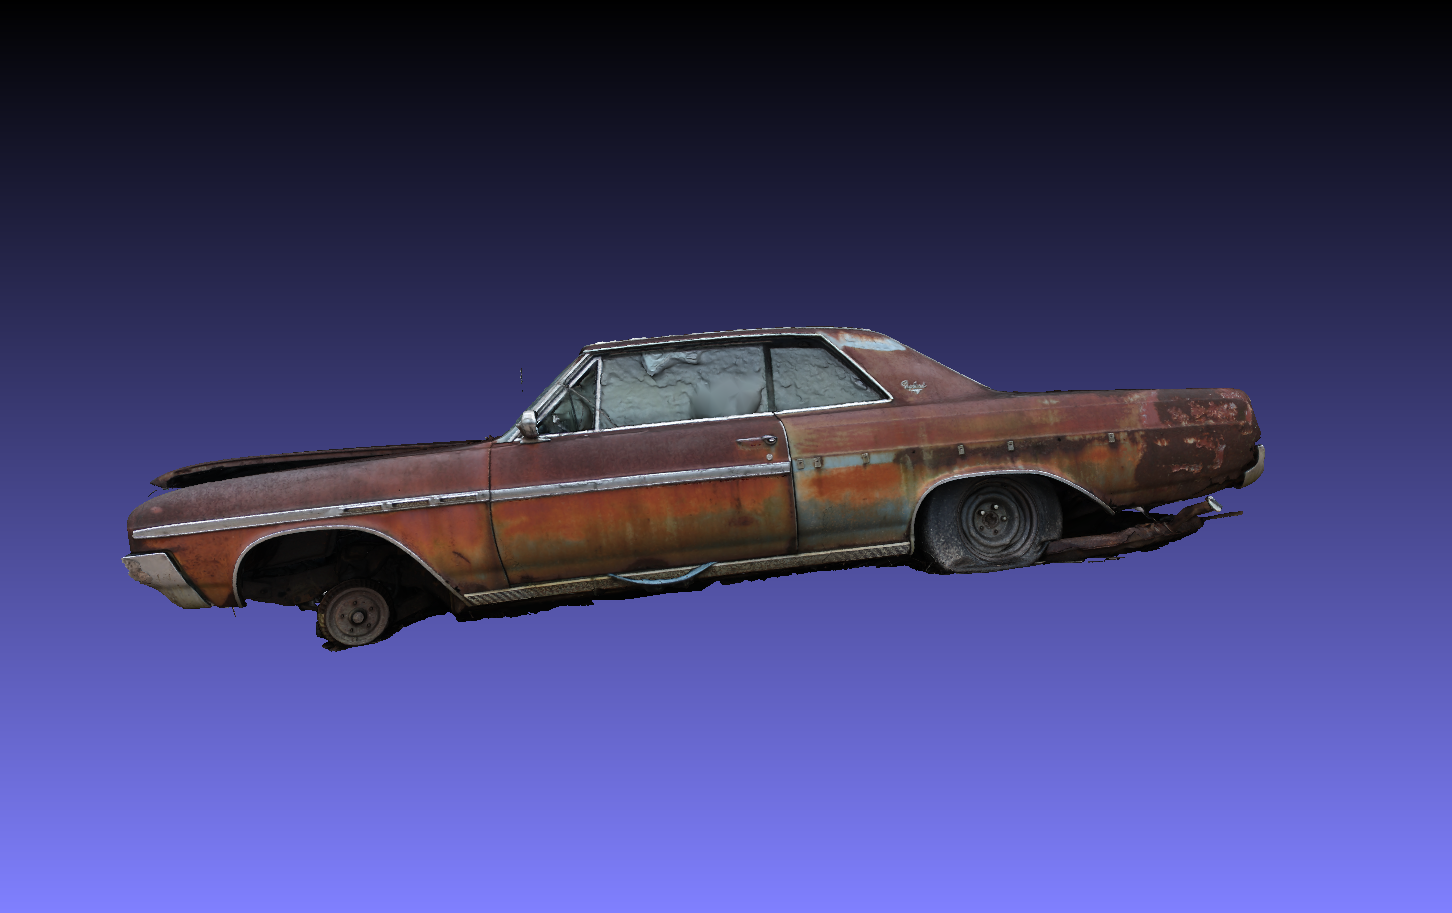
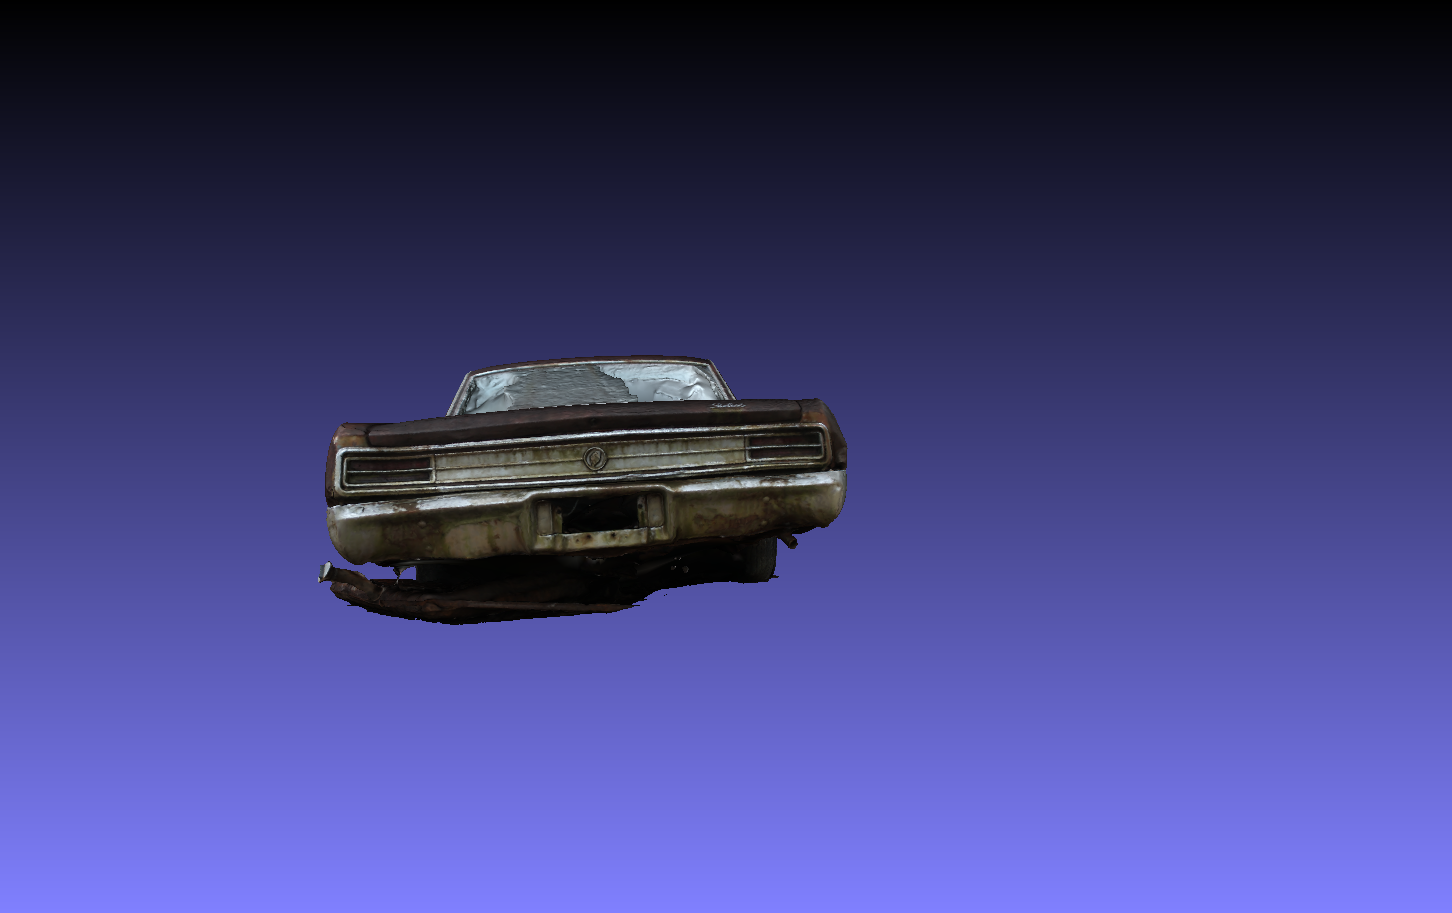
I won't be using that 64 Skylark for my project. I have a raw scan I got off Sketchfab.
-
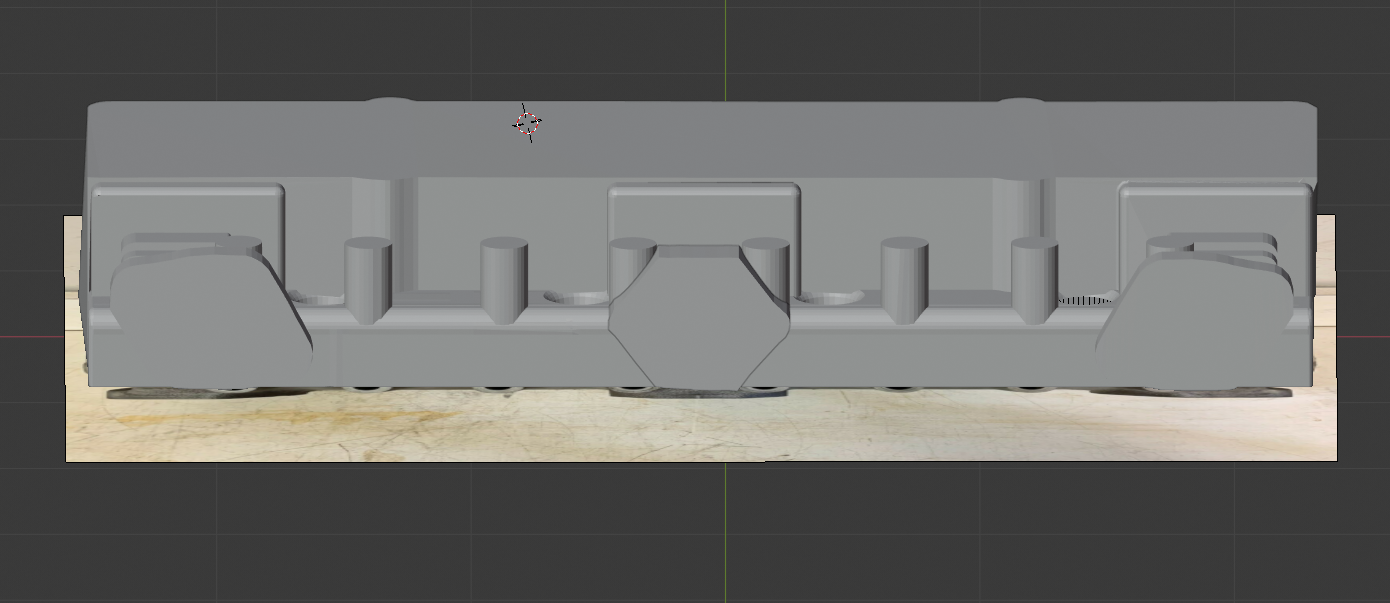
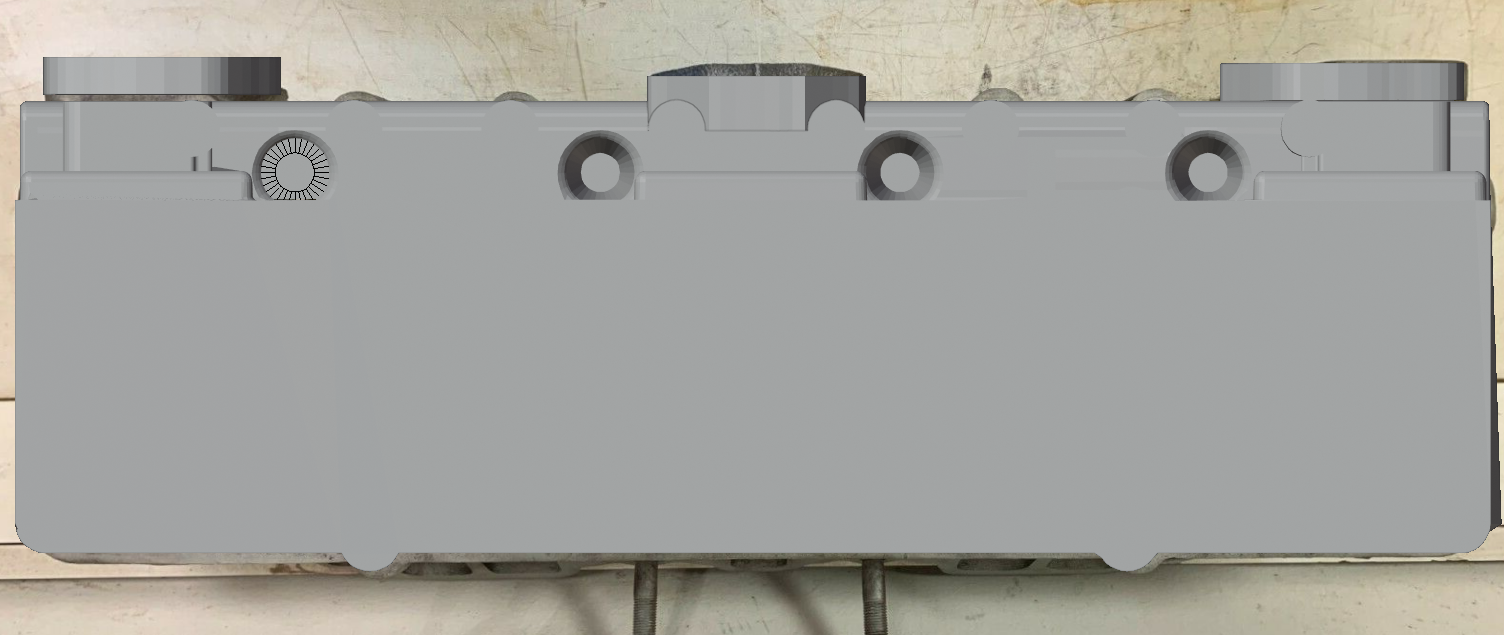
I found a site with a 56 Dodge that was being built for Trans Am racing. There are pics of the sheet metal for under the hood that gave me great insight on how to create the needed parts. This one worked well to make the horse collar.
-
Thanks for the heads up.The bottom pic will help me a lot.
-
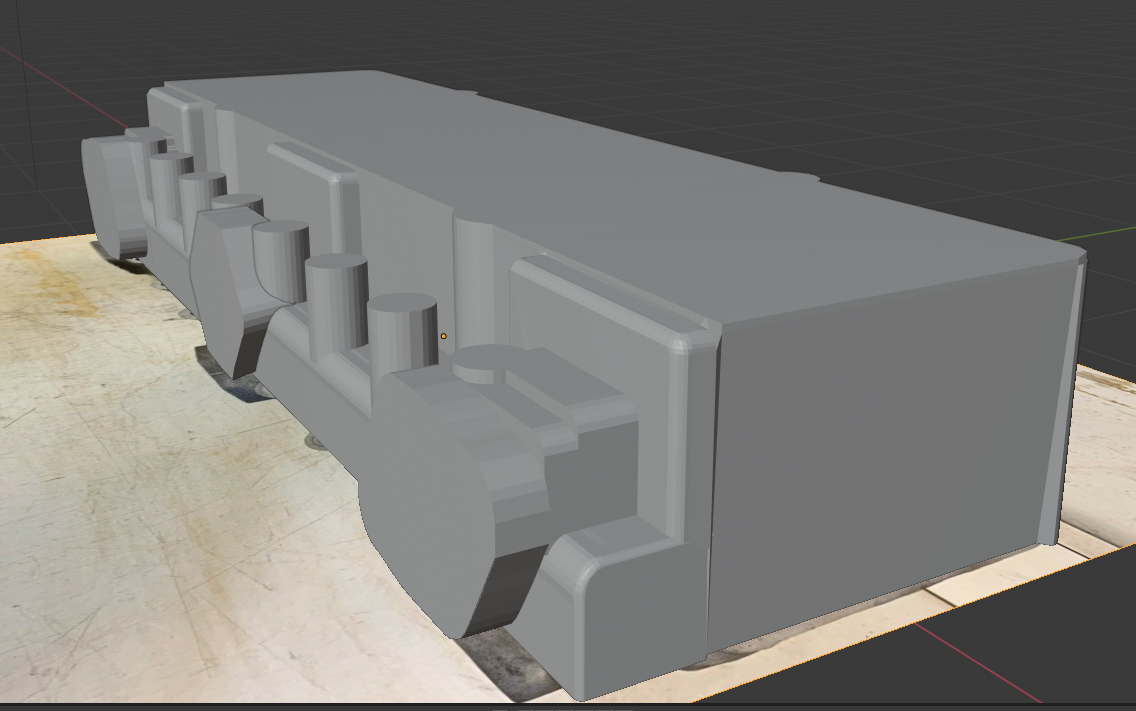
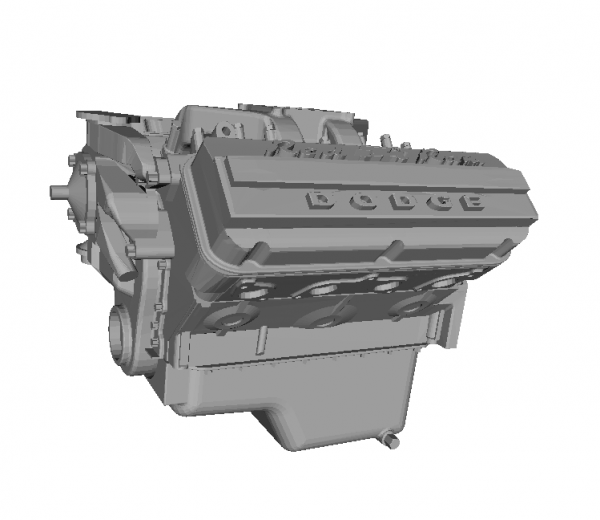
So now the body has been corrected. The frame and suspension have been done. I put my 55 Dodge 270 hemi in to help for positioning the next step. Up coming next is under the hood files