my66s55
-
Posts
1,395 -
Joined
-
Last visited
Content Type
Profiles
Forums
Events
Gallery
Everything posted by my66s55
-
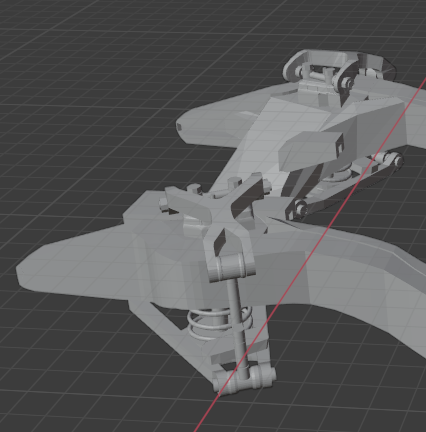
Adding a steering knuckle, shock and coil spring makes the front suspension.

-
I used the service manual to find pics to make the upper and lower control arms. Here are 2 of them. Here's the finished parts.
-
Frames done. Next comes the front suspension.
-
I will only use Phrozen printers. It's a Taiwan company run by 3 Taiwanese engineers. The printer in this case is the 2018 XL I upgraded it from a 2k rgb lcd to a 4k mono lcd last June. Mono lcds let more light through and cure the resin faster. This speed the print time up by i/3 rd or more. The 57 DeSoto took 15 hrs at 2k and 11 hrs 4k.
-
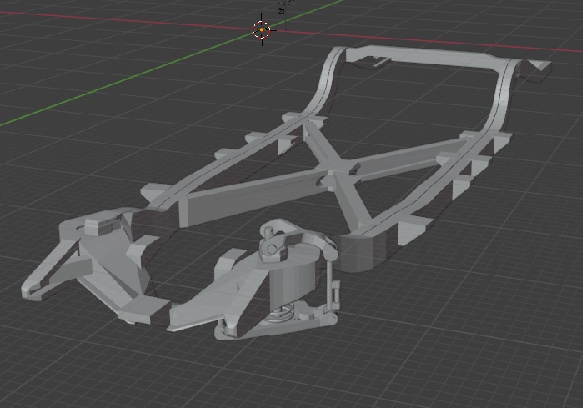
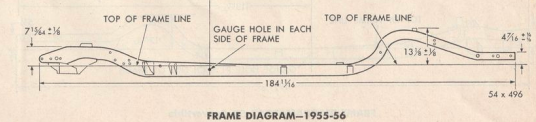
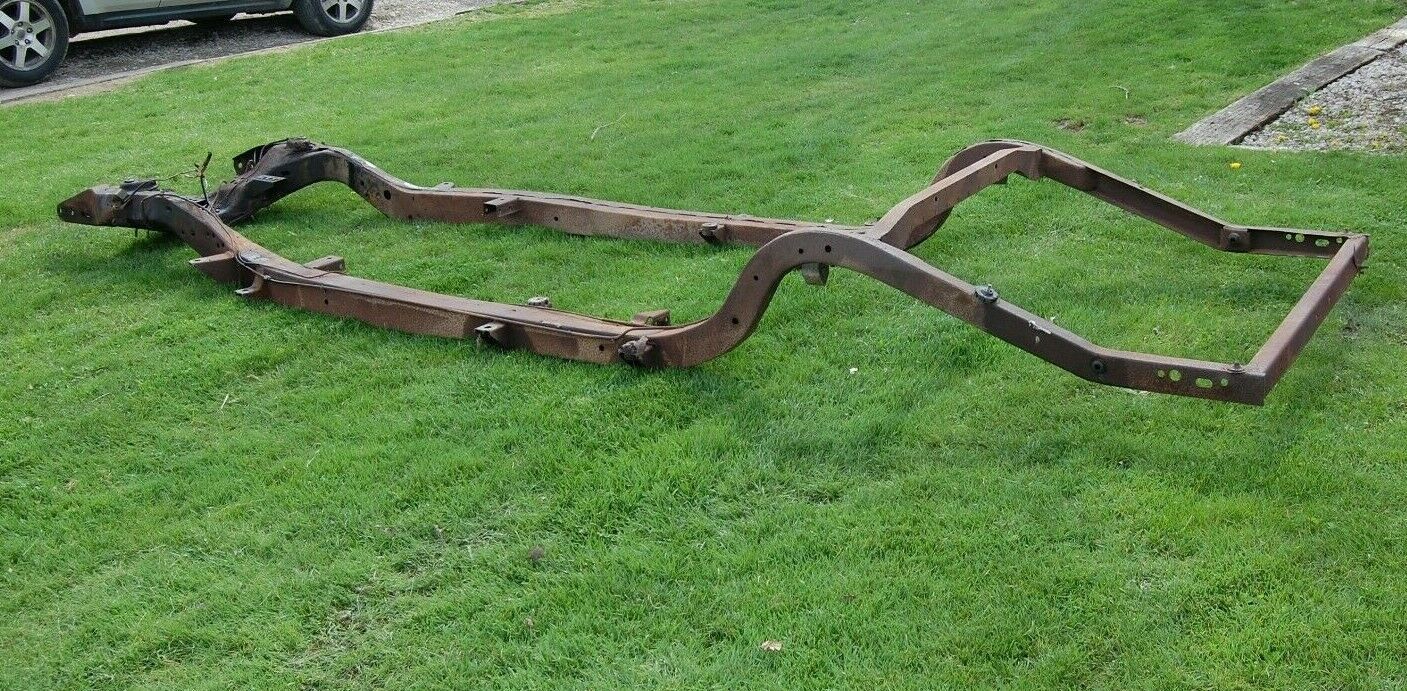
My next creation is the frame. First I find a frame chart for the convertible and take screen shots of the top and side. These I import into a new Blender file. The top goes into the top view and the side into the appropriate side view. Then they are lined up and the drawing begins. I always start with the top view. It's always important to search for reference pic's. In this case, I found a 55 Plymouth frame for sale that had 13 different views. Plymouth, Dodge same basic frame.
-
crai2773@bellsouth,net.
-
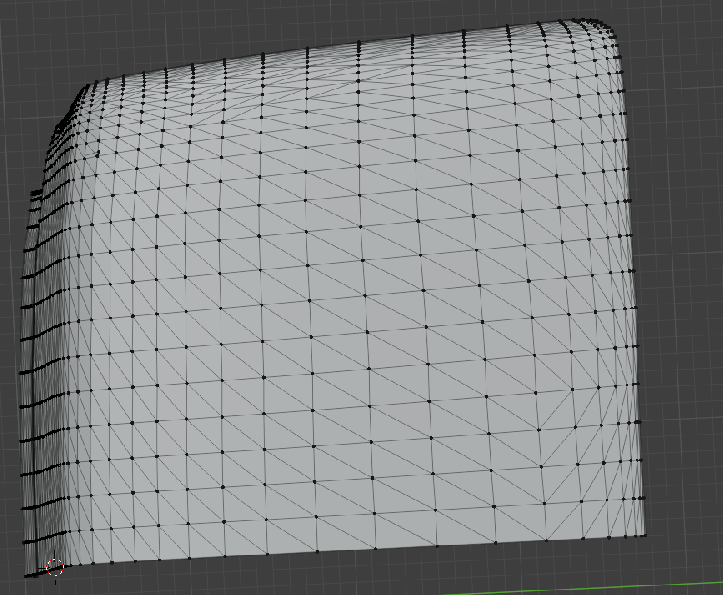
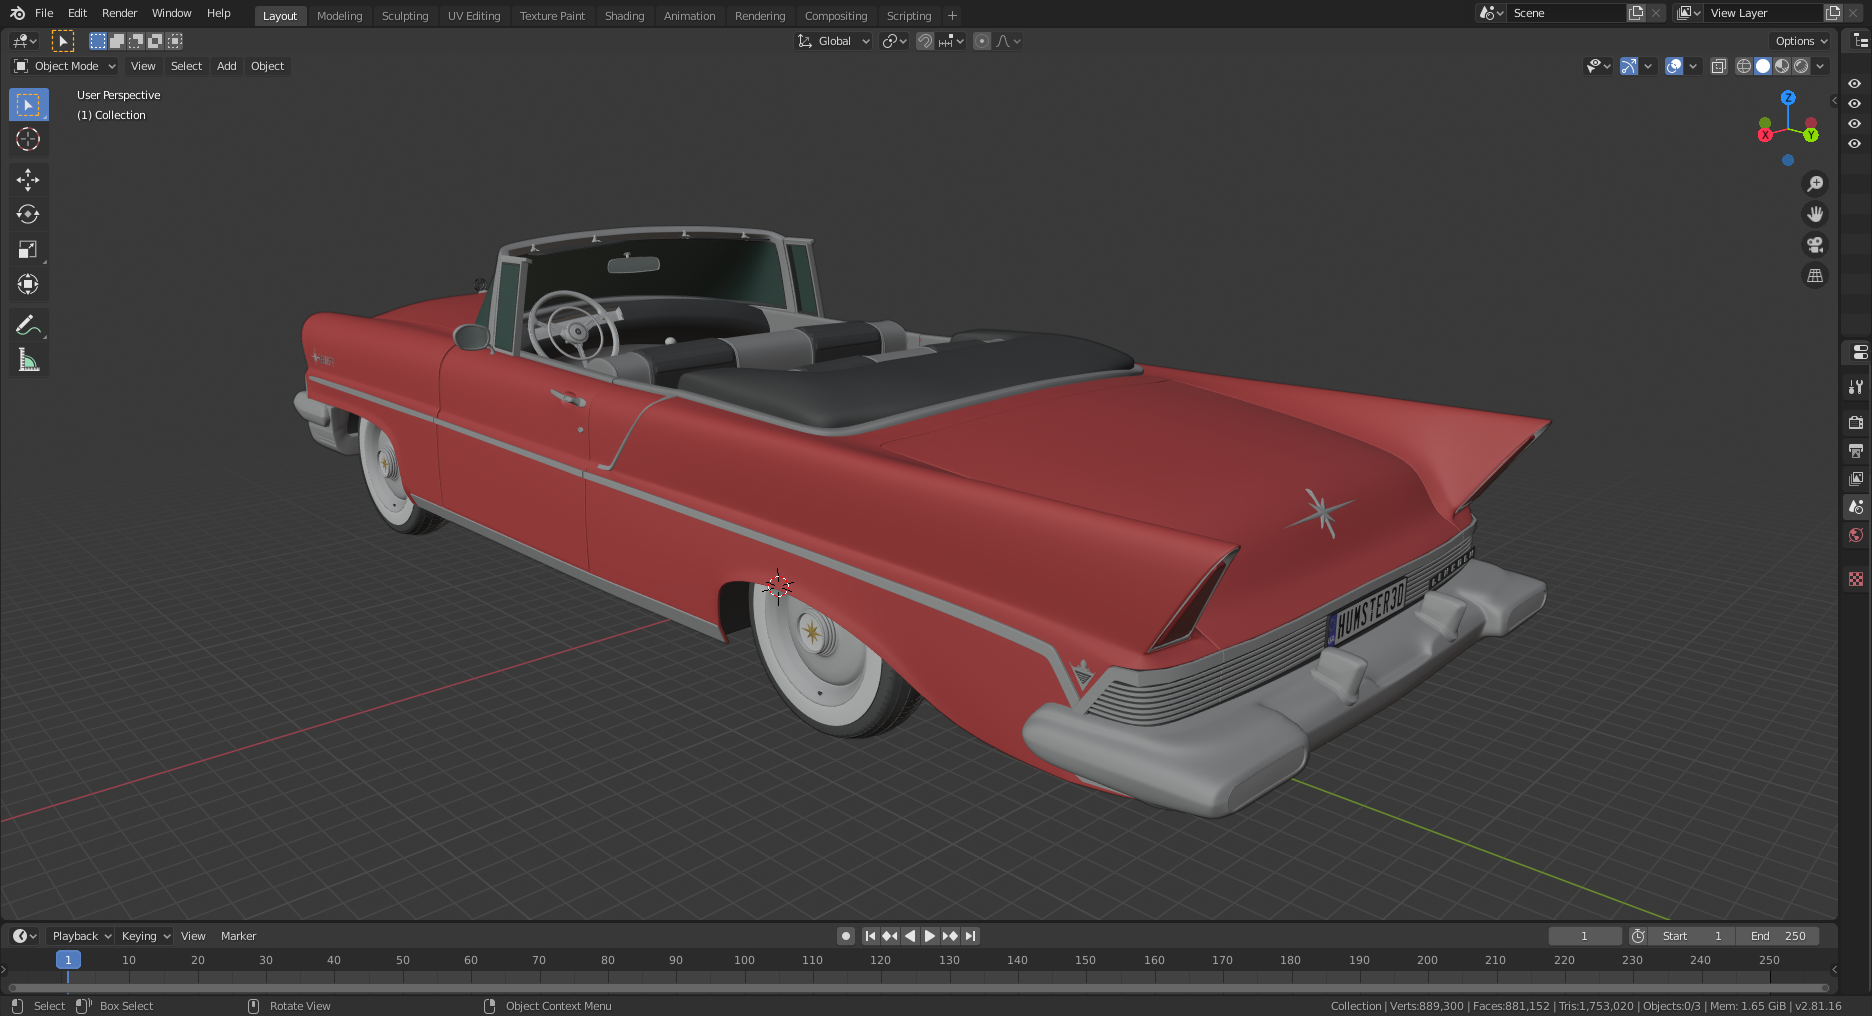
Let's take a look to see what we've accomplished. Then do a quick test print.
-
 What are you using the 1957 Sierra Gold on exactly Steve? As I remember from my youth, it was used with a particular off white.
 -
The original file was a Coronet. I want to create a Custom Royal Lancer. To do that, I need to make files of the Tail fins, the Custom Royal Lancer name on the front fenders and two chrome strips that go on the rear panel below the trunk lid.Notice the file I used to create the name.
-
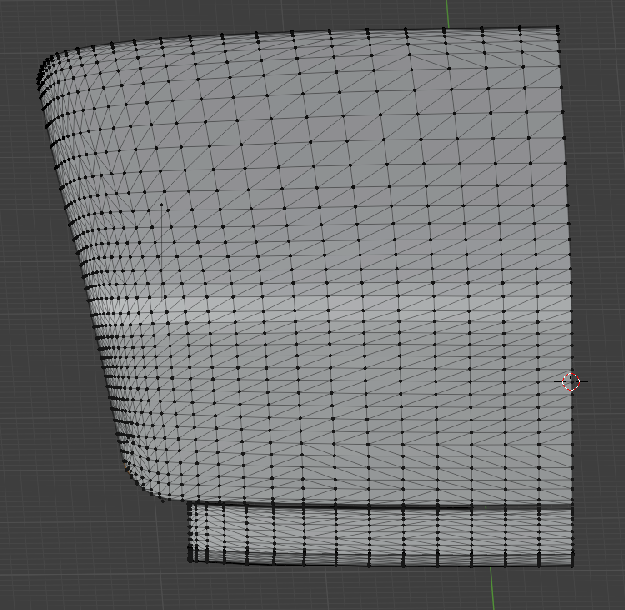
The front clip is next. This first pic is the original. Note the lip around the edge of the part. This lip has to be deleted in order to thicken the part for printing. The middle pic is the part after fixing and eliminating the lip. The third print has the walls thickened and is ready for printing. I have found that 1.7 millilitres is the best thickness for body parts.The reason I use individual parts is that it is the best and easiest way to thicken the car.
-
After:
-
Next is the trunk. Before top: and back
-
Thank you for the kind words Rusty.
-
Micheal it's possible, but not ideal. The best way to do window is clear plastic. If I take the windshield glass file out of the cad file, I can create a file to 3d print a buck to form it with clear plastic and heat gun. The end results are much more realistic and to scale.
-
Sounds like an interesting proposition Charlie. Please keep me posted as to the details.
-
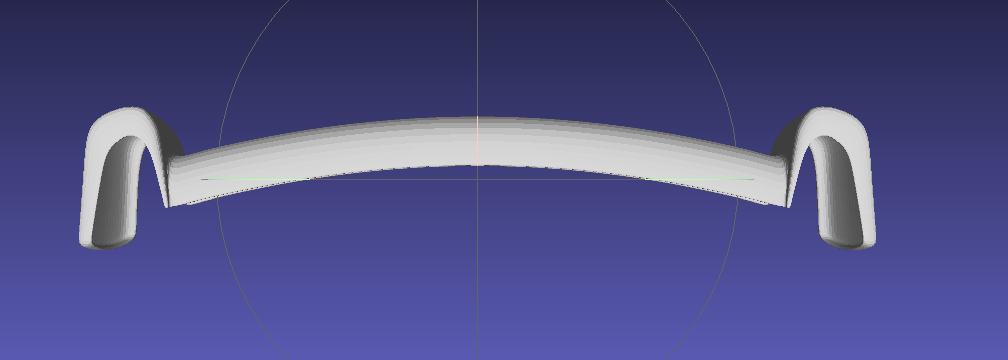
That took care of the curve in the side. Now for the curve in the back. First the rear stone guard straightened. The original bumper. Then the stone guard corrected.
-
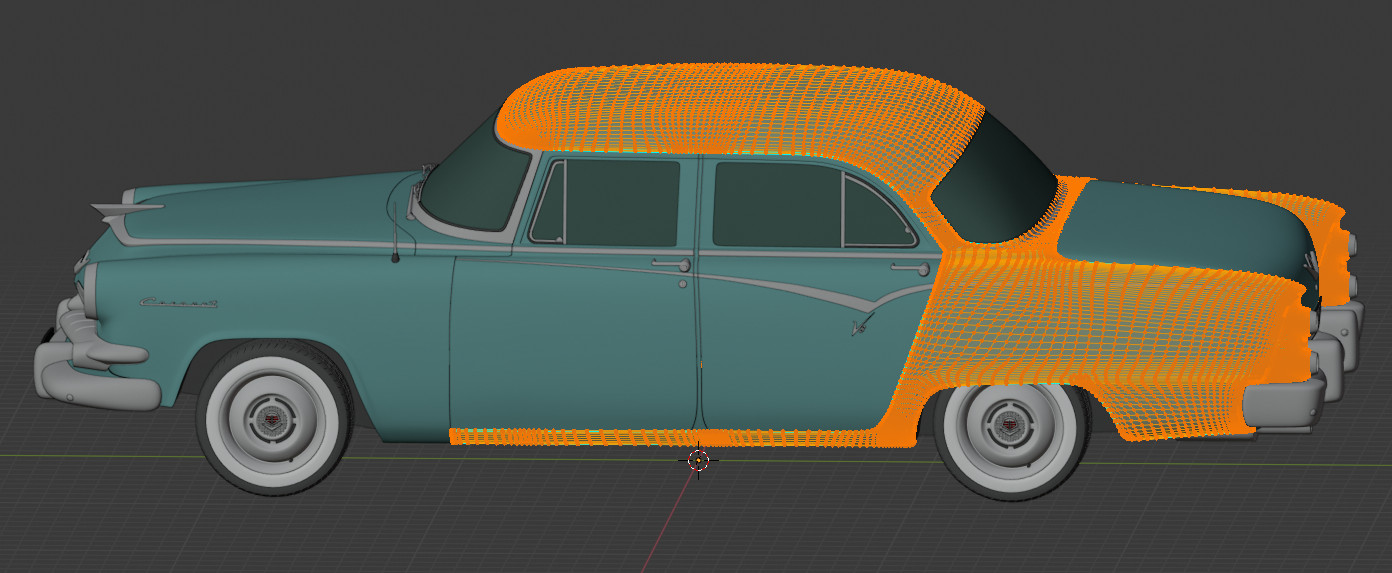
Time to fix this mess. The first thing I work on is the rear quarter panel after I split the body in half. I can't see any reason to try to fix both side of a symmetrical body when you don't have to. The only thing not the same is the gas tank door. I'll cover that fix later if I remember. If not, someone remind me. The the first thing I did was to re-attach the rear door and fill the existing gap between it and rear panel. Next, I converted the curve into a slab side to replicate the real car as best I could. Then I adjusted the panel to fit the width of a 2 dr. Then I added the door and extend it to fit. Notice how I have corrected the line at the top of the panel to fit the convertible.
-
Now that I know what's wrong with the file, it's time to start fixing it. I'm not a big fan of 4 dr sedans. This will become a convertible. Hum3d files are created like a reaj car with individual parts. These can be highlighted and saved as an stl. file so that they can be worked on separately. You can see this in the first picture of this post. I create an stl. file of the highlighted part and delete the highlighted part on the first file. Then I open a blank file in Blender and load the created stl. file and remove the roof. The back door will be used. The next step is to go to work on all the problems. It's one of the better Hum3d files that I found for free on a different web sight.
-
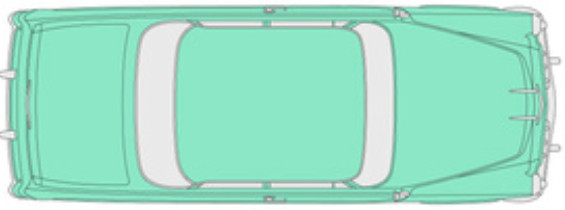
So I get the file and take a look. This is what I find. The guy who created the file didn't have a clue what a 50's American car looked like. Here is the comparison of the file and the 3d blue print top view. The windshield and front cowing / hood are a total mess. This will require a large cad drawing fix. Then when the sides are checked, major problem. American cars in this period were slab sided, not curved way under the body. The whole back end need replacing.
-
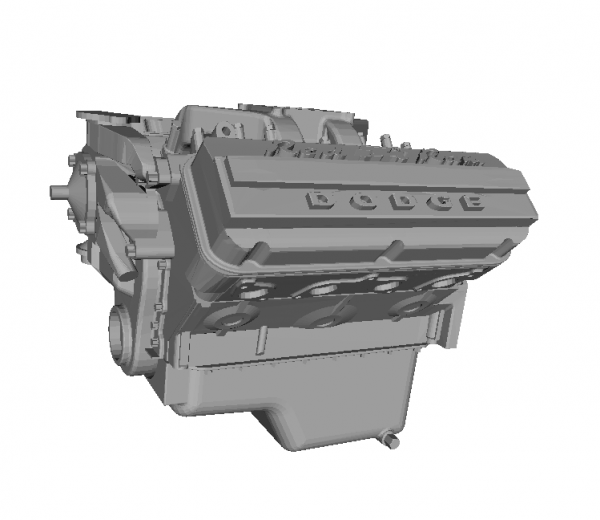
First and foremost is the fact that you need to be able to use a CAD software. The first task is to find a usable 3d cad file. I usually search for 3d car files and find websites. 3d printable files are almost non existent. Sometimes I find a really nice free one file. Sometimes there in the $30 to $40 range and then there's the higher priced ones like on Hum3d. As I have mentioned in other posts, Hum 3d can be a BLAH_BLAH_BLAH_BLAH shoot. Such was the case with this 55 Dodge 4dr. Another good thing to have is a 3d blue print of the car.
-
My intent is to give a very detailed description of what I go through to furnish a finished product.
-
First up is a 55 Dodge. Your gonna love this one.
-
Watch and observe. What you learn will be very beneficial to you and others. Don't be hold back on any questions. That goes for anybody following this post.
-
I have tossed this idea around for quite some time. With the amount of dis-information of current 3d printing, I think it is high time I do this. Over the last few year I have accumulated a number of files of 3d cars I am interested in. Some were free. Some were low priced and some were free. From these 30 files I can create 35 cars from the 30's.50's and 60's. These files include: 36 Chevy 2 DR sedan,36 Buick 2 dr< 37 Bugatti Atlantis with interior, 37 Buick 4 dr, 37 Delehaye 135 F&F roadster, 38 Talbot logo teardrop coupe, 39 Olds convertible coupe, 40 LaSalle convertible coupe, 53 Cadillac Eldorado convertible, 53-54 Mercury convertible, 54 Olds 88, 55 Lincoln Caprie, 55 Mercury, 55 Pontiac, 55 Dodge, 57 Dodge,55 Buick Century 57 Plymouth, 57 DeSoto, 57 Lincoln Caprie convertible, 57 Olds 98, convertible, 57 Buick roadmaster, 57 Dodge. 58 Buick, 58 Ford, 59 Olds 98, 64 Buick Skylark, 65 Dodge Dart, 66 Cuda. I will Take you though the process of what;s needed to complete a model in 3d.
-
Chrysler Turbine Car for sale
my66s55 replied to Richard Bartrop's topic in General Automotive Talk (Trucks and Cars)
I actually saw one of these turbine cars on the John Lodge expressway in Detroit multiple times during 64-65. They really stood out from the rest of the cars.


_4door_sedan_19551.png.97c332f91f321ed32f3a3764d1b01b4e.png)