my66s55
-
Posts
1,395 -
Joined
-
Last visited
Content Type
Profiles
Forums
Events
Gallery
Everything posted by my66s55
-
 Non of the above. If you want the best printer available at this size, it's this one. https://www.amazon.com/Phrozen-Sonic-Mighty-BUNDLE-Photopolymer/dp/B09824Y63L. All the others are cheap knock offs that cut features that effect the final result. Phrozen leads the market in this price range of 3d printers. The others are copy cats that cut features so they can lower the price while increasing their profit.
 -
Anyone ever "split" a body for 3D printing?
my66s55 replied to MrObsessive's topic in Model Building Questions and Answers
Will do. Will do. -
Anyone ever "split" a body for 3D printing?
my66s55 replied to MrObsessive's topic in Model Building Questions and Answers
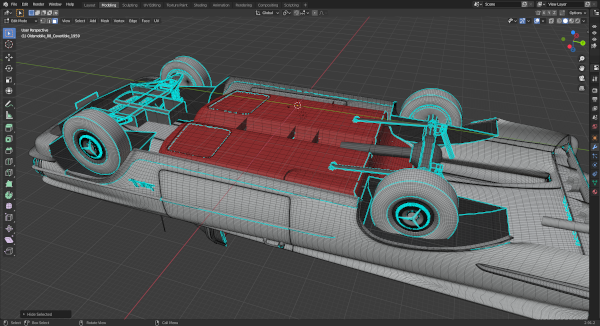
That would be the first thing I would check,Jim. Good idea, but the printer ha has only has a z height of 130 mm. The file itself is, as is usually the case, has a lot of non quad faces. This makes it impossible to get a straight line for splitting. An ad on called Quad remesher does this. It only works on 5-6 cad softwares. This will create what's needed to do what Bill wants. And yea, it should be printed on an angle anyways. Flat would cause a lot of problems on the bottom of the body pane;s. -
Anyone ever "split" a body for 3D printing?
my66s55 replied to MrObsessive's topic in Model Building Questions and Answers
Bill, Email me the body and I'll do it for you. It may have to be re-meshed and you don't have the add on to do it. Besides that, it'll only take me a couple of minutes. -
TinkerCad? Do you use it or other free 3D?
my66s55 replied to Oldmopars's topic in Model Building Questions and Answers
I have yet to make a tire. There are too many goods ones found with Google. Google 3d tire files. -
TinkerCad? Do you use it or other free 3D?
my66s55 replied to Oldmopars's topic in Model Building Questions and Answers
The slanting of 3d printed parts was created josef Prussa circa 2012 and was for fdm filament printers. It just makes a better print. -
TinkerCad? Do you use it or other free 3D?
my66s55 replied to Oldmopars's topic in Model Building Questions and Answers
Do not tip to 90 degrees. Go to the Official 3d Printing Discussion Thread in General Automotive Talk(Trucks and Cars) and watch the video I posted on slanting parts for best print. Putting the parts flat lead to other problems. I have been using Blender to create and modify files since 2013 and 3d resin printing since December 25, 2015. -
If you are trying to use Blender 3.0, forget it. It's famous for crashing. I use 2.91.2. It will do everything needed to create files you want.
-
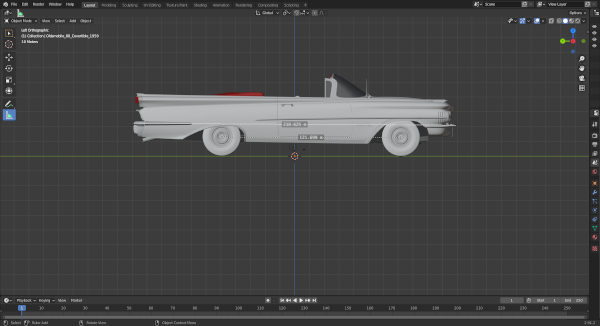
Squir Is the vender and also the creater. If you blow up the side view above. you can see the file measurements. The length is right on and the wheel base is about an inch short. I've never see a file that's already in scale. They always were too large. CG Trader has the same file, but for $99 more.
-
I made my absolutely last 3d file acquisition this past Sunday. This 59 Olds Super 88 is high on my list of favorite cars of the 50's. I've been watching this file for quite awhile and finally decided to get it. I'm familiar with the designers work as I have 1 or 2 others of his others. I can only find 2 flaws in this file. The side chrome strip is that of the 98 as it is too long and goes past the door. The other is the slight change in the surface of the side panel that sweeps down from the front of the door to the back. The other nice things about it is the detail of the interior, the front control arms, spring and rear end. You could print this car as a curb side.

-
I'm so proud of you Bill. Ever since I built that first resin 3d printer and posted the results on December 26 2014 and Joseph messaged me that he wanted me to print one of his files out and send to him, I've been hopeful that people will take notice and get into the process. Joseph got samples from other people, but went with mine as he surmised that I new what I was doing over the others. This is something that is known only between me and Joseph. No one else needs to know. When in 2017, I purchased a Wanhoe D7, someone took note and got on board. This has been my goal from the beginning. To inform, gently coax members into the world of 3d printing. Ever time I see Someone post a 3d print, I'm happy. If I can pass on my years of knowledge, I'm happy. I don't need recognition, That's not my goal. I just want to see progress.
-
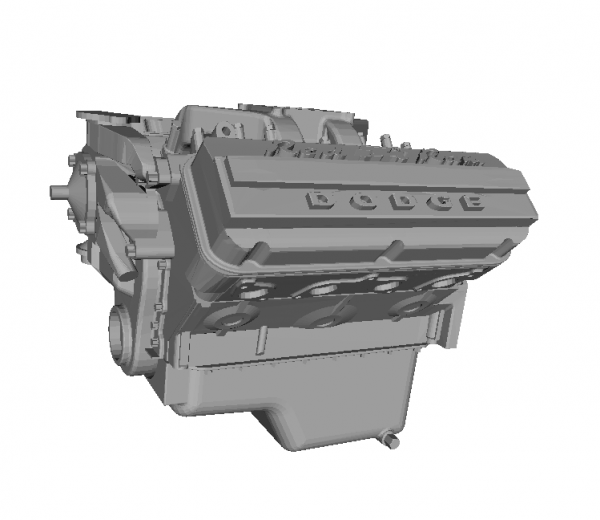
Bill, that 318 print is from the 3d resin printer I built i late 2015. The one I sent you from my Phrozen Shuffle 2018 is so much better print quality.
-
Here is my tip for the day. I just learned this myself last month. Do not remove the supports from your print after it's done printing. Instead, clean it up and put it into a container of hot water. It should be about 130-140 degree's F. Cover it if you can and let it sit for about 20 minutes. Remove it and the supports will come of easily. Some will even fall off. Some might not come off easily. Clip them as close to the part as possible. I use a straight edge razor blade to cut it off at the surface or some times you can use something to push the stub off. The result is that you eliminate pits. I didn't believe this at first, but I tried it on my last print and it works. Hot water softens the supports and won't damage the print.
-
I 3d printed up both angled and straight boots. There is the bottom of the spark plug and an opening at the top to incert the plug wire. You can see them on the last page of w.i.p. "my 3d printed projects" post.
-
Printing flat on the build plate whenever is good, but printing on supports need to be on an angle. The backs of those seats are going to be bumpy and need a lot of work to make them smooth. Here is a video showing how to find the right angle to get a perfect print. https://www.youtube.com/watch?v=Qs2Rb0ExnIM
-
Phrozen Sonic Mini 4K 3D Printer
my66s55 replied to MrObsessive's topic in Car Aftermarket / Resin / 3D Printed
To answer your question correctly, unless Bill has found a cad file for it, it will have to be created. As I pointed out on the Where do you find 3d files for printing on this thread, on my computer. You have to create them. -
Phrozen Sonic Mini 4K 3D Printer
my66s55 replied to MrObsessive's topic in Car Aftermarket / Resin / 3D Printed
The printer software comes with a test print. This was it. -
Phrozen Sonic Mini 4K 3D Printer
my66s55 replied to MrObsessive's topic in Car Aftermarket / Resin / 3D Printed
Looks decent. I need to send you some test files to zero in you prints. It looks good. but maybe could be better. The speck for printing I sent you were for 30 um layer height print specks. This is for something that you want to create fine detail or is small like door handles, side mirrors ect. Most larger prints will be done at 50 um. It's also better for prints with a curve or slant. There's also anti anti anti-aliasing to help eliminate the step results. Even though we have the same printer, honing in the best results can be off be .1 tenth of a second or more. As far as the Volvo 1800, I did some research on the subject. -
Y Block Rams Horn manifolds
my66s55 replied to Sledsel's topic in General Automotive Talk (Trucks and Cars)
What printer are you using to print these? -
You can't go wrong ordering from Fireball. Buy with confidence. Joseph is top notch when it comes to his offering. There's nobody better better.
-
Y Block Rams Horn manifolds
my66s55 replied to Sledsel's topic in General Automotive Talk (Trucks and Cars)
Looking Good. -
Y Block Rams Horn manifolds
my66s55 replied to Sledsel's topic in General Automotive Talk (Trucks and Cars)
I didn't take you post to mean anything more than what you just state here. I saw it as a gesture to help someone and work on your skills. You valve cover looks nice. -
Y Block Rams Horn manifolds
my66s55 replied to Sledsel's topic in General Automotive Talk (Trucks and Cars)
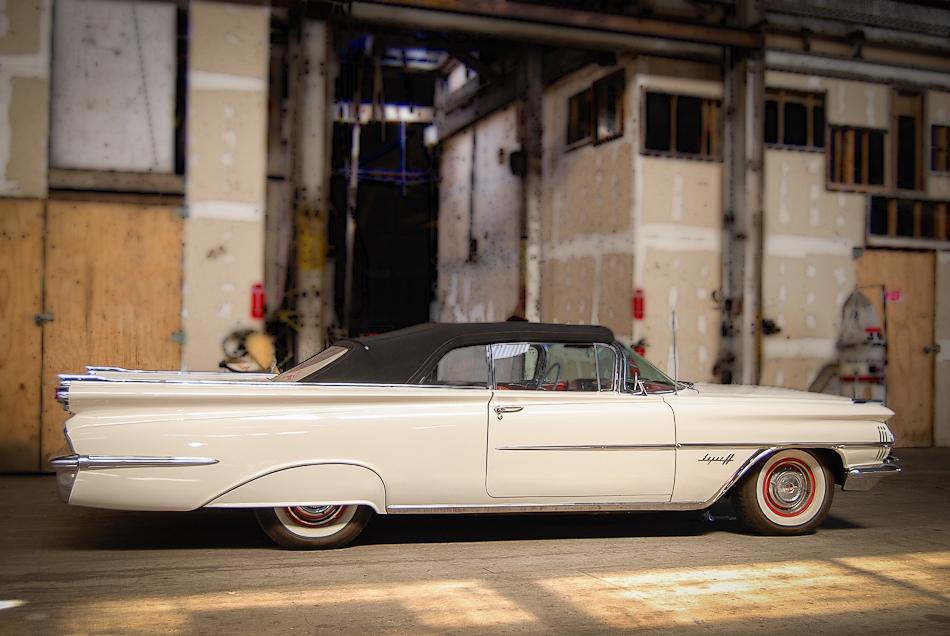
I think I saw in one of your recent posts that you are using Blender. First off, be aware of tunnel vision when using photos for background image. Search the web for good images and set up background images from available sides. This photo shows a more accurate straight on picture. It came from an ebay listing https://www.ebay.com/itm/165287597173?hash=item267be89475:g:EBkAAOSwLHhfWV9l and has more decent views. I've been using Blender for 7+ years so if you need any help, just message me.
-
Unless it's a body, most all my parts come off Blender as I have to create them myself. My avatar is a 50's Dodge hemi.
-
I'll get back to the 55 Dodge soon.