

Mr. Metallic
-
Posts
2,865 -
Joined
-
Last visited


(1).thumb.jpg.e371d4579f83ee021ff22f9ad4b79bbc.jpg)


Mr. Metallic's Achievements
MCM Ohana (6/6)
-
'32 Ford roadster gluebomb rework. April 26: back on track
Mr. Metallic replied to Ace-Garageguy's topic in WIP: Model Cars
Ace, I know you haven't been at the bench much lately, but I stumbled on this one again looking for something else and decided to bump it again. 😁 So much good stuff going on in this post that I felt obligated to introduce it to those that missed it before. -
Revell '30 model A
Mr. Metallic replied to rattle can man's topic in Model Building Questions and Answers
This is exactly how I did the master for both a stock height and "more" chopped roof sections for Altered States back when the Revell kit came out. Sadly he no longer produces the resin roofs, but you can make your own by creative cutting and splicing like Brian describes. Here are a couple builds I did using the resin copies. -
Yes, very nicely done conversion work. I think the revival of this thread has given a few of us some ideas to try our own 3W
-
AMT Hot Wheels Snap Kits
Mr. Metallic replied to OldNYJim's topic in Model Building Questions and Answers
With your talents at 3d design and paint you should be able to turn some of these into real gems. -
Revell GMC Van "Stranger things"
Mr. Metallic replied to Luc Janssens's topic in Truck Kit News & Reviews
The shows popularity is not declining. The viewership numbers are apparently through the roof so far. And think about it for those that are wondering if it's a sales failure because they see it sitting stagnant on hobby shop shelves. Fans of the show are generally not going to venture into a hobby shop to buy it, because they probably don't even know it exists. They're going to stumble upon it on Amazon or grab it off Hobby Lobby shelf IF they happen to see it on the shelf. -
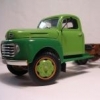
Cool little hot rod. Creative kitbashing and ideas.
-
Excellent job as always Dennis. I didn't catch the tinted glass in our texts, but in this bigger format it really adds a subtle realism to the build.
-
The trailer first appeared in the AMT 64 Vette convertible. Currently resides in the tooling for the Fireball 500, although they deleted the ramps.
-
AMT '36 ford gasser coming next year !
Mr. Metallic replied to Mr mopar's topic in Car Kit News & Reviews
The overhang is highlighted in black. My solution is similar to hondamatics, cut the firewall away from the body on one side which allows you so spread the body slightly to meet the roof. -
Just stumbled on this build, decided to give it a bump. So well done Ferbz
-
Absolutely dig this thing Alan, especially the wildly overpowered Westcraft boat. Looks like a handful!
-
AMT 1929 Ford Woody/Pickup
Mr. Metallic replied to Flatout's topic in Model Trucks: Pickups, Vans, SUVs, Light Commercial
Black wheels with blackwall tires just makes it look tough. Great stance too. -
32 Ford pickup
Mr. Metallic replied to Bullybeef's topic in Model Trucks: Pickups, Vans, SUVs, Light Commercial
This thing is bad-@ss. Nice tight design, especially with the shortened bed. Great stance. -
Great job getting this one across the finish line Bil. Love the color and stance.
-
Stranger things Blazer
Mr. Metallic replied to SteveKnox's topic in Model Trucks: Pickups, Vans, SUVs, Light Commercial
This is killer. Great stance and color choices.

