Jump to content
Model Cars Magazine Forum

Foxer

Members
  • Posts

    9,490
  • Joined

  • Last visited

Everything posted by Foxer

  1. I've done it before using a wire on each side of the back that went into holes on the side of the seat bottom. Might need some kind of stop so it doesn't recline all the way. This is similar to how I've seen it in kits that have them. Usually in kits they have arms with pins into the sides of the bottom.
  2. This is just a photo needed to zoom in and check paint touch up needed. Yes, there are some needed as usual. I think this scheme will work. I used Tamiya Clear Red on the intake pipes.
  3. Foxer

    F355

    Beautiful! .. especially nice job on the panel lines.
  4. It's been 4 years now since I quit my 2 pack a day habit and I congratulate all those that just stopped. I used Chantix which is amazing stuff. My desire just disappears with that stuff. This is the real deal if you need to stop! The trouble now is I cheat and have a pack every few months because it's so easy to stop again with the Chantix!
  5. Interesting changes you've done so far. I'm really interested seeing the hinges you do. I've got an A-Team van I used the build my daughter's '85 GMC and the door hinges were a nightmare. One door still needs to be glues back on for about the 4th time.
  6. That's looking fantastic! Your brickwork is totally believable. I'm truly impressed with the floor! Being a structural engineer, concrete floors were my business and you got the look .. coloring and texture . down cold!
  7. I'm so glad we have enough members here to fill out this list!
  8. That's pretty ambitious for a first build! And it looks great and unique!
  9. I have NO set amount to build! In the past 4 years I've completer an average of .25 builds per year .. yes .. one completion in 4 years. It's just me .. I enjoy working on them too much. I do something on one or the other almost every day and detail them all WAY too much!
  10. Very nice! All that work is going to pay off when it comes together!
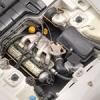
  11. Been working on the SHO engine mostly. I had to relocate it to allow the fan to fit and raise the engine as it was dragging on the ground. This is the air intake with a K&N filter. The pipe out the manifold needed to be longer but it was already superglued in so I just extended it with a plastic tube and another piece of the plant wrapping wire. Most will be tucked under he firewall so it needed to stick out more. I'll probably wrap the tube with wire to simulate rubber. The intake tubes on the manifold will be painted with a transparent red over the silver.
  12. Sorry James if I misled you .. I DO have the J30t kit. I bought it just for the Infiniti logos on a whim and hit the jackpot. It has both PE and decals with the 4 wheel logos and the front and back ones. I'm using all the PE ones outside and have the decals to do the steering wheel and seats that only the 6MT (manual) had. Now back the Chuckie's paint job ... I AM surprised at the racing paint! But, it WILL look good, and unusual. on a Q!
  13. Got the brass strip mounted behind the joint as I should have done long ago. A bit of bodywork on the outside and I can paint ... again.
  14. Foxer

    VW Beetle

    That's really good looking for an HO model! Nice job.
  15. I give you major credit for how good you're doing with these. I first used those in drafting class in the 60's and never got that good. There are how long lasting engineering drawings were created since the 1800's! You can sure draw straight even lines with them. I needed an eraser too much in the drafting I did to be using ink. I can imaging what we'll be seeing from you in addition to your amazing paint abilities now!
  16. Liking the look of this one!
  17. Nice visor ... the edges put just the right look on it!
  18. This is so simple and no cost I'm almost embarrassed to show it! I cut strips of coated cardboard boxes into strips I use to mix epoxy, glue and body putty. It should be from a cardboard packaging box that is coated with the product images and text ... all those things you but and order online that go right into the trash after opening. The coated side keeps the glue or material from being absorbed into the cardboard. How simple or cheap can you get? I just had to cut some new ones this morning and here's a shot with the used one that's now headed to the trash can.
  19. Foxer

    VW500S

    Lordy, lordy .. I can see why that's so long! Cool!
  20. Thanks for the pic with the cut lines.
  21. I'm not real experienced with scale brickwork but I'm a structural engineer and very familiar with 1:1 brick. Doing things in scale the same as 1:1 usually works best. I would color the brick first then put the grout on with a water based material that can be wiped off the surface with water. This is how 1:1 brick is done ... the mason will wash down the joints with water to even off the joint and get residue off the brick face. Any staining that stays on the brick will make it look even more natural. You're getting a nice variation in the brick which looks good and natural.
  22. That sure looks good. Seems to be a pretty nice fit overall. It's hard to see where you mated it at the rear .. might you take another shot with the mating lines in pen or pencil for us old timers with bad eyesight to see how you did it?
  23. That definitely will be unique. That's a good looking custom. Will be looking forward to your build.
×
×
  • Create New...