2002p51
-
Posts
861 -
Joined
-
Last visited
Content Type
Profiles
Forums
Events
Gallery
Everything posted by 2002p51
-
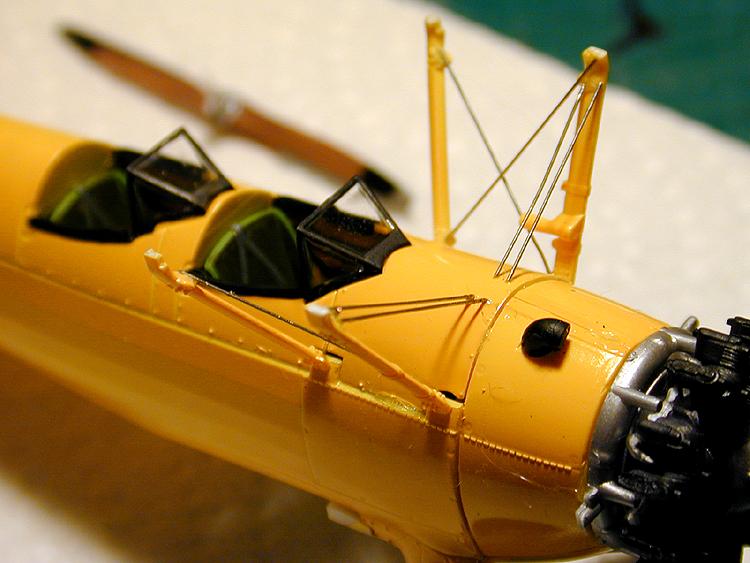
 The double wires in front of the cockpit aren't mentioned in the instructions but after looking at several photos of the real plane, they are definitely there.
-
I saw this kit in Hobby Lobby last week and couldn't resist it. That marvelous wooden look propeller is done with the kit decals and a little touch up with paint. Those wire braces are not included in the kit and I wasn't sure how hard it would be to add them but they add so much to the model that they are worth the effort. Turns out these weren't that hard to do but the ones for the wings will be much longer.
-
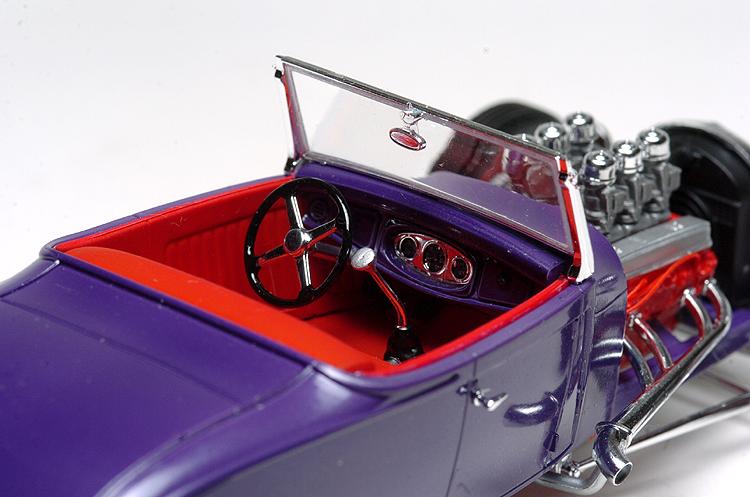
Simply amazing, the most realistic hot rod model I've ever seen. The lead photos look to be straight from the pages of the Rodder's Journal!
-
It's perfect, the chrome wheels set it off.
-
Read my original post, Geno. The body is an original MPC Demon from the early '70s, the chassis and interior are form the more recent AMT '71 Duster 340.
-
Take another Car Test
2002p51 replied to Ramfins59's topic in General Automotive Talk (Trucks and Cars)
-
Nice job on a kit that's no picnic to work with. And I echo what someone else said about your restraint on the rust, very well done without going too far. I had a '54 Chevy in high school. It was a 150, even plainer than your 210. Only cost $50, those were the days.
-
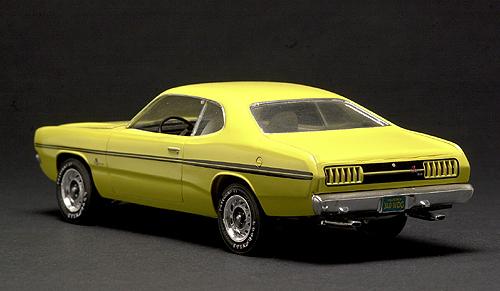
I assume that "GY4" is the paint code for that shade of yellow. What's it called?
-
If you will allow me a little Throwback Thursday. Since I've been in a sort of MoPar mood lately I thought I'd break out this Dodge Demon that I built a number of years ago. The body is an original MPC item from back when it was new. I had originally built it as a Pro Stock Demon some time in the late '70s so the first job was to remove the hood scoop and fill the hole. The entire chassis and interior was from the newer AMT '71 Duster 340 kit. I was actually amazed that, considering these parts were molded by two different companies at different times, it all fit together surprisingly well.The graphic decals and all the tags and labels under the hood came from "The Last Detail". The color is a correct yellow shade (forgot the name) that I got from MCW. Anyway, I hope I didn't break any rules by posting an older model here rather than something I just finished, but I thought some of you might enjoy seeing it.
-
Funny you say that, I would've preferred a deuce grille but I just didn't have one.
-
Group 29 - the thread for everyone's '29 Ford Roadster builds
2002p51 replied to Phildaupho's topic in Model Cars
Okay, I'll play. Here are the two I've done.
-
Well, if you been following the saga of this project over on the ""Workbench" thread then you know of some of the problems. Here's the finished product: That's all folks.
-
I'm calling it done. Finished photos are over on the "Under Glasss" section.
-
Thanks for all the positive comments you guys. It's a pretty decent shelf model after all and I'm okay with it. I may just have to do another one of these. I see a red one with a '32 grill with a small block Ford behind it.
-
Very funny.
-
Well, here it is with lowering done. Compare this with the earlier photo and you should see that the stance is much better and that improves the overall look of the model. The main problem now is, like any time you have to rebuild an almost complete model, you can never get it as "clean" as the first time it was built. The rough handling "removed" some parts that shouldn't have been and stuff like that just never seems to go back together as neatly as it was the first time. So this model will never see a show table, not that it would've before, of course. In conclusion, my original opinion of this kit has not changed. It's got some nice parts that will prove useful and show up on a wide variety of other projects. But as a stand alone, this kit just misses the mark. Close, Revell, but a swing and a miss just the same.
-
Here are the "new" headlight stands.
-
The fix is in: Mounting the spring behind the axle instead of on top will lower the front approximately 2 scale inches. Helps the stance a ton. The headlight stanchions/shock mounts will be stripped and painted black then mounted lower. Then the whole thing put back together.
-
That's okay, I appreciate your efforts but I don't need them. Thanks.
-
My thoughts exactly.
-
I agree on every point.
-
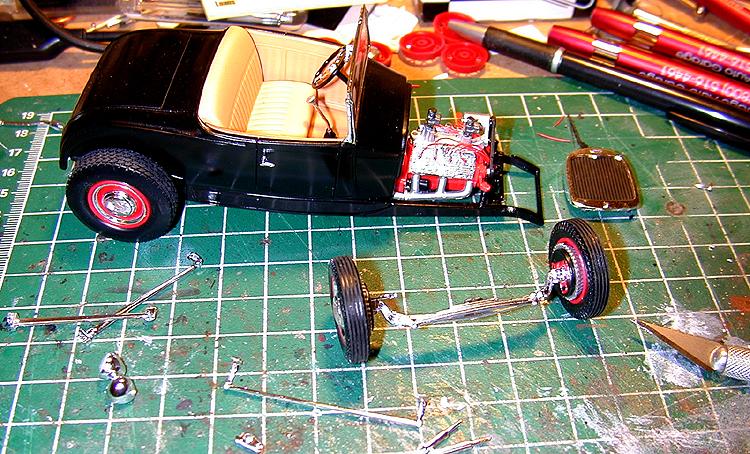
It's starting to look like a car, well, sorta. Now that I see the stance I wish I had dropped the front end like I did with the channeled version. I may tear it apart and do that. . . maybe. The upper radiator hoses will also be a problem. And, like the channeled version I did, there's just something I can't put my finger on that doesn't look quite right. Not thrilled. There's a lot of potential in this kit but I haven't got it where it needs to be yet.
-
The wheels and tires are ready.
-
Today it's raining, there's nothing interesting on TV and so I am quite literally watching paint dry.
-
I agree. That's why I used them on my 1:1 roadster. I also like that the caps in this kit are the same ones I used on my car. First time I've seen them in scale.