Brizio
-
Posts
3,913 -
Joined
-
Last visited
Content Type
Profiles
Forums
Events
Gallery
Everything posted by Brizio
-
Good point. I prefer paint it as well. I will do some testing for sure. For now I'll put on stand by, I have a commission model to build... Is going to take a while... I have anothe project to do.
-
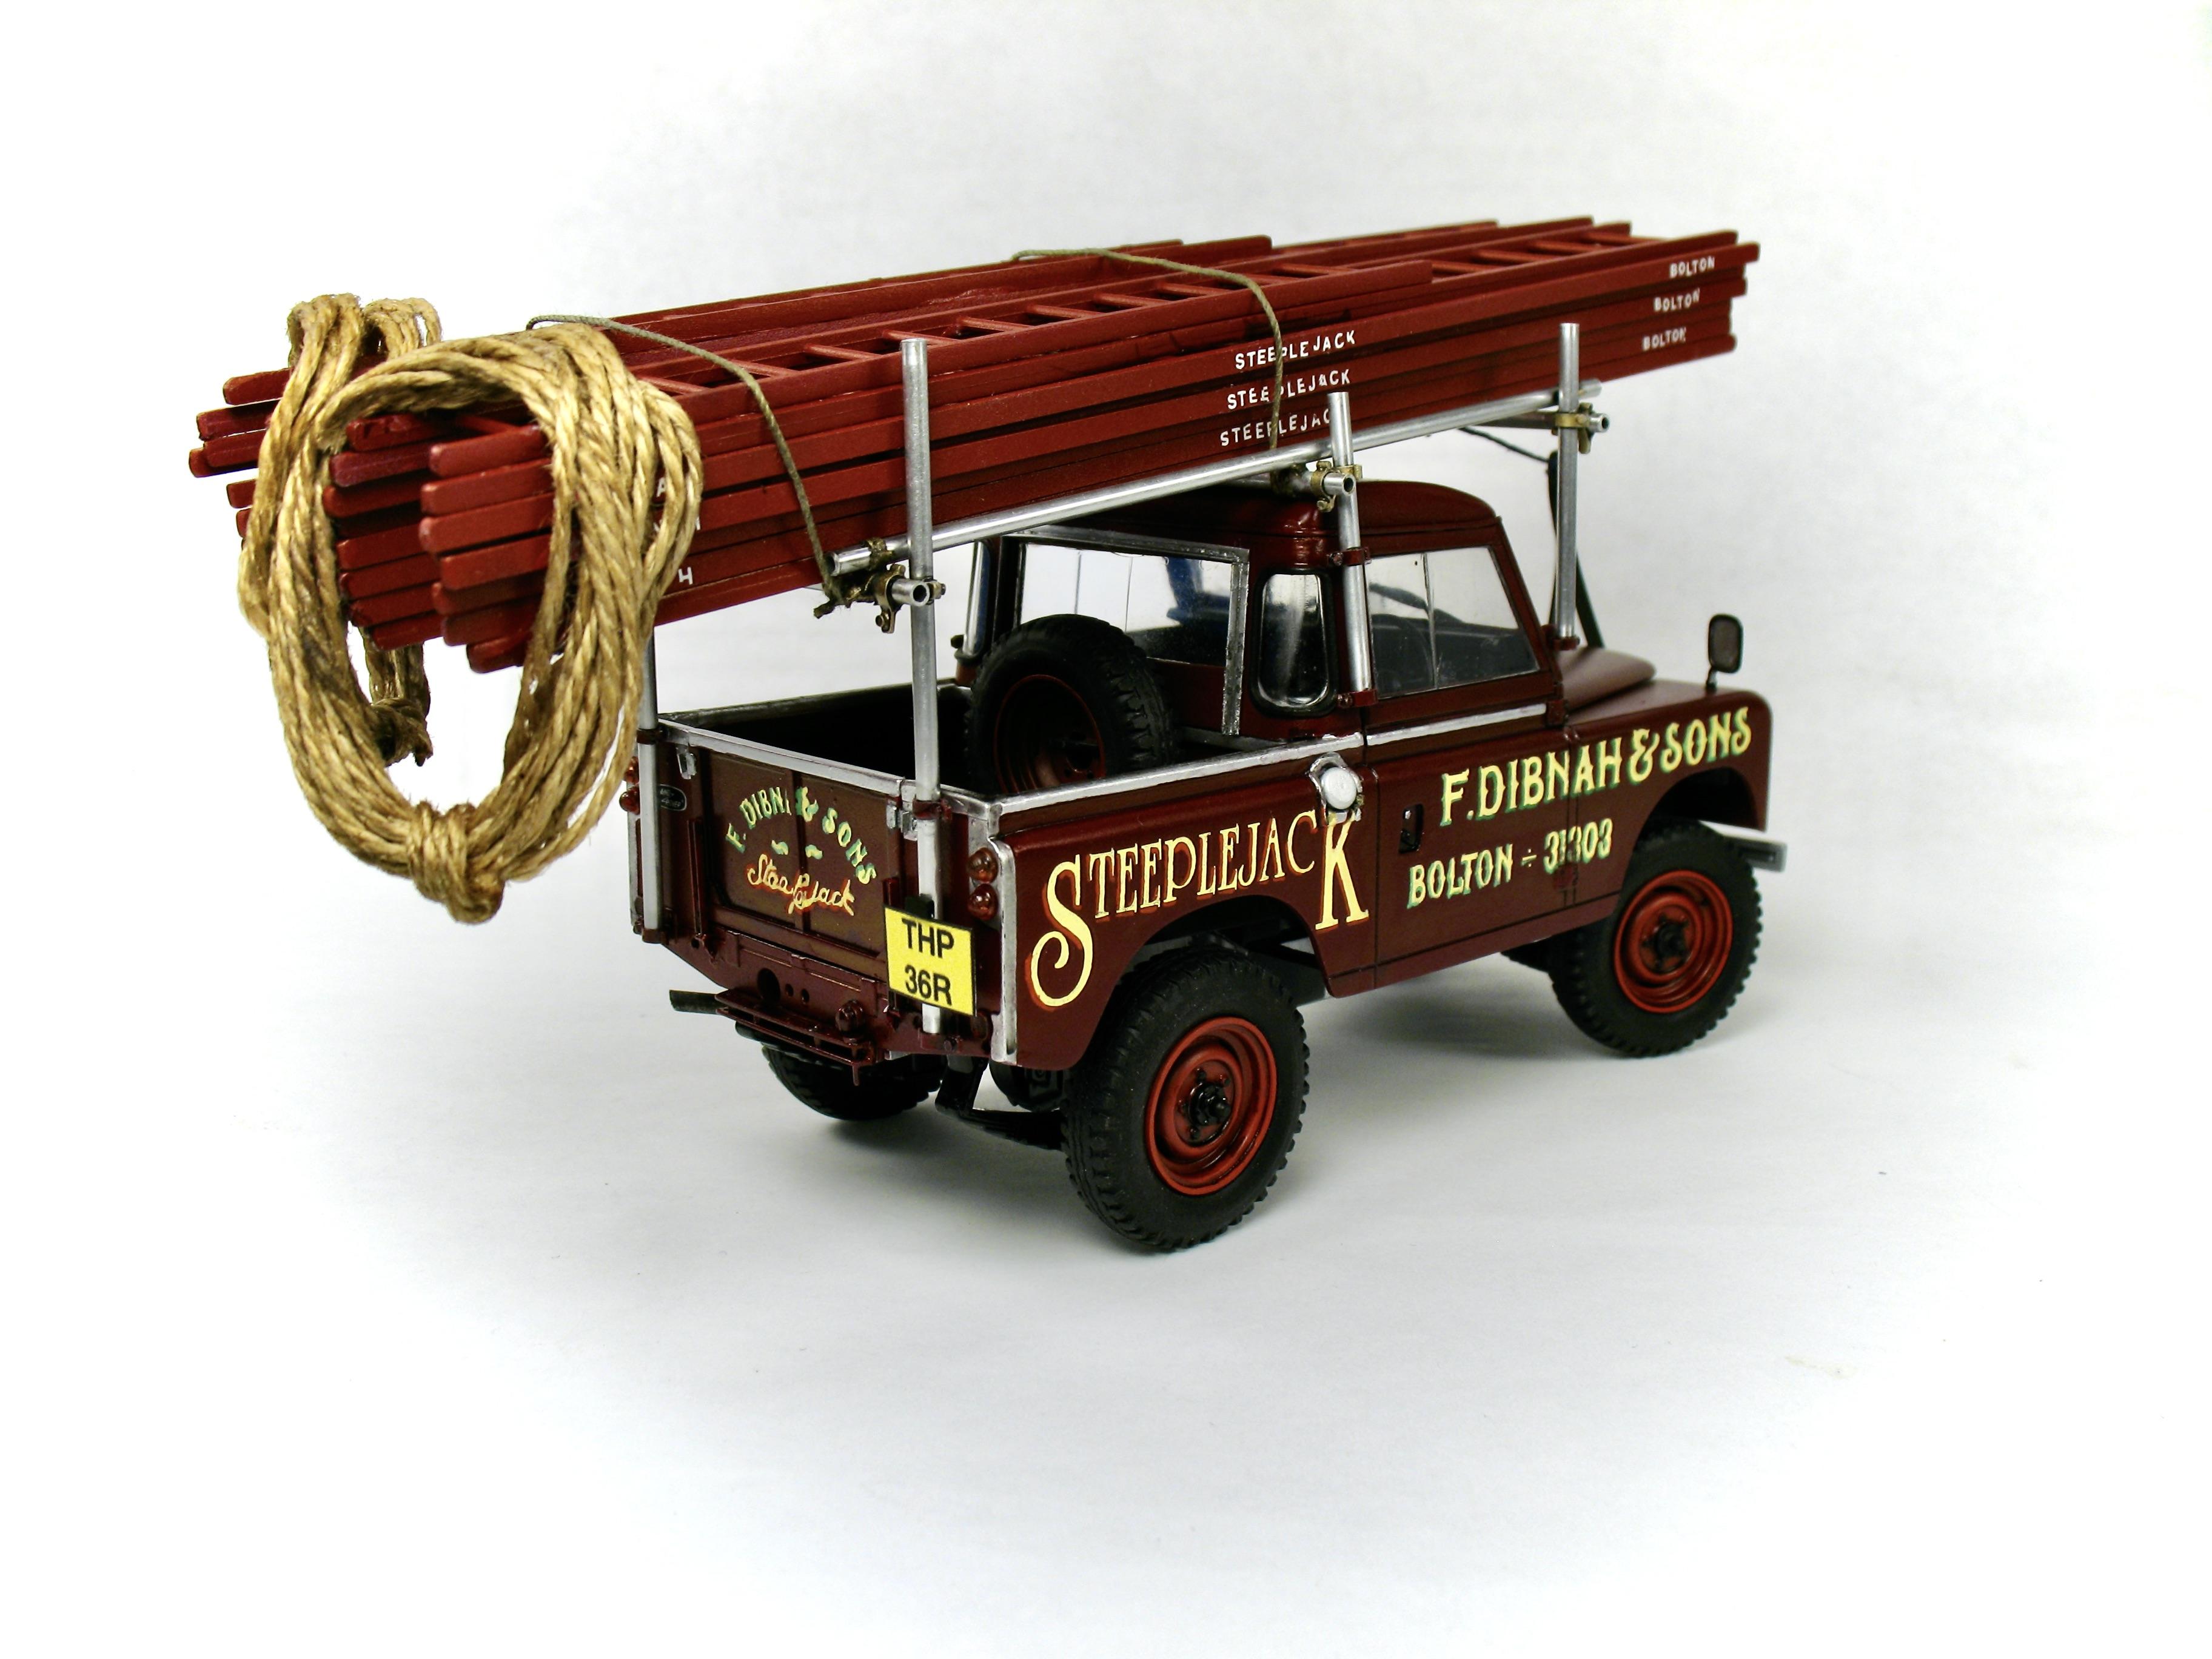
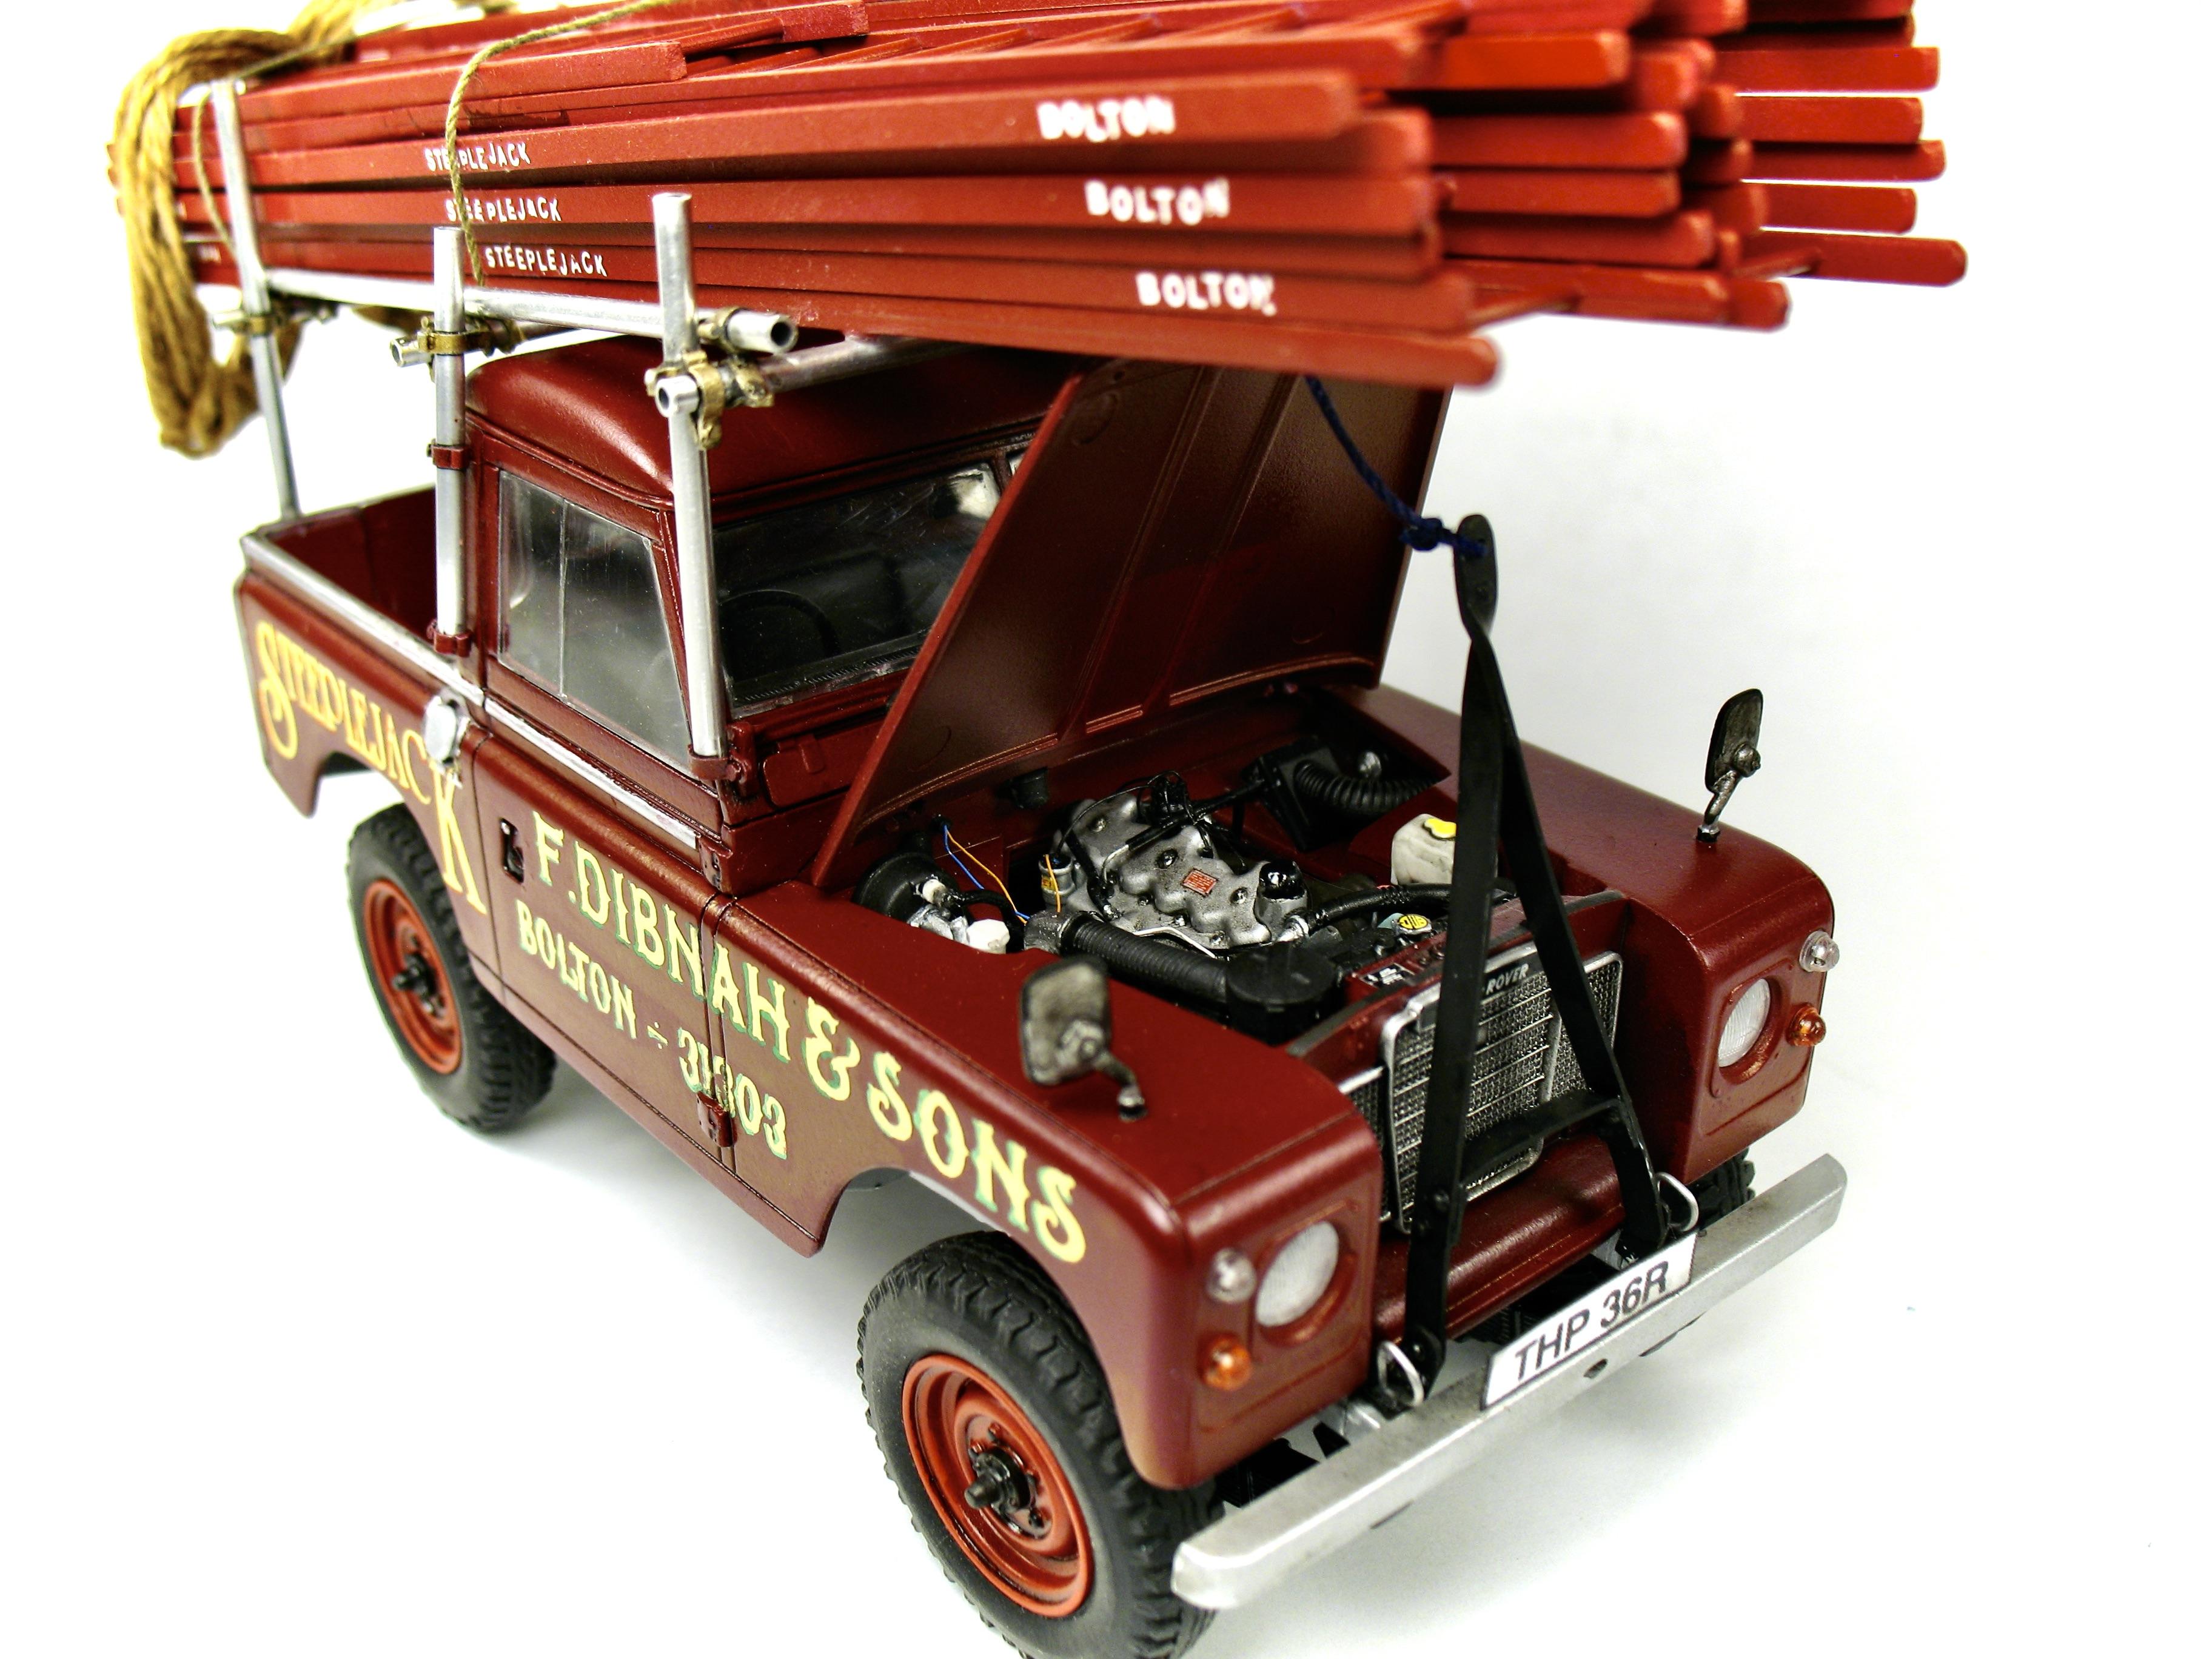
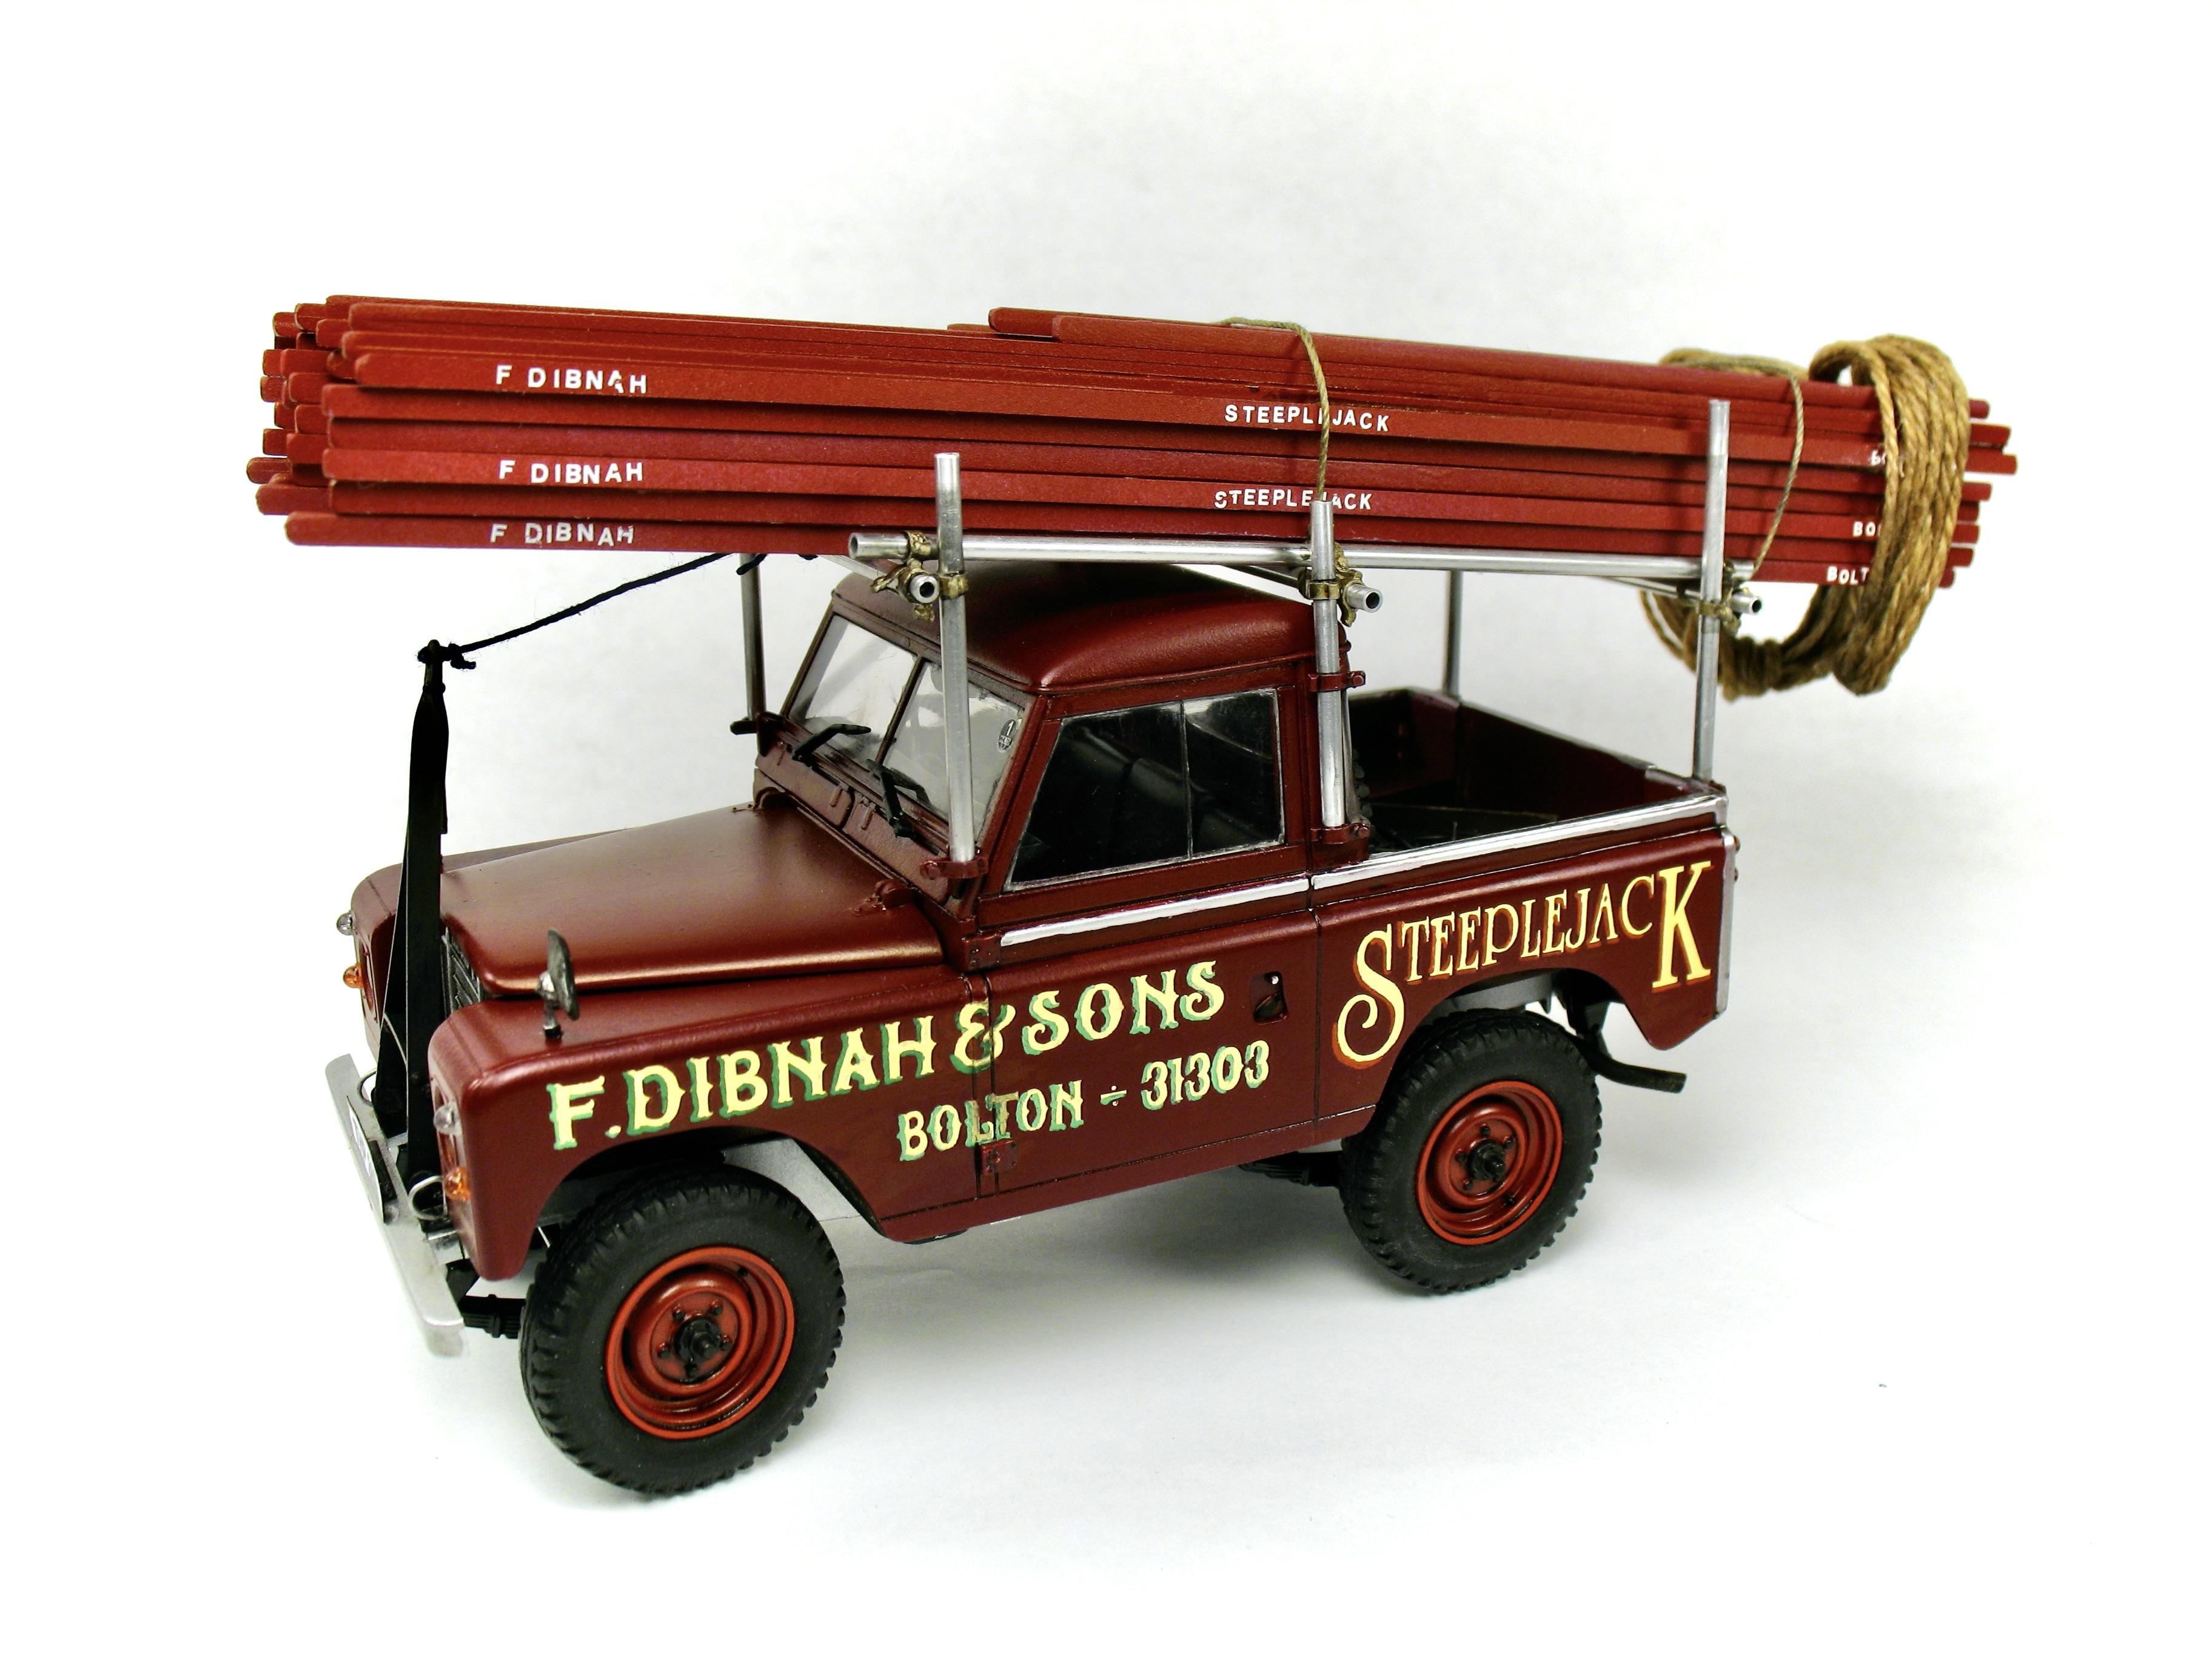
After watching a documentary and few videos of Fred Dibnah, I decided to build his Land Rover. Fred Dibnah is a legend in the UK, he was a famous steeplejack and also a TV presenter. I start with the Revell Land Rover Series III 109 in 1/24 scale... The last part I added, I made some "dogs" the hooks that keep the ladder to the chimney wall.

-
Mee too! Pretty fun movie to watch. It's going to take a while, I have a commission build to do first... I always wanted to build one, but never got the chance. One time I got a snap kit, I don't remember almost build it, but after I donated to a kid. I was thinking that too. Mayne paint the front and rear since they seems different color on the original car. Overall looks pretty good.
-
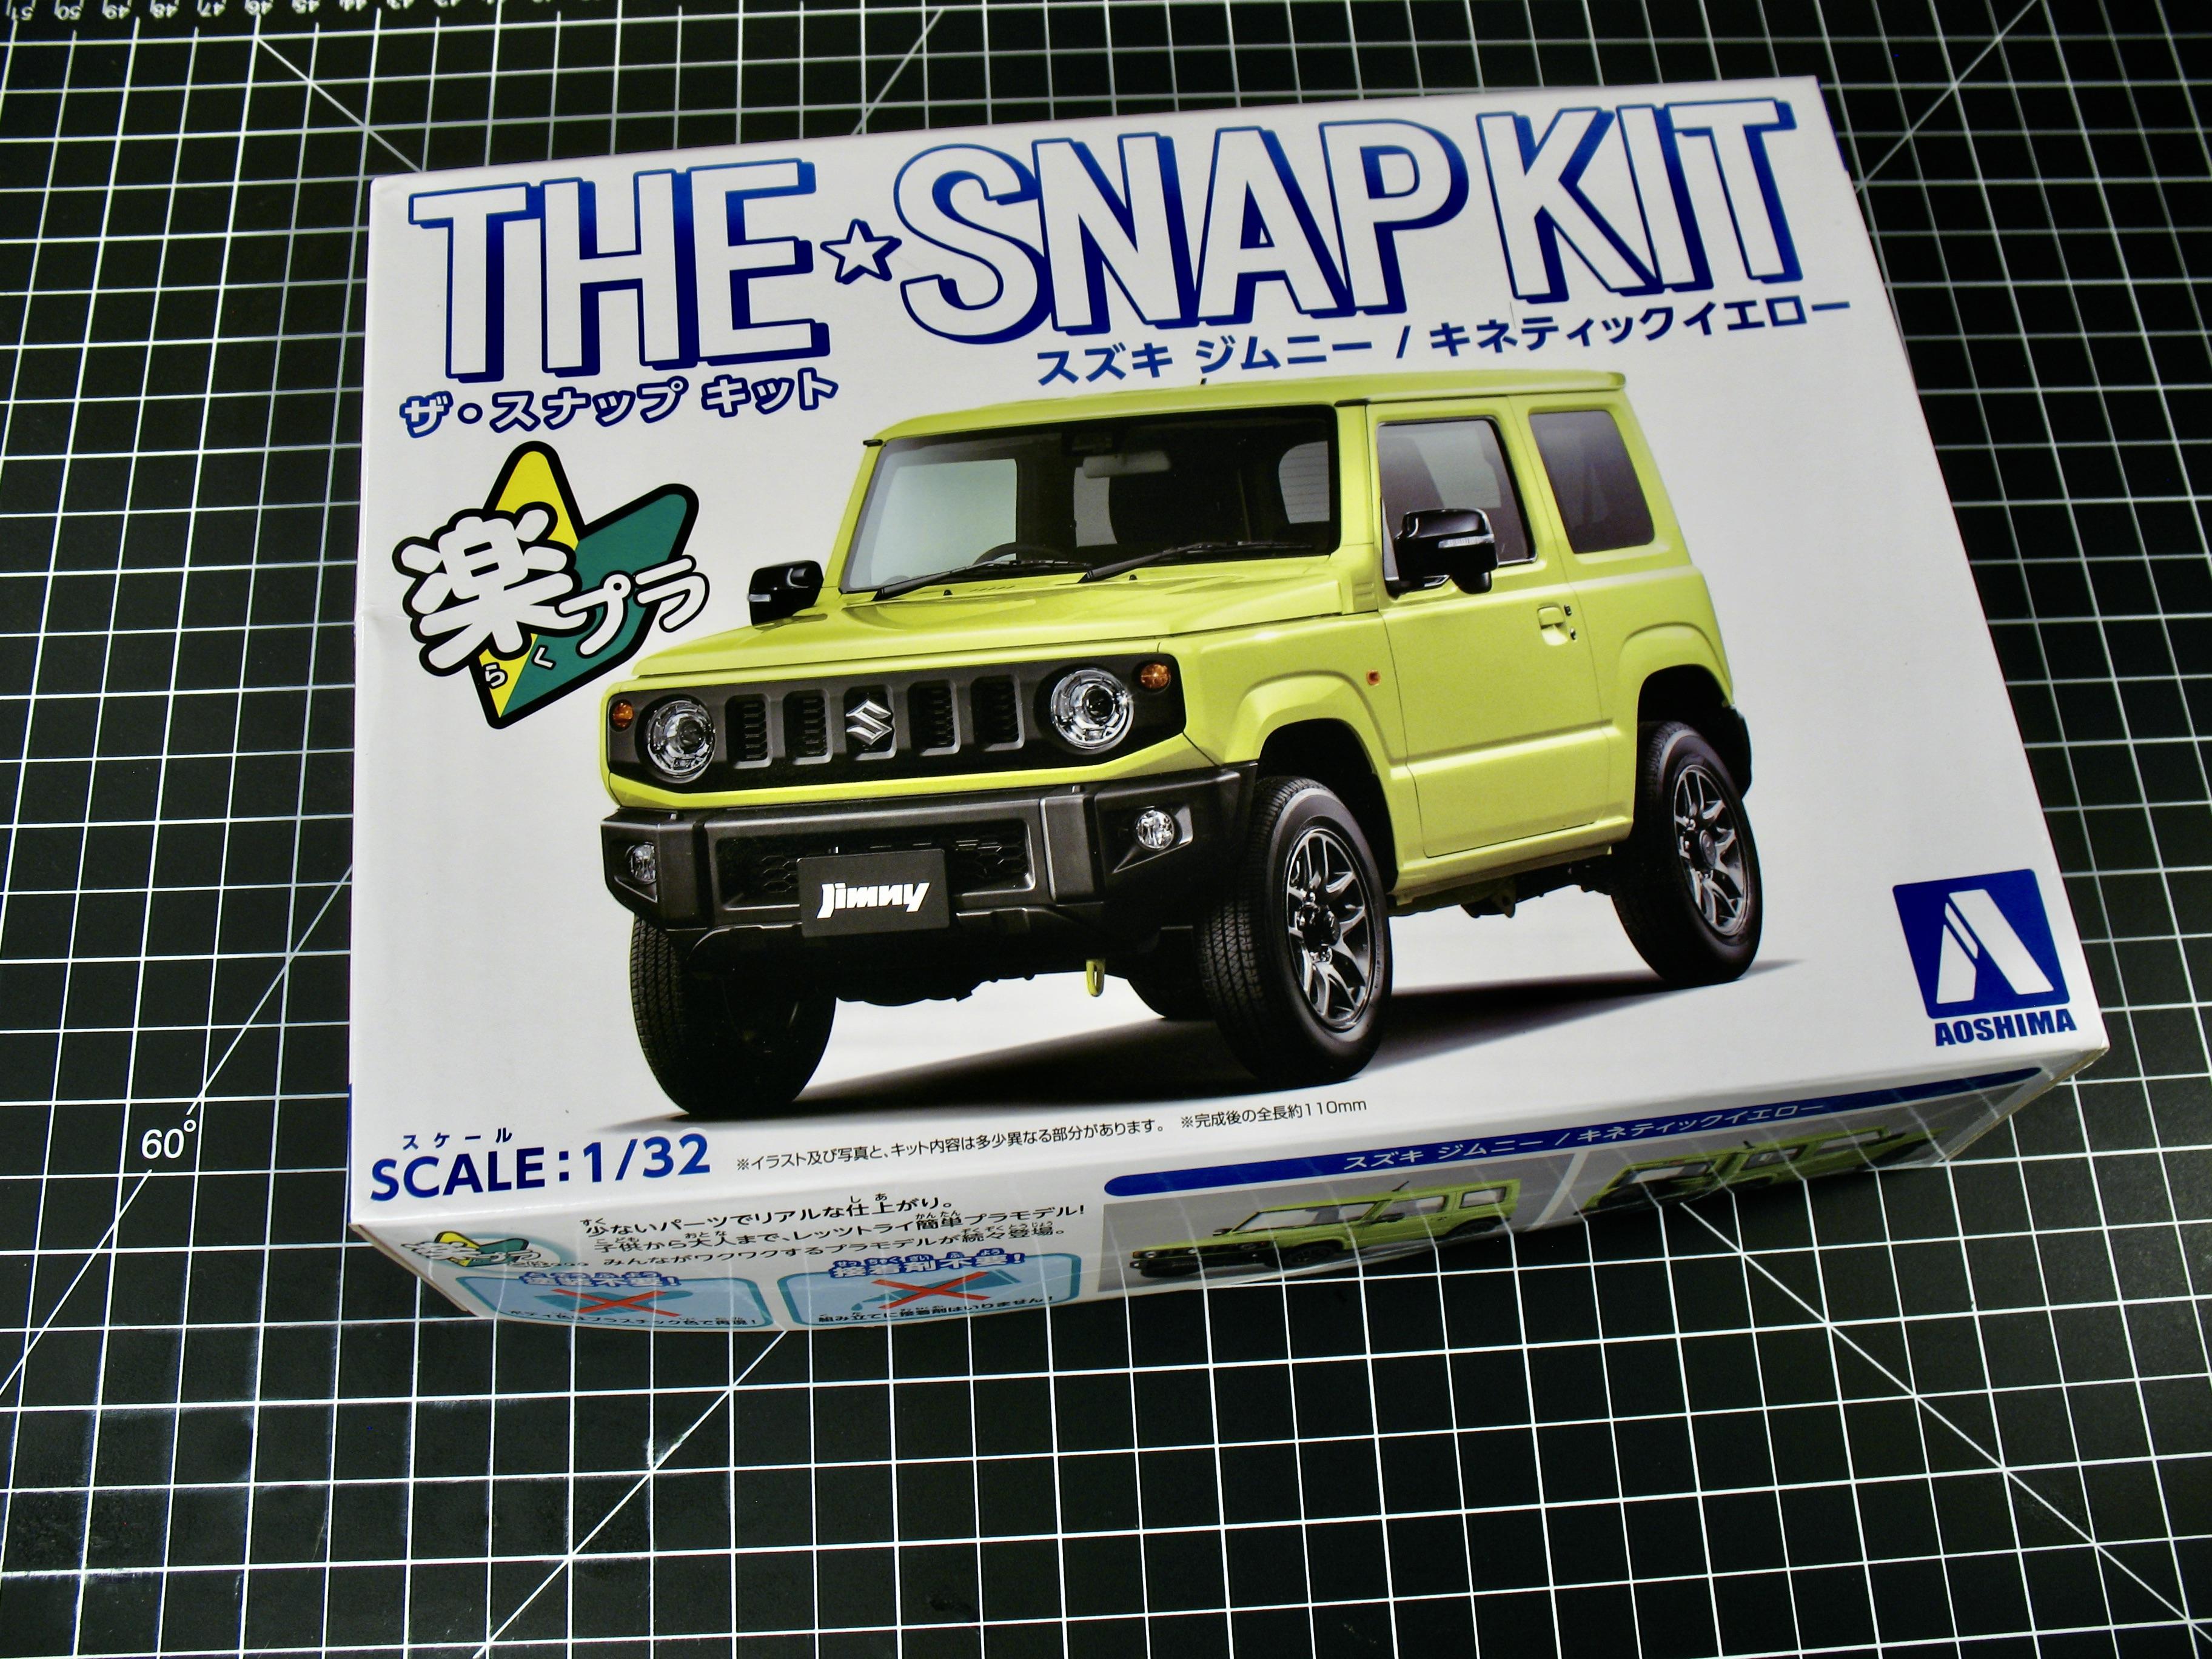
I always wanted this kit, but newer got one, untill I saw the new Aoshima. The quality of the kit is great, the doors open, and the molding is super clean. Another cool thing is that they sell direct from the US now!
-
Benvenuto Carlo, I'm Italian too! You'll love here at MCM!
-

Alfa Romeo Scuderia Ferrari 1/8...
Brizio replied to Brizio's topic in WIP: Other Racing: Road Racing, Land Speed Racers
I should probably update this post.... -
I think you can still can, with a implanted device that uses neural signal.
-
Now all is working! Thanks!
-
It is workning now. I can change page! Thank you!
-
I still cannot change page. I use Chrome. Do I need to do something on my part or you guys are still working on it. Please quote me so I can see the reply. Thanks!
-
I doubt you can use CAD without arms and legs... It could be the same with scratch building, how many people on this forum scratch build a complex object,(with complex object I mean not bend a plastic rod and consider it scratch building). ? Few only, in the last 10 years on this forum I saw only a handful scratch building a car. Why this? Nobody whant to learn how to scratch build? In the other hand I saw more people start to using 3D software and printers.
-
Lol! True! Thank you David!
-
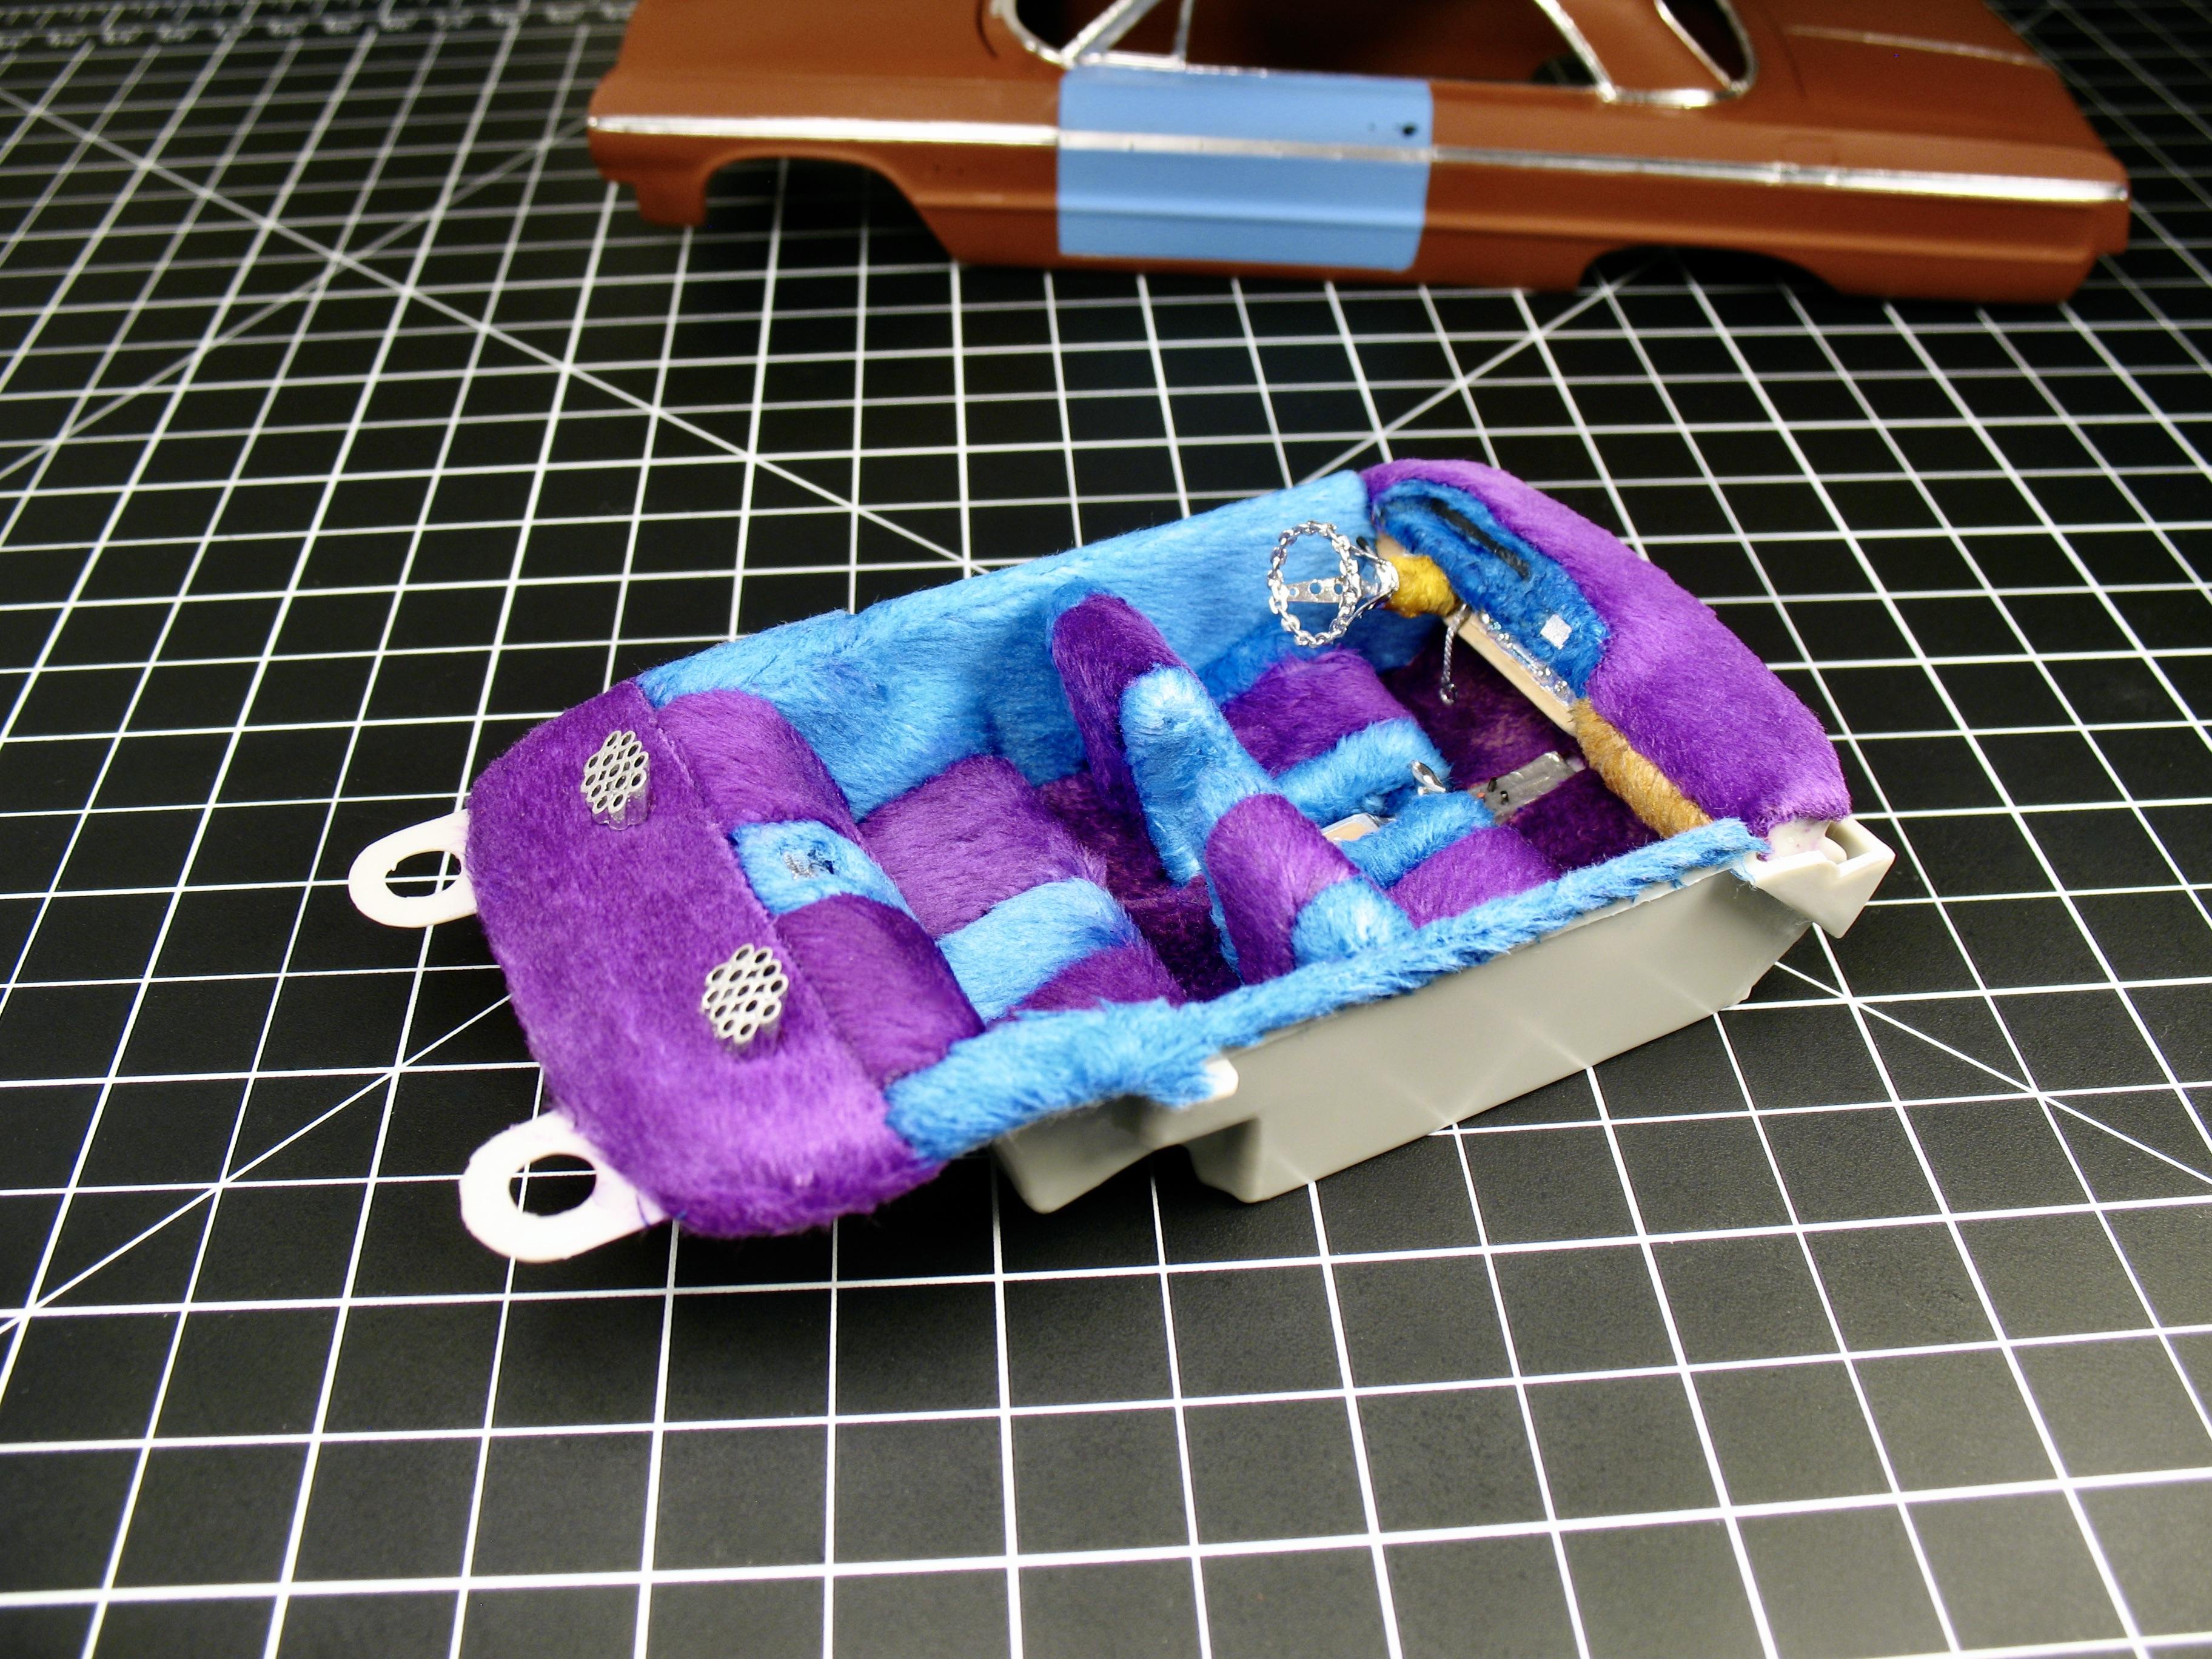
Thank you Donato! I ask at the costume person at work if they had a material that could work in 1/25 scale. They gave me to try few pieces, I liked this one because is softer, even after the color is applied. Thank you Jerry! Will see when done! Thank you Bob!
-
Thank you Carl! Thank you David! Thank you Donato!
-
I ask at work if they had a material that can suit my project. I work as Model maker for an animation studio.
-
Yes, A pain to make but worth it! Very fuzzy! For some reason I cannot change the title of the tread... The trim on the door is removed, maybe the light make it too shiny.
-
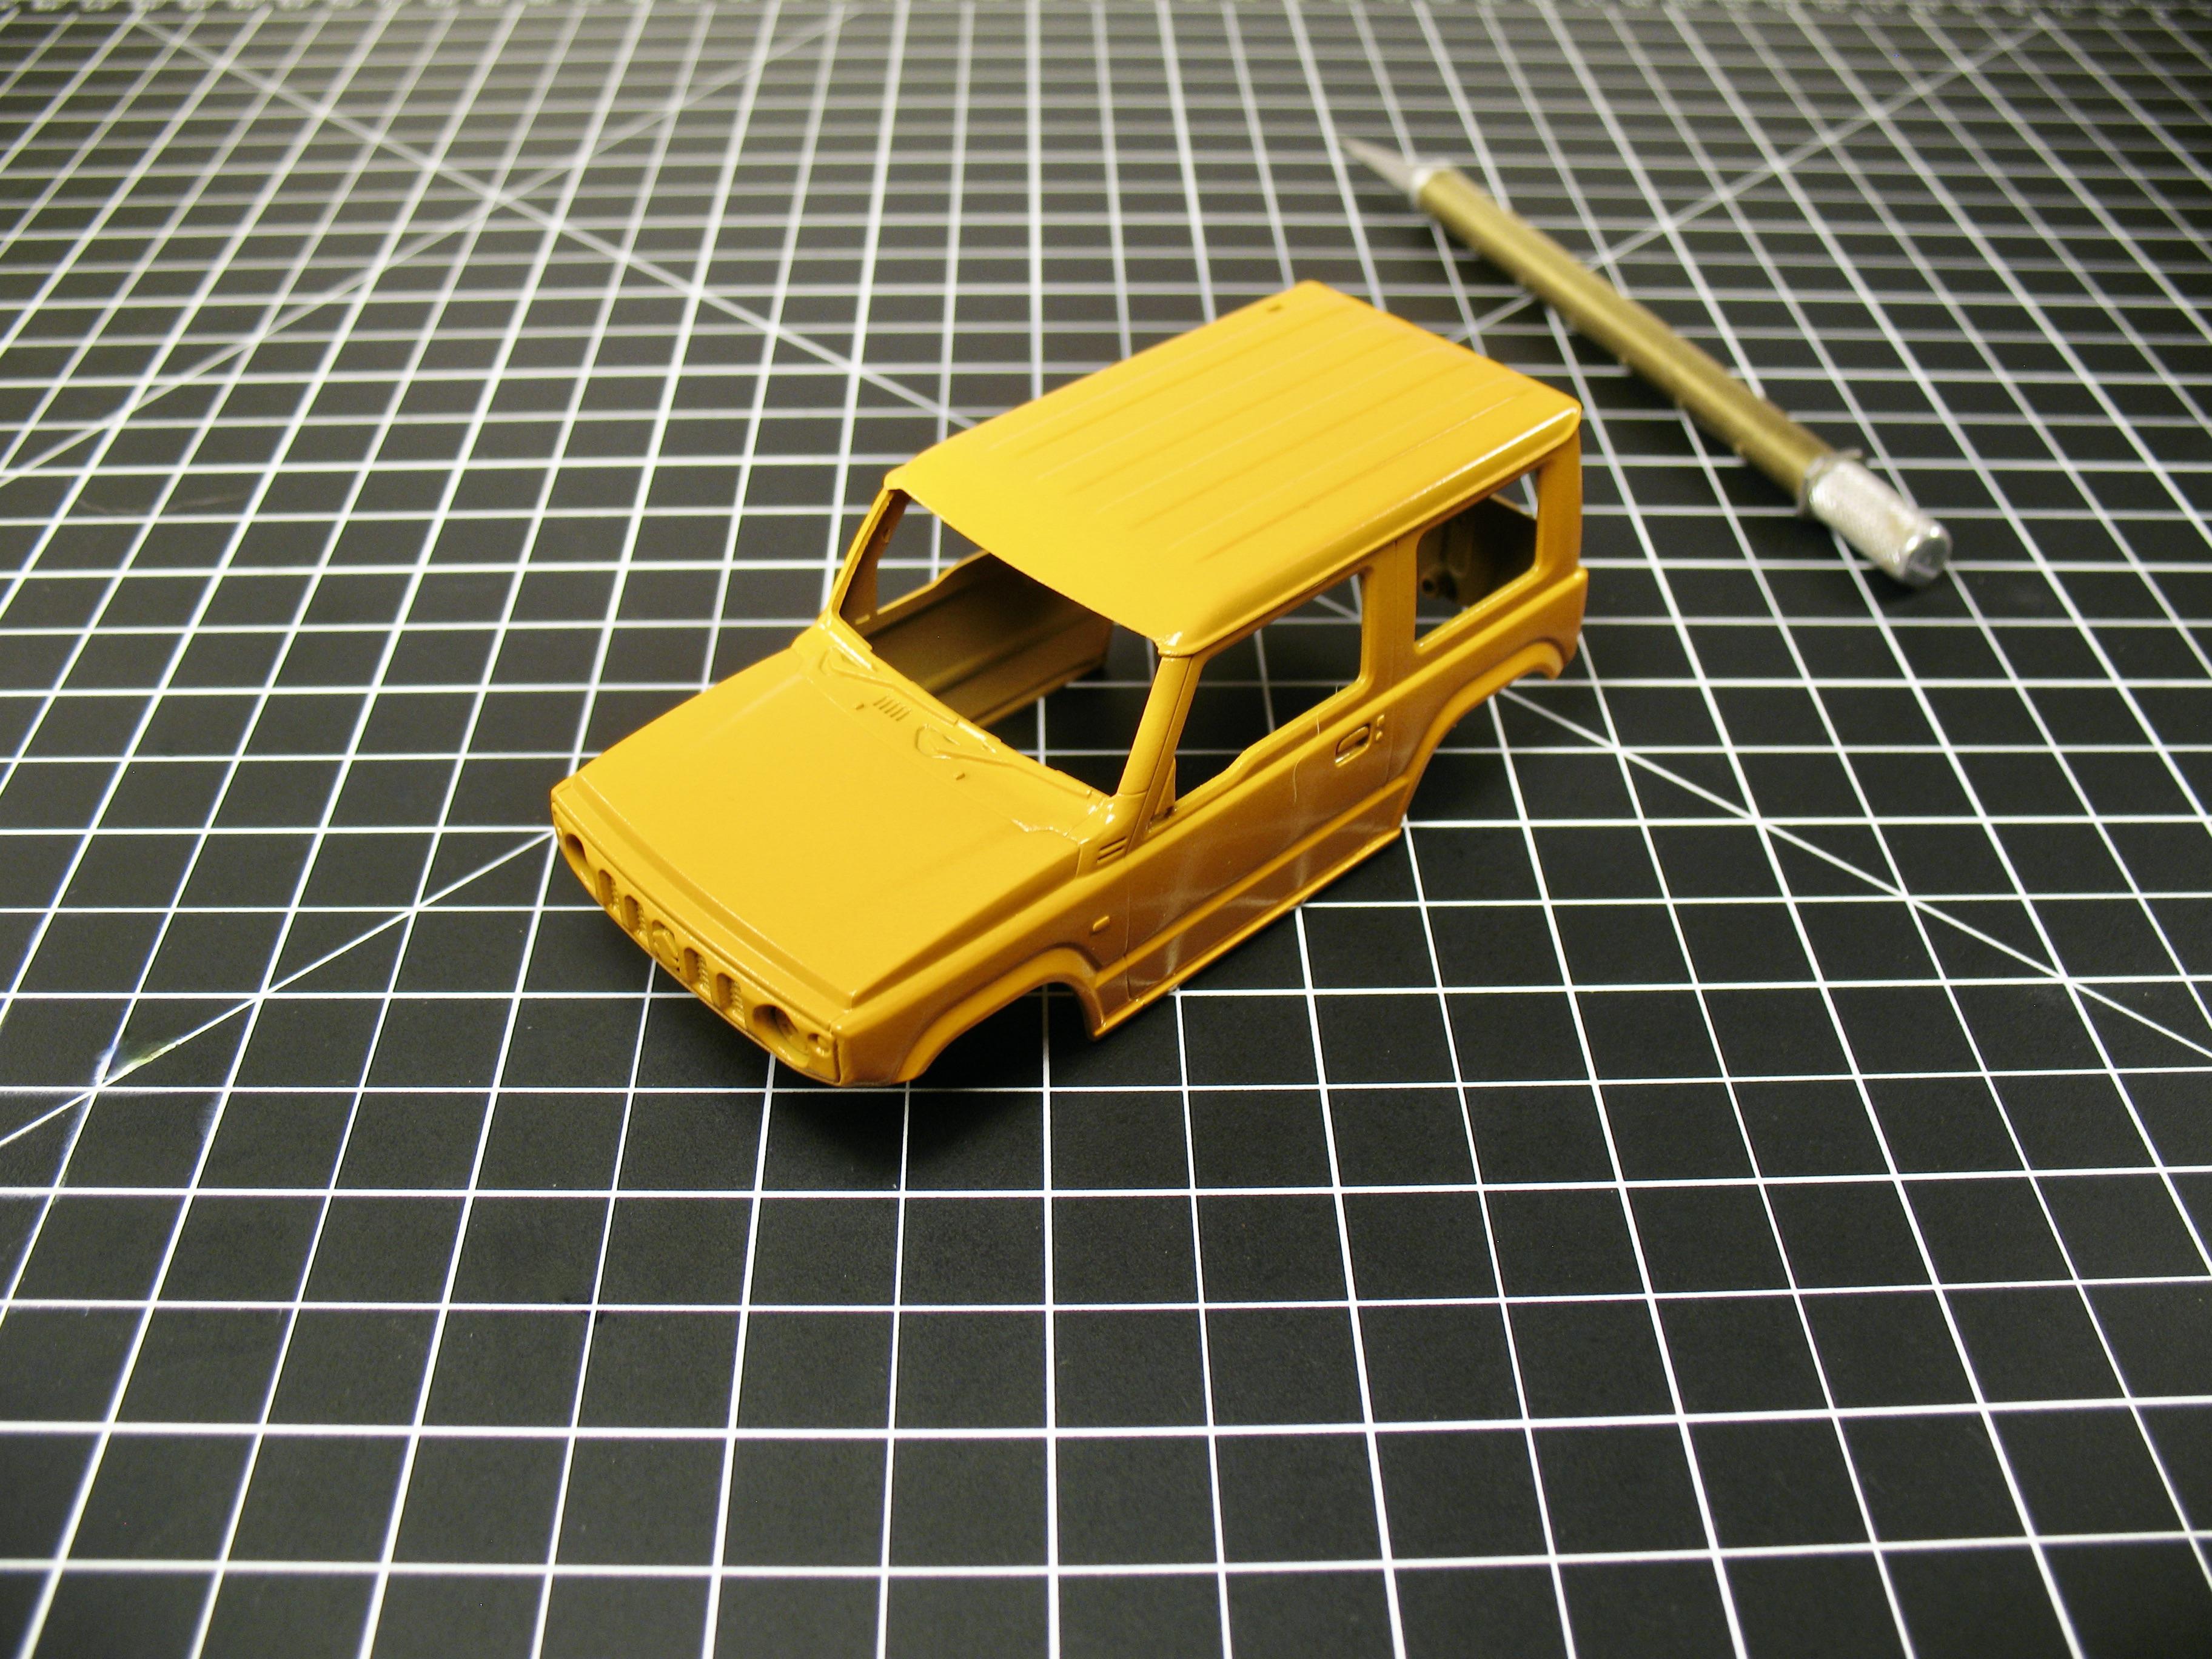
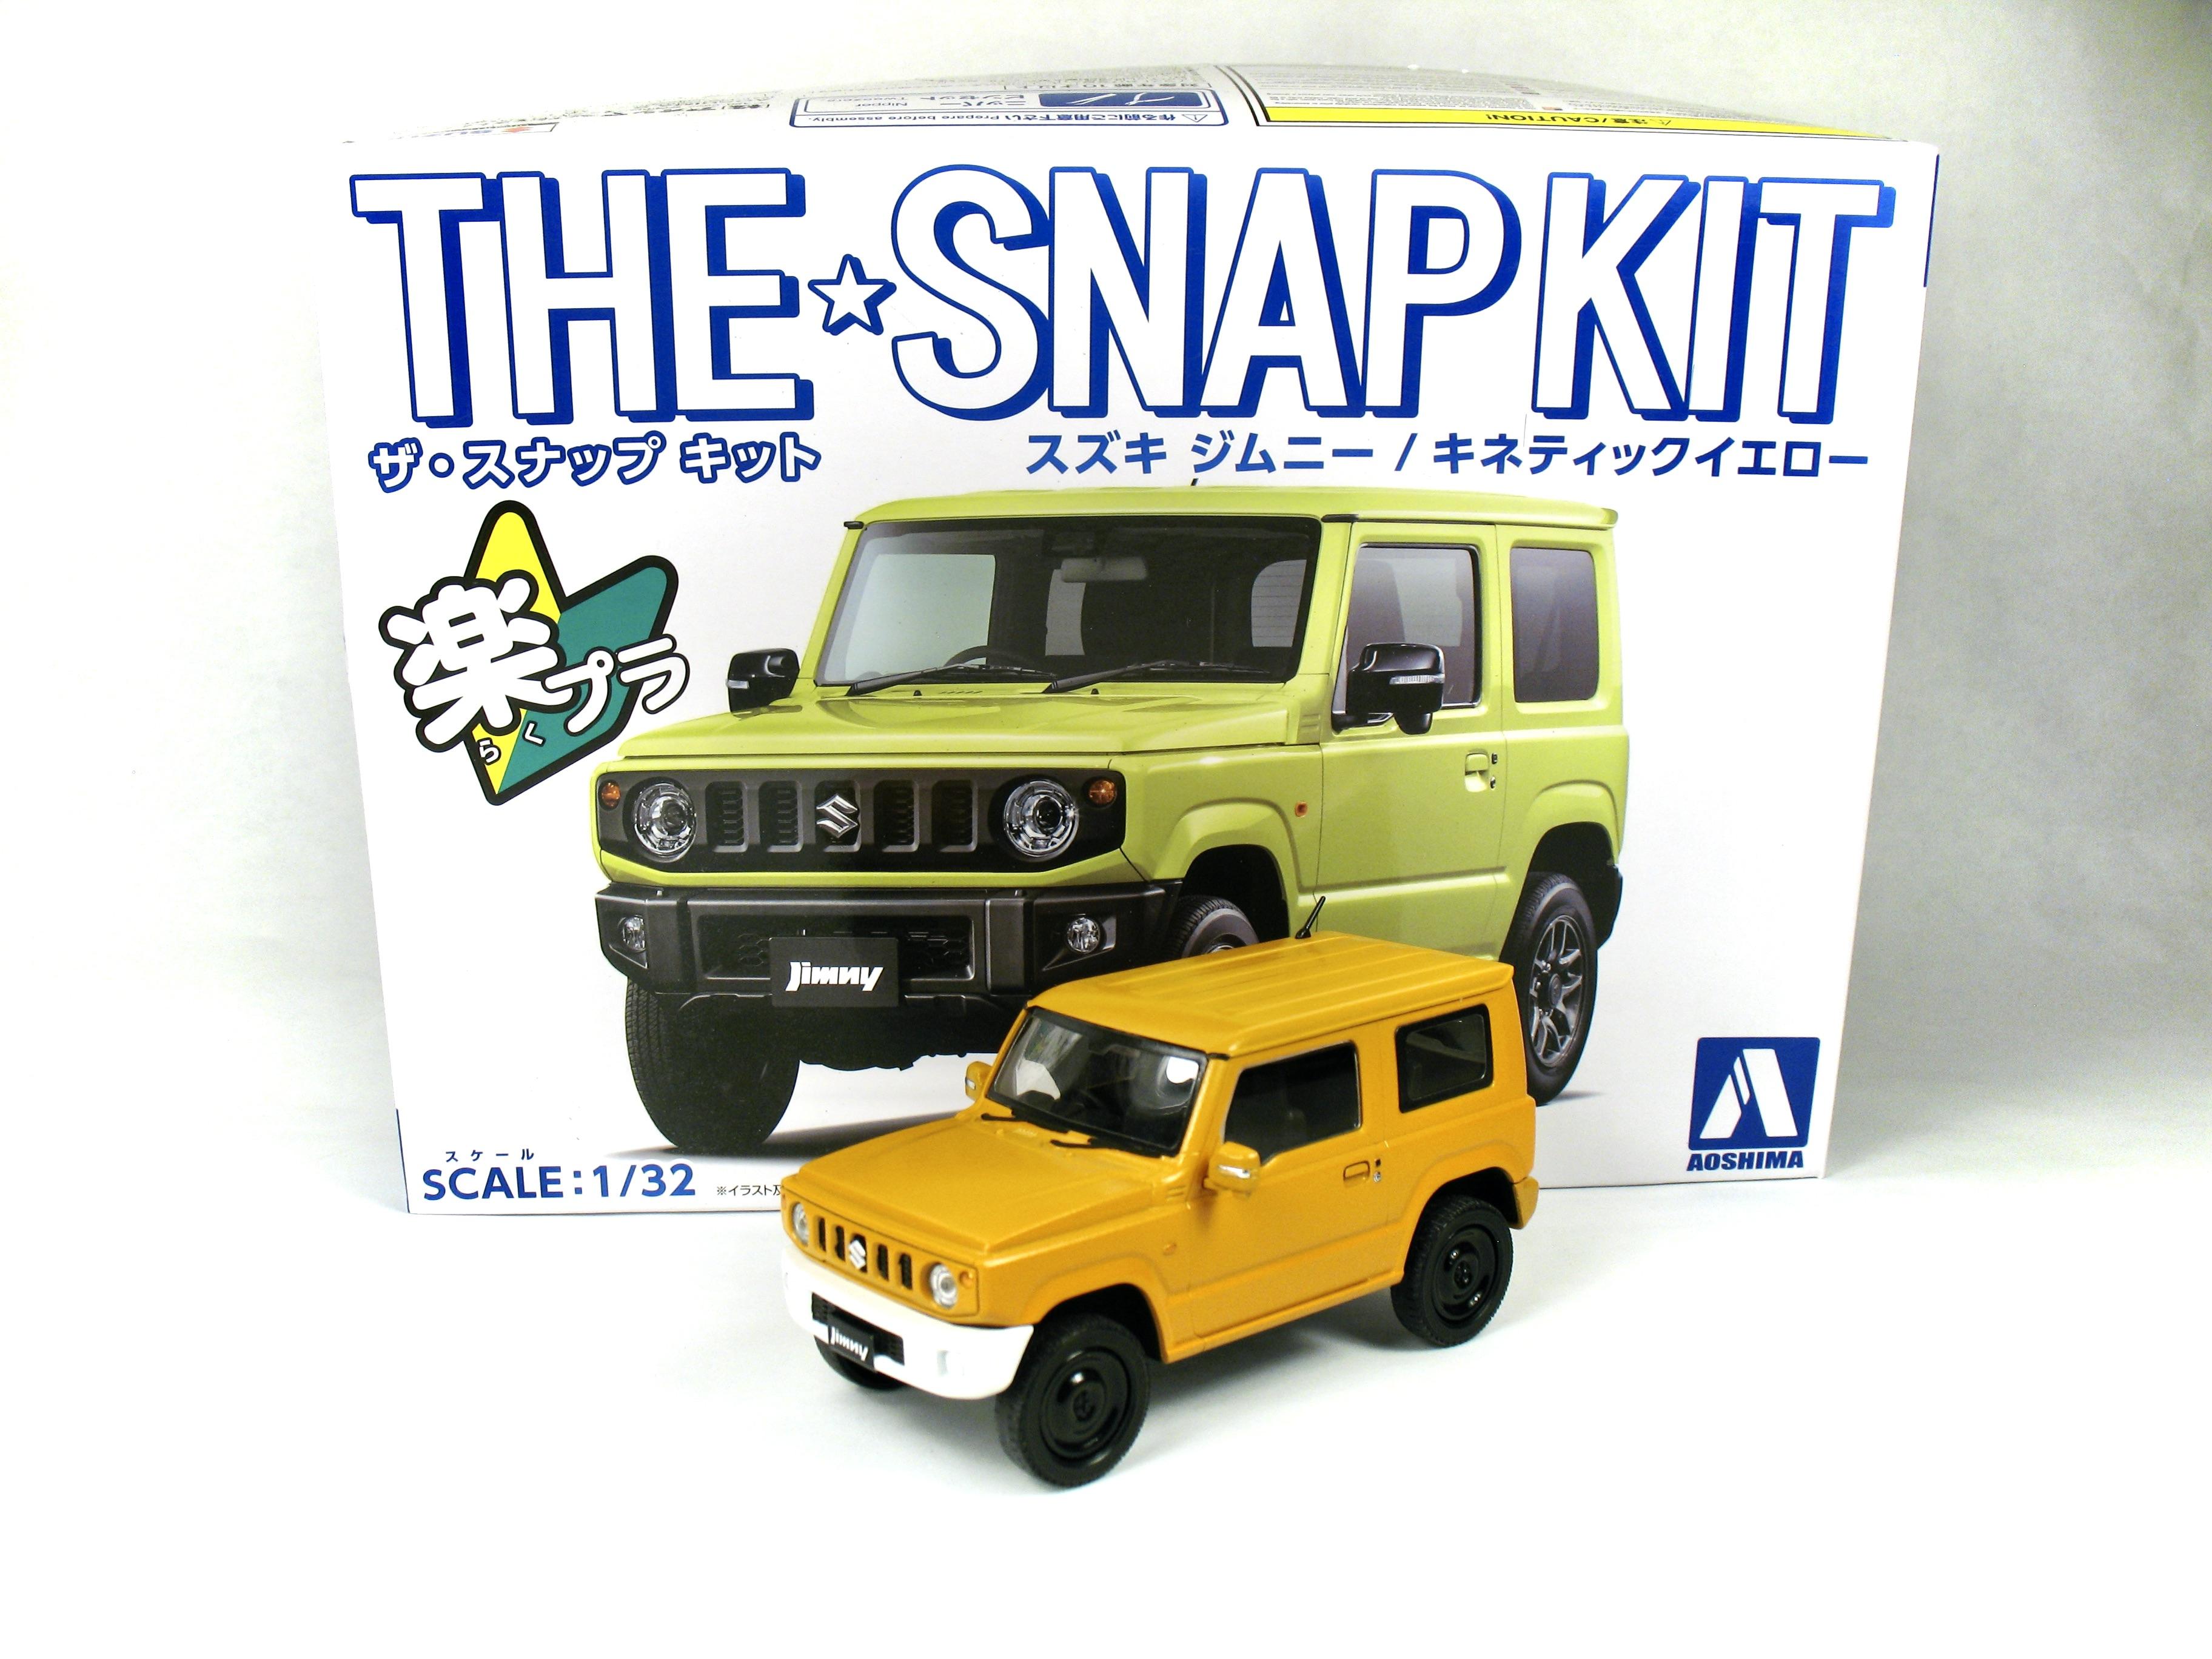
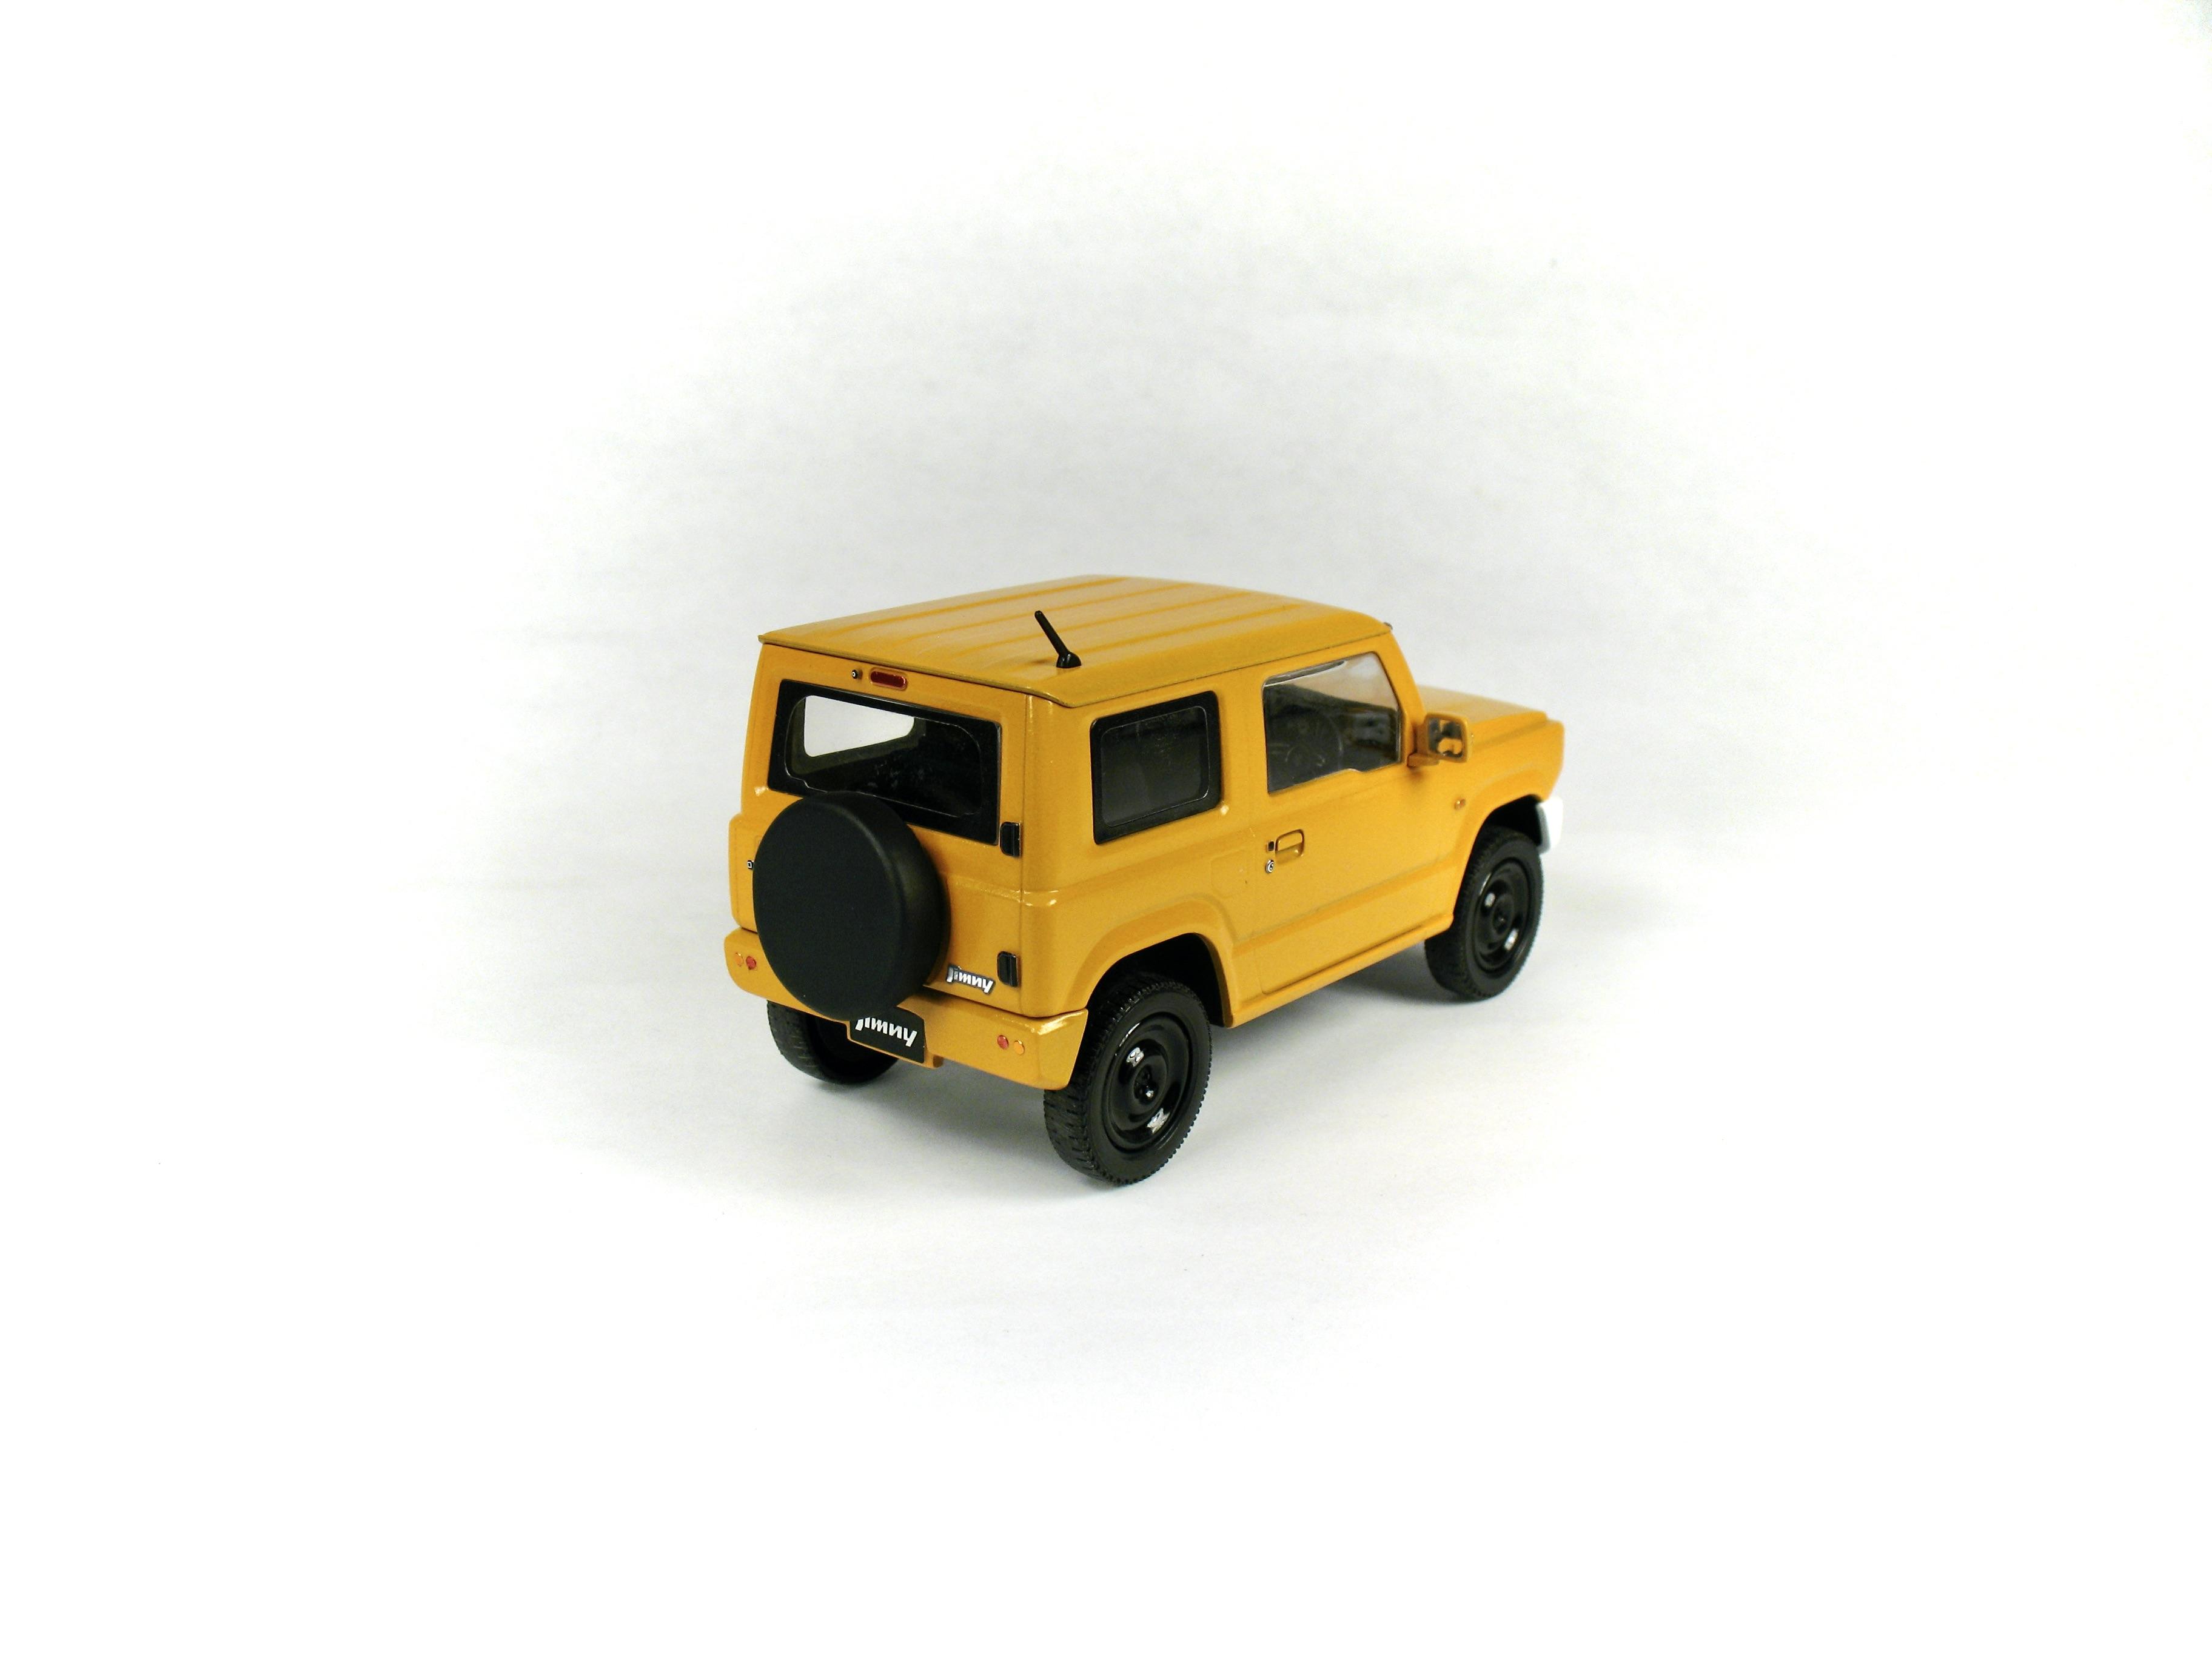
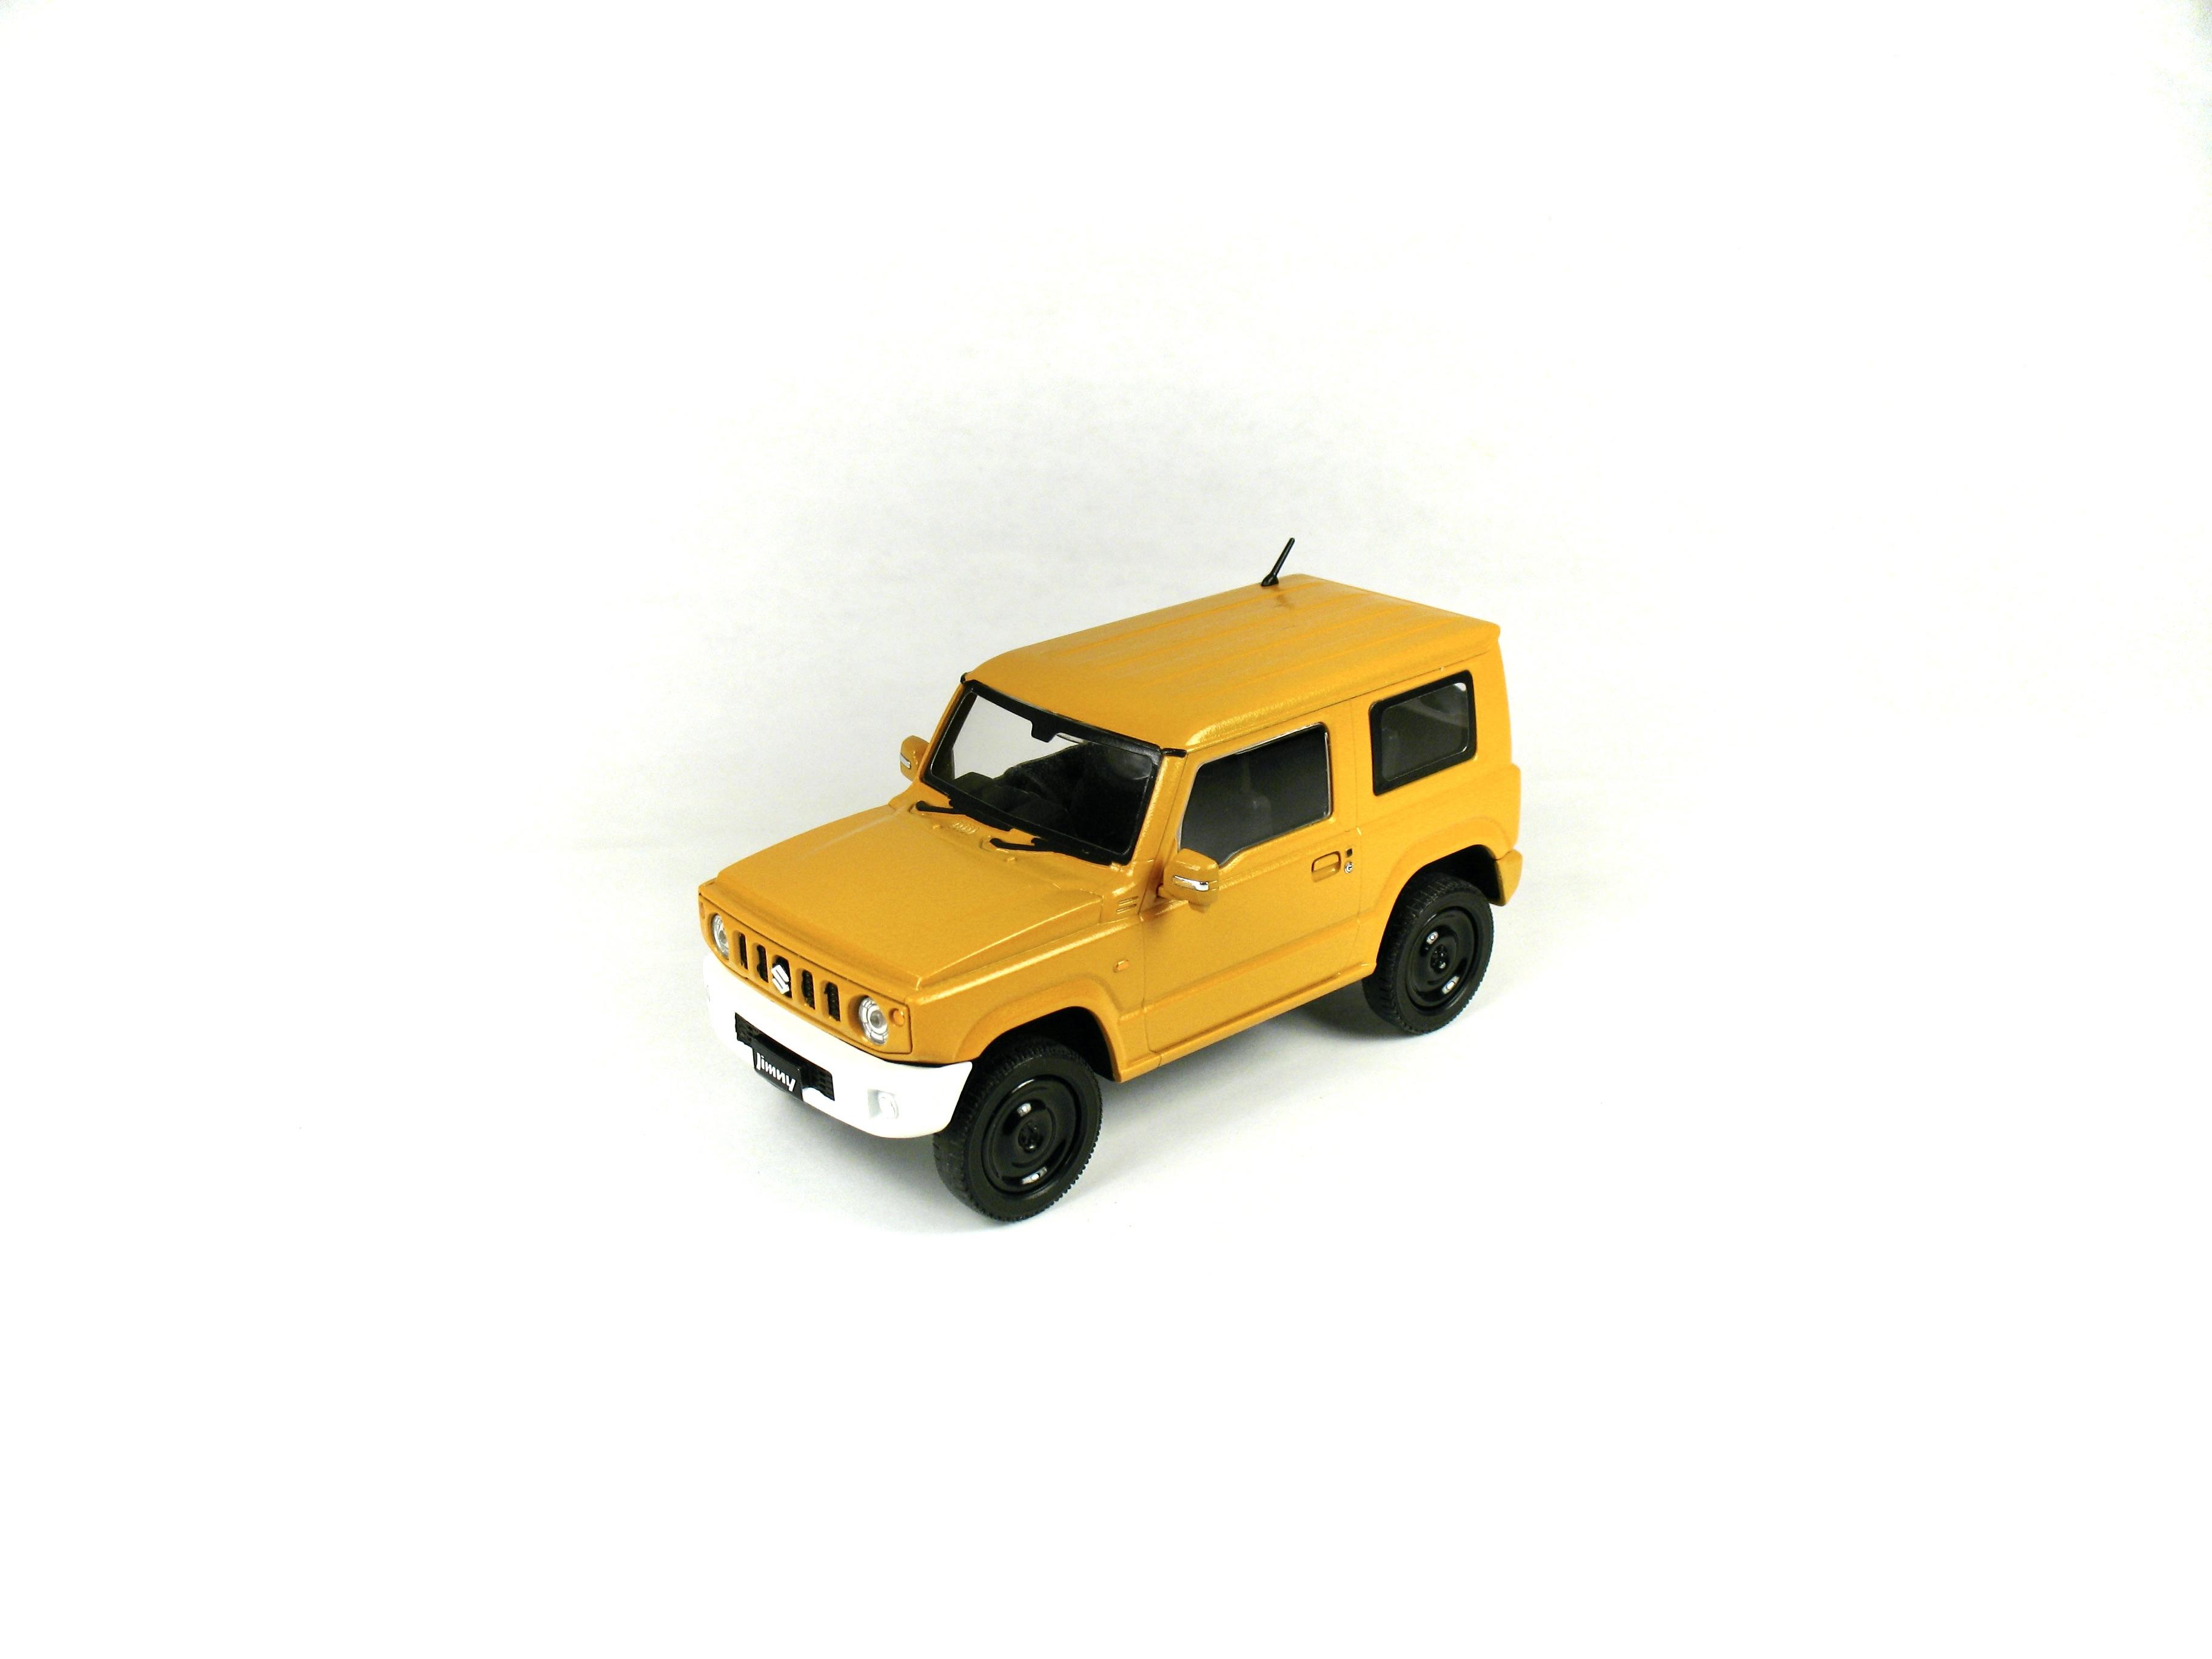
The yellow is similar to the one they used on the Suzuki LJ 20 in the 70's. Thank you David! We used to have a LJ 80, great gear ratio for mountains trail. I wish they could import it in the US. Thank you Garry!
-
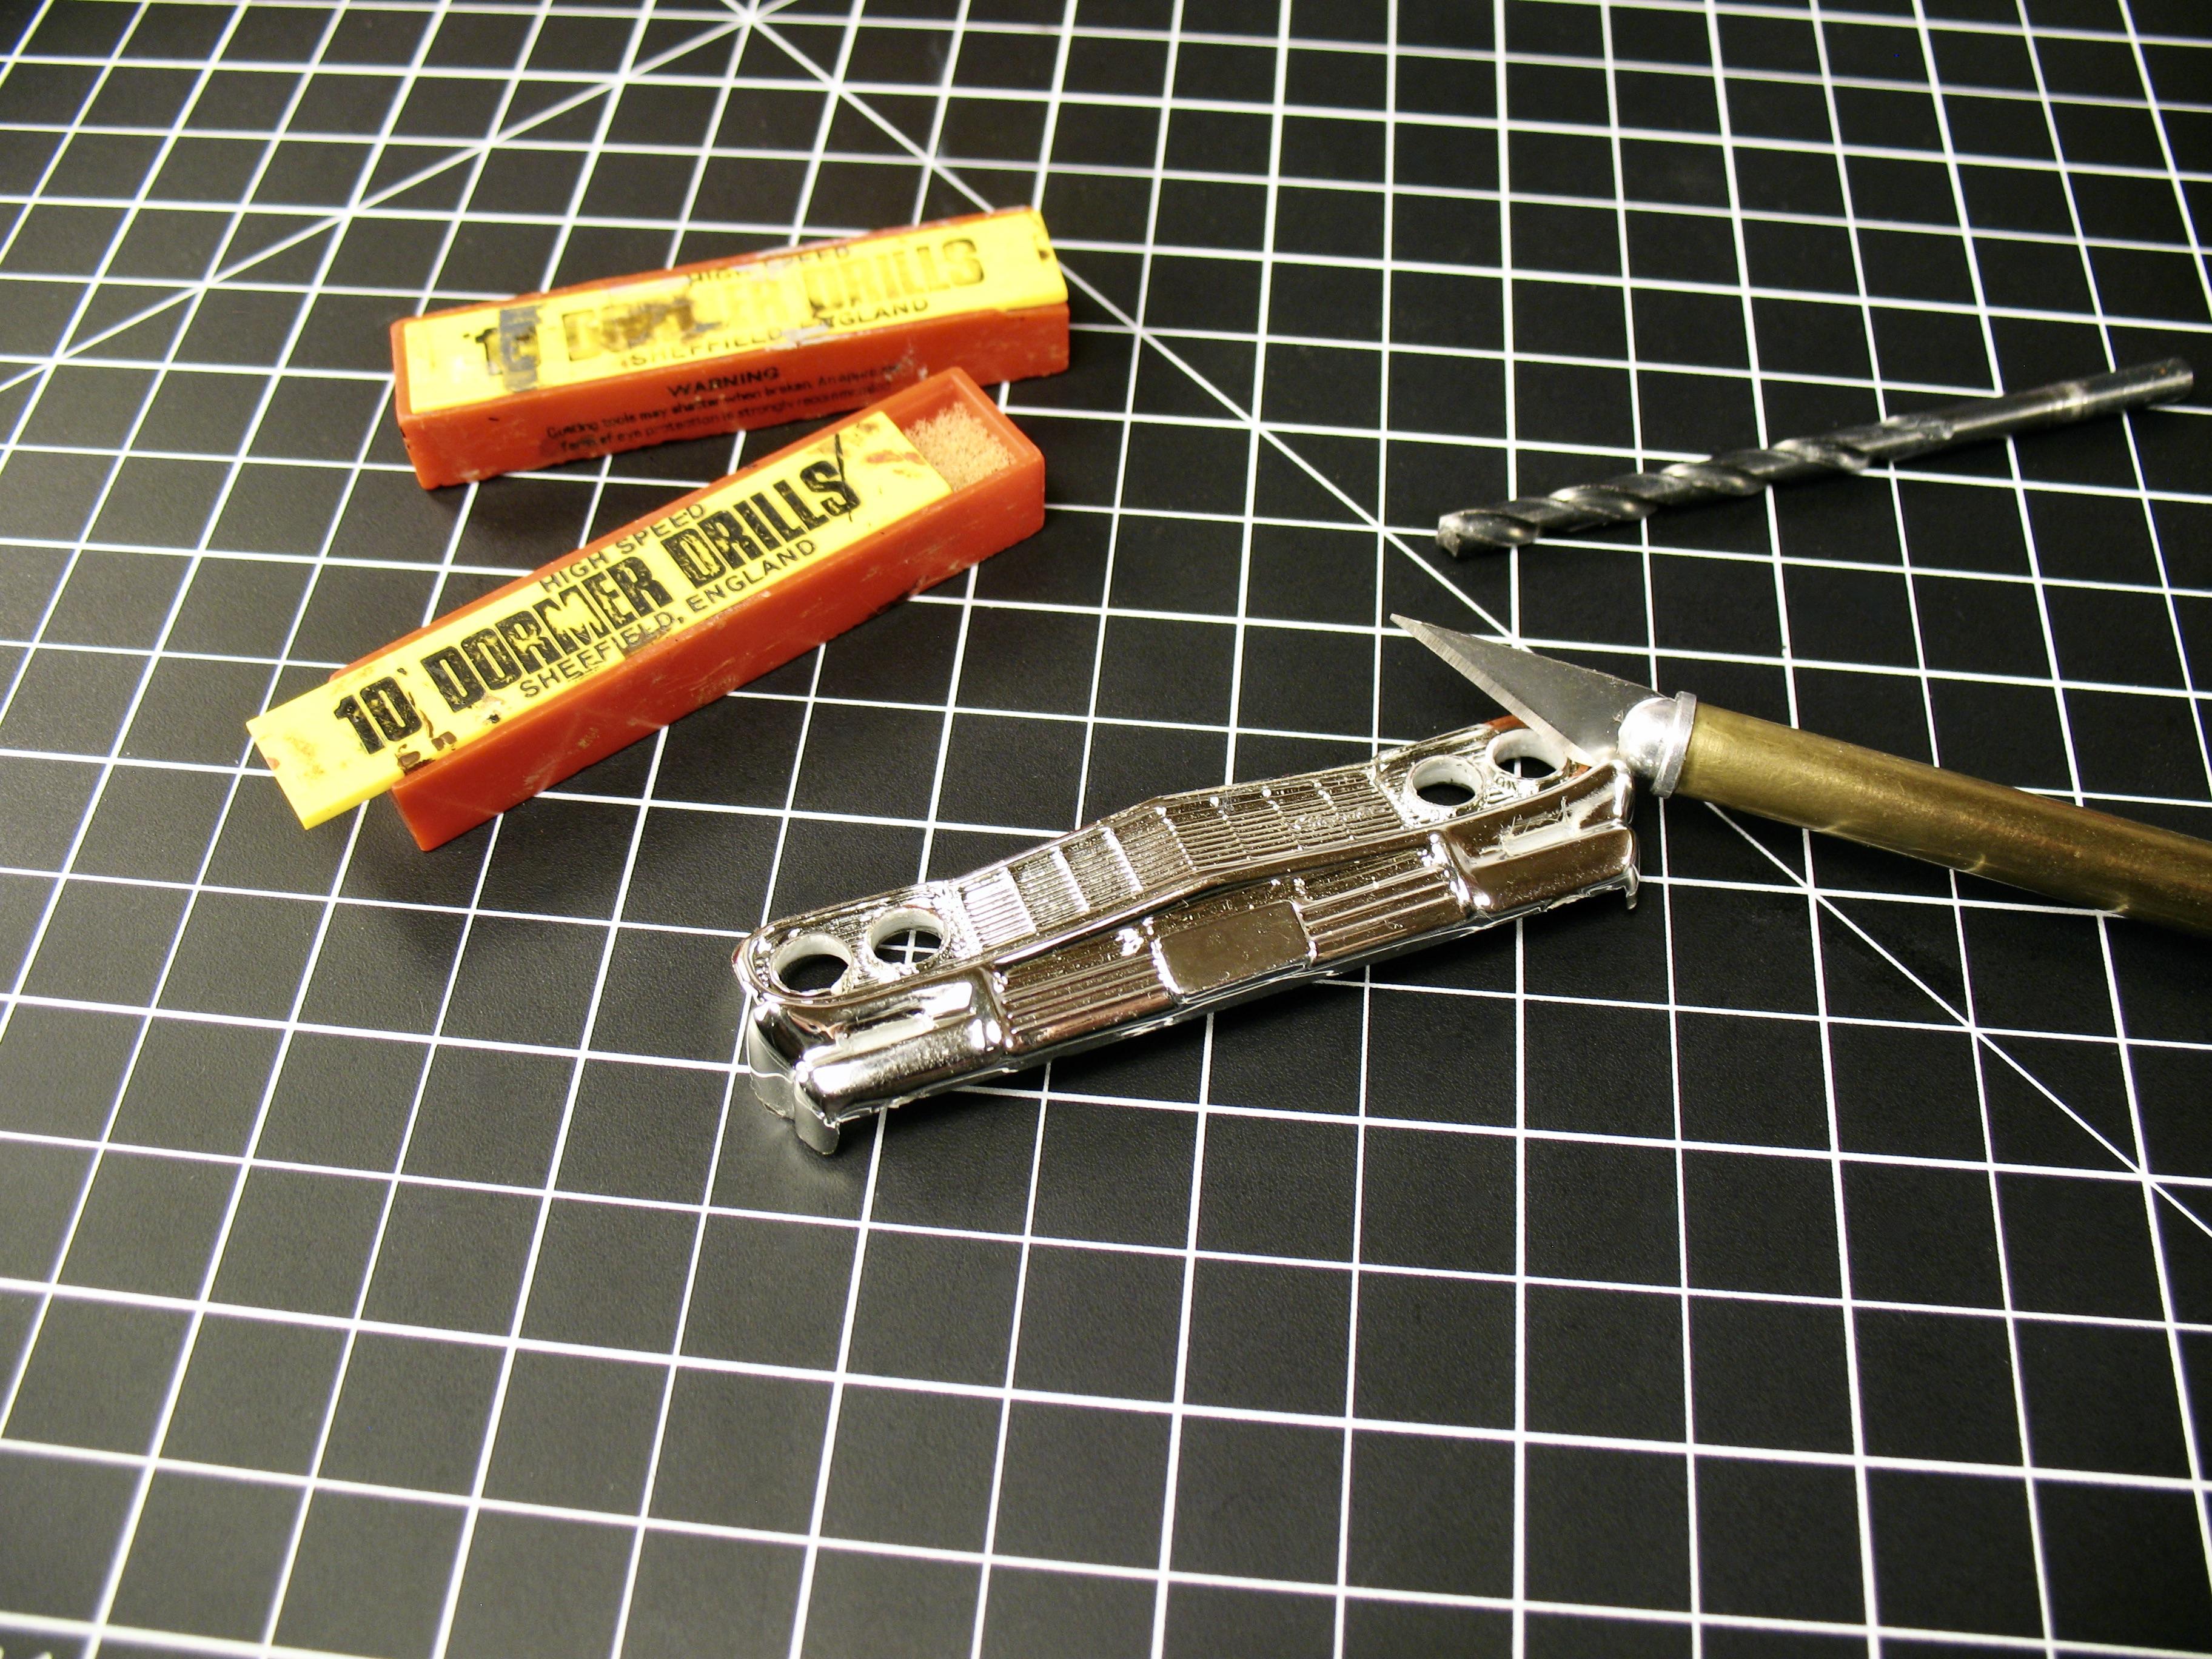
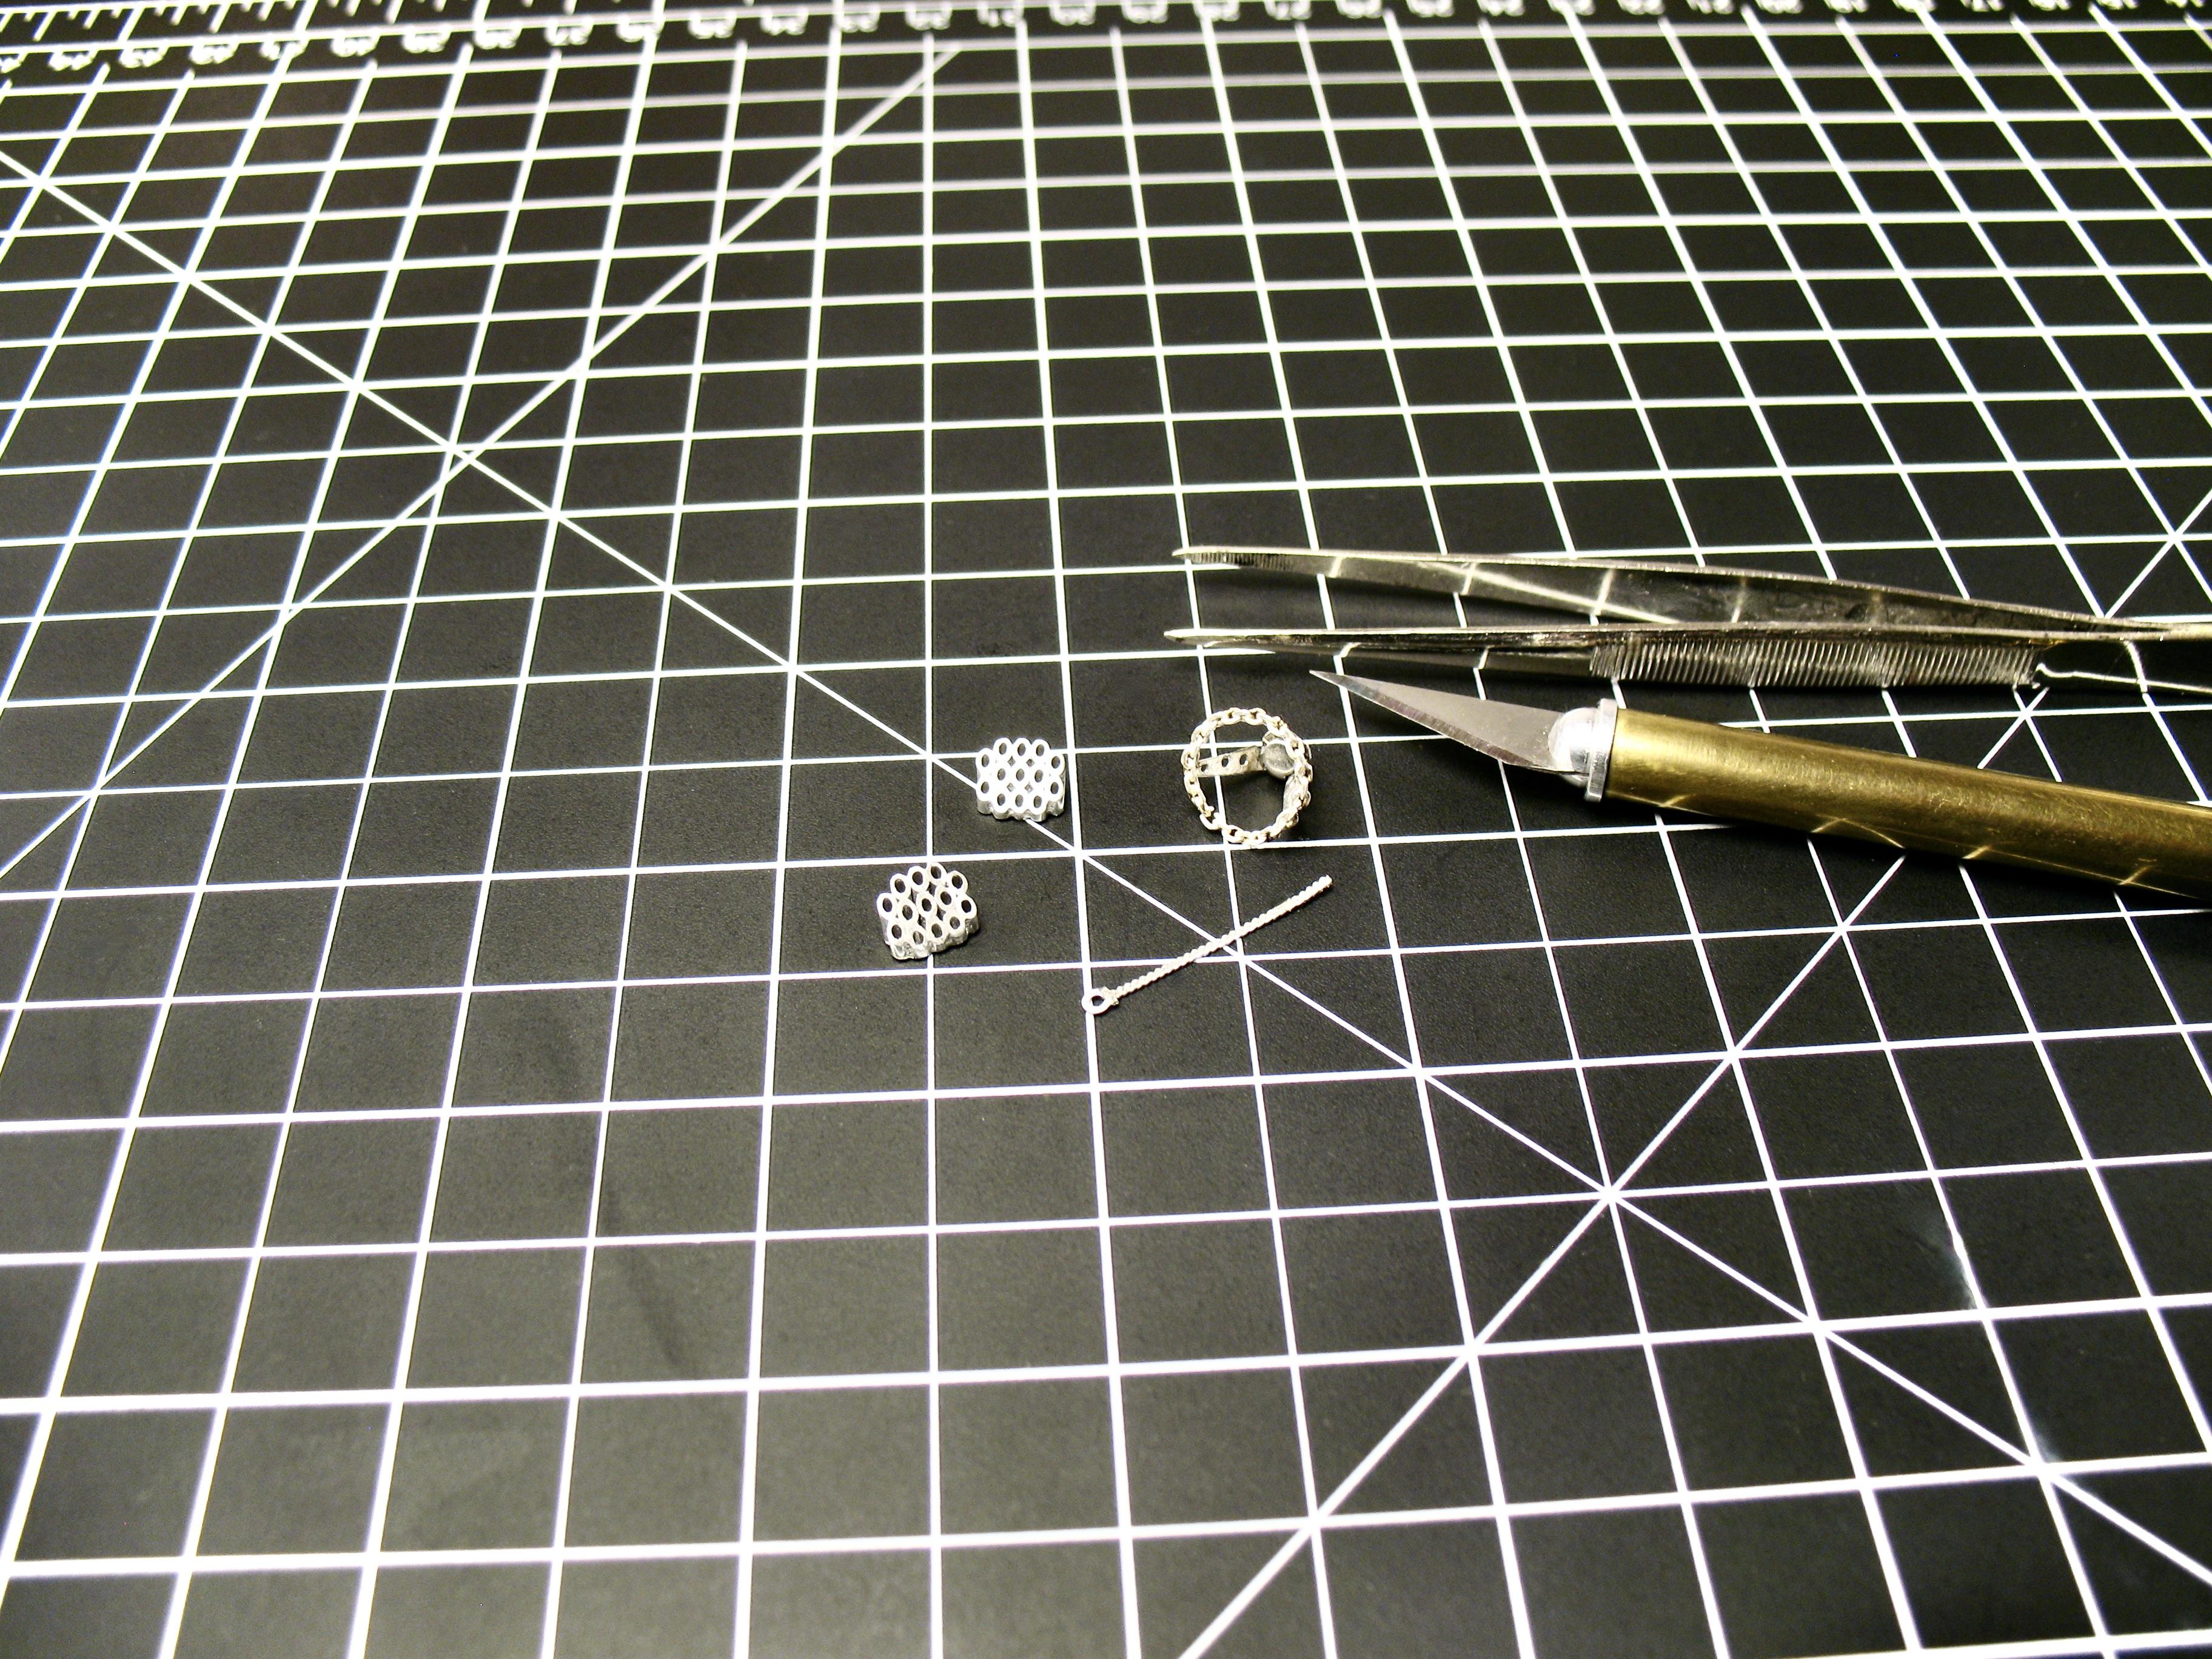
Little progress on this one... Drilled out the front head light, will replace them with clear one. The interior got some upgrade too... I made new steering wheels, rear speakers and key chain... The rest of the interior got new upholstery... And is completed. It was teh most tricky interior I hawe done. but I think it came out good. Before start, i painted few parts on the interior and painted chrome.
-
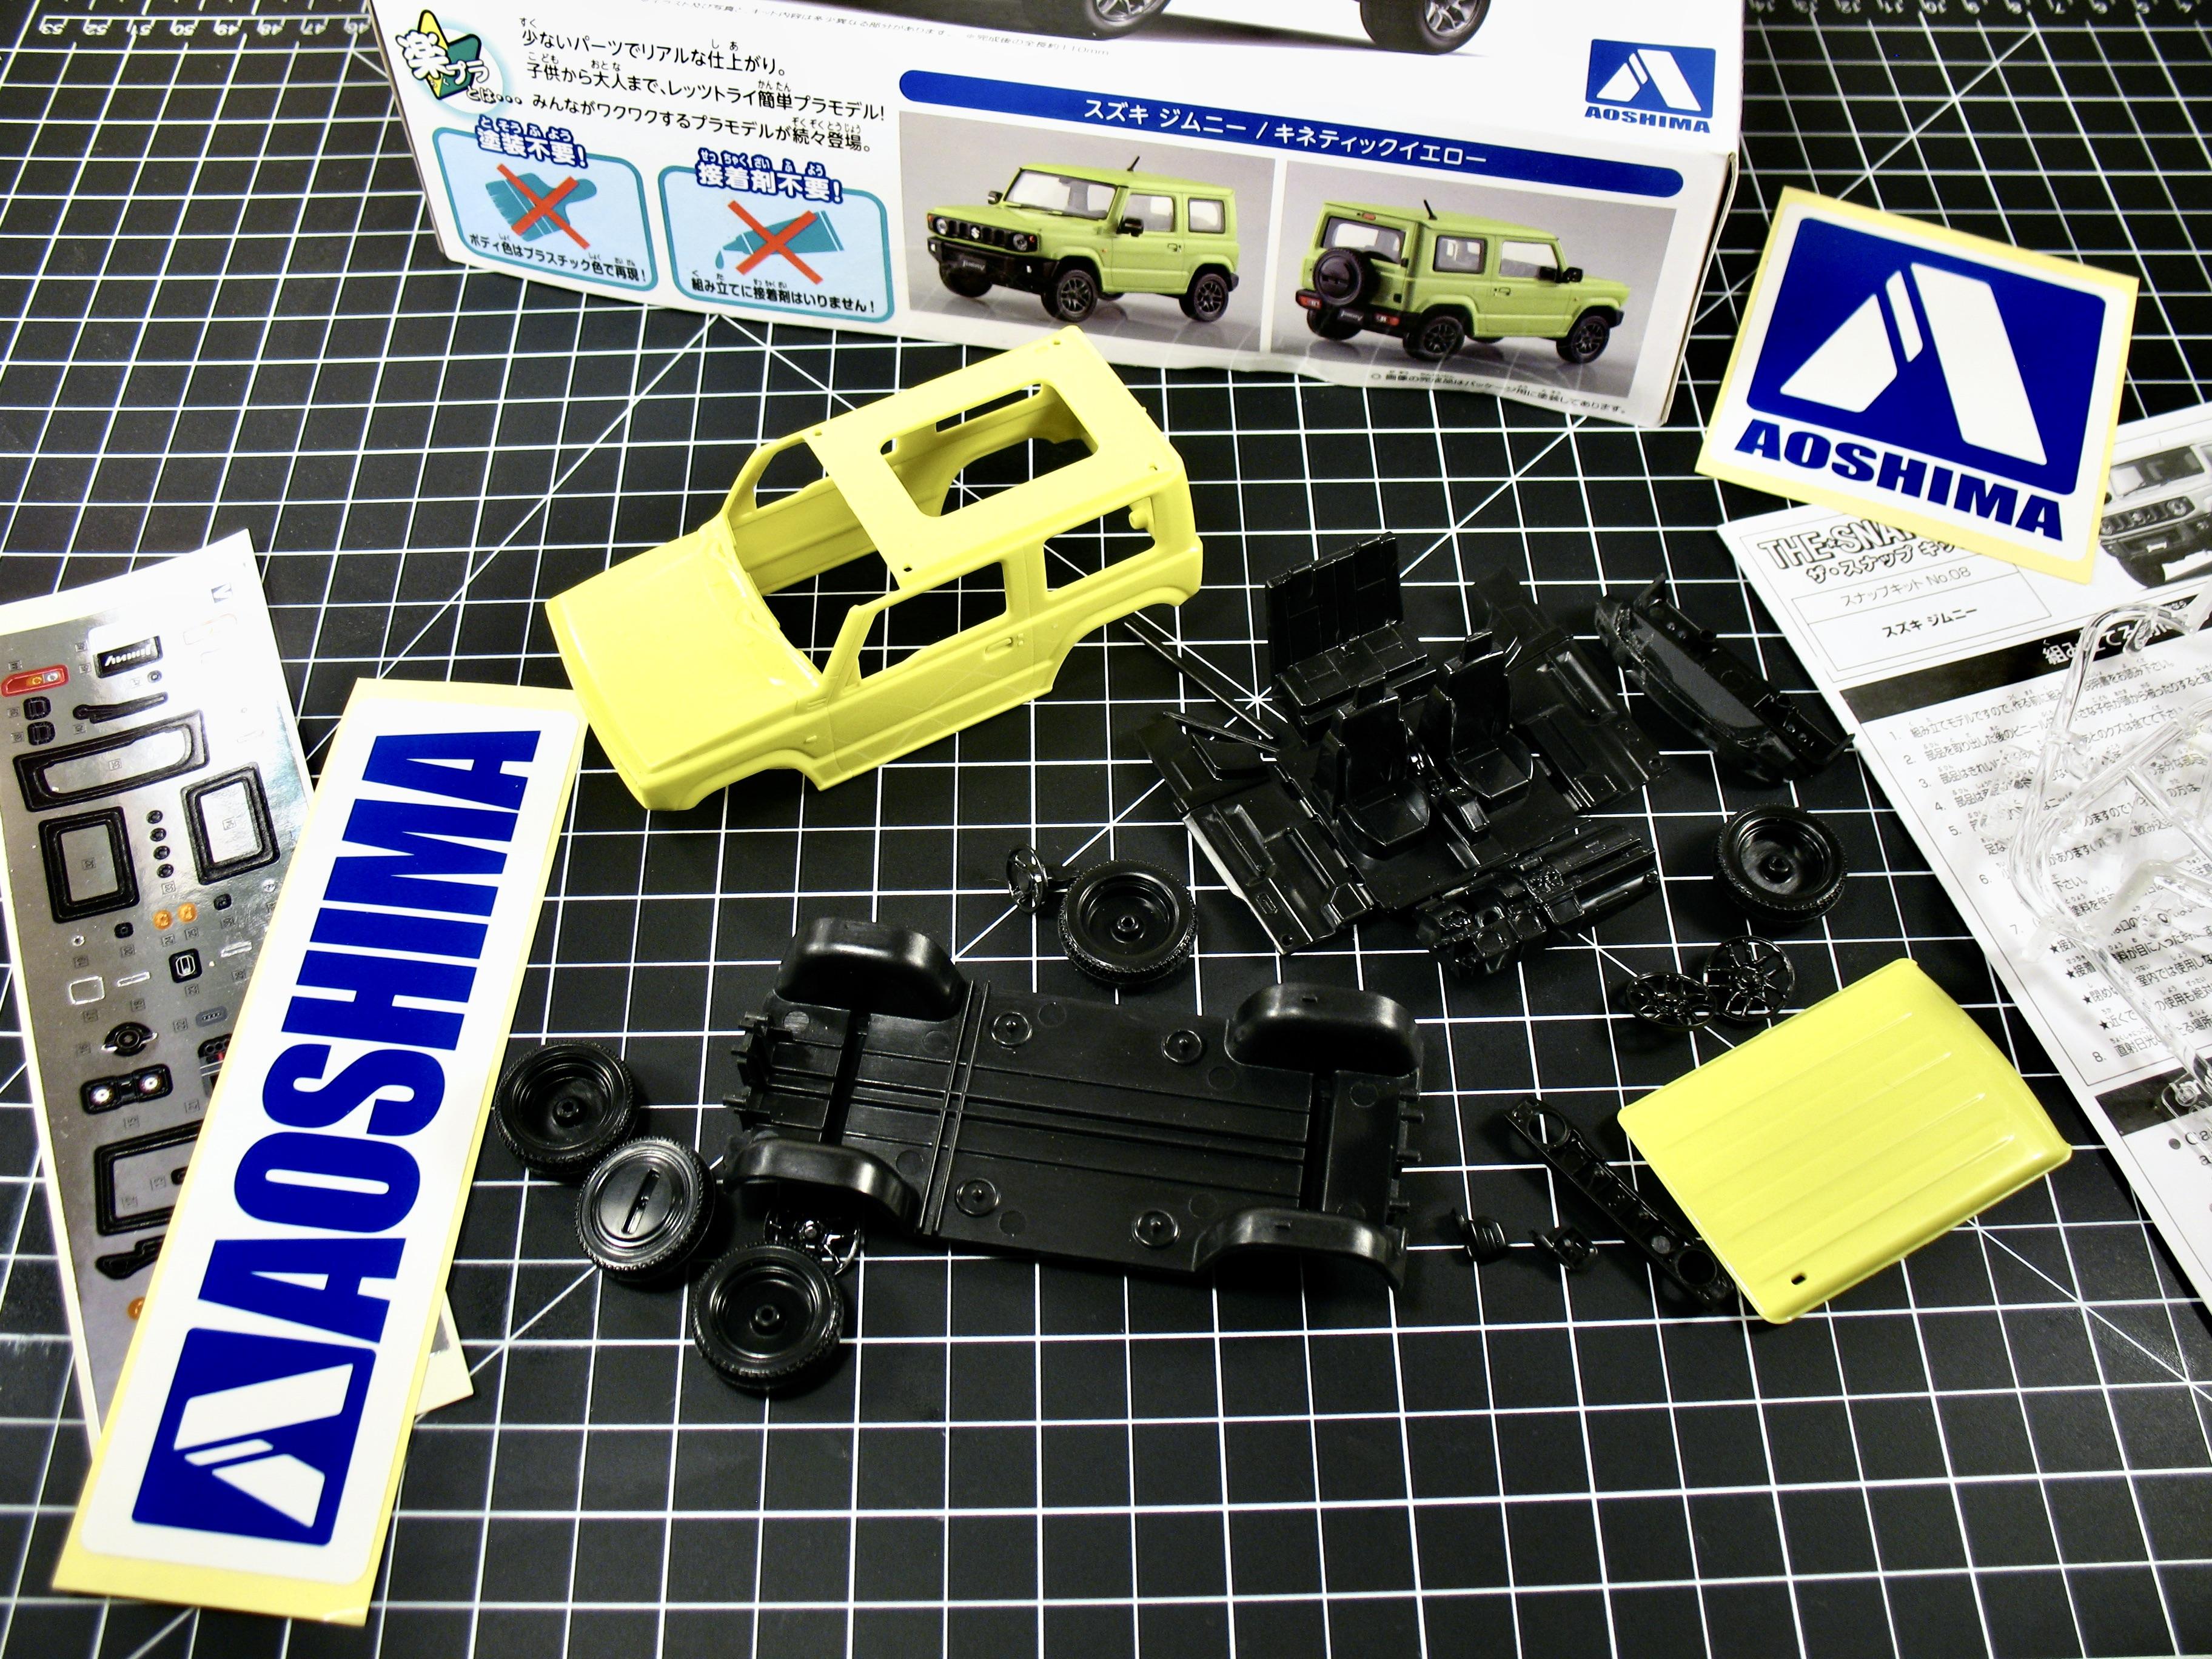
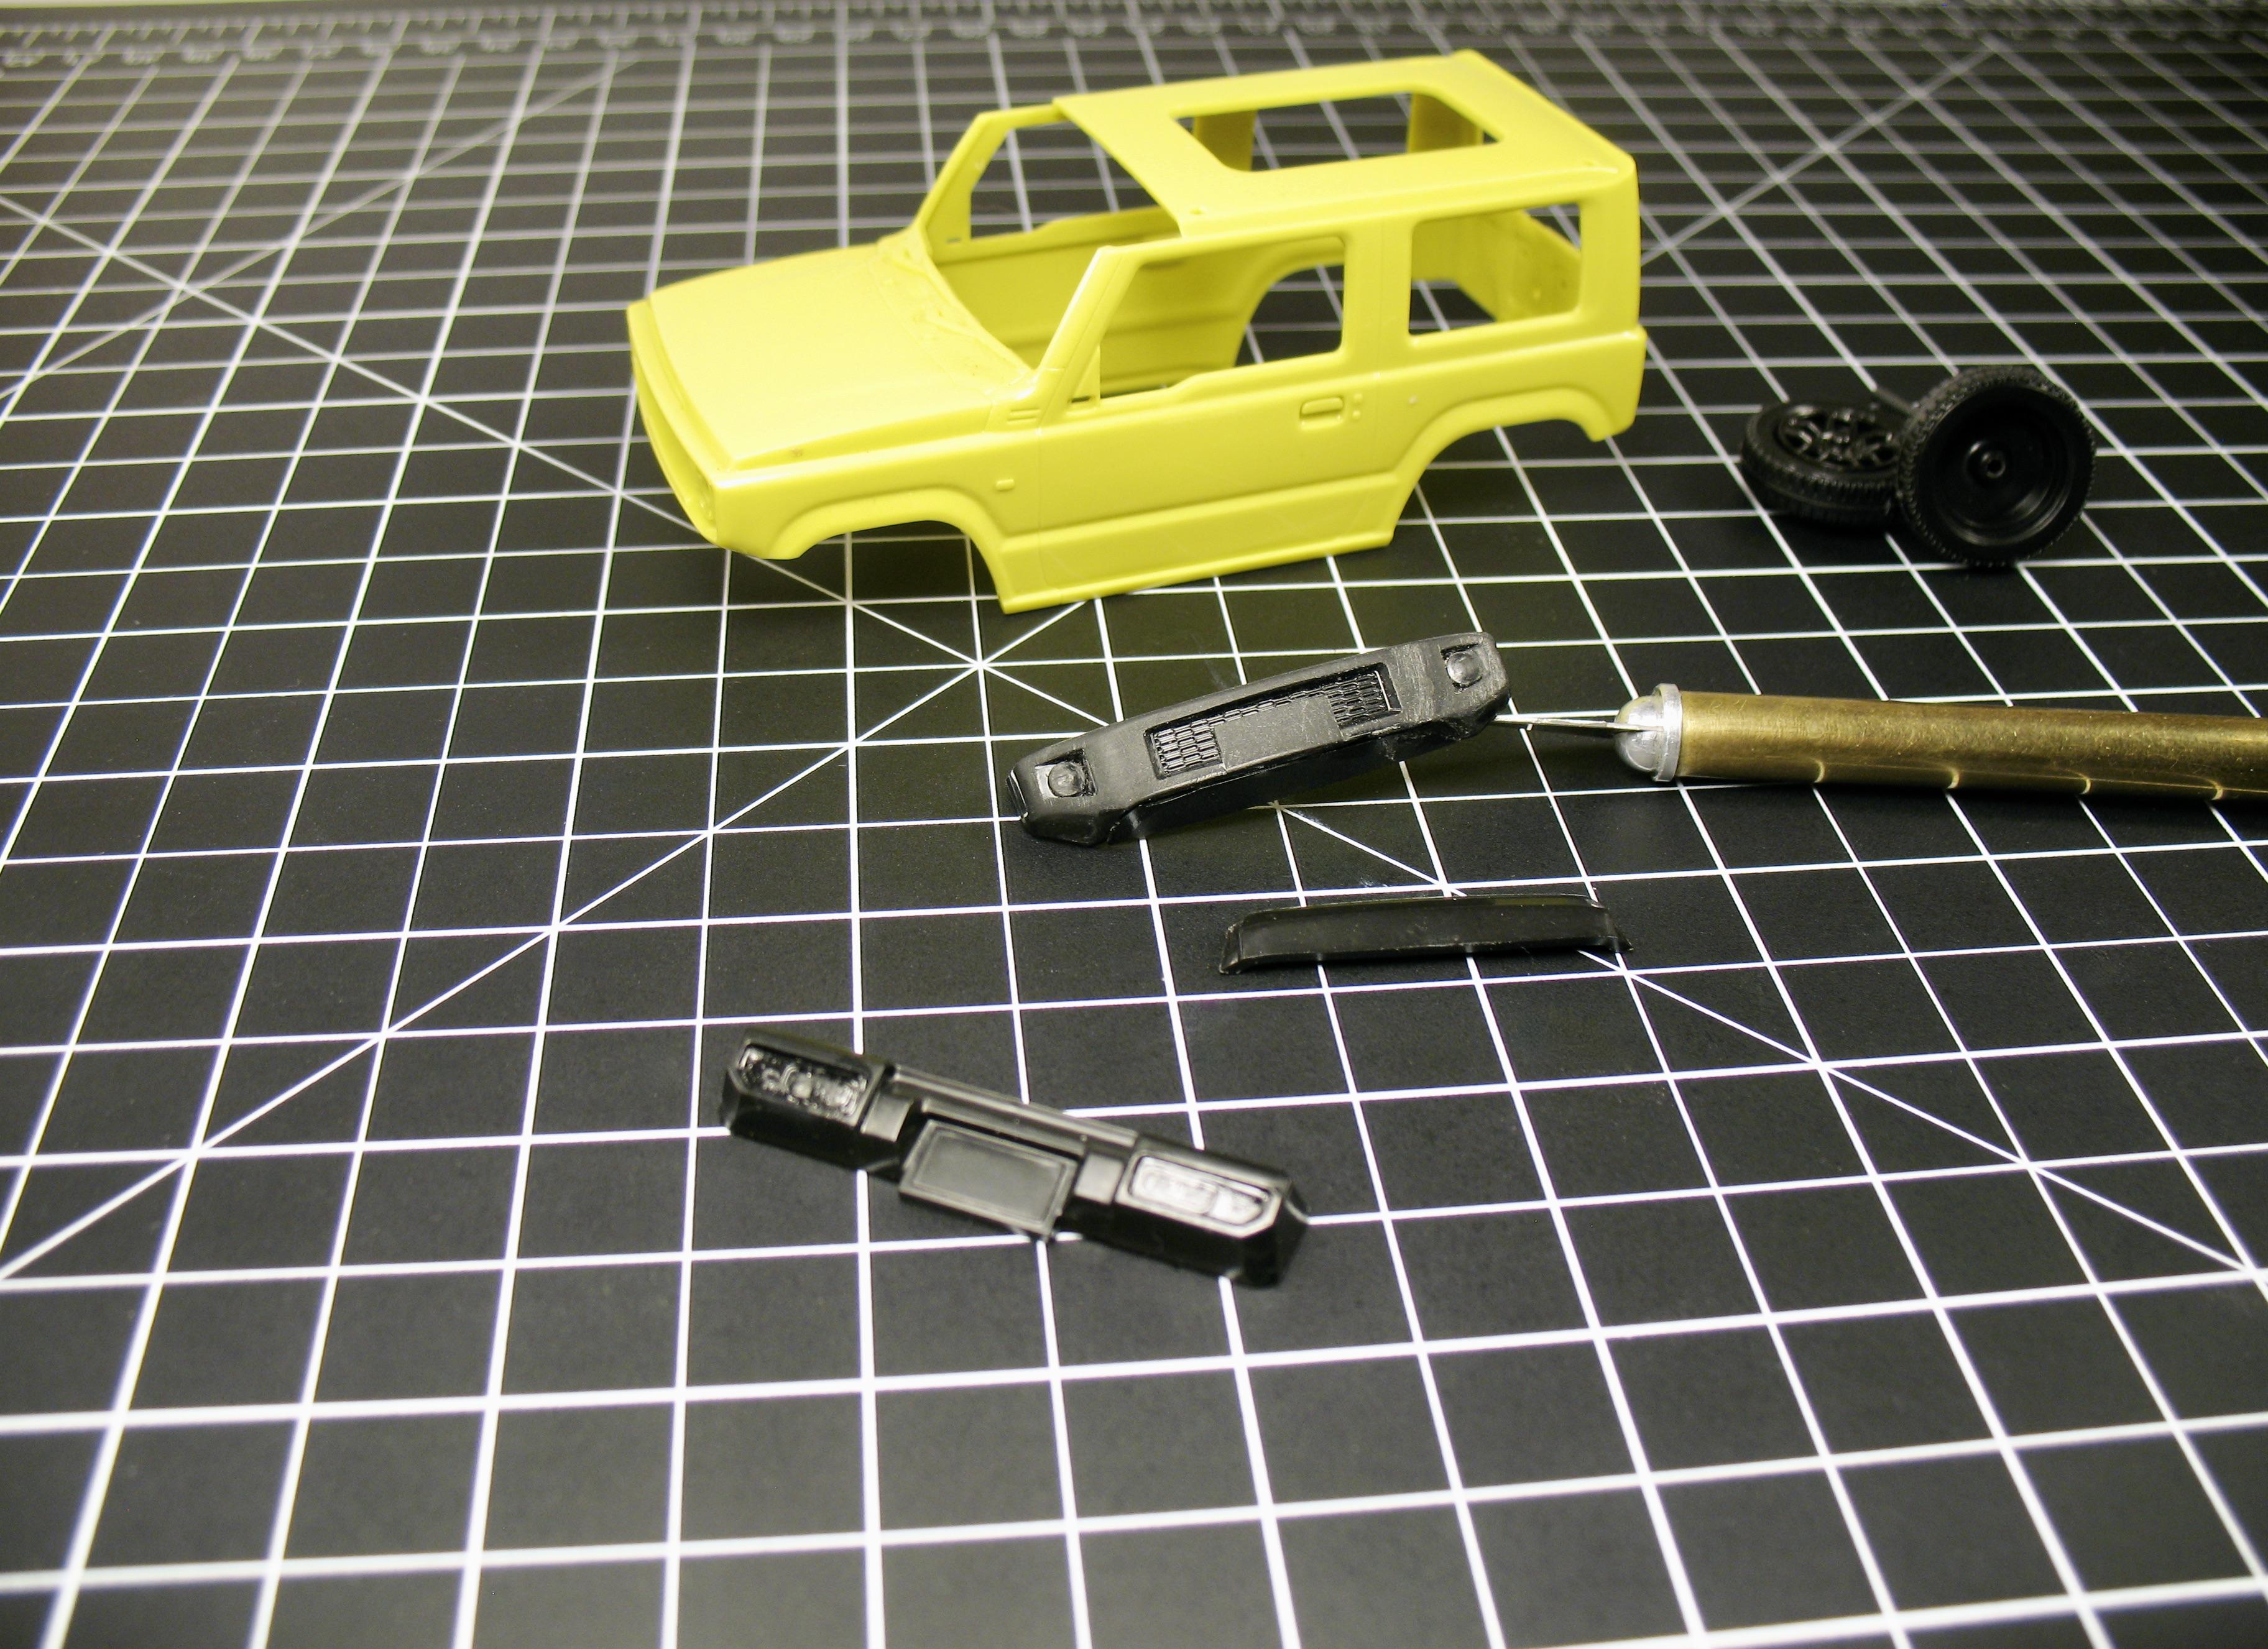
I just finish this one. It is a Suzuki Jimny from Aoshima, snap kit in 1/32. All the pieces fit great, great quality molding and casting, in fact you can build it without painting it. The decals also are very good, not water slide, but paper decal. I modified it little bit cutting the front bender bottom part and fill the tail light on the rear bumper. Also decided to make new steele wheels instead of the one that came with the kit. I decided to give it a retro look, so I painted the grille, mirrors and rear bumper the same color of the body, front bumper painted white. Like the old LJ20 from the early 70's. Fun and fast kit to build! Here the work on front and rear bumper. The front one I had to add a piece on the bottom to cover where i cut. the rear I had to add a piece across because it looks better.
-
Any CA (like SuperGlue) glue.
-
What is the best glue for glass/clear surfaces?
Brizio replied to AlbertS's topic in Tips, Tricks, and Tutorials
It depend how big they are, on a model in 1/25 I use Mikro mark Same Stuff plastic welder. On model in 1/5 scale two part epoxy, using a tooth pick. -
Not able to go to switch pages on individual topics.
Brizio replied to GMP440's topic in How To Use This Board
I'm having the same problem, I'm using a Mac, Chrome and I disactivated ad blocker. If this is going to be fixed, it would be possible to have a new tread with the info. Because reply to this post will add more to the 2nd page and I cannot have access. Thanks! -
It is always fun to build! Agree on the casting, it is pretty nice and clean, with minimal flashing. Good to know about the '62 chassis. Thanks Bob!
-
I usually live the metal axle, ora add metal pins if needed, I find it more secure to hold the weight of the car. I like better the '62, but this is a specific build and need a '64.