Alan Barton
-
Posts
2,113 -
Joined
-
Last visited
Content Type
Profiles
Forums
Events
Gallery
Everything posted by Alan Barton
-

-
-
-
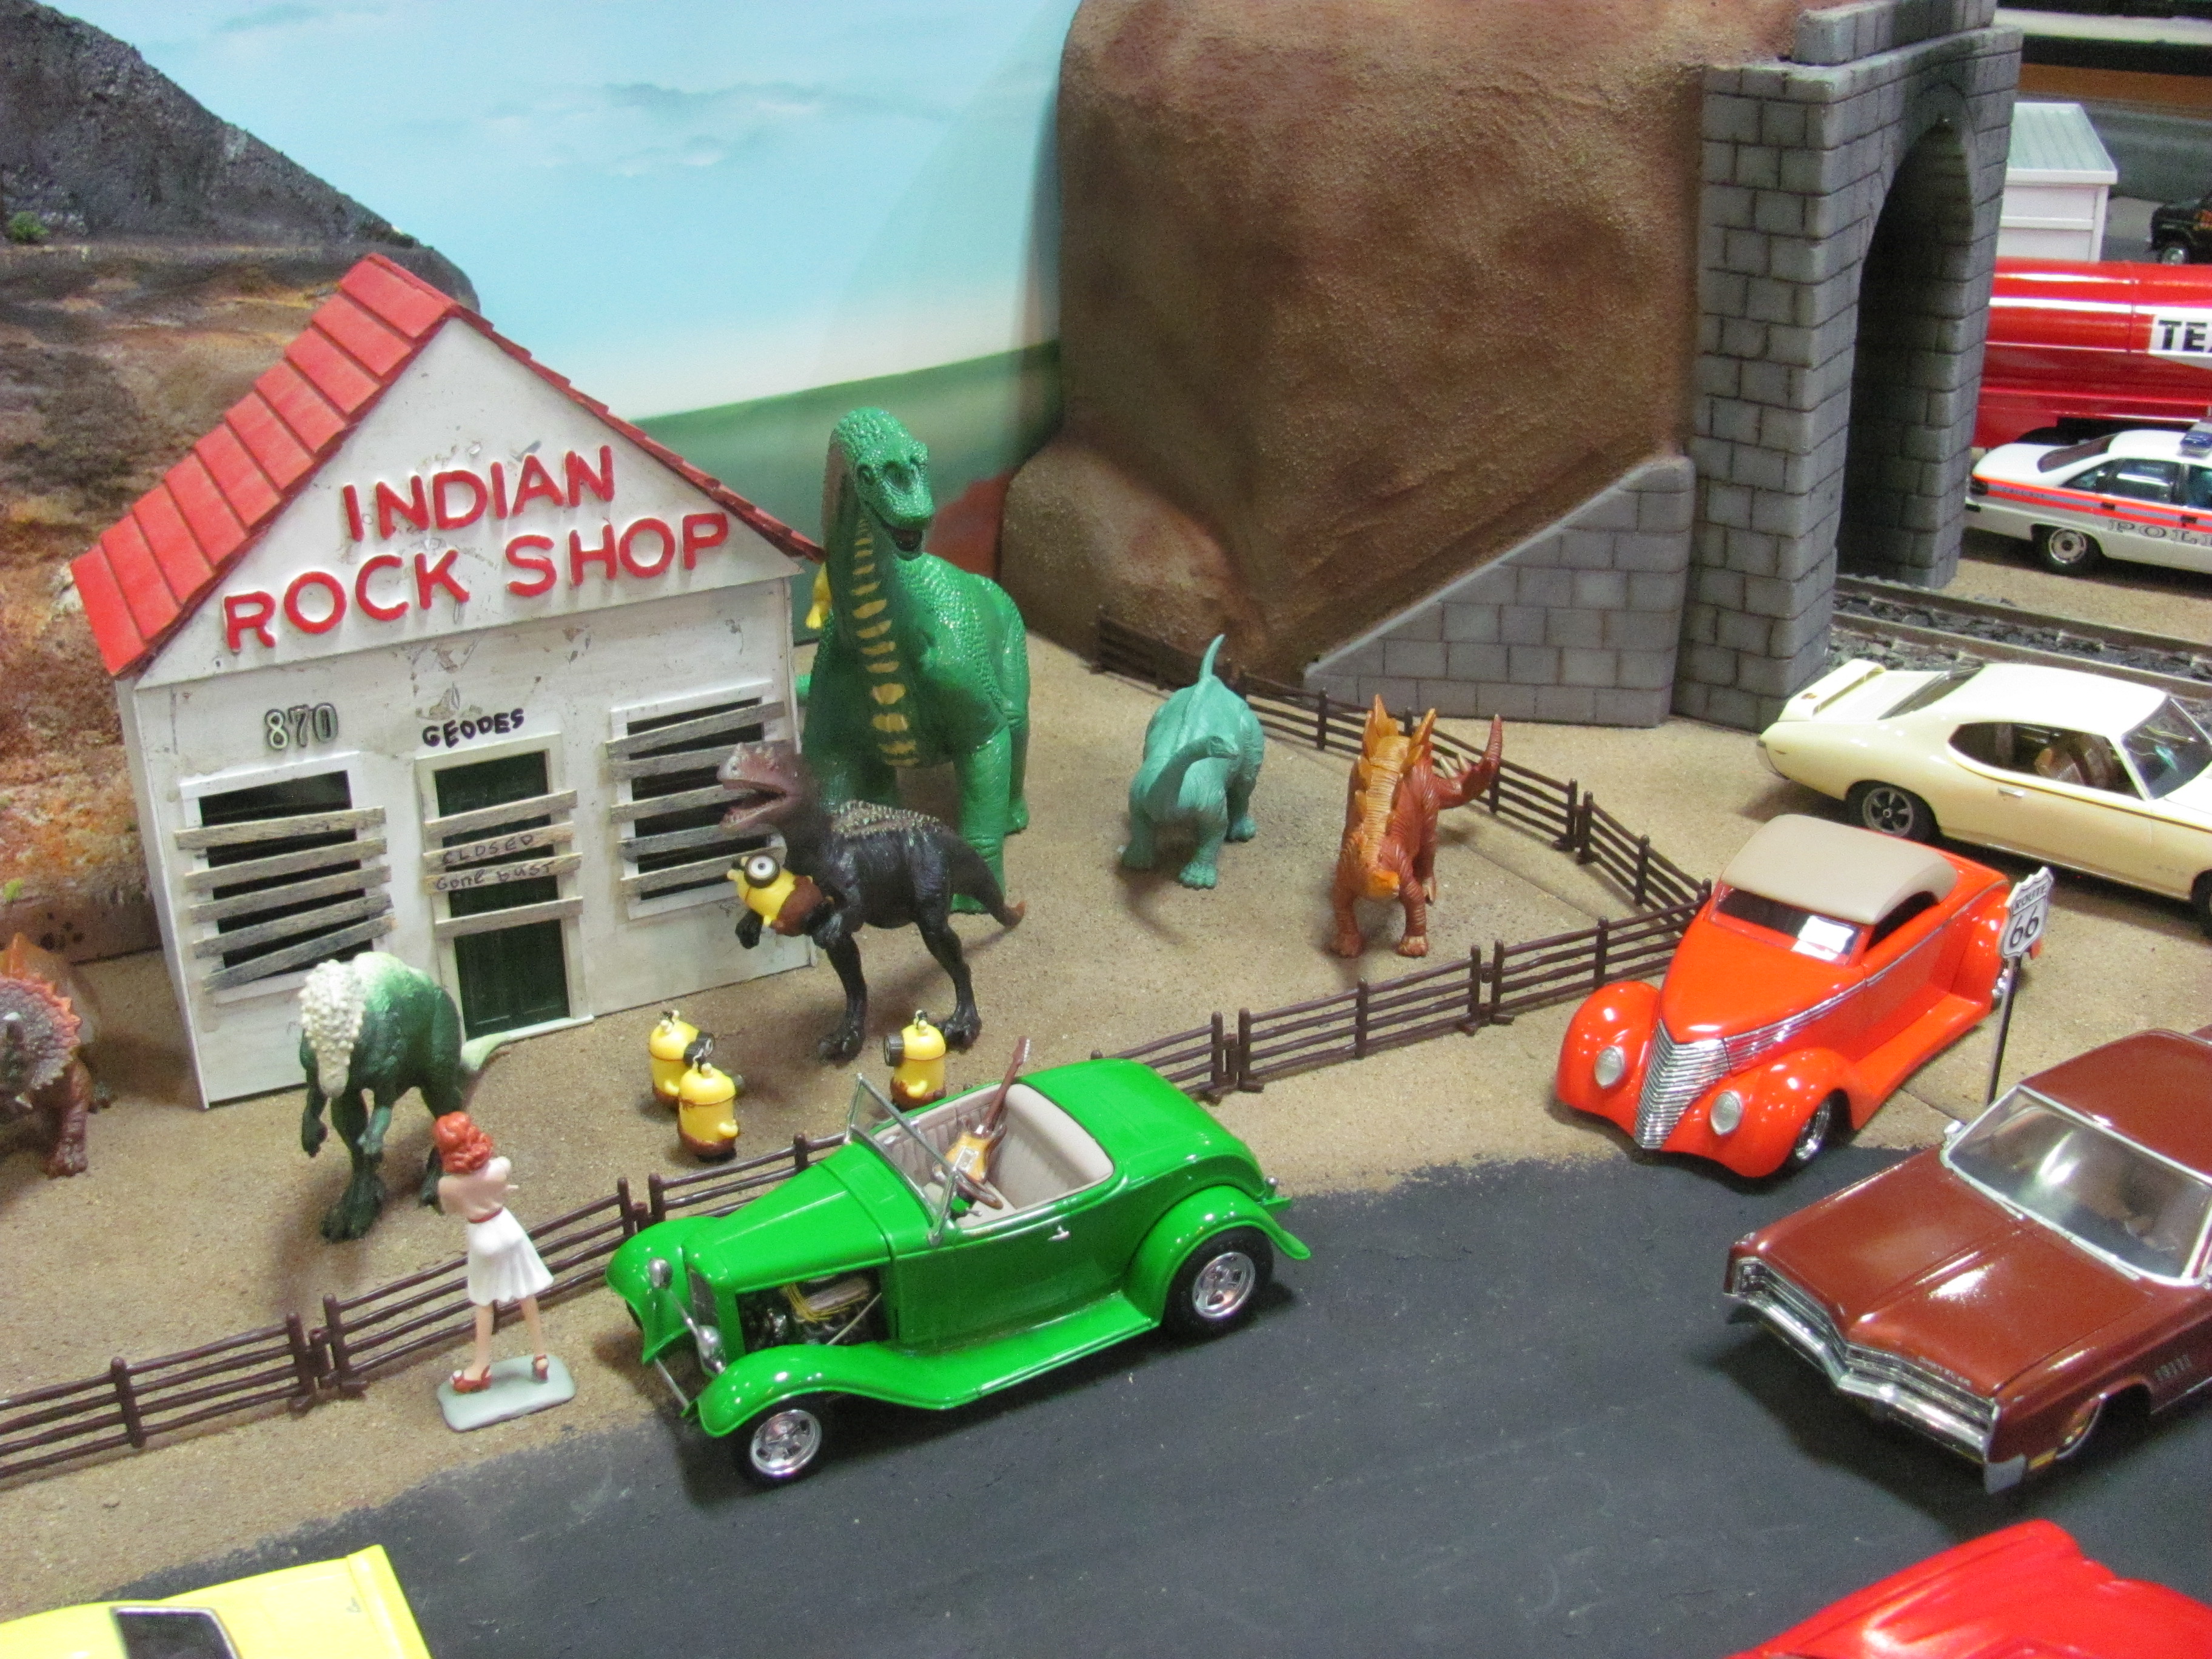
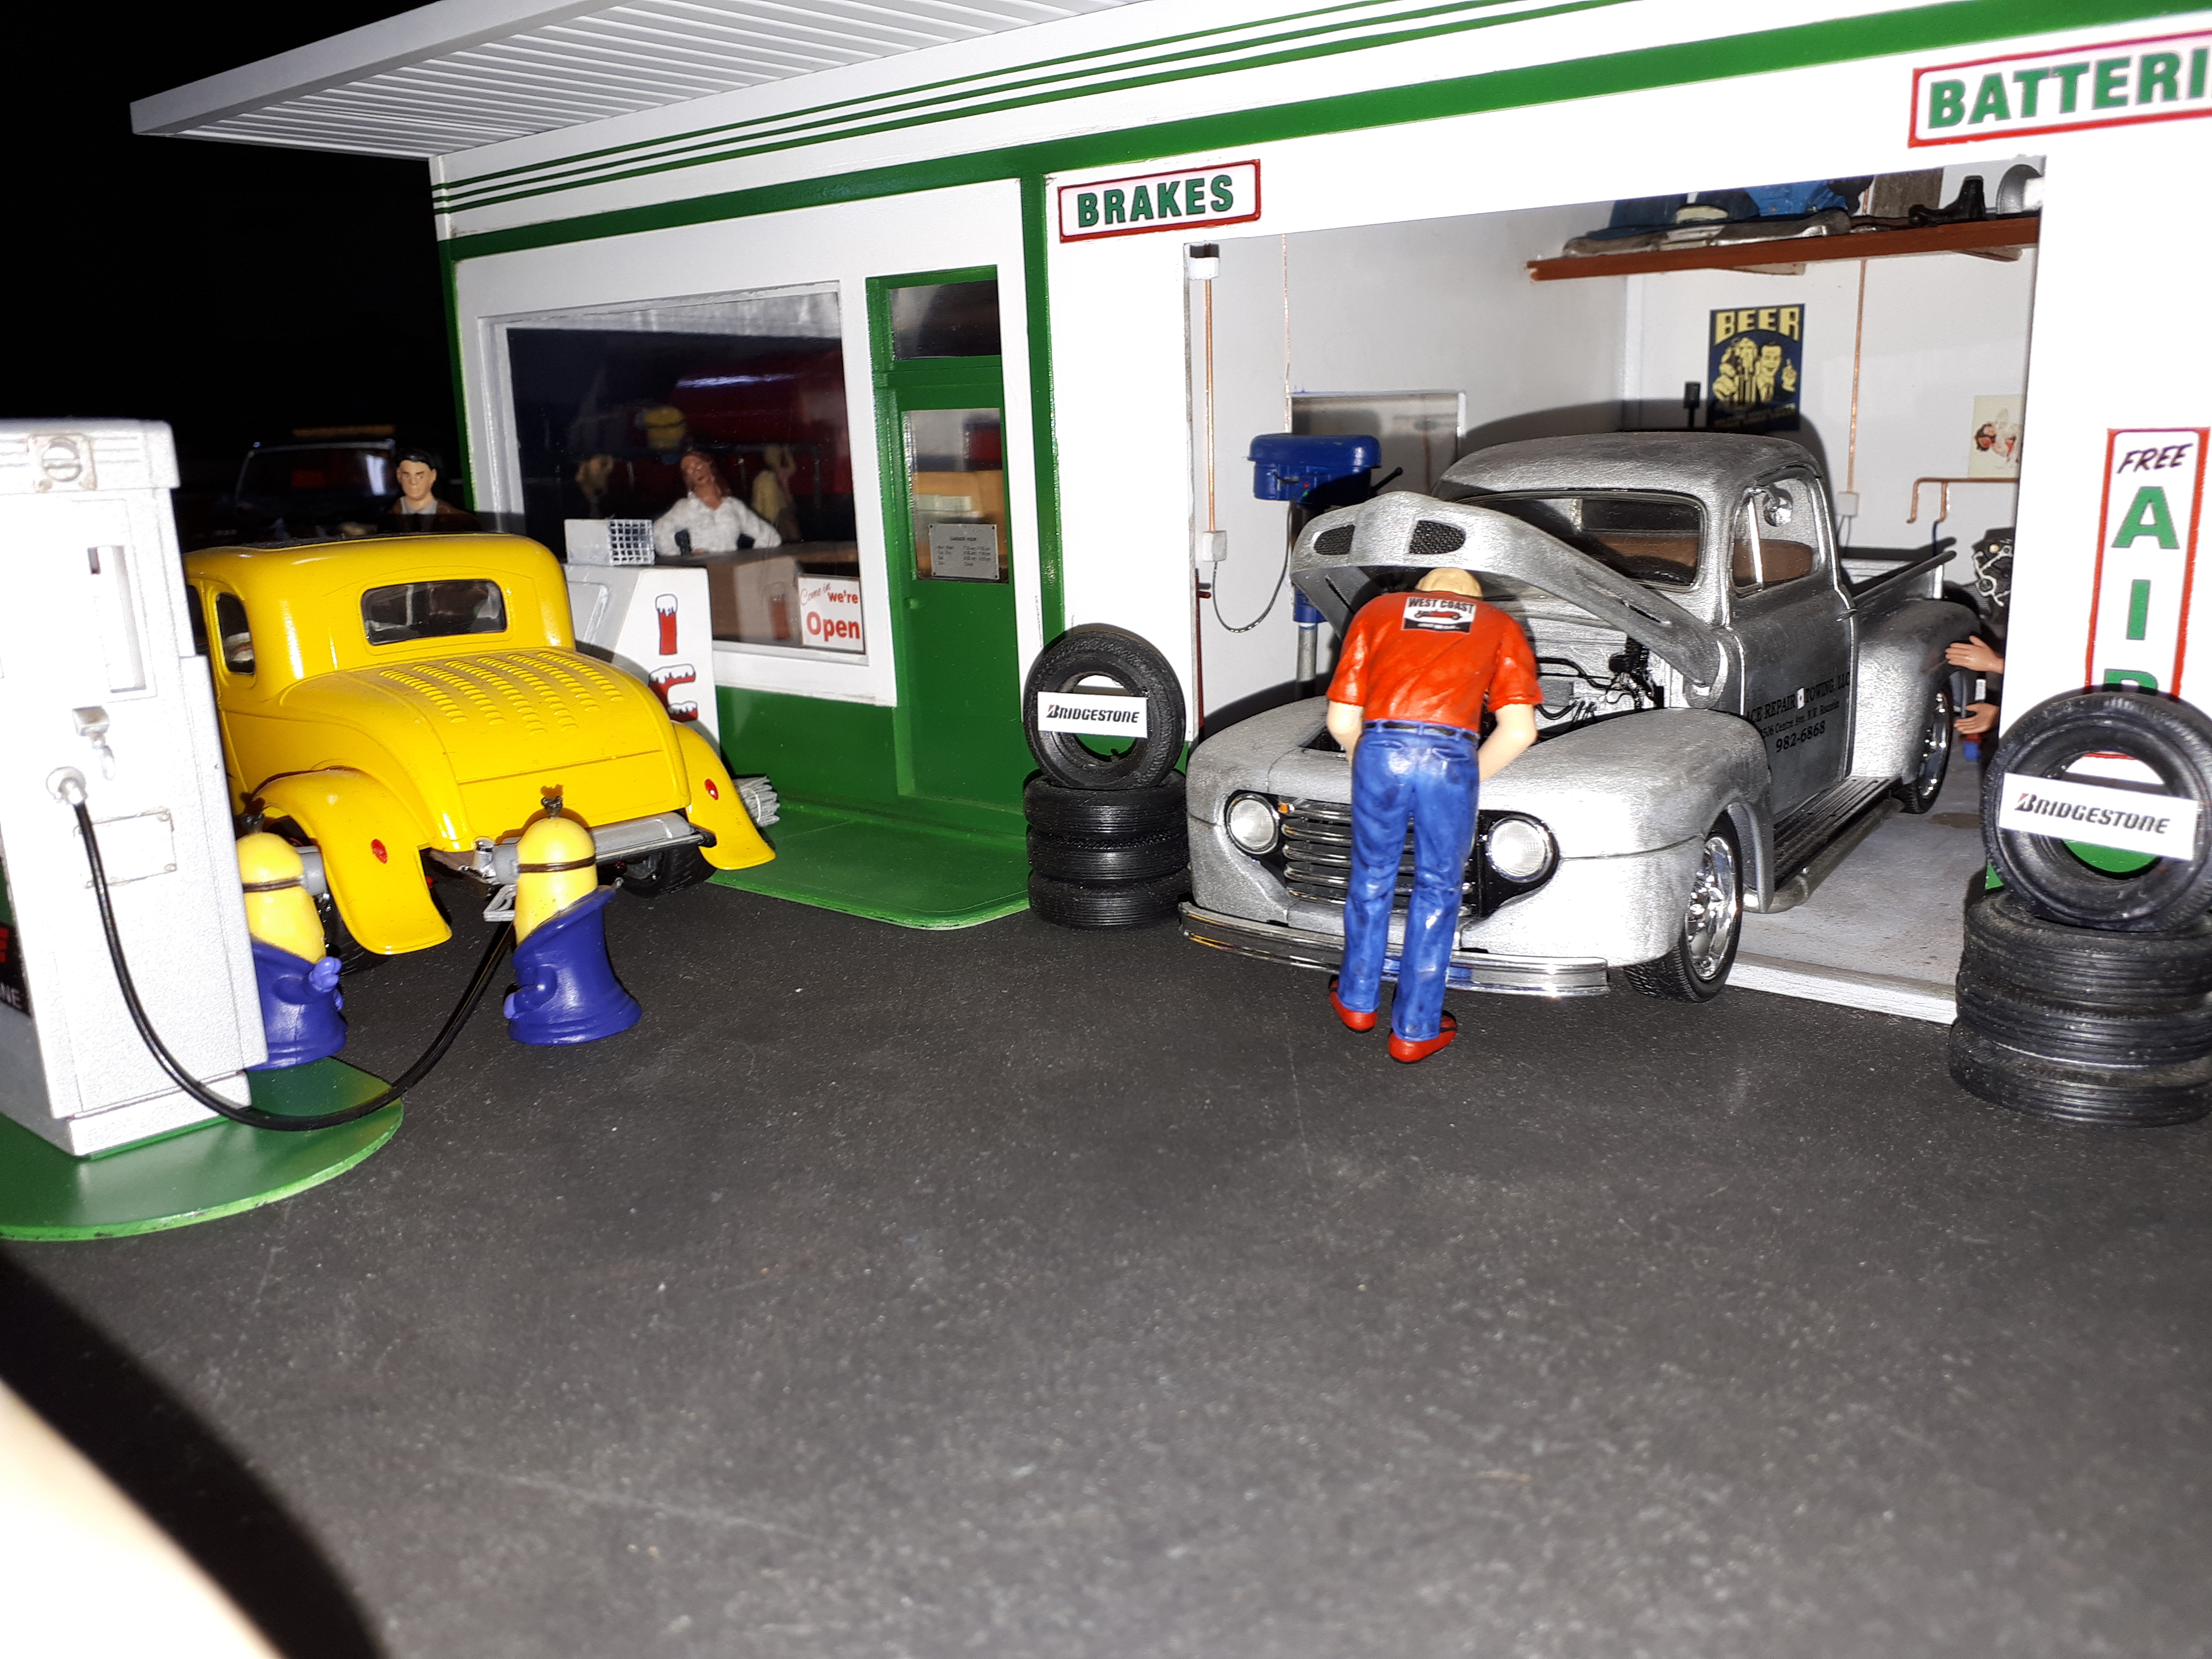
For the past five or six years the members of Perth and Districts Model Club here in western Australia have been collaborating to build giant dioramas to display at the annual Hot Rod and Street Machine Spectacular, the Super Model Car Sunday NNL and the WASMEX model show. This year we chose to do a representation of Route 66 with vignettes to represent typical features of each state along the way. The main culprits were Rob Rattray DIner, Gemini Rocket Man, Cadillac Ranch, Texas Gift shop, Rock shop and main cordinator, director and cattle prodder for the whole deal Alan Barton BP Garage and Motel Cucuracha Brodie Puleo Texaco Garage Tony Ashton Wig Wam Motel, Santa Monica Pier Grant Elliot Caves and tourist shop and Railway Crossing Nick Car yard Ian Catchpole Train Yves Zuber airbrushed backdrop, all 40 or so feet of it!
-
Your quality background and photography has done justice to a very fine model. It is a credit to you. I really enjoyed the accurate colour treatments in the interior. Cheers Alan
-
Group 29 - the thread for everyone's '29 Ford Roadster builds
Alan Barton replied to Phildaupho's topic in Model Cars
Thanks Bernard. The tyres are from a Japanese company called L&S if my memory serves correctly. I seem to recall that they came on a set of chromed, alloy wire mags, like the old Appliance wheels of the seventies, although with only four studs. Although L&S made full kits, I think these came from a parts pack. They make the nicest hiboy rears ever but sadly this model used up my last set and I'm running out of large Monogram Goodyears as well, my other go - to tyre. There just aren't that many scale 235-75/15s out there. And a small correction Bernard, those wires are the wide Kelsey Hayes units from the Monogram 30 Woody. Narrowing the fronts was quite a challenge but worth it to get the front and rear styles matching. Cheers Alan -
Group 29 - the thread for everyone's '29 Ford Roadster builds
Alan Barton replied to Phildaupho's topic in Model Cars
There's another "Why didn't I think of that?" moment Phil. I've got a bunch of spare Revell RP cabs and now I know what I will be doing with them soon. I also love your valance panel hanging off the frame - did you cut that from the fender unit or roll it up from thin aluminium? -
O.K., when I get home tonight I am going to dust that puppy and retake those photos - man, who would want to look after a black car?
-
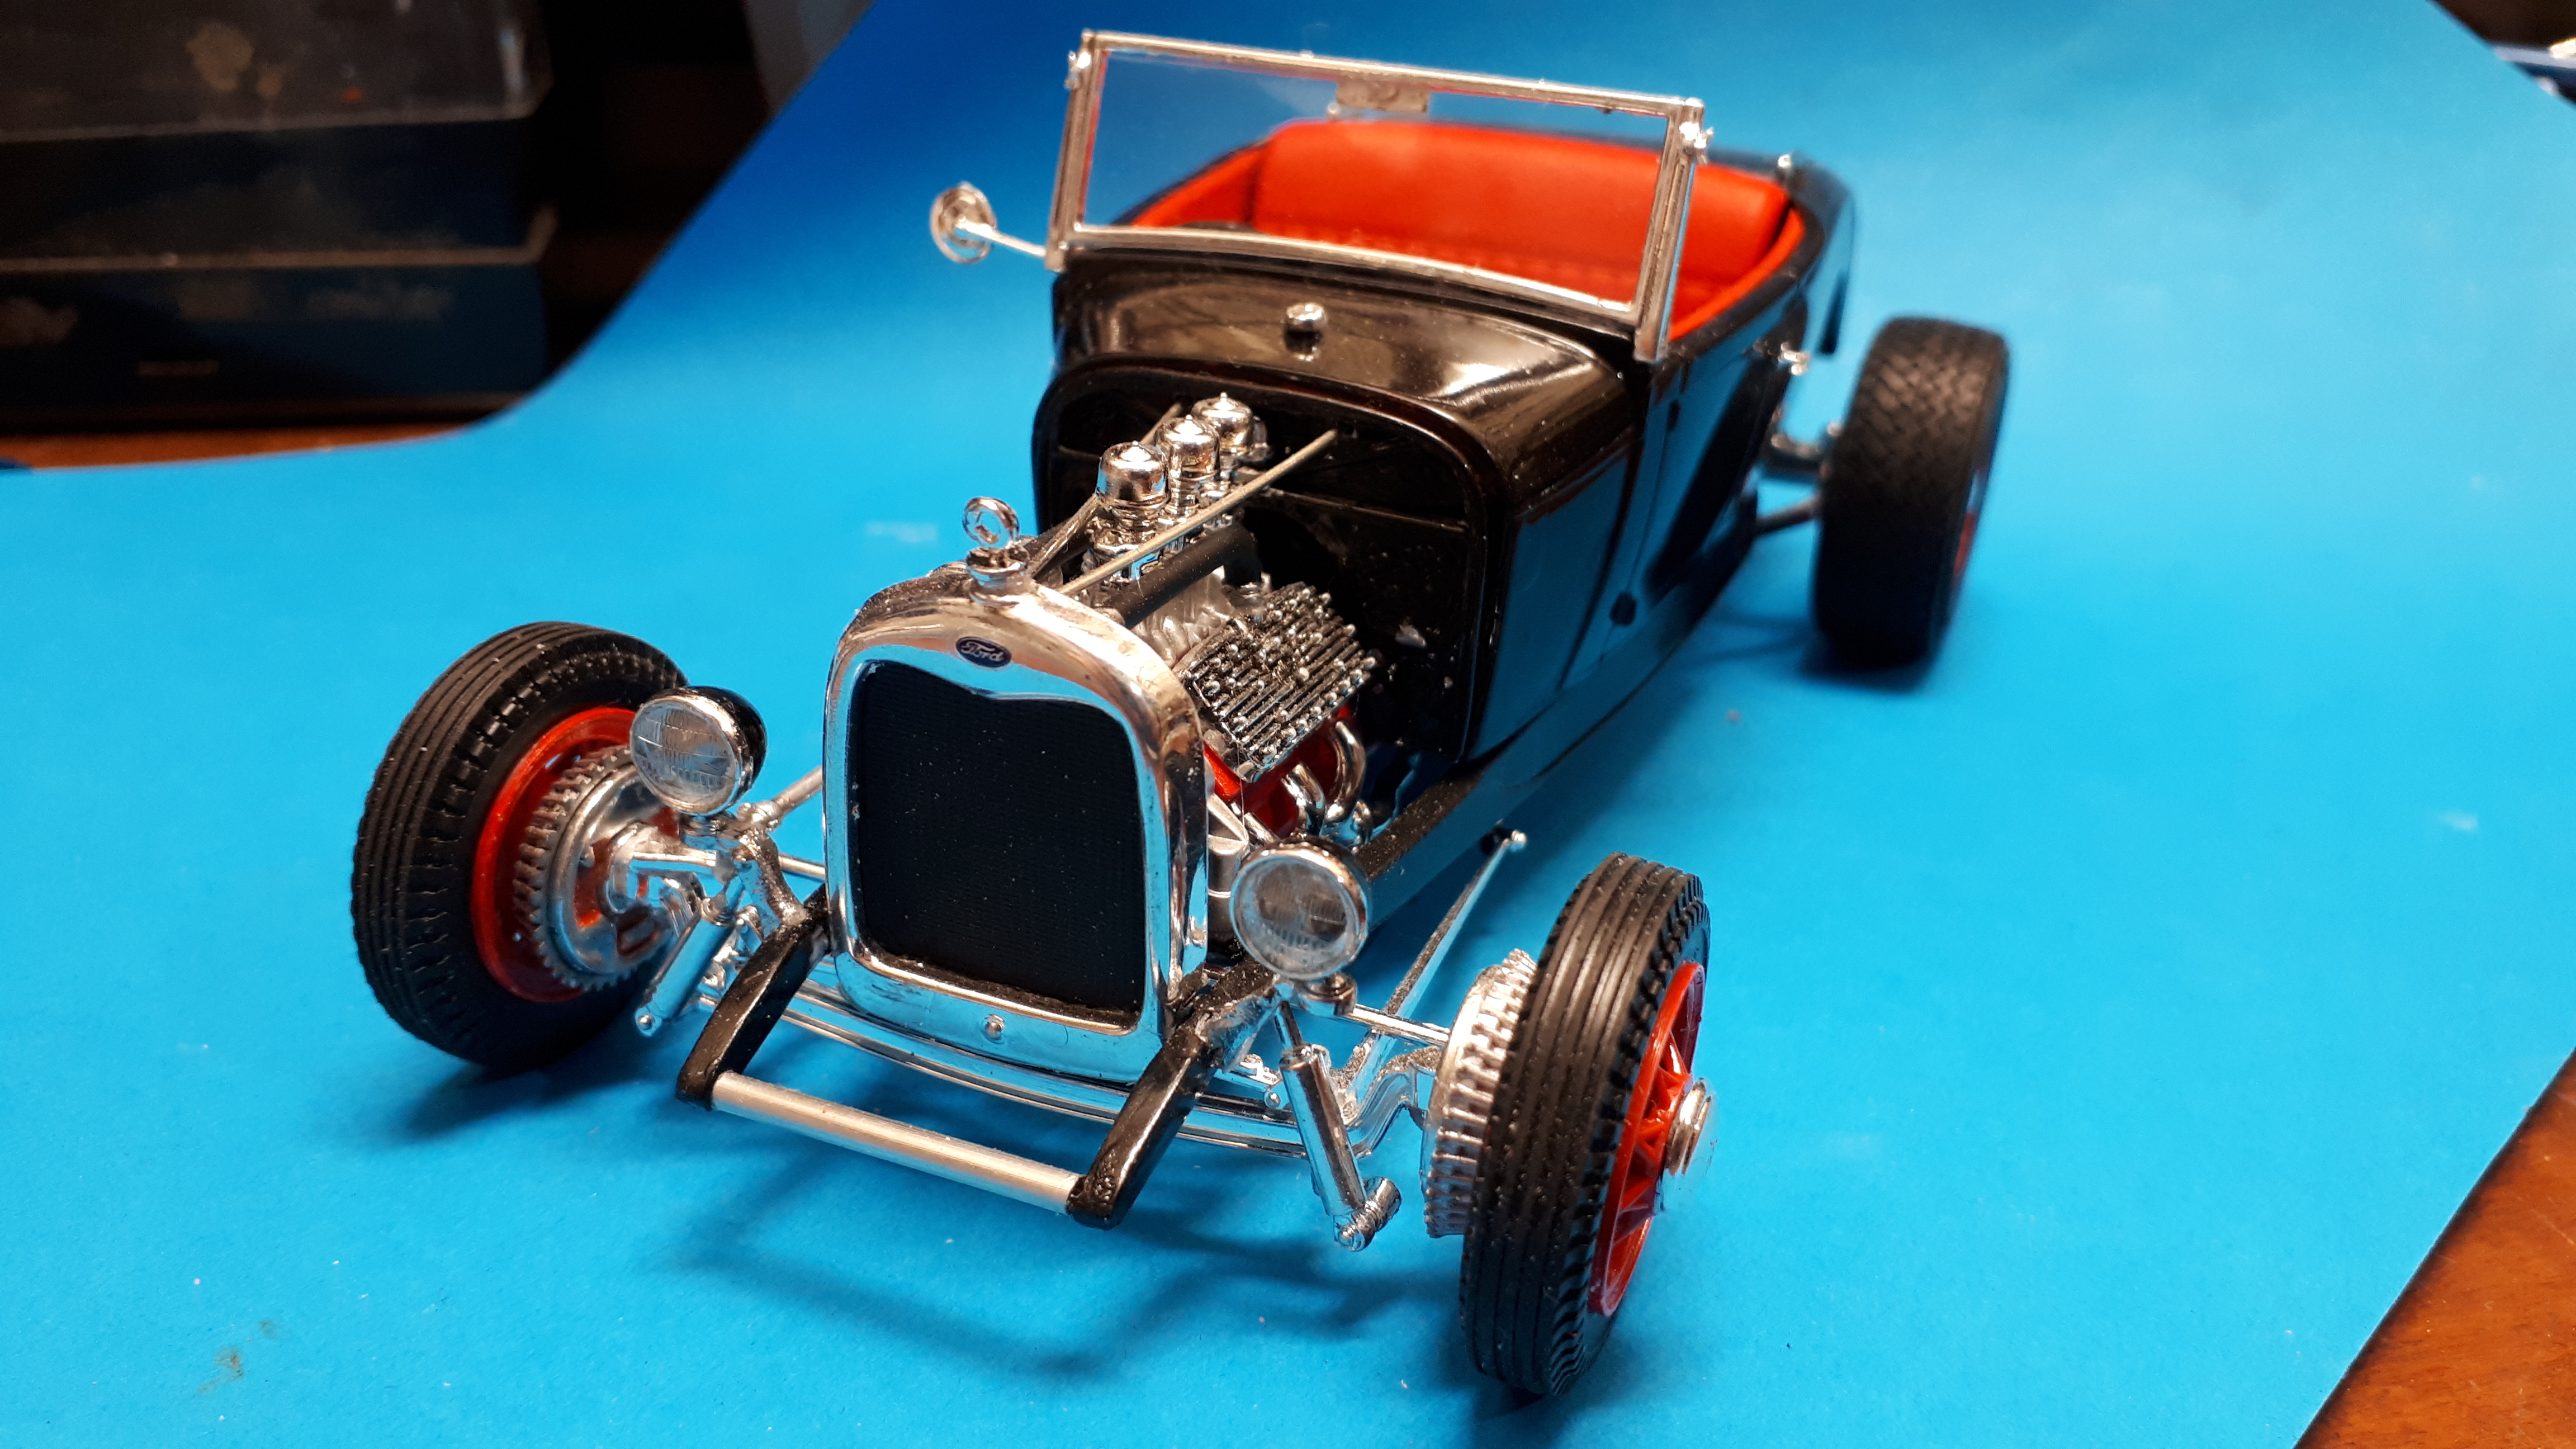
Here is my finished version of Bud Bryan's iconic Rod and Custom project car. The model really does demonstrate the versatility of the Revell 29 Hiboy kit. With very minor modifications and enhancements, you can completely change the style of the car and still have a bunch of cool parts left over for future projects. For the sake of those who didn't buy them first time around, I do hope Revell rises to the occasion and reissues these when they have got their business issues sorted out. Engine and trans from the Revell 32 Tudor, wheels from the Monogram 30 Woody, rear tyres from a Japanese L&S kit ( cant remember what is was, it was a long time ago!) Rear axle and spring from Revell 30 Model A with a resin quick change.
-
Yes Dave, I read that article by Pat Ganahl when I was still in high school, frustrated by the fact that at that time, AMT kits were not sold in Western Australia! All we could get was the Monogram Son of Ford, the Boss A bone and the SweeTee so my brothers and I bought them up in multiples to be able to build a rod of some sort! And yeah, horizontal, vertical, level, I don't know what the right way to describe the placement of the prisms cut into the headlight glass, other than they shouldn't be crooked! Speaking of headlights, I kept looking at those photos above and decided I couldn't stand them anymore, they had to be replaced. They are just too big for that era car. So last night, I gently removed the medium sized Revell kit lights and replaced them with the smallest sized lights after painting the buckets black. I'm much happier now! Cheers Alan
-
Thanks Pat, yeah, we all do it some time. I think I got sucked in by thinking how easy it would be - and it was an easy build, but a bit more foresight on my part would have been beneficial. I love looking at your engines and your machine shop, the realism of your equipment is eye - opening! Thanks also Tim, your comments are greatly appreciated. Turns out it was Phil Daupho's Group 29 thread that I was looking for so I've added a few new photos there.. There is just so much you can do with this kit. I bought seven of them and have heaps of ideas for builds, not to mention the plethora of spare parts. What a goldmine, and thanks for your part in it. Thanks everyone for your interest. Cheers Alan
-
Group 29 - the thread for everyone's '29 Ford Roadster builds
Alan Barton replied to Phildaupho's topic in Model Cars
In 1991 I completed a model of the Niekamp roadster, at the time the most complex and detailed model I had ever attempted. It was built for the Oakland Roadster Show Diorama at the International Model Car Builders Museum in Salt Lake City. Some years later I built this second version to keep for myself. The body is a shortened AMT but you could easily use the Revell one. The hood, nose, bellypan and spring covers are all vacforms from hand carved wooden molds. Not pictured here is a tonneau modified from the one I did for the Tony Nancy car. The chassis is soldered up from K&S brass channel. The grille is a photoetched item from MCG. Still have to do a decent rear bumper because I was never completely happy with the one I build out of paper clips for the first model. Hope you enjoy it.
-
Group 29 - the thread for everyone's '29 Ford Roadster builds
Alan Barton replied to Phildaupho's topic in Model Cars
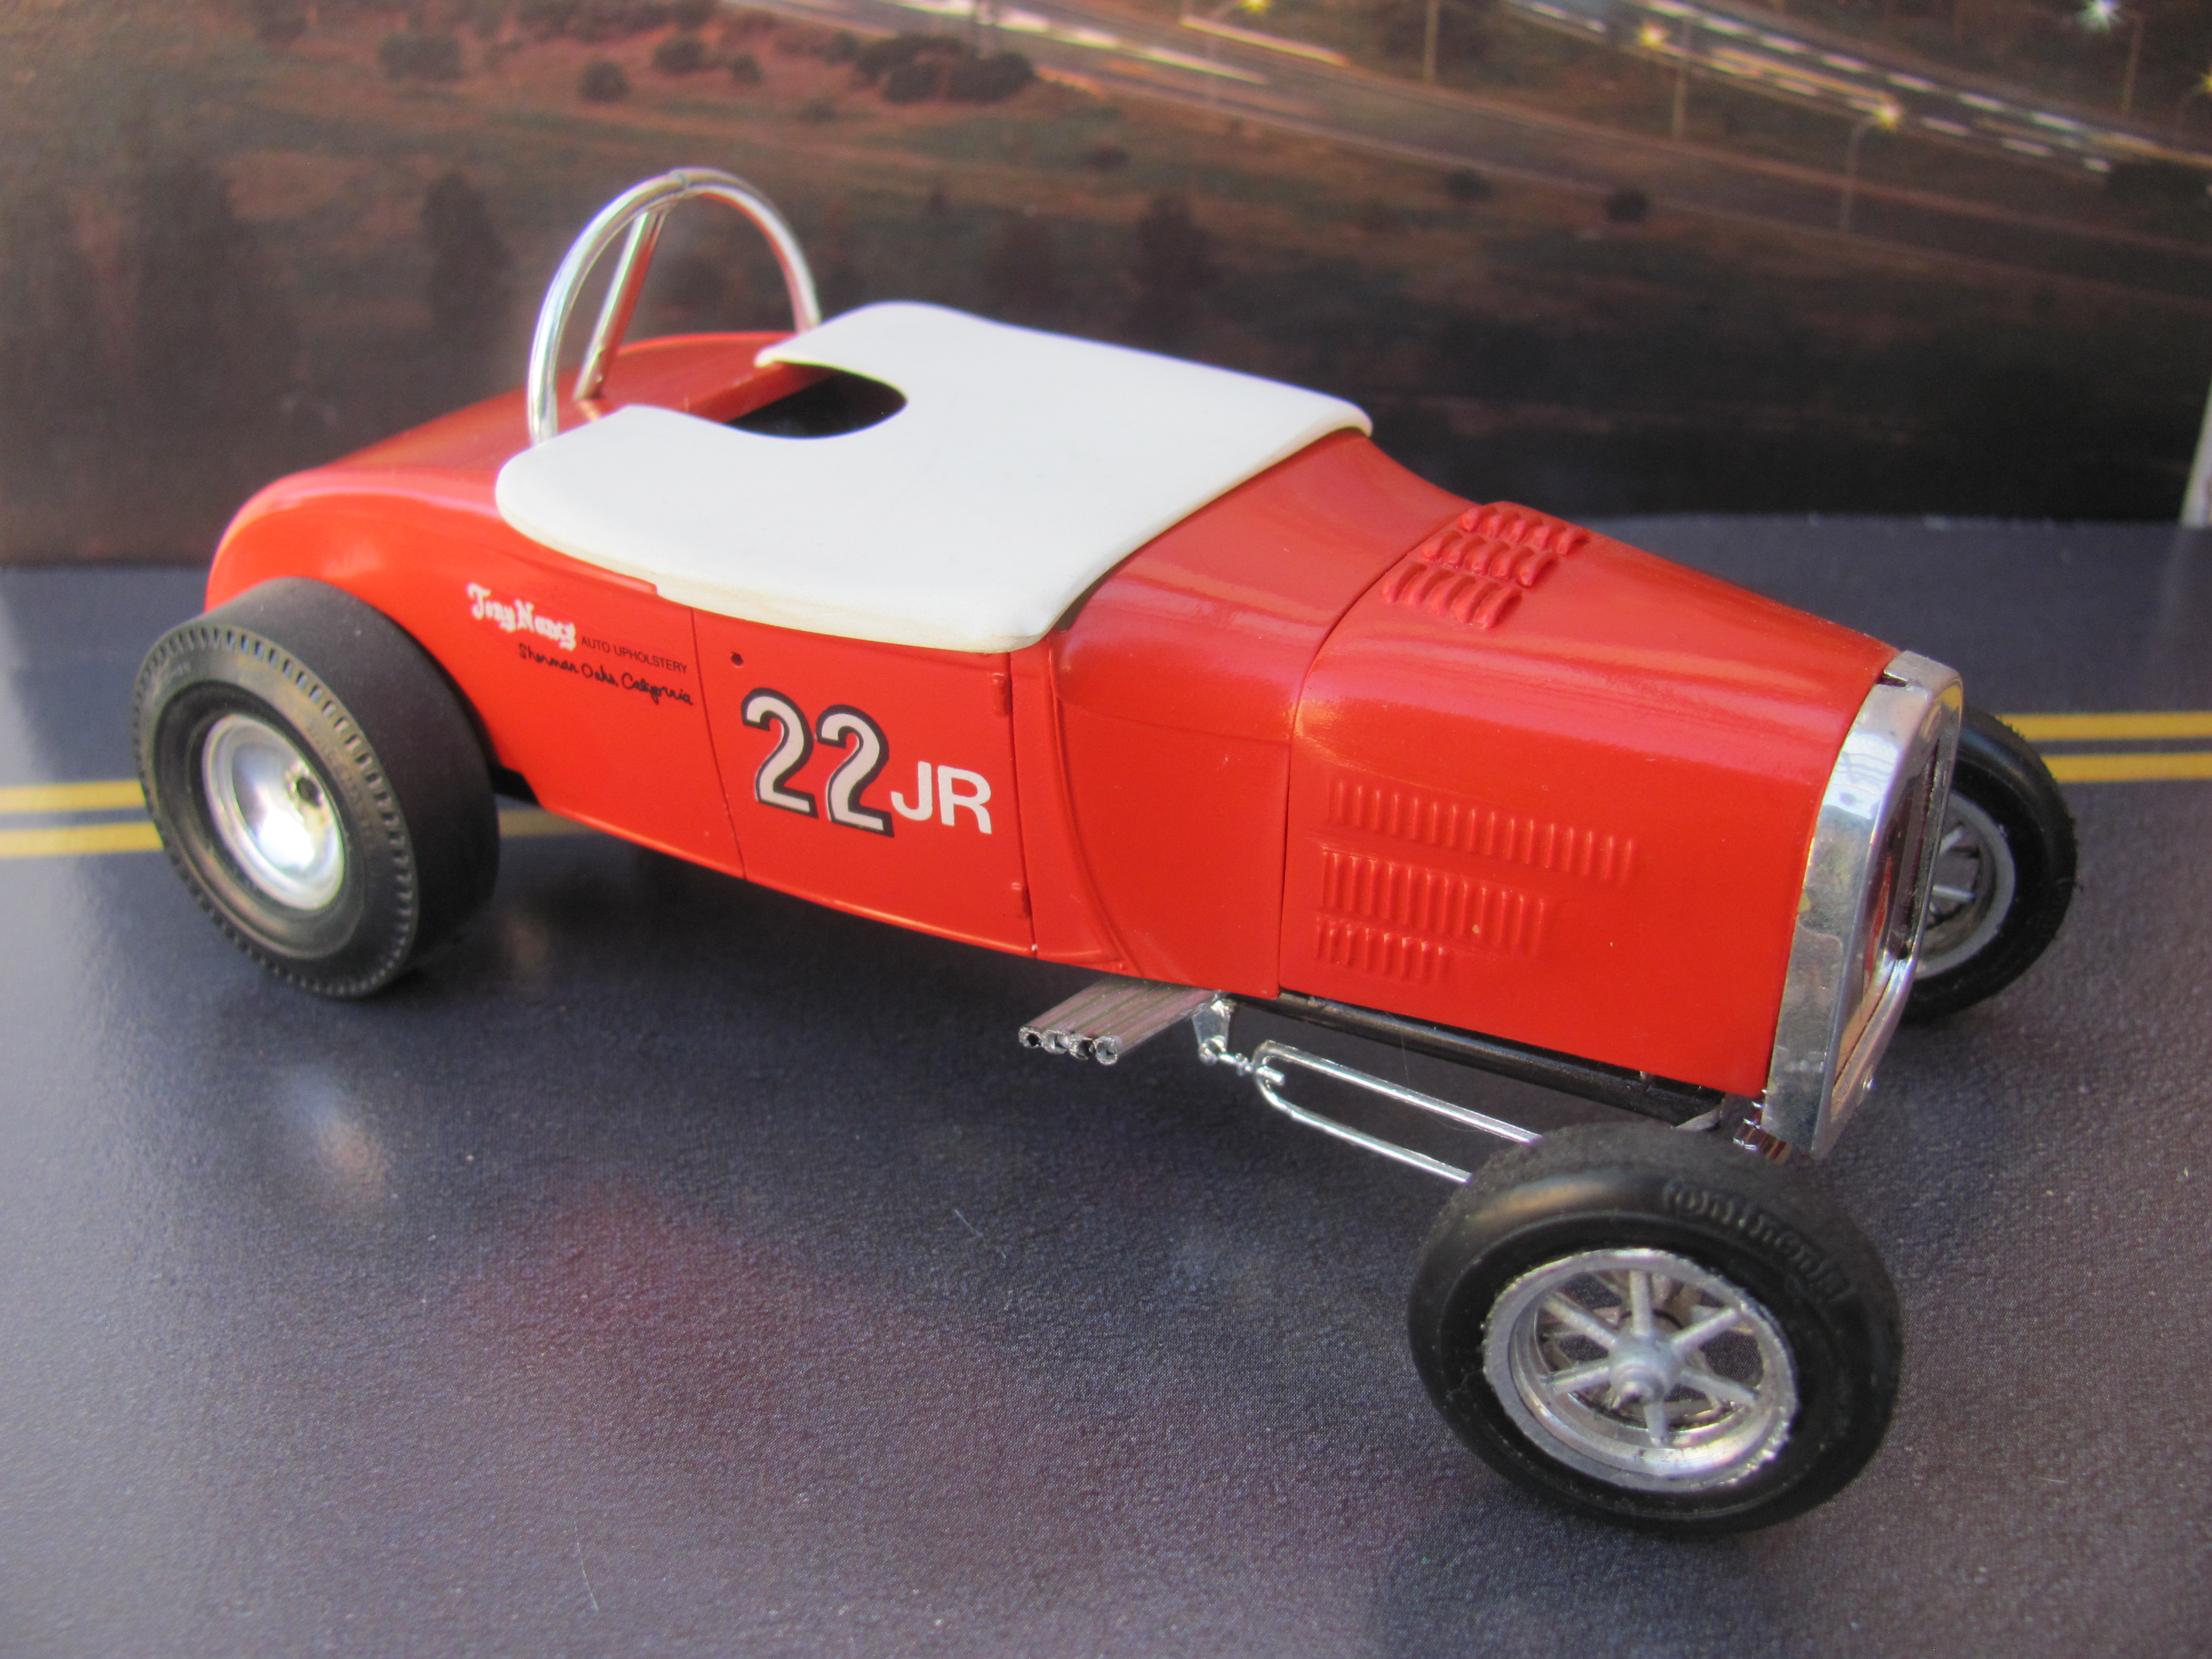
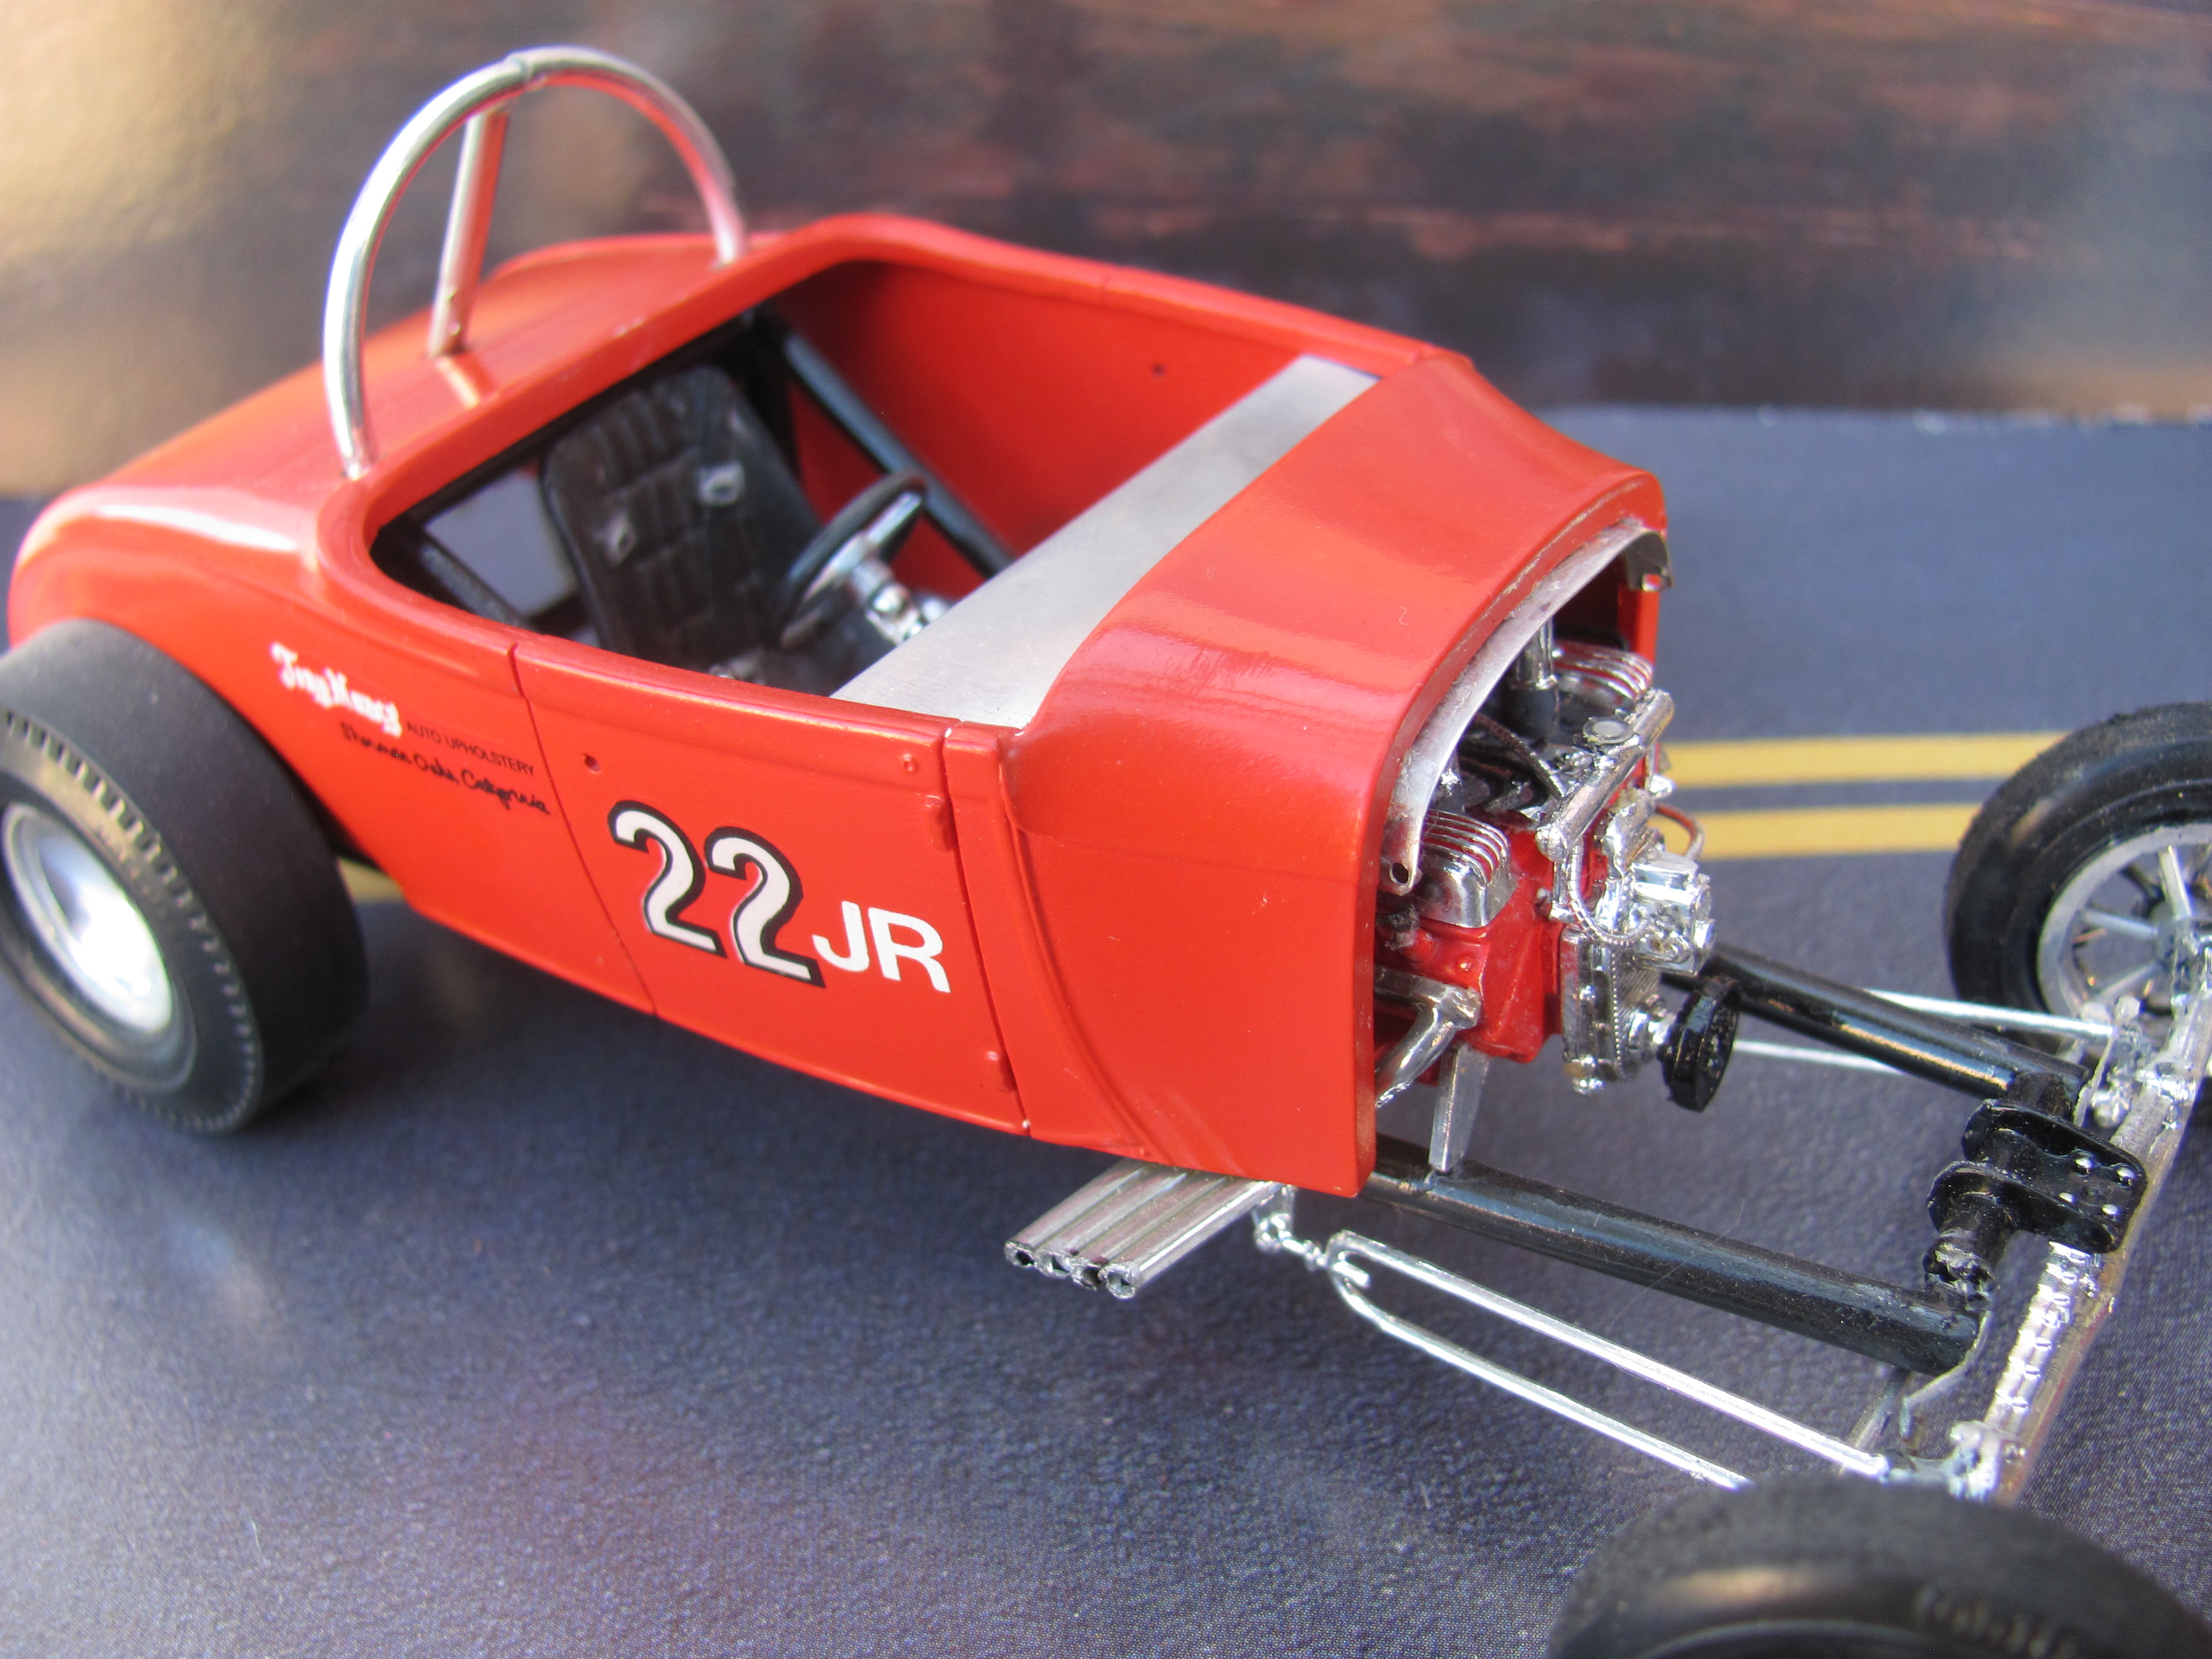
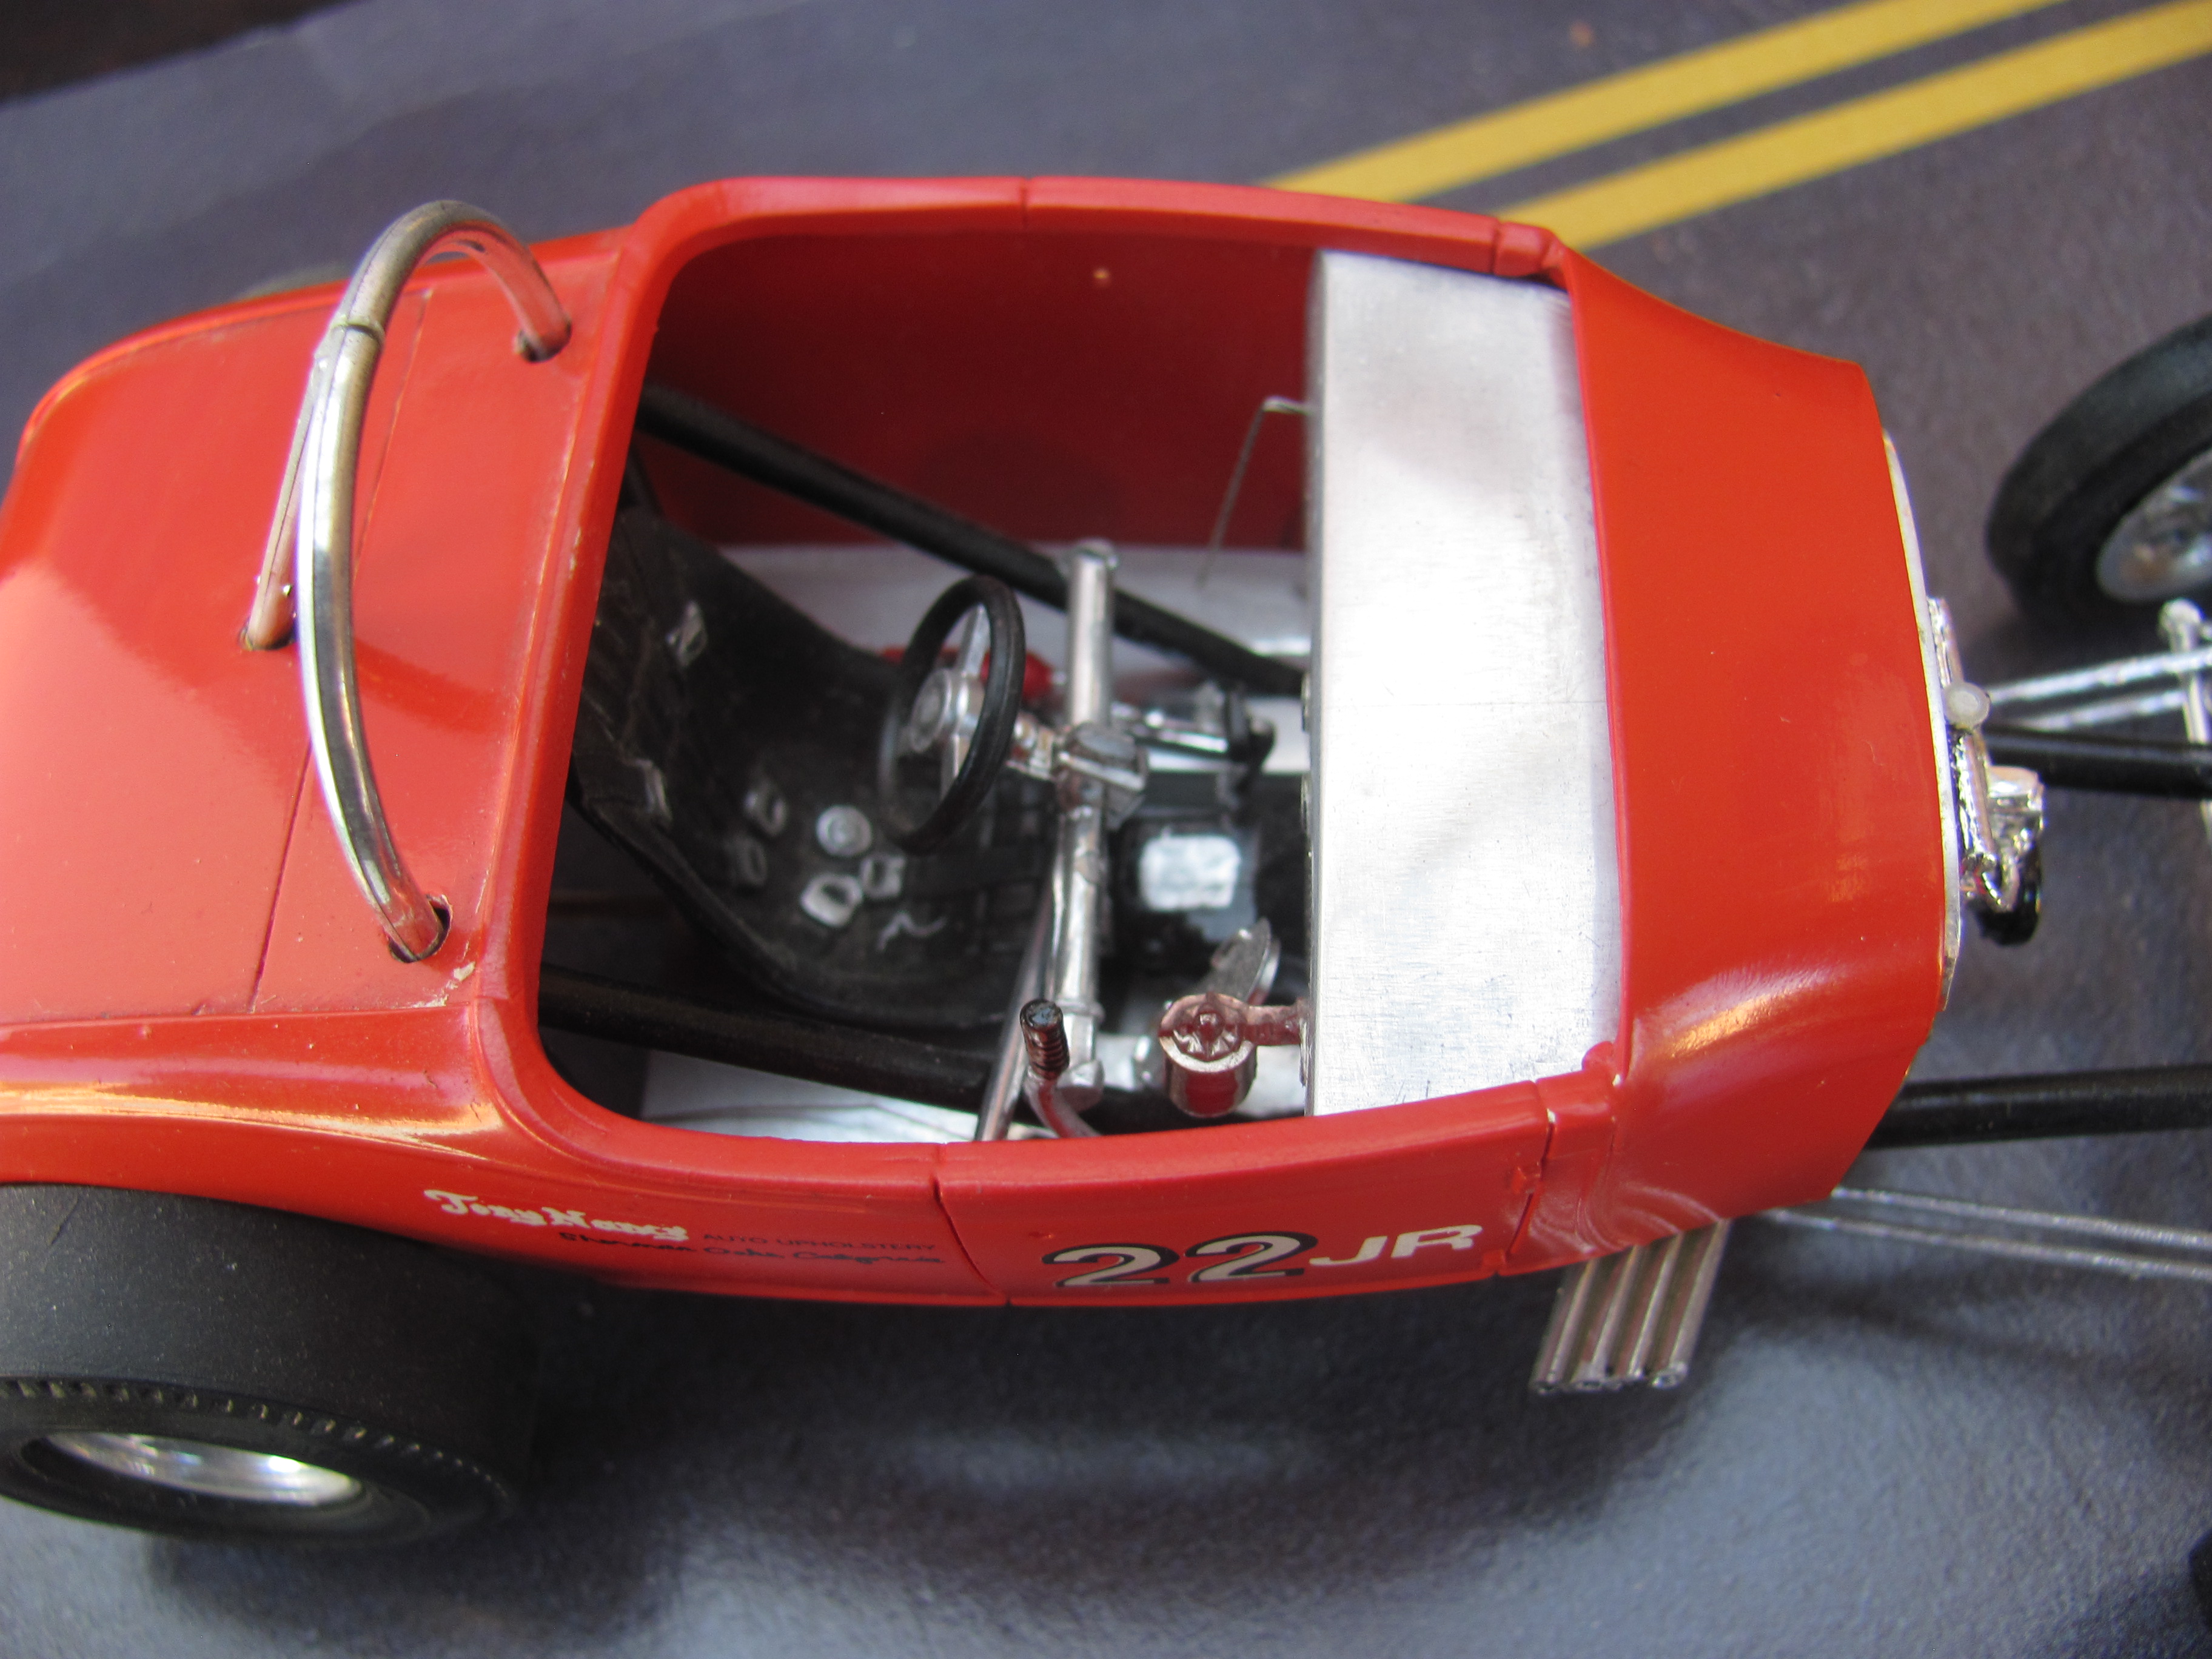
I'll add a few more. This model of Tony Nancy's 22Jr roadster is based on the AMT body but it would be just as easy to build it from a Revell, especially that you now get a Buick Nailhead to go with it. I scratchbuilt a tubular frame based on photos from a very old Petersen magazine article. I built this over twenty five years ago and I have been fortunate enough to see the real car in the meantime at the Petersen Museum. I now know there is a little recess in the rear of the passenger compartment to allow more room for the seat and that the trunklid was replaced by a one piece panel to the bottom of the body. Such is life. On the shelf, the most obvious difference to the real car are the front wheels. They are what pretty much every other car racing in this class used but they are NOT what Tony used. He used a somewhat rare Halibrand that had a large centre disc with eight thin fins running out to rim. I've never glued the front rims onto this model because one day I am going to find or make the correct rims. The tarp is a vacform I made myself.
-
Group 29 - the thread for everyone's '29 Ford Roadster builds
Alan Barton replied to Phildaupho's topic in Model Cars
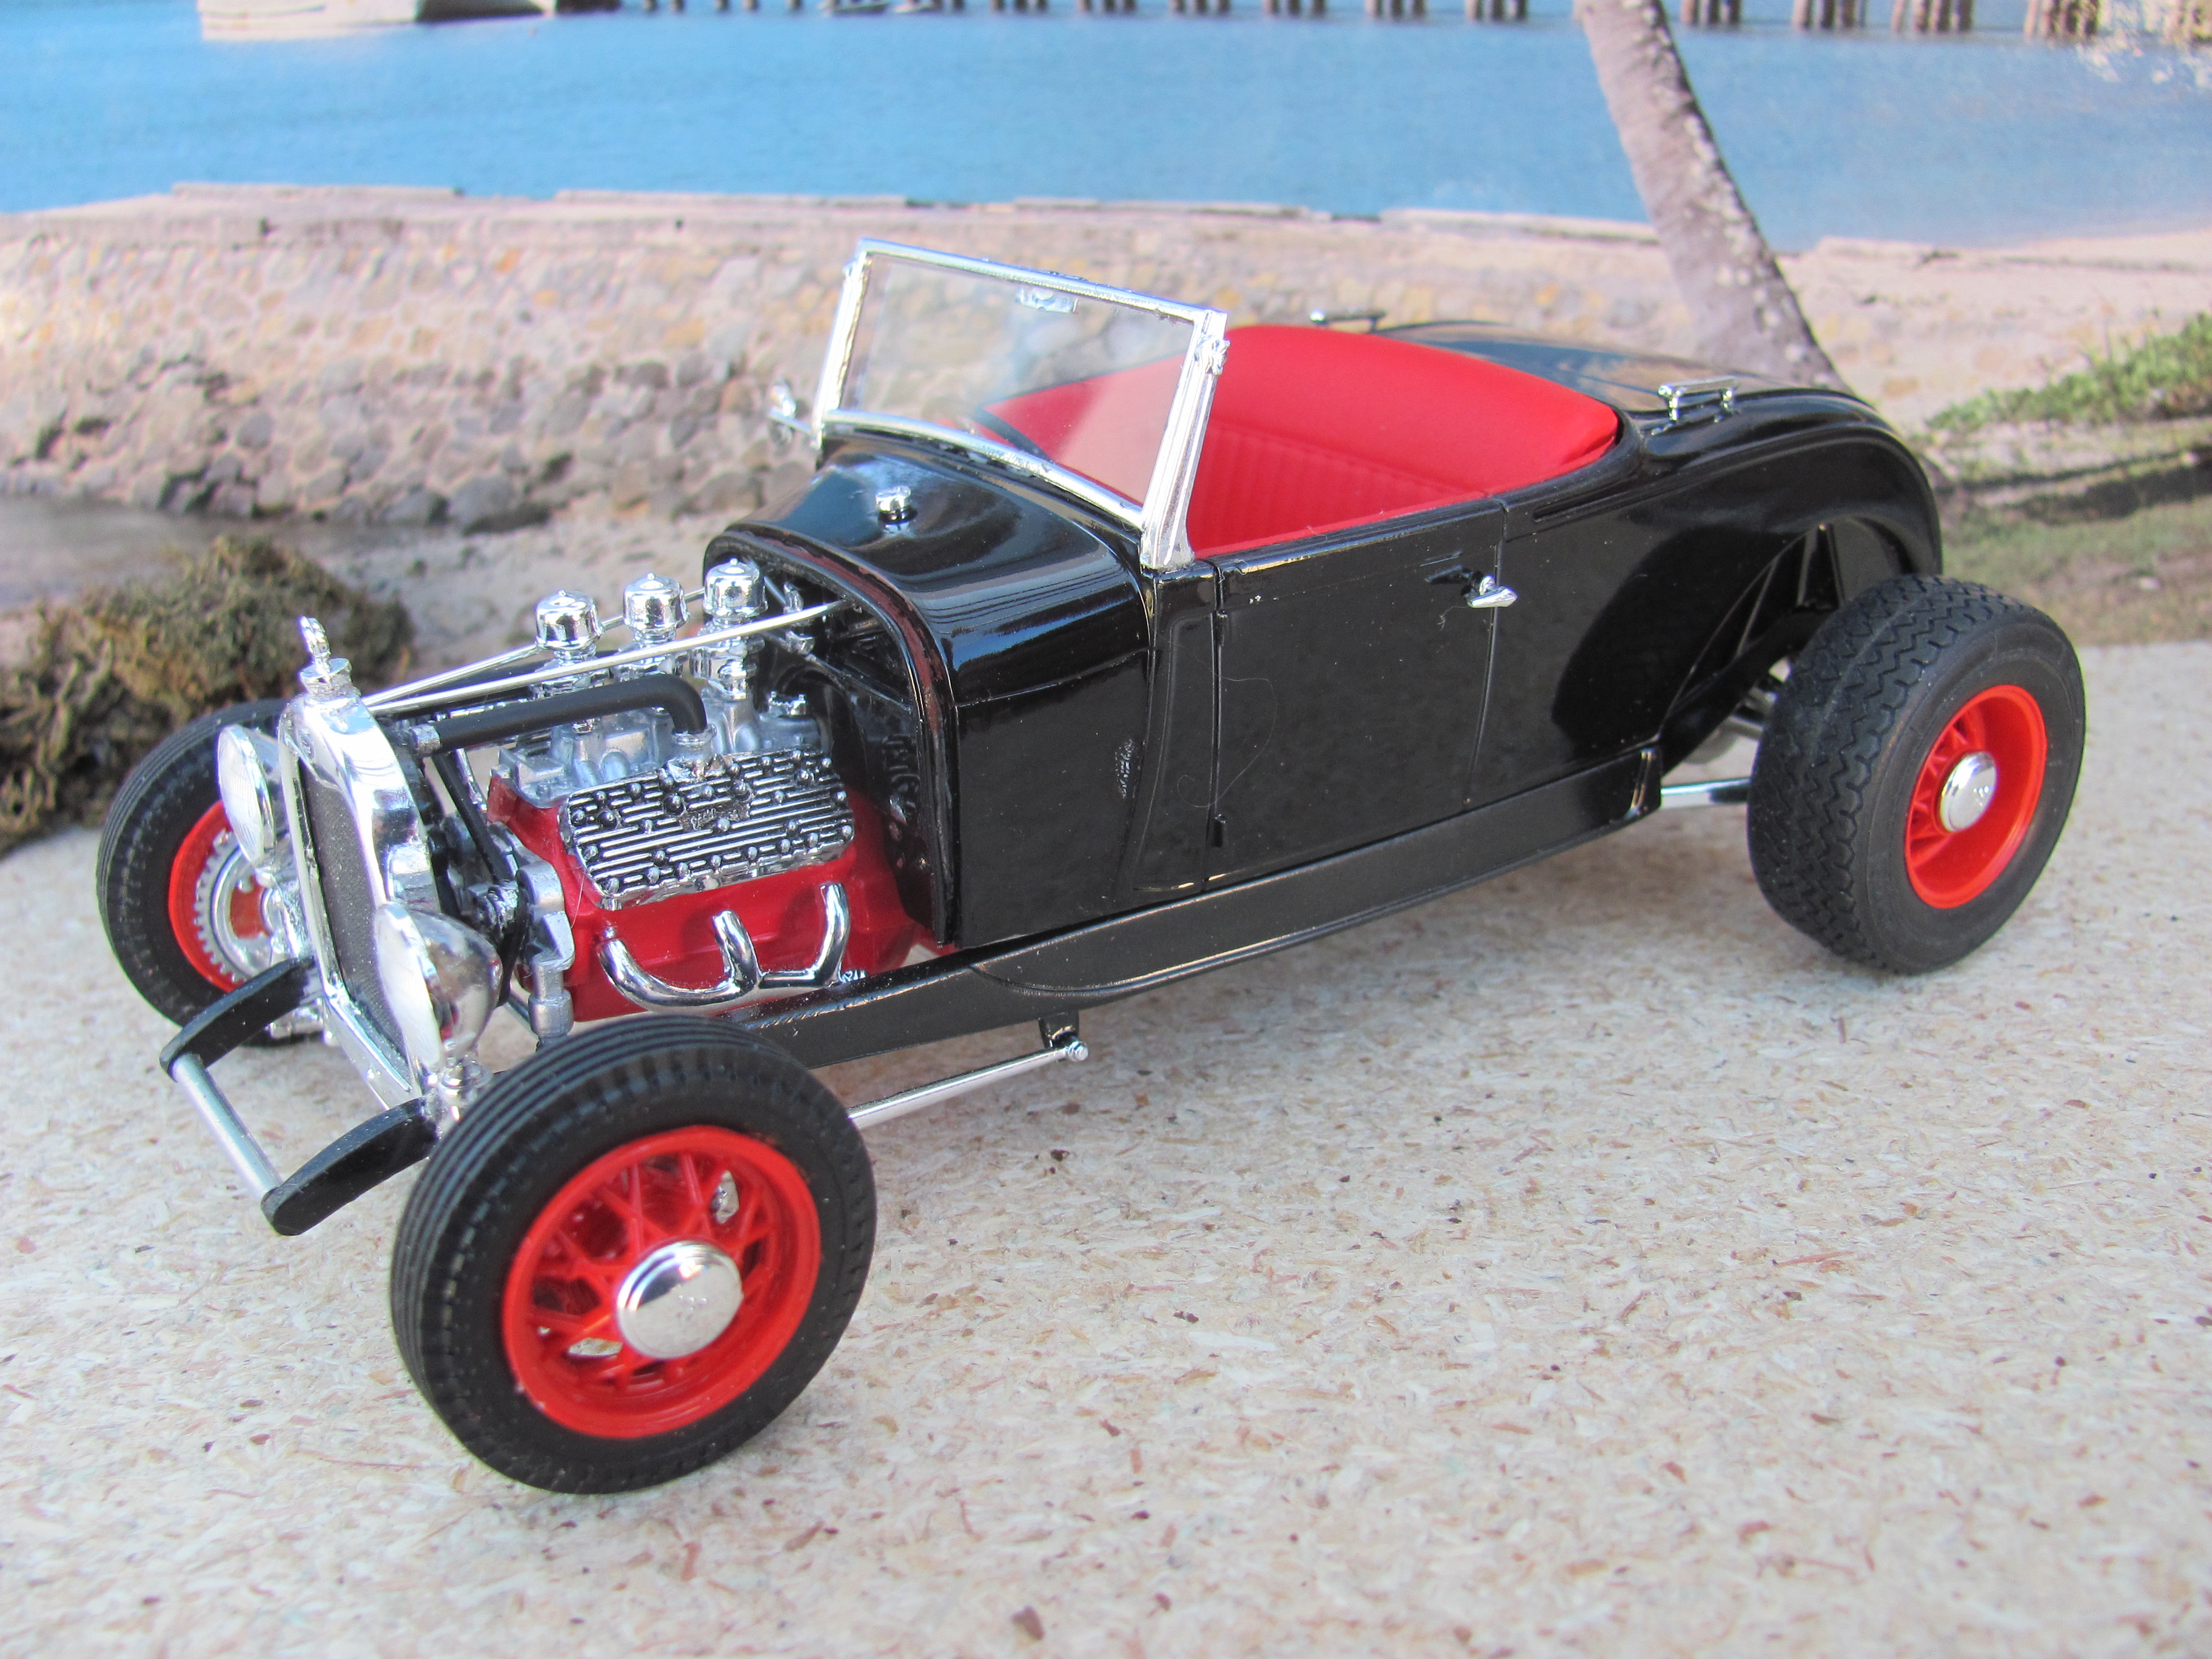
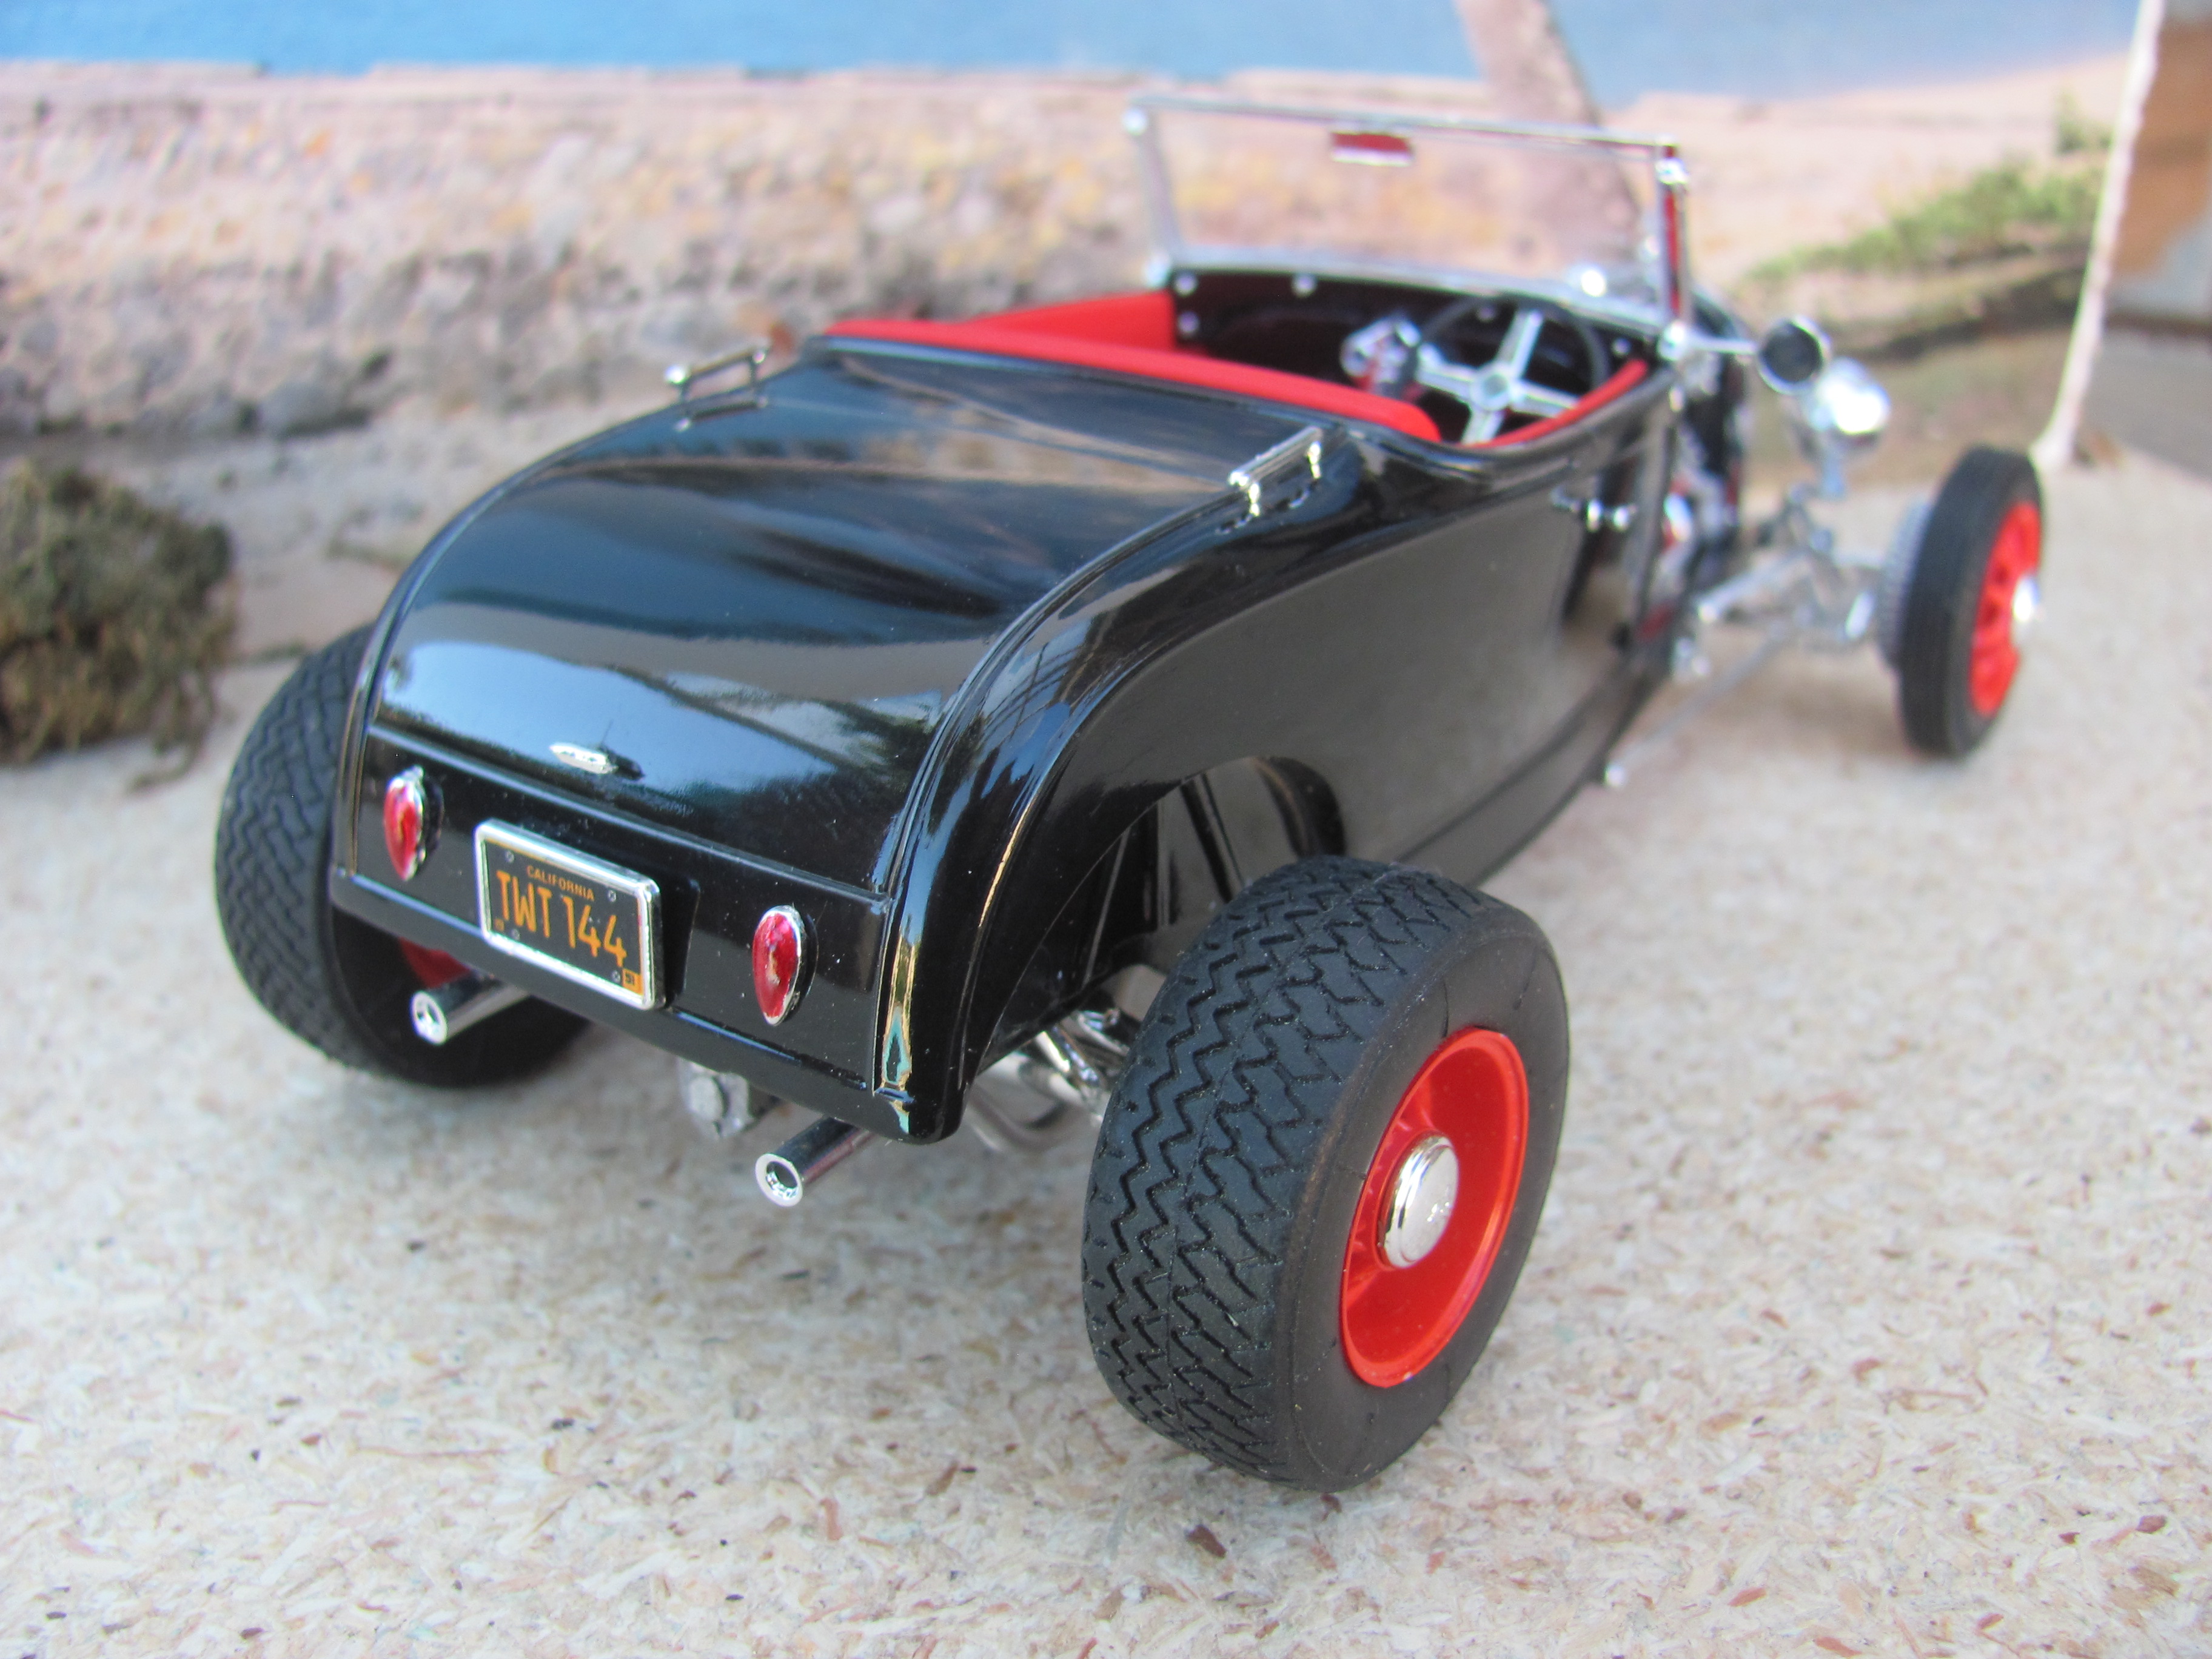
Here is my second completed Revell hiboy. A Bud Bryan style A-V8. And guys, don't let this post die. There are a lot more models that should be posted here! Cheers Alan
-
There's a thread on this forum about pet hates. Not wanting to be negative, but there are two that I see on here a lot and they are both easily fixed. First is windshield angle. Guys, all model A's, 32s, 33, 34, 35 and 36 roadsters have windshields that lay back at varying angles. That's how Henry made them. When you stand them up vertically, in defiance of how the kit parts are molded, it looks like a dirty great farm gate stuck up on the cowl. Please, for the good of humanity, lay 'em back a little ( or a lot if you are going all swoopy like) Secondly, the lines on headlight lenses are meant to run horizontally on ALL headlights. In fact, most headlight mounting systems won't let you mount them any other way. When I'm doing something as awkward as hod rod headlights on separate posts, I mount the buckets first and let them dry overnight before fitting the lenses. Use white glue (PVA) to avoid fogging them. And yes, I can see from these photos that the left hand light is a bit further away form the grill than the right and side. I'm going to have to fix that but I might make another change at the same time. You might notice I also did quite a bit of slicing and dicing to the Revell headlight posts to get rid of the bug eye look of the original kit. This will be the last post before I post the finished model. If I can find the Revell Hiboy thread started by Tim Boyd I will pop it up there as well. Cheers Alan
-
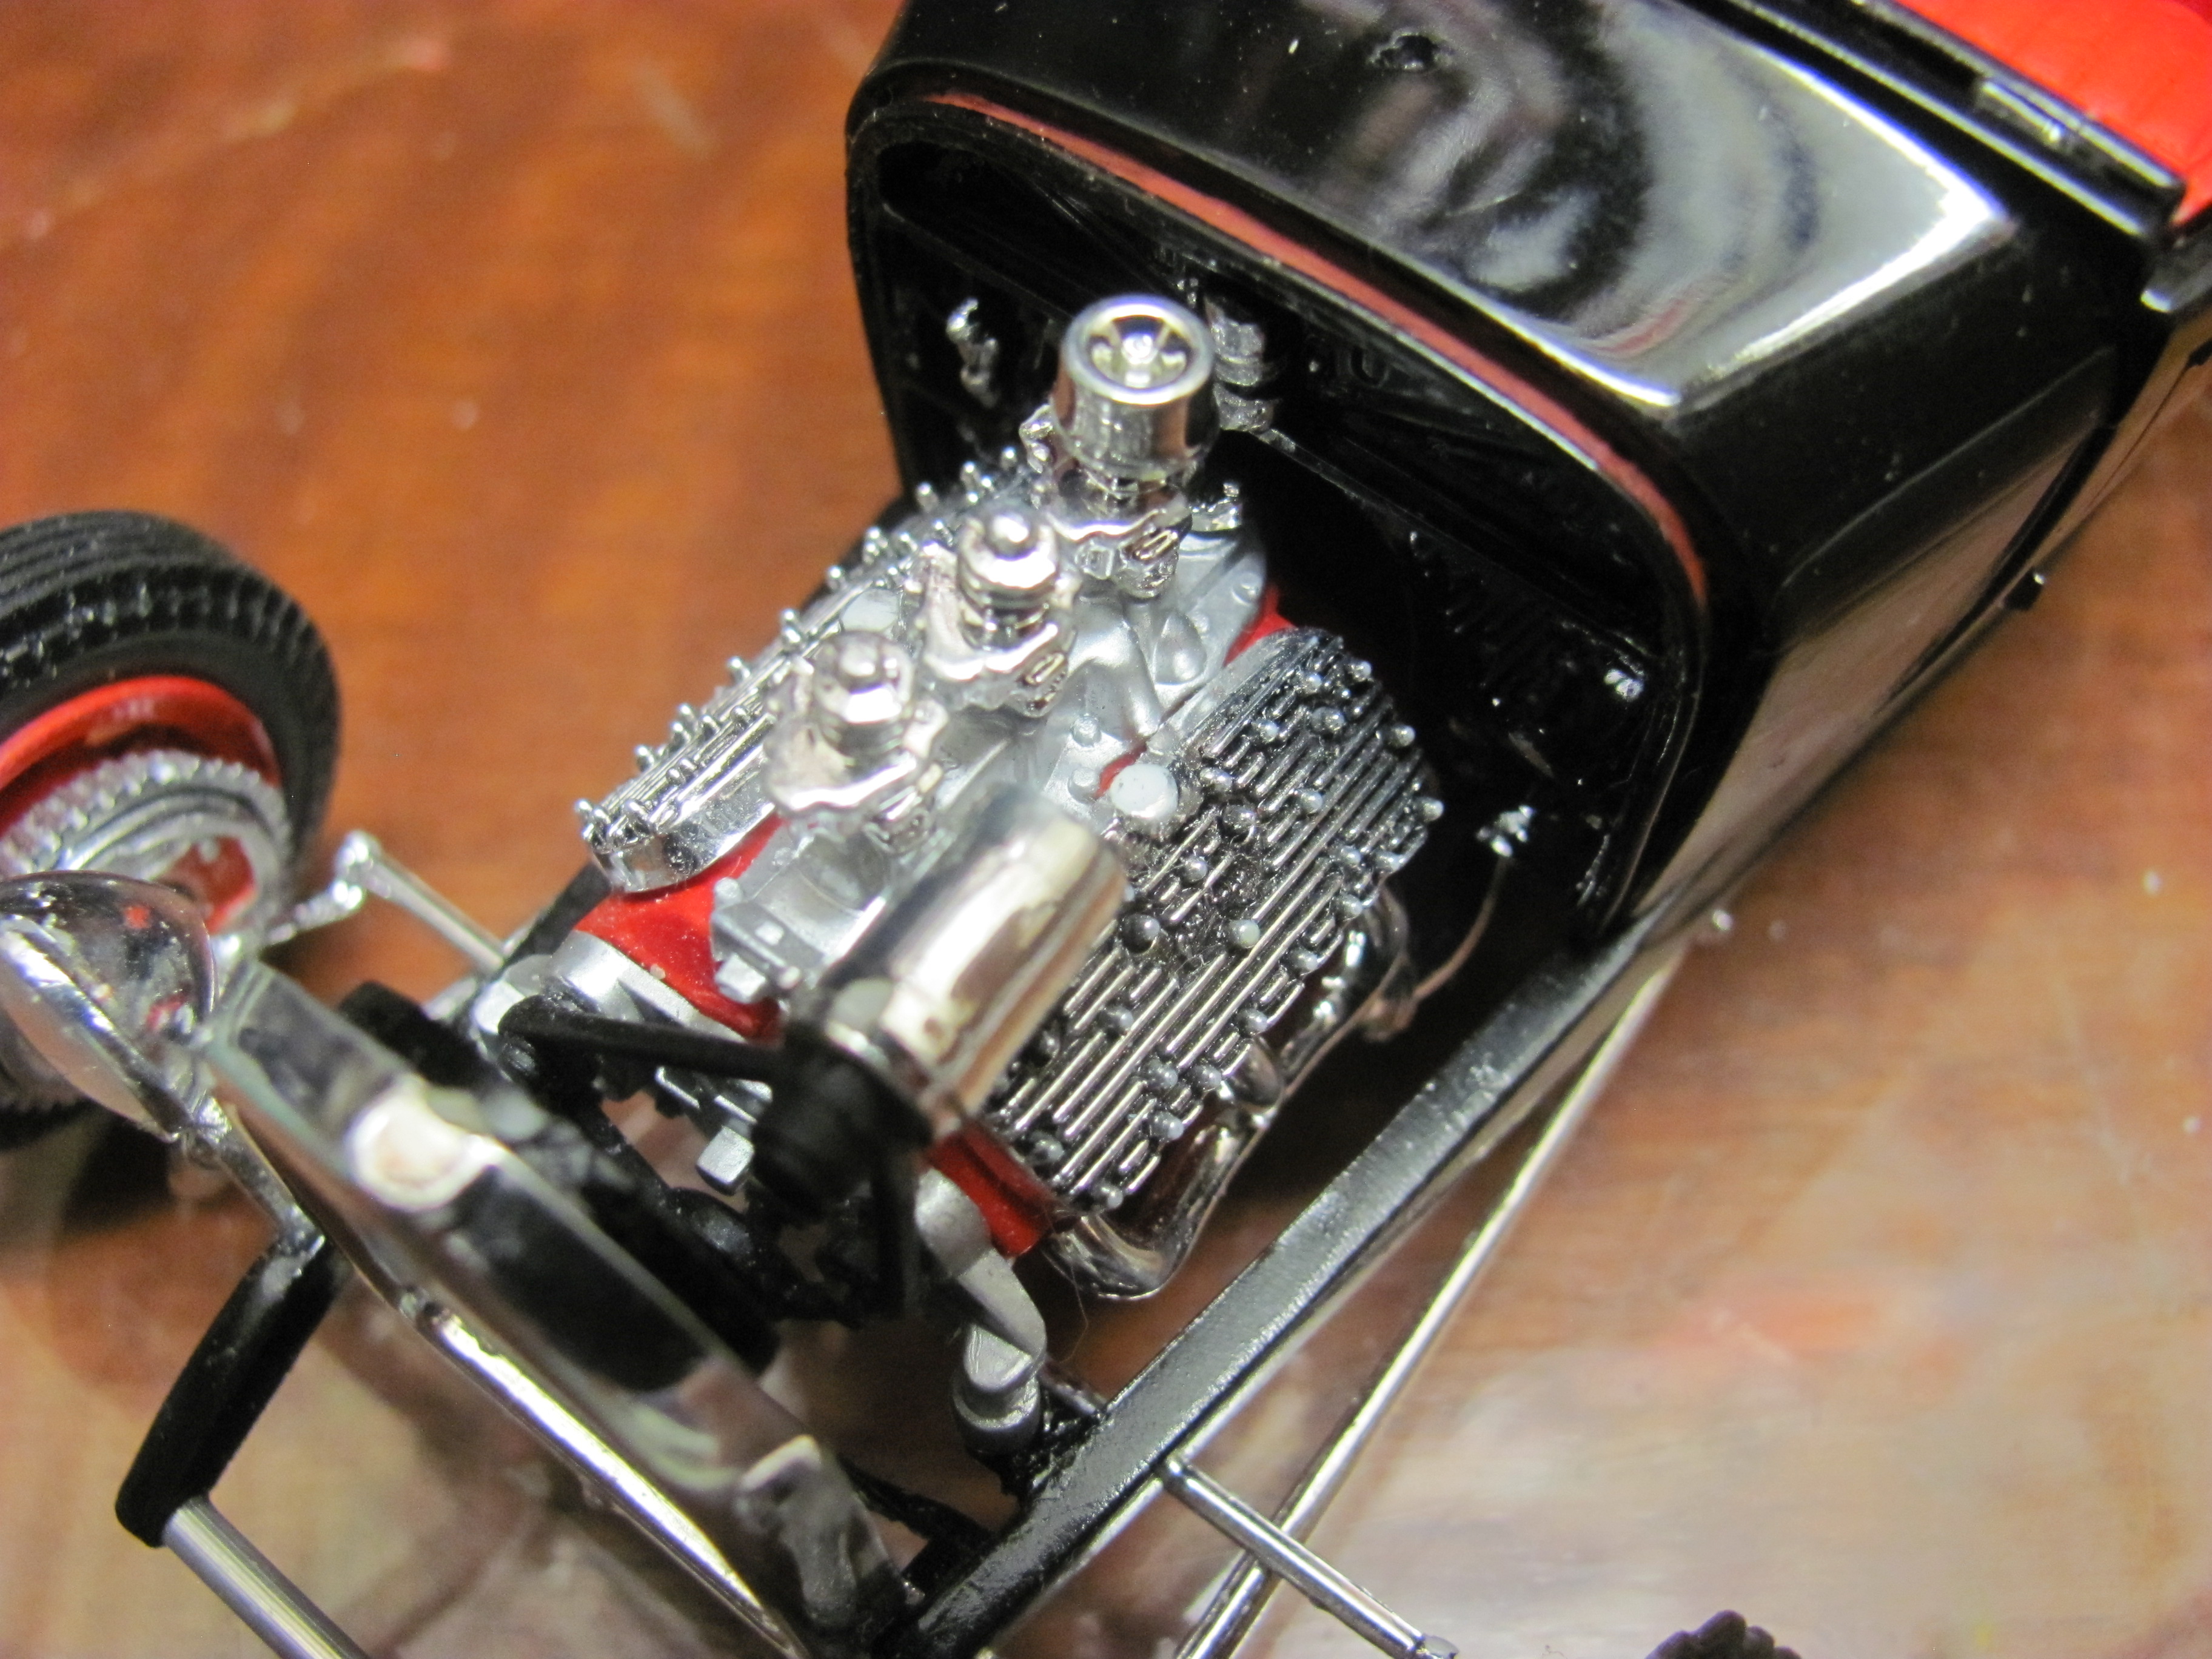
I used the kit's rear exhausts but turned them upside down to run under the rear axle. To connect the mufflers to the flathead headers< I used pieces of AMT 40 Ford exhausts, just because I had them handy.
-
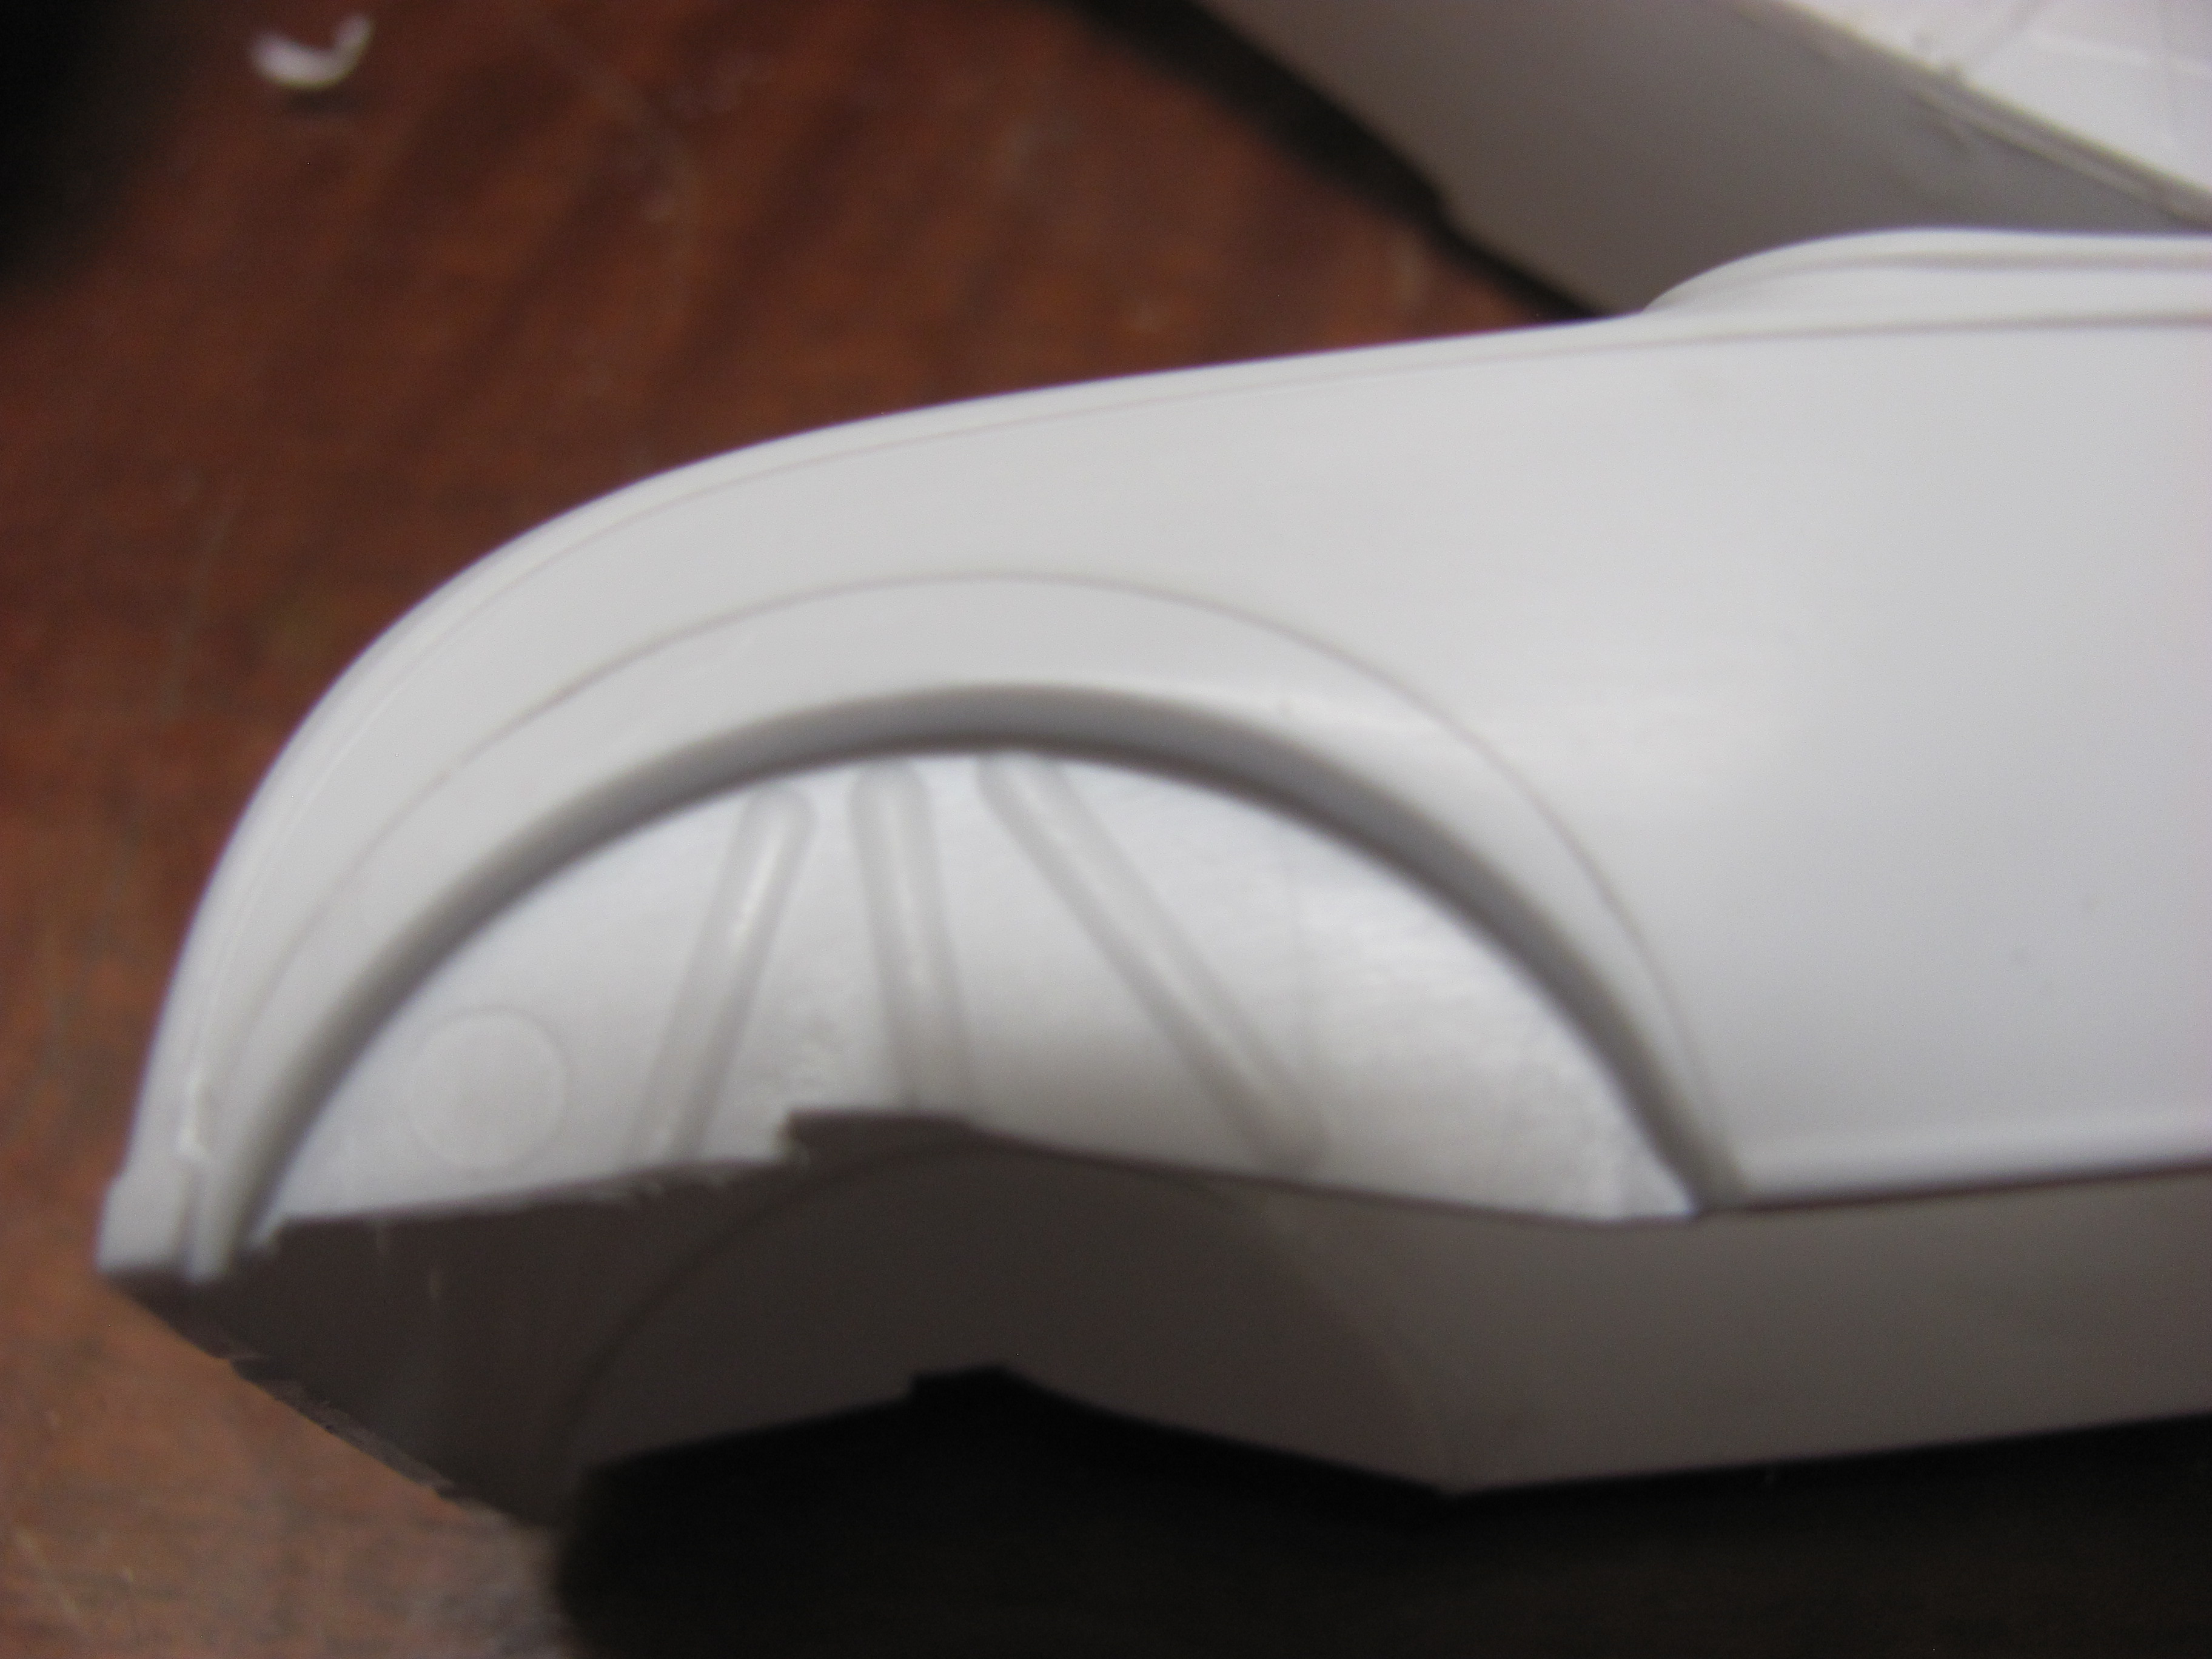
For a whole bunch of reasons, I parked up the old favourite AMT body and had a look at the Revell body instead. Most importantly the interior and floor were going to work far better with the Revell parts.There was no way I could live with the radiused rear wheel arches but someone here showed a neat trick for fixing them so I went for it. Sorry I can't remember who that member was but it is a simple trick. First, cut the original wheel arches free of the interior panels. Then position the arch inside the body and determine where you want it to be - I placed it about 4mm below the original arch. Trace the original arch onto the plastic and then carefully file it to fit the body When you are happy with the fit, glue it to the body ever so slightly proud of the quarter panel. I used Testor's tube glue to tack it in place and then dowsed it with super glue . After setting the superglue with Zipkicker, I sanded it flush and didn't need to use any filler. I then did more detail work on an AMT firewall and grafted it to the Revell body. The Revell firewall is probably the low point of this whole kit in my humble opinion. I am going to go out on a limb and say that NOBODY in the world ever attempted to graft a 30-31 firewall to a 28-29 body - there is simply no reason or advantage in doing so. Fortunately it is not a difficult thing to fix and it is a hot rod after all. (Someone will now post a photo of a real 29 with a 30 firewall, but that's O.K.........
-
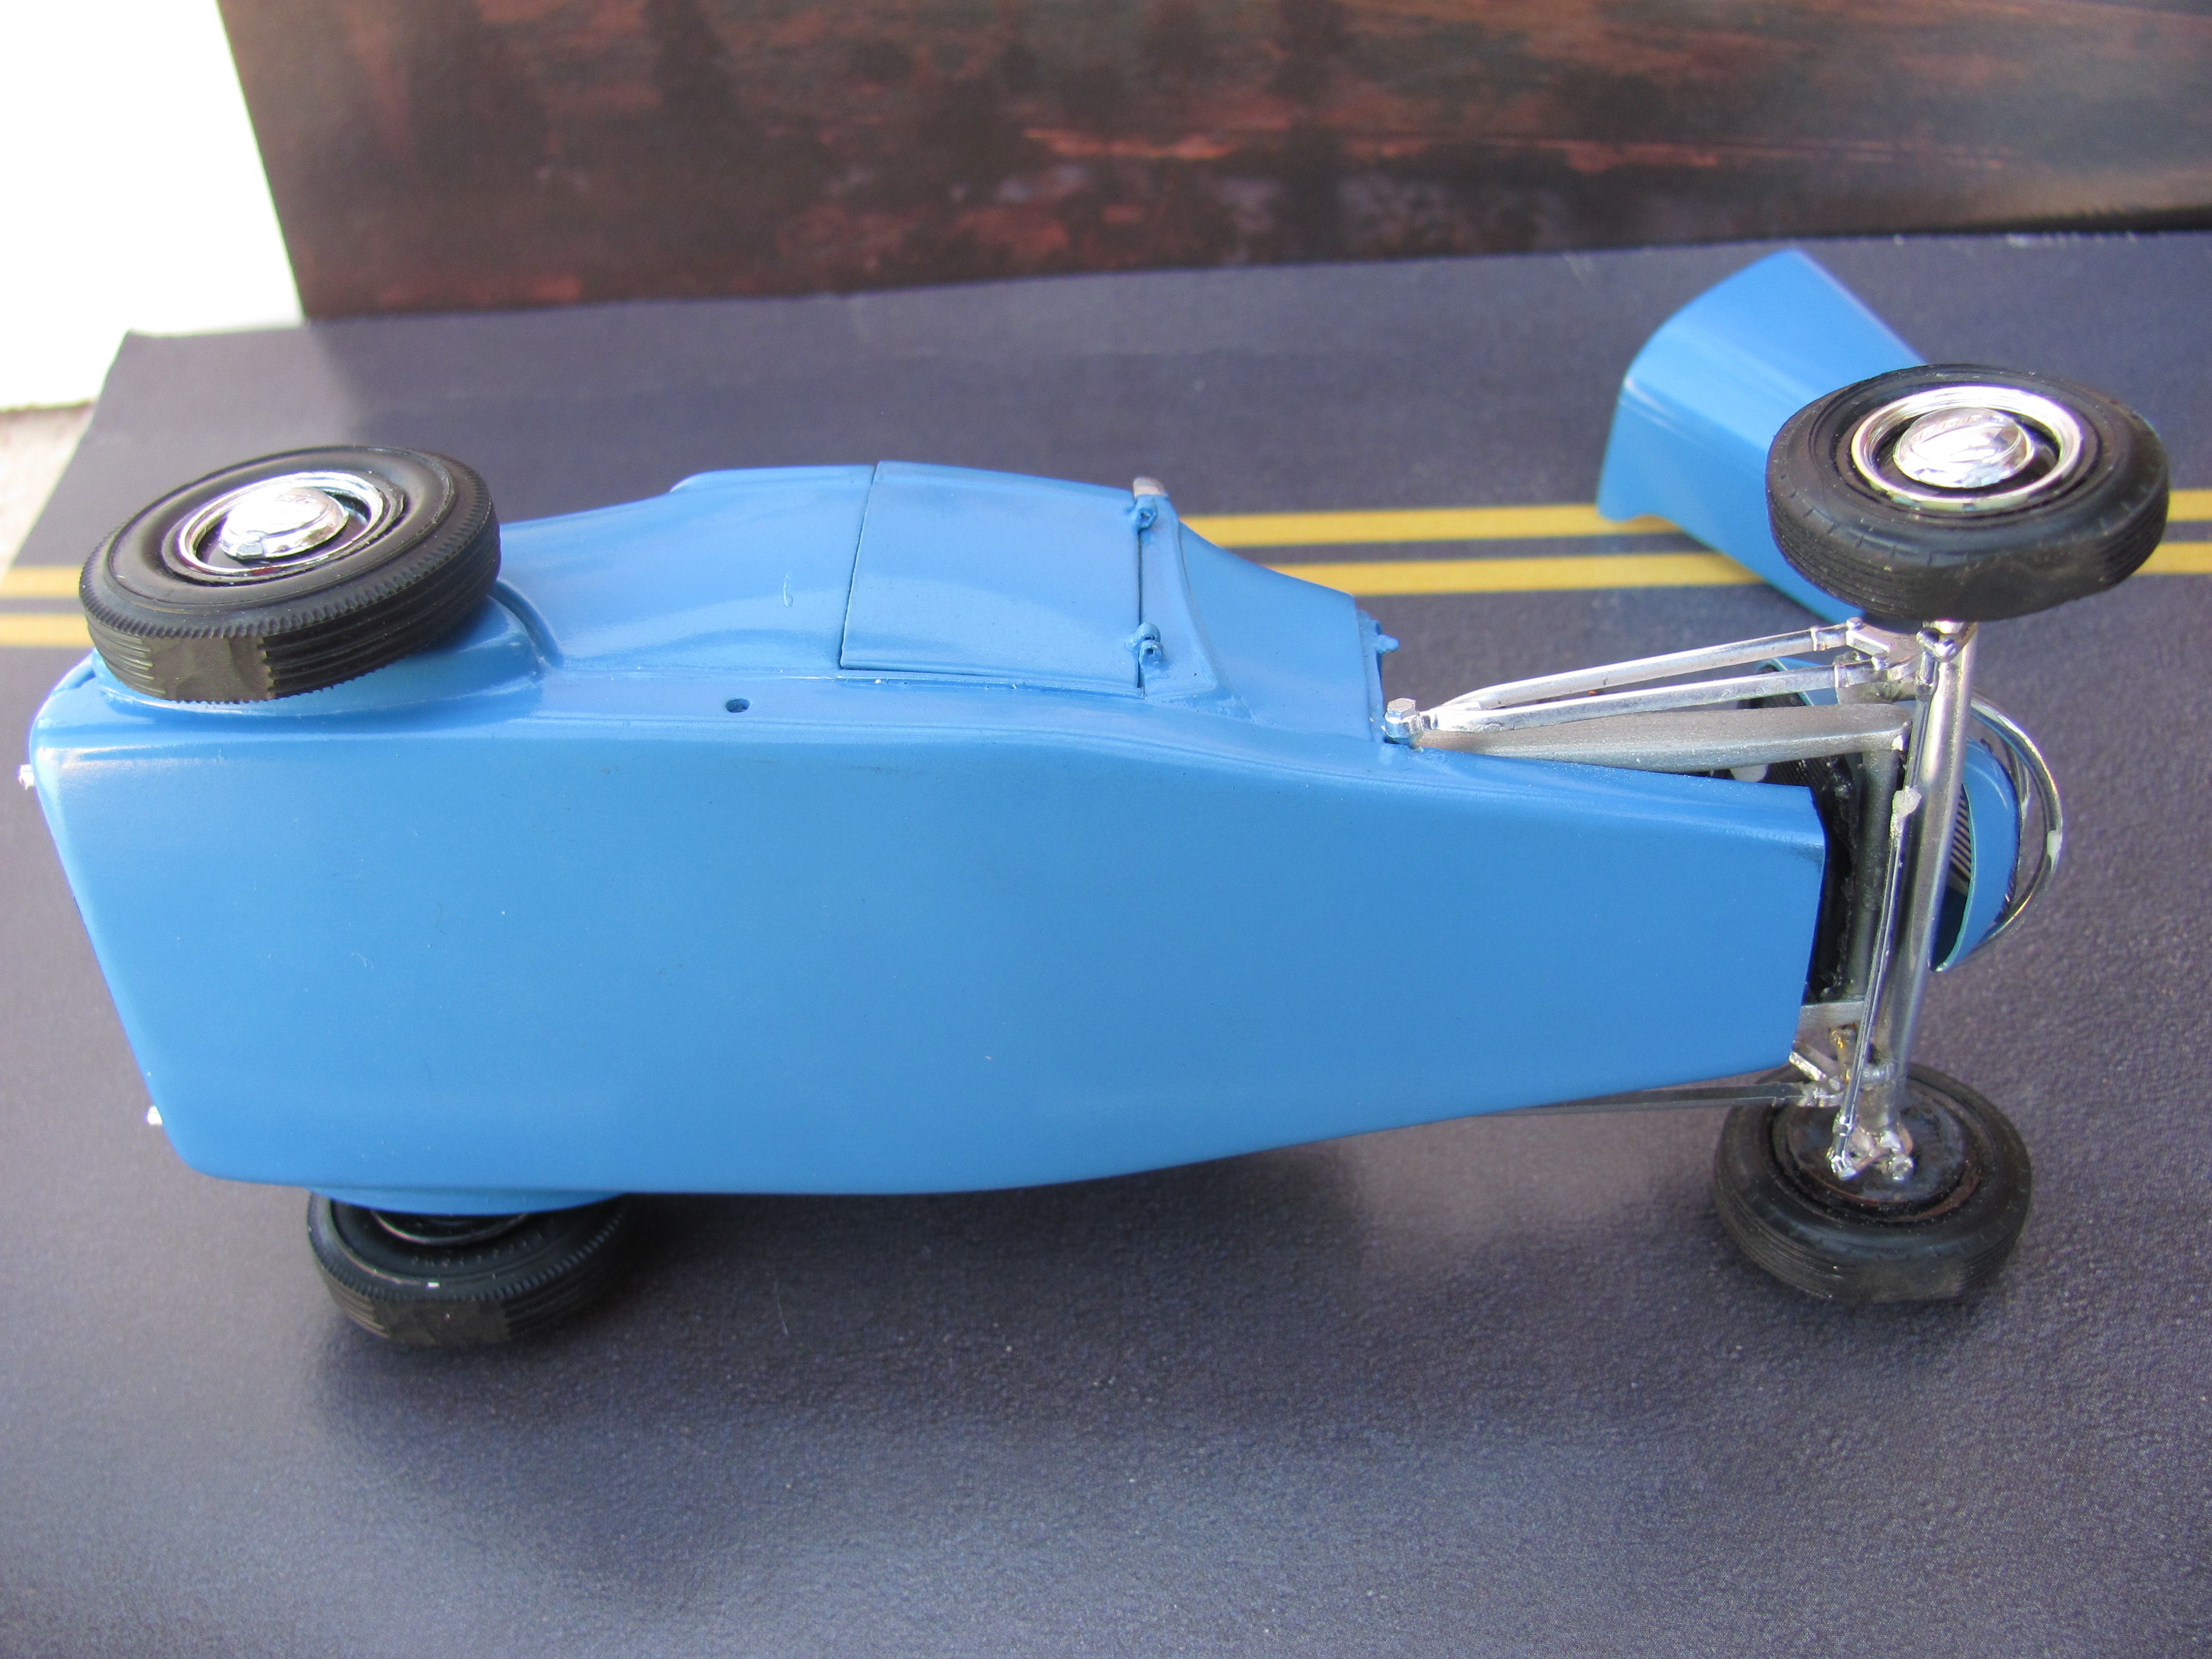
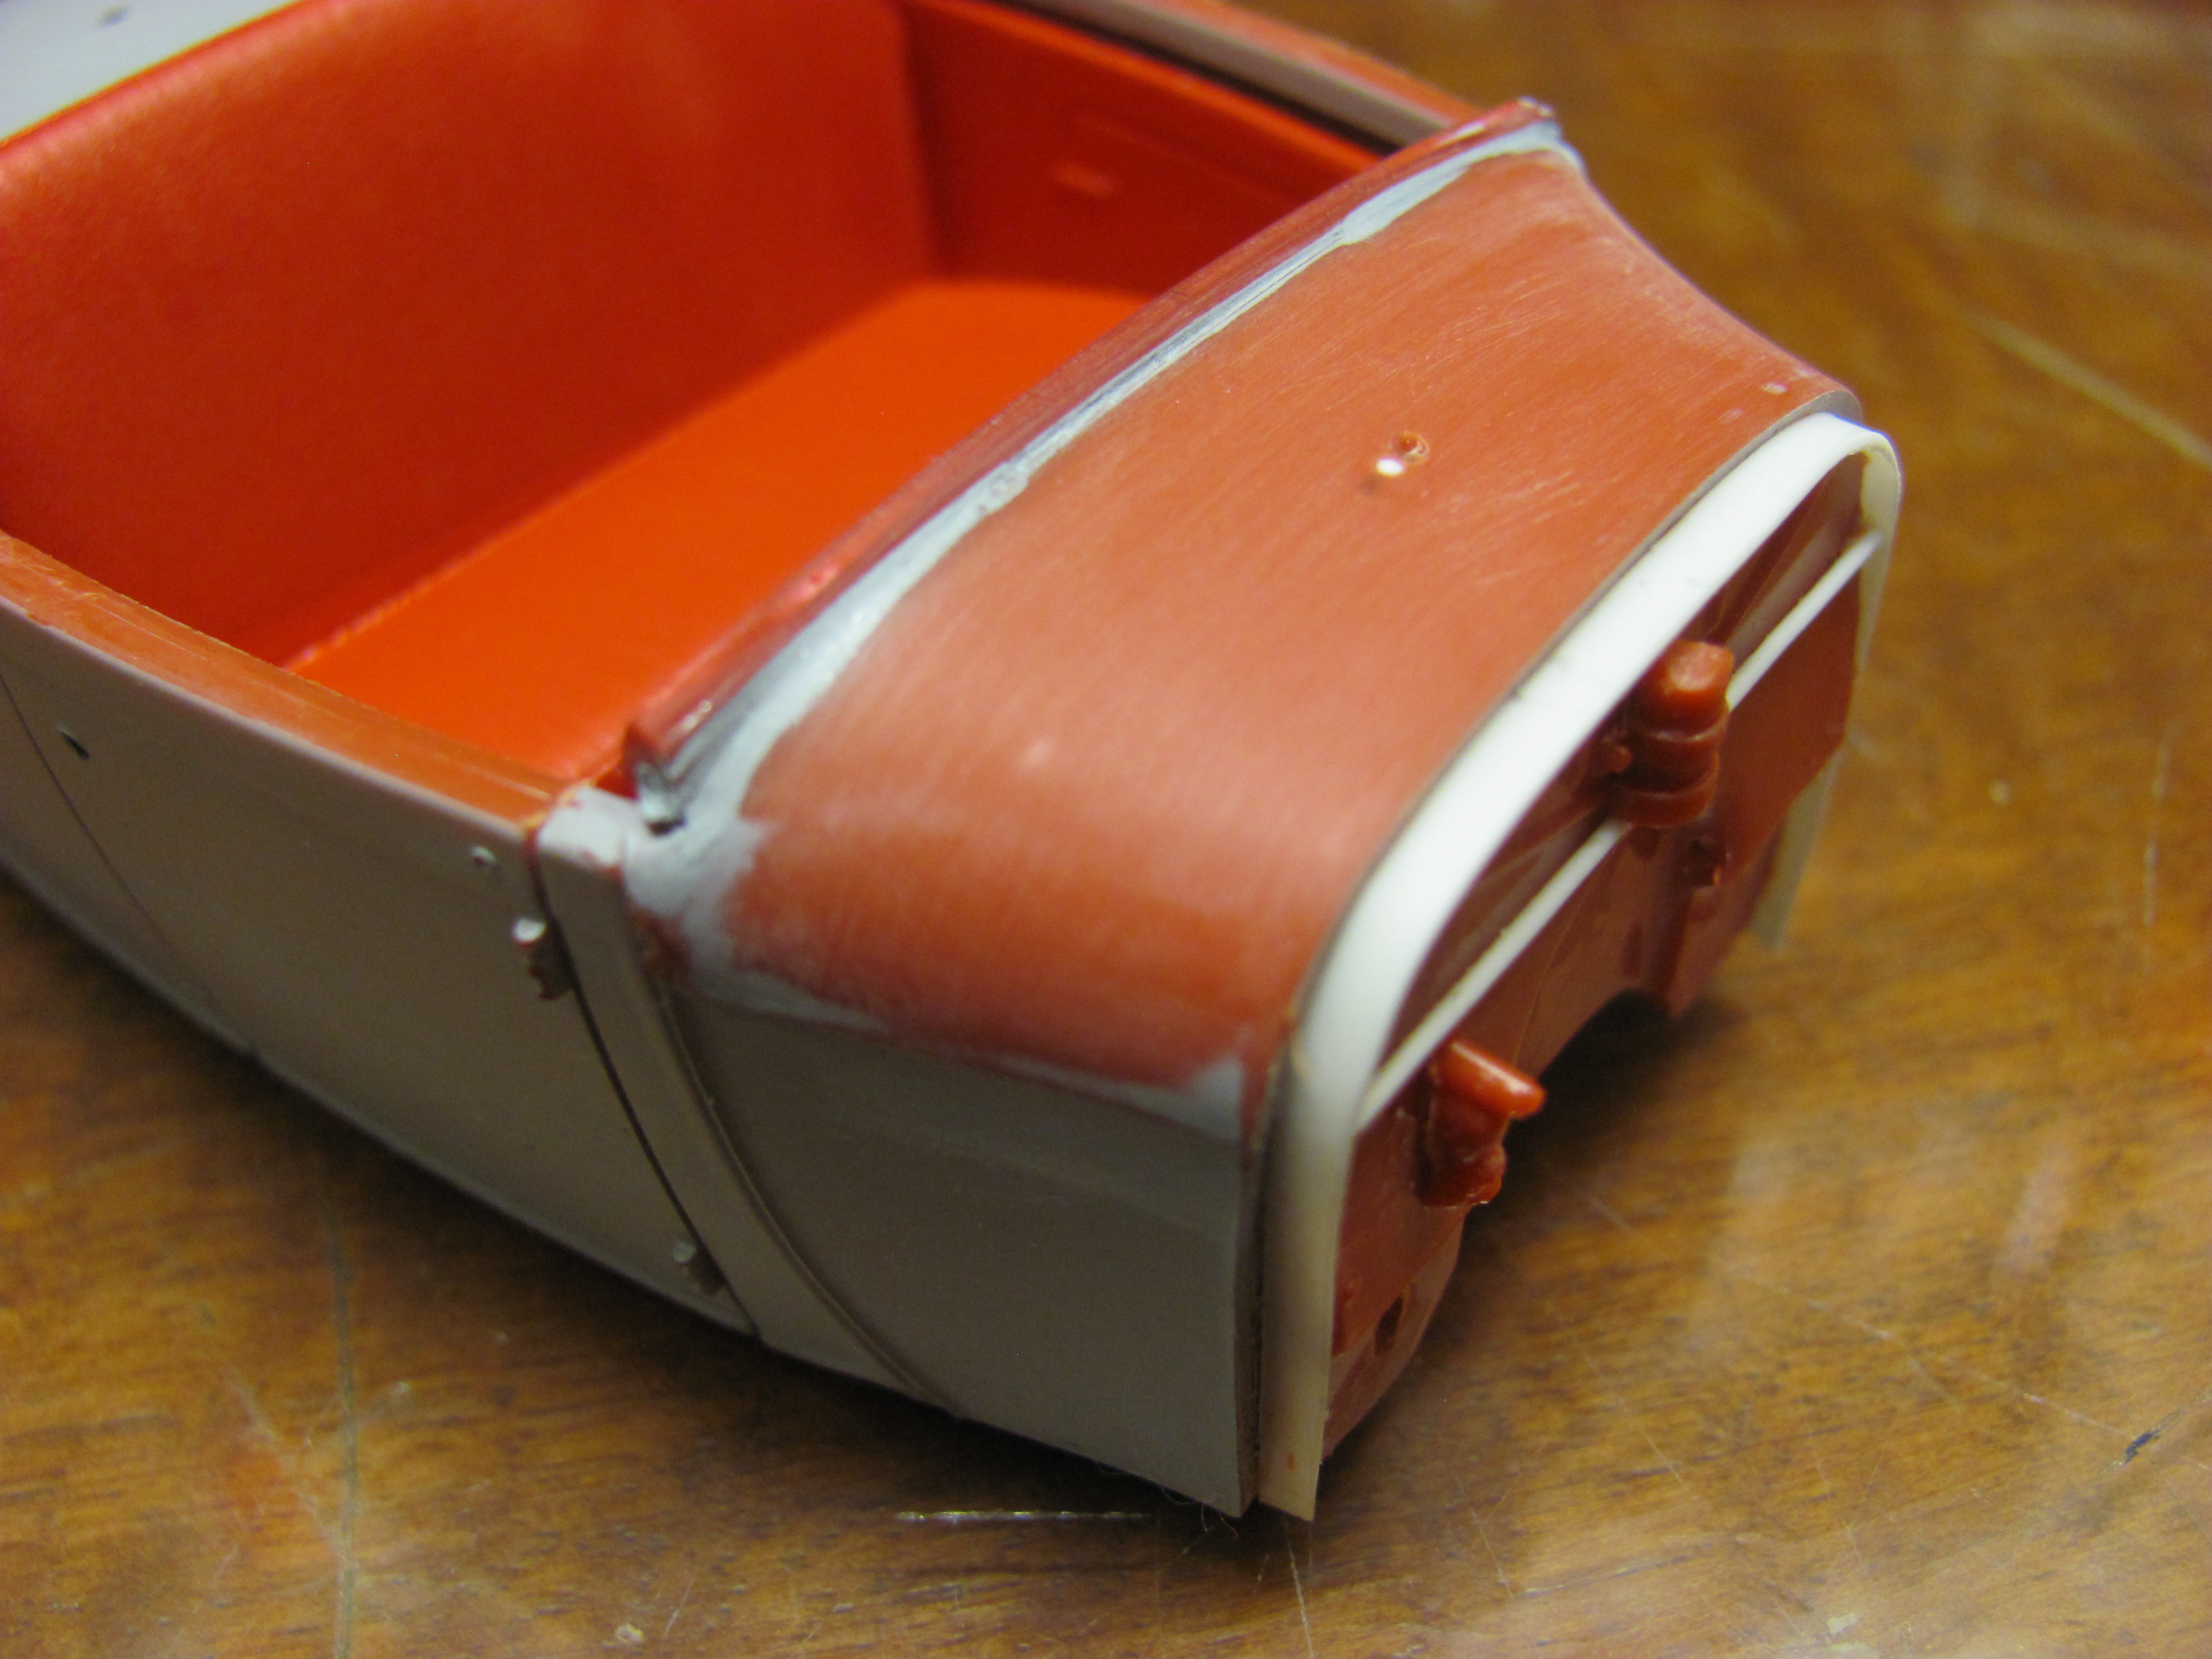
Now I got a bit lost when it came to the body. I started off improving the old AMT body by adding ribs to the rear wheel arches and modifying the cowl header panle to accept the Revell windscreen. I like the AMT body and it handles some contours better than the Revell version. I also added some extra detail in the form of flanges to the AMT firewall and even got the finished body in paint.
-
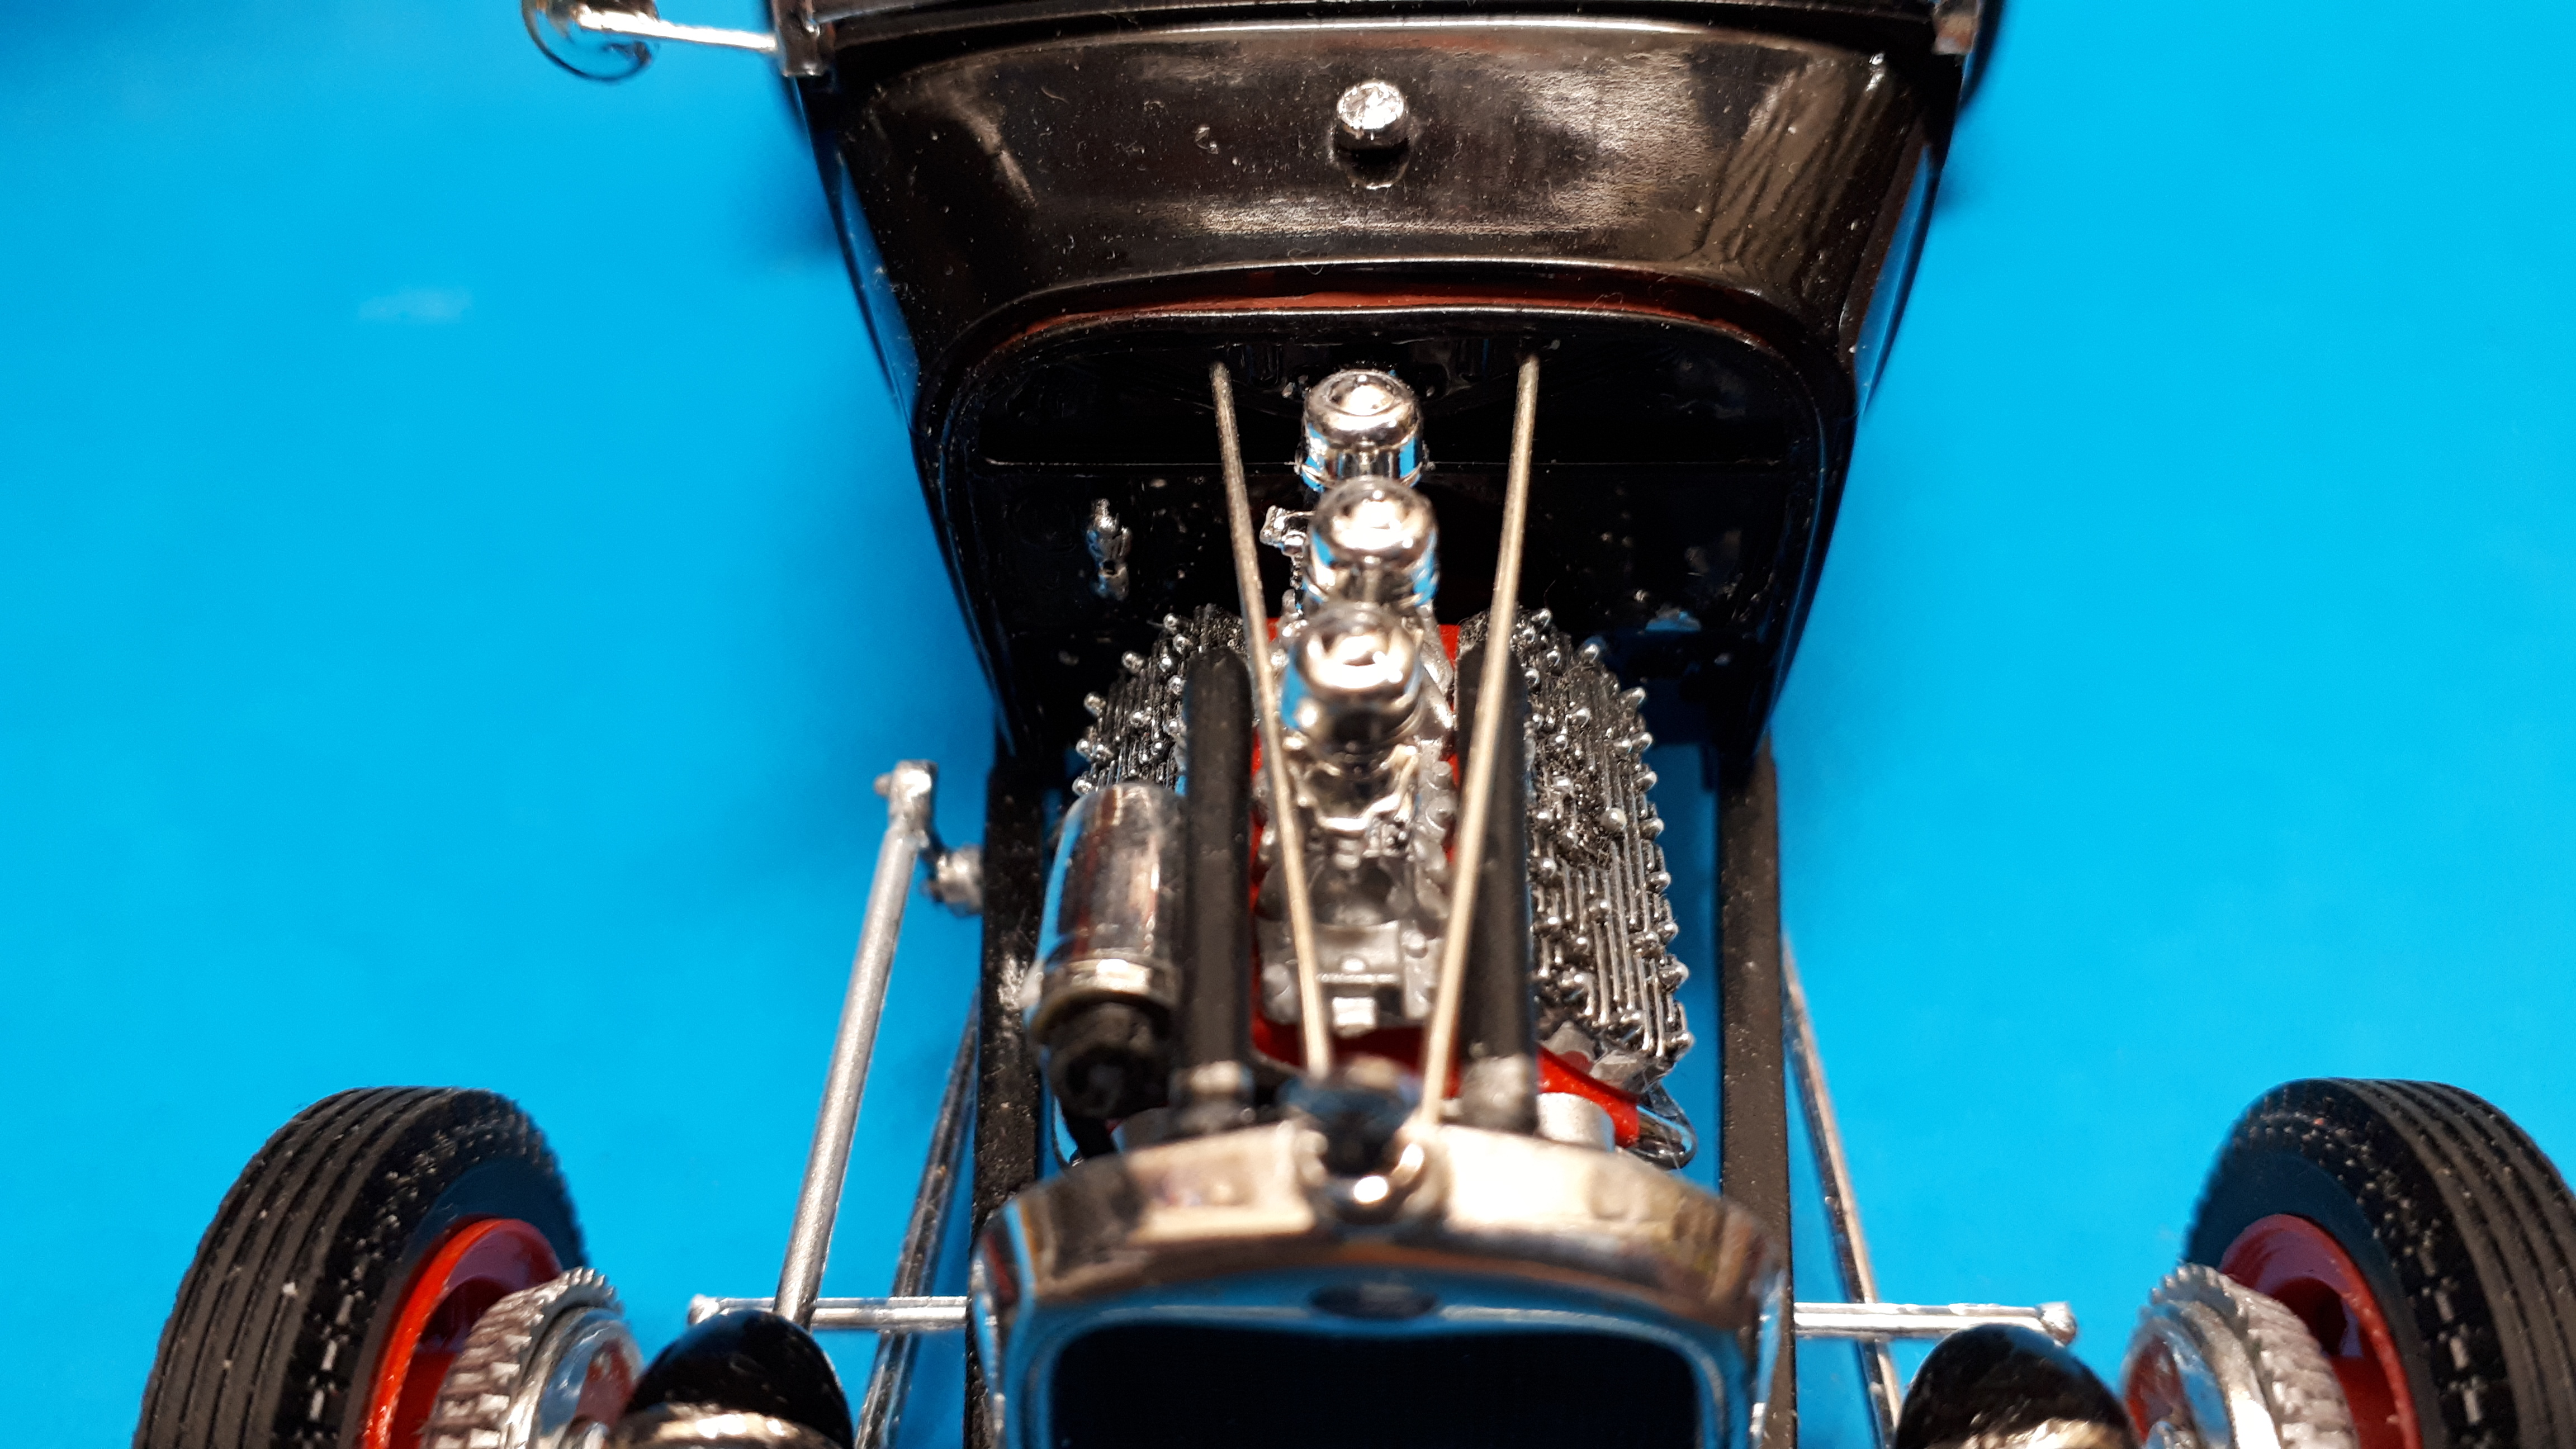
The only thing I did to the complete flathead assembly from the Revell 32 Tudor was to shorten the fanbelt and tuck it in closer to the heads so that it didn't hang out in the breeze. Its a beautiful engine that really responds to detail painting. So why didn't I run plug leads? I've done it before on flatheads and the diameter and placement of the wire is so critical I just didn't want to detract from the appearance of the heads with some slip up of craftsmanship. I'm happy with the result and don't think it detracts from the look of the finished model.
-
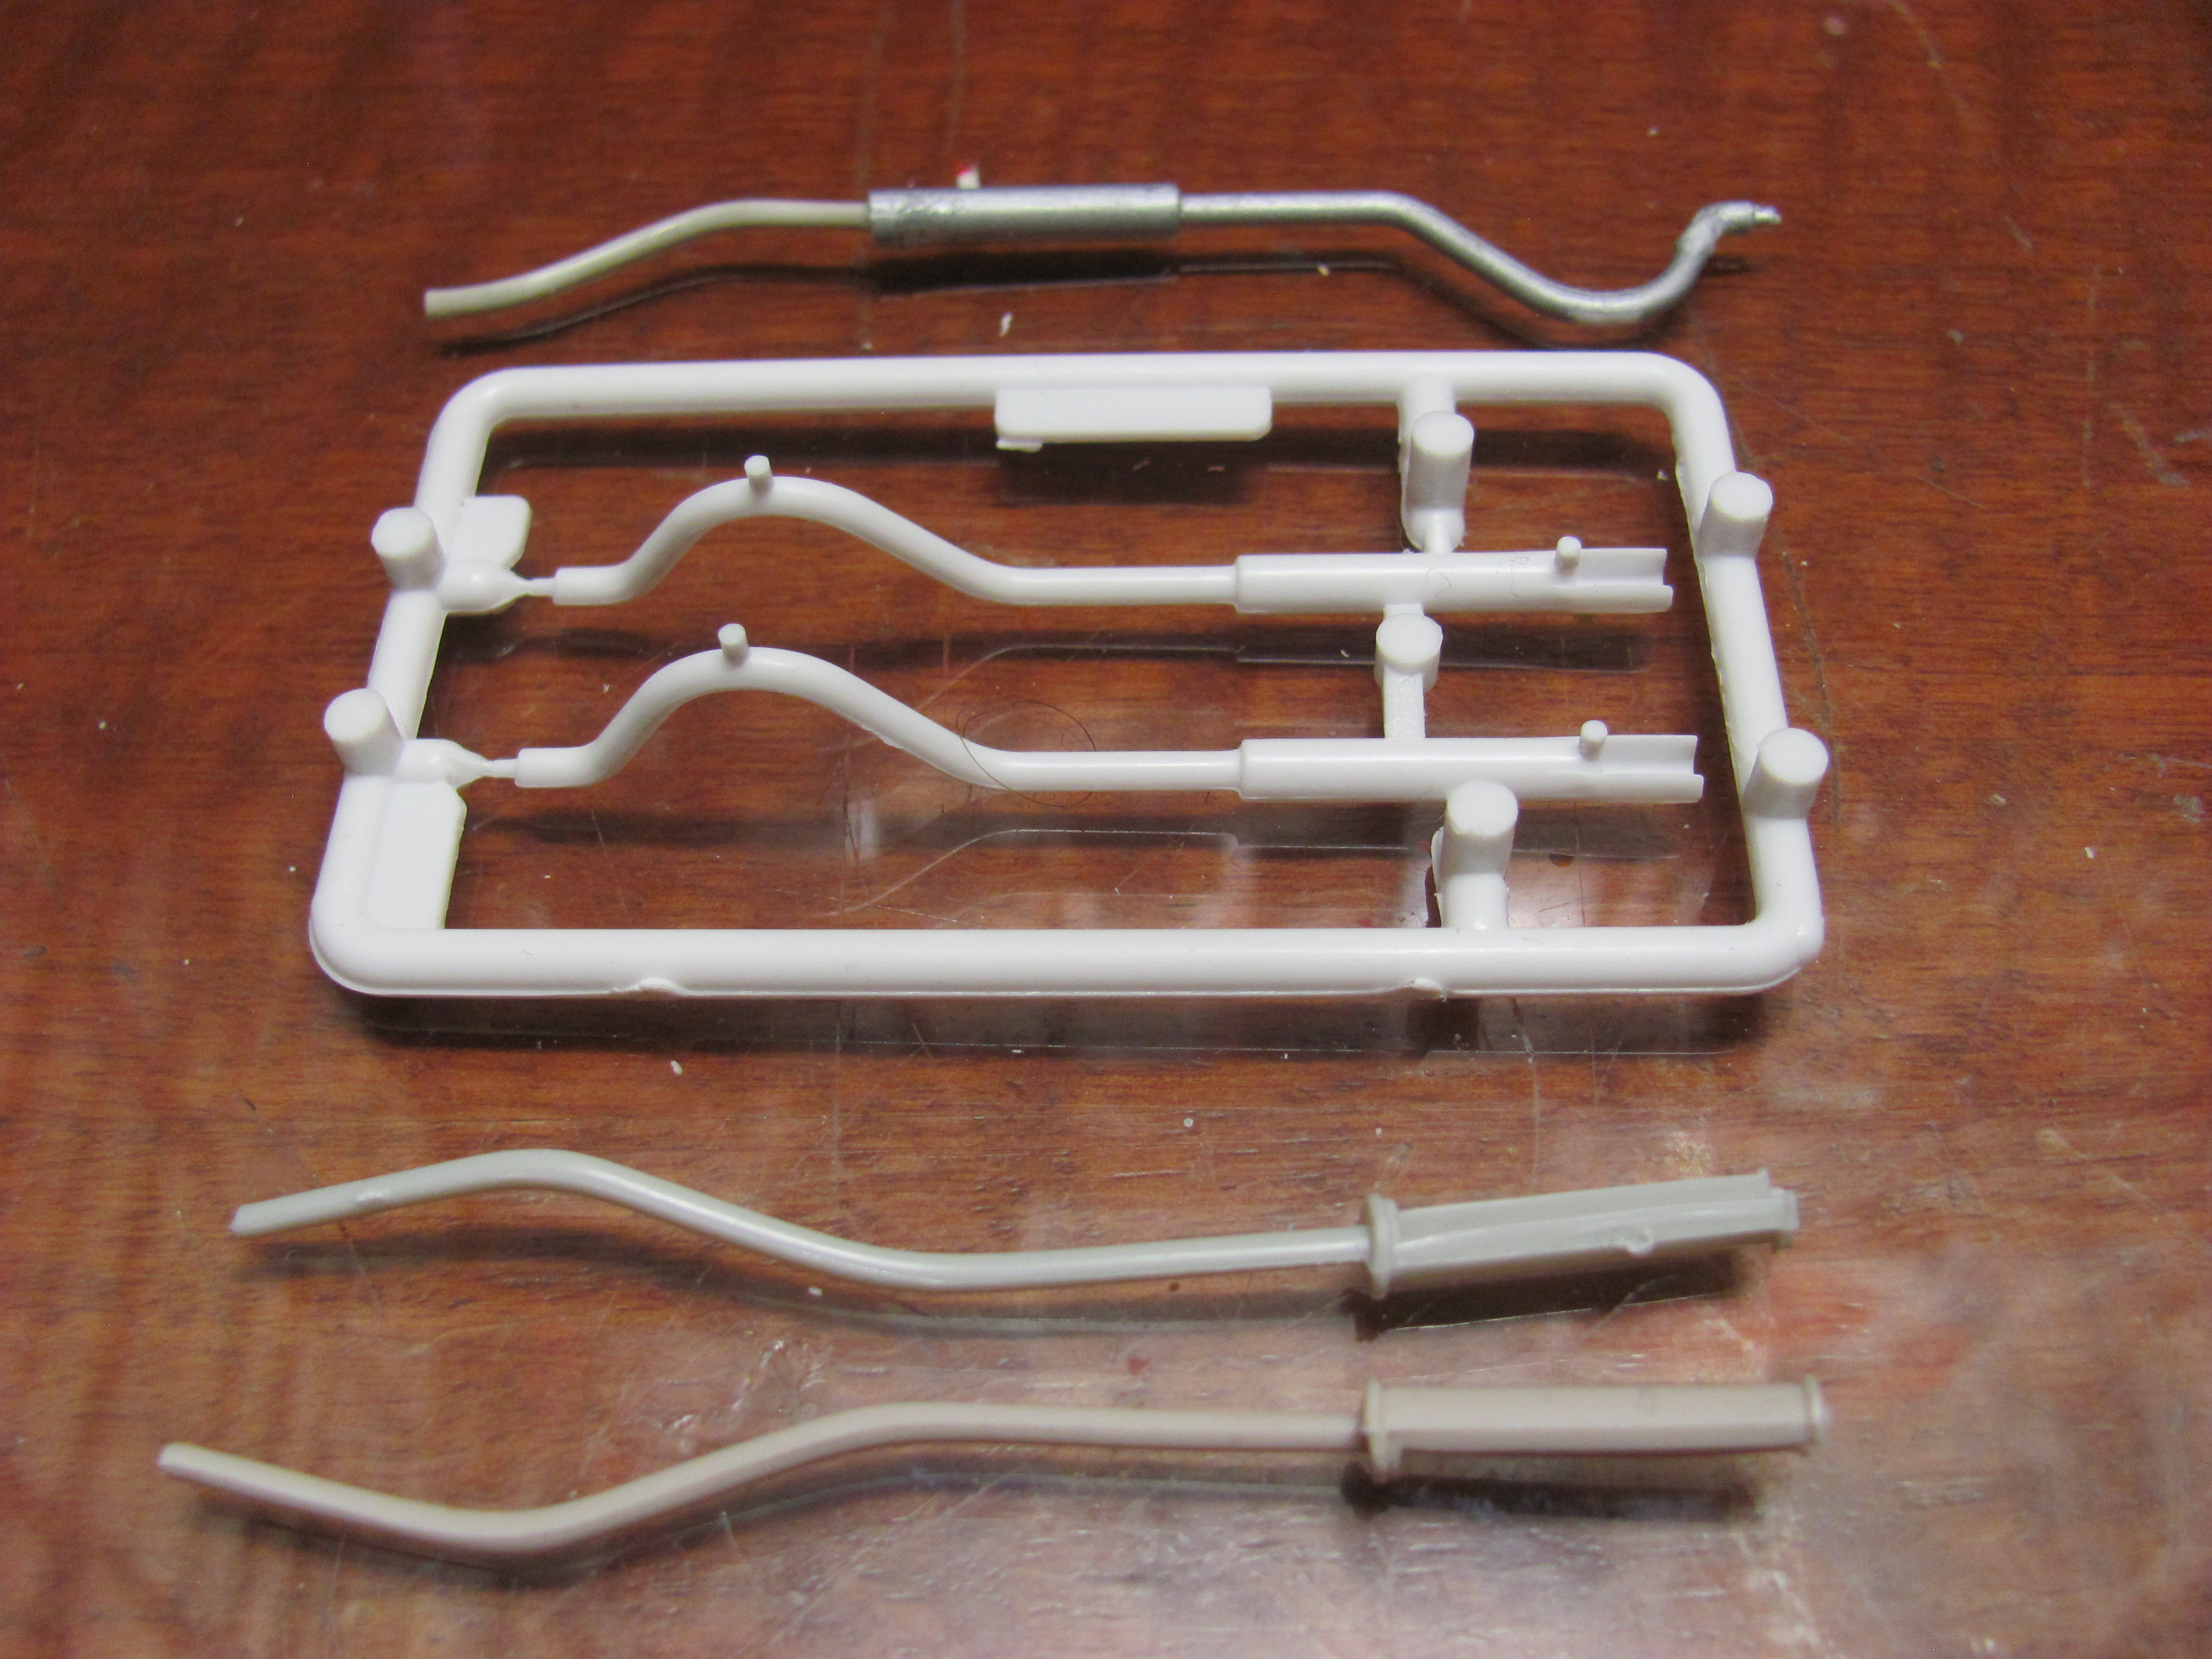
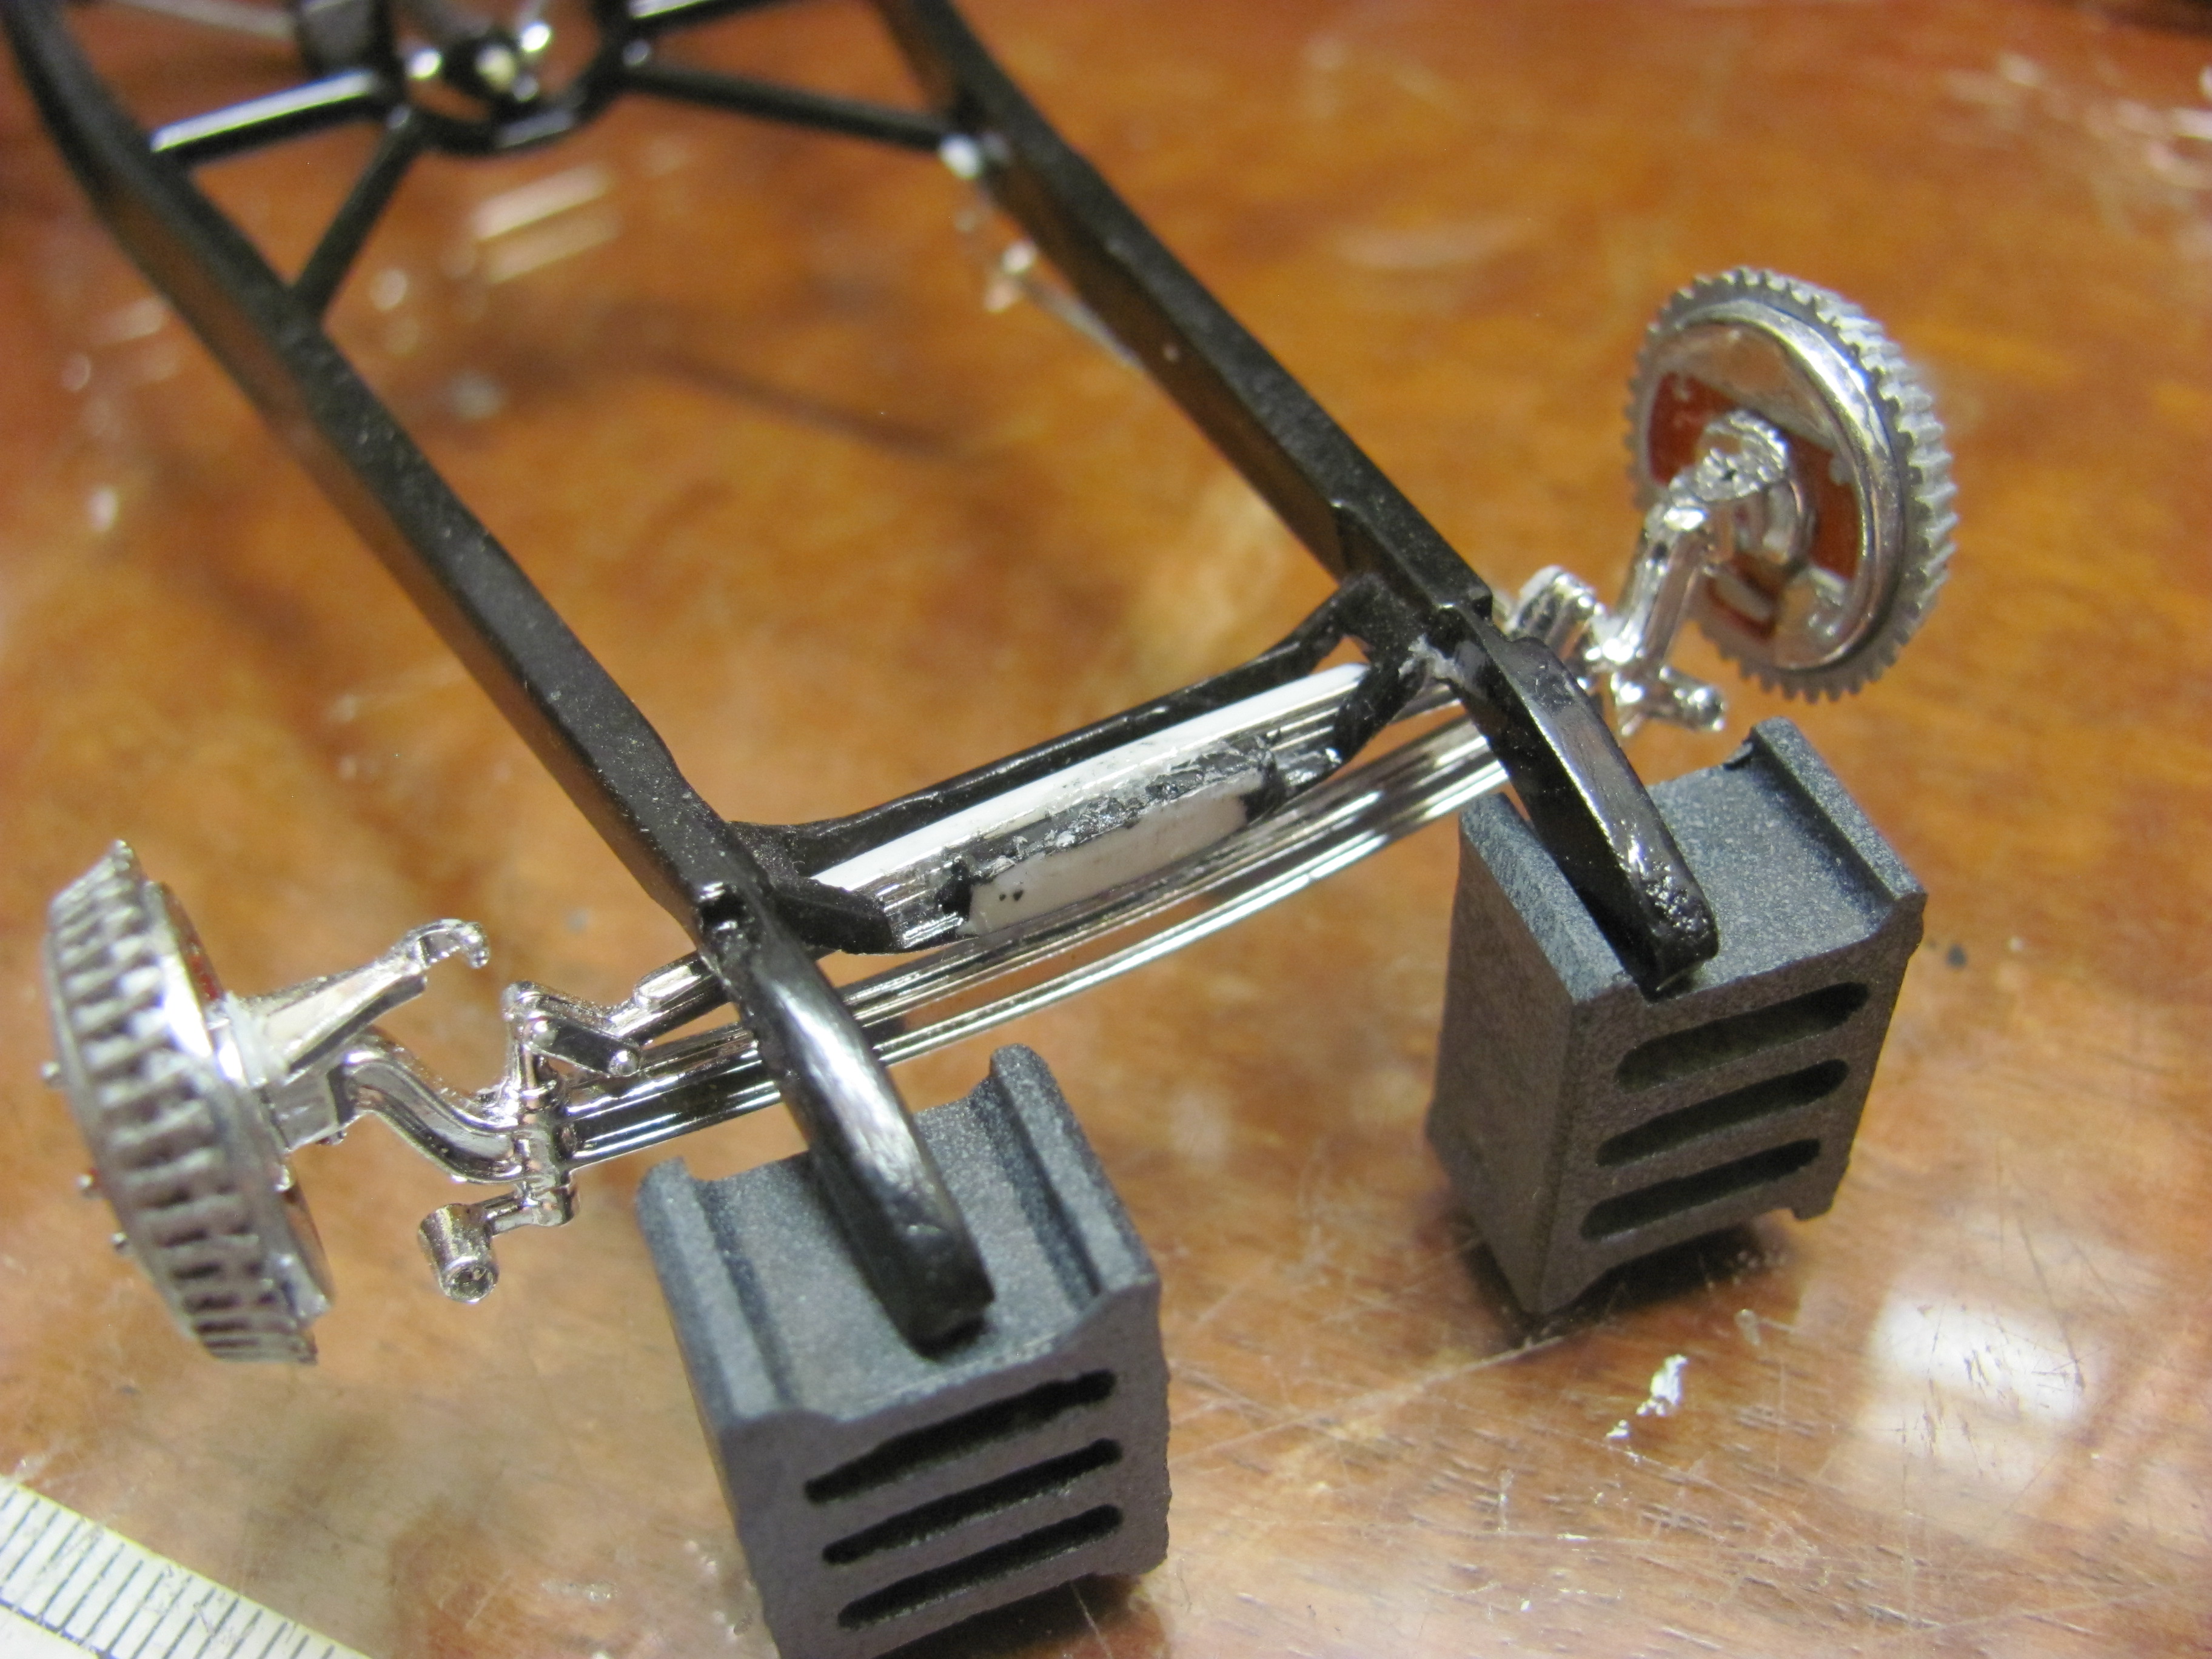
I needed a pair os shocks to finish up the rear so I dug through my spares box and found these ones. I then drilled out the mounting eyes and used some Evergreen to make the mounts. I then drilled matching holes in the rear axle - next time I would think to do this BEFORE assembling the frame!!!
-
I really wanted to nail the wheel and tyre combo otherwise the build was never going to be convincing. I had a set of widened Kelsey Hayes wires from the Monogram 30 woody that I had already painted red but I anguished over whether I should narrow the front set or use say, some AMT wires instead. In the end I chose to narrow them, a nerve wracking experience that could have easily gone bad. As it was, I only just barely made them narrow enough to fit the Revell kit's narrow front tyres. Should I have kept the second wide pair for another project? - we'll never know and it's too late now. In case you are wondering about the rear tyres, I believe they were from a Japanese L&S parts kit. I have had them for decades and this was my last set, a shame as they make great hiboy tyres in my opinion.
-
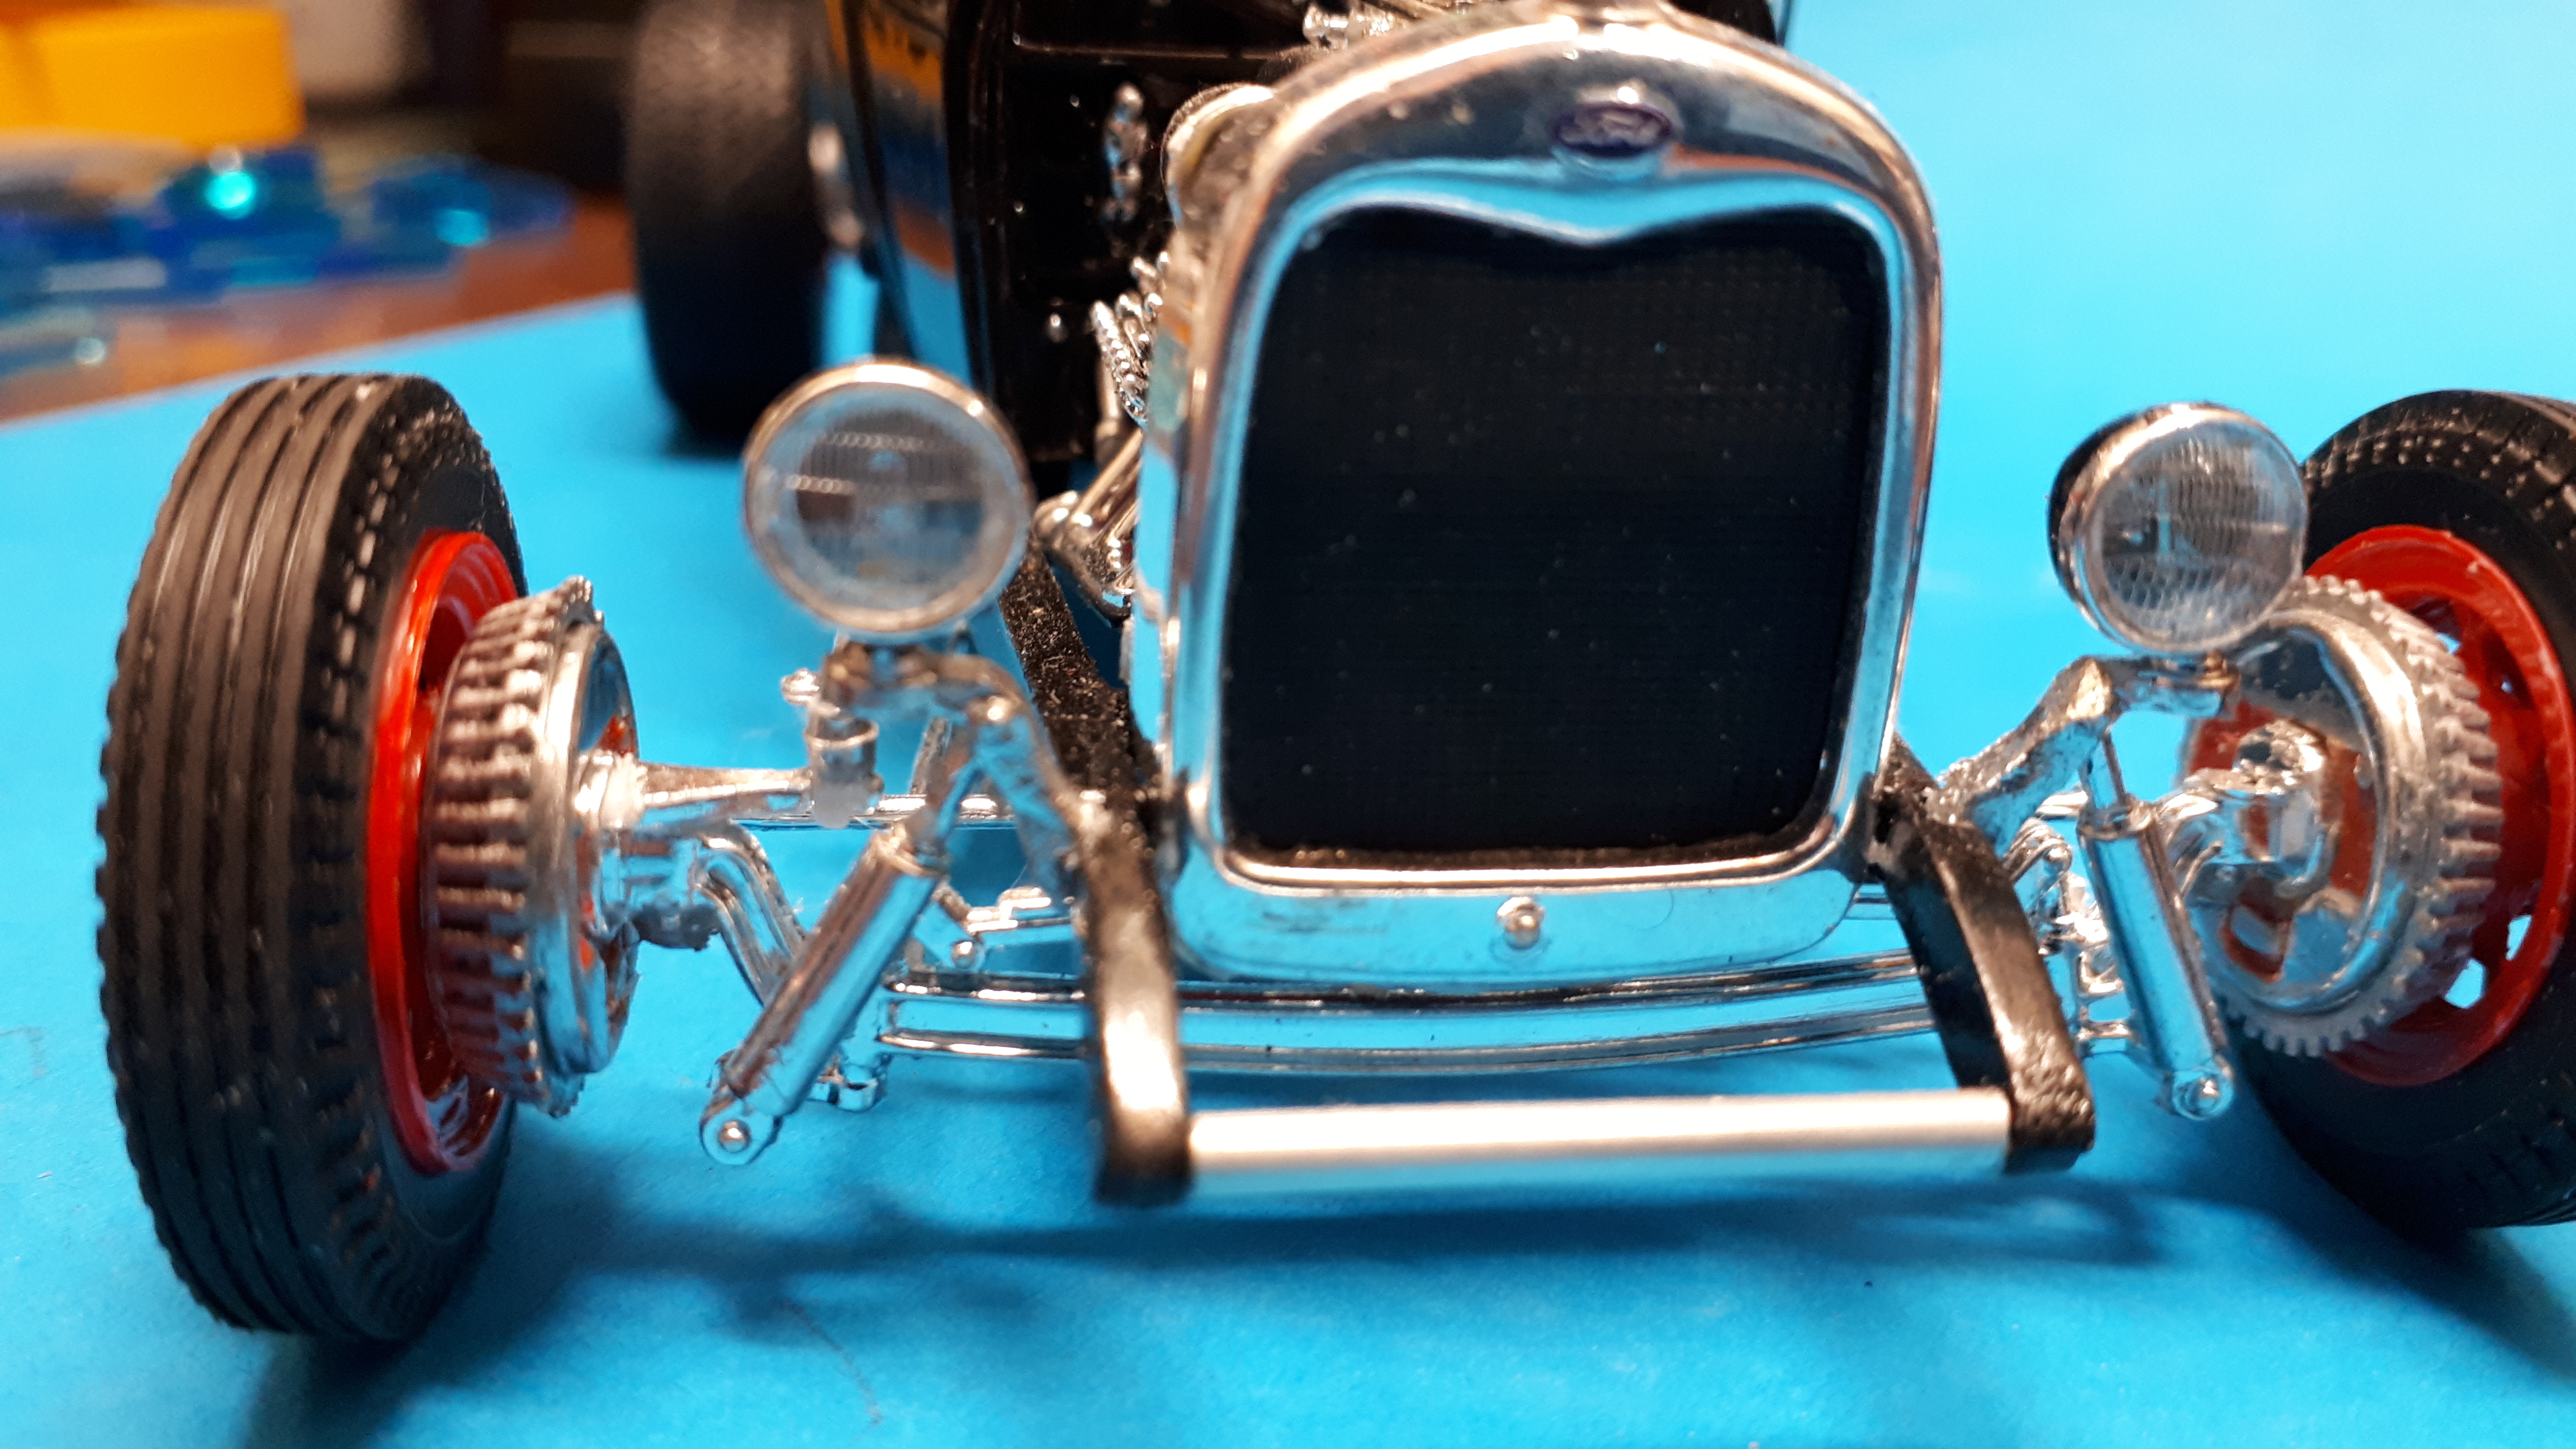
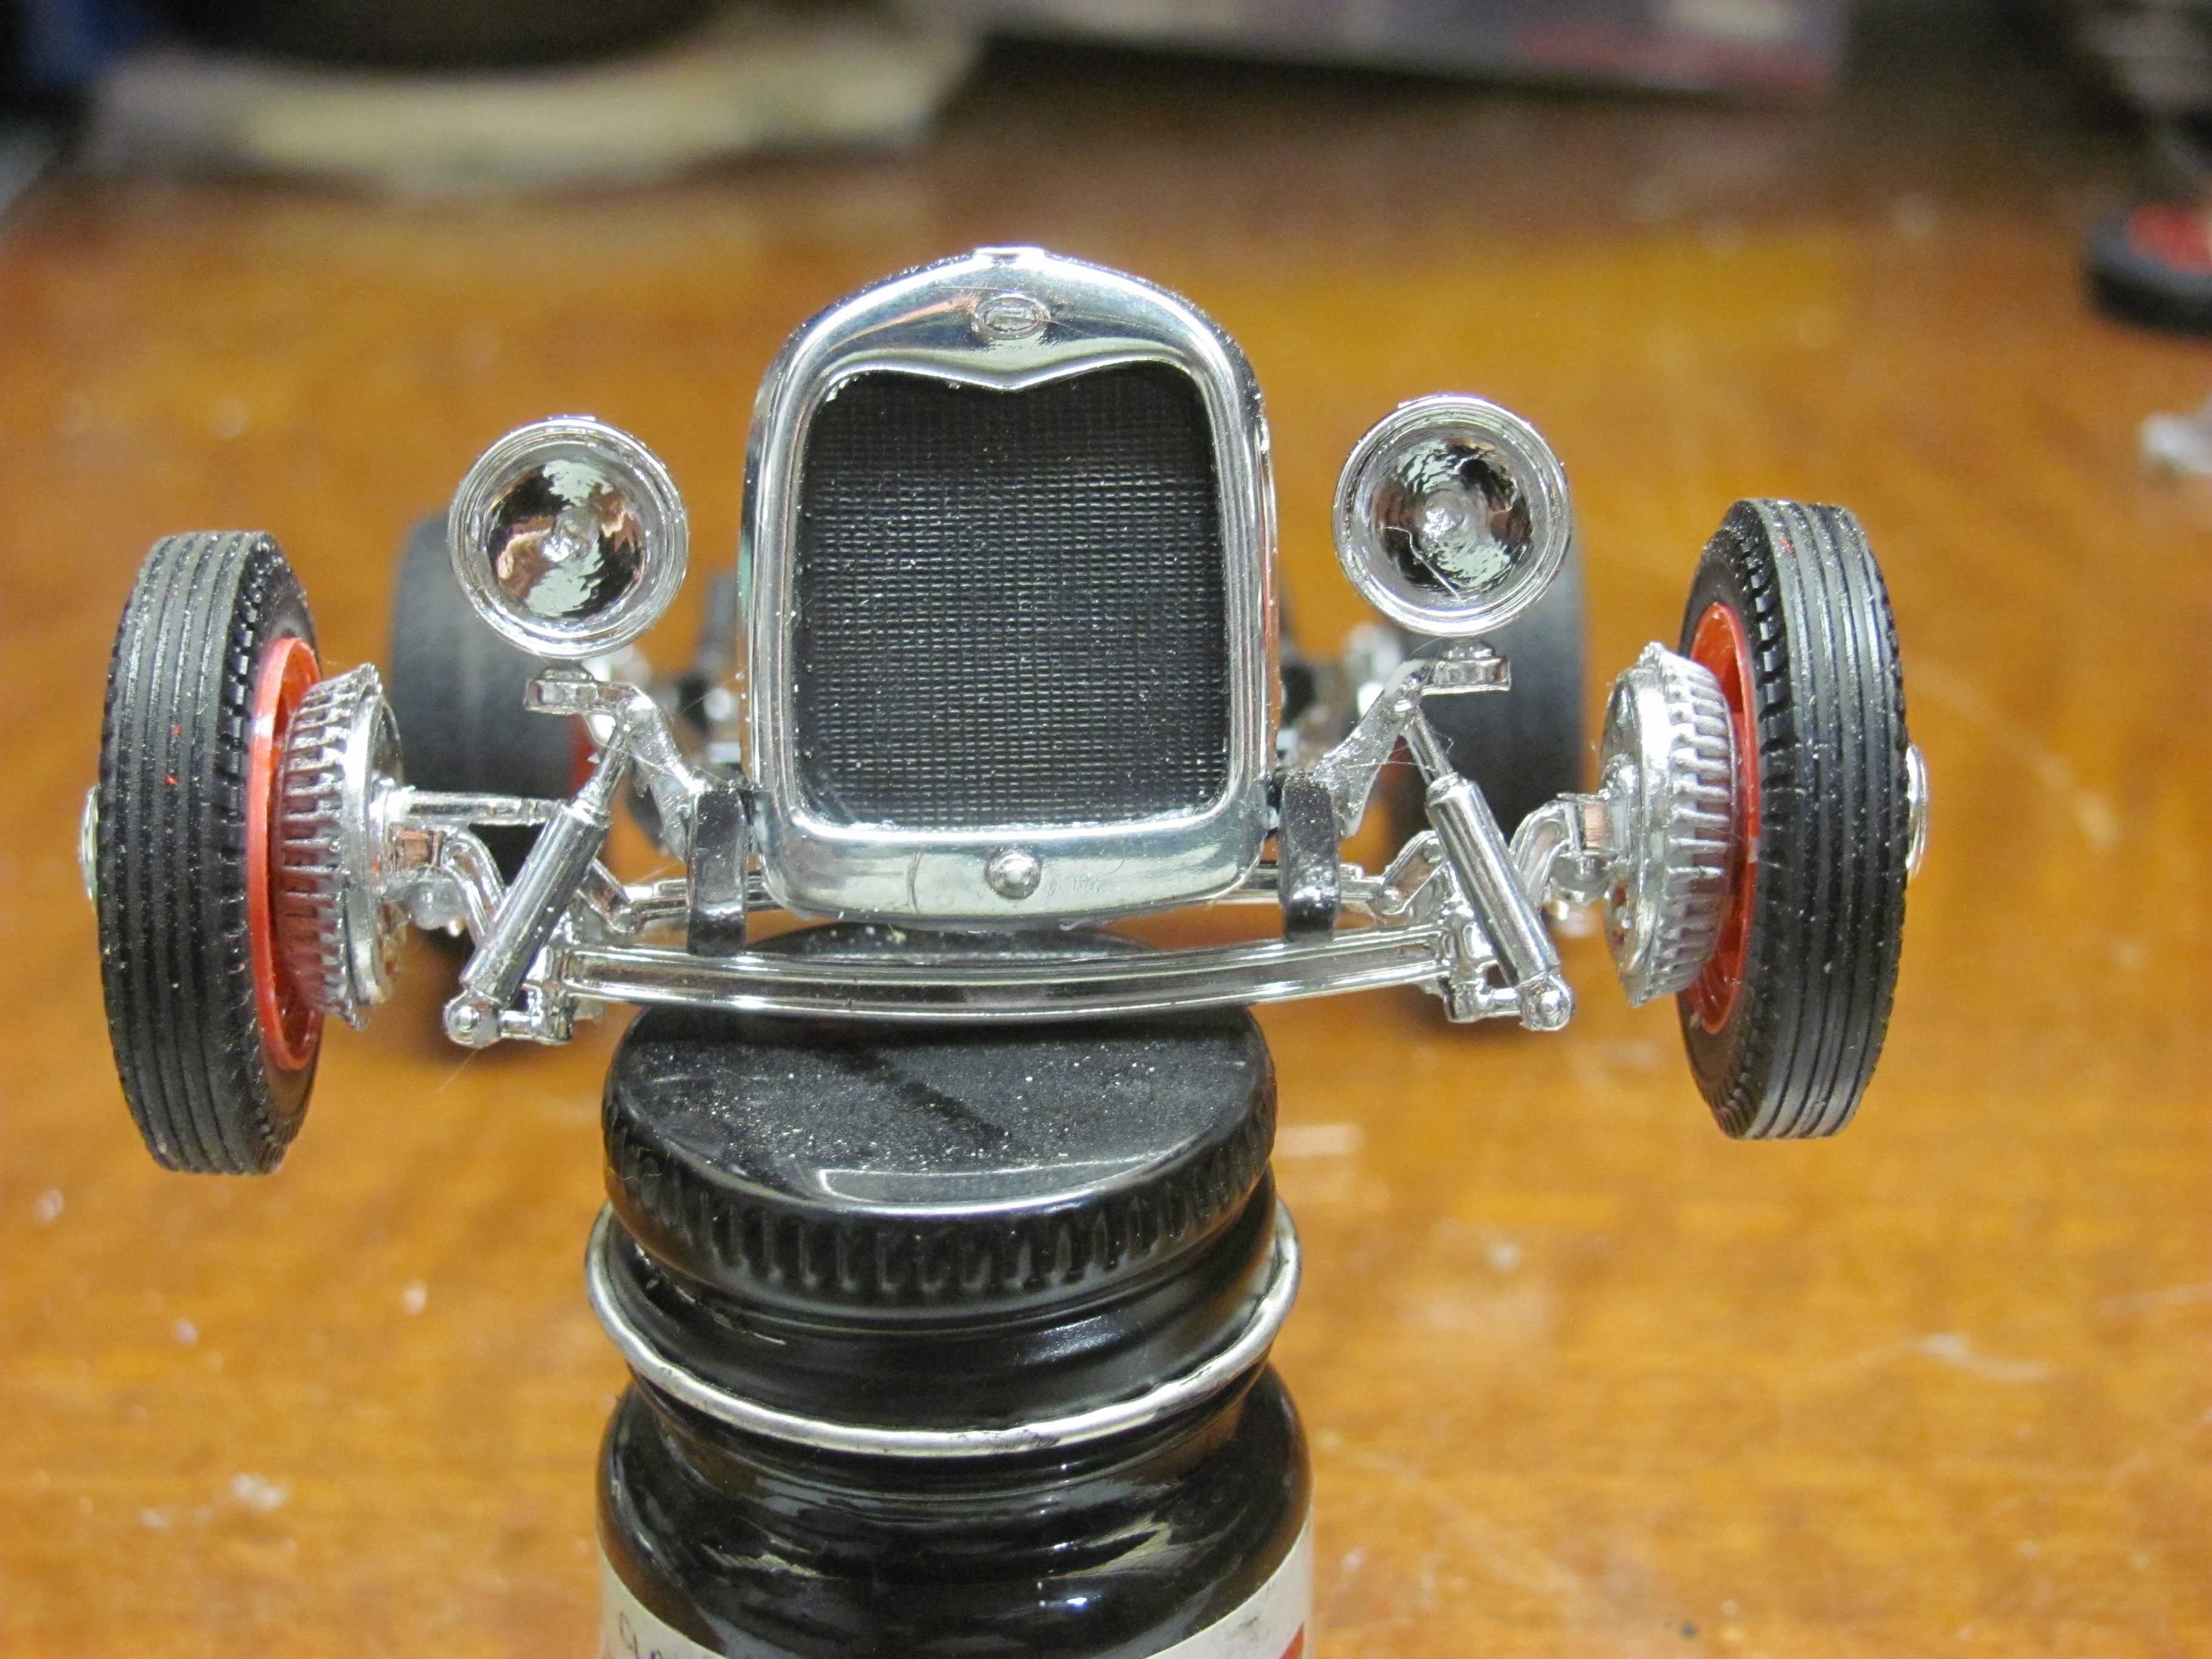
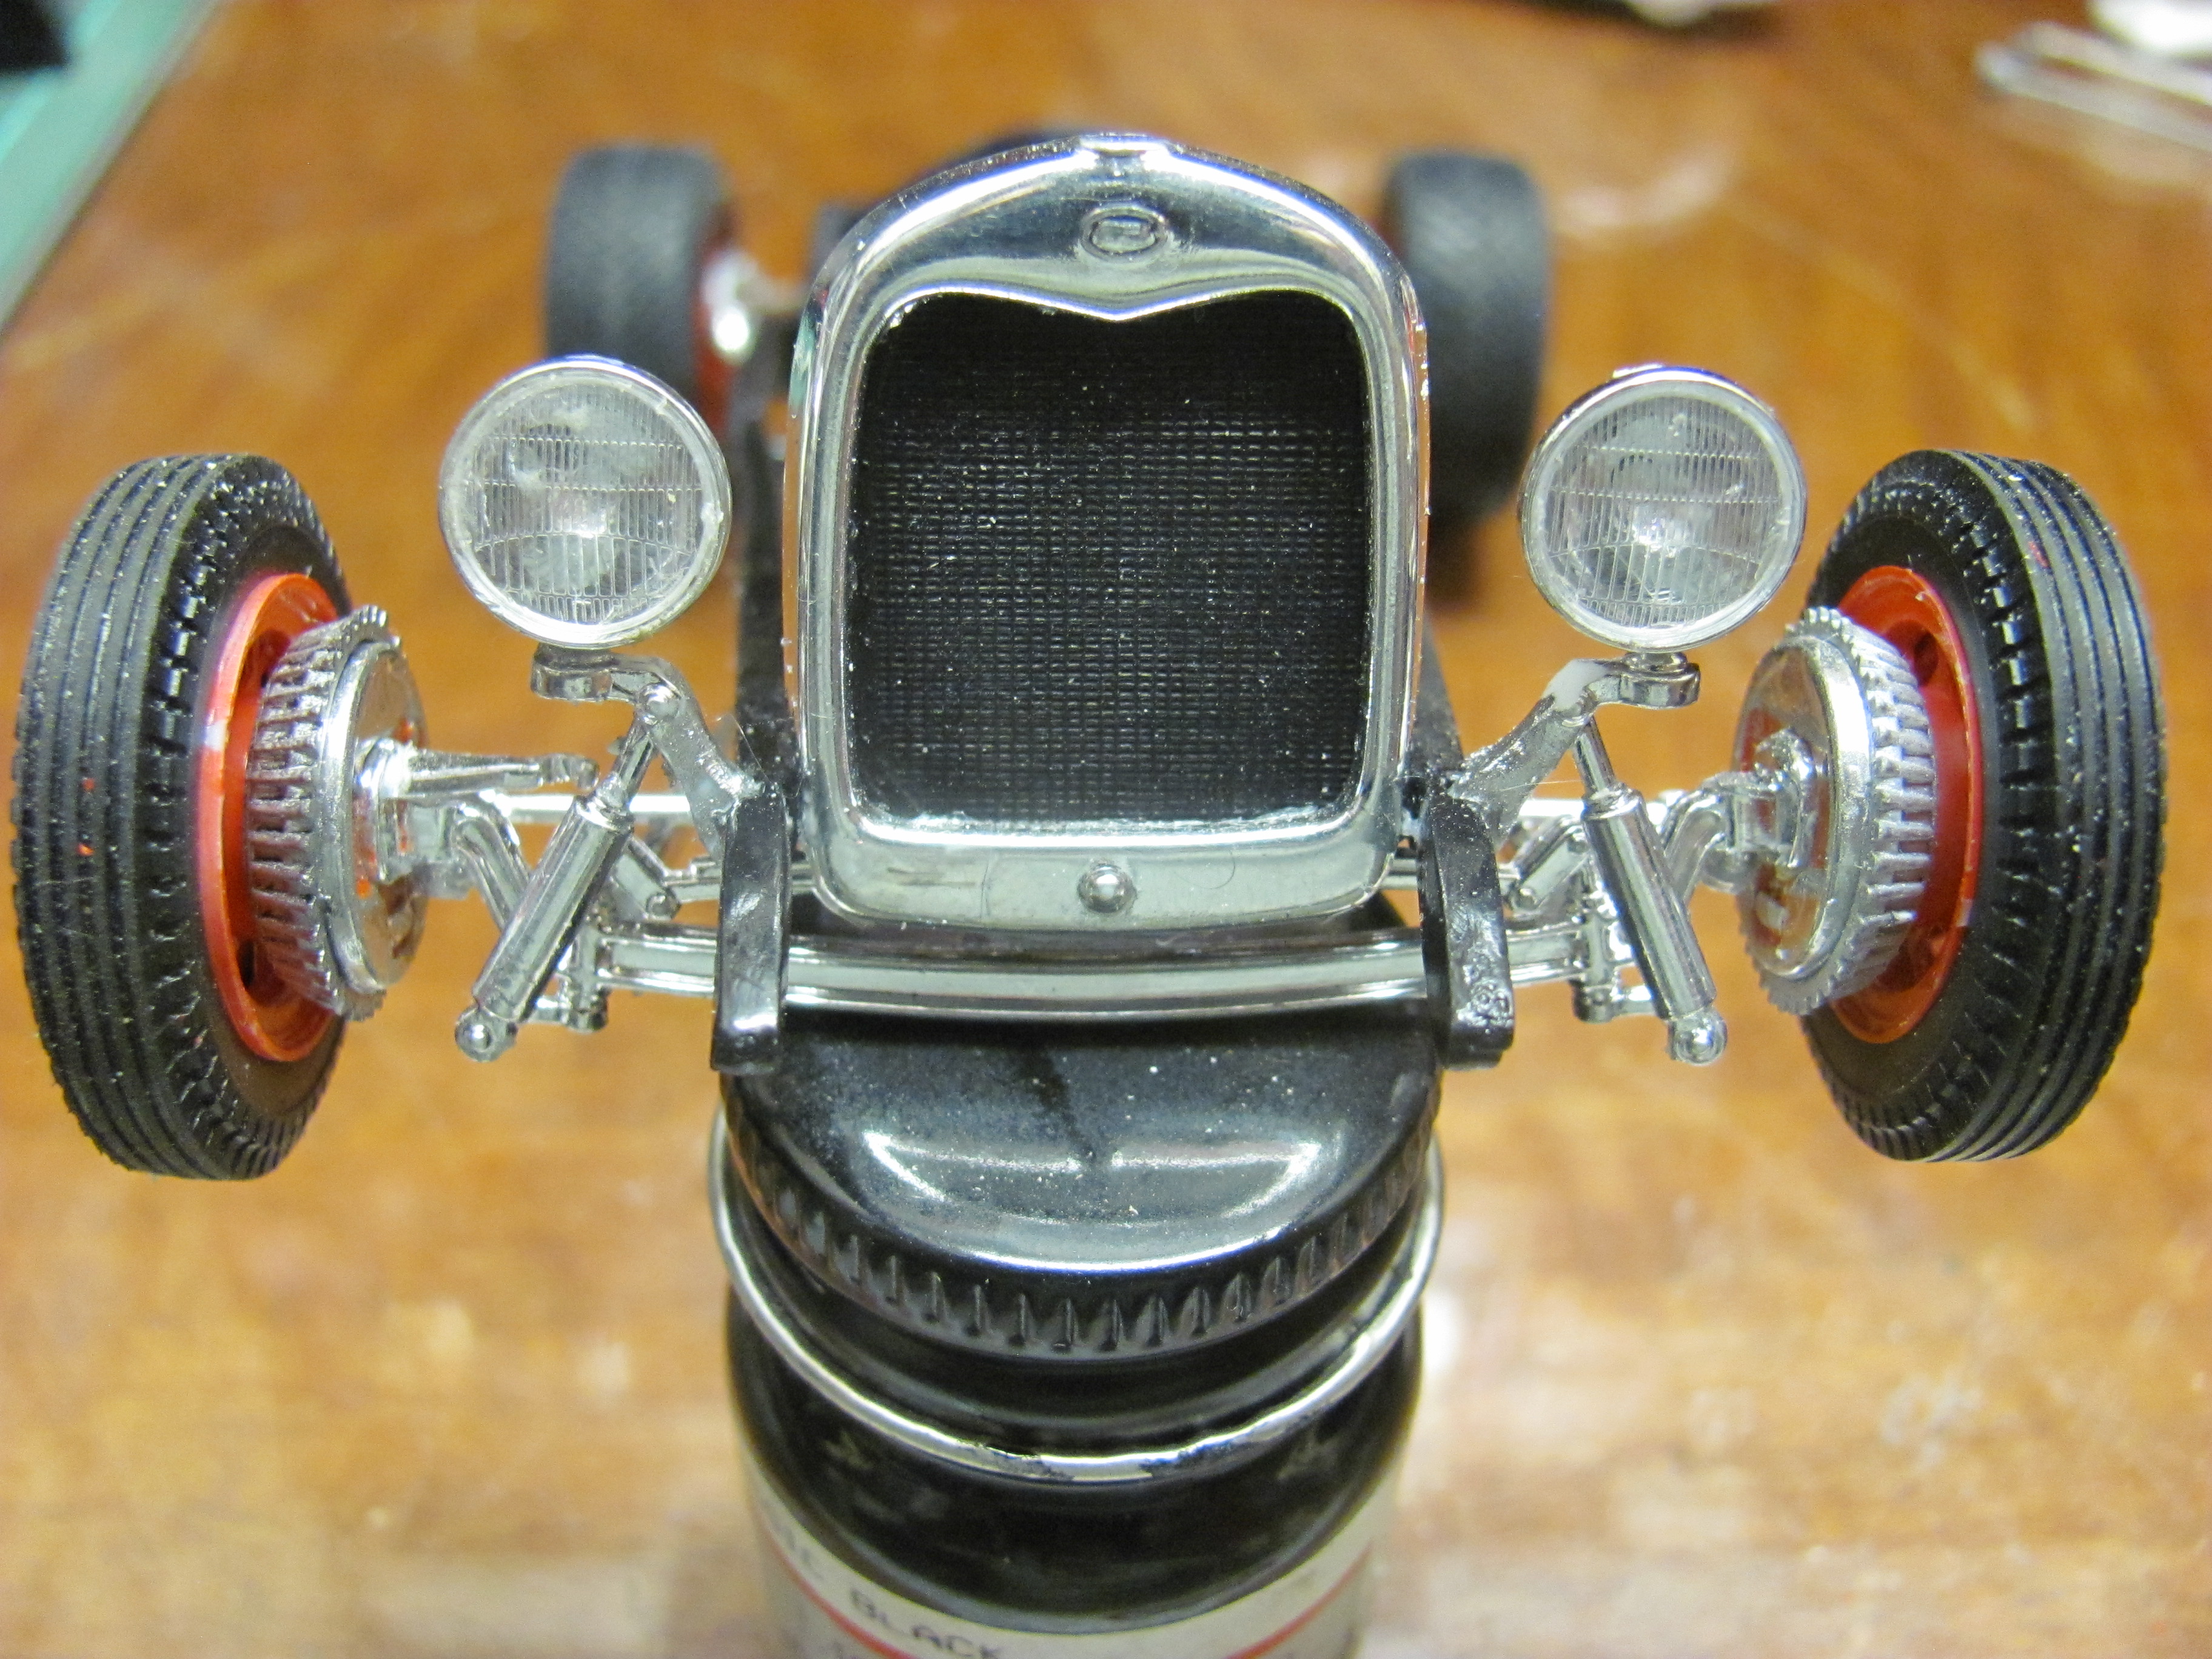
It is basically the stock kit frame with a few significant changes. The rear crossmember from an AMT 29 frame has been used to replace the fabricated crossmember that Revell used. I then used the axle tubes, spring and radius rods from a Revell 31 Model A Tudor kit, with an unknown resin quick change 3rd member. The front engine mounts were replaced with small stubs to accept the engine crossmember from the Revell 32 Tudor flathead that I used in its entirety. Two tubular braces were added to the stock gearbox crossmember. The top of the front spring crossmember was carefully sliced out to allow the spring to sit lower and the front surface of that same crossmember was filed as flat and thin as I dared, otherwise the grill shell was going to sit far too far forward for my liking. Finally, I filed down the rear surface of the AMT grille shell, again to allow the radiator to sit over the axle centreline as closely as possible. To my eye, this is really important otherwise the whole axle/grille/headlight arrangement is going to be compromised. I had plenty of spare AMT grille shells and radiators which gives a much crisper result than trying to paint a perfect black radiator on the Revell one piece grille.
-
I was about 15 When Rod and Custom magazine started featuring the buildup of the Bud Bryan 29 Hiboy. It was one of a number of magazine cars that started the turn away from accessory- festooned resto rods. There was an also equally nostalgic and stunningly detailed hiboy built in a very similar style by Ian McConnell (think I got that right) of Queensland Australia. I got to ride in this car on a balmy spring night in Brisbane many years ago and can still remember the whine of the quick-change as we buzzed along. So while building a model of this car is hardly creative or breaking new ground - I really am building to a well-proven formula here - the release of the Revell Model A hiboy convinced me it was time to tackle this build. I didn't get a lot of build photos of the frame but here is how it ended up.
-
Super Model Car Sunday 8th July 2018 Perth Western Australia
Alan Barton replied to Alan Barton's topic in Contests and Shows
Don't forget, West Aussie modellers, it's on this weekend! -
Finding stuff you forgot
Alan Barton replied to randyc's topic in General Automotive Talk (Trucks and Cars)
I remember that day well Tom. Funny as! I think we both got a few surprises back during our stay in 2013.