Alan Barton
-
Posts
2,128 -
Joined
-
Last visited
Content Type
Profiles
Forums
Events
Gallery
Everything posted by Alan Barton
-
'32 Channeled Nailhead Roadster UPDATED 11/7/18
Alan Barton replied to Dennis Lacy's topic in WIP: Model Cars
Here ya go, Dennis. A long way from finished, like I said, but the juices are flowing to get this done in the New Year. I write a model column for Australian Street Rodding magazine these days and I have a column planned on the variations and potential of the Monogram 32 roadster - still by sentimental favourite hot rod model of all time. And yes, the stance is ALL wrong - this was a very quick mock-up for the photo. Cheers Alan
-
I've never seen this rod before but it looks like a great choice for a model subject. If you are not too hung up on duplicating it exactly, could I respectfully suggest losing the cowl lights ( I can't think of a good reason for them being there!) and swap out the four bars for hairpins so that you can reduce the visual barb of that lower four bar mount. I know four bars are far more sensible on a 1:1 but you won't be driving this anywhere so it would make sense to clean up an otherwise cool design. Cheers Alan
-
'26/'27 turtle deck T hot rod kits requested
Alan Barton replied to Phildaupho's topic in Car Kit News & Reviews
Ace, I couldn't agree more about the undersized Ala Kart hemi and the Buttera smallblock. Until the Revell 32 series arrived, the only one that looked right to me was the Windsor out of the Monogram 55 F100. The Buttera Windsor added a whole new meaning to the term "small-block" and you didn't need a tape measure to see it! Fortunately it looked bearable in a T or A but you could not use it in a larger car with a clear conscience. Same goes for the few V6s out there. I also build dirt tackers and bought quite a few ASA kits - when I could I picked the V6 version because it is such a nice sized engine to use in Anglias or track T's. The few that came out in stock kits had been put in the shrinkerator! Cheers Alan -
This has potential
Alan Barton replied to Richard Bartrop's topic in General Automotive Talk (Trucks and Cars)
Shame about the driver having to have his legs amputated! Just joking, but I drive a stock bodied Model A, I'm about 5'11" and it's kinda like being in economy class in a 737. Still, like me, he probably got used to it. That thing would make a serious impression on the street! Cheers Alan -
'26/'27 turtle deck T hot rod kits requested
Alan Barton replied to Phildaupho's topic in Car Kit News & Reviews
Would this be a different angle? Tool up 26/27 turtledeck roadster and coupe bodies, and then release a pair of kits sitting on the chassis x 2 from the Model A coupe roadster release and another pair sitting on the fenders and running gear from the old Buttera series. That way you get 4 spinoffs straight out of the gates! Cheers Alan -
'32 Channeled Nailhead Roadster UPDATED 11/7/18
Alan Barton replied to Dennis Lacy's topic in WIP: Model Cars
This is looking period perfect and well thought out as always, Dennis. I like shortened grilles but agree that the longer shell is perfect for this era. By some strange coincidence I pulled out a long stalled channelled Monogram 32 project (an old Lil Deuce) last Friday and have started selecting the parts to finish it off as a mid to late 60's Australian channelled roadster - these were flavour of the month back then. I'm using a Mysterion FE motor to represent the 332 or 390 Galaxie motors that an Aussie would have had available. I've used the Lincoln wheels before but never thought about grafting in different centres - I will now! Cheers Alan -
Hot Wheels 1/25 Tribute - "Sweet 16" - Custom Corvette
Alan Barton replied to RestoModGuy's topic in Model Cars
Like everyone else here who collects Hot Wheels as well as building 1/25th, this set is a fantastic crossover between the two genres. I love that you went to the trouble of adding a rollpan to the Vette and changing the shape of the King T to match the Hot Wheels, even if the Hot Wheels isn't the prettiest rendition ever. When you have them all done, please post of a photo of all sixteen laid out together. What an amazing project. Cheers Alan -
Such a sweet ride! I am rapt in the glossy blue paint. I built mine (AMT body with Modelhaus hood) in a similar style and painted in Testor's Guards Red one shot acrylic. I like it a lot but, wow, I just keep going back to that blue paint and thinking of what might have been. These are easily the most under-rated pony cars. I don't understand why you don't see more real ones and more model ones. Congratulations on a beautiful job. Cheers Alan
-
Thanks guys. And Bob, you were right on the money. I mocked up the car with Ice T side tanks and a visiting friend said "I could laser cut those from aluminium for you at work." So he did! I then filed and sanded them into a more streamlined shape but finished them with 800 wet and dry but no polish so that I got that fabbed aluminium look rather than chrome. For those that are playing at home, there are at least another six significant donor models in this one. And no, I didn't notice the black rear window glass had slipped out of lace while I was photographing it! Cheers Alan
-
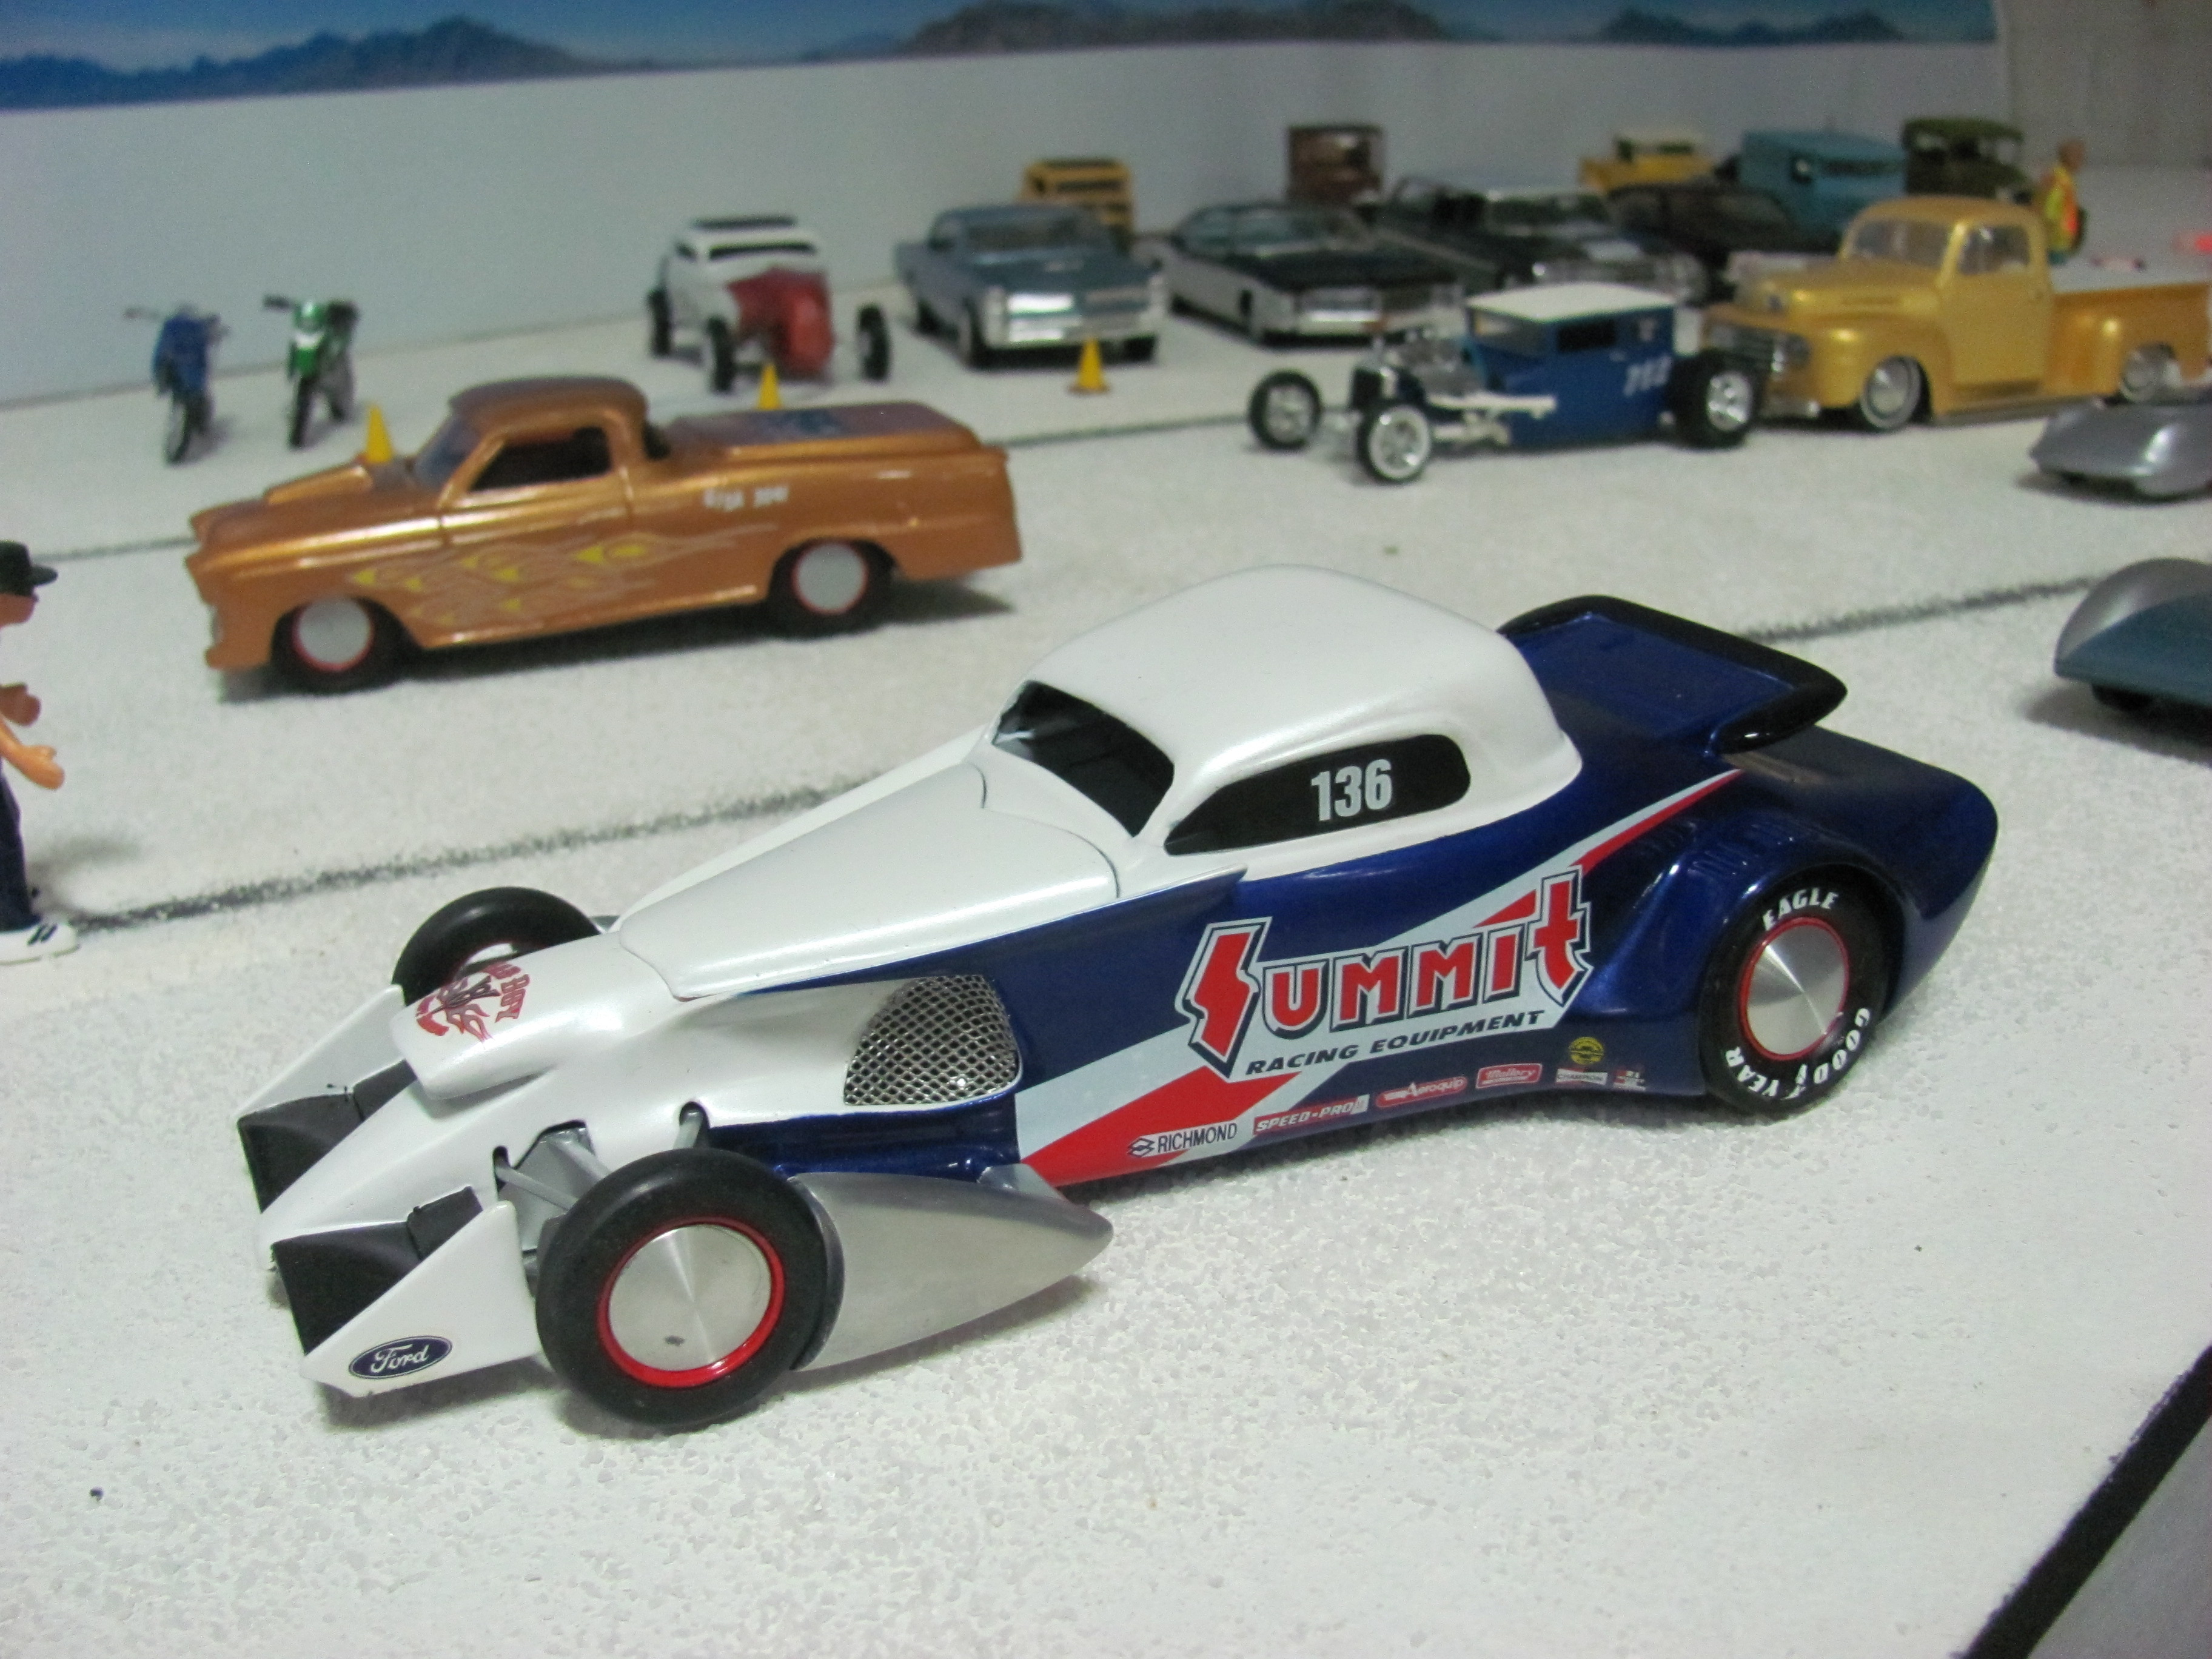
With all the swoopy coupes on here lately I thought I might join in the fray. Believe it or not, this thing spent over thirty years on the bench. It received two front ends, two rear ends and at least three paint jobs before it got on the shelf. It got dropped during one of those paintjobs and cracked the roof off. It travelled with me when I took a year of exchange teaching in Alberta Canada and it even got on the primer table at the 1997 NNL West and the LAIRS show in 2010 which means parts of it have crossed the Pacific Ocean from Canada or the USA to the west coast of Australia or back no less than five times!. It was made entirely from either glue bombed parts or leftover parts that others didn't want. I call it Spoiled Rotten because it has at least six aerodynamic aids by my count, and as a Bonneville contender it probably shouldn't have any! It is strictly a curbside and I didn't dare tackle scribing door lines on it through all the layers of plastic and Bondo - that could have only ended in tears! It started life as the lower body of an AMT 36 coupe but I want to see if you guys can identify the other bits that went into it. Some are obvious while others are a bit obscure, .It is a pure fantasy build but if it could race anywhere, Bonneville (or Lake Gairdner here in Australia) would be the place! Let me know what you think, good or bad.
-
I don't have a problem with late model large diameter wheels, especially these ones, but I thought the early style mags and whitewalls /slicks worked better with the aggressive chop. Just my two cents. Have you thought about a Greer Black Prudhomme or Tony Nancy style scoop - a pointy sheetmetal style in body colour rather than a polished aluminium style? Might work well with the chop/grille/wheel combo. What amazes me is your vision in seeing something usable in this car. I have the kit myself but with a reasonable stash of AMT 5 windows, Monogram 3 windows and even a tatty pair of Aurora 5 windows, I basically hang onto it for its historical aspect. Who knew you could do something cool with it! I will be very interested to see how this pans out. Cheers Alan
-
K&R Kustoms+Rods 33/36 Coupe -update Halloween
Alan Barton replied to Rocking Rodney Rat's topic in WIP: Model Cars
This looks great Rodney. I think the thing I like the most is that it is neither a 33 or a 36. It's a happy blend of both. No one model overpowers the others. That is quite a skill you have to make this thing look so balanced. The grille is growing on me so I will wait to see the finished article. -
No worries Pat. I've seen your scratchbuilding skills on all your workshop machinery so I don't think you will have any problems mastering this conversion, no matter what you start with. Just for reference, here's what the Oldsmobile front clip looks like. Cheers Alan
-
I would be definitely looking at the Beverley Hillbillies kit for more parts and inspiration. It was supposedly based on about a 24 or 25 Oldsmobile if I recall and the grille and fender shapes are close to what you need for the Dodge - better than the Model T I suspect. I would also be using any Revell or AMT Model A four cylinder to replicate the Dodge powerplant. (The Revell motor from a 29 Pickup or 30 Tudor/Woody/Delivery is far more detailed with more separate parts that you wont have to grind off like you would with the AMT). From your photos the block and head are very similar in shape and detail but you would be up for scratchbuilding or kitbashing a new front cover. The Olds also comes with very detailed wooden spoke wheels that may be better than the Model items in your coupe kit. Finally, the Olds cowl might graft onto the T coupe body to get more swoop into it and to match the Olds hood. Finally, I would look at the Revell 27 T Tudor, Delivery or touring kits for the rear fenders as they have a very similar cross section to the Oldsmobile ones. I agree with your choice of the AMT T coupe - I think if you bulk up the sides and the top of the turtledeck area with sheet styrene you should be able to file it up to match the Dodge contours. Hope that helps - I loved what you did with the frame! Cheers Alan
-
Hey Nick, I know the car you used for inspiration!!! Your model is every bit as tough as the real deal ( and yes folks, it has one of those scoops) but, for shame, you chickened out on the right hand drive dash! That would be the final touch on an awesome replica (yeah, I know it's not a four door but the two door looks cooler anyway!) Fantastic job on replicating the colour, what did you use for that? Cheers Alan
-
K&R Kustoms+Rods 33/36 Coupe -update Halloween
Alan Barton replied to Rocking Rodney Rat's topic in WIP: Model Cars
Just a wild crazy thought about the grille. One I have never used but always wanted to is the custom grille out of the AMT 37 Chevy coupe. It could easily be laid back a little and fitted up to your 36 style leading edge. Bottom could be shortened, reshaped as desired. Like I said, just a thought. Cheers Alan -
Congratulations on your fantastic progress so far, Boban. I am really enjoying your creative use of such a wide variety of materials to produce a very unique model. I like the way you think! And like many others, making those hinges out of crimped earing clamps just blows me away! Cheers Alan
-
K&R Kustoms+Rods 33/36 Coupe -update Halloween
Alan Barton replied to Rocking Rodney Rat's topic in WIP: Model Cars
I love the way you do very non-traditional mods on these fine Fords to produce a very traditional look. I'm not wild about the grille but with the way you have thought everything through so far I suspect the best is yet to come. Cheers Alan -
Thanks Tim and Bernard, I'm not a boat person per se but I think they look great behind hot rods and classics so they make a great accessory. Speed boats are cool! Cheers Alan
-
This is looking terrific Bernard. The decal artwork is very creative and a much more controllable way of managing fadeaway art work. I cant wait to see it all buried in clear. I am currently doing a Hemi Hydro as well, in a surprisingly similar tone of gold but not coarse flake - it is one of the Testor's one step lacquer colours. I planned to run the Hemi but you have me thinking about the FE now. Mind you, I already have an FE and a SOHC in the fleet so the Hemi might stay put after all. Cheers Alan
-
Thank you Alan and Ron. Without a doubt, the masking was the most challenging part. I did the rear deck and left hand side with Bare Metal foil and the right hand side and the lower part of the hull with Tamiya masking tape - I definitely got better results with theTamiya tape and far less cleanup. The shape on the side of the hull is outlined with a groove so cutting the tape is not a drama. The only tricky part is where the spear widens out as it goes towards the rear - the edge is a bit soft here and tricky to cut cleanly. I still have to psych myself up to gluing the windshield frame on - lots of room for error here as the mounting is very vague! I used Tamiya Pure White and Testors Fabric red from the spray can and Tamiya Dark Red airbrushed on the hull to reduce paint build-up on the masking. I can definitely see lght metallic blue working on this colour scheme! Cheers Alan
-
This is my last shot at posting - either it works or I'm done. I got the boat out for some photos today. Overall I'm fairly happy with it but being a Lindberg and being old it takes a lot of work to get it decent and I would never enter it in a comp - there are just too many issues with fit and finish. I think it would need something like an Aarri 58 Caddy to tow it as the size would overshadow most models. To be honest, it would overshadow a real car in 1:1 but the difference in size never seems as obvious in a 1:1 as it does with a model. Just noticed I still have to run some black paint into the intake scoops up front and paint the port and starboard lights. I also decided to leave the window frames off the starboard side - it gives it more of a hardtop look and less of a ferry boat look! Cheers Alan
-
Sorry everybody - readers ,modellers, moderators, Gregg, everyone. Although I work with computers every day, I hate them. With a passion. They are without doubt the biggest mongrel machines ever put on the face of this planet and you are meant to learn about them solely by osmosis. Tonight I tried to remove all of Photobucket's ransom notes and resubmit my boat photos. Despite me deleting everything, using the trash can icon etc etc etc, I now have multiple photos in every post. I am not going to continue wrecking this forum so I think this is where I just give up. I had new photos of the Coronet Toronado to put up but I think I will forget about this and just stick to modelling in the real word, not the cyberworld, and show my mates my work here in Perth. It is a shame as I have enjoyed it here but I simply cannot put up with the frustration of trying to post photos successfully and then end up looking like a complete muppet when I do so. It's all too hard. Cheers Alan
-
Forget fixing the paint - I have to do that now! Nice job! The high gloss really helps keep the grain to scale. Love it! Cheers Alan
-
I started an almost identical project, also about 20 years ago, also inspired by the Belanger car! This one is looking excellent. The thing that really impresses me is the improvements you have made to what is a very basic lump of an Offy. Your injection and plumbing detail has given me inspiration to have another go! With numbers and signwriting this thing is going to be a knockout! Cheers Alan