Alan Barton
-
Posts
2,128 -
Joined
-
Last visited
Content Type
Profiles
Forums
Events
Gallery
Everything posted by Alan Barton
-
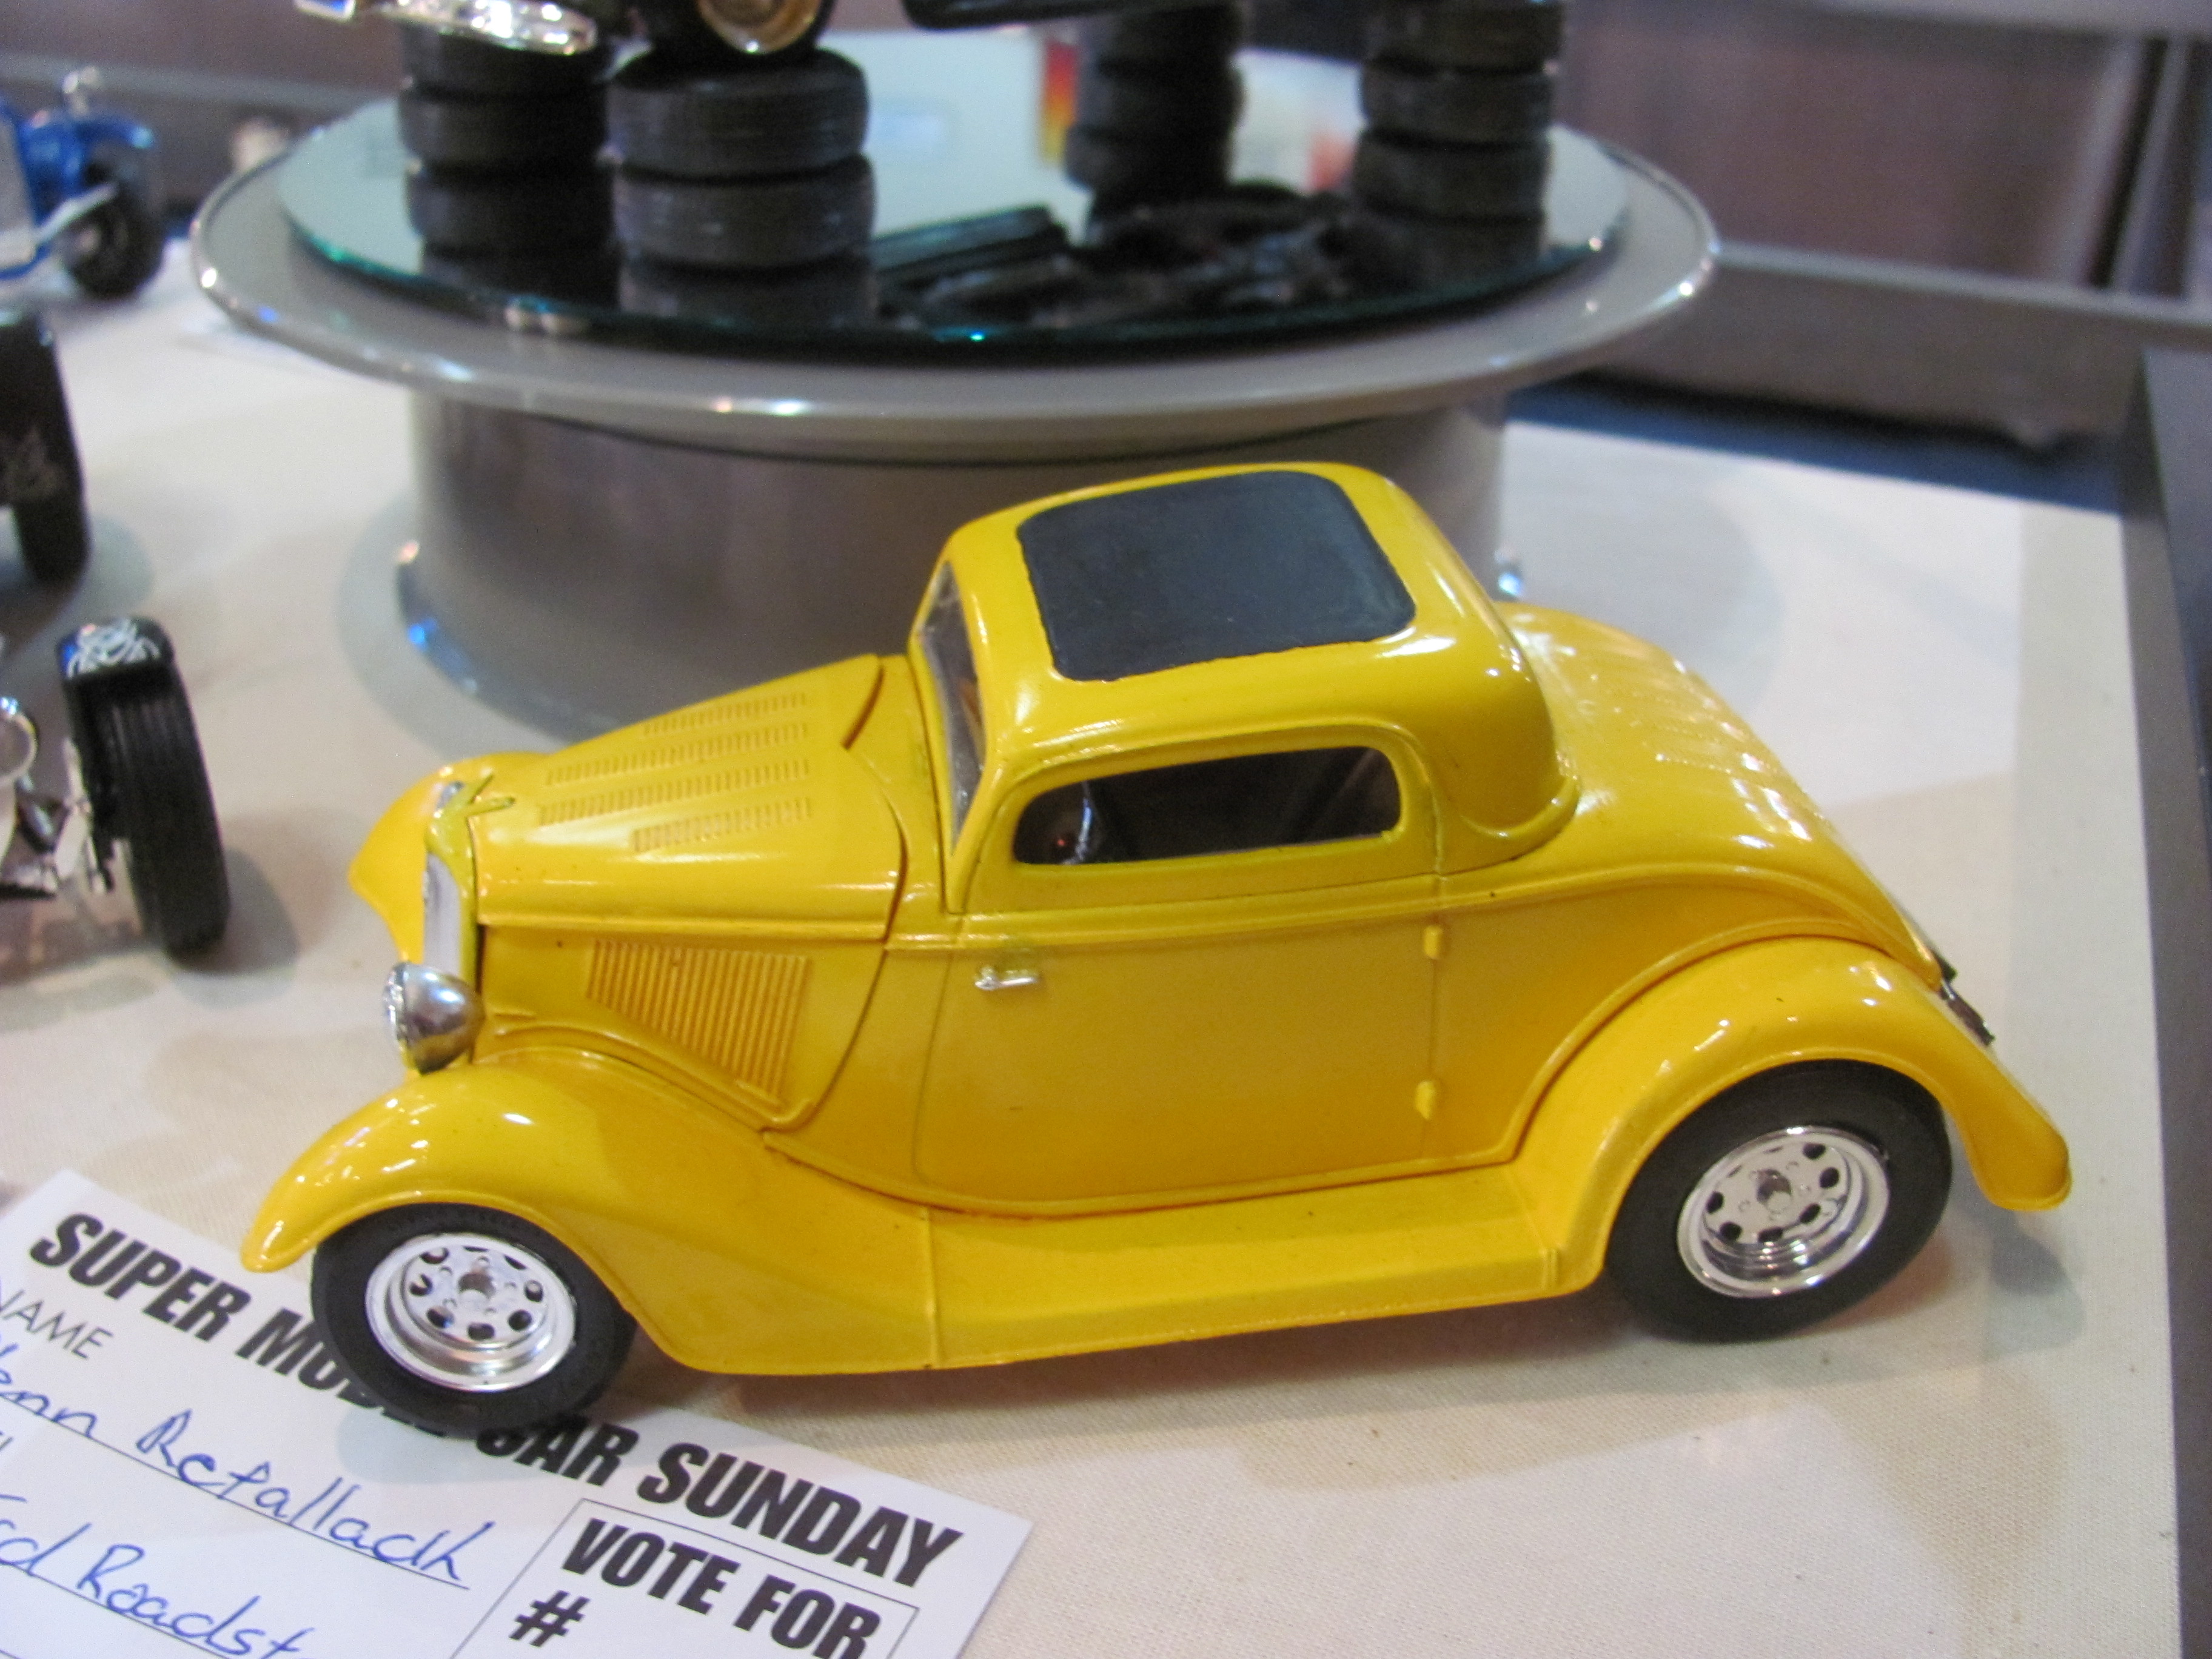
George, the Buttera coupes are very small compared to an AMT 1/25th scale or Monogram 1/24th scale coupe. This is because Revell chose to use a Buttera Model T sedan tubular frame to base the model on. As a result the coupe is considerably scaled down to suit the Model T wheelbase and track measurements. It can build into a really nice looking model but it will never be an accurate rendition of a 34 coupe. The model below was built by an entrant in last year's Super Model Car Sunday event here in Perth. He did an excellent job but as you can see the proportions are not what you would expect - the hood is particularly short as is the grille. Cheers Alan

-
I got the chance to look at one of these at a club meeting recently. Beautiful kit of a not so beautiful car. If I was to rod it, I would seriously consider separating the front fenders from the body and sliding them forward to be at least level with the grille. It would help get rid of the anteater look. Cheers Ala
-
Aurora's Show Rod kits in 1:32 scale
Alan Barton replied to blunc's topic in General Automotive Talk (Trucks and Cars)
No worries Craig, that is exactly how I felt when I started gathering my collection! I found a bunch at the Toledo Toy Fair back in 1996 while I was living in Canada for the year and then set about finding the rest of them. I have three brothers and as kids we had Snap Draggin, Shiftin Drifter, Scat Cat as well as a bunch of Lindberg and Pyro rods. Hey, they were cheap and often all we could find over here in Western Australia. I still have a Hot Surfer to rebuild from a Hot Dogger (I think), a Ram Rod that has taken extensive restoration owing to the first builder misaligning the body panels and the Chevy pickup to restore from a gluebomb. I have also started a major rebuild on a rough Scat Cat (I actually had to fabricate an entire missing quarter panel!) which will be a track nosed salt lake roadster, to be towed by the Chevy. Tonight I will see if I can post some photos of my completed Scat Cat, Moody Monster, and the Buick and Tee for Two ( the one posted above was given to me by a friend over thirty years ago - after building my own I returned it to him for nostalgia stake as it was a childhood build of his.) And Mike Cassidy, I'm a bit busy with some other projects at the moment but when I get the chance I will flick through my Car Crafts and see if I can find the articles detailing the cars for you. If you have any other questions about Aurora rods, be sure to ask. Michael Smith, yes that is a great book and a big help to identifying all the Aurora's - I'm lucky to have an earlier one in my library. Cheers Alan -
Aurora's Show Rod kits in 1:32 scale
Alan Barton replied to blunc's topic in General Automotive Talk (Trucks and Cars)
OK, the Road Raider wasn't the Buick Touring, it was the Model A Phaeton with the half top. If you look at the cover of the Ventures album you will see the same car on there with the band! Here's some photos of my built Auroras. And Mike, you're right about the Forty-Niners. They also make a cool little rod that is a throwback to a simpler time. The channelled 32 roadster they do is very neat. Wanna trade the trailer? In my humble opinion the 1/32 Aurora hot rod models are very underestimated kits. The quality of engineering is very high and the fit is as good as you could ask for. Sure they have multi piece bodies but they fit better than any multi piece body you ever attempted in 1/25th scale. I have made no attempt to modify any of the models you see below. Some were built from virgin plastic while others were restored from glue bombs. When you use modern hobby paints plus Bare metal foil and a few adult modelling skills, they can look quite smart on the shelf. I only wish Molotow pens were available when I built these at least I can use them for the half a dozen or so 1/32 scale kits I still have to build. .Me, I love them!
-
Aurora's Show Rod kits in 1:32 scale
Alan Barton replied to blunc's topic in General Automotive Talk (Trucks and Cars)
Did someone say 1/32 scale Aurora? I am a nut for these things and have managed to amass all the original hot rods - I must admit to not chasing Old Ironsides, The Meat Wagon or the Heavenly Hearse because they did not appeal to my traditional definition of a hot rod. What I can tell you is that pretty much every one of these cars was originally featured in either Car Craft, Hot Rod or Rod and Custom around 1961 - 1964. I thought I had written down all the corresponding articles and magazine issue dates somewhere but can't seem to find it right now. The ones I know for a fact existed in real life are as follows. Shiftin Drifter - right down to the rear bumper and taillights Scat Cat including the Rolls Royce grille shell The Spyder Beatnik Box 32 Skidoo - the early version of Dave Stuckey's Lil Coffin before Darryl Starbird bought it. Wolf Wagon (including the bed rails and rippled exhaust pipes Moody Monster - a very famous drag car, Hugh Tucker's silver 29 Chevy. The only thing missing is the full hood that Tucker usually ran. Tee For Two - the only one that used the original car's name. I modified my version to run a flathead but the real car later replaced the flathead with a Chevy, still with the unique exhausts out the front of the car. If Road Raider was the Buick Touring, then that is in the magazines as well. I hadn't found The Charger before until I followed the link in this thread to another thread that I somehow missed before. I figure if such a high proportion have appeared in magazine articles, maybe they ALL did? Unfortunately my early sixties Car Craft and R&C collection has a few gaps so I can't be sure but it makes sense to me. I believe that Snap Draggin, the 27 T coupe, is the rarest of all of them. I am very fortunate to have a restored one in my collection. It not only had a 390 Ford instead of a 409 Chevy, but also had totally different wheels and tyres to every other model in the series as well as posed front wheels. The grille was a very squared off version of the Ala Kart or Silver Sapphire grille. Not that pretty and I didn't lose a lot of sleep over the fact that mine was missing! With a copyright date molded in the floor for 1965, I believe this was the last Aurora hot rod to be designed. I would love to know if, with the significant engine and wheel changes, if it was to be the start of a new generation of hot rod designs that sadly never continued. I guess we can only speculate now. I will see if I can find some photos of my collection too post here. Cheers -
Just thinking randomly here but in the mid to late sixties, when channeling was very popular on the Aussie rod scene, a lot of cars ran post 34 style front axles, with the spring in front of the axle but still in the stock crossmember. It allowed the car to sit closer to the ground but shortened the wheelbase at the same time. Would that help with the close coupled look you are after, Bernard?
-
Fisher Body Craftsman Guild Models
Alan Barton replied to FASTBACK340's topic in General Automotive Talk (Trucks and Cars)
Just thought you might be interested to know that the Guild contest made it to Australia! When I was ten years old, my parents took me into the R&I Bank headquarters in Barrack Street, Perth. On display in the foyer were glass display cabinets full of Fisher Body Guild contest models. As a ten year old I was blown away. I so badly wanted to enter this but, alas, I was nowhere near "16 to 21 years old". I was aware of this contest having read about it in 1964 or '65 Model Car Science magazines that my cousin had given me. I went home and Dad gave me a block of pine that I started carving away at with a one inch chisel. I seem to recall it looked more like an old sneaker than anything automotive - I wonder if it is still lurking in amongst my Dad's timber stash? One car I remember in the display was a very smooth swoopy two door coupe in a soft light metallic green. It was very believable and could even be compared to some early 21st century Japanese coupes seen on the road today. There was also a black car with red trim and I remember thinking it wasn't very well finished (much like my own models of the time!) . The green one was flawless. I have no idea if these were some of the models that GM had bought from US contestants and was now using as promotional material or if in fact these were built by Australian modellers. Last night, I was searching through a 1966 Australian Hot Rodding Review magazine for some info on early Australian Holden customs. There on the very yellowed pages I found a one page article on this forthcoming contest - closing date was March 1st, 1967. But just like you guys, in all my years of travelling around, doing model shows and hot rod shows, I have never encountered anyone who even remembers this contest, let alone has one of the models. Can any Aussie forum members shed any more light on this? Cheers Alan -
That works for me Dale! The amazing thing is, a 59 Chevy is so outrageous to start with that you can add bubble tops and not change anything else and it works just fine! And, it would keep you nice and warm in Tasmania! Cheers Alan
-
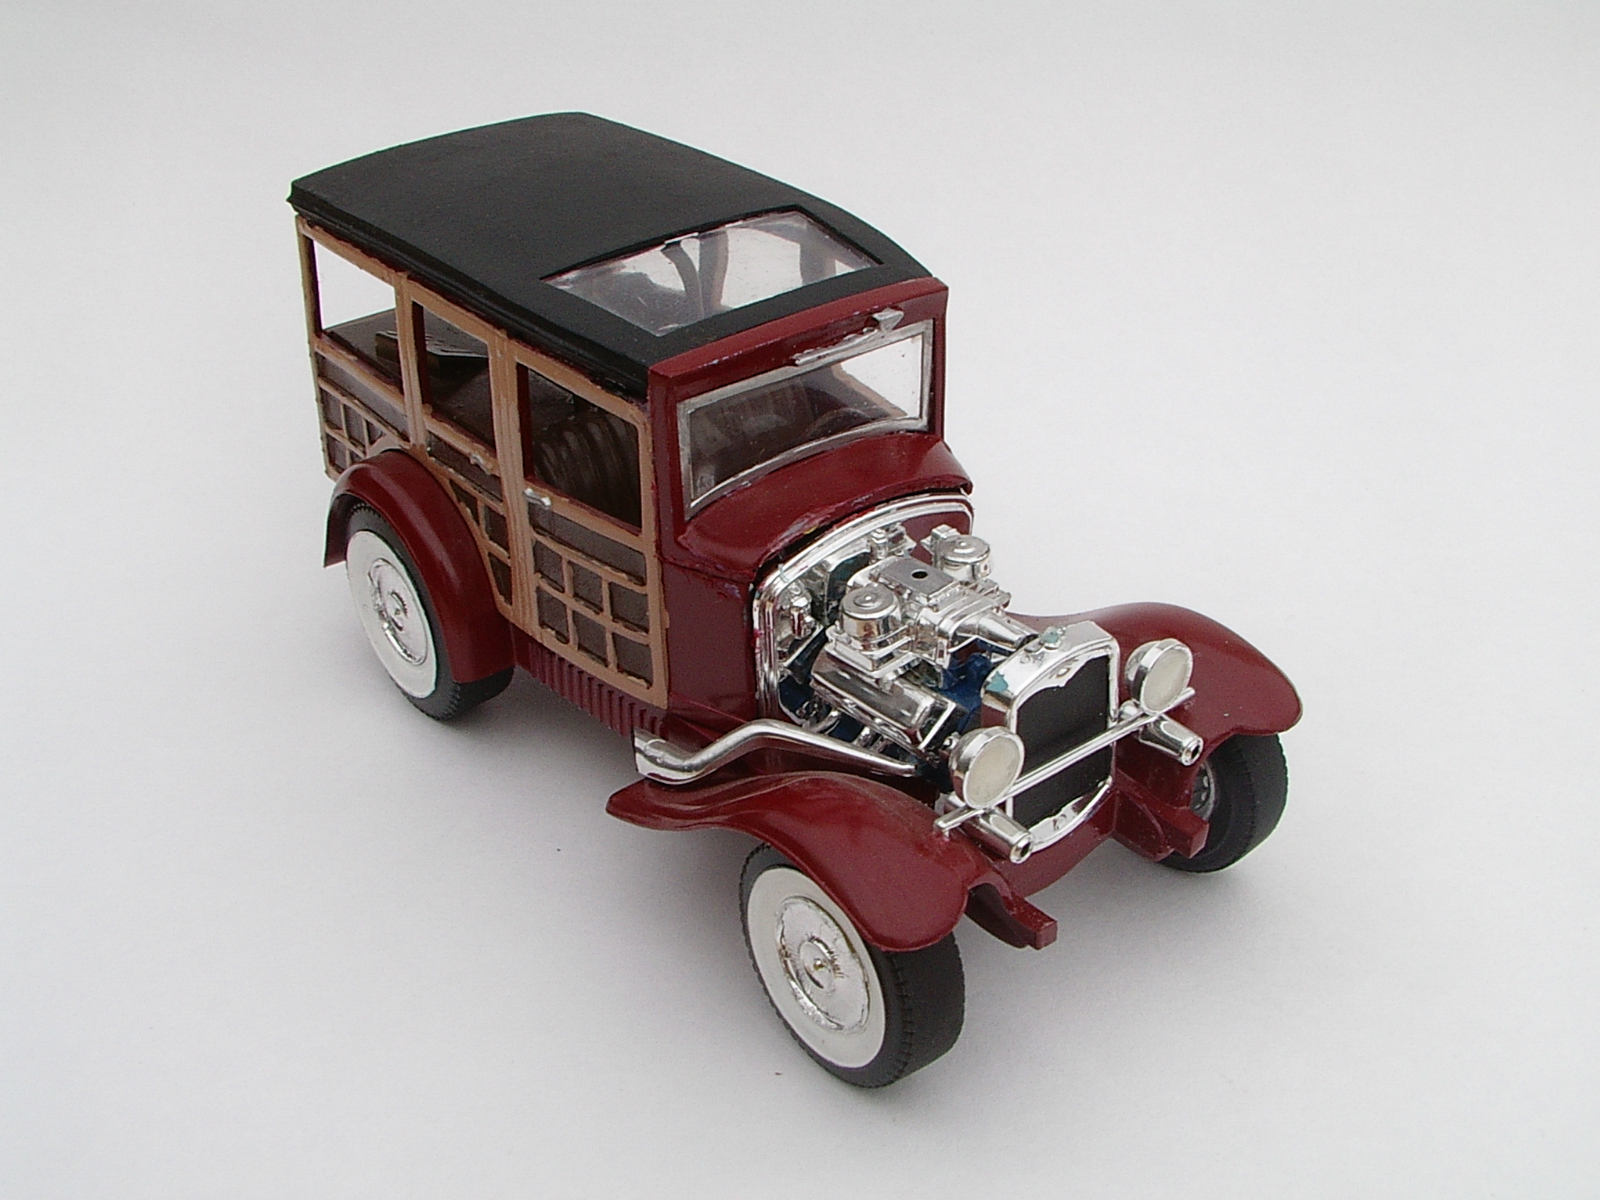
Thanks Dennis, for showing us a beautiful model and a great way of doing it. I don't know that I would have thought of the zig zag cut but it is so obvious when someone else has already done it! Not only do you overcome any proportion issues that you mentioned, you also have a much easier area to prepare for paint, rather than trying to clean up the join between the back edge of the fender and the front edge of the doors - that would be a nightmare! I had already cut the front off the woody for such a project and was also intending to graft a 41 Plymouth front clip onto the remaining woody body. Your great work here has got me thinking about it all over again! Cheers Alan
-
I'm guessing this is a fairground only car. If so, that's fine, it has created attention for the builder, some people will love it, some people will hate it, but basically no harm done. Style aside, the biggest issue from a road safety point of view is that with that highly exaggerated rear spring mounting, if either the main leaf or one of the spring perches breaks (believe me, it happens), that frame is going straight into the ground (or it will do after it grinds off the bottom of the cowl.) Either way there won't be much steering going on. Just be hopeful that it's not your wife and kids in a mini-van that it careers into when that happens. Cheers Alan
-
Rodney, you nailed the proportions and stance on this one and I do like the way the colour scheme flows right throughout the car. Strikes me as a perfect contender for about a 1963 Car Craft feature article! Cheers Alan
-
1955 Ford Panel Truck
Alan Barton replied to Koellefornia Kid's topic in Model Trucks: Pickups, Vans, SUVs, Light Commercial
That would have been very on-trend for the mid nineties, Oliver. Using the frenched Mustang taillights was a great idea. Cheers Alan -
Fair enough! Patrick, this will mean you will get rid of the woody body that you didn't like and also put a much more competent chassis and fender unit under the Tudor body. I am currently massaging an AMT Vicky body to fit the Revell fenders but there are three points to note, one of which I haven't quite resolved yet. 1.The AMT body hangs a bit low at the rear and interferes with the fuel tank. I found the easiest option in the long run was to carefully cut the Revell fuel tank free from the chassis and lower it a couple of millimeters - easier than cutting down the body and having to rebuild the lower swage mark. Haven't tried the MPC body yet. 2.You have to add a wedge shaped piece of plastic to the bottom of the AMT body to get it to sit level on the fender unit. Not hard but definitely time consuming to get nice bodywork. 3. The swage mark on the cowl won't quite line up with the swage on the Revell hood. Still have to come up with a solution there. Maybe a combination of AMT hood top with Revell hood sides - huh, just thought of that and now will have to wait until I get home to see if it will work! Cheers Alan
-
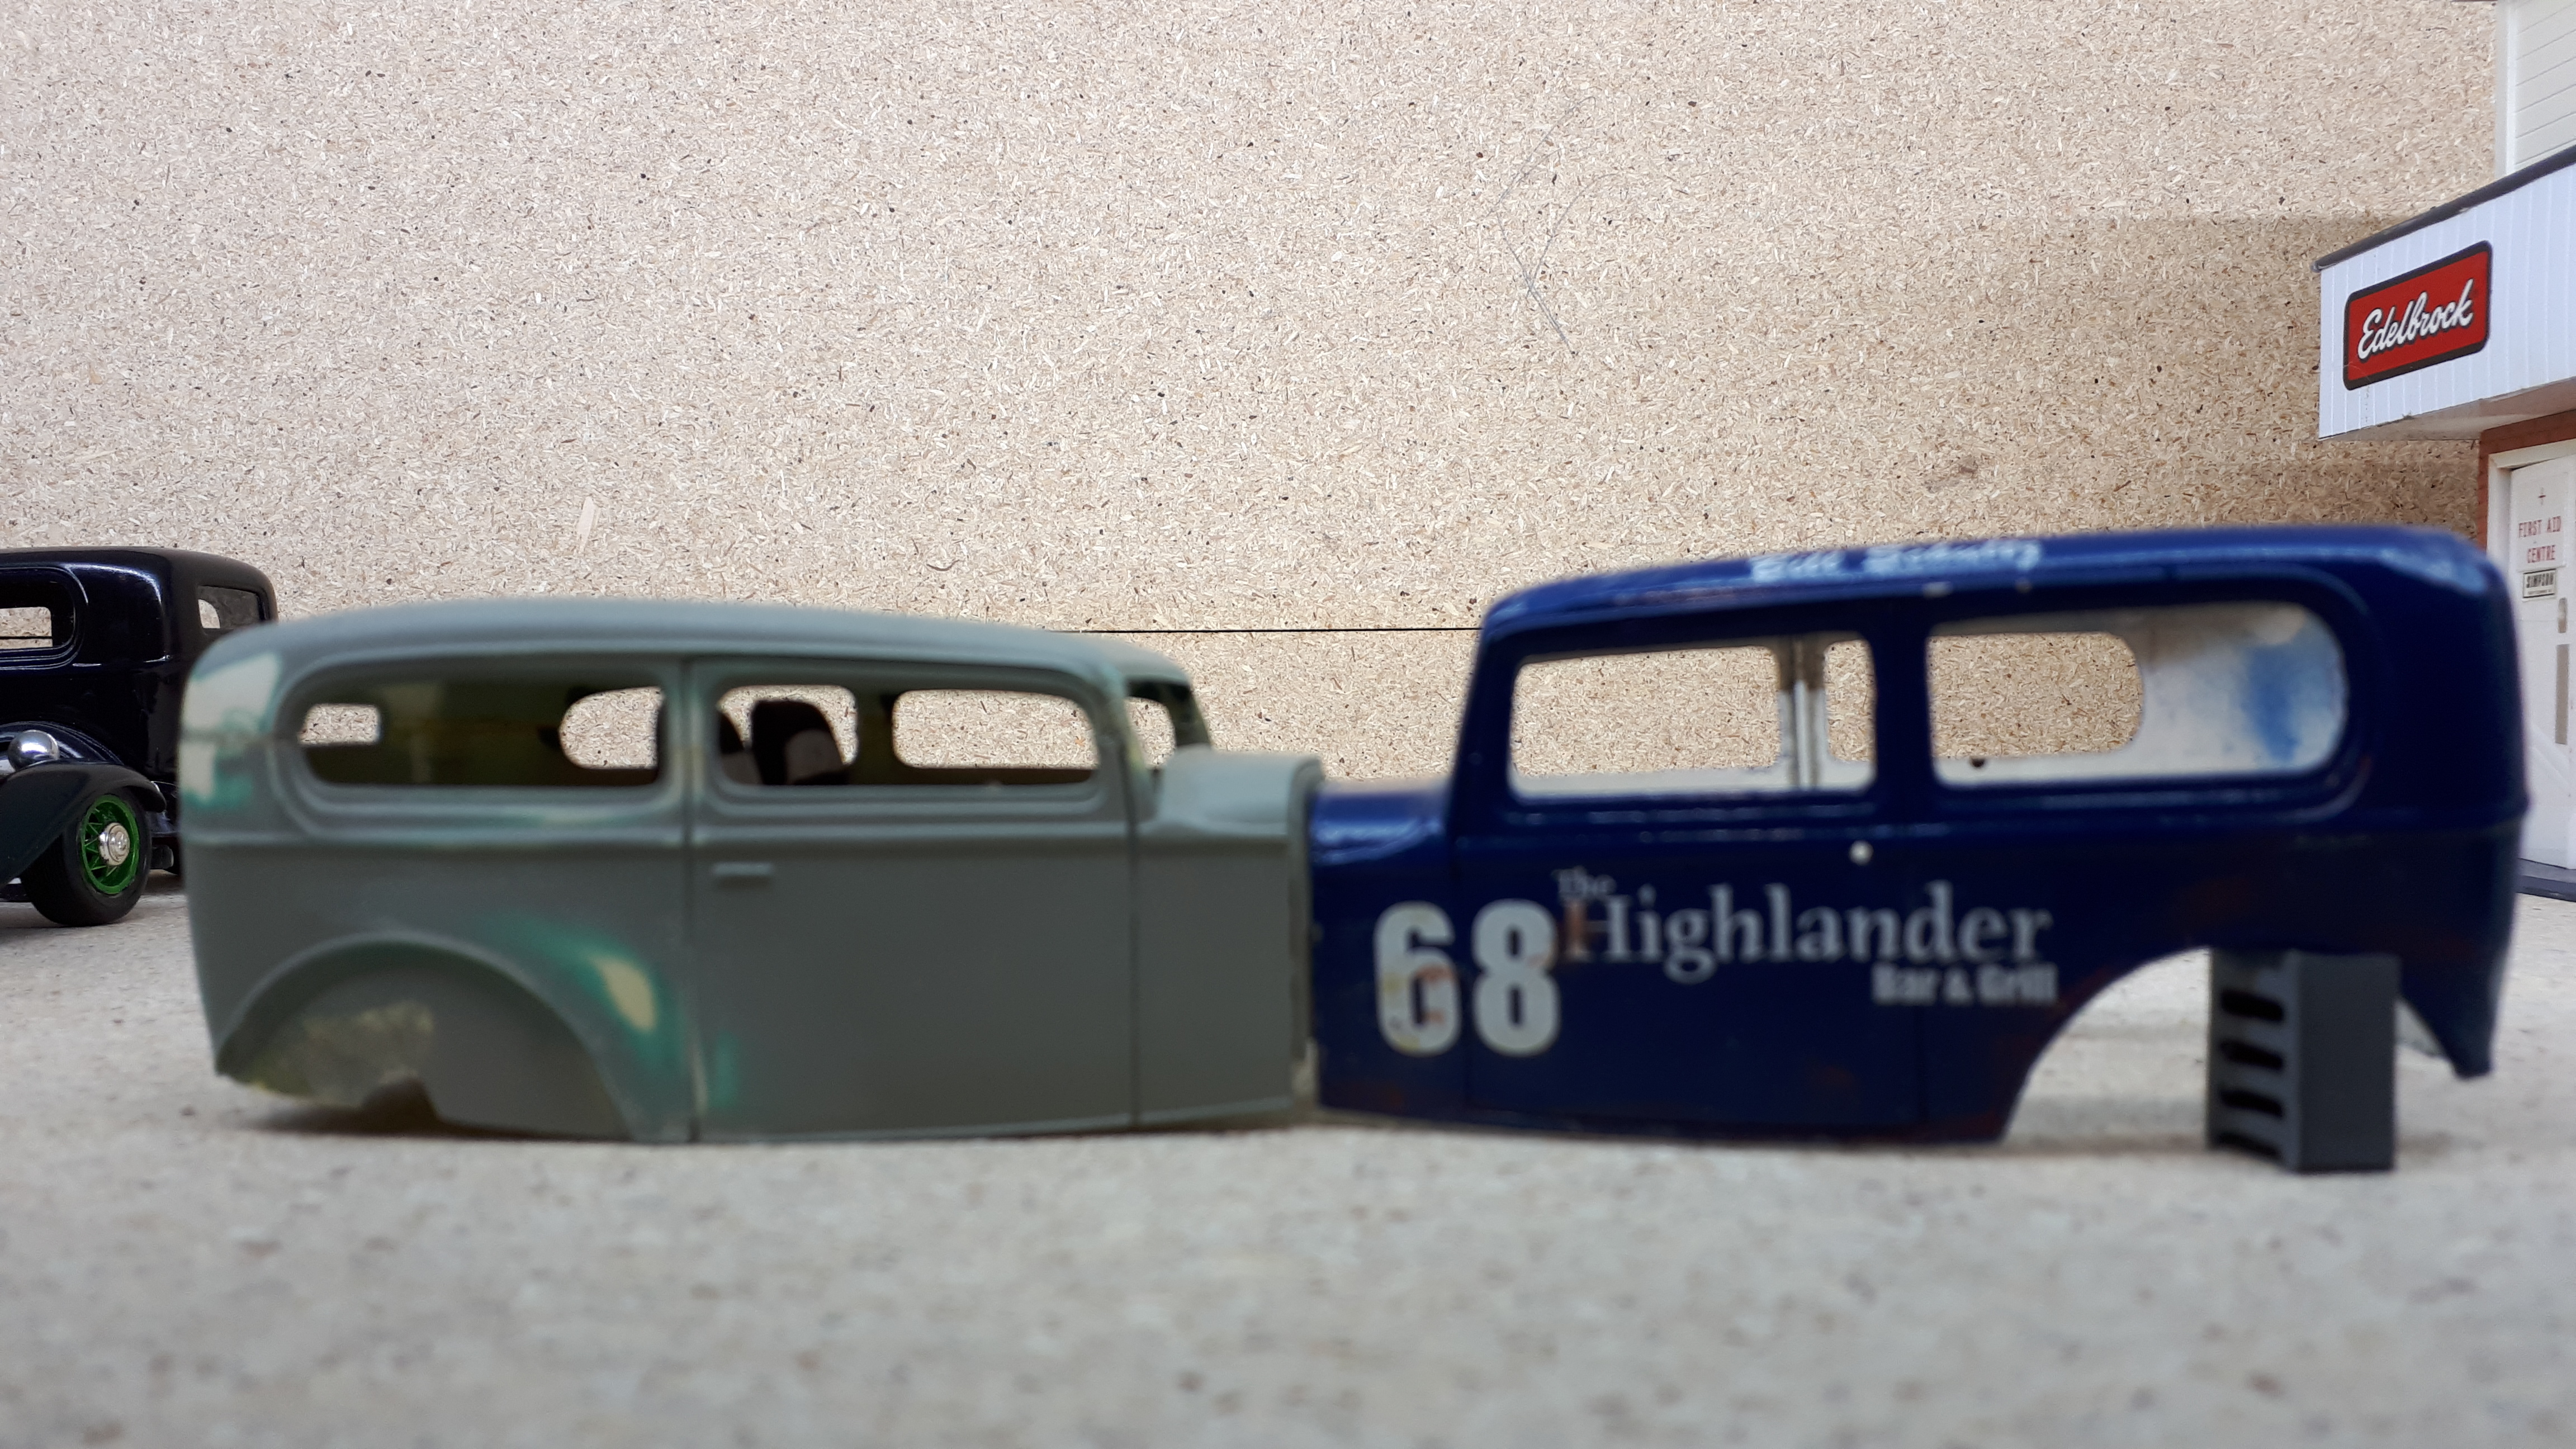
I grabbed some photos on my phone before I headed off for work so that you can see the differences between an MPC Tudor or Delivery and an AMT Tudor. The differences I see are as follows: AMT door handle is in swage lines, MPC door handle is below them on flat section of door MPC Body is taller at firewall and swage mark is higher as well MPC has noticeably taller windows (as per the Delivery shot) Note that even though I chopped the MPC body A LOT it is still not much lower than the AMT at stock height. From the rear, MPC bodies look much flatter sided and more upright. From rear, MPC body has an exaggerated upwards arc to the swage line. On the chopped Tudor ( I started this over thirty years ago!) you can see that I didn't need to lengthen the roof. On the front or "A" pillar, instead of shortening it by the amount of the chop, I cut a vertical notch into the A pillar after the roof was removed. I then dropped the whole roof down inside that notch. There was so much plastic there that I was able to reshape the front pillar to suit without any filler. If anyone has any tips for sanding the window reveals accurately after a top chop I would love to hear them! (Oh yeah, be gentle about my Delivery - it was built over 35 years ago and was my first spray can paint job ever. Rather than rebuild her, I am waiting for the new re-issue, if it ever gets to Australia!) Cheers Alan
-
Thanks everyone. I got sidetracked last night Patrick but will get to it tonight. My MPC Tudor is an unfinished chop top but I also have a built MPC delivery so I will grab a photo of it as well. Might even grab the current Revell body to join the party. I agree Dennis, the right hand side is definitely the tough side. I see the whitewall side representing a 59-62 era build while the blackwall side is much more contemporary - I see a lot of cars being built in Australia with this look, pretty much from the mid eighties onwards. Cheers Alan
-
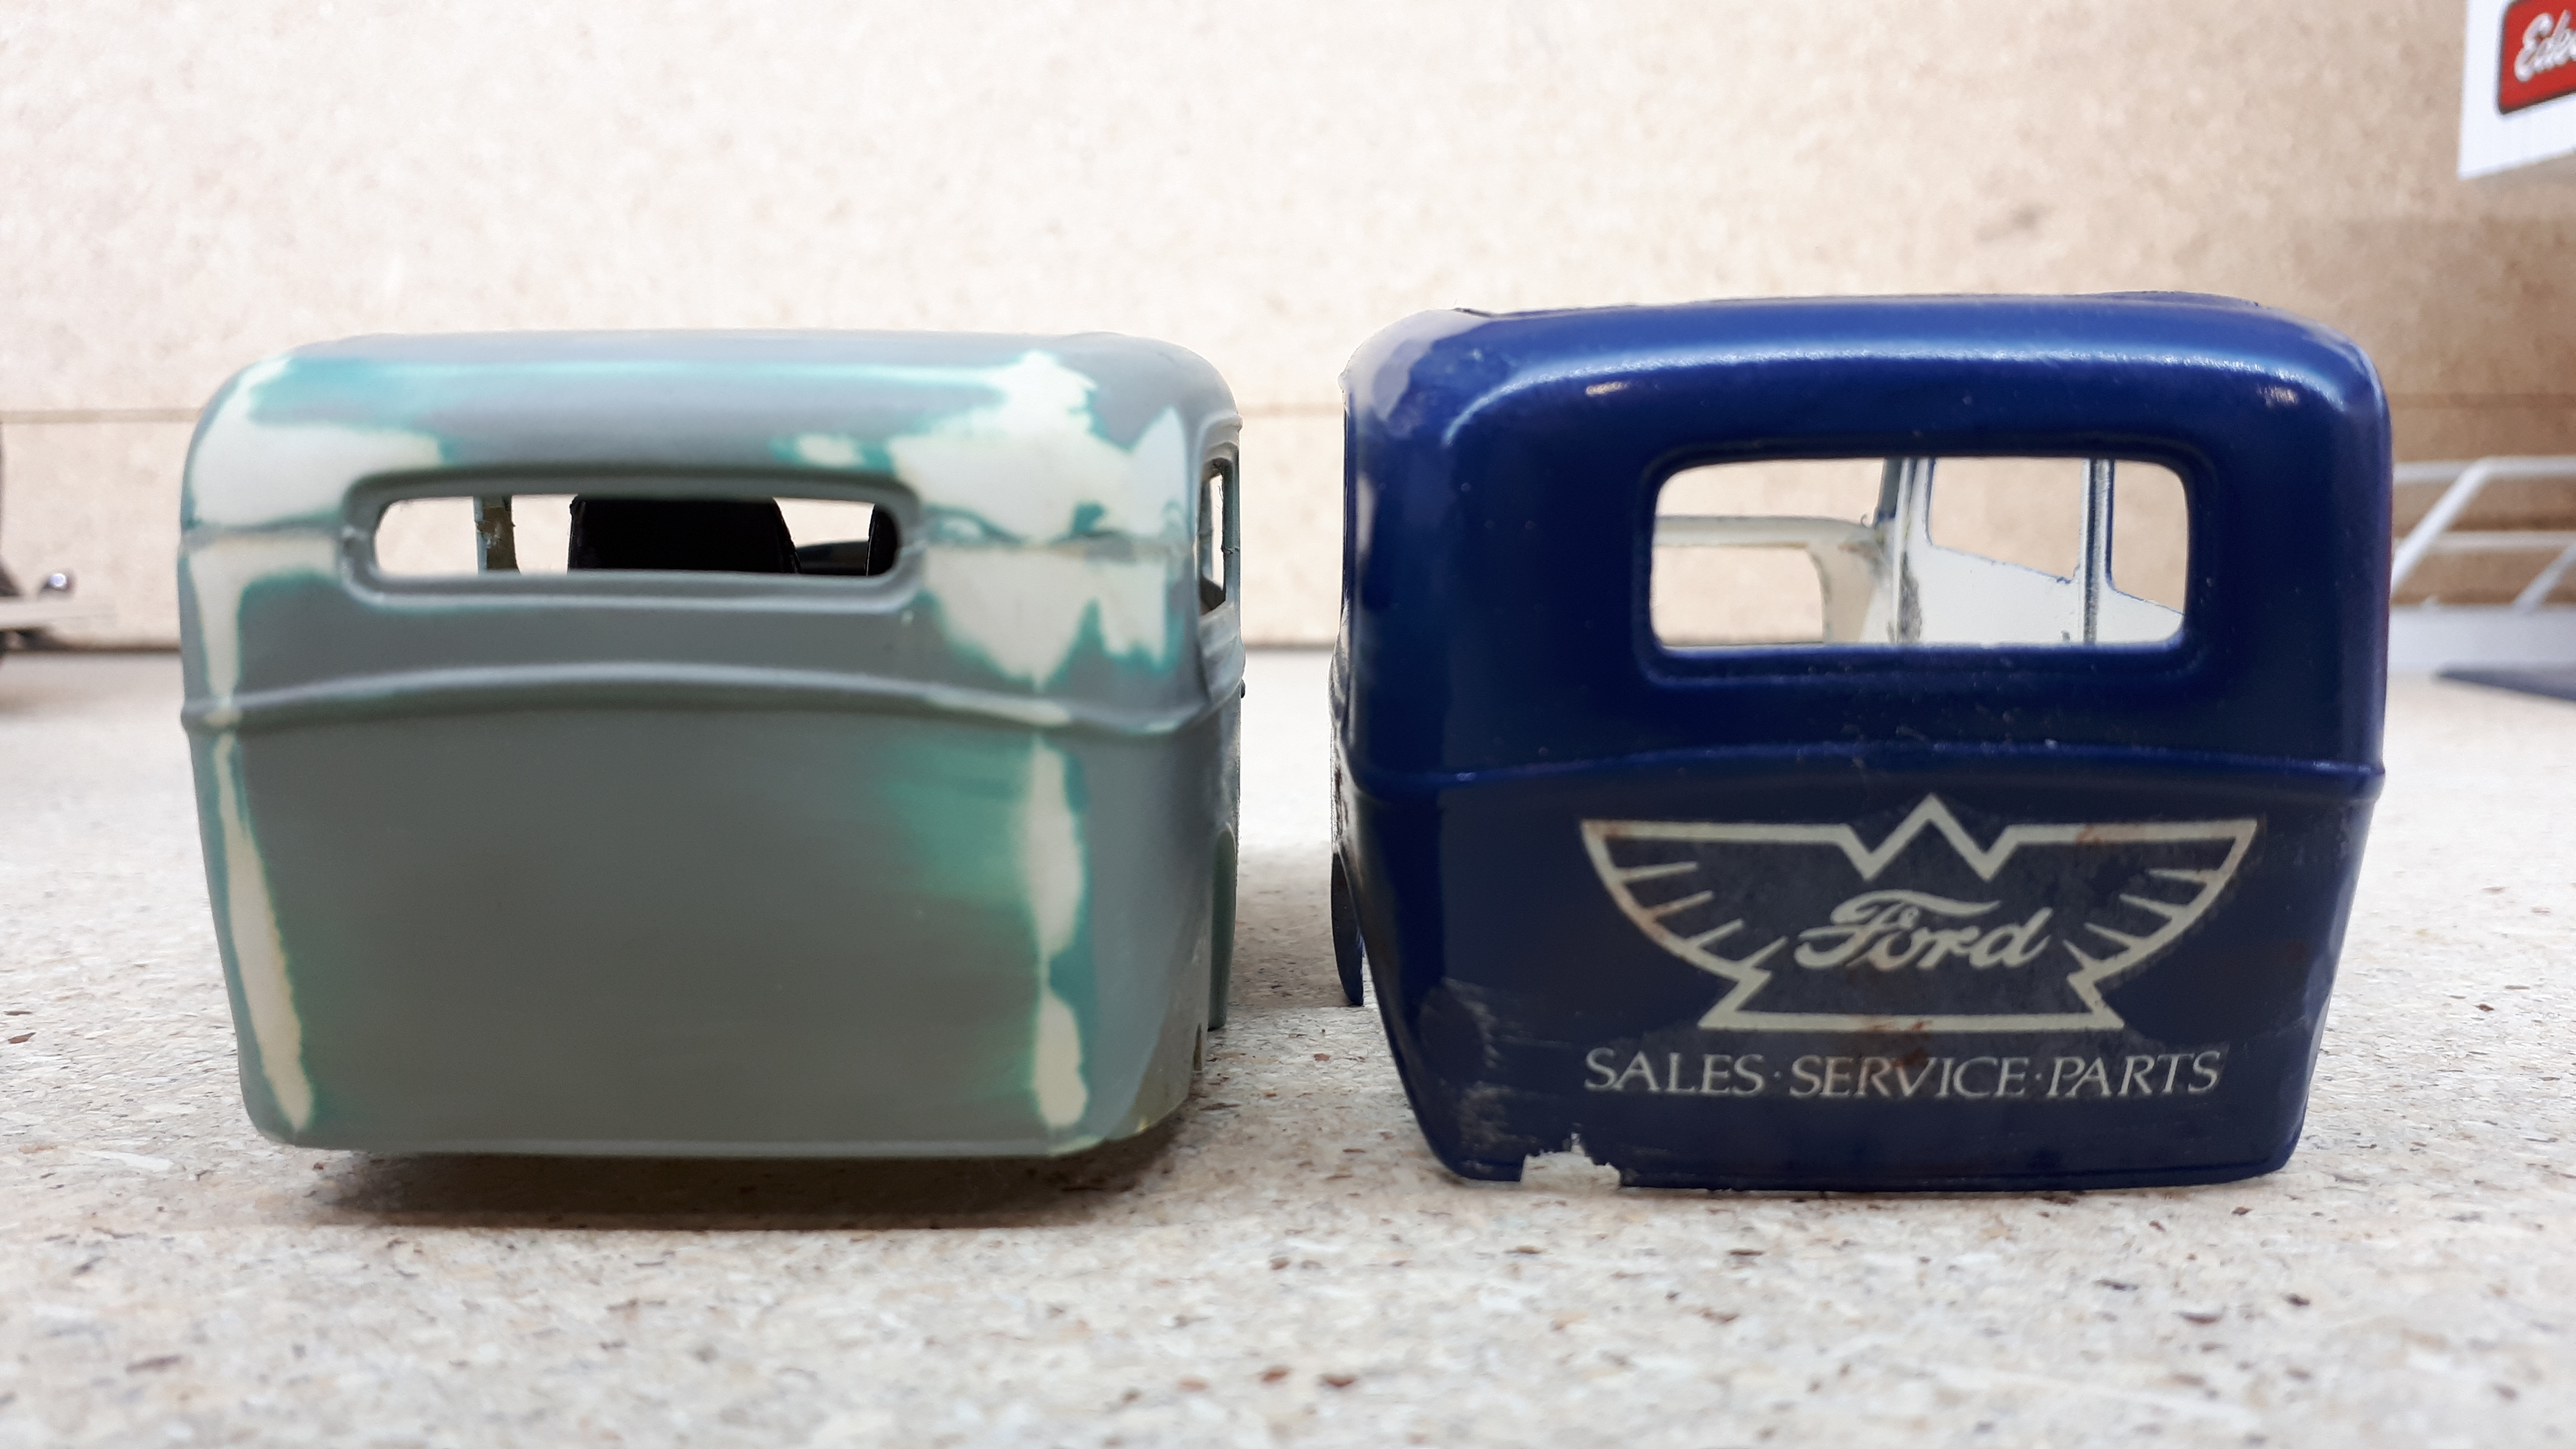
Hi Patrick, they are definitely two very different bodies from two different manufacturers and two different eras. The AMT is from the early sixties and has the characteristic uphill slope along the bottom edge of the body. The MPC item is from the mid seventies and has a more accurate lower edge but to my eye at least looks a smidge too tall and a freckle too narrow. In other words, neither of them is perfect. To tell which ones you've got, check out the lower edge. If I get the chance when I get home form work, I will put up a photo of each one so you can tell. Cheers Alan
-
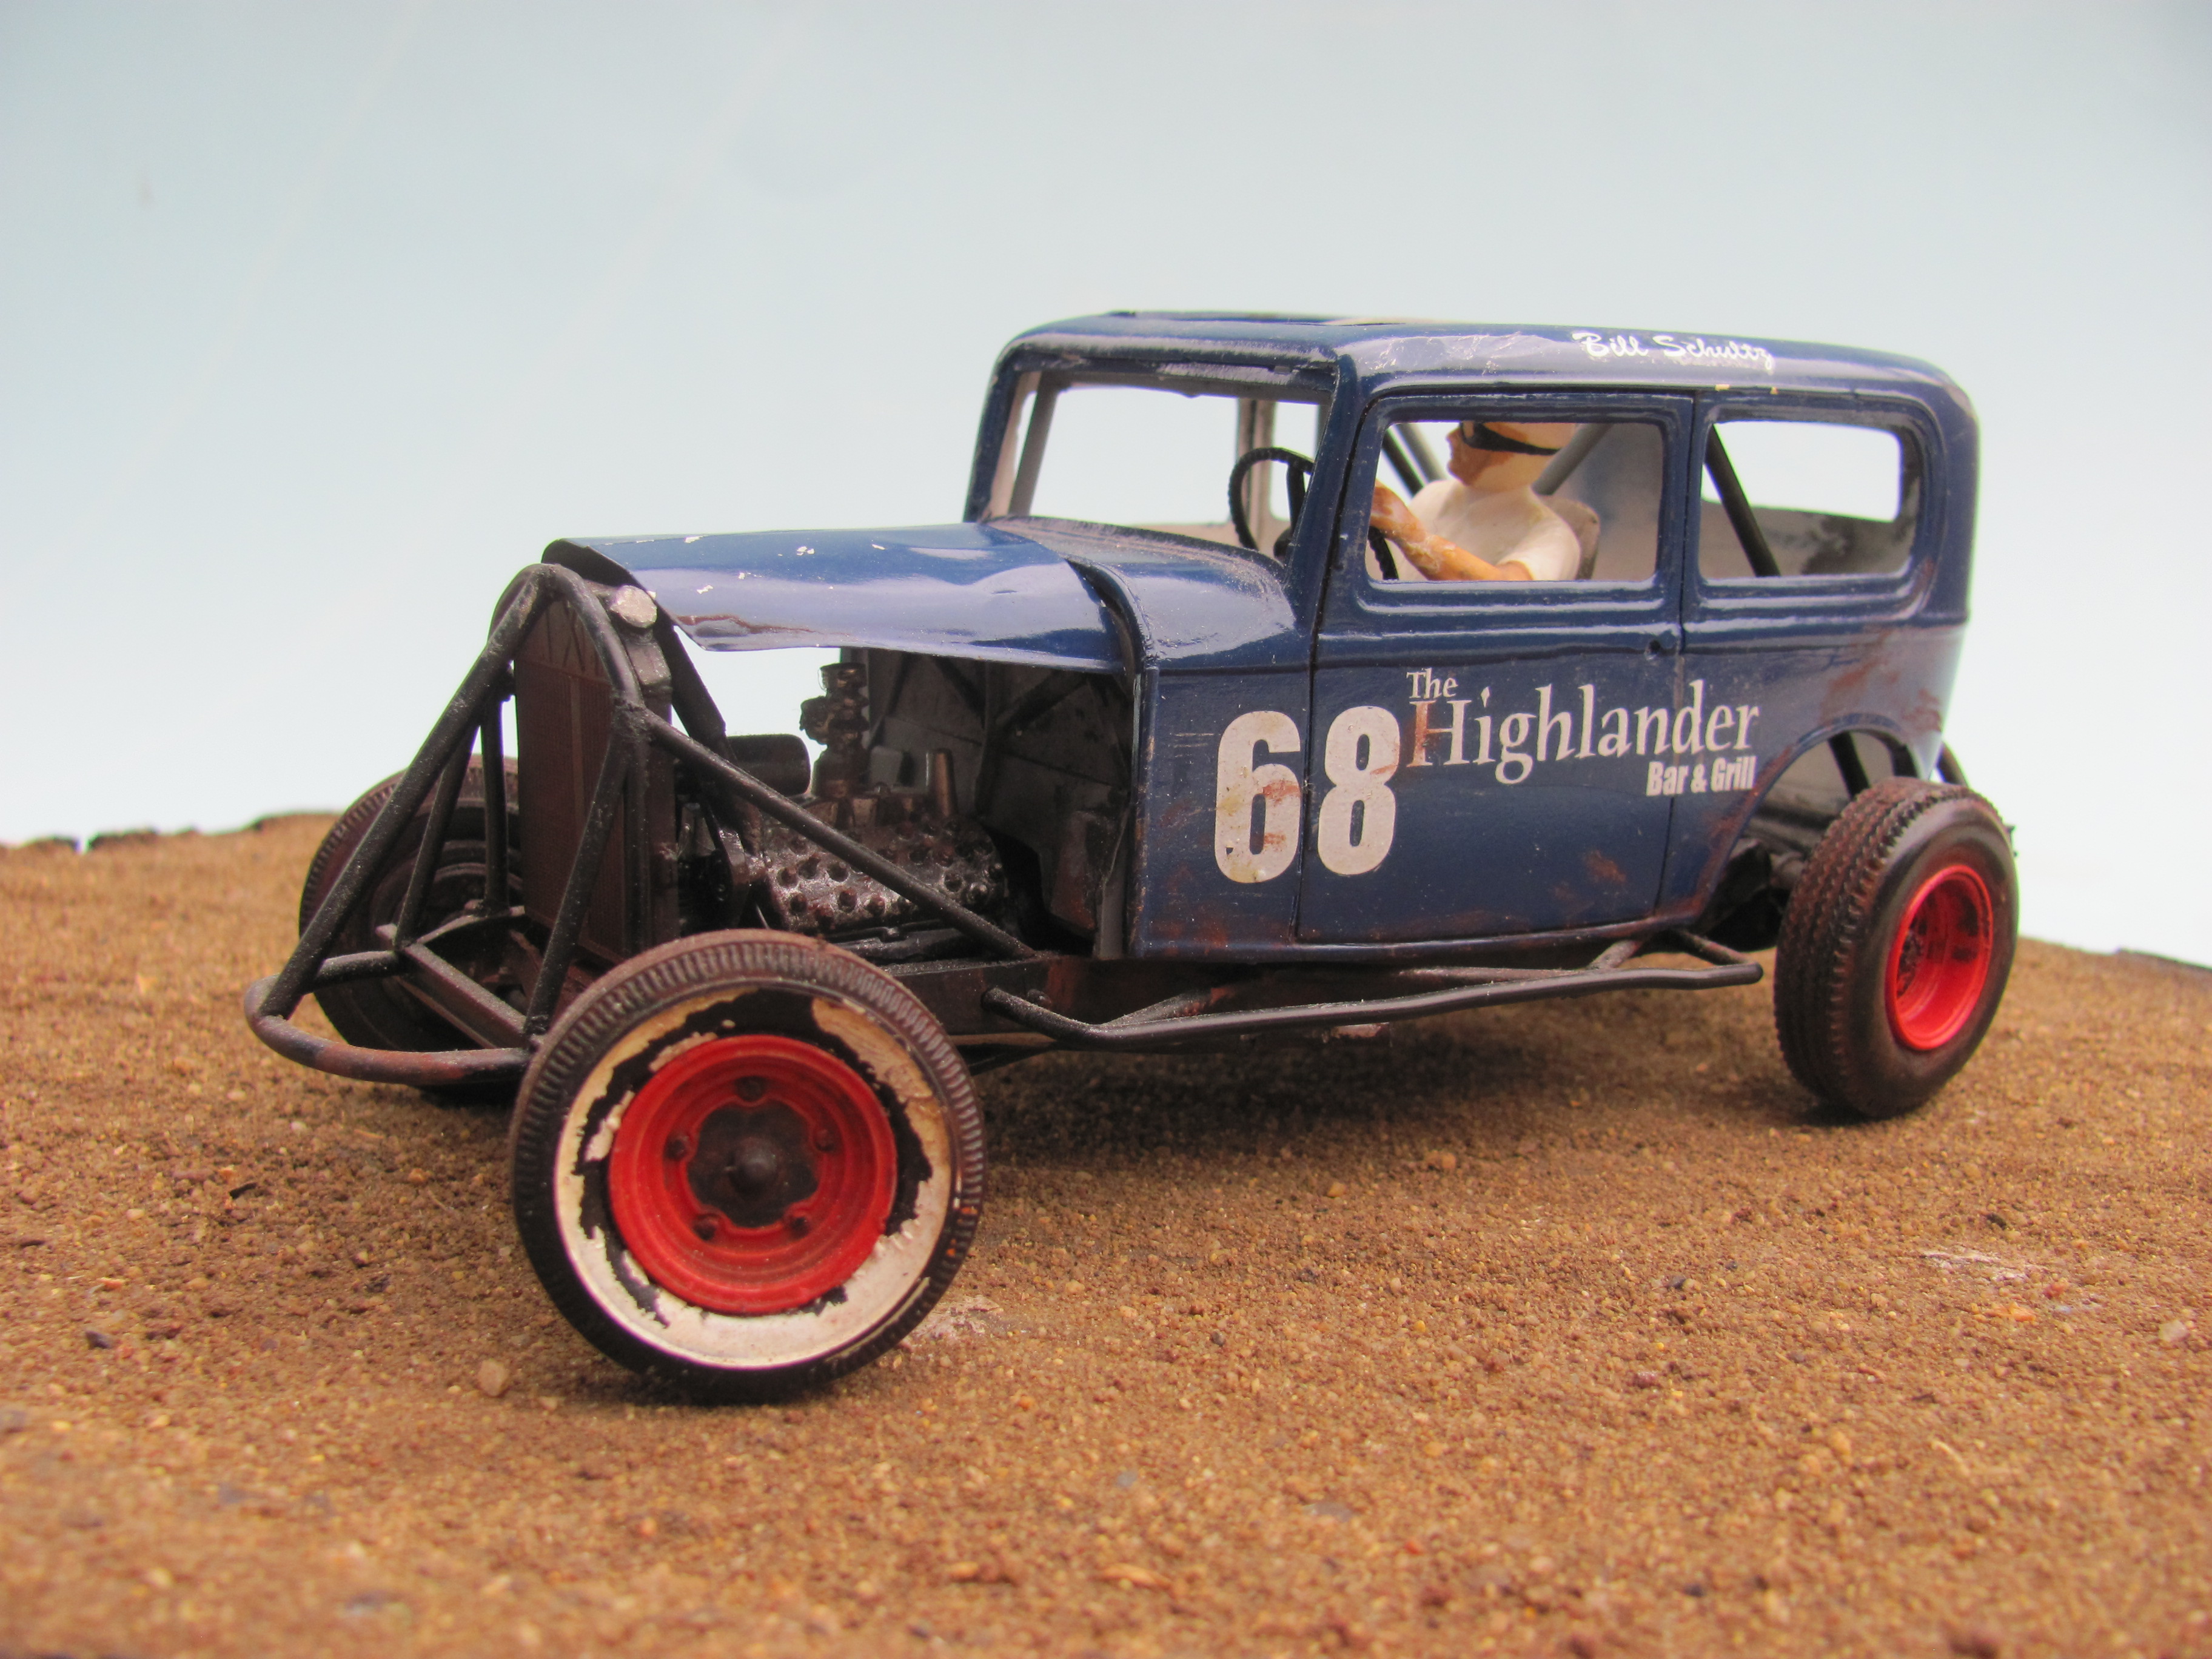
Thanks guys! As explained above, the Tudor is not sectioned and I did no bodywork other than restoration of a mild gluebomb ( it really was in good nick) and opening up the rear wheel arches so that reasonably wide tyres would fit under the fenders. The problem with all the AMT Deuces is the bottom of the body, the sills if you like. For whatever reason, instead of having them roughly parallel (albeit curved) to the running boards, AMT made it sweep upwards towards the firewall. I have found that dark colours go a long way towards hiding this anomaly on a full fendered car but I wouldn't dream of running one as a highboy or a channelled car - they just look awful! I've also included a photo of the Tudor with it's hood fitted. I forgot to mention that I also used a resin copy of the Rat Roaster firewall as the stock AMT one s pretty average in detail! My second body, one I had since I was a young teenager, had suffered many indignities in my school days including having the paint scraped off with a knife. It was never going to be restorable into a factory fresh body so a few years ago I knocked up this old jalopy from the California Jalopy Association days. My early butchery lent itself to the battered appearance of many of these cars. I cut open the roof insert and made a small gutter to replicate the sheet metal of these old bodies. The side rub rails or nerf bars help disguise that awkward sill that I spoke of. It is mostly AMT 32 parts with an AMT 40 Ford radiator and AMT 36 Ford wide five wheels - the rears are slightly wider versions from Fred's Resin Workshop when he was in business. Cheers Alan
-
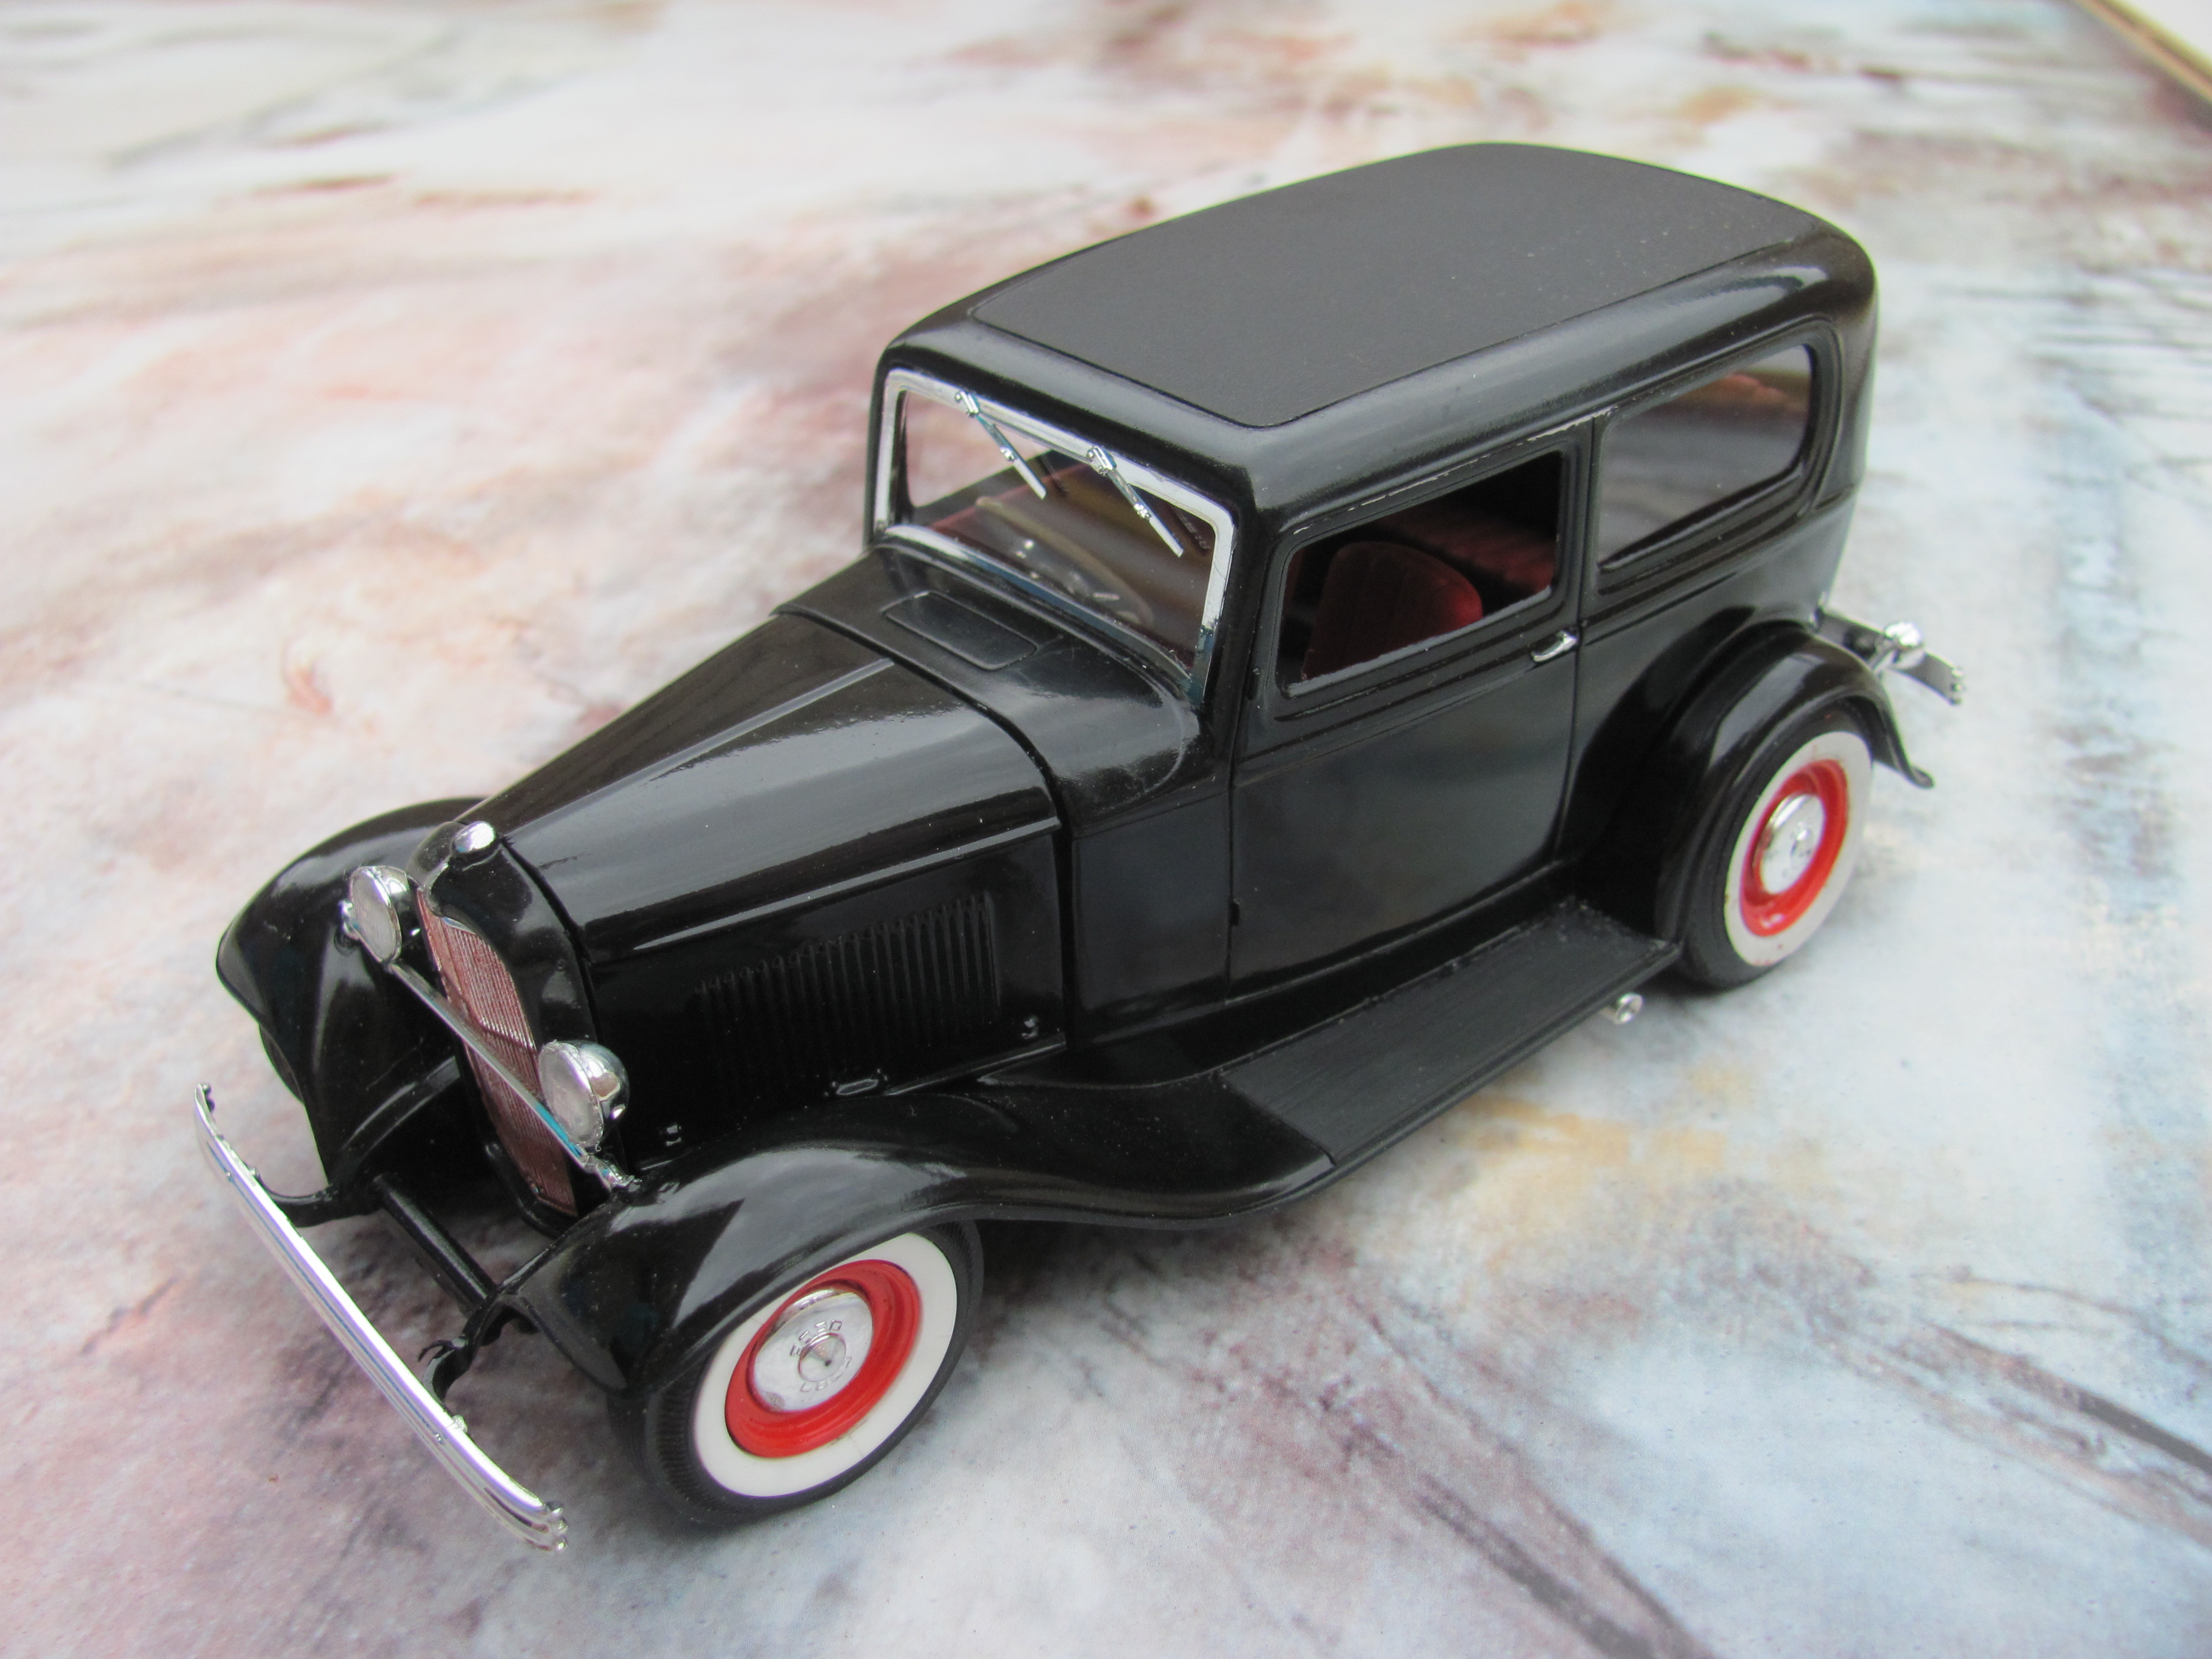
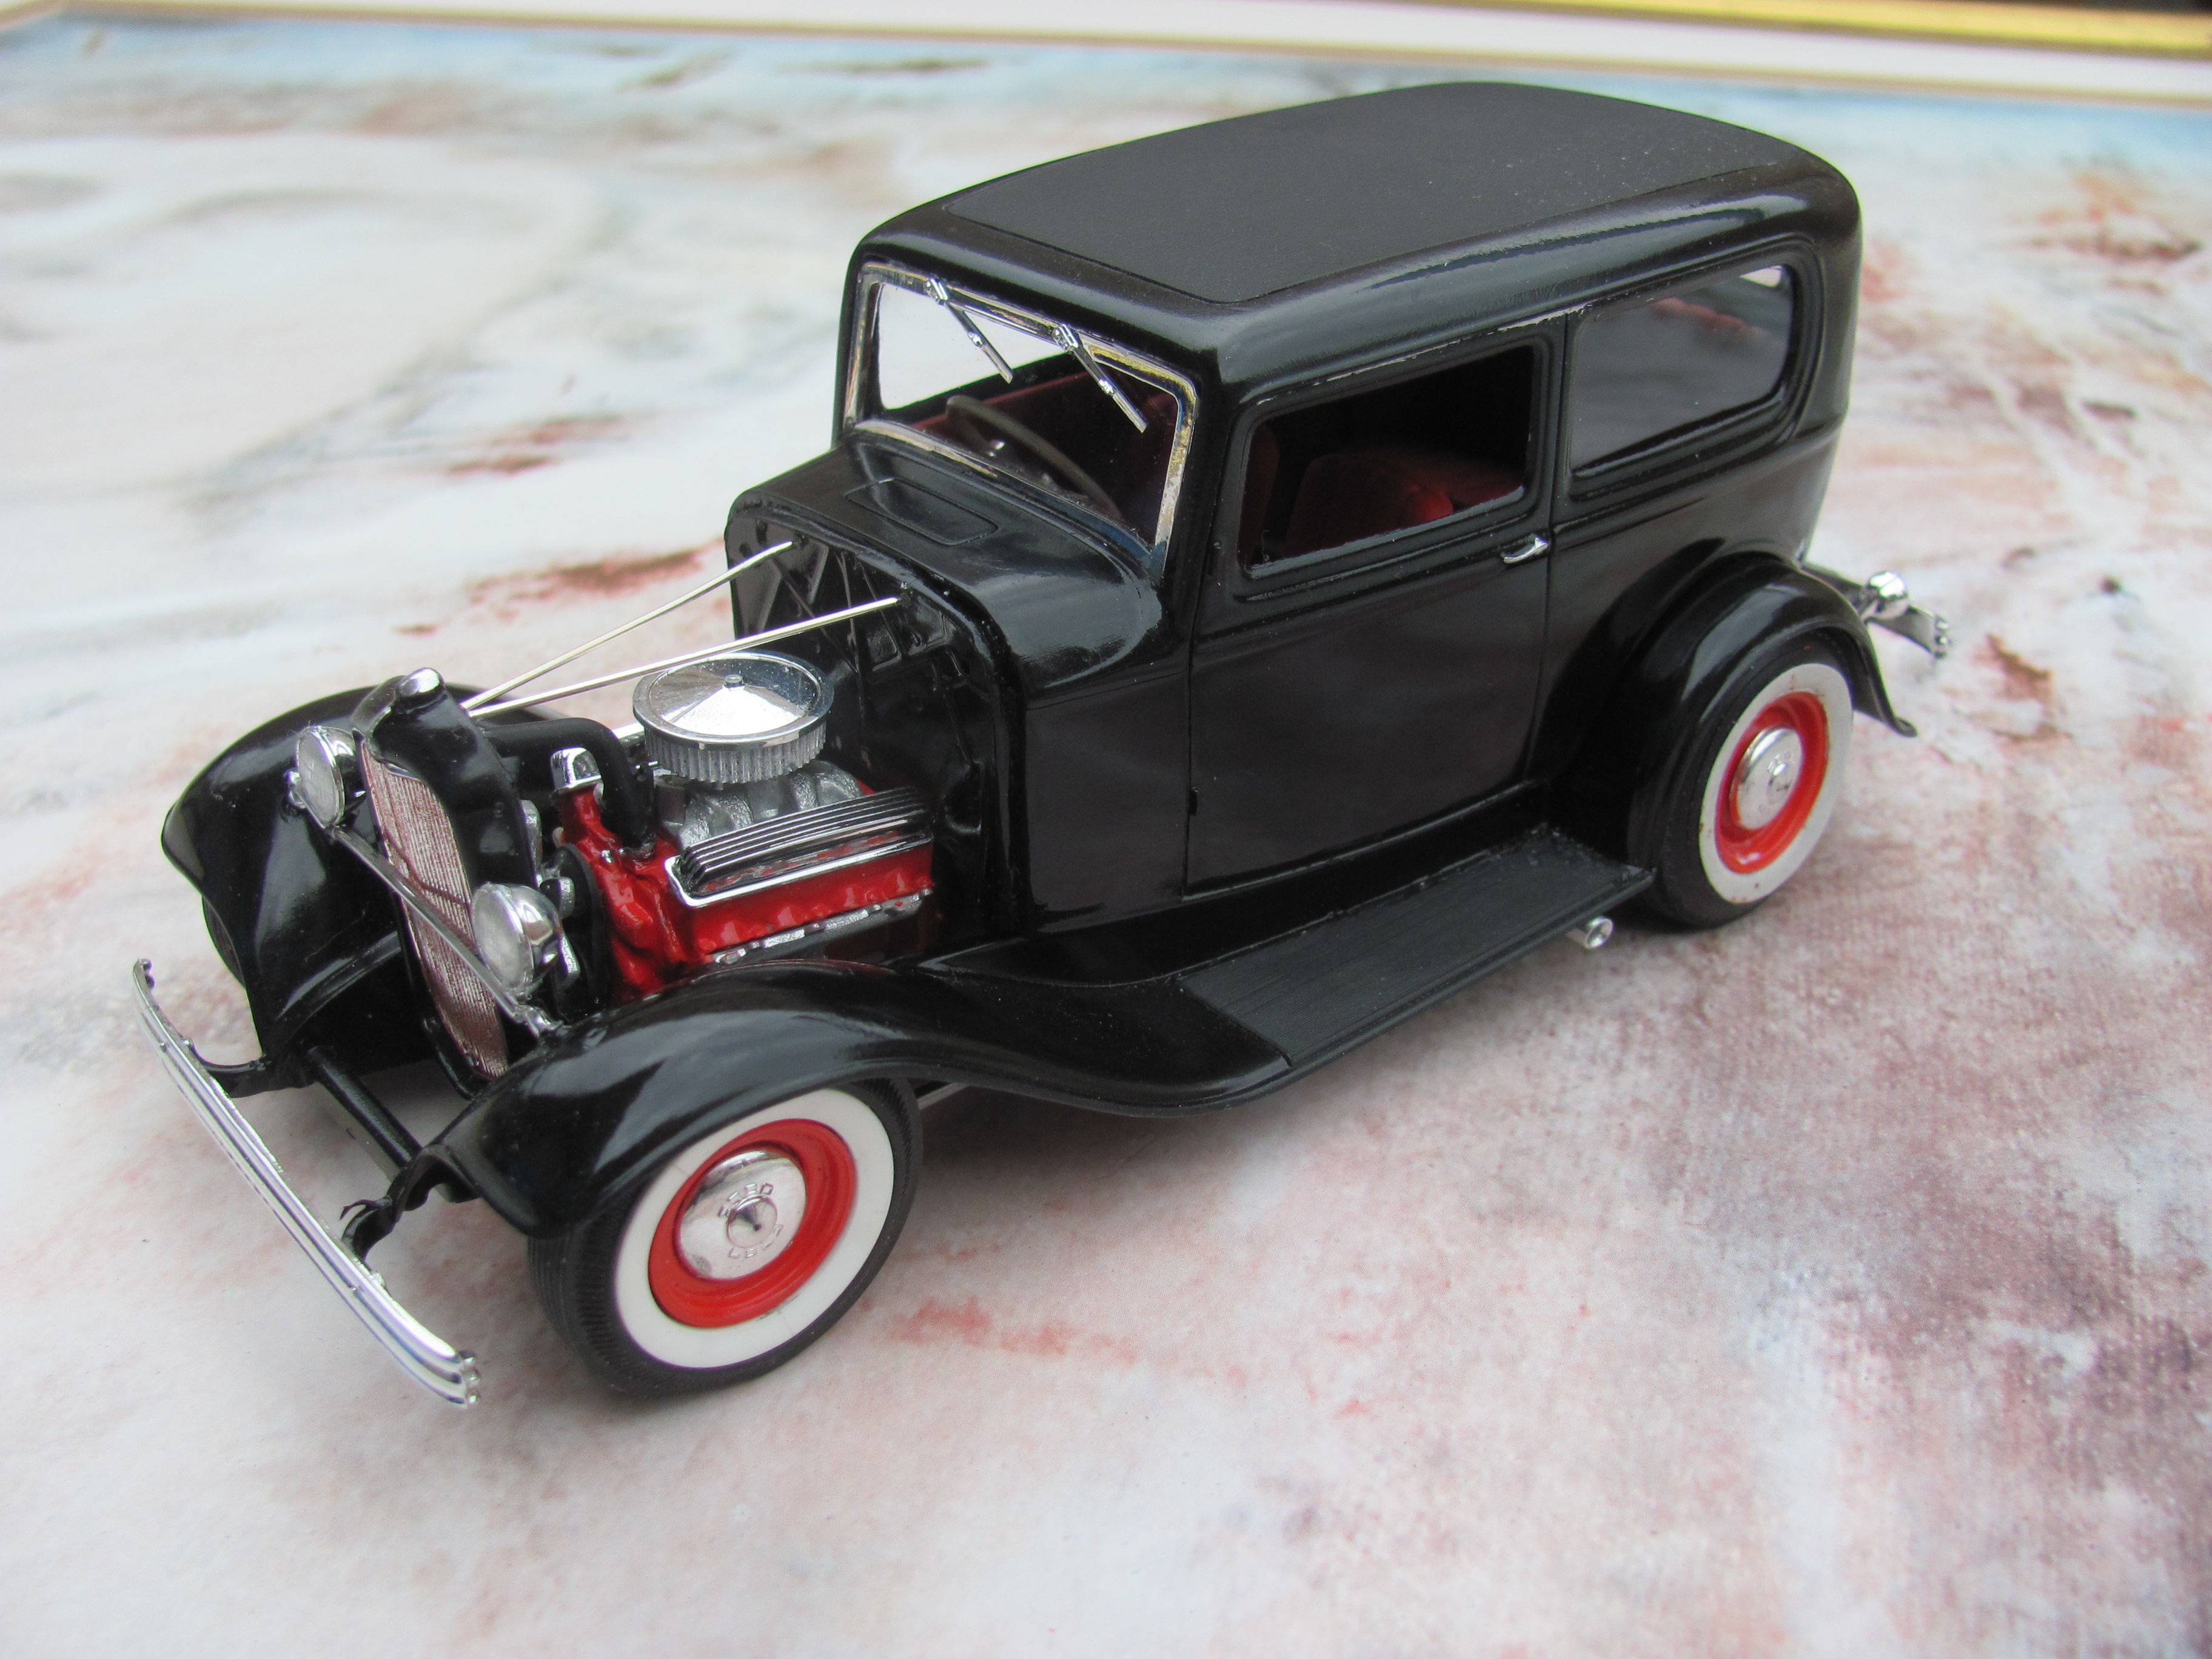
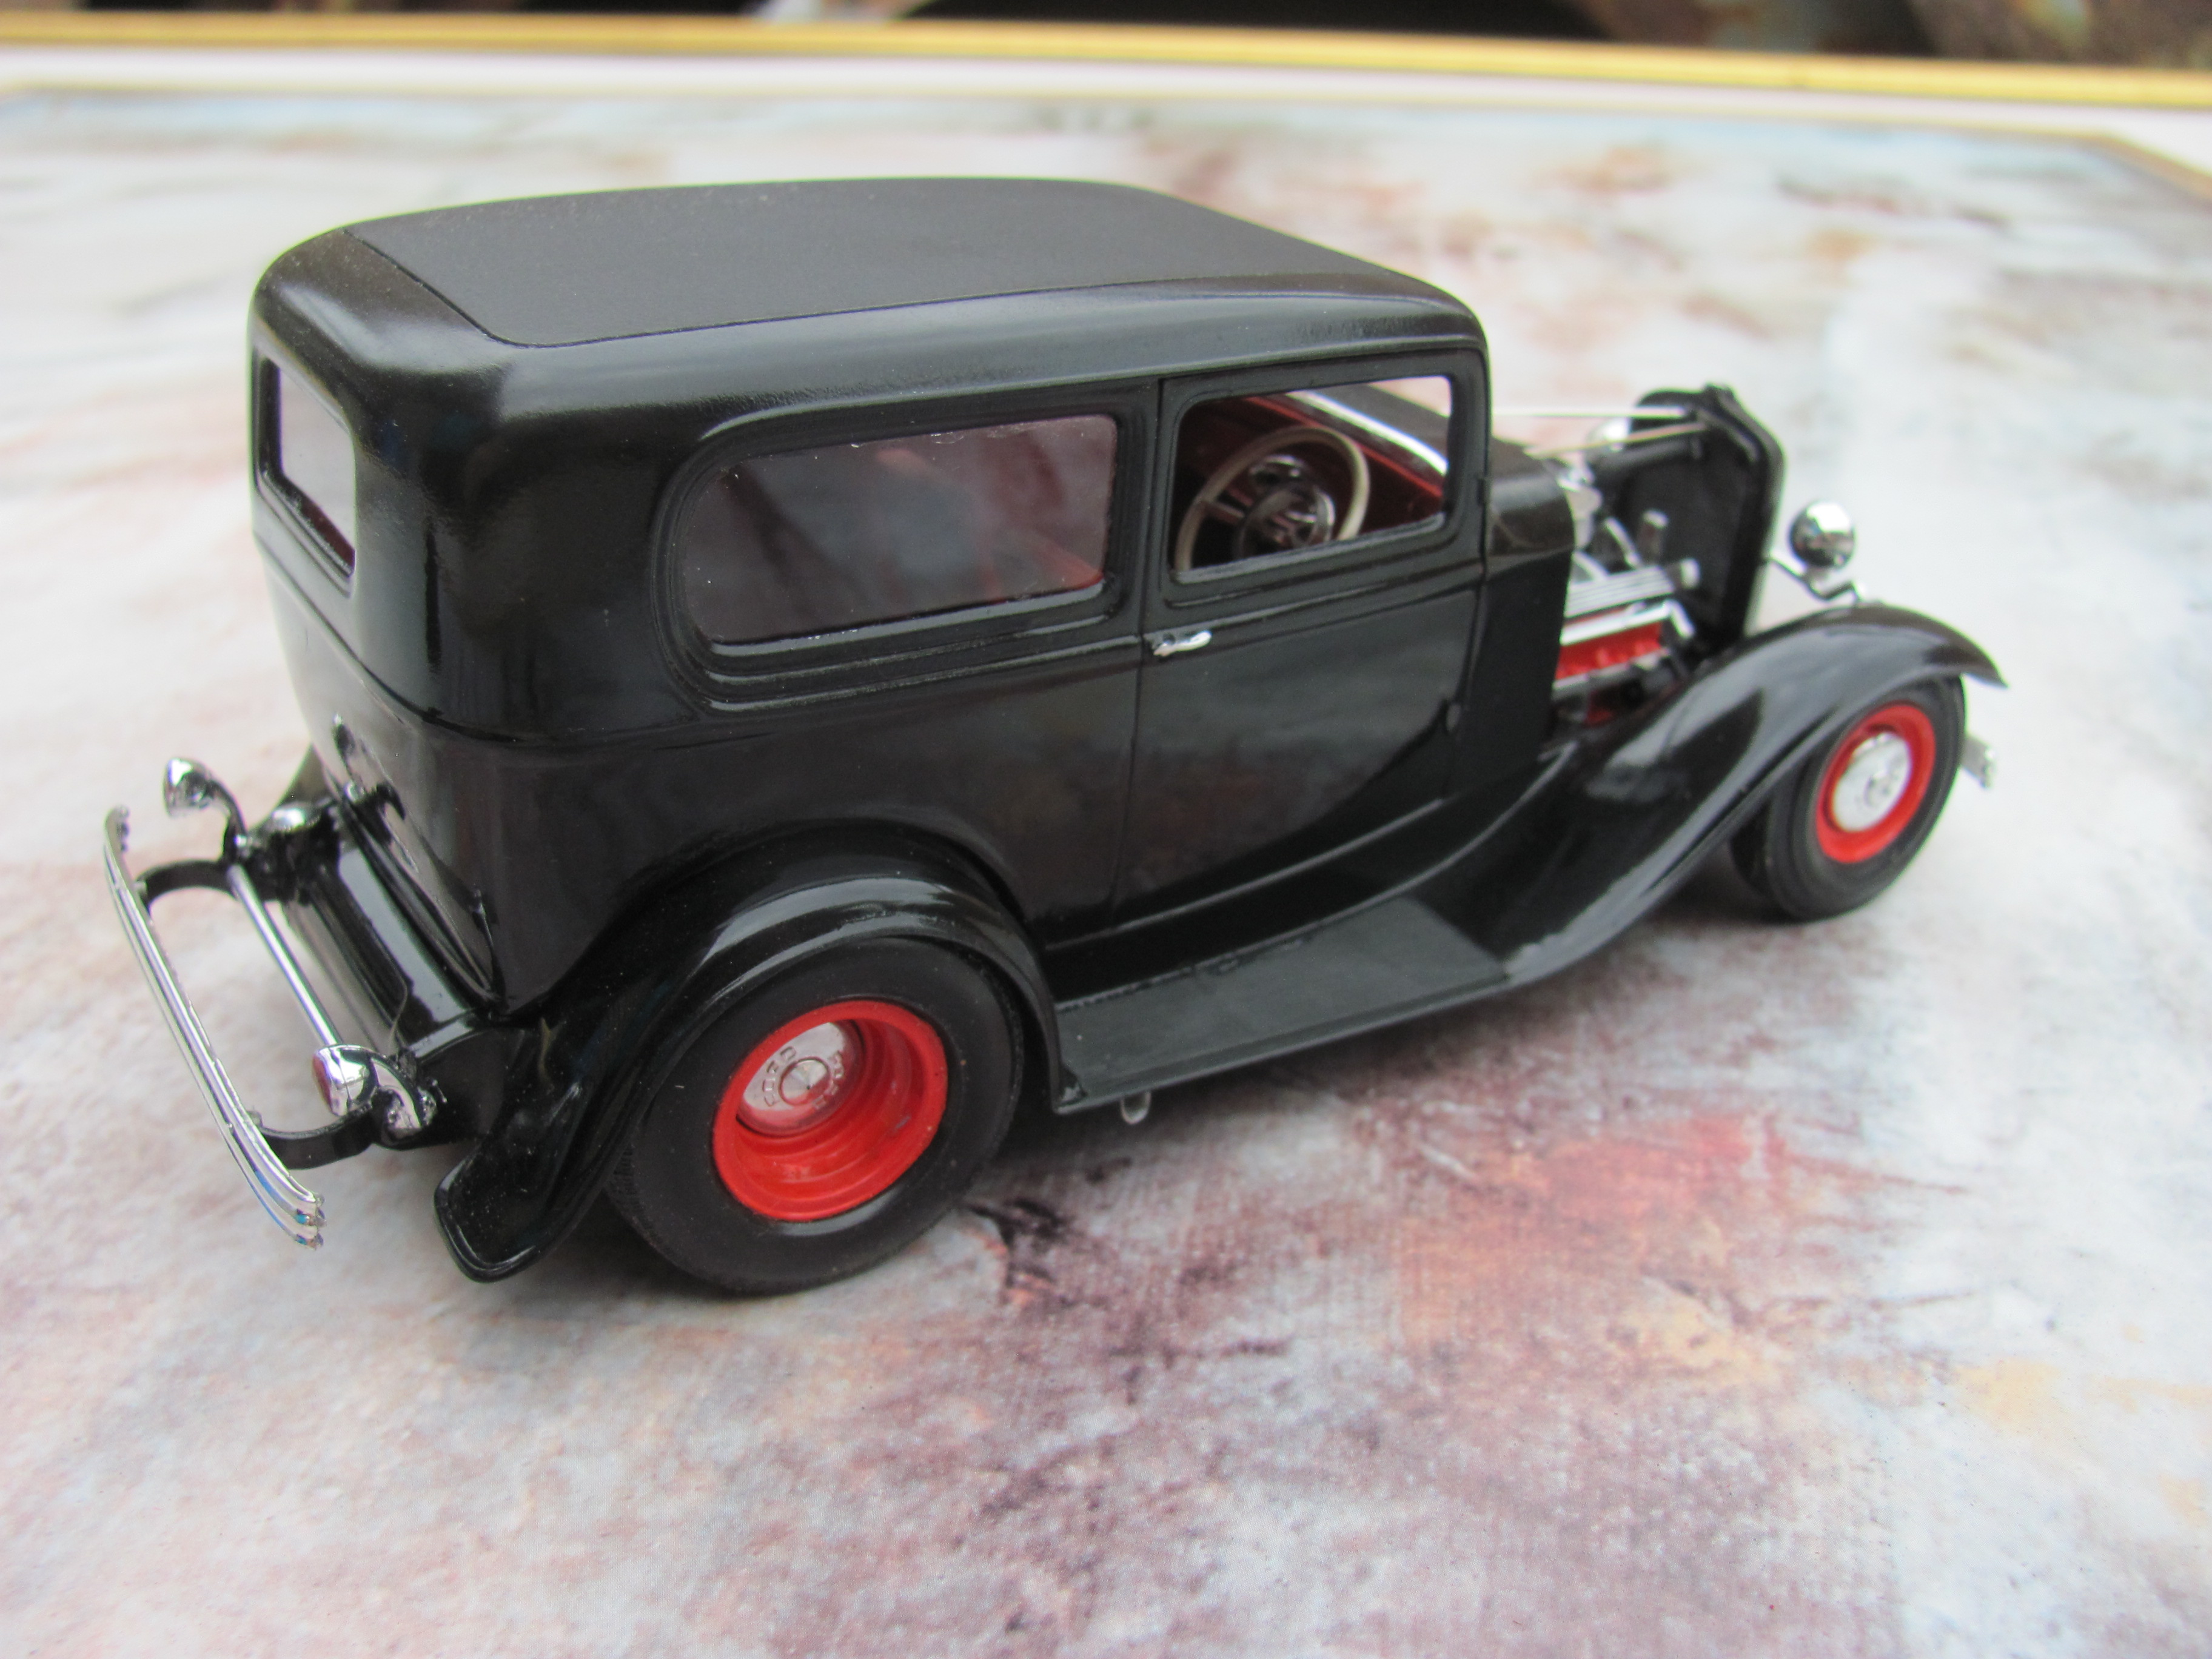
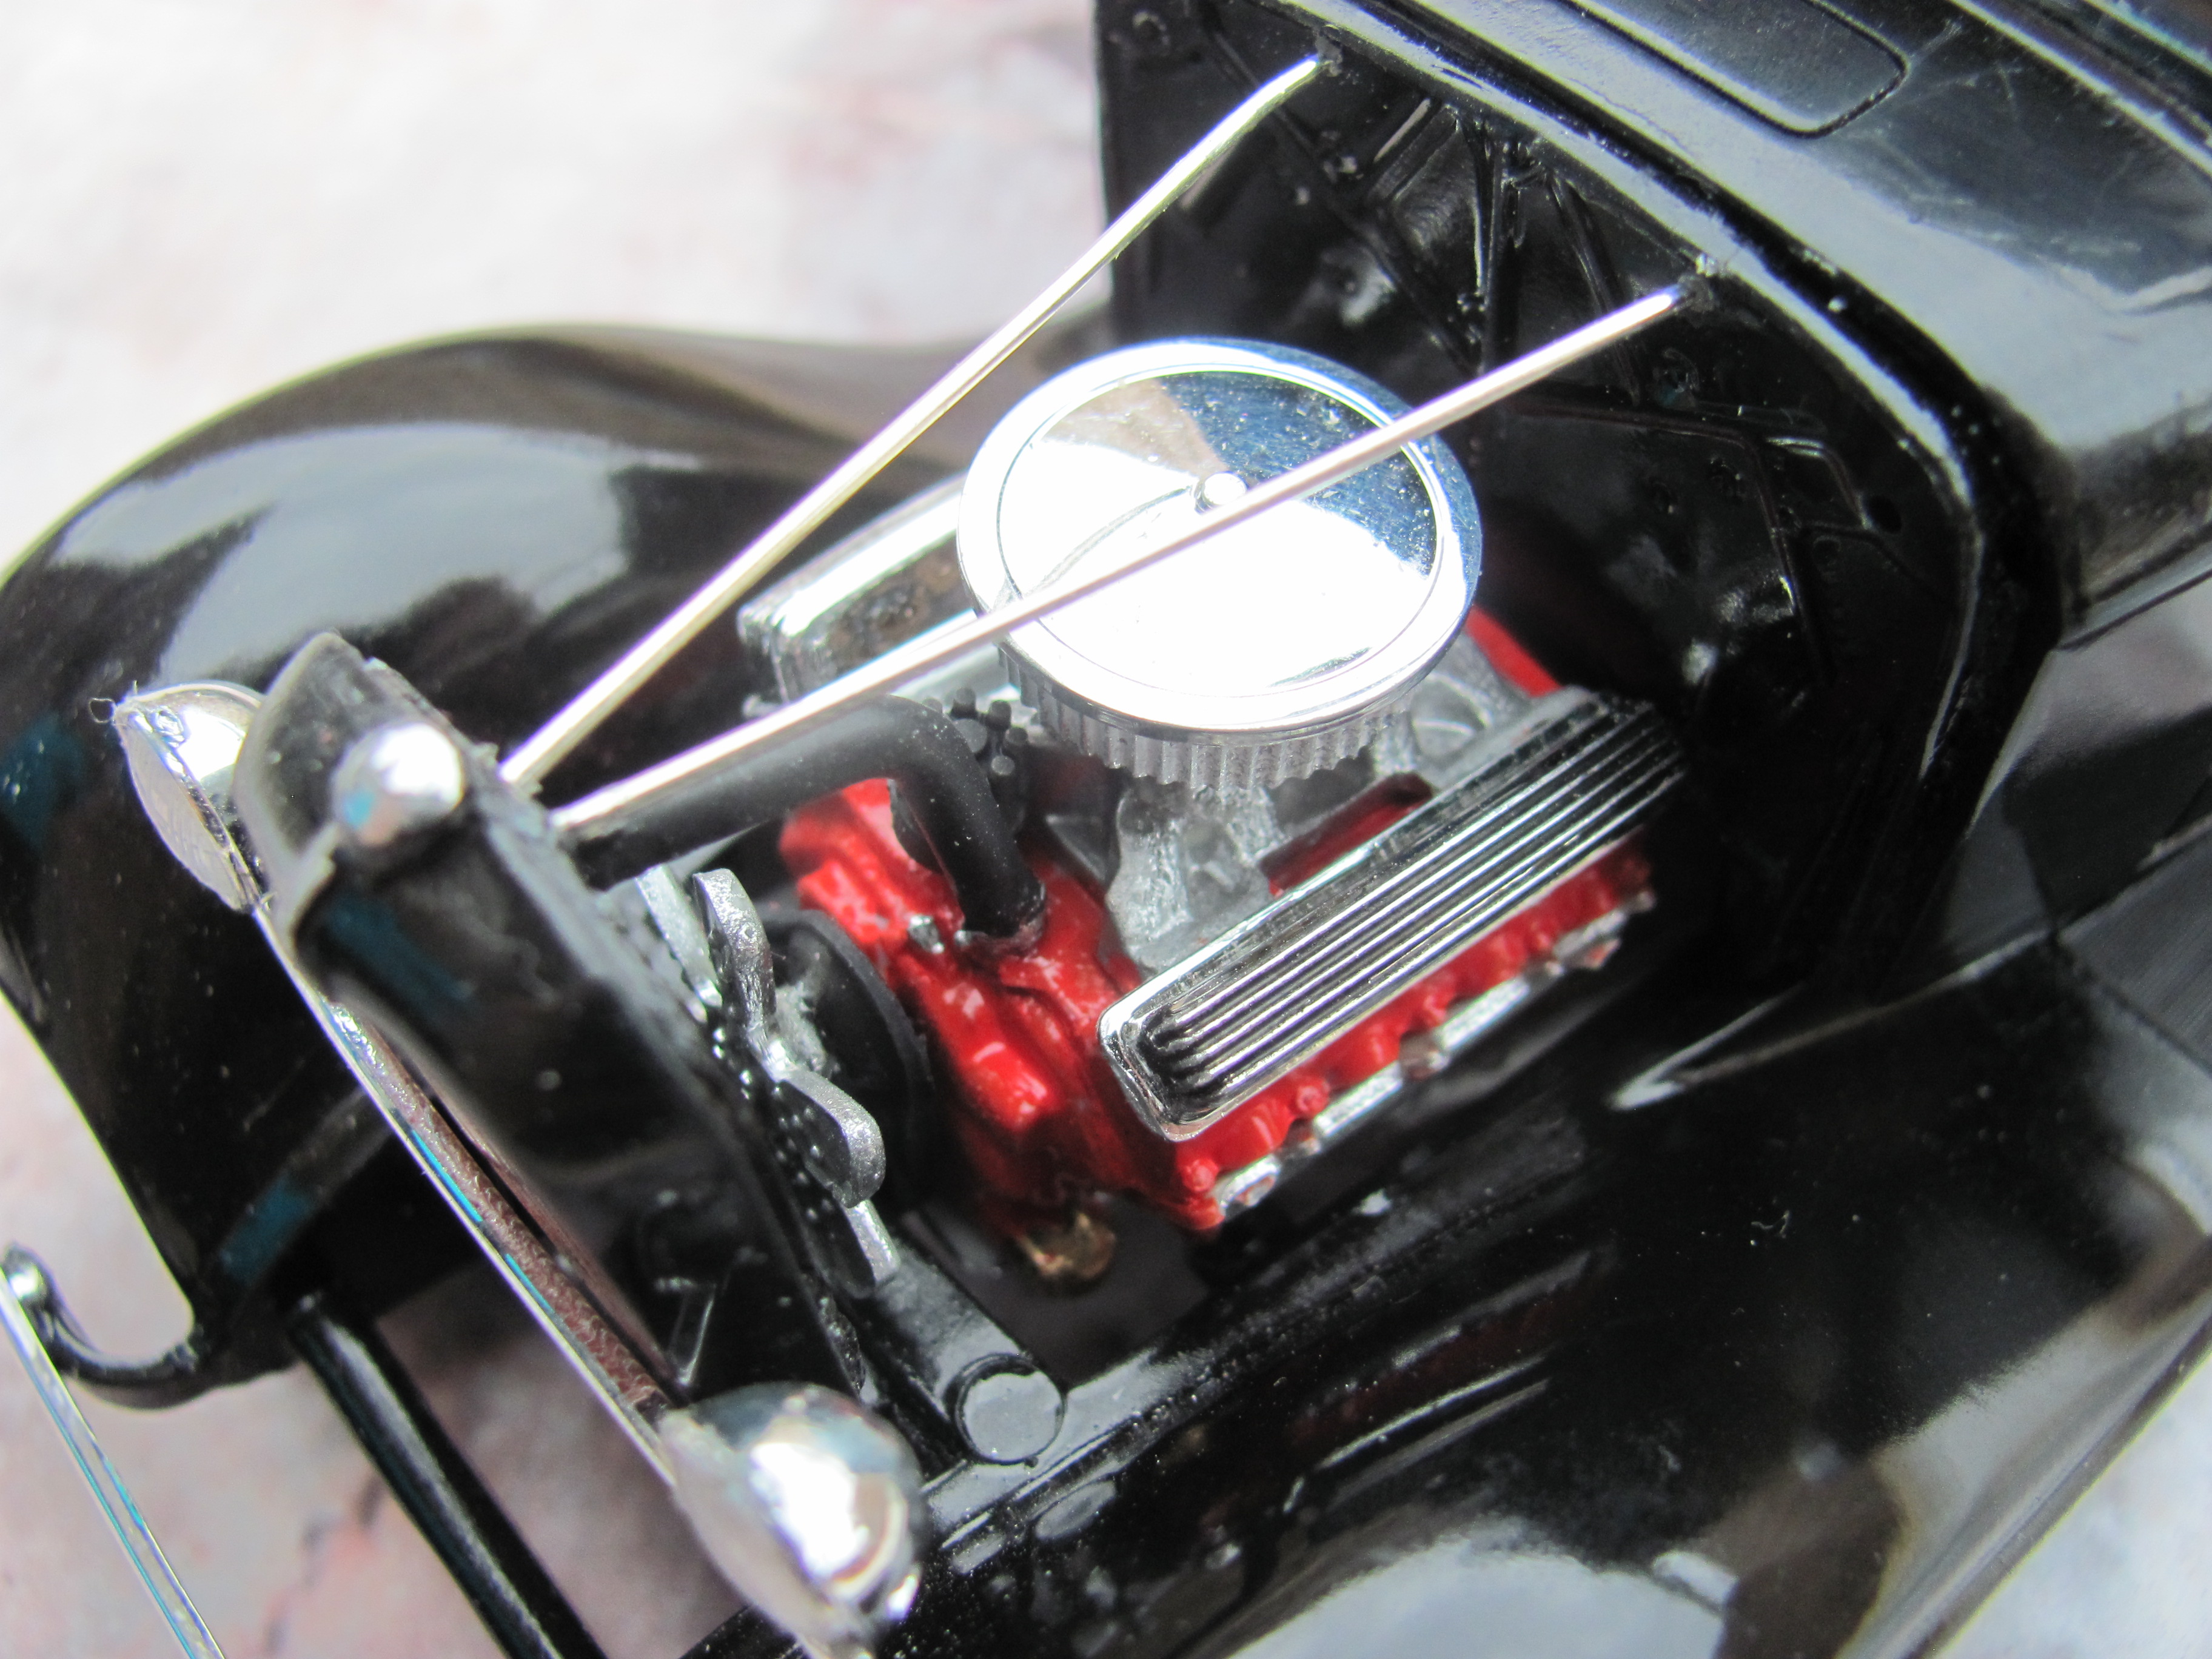
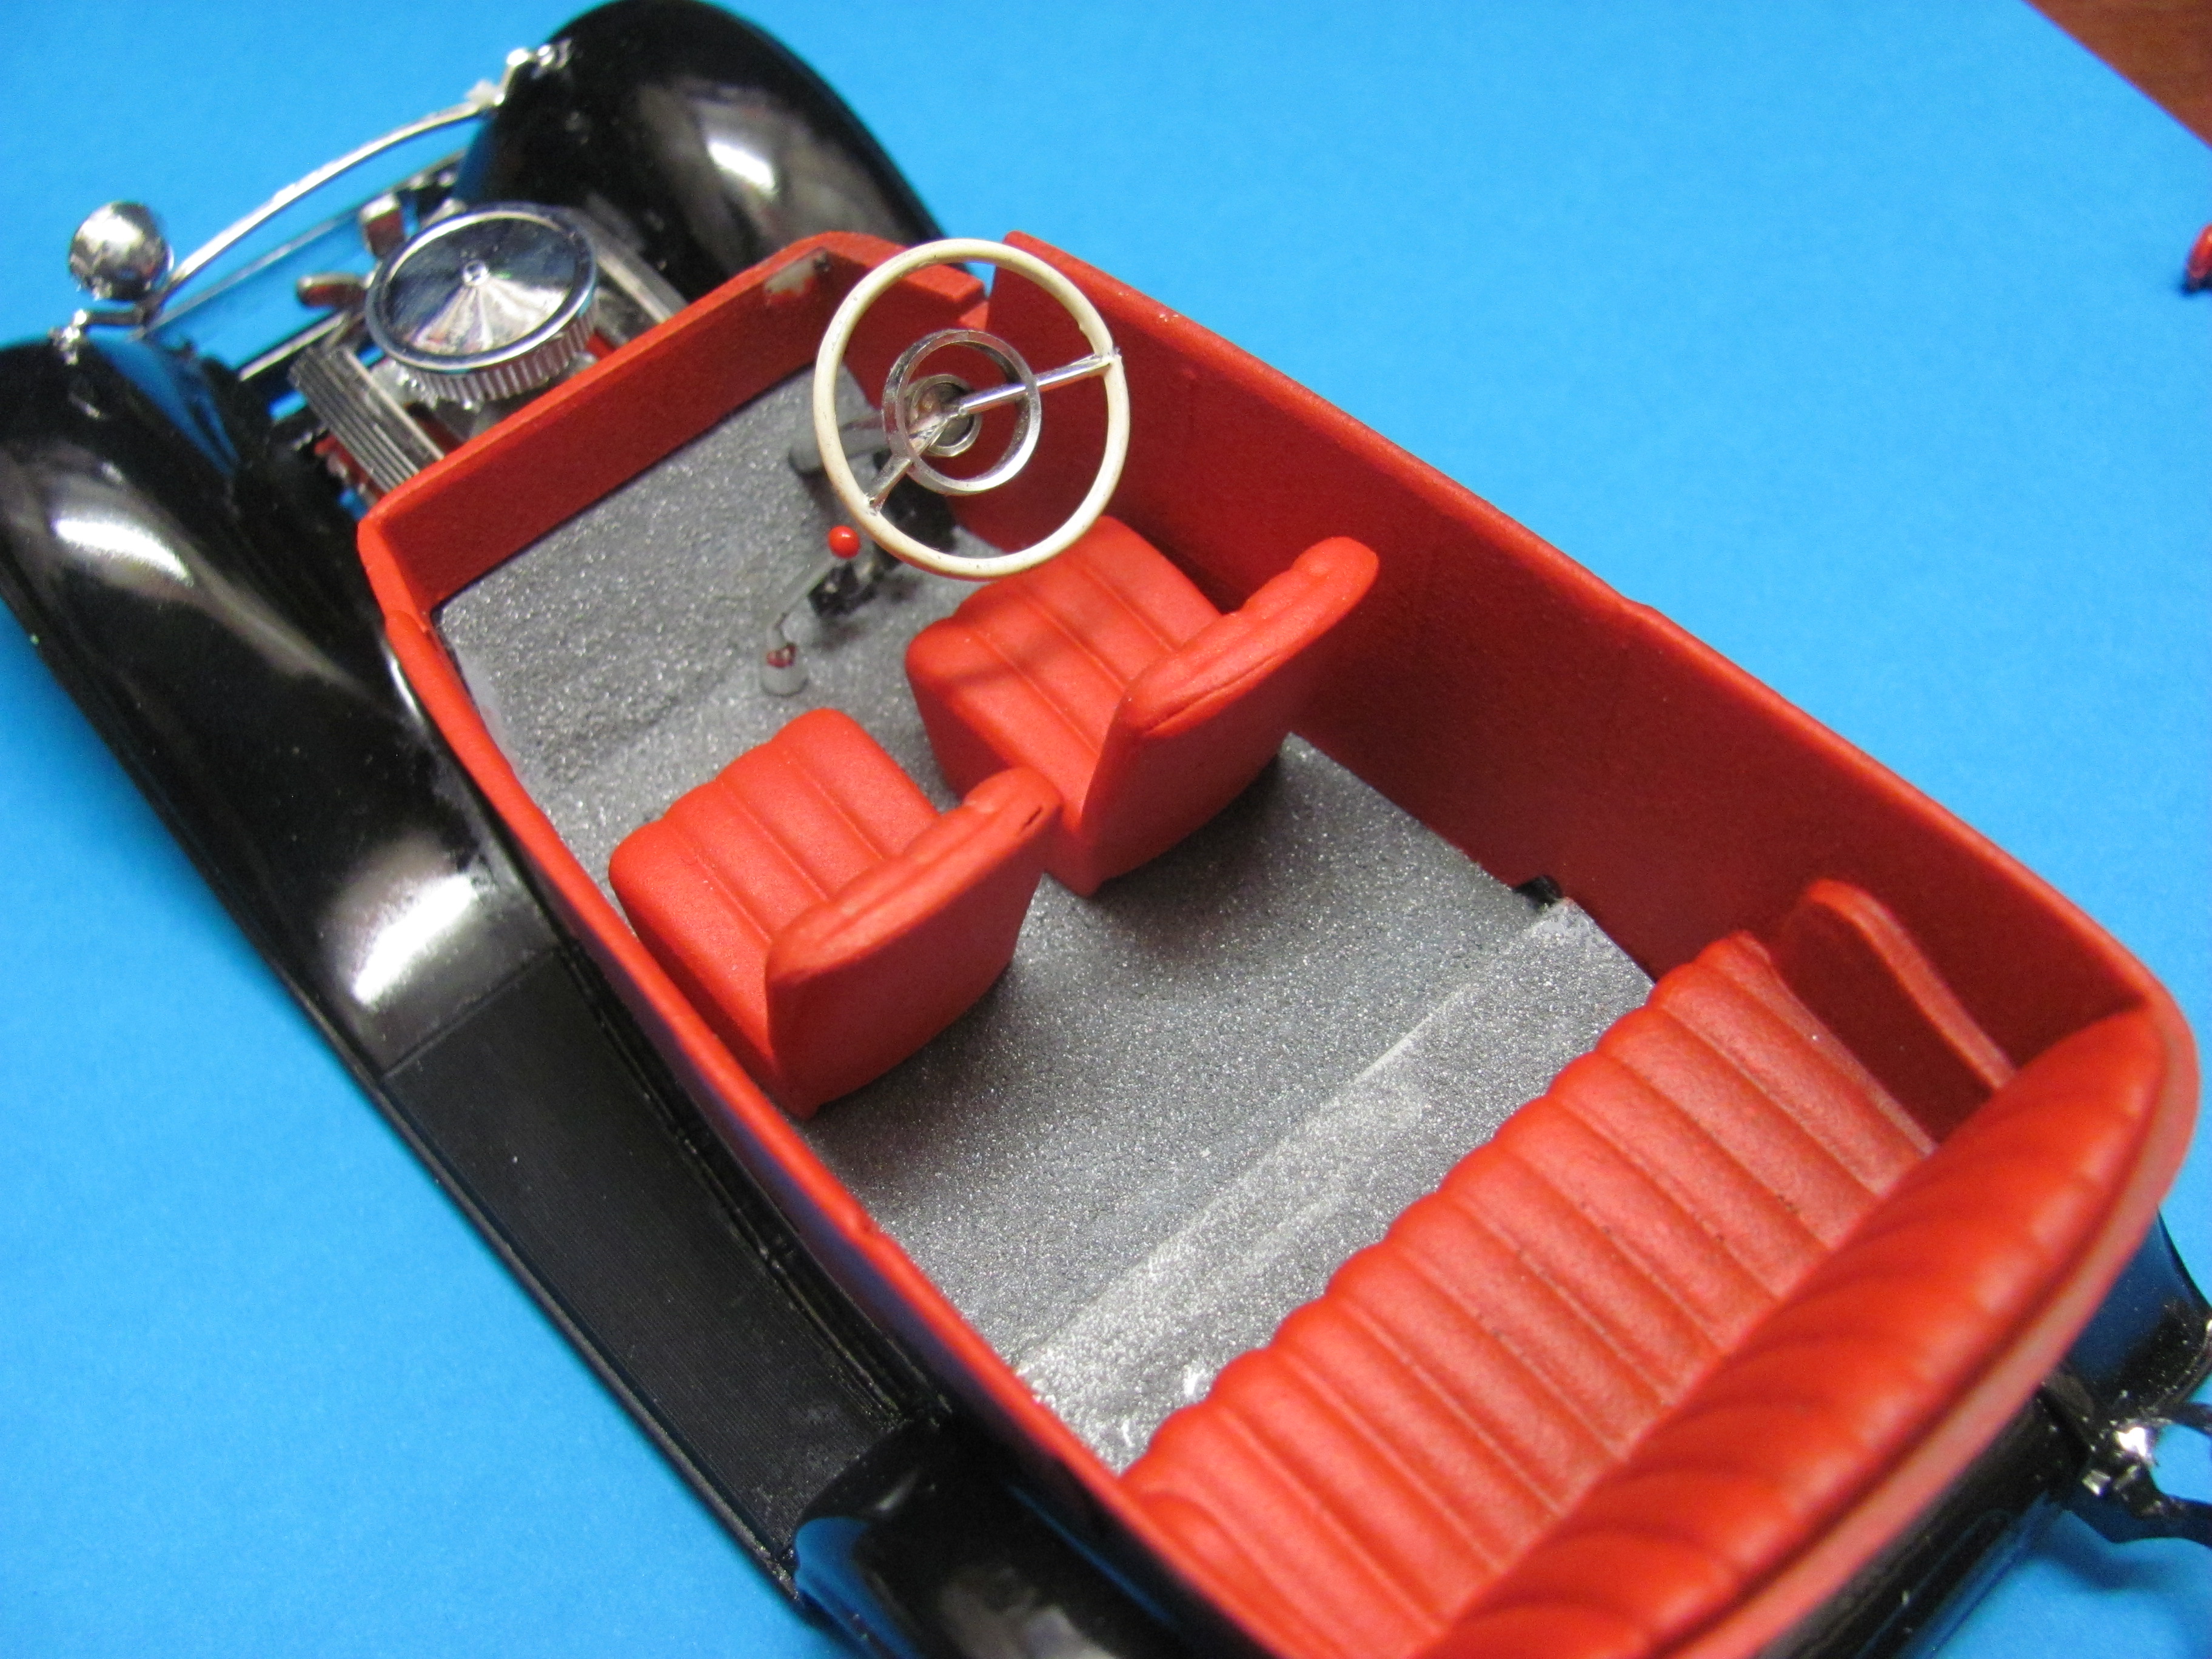
I have been fortunate to find two AMT Tudor bodies over the years and even though the modern Revell kit is a far better model, for nostalgia stakes I wanted to see how I would go building a 50's style rod a with a contemporary twist. I used the following components to get the result you see here. Original AMT 32 Tudor body from the ancient Tudor/Willys double kit. Chassis, fenders, hood and grill from 32 Vicky kit. FE style engine from Vicky kit with aircleaner from Revell 32 Ford kit. Interior tub built from two Vicky units, cut offset to create a longer length. AMT Vicky custom" rear axle with "stock" rear spring Dropped headlight bar and taillights from Revell 32 kit. Steelies with AMT 50 Ford hubcaps. Fuel tank made from disposable razor cover partsbox.com resin dropped front axle I tried both the luggage rack and the spare tyre mount from other AMT 32 kits at the rear but it just turned it into a restored car so I left it with just a bumper. Colour is Testor's Classic black straight form the spray can. Interior is Testors Fabric red. I haven't built my Revell Tudors yet but for a quickie, I'm pretty happy with how the AMT version turned out. Cheers, Alan
-
What a great combination of parts! It is so nice to see such a well balanced approach to channelling a hot rod, as opposed to the distorted efforts of many rat rodders. Balance is everything! Nice job Dennis.
-
What scale do you suppose these are?
Alan Barton replied to El Roberto's topic in General Automotive Talk (Trucks and Cars)
In the photo of the Merc the proportions look just a smidgeon off but I got to see this car pacing a field of dwarf cars at Arizona Speedway in 2014 and everything looked perfect. It was only the oversized head and arm in the window that made you go "Wadeaminnut............ Cheers Alan -
Glen, this looks very nice and it does demonstrate how different a 32 Woody looks compared to a Model A woody. If I could make one positive suggestion, your engine bay looks a bit "open" like something is missing. If you dig up two long straight dressmaking or jewellery pins and glue them between the radiator and the firewall as radiator support rods as the real car would have, it will help tie the front of the car to the back. Carefully drilling a couple for small holes in the firewall about, say, 10-12mm either side of the centre will help you locate those pins. It is a simple trick that will add a lot to your model. Cheers Alan
-
Hi Kevin, On a real Model A, there is a thin sheet metal panel that joins the two centre or "b" pillars to each other. In other words, it becomes part of the bodywork - that is what is represented by the rear section of your model seat. Most likely painted body colour. The real seat would them comprise of a back and a base. The back would be attached to the sheet metal panel. It is a while since I built this kit but if you paint your seat (the front bit) in your interior colour and paint the rear in body colour (not saying you couldn't cover that in a fabric of some sort as well) then when you assemble it it will all work just fine, as Henry Ford intended. Hope that helps Alan
-
Your chop has done much to disguise the awkward proportions of the AMT 34 Tudor. One of the better built versions of this kit that I have ever seen. Cheers Alan
-
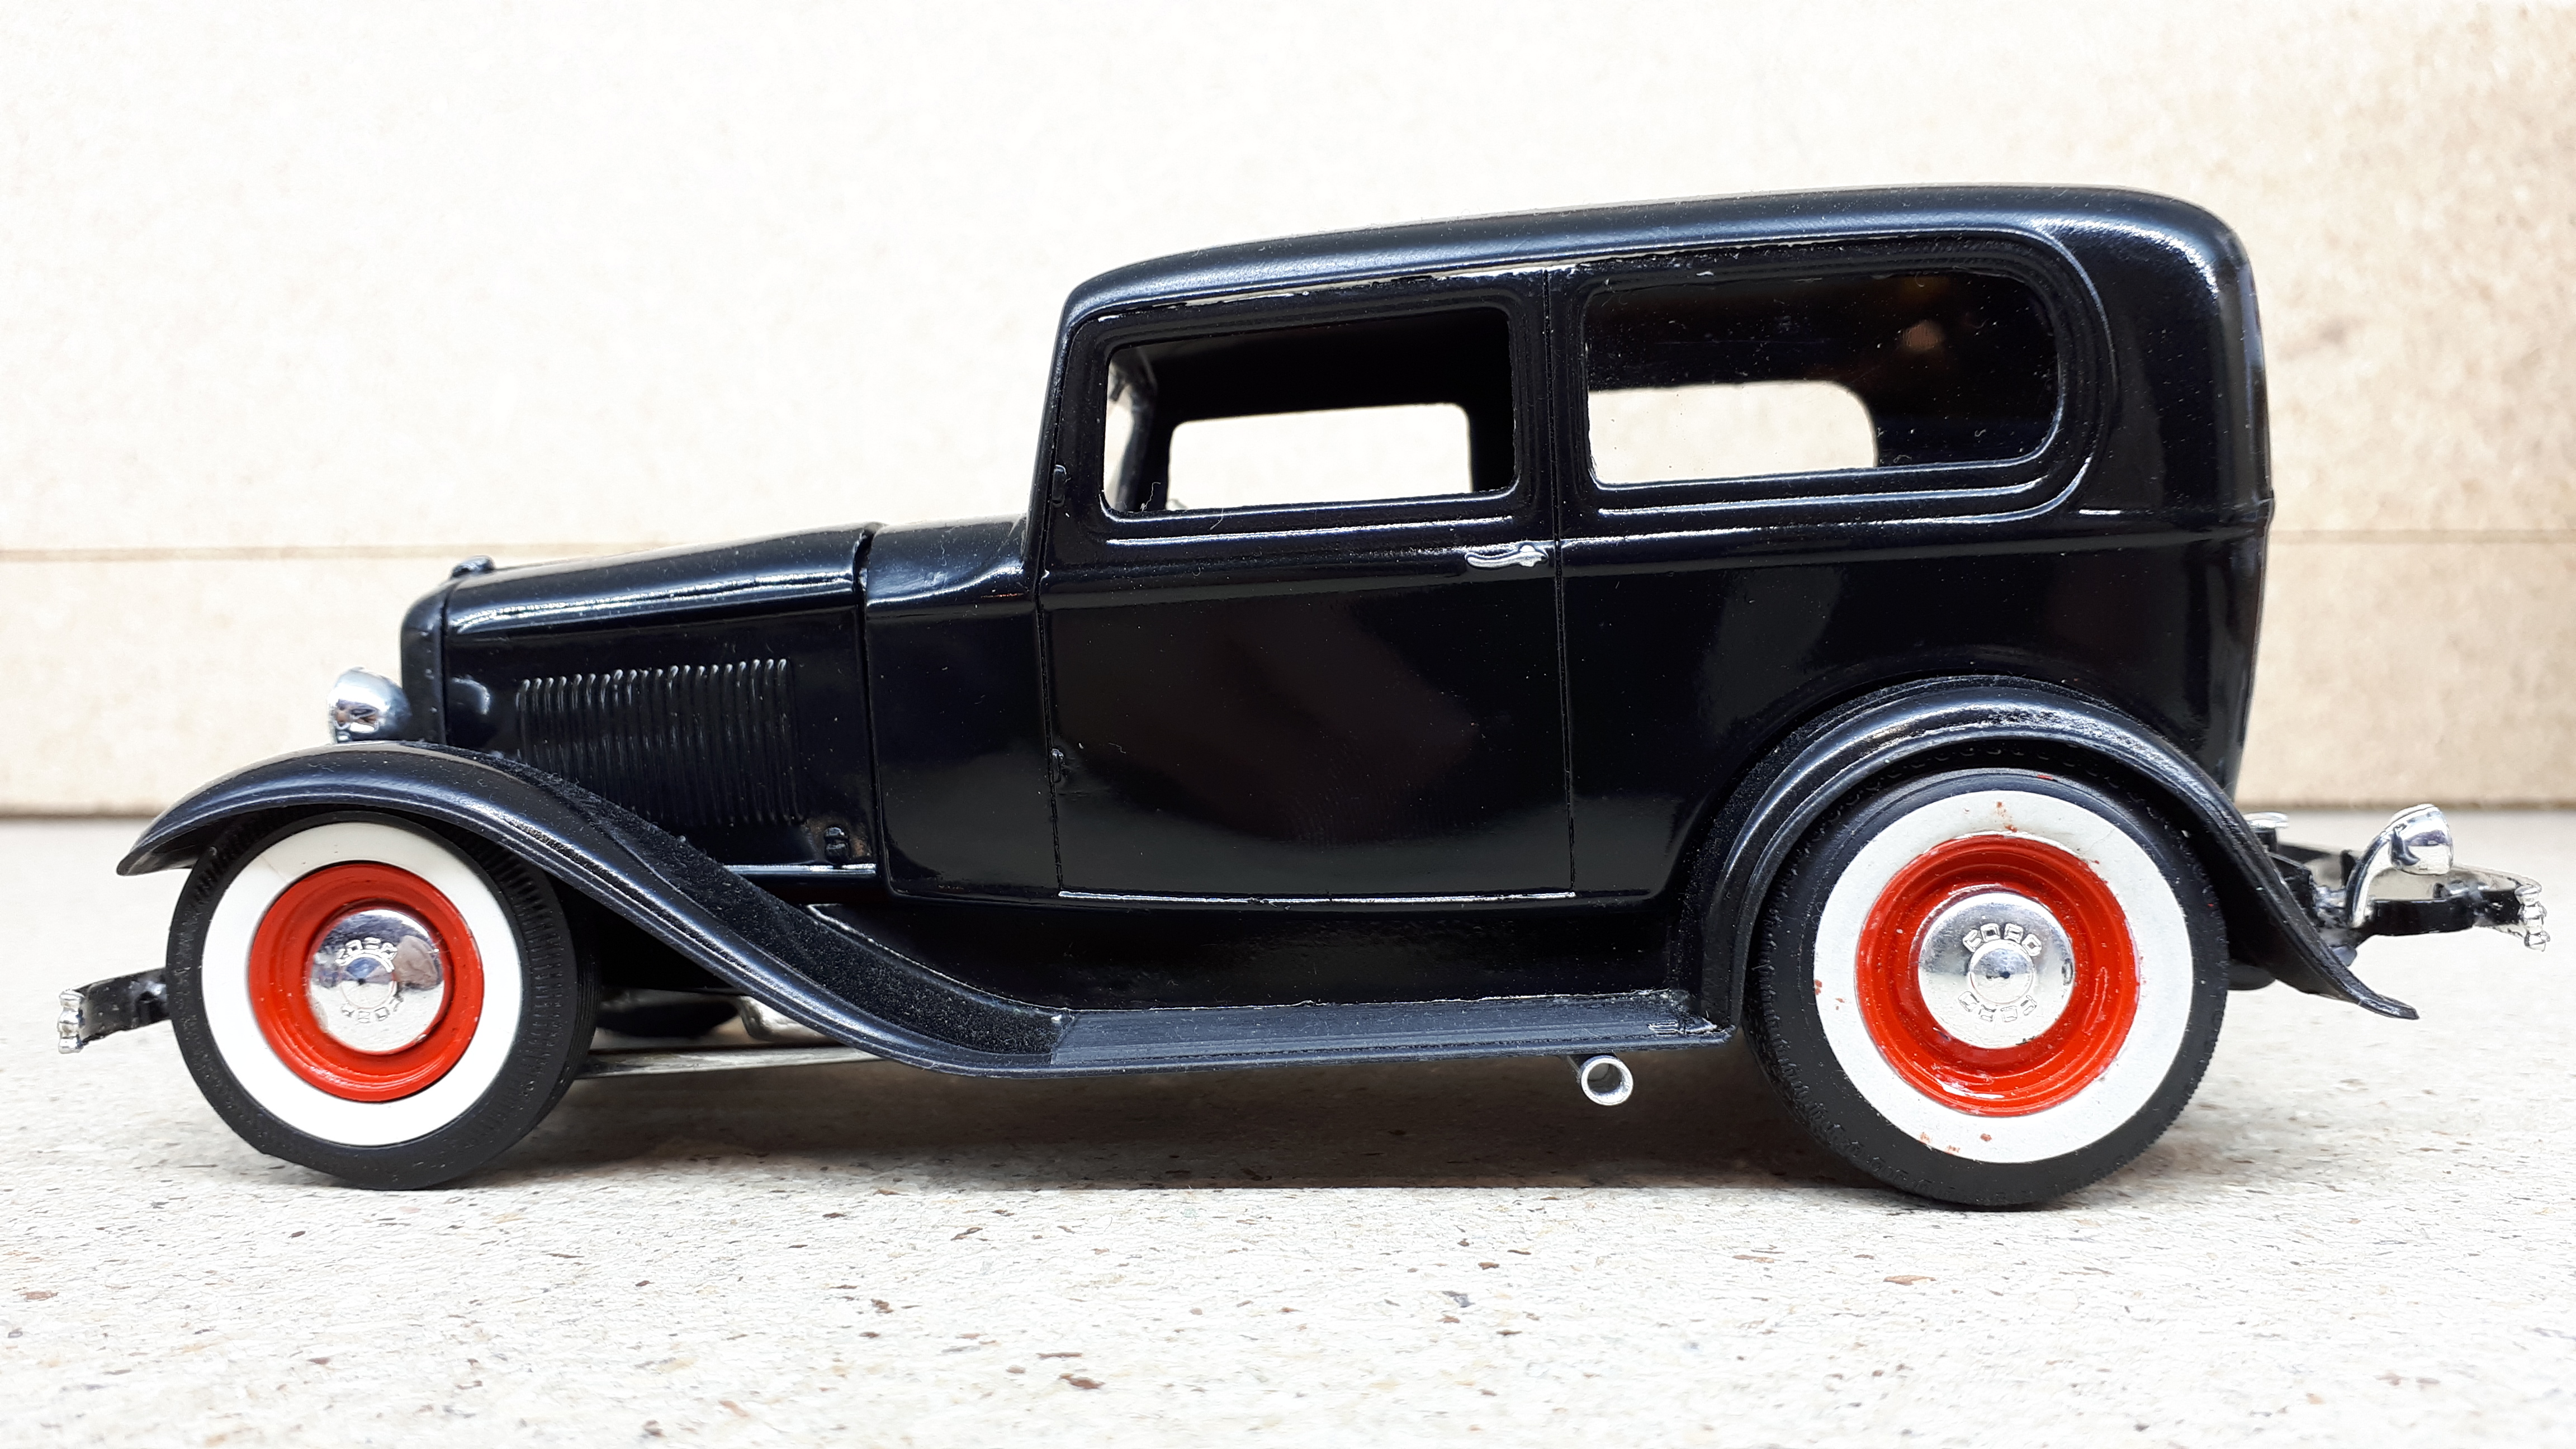
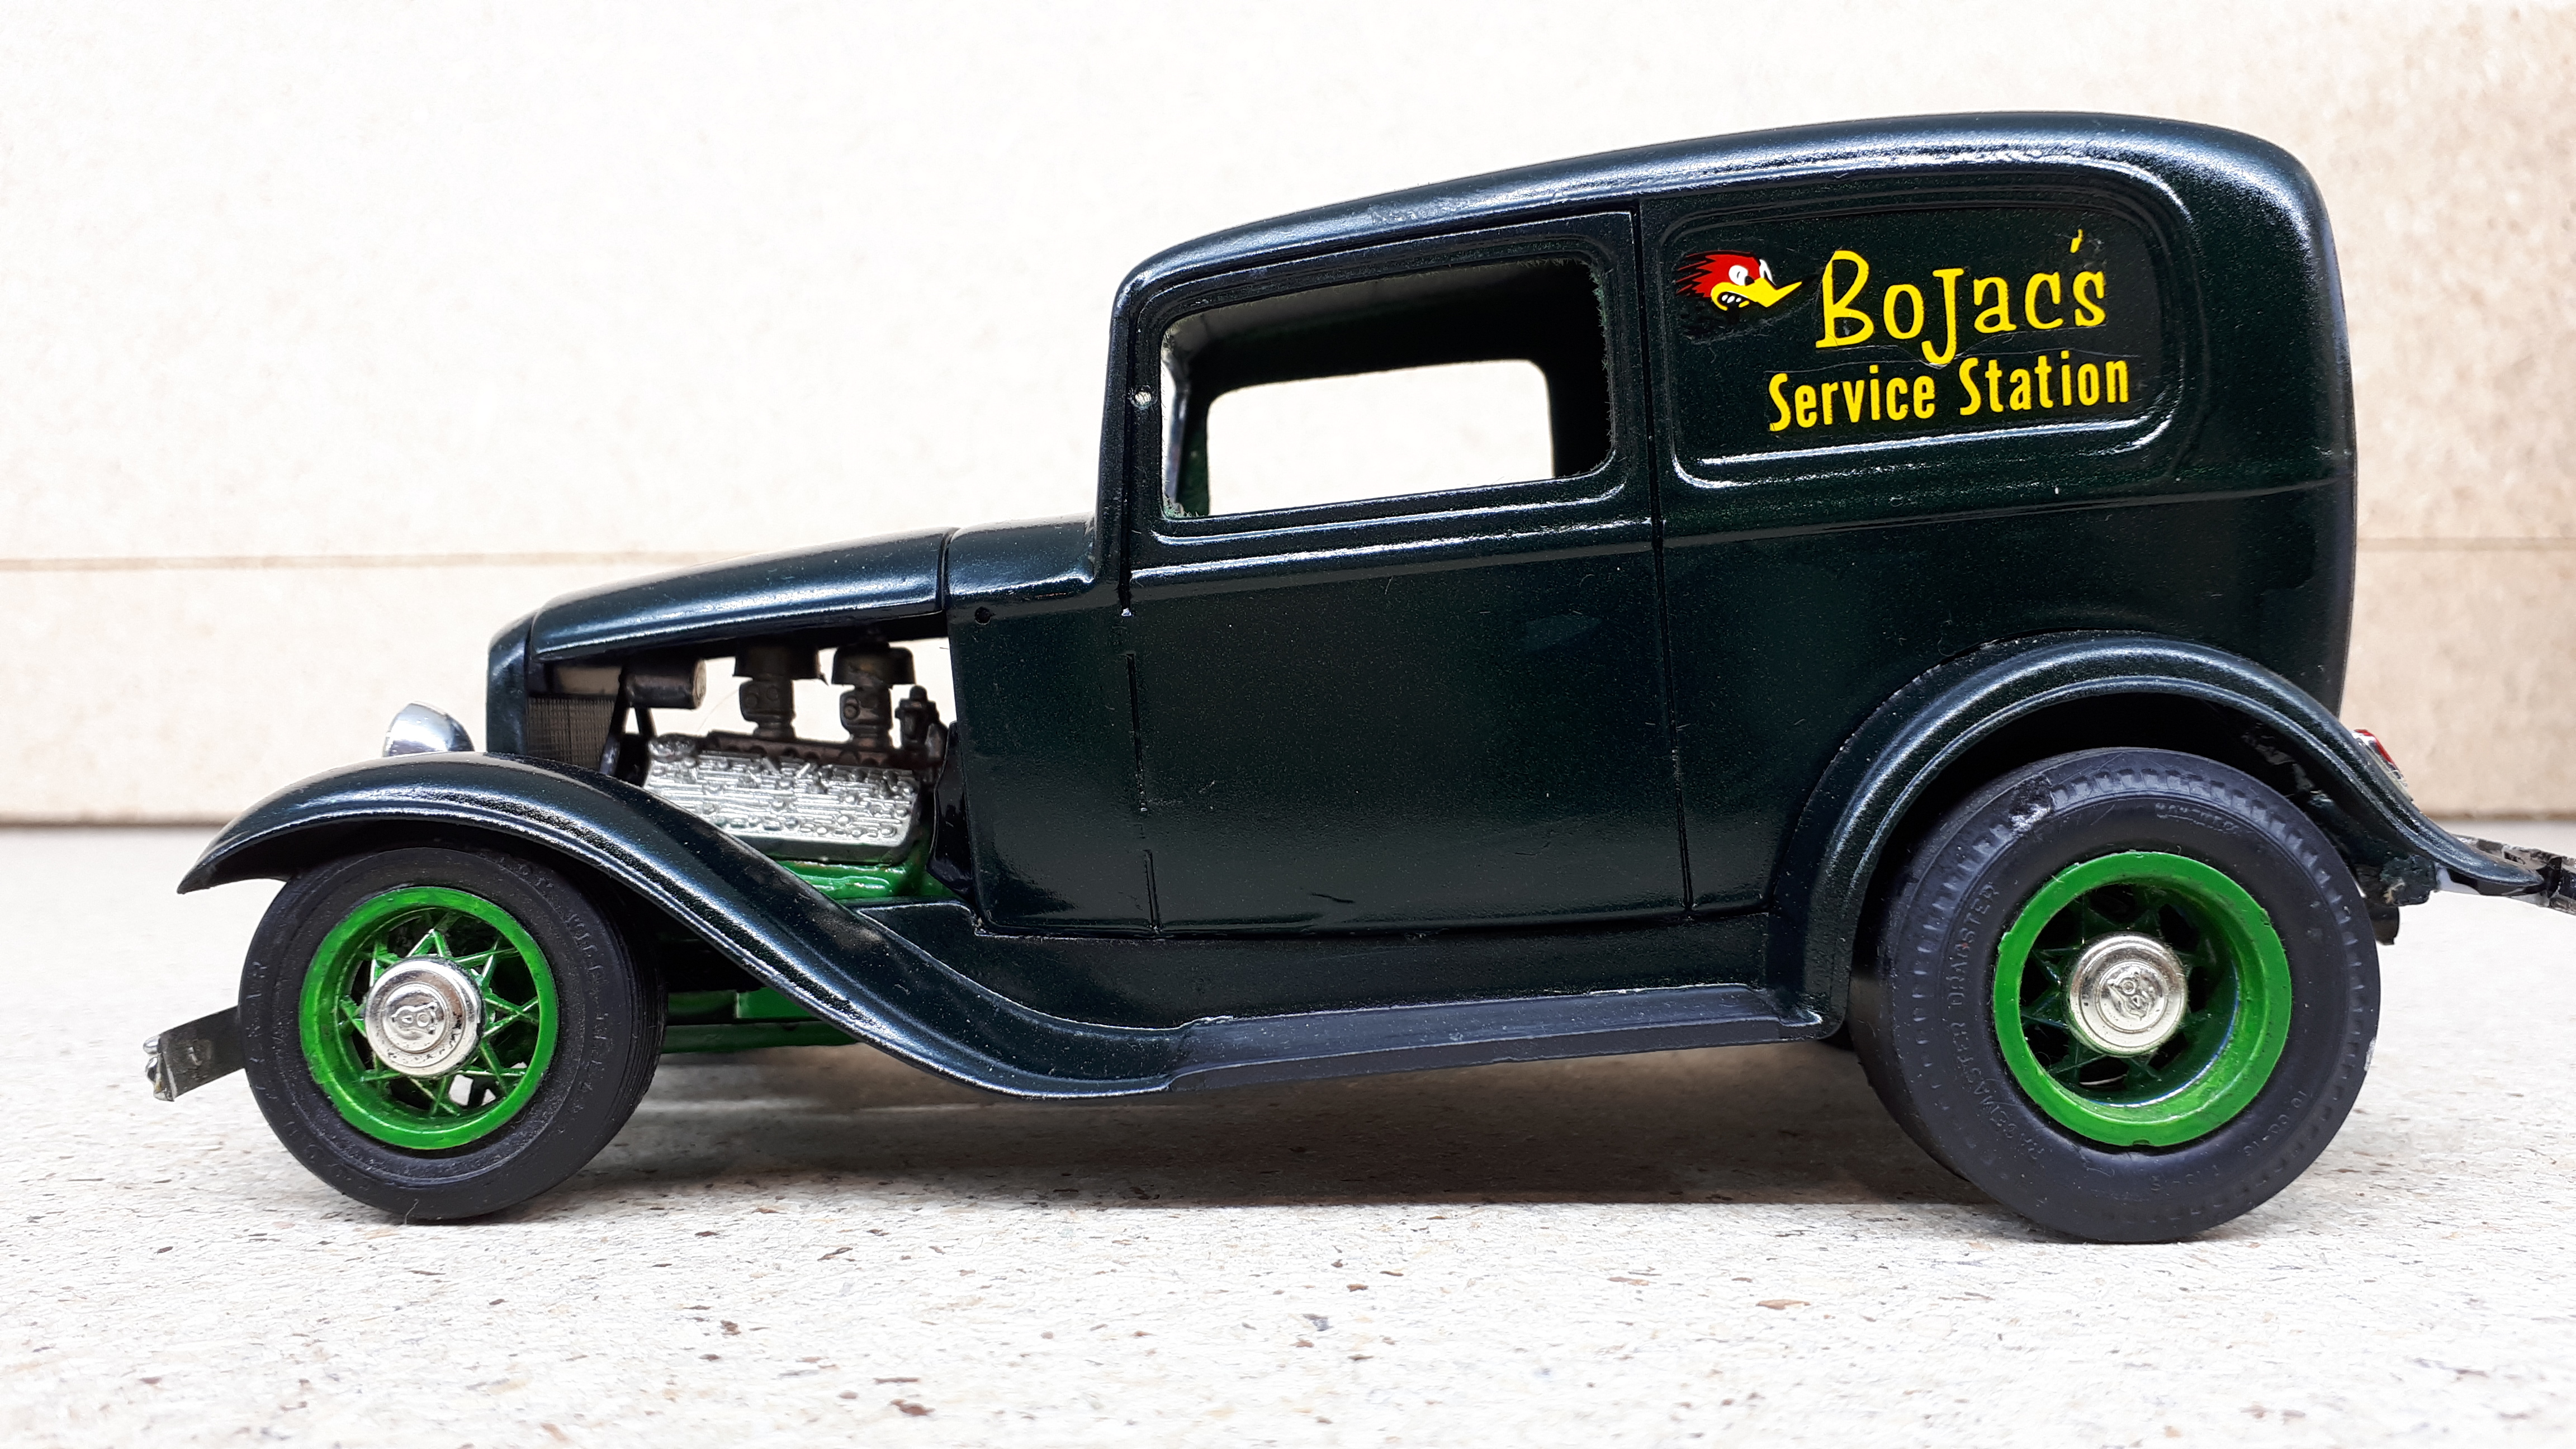
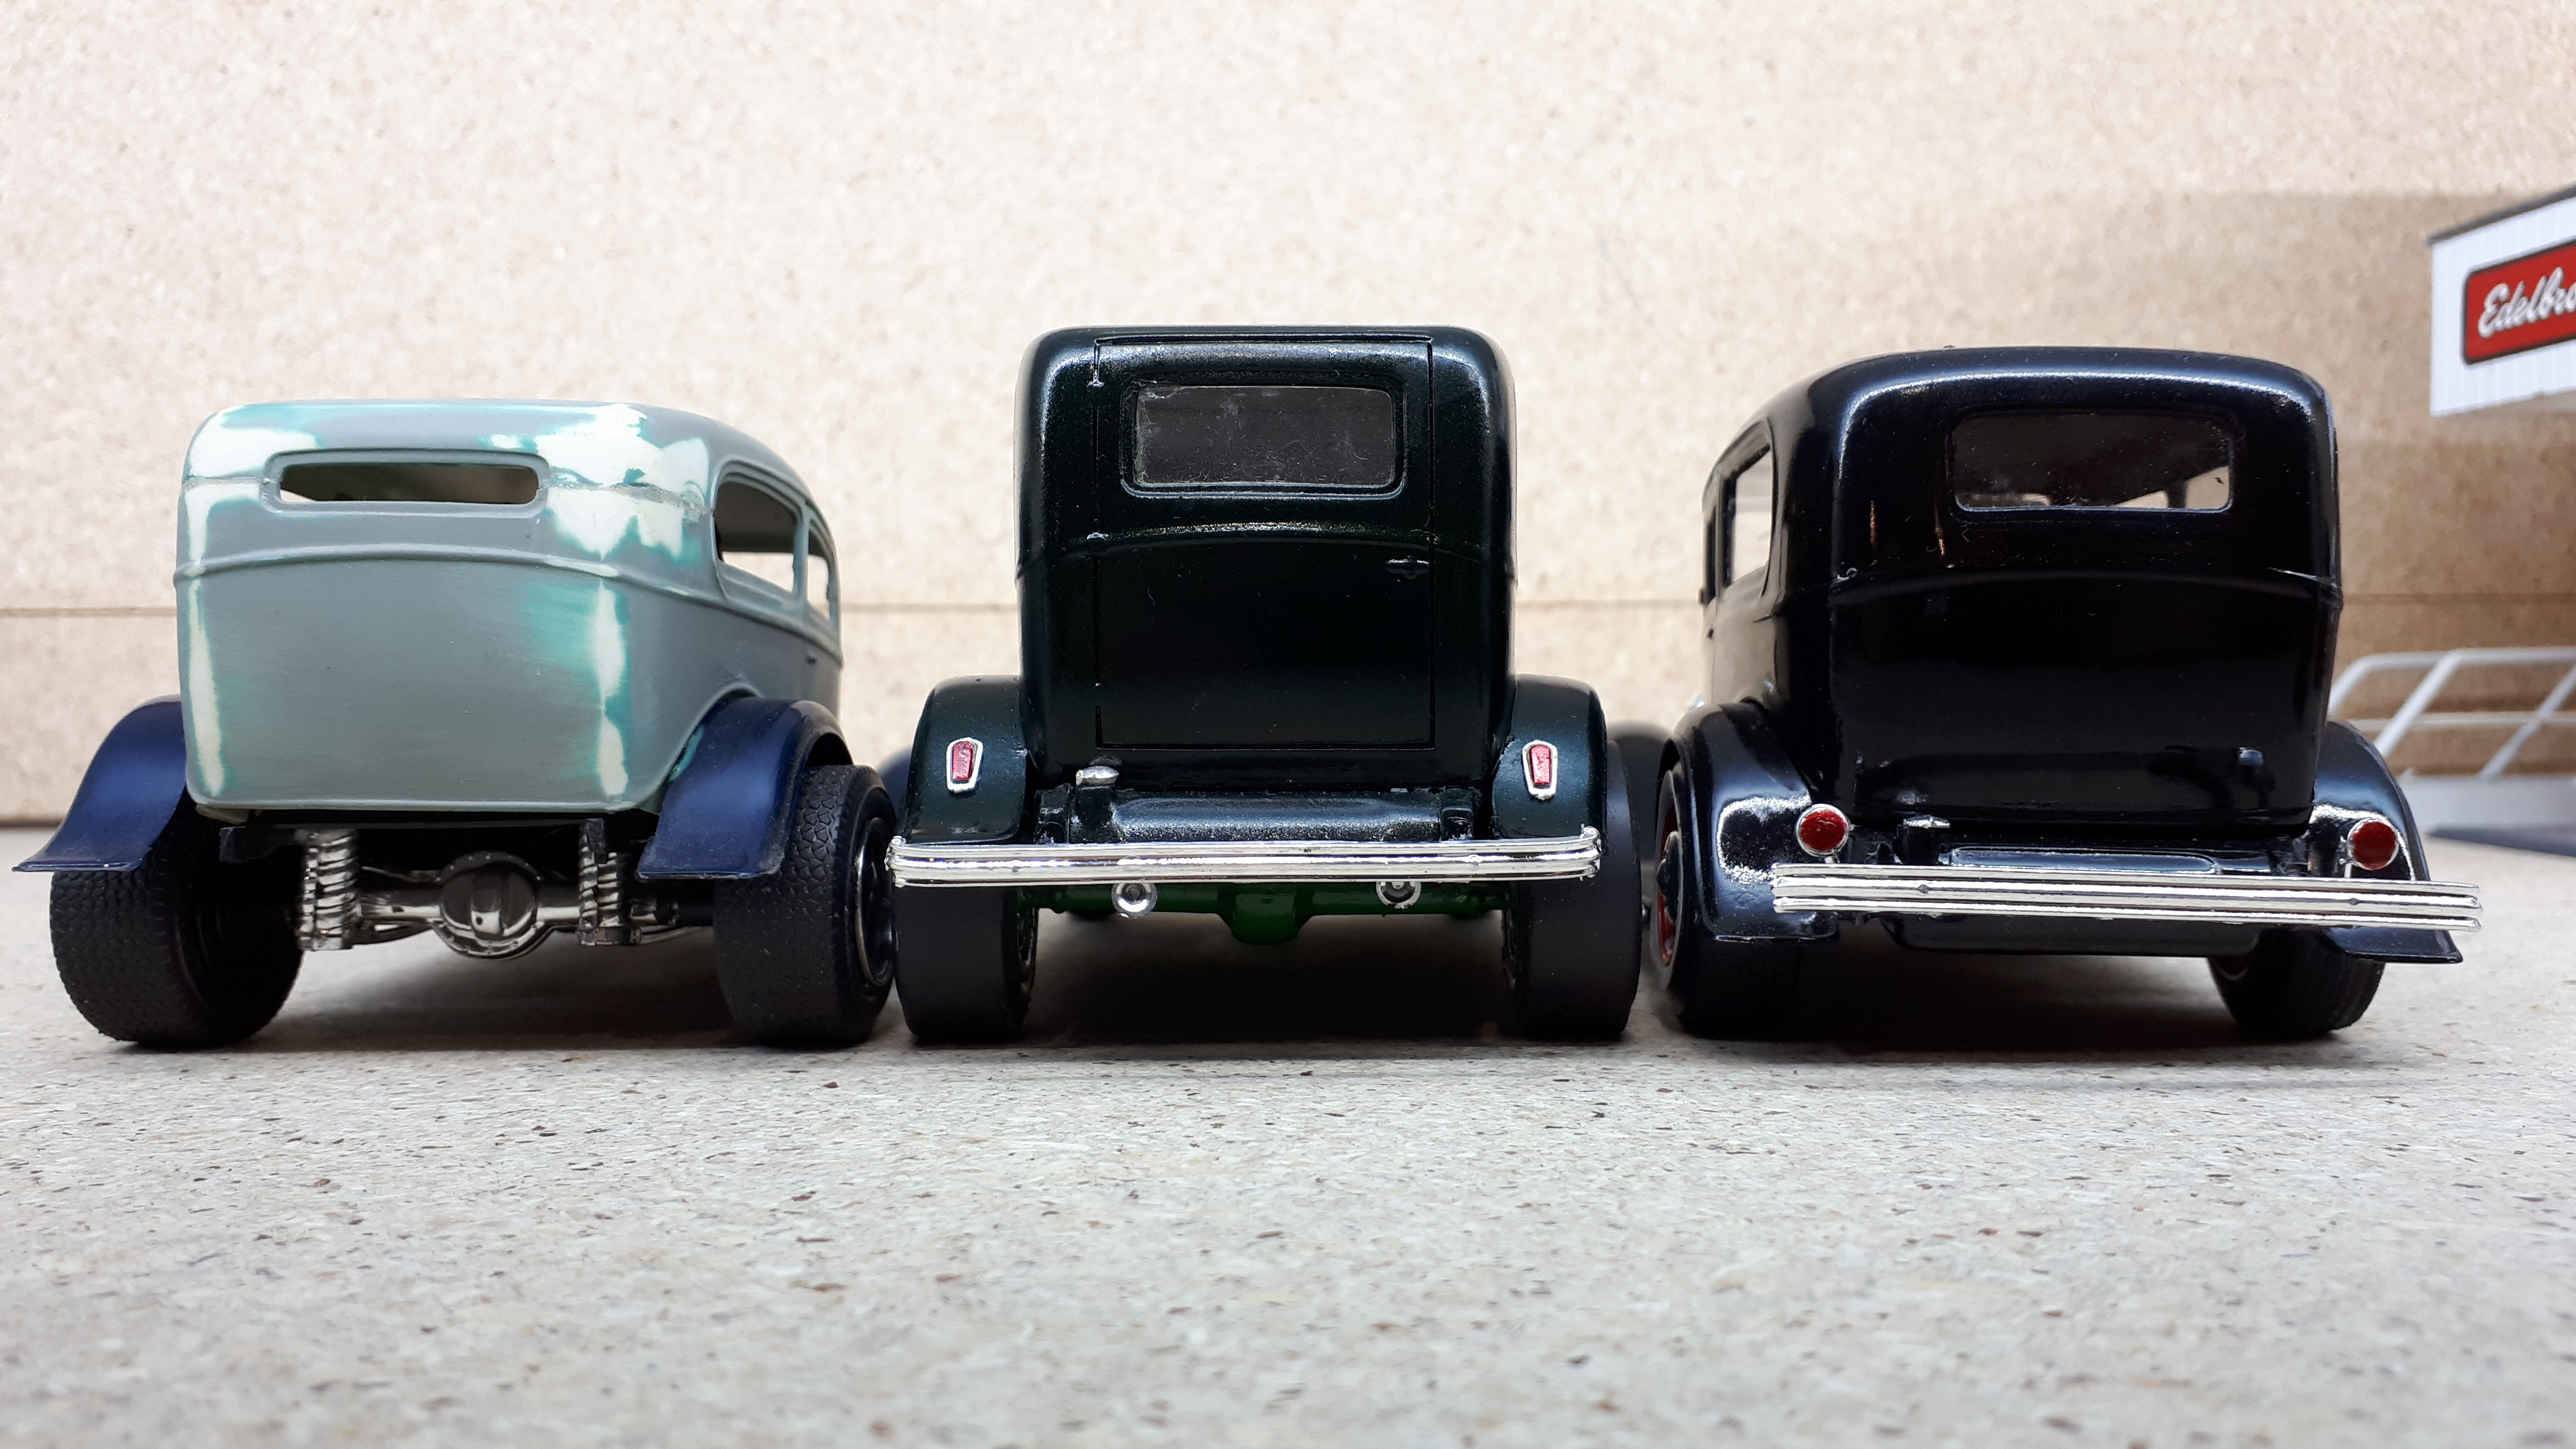
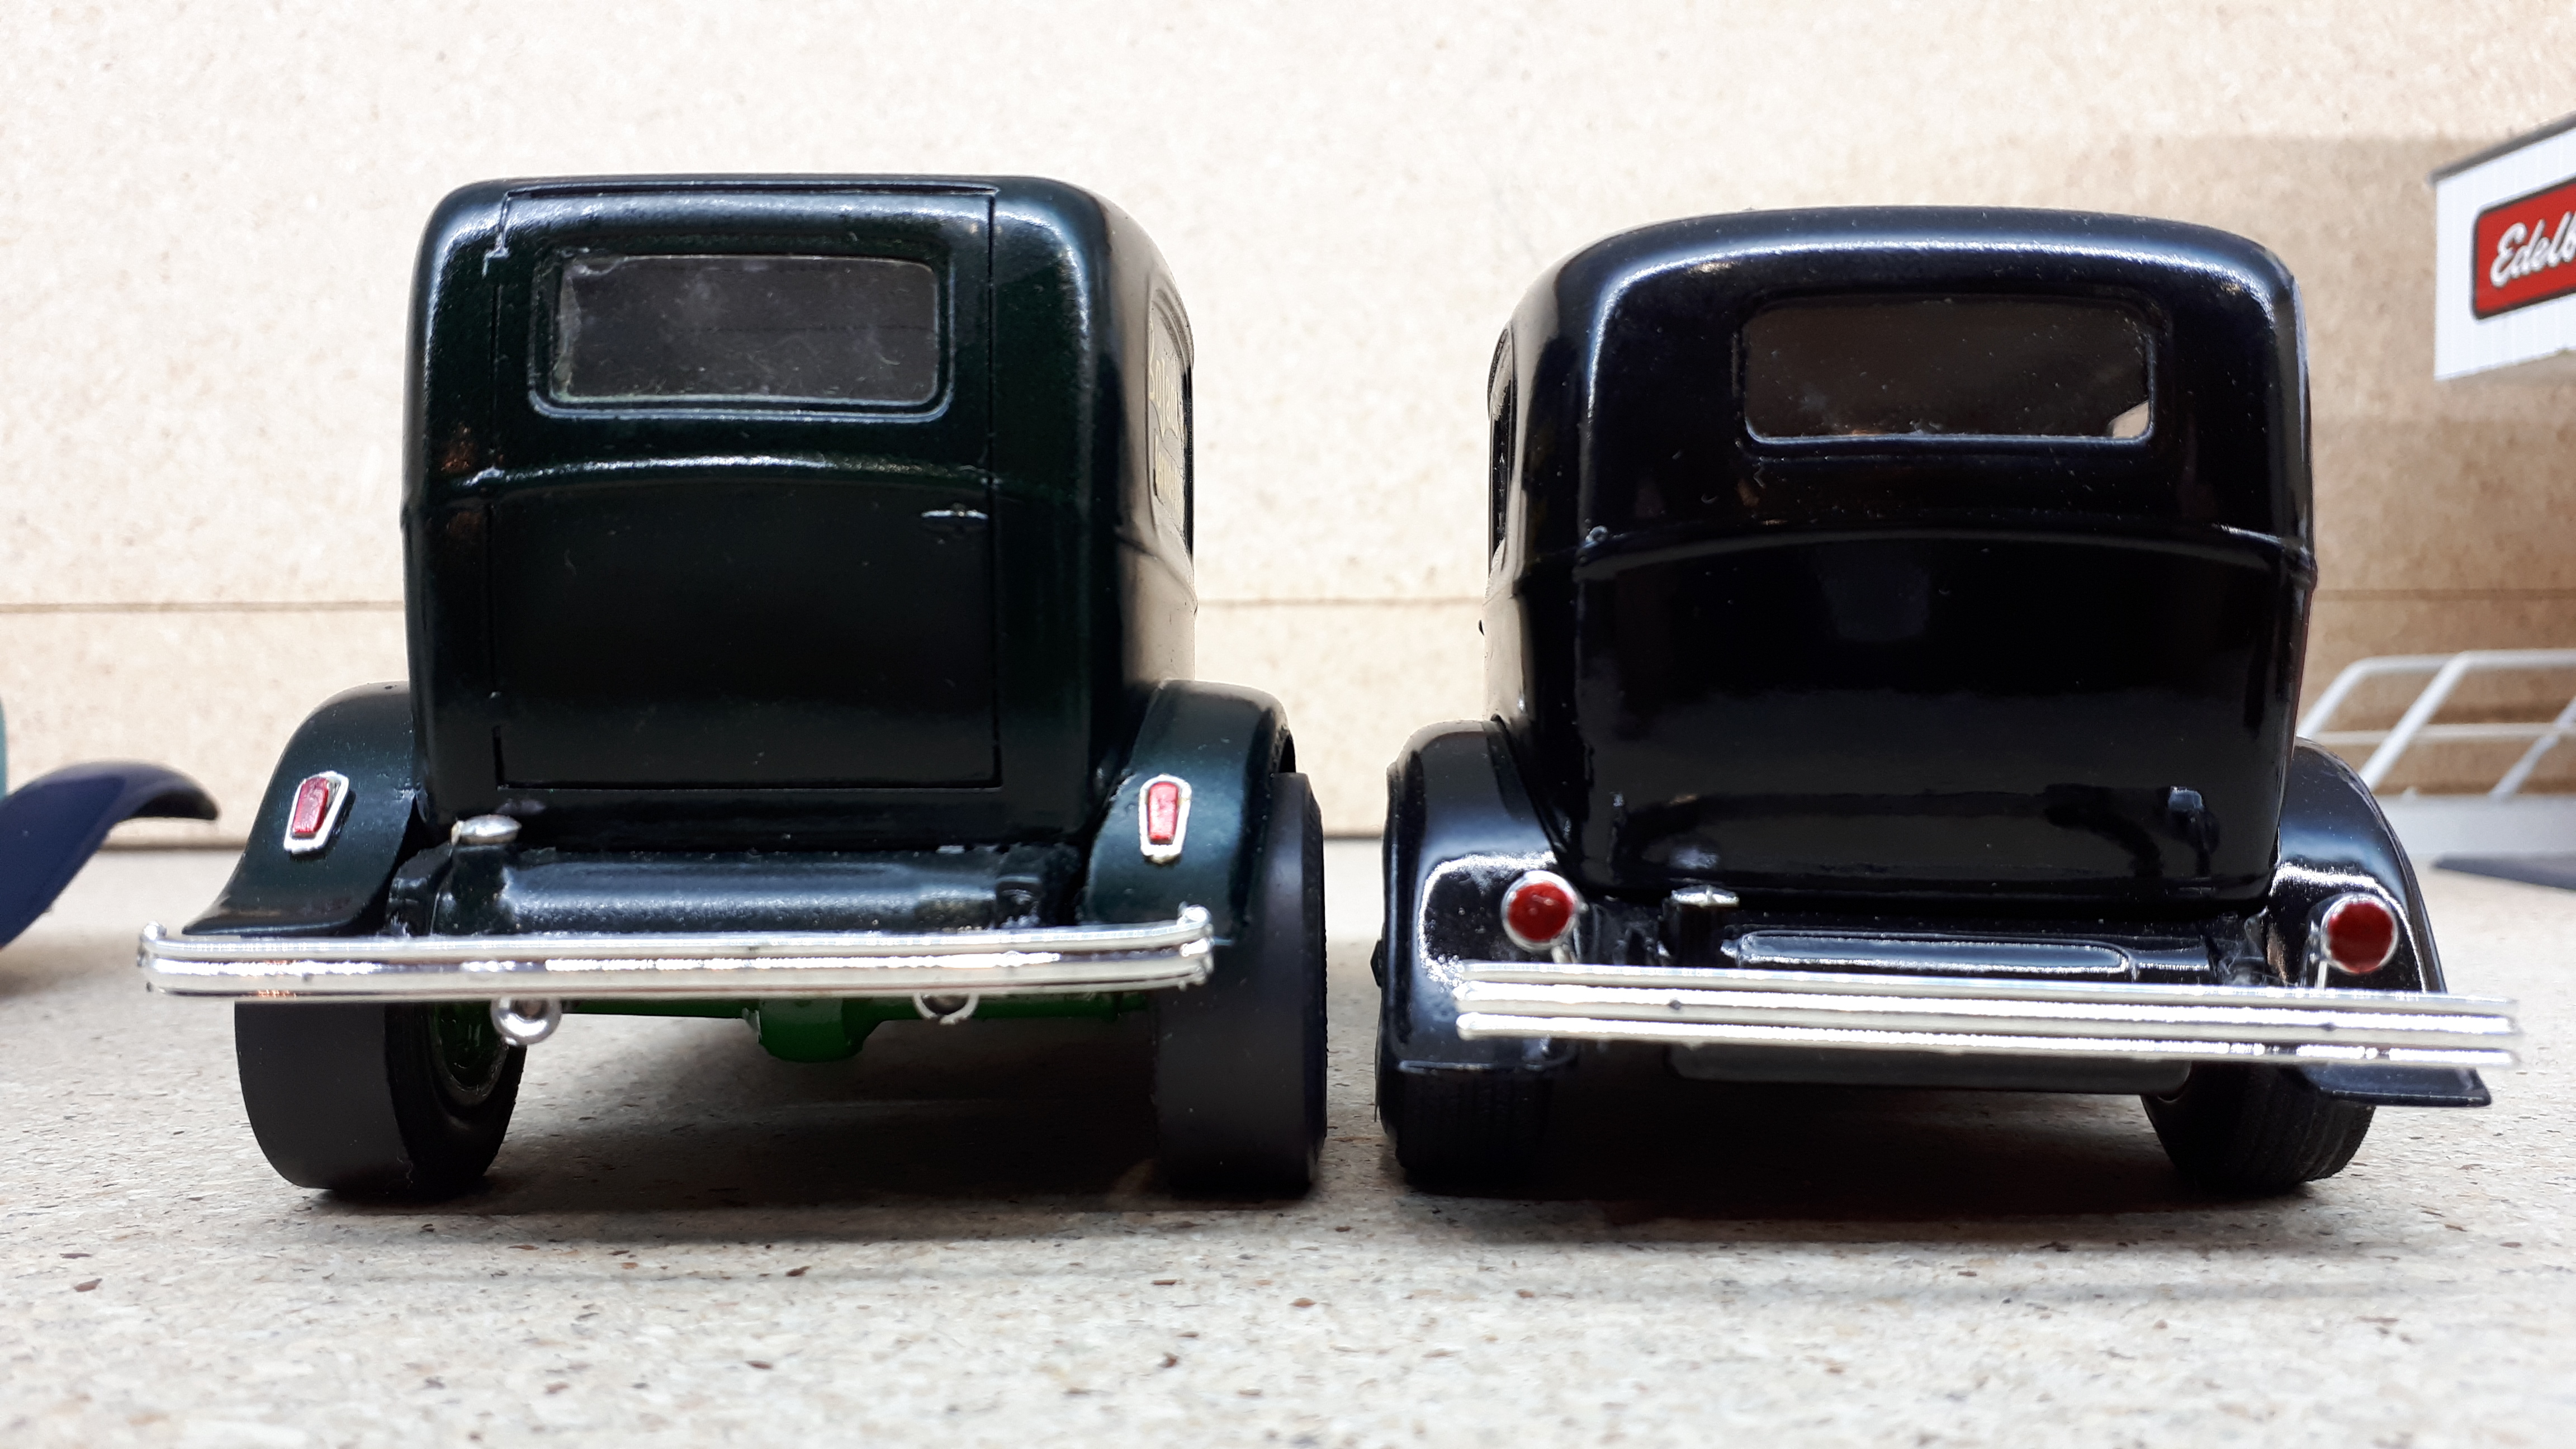
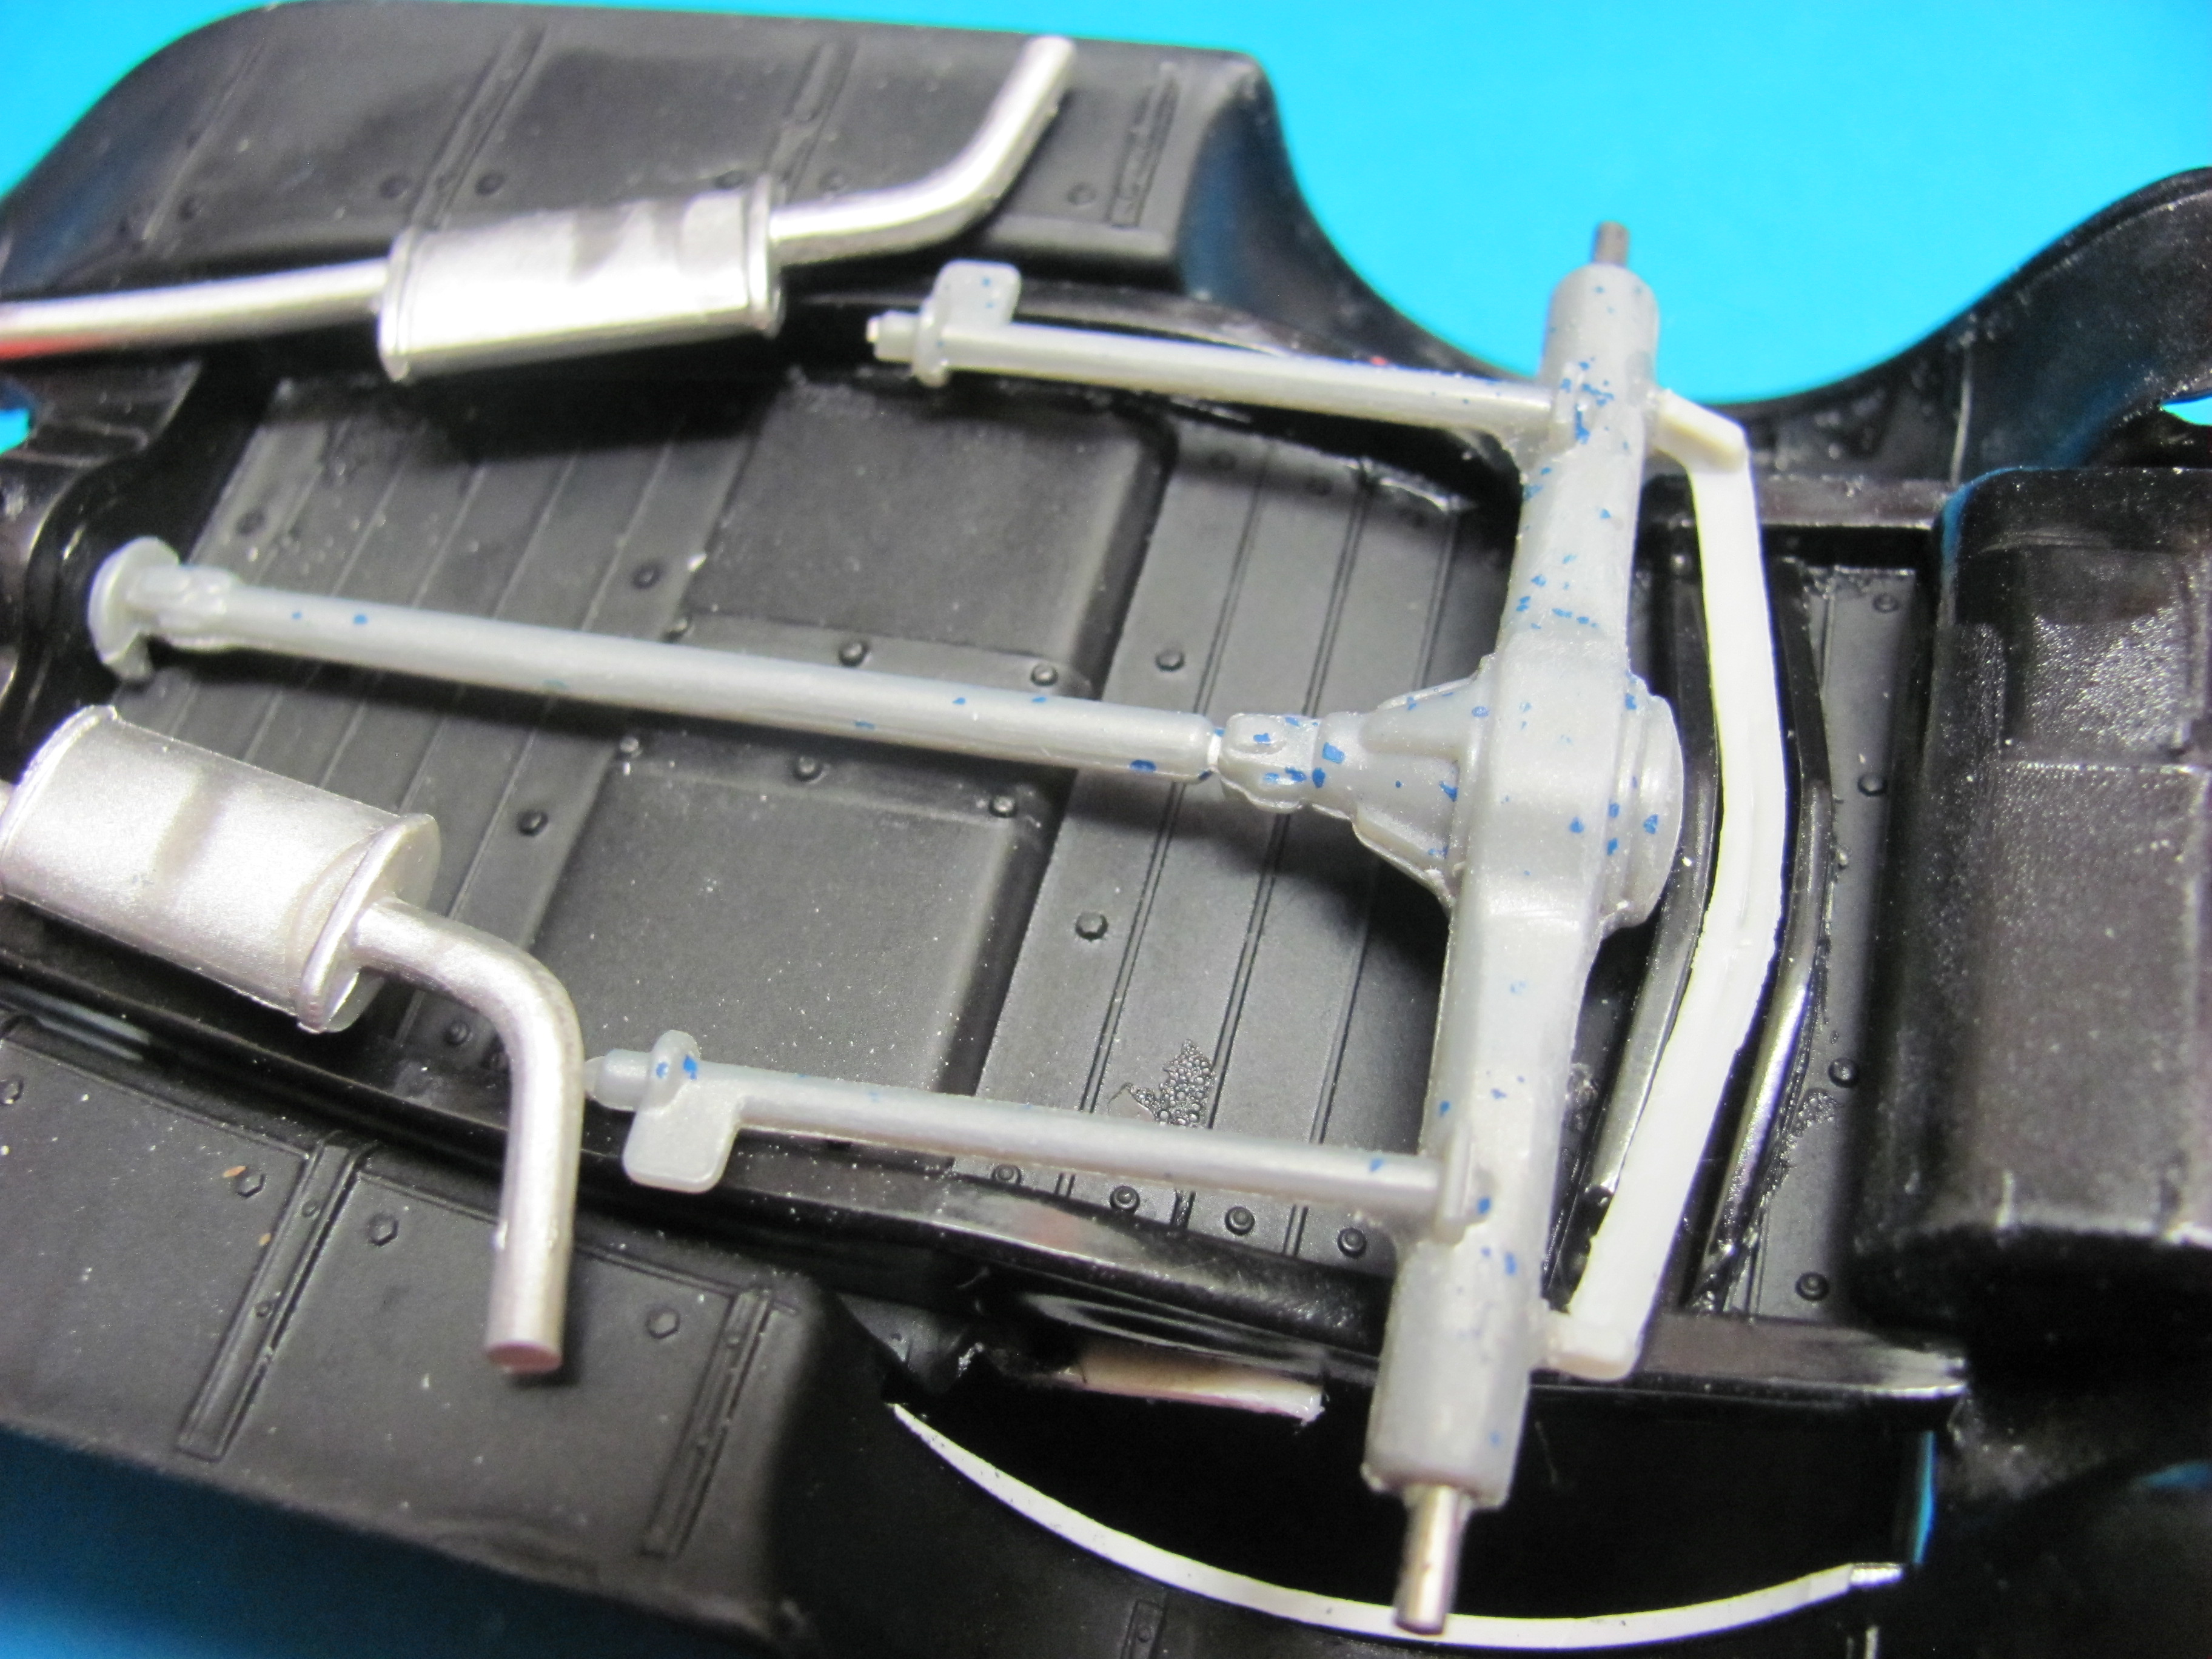
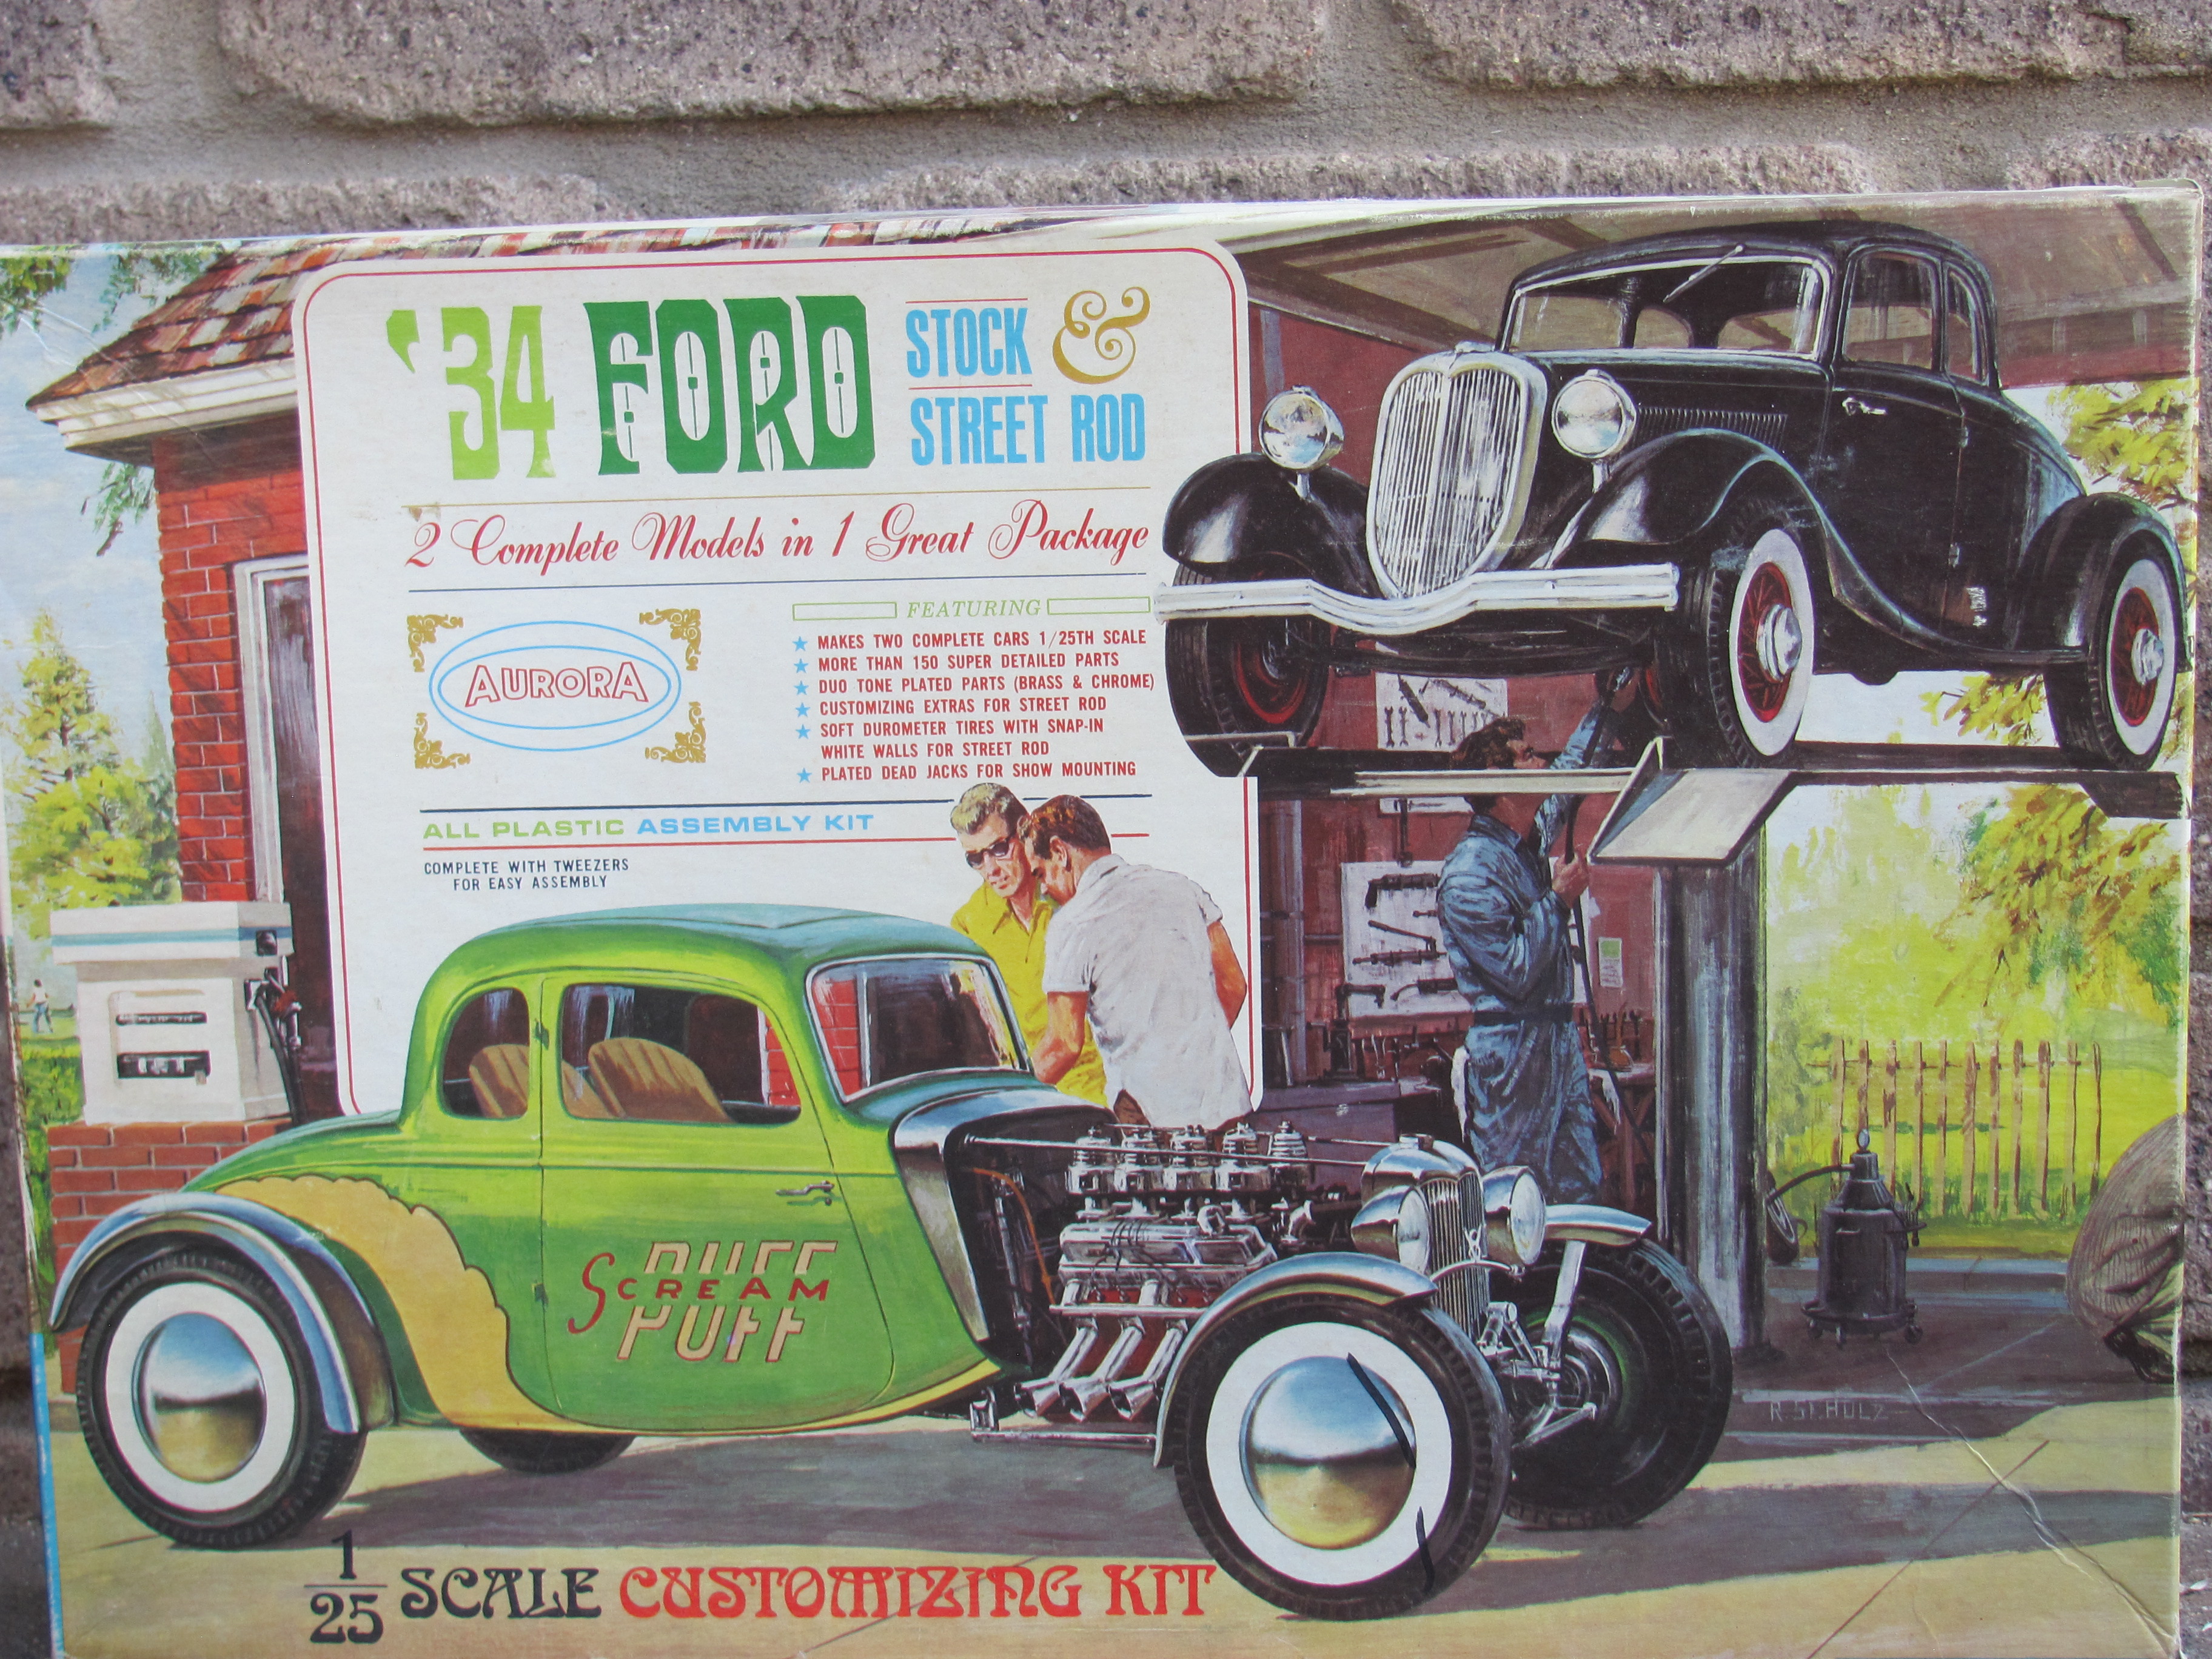
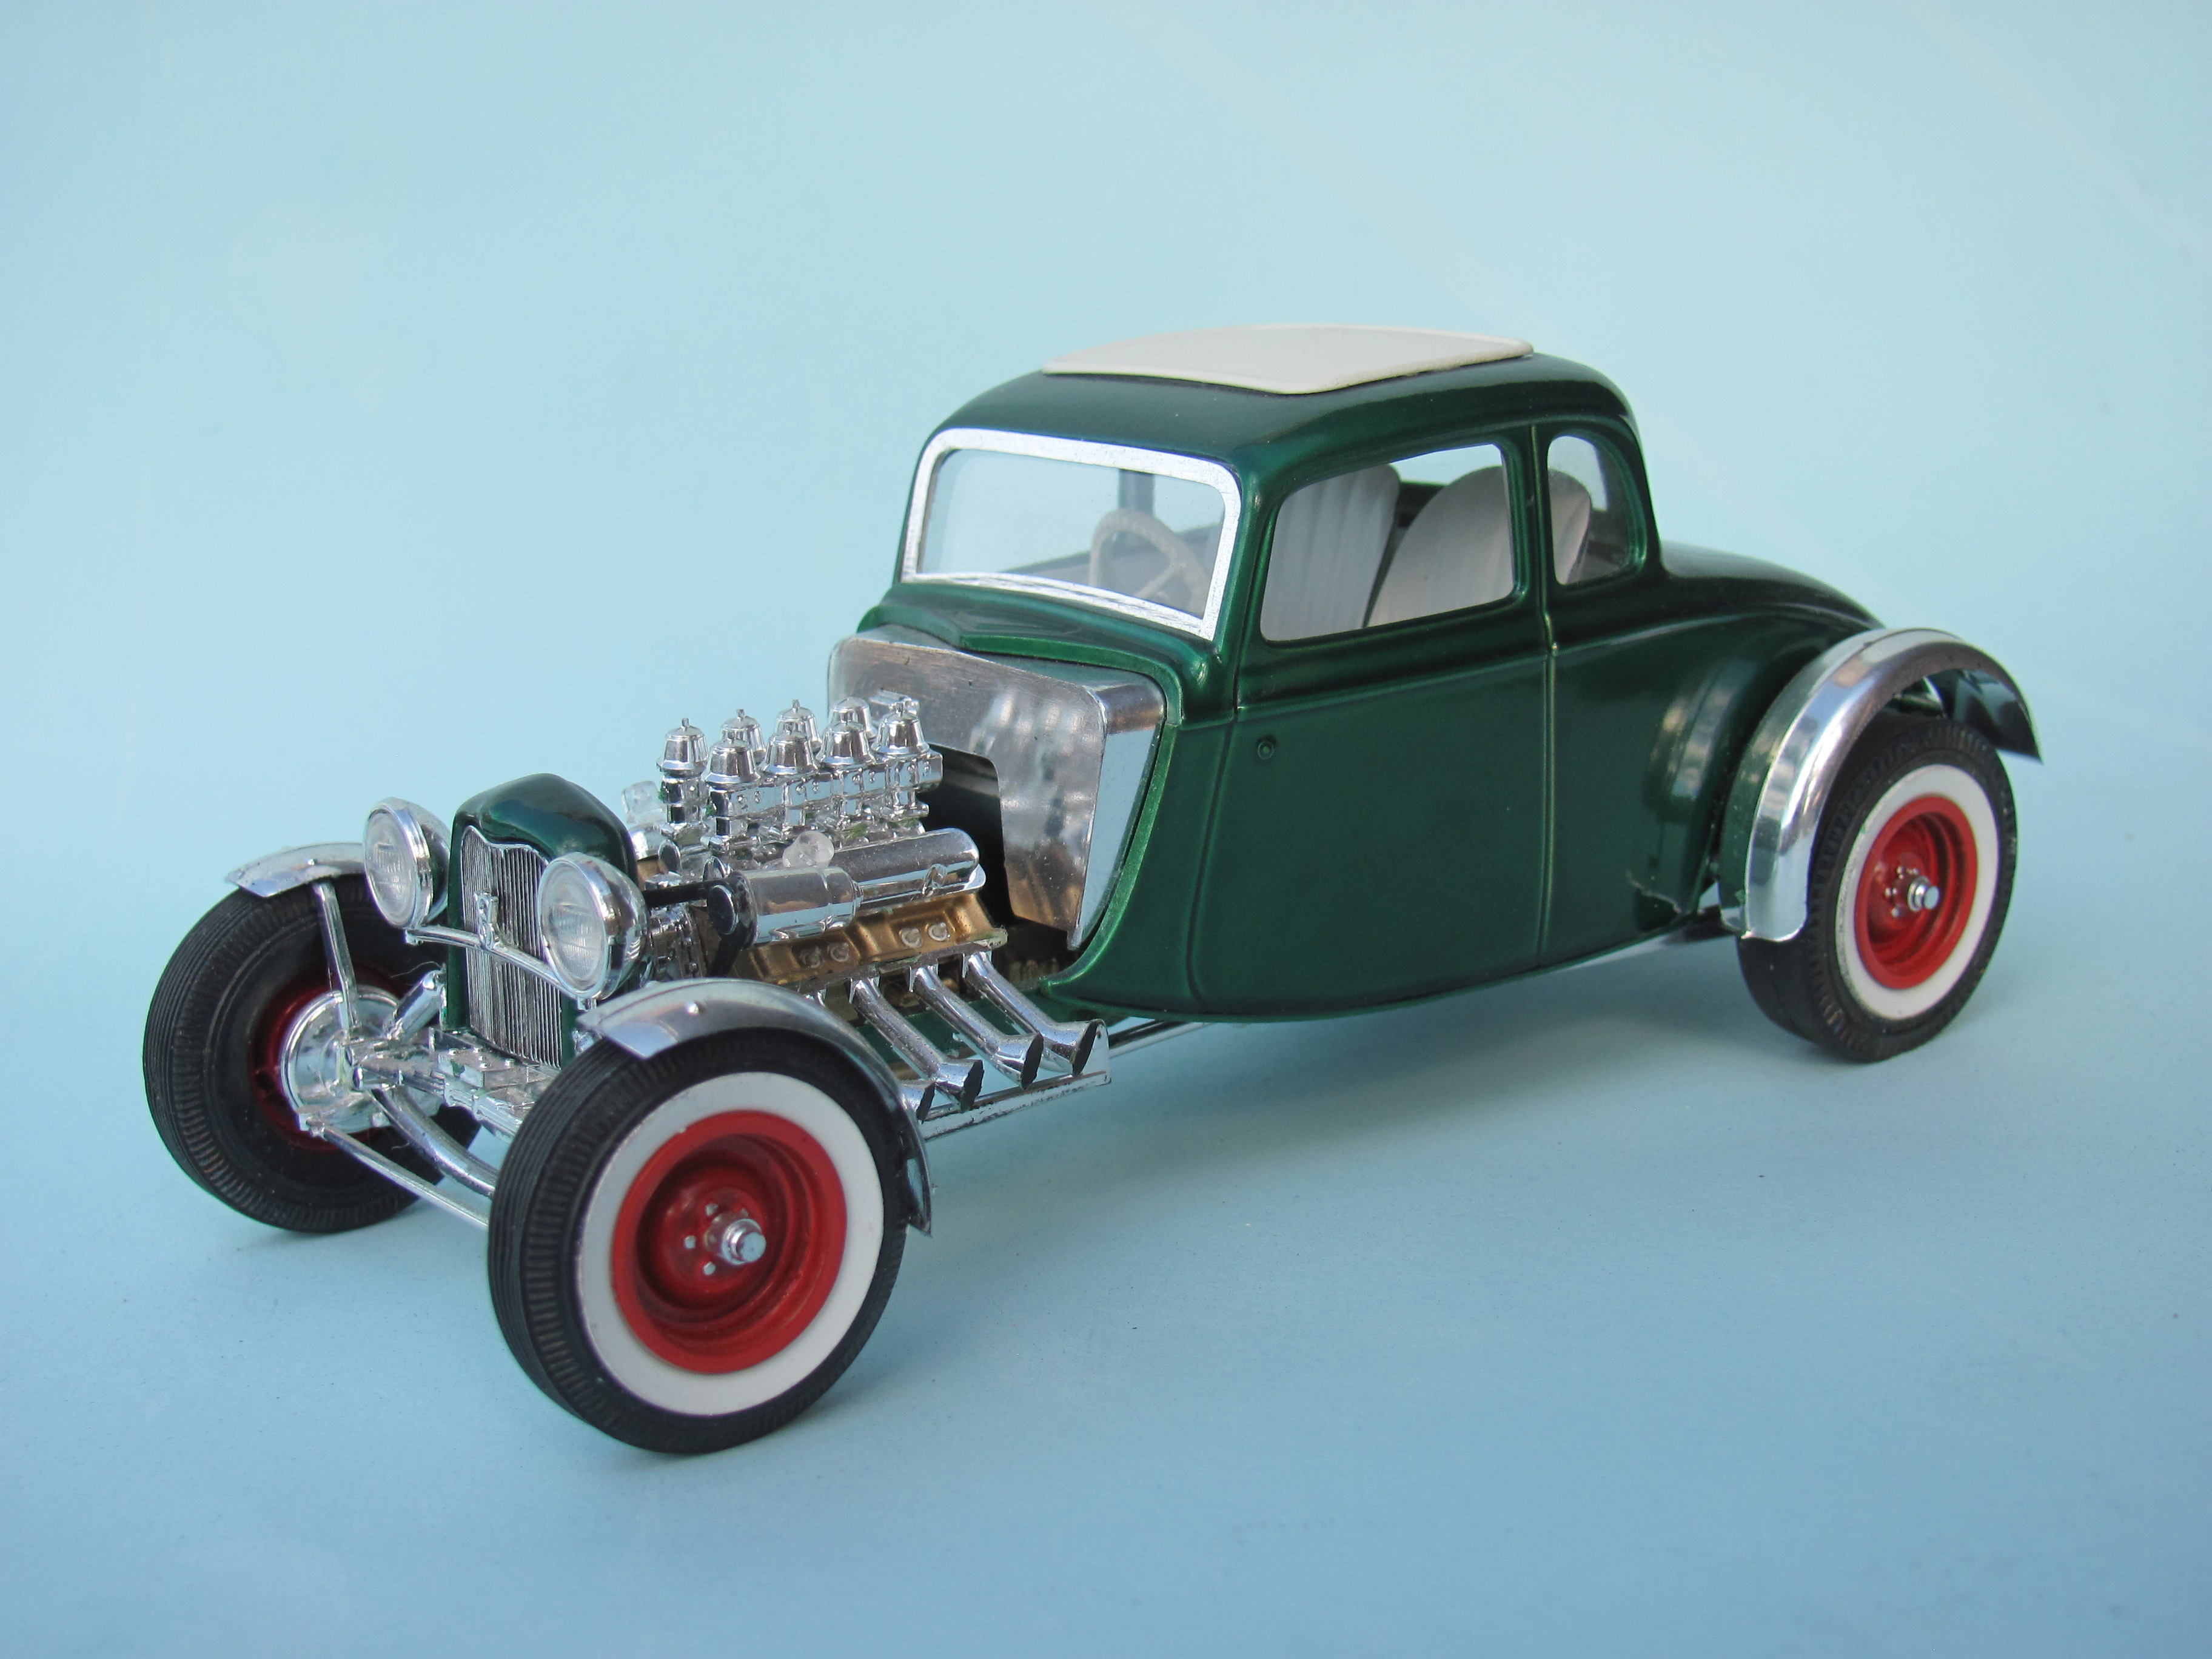
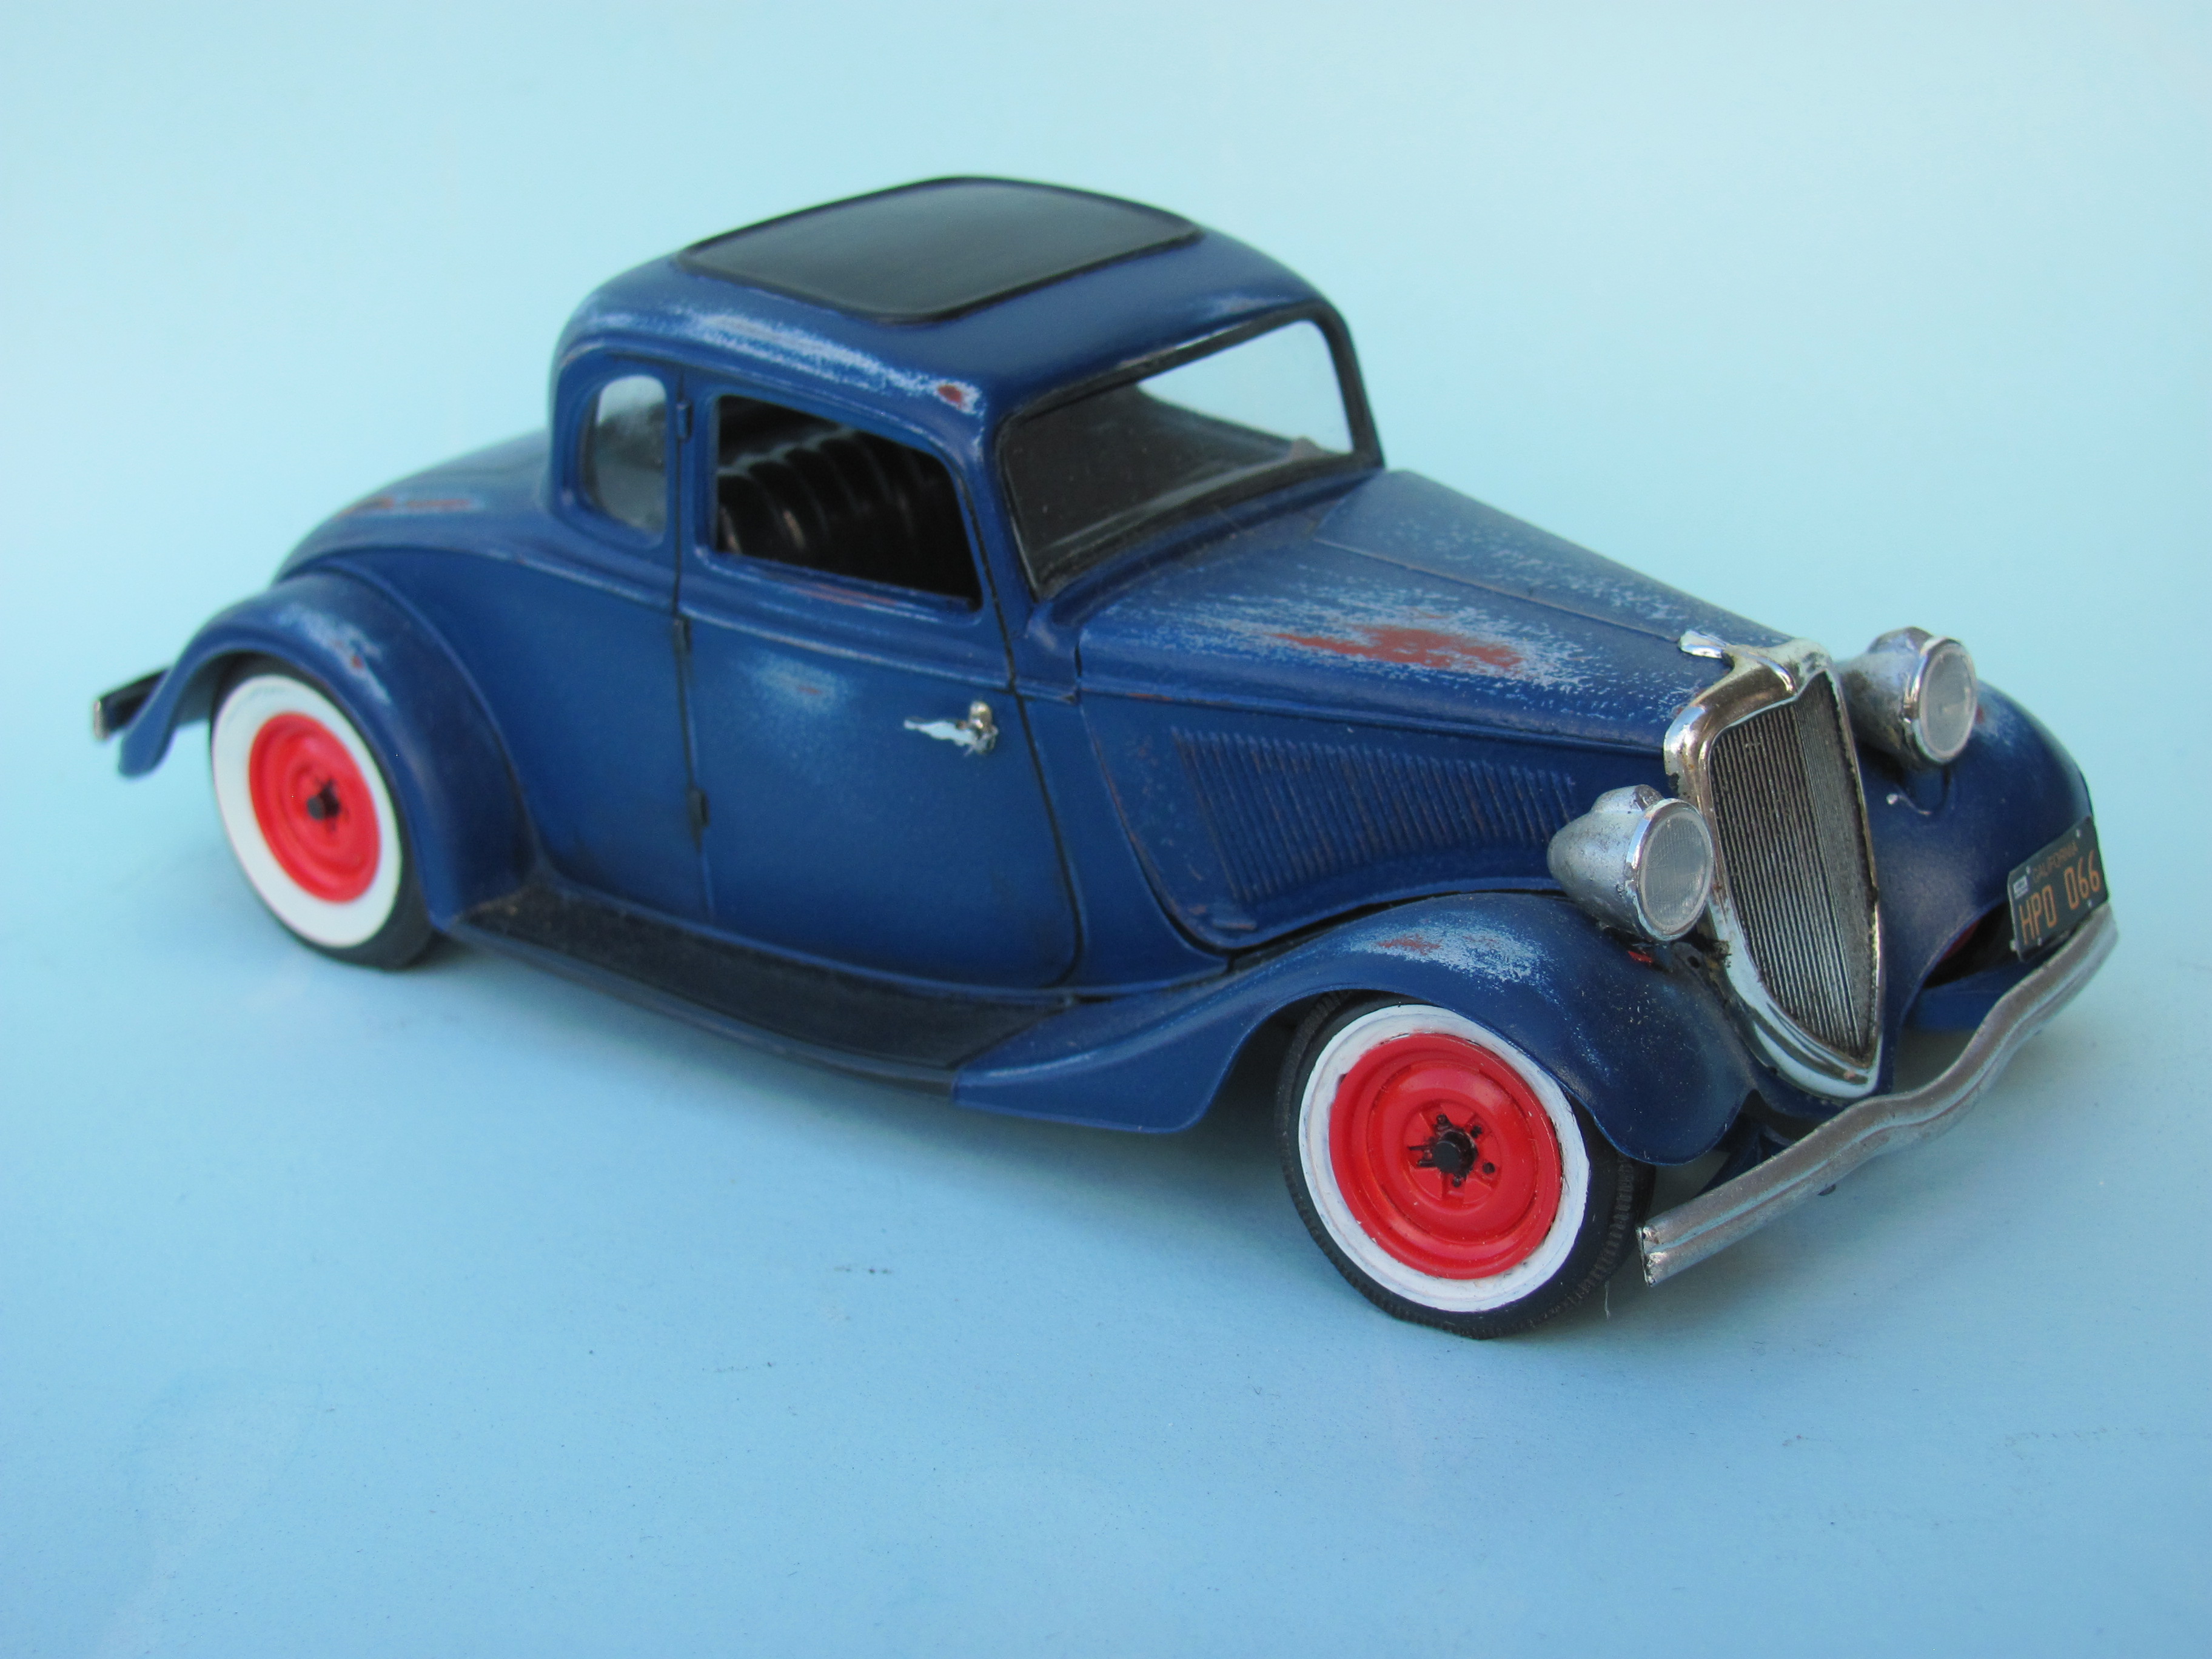
I had these two as a kid but they were glue bombs when I got them and my teenage efforts did nothing to improve them. When I went to live in Canada for a year back in 1996, one of my holy grails was to find a mint kit. I got talking with Tom Geiger and arranged to attend NNL East with him. Walked into the traders hall and on the VERY FIRST STALL was this box and an unbuilt channelled green coupe - the stocker was gone. It was near enough for me although the vendor still probably can't believe his luck that some dumb Aussie was keen enough to pay his kinda outrageous asking price. I found the stocker years later, built up cleanly but assembled with some glue that never was going to let go. A patinaed car made sense because I was never going to be able to organise a clean paintjob on a fully assembled model. I don't know how rare these are in terms of production numbers (does anyone?) but I will call them my rarest for now and as you can see I built them! Cheers Alan
-
I was going to use JB Weld on my Hubley Model A's but I hadn't thought of reinforcing with mesh. Great idea! I will also be making a point of using an automotive etch primer before I start the normal painting process as my experience customising Hot Wheels cars shows that regular hobby paints and primers chip easily. Cheers Alan Cheers Alan