Alan Barton
-
Posts
2,113 -
Joined
-
Last visited
Content Type
Profiles
Forums
Events
Gallery
Everything posted by Alan Barton
-
Anyone Up For A 1964 Valiant Convertible?
Alan Barton replied to Tom Geiger's topic in WIP: Model Cars
With slightly skinnier tyres and a four door B pillar that Valiant stock car could have raced at any number of Australian speedways in the early seventies. Nice work Tom! Cheers Alan -
Educate me on Model T speed equipment
Alan Barton replied to Aaronw's topic in General Automotive Talk (Trucks and Cars)
Here's a Fronty for you from the amazing engine collection at the American Museum of Speed in Lincoln Nebraska.
-
Ford Flathead V8 101
Alan Barton replied to Ace-Garageguy's topic in General Automotive Talk (Trucks and Cars)
Thanks Ace, I really enjoyed that. I was always aware of the shortcomings of a flatmotor but never fully understood exactly what caused them. That guy made it beautifully simple to understand. I have been a teacher and a trainer my whole life and it is always a joy to hear someone who can deliver as smoothly as that and with such clarity. And I wouldn't mind that monster of a flatmotor in my cabinet either! Cheers Alan -
Rusting products
Alan Barton replied to landman's topic in General Automotive Talk (Trucks and Cars)
Tommy, that is easily the best weathered engine I have ever seen. Those rusty exhausts are incredible and the greasy shine on the rocker arms is totally convincing. If I were to pick up that gearbox, I can just feel the grease on my hands and then wiping them off on my jeans.! This is automotive art at its finest. Cheers Alan -
Time For a Workbench Makeover!
Alan Barton replied to 2002p51's topic in General Automotive Talk (Trucks and Cars)
I should have guessed! When you were doing Bench Racer we were very much on the same page as far as short track builds go. And I love your A modified. Another thing I love about my glass top is that I can be a complete slob with glue, paint or putty and a few seconds with a scraper and I am looking sweet again! Cheers Alan -
How many ways could this thread go ?
Alan Barton replied to Greg Myers's topic in General Automotive Talk (Trucks and Cars)
You know what, they are just fun! Anyone who looks at these two can't help but grin. No rare classic cars were cut up to build them and it wont start some crazy new trend. It really doesn't matter if they run or not, they are just to look at and enjoy. I'm a hot rodder but I think he did a better job on the Kombi but hey, it's a personal choice. Cheers Alan -
Time For a Workbench Makeover!
Alan Barton replied to 2002p51's topic in General Automotive Talk (Trucks and Cars)
That came out great Drew, but before you get paint and glue on that nice white surface, go and get a sheet of glass cut to fit, with a polished front edge for safety. You are a racecar and hot rod builder like me, and glass is the only way when you are trying to fab chassis, setup suspensions, keep the wheels upright and all fours etc etc etc. You will never regret the very small investment. Cheers Alan -
Hi guys, Glad you love our Aussie icons! Yep, even as a Ford guy, I think the HQ coupe was the prettiest car we ever made. There are hundreds of show cars and street machines built from these and though their older brothers , the HK, HT and HG get more dollars, they are still a very desirable car. There was a facelift with the HJ, HX and HZ models but they looked like a Monte Carlo and frankly, were square pegs in round holes, or blunt square noses on a sexy flowing body. Those later models did have upgraded front ends that made them handle much better than the HQ - I once owned an HQ ute and I never understood how a woman could have parked one - the non-powered steering was heavy as a truck! The HX and HZ front subframe (think Camaro) is a popular bolt on swap into an HQ. Fun Fact - every HQ,J,X,Z Monaro coupe came with a tinted band rear window - why? Because they pinched them off early seventies Chevy Caprice - for a low volume market like Australia it was a cost cutting exercise using the GM parts catalogue. And TomZ, if I can speak on behalf of Jason and Michelle who are great friends of mine and run TPB to support themselves and two boys, can I discretely say that the lack of identification on some of their parts reflects the need to avoid spending huge dollars of their income on heavy licensing fees - get my drift? A little google searching will reveal what their parts are for. An unfortunate fact of the modern business world. Not much help to an American but every Aussie car guy knows exactly what a "red motor" is, it only refers to one make and generation of Australian engine and easily the most popular of all time. it was in production for at least 30 years that I can think of. "Red Engine" is their way of not treading on toes yet telling Aussie modellers, at least, what it is. Again, Google is your friend Cheers Alan
-
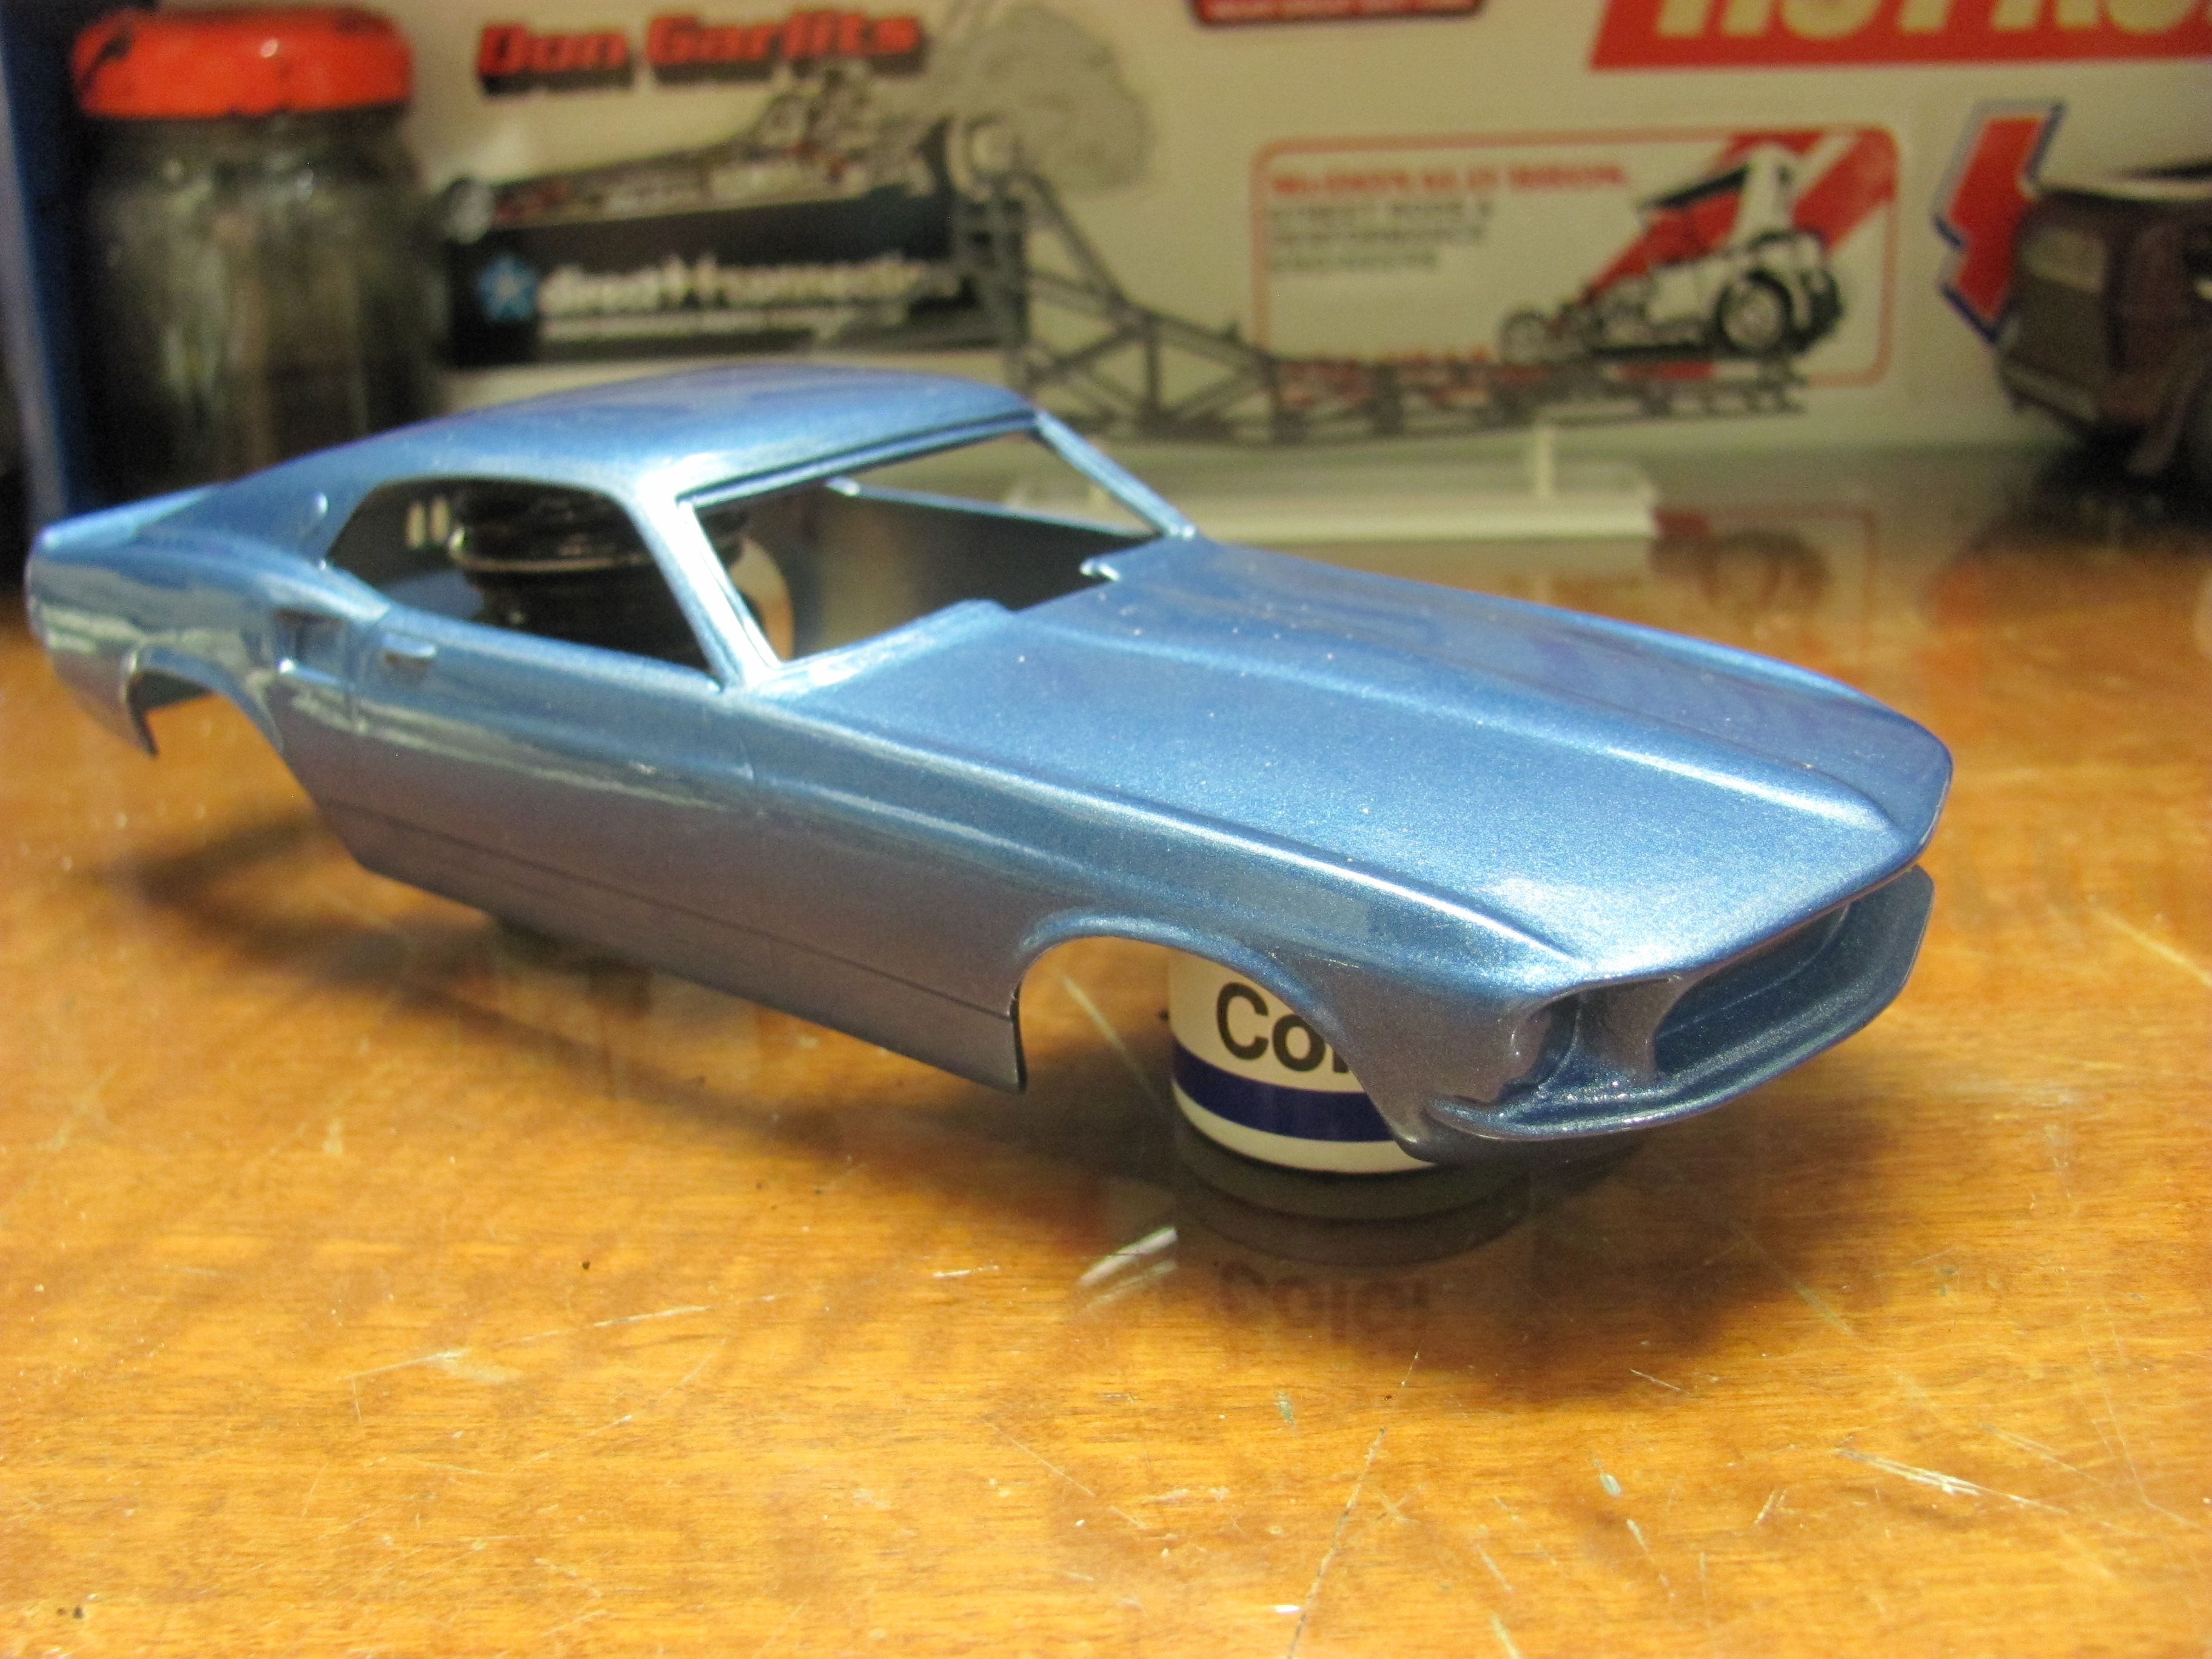
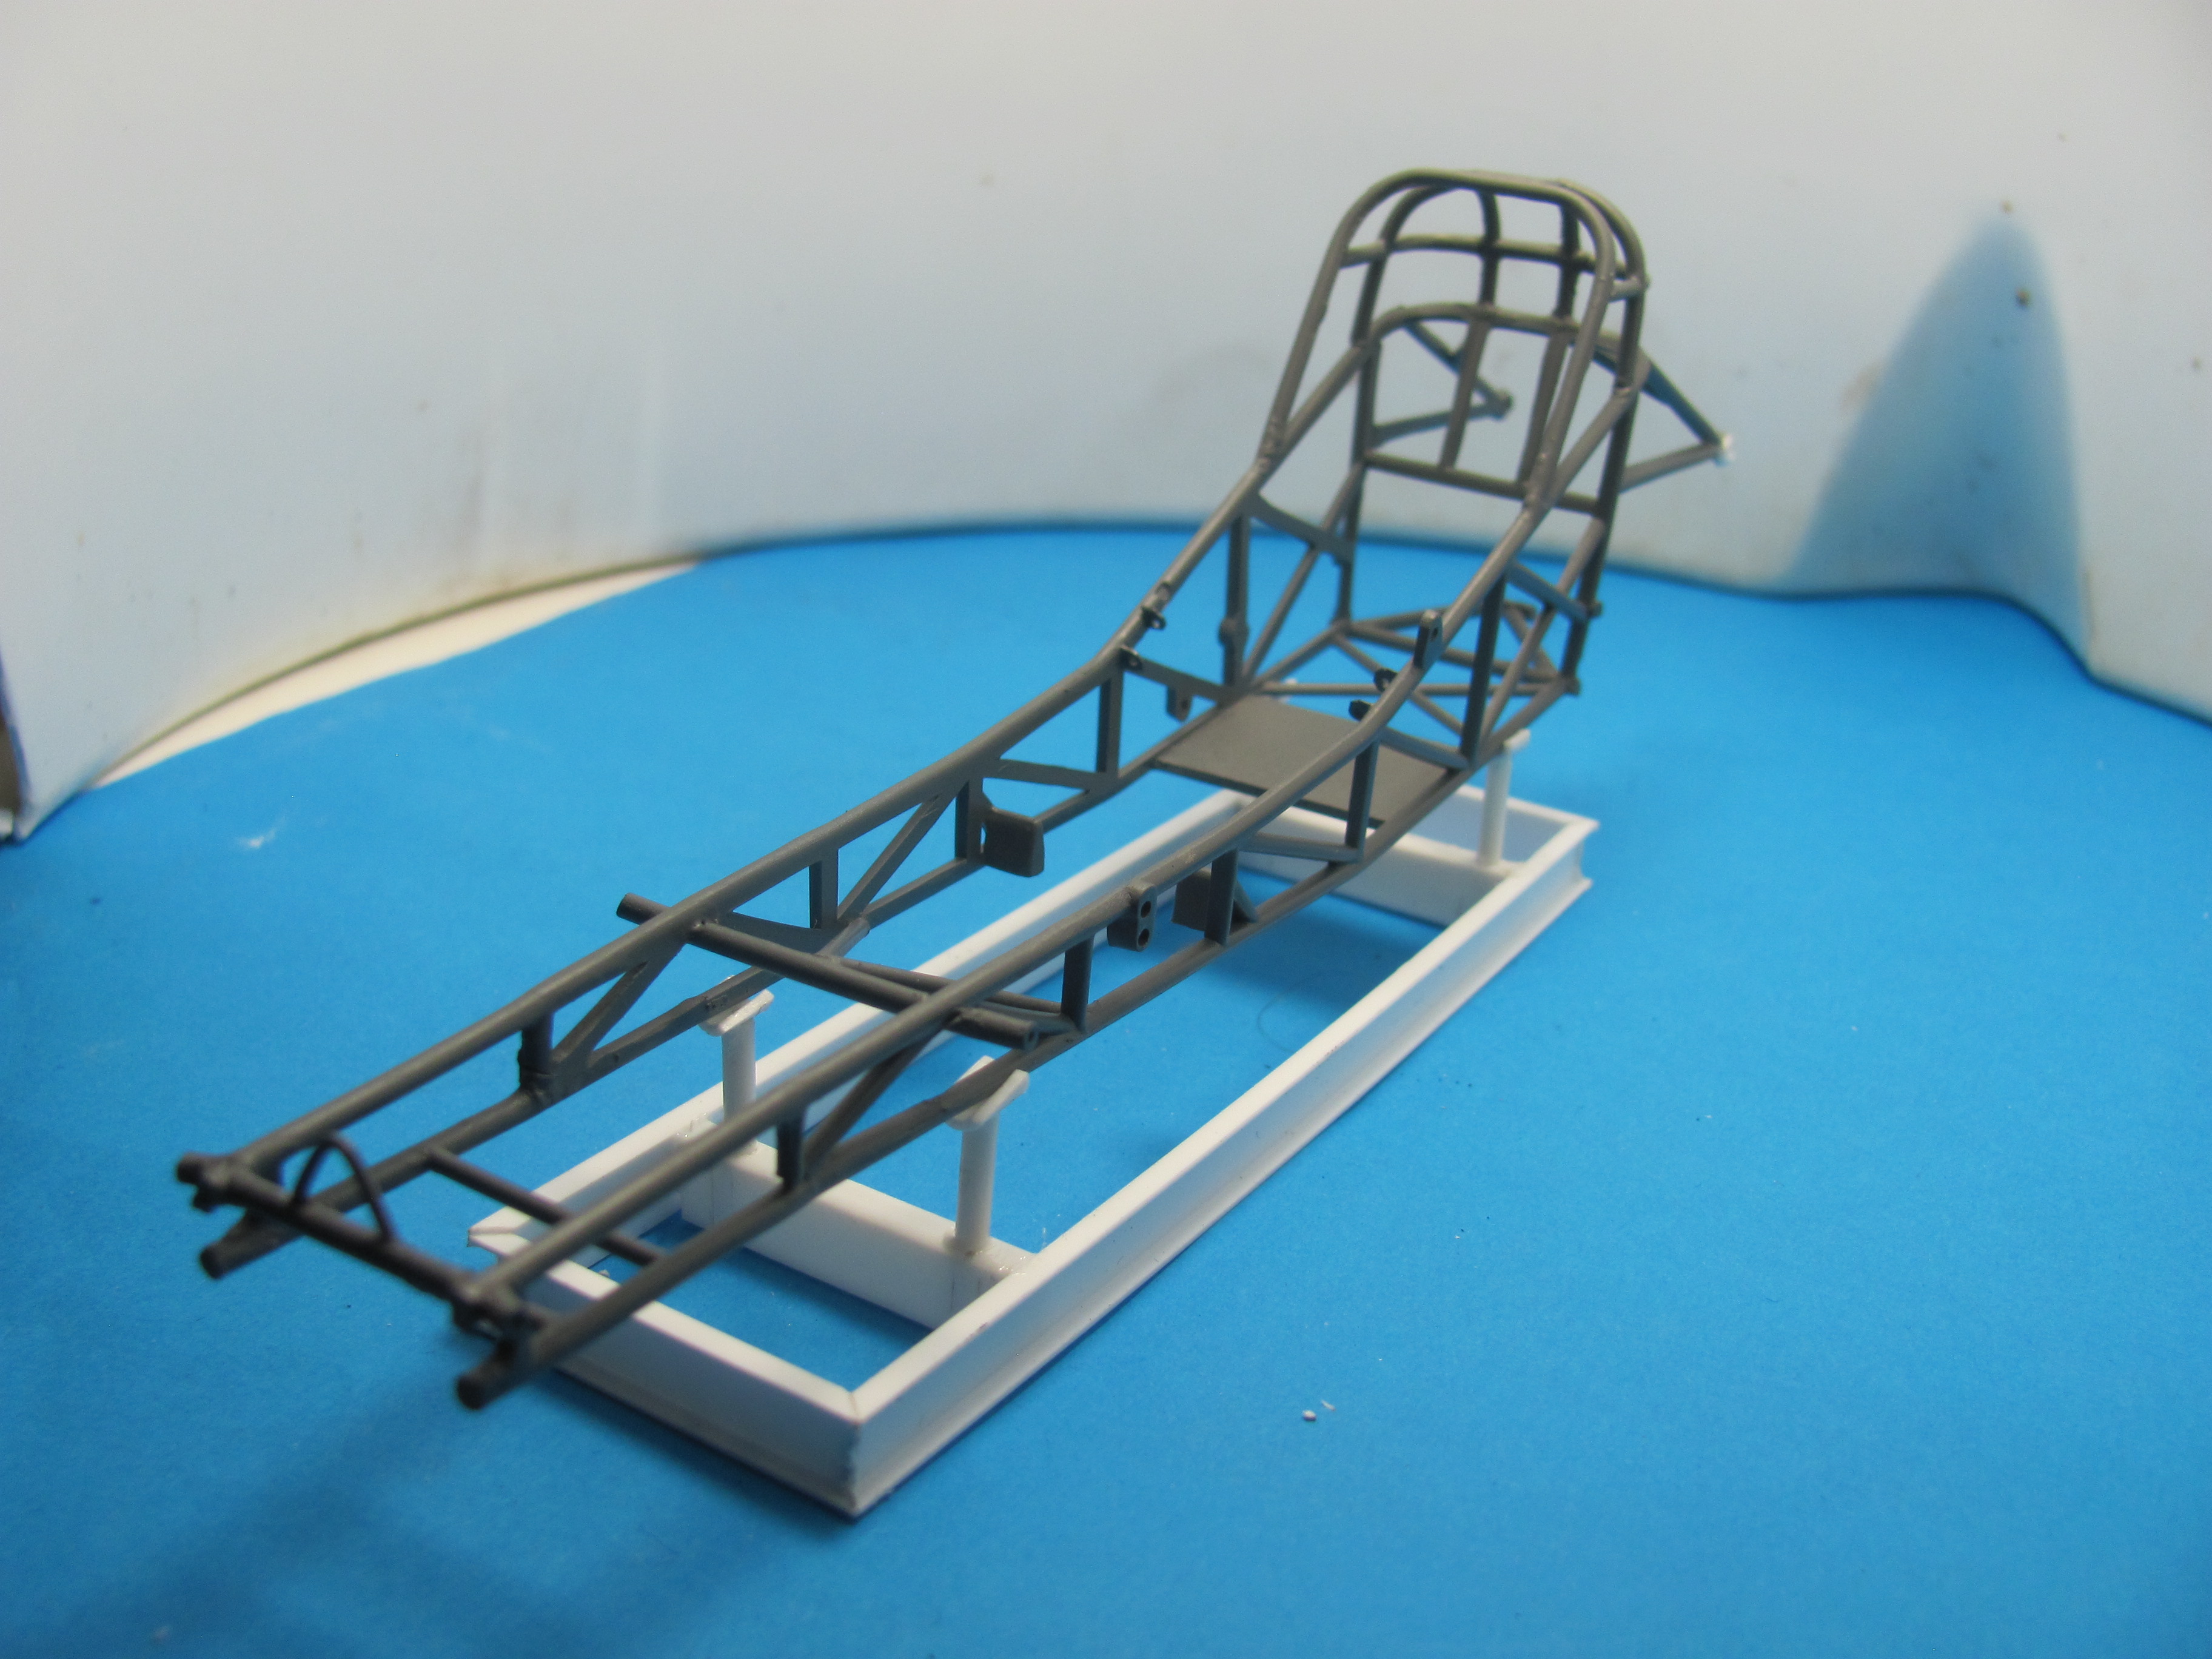
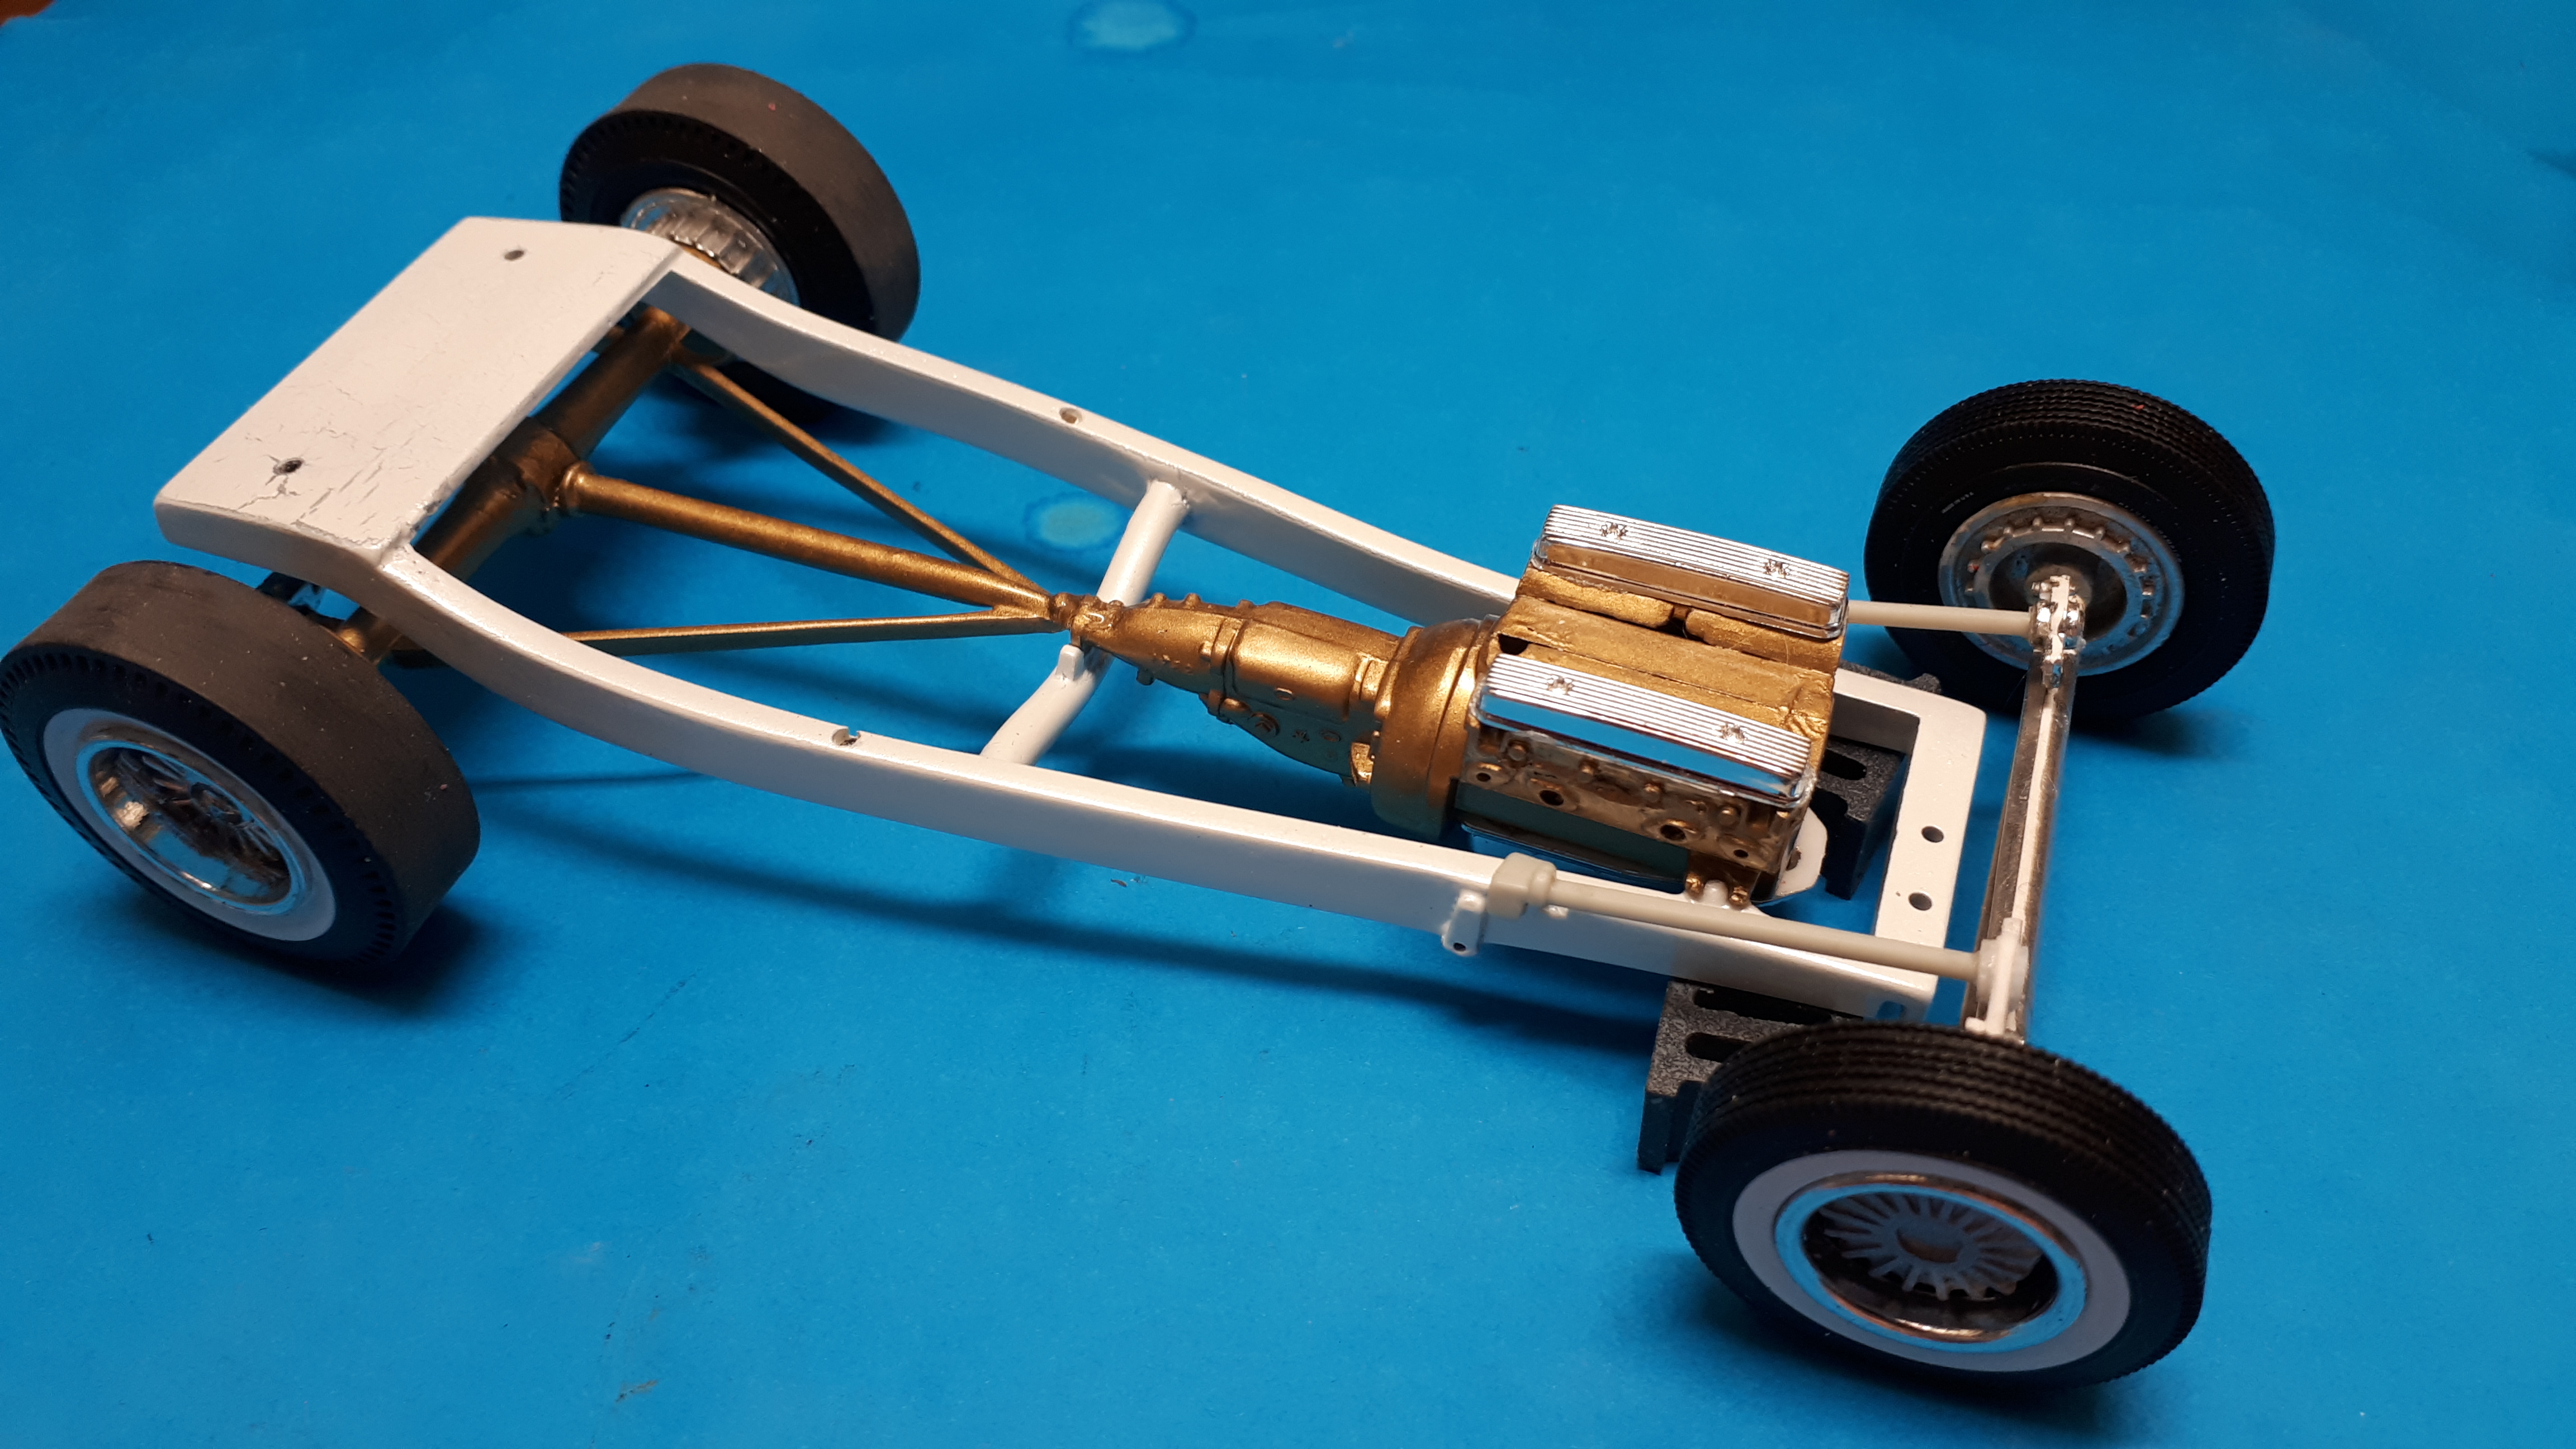
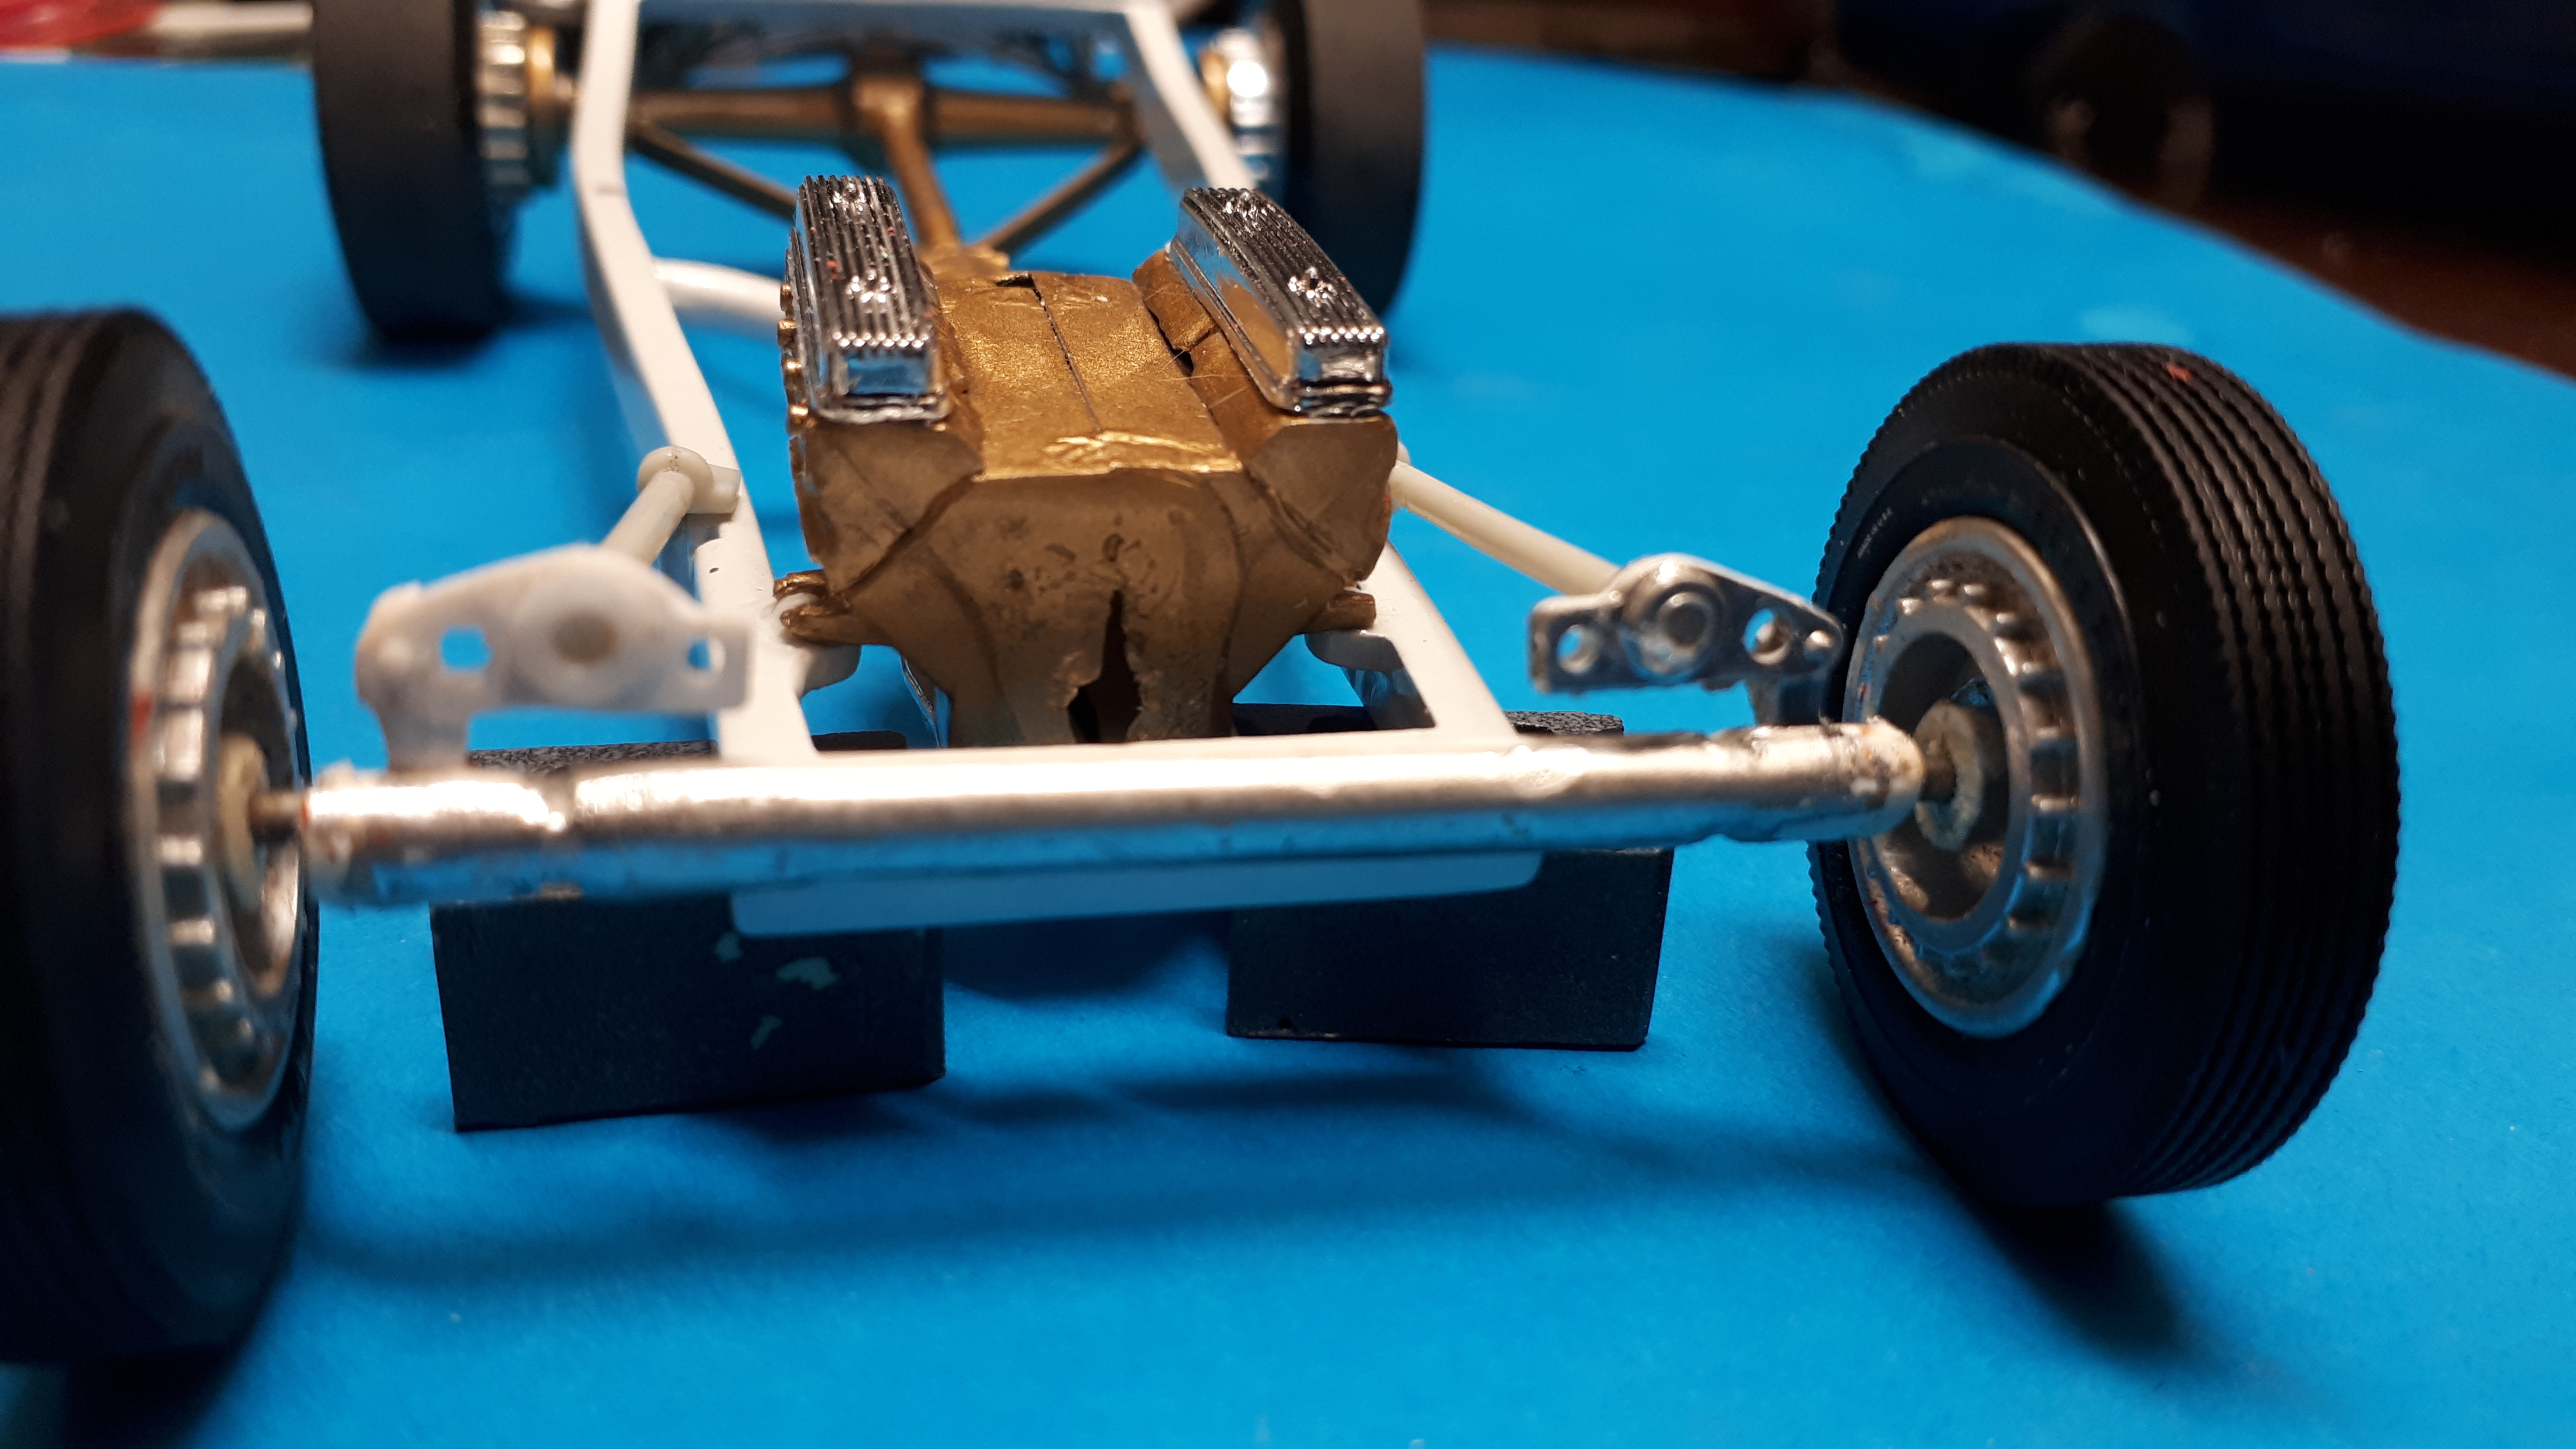
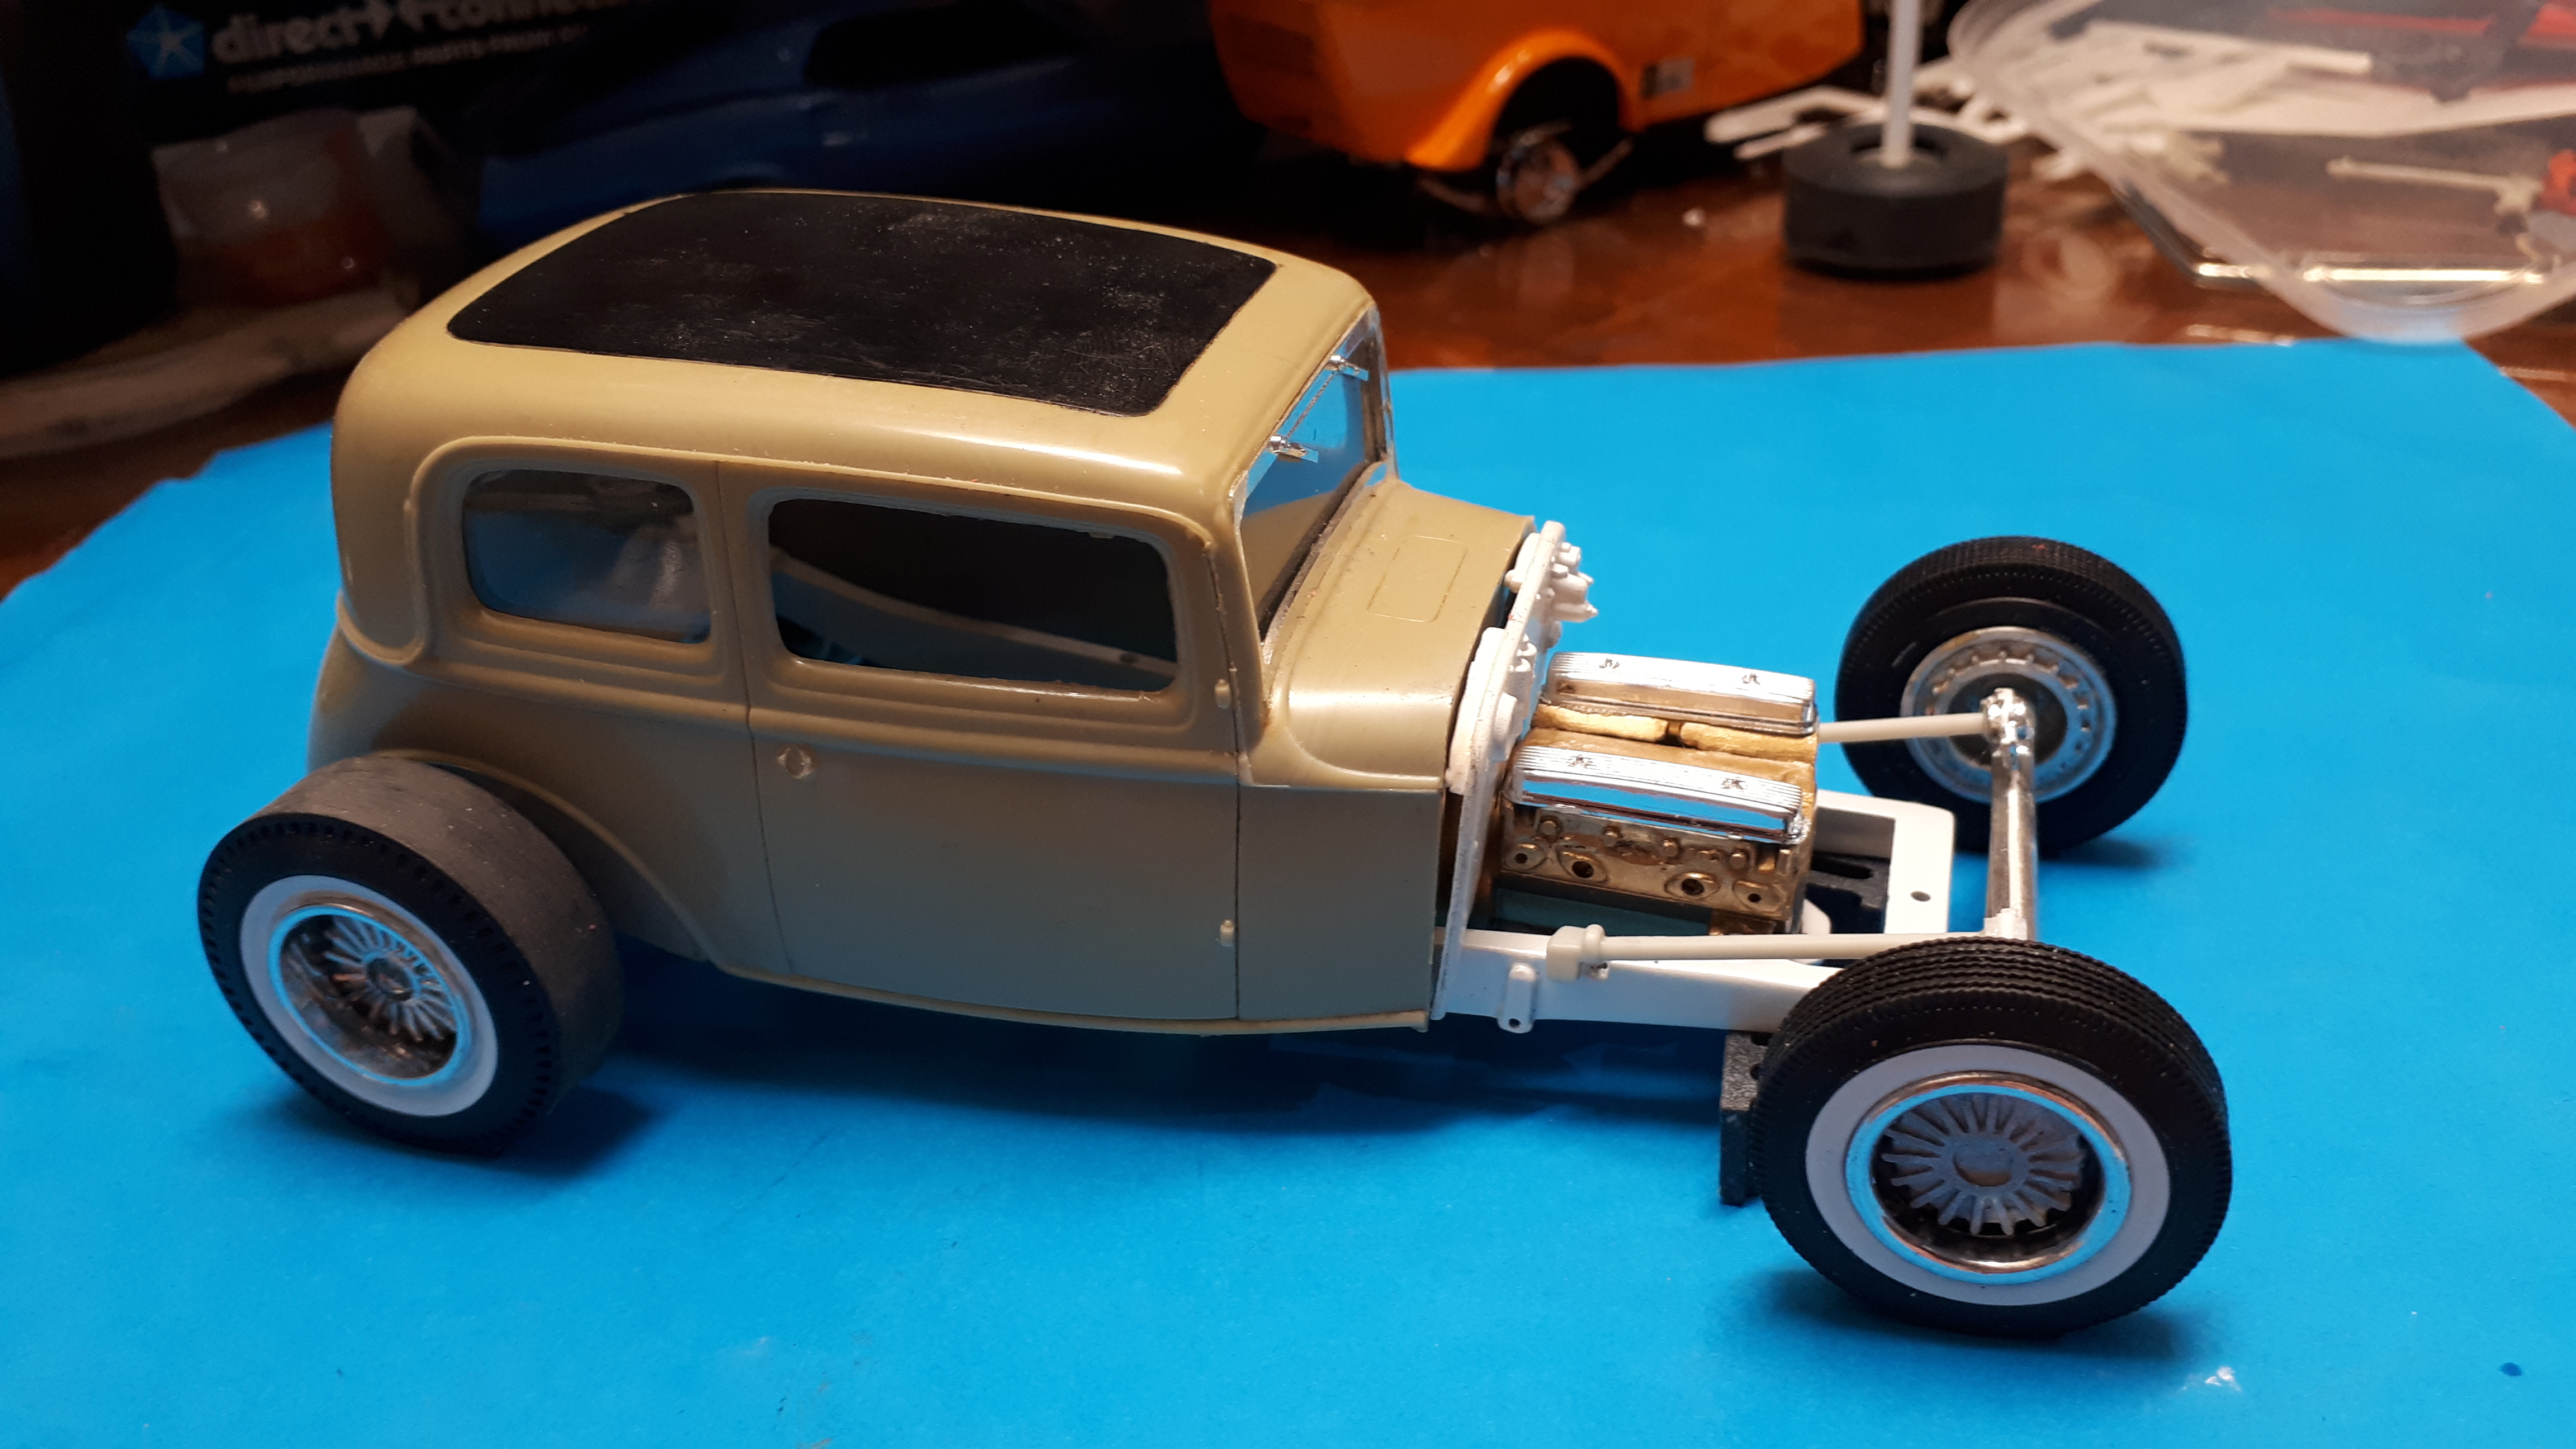
Made some progress on the weekend with the frame. I fabricated a new torsion bar lever arm to replace the broken one - it's just bits of plastic. The engine is glued in so that I can start getting the exhausts repaired and aligned. I found a suitable replacement for the broken rear shock ( I was amazed at how similar it was!) and got the rear end in place. I still have to add some details to the front axle such as king pins and hubs and backing plates - it's just a bit toylike in that area. And just for giggles, I dropped the Vicky body on for a mock-up but this is only temporary - more news soon!
-
Mickey Thompson 69 Mustang Mach 1 Funnycar x 2!
Alan Barton replied to Alan Barton's topic in WIP: Drag Racing Models
You're right there, Goatguy, I couldn't get the smile off my face when I saw them. It takes a lot of stress out of the build. There is still a lot to do but I am very happy with the chassis - front and rear axles are the next bit of scratchbuilding to contend with. The engine is going to look after itself but I made need to scratchbuild the injectors - I have a found a few parts that are close in shape but too small. I heard a few more interesting stories from Greg on the weekend. One of the ways that he was able to identify that the sandblasted and generally neglected body was in fact the Mickey Thompson car was by the rear marker lights. Ford supplied crates and crates of parts for this effort in order to promote the then new Mach 1 Mustang. Somehow they inadvertently sent Mercury marker lights instead of Mustang ones - that is what went on the car and the spacing of the holes helped confirm it! You can also still see evidence of damage to the right hand windshield pillar (underneath) that occurred during an accident. Once I get the front and rear axles sorted and the frame sitting on wheels I think it will start to build itself. Hopefuly I will have more photos by the weekend. And Codi, thanks for your comments. It is your approach to scratchbuilding simply everything that has inspired me to tackle this project. I wont meet your levels of metal mastery, even in plastic, but I will try to use your approach to keep me on track. Cheers Alan -
Green is a suitably alien colour for this one - cool concept! Cheers Alan
-
It always hurts to go backwards, especially on a beautiful black finish like that. Earlier this year I went to polish out a very small blemish on a black 32 roadster. I had a major brain fart and started polishing with Tamiya PUTTY, not Tamiya COMPOUND. Similar tubes, radically different results! You've got some stunning proportions on this little roadster. I'm a big fan of suicide front ends but they are not easy to get looking right and this one really hits the high notes for me. Love the half tonneau as well. Good luck with the repairs! Cheers Alan
-
Believe me Bob, I'm thinking about it! The AMT wire axles would make it fairly easy to do. I often build full bodied or full fendered cars with different wheels on one side to the other (I used to be indecisive, but now, I'm not so sure!) but fenderless cars, well, it's kinda hard to disguise what you are up to! I got the instructions off the Drastic Plastic website today and they show that I am looking pretty good as far as parts go. I doubt whether I have the taillight assemblies but there are many other options - 49 Merc custom units, C2 Corvette, Corvair, all could be made to work. I'm not pedantic about getting every single part as per AMT but I do want to maintain the spirit of the model. After all, it is no beauty queen but it does accurately represent an era in both hot rodding and modelling history - that's what I want to preserve. Cheers Alan
-
I'm kinda late to the party but wow, this is a stunner, Mike. As I am now in the process of building the same model form leftover parts, your photos are also a great reference source as well. You also have me seriously re-considering my choice of wheels! And Craig, love that Vicky! That was my plan (B) until I got a very generous offer that I will reveal in my thread when it arrives here in Australia. Cheers Alan
-
Thanks for the link Casey. Somehow I missed this one entirely ( and I never skip a hot rod post, not sure what happened there!) It is a beautiful model, a real inspiration and a great reference as well. Only problem is, I am now confused with wheels. I had intended to keep the kit wheels purely from an historical aspect but Monogram whitewalls and five spokes are my favorite wheels of all times and look killer on that Deuce. Ahh, decisions, decisions! Cheers Alan
-
A little bit of progress last night. I got home from work and pulled the interior tub out of the caustic path and it was spotless! I was very impressed as black often is very tenacious and can stain the plastic - the fact that it had never been sanded would have helped a lot here. I can't get over how pure white the 50+ year old plastic is! I also cut some fine mesh to make a backing for the grille and I'm pretty happy with the look. I also got some gold paint on the engine and rear end and some white primer on the firewall - but that may change - stay tuned! Cheers Alan
-
Great to see you got these done! Never, ever give up! I'm a big fan of woodies and it is amazing how different they look just with a change of colour. Nice work! Cheers Alan
-
Not a bad idea, Steve, but I have something in the wind that could be even better! I am going to keep working on the frame for now and will let you know when I have it. Cheers Alan
-
Thanks for the interest , guys! I have been talking to Muncie who has been full of information and assistance and he told me that the original headlight bezels were in the Blueprinter Grilles Parts Pack. Opened it up and there they were along with an Edsel grille which is apparently slightly different to the Double kit unit. So I went looking for the original nose and as I expected I found it on this long stalled 3 window. This is the old Monogram Beachboy's coupe (I think Snake45 would call it a backbirth!) but it was the only thing available when I started it. It is intended to be an east coast show car. I will concoct something new for the coupe - I always thought the custom headlight units form the 66 Corvair would make a startling custom nose piece so we will see what happens there. Cheers Alan
-
Mickey Thompson 69 Mustang Mach 1 Funnycar x 2!
Alan Barton replied to Alan Barton's topic in WIP: Drag Racing Models
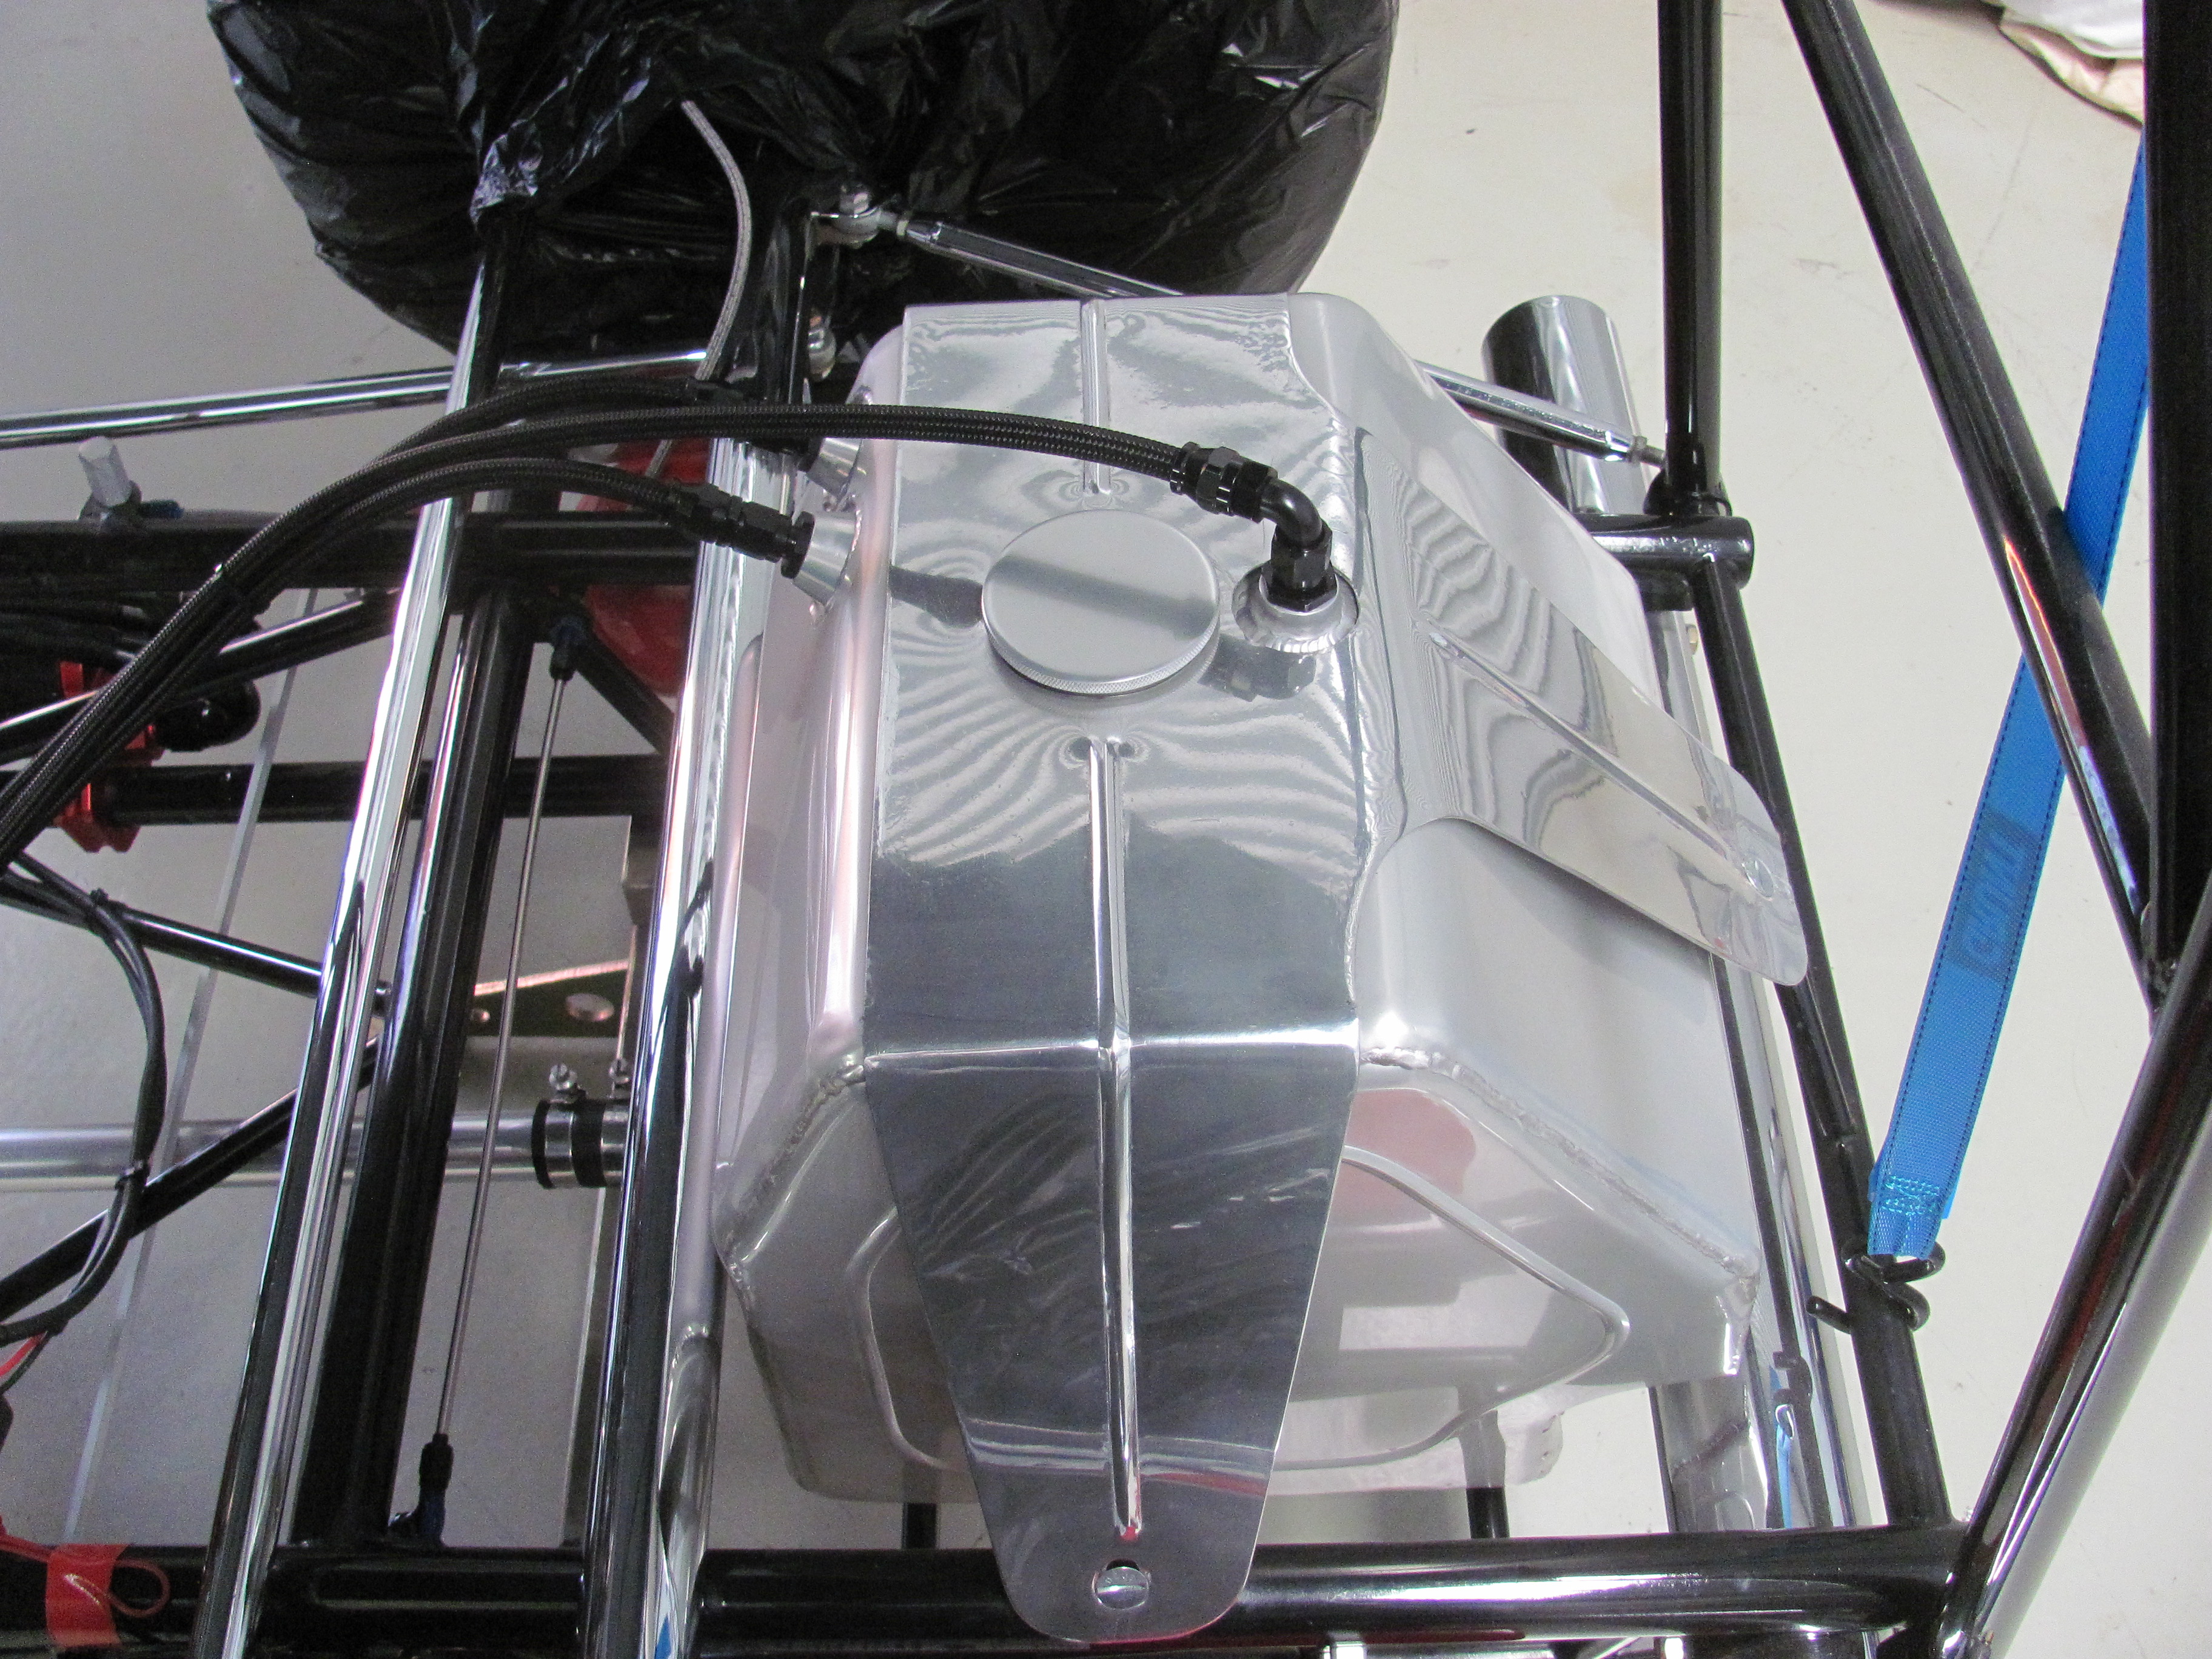
Thanks for all the support, guys. I got a coat of paint on the fuel tank before heading out to Greg's workshop this morning. It is made of 13 pieces of styrene sheet and tube and I am very happy with how it came out - just got to build a second one now. Greg's painter did a magnificent job on the two resin bodies. He is taking the Slixx decal sheet to his signwriter to see if he can retouch the name - all Greg's research indicates the shading on the name was in bright yellow while the decal sheet shows a very soft pastel pinky orange. Got a heap more photos, spotted a few corrections I need to make but overall progress is good and Greg is very happy with what he sees so far. Cheers Alan
-
And for those of you who would rather be injected than blown, here's some photos I took last year at the brilliant, totally amazing, unbelievable Speedway Motors American Museum of Speed in Lincoln Nebraska. If you are on this forum , you NEED to visit this museum. I have been fortunate to visit about 35 or so car museums in North America and this one is in a category all of its own - words cannot describe either the depth or quality of the items on display. Trust me, just go. If the wife insists on going, drop her off at the International Patchwork Quilting Museum at the university but tell her you WILL be gone for several days. Fortunately, my wife, a very skilled and passionate quilter, actually preferred the car museum and took over 1500 photos for me on our first visit in 2010!
-
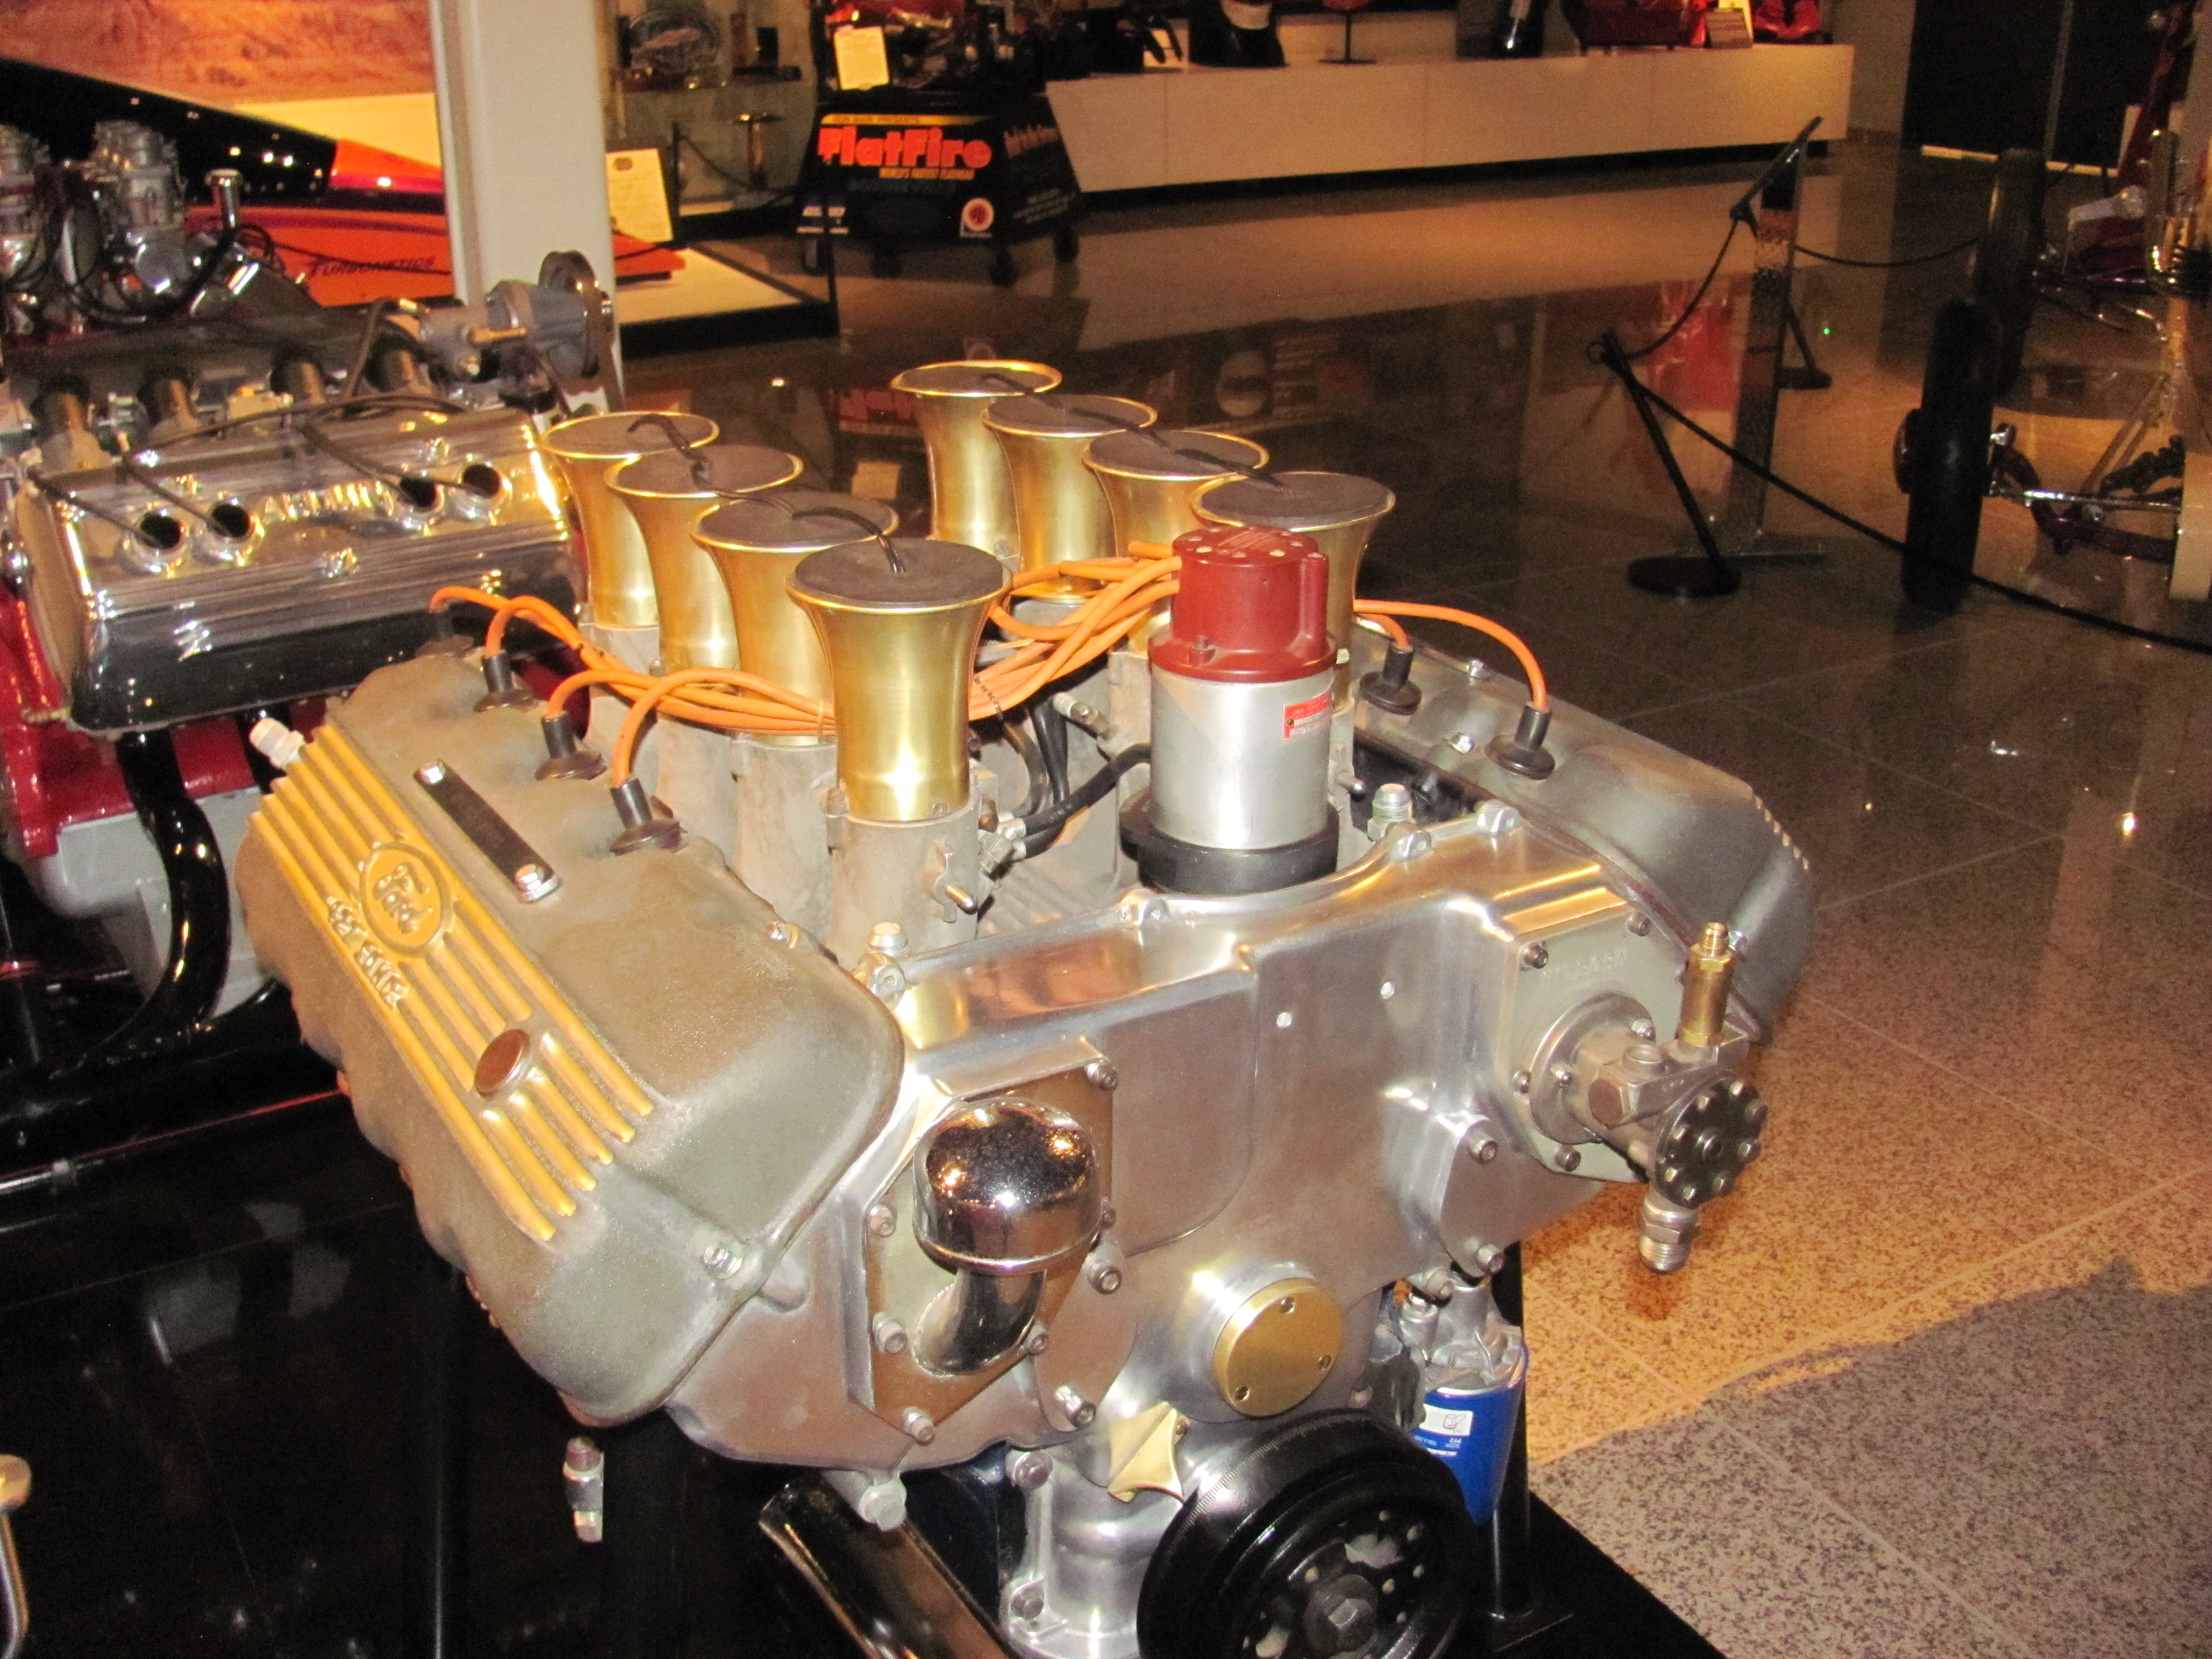
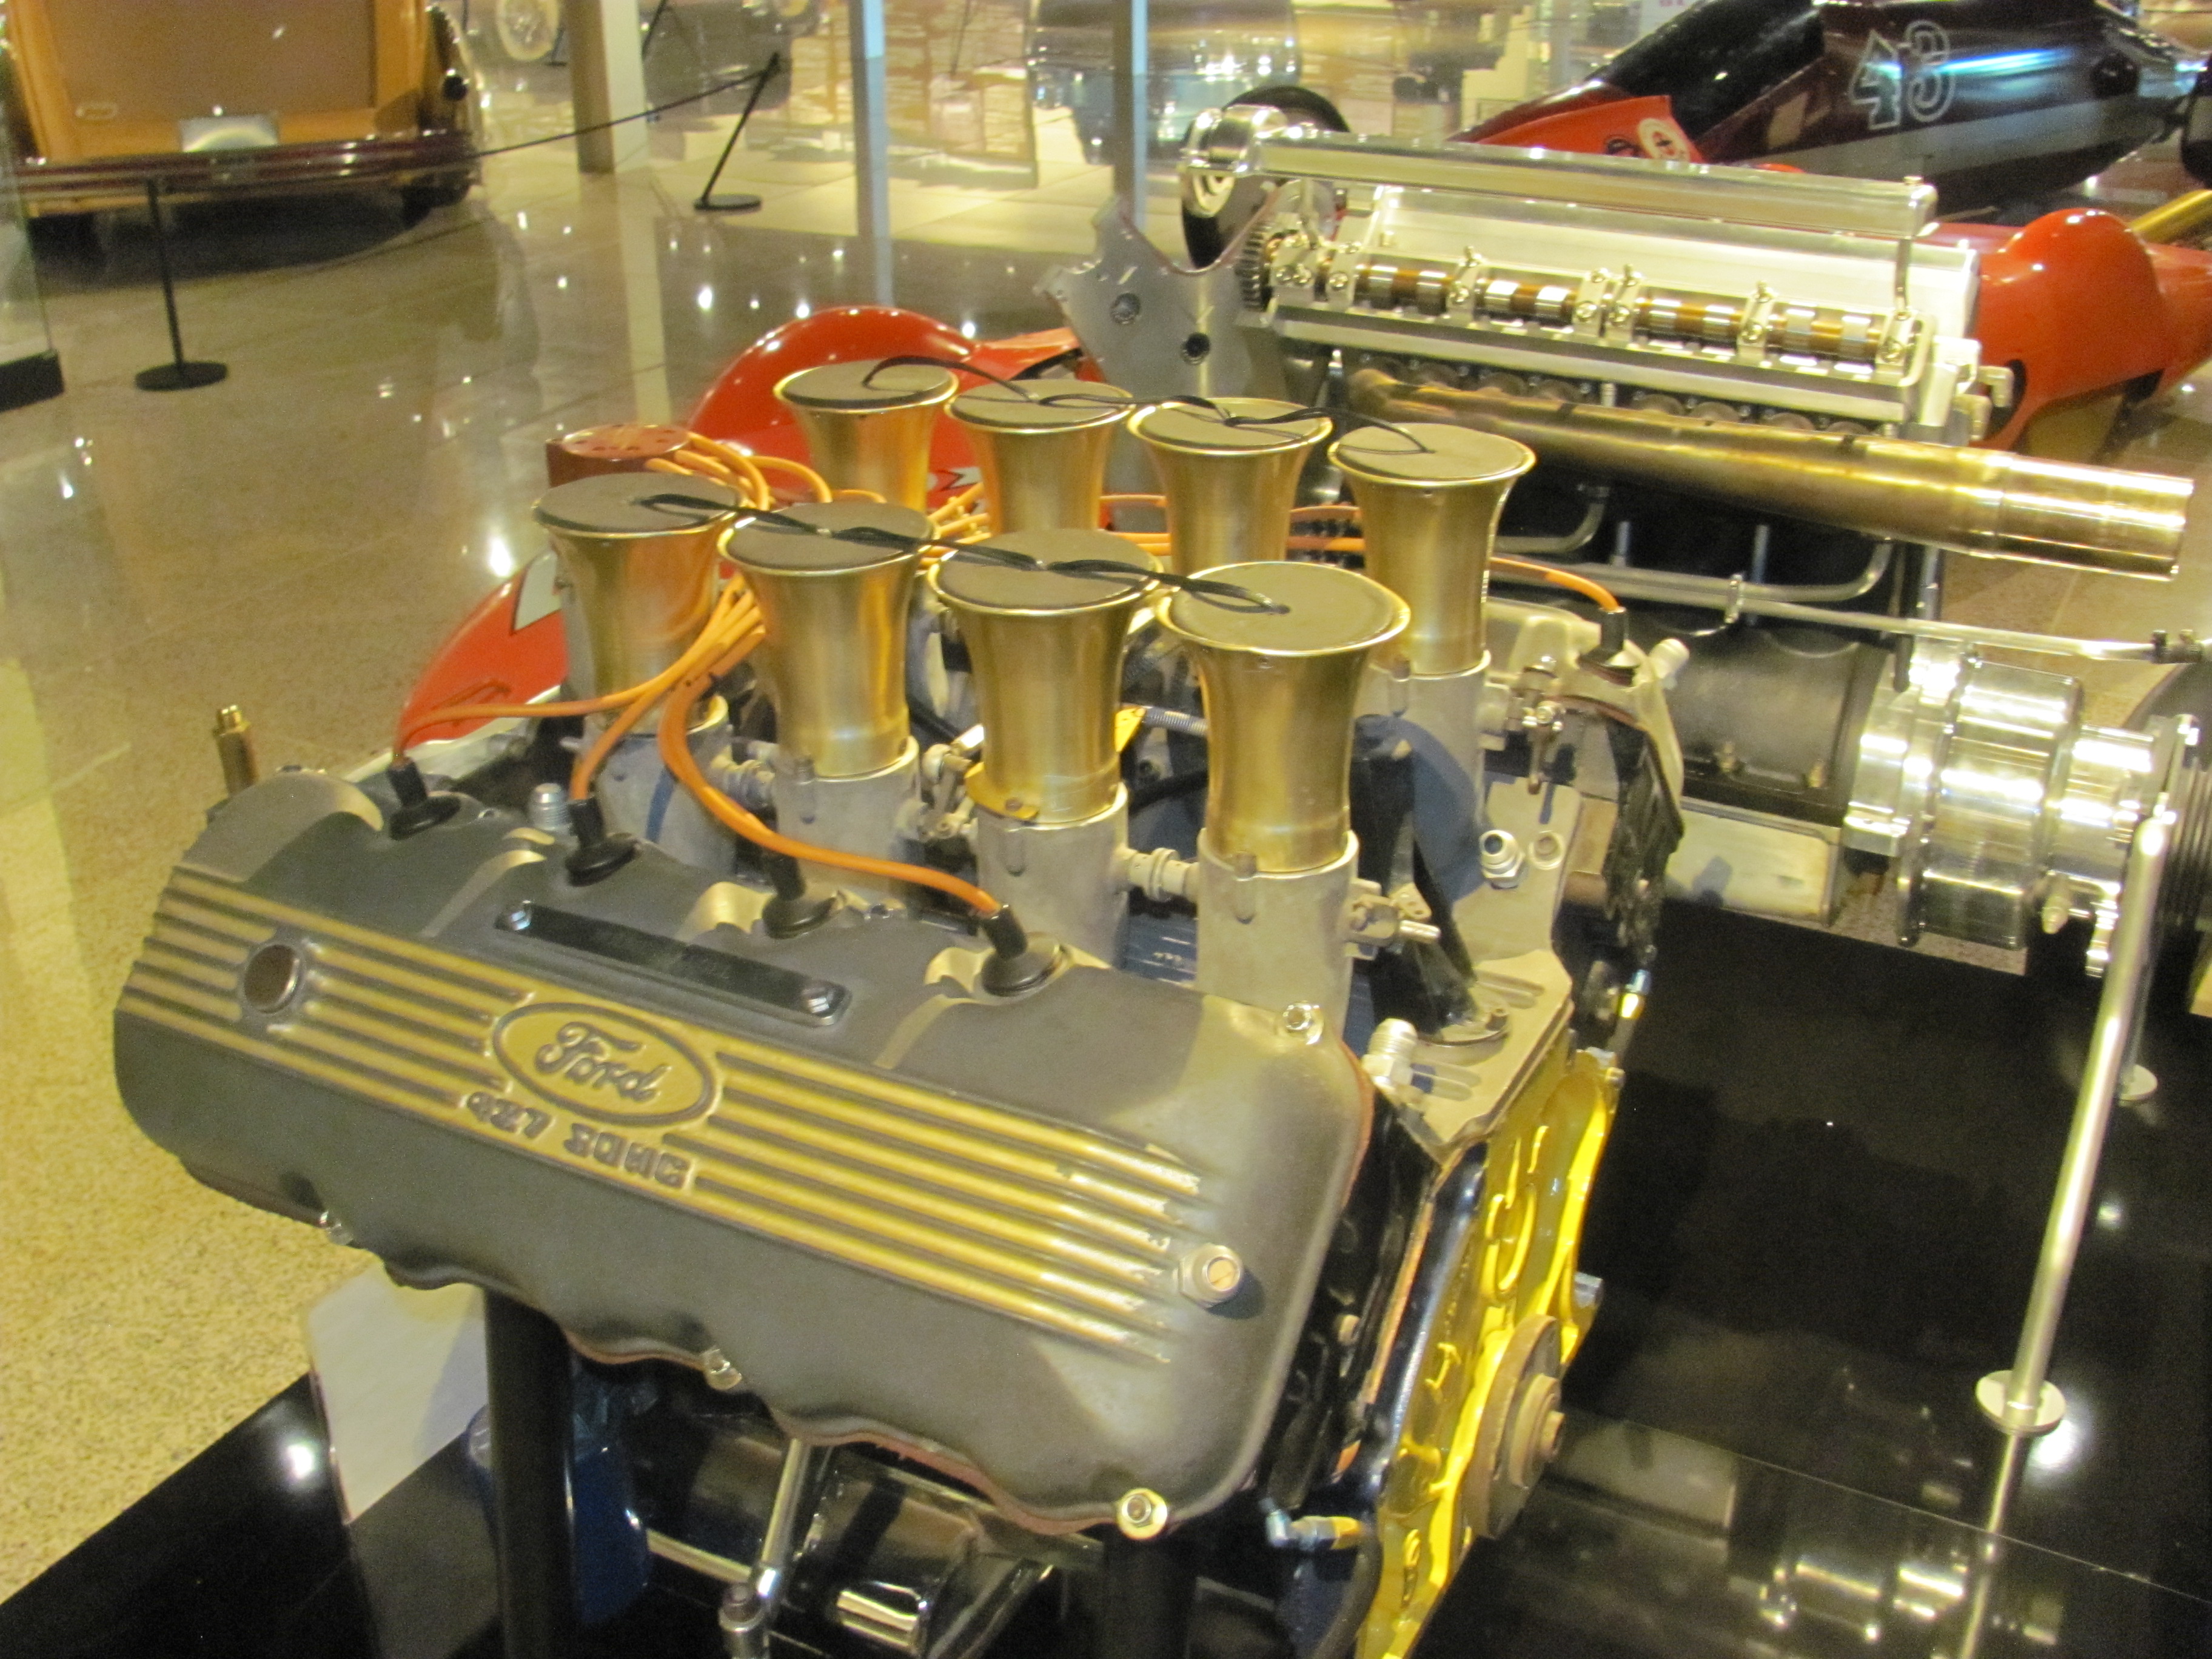
Hi guys, Today, as part of my commission build to do two replicas for the current owner of the 1969 Mickey Thompson MAch 1 funnycar, I got an "access all areas " pass to photograph the daylights out of a complete assembled SOHC. The most noticeable inaccuracy to the Ohio George motor is the shape of the bumps under the rocker cover. On the OG they look like half an egg cup but on the real motor they are very subtle and I will be filing them down appropriately. Yo will see that I also got some close ups of the front cover and of the location of the header flange on the heads - a lot lower than most motors. Bill, I hope these help you in your quest and if you need any more photos or dimensions just yell and I will be sure to get them for you. Cheers Alan
-
Plus, you won't have any trouble parking it with those little marker balls up the front to guide you! Sorry, mate, couldn't resist! I love the direction this car is going and have to admit that it had never occurred to me to convert a kit dropped axle to working steering. I have scratch-built straight tube axles before but this is a classic case of "Why didn't I think of that?" Cheers Alan
-
Mickey Thompson 69 Mustang Mach 1 Funnycar x 2!
Alan Barton replied to Alan Barton's topic in WIP: Drag Racing Models
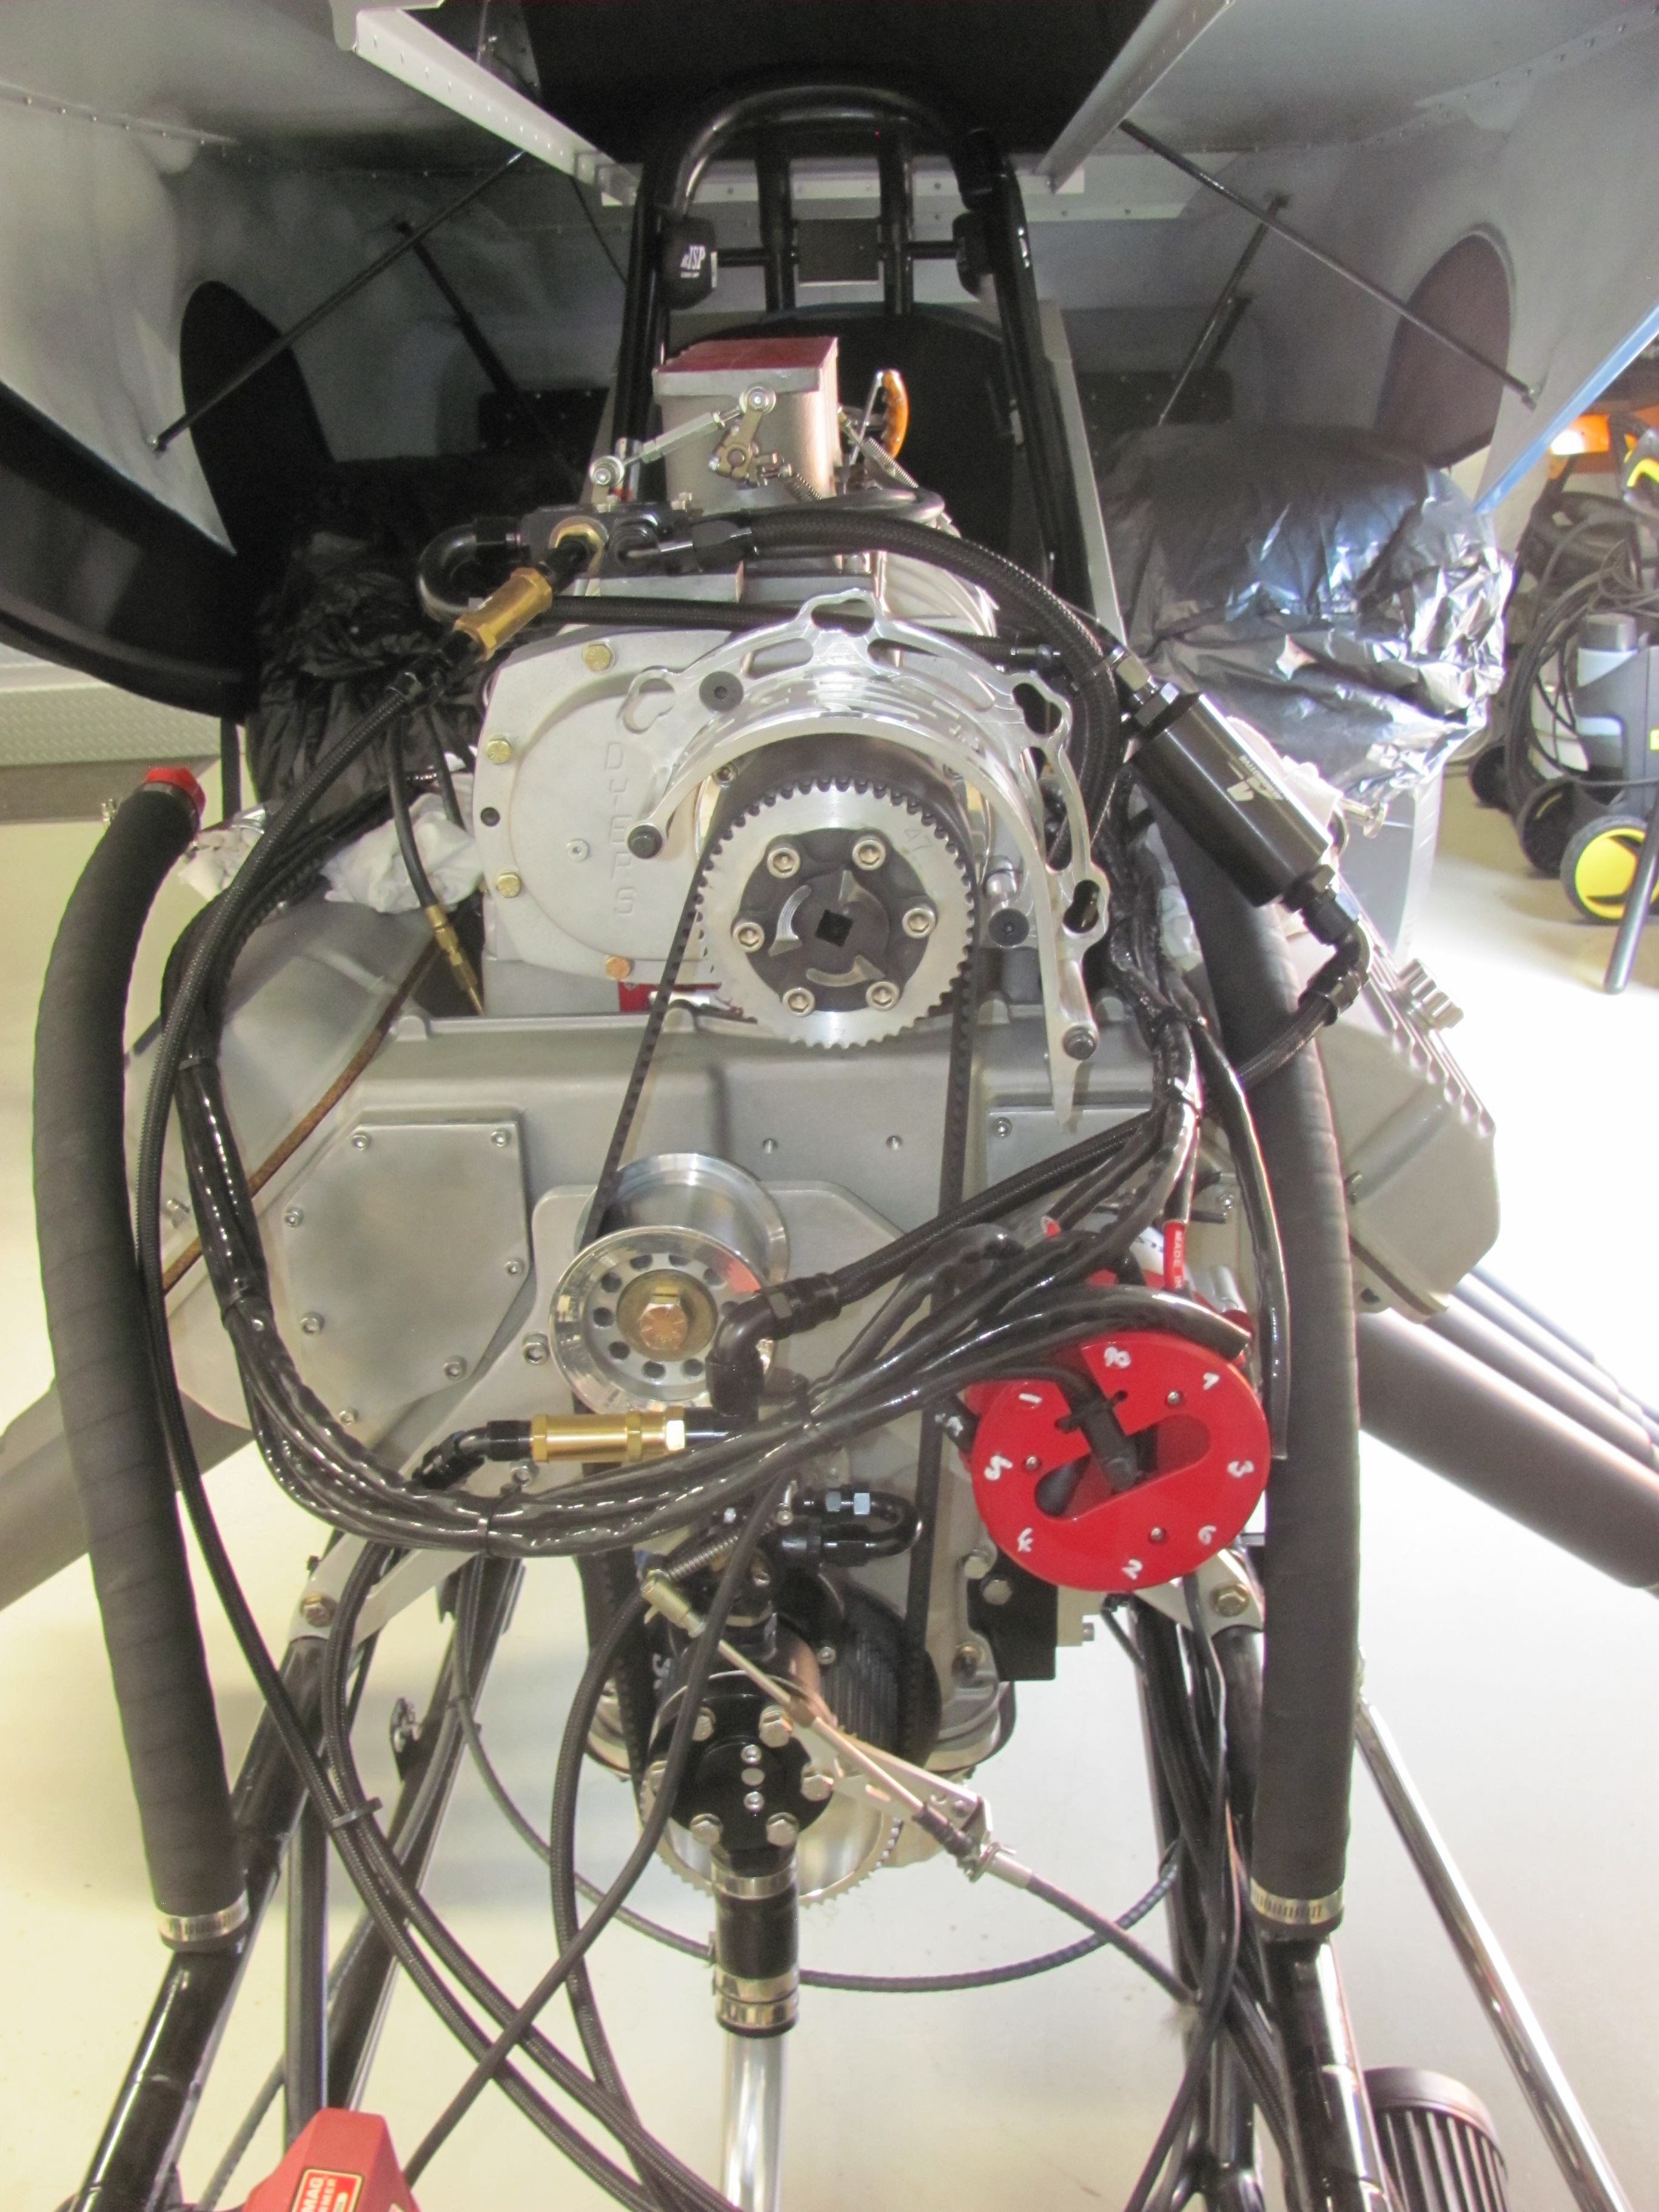
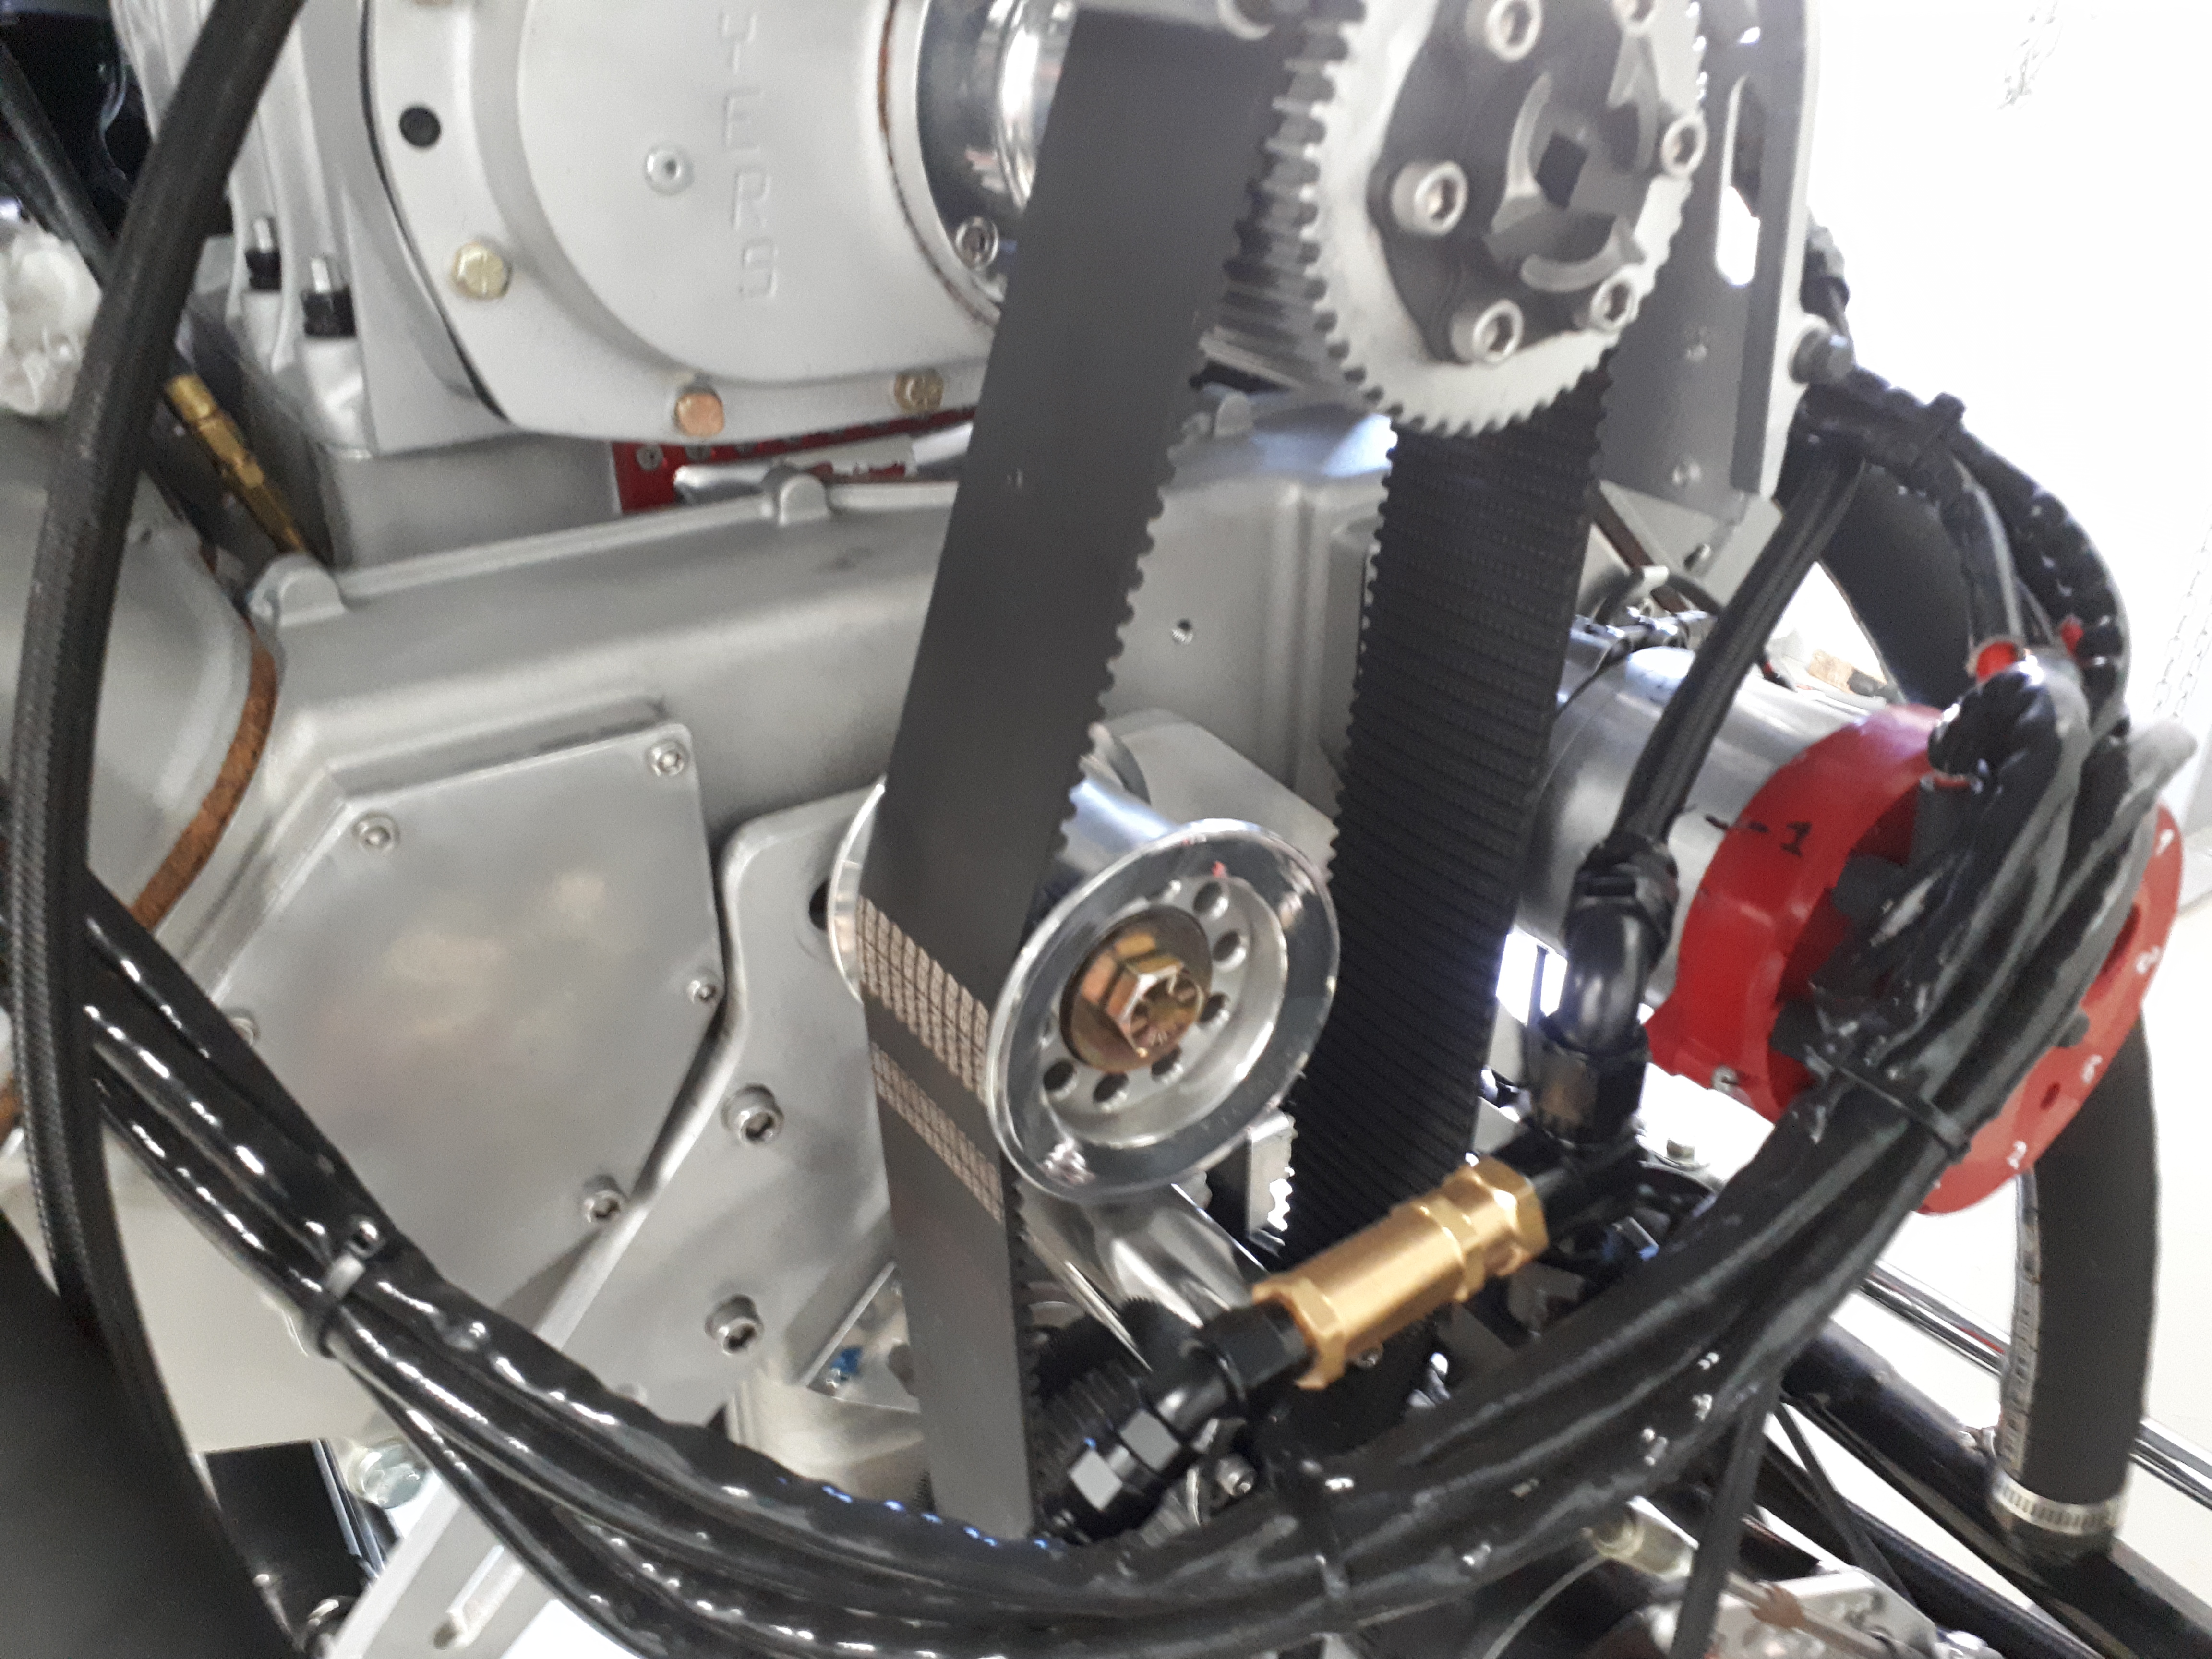
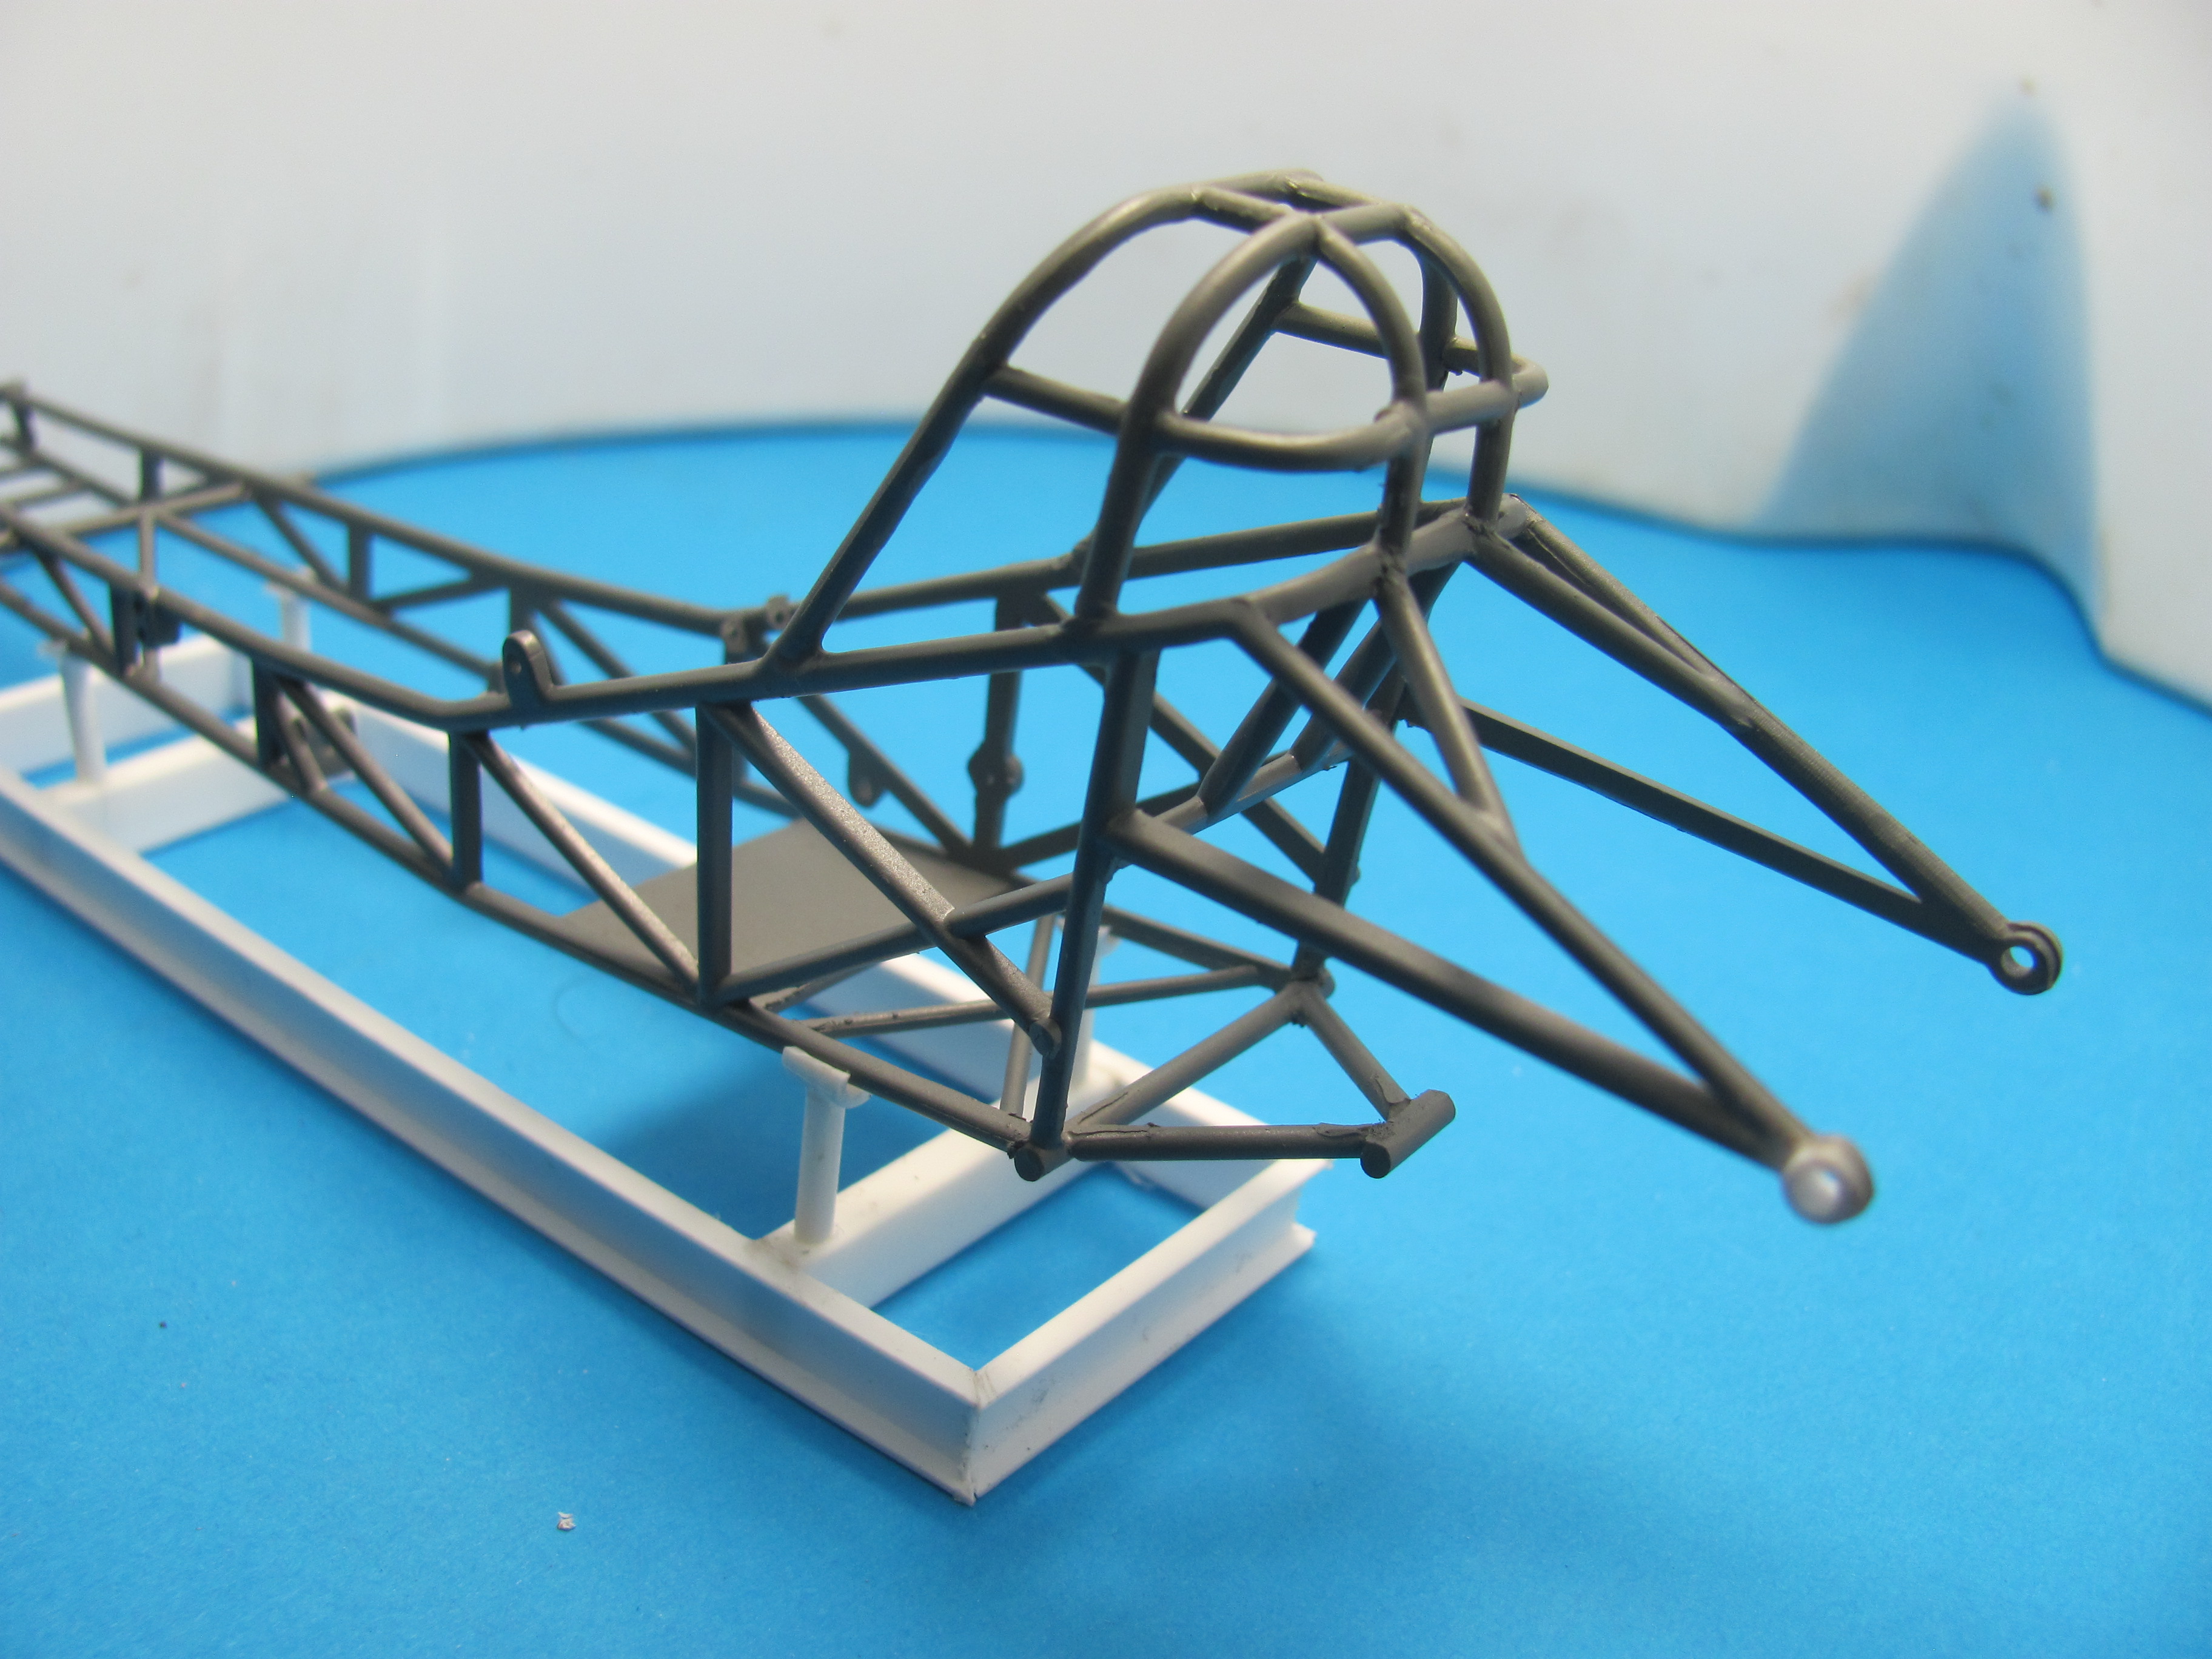
I must confess to not taking nearly enough photos during the reworking of the frame but I promise to take more when I start on the second frame. I must have been hiding under a rock but I had no idea that Revell had completely retooled the old multi piece Buttera frame from the sixties into a magnificent 21st century version! This has saved me hours of frustration. I have built at least four of the original nightmares so I was over the moon to open the new Jungle Jim box and find a pristine, STRAIGHT frame. I got some primer on today and I am heading for Greg's workshop tomorrow to check my progress against the real car and also to take more photos - it doesn't matter how many you take there are never enough. This car also has a rather unusual rear end arrangement so that is one thing I must photograph tomorrow. I will also be picking up the two bodies - Greg had his painter finish them in the same paint used on the real car. What a relief - that is a huge weight off my mind. The phone photos I've seen of the paint look amazing! I have changed the rollcage to a six point design, installed the torsion bar crossmember, removed the original fuel tank mounts and added the front weight bar brackets as well as a start on the rear end location.
-
Mickey Thompson 69 Mustang Mach 1 Funnycar x 2!
Alan Barton replied to Alan Barton's topic in WIP: Drag Racing Models
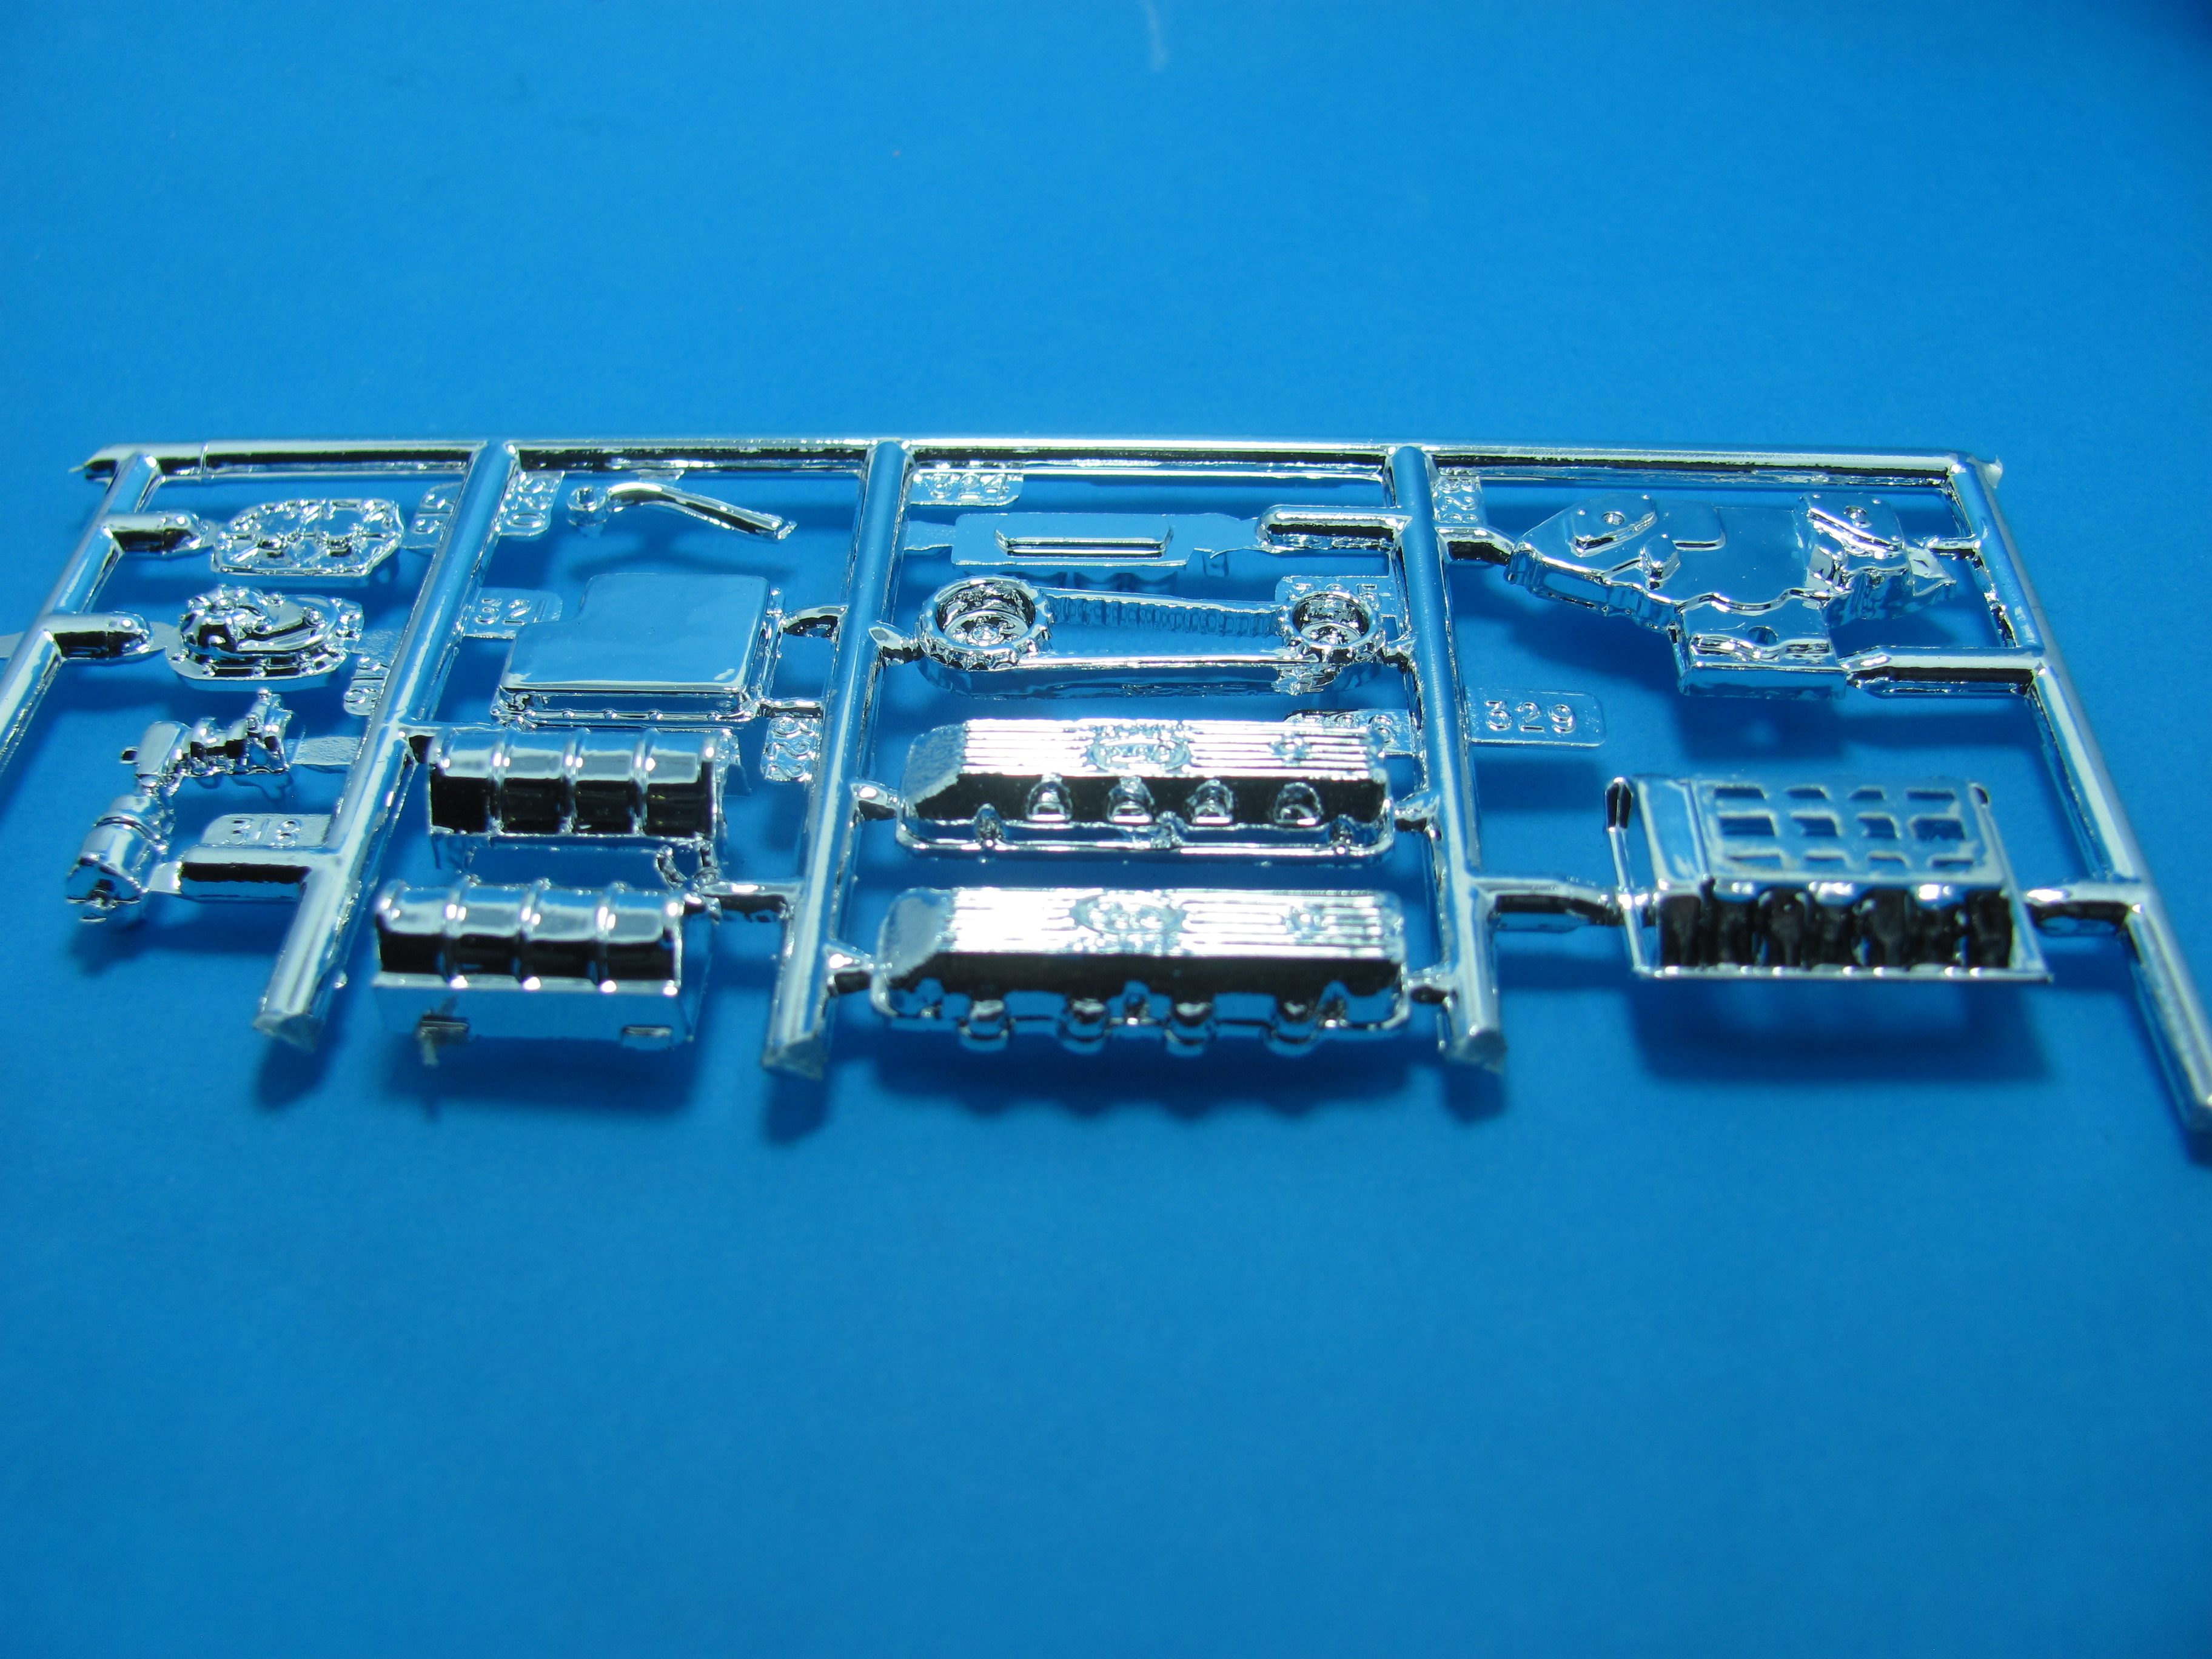
I have decided to use the SOHC motors out of the Ohio George Willys kits, simply because I had two of them! I cut the trans off and trimmed the rear of the block to accept the Vega firewall. The SOHC front cover also needs some corrections and I have to fabricate a new front motor plate. I will be using the Vega headers ( I think) manifold and blower because they are very close to to items on the real car.


1.jpg.d805b099ba13c1d0092eb74ff80e928c.jpg)