alan barton
-
Posts
2,105 -
Joined
-
Last visited
Content Type
Profiles
Forums
Events
Gallery
Everything posted by alan barton
-
So here I am on the opposite side of the world wondering about amazing co-incidences. Just ten days ago, I unexpectedly picked up a second copy of the AMT T altered body. No reason, just seemed like a good idea at the time. Then after extensively reworking, and shortening, a Revell Buttera funnycar chassis for my M/T Mustang project, I found it simply won't work for that application. And, I have a set of those unusual bearclaw rear wheels, with no idea where they came from. Thank you for giving me W.I.P. #217! Just have to do one of these, it will fit in between my Willy Borsch altered and a super swoopy late funnycar chassied T. The first T altered body I bought is destined for the Fiat Double Dragster chassis, which will give me four distinct iterations of T style fuel altereds. I love everything about your build, thanks for the inspiration. Cheers Alan
-
White headers, when started and why?
alan barton replied to Speedfreak's topic in General Automotive Talk (Trucks and Cars)
When my Model A roadster was only six months old , but after I had done a six thousand mile cross-Australia road trip in it, we entered our first major show, with the car on top of limestone blocks and mirrors underneath. Unfortunately I was forced to drive through many miles of roadworks and my previously fresh aluminium sprayed headers, that tend to cook to a white colour anyway, were now stained with the distinctive red of the Australian outback! We were doing quite an elaborate display and had brought a can of ceiling white acrylic paint with us for touch up so my mate said " I can fix those" and promptly brushed the ceiling paint onto the visible lower sections of the headers. It looked great but I was fearful of how bad the smell was going to be when I fired it up to leave the show. Well, I am here to say there was no smell at all and that white paint stayed there for years! Maybe I was onto something? Cheers Alan -
Flocking questions
alan barton replied to iamsuperdan's topic in Model Building Questions and Answers
I too am a big fan of a thick coat of Humbrol gloss enamel before flocking. I did have a problem with one manufacturer of flock, as discussed in my 32 Phaeton thread, and a bath in caustic soda overnight fixed that and let me start again. One thing I seem to do differently to everyone else is that I put my tub in a small takeaway food container, dump the flock onto the painted tub or parts, put the lid on the container and do some shake and bake. This method has always, like for forty years or more, given me a smooth even finish. I have no problems with waste because all the excess is in the takeaway container waiting to be used next time. I have only just started using embossing powder and I like it also. My "shake and bake" technique works just as well with the powder. Great to see so many interesting and positive responses to Dan's enquiry - that's why i like this place so much! Cheers Alan -
Modeling for fun.....again!
alan barton replied to GaryR's topic in General Automotive Talk (Trucks and Cars)
Pete, in defence of Tom, he's been hanging around Aussies too much! As dumb as it sounds, we all say dizzy - Australians are notorious for shortening pretty much our entire vocabulary - it's just how we roll. I know there has been a steady stream of Aussies ('nuther abbreviation!) through Tom's front door over the years and I guess our bad influence is rubbing off on him! Honest, it's not his fault! Cheers Alan -
Mickey Thompson 69 Mustang Mach 1 Funnycar x 2!
alan barton replied to alan barton's topic in WIP: Drag Racing Models
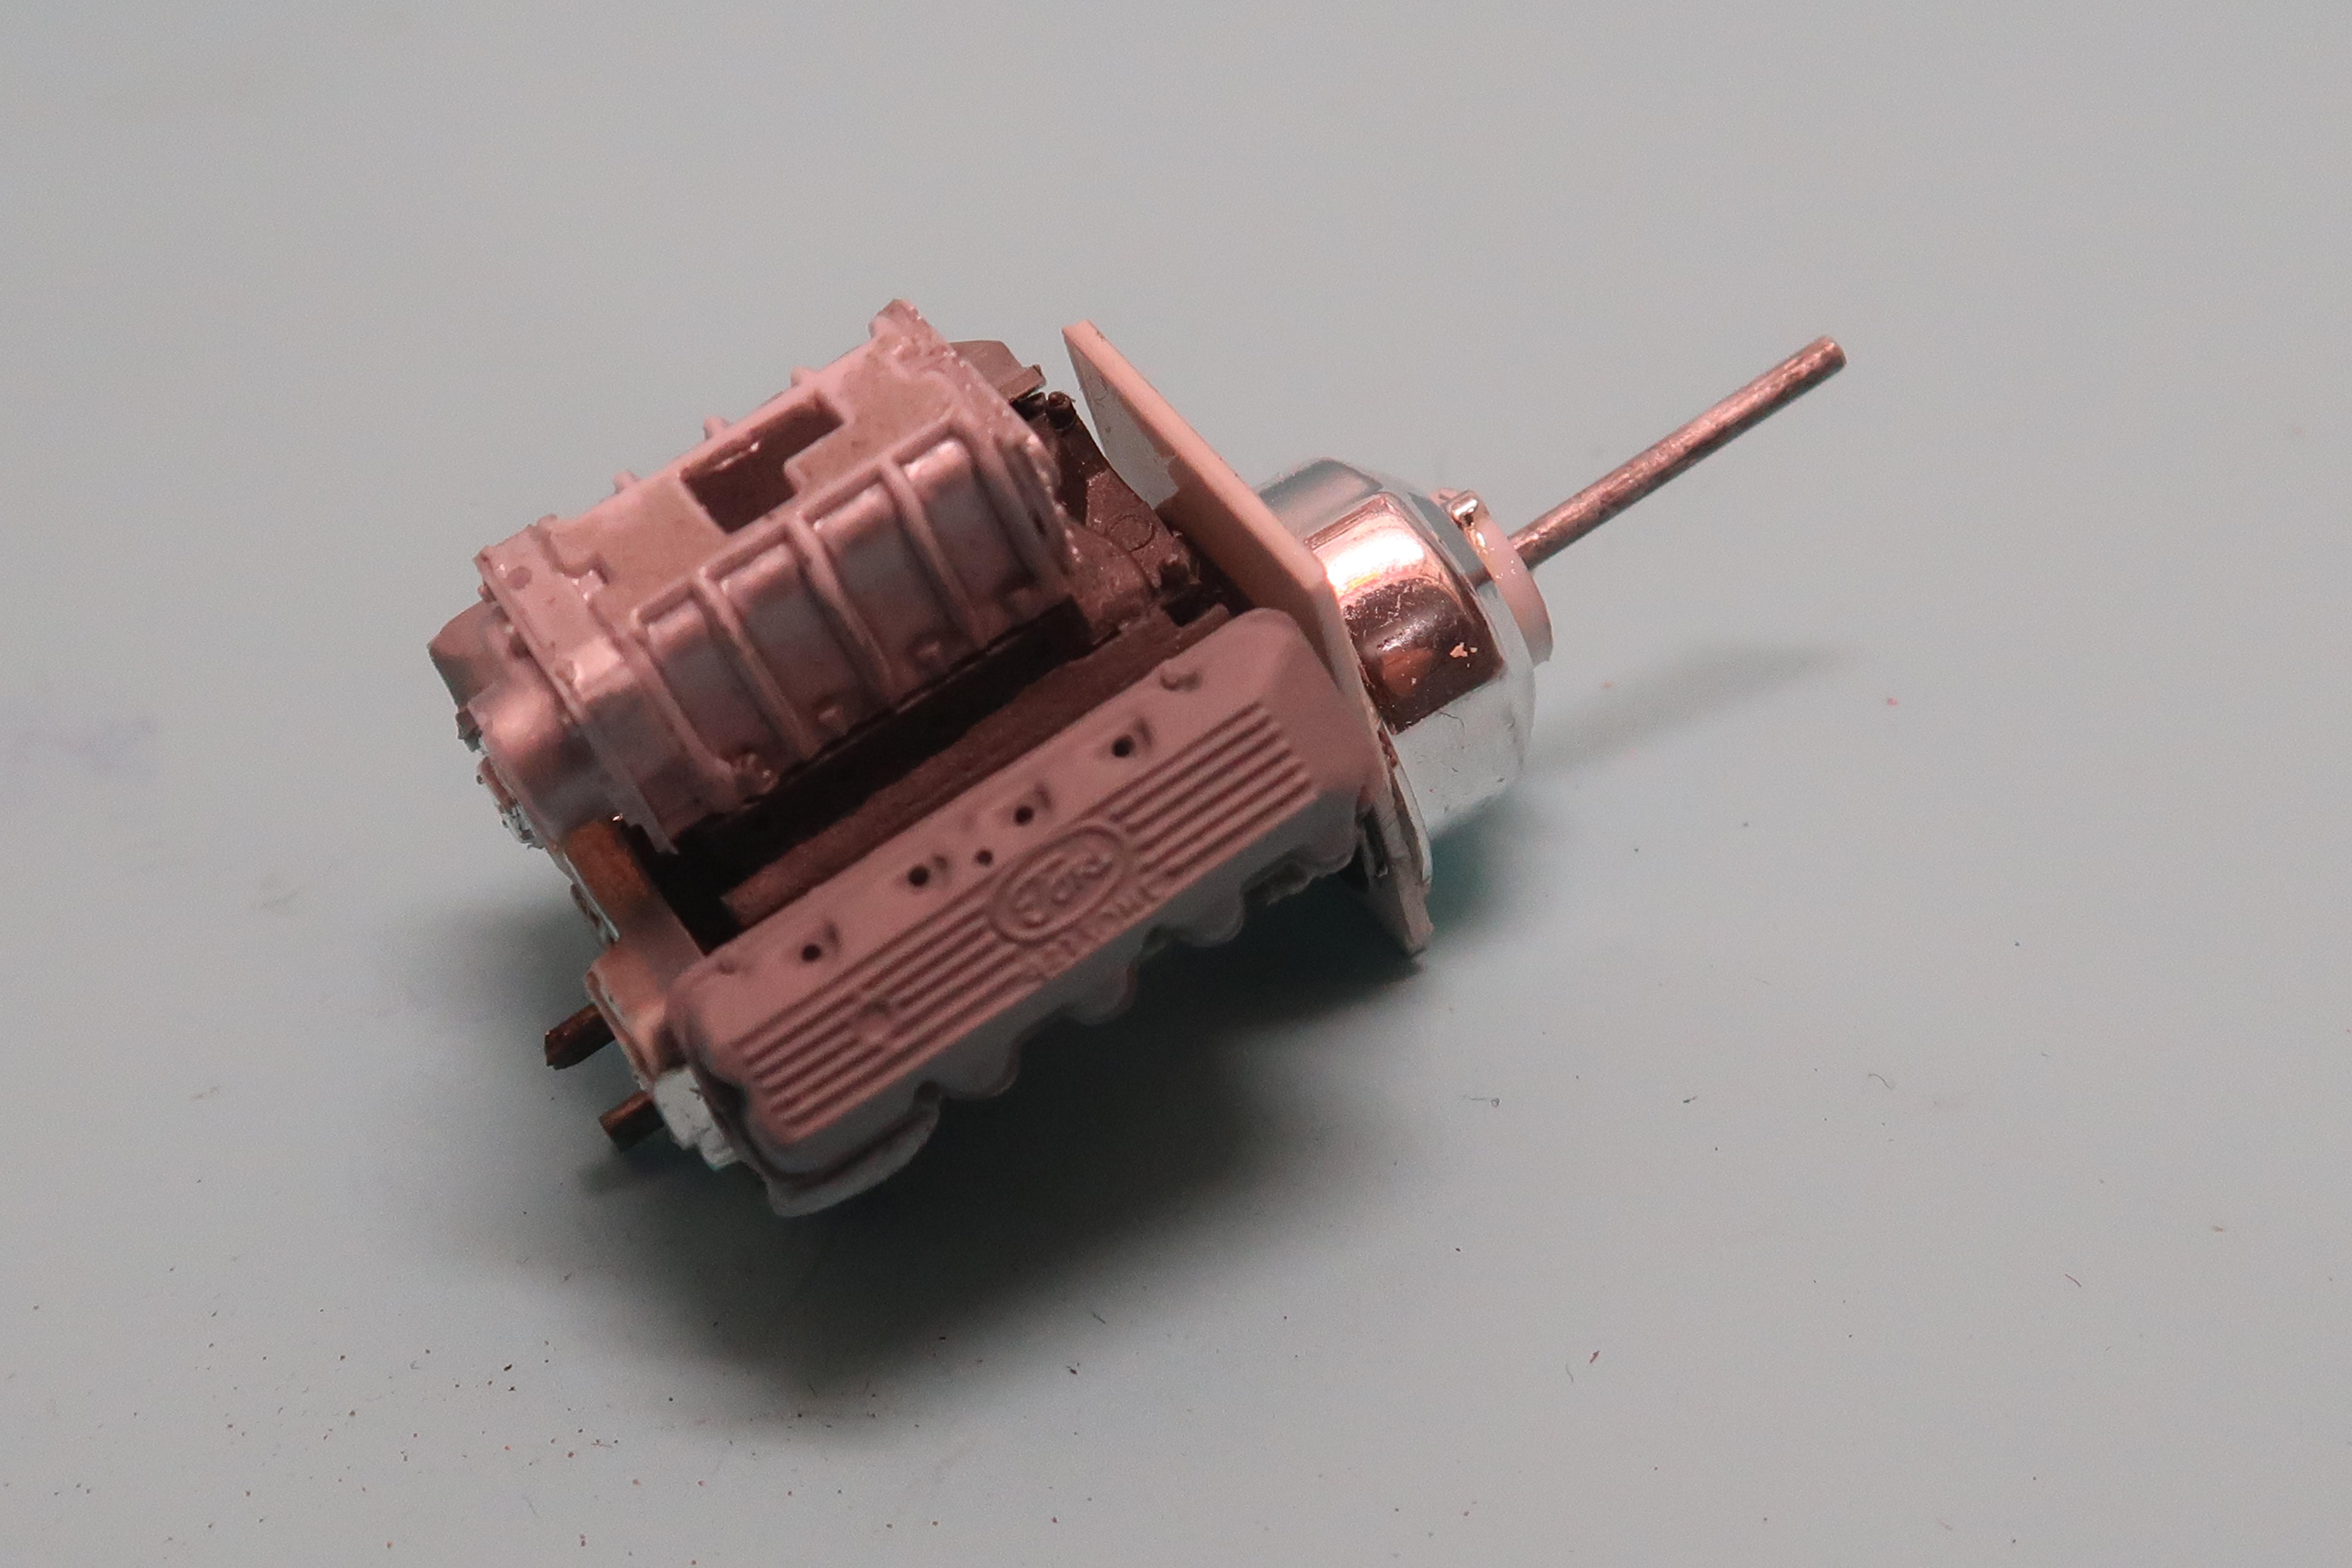
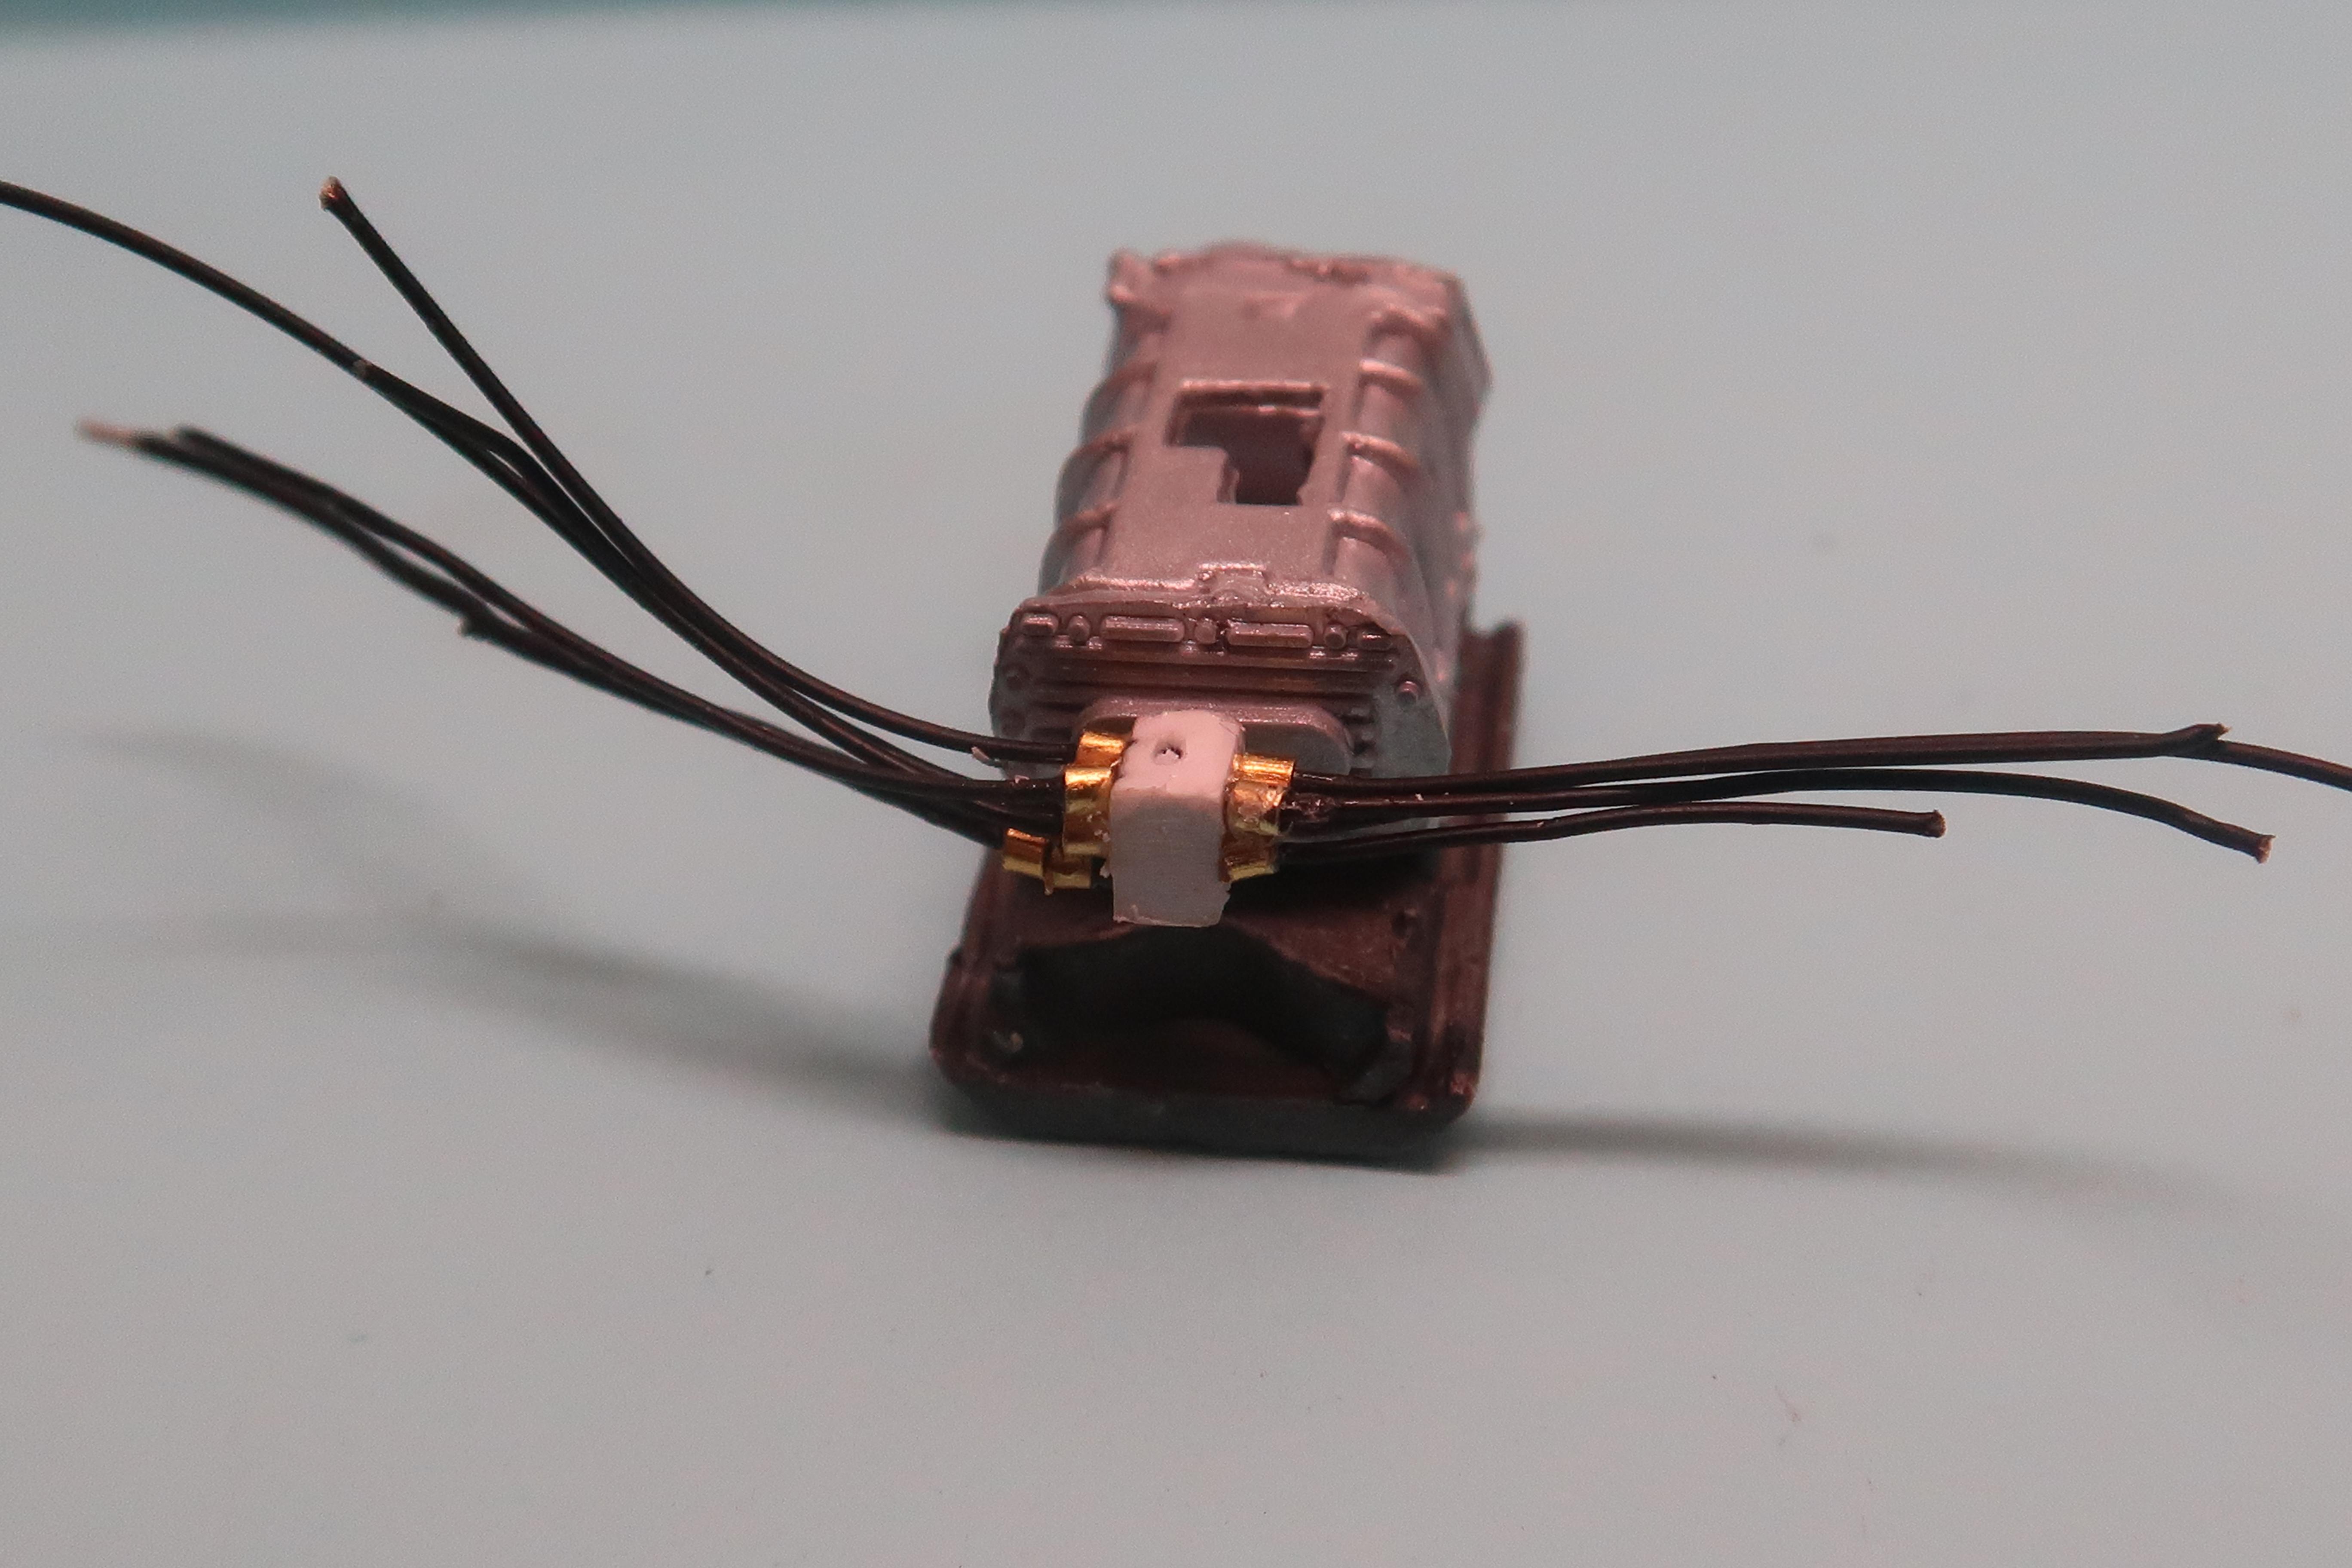
Another busy day on the bench today! I set to wiring the engine and made a fair bit of progress. I'm not sure if the photos will post as all morning I got the 200 error so we will see in a moment. I have sent several hours threading tiny beads onto various fuel lines. Now I have to say, it looks really cool on the bench in front of me but the photos, being so close up, look very clunky. I am going to go back in with some gold paint to blend a few of the joins together. I have spoken to Greg tonight and I have about 14 days to finish this project before he comes to collect it and transport it to the USA.
-
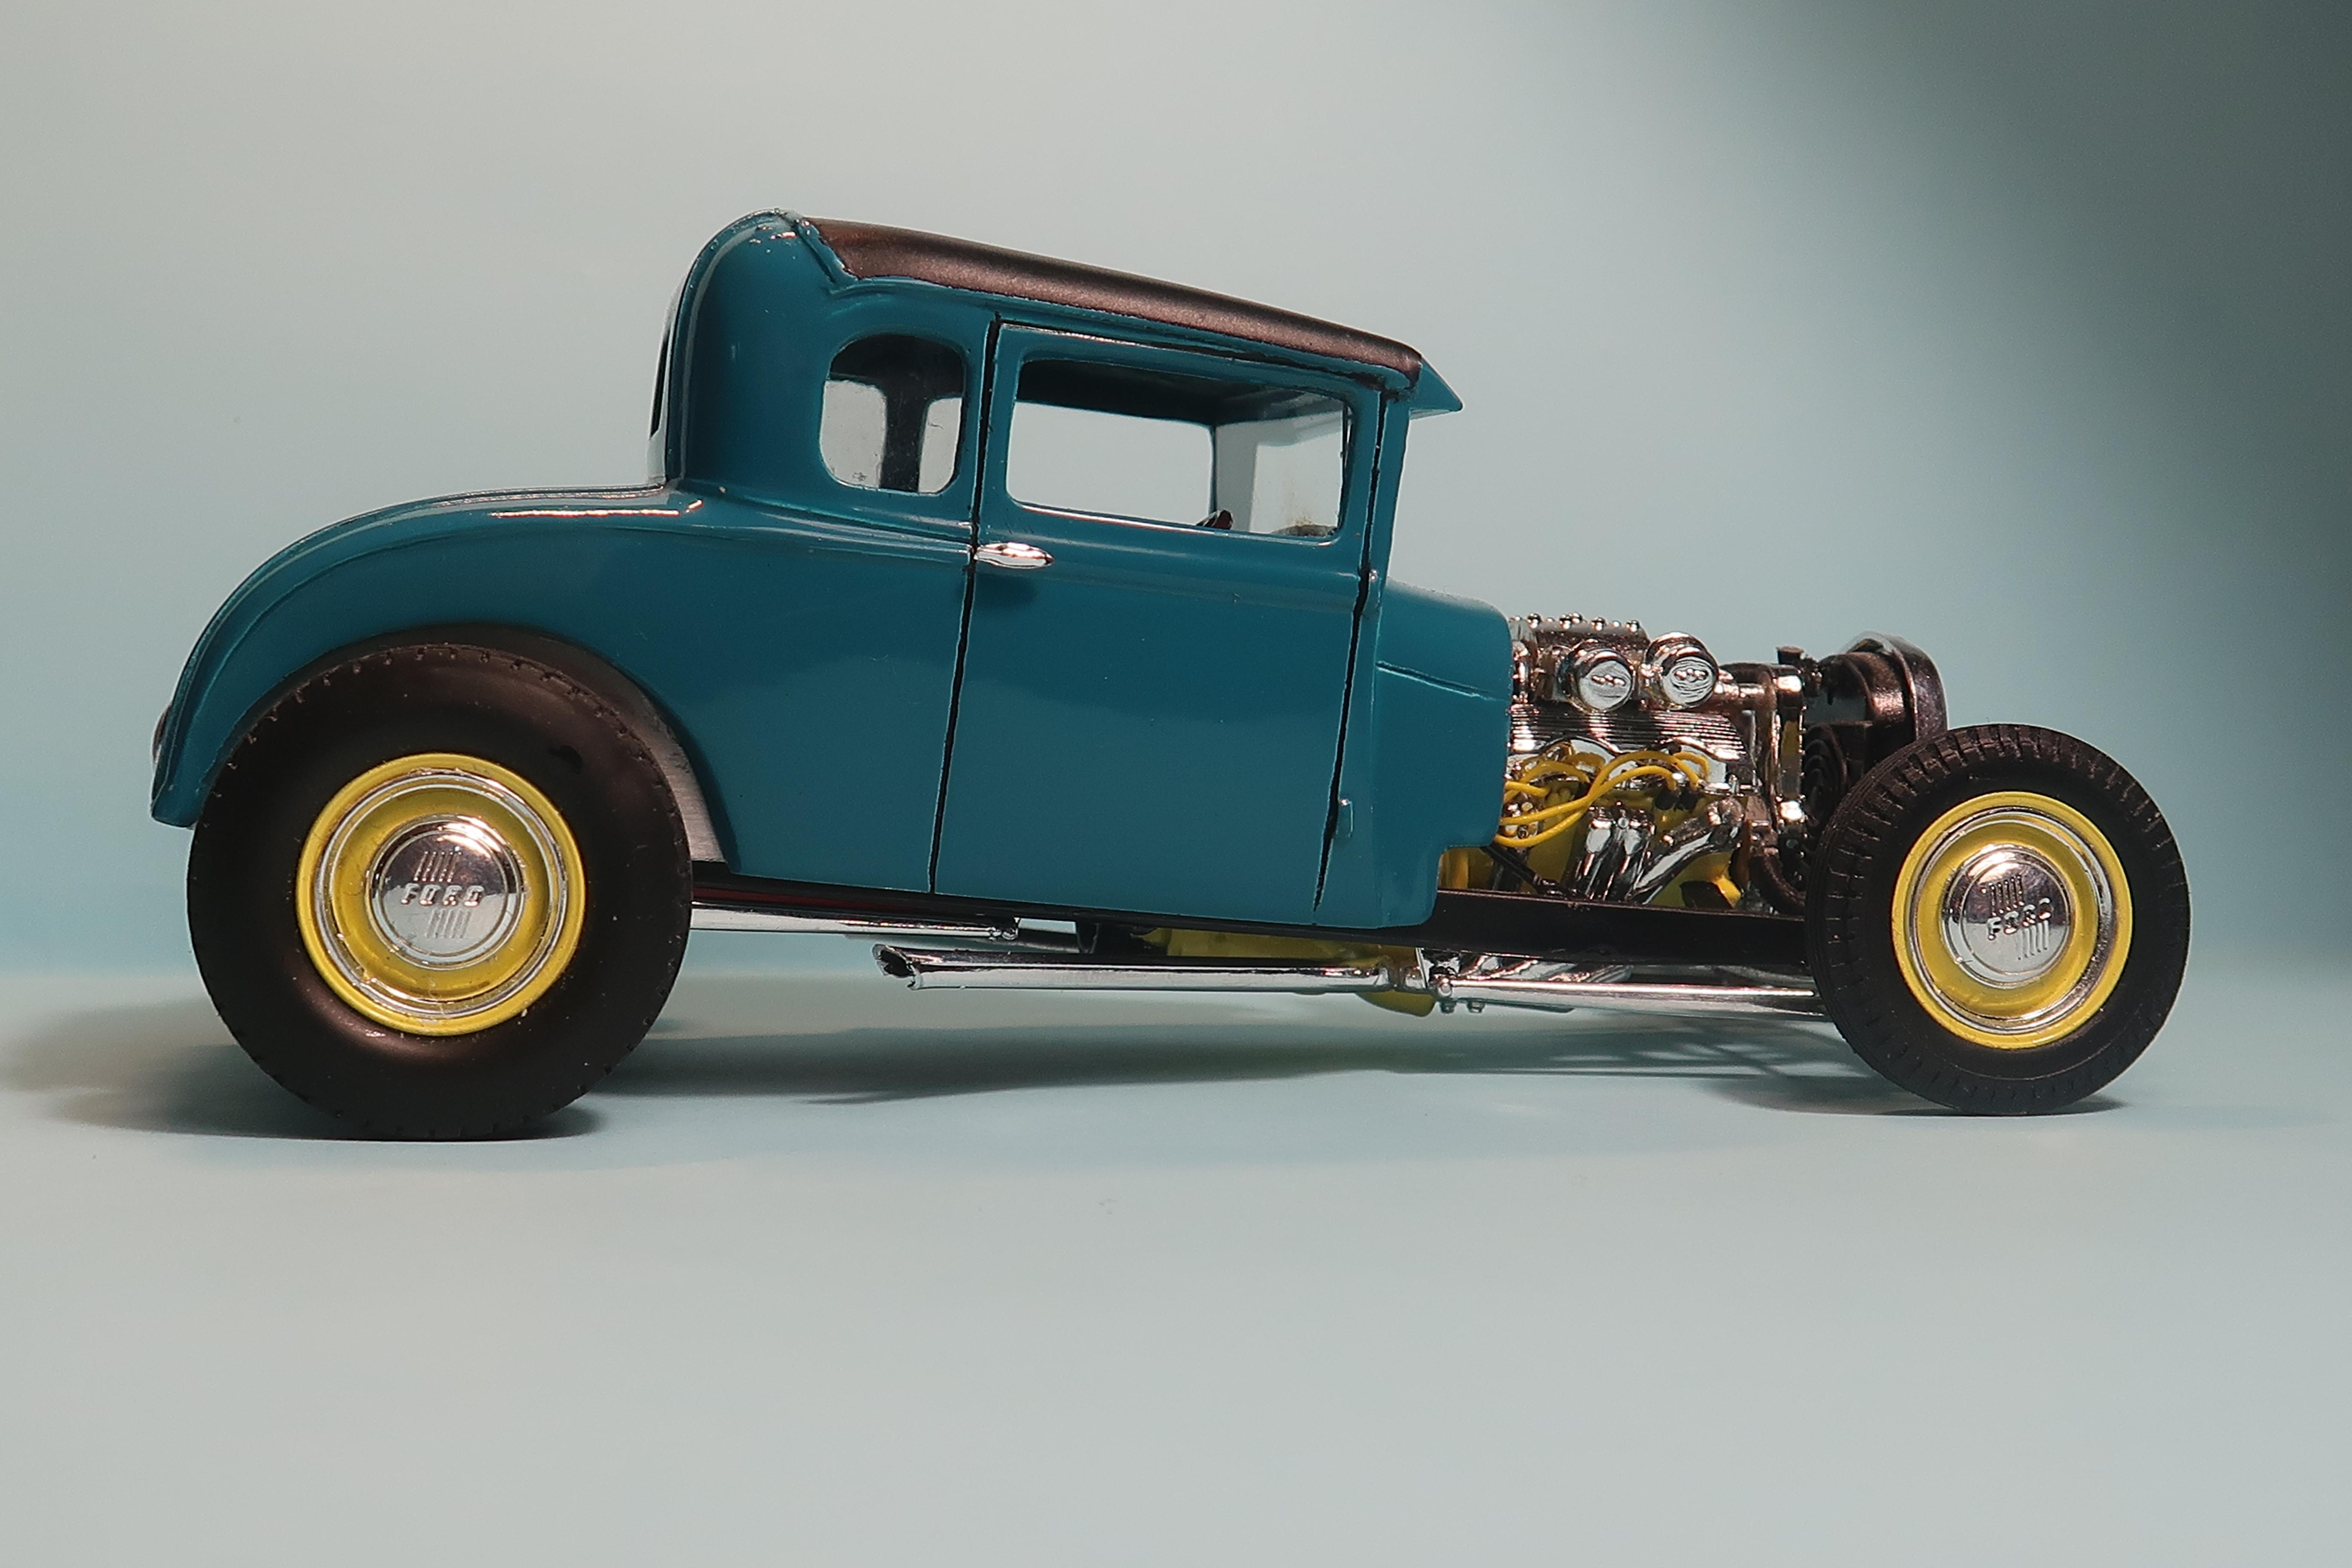
Channelled 29 Model A Ford Five window coupe
alan barton replied to alan barton's topic in Model Cars
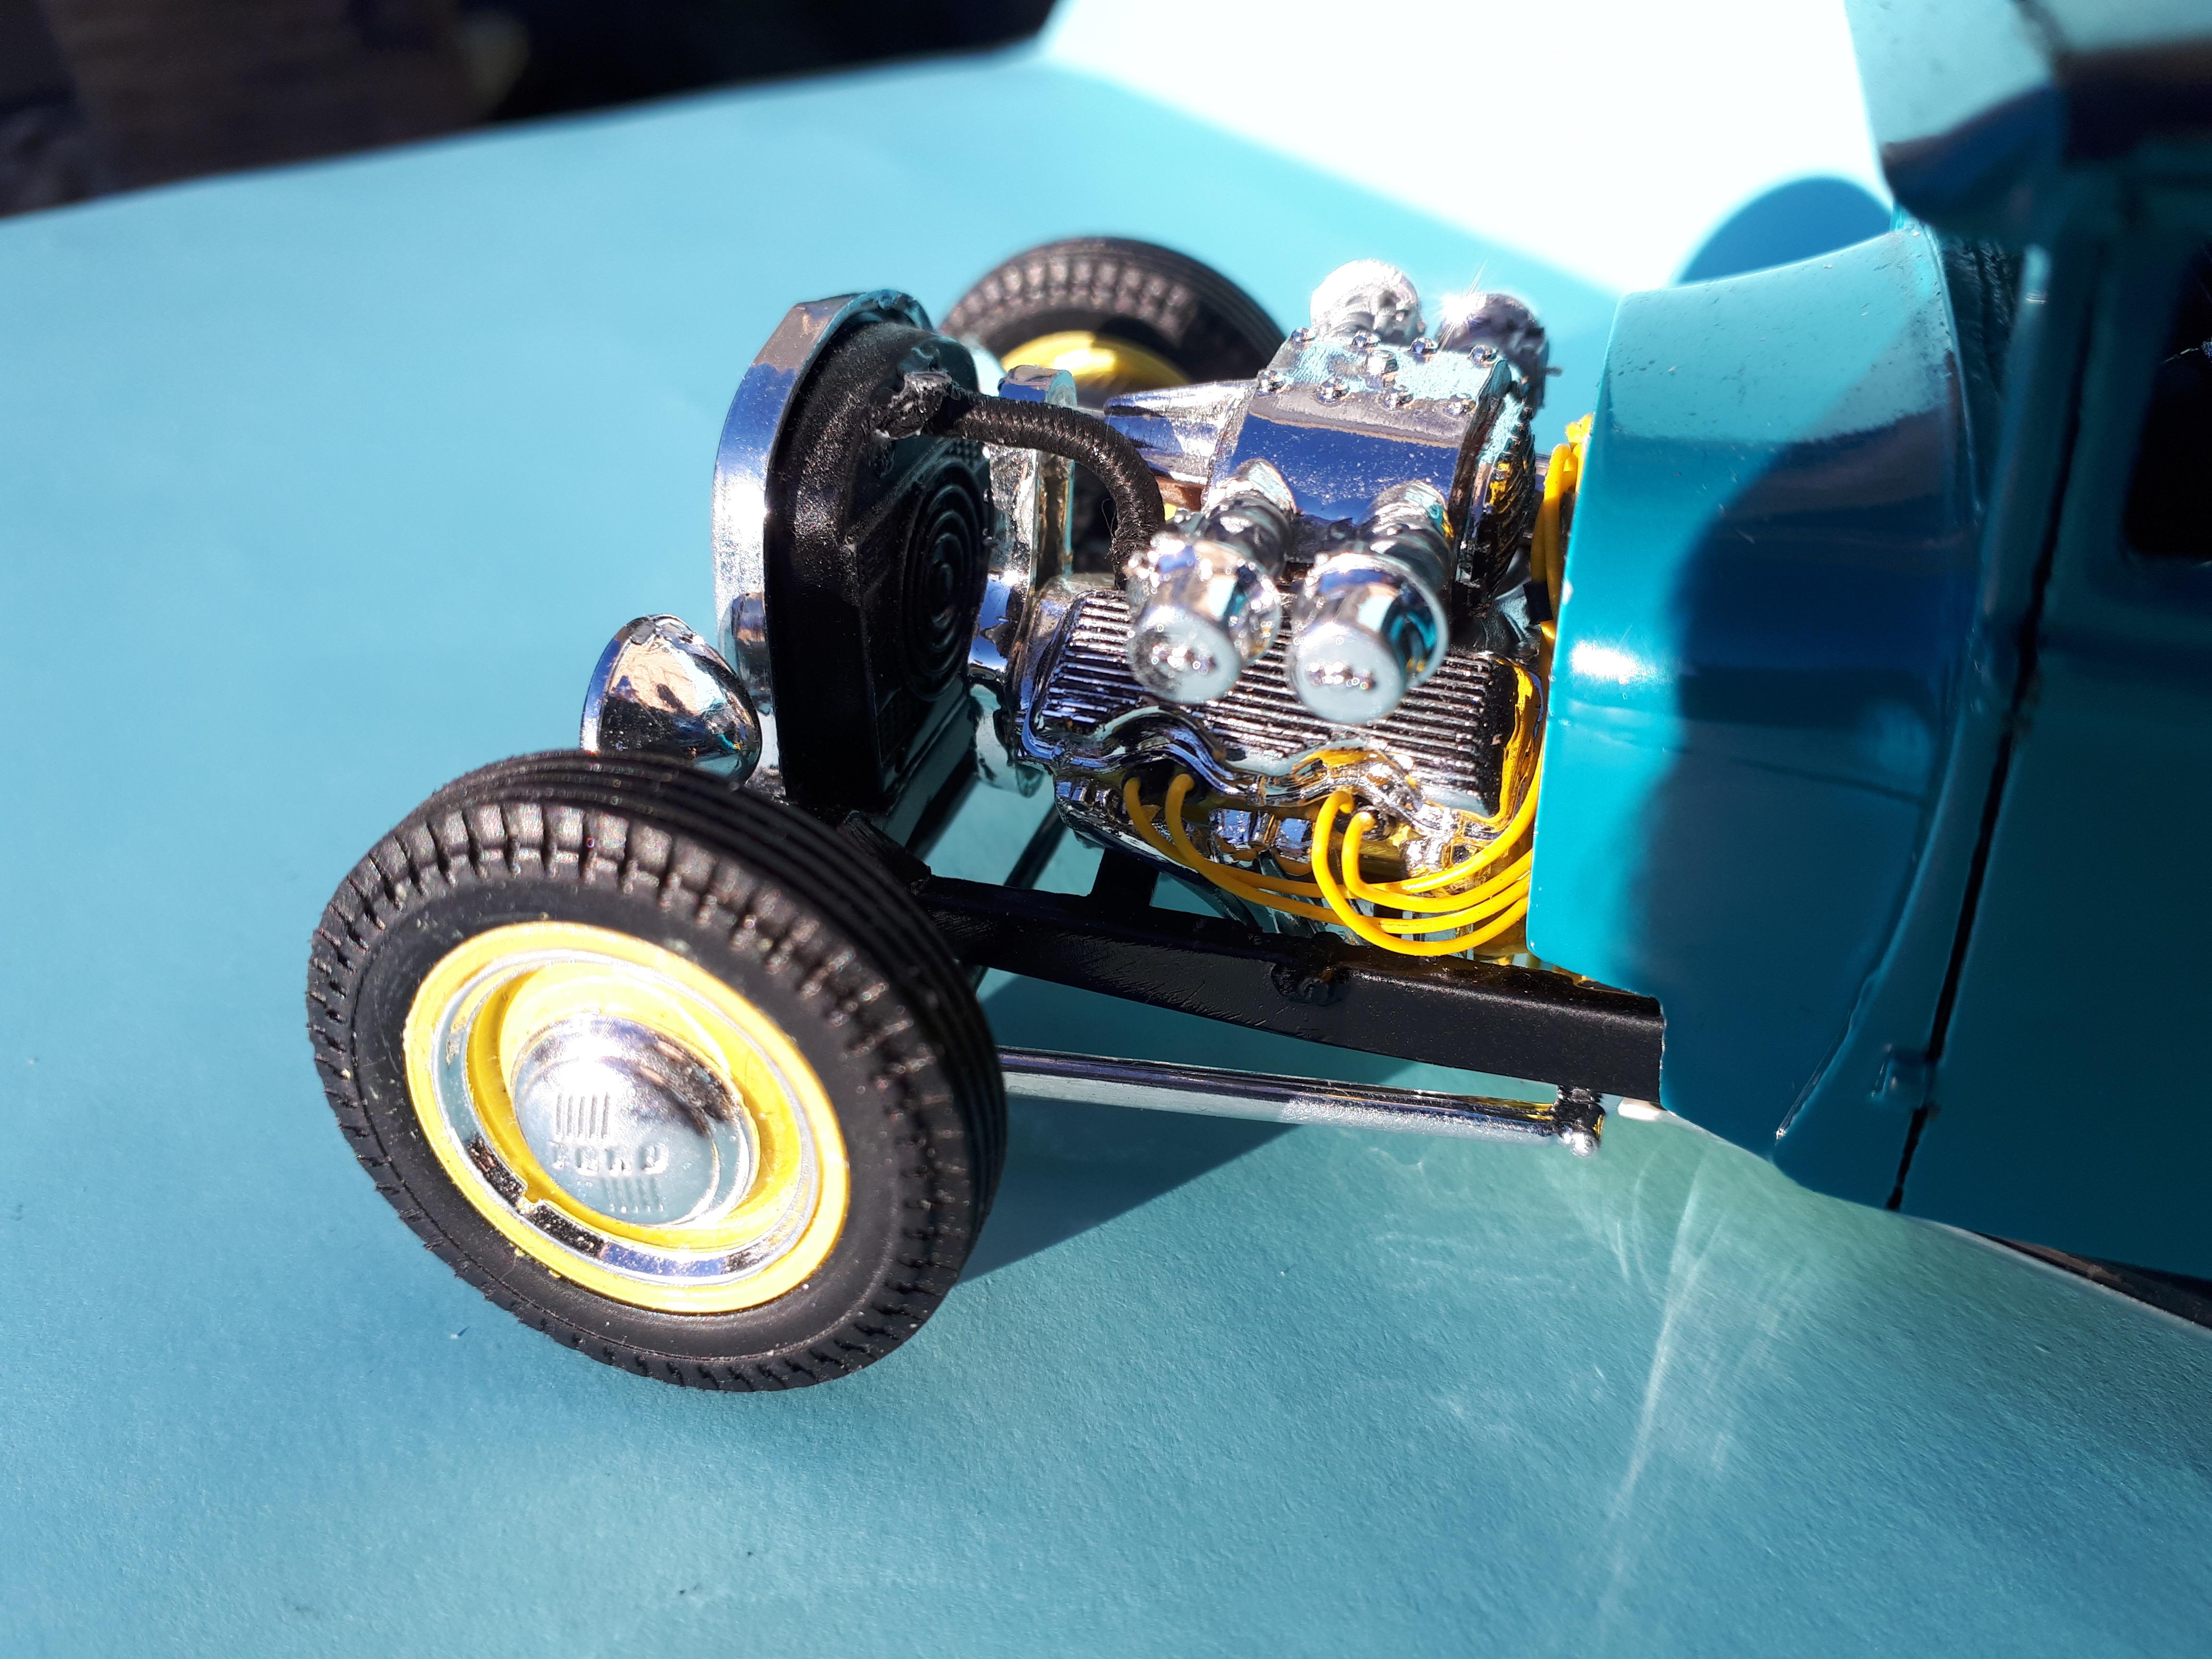
Thanks Dennis. The JF body is such a mixed bag - the shape isn't bad and the faults were easily fixed but the uneven thickness made getting the interior and inter splash aprons no fun at all! I'm glad everyone likes the 409 - I think it really defines the car! Cheers Alan -
Mickey Thompson 69 Mustang Mach 1 Funnycar x 2!
alan barton replied to alan barton's topic in WIP: Drag Racing Models
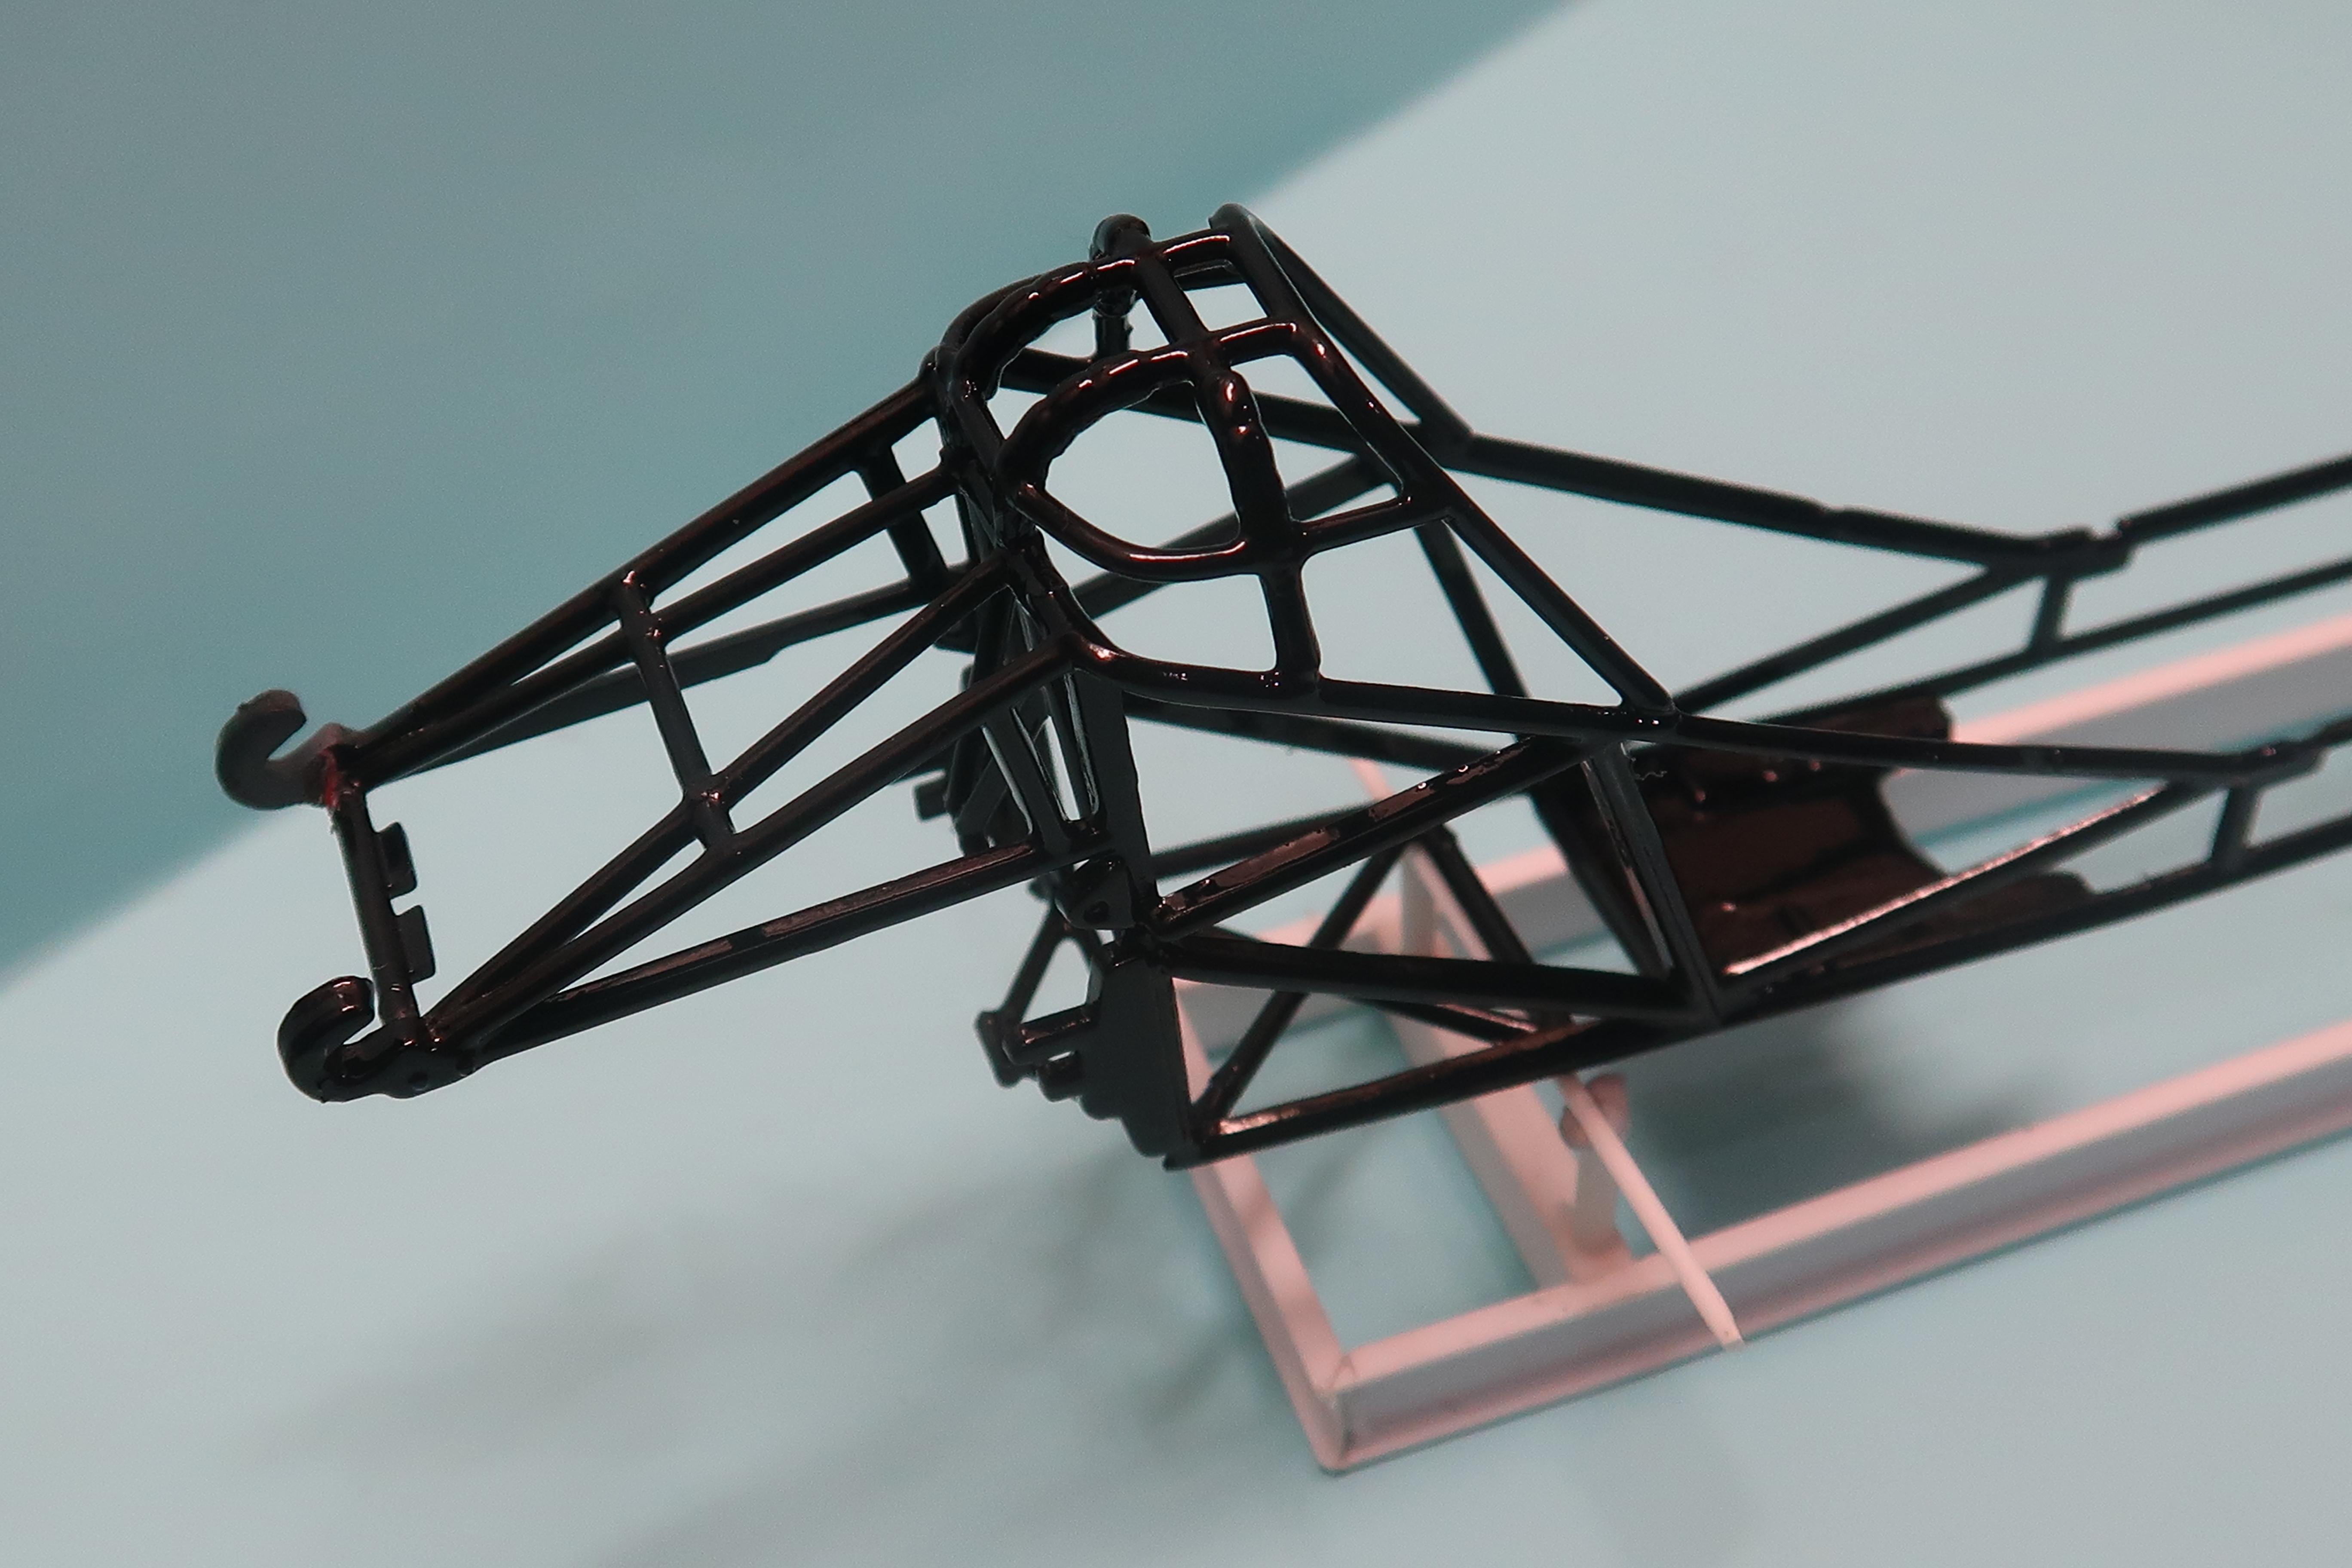
Gee, those close-up photos reveal a few sins, eh? Looks like I'm going back in for a bit of cleanup! The Monogram funnycar seat was nearly right for the job - hey, by this stage I'm not expecting ANYTHING to be right from the start! I opened up the seatbelt holes and removed and filled the headrest area. I also made up some side tins that will need more trimming before they go on the chassis. I made a weight bar from a piece of polished K&S aluminium with two tiny endcaps superglued on. It was nice to do a simple straight forward bit of fab for a change! I then glued the stock Monogram fire extinguishers in place. At last it was time to see of I could install the completely scratchbuilt front end. I started to offer the arms up and ,oh wait, the real car has the fire extinguishers mounted lower so now the trailing arms hit them! So I popped the extinguishers off, snipped away the mounts and trimmed off the remnants and mounted them off the lower frame rail. I then assembled the front end. Sounds easy but I think an hour disappeared before it was done. All the joints are pinned with tiny dressmaking pins. I have a bit of a forward caster issue , caused by the lack of movement in the joints - where are those fully functional 1/25th scale Heim ends when you need them? But hey, she's on wheels! I've included a photo of the real frame for comparison. Cheers Alan
-
Mickey Thompson 69 Mustang Mach 1 Funnycar x 2!
alan barton replied to alan barton's topic in WIP: Drag Racing Models
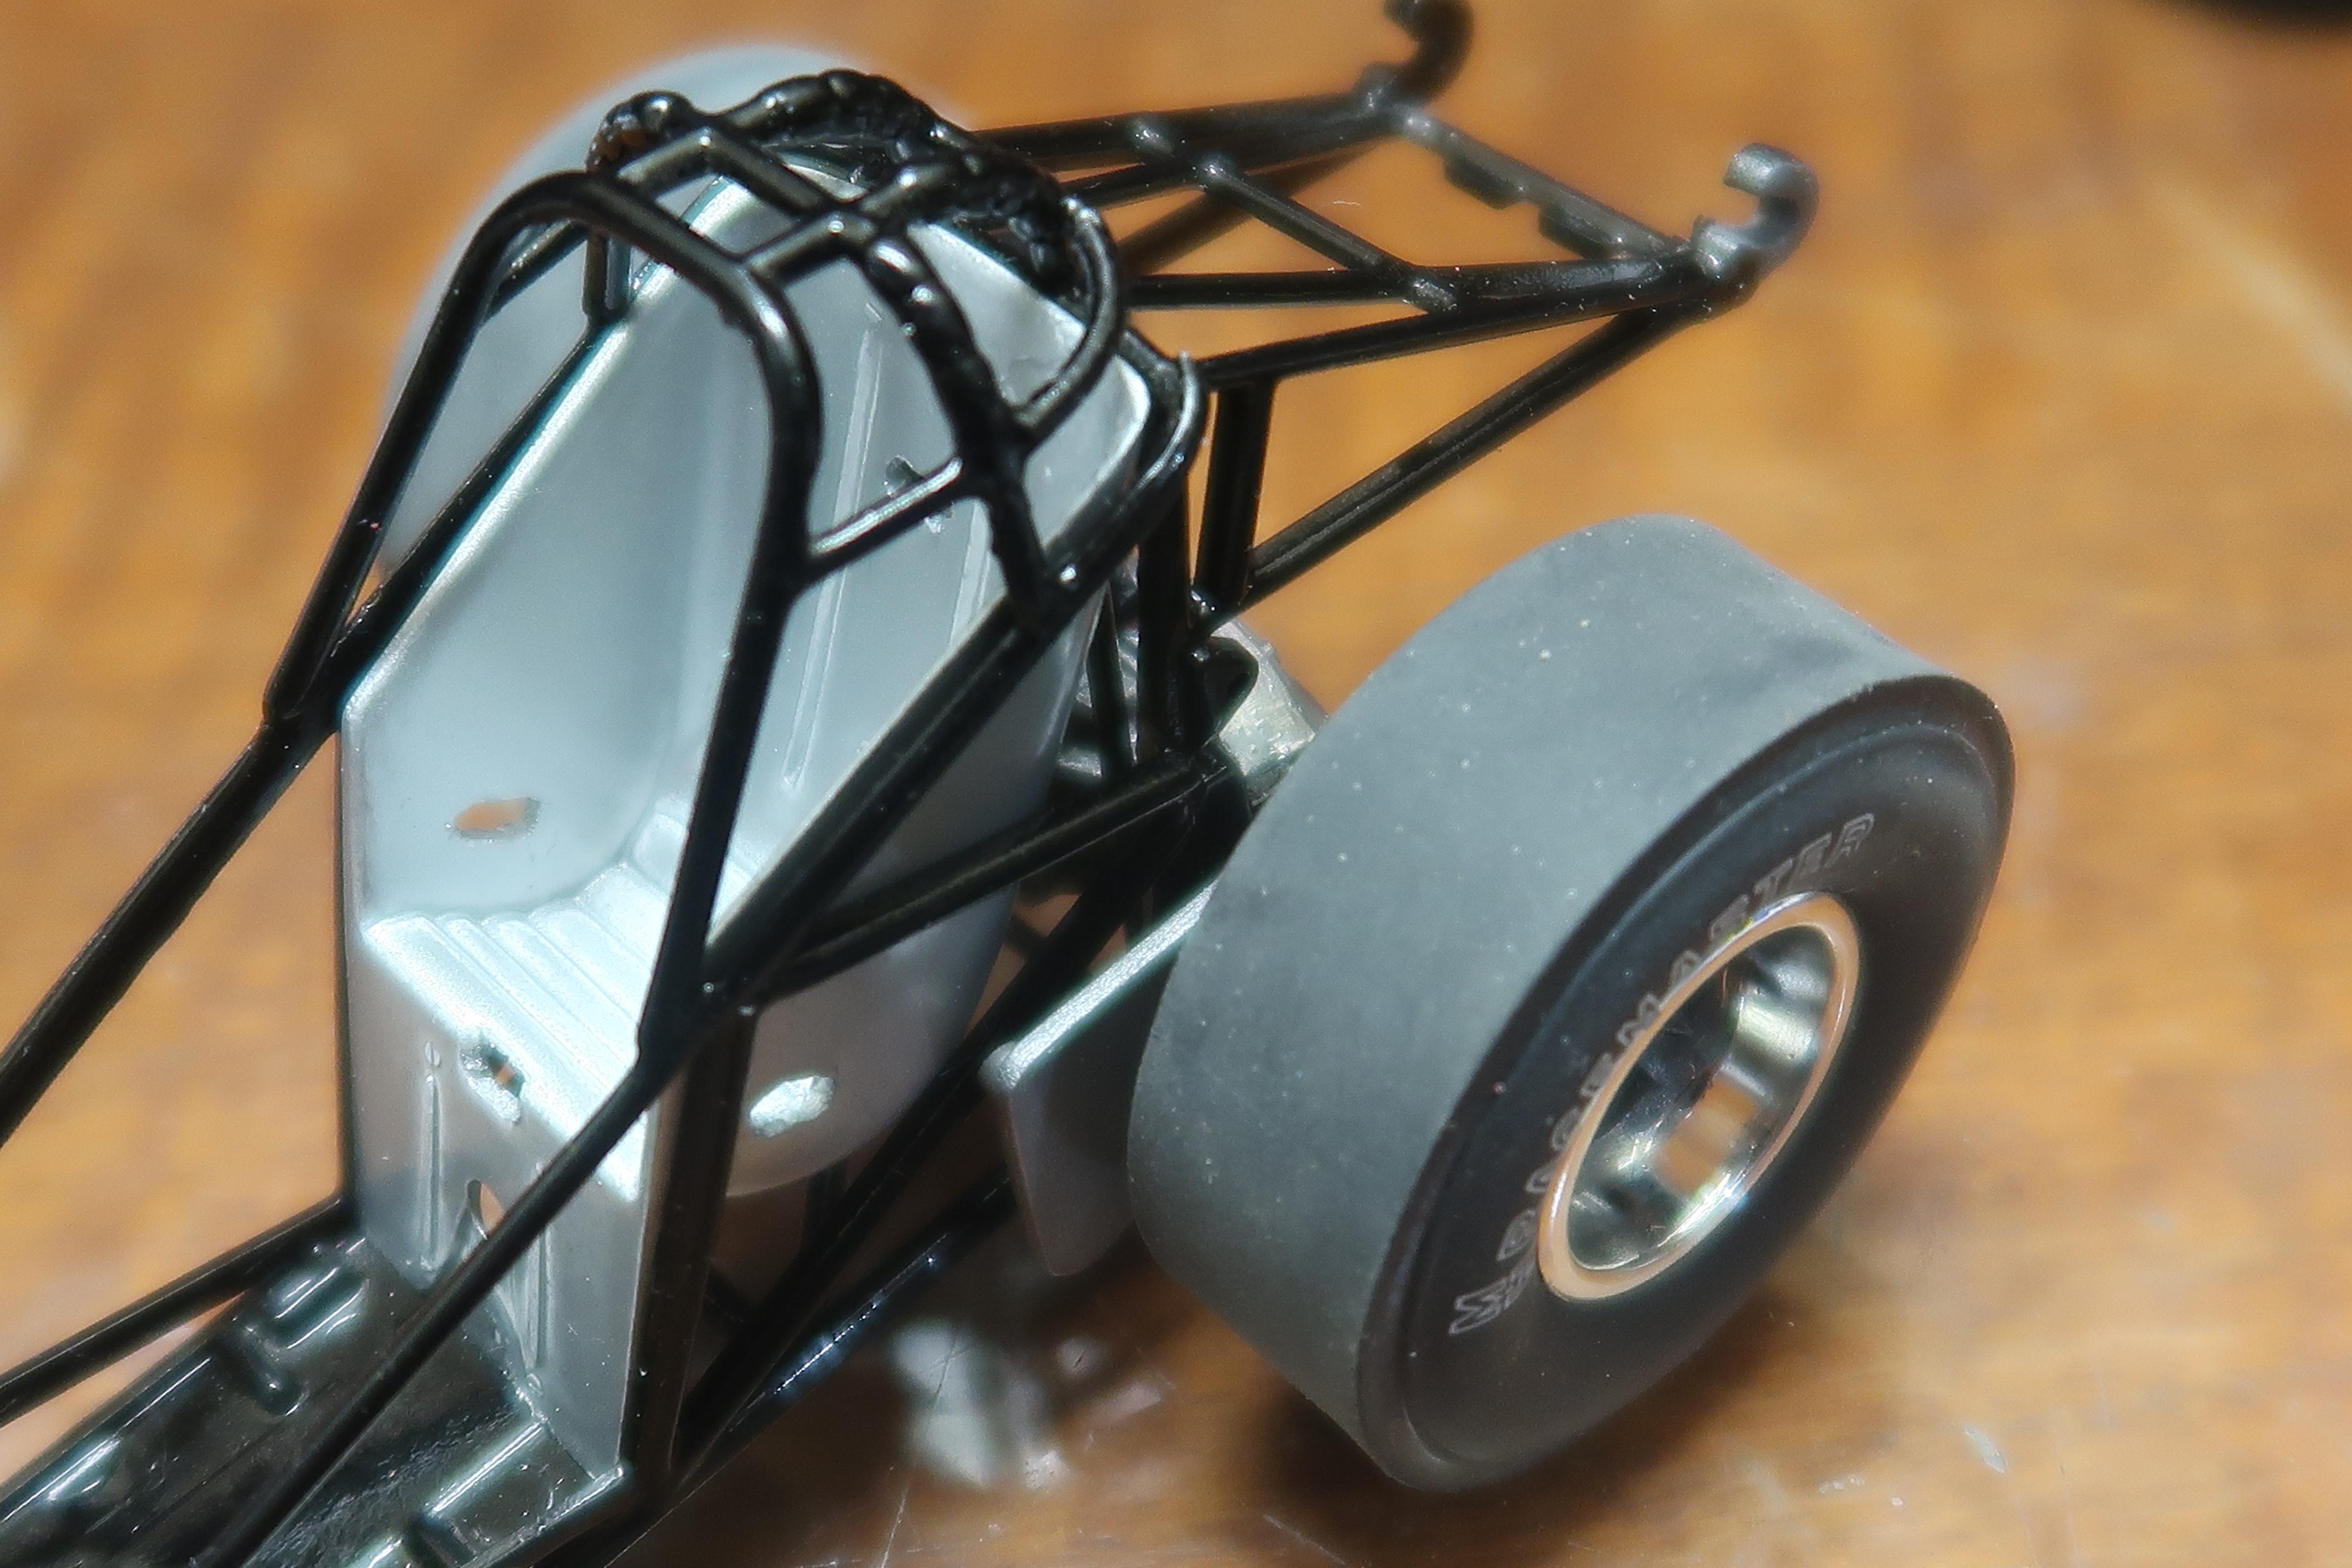
Next up was the front brakes. Another case of building everything twice. Yesterday, I prepared some Revell funnycar calipers by adding a small slice of plastic to the centre of the caliper and then painting them flat black with silver bolts - they looked great and very similar to the 1:1. While looking for more flat washers to use for correctly sized disc rotors, I stumbled on some shakeproff washers. Turns out these are just the shot for the lightweight Willwood discs. Woohoo! I assembled the wheels, painted the back of them in a magnesium mix of Humbrol silver and Revell flat black enamels and waited for everything to dry. When I went to assemble everything, I found that the calipers overlapped the wheels rims. Yuk!!! Close investigation revealed I had used rims that were far to thick in cross section. Because I am eventually to build two of these I have two of most of the major components. This time I used inners from the old AMT Model A roadster custom wheels after heavily thinning them in thickness with a file and then in cross section with an Xacto. After some sanding I reassembled and repainted the new set of rims. I grabbed a second set of Revell calipers, sanding off 1/2 a mm here, 1/2 a mm there, until they looked like they would fit inside the rims. I also elongated the centre hole to allow for some wriggle room. I reassembled the lot, popped them on the spindles and happy days, they fitted. Hey, it was only a few hours lost!
-
Mickey Thompson 69 Mustang Mach 1 Funnycar x 2!
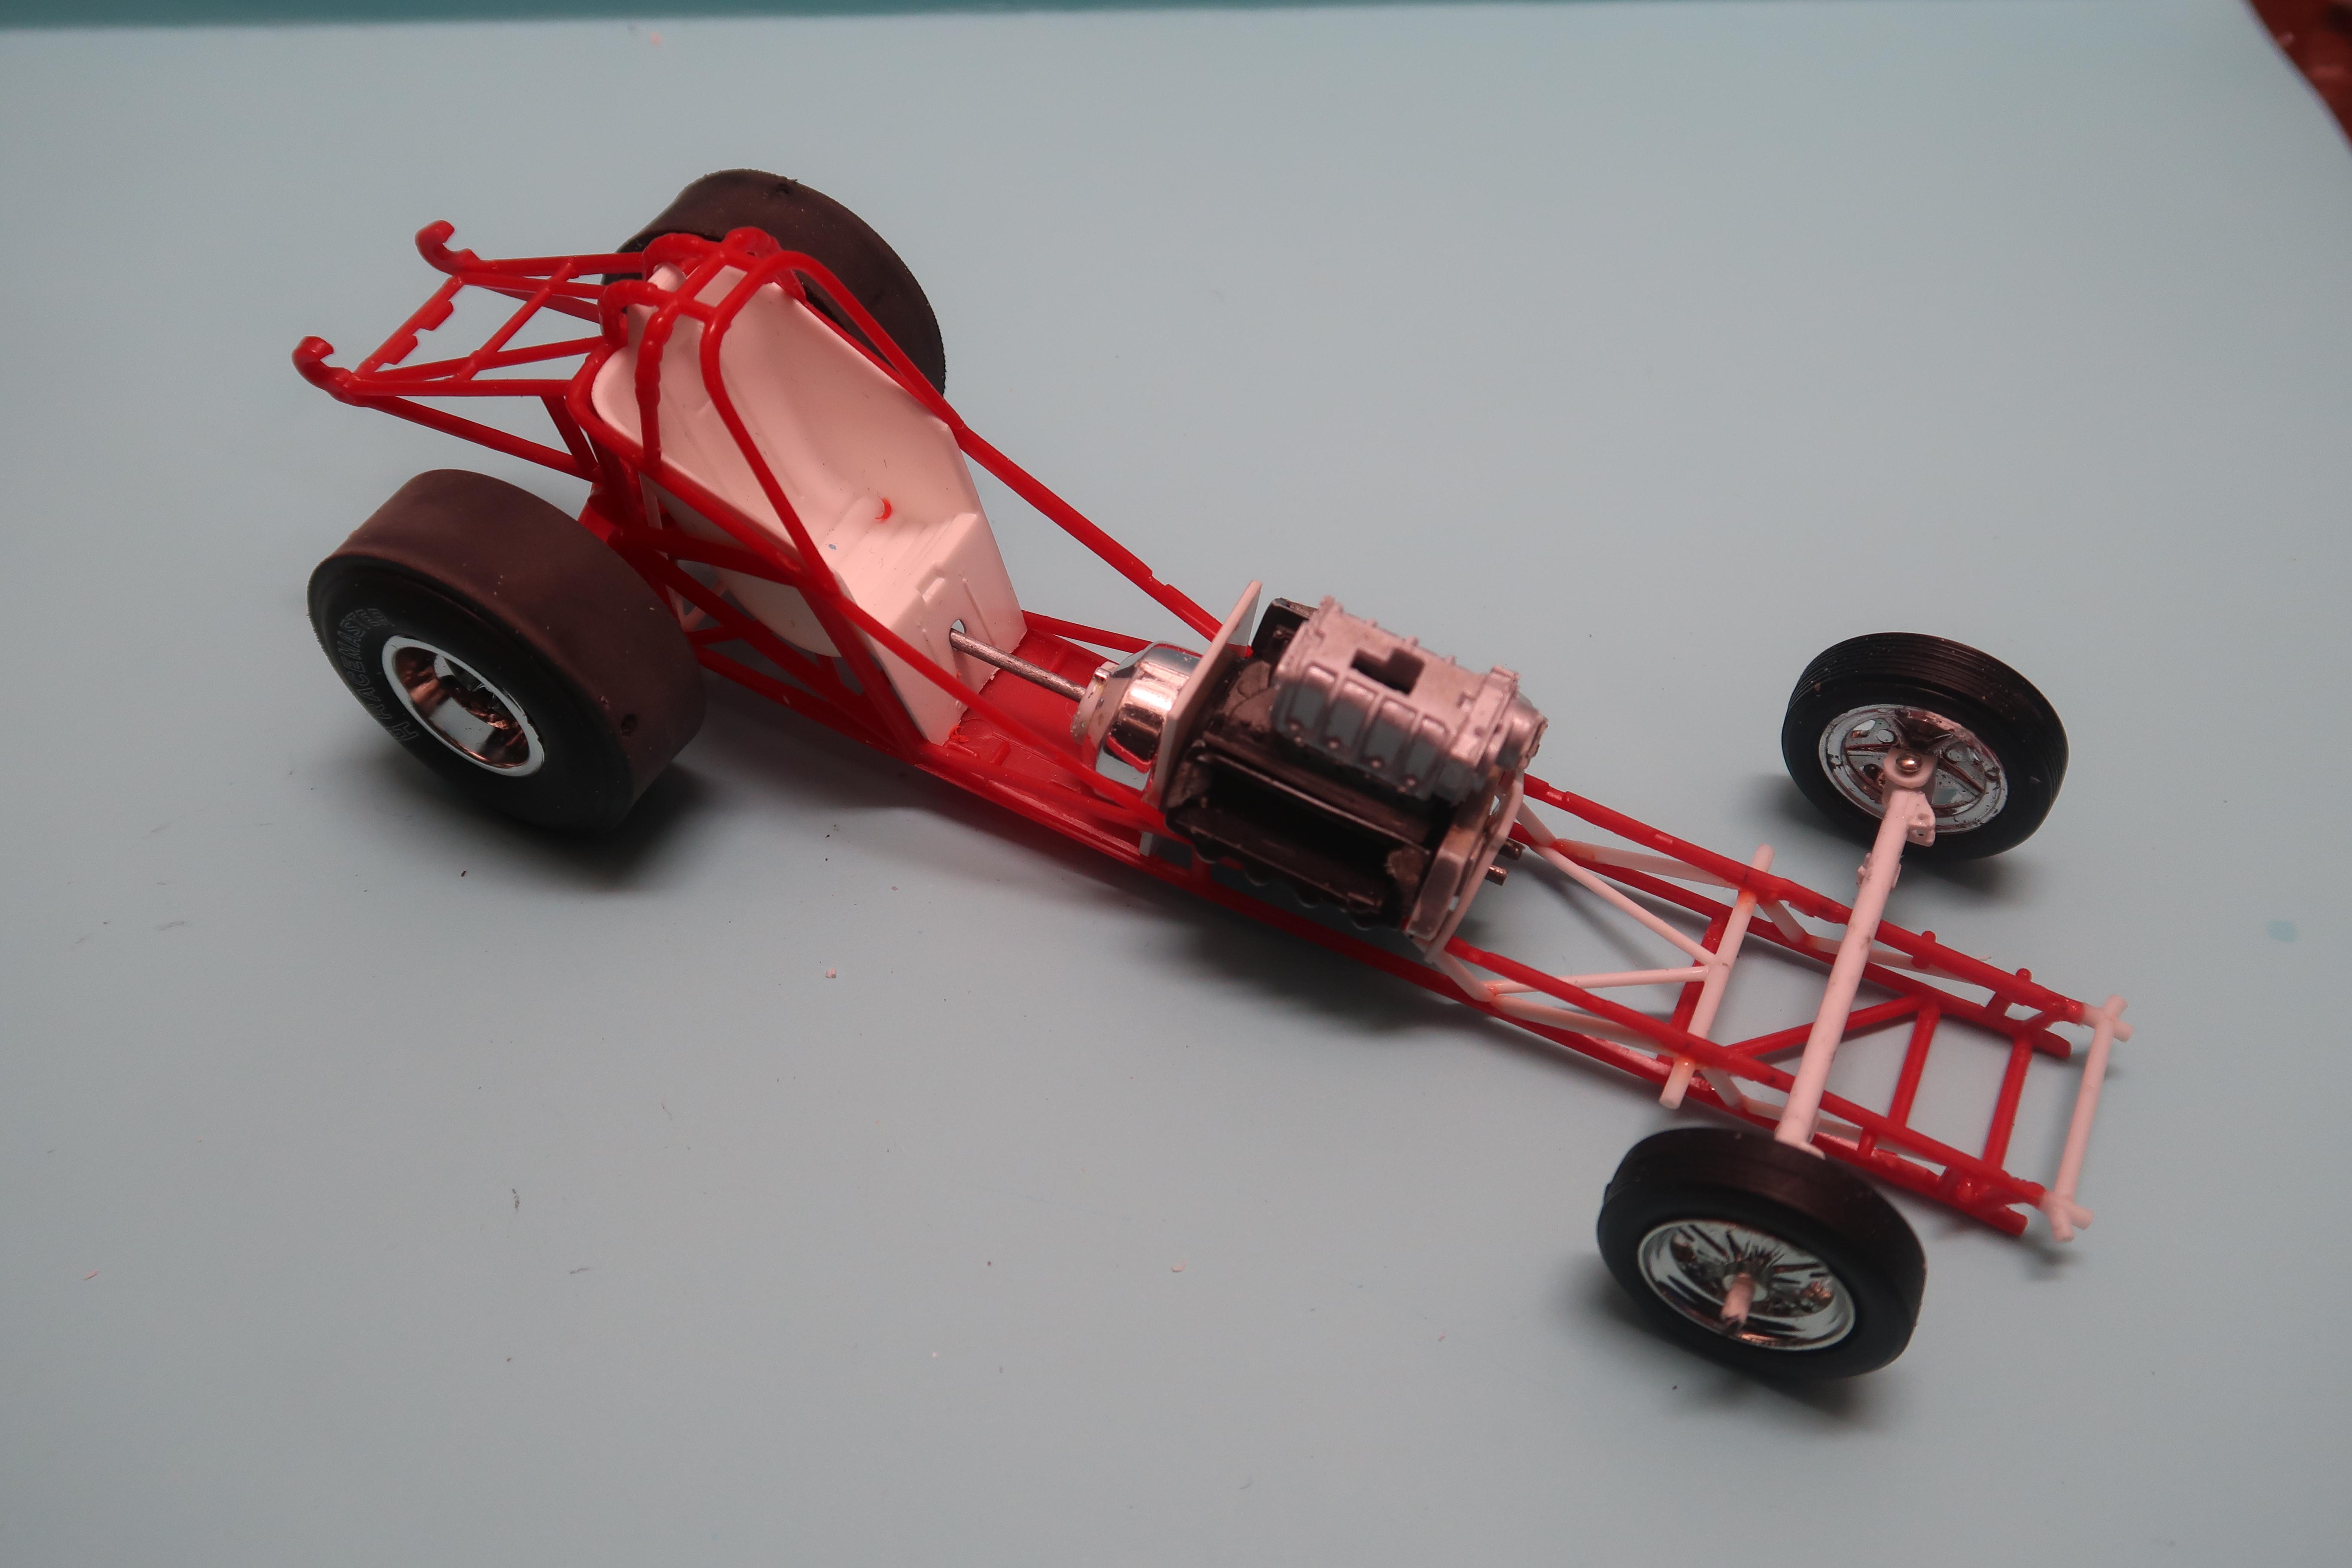
alan barton replied to alan barton's topic in WIP: Drag Racing Models
Thanks Andy, I need all the support I can get! This is categorically the most challenging project I have ever undertaken! It seems that even though it looks like your average funnycar chassis, absolutely nothing works out of the box. The good news is, just this minute I got it on wheels so I am going to take a moment for an update. I sprayed the chassis in Tamiya gloss black acrylic yesterday and kept working on other parts until a few hours ago. I fitted the rear axle after chroming it with my beloved molotow pen. I then added two disc brakes using small flat washers I found out in my garage. I also cut and filed two pieces of plastic in the shape of calipers and glued them on but, alas, you can barely see them through the rims! Still, better than seeing fresh air through there I guess. I also made two flat plates for rear end mounts and glued them in place after spraying with Tamiya gloss aluminium.
-
Boy, you got a beautiful lustre on that paint, Ray! A perfect choice for the car. The whole stance thing has had me thinking. As Ace Garage Guy often points out, quite correctly, they didn't race that high back in the day BUT there doesn't seem to be any shortage of people who have built real cars with that exaggerated stance since those times. Rod and Custom once ran a Hiboy of the Month photo contest and there was some crazy stupid stance in those entries! I guess you just have to pick your era and back story! The teardrop is a great addition also. Magazine photos of the time are full of mid fifties cars with sixties/seventies accessories added to them. Might not be something we would do today but the young guys thought it was col back then. I think your Chevy is a great time capsule any way you look at it. Cheers Alan
-
That looks really sharp Roger. You see the coupe all the time but the panel - not so often! It really is one of those forgotten kits that has more to offer than people think. I have one on the bench right now, just waiting to get some exhaust header issues sorted and it will be done. Thanks for giving me some inspiration to get it finished. Cheers Alan
-
Channelled 29 Model A Ford Five window coupe
alan barton replied to alan barton's topic in Model Cars
Thanks everyone, it's always nice when your peers enjoy your creations, especially when I see some pretty hard core hot rod guys in the comments above. Ace, that bluey turquoise colour was from a hardware store chain that only lasted briefly over here but I think it was an American brand. Fortunately it was cheap - the problem with the large hardware store cans is you can end up with a whole shelf of cars of the same colour if you are not careful. It dried very glossy but took forever to gas out.! Cheers Alan -
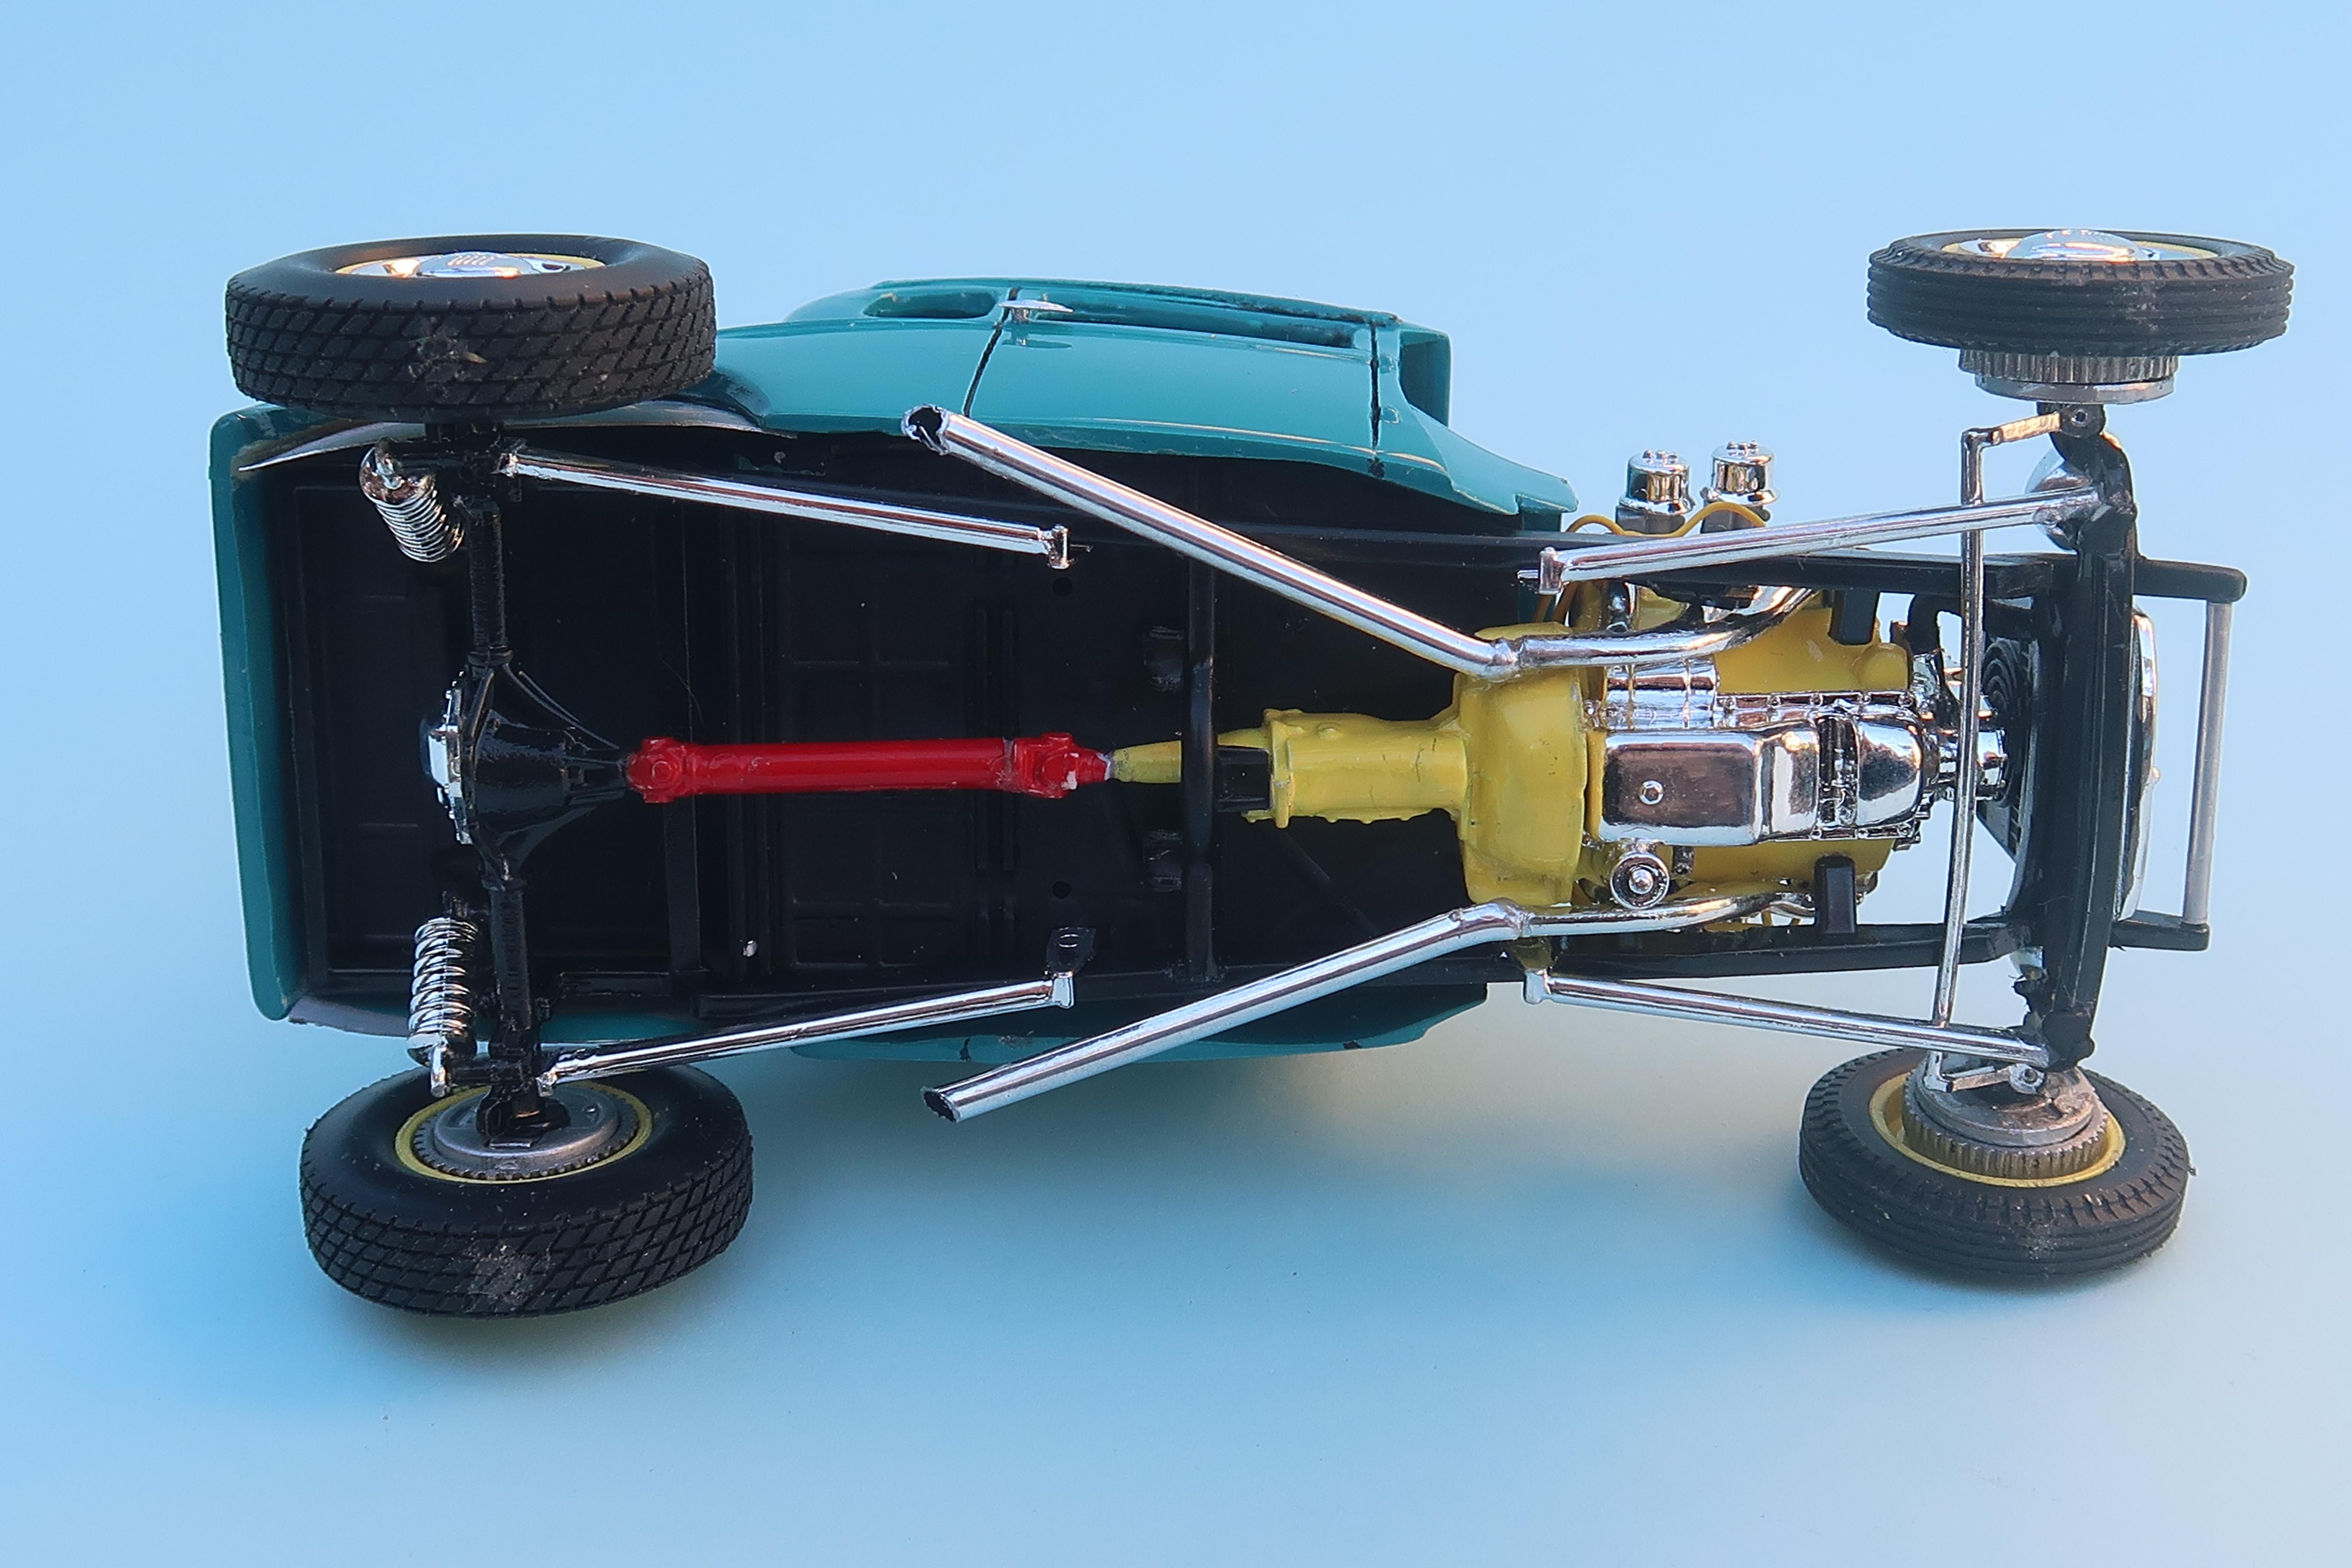
I haven't got as many models finished as I would have liked to this year but here is one of them. Essentially it is a Jimmy Flintstone Model A five window on the Model A frame from the Revell Hiboy kit with an AMT 57 Chevy 409 W motor up front. I wanted to see how much of the leftovers I could use from the Revell kit. It ended up being as follows Frame Channelled floor Channelled radiator 2 sets of channelled front radius rods Headlights Steering column and wheel Dashboard. Channelled interior panels I could have used the spare seat but changed my mind and used a pair of AMT 25 T bucket seats instead. Front axle is from thepartsbox.com and rear end from my parts box - no idea what it was! It does show what fantastic value the Revell kits are as I only needed a body, engine and a handful of parts to get this rod on the street. The wheels and tyres also came from the kit as I used Kelsey Hayes wires on my Bud Bryan hiboy that provided these leftovers. The Revell Model A chassis has been "Z" d just behind the radiator to try and close up the gap that always exists under fenderless Model A chassied cars. I did have considerable challenges with the resin body. The thickness of the side panels required a lot of thinning to get things to fit and it's still not great. The rear quarter windows and raingutter were all wrong, but having a real five window project car in the garage made it easy to fix that. Despite extensive cleaning and sanding and priming I still got a big fisheye on the cowl but I am going to live with it for now. There is very little interior detail because frankly it's dark in there! The AMT 409 is one of my favourite kit motors and only required the axle hole being filled. I just mashed a big chunk of sprue and some superglue in the hole and it took very little sanding to remove all evidence of its existence. I don't want anyone to think this is an accurate representation of a fifties hot rod. To me , it is more like a contemporary 21st century interpretation of a fifties hot rod. I'm good with that! I hope you like ti too!! Cheers Alan
-
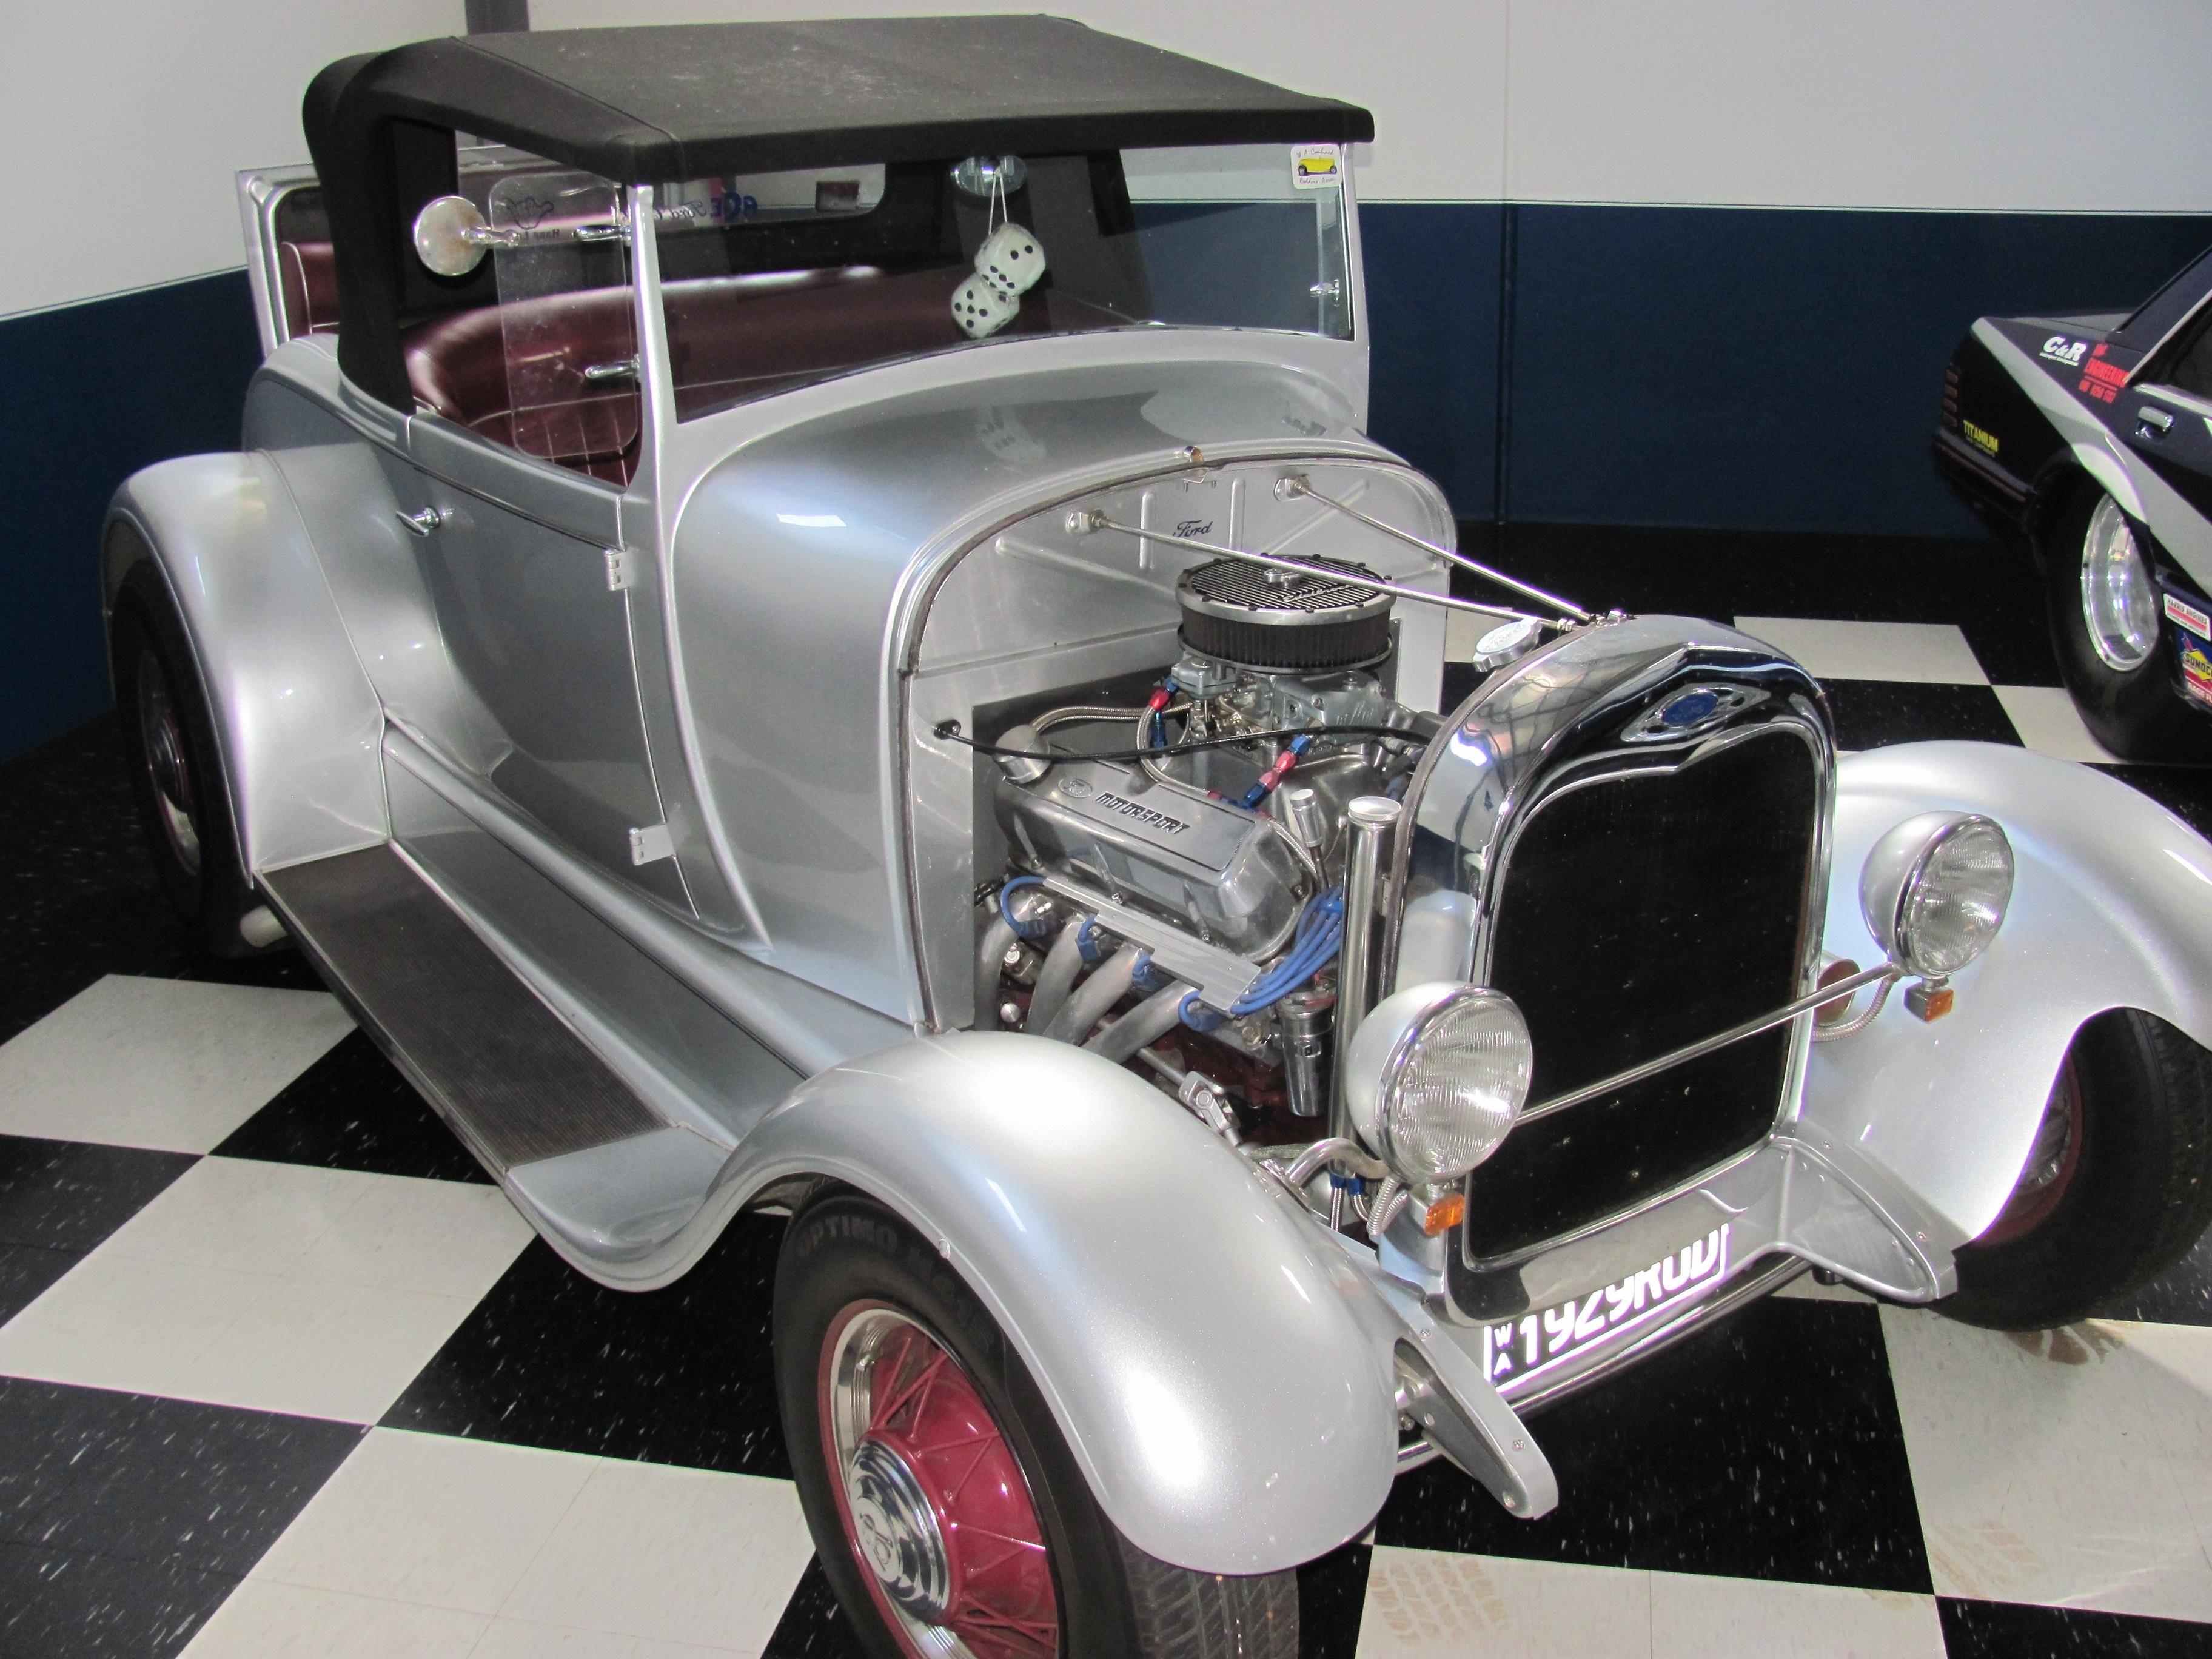
Really like where this is going but for what it's worth, I reckon she could really do with some rubber rake. You don't sound convinced on your wheel choice but I think it is more likely the tyre selection that is giving you a bad vibe. Fill those back fenders up, tilt her nose down and her bum up and I reckon this will pop! If it still needs some help, try gluing a 1/24th scale inner rim to the outside of your rears to give them a bit more depth and offset. On the other hand, a fellow rod club member here in Western Australia built the Model A below about ten years ago. Silver with an oxblood interior and his wires are maroon with dress rings. Maybe that would work? Cant' wait to see this done! Cheers Alan
-
That stock AMT 32 is cool but that chopped coupe is killer! I wouldn't have thought of doing the accessories in that gold finish - it ties in beautifully with the wheels. Cheers Alan
-
Mickey Thompson 69 Mustang Mach 1 Funnycar x 2!
alan barton replied to alan barton's topic in WIP: Drag Racing Models
Thanks again everyone, I made reasonable progress this week but the pressure is definitely on! I got the frame into primer last night and hopefully colour tonight if it is not raining when I get home. The mods I made to the front of the frame seem to be working OK and I have gone with a compromised rear arrangement to save time and to gain rigidity. Hope to have more updates, on wheels maybe, by the end of the weekend. Cheers Alan
-
Didn't Esso stand for S.O. - Standard Oil ? But yeah, he's probably trying to catch a lift! I love the facade on that service station - great to see a building with a bit of presence. What did you use for your inspiration? Cheers Alan
-
It's the sort of rod that someone really should build in real life. Your model would be the perfect prototype! Your flathead detailing looks exceptional and I love the custom dash. Colour is perfect, yeah, lots to like about this one! Cheers Alan
-
Modeling for fun.....again!
alan barton replied to GaryR's topic in General Automotive Talk (Trucks and Cars)
Yeah, I'm 61 and for quite a long time had been scooting along at 12-15 models a year. My work now takes me away from home semi-regularly so last year I only got 5 done and there's only three done so far this year. I do some motel room building which is fun but hard to get much final assembly done because the airport baggage handlers tend to undo your assembly work anyway! I have decided that closed hood cars won't get engine wiring any more. Open engine compartments on rods and dragsters will get that time spent. I find Tim Boyd's models are right at the level I am happiest with. Great stance, cool paint and just enough detail to make you go "Oh yeah!" And I'm right with Tom, gotta start using more of those goodies we have collected for years. Unfortunately I have a weird personality trait that has me restoring dead bodies rather than using the virginal ones in my stash! Gotta try and get over that and save some time! Another thing I got into a few years ago was 1/32 scale hot rods. I make absolutely NO attempt to super detail these in any way. Cleaning off mould lines is about it. If the backs of the tyres are hollow, so be it. If the exhausts look like tree trunks, tough. It takes you back to your childhood when all you were interested in was getting the thing finished. By using adult paint techniques and yes, BMF, you get a very cool model for the shelf and a great bit of nostalgia to boot. I have been writing model columns for an Australian hot rod magazine for the last three years so that has kept me busy modelling although not always finishing models. Hopefully I have another 1/32 scale period coming soon and for the first time I will use Molotow on them - those old chrome-less Pyros, Lindbergs and Auroras are just begging for it. Meanwhile, to the John Teresis. the Codis, the Steve Guthmillers the Mark Jones, the Dennis Laceys please keep doing the awesome ultra detailed models that you build because there is inspiration, admiration and entertainment in everything you do. Just because I haven't reached that level doesn't mean I can't enjoy it immensely. -
Add me to the list of people who has one but hasn't built it yet! Way back I did buy additional sheet and I beam plastic for a planned extension so it is very interesting to see how effective your modifications are. Did you print your own forecourt with those No Parking signs or was that a commercial item? Cheers Alan
-
Mickey Thompson 69 Mustang Mach 1 Funnycar x 2!
alan barton replied to alan barton's topic in WIP: Drag Racing Models
Here's the axle so far, scratchbuilt from Evergreen. This is really testing me, probably some of the smallest parts I have ever tried to cut, shape and join!manipulate
-
Mickey Thompson 69 Mustang Mach 1 Funnycar x 2!
alan barton replied to alan barton's topic in WIP: Drag Racing Models
Me too Tim I need to have this finished by September and the days are flying past! I have had a constructive few hours tonight, adding new bars to the frame. I also have the axle looking reasonable. If it all fits up in the morning when everything is nice and dry and solid, I will try and tack it in place and get the rear end setup. I figure once it is on wheels I am on the trip to the finish line. Still a lot of fabricating, sanding and priming to go! I have already decided to make a few compromises on strict accuracy in the interest of durability. This puppy has a long trip to California in its future! Thanks everyone for watching. Cheers Alan
-
I'll fly back with you after you visit our show! Bazinga!
-
Thanks guys, I will make sure my wife sees your compliments. It is so cool to have something like this in our display cabinets and I expect from time to time we will swap out the cars in the carpark to produce a new scene or even change the era. Also, because Ute chose polystyrene foam for a base, if she chooses to add more people then it is just a matter of drilling a small hole in one leg and inserting a pin. The figure, or plants or other accessories, can then be pushed into the foam with no noticeable damage, no risk of glue smears and no having to stand the figures up every now and then. It works so well I can't imagine doing it amy other way in the future. Cheers Alan
-
Thanks David, I'm glad you liked it. This tub just wouldn't talk to me for years but once I got all the right elements together I was really happy with the result. Thanks Rick, I will keep those tips in mind for the next one! Cheers Alan