Alan Barton
-
Posts
2,128 -
Joined
-
Last visited
Content Type
Profiles
Forums
Events
Gallery
Everything posted by Alan Barton
-
Steve, I have been following his from the start and continue to be amazed at how well all your various sub-assemblies fit together on such a massive project. You are really teaching us all that a human being can do anything! This is like a batchelor's degree course in scratchbuilding! Cheers Alan
-
Revell '29 Roadster, Late '50s Style
Alan Barton replied to Richard Bartrop's topic in WIP: Model Cars
You've got a beautiful sense of balance on this roadster, Richard. The fifties feel is really working for you. Will enjoy seeing this one done! Cheers Alan -
Can't go wrong with whitewalls on a red coupe! Have you tried lifting the rear end just a smidgeon? 40s love a touch of forward rake. Cheers Alan
-
James, I agree with all your opening comments but as a separate category is unlikely to happen, can I suggest you start a thread called "Put your Bonneville and Dry Lakes cars here" Come to that, you could add Lake Gairdner, the far superior surface in the middle of outback Australia. It would then work a bit like Tim Boyd's boat thread, where those of us with an interest in this niche have a place to go and compare other models. I have a bunch of cars that would fit your category and if various contest annuals are anything to go by, other people do as well. It is always nice to have one thread to go to to compare all. The H.A.M.B. hot rod forum uses this idea very successfully and has threads that are over ten years old yet alive and kicking. Start it and they will come! Cheers Alan
-
One of the most realistic Revell funnycars I've ever seen built. A pleasure to view - thanks for sharing! Cheers Alan
-
Hi Bill, fantastic to see this progressing after all your trials and tribulations. Unfortunately they are a part of the things we do - if we just built box stock we would only have to worry about a few seam liines and sink marks but where would the fun be in that? This car is looking stunning. If it were mine, I would be building the original up as a curbside, just for a bit of instant gratification and to keep the juices flowing on the full detail version. Either way it is going to look as cool as any Model A that ever hit the dry lakes. And when the day comes for production of your fibreglass copies, please be sure to keep me in mind. Cheers Alan !
-
Here's a rare sight!
Alan Barton replied to Joe Handley's topic in General Automotive Talk (Trucks and Cars)
I run 195-65 x 14s on the front of my Model A roadster. Went to buy new tyres for my annual roadworthy check last year and three major tyre retailers looked at me like I had landed from Mars! Fourth guy came good - he had a set ordered in for a guy with an old Fiat and wasn't due to pick them up til later in the week. I snatched those and he re-ordered. Same goes for parts in general. When my rod first hit the road in 1984, most of the wrecking yard parts on it were under ten years old. Some parts on it now are older than the Model A was when I started building it! Parts that people used to give you for free are now rare collector's items. On top of that, all our sixties and seventies muscle cars were based on poverty pack family sedans. So you can no longer buy ,say, a lower control arm for a Holden Belmont four door sedan, it is always listed as a genuine HK Bathurst Monaro GTS 327 lower control arm!!! With the accompanying price tag! These late sixties, early seventies sedans were the most common donor cars for hot rods back then so it is really starting to sting. Cheers Alan -
Congratulations, Paul, on what is surely the finest collection of Thunderbolts ever assembled. That Bob Ford is laser sharp - the side trim is a lesson on foil detailing for everyone. Just beautiful! Cheers Alan
-
Thanks everyone. It is nice to get some comments - I was a bit surprised that it took so long to get many. Yes, it was fun populating it. For years, I was the only clubmember with much of a collection of figures and we used them at all our club displays. Then two guys, Rob Rattray and Yves Zuber started really pushing the other members to produce more. It has really taken off and adds real life to any of our dioramas. Each member has selected a colour to put a dot on the heals of the figure's feet or shoes - mine is red- as it is the only way we can ensure each member gets his own figures back. I think we had about 400 figures on there in 2017. Unfortunately, one of our most prolific figure modellers, the legendary Ken "Bandit" Searle passed away suddenly just days before the display. Most of the figures in the hillbilly bush band display were his work. Amazingly, he lost the use of his right arm in a motorcycle accident so all his modelling was largely done with his left hand, and no, he wasn't left handed to start with! Anglia 105E, it is interesting that you noticed the models of Des Smith, the founder of our club. When a weird model turns up a the club meetings, we joke that it is a "Des model" because Des loves the offbeat and the unusual. Often, models in his collection are the only examples we have ever seen! Bruce Saunders had the idea to sprinkle the minions about. The little kids just love them and spend ages running around trying to count them all! The neat thing is, they don't jar against the accuracy of the scene as a whole - they are only there when you notice them ( and the kids always notice them first!) Cheers Alan
-
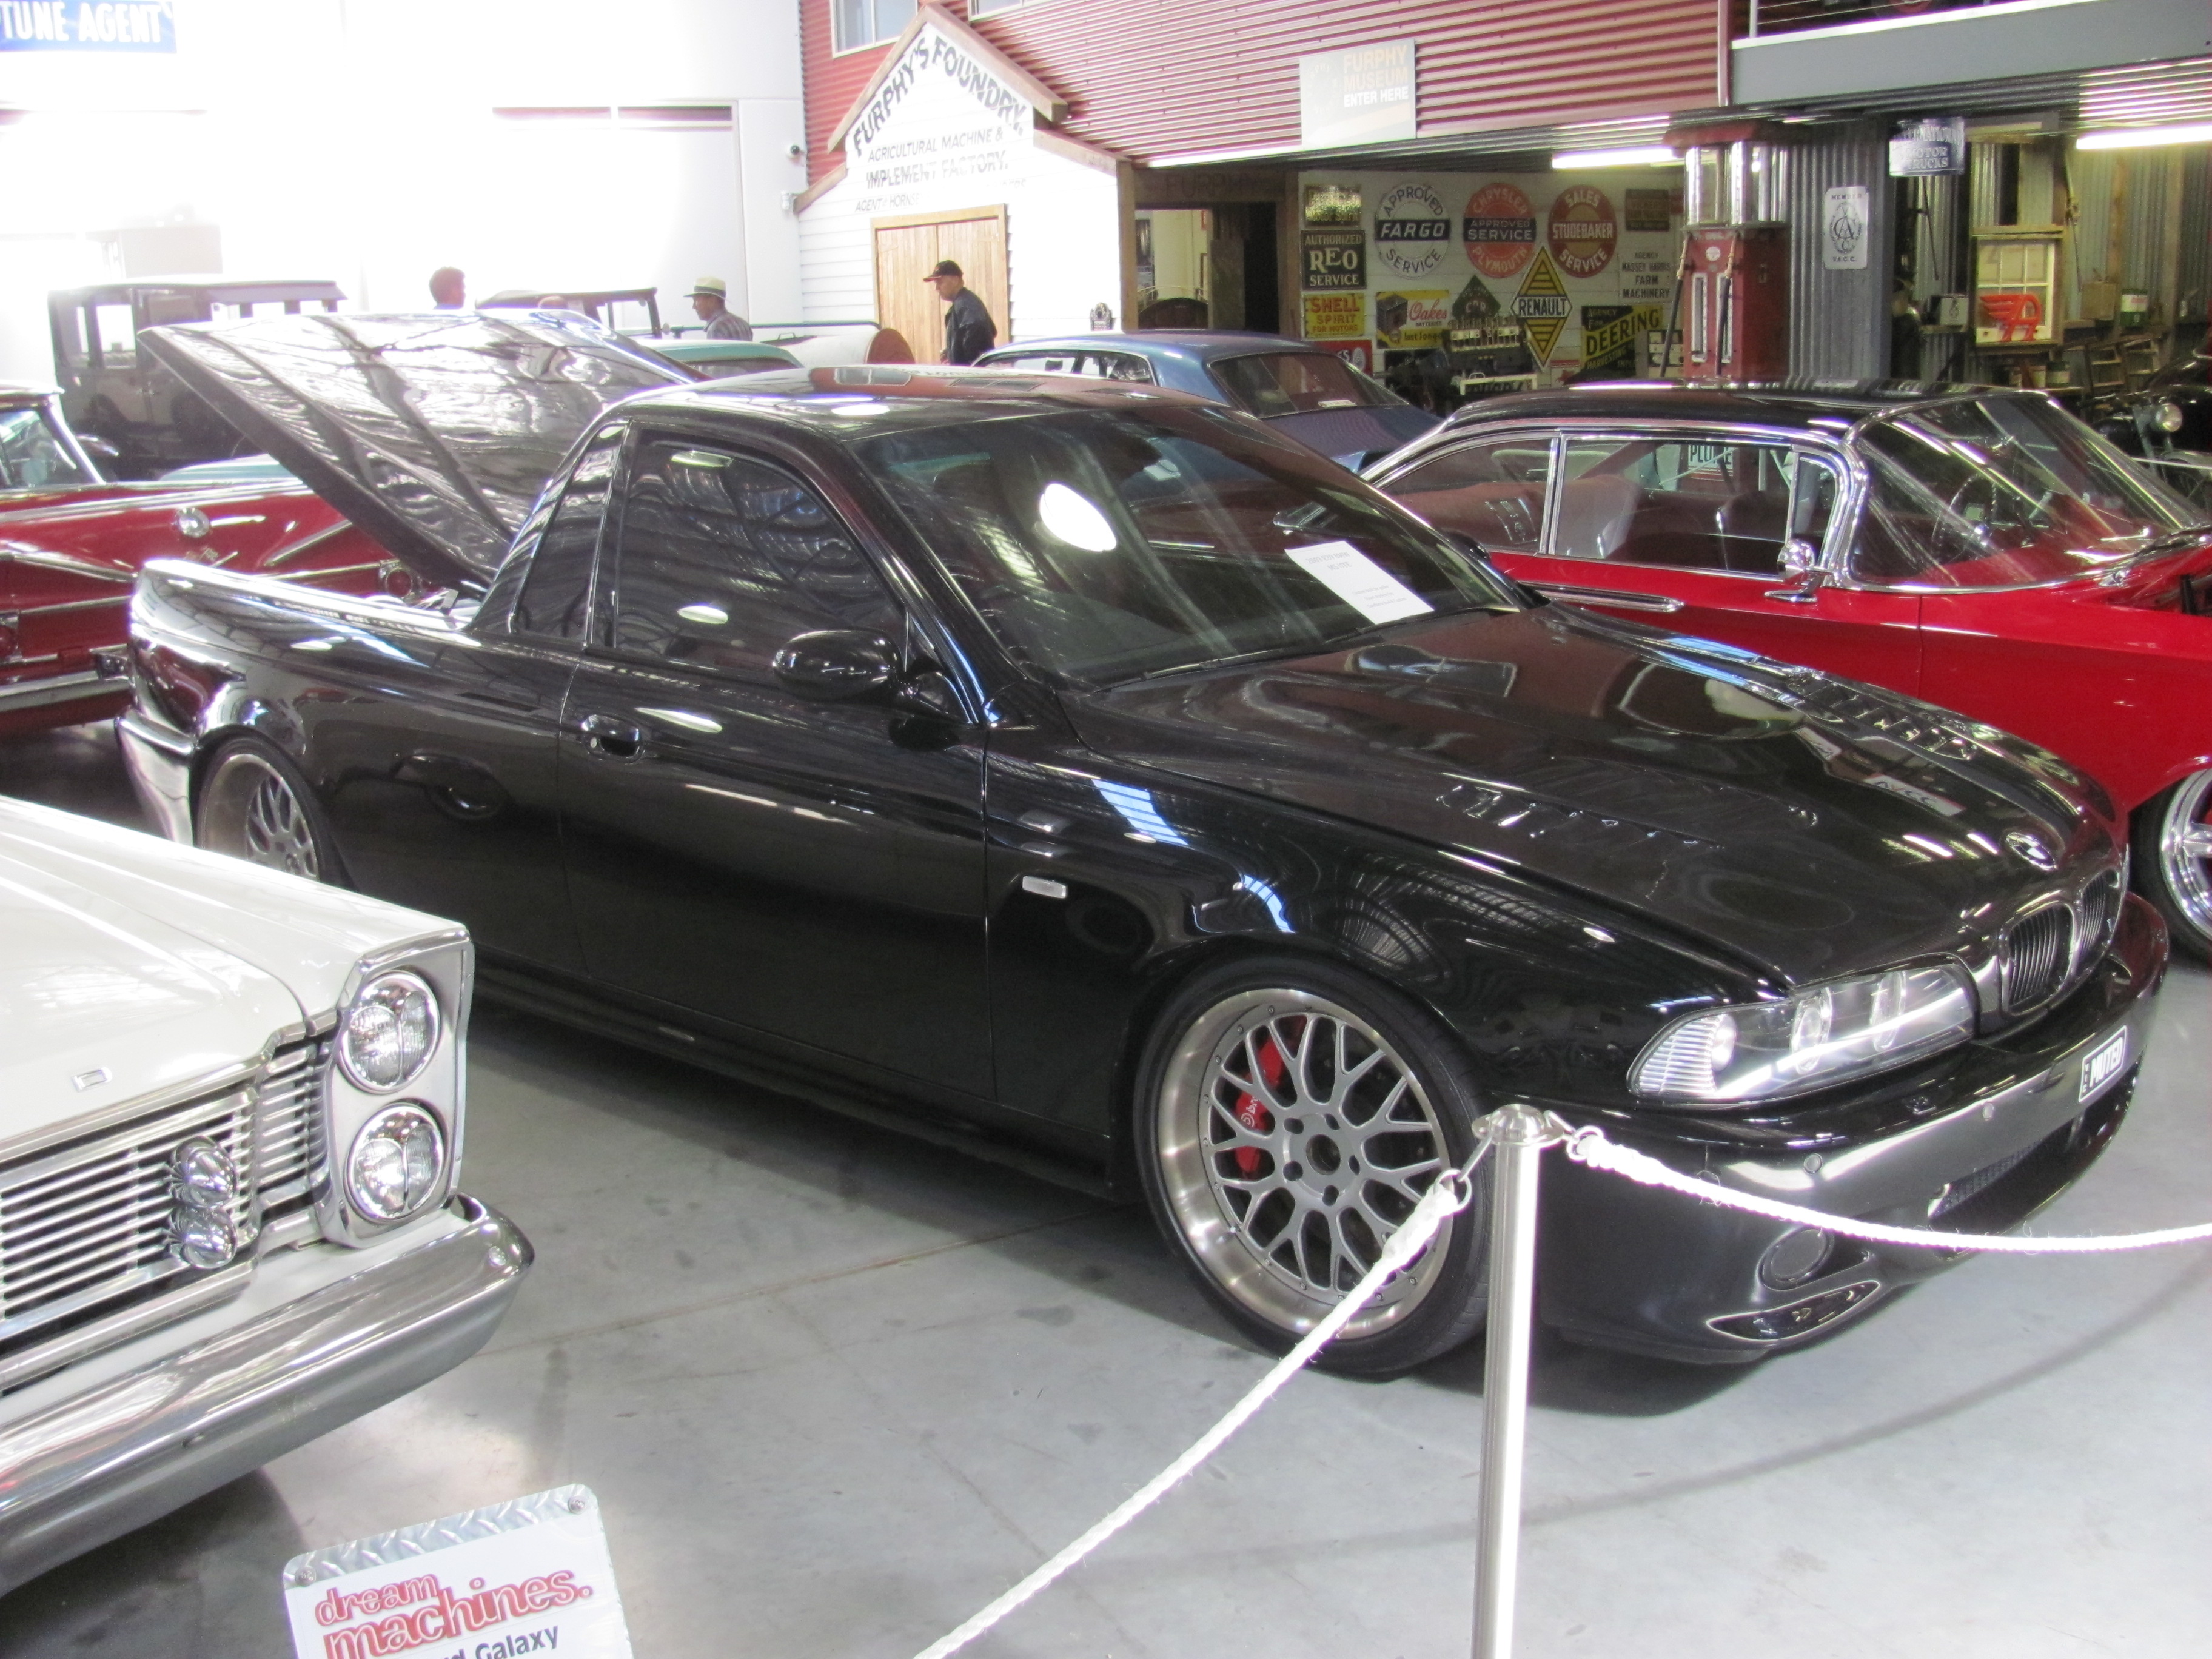
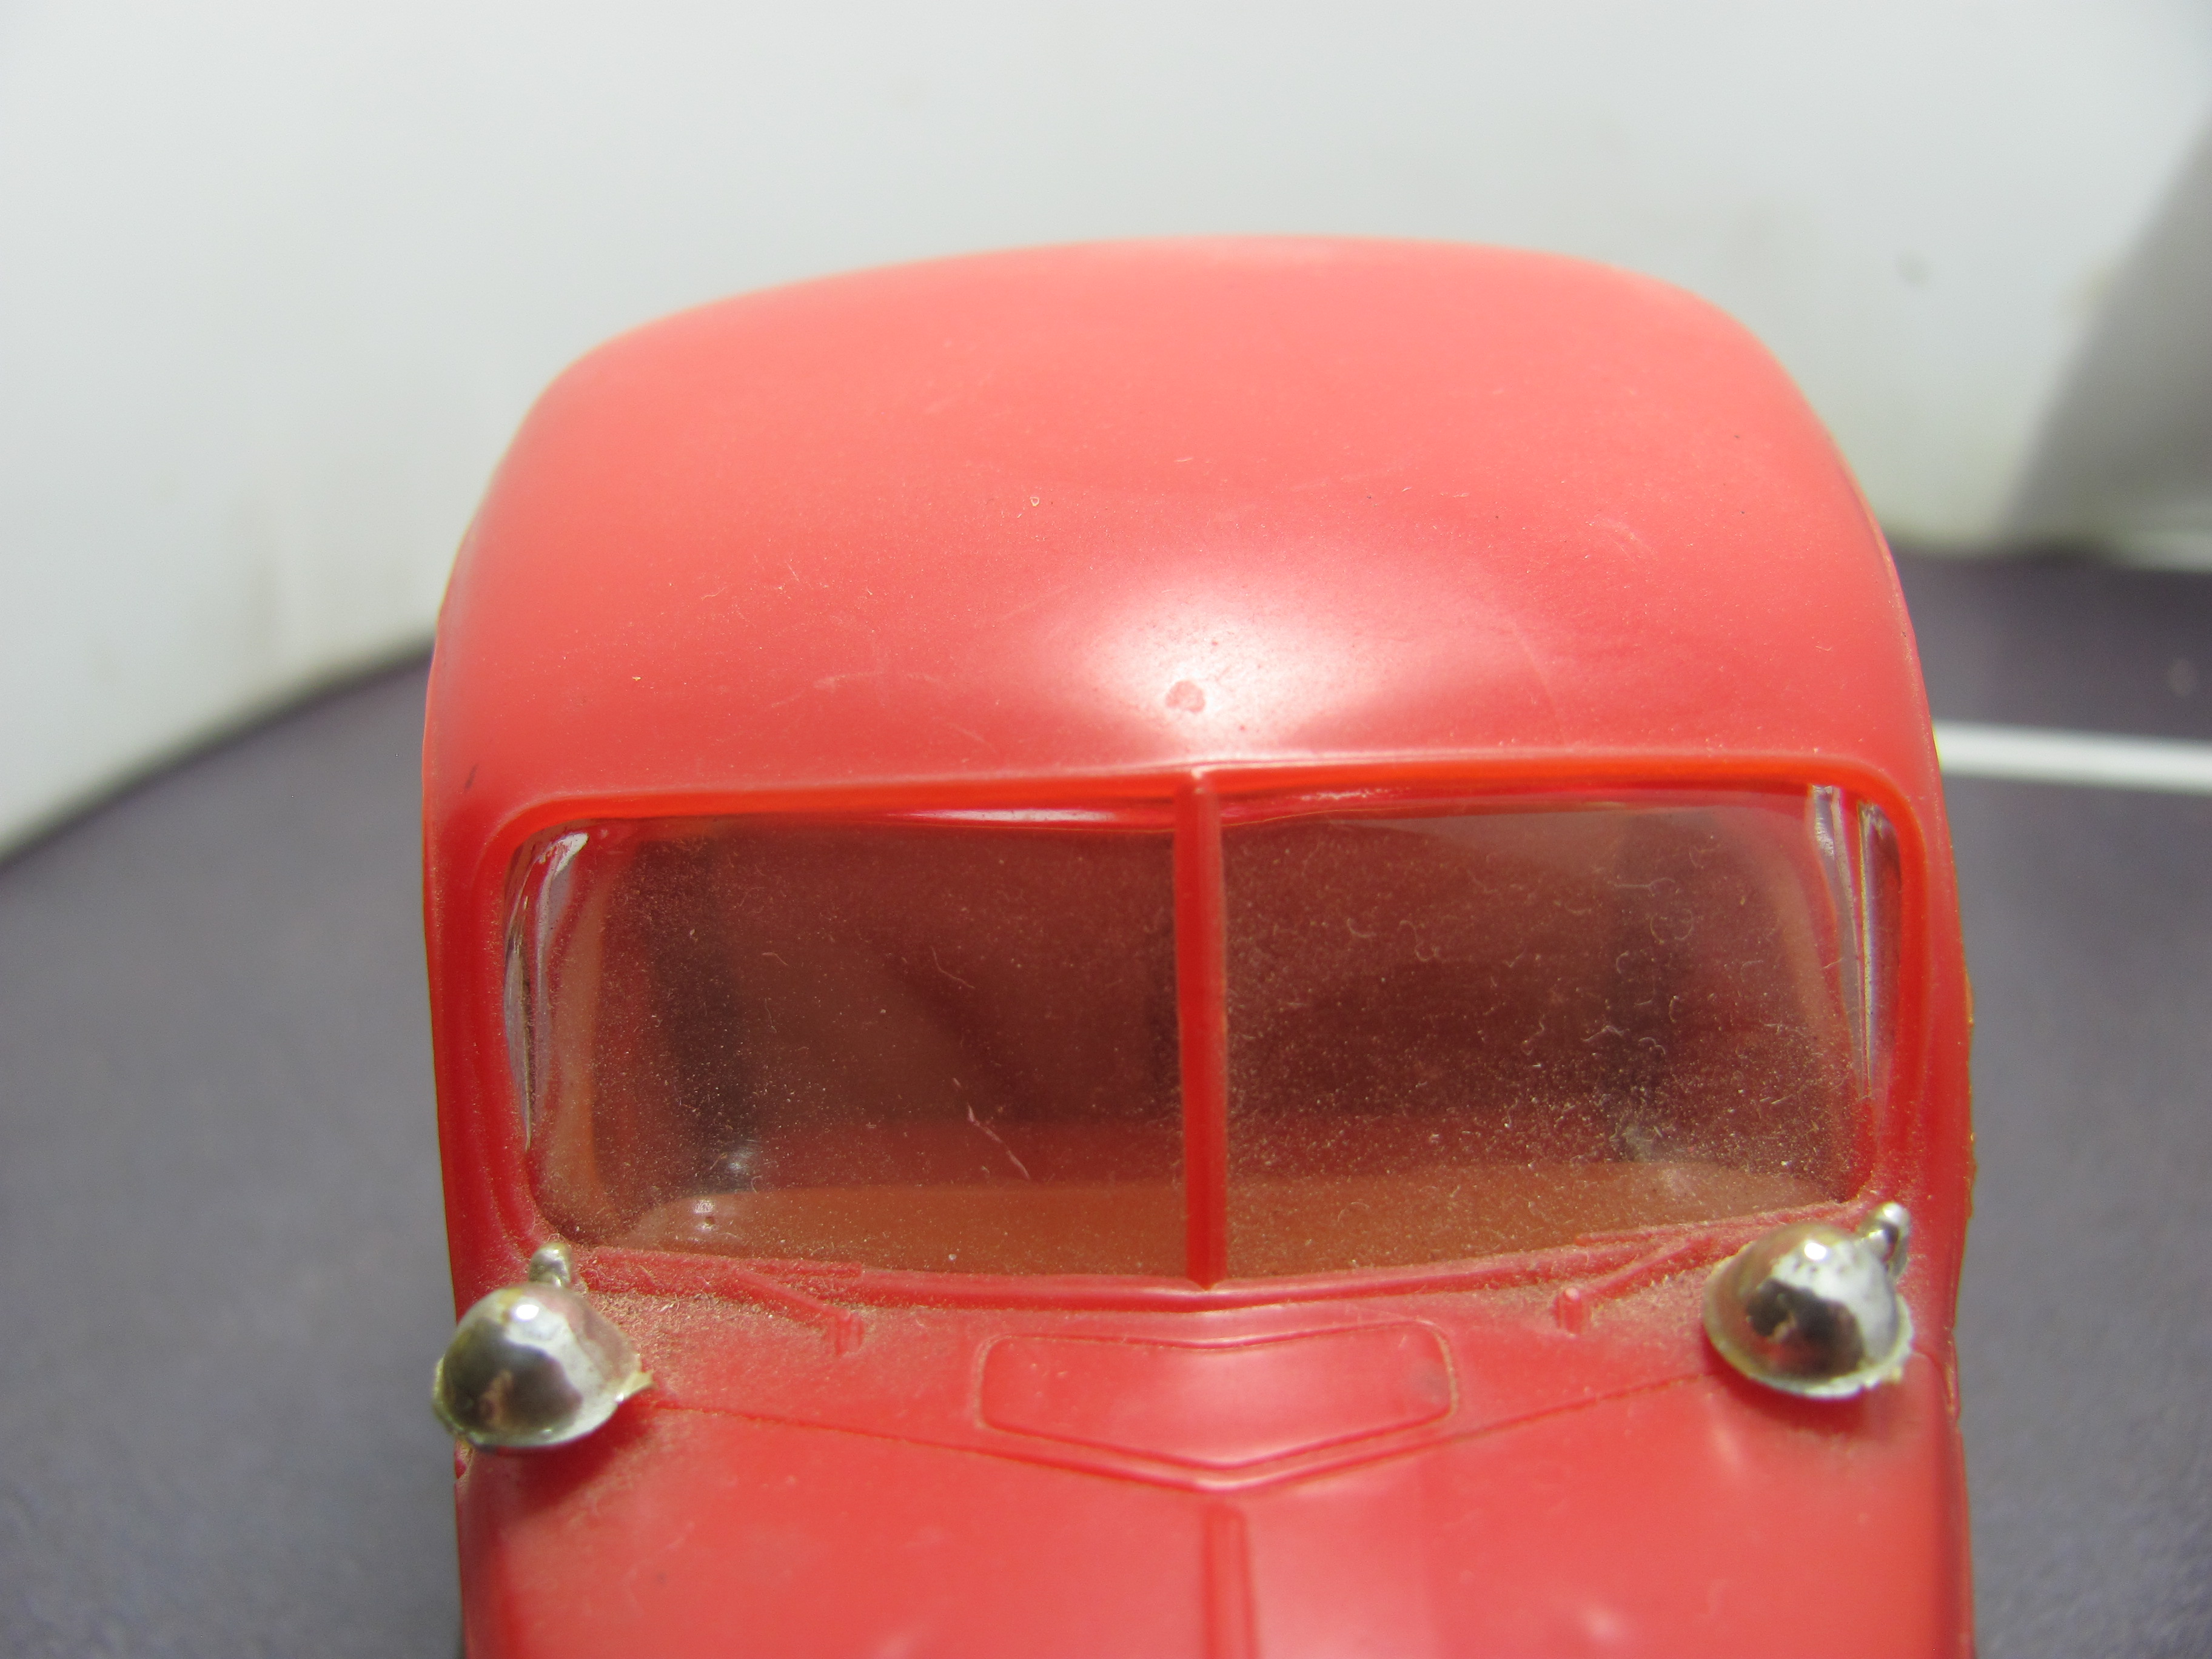
Package tray or cargo tray? We still call the shelf behind the seat the parcel shelf or parcel tray. For the rear cargo tray, most guys I know usually say the bed or even just "chuck it in the back!" It is not unusual for the bed to continue forwards , under the back window and parcel shelf up to a bulkhead behind the seat. This gives about another foot of carrying area. Happy help with any info you may need. Here's a few more utes for your viewing pleasure. The M3 BMW was custom made by a noted bodybuilder for a famous Aussie golfer, whose name I can't recall. Stewart Applebee perhaps? Cheers Alan

-
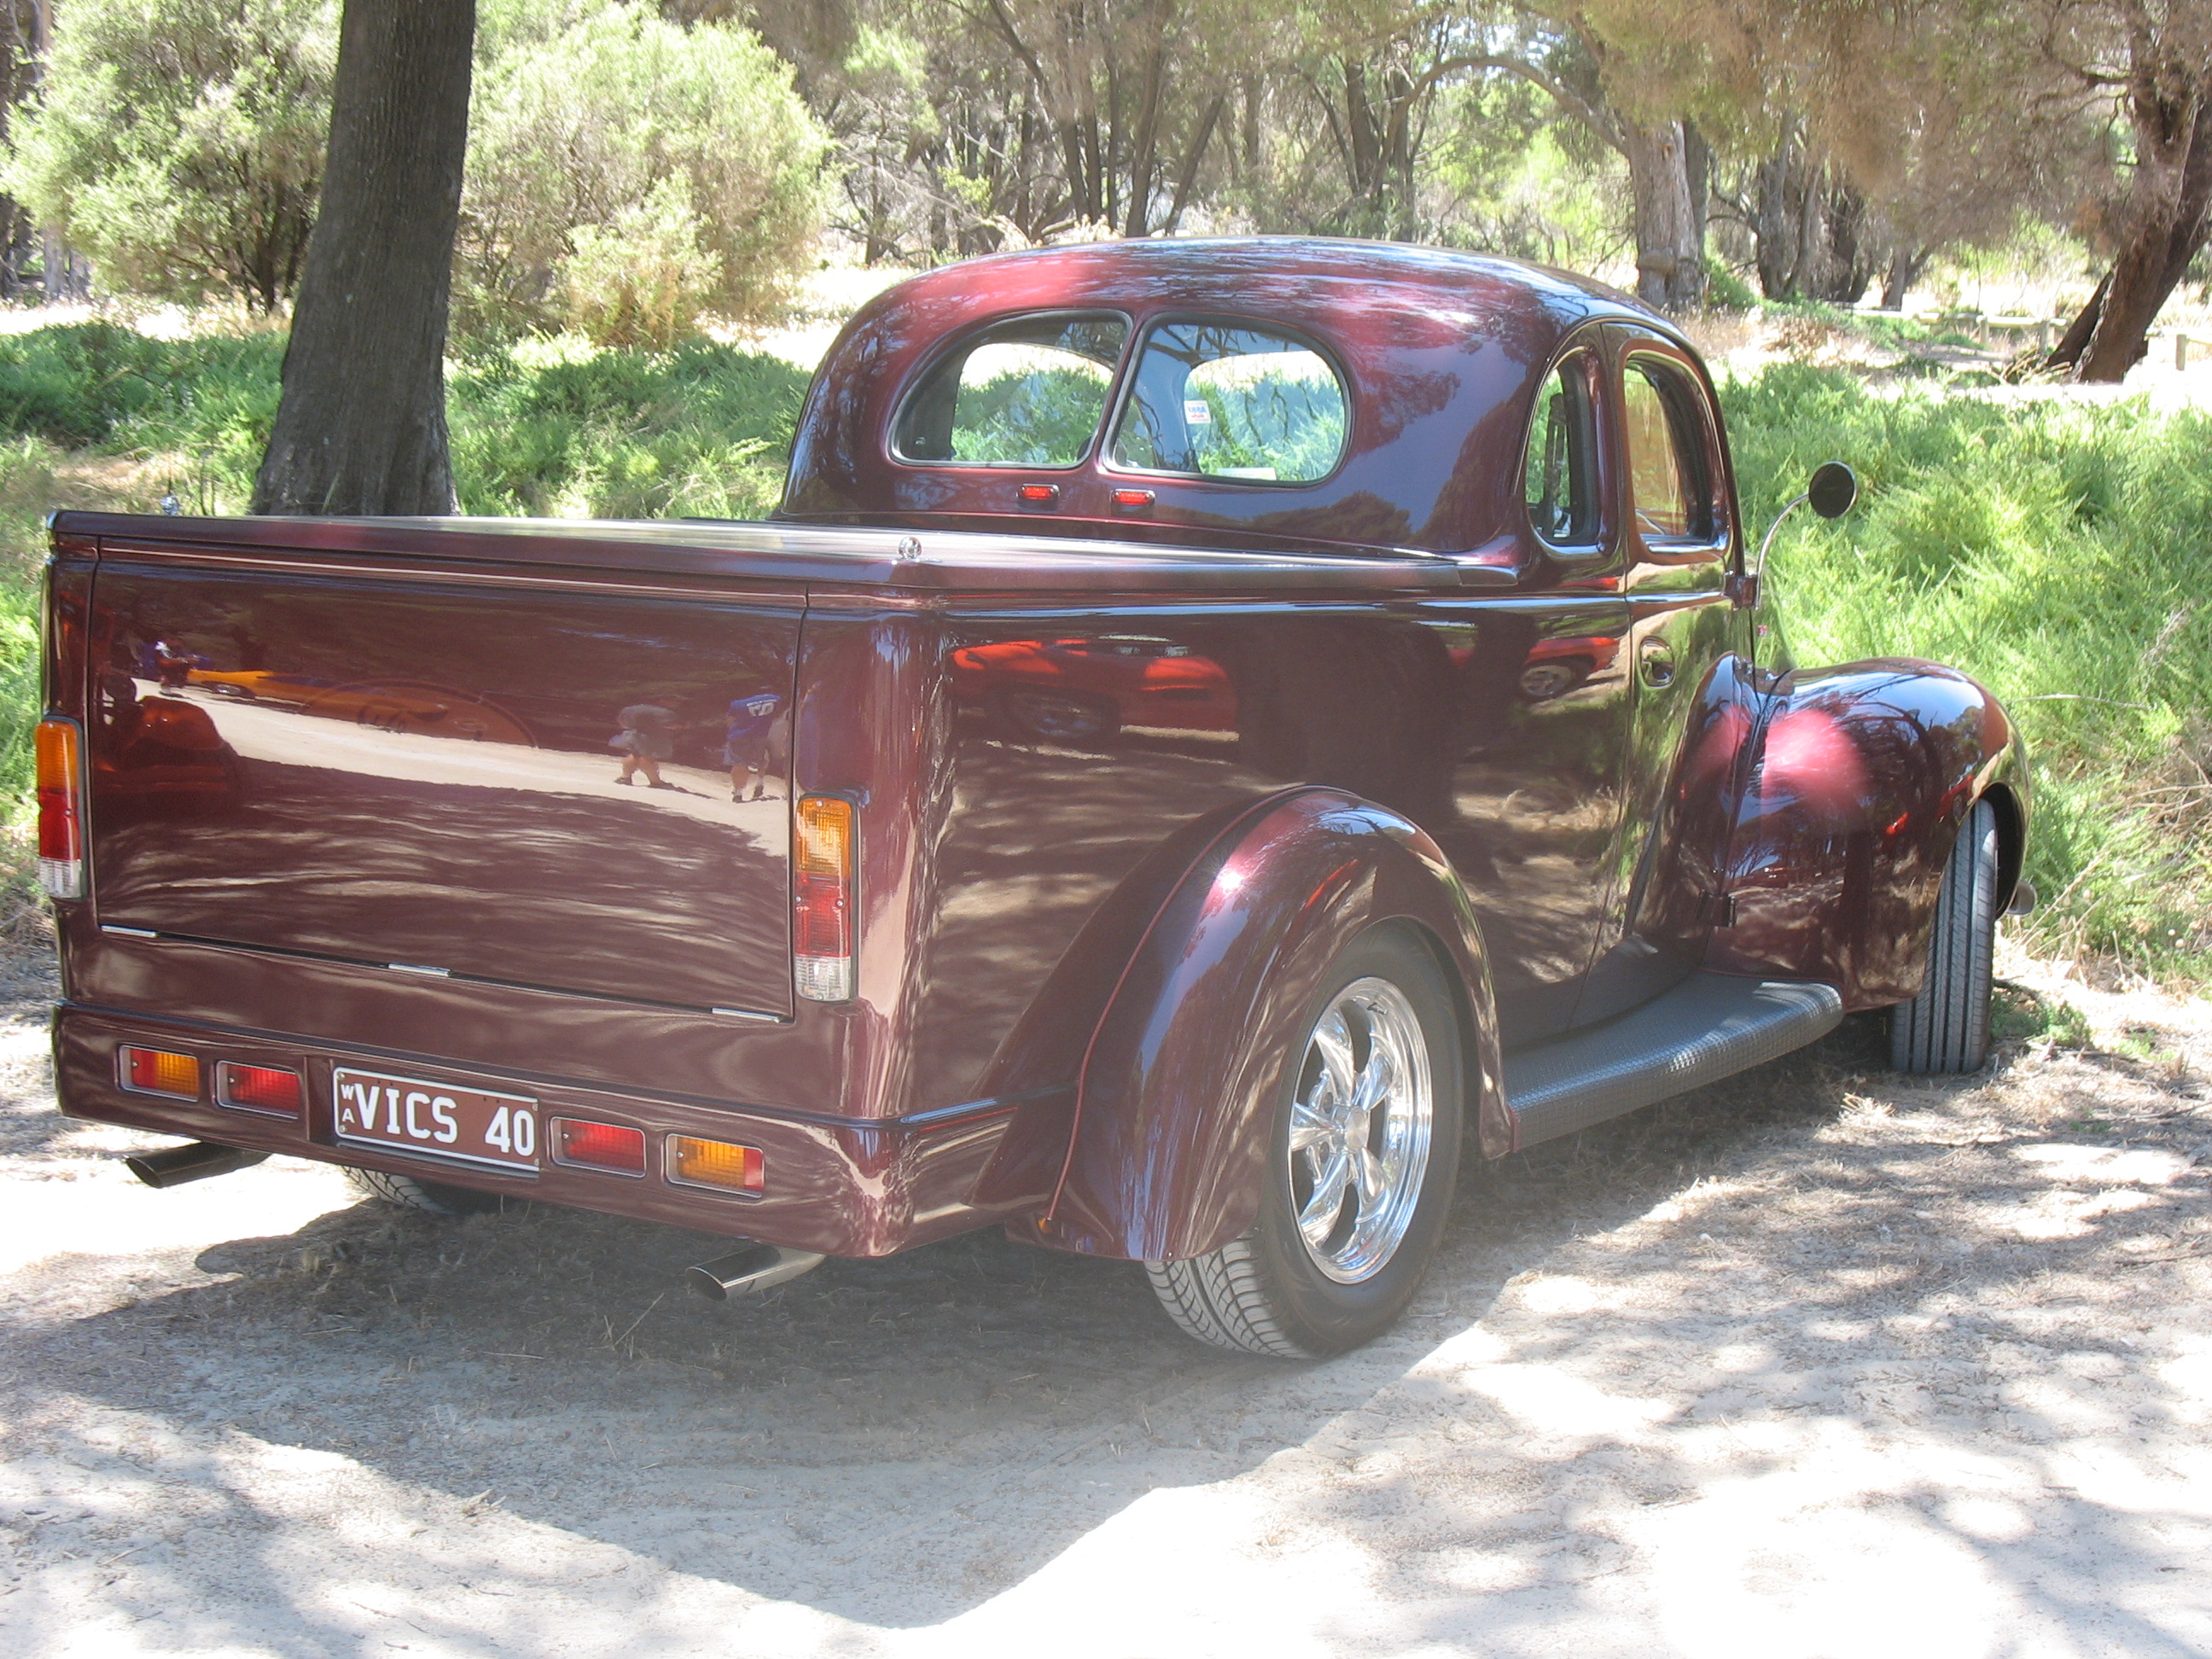
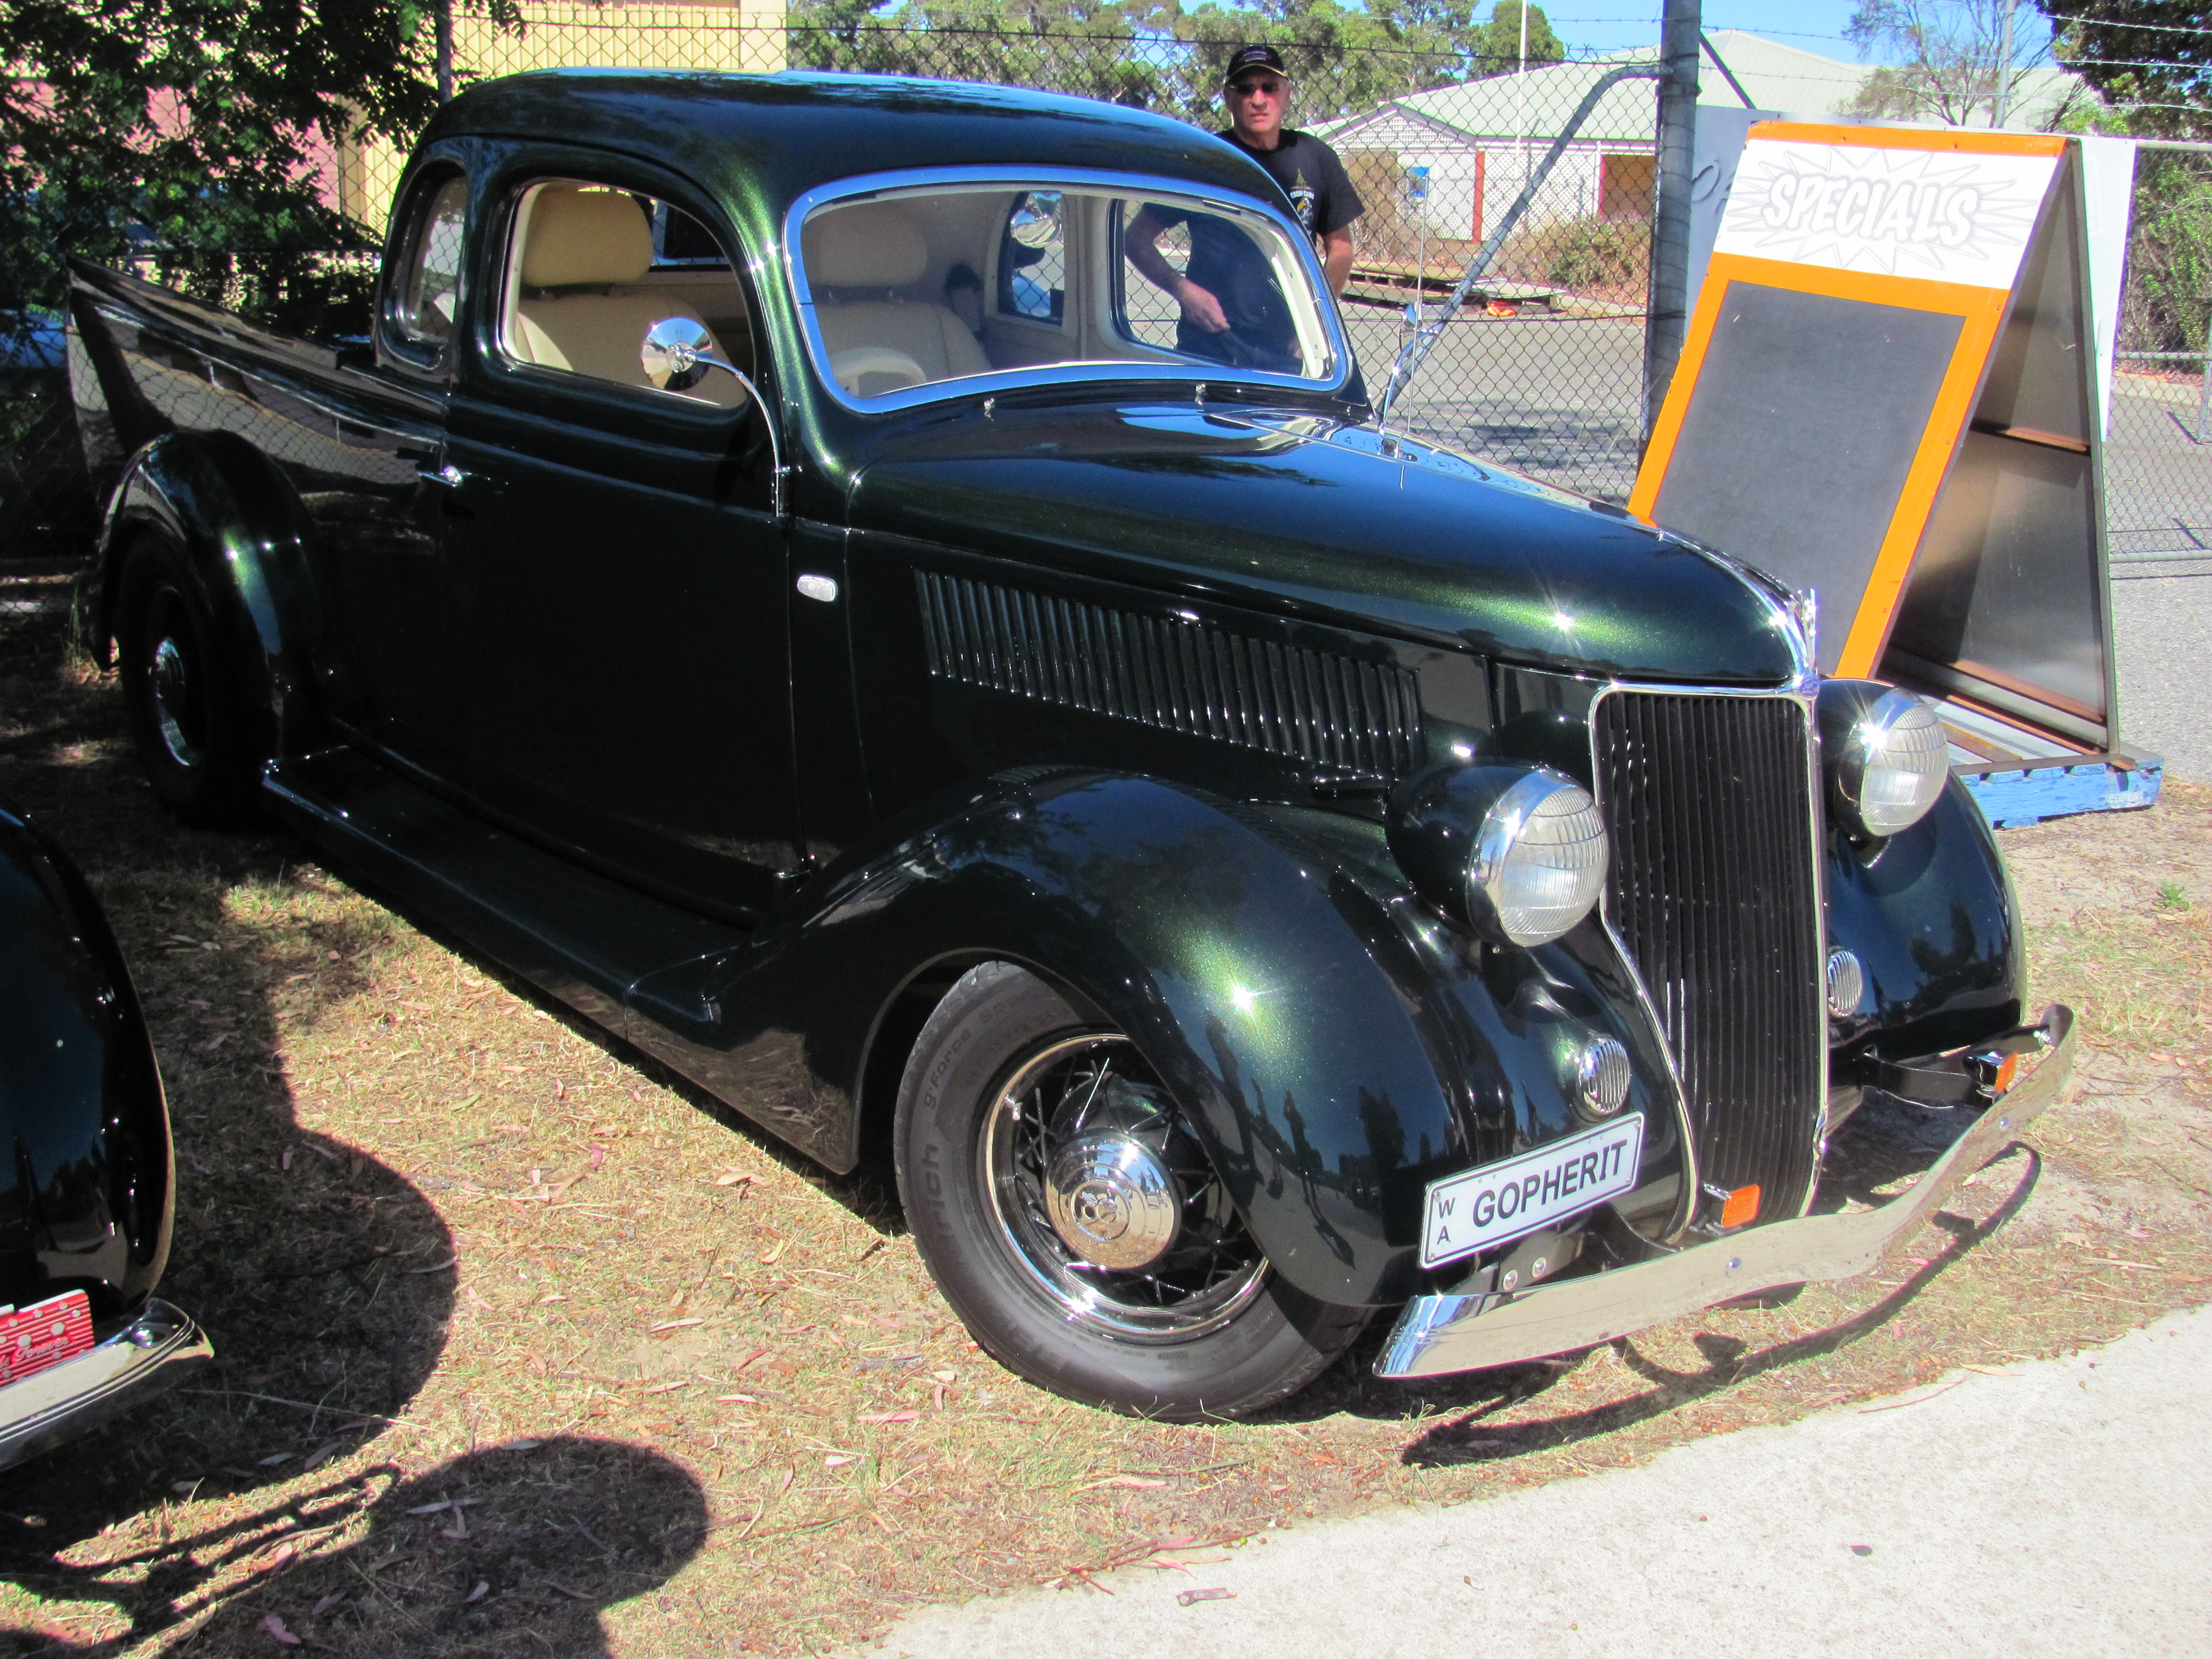
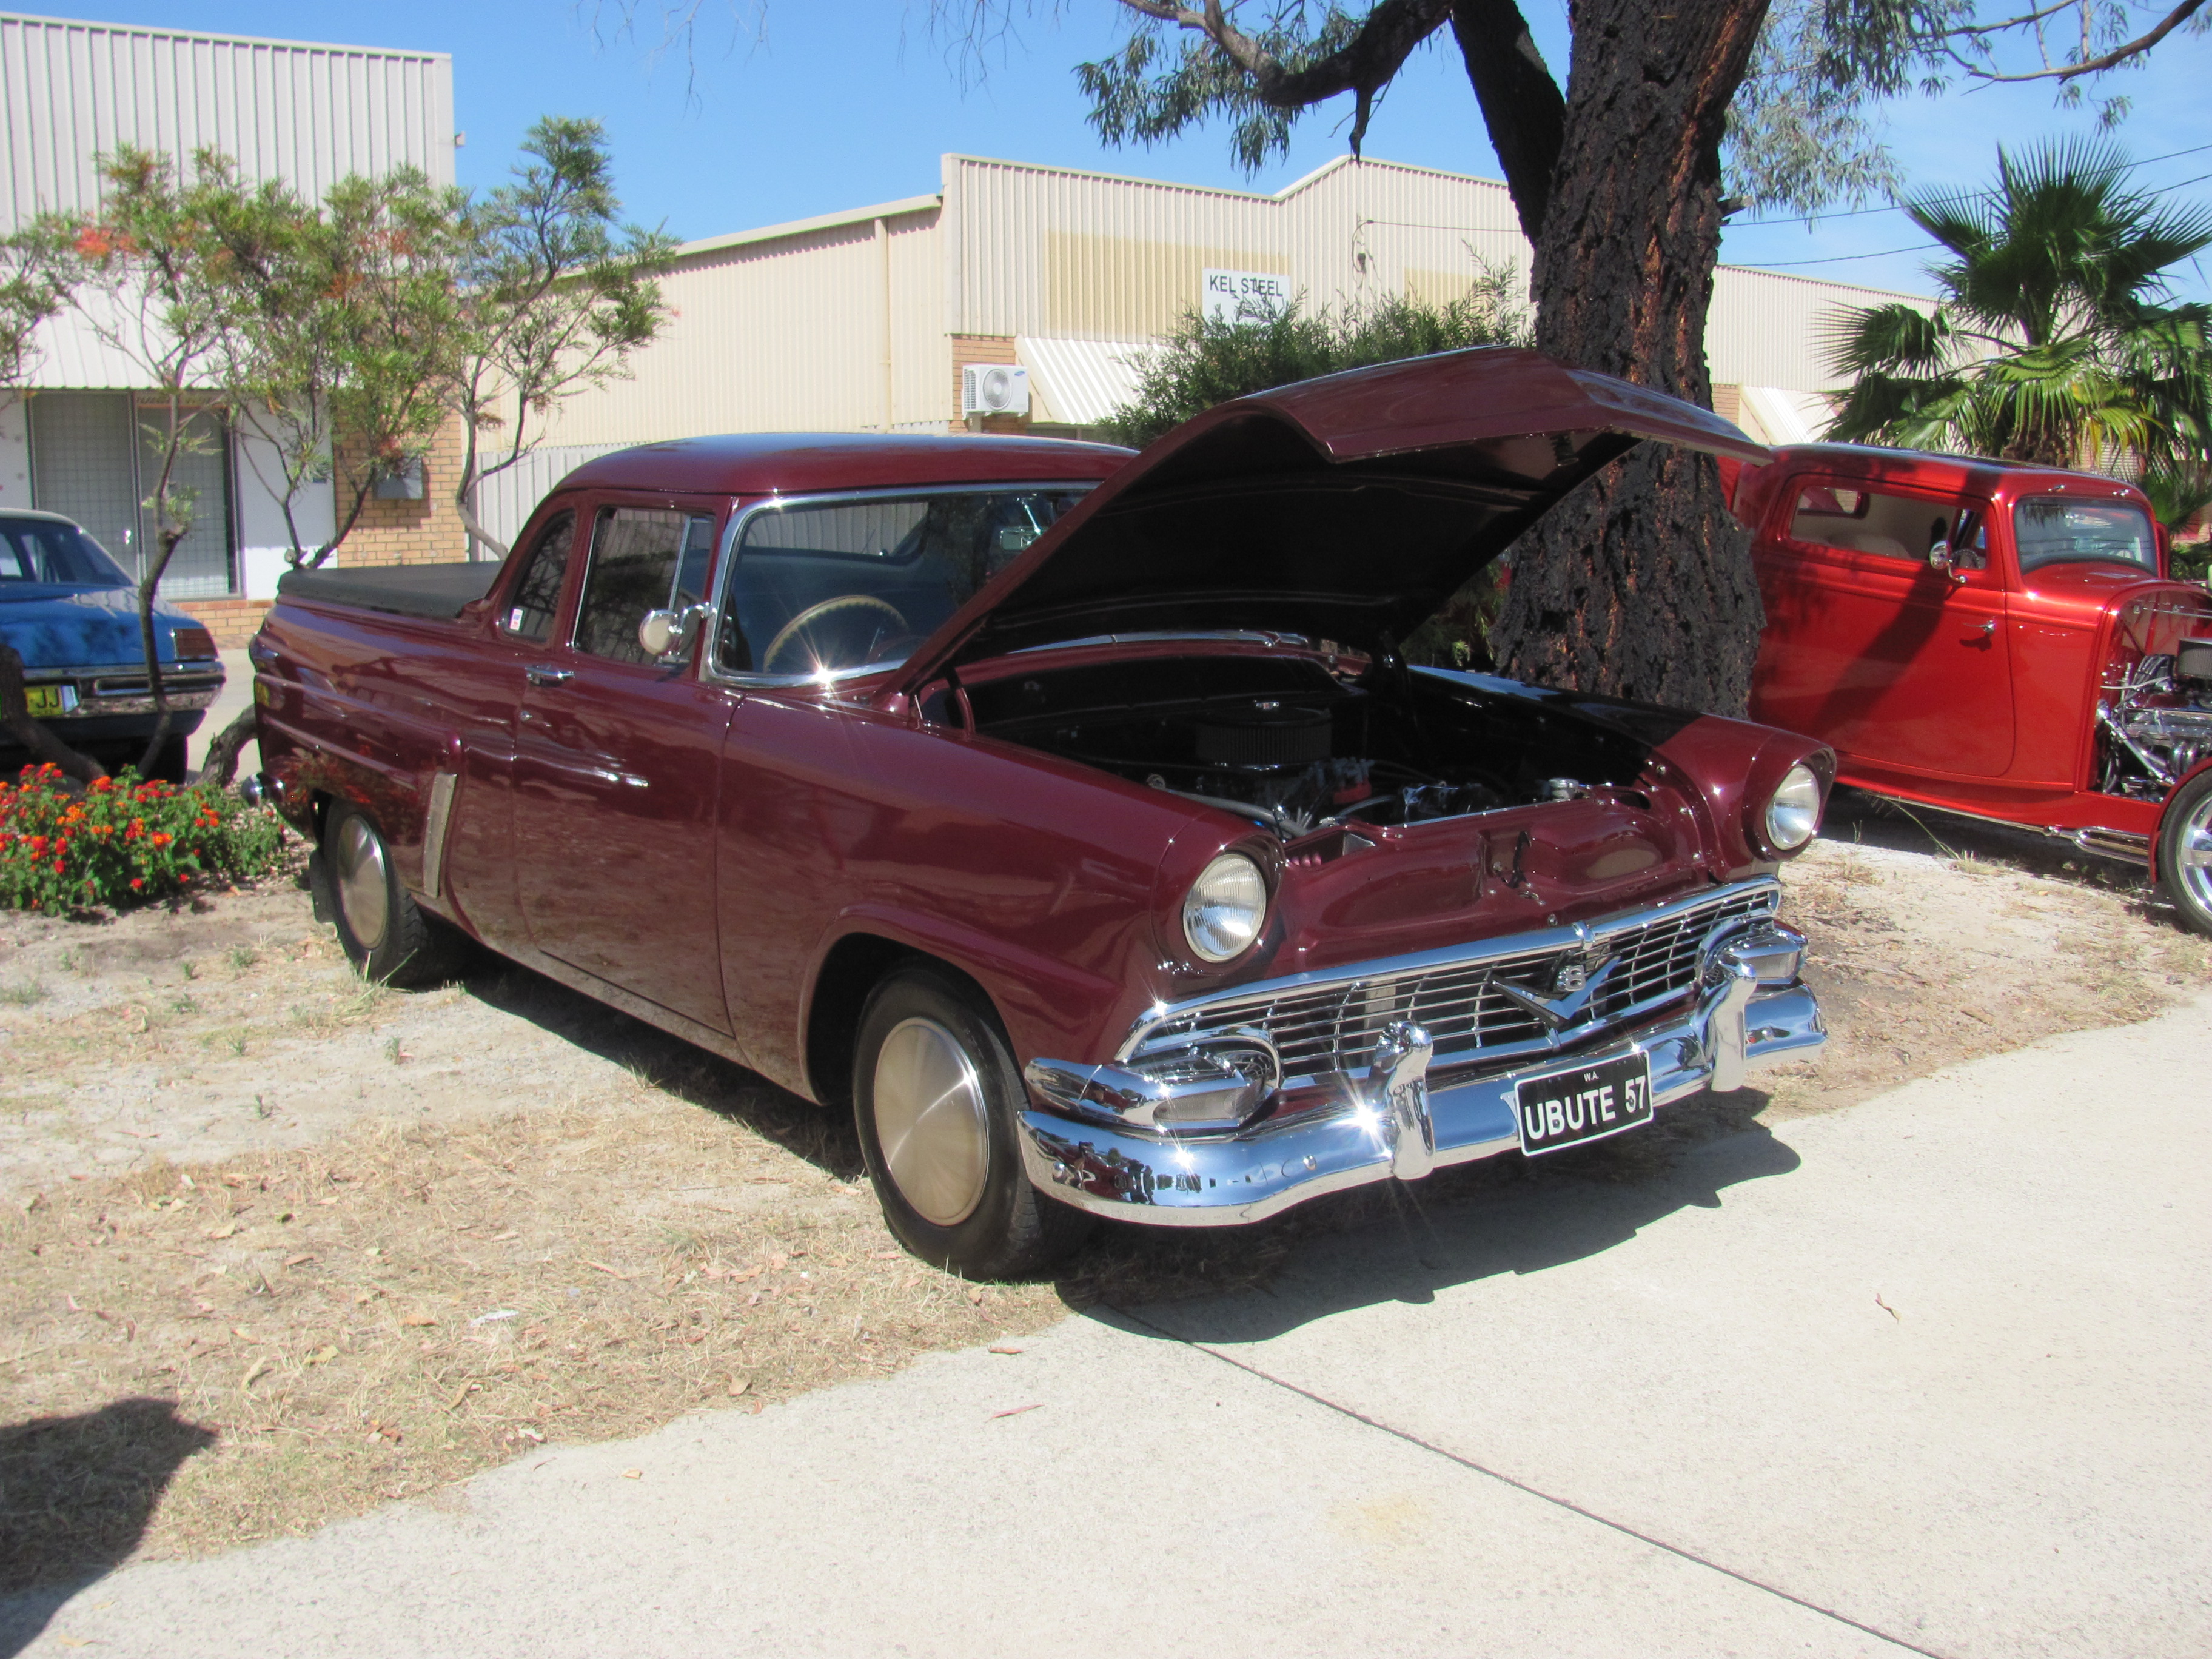
That gets my seal of approval restoman. All the proportions on your Poncho are perfect for an Australian ute. It is using a two door door but the land barge proportions of the Bonneville are fine with it. Throughout Australia, enterprising enthusiasts have built utes from American and European cars just like yours, often because they were old and cheap at the time.Looking forward to seeing this one finished. Cheers Alan
-
Hi guys, would love to add a couple of observations on utes, being an Aussie and being quite fond of them myself. The Wikipedia article that Jon included is quite accurate, particularly regarding the bastardisation of the term ute to include any form of commercial vehicle. The media might be clueless as they are on most things but a car guy in Australia would never call a pickup or a Landcruiser or a Landrover a ute. Why, you might ask? Because a true ute is based on a passenger car design with an integral bed. However, like much in this world there are some exceptions to the rule. Dodge Fargo from the late 40s, early fifties had a ute as well as a pickup. Chevrolet in 1947 and 1948 had a passenger car based ute, a commercial based ute and a commercial based cab-chassis . The last generation of Falcons had ute styling but the bed was separate, albeit with a quite discrete join behind the cab. This allowed the installation of custom beds or boxes. Some utes are a five window design, some are a three window. Yep, it can be confusing. The first coupe utility was built by Ford Motor Company in 1934. Since then the following makes have produced utes in Australia although some were in ridiculously small numbers. I am only including factory production line models here, not conversions. Ford almost continuously from 1934 til 2017 although I'm not sure if they made one in 1959. Models included Ford Standard and Deluxe, Mercury, Mainline, Consul, Zephyr and Falcon General Motors from 1934 or maybe 1935 until 2017. Models include Holden, Chevrolet til 1952, Vauxhall, Commodore Bedford. Chrysler including Dodge and Plymouth from about 1936 or 37 until the late fifties, Chrysler Royal, DeSoto, Valiant, Willys, Anglia and Prefect - yep, you can build a gasser ute! Armstrong Siddley Vanguard Austin 1800 Morris minor, although like the late model Falcon, there is a join, but not a separation like a pickup Mini Toyota Crown and Corona Now there is one more thing to consider if you are going to design and build a model of a ute based on any non-Australian car. Our Aussie utes have a certain balance to them. In magazines and websites all over I see examples of utes based on a Mustang or a Corvette or a Cutlass or whatever and they often miss the mark for two reasons, both of which are pet hates of mine! First, if you are going to build a ute out of anything, remember that all bar one generation of Ford Falcon utes were based on FOUR DOOR cars. That's right they have a short front door thus allowing a longer bed. In regards to those Falcons, the XA, XB and XC models from 1972 to 1978 used a two door coupe pillarless door, quite similar to an American Ranchero of the same era. To the best of my knowledge they are the only utes with two door style doors. Secondly, they don't have triangular side windows! Australia has always been a land of low production numbers so rarely did a ute get special doors - there are some exceptions, namely pre- 1962 Holdens. When modellers typically take, say, a 69 Camaro to make a ute, they drag the rear of the hardtop roofline straight forward creating an awkwardly shaped side window that would bang your head on the opening every time you got in. If you keep the door window pillar nearly vertical and stand the B pillar up almost vertical as well, possibly slimmed down, it will look a lot more balanced. Also, regarding the Falcon Rancheros versus Falcon utes if you Goggle the utes you will notice that they had, as mentioned, a four door sedan front door, a T bird inspired B pillar, much more rakish than the Ranchero, and a shorter bed by about four inches. This was because in rural areas with gravel roads, we had a lot of creek crossings and early trials by Ford showed the American bed dragged on the ramps in and out of the creek crossings. It always bugs me when I see references to the Ranchero, 1957 and the El Camino, 1959, being the first car based pickups! Pfffft! We were onto our third generation by then! If you want to read everything there is to know about Utes, Larry O Toole wrote a very comprehensive book called the great Aussie Ute, by Graffiti Publications. It is still available directly from them and is extremely comprehensive. Cheers Alan
-
Show Your T's
Alan Barton replied to Terry Jessee's topic in General Automotive Talk (Trucks and Cars)
My Big Rod resto with three 1/24th scale buckets for comparison, plus a heap of 1/32 scale Pyro, Lindberg Monogram and Auroras.
-
Comparing the AMT and Revell 1940 Ford Coupes.
Alan Barton replied to Lovefordgalaxie's topic in Model Cars
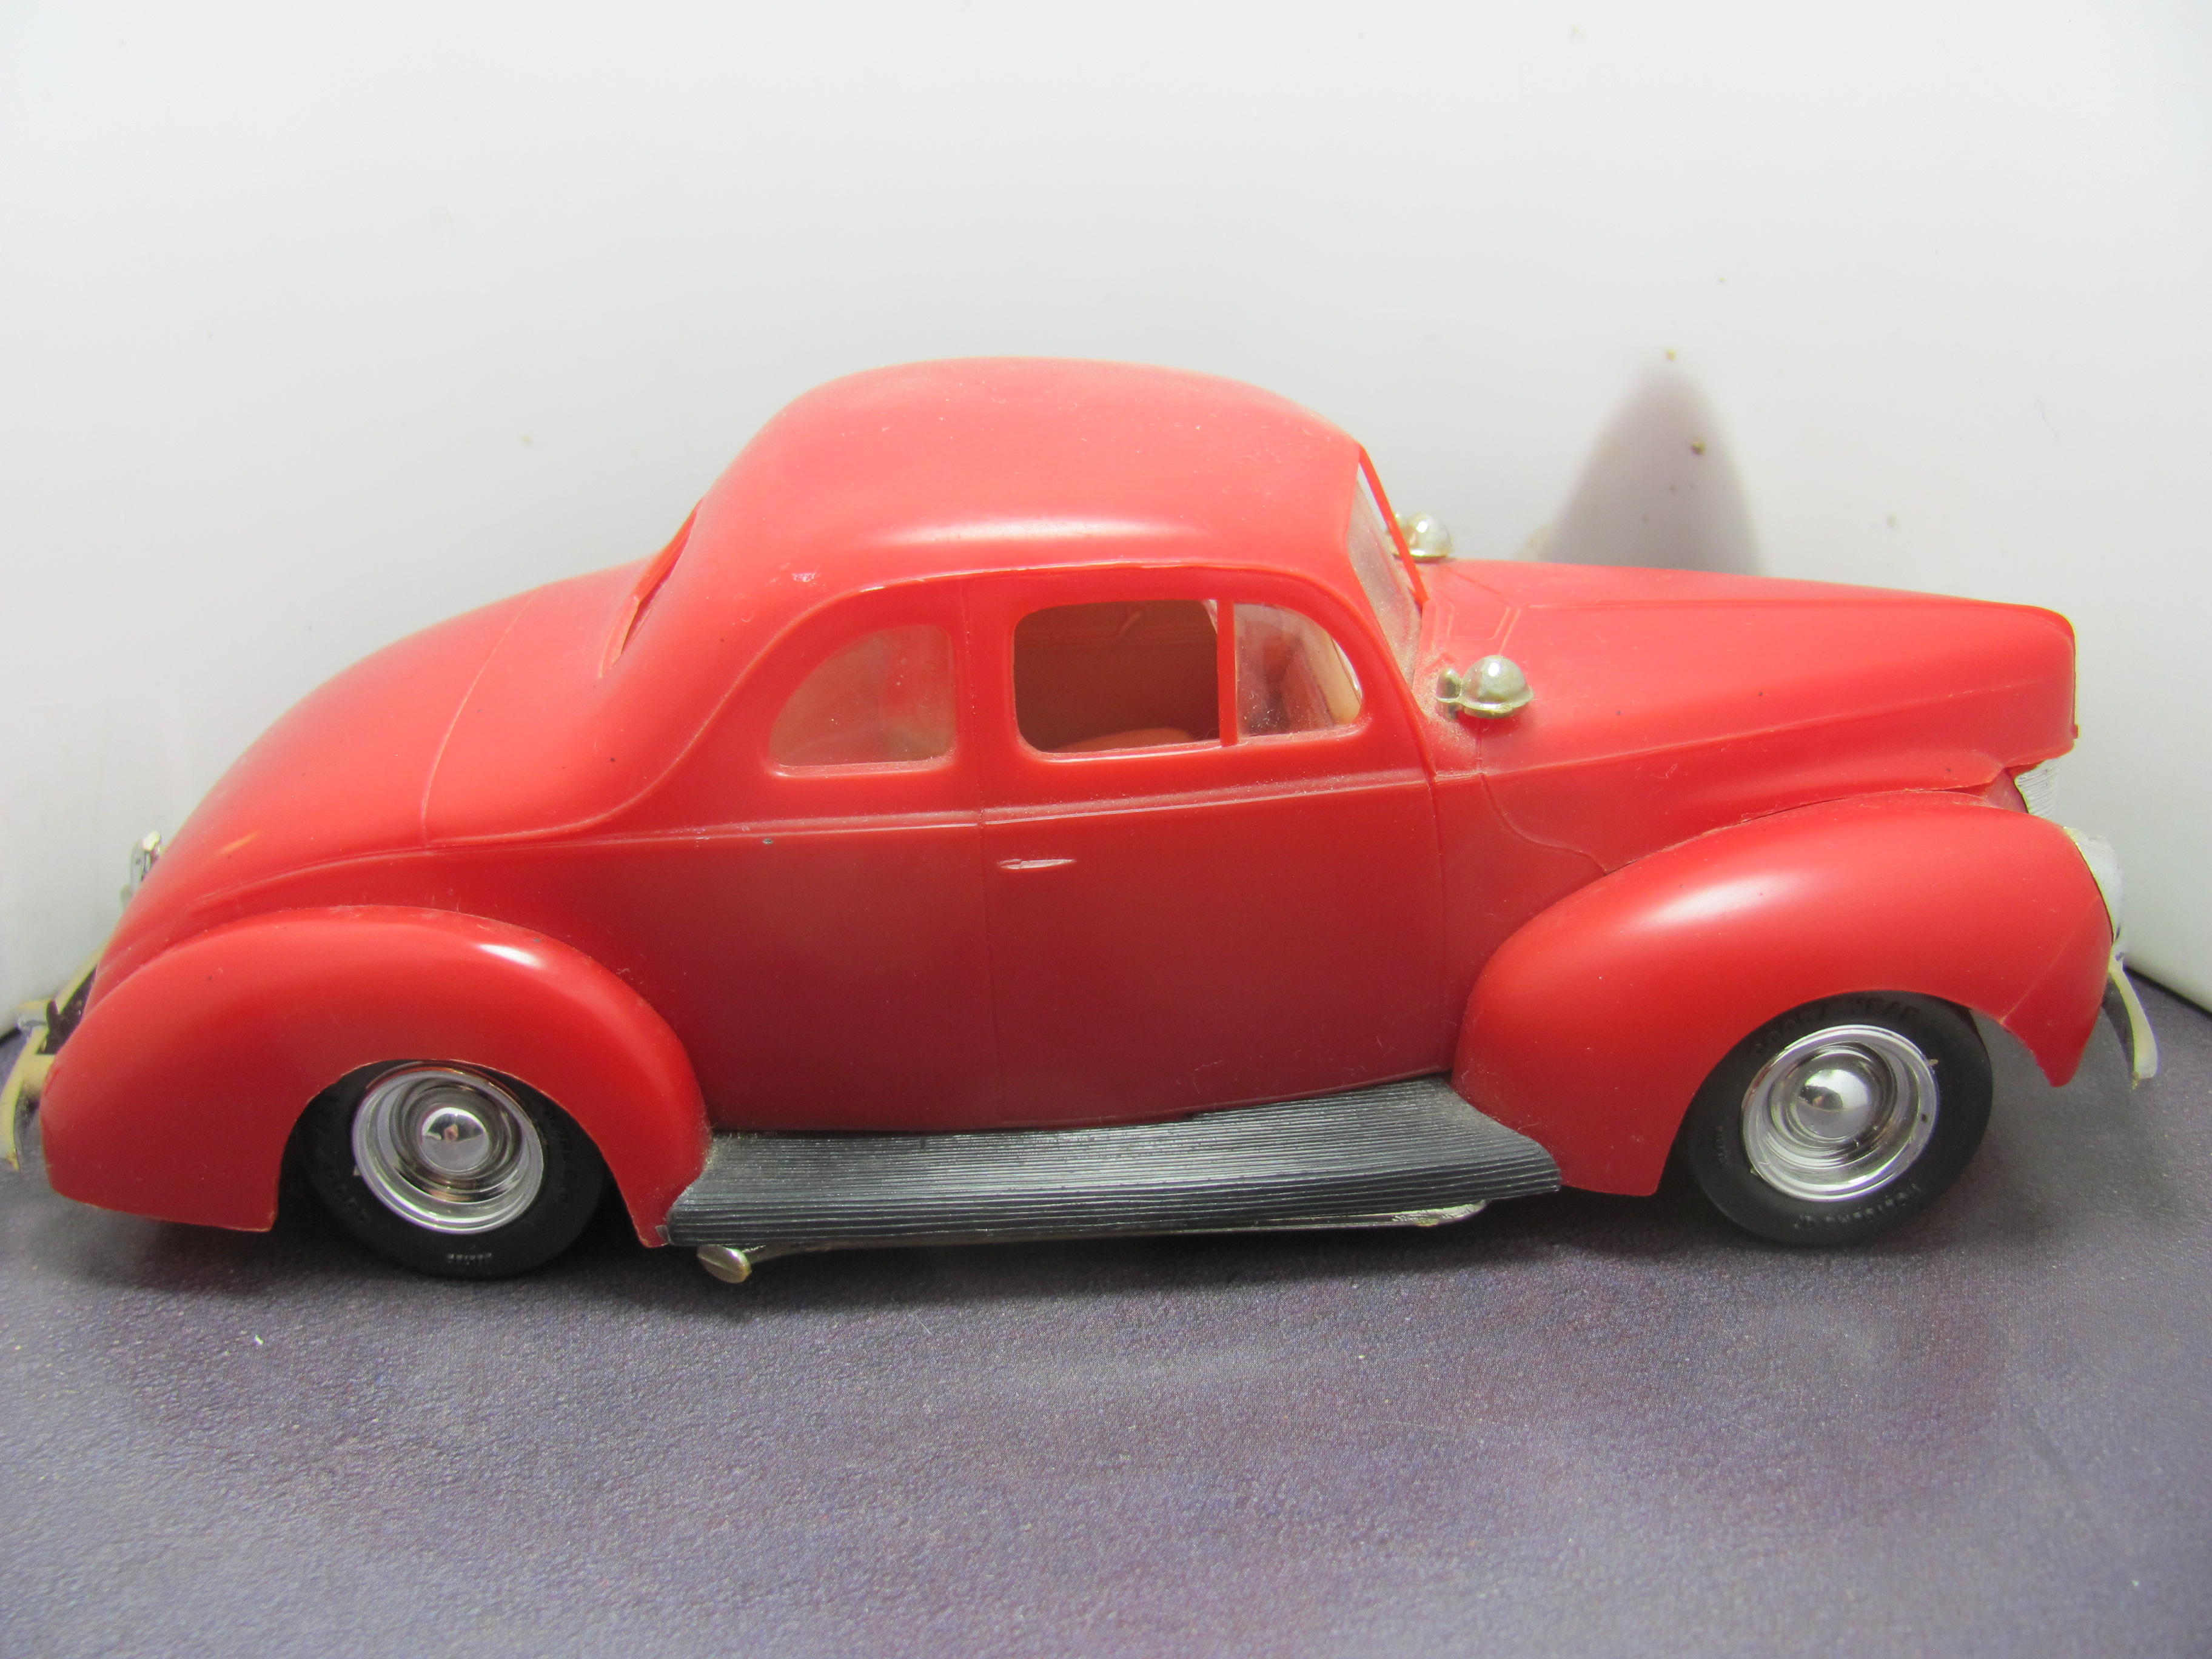
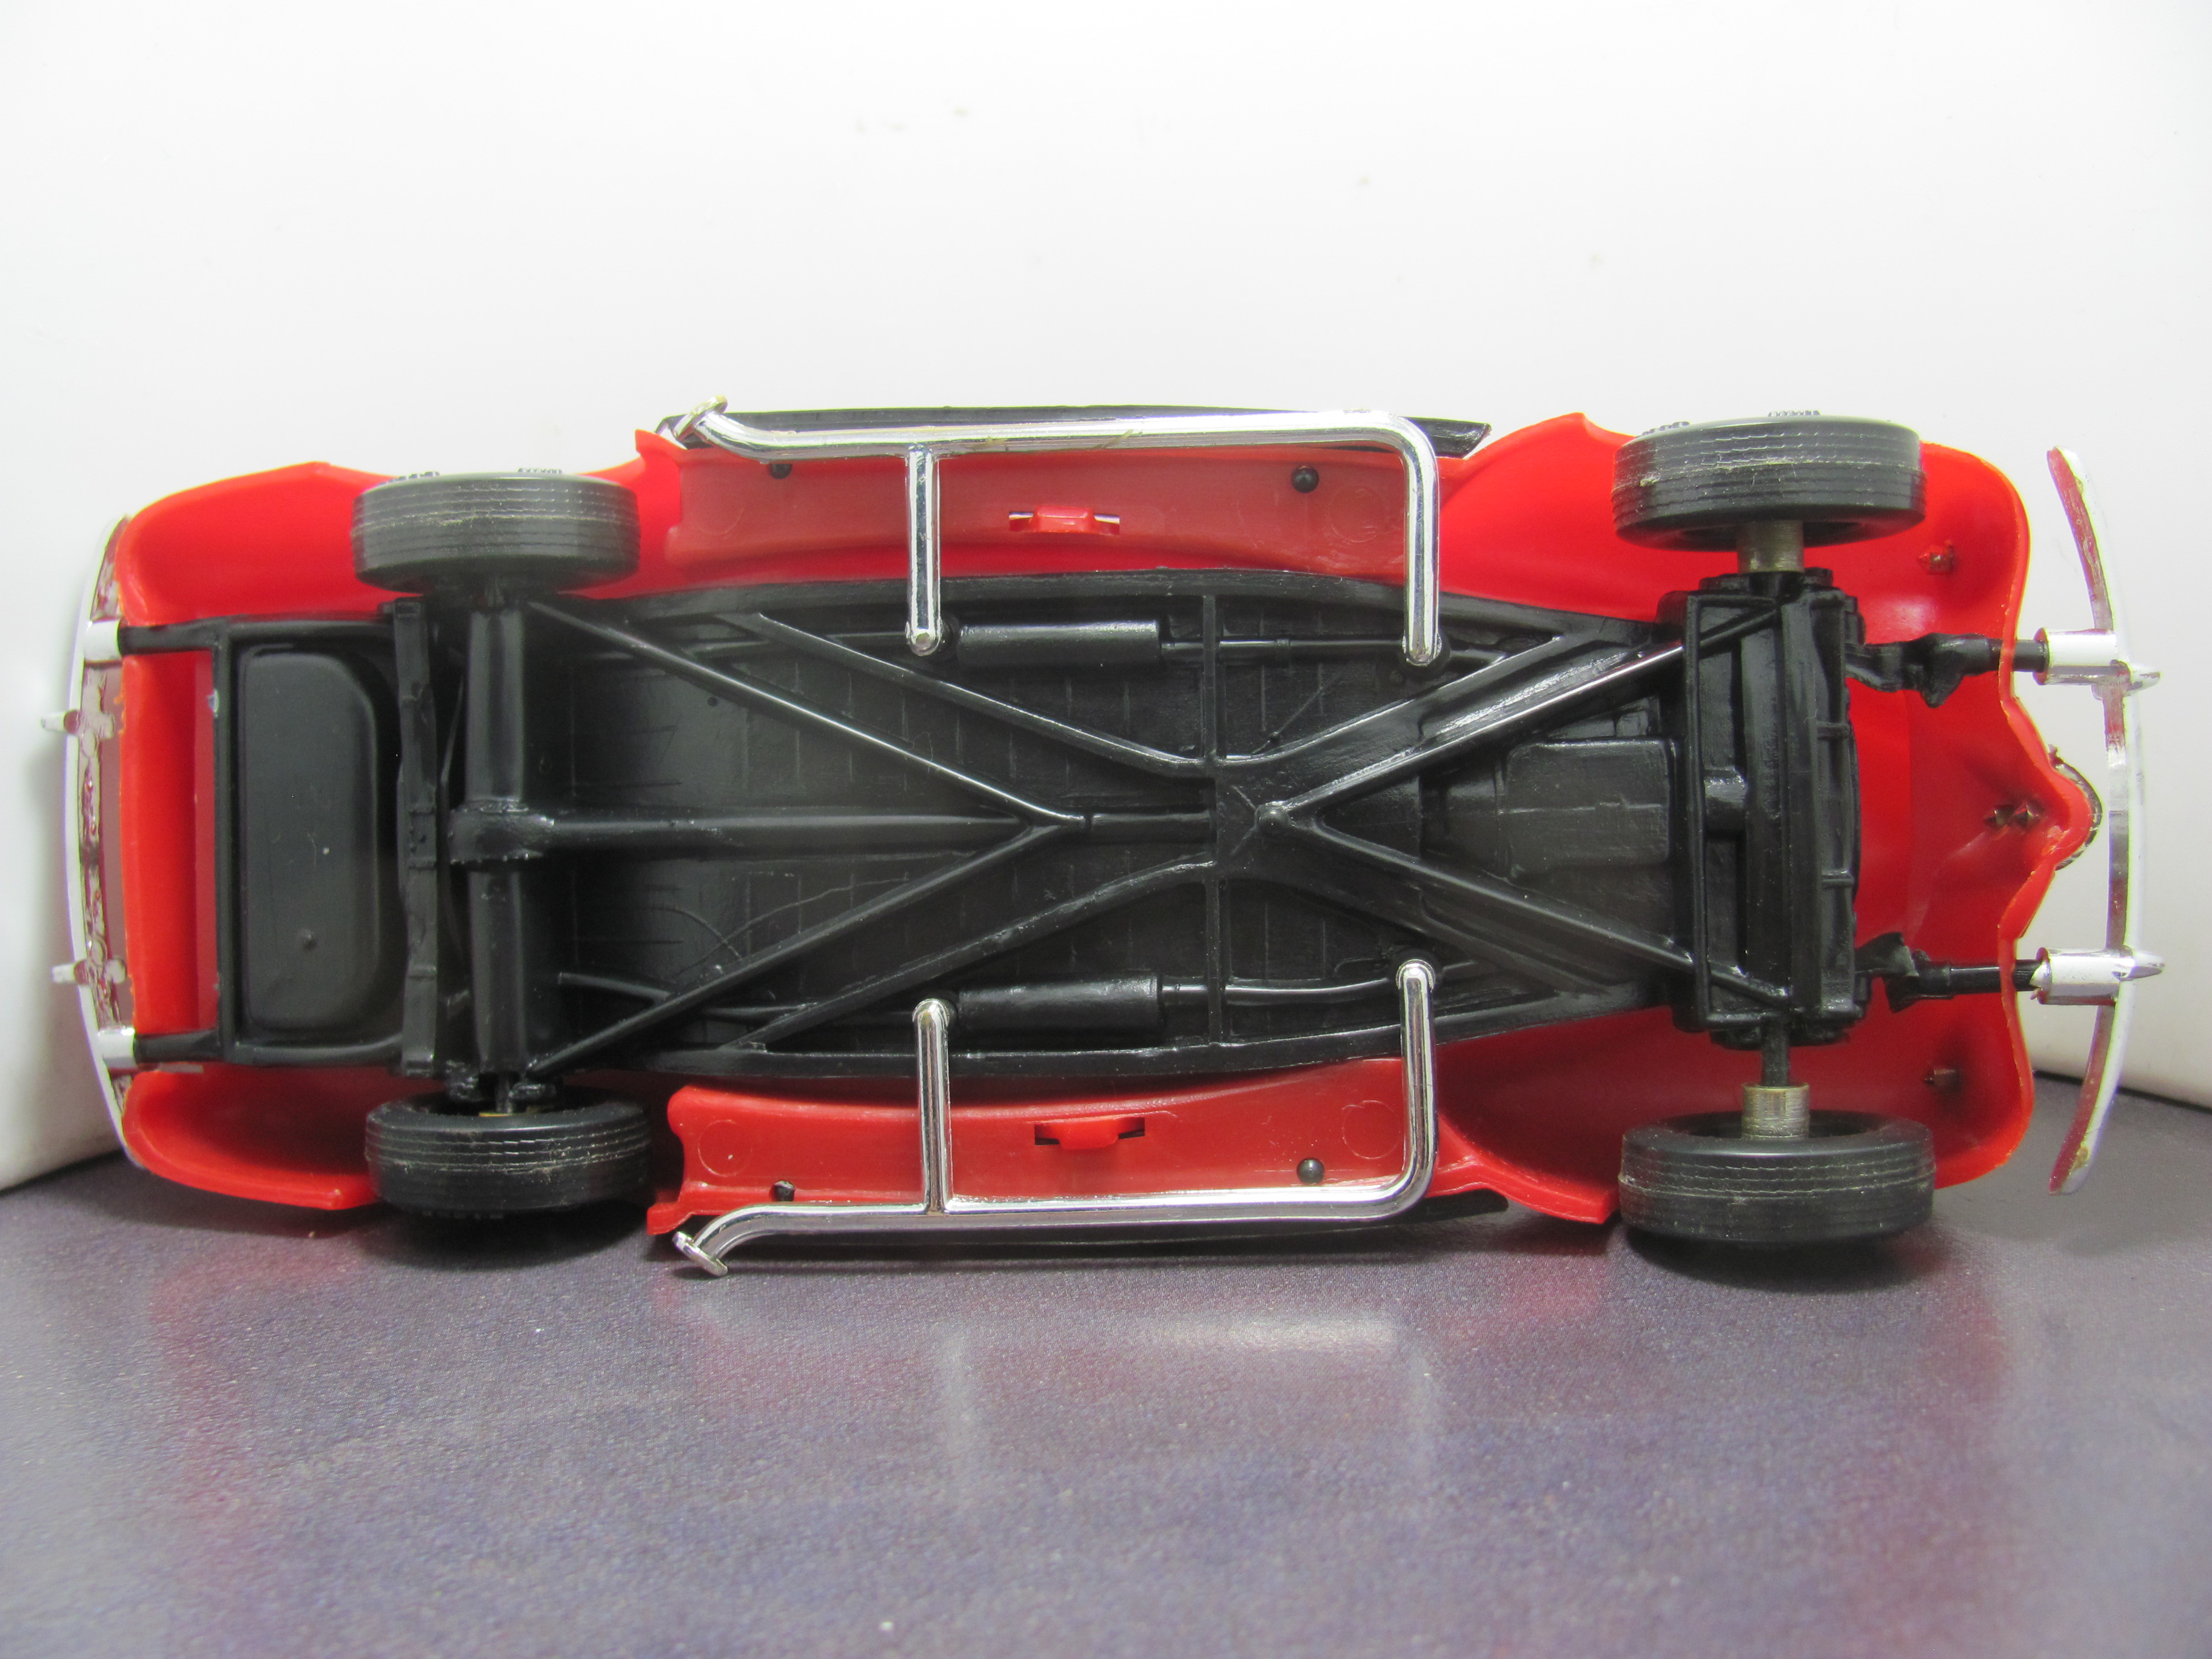
You know, until I read this thread it never occurred to me that the Lindberg WASN"T the MPC snapper. I guess I just assumed Lindberg grabbed some old molds (pretty much their modus operandi) and pumped them out. You learn something everyday. So to help out here, I just grabbed some quick piccies of my old assembled red plastic MPC snapper . This is the street rod issue ( the first issue I believe) and I built it while using up the last ten minutes on a parking meter about 35 years ago! Obviously the windshield and to a lesser extent the rear windows, have some issues. Mine is destined to become a dirt tracker so it won't be an issue - I will probably be hogging out the windows anyway. Not a deal breaker but why would you bother with the MPCwhen you have the far superior Revell and AMT offerings. And as much as I love my Monogram 40 convert, (haven't built a coupe yet) you can't beat the fun factor of the AMT. It gets my vote every time. Finally, Tulio, I love everything you build! I am unashamedly a hot rodder, but your showroom stockers could turn me, one day!
-
1928 Ford Sedan 60's Style Altered UPDATED 2/10/19
Alan Barton replied to Dennis Lacy's topic in WIP: Drag Racing Models
Great to see someone building this beautiful kit. I have a three to do, one mint and two survivors. I really like the use of the SWC rear assembly - looks period perfect! And the set back engine is pure 60's porn! Cheers Alan -
1936 Ford 5W Coupe - James Hetfield´s "Iron Fist"
Alan Barton replied to Koellefornia Kid's topic in Model Cars
You did a great job of capturing the essence of the original car with your model, Oliver. You're a braver man than me scribing that new curved trunk outline! Kudos for a job well done. Cheers Alan -
60's Style Chopped '34 Ford 5-Window Coupe UPDATED 11/19/18
Alan Barton replied to Dennis Lacy's topic in WIP: Model Cars
Chassis mods are great, engine choice and setback are perfect, wheels and stance spot on but one thing is glaring at me. It's not your fault, and I am not sure I could change it myself with my skills BUT after the caster finished his chop, he tidied things up with that really heavy gutter. Is there any chance it could be sanded/filed/scraped into something closer to Henry's original contours? Just a thought. On the other hand, it might disappear with a darkish paint job. Love the car, mate. Cheers Alan -
60's Banger Geek '27 T Touring - Updated 10/13/18
Alan Barton replied to Dennis Lacy's topic in WIP: Model Cars
Doh!!! You said in the first post it would be metallic my short term memory gets shorter by the day! -
60's Banger Geek '27 T Touring - Updated 10/13/18
Alan Barton replied to Dennis Lacy's topic in WIP: Model Cars
Your work continues to inspire and amaze me, Dennis. I love the way you are completing each part totally so that when it comes time for paint, this thing is going to go together like it came out of the box that way. I have a number of traditional and not-so-traditional projects on the bench at the moment and they have all benefited from your very tight approach to planning and execution. Looking at the Tub itself, there are so many things to like. The injection is a great upgrade for that banger revolution period you mentioned. I have suspected for years that those Revell wheels were a) real but I didn't know where and capable of looking far better than Revell's early silver frost chrome or their modern ultra shiny chrome. I must have eight sets or more of these and I have yet to use them - that will change very soon! Like you I am already using some of the awesome spares from the Revell Model A kits. I am so glad I bought a bunch while they were available. I just wish they were available when I did the interior of my still unfinished Revell T tub project - your interior looks much nicer than the one I am locked into at the moment. And it might sound silly, but it hadn't occurred to me to shorten the Deuce frame like you have. I am putting a resin A tudor body on one and it just looked wrong - now I see an easy solution. So thank you again. Can't wait to see this finished. I'm seeing either metallic or flake - am I close? Cheers Alan -
'32 Channeled Nailhead Roadster UPDATED 11/7/18
Alan Barton replied to Dennis Lacy's topic in WIP: Model Cars
That's gonna work! Cheers Alan -
Wow, that is even uglier than I remember! Do those two models share the same custom front clip or did AMT have two models with a similar theme on to different cars? And to think this was BEFORE psychedelic drugs became popular! Say Hi tp the guys at the club for me! Cheers Alan
-
O.K., stop laughing, probably the world's ugliest toy deuce but Motorific did have a one size fits all policy - a 63 Cadillac and a Karman Ghia both fit the same chassis this Deuce is riding. But, I collect toy hot rods irrespective of how ugly they are so I I just laugh and live with it. Here is a before and after I did for the guys at my model club. The chrome on both headers had been rubbed back to black. The LHS is before, the RHS is after. Says it all really, and once again, no prep!
-
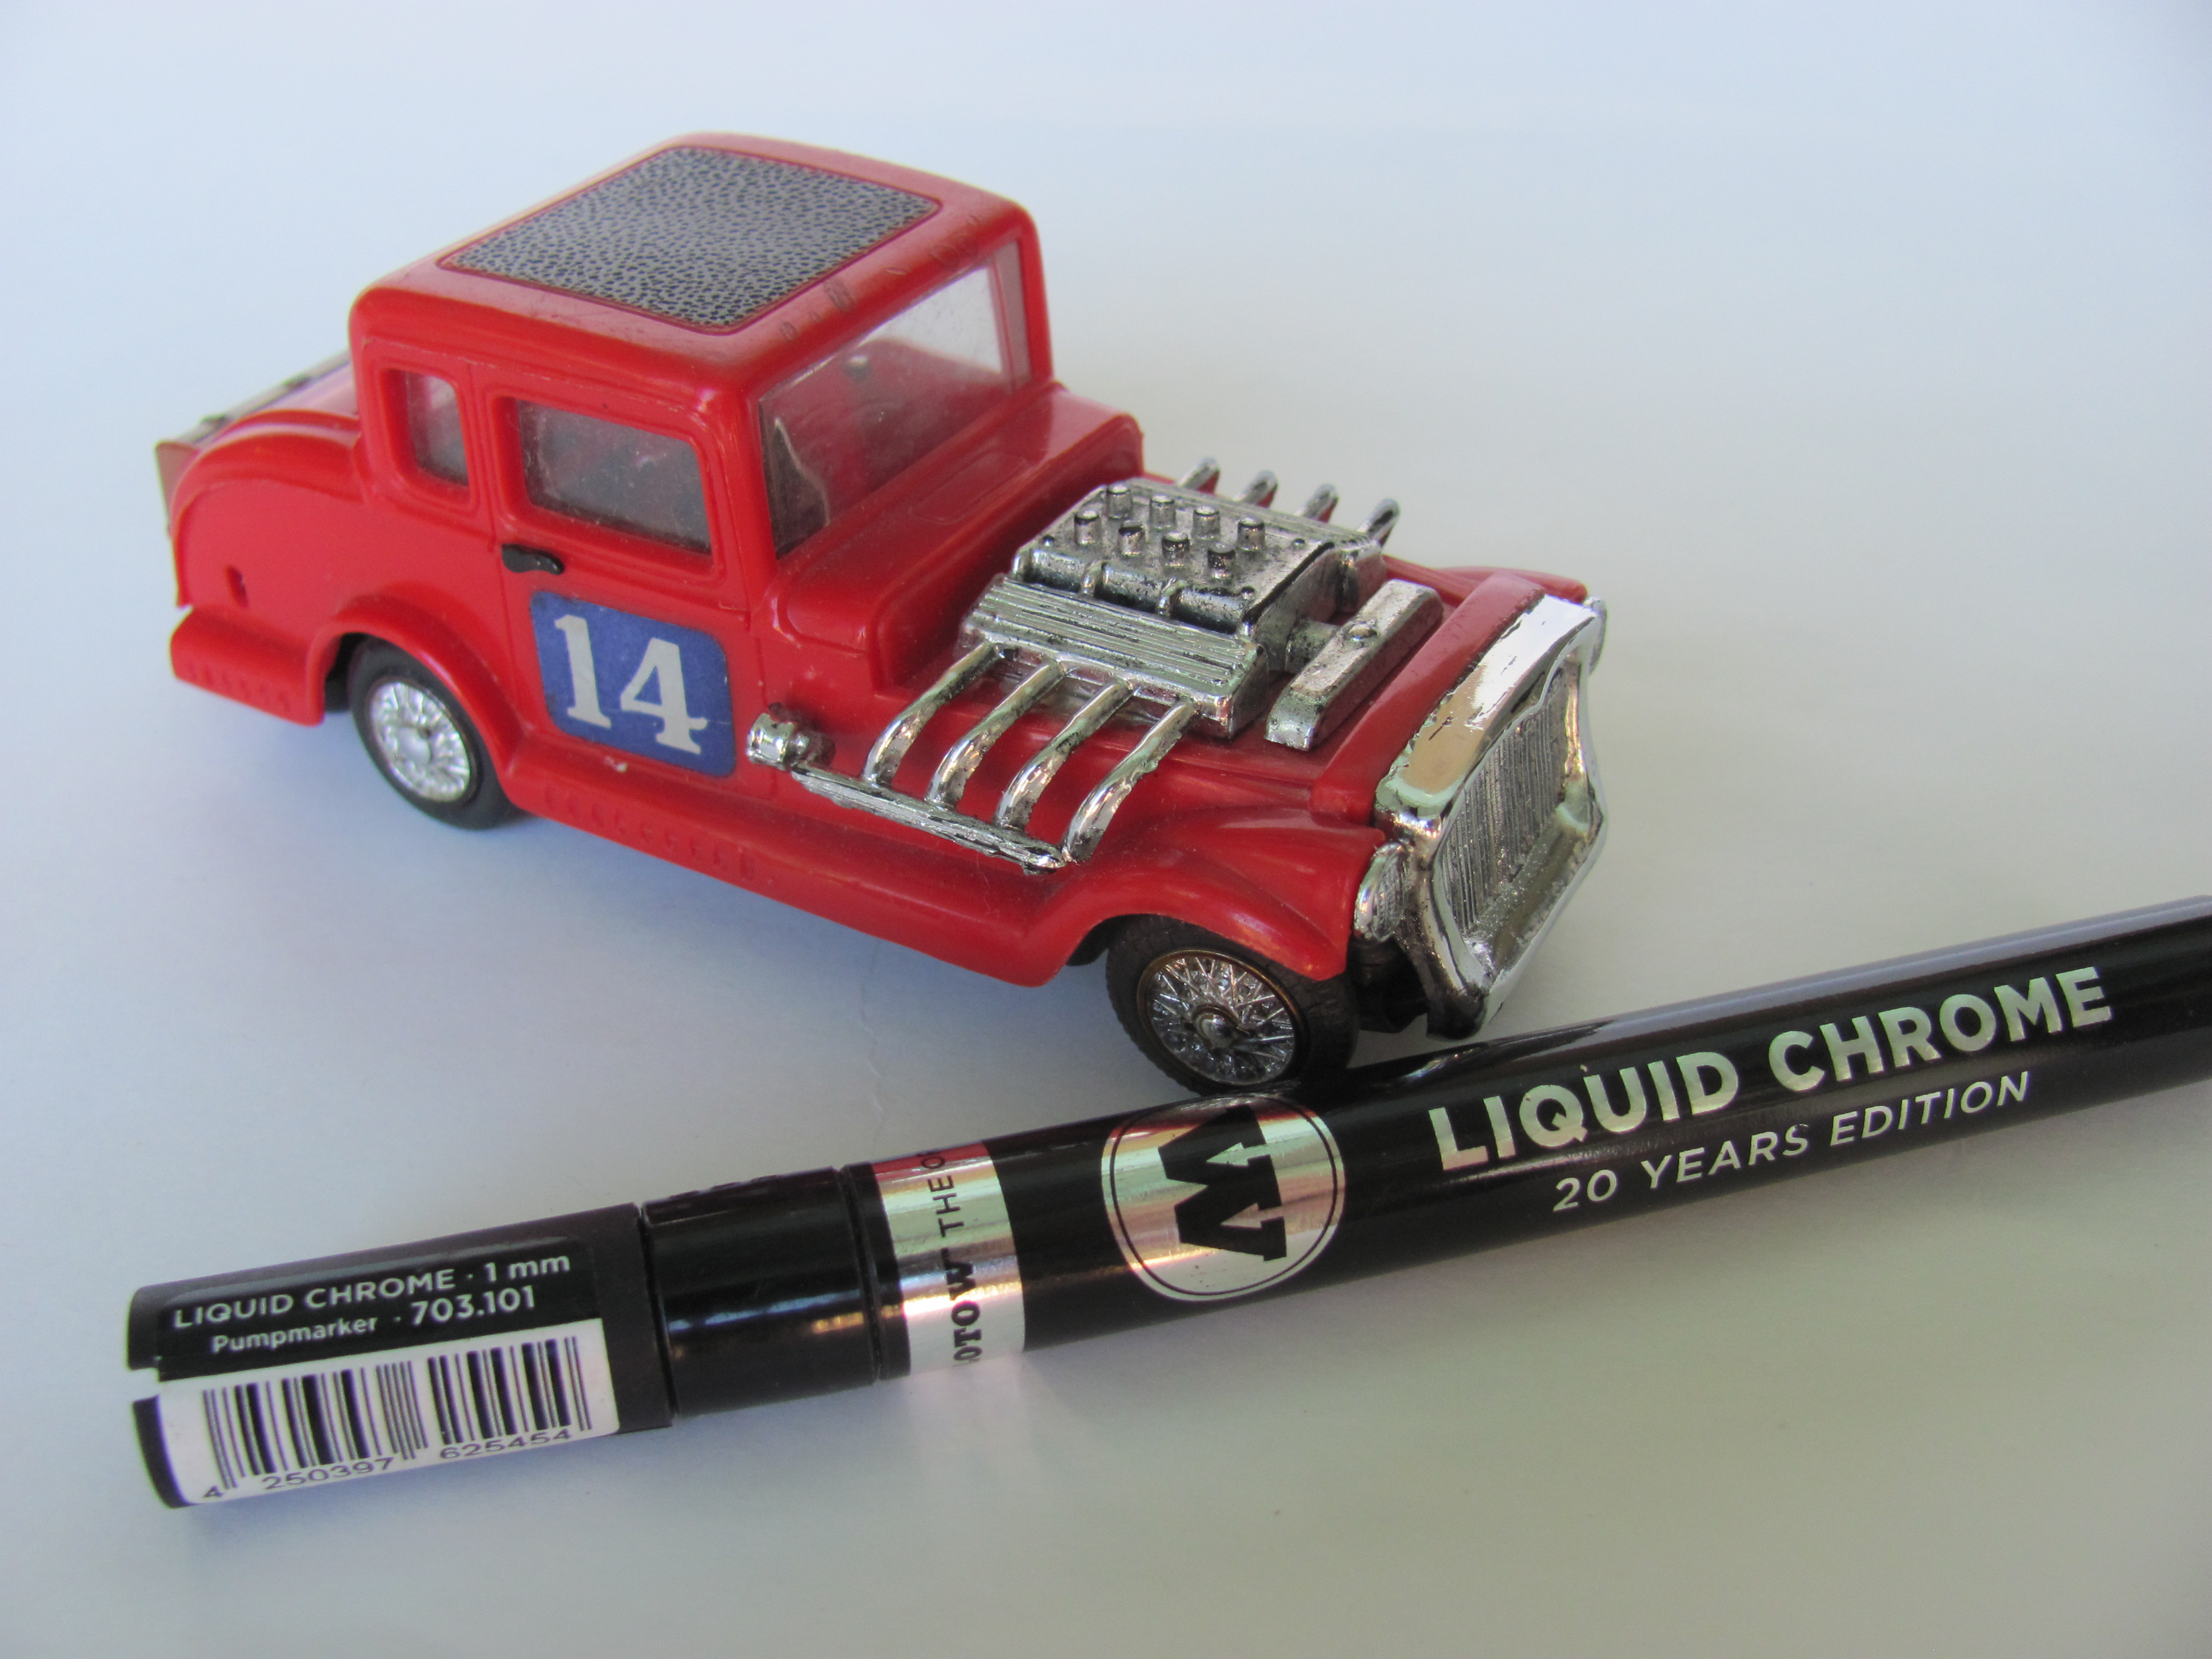
I love my Molotow pens, all three sizes. Haven't done any airbrushing as yet. I have a large toy hot rod collection and they are awesome for touching up damaged, worn or faded chrome on old toy - can make a roughie look brand new. I have also used the 1mm on chrome trim on a Motorific slot car body - these are somewhere between 1/32nd and 1/43 . One quick swipe and they look brilliant! My trick is to always shake the pen and give a few pumps on the nib before you use it so that you get bright wet chrome on the first go. I have had Molotow job in the cabinet for over a year and they still look great. The Imperial below had very faded silver paint trim - you can still see some on the lower edge of the windshield frame. The top edge of the frameand the wiperes are Molotow 1mm, no masking, the windshield is still in and in fact, the only prep was a quick wipe with my hand. This chrome is about 14 months old. On the rear of the Imperial, the fender top spear is OEM chrome, the side spear and rear window trim is Molotow. Impossible to tell the difference. Again, the window was not removed and there was no masking applied. And, I shake like a drunk epileptic on an ice rink! I would however agree with all posters that I probably wouldn't be brave enough to tackle a full length trim on a fifties classic. But I would and will be cheerfully attacking a 1/25th scale windshield trim shortly. I love BareMetal but hate wrinkles I often get on the corners of windscreen trim and the quarter vents.
-
Yeah, that rear view is pretty scary when you compare it to the real one! Kinda glad I didn't go chasing one now. I know of one SMP Elky hear in Perth but it was heavily customised so the owner just tidied it up and put it on his shelf. Cheers Alan
-
'32 Phanton -Foose build -update 2/11/18
Alan Barton replied to Rocking Rodney Rat's topic in WIP: Model Cars
I'm sure you've seen it already, Rodney, but just in case you haven't, the latest Rodder's Journal has a detailed article on a baremetal full fendered display car. I love how this is working out - your surgery is beautiful! Cheers Alan