
charlzrocks
-
Posts
564 -
Joined
-
Last visited
Content Type
Profiles
Forums
Events
Gallery
Everything posted by charlzrocks
-
scratch building a scale car battery?
charlzrocks replied to charlzrocks's topic in Tips, Tricks, and Tutorials
I really like the "Streching Sprue" idea! Thanks!! -
scratch building a scale car battery?
charlzrocks replied to charlzrocks's topic in Tips, Tricks, and Tutorials
Now THAT'S a great idea Harry! I could actually fold the index card stock into a rectangular box shape and glue it shut! I would have to test the stock for paint absorption, but otherwise a great idea!!Thanks! -
scratch building a scale car battery?
charlzrocks replied to charlzrocks's topic in Tips, Tricks, and Tutorials
thanks, but again, I would like not to have to buy it from the web. There has gotta be something here in the house that would work. -
scratch building a scale car battery?
charlzrocks replied to charlzrocks's topic in Tips, Tricks, and Tutorials
Thanks for the tip on the radio/electronic device. I got nothing that I can take apart here, but will keep it in mind for the future!! The credit card idea is a good one for small amounts of flat stock. I could maybe use an old dept. store giftcard and cut that up, glue it together and add posts to it. Thanks for another good suggestion!! -
scratch building a scale car battery?
charlzrocks replied to charlzrocks's topic in Tips, Tricks, and Tutorials
If you read, I mentioned none LOCALLY. I would like to make it out of found items/materials. I would rather not wait for the plastic stock and to pay for shipping when all I need is one lousy battery. But thanks for your concern Harry, sorry to have bothered you. -
Does anybody have any ideas on what to use in the way of household type items to make a 1.25 scale car battery? Plastic stock is out of the question as I can't get any locally. Any ideas at all guys and gals??
-
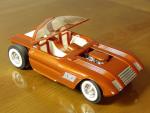
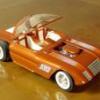
Very Smooth and MEAN looking at the same time! KUDOS!
-
Saving old decal sheets
charlzrocks replied to elan's topic in General Automotive Talk (Trucks and Cars)
I SPRAY ALL MY DECALS WITH Rustoleum clear first. That way, if they are bad I saved myself a huge headache!! -
sorry it's gonna take a while to finish this one as I have to fashion some sort of suspension for it with shorty curved leaf springs for the front. Not to mention the sanding, finishing, etc.
-
First off ...apologies to the board moderators if this is an inappropriate post. If there is anyone out there looking for Polar Lights kits, this guy on eBay has a whole buncha stuff! His moniker is bodyforce2000 If you are looking for some of the PL funny car kits as well as some MPC kits, look him up and shoot him an email to see if he has what ya need. .....and now back to your regularly scheduled program..........
-
How to use Future floor wax
charlzrocks replied to plasticfrog's topic in Tips, Tricks, and Tutorials
I use it all the time....just brush it in as it's self leveling acrylic! I use it for clear coat as well as tinting windshields. To tint the windshield, first dip the windshield in Future and let it drain off, blott the thin edges with a paper towel to avoid pooling. Let it dry for a few hours. Then add food dye to some Future and repeat the first part. Let Dry. Repeat if needed. If you mess it up, just take a cotton swab and wipe it off with clear future and re apply! -
Very clean build, nicely done!
-
I concur, all previous retorts heretofore notwithstanding as it were so to speak, whatever. I use Future (Pledge with Future Shine) yes it's an acrylic clear coating for floors. No it does NOT need to be airbrushed on as it is SELF LEVELING. It will NOT harm your decals. You can spray it if you like but it will look as good brushed on. Clean the brushes with ammonia or windex. It costs about $6 a bottle at Walmart. Invest the money, TEST it on a PLASTIC SPOON with some decals already applied. Your model will react just like the spoon and be all shiny and bright. All will be right with the world. You can exhale. TRUST ME.
-
It may be a bit yet but the next update will be in the underglass section!
-
Very nicely done!!
-
Body has had 2 sections out to shorten it and preliminary sanding/priming done to expose some flaws. The interior roll cage has been redone and interior is nearly complete.

-
Color me Gone or Disappointed Dodge.
charlzrocks replied to caine440's topic in WIP: Drag Racing Models
It should be called "Color Me Pissed Off"! After all your troubles it is still a great looking build!! -
I use Future to clear coat all my builds for two reasons. It's a pretty inert acrylic (no thinners, etc needed) and I can just apply it with a brush because it is self leveling. Just let the first coat dry completly and apply the second coat.
-
Great build! Those motorcycle wheels and tires are a stroke of genius and make the car have a whole different look!
-
Looks very cool!! Great restoration on a classic kit!!
-
although a bit blurry.....I am digging the wing!! Please post some more of your builds!
-
Why i dont post pictures
charlzrocks replied to gray07's topic in General Automotive Talk (Trucks and Cars)
I wanna see some pictures! I wanna see some pictures! I wanna see some pictures! Everyone here is an artist!! Some deal in abstracts, some in impressionism and some in photorealism......whatever....it's all ART!! Please...let us see yours! -
that is TOTALLY WICKED!
-
I agree with Harry. Not the most perfect look, but it's that or strip it and Alclad which in some cases can look worse.
-
some further preliminary work done... I cut out the frame wheel wells so as to better fit the slicks as well as modifying the chassis by cutting out non needed areas. I also cut out the interior engine cover to accomodate steering and some leg room for the driver. I am using a seat that came with a Roth kit as an extra part. I have built a roll cage and covered the interior area that was cut out. more to come.

