chepp
-
Posts
266 -
Joined
-
Last visited
Content Type
Profiles
Forums
Events
Gallery
Everything posted by chepp
-
Wow! Having the passenger-only roll bar is the goofy kind of detail that I like. All that masking and multi-color paint looks great. ...and that half-vinyl top on the driver's side is also a fun detail. Keep up the good work.
-
Nice save! I think that you did just the right amount of improvement to make it look good while still preserving the original.
-
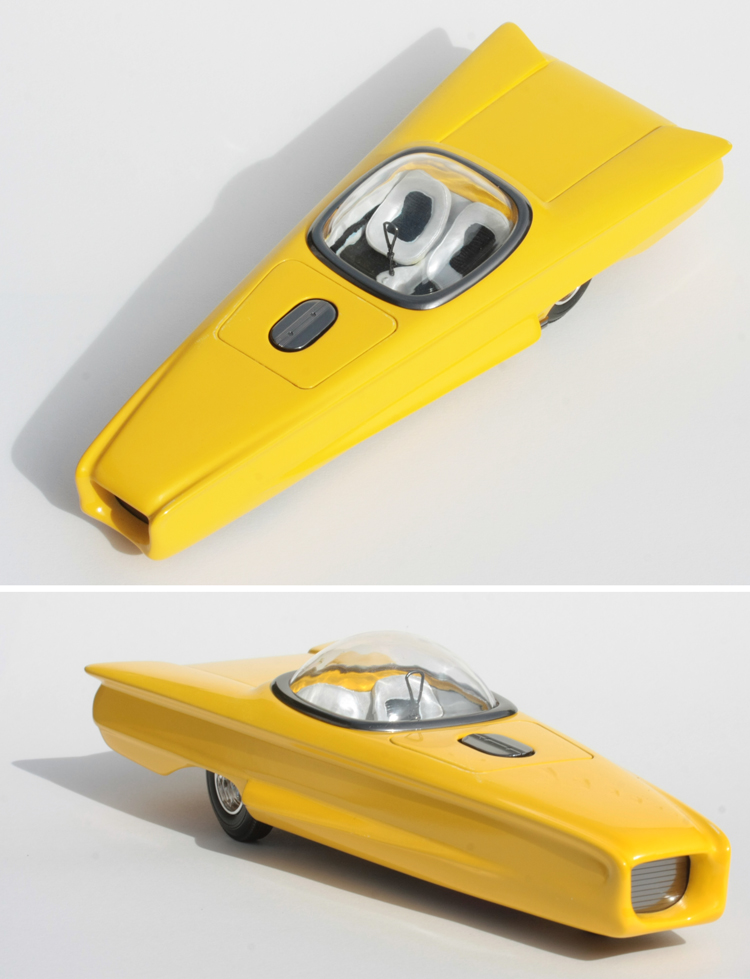
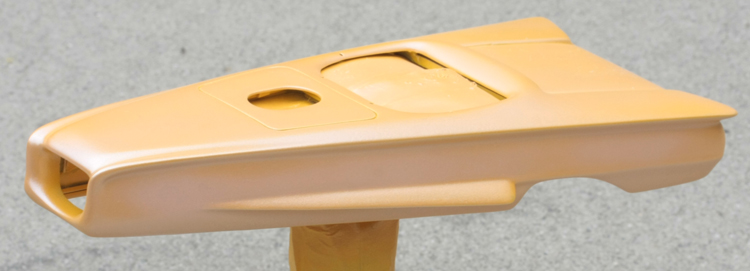
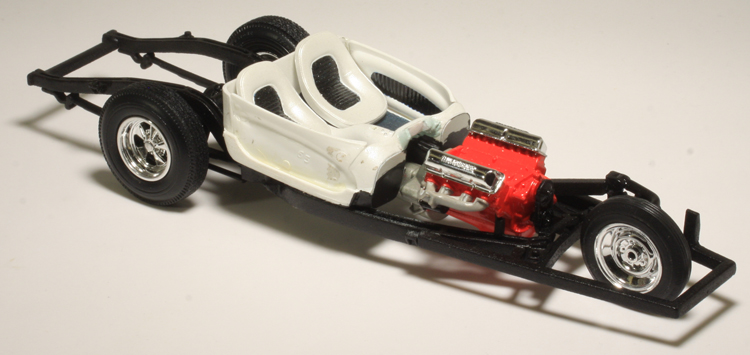
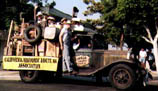
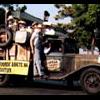
Thanks, all, for the positive comments and especially to Russell C for the inspiration* and for posting the award pix. Sorry for the late reply but I've just gotten home from GSL (my wife and I visited five national parks and Hoover Dam in the six days after the event in Salt Lake City). The award is from the Metroplex Car Modelers Association in the Dallas, TX area and was presented by member Len Woodruff. I couldn't find the criteria for the award, but it's essentially the club's choice of the GSL entry that was the most "out of this world." Thanks, guys! In searching for the criteria, I came across this advice on how to win at GSL: http://www.modelcarsmag.com/category/shows/ . It's by Jairus Watson from the July 2007 issue of Model Cars Magazine. He suggests "if you are looking for a relatively easy class win, then look to enter in something a little less populated... Other awards generally not concentrated on by other competitors are the Klingon Cruiser Award." Also, "it should be sharp and brightly colored in order to be noticed...", "Build something different and make it unique..." and "One way to get your car noticed is so obvious that many guys forget to do this, and that is to put your car on the edge of the table. YES, really!" By coincidence I did these things but this entry was not a serious attempt at building something that would be a winner in a real GSL class. *Actually, I had built the body in 2011. Later, learning of Russell's entries at GSL events I figured, hey, I already have a three-wheeled Ford so I'll just re-paint it yellow and build a chassis for it.
-
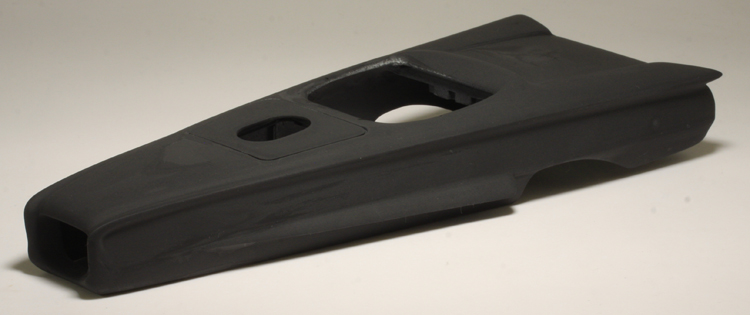
Here's an AMT 1960 Ford Starliner with a Revell Roth Beatnik Bandit bubble top and interior. To me it's sorta goofy and sorta interesting but I haven't made up my mind about it. It has some significant shortcomings in design and workmanship. Even though it's a "20 footer," we'll see if it attracts any attention at GSL XXVI. Feel free to make comments, positive, negative or otherwise. See the build thread at http://www.modelcarsmag.com/forums/topic/121481-3-wheeled-ford-for-2017-gsl/ .

-
What, me worry? There are still a couple of more days... So far, the paint is: white primer — Tamiya Fine, spray can solid yellow base — Testors 1214 Gloss Yellow (with "baking" overnight), spray can pearl — Createx Pearlized, airbrush silver flakes in clear (body sides only) — unknown brands (probably Pegasus flakes and MM Acryl clear gloss), airbrush Paint is not finished yet. See the spoon tests earlier in this thread to see what I was testing. This will probably be my last post in this thread. The completed model should appear with the same subject line in the "Under Glass" forum in a day or two.
-
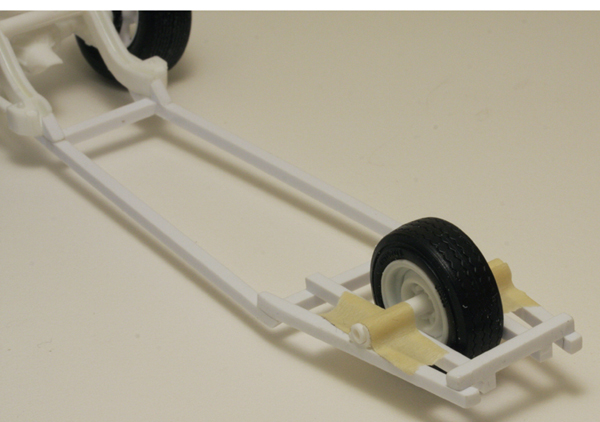
Maybe great minds think alike. Here's what my early-version frame looked like. Thanks for the video link. It worked fine.
-
Nice start. Smooth is good!
-
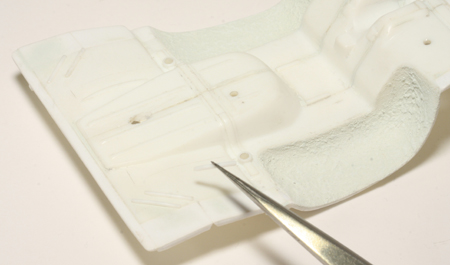
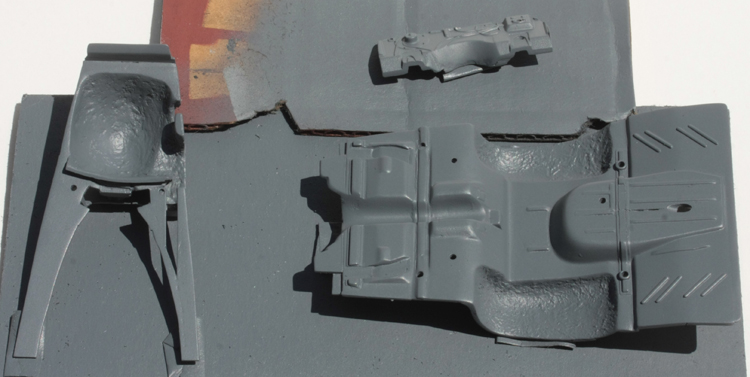
Thanks. I have no aspirations for this to be an award contender. Originally it was just a shell with minimal plastic pieces to attach wheels for an informal online photo model contest that didn't show the underside. Since it had three wheels and was a Ford I figured that I could repaint it yellow and put a believable chassis under it as a tribute to Russell C's oft-mentioned winner. Little did I know that the chassis would be such a struggle. To add some visual interest in featureless floor areas I made some 10mm long .040" half-round pieces to simulate pressed-in stiffeners. They're hard to see here but show up in the photo below. To avoid having to smoothly fill the pieced-together wheel houses I spread filler on with my finger. As it set up I played around with it to make a rough finish that simulates a sprayed-on sound deadener. Time is getting short. I'm finished with fitting, filling, sanding and primering the floor pans despite their shortcomings.
-
The fadeaway fenders and different grille really make this look better than stock. Keep up the good work.
-
That weathering looks fantastic. It reminds me of an old joke: "Yeah, I have a two-tone car. ...it's green and rust."
-
Here's the latest. I let myself get distracted by a "quick" Corvair build for the Group 17 class that took a week and a day. Once the floorboards are in place and the body is on, the chassis will only be visible from below. Yes, I know the exhaust manifolds are on the wrong heads and upside down — they will feed into the side exhausts. The model will not have an opening hood. There's only a week left. My wife came down with the flu tonight — hope I don't get it!
-
Thanks all. Bingo. Although I'm no expert, I remember hanging around a Scheib shop a couple of times as a teen in the early '70s. They used some tire masks. As I recall they were something like a rough canvas with fiberboard sewn in to make a flat-bottomed half-circle that covered the tread and outer surface. When I painted this model I masked off the tread and outsides but made sure that the inners were still exposed to overspray. There is a little bit of red on the inner side of the right front tire but I was hoping for more. I should have given a little extra spray there. I may go back and add some.
-
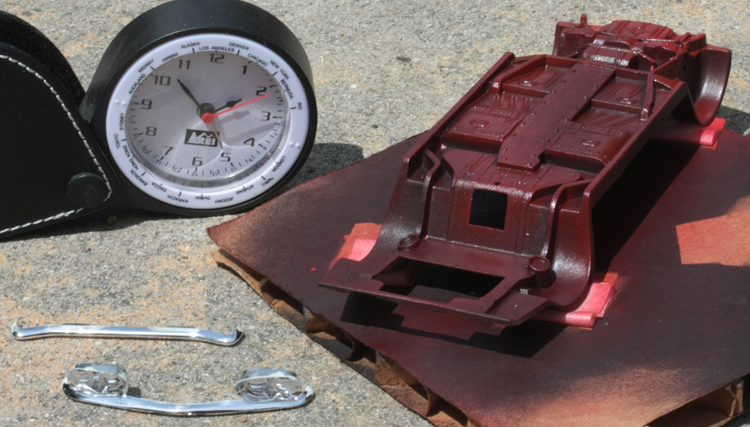
The GSL-XXVI convention/contest has a group category for 1969 Corvair models*. Here's what I'm planning to bring. It is, I hope, an novel idea and it didn't require any detailing of the interior, engine compartment, lights, etc. The model depicts a slightly hopped-up nine-year-old car right out of the spray booth. The guy with the gasoline-soaked rag to wipe the fresh paint off the top surface of the emblems should be here any minute. Yes sir, he'll be here any minute. Any minute, now. Riiiiiiight. The right front tire is a little low. The squatted-down rear has some IRS camber. The "re-sale red" paint is Model Master Ford Engine Red over white Tamiya Fine Surface Primer. Although not too obvious in these photos, there is some gunk in the paint and several sanding scratches. On the front near the left headlight and emblem there is what looks like body filler that was applied but didn't get sanded smooth. See the build thread at http://www.modelcarsmag.com/forums/topic/122377-69-corvair-gsl-earl-scheib-special/ . *The Group model for 2017 is as follows (copied from the GSL downloads): "For GSL-XXVI, the “Group” kit is the 1969 Chevy Corvair. Entries may be built from any original or reissue release of the Round 2/AMT kit, in any style, with the skills and craftsmanship you have today, but using only parts, materials and supplies (except current putties, adhesives and paints) available 35 years ago (1982 or earlier). Entrants may use the newly re-issued Round 2 Corvair engine kit (AMTPP010) if desired. There are just three additional limitations: no one-off machined or photo-etched parts not fabricated entirely by the entrant; no aftermarket products not available in 1982 or earlier; and no resin bodies or resin body parts (regardless of who made these resin parts). Bare Metal Foil may be used."
-
Good luck on yours -- could you post some pix? See you at GSL. Thanks. I was thinking about making the sidewall bulge, too, but didn't. Thanks! Hmmm... Maybe I should hide a sponge wetted with fish oil inside the model. Doh! That's a good idea. Pegasus Hobbies is only about a mile away from me, too. Oh well, it's done now. Except for the kit itself, I've managed to not spend any additional dollars on this. Here's the first of the airbrushing. Since shooting this photo it's all painted now. Instead of Scheib's infra-red treatment the model is drying with a re-purposed computer fan blowing air at about 90 degrees F through my modified dehydrator. This is my last in-progress post. I expect to post photos of the finished model in an "Under Glass" thread in a few days.
-
SMP '58 Impala ala Larry Watson! Interior Done, Final Assembly!
chepp replied to John Goschke's topic in WIP: Model Cars
The interior colors, exterior colors, flames and just the overall look are perfect! -
1963 Pontiac Bonneville, New, Outdoor Shots.
chepp replied to StevenGuthmiller's topic in Model Cars
I agree. That really looks good. It's great to see such fine work. -
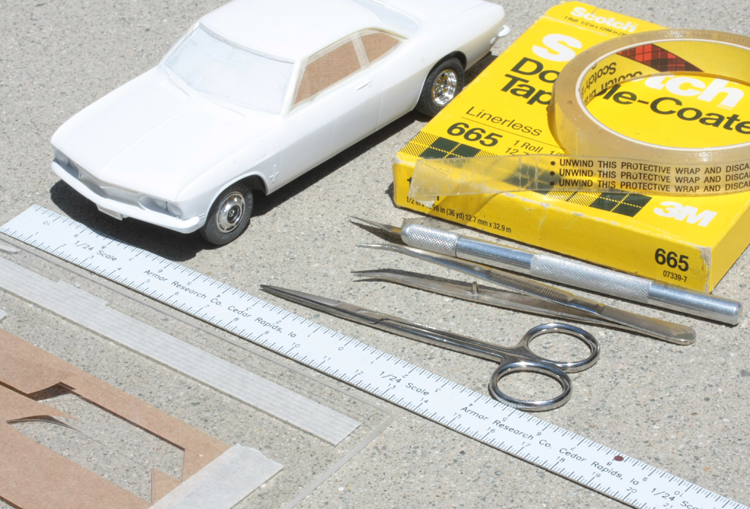
The chassis is weathered. There's not much point to doing much when you're keeping things like the kit's inner wheels and molded-in front suspension. Masking is progressing. The brown paper is from a shopping bag (shown in the first post above). Double-coated tape is adhered to the window area, the brown paper is cut to size and stuck down. Finally, Approx. 2-scale-inch wide actual masking tape is applied.
-
Can't judge a box by its cover
chepp replied to dragcarz's topic in General Automotive Talk (Trucks and Cars)
You lucked out -- congratulations! -
I'm not so sure. The vinyl tires in my kit were the wider ones (a little too wide to fit). Still, it was an opened box and I bought it with the knowledge that some parts were missing so anything is possible. That's the spirit! If only I had a 1/25 scale roller... Finally, I'm ready to start weathering the underside. I located some nice shots for reference. Before assembly, the various components were painted in a variety of grays and flat black. Some of the plating on the oil pan and exhaust system is still there after scraping off the parting lines so I'll try to let some of it show through. I'll be careful not to put any rust on the engine or trans. The intent will be to simulate just a regular grungy underside — nothing too severe. It looks like AMT forgot to include the heater shroud. Oh well, this will represent a 9-year-old car so I'll just say that mine fell off. A couple of .020" styrene rods were added, roughly based on the photos, around the transaxle to try to make it look more detailed. The front wheel covers were detailed a little with flat black and flat clear while the rear wheels will remain untouched. My story is that the third owner bought two new wheels and a pair of used tires for the rear. He then realized that they wouldn't fit so he radiused the rear wheel openings and, running short on money, took it to Earl Scheib for a $49.95 paint job to try to make it look sporty. Someday he'll get two more new wheels and tires for the front.
-
Thanks for the encouragement. What I thought would be a one-day quickie build with most of the time spent adding the tape/paper masking turned out to be much more involved. I had bought the kit knowing that it was missing the stock exhaust but that was OK because there were several other exhaust options. However, a pair of those other parts were also missing. But there was still the option of headers + mufflers that would work. Unfortunately, the headers didn't have the 180 degree bend on the end as shown in the instructions. I'll have to scratchbuild that. The biggest problem turned out to be the tires. The stock tires shown in the instructions appear to be vinyl but in my kit there were only four white styrene half-tires. They sure look narrow — maybe they were to be mated to wider "halves" (that were missing from the kit). That's OK, I'll use them (see below) and put the wider vinyl kit tires in the rear (above). I kluged a motor tool rubber sanding cylinder with masking tape so the assembled styrene tire would fit snugly then trued them up on a big file. The skinny "treads" look like they had recaps that flew off but they should be perfect for this build. Unfortunately, the wide tires are too wide for the body and despite the kit's plethora of "rally" parts none of them are fender flares. So, I'll just radius the rear fenders to clear the tires. It'll look like a homemade hack job of the '70s. This is my first (and probably last) kit to have 13" wheels/tires so I don't have any spares to substitute. Sure, I could section each rear tire to narrow it but this one-day project is on its third day already so that is not an option.
-
1969 Torino Fastback - Almost finished (plus some commentary) - 04/20/17
chepp replied to Igor's topic in WIP: Model Cars
Looks good. I'm sure that you'll get it done in time and will have it look even better than the first build. -
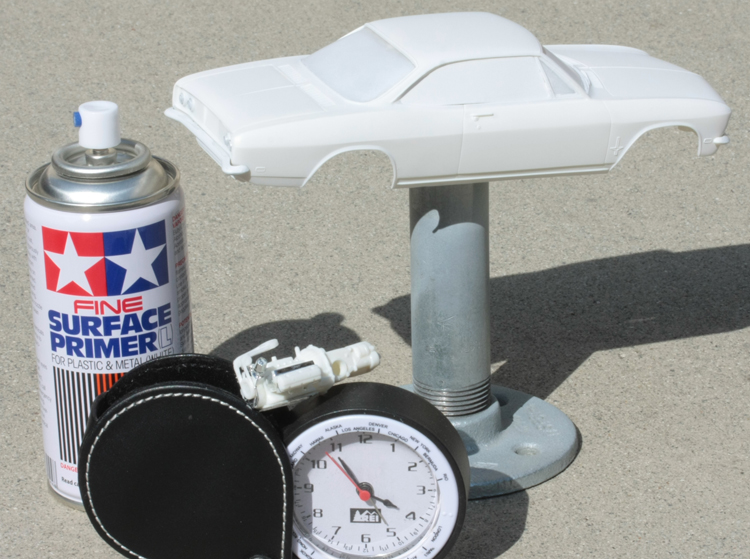
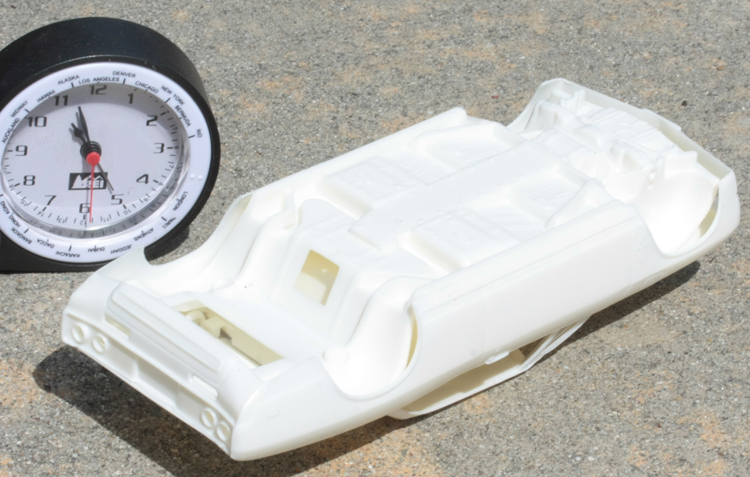
The body was wetsanded with 320 and 400 then the trim parts were cemented on. After a quick wash in detergent and drying, a thin coat of white primer was sprayed on. The basics of the engine are assembled but more parts and cleanup will be needed.
-
The filler on the front of the chassis floor pan was shaped and sanded a little more then some spray can red was lightly spritzed on. A quick online search didn't result in any photos of Corvair undersides so I don't know how much body color would have been on there from the factory. More time than I would have expected was spent on getting the bumpers/lights to fit decently to the body. They will be covered with masking but, still, they needed a lot of help.
-
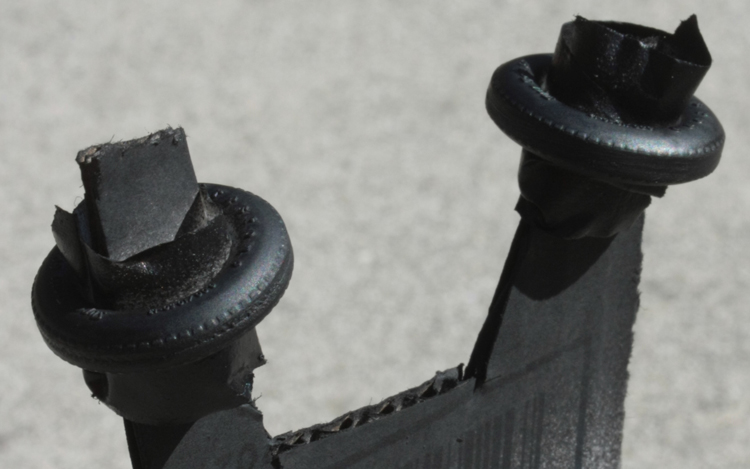
The filler on the chassis was carved and looks pretty good but will need a little more after the primer dries. Does that constitute the $10 free metalwork from the Scheib ads? The underside of the bucket was sprayed, just in case parts of it will be visible later from underneath. 0.020" styrene sheet was hacked to size and cemented into the side openings on the body. Hey boss, can I go to lunch now?
-
There definitely will be masking errors and overspray. Thanks, Draggon. From what I've seen, they didn't mask the smaller or complicated things like emblems — somebody might just wipe a gasoline-soaked rag over the top surface of the emblem after painting to reveal the chrome. But if that guy was busy with something else, like picking boogers out of the just-sprayed paint, then the emblems would be 100% body color. The floorpan has been cleaned up, the dash cemented to the interior bucket and the parts dry-fitted to be sure that they will fit together later. The chassis shows vestiges of the plugged holes from the promo attachment screws so blobs of putty were applied. When it hardens it will be carved to simulate what should have been there.