
astroracer
-
Posts
451 -
Joined
-
Last visited
Content Type
Profiles
Forums
Events
Gallery
Everything posted by astroracer
-
Material for a Blanket for lenco Trans
astroracer replied to Prostreet's topic in Model Building Questions and Answers
Check out the sporting goods department also. The atheletic tape comes in white or black and the white is paintable. -
Show us your Engines - Post Dedicated to the Engine
astroracer replied to TheCat's topic in Model Cars
This is the last model I actually finished... Pro Street Grand National 1989-90. That's kind of sad isn't it?... Mark -
Yea, do the paint work 1st. You can use the chrome trim as your mask lines. Mark
-
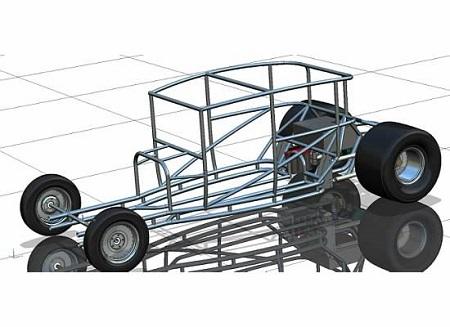
1:16 Modelers, a couple of questions.
astroracer replied to DirtModeler's topic in WIP: Drag Racing Models
You mentioned "artwork" so I am assuming these will be photoetched parts. If so what material will you be using? If you use a half hard stainless it will be difficult for these guys to drill it out cleanly. Most 1:1 axle tubes are 3" in dia. This scales down to a 3/16ths dia K&S aluminum or brass tube. If you make the hole about .19 you will be good. Anything smaller will look out of scale as will anything bigger. Mark S. MAS -
Improved Lighting & Magnification Options?
astroracer replied to nitrojunkie's topic in Tips, Tricks, and Tutorials
Pick up some cheap magnifying reading glasses. I have a couple of the magnifying visors but quite using them because the glasses are much easier. You can get them up to 3X or so and I have found 1.5X to be plenty. I have found them on clearance at Target and wallyworld for a couple of bucks. Mark S. -
When i built my Pro Street Buick back in '89 I hit on the idea of filing down 1/16 aluminum tubing. I taped one end of a 12" piece to my model table and filed it off it with a flat file. I then rolled it over to the flat side and filed it again. I thought it would be hard to keep the hex shape but then I saw my pin vise, it is hex shaped. I chucked the tube in the pin vise and just rolled the vise to the next flat after filing. After 5 mins of filing I had 12" of hex shaped aluminum tubing... I simply part them off with the hobby knife. A little care with a sanding stick and you can put a nice angle on each piece before parting it off. Mark S.
-
Use the Dawn, some hot water and the Isoprophyl Alcohol. That will get the piece clean enough for paint. Remember to keep the model clean when you are spraying it. Wiping it down and then handling it with dirty/greasy fingers will not give good results. Use some fine or extra-fine Scotch-Brite to rough up the surface for primer. You can do this after the first good bath. Don't sand on the body before washing off the mold release because this just grinds the mold release into the surface. Mark
-
Please read this thread... http://www.modelcarsmag.com/forums/index.php?showtopic=28944&st=0&p=281754&fromsearch=1&#entry281754 YOU DO NOT have to soak your model in anything... Just clean it as I describe and you will be fine... Mark
-
Dust free spraying environment
astroracer replied to nilsleven's topic in General Automotive Talk (Trucks and Cars)
It sounds like you were simply spraying in a box, right? No vent fan? The "dust" you had in your paint was probably overspray left in the box when you finished painting. This settled on your fresh paint as it was tacking off and left you with a bunch of dust nibs. There is a way around this if you don't have a vented booth or box. I have a nice vented box I built BUT I usually don't spray inside it. I'll turn on the vent to draw out fumes but I usually spray in the open air. I do this because I don't like all of the "back spray" I get from the box. I also think this is better because it keeps the sides of the box clean. I also mount the body on a wire frame so I can hang it upside down in the box when I am done spraying. Hanging it upside down eliminates 99% of the dust problem. If you spray in the open air you can use a "clean" box to hang your model in upside down... Do this and you will eliminate your dust problem. Mark -
1/25 wire wheels - help me find them
astroracer replied to sjordan2's topic in General Automotive Talk (Trucks and Cars)
Check out Machined Aluminum Specialties. We have an excellant selction of photo etched wire wheels and can work with you on rim sizes... http://mas-parts.com/cart/indexframe_phetchwhlcentrs.html Mark -
How long do u soak a resin piece!
astroracer replied to my 70 chevelle ss's topic in Car Aftermarket / Resin / 3D Printed
DING! DING! DING! Silicone! Yes!!! Do you know what has silicone in it as one of its main ingredients? I’ll give you one guess… Did you know that scrubbing your model with TSP (trisodiumphosphate) and hot water will remove all traces of silicone? TSP is a cheap, hardware store available powder, which is used in the professional house painting industry to clean surfaces. I have used it for thirty years to wash down vehicles prior to sanding and doing body work. It DOES remove Armor All. Dawn dish soap does the same thing. I have used with excellent results for years. Believe me; you do not have to jump through all of those hoops when working with resin. Plastic injection molders use the same mold release and I don’t hear of anyone soaking their plastic bodies to remove the mold release… Mark Smakal -
How long do u soak a resin piece!
astroracer replied to my 70 chevelle ss's topic in Car Aftermarket / Resin / 3D Printed
I will play the devils advocate here. Everybody "says" you HAVE to soak your resin parts in this or that but, I have seen no legitimate REASON for it... Can anyone explain to me (and the rest of the guys here) WHY we have to soak resin parts in any kind of solution before painting? I need to know what this does to improve the painting process over simply washing the part in hot water with a degreaser. Notice I said "washing" NOT soaking, simply washing with hot water will NOT warp a body... I want a legitimate reason here. No "this guy told me I have too" stuff. Mark Smakal -
Bought my first photo etched kit
astroracer replied to my 70 chevelle ss's topic in Tips, Tricks, and Tutorials
Most photo etched parts are made out of Stainless steel. This can be polished to a chrome like shine with metal polish. If you plan to paint any of it clean the parts with denatured alcohol to remove the photo resist residue. To attach emblems and the like to a body use a little clear fingernail polish, it doesn't take much. you may want to experiment with some unused bits out of your kit to get the technique down. Mark -
How long do u soak a resin piece!
astroracer replied to my 70 chevelle ss's topic in Car Aftermarket / Resin / 3D Printed
This is a really old wifes tale and should be dispensed with. I have never soaked a resin body in anything... All you need to do is wash the body the same as you would a plastic injection molded piece. I use really hot water and some degreaser dish soap. Scrub it well with a piece of gray ScotchBrite during the washing process and you are practically ready for primer. I have NEVER had an issue with fisheyes or mottling using this process... Mark -
Go buy a couple of new shirts. The clear plastic collar stays that come with them are perfect for model car windows. You could probably ask for some at the mens dept if you don't need any shirts... Mark
-
Automotive primer on Resin!
astroracer replied to my 70 chevelle ss's topic in Car Aftermarket / Resin / 3D Printed
Dupli-color or PlastiKote gray sandable primers will work well on both resin AND model car plastic. If you clean and prep the resin well I see no reason any primer would have an issue with it. Mark -
Sounds fairly ambitious... A college course in processes does not a master make... In order to "cast" a body that no one molds you will have to have a master scratch built... Where are these "masters" coming from? You will also have to have 3D models of your "engine" in order to machine it on CNC... I am not trying to burst your bubble here. I just want you to know this stuff does not pop out of thin air when you are machining or casting it. Mark
-
Check out ENCO.COM for a lot of your tooling needs. They have some real good sales and you can get "tooled" up for not a lot of money. Mark S.
-
Actually, a shiney surface for primer is NOT what you want. The primer HAS TO HAVE a certain amount of roughness, or "tooth" in the surface for it to adhere to. Spraying it on a polished surface will not give it this tooth and this affects the adhesion. All of the work you are doing "polishing" the plastic should be reserved for the primer. The primer serves two purposes in an automotive type paint job. The first is as a substrate for the glossy top-coat to adhere to. The second, and most important, is as a "leveling" medium to smooth out all of the dips and waves inherant to any molded surface. I have never sprayed primer over a surface smoother then 800 grit... 600 is usually the "industry" standard. I also use a lot of Scotch-Brite. If I am not leveling surfaces and just roughing a body up for the 1st coat of primer the gray SB does an outstanding job of getting into all of the little nooks and crannies on a model body. Mark S.
-
Get a few bottles of Testors metalizer paints. Jet Exhaust, Titanium, Steel, Platinum, etc., Thay can be thinned and added as a wash or mixed on a palette to make your own colors. Mark
-
Scratch-built trailing arms
astroracer replied to Jon Cole's topic in General Automotive Talk (Trucks and Cars)
Building trailing arms from aluminum tubing is pretty simple. To build a strong joint simply drill a hole the same size as your "arm" tubing into the side of the bushing tube. Slip the arm tube into the hole and epoxy. after everything is set up drill out the bushing to clean it up for asm. I have done this in brass also as soldering is alot stronger but I have never had a problem with the aluminum either. Mark -
THE best thing you can do is get yourself some real car reference material. Order up some catalogs. Summit, Jegs, TCI, Chassis Eng., etc. Go online and look at their catalogs. It is very easy to find what you are building on-line and the real deal parts are the best reference you can use. I included instruction sheets with most of my "more difficult" photo etched kits because I realized all model car builders are not necessarily "real car" guys or girls. A real car guy will have a definite edge on building some of this stuff because, at one point in time, he has worked on something similar in his garage. Mark MAS
-
If you are carefull you can use plastic cement. Tape the window in place then carefully glue just the edge. It doesn't take a lot of glue. You can also use Elmers white glue if you would like. Once again, tape the window in place as it will need the support. The white glue has a longer drying time. Mark S.
-
Machined Aluminum Specilties. www.mas-parts.com Engine pulleys, air cleaners, hood hinges, dry sump tanks, roof flaps, etc. Mark S.
-
Like Drew said simply work the plastic a bit and it will bend just fine. One thing I do is heat it up with my fingers. Hold the bend point between your finger and thumb and give it a good rub. It's surprising how warm it gets and that little bit of heat helps it retain your shape after it cools off. Mark S.
