astroracer
-
Posts
451 -
Joined
-
Last visited
Content Type
Profiles
Forums
Events
Gallery
Everything posted by astroracer
-
Scale question
astroracer replied to alangarber's topic in General Automotive Talk (Trucks and Cars)
In 1/28th scale 1" = 0.0357 In 1/25th scale an 1" = 0.040 In 1/24th scale an 1" = 0.042 Mark -
new to airbrushing, where to buy paints?
astroracer replied to DrewCfromSC's topic in Model Building Questions and Answers
Yes, totally serious. This stuff sprays just like laquer. Buy a few bottles (at least three) if you are planning to do total repaints with translucents. Mix the bottles into one container to get the color consistant. Spraying opaques can be done with one or two bottles for a complete model. I use Dupont or Plasti-Kote gray primer under it just like automotive laquer. Go crazy! The colors that are available will blow your mind. Right down to flip-flops and camelions! Mark
-
Very nice! Did you build any jigs for the drilling? I would like to see them if you did. I like seeing how guys do things like this. Mark
-
Need something to simulate seat/interior fabric? Look at the peel off lids for most Yogurt containers. Also look for some that are "quilted". I think Folgers red plastic coffee containers use these. Real easy to cut and fit on a bench seat. Paint a flat or semi-gloss and you have a nice custom seat pattern. When I did the master for the "Aztec" '55 Chevy for R & R I used a Klondike bar wrapper to cover the seat. It was VERY thin foil over paper. The yogurt covers are nicer to work with.
-
A lot of the outlaws run scaled down 'glass or CF bodies. 7/8ths scale if I remember right. Mark
-
new to airbrushing, where to buy paints?
astroracer replied to DrewCfromSC's topic in Model Building Questions and Answers
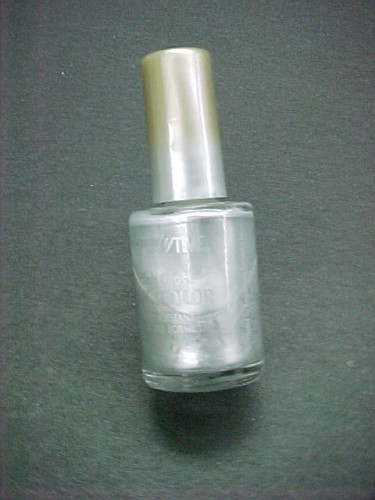
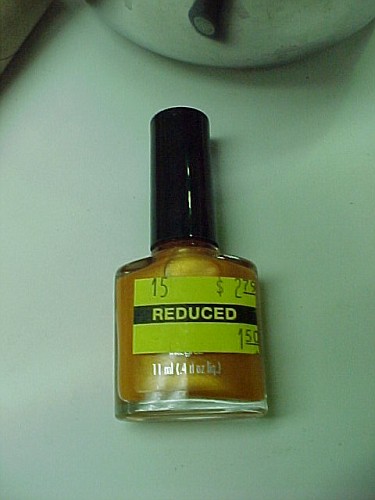
Buy a BLAH_BLAH_BLAH_BLAH load of nail polish... I use it almost exclusively now! Mixes the same as the old laquer and there are some INCREDIBLE colors out there! One bottle will cover a car with three or four coats. I get this stuff cheap at Big Lots and the big box stores. Mix it with your choice of laquer thinner. Sprays about the same as laquer also. Get some plastic spoons to practice on, they are cheap also. Mark -
Okay, Spray your main body color. Let it dry very well whether you are using laquer or enamel. Like Ray, I recommend laquer, much easier to work with. Mask the body for the second color. NOW spray a light coat of clear around the taped edges. You are not flooding the entire panel with clear, just the taped edges. This helps seal the taped edges to prevent bleeding of the second color under the tape. IF there is any bleeding, it will be clear and will not be visible after the tape is pulled. Once the second color is down, pull the tape, knock down any rough edges and THEN bury the whole car in clear. Using laquer I did this entire job in one day, start to finish. Mark
-
Need Help From Modellers.
astroracer replied to TBG66's topic in Model Building Questions and Answers
Hey A.Rudi, A bit of a language barrier to get past. Need a better explanation of what you are looking for... Mark -
anybody remember thuderbolt and lightfoot?
astroracer replied to mnwildpunk's topic in The Off-Topic Lounge
1973 Trans Am... That's what I remember from the movie... -
I got out of it because of a multitude of things. The biggest being my real world job. I was at GM and, when they moved design from Flint to Warren, my drive went from 20 minutes to 1 1/2 hrs. (one way). My dad was having heart issues and I just didn't have the time to devote to the model car stuff any longer. I kept up for about a year but I got burnt out real quick. Started closing things down in '03 and that's when Terry stepped in to start making stuff. he pretty much took over the business in '04/'05. I've been building 1:1's since then.
-
Thanks Casey, I did a lot of etched stuff back in the day. This brings back a lot of memories... Terry is still using all of the artwork I did. Once the artwork is done it's kept in a drawer. It's easy enough to re-run them when necessary.
-
If you have your artwork done you can go direct to the etcher. I used Indiana Micro Etch for a lot of my product. He does the rubber backing so the parts can be fret free. Google him. He'll want to know sheet size and quantity. It's always cheaper to get more then you need. Mark
-
alternative A/N fittings?
astroracer replied to shift13's topic in Model Building Questions and Answers
Make your own. Grab a hex shaped pinvise and a piece of 1/16th dia. aluminum tubing. Chuck the tubing in the vise and clamp it one of the flats is against the table. File off one side until you get a small flat running the length of the tubing. Once you have a small flat, flip the pin vise to the next flat. Now file THAT side of the tubing. etc., etc. until you have filed the hex shape along the entire length of the tube. Once this done you will have a 12" long hex shaped tube in your hand. Now, using a sharp hobby knife, part off as many fittings as you think you'll need. Build them up with .020 diameter solder or armature wire you can get at Radio Shack. Mark I have pics but the site won't let me load them... The "Image" button just locks up when I paste an url into it... What is the problem? -
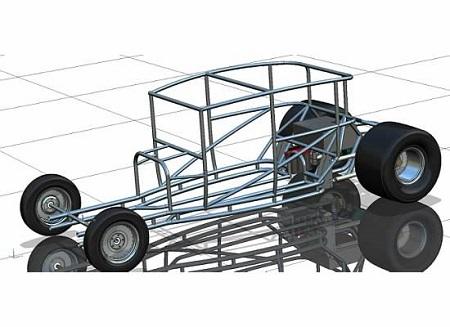
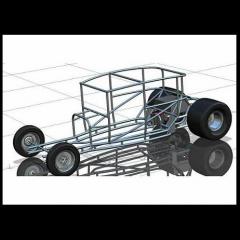
Get one of those self healing cutting mats. They have a nice grid layout built right in and you can use that to keep things square while glueing. If you make a nice board to put the mat on you can also pin through it to help keep parts aligned while you are mocking things up. Do a google for some of the chassis builders out there in the 1:1 world. Chassis Works is a nice site and you can look at what most of the mainstream cars are running for chassis. Most chassis will be built out of 1 3/4" round tubing making up most of the main cage. That scales down to .070 in our 1/25th scale world. I wouldn't use anything much bigger as it starts to look clunky. Plastruct has tubing and rod available in .060. Pick up a couple of bags of that, (1 1/2" scale) and a bag of .040 (scale 1" tubing). You can build a very realistic chassis with those two sizes. The best thing you can do is research. Know what you are building and keep things in scale. Mark
-
FIRE FROG! Futuristic Off Road Racer. WIP Photos!
astroracer replied to Ira's topic in WIP: Model Cars
I'll be watching Ira! I grew up on your articles in Model Car Science! It's very nice to see you still building. Most of us "old guys" move on to other hobbies. I have moved on to the full size stuff but model cars are still a passion and I plan to get back into them. Mark -
Body Fillers and Putty
astroracer replied to Brock.Chance's topic in Model Building Questions and Answers
I don't believe I was knocking anything... Just stating what I know. I have never used the Bondo Glazing Putty because, like you said, I have a HUGE tube of the ICING and it works very well. I will have to pick up the Bondo brand and give it a try. Mark -
Body Fillers and Putty
astroracer replied to Brock.Chance's topic in Model Building Questions and Answers
You're not doing anything wrong other then using the wrong stuff to do body work... Google "USC ICING". This is what I recommend for anyone doing any kind of body work on styrene or resin. It is a two part polyester filler and it will not shrink. It goes on very smooth, sets up quickly and is easy to sand. It sands similar to resin. I use it exclusively. I did a '56 Chevy conversion on an AMT '55 and used the ICING for all of the body work. ZERO shrinkage on any of it over the three year conversion time. It can be purchased at any automotive paint shop. Mark -
Check with MAS, turned aluminum with photo etched brackets. Mark
-
Be careful, the superglue will work BUT it sands a lot harder then the resin. I would put a bit of a bevel on the front sides of the break before I glue it on. Use the SG but keep it below the visible surface. After it's set up and you have done your reinforcement on the back, fill the bevel with a good polyesther filler such as ICING. It sands about the same as the resin and will give you a nicer finish without creating high and low spots as you try to level the break.. Mark
-
ET 10 spoke wheels?
astroracer replied to Mike Chernecki's topic in Car Aftermarket / Resin / 3D Printed
I did 10 spoke Halibrands in photo-etch when I owned Machined Aluminum Specialties. Contact Terry Kinnear to see if he has any left. Aluminum rims with a two piece photo-etched center. They were spindle mounts. Mark Found his eBay listing: http://www.ebay.com/itm/1-24-1-25-System-4-Pro-Street-Wheel-kit-with-Hallibrand-centers-by-MAS-/121257835772?pt=Model_Kit_US&hash=item1c3b87bcfc#ht_67wt_1190 -
compound cross slide
astroracer replied to CrazyGirl's topic in Model Building Questions and Answers
Everything stated above is correct but, the biggest reason you do not want to do this is because the arbor on a drill press is only a press fit taper into the spindle. it is retained in the spindle by the upward pressure of "drilling". A "real" mill will have a drawbar to retain the arbor or milling attachment in the spindle. Do not use a drill press to mill things. The drill chuck will fall out and make a mess of things... Mark -
Color of Buick Motor
astroracer replied to Bruce Poage's topic in Model Building Questions and Answers
Buick used a blue/breen color. Here is a link to a rattle can. Kind of spendy though. http://www.classicbuicks.com/Engine_spray_paints.html You may try asking at your local auto parts. I am sure someone in your area will have something similar. Check for a local Buick Club Chapter also. Mark -
Be very careful with the water based fillers. They will have a huge shrinkage rate. I use nothing but USC's "ICING" to do body work and fill pinholes. It is kind of pricey but you can go in on it with a few friends and divvy it up. It will work with any of the body filler catalysts. http://www.autobodytoolmart.com/usc-icing-polyester-finishing-putty-p-10969.aspx Mark
-
Hey Greg, I just want you to know you are doing some incredible work here... Fabricating parts is my favorite part of builds like this. If I could make a suggestion? All of these brackets you are making out of sheet plastic could be just as easily (if not easier) be made out of sheet aluminum... Try a couple. Rebuild that starter bracket on your blower out of aluminum sheet and see what you think. Polish it up a bit and it will really pop on the front of that motor... Mark MAS
-
Painting question?
astroracer replied to fastbackfiero's topic in General Automotive Talk (Trucks and Cars)
Hey Mike, Painting a base coat under the black will depend on if it is translucent or not. I don't think it is so i would think your primer coats would be sufficient. If you want your yellow to "POP", shoot a white basecoat or primer under it. Mark MAS