Exotics_Builder
-
Posts
3,635 -
Joined
-
Last visited
Content Type
Profiles
Forums
Events
Gallery
Everything posted by Exotics_Builder
-

New Project – Revell 1969 Camaro Pace Car
Exotics_Builder replied to Exotics_Builder's topic in WIP: Model Cars
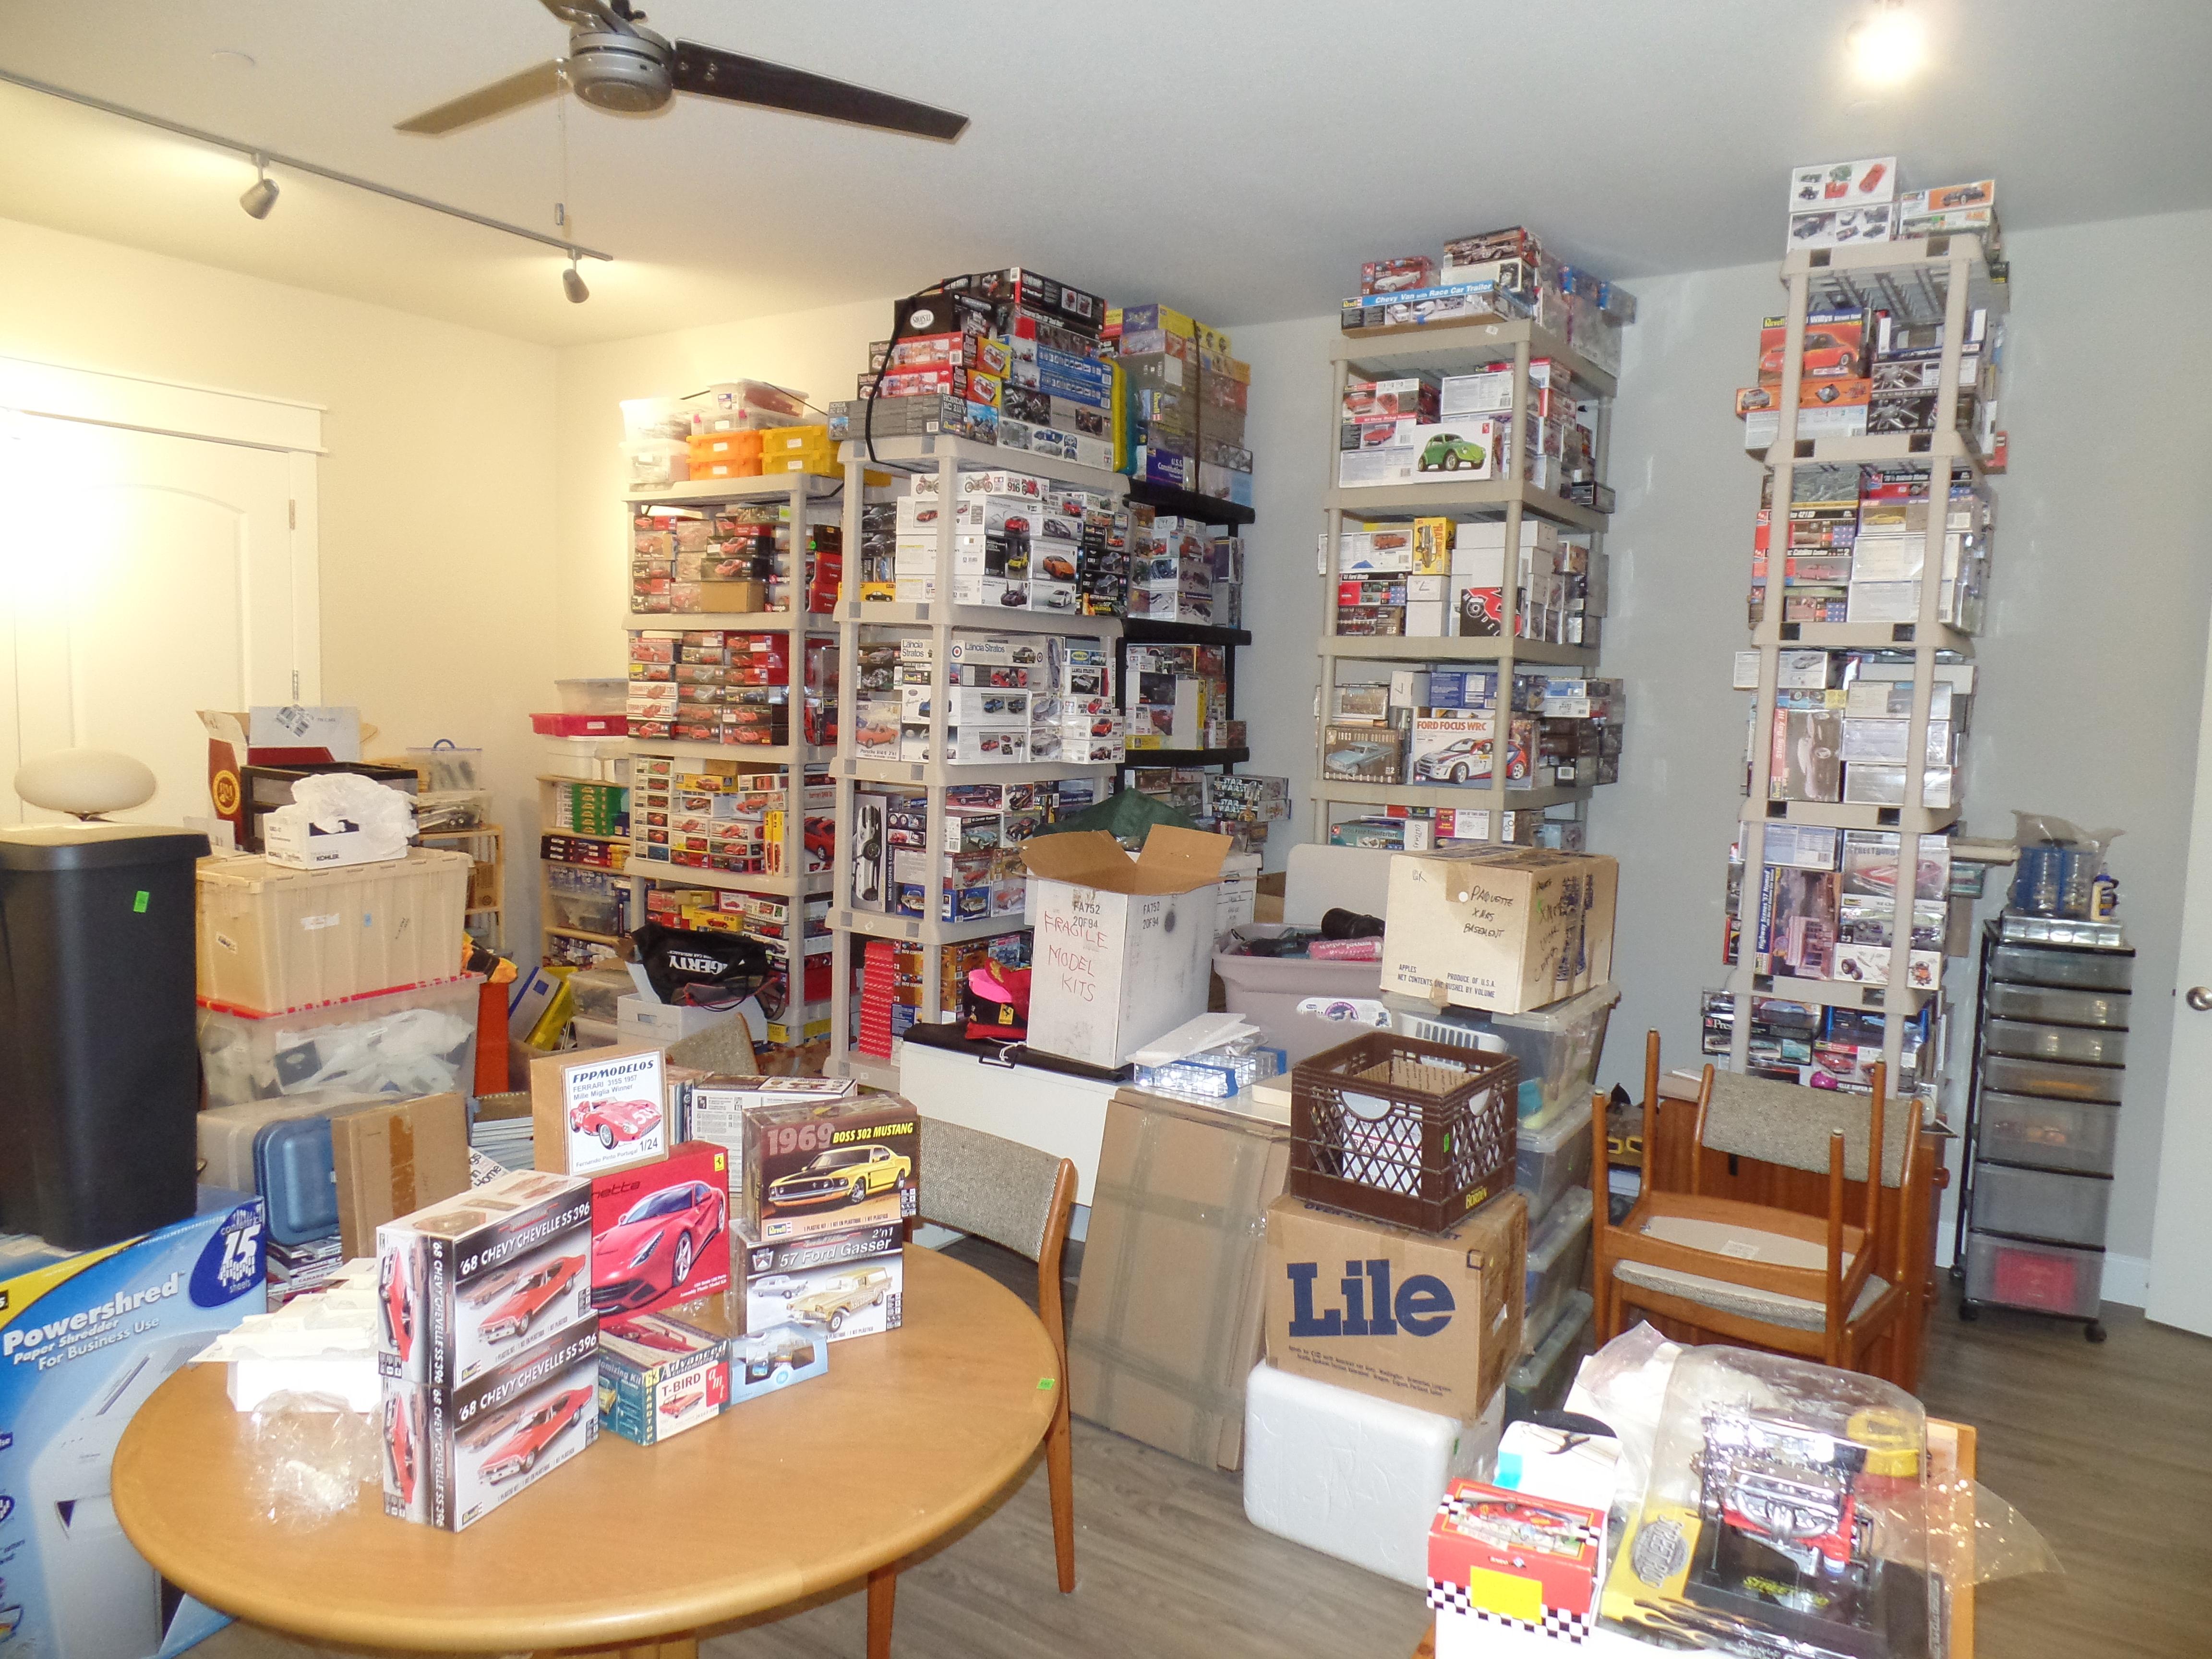
Since I got the room, I decided to use it. In the old house, a part of the work area was in the basement and the rest in the bonus room over the garage. Here, we don't have any basement, just crawl space. The floor of the lower level is 5 1/2 feet above ground level -
New Project – Revell 1969 Camaro Pace Car
Exotics_Builder replied to Exotics_Builder's topic in WIP: Model Cars
They are, but are lagged to each other and the wall. I also slid some dowel rod (such as for closet rods) down them. Don't recollect the diameter. I have an adjustable height desk, because I stand most of the time I'm working on a model. I also have a couple of work areas for special tasks that regular height desks. Yet to set those up. -
New Project – Revell 1969 Camaro Pace Car
Exotics_Builder replied to Exotics_Builder's topic in WIP: Model Cars
Slow at the moment. Fabricating the cross brace the old fashioned way. I was going to buy a 3D printer after we settled in, but have put that off until after this craziness ends. So I'm doing it with the card stock template now glued on a .020 plastic sheet and scribing it out. To fit to the AMT chassis would need modification. I'm concentrating now on the 69 Pace Car, then the 67 and then will go to a replica of my 68. I'm still setting up the hobby room and we're still unpacking. One key thing here is to lag cabinets and bookshelves to the wall to keep from falling over in an earthquake. Doing that slower now as my wife is not able to help moving the heavier stuff and I don't want the odd jobs guy over doing anything inside the house for a while (for obvious reasons). Also, a display cabinet was damaged and needs to have glass replaced before I can load it up. Again, waiting until things settle down.
-
New Project – Revell 1969 Camaro Pace Car
Exotics_Builder replied to Exotics_Builder's topic in WIP: Model Cars
Stolen and wrecked by the thief -
New Project – Revell 1969 Camaro Pace Car
Exotics_Builder replied to Exotics_Builder's topic in WIP: Model Cars
? She was my steady at the time. -
New Project – Revell 1969 Camaro Pace Car
Exotics_Builder replied to Exotics_Builder's topic in WIP: Model Cars
I think so. The only thing it wouldn't go past was gas stations! ? Six and half MPG in the city and 12 open road if you were easy (4.10 rear and Muncie M22)
-
New Project – Revell 1969 Camaro Pace Car
Exotics_Builder replied to Exotics_Builder's topic in WIP: Model Cars
When I ordered my 68, the headers, manifold, cold air, carbs, cam, valve springs and springs came separately and the dealer installed. On the headers, they had to drill them and attach the connection to satisfy smog control. That wasn't as big an issue as the manifold. The twin 550's had manual chokes and the short ram had blocked heat risers. With the cold air through the plenum, you could get the gas smell in the passenger compartment at times. -
New Project – Revell 1969 Camaro Pace Car
Exotics_Builder replied to Exotics_Builder's topic in WIP: Model Cars
Where I was living at the time, they didn't show up until 1968. A lot of people removed them, but the 68 Z/28 I bought even had the AIR points on the tuned headers, -
New Project – Revell 1969 Camaro Pace Car
Exotics_Builder replied to Exotics_Builder's topic in WIP: Model Cars
Going to try. I have the MCG PE set that should help some. I was wondering if the setup was more for the non-RS which I think was deeper set? Also going to be doing this to the engine
-
New Project – Revell 1969 Camaro Pace Car
Exotics_Builder replied to Exotics_Builder's topic in WIP: Model Cars
Okay. I appreciate that. I had them reversed. Just checked and Scalemates does too. -
New Project – Revell 1969 Camaro Pace Car
Exotics_Builder replied to Exotics_Builder's topic in WIP: Model Cars
I know. But my enjoyment is building something as accurate as I can and with a reasonable amount of detail. There is such a thing as detail overload in 1/25-1/24 scale. I try to pick out the highlights to not overwhelm. Sometimes it doesn't go as well as I'd hoped, but it is a hobby -
New Project – Revell 1969 Camaro Pace Car
Exotics_Builder replied to Exotics_Builder's topic in WIP: Model Cars
So far just a printed template that I crafted using the photo and adjusting for the fact it is not straight on. I printed it out and fitted to the chassis. It's pretty close, but needs a little tweaking. Next step is to adjust it and print to cardstock for final crafting. I don't yet have a 3D printer so doing it the old fashioned way. Also not set up to resin cast, so I can't make additional copies with a mold. I need at least one more for the 67 Camaro pace car, but I have yet to match to the AMT chassis. -
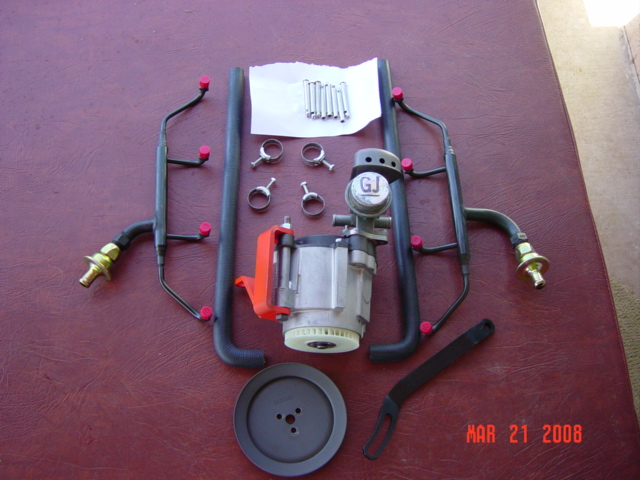
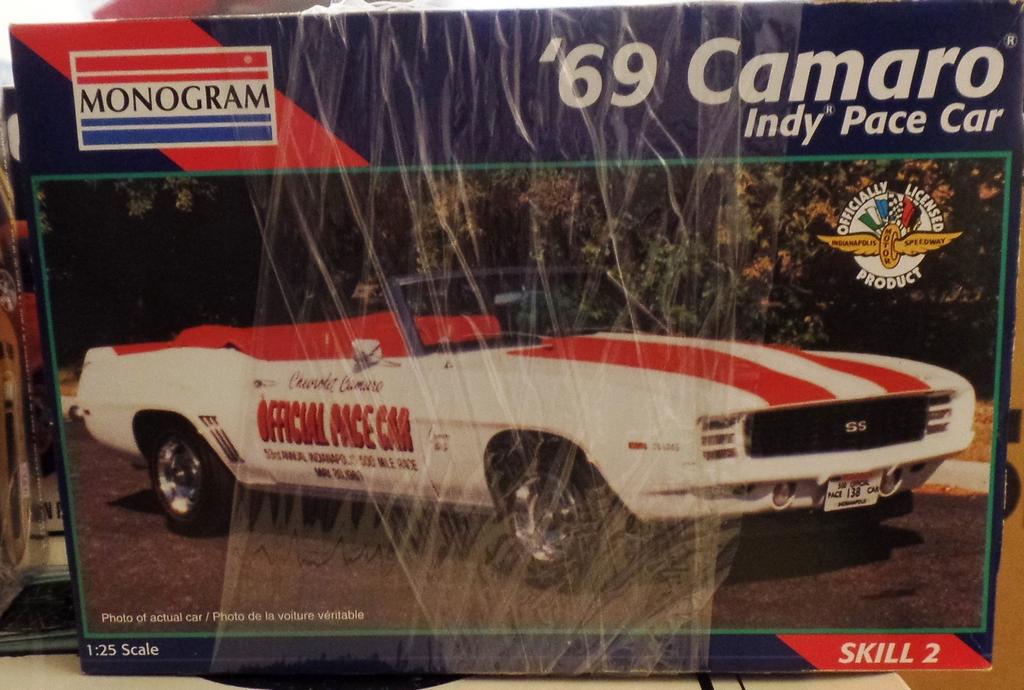
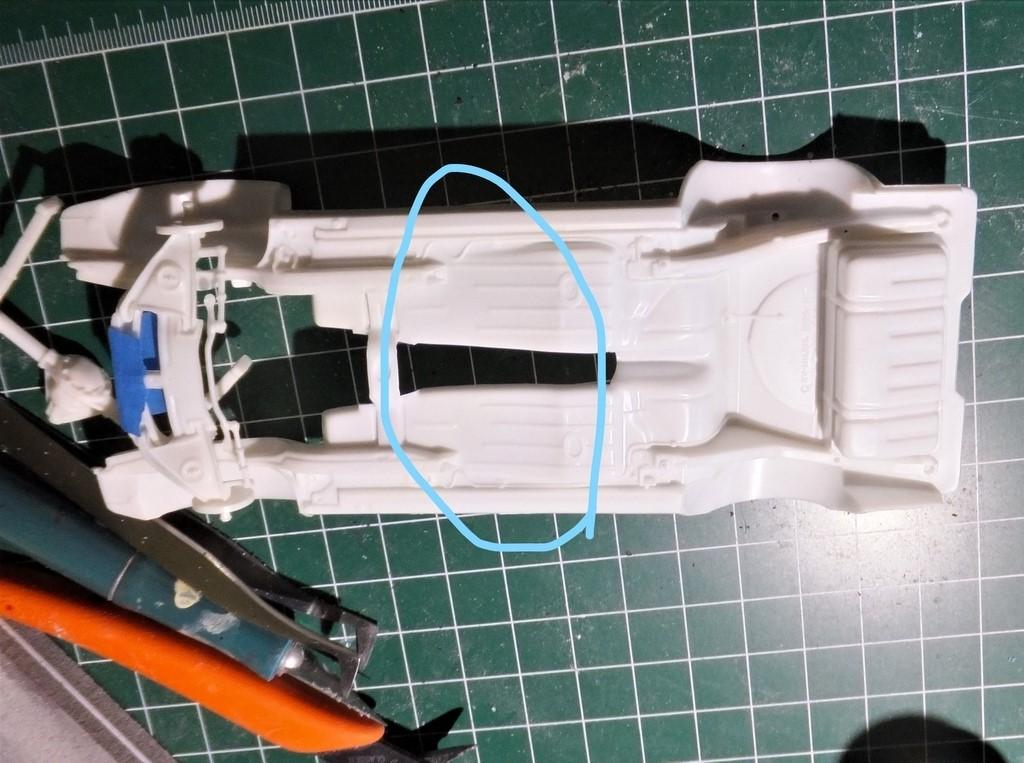
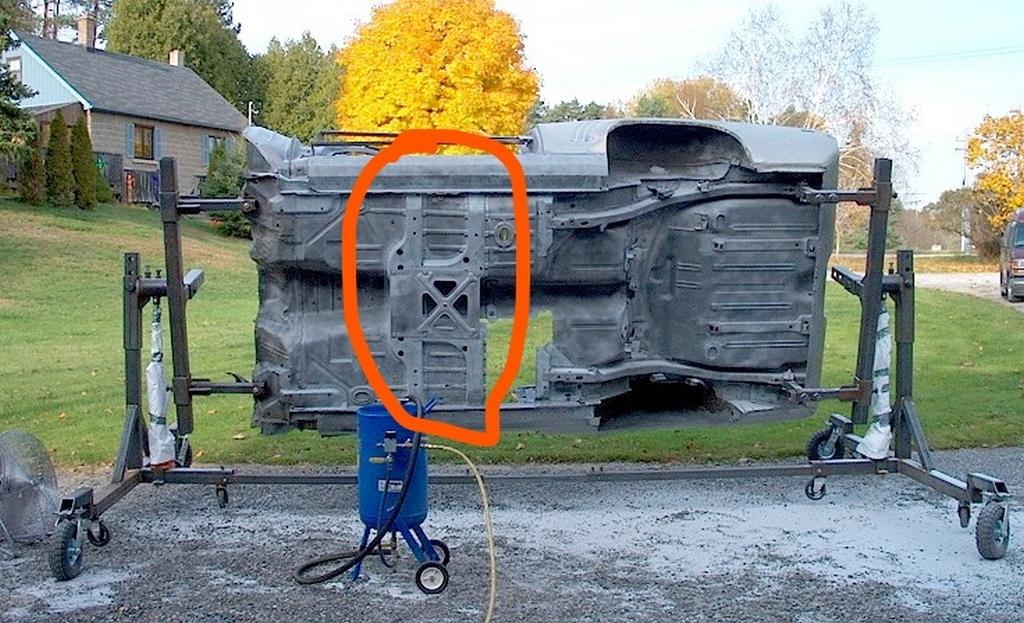
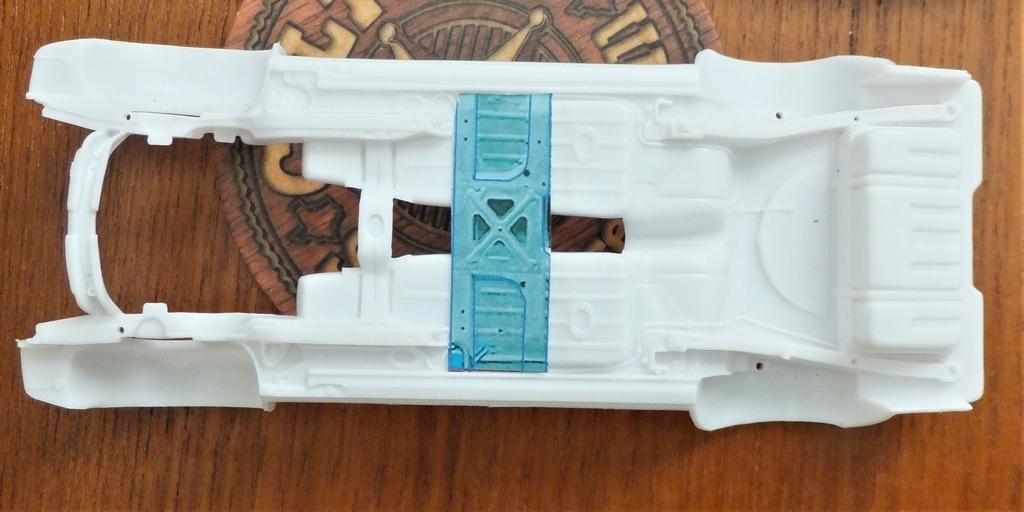
I decided since I had not done a stock muscle or pony car since just before the move, it was time to pull one out and get some work on it. I’m postponing any exotic car builds until a little more organized. My selection is the Revell 1969 Camaro Pace Car. Originally, I wanted to do it last year for the 50th anniversary of the only Indianapolis 500 race Mario Andretti ever won. But, hopping across the country a couple of times to get things organized for the final move thwarted that. The kit is just one variation of Revell’s 1/25 scale kit that first appeared around 1990 as the Z/28 Coupe. This version came out in 1996. In general, the kit is pretty good, but will need some modifications to be correct as a Z11 option pace car replica. The biggest issue is that the chassis is incorrect. It represents the coupe chassis and does not the extra bracing for the convertible. Below is the kit chassis. I circled the area where the additional bracing is missing. A real convertible would have the bracing as indicated in the restoration photo I found: Also, there would be four vibration dampers at each corner of the car. Since two would be in the trunk area, that would not be an issue unless you decided to open it up (which I am not for this build). The front ones may need to be represented, but are essentially cylinders with mounting brackets, so should be easy. I could not find any detailed spec or straight-on photos to capture specific dimensions of the bracing. So, I did a little finagling and the kit chassis and came up with (I think) a reasonable approximation and will use to build the plastic piece to add:
-
Italeri - Ferrari 275 GTS (Spyder N.A.R.T.)
Exotics_Builder replied to 89AKurt's topic in WIP: Model Cars
That is an exquisite model. Exceptional work! -
Sorry for the update delay. Even though a 30 odd year-old kit, it certainly has a rash of sink marks and ejector pin marks. Took a lot of clean up to make presentable for primer. I’ve been working on the clean up of the parts and doing some partial assemblies before primer. In looking at assembly of the storage “box”, it appeared the visible section needed to be partially assembled as it would be exceedingly difficult to insert post finish without the risk of glue marks being visible. The downside, of course, is that masking will need be done to get the distinct components painted. We’ll see if I made the right decision or not. Those are certainly 2 options I am contemplating. Next step is primer
-
48th Annual Bob Paeth Portland d Classic Model Car Contest is cancelled. The Club is working with the World of Speed for a future date. The Portland Roadster show is also cancelled but I have not heard any more than that on it
Exotics_Builder replied to Exotics_Builder's topic in General Automotive Talk (Trucks and Cars)
Yep! ? -
48th Annual Bob Paeth Portland d Classic Model Car Contest is cancelled. The Club is working with the World of Speed for a future date. The Portland Roadster show is also cancelled but I have not heard any more than that on it
Exotics_Builder replied to Exotics_Builder's topic in General Automotive Talk (Trucks and Cars)
The club reps are working with the World of Speed for an August to early September date. -
48th Annual Bob Paeth Portland d Classic Model Car Contest is cancelled. The Club is working with the World of Speed for a future date. The Portland Roadster show is also cancelled but I have not heard any more than that on it
Exotics_Builder replied to Exotics_Builder's topic in General Automotive Talk (Trucks and Cars)
I was testing the limit. That way, you didn't have to click on the post ? That's for sure. And I had just pulled out the photo gear for the event. Now, it can wait until the NNL in mid-April -
48th Annual Bob Paeth Portland d Classic Model Car Contest is cancelled. The Club is working with the World of Speed for a future date. The Portland Roadster show is also cancelled but I have not heard any more than that on it
Exotics_Builder posted a topic in General Automotive Talk (Trucks and Cars)
Oregon and Washington have put in bans on large gatherings for several weeks -
The High Cost of the Hobby
Exotics_Builder replied to Nitrobarry's topic in General Automotive Talk (Trucks and Cars)
I recently fretted over spending money on kits that I lost interest in and unloaded. I've about broke even on those. I am not into collecting, but my buy rate (as with many of us) has far outpaced my build rate. As already stated, armor, aircraft and naval modelers often far outspend us in completing a kit. Just walking through an IPMS event opens the eyes to the degree of detail these modelers go to and the costs of achieving. As regards building, I try to get by as frugally as possible in any build, but I strive for realism and the effect I an trying to achieve. I will scratchbuild or kitbash, but rely a lot on aftermarket. There is an amazing amount of product now available to us to achieve what we want. When I was working, I did not have the time to delve into some of the modeling techniques as 3D design and print, machining parts, etc. Not only is there the cost of equipment, but the huge investment in becoming proficient. I (as many of us) have limited time for the hobby (and it is a hobby not a profession). So time spent is either on building, supporting one's club or learning new tools/techniques. Many of the aftermarket vendors have made it easier for me, at least, to acquire what I need and spend the time building rather than machining or designing my own parts. I look at it as how to best use my hobby time. Cost is relative. We all have our budgets and views on how/where we want to spend our money. A good model is in the eye of the builder. If satisfied, that is good enough. If others appreciate it as well, so much the better. But, we all improve our skills on every build we do. I have seen models that are very good done in the $30 kit/paint/etc range to ones that are several hundred dollars (both exclude the time spent cost factor). As it is a hobby, enjoy it at the level that gives you satisfaction and strive to improve. -
Thanks for the help. I got back to my friend. He has some guidance now on next steps. I think he is going to try to search some "boneyard" sites for a body, or at least the roof to graft onto the body he has. I have unbuilt 63 coupe and convertible, but not ready to part out the coupe body. Nor, am I ready to sell it to him, given he only needs the body.
-
A friend of mine is looking to restore an AMT 63 Tbird kit but the body is beyond hope. He was looking into getting a promo for the body. Does anyway know if the plastic on the promos was different or might affect what he is looking to do?
-
Another for MAD distributors. Norms are good as well if you want a unique color. You can also buy vacuum cans from Norm to use with his or Kris' distributors
-
Put this one on the back burner for a while. The more I got into it, the more I think this deserves a modern custom treatment rather than a period custom. Switching gears to another project for the June deadline. Stay tuned for future updates on both
-
That is what was claimed. He did a variation of it also that was supposedly 60 copies. I bought mine when they came out. Just sorry I didn't do the 67 Camaro. It seemed too Mustang looking. Yes. I have the 64 kit and that roof is in it.