Rockford
-
Posts
1,937 -
Joined
-
Last visited
Content Type
Profiles
Forums
Events
Gallery
Everything posted by Rockford
-
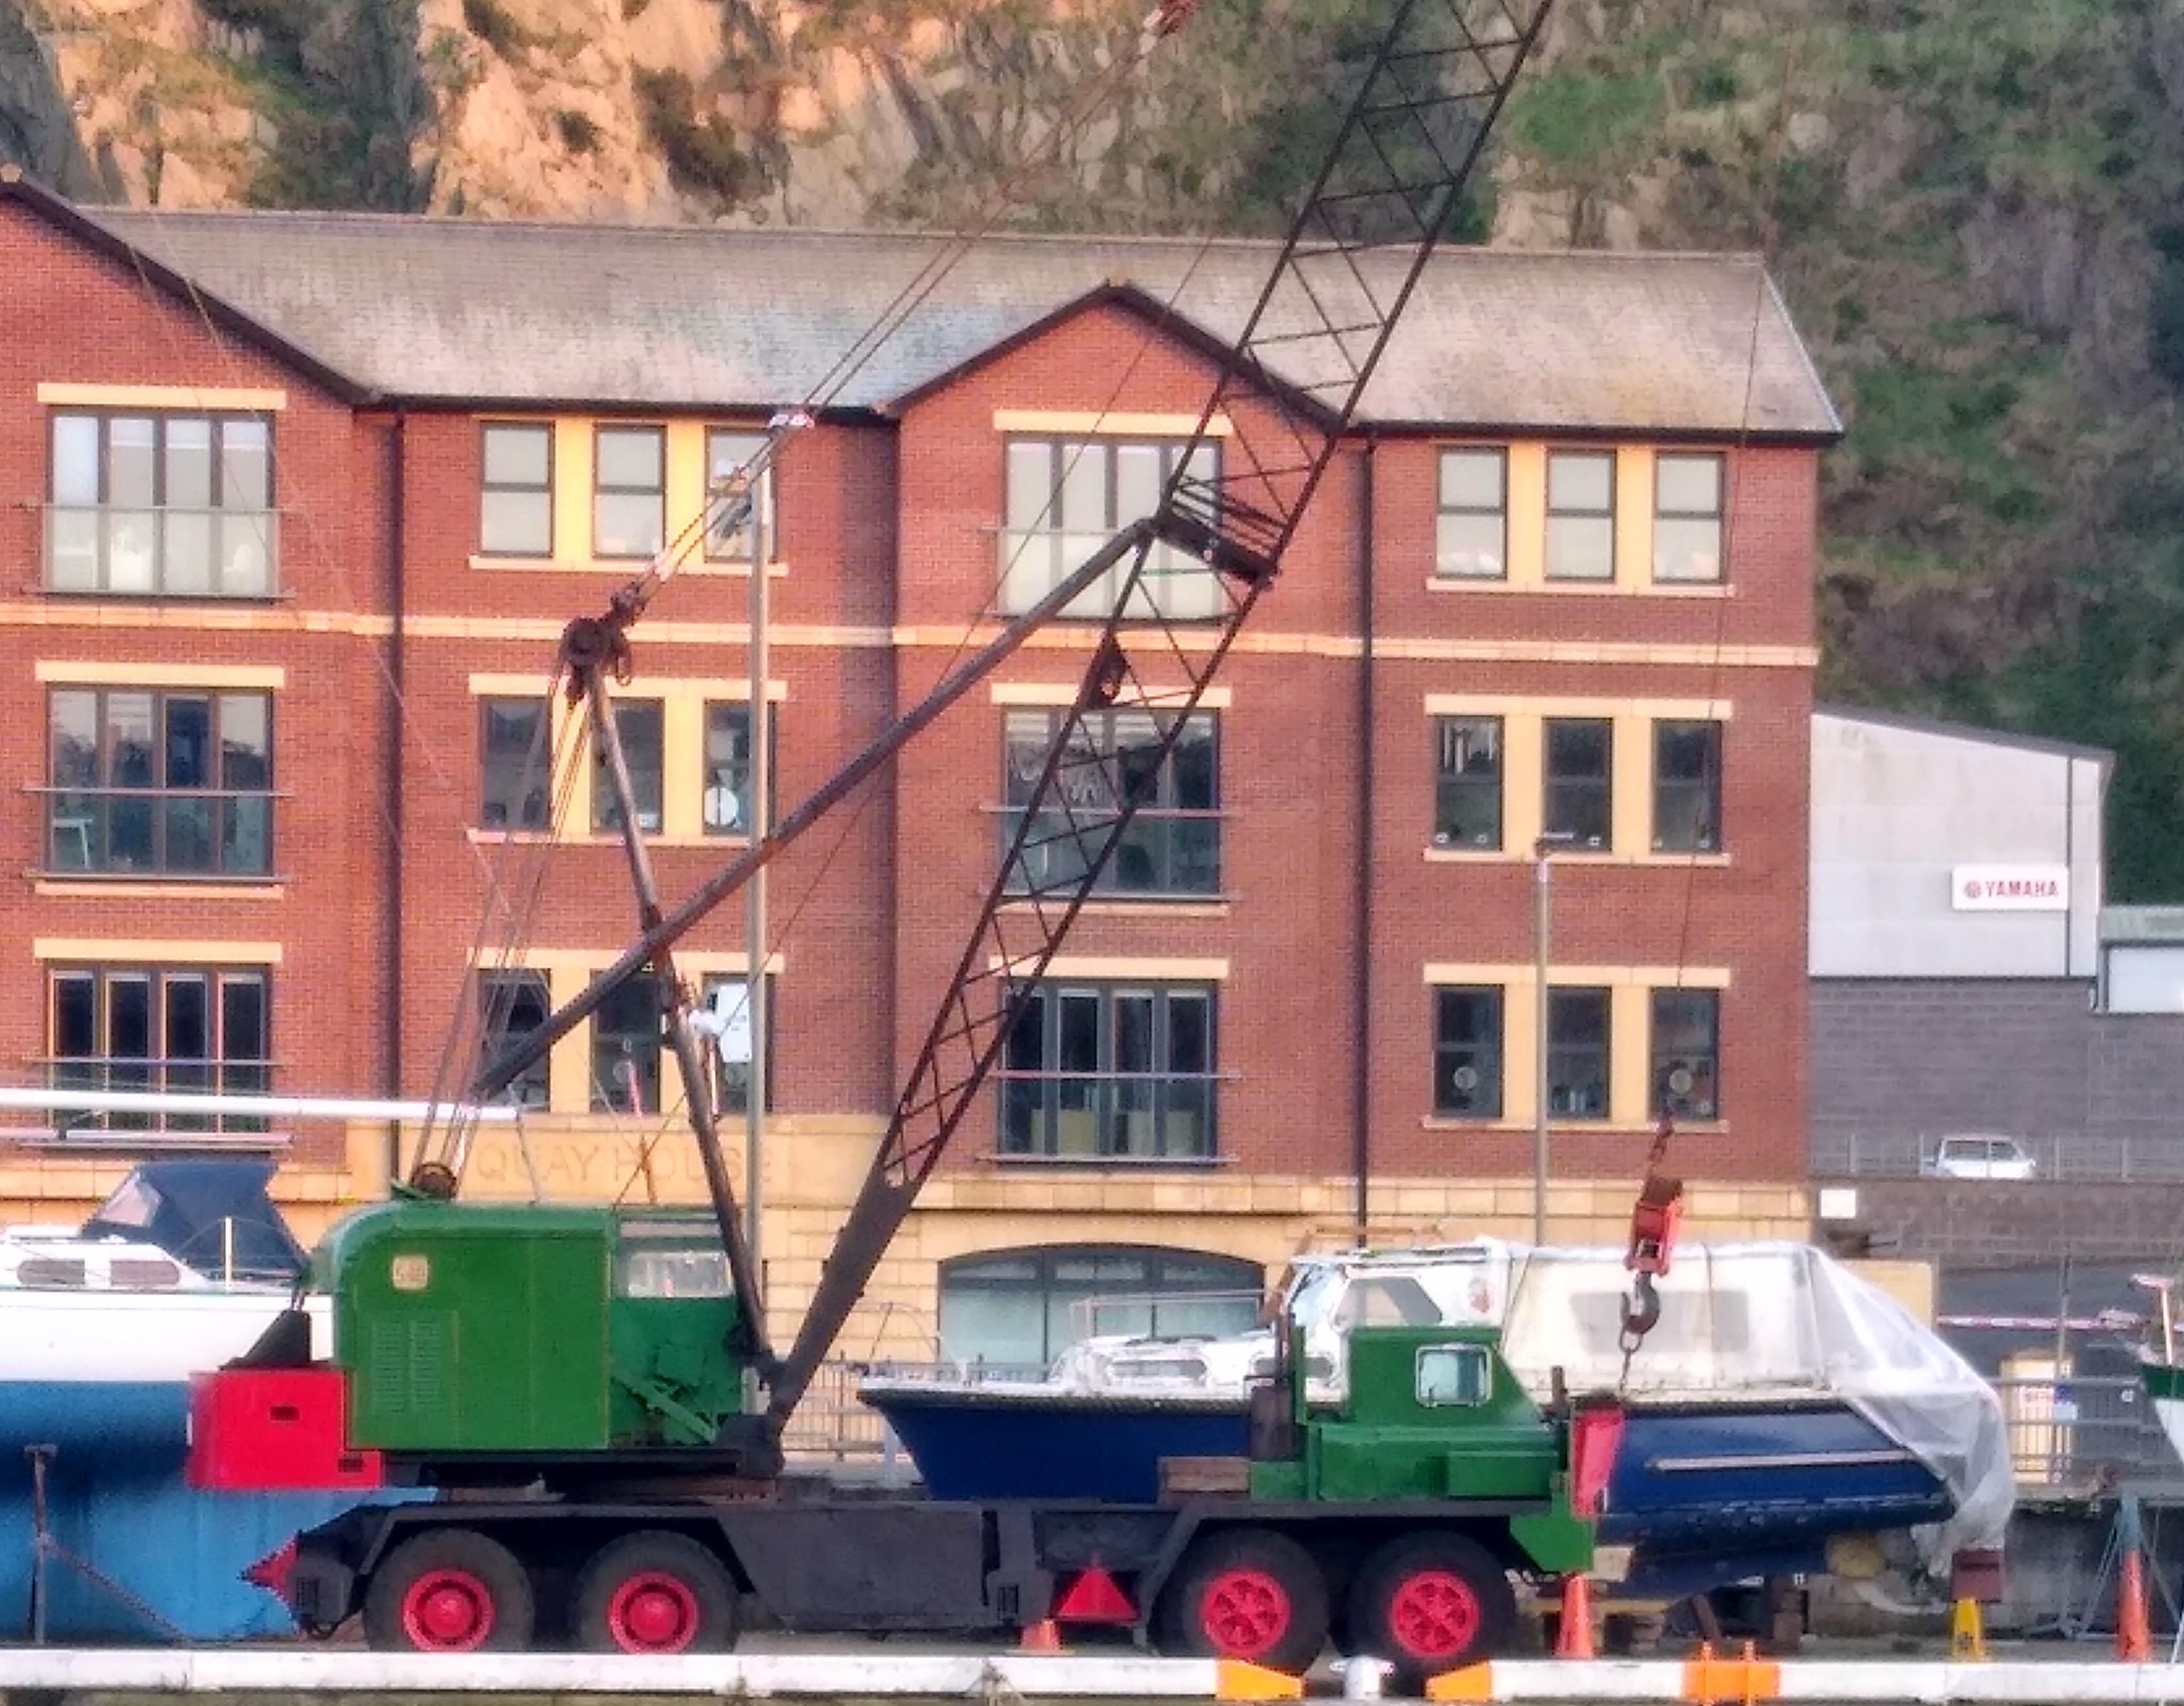
I was in the Isle of Man this weekend, it was fantastic weather for the first time in ages, but walking along the harbour in Douglas, the capital I spied this on the quayside. Couldn't really get any closer as the dear wife wasn't cooperative. I know it's a Lorain of about 35-40 ton capacity by the number of axles, but other than that, I'm an ignoramus. It's one of the many old cranes left on a quayside for lifting boats about. A company called Woolfendens in Liverpool had a few Lorains in the 60s and 70s, I can only imagine they were ex US military based in the UK.

-
 I haven't got a kit to compare but I agree you need to clock it to the left a little until the lower steering column aligns with the piece in the cab. What about one of Mike the Truck Nut's YT videos when he was working on his K100? I think he had to renew the treadle valve for the brakes and they puts you right in the area you need.
 -
New Print Job
Rockford replied to Jürgen M.'s topic in WIP: Model Trucks: Big Rigs and Heavy Equipment
I worked for a Mercedes dealer in UK for 27 years. The 814 was the benchmark for that class of truck. Full air brakes, indestructible drivetrain, just fantastic stuff. The 1617 was the same in the 16 tonne category. After the 1626 disappeared though, their heavy chassis lost ground to Scania and Volvo. The EPS gearbox was too much too early for the industry, especially in UK. -
1/32 Mack F700
Rockford replied to The Brush's topic in WIP: Model Trucks: Big Rigs and Heavy Equipment
These are looking great! You're very ingenious how you go about things. I feel your pain on the paint front, been a nightmare summer here in the UK. These tractors would look good with the AMT van or reefer trailers. -
Quite a task ahead of you there but will look great when it's done. There's no end of detail you can add to something that size.
-
Looking good. Be good to see another "Movin'On" based vehicle being produced. I remember seeing this film when I was a kid, I was utterly mesmerised by it. My mum let me stay up to watch it. No videos in them days!
-
New Print Job
Rockford replied to Jürgen M.'s topic in WIP: Model Trucks: Big Rigs and Heavy Equipment
I can just imagine the fear in your printer when it heard the key in the door "Oh no he's back!" I think it's very practical of you to use the parts you've already drawn and that you know work in the process, it helps you focus on the other parts that make the truck individual. We do slave over the details, which no one really ever sees, especially once the model is assembled and sits on the shelf so you're making efficient use of your time I think. Keep up the good work and give the printer an affectionate pat from me. -
AMT Ford LN 8000
Rockford replied to OldTrucker's topic in WIP: Model Trucks: Big Rigs and Heavy Equipment
We'll have to rename you The Janitor because you're always cleaning up! These old kits come with a cost. I'm sure you'll make a great job of it. -
Hank's Truck Pictures is long gone, I know, and sorely missed. Is there a good site that you go to for pictures of trucks working in the 70s and 80s? I tend to search by make and model nowadays but I find I get mostly show trucks that are beautifully done, but not what I want, also a lot of useless garbage because the interwebs like to do that. I sometimes add "for sale" because you get some survivors on Truck Paper, Big Iron, and the other auction sites. If I search "Class 8 trucks" you get a few but then millions of pick ups because you used the word "truck", it's so frustrating. Pinterest is like a pinball machine bouncing around from one thing to another, you can't follow a subject in it. Some of the collections on Flickr are useful, I know the Dutch Model Truck Club have decades of Overdrive magazine on Fotki, that's a great resource. Let's know if you have landed on a good source.
-
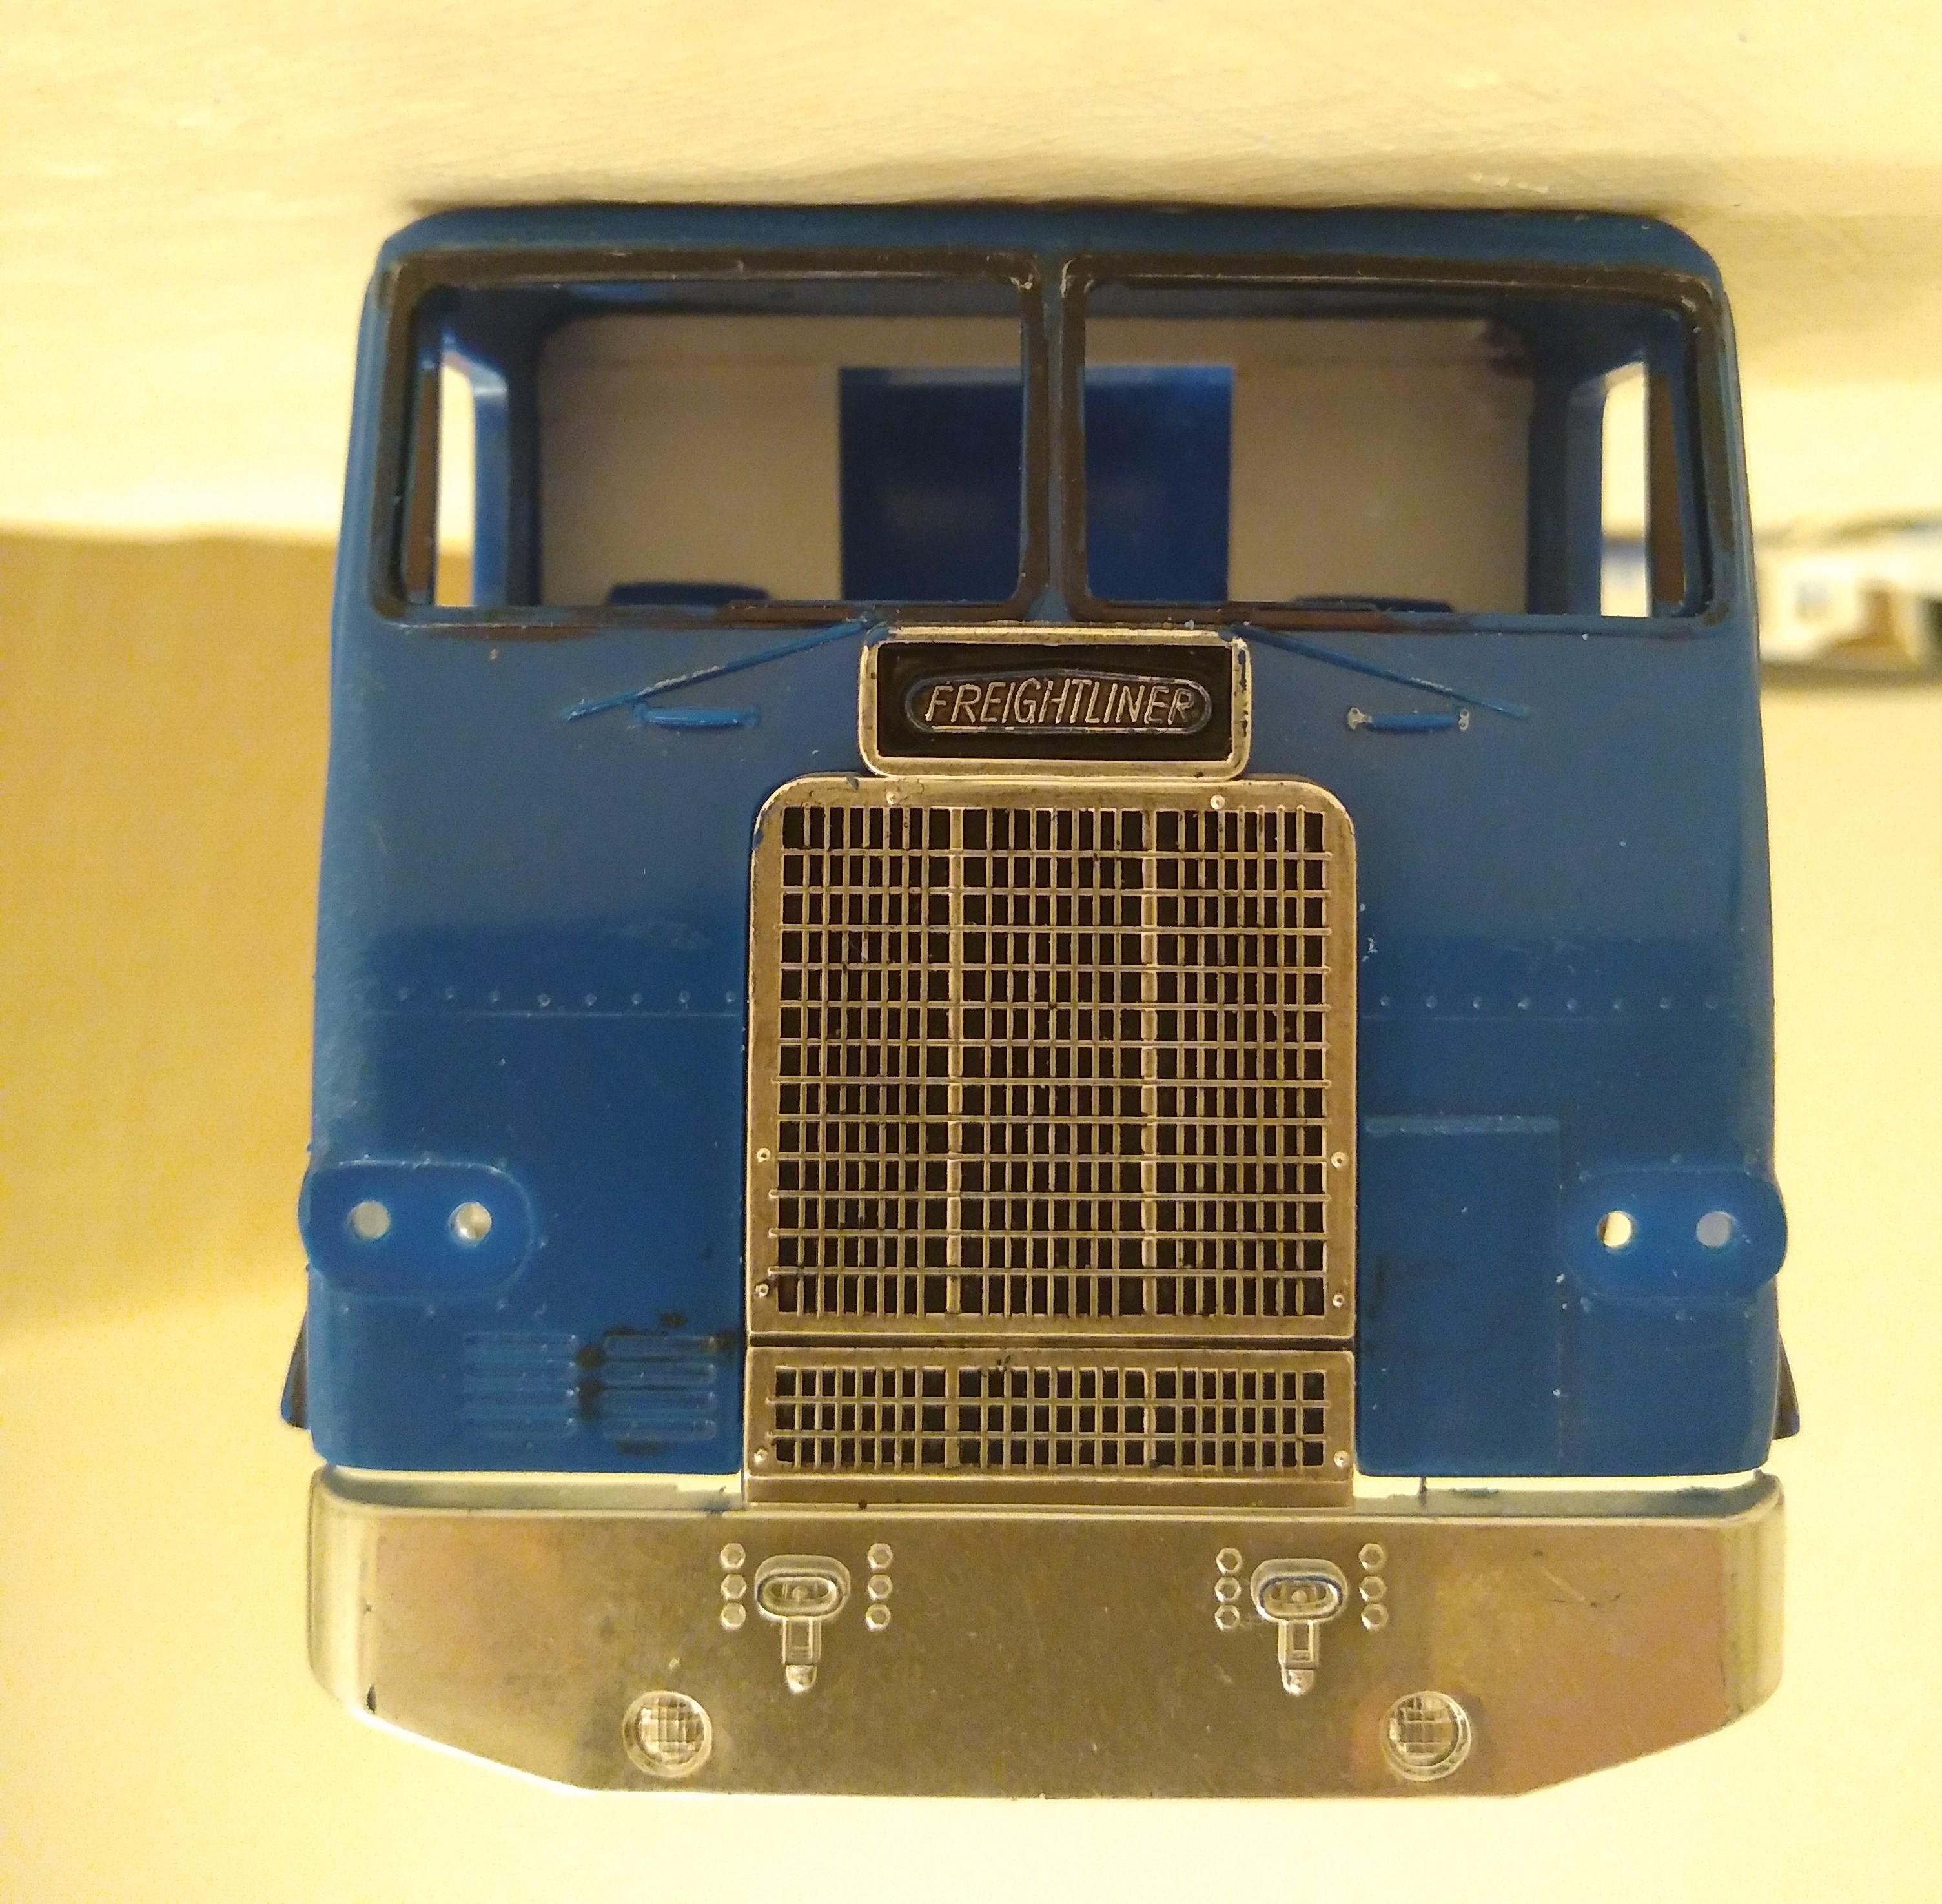
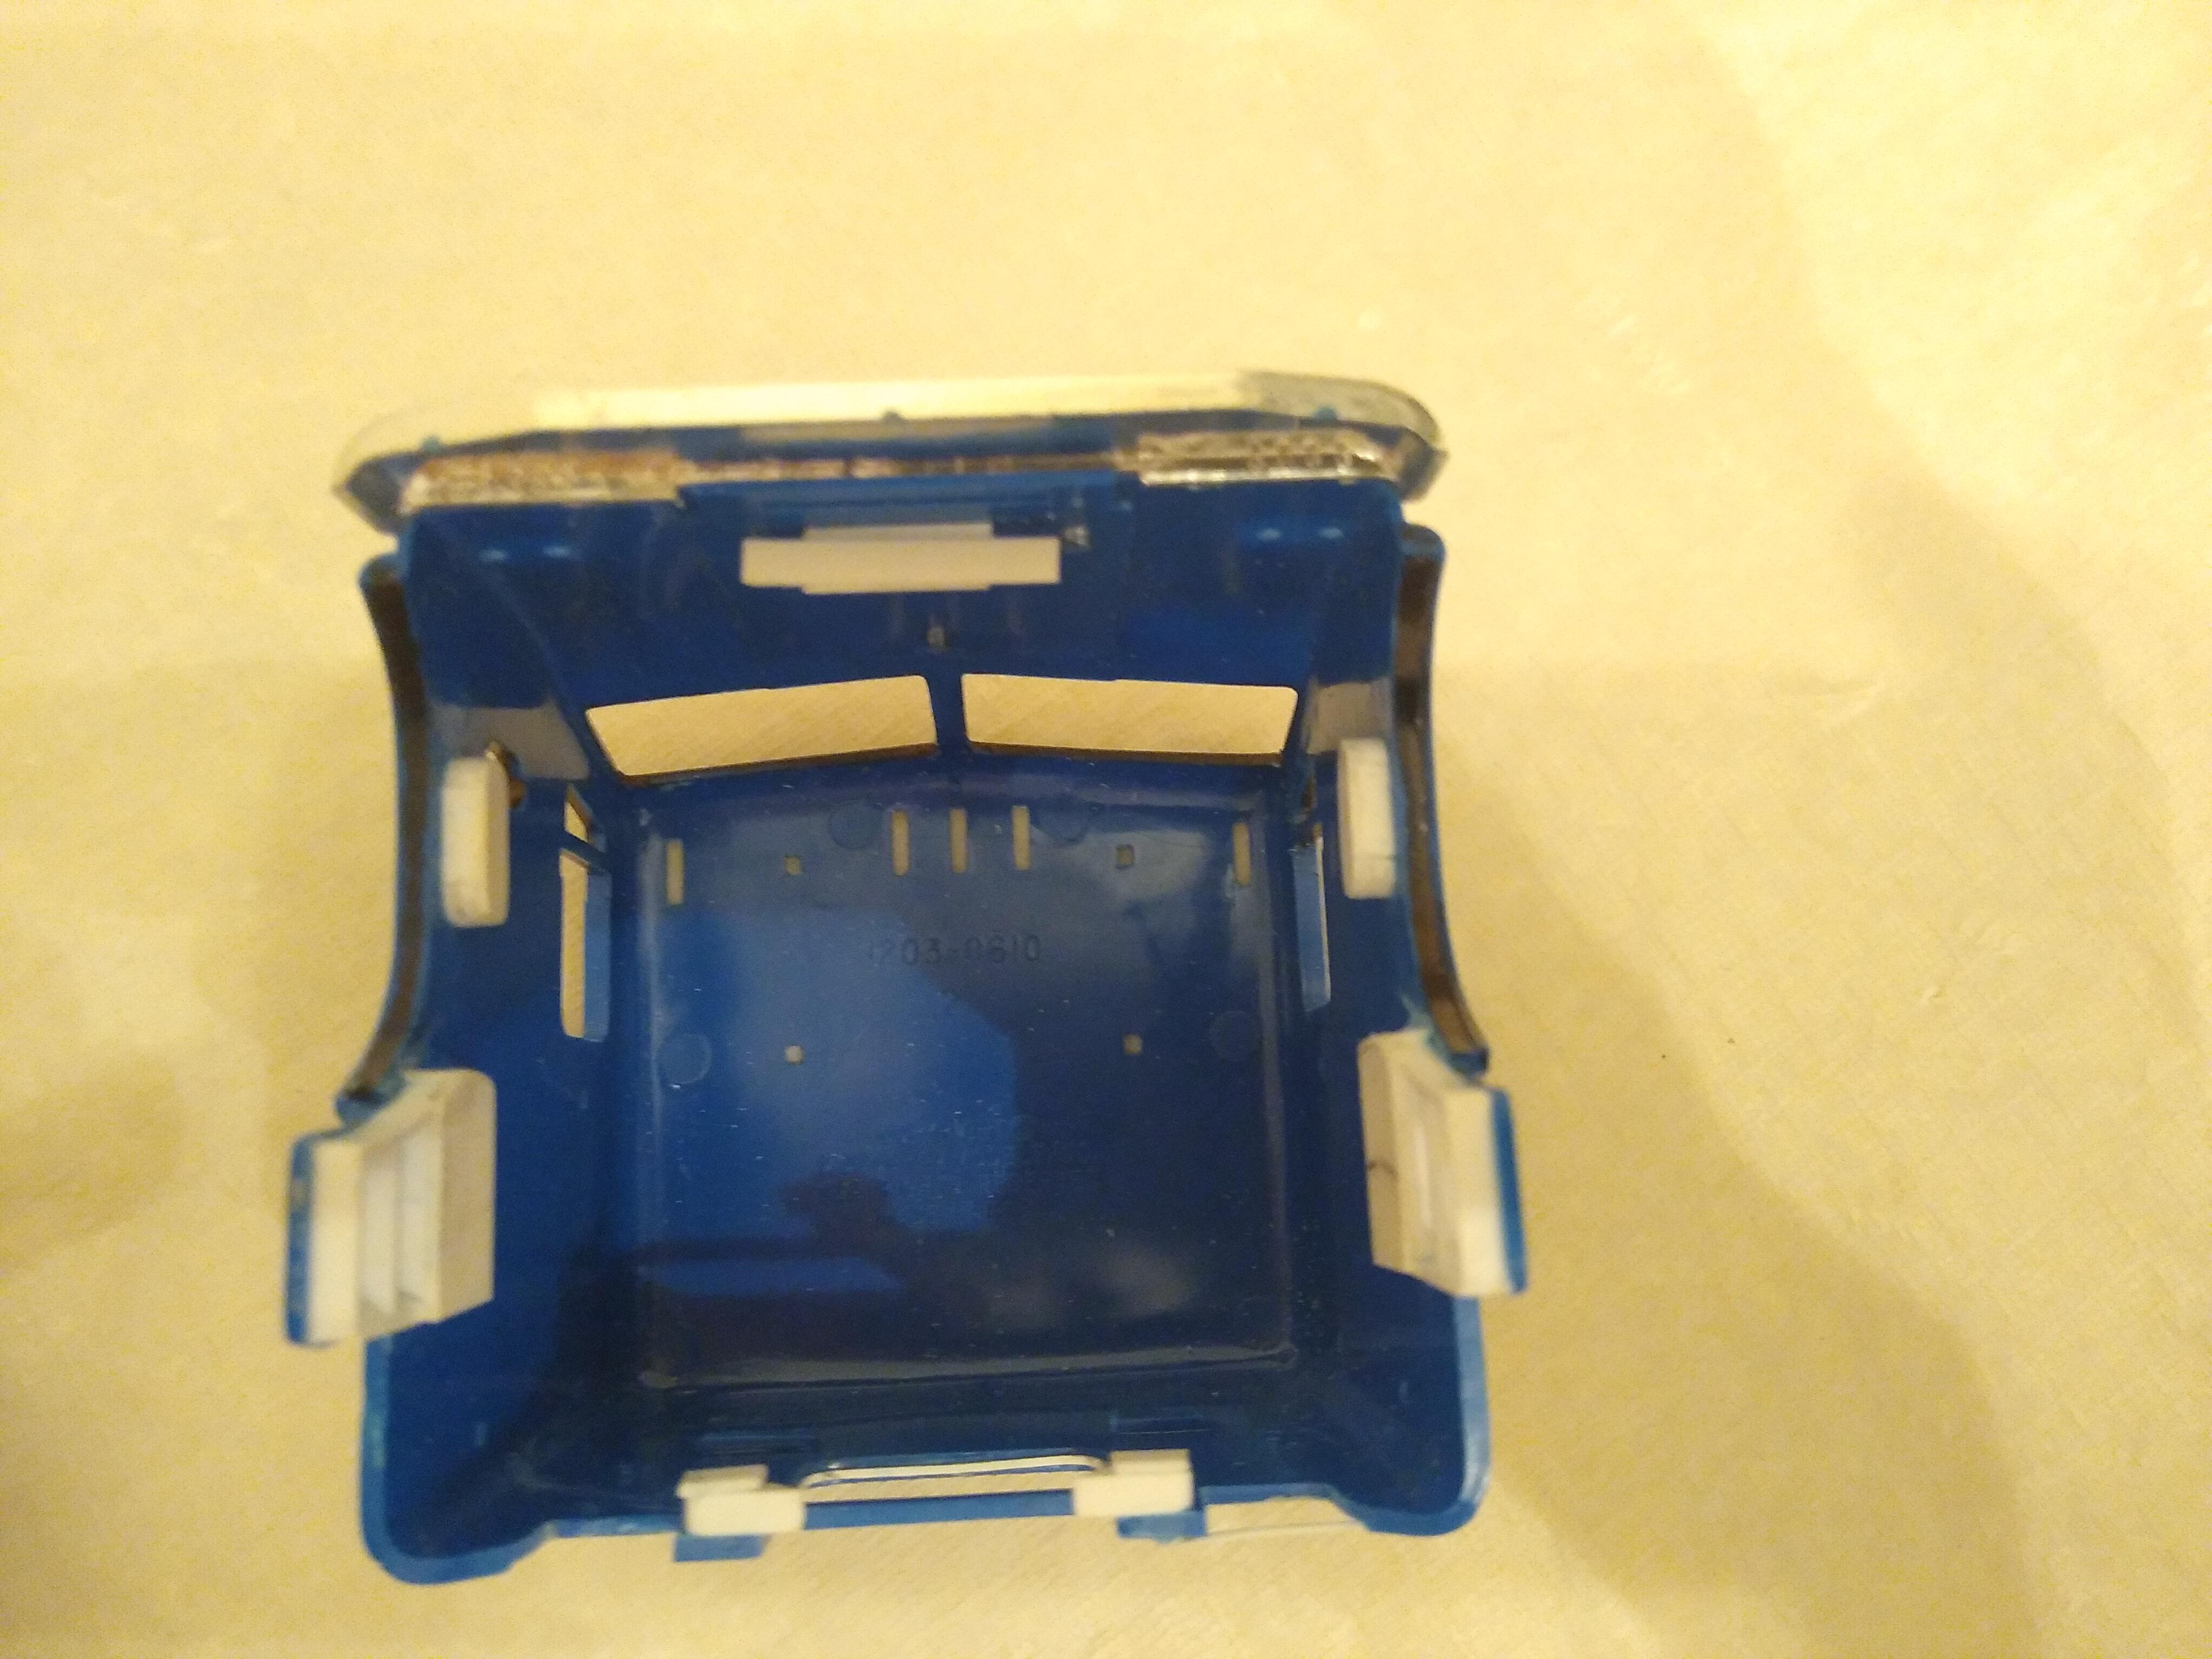
1/32 Freightliner cabover
Rockford replied to Rockford's topic in WIP: Model Trucks: Big Rigs and Heavy Equipment
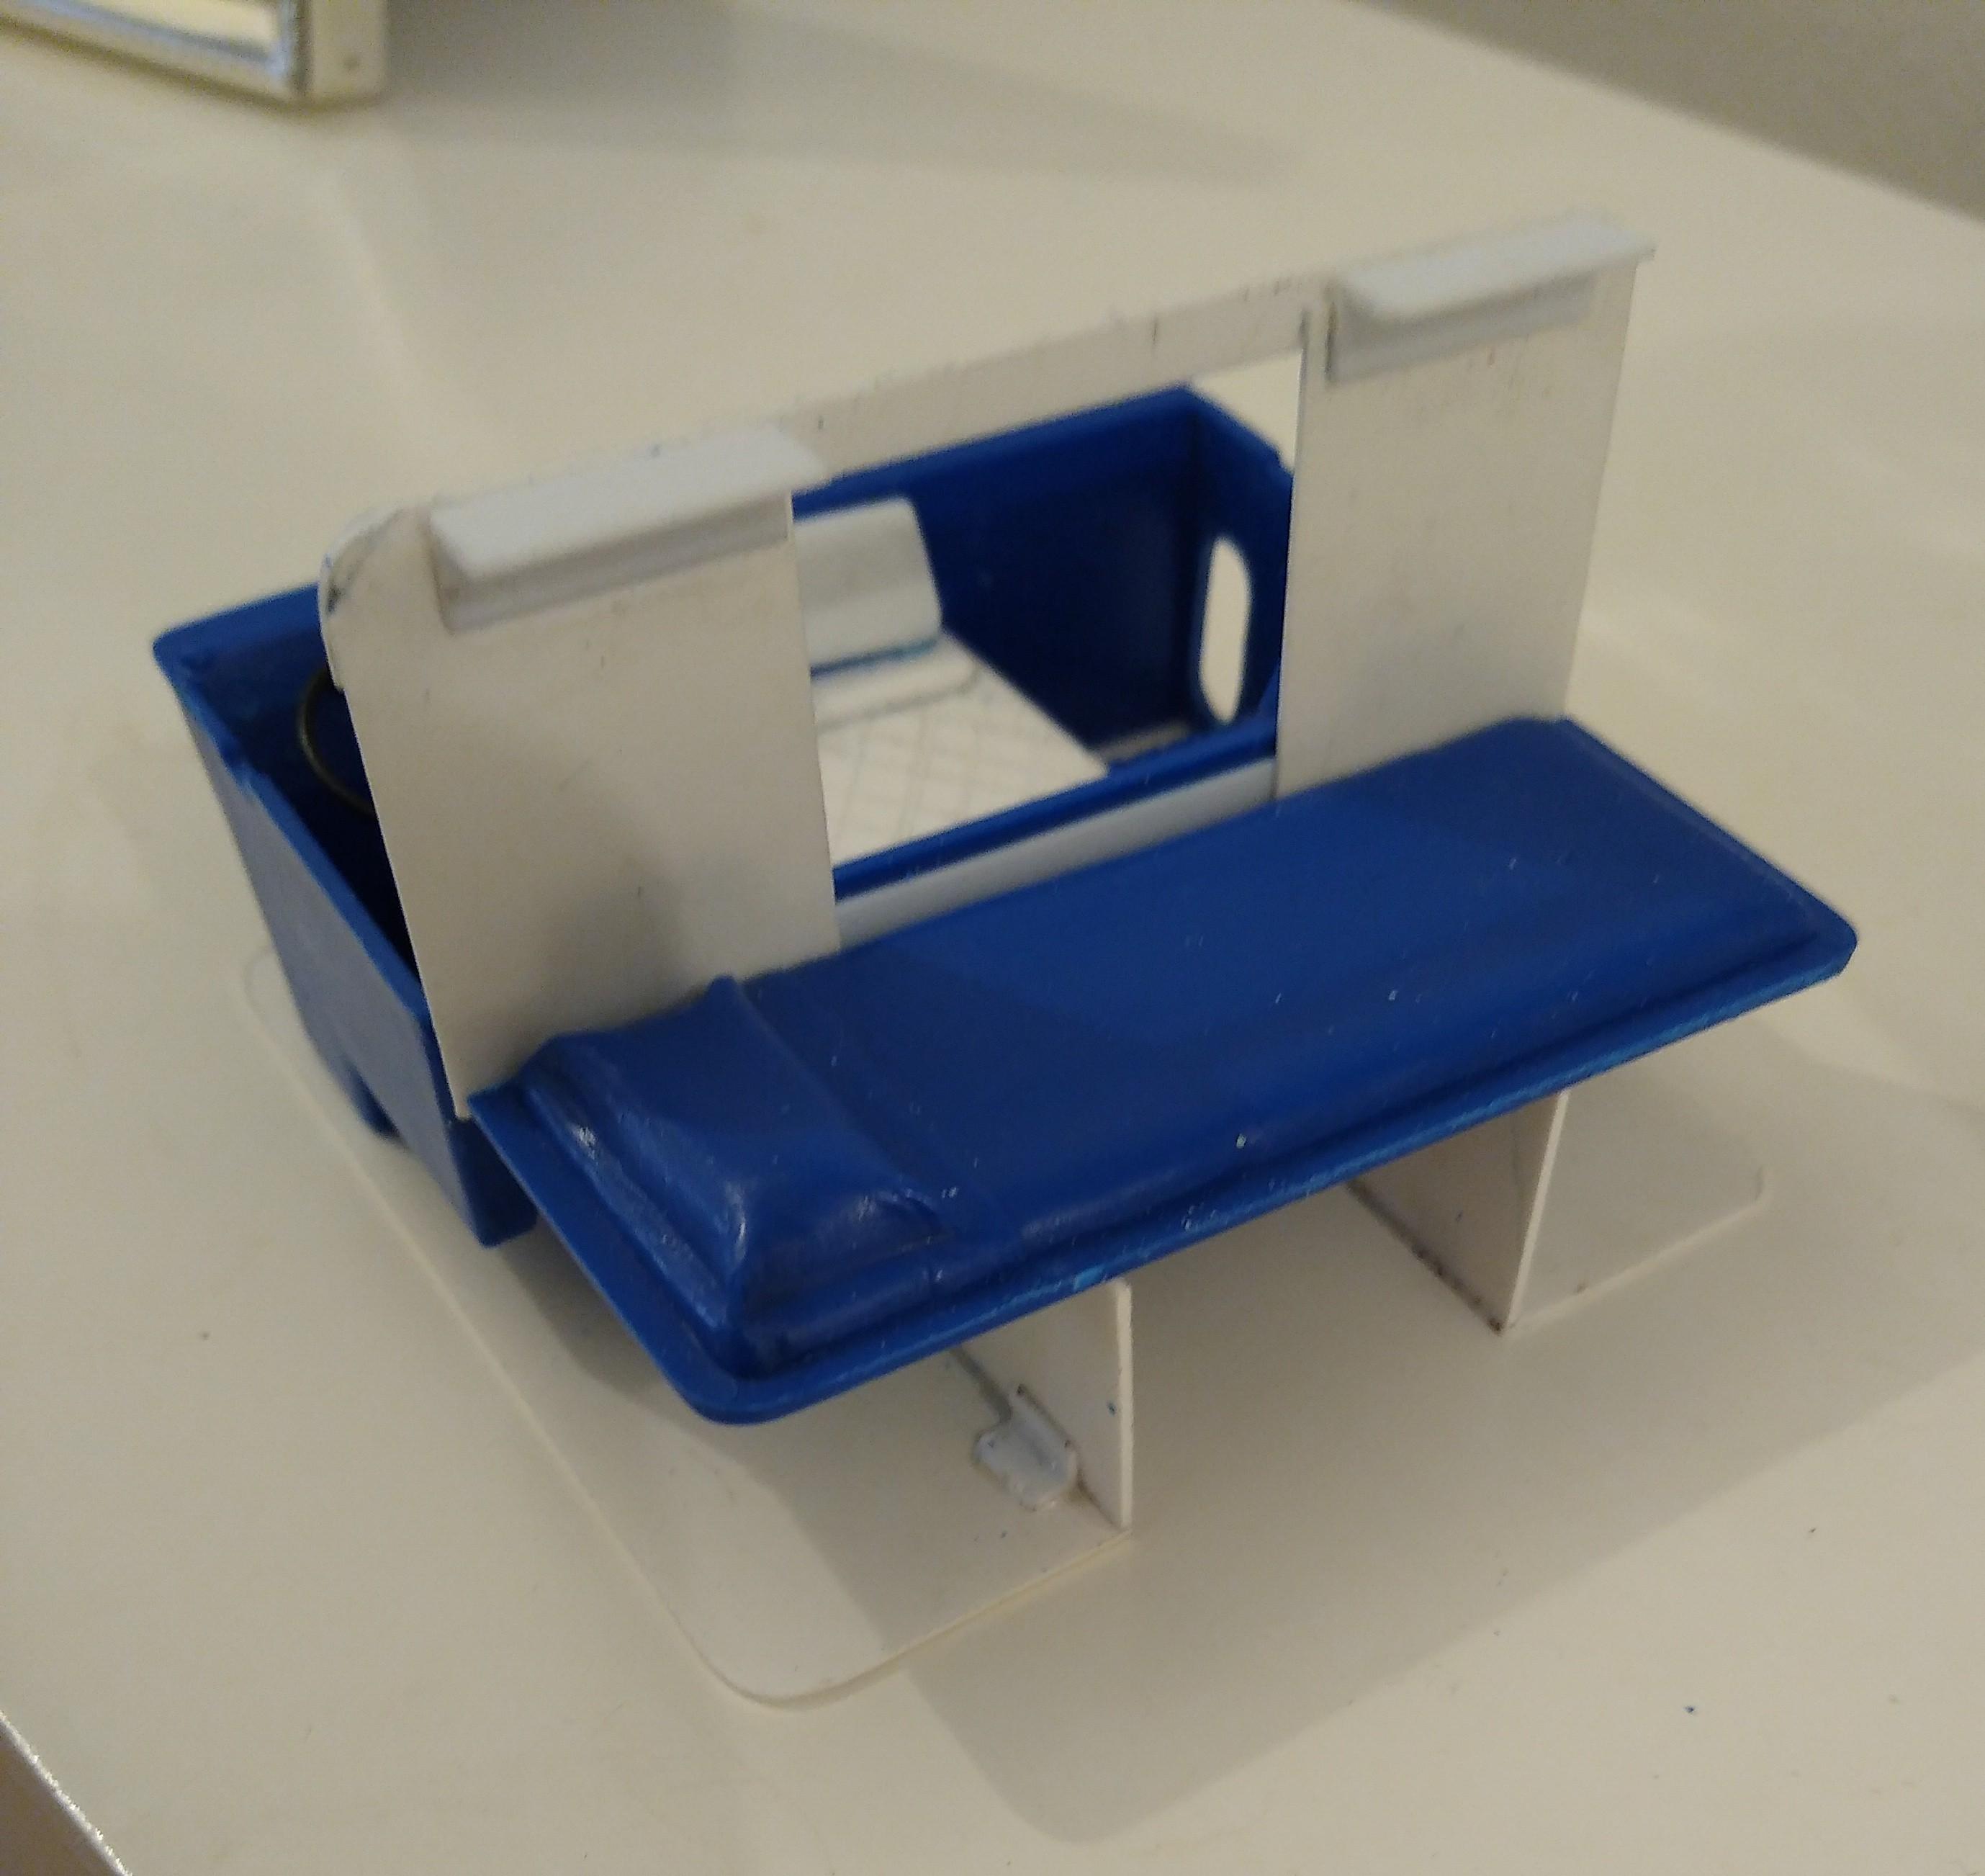
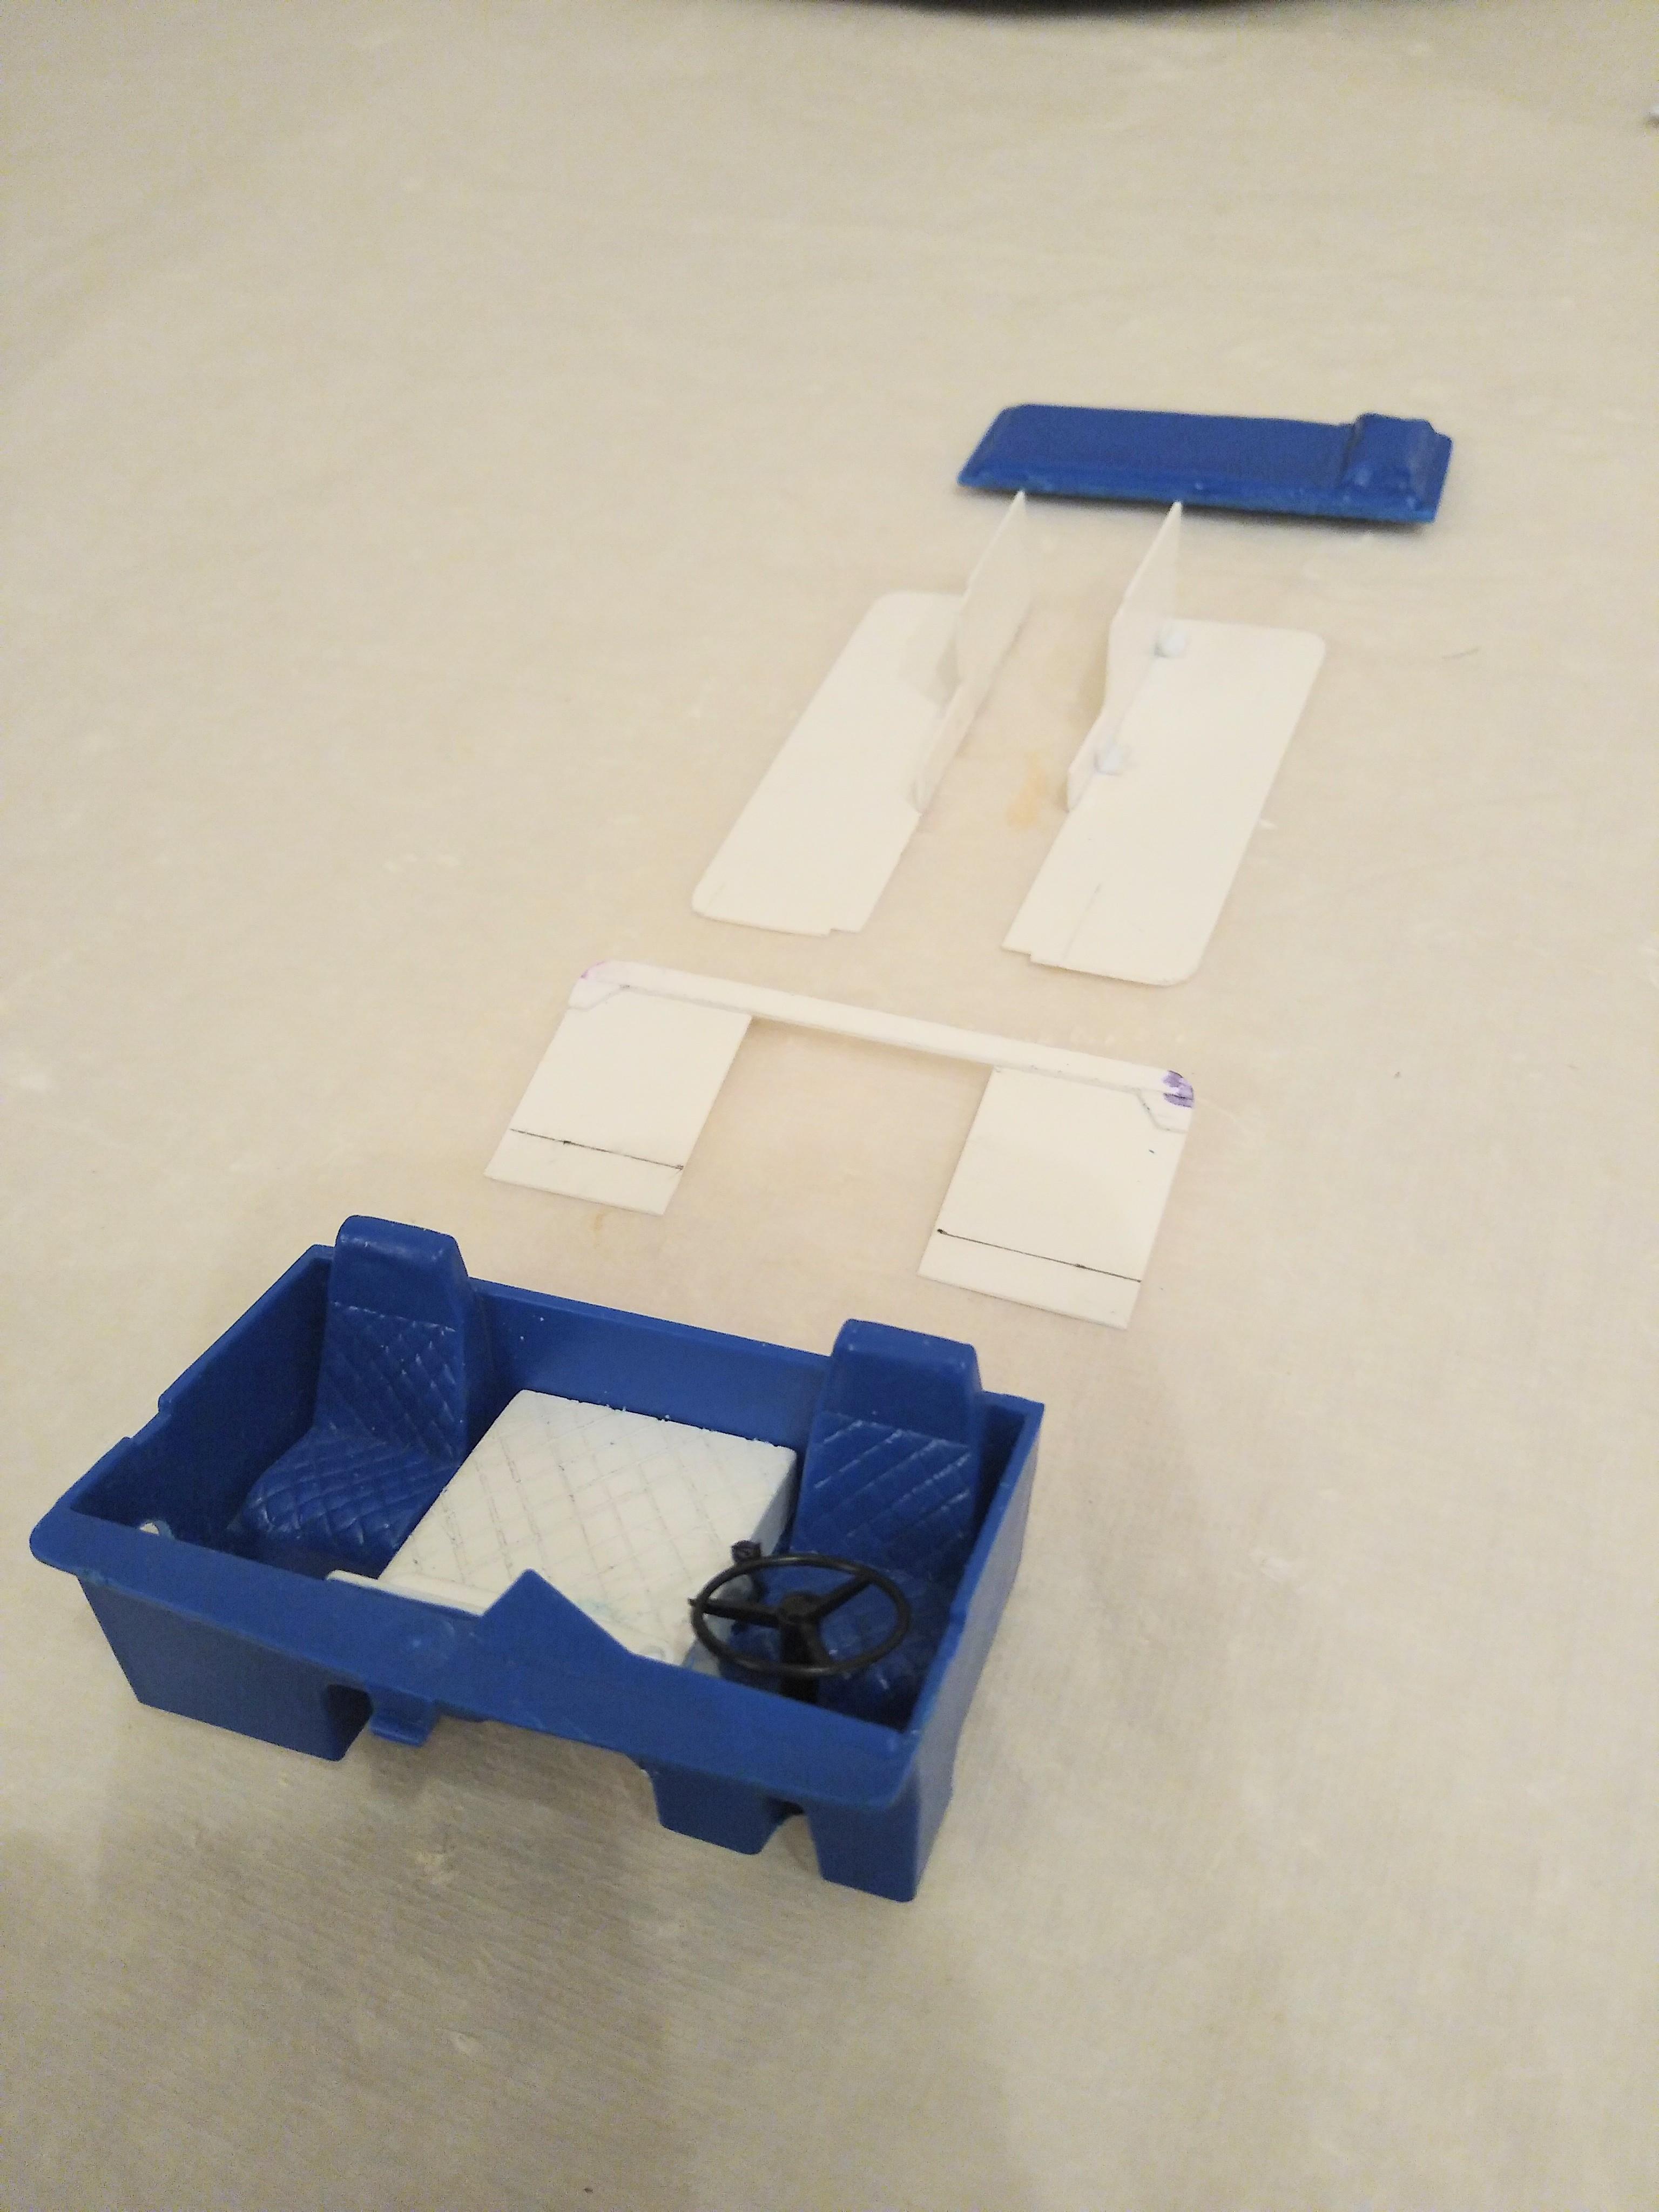
Turned my attention to the interior. Because I added the steps in full depth I can't get the interior back in as one piece, so I cut the bed off which allows me to get the seats and the doghouse in. Then I built a pair of curtains and a roof crossmember, also a rudimentary cab floor. Hopefully I can fit the interior tub, secure it with the curtain assembly, then add the bed before fitting the floor pieces. Usually these kit interiors are simple but dimensionally ok but this is utter garbage! Doghouse is half the size it needs to be, half of the dashboard is missing. I fitted a new doghouse (for a bigger dog), scored a quick diamond pattern on it. Added a glovebox on the dashboard. Made a shift lever from a big paperclip. Used insulation from copper wire for a gearknob. Cut out the sight window in the passenger door.
-
If I had a real Pete
Rockford replied to Biggu's topic in WIP: Model Trucks: Big Rigs and Heavy Equipment
Always a nervous moment, finding the hood-to-cab fit, can really spoil a lot of hard work. Glad it turned out for you. Looking good. -
....... Big Freightliner .......
Rockford replied to 17741907's topic in Model Trucks: Big Rigs and Heavy Equipment
Very novel approach! Looks great. Weathering is excellent. -
AMT Fruehauf Tank Trailer
Rockford replied to OldTrucker's topic in Model Trucks: Big Rigs and Heavy Equipment
Despite the wrangling it took you seem to have subdued it very well. Looks great in that livery. You have to admit that it does build into a great looking trailer. I have one in the stash which I'm hoping to build when we move somewhere bigger. I've opened the box but gone no further so far, not even took the parts out of the bags yet, maybe I'm scared to see how warped they are! -
If I had a real Pete
Rockford replied to Biggu's topic in WIP: Model Trucks: Big Rigs and Heavy Equipment
No need to apologize, I know exactly what you mean. I detail something and am really pleased with it, then photograph it and it looks like I used a 1-inch brush with my eyes closed. The difference between what the eye sees and what the camera sees is unbelievable. That looks great. I noticed the hoseclips on the after cooler pipes, they really enhance the appearance. -
If I had a real Pete
Rockford replied to Biggu's topic in WIP: Model Trucks: Big Rigs and Heavy Equipment
It does look the business. Very impressive. -
1/32 Freightliner cabover
Rockford replied to Rockford's topic in WIP: Model Trucks: Big Rigs and Heavy Equipment
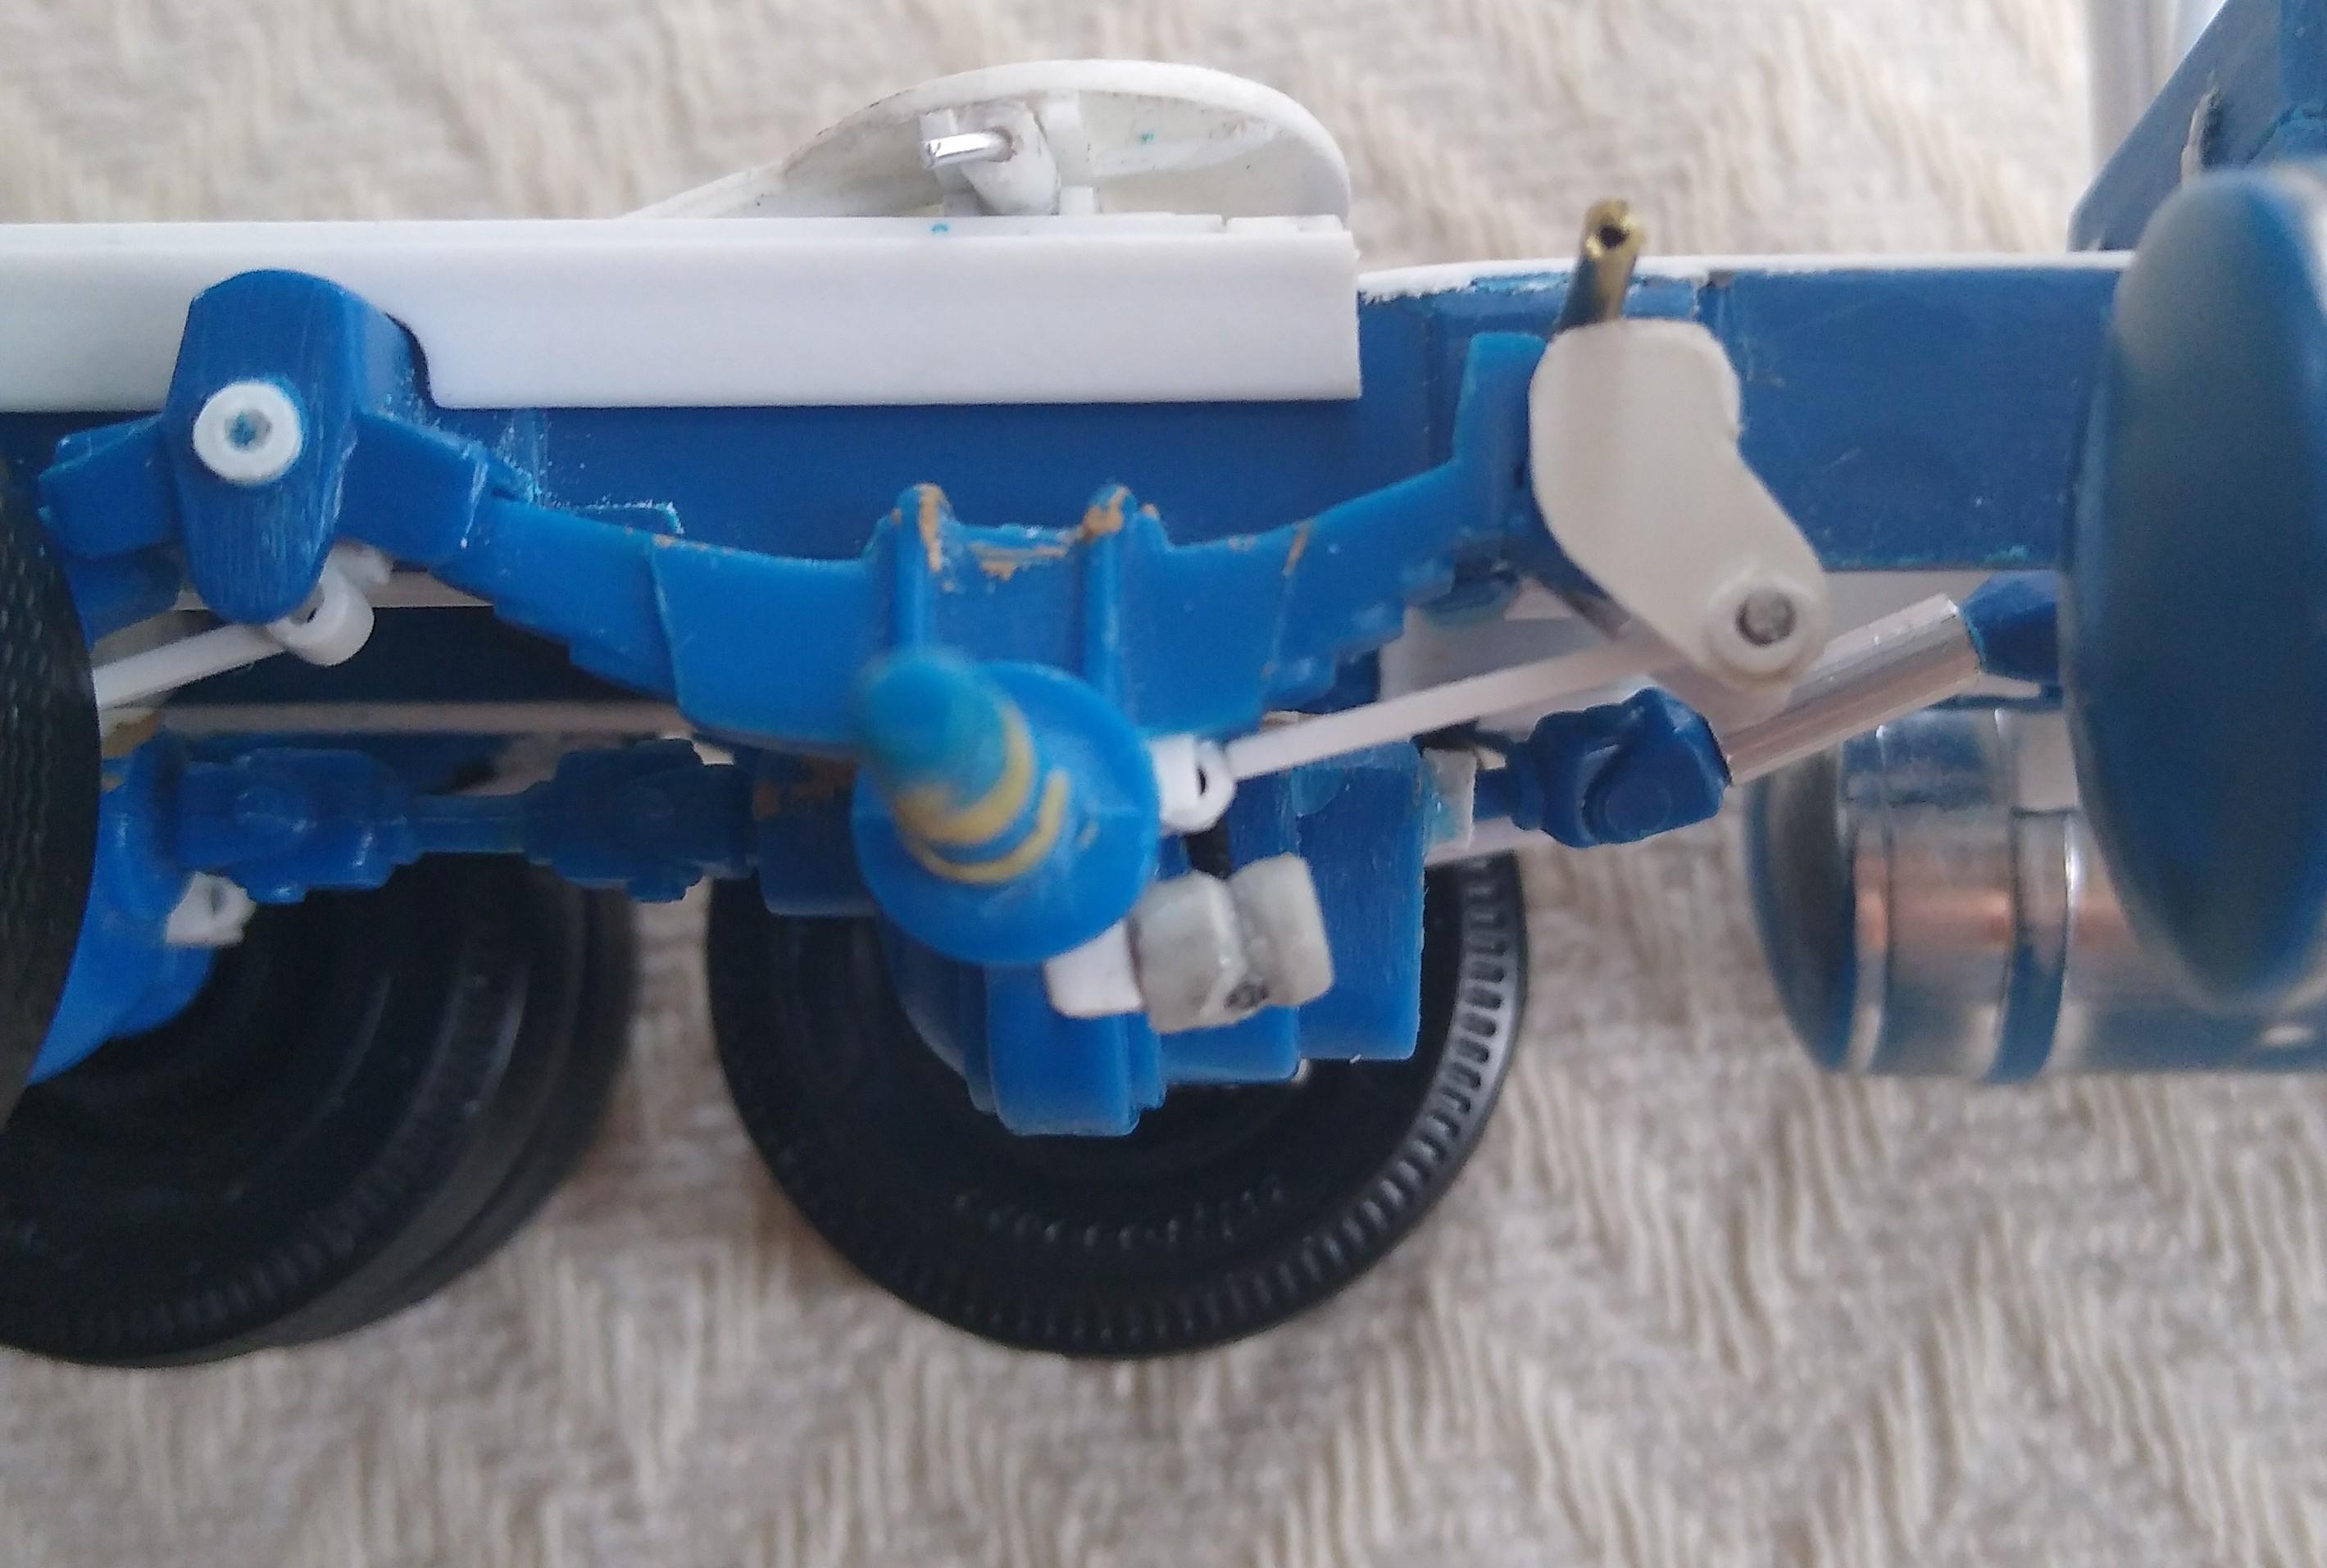
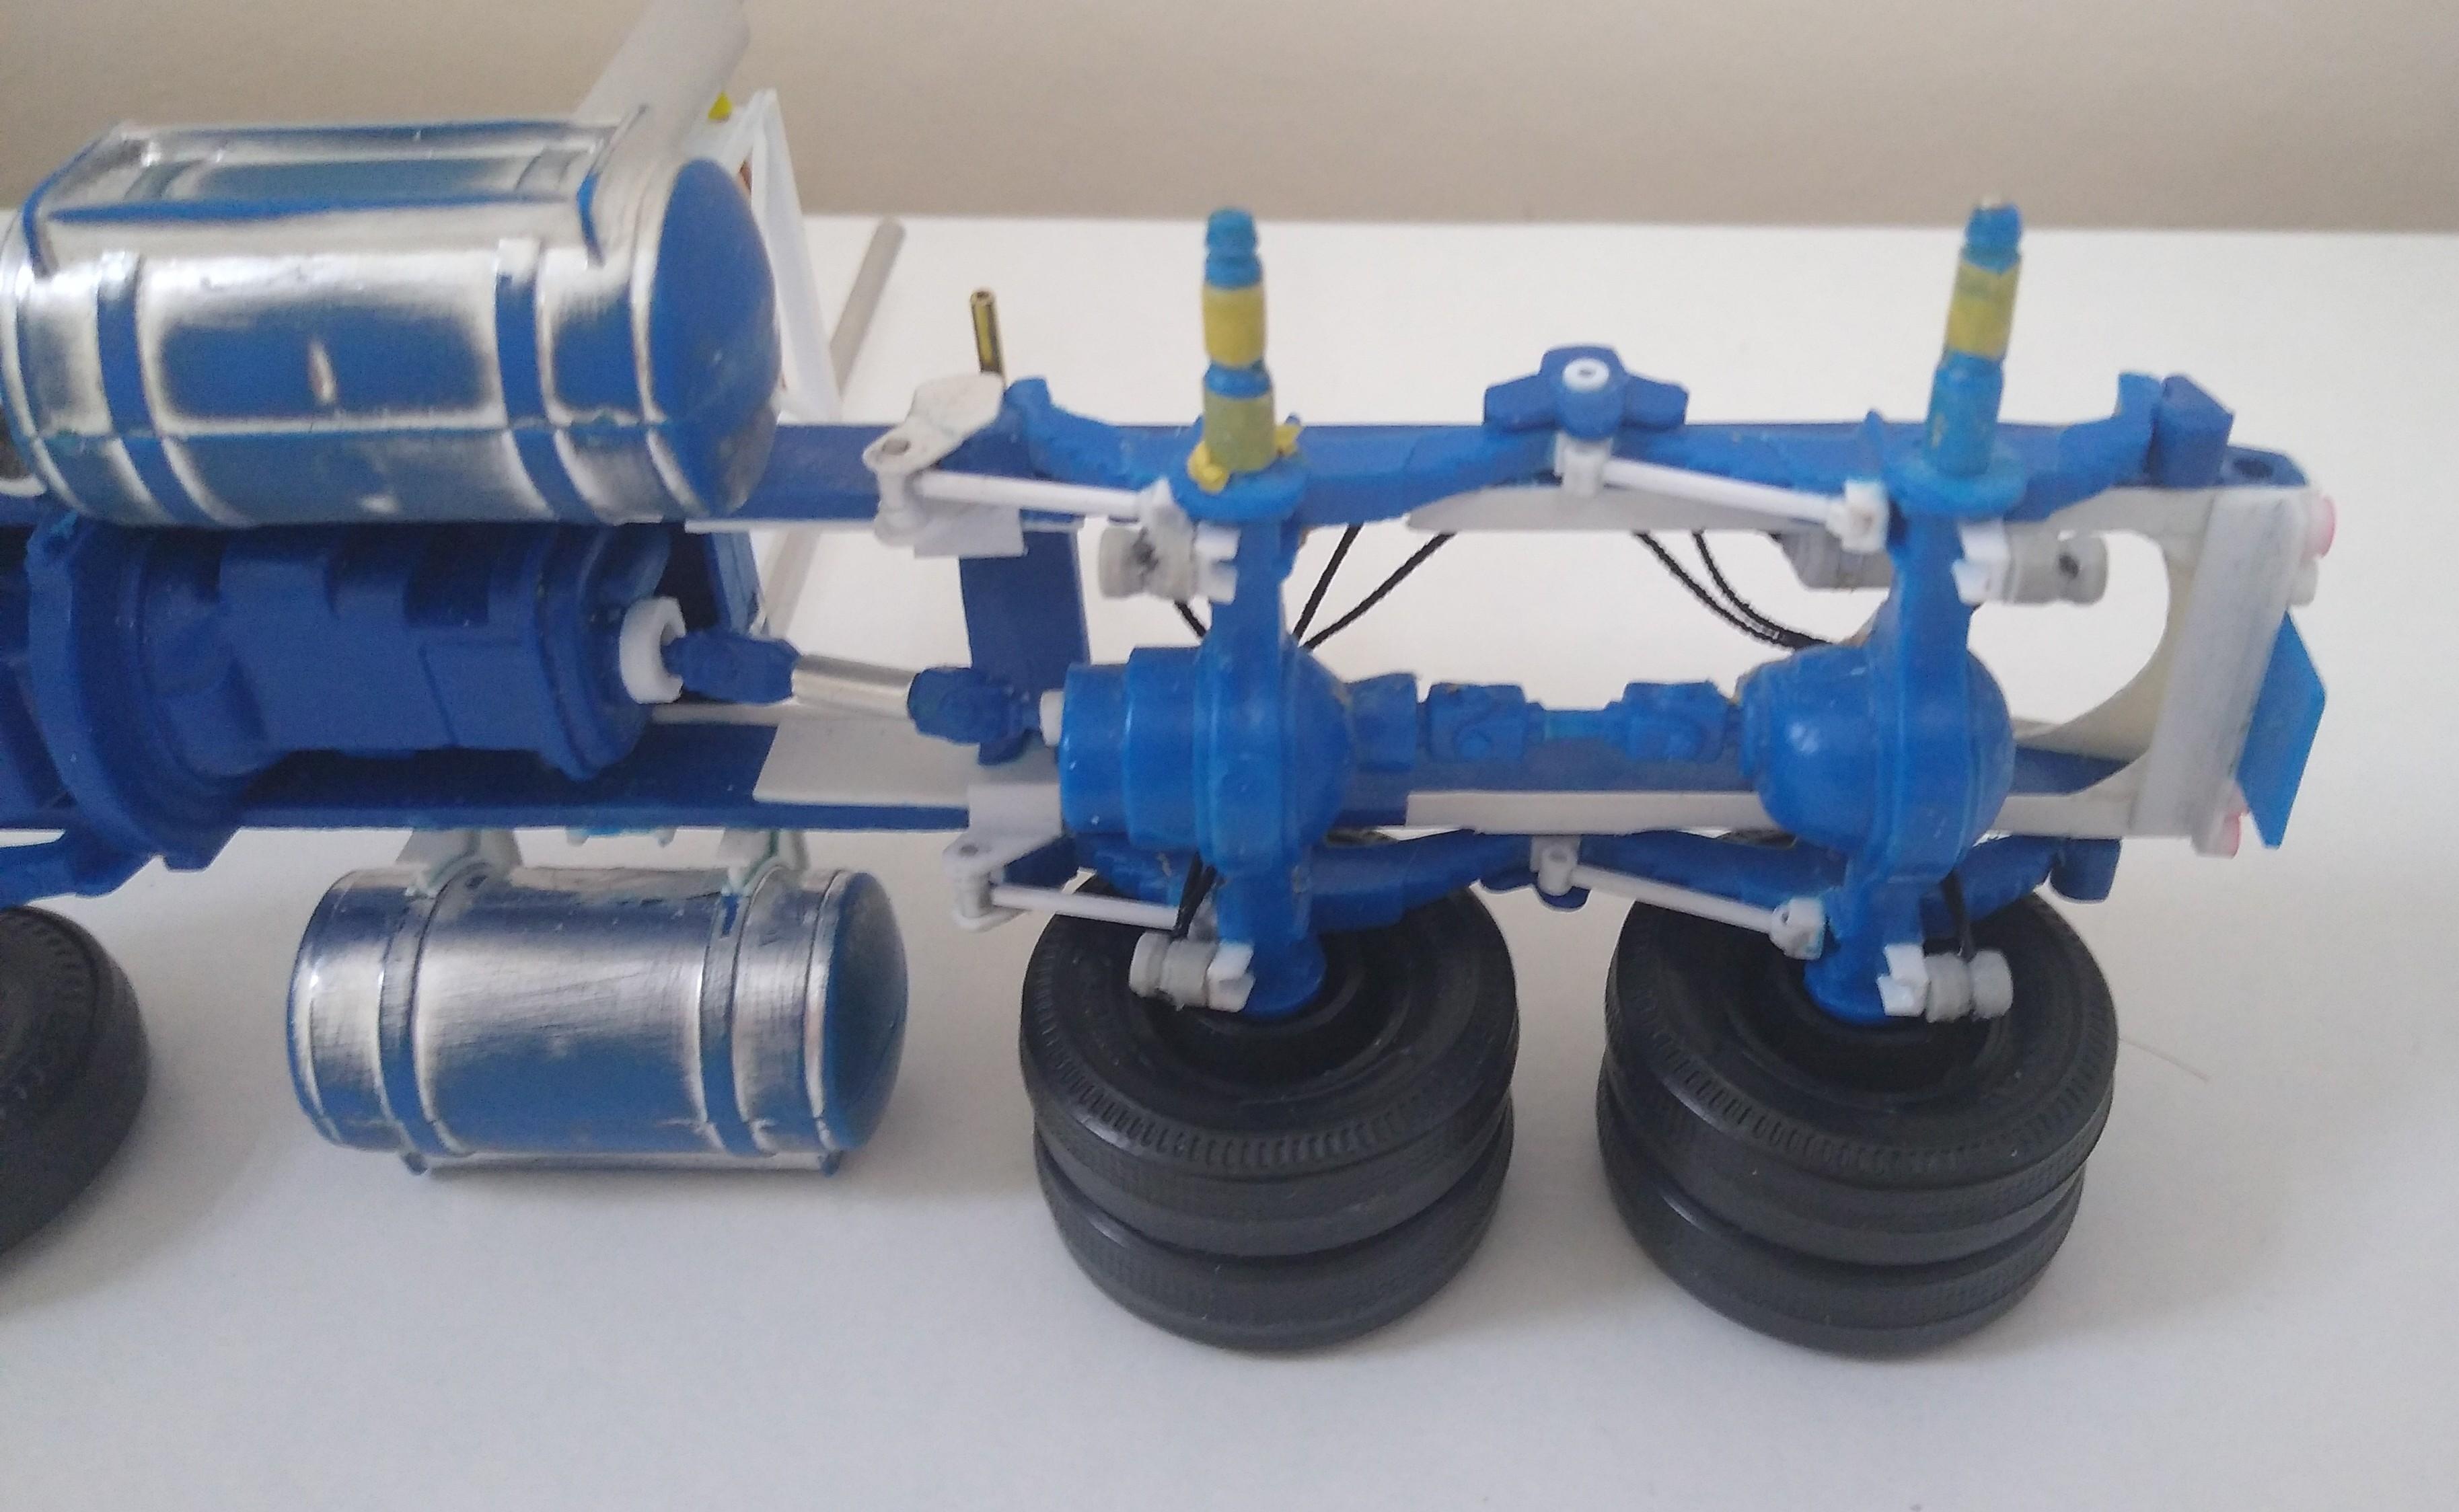
Turned some brake chambers from sprue. Piped them up. Made a cab tilt pump out of sprue, square rod and a piece of aluminium wire (arrowed). Added securing straps to the lid of the battery box. Realised that I'd made a mess of the radius arms on the Reyco suspension. The front brackets have a dog leg in them to bring the front arm bushing out and down. I knew that and still made the original brackets wrong, modelling them on the centre bracket. Looks righterererer.
-
Making Tracks
Rockford replied to Chariots of Fire's topic in WIP: Model Trucks: Big Rigs and Heavy Equipment
They're absolutely fantastic. You can see the effort that has gone into them, so crisply moulded and proper individual pieces like the real thing, the droop in the middle of the top layer is just so realistic! Your patience has definitely been rewarded there, although I bet you're sick of the sight of them now! Well done for persevering. -
1/32 Aerodyne refurb
Rockford replied to Rockford's topic in Model Trucks: Big Rigs and Heavy Equipment
Thanks Jurgen that's what I'm aiming for I suppose. -
1/32 Aerodyne refurb
Rockford replied to Rockford's topic in Model Trucks: Big Rigs and Heavy Equipment
Thanks Brian, very kind of you, I don't have much space at all, just one shelf, so my trucks are tucked away all over the place. I'm forever getting them out and putting them away and rotating what I have on display. Maybe that's why I've stayed with 1/32 despite their obvious limitations, I couldn't have more that one or two 1/25 knocking around and they're so fragile they'd soon be wrecked. 1/32 seem quite robust and I take steps to even improve that in the way I mount quarter fenders and build mudflaps. I actually work in a converted cupboard in the hallway of our apartment. Needs must... -
1/32 Freightliner cabover
Rockford replied to Rockford's topic in WIP: Model Trucks: Big Rigs and Heavy Equipment
Thanks for the kind comments. My work pales into insignificance compared to some of the scratchbuilding I see here, but I do like sitting at the workbench working away with my hands, so therapeutic. -
AMT Fruehauf Tank Trailer
Rockford replied to OldTrucker's topic in WIP: Model Trucks: Big Rigs and Heavy Equipment
It's going to look great when it's done, I like the contrasting colour on the chassis, I'd have probably been lazy and painted everything aluminium. Worth all the effort. I've got one of these that I hope to build one day. You're inspiring me. I might even do a 1/32 one to go with my fleet. -
New Print Job
Rockford replied to Jürgen M.'s topic in WIP: Model Trucks: Big Rigs and Heavy Equipment
Impressive, as ever. I heard a boom earlier on, must have been you breaking the sound barrier! -
New Freightliner Cascadia!
Rockford replied to RoninUtah's topic in Model Trucks: Big Rigs and Heavy Equipment
That's a nice build. You're right, modelling does seem to be trapped in the 70s, mind you, so am I! -
Only took 50 years!
Rockford replied to Rockford's topic in Model Trucks: Big Rigs and Heavy Equipment
Thanks very much, I am still surprised that I managed to pull it off! -
Making Tracks
Rockford replied to Chariots of Fire's topic in WIP: Model Trucks: Big Rigs and Heavy Equipment
I can't even drill a hole in the right place! You've got some patience to do that. As with all your jobs it will look fantastic when you complete it.