crowe-t
-
Posts
1,965 -
Joined
-
Last visited
Content Type
Profiles
Forums
Events
Gallery
Everything posted by crowe-t
-
Heather, My condolences to you and your family! I hadn't been on here in a while and just heard of your loss. I had talked with your dad a few times on here. He was a true artist and I always enjoyed seeing his creations. Michael.
-

1965 Oldsmobile 442(from an AMT '64 Olds 442) - FINISHED
crowe-t replied to crowe-t's topic in WIP: Model Cars
You did this amazing '67 Chevelle Pro Street build in the link below. It's one of my favorites. I'd love to do the same but with the '65 Olds 442 body I have. https://www.modelcarsmag.com/forums/topic/154050-67-chevelle-pro-street/page/1/#comment-2763671 Would you suggest the Revell '67 Chevelle Pro Street kit as a donor over the AMT '67 Pro Street kit? -
1965 Oldsmobile 442(from an AMT '64 Olds 442) - FINISHED
crowe-t replied to crowe-t's topic in WIP: Model Cars
I'm sort of liking the Pro Street idea instead of building the same thing again. The AMT '67 Pro Street Chevelle seems like a good donor kit and they are easy to get. I'd put Weld Drag Lites on and maybe do a blown Olds 455. Make the same front seats in the interior and the same roll bar so it looks like the same car with the tubbed rear and blower. Keep the cowl hood scoop but have the blower sticking out through it and go a little lower on the stance. -
1965 Oldsmobile 442 (Built from an AMT '64 Olds 442 and Lindberg '67 442)
crowe-t replied to crowe-t's topic in Model Cars
Thanks Steve! I was determined to finish this one and I had fun with the details. This Summer was tough with their loss but I've been keeping busy with some projects. Finishing this one put me in a better place. -
1965 Oldsmobile 442(from an AMT '64 Olds 442) - FINISHED
crowe-t replied to crowe-t's topic in WIP: Model Cars
Thanks Larry and Steve for the compliments! The paint was fighting me and then the original body started cracking. Too much handling stripping it and the thin plastic wasn't good. This one was a bear to paint. Thankfully I got it to work this last time. I can do the stripes in my sleep now I've masked and sprayed them so many times. lol I'll fix the original body and either build another one like this one or use the AMT '67 Pro Street Chevelle chassis and parts and make a Pro Street version of my friend's car. -
1965 Oldsmobile 442 (Built from an AMT '64 Olds 442 and Lindberg '67 442)
crowe-t replied to crowe-t's topic in Model Cars
Thanks guys for all the nice words! I really appreciate it. -
1965 Oldsmobile 442(from an AMT '64 Olds 442) - FINISHED
crowe-t replied to crowe-t's topic in WIP: Model Cars
Thanks Bob for the kind words! -
1965 Oldsmobile 442(from an AMT '64 Olds 442) - FINISHED
crowe-t replied to crowe-t's topic in WIP: Model Cars
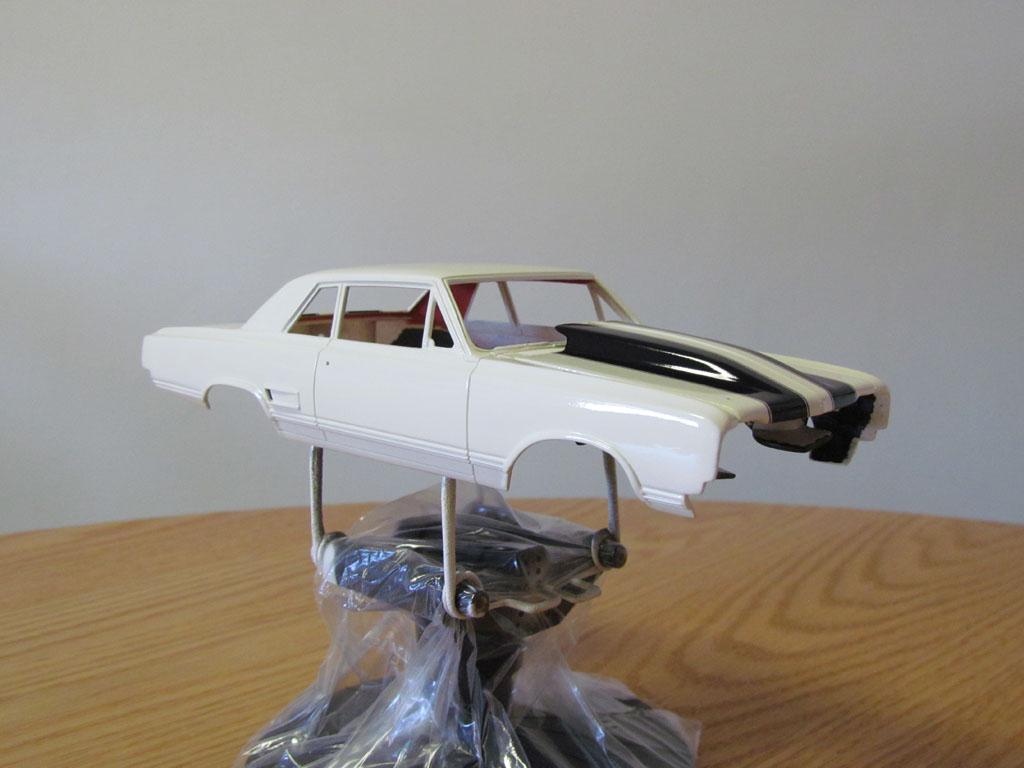
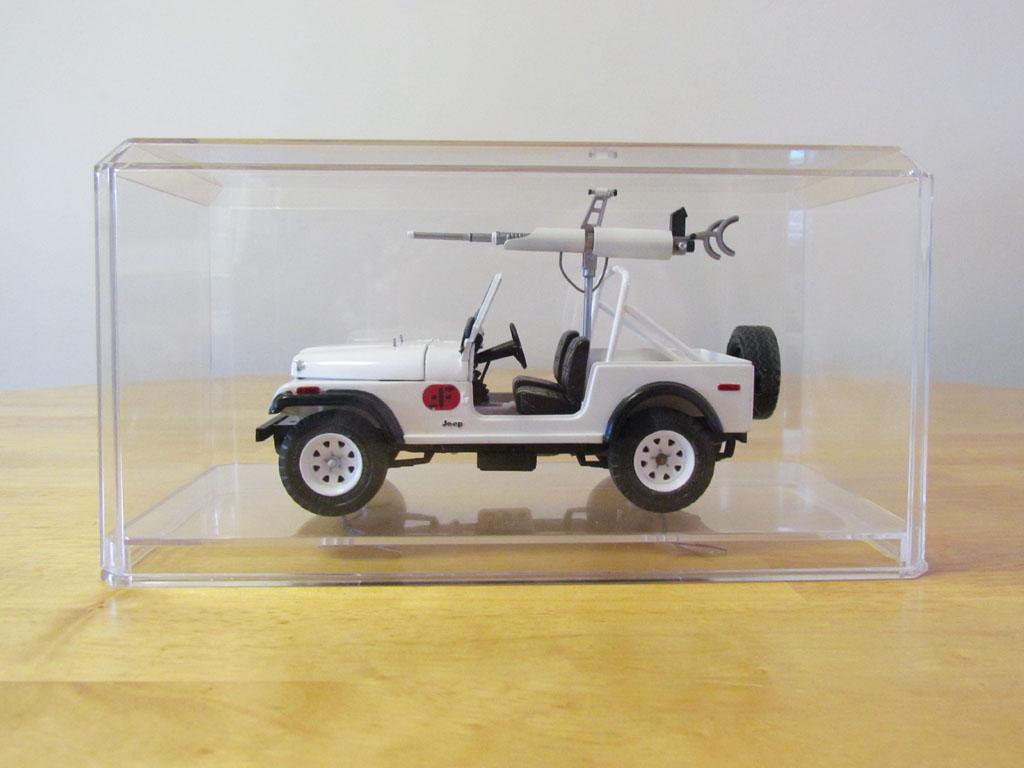
Here's some sneak peek pictures of the finished model. I'm shipping this to my friend so I mounted it in an AMT Display Case so nothing comes in contact with the body. It's packed in a Pelican case with the hood in a separate box. Below is the link to the finished pictures in the Gallery section. http://www.modelcarsmag.com/forums/topic/185492-1965-oldsmobile-442-built-from-an-amt-64-olds-442-and-lindberg-67-442/ Thanks for following along with this long build!
-
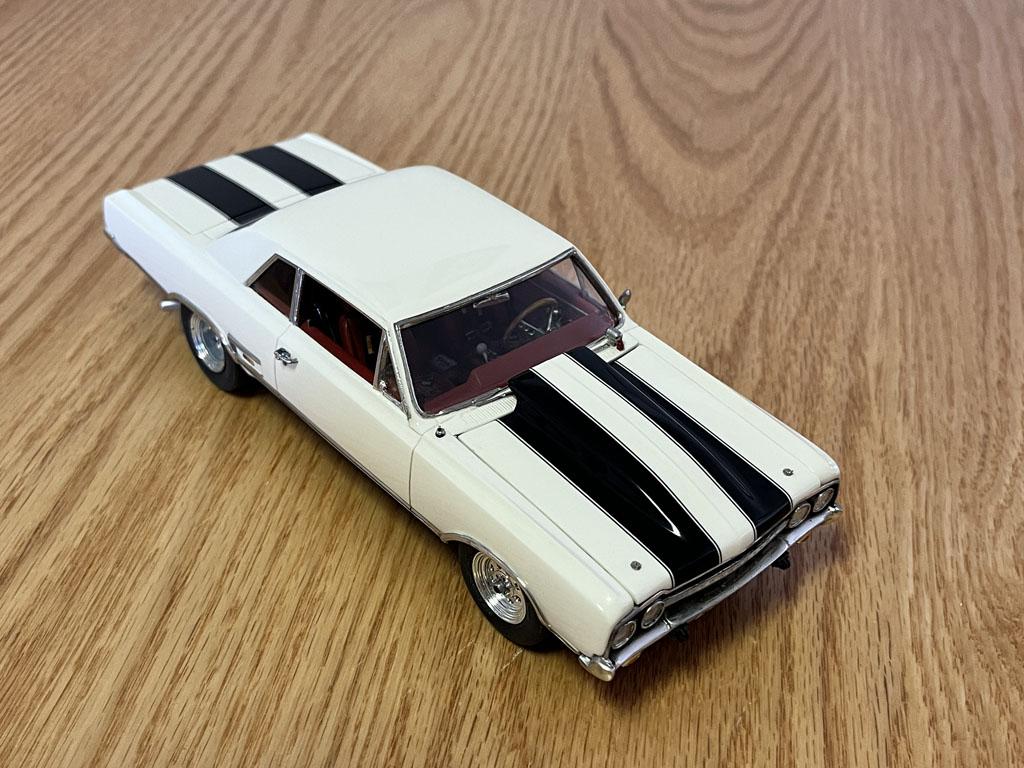
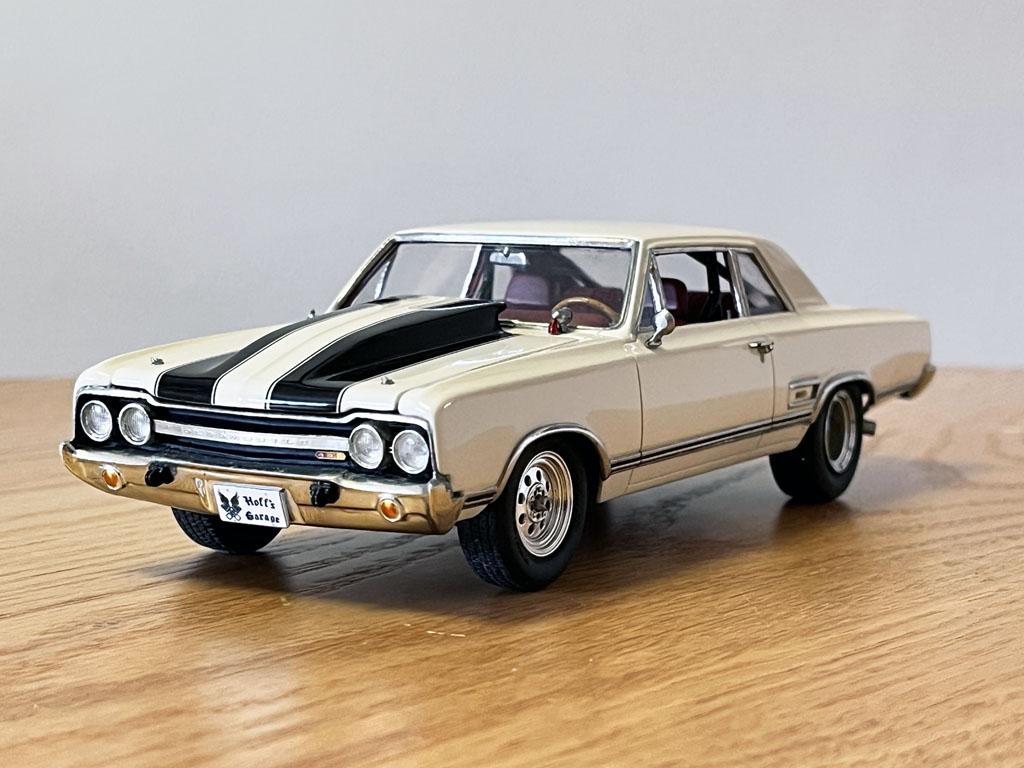
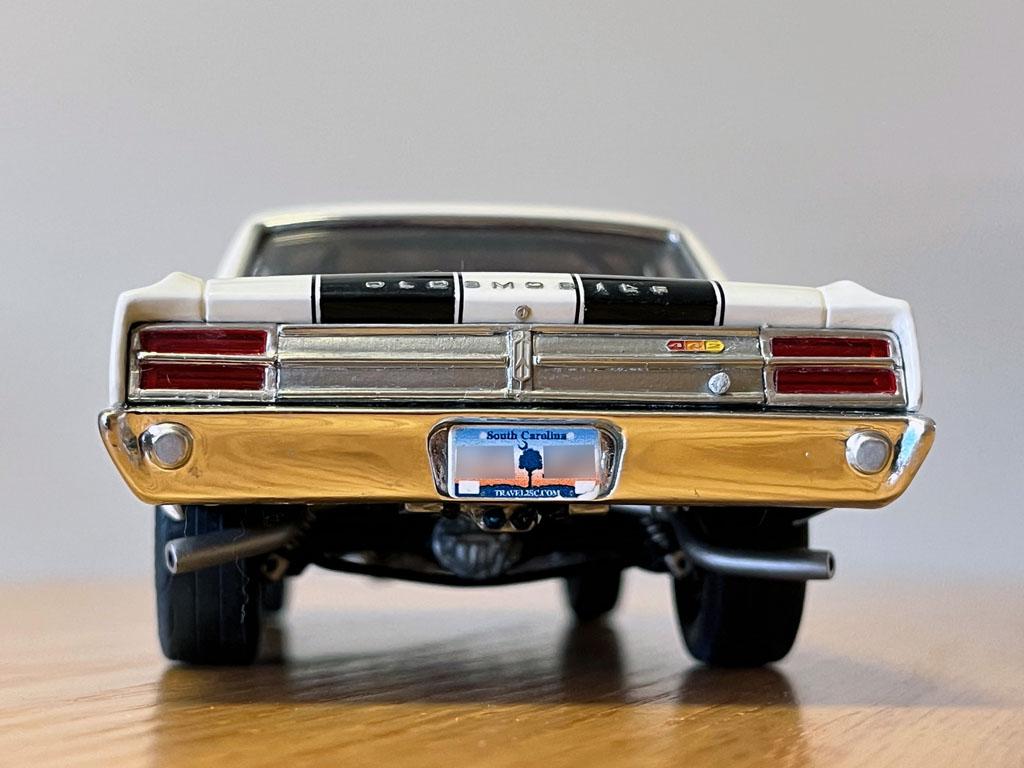
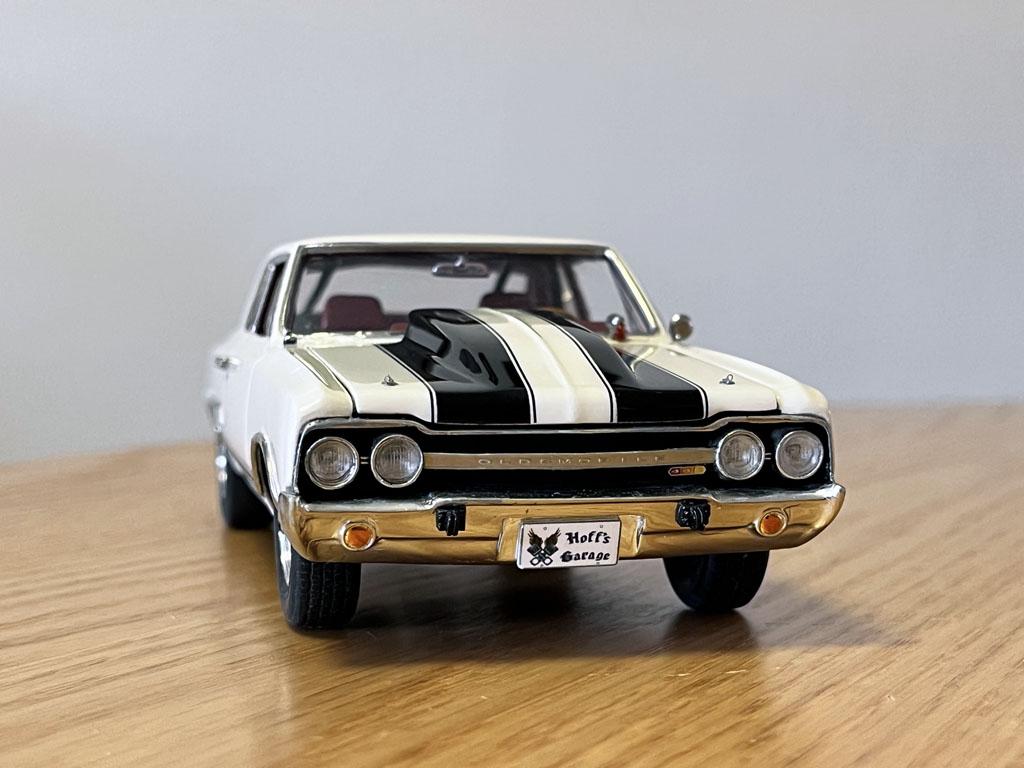
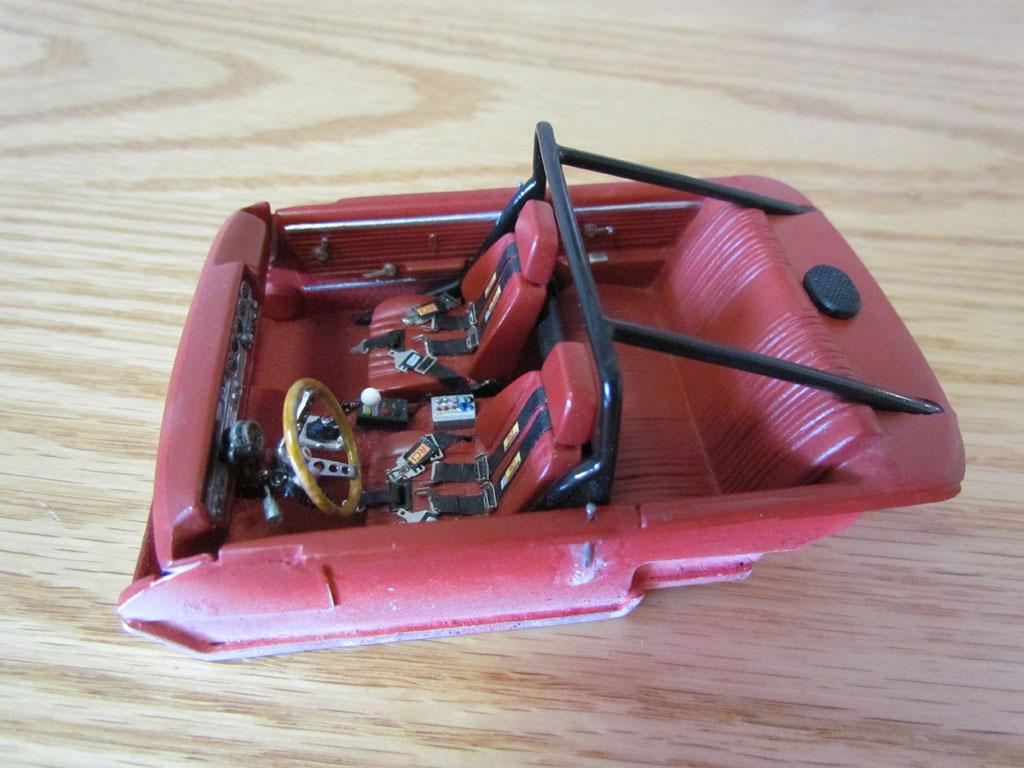
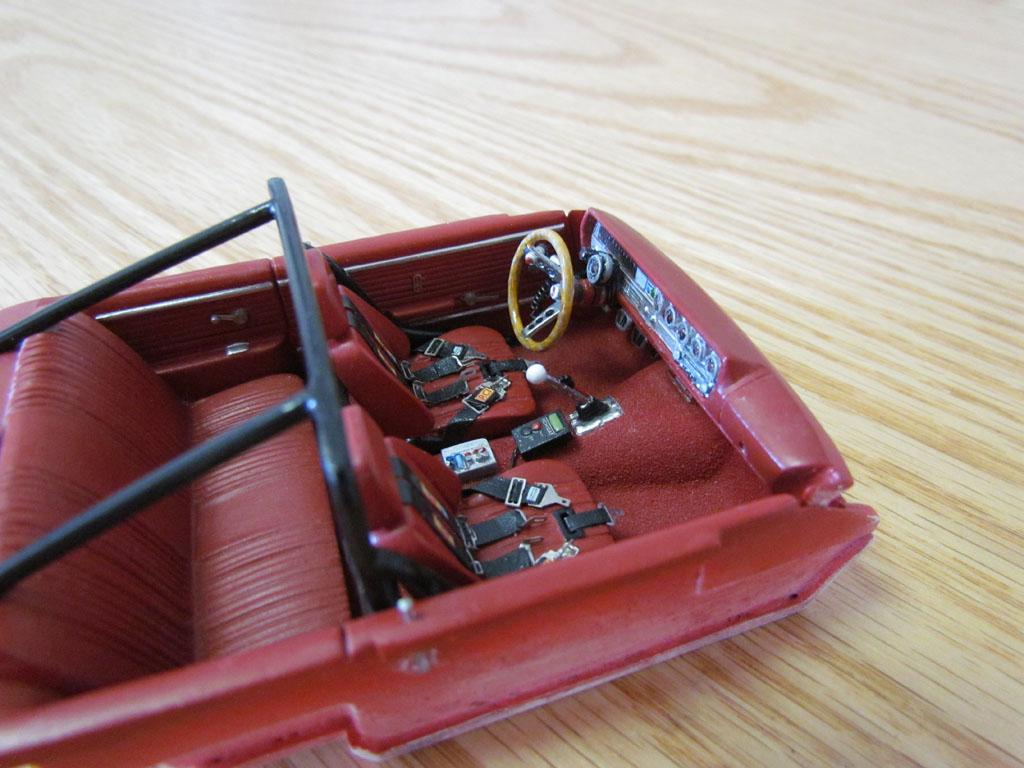
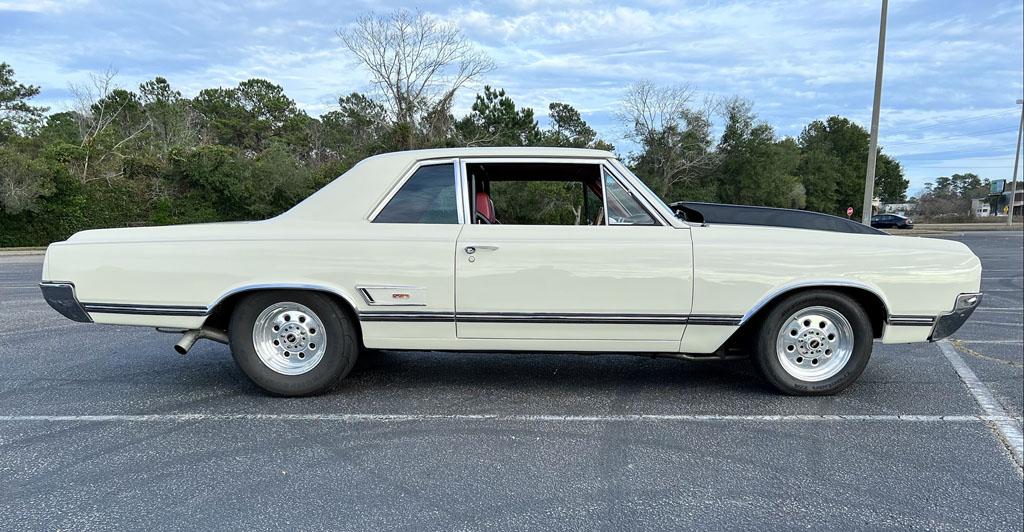
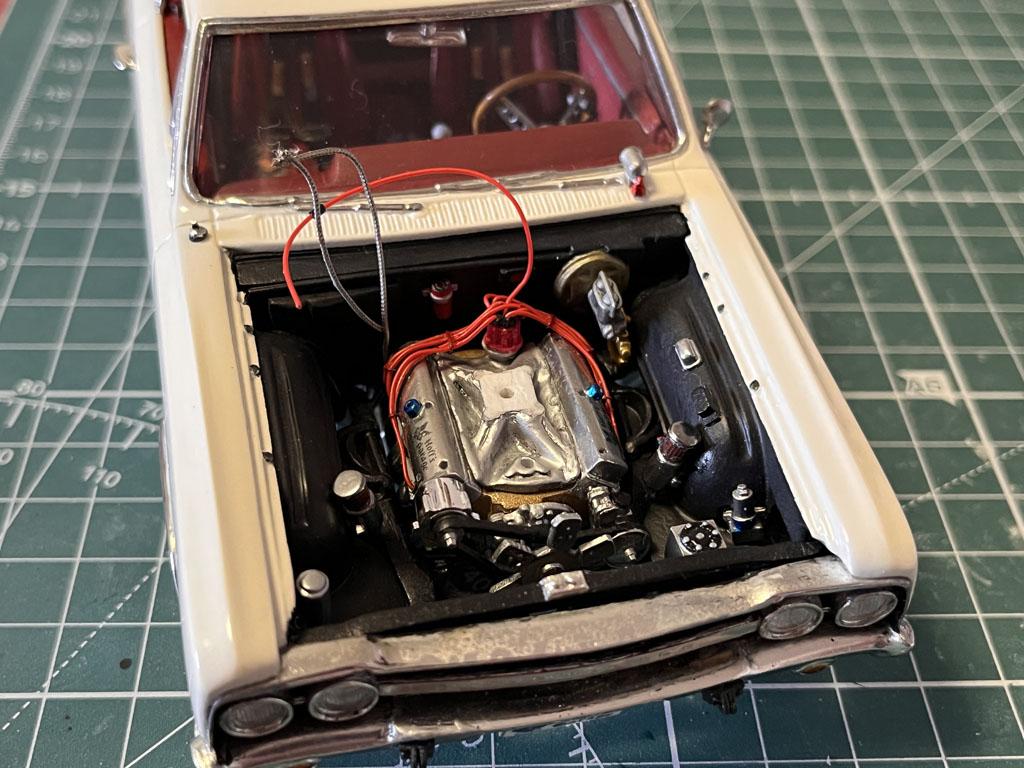
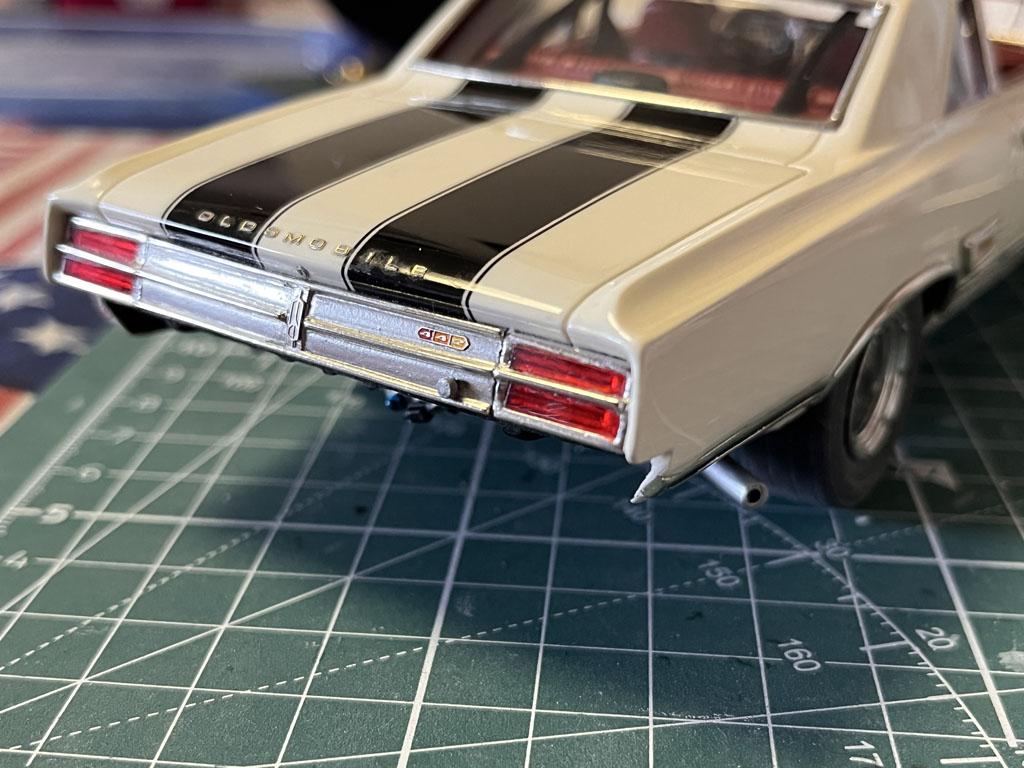
I started this build for my friend Craig two years ago. This is a model of his 1:1 '65 Oldsmobile 442. I used an AMT '64 Oldsmobile 442 and a Lindberg '67 Olds 442 to build this. The body, hood and dashboard are from the '64 kit and the chassis, engine, interior and front inner wheel wells are from the Lindberg kit. Along with combining these two kits I modified and scratch built many parts. Here are pictures of the finished model followed by pictures of the real car. Below is a link to my build thread. https://www.modelcarsmag.com/forums/topic/166334-1965-oldsmobile-442from-an-amt-64-olds-442/ I'd like to dedicate this build to two friends, Chris Capasso and Noah Gross, both of whom passed away in July of this year. They were both great guys and great model builders. I miss them both.
- 49 replies
-
- 15
-

-
1965 Oldsmobile 442(from an AMT '64 Olds 442) - FINISHED
crowe-t replied to crowe-t's topic in WIP: Model Cars
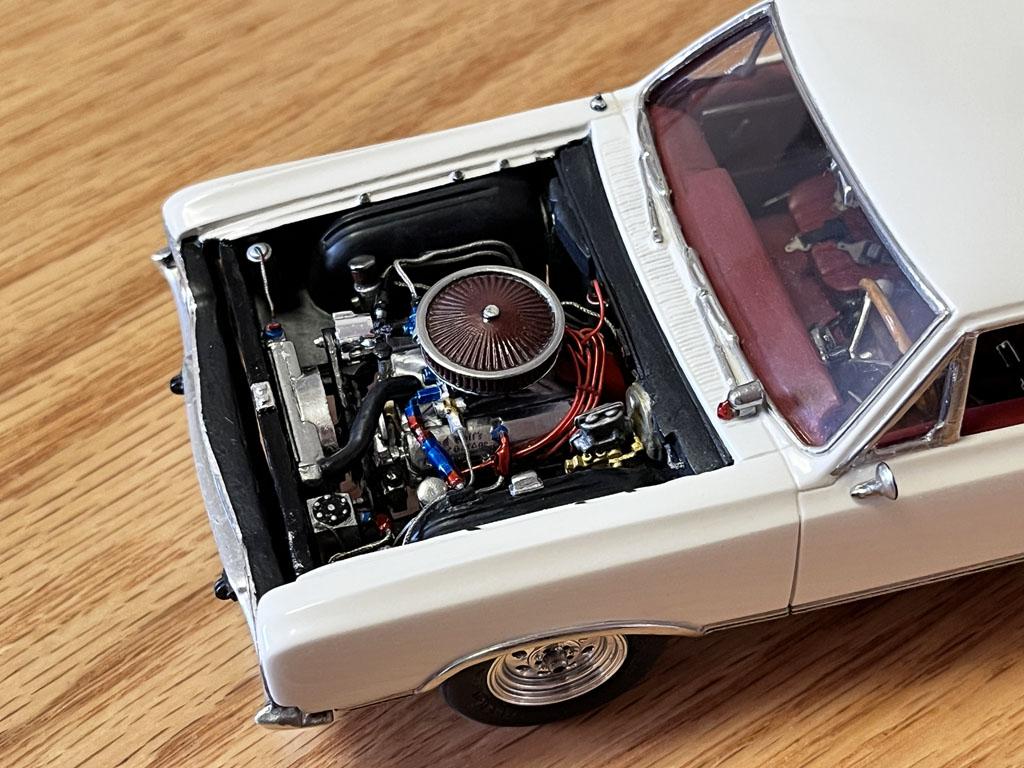
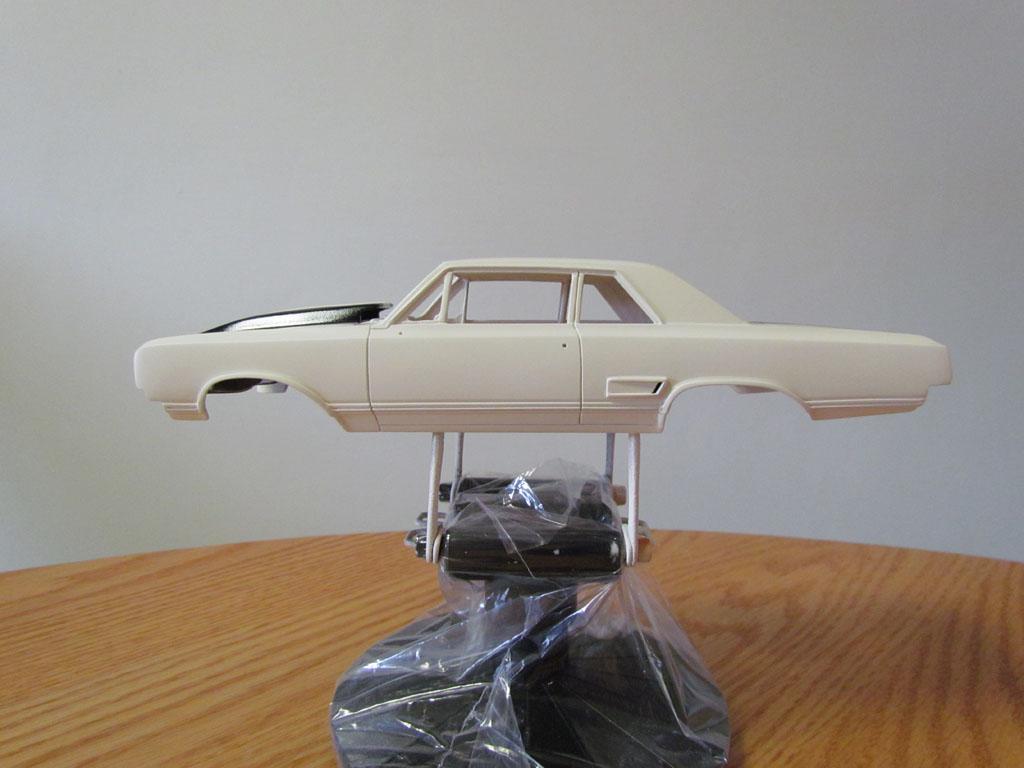
The last change I made was the carb. The resin carb I had was too large and made the air cleaner sit too high. I got a resin carb from Fireball Modelworks and added the plumbing as I had on the first one. The new one is the unpainted one in the picture. The interior, chassis and engine were glued in next along with the tail light panel and the wheels/tires.
-
1965 Oldsmobile 442(from an AMT '64 Olds 442) - FINISHED
crowe-t replied to crowe-t's topic in WIP: Model Cars
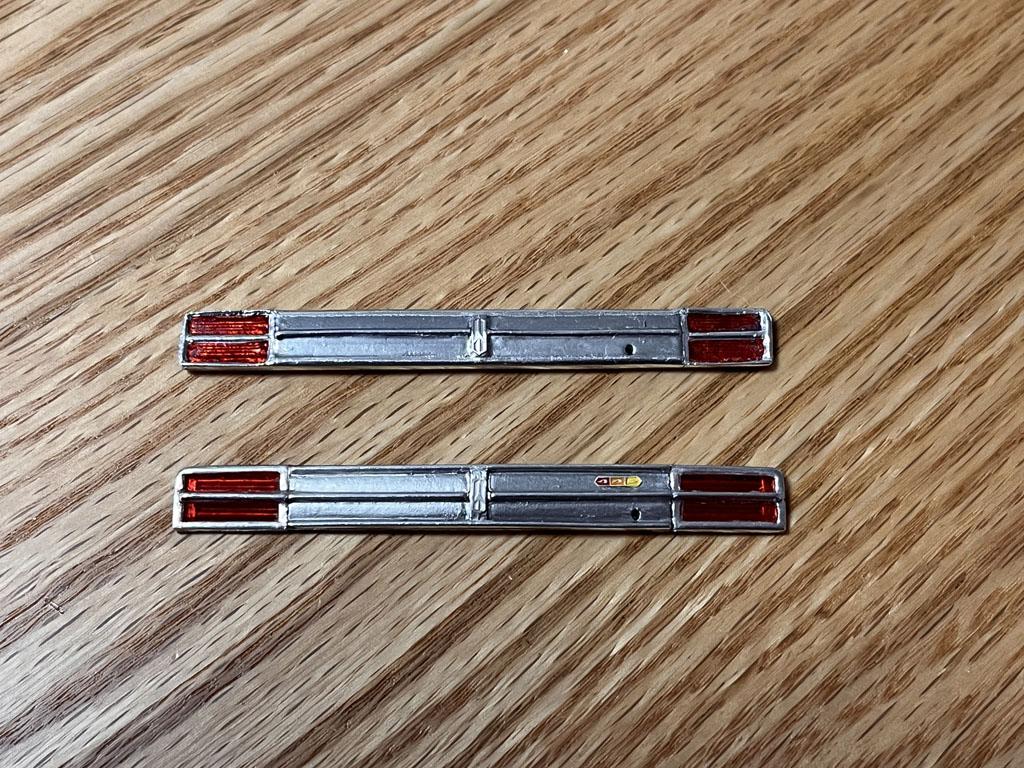
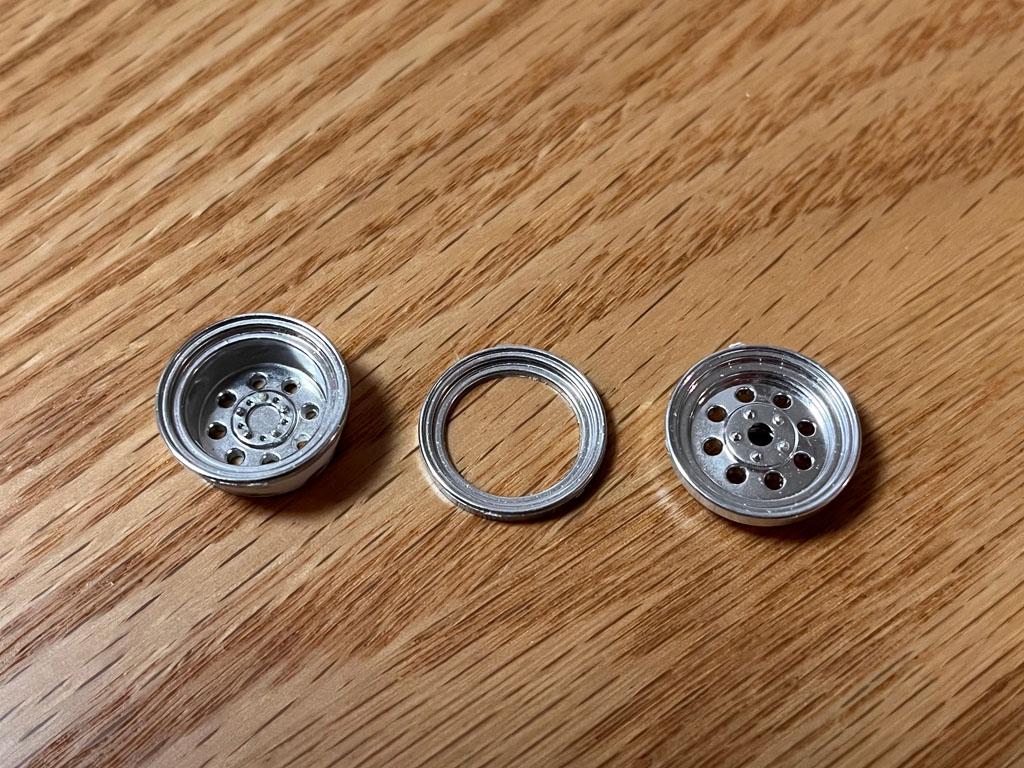
The resin tail light panel I got from MCW didn't have sharp details and the tail lights weren't wide enough so I decided to scratch build a new one. In the picture with both tail light panels painted the new one I scratch built is on the bottom with the wider tail lights. I also didn't like the resin wheels I had gotten for this. I found a set of Weld Drag Lites on E-Bay from one of the Revell/Monogram Pro Stock Kits. I cut the outer bead locks off the rear wheels and attached the front wheels inner outer rims. In the Pro Stock kits the front wheels mount on a spindle and there are outer rims for the inner front wheels that are chrome. They fit perfectly on the rear wheels once the bead locks are cut off. I did this modification on the rear wheels to make them resemble street car wheels. I did have to add the small screws around the perimeter that the 1:1 car has.
-
1965 Oldsmobile 442(from an AMT '64 Olds 442) - FINISHED
crowe-t replied to crowe-t's topic in WIP: Model Cars
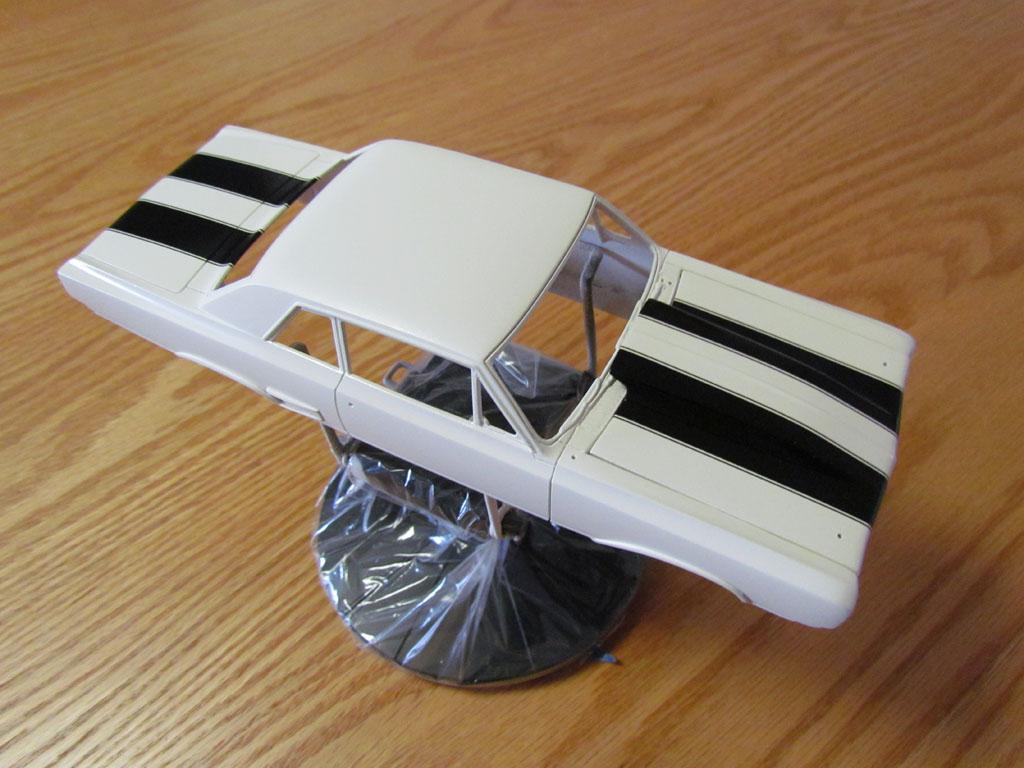
Over the Summer I continued to polish the clear, spray the front inner fender wells(engine bay) black, and spray black under the hood. After all the polishing I applied the Bare Metal Foil on the trim. The photo etch hood pins and side body emblems from The Model Car Garage were glued in place. I also painted the inside of the photo etch 442 emblems. I attached the rear license plate and the custom front plate to the bumpers. The license plate numbers are blurred out to protect the innocent. lololol On this new body I removed the molded in door handles and used the chrome door handles from the Lindberg '67 Oldsmobile 442 kit. I'll continue the progress pictures in another post due to the amount of pictures.
-
1965 Oldsmobile 442(from an AMT '64 Olds 442) - FINISHED
crowe-t replied to crowe-t's topic in WIP: Model Cars
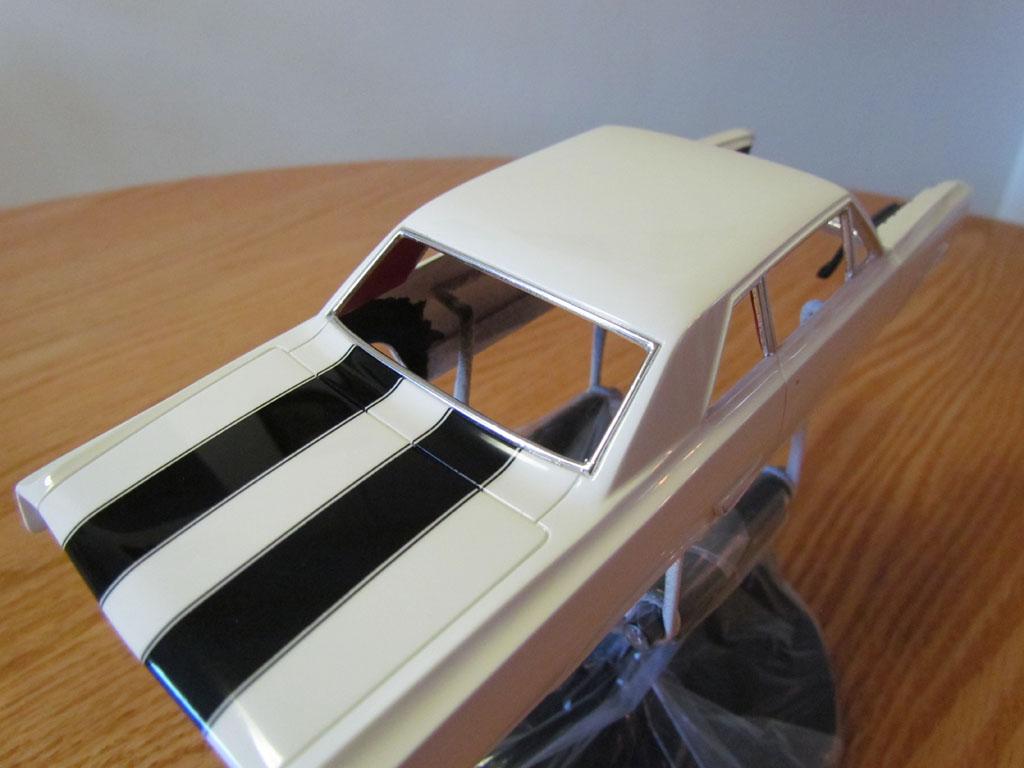
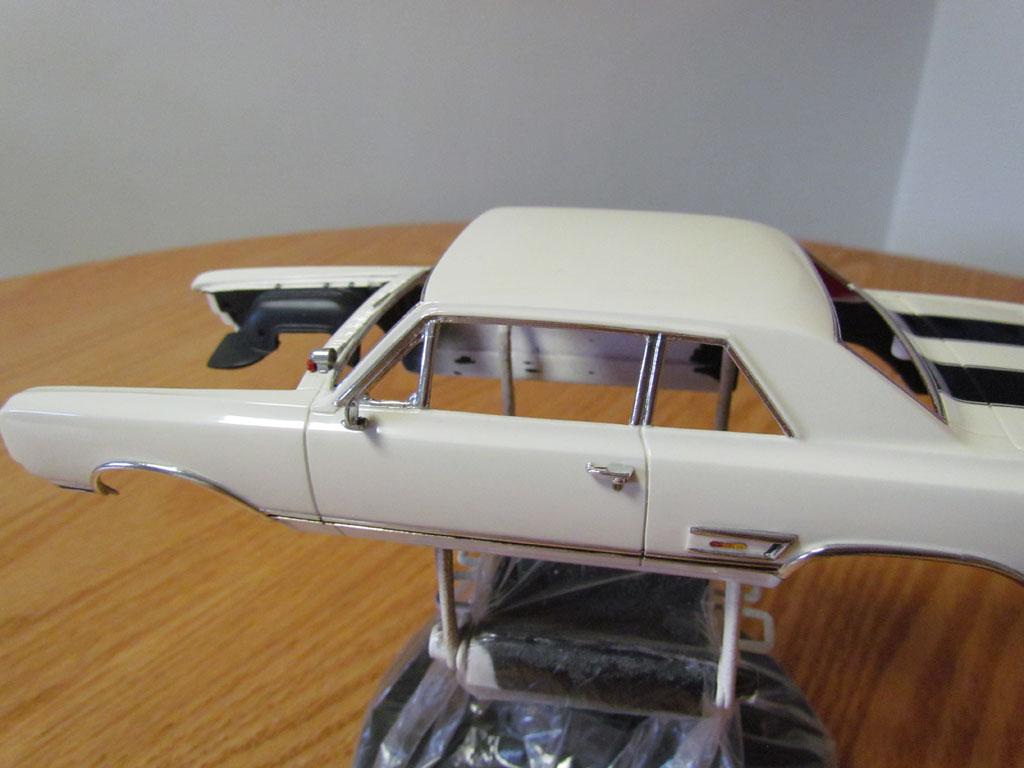
It's been a long while since I posted any updates. I'm glad to say that this one is finished. First I want to show progress pictures and a description of the work involved. I had to strip the body and then strip it again and again... lol I had every problem I could imagine from bad paint to cracks appearing in the body. The AMT 1964 body I'm using is from an old kit and the plastic is thin. After having so many things go wrong I decided to give up on the body and start on a new one. I picked up another AMT 1964 Oldsmobile 442 kit and started modifying a new body. This time I reinforced the inside of the fenders, quarter panels, under the windshield cowl... with sheet styrene and straight pins glued in with CA glue. The hood scoop on the first body's hood was a bit too low so this time I paid better attention to the size and shape. It's much closer to the real 442's hood scoop. In the beginning of the Summer I painted the body, sprayed the stripes, applied the small black pinstripe decals alongside the wider black stripes and sprayed the clear. In all I think between the 2 bodies I gave this one about 6 paint jobs. I wanted this paint job to be the final one and as it turns out it is. Hurray!!! I'll post more progress pictures in another post and then show the finished model.
-
I had shipped a model a few years ago. I used a plastic display case and tied the model down inside. I put this in a larger box with plenty of packing and it worked. I didn't want anything touching the upper part of the model.
-
Has anyone used Impresa Airbrush Lubricant? It's cheaper than Iwata Lube.
-
Testors isn't making the clear enamel in the small jars anymore. Is there an equivalent enamel for attaching photo etch emblems?
-
How are the MCW(Model Car World) Enamels? Do they require a lot of polishing? Is the clear enamel good? Mike Guest who owns MCW said they don't yellow. I was never a fan of enamels mostly due to them yellowing but I'm considering trying the MCW Enamels.
-
This is an awesome build!
-
Revell 1971 Plymouth Hemi Cuda 1/24 Scale in Metallic Gold.
crowe-t replied to Dragonhawk1066's topic in Model Cars
This came out great! How durable is the Createx Gloss Clear? Can it be used over lacquer? -
How does the GSI Creos Mr. Airbrush Procon Boy PS-289 airbrush compare to an Iwata Eclipse or a Grex airbrush? I keep hearing great things about it.
-
Revell or AMT '67 Pro Street Chevelle?
crowe-t replied to crowe-t's topic in Model Building Questions and Answers
Is either the Revell or AMT kit's body more accurate? -
Which is the better kit, the Revell '67 Pro Street Chevelle or the AMT '67 Pro Street Chevelle?
-
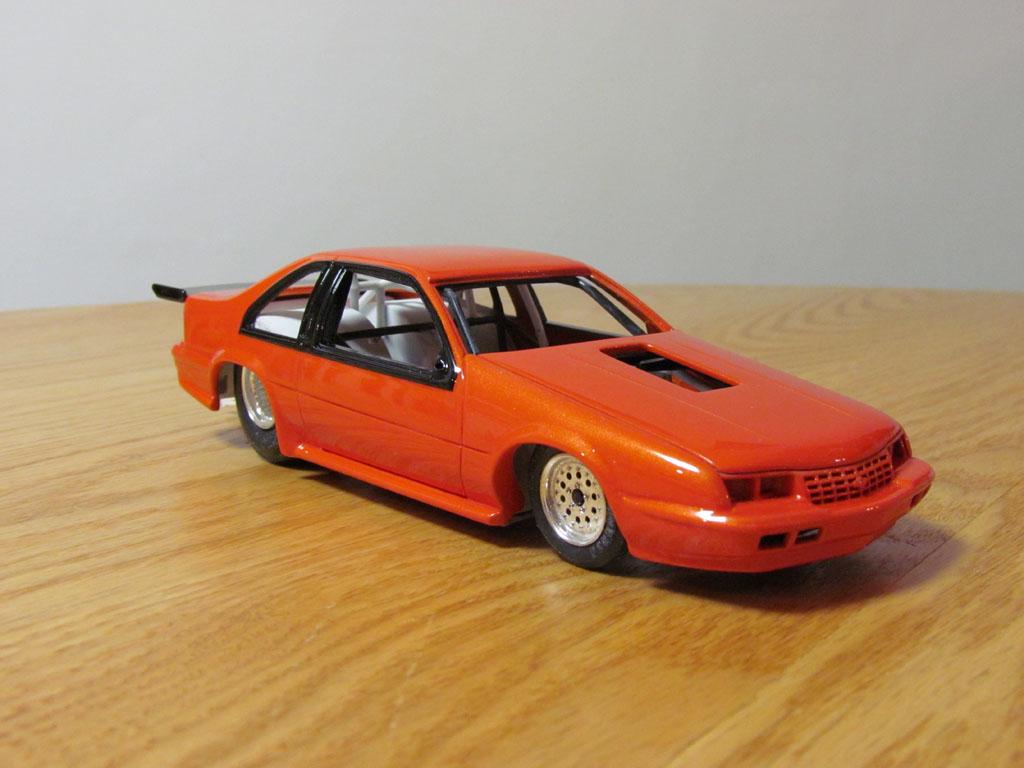
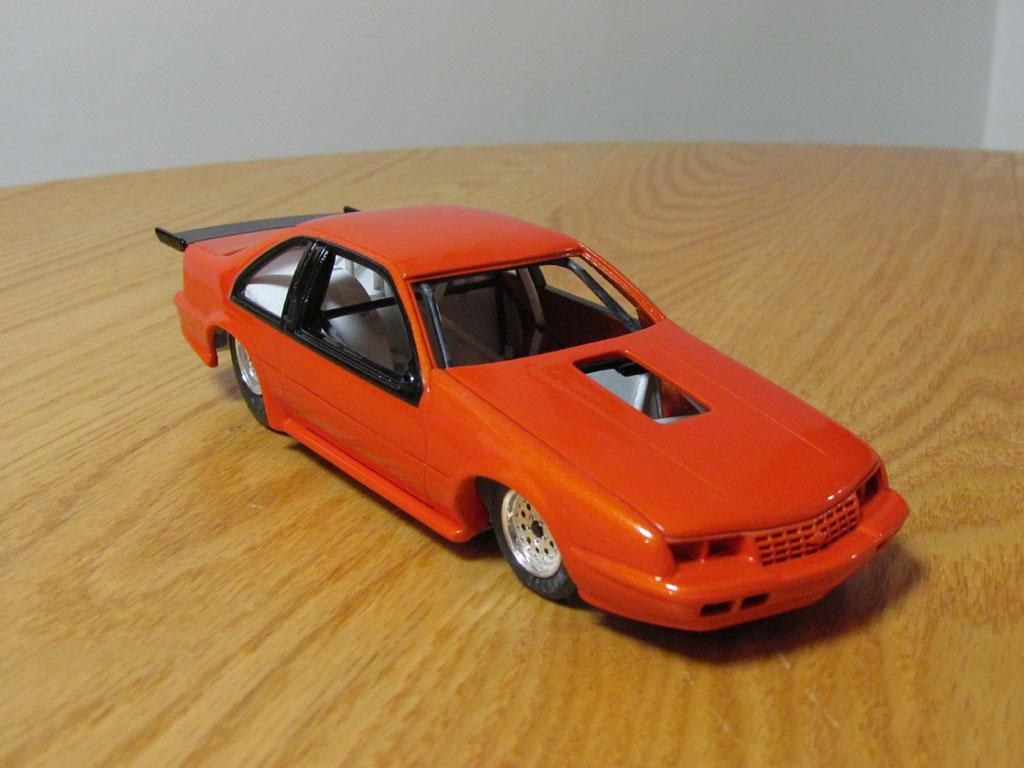
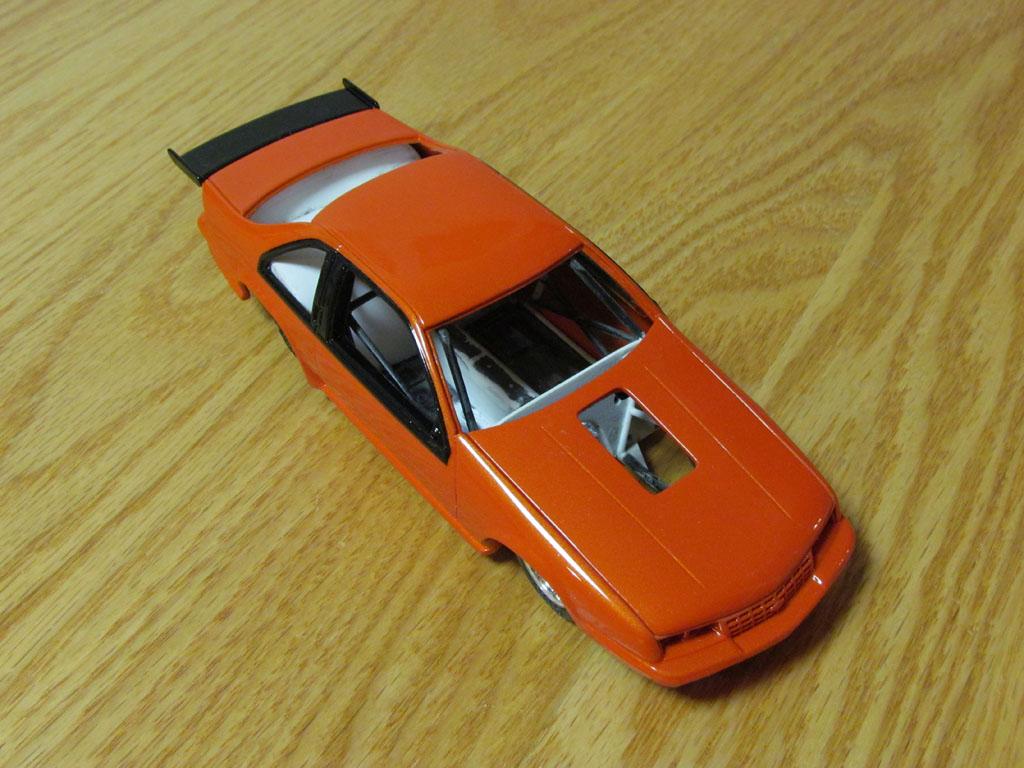
Hey thanks guys! I had posted pictures of the real Beretta that inspired this build. This build isn't exact but close. I tried to get the color as close as possible.
-
Thanks for the compliment!
-
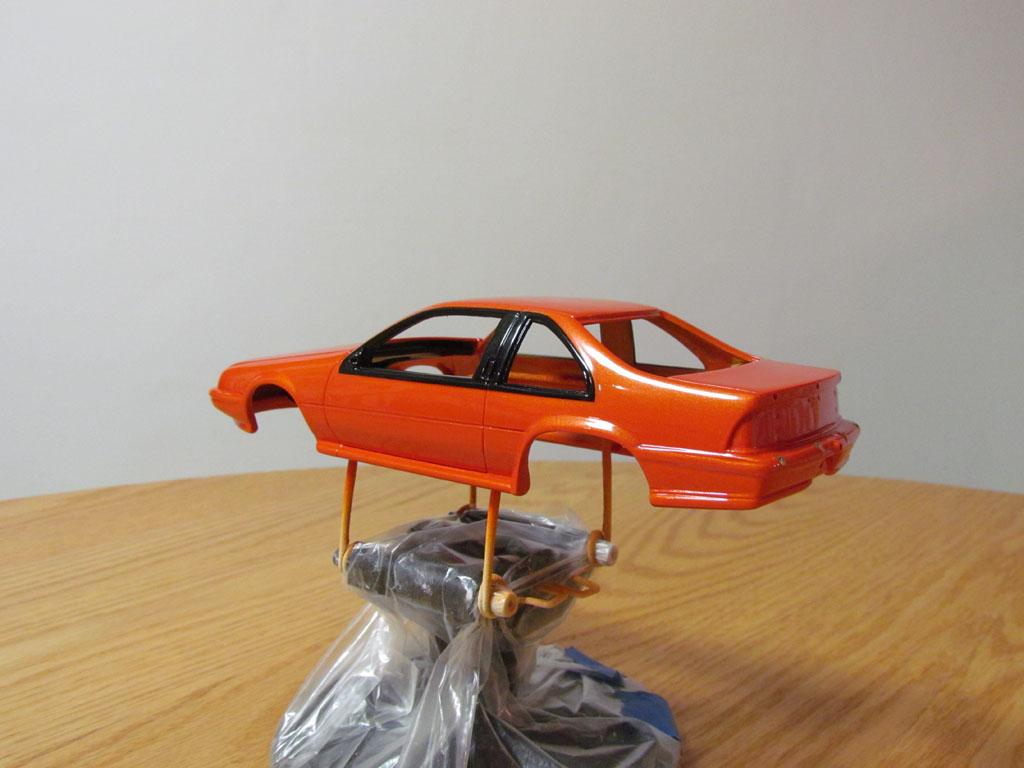
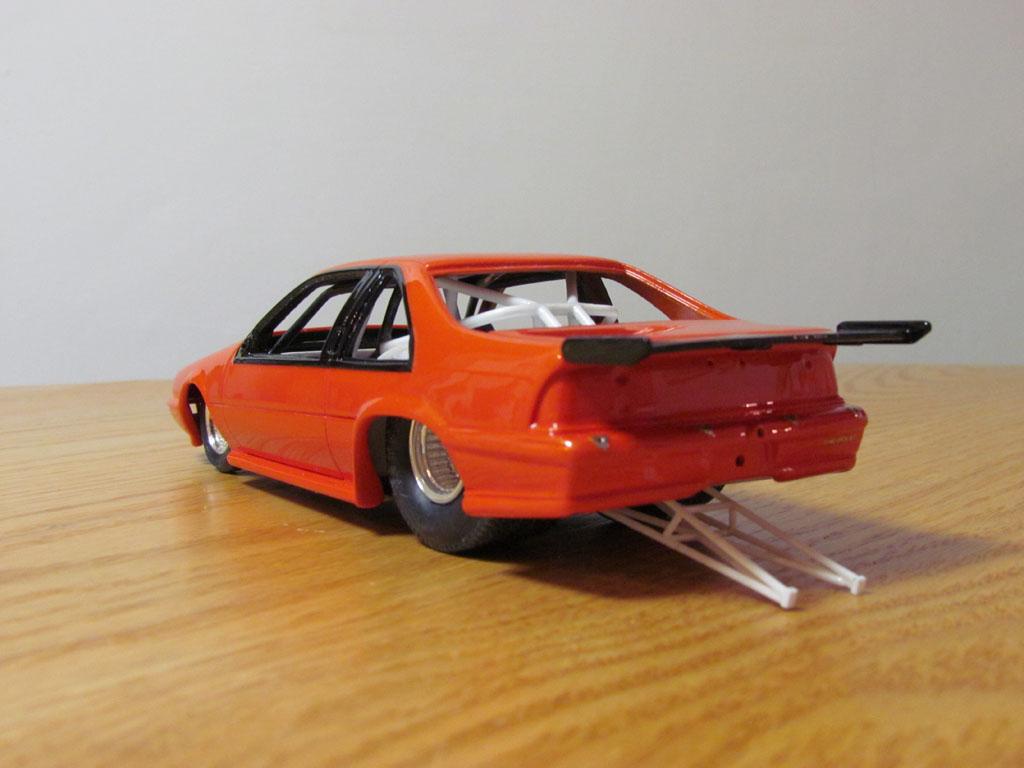
I sprayed some paint on the body. The wing is black for the chrome paint. The color is a mix of Gravity Colors McLaren Mira Orange and Lamborghini Arancio Borrealis. It's 9 parts Lamborghini Arancio Borrealis and 1 part McLaren Mira Orange. The clear is Splash 2K clear.