crowe-t
-
Posts
1,965 -
Joined
-
Last visited
Content Type
Profiles
Forums
Events
Gallery
Everything posted by crowe-t
-

How Can Tail Lights Be Tinted?
crowe-t replied to crowe-t's topic in Model Building Questions and Answers
The paint on the body is incredible! Are both the Tamiya Smoke and LP Clear red on the inside of the clear lens? Did you use Tamiya X-19 Acrylic Smoke or Tamiya Smoke in the spray can? Do you have any other pictures showing the tail lights closer? -
How Can Tail Lights Be Tinted?
crowe-t replied to crowe-t's topic in Model Building Questions and Answers
The black on the inside isn't totally opaque? -
How Can Tail Lights Be Tinted?
crowe-t replied to crowe-t's topic in Model Building Questions and Answers
Either isoproryl alcohol or Windex will remove the Tamiya Acrylic colors. I also have a broken clear tail light part I can test on. -
How Can Tail Lights Be Tinted?
crowe-t replied to crowe-t's topic in Model Building Questions and Answers
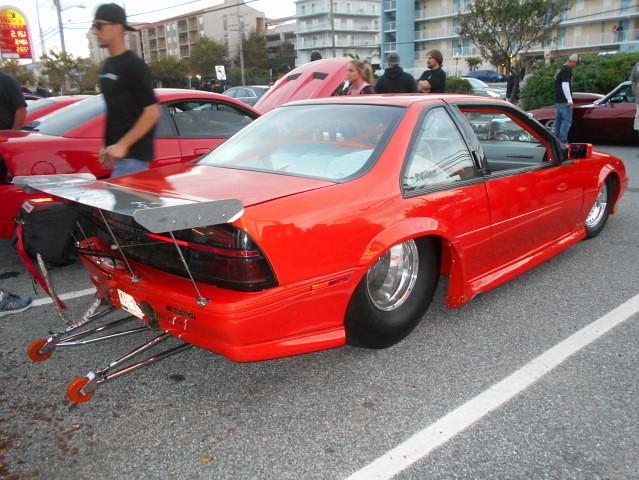
It's a beautiful build! The tail lights looks like a real Beretta's. When you say you painted the inside black, do you mean the body behind the tail lights or the inside of the actual clear red part? Did you paint the outside of the middle section black? I'm building a Revell Beretta pro Street kit that I'm modifying. The tail light piece is clear. http://www.modelcarsmag.com/forums/topic/168464-revell-beretta-pro-street/ -
I'm working on a build that has clear tail light lenses. I usually spray the back side of the clear lenses with Tamiya Acrylic Clear Red and put them over BMF or silver paint. However they tend to almost look lit. This is for Chevy Beretta Tail Lights. I believe the middle panel with the Beretta lettering is actually black. I'd like the tail lights on the sides to look red but still tinted. If I spray the back sides of the clear lenses with Tamiya Acrylic Clear Red can I spray Tamiya Acrylic Smoke over the outside of the clear lenses and still see the red?

-
Nice job on this! How did you tint the tail lights?
-
I like the rear wheels. What kit are they from?
-
Painting interior tin(in a drag car)?
crowe-t replied to crowe-t's topic in Model Building Questions and Answers
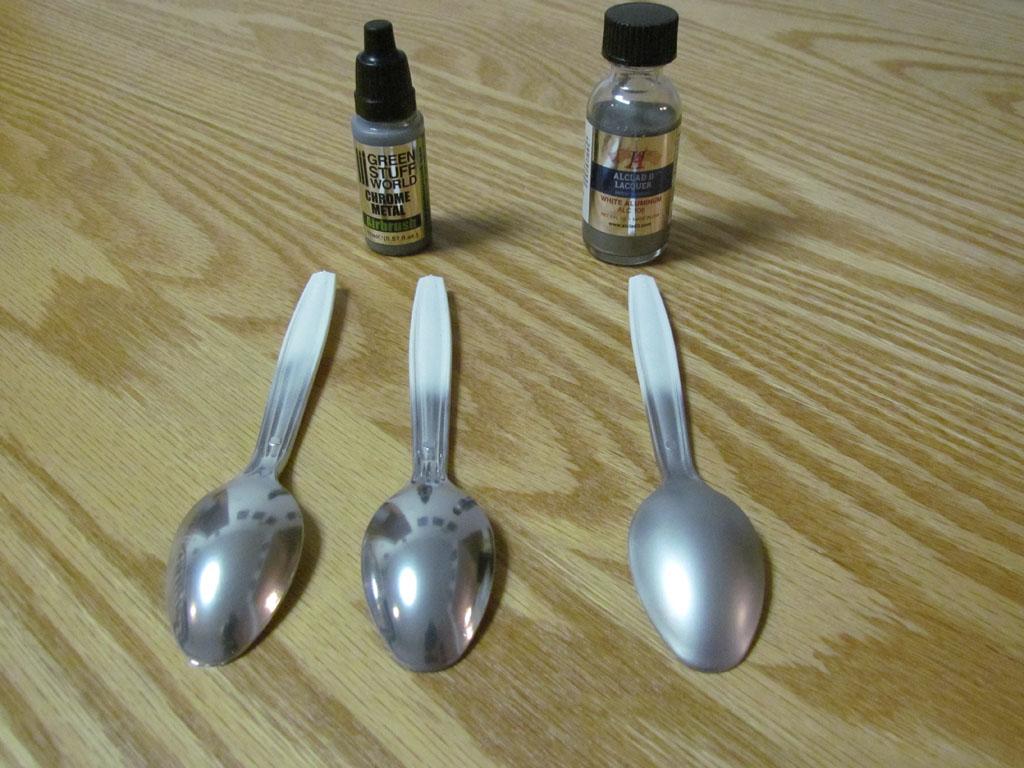
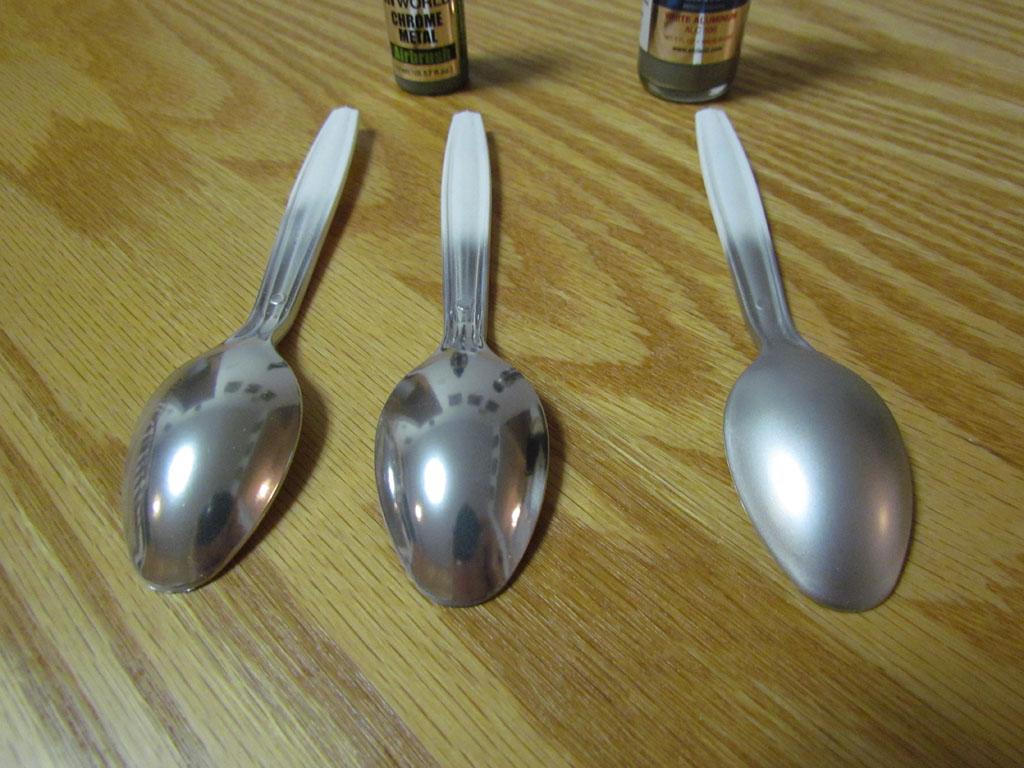
I sprayed some spoons. The 2 spoons on the left are sprayed with Green Stuff World Chrome Metal over Testors Gloss White Enamel. The spoon on the right is sprayed with Alclad ALC 106 White Aluminum. The gloss white enamel does make the chrome look more like polished aluminum. The Alclad White Aluminum is good for unpolished raw sheet metal. I usually use Alclad ALC 101 Aluminum but it's more of a grayish aluminum. The White Aluminum is brighter. I've tried Alclad ALC 105 Polished Aluminum but the Green Stuff World Chrome Metal over the gloss white looks better and is more forgiving when spraying.
-
Thanks! I'll look into it.
-
I need to have an STL file printed in resin. Can anyone recommend an online 3D printing service?
-
I appreciate the compliment Glen! The chassis is where a lot of the problem areas are. Next time I build one I'll most likely use a different chassis. Possibly from a Revell/Monogram Pro Stock or a Revell Pro Sportsman kit. This kit's chassis is too stylized and needs work to resemble a standard tube chassis/roll cage. So far I'm happy with how it's coming. The one thing I'll most likely leave alone is the angled radiator. It looks kind of cool and does support the front of the body. I did start re-shaping the tin area around the engine compartment. I might get rid of the Chevrolet symbol and shorten that area.
-
Thanks Joe! I did a bit more and have to take pictures. I'll get some pictures up here in a day or so.
-
I'm sorry to hear this. I usually wait much longer before foiling a paint job. When using clear lacquer I usually wait about 1 - 3 months before even polishing it. Lacquer never actually fully cures anyway so the longer you wait the better. A guy I know who paints cars always said to wait about 3 months before polishing or handling lacquer.
-
1965 Oldsmobile 442(from an AMT '64 Olds 442) - FINISHED
crowe-t replied to crowe-t's topic in WIP: Model Cars
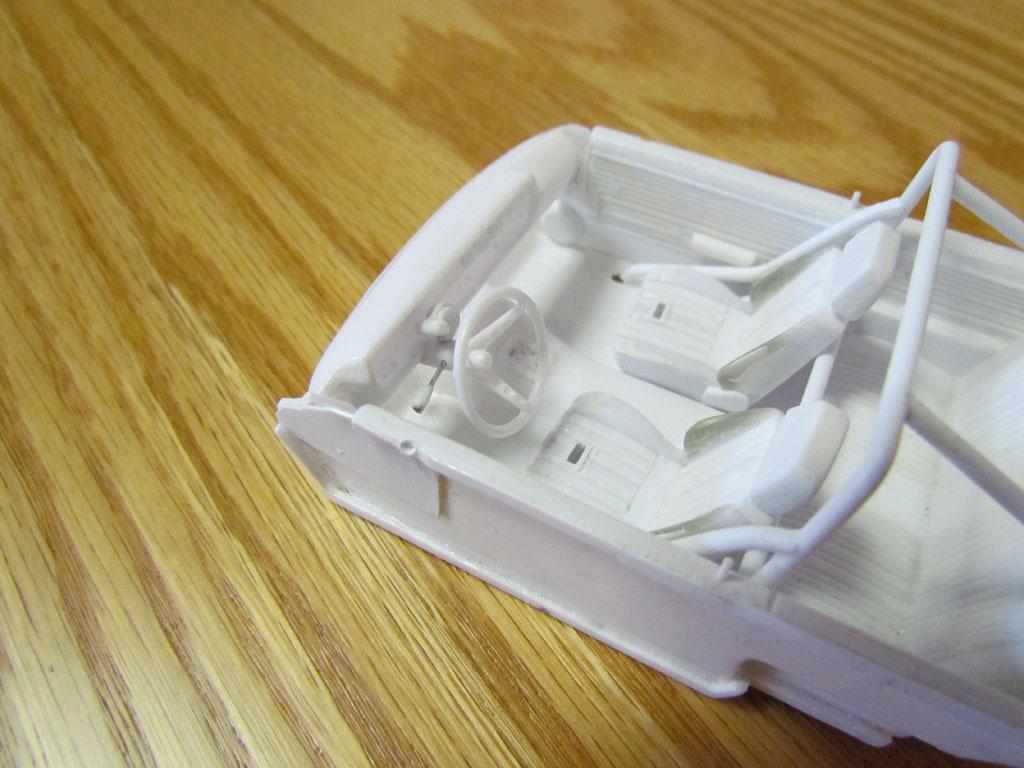
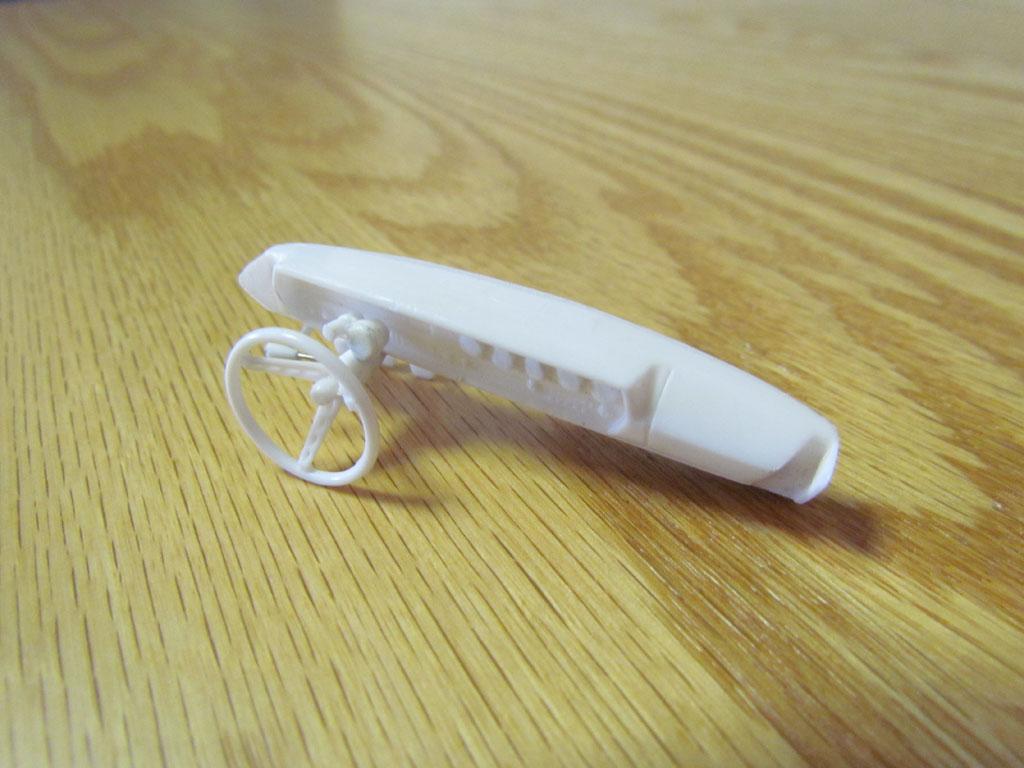
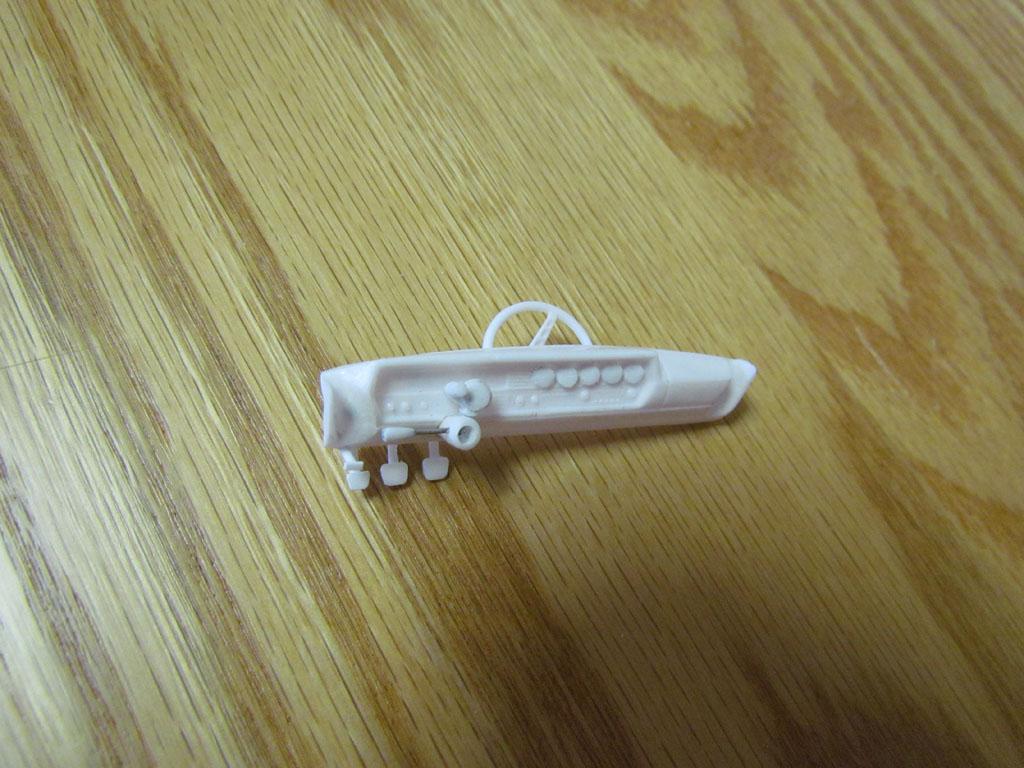
I made the fuel gauge, tach with shift light and the directional lever. The directional lever is a straight pin with 1.6 mm styrene rod on the end that I shaped for the handle. The printed gauges and bezels are from The Model Car Garage. These will be used for the tach, fuel gauge and the five gauges on the dash board.
-
These are all great ideas! What would a good wire gauge be to use? 30 awg, 34 awg...?
-
Thanks Chris! The belly pan was OK but was too close to the Dobbertin J-2000 that this chassis is based on. I wanted to make it look like a regular tube chassis.
-
Thanks Ian! I'll have a new update soon.
-
Where can I get or what's the best way to make a micro switch with the coiled wire that gets attached to a steering wheel in 1/25 scale? If I can get the wire I'll make one.
-
This looks like the chassis I have. I thought it might be from the Revell Matt & Debbie Hay's Pro Street T-Bird but it's definitely the Bob Glidden T-Bird chassis I have. Thanks for posting the pictures.
-
The body looks great polished.
-
Do you have a picture of the chassis out of the car? I have a Pro Stock chassis that might be the Bob Glidden T-Bird chassis but I'm not sure. I'm curious what chassis I have.
-
The paint looks great!
-
I always get orange peel with lacquer. It can be polished smooth. I don't think your paint looks bad at all.
-
I don't think the paint looks that bad. Isn't it lacquer? Lacquer always orange peels. It will have to be polished. Will you be clear coating it?
-
Ron, Have you figured out what chassis you'll be using?