crowe-t
-
Posts
1,965 -
Joined
-
Last visited
Content Type
Profiles
Forums
Events
Gallery
Everything posted by crowe-t
-
Glen, Thanks for the compliment on the Beretta. I'm having fun with that build. I hope I can do half as well as you did with the details. Thanks for the information on the harnesses They look real. Did you use a marker(Sharpie) to color the belt material? If so did the gloss clear go over the marker OK?
-
This is such a clean build! I have the harness from Pro Tech and also harnesses from Futurattraction. I also have extre harness material from Pro Tech. Did you use CA glue to attach the belts to the hardware?
-
Beautiful job on this! What did you use for the harness belts? Is that decals on the harness?
-
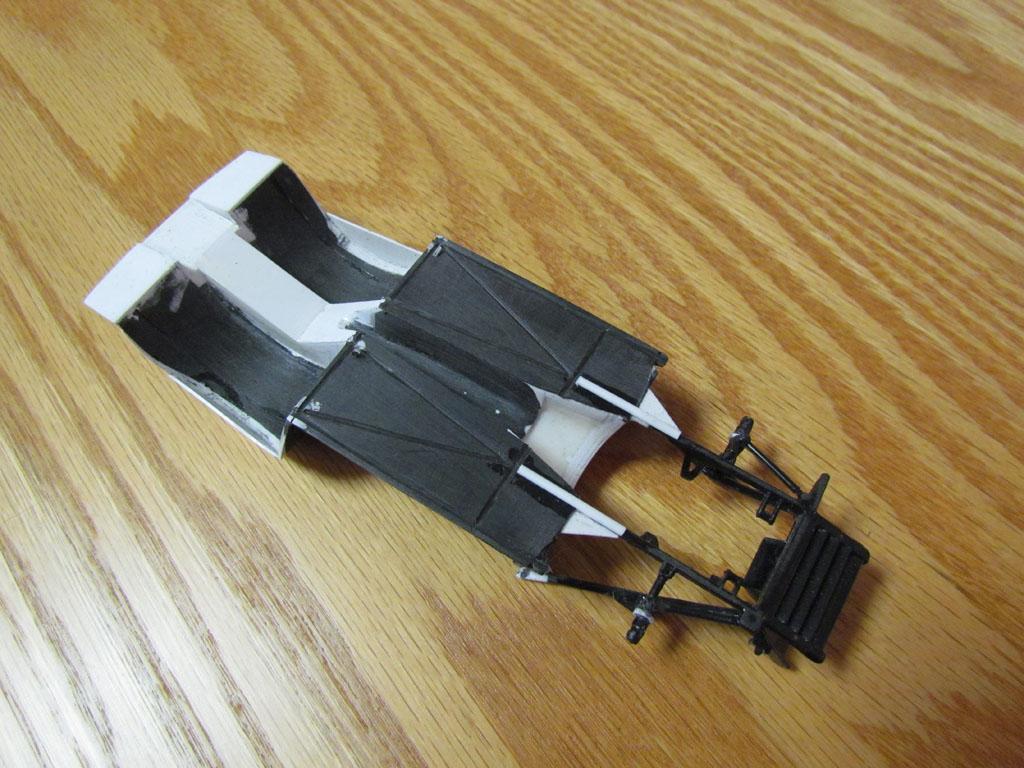
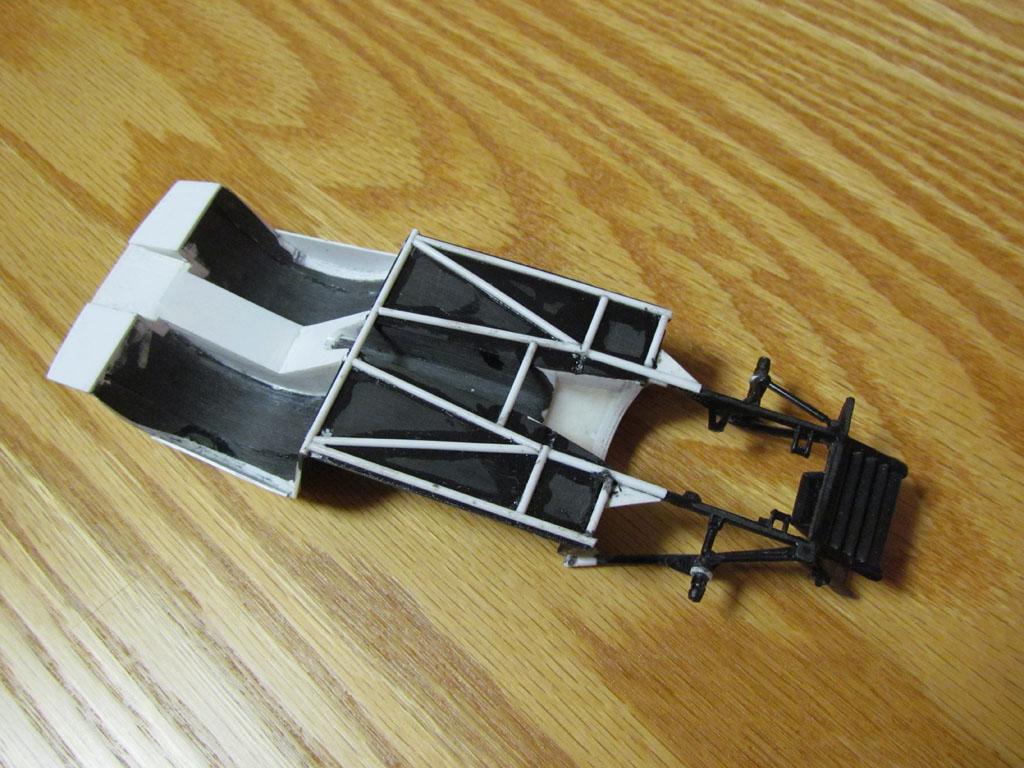
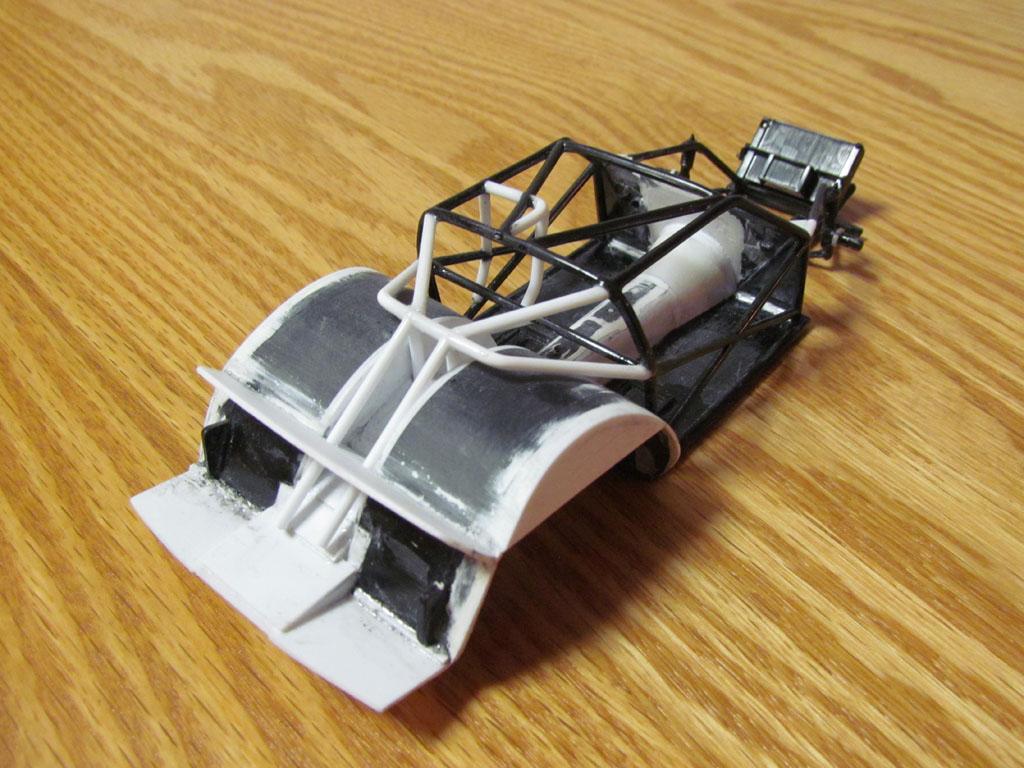
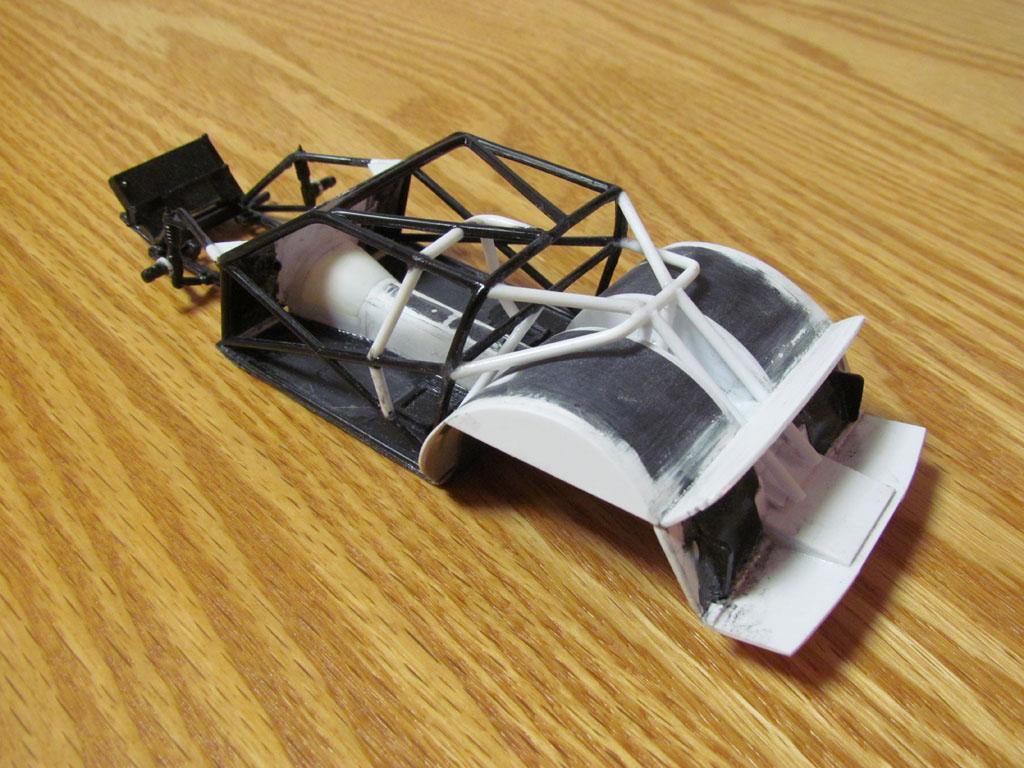
I opened up the bottom of the floor below the transmission tunnel and added chassis rails. The belly pan wasn't doing it. lol I used a file and made grooves to fit the rods into. I cheated it a bit and used 1.6 mm styrene rods instead of the 2 mm rods. The kit's front chassis rails are actually above the floor instead of below it like on most tube chassis'. I sanded the floor as much as I could and then extended the front chassis rails back with some 2 mm half round rods that I thinned a bit to match the 1.6 mm rods more closely. The 1.6 mm rods match better with the 2 mm half round rods since they don't stick up as much as 2 mm rods would have. Since the bottom of the floor is narrow the 1.6 mm rods just look better. I still have to extend the rods in the area of the floor between the wheel tubs. I had to compromise a bit but overall it's not bad and I feel it looks better than the 'Dobbertin' belly pan. I might remove the 2 mm half round rods and use 1.6 mm rods to blend into the front frame rails.

-
Outstanding! It's a beautiful Charger.
-
Thanks JC!
-
Thanks Joe! I always felt the same way about the Beretta. I generally don't like cars past the 70's but the Beretta was something special. It has great lines. I especially like them done up as Pro Stock and Pro Street.
-
Ron, I appreciate your kind words. I should have another update in a day or so. It's getting there.
-
Anytime! Even one of the Revell/Monogram Pro Stock chassis' can be modified to look like a Pro Mod chassis.
-
Excellent job on the interior!
-
If you can find one of the Revell '55 or '57 Chevy Sportsman kits they have a great chassis to work with.
-
Ron, Did you get it already painted or is this a re-build of one of your former builds? I'll be following this one.
-

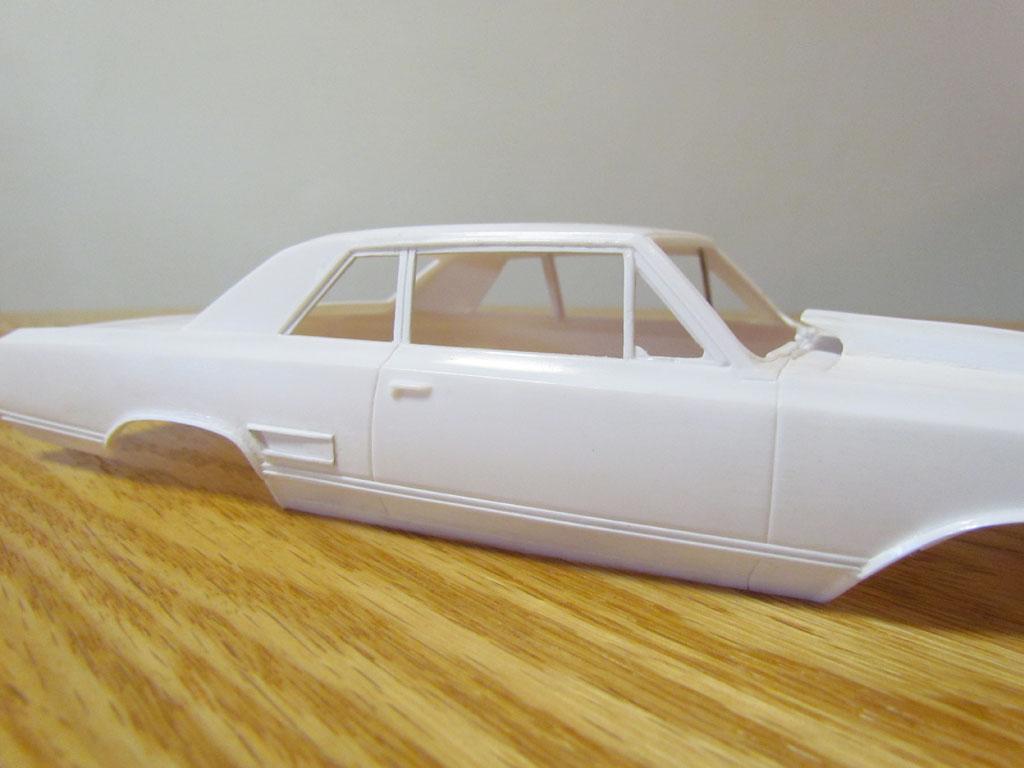
1965 Oldsmobile 442(from an AMT '64 Olds 442) - FINISHED
crowe-t replied to crowe-t's topic in WIP: Model Cars
Thanks Tony! I've been putting a lot of work into this one for my friend. I'll be able to start painting it soon. -
Hey thanks! I had a good time building this kit and making the changes.
-
I always thought Round 2 should have gotten a 1969 annual Charger and scanned the body to re-make the annual kit. The original body was perfect. I built the snap version and it's an improvement over the old glue kit. Here's my thread for the snap kit I built. http://www.modelcarsmag.com/forums/topic/128723-another-orange-clunker-car-mpc-snap-kit-general-lee/ Here's my thread for the MPC kit I built. http://www.modelcarsmag.com/forums/topic/121100-orange-clunker-car-mpc-general-lee/?tab=comments#comment-1760087
-
Food Dehydrators & Paint Dryers
crowe-t replied to JayVee's topic in Model Building Questions and Answers
The 1K urethane clear I'm using cures by evaporation and not from the humidity in the air. It's not a moisture cure urethane. I checked with the manufacturer. I am finding that it is curing over time. It's possibly the cold weather slowing down the cure time regardless of being in the dehydrator. -
Excellent work on these modifications! I actually love this old kit no matter how bad it is. lol Out of box the details aren't too good and the chassis is crude but I feel it has a more accurate shape to a Charger than the Revell kit. The front end and grill of the Revell '69 Charger is too bulky. This MPC kit got that area right. I built one of these a few years ago(actually the General Lee kit) as a GL and did a lot of these modifications using parts from a Revell Charger. I have a couple Revell '69 Charger kits that I've still never built. Your build is bringing back memories for me. Keep the pictures coming.
-
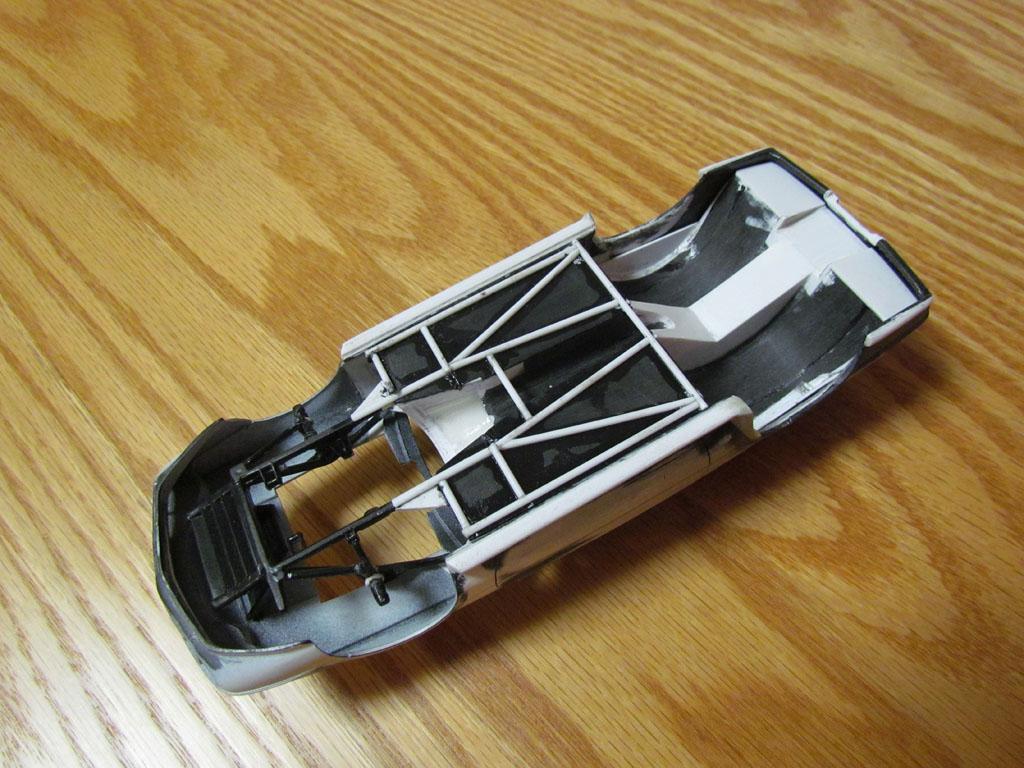
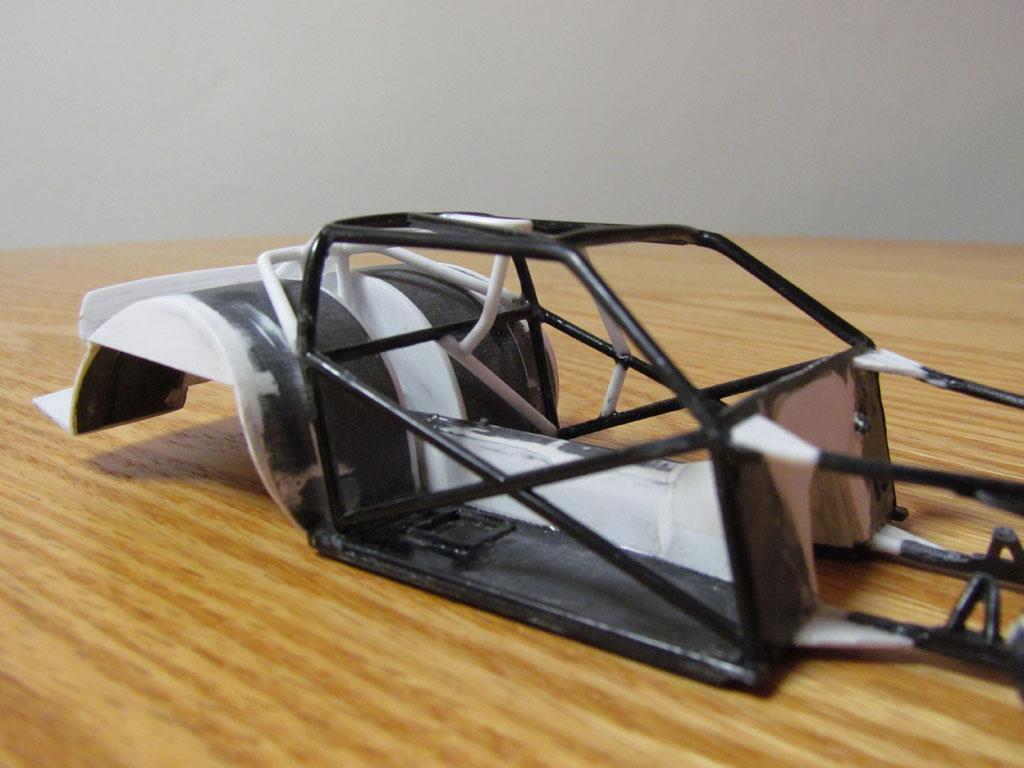
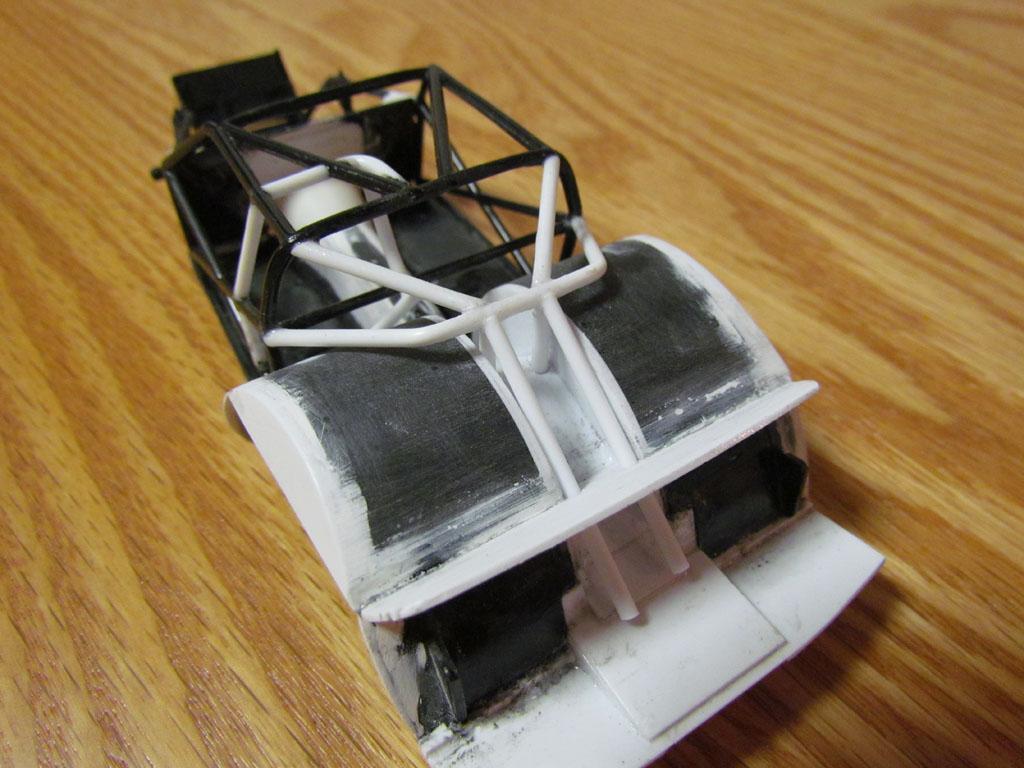
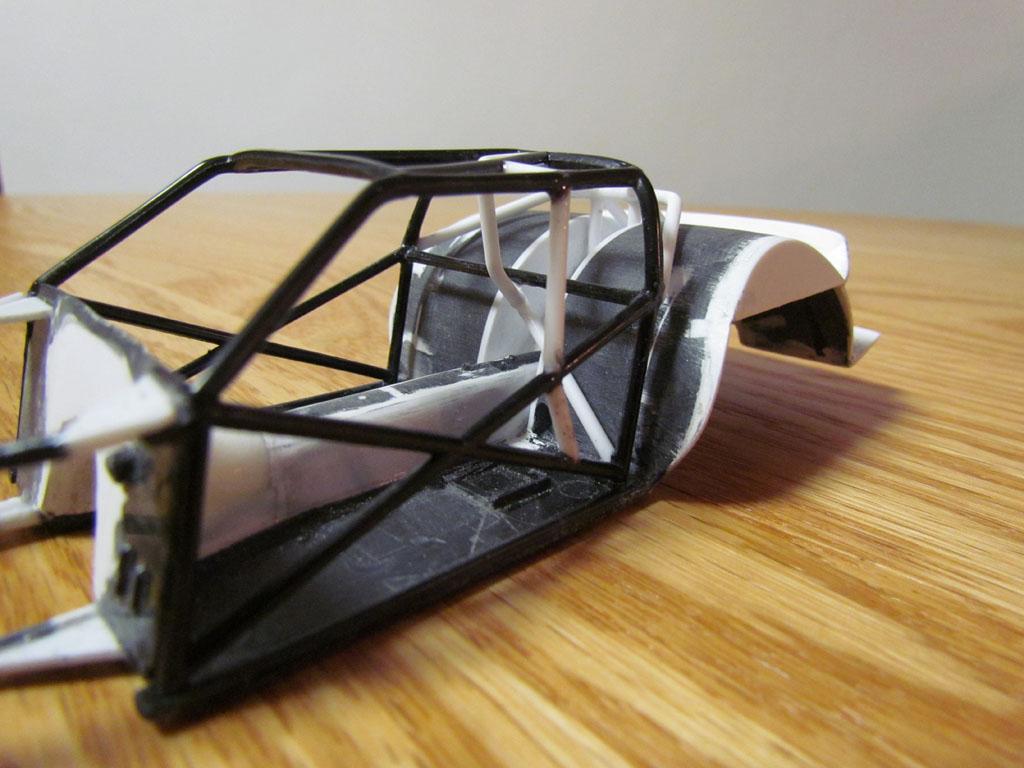
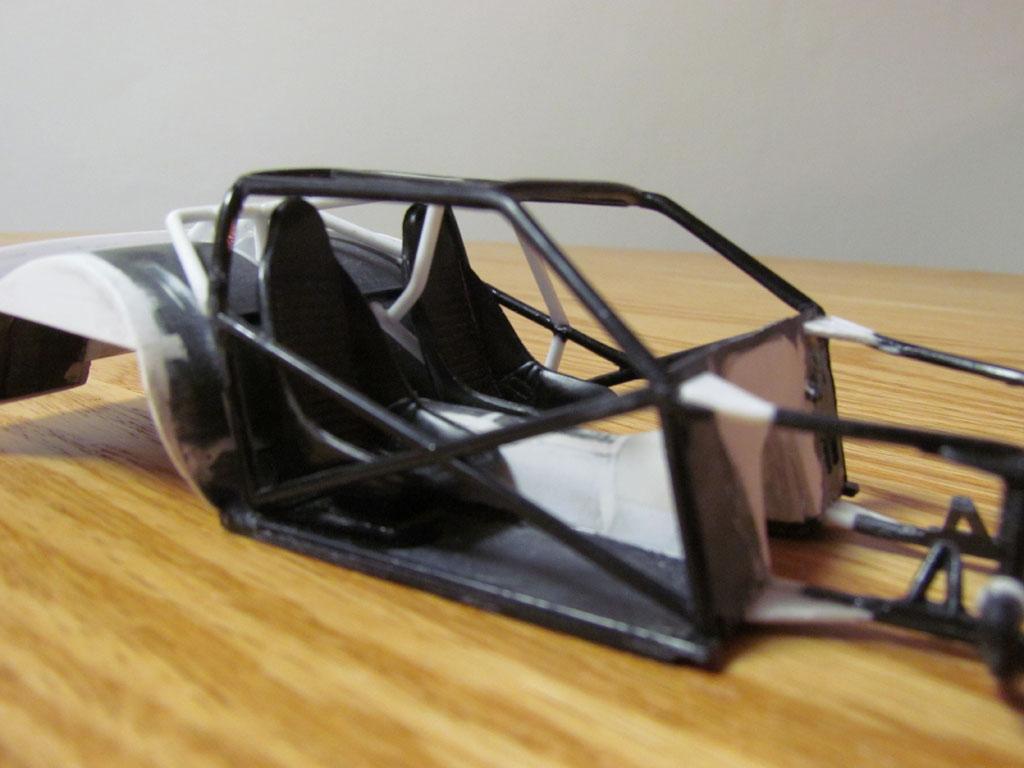
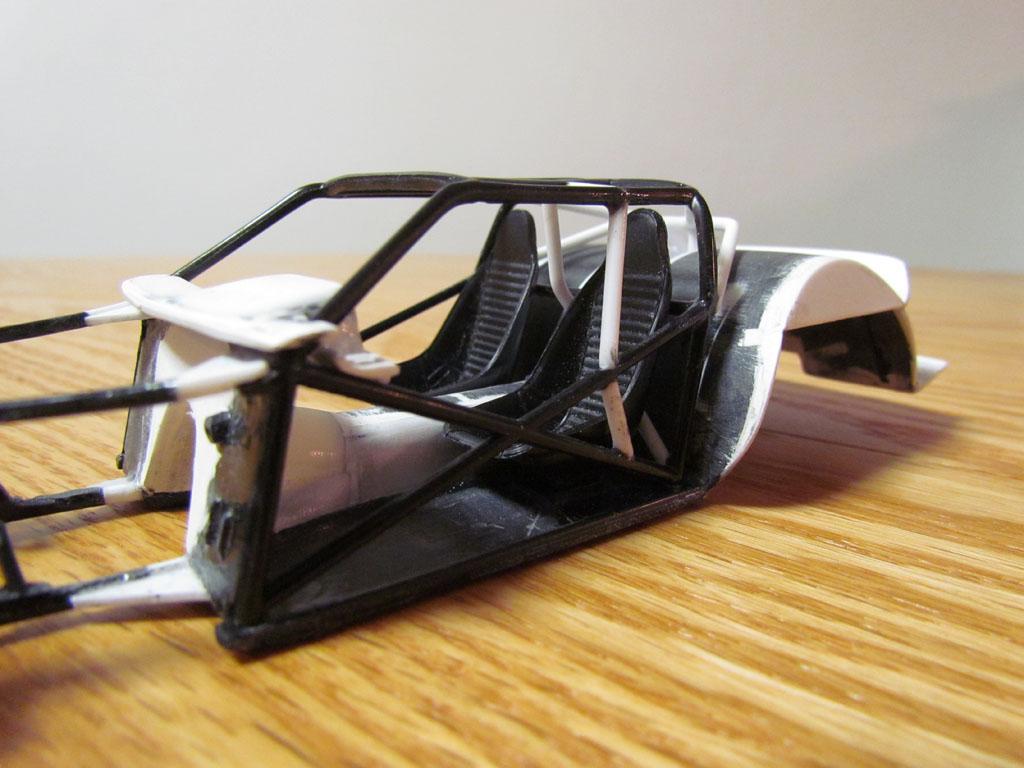
I got a bit more work done. I started adding the ground effects on the lower quarter panels behind the rear wheel openings. They're still rough now and need some more work. The transmission tunnel is now glued in and I put more bars in the roll cage. There's another bar on the right side of the drivers seat to make the funny car style cage and 2 bars extending the cage into the trunk. I'm still deciding if I should open up the bottom of the floor to expose the driveshaft and add some bars to get rid of the belly pan look. I'll most likely do it.
-
Thanks!
-
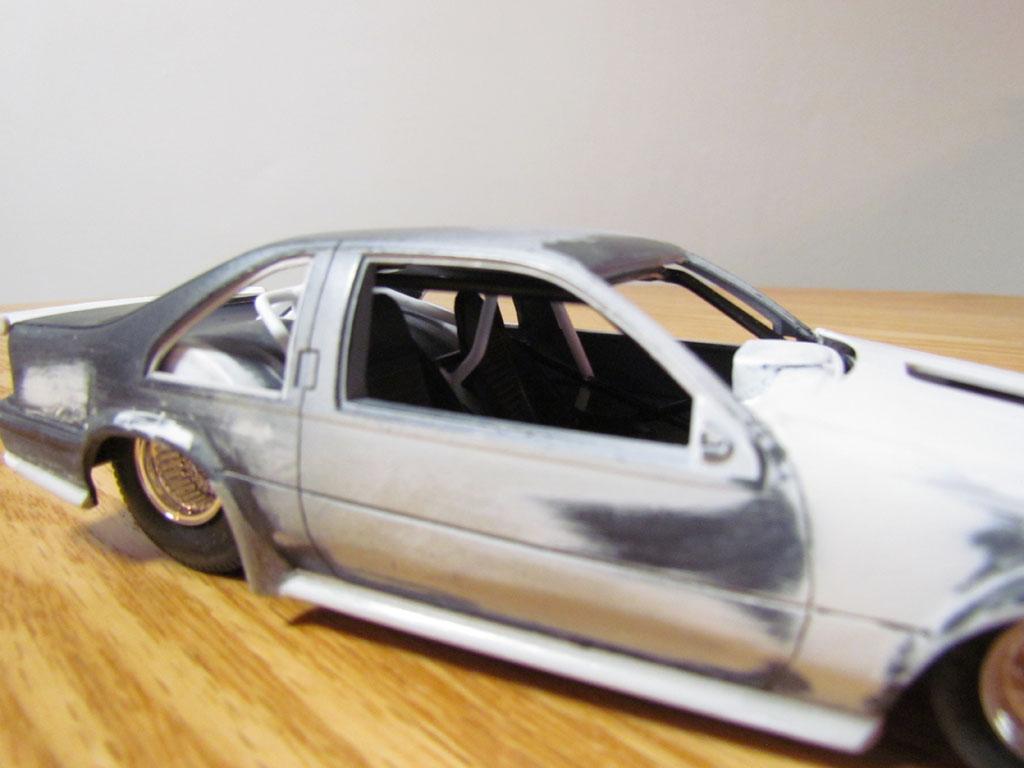
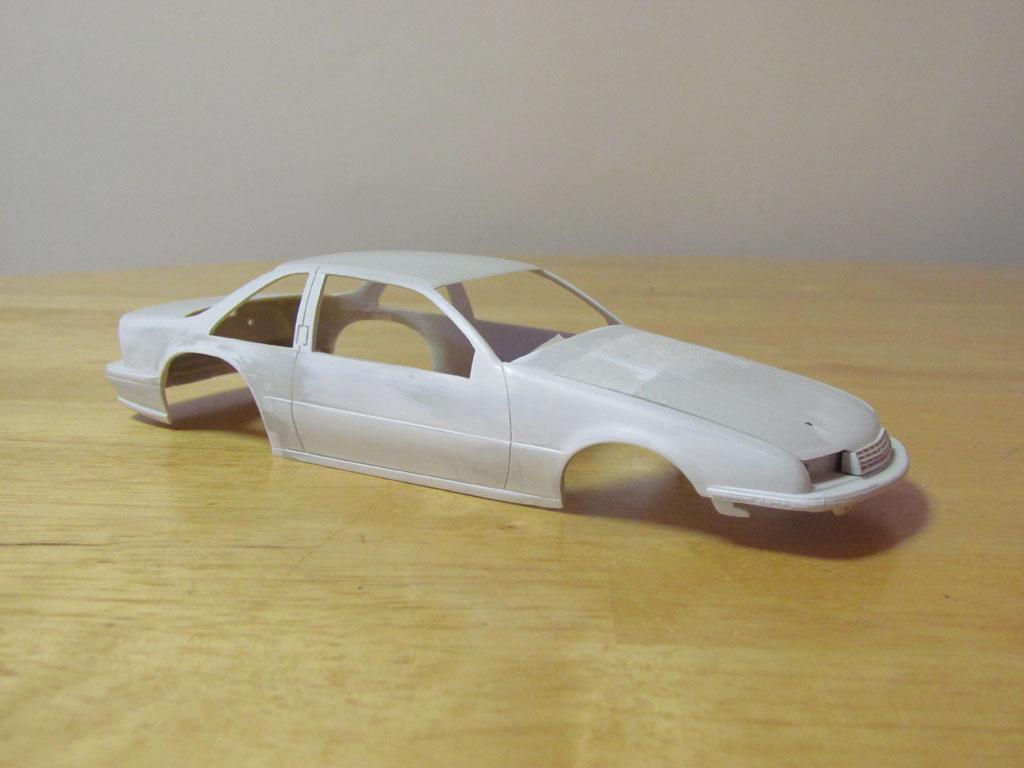
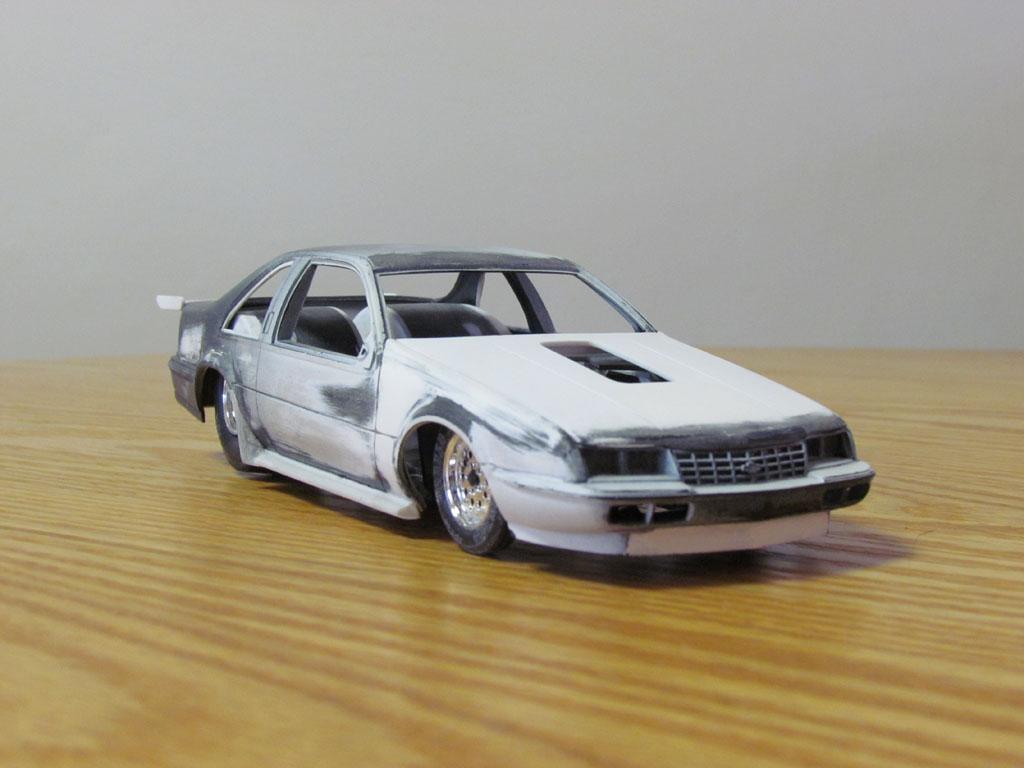
Thanks Chris! I'm really enjoying building this one. I have always loved the Beretta's as drag cars and Pro Street cars. This Beretta Pro Street build is sort of a 3rd attempt. A while ago I had started building a Revell kit as a Super Gas car. I stretched the nose, widened the rear wheel openings... At the same time I did the same modifications to an MPC Beretta body. The MPC kit is going to be the Reher Morrison Levi Garrett Pro Stock Beretta that I had planned on getting back to later on. In both cases I was stopped at the hoods. Both the hoods got badly warped. I do plan on getting back to them. This current Pro Street build wasn't planned this way. I was going to build it mostly box stock but I'm having so much fun I keep making changes as I go. I think I finally got a handle on how to make the hood. Last week I cut the front off the kit's hood and made the rest out of sheet styrene and it finally worked. I think I'm over that hurdle. lol I attached pictures of the other 2 Beretta's. I can't wait to get back to those.
-
Thanks Ron! I can't wait to start getting some paint on it. I did some more work today and will post pictures later or tomorrow.
-
1965 Oldsmobile 442(from an AMT '64 Olds 442) - FINISHED
crowe-t replied to crowe-t's topic in WIP: Model Cars
I added the rest of the details to the body. I put the molding on and made the side scoops on the quarter panels. After it all cures I'll scribe the door lines in the molding.
-
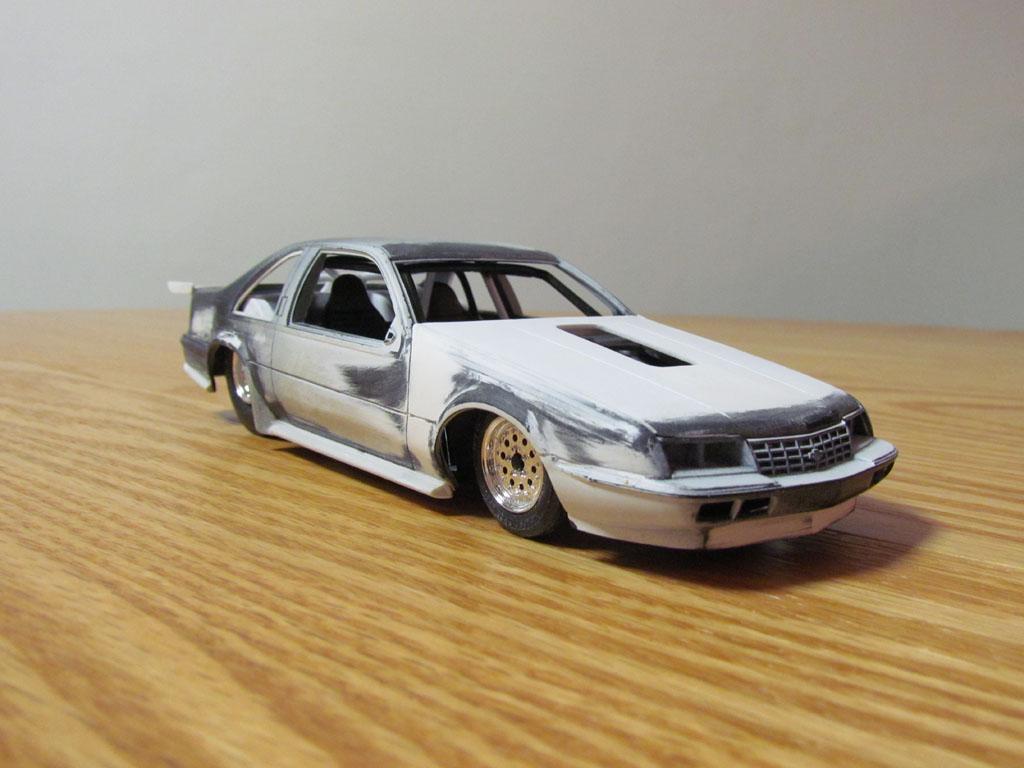
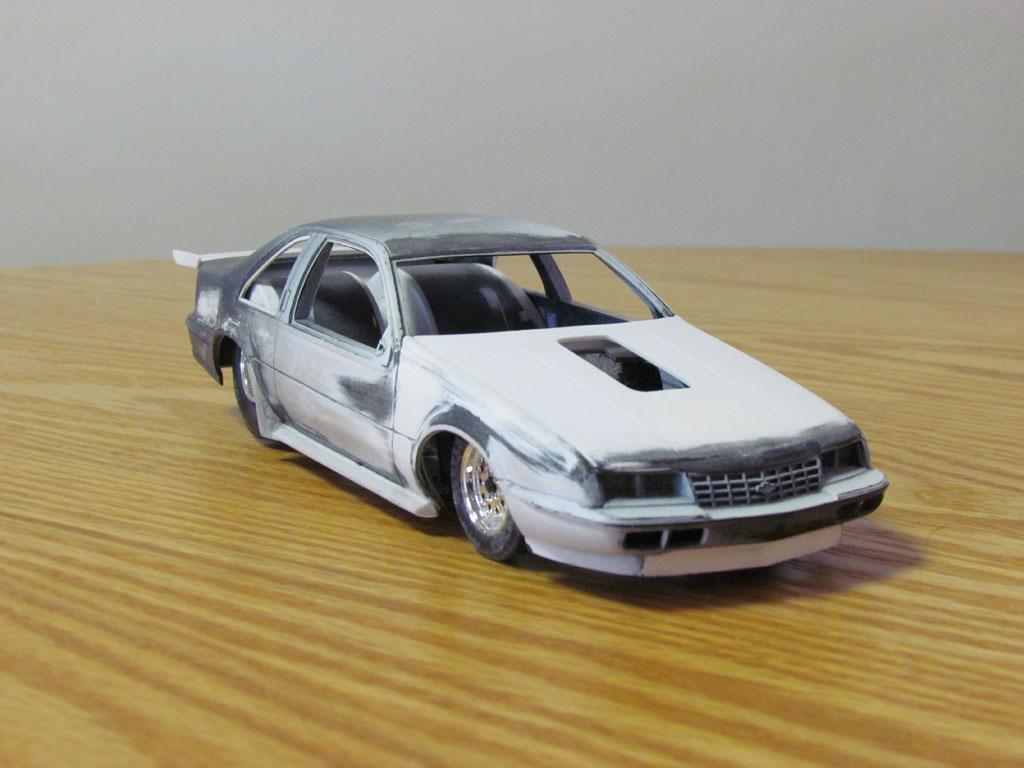
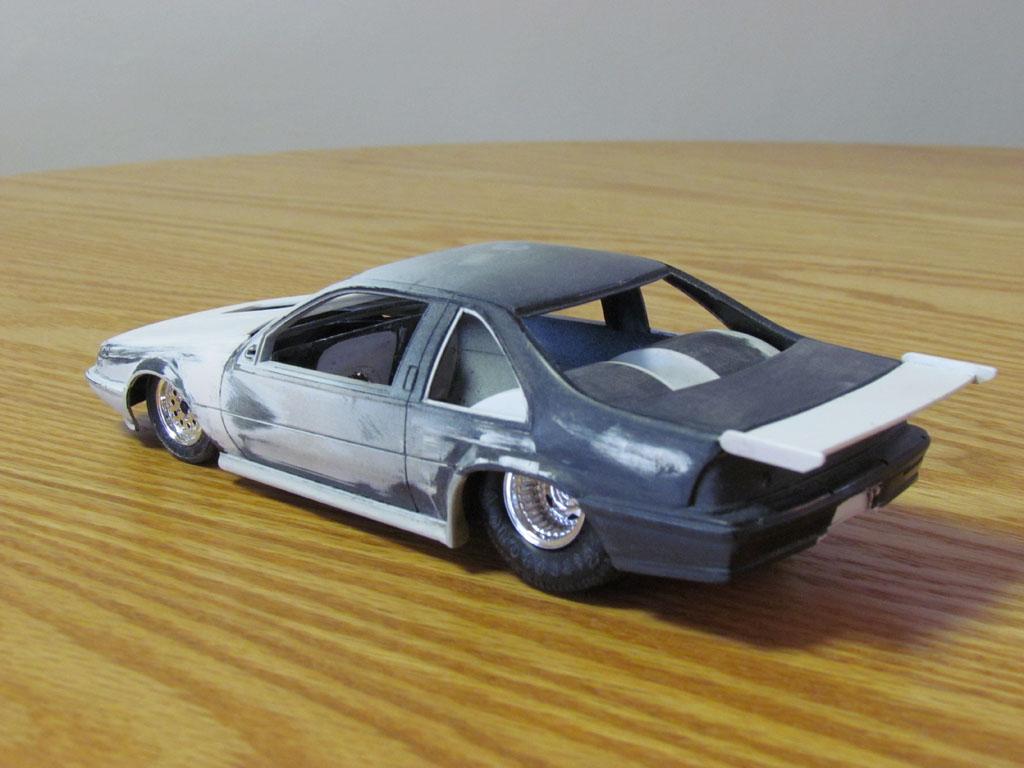
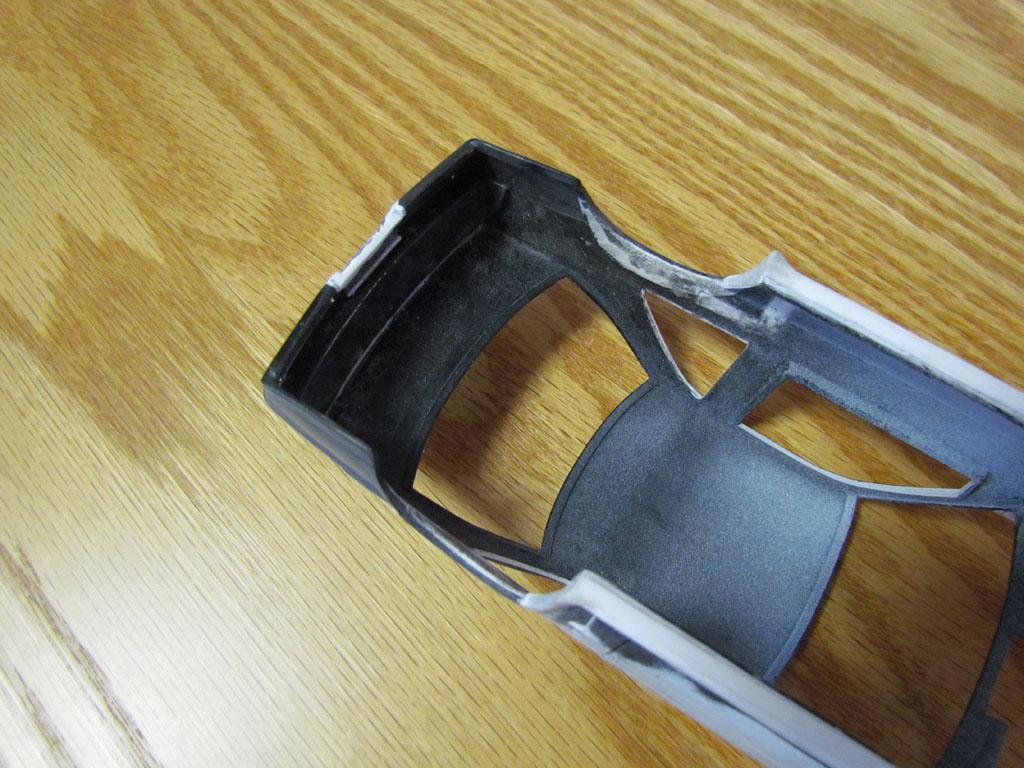
I got some more work done on the Beretta. I installed the ground effects on the body. It really gives it a different look. I wasn't sure I'd like it but it's growing on me. I made the rear fender flares with Epoxy Sculpt. They stick out a little more then the ground effects on the 1:1 Beretta that I posted pictures of. The Revell Beretta body isn't 100% accurate. I compared it to an MPC Beretta body and the MPC's lower body is less curved. Due to the curve of the Revell body in order to make the flares look right they have to stick out a bit more than the running boards. I did some more work on the wheel tubs. I widened them a bit to meet with the body and added the trunk divider. Otherwise there was a space that you could see into the trunk area. I removed the area under the rear bumper. This kit had it wrap under which isn't correct. I had to add a piece to the floor but I think it looks better now. I also closed off the opening under the front bumper.
-
That's a great idea with the rivets. Excellent job so far!
-
Thanks Ron! Making the new hood really made a difference. The kit's hood needed too much work. I'll work on the ground effects and I might sand down the belly pan and put some half round rods on to resemble a real tube chassis. I'll get some more pictures posted soon.