futurattraction
-
Posts
1,647 -
Joined
-
Last visited
Content Type
Profiles
Forums
Events
Gallery
Everything posted by futurattraction
-
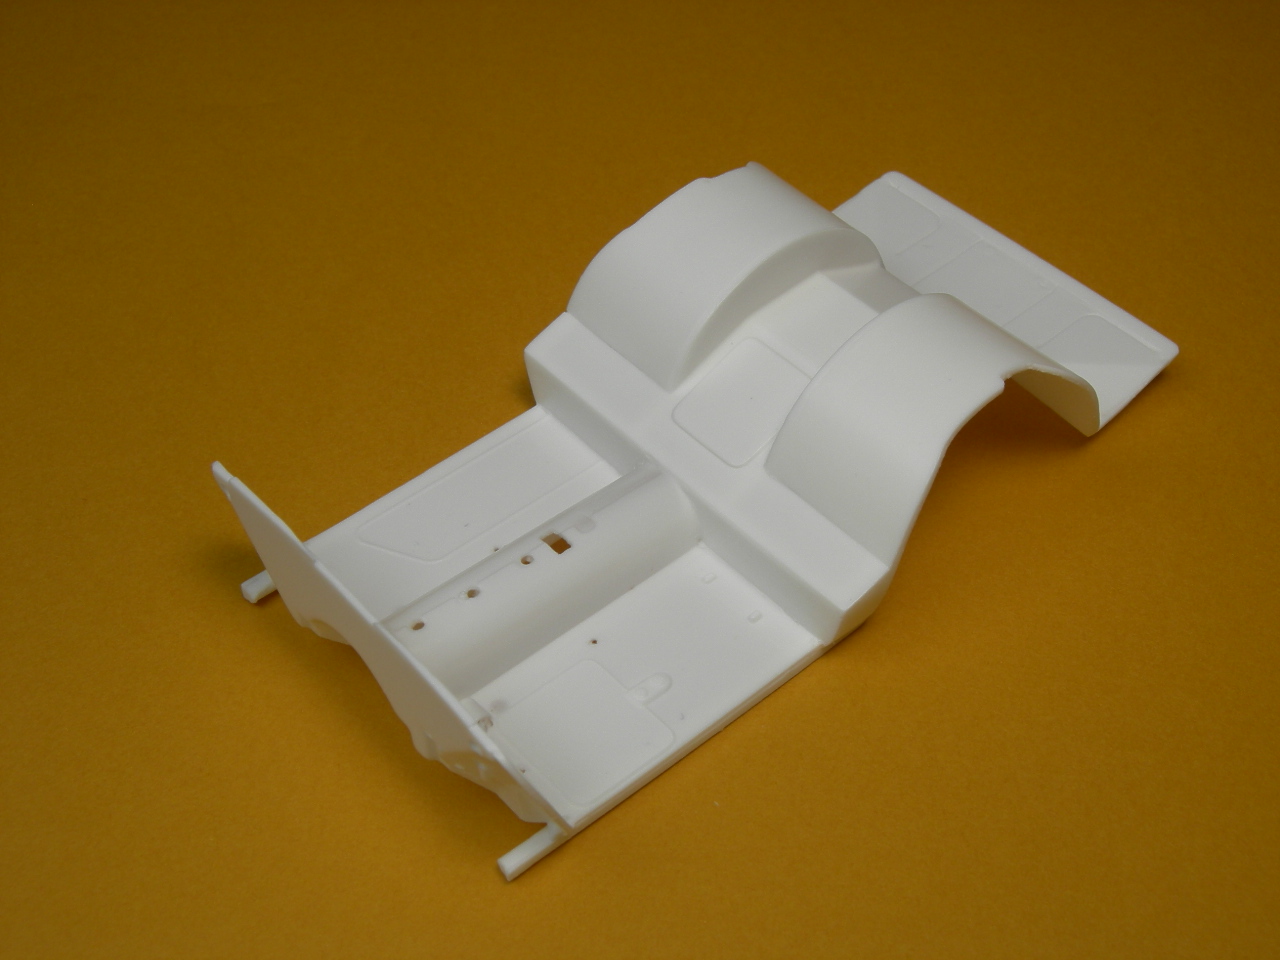
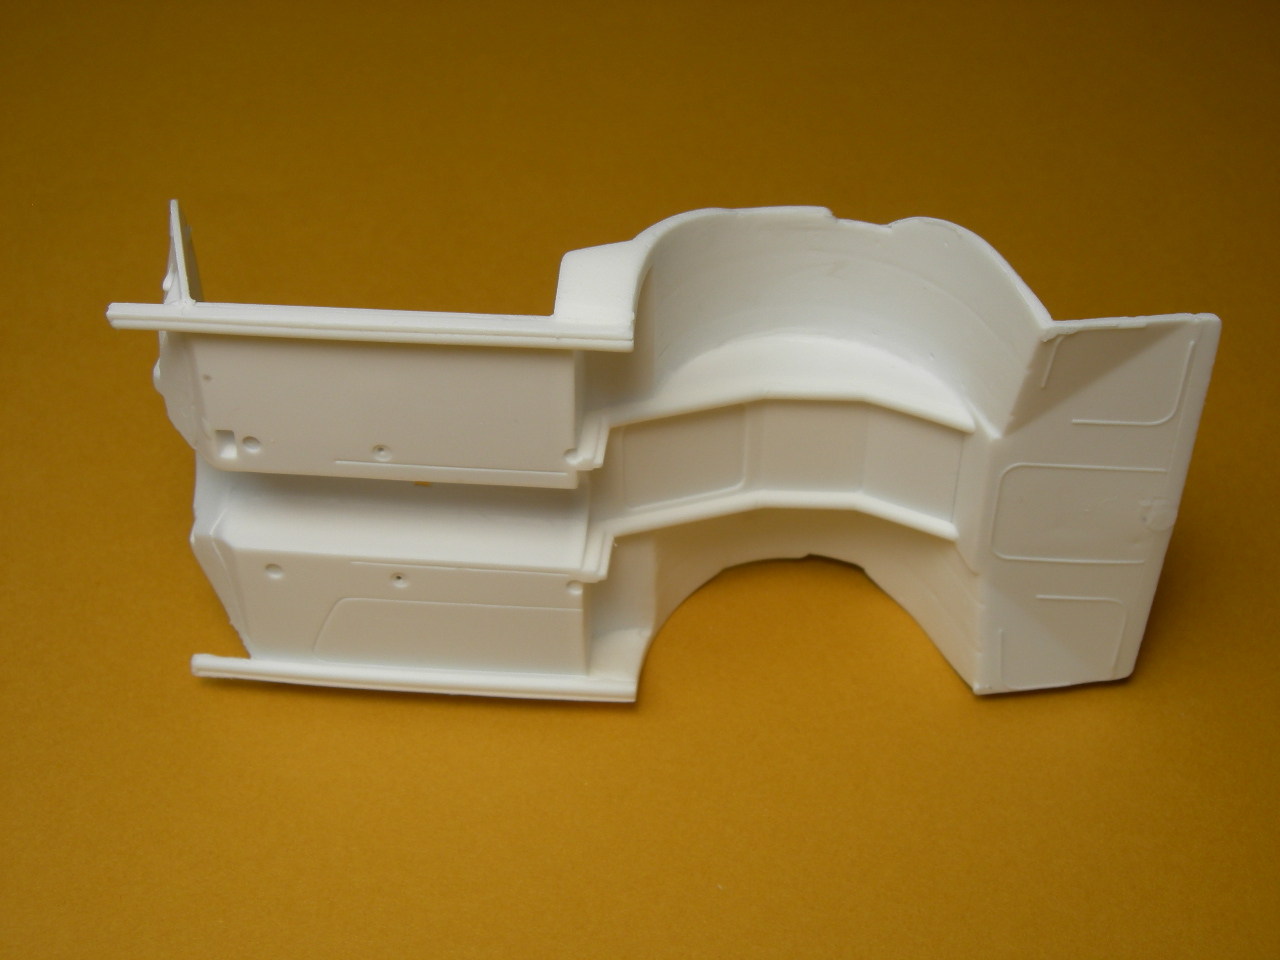
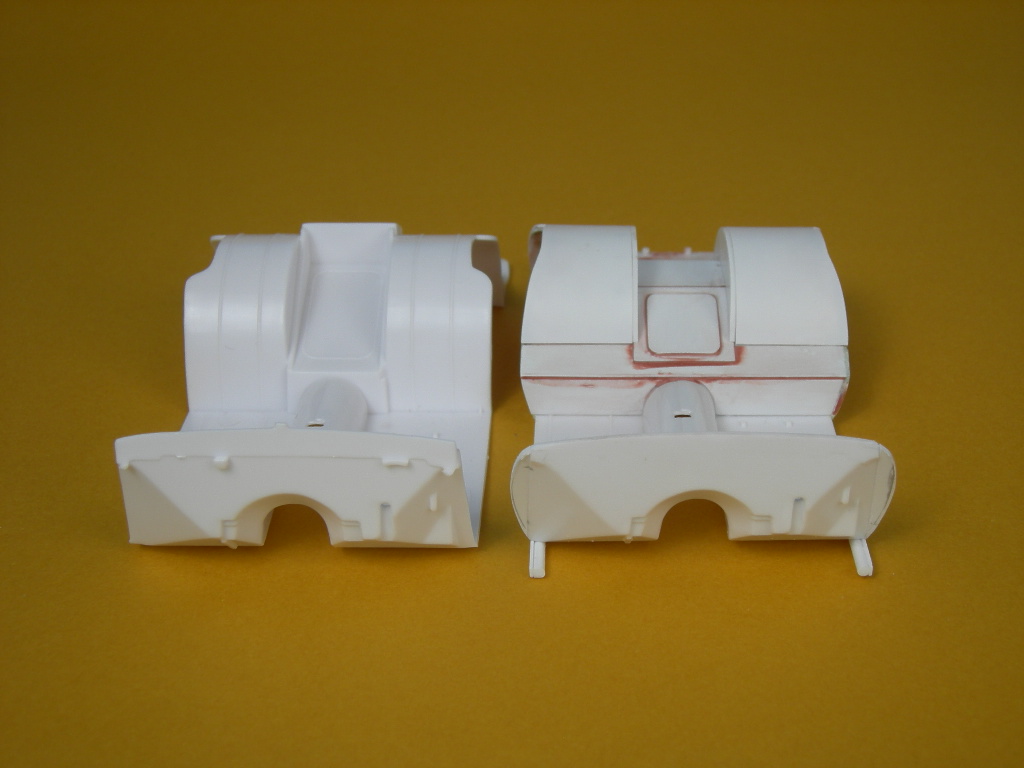
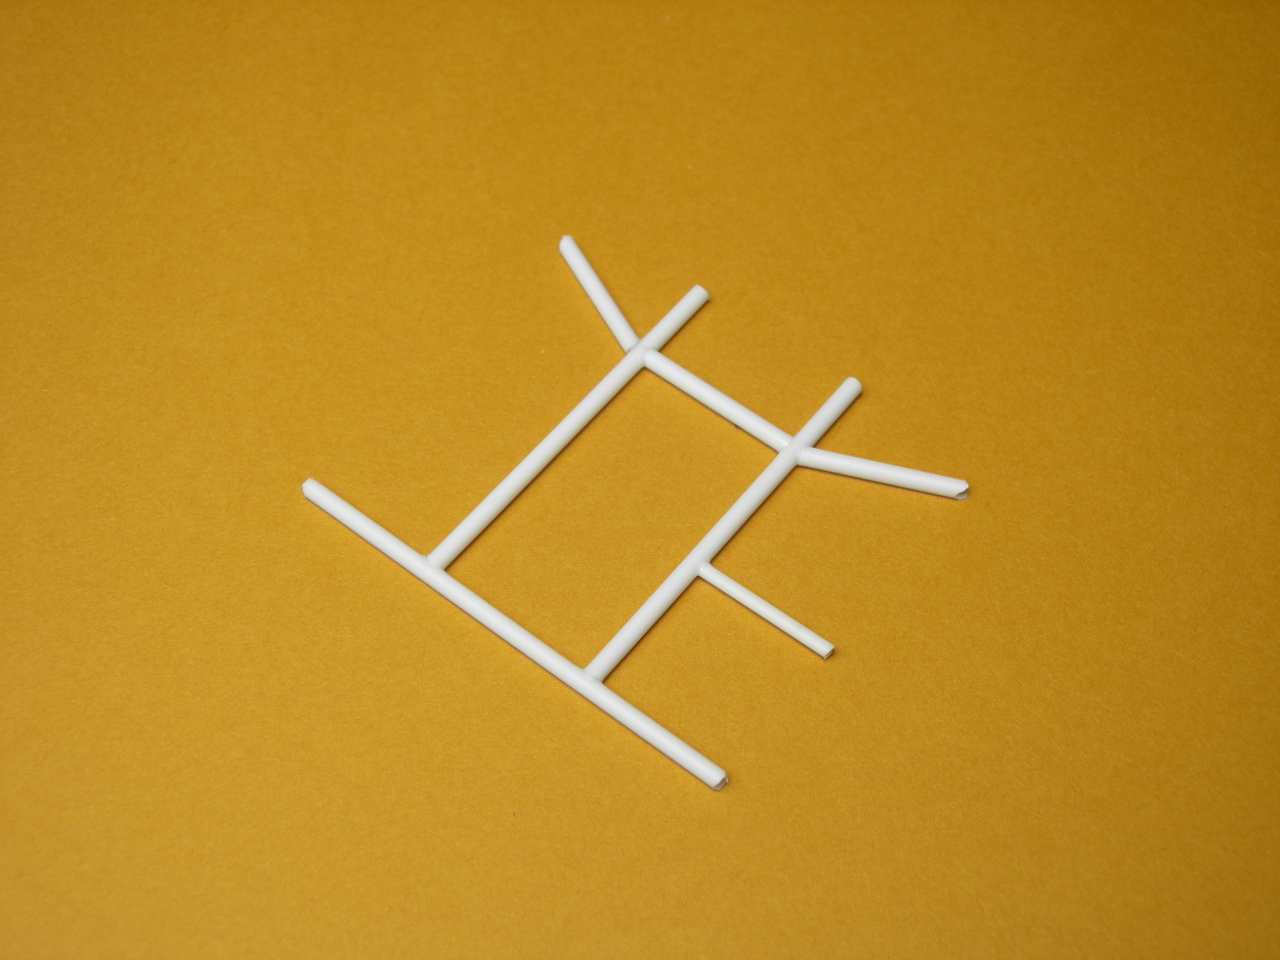
 custompainter - If you want to PM me, I can get more info to you about getting one. Another component of my build will be the chassis pan, which started life as a Revell pro sportsman piece. The forward half is modified to fit the interior body shape, and incorporates a slot where the dash rests. The floor itself is narrower than the Revell pan. Outer frame rail tubing and rocker panel detail were added which also permits a slight channeling of the body over the frame, all of which can be seen in the side-by-side comparison with the stock pan. The rear of the pan required more rework. The stock pan has a sizeable bulkhead between the tubs that is raised about an 1/8th inch above the tubs. The entire bulkhead was removed and new flooring from the 4-link kick-up to the trunk floor added. Frame rail detail was added on the underside in the area of the rear end housing. The pan also has incorporated into it guides for the photo etch 4-link chassis brackets. I've begun work on the center portion of the frame rail. I have yet to add the X in the middle and am debating whether to add stringers under the driver's seat area. Yes - my frame work resembles the Revell frame, but is lacking all the molded-in brake line tubing, etc., in case someone wants to add their own lines. The MC also needs to be added. I want to do it in the cleanest way possible while incorporating it into the new frame, similar to the Revell piece.
-
1/16 Scale Army Vega Funny Car - Finished 10/14/2018
futurattraction replied to Mooneyzs's topic in WIP: Drag Racing Models
Okay - you're nuts! I had to say it before anybody else does... LOL Super job Chris. Your scale shot does really demonstrate how tiny that "T" is... wow! -
Thanks for your support guys. I very much appreciate it... John, as far as lens casting goes, it hasn't been as difficult as I originally expected, but it's still more involved than standard casting. I'm using Alumilite products at this point. The clear is mixed 1:1, though I had some problems with it, at times, having a milky, opaque appearance, especially with the red taillight lenses. They weren't as translucent as they should have been. They are considerably thicker, too, than the parking light strip and headlight lenses. I called Alumilite and talked to Carol. She suggested that I cut down on the "A" component. The "B" component has a tendancy to congeal and doesn't mix as easily. Heating the bottle of "B" in warm water helps thin it. I use a digital scale for measuring everything out and a microwave oven to heat the two parts for a few seconds before mixing and pouring. Mixing thoroughly helped some with the milkiness, though it still sometimes shows up. Warming up the molds was recommended and I'm using a small toaster oven to do that. I heat the molds for five minutes before pouring. I pressurize at least overnight, but usually usually longer and don't demold for at least 10 hours after pouring. I pre-mix enough of the colored dyes with the "A" side that I can get several pours out of a batch, plus the color is consistent from one set to the next.There are probably other points I'm forgetting about, but you can see the general process I follow. Hopes this helps...
-
Thanks for your kind words, John. You've got a good eye! I am casting strips of orange/clear for turn signal/parking lenses. My goal is to also do a factory stock body that will have all the "drag" stuff removed. Rear wheel well openings shortened back to stock length, fuel filler door added, cowl vent panel added, stock length hood, blended bumpers removed and stock width, removable bumpers included. I've done some work on interior side panels and Mustang chassis for that one, but it's got a fair ways to go. Vince - Don't exaggerate the length of time this has taken... LOL It's only been seven years!!! Still way too long for everybody - me included...
-
MISTER TWISTER Chevy II Nova..COMPLETE..12/01/13
futurattraction replied to Mister Twister's topic in WIP: Drag Racing Models
Count me in for a detailed build. One of the problems, so often, is not having good documentation of a build of someone else's 1:1 car. I'd hate to see you not take advantage of the opportunity to use primary source information of your own car. -
Thanks Chris – it ought to be an interesting journey. Hey Dave – I’ll do my best to keep it fun and interesting. Marty – I’m hoping it’ll turn out to be as wonderful as you’re saying. To answer your question, I developed the resin body kit I’m using. It’s been an eternity getting to this point. Jim – I can’t wait to see it too! LOL Bill – thanks for following along. Thanks Ray – I may need all the luck you can send me! Hi Len – I guess you’ll just have to keep tabs on me. Tyrone – thanks for popping in. I’ll do my best to keep things moving along. Hey Joe – thanks for your support. I guess we’ll see where this thing goes, together…
-
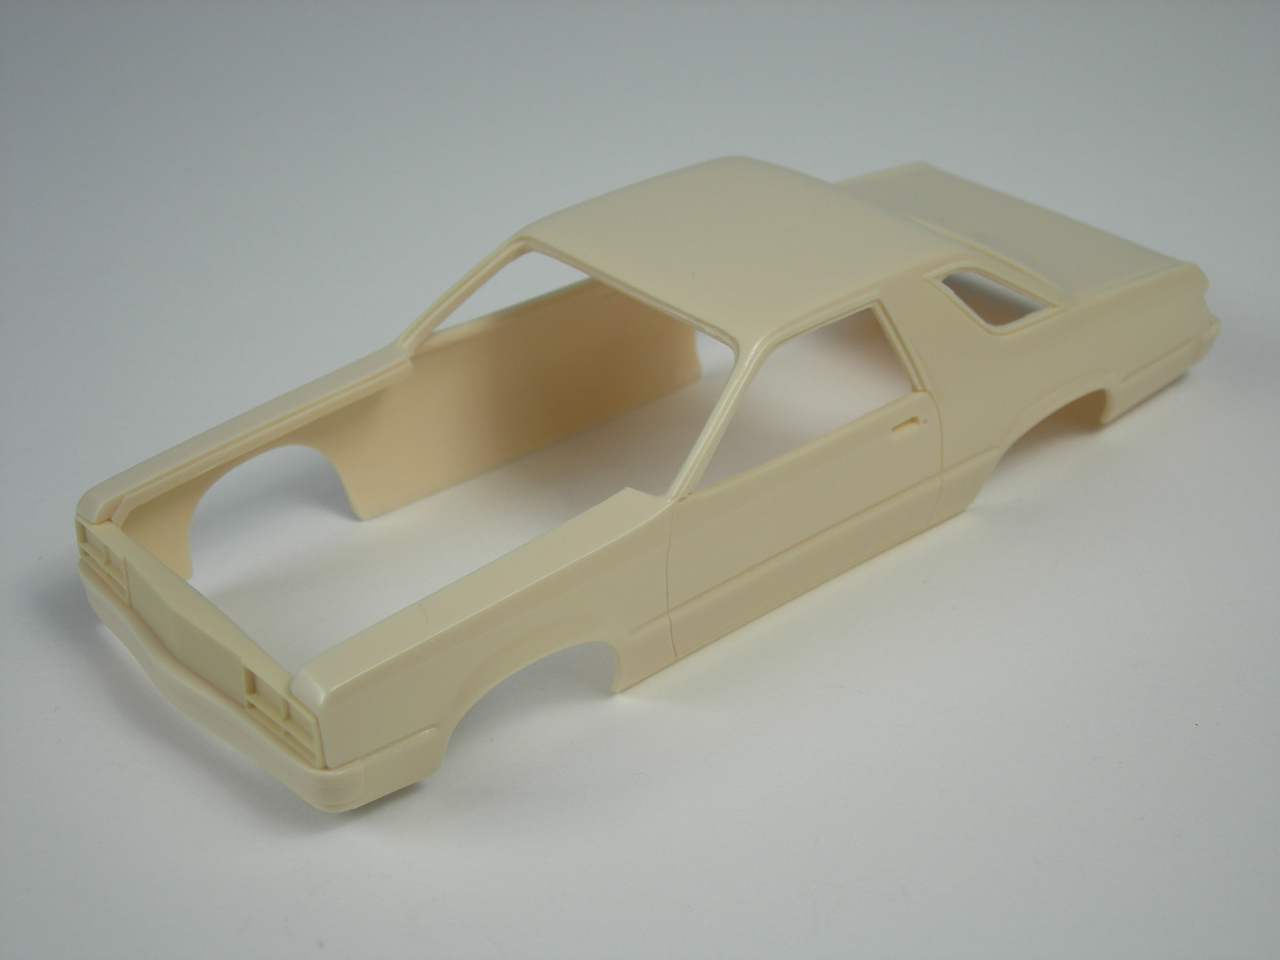
I’m going to try my hand at something I’ve never succeeded at before – build a car online from start to finish. This is a huge challenge because it’s been ages since I even finished a build, let alone let anyone track my progress over an extended period of time. LOL I'll do my best to document as I go. My goal is to build a drag car that will be based off my Fairmont body and the floor pan I’ve been working on. Notice I didn’t say it'll be a Pro Stock build. I’m undecided which hood I will use. In actuality, I have a preference for the outlaw cowl hood over the pro stock hood, so I guess I’ll see what direction I end up going... Regardless of the hood, this will not be a purely vintage build, because it will set lower in the rear than cars of that era, will undoubtedly have modern-design wheelie bars, and I may run 16” wheels of a newer vintage and larger OD slicks out back. The engine will probably be a stroker Cleveland with a Lenco. I'll start off with the basic pieces for the body and what it looks like after some basic cleanup work. More to come...
-
It looks super, Joe. I used that same color on a build I started. You're right - the metallic is pretty pronounced, but it's a nice color overall. I'll look forward to more updates, soon...
-
You're making some really nice progress, Steve. Chassis looks great and your engine work looks super, too!
-
That turned out great, Greg. Super build, especially given that's not even your car...
-
Cool! I'll check in to see your progress...
-
Rubber / Braided Fuel and Oil lines
futurattraction replied to cherokeered's topic in WIP: Drag Racing Models
Good idea, Ted... -
That looks fantasic Joe... Lookin' forward to your next update already!
-
Rubber / Braided Fuel and Oil lines
futurattraction replied to cherokeered's topic in WIP: Drag Racing Models
I think that's an excellent idea, Dave. I, for one, have never totally followed the schematic for dry sump systems, in particular. -
Those are sweet-looking Joe. Keep up the great work!
-
Cool! A Mustang scoop on a Camaro! LOL The scoop looks like it's shaping up well... It's neat to see something a bit different like it.
-
Model train or air plane guys - Diorama is just to cool
futurattraction replied to gtx6970's topic in WIP: Dioramas
That's very cool.... -
Fantastic build, so far, Clay. Can't wait for more updates...
-
Rubber / Braided Fuel and Oil lines
futurattraction replied to cherokeered's topic in WIP: Drag Racing Models
I just bought some .025 and .035 braided line from Charlie and Pro Tech for my fuel lines for my 1/25th build. Most gasoline-fueled street and drag cars will probably run somewhere around #6 to #8 braided line, which is approximately equivalent to 5/16" and 3/8" ID, if I recall correctly. #10 line would be for something that requires a lot of fuel. -
Hey guys, Here are pics of most of the pieces that are in the larger scale. Shown are 1/16th and 1/12th self-ejecting Dzus buttons, 1/16th window bezels, and 1/16th round and oval fender/header bezels. I haven't received the invoice for this yet so I don't know what the cost is going to be. PM me to let me know what you're interested in and I'll get back to you ASAP. Scott
-
Just an update. My stainless order arrived today. I'm at work and it's at home, so I haven't seen anything yet. Hopefully everything turned out well. I'll try to post pics tonight or tomorrow night, depending on how things go at home this evening... There will be self ejecting Dzus buttons in the following sizes: (25/16/12/8); window bezels (25/16/12); fuel cell rings and latches and hold-down straps (25); stainless 2-pc fans (25); zip ties (25/16); fender/header bezels (25/16/12); spark plug wire looms (25); 1 hole spacer/ruler (16); 1 hole spacer/card 25/16); camlock harness (25).
-
Ford Fairmont resin body
futurattraction replied to route66modeler's topic in Car Aftermarket / Resin / 3D Printed
Hi Charlie - My goal is to make a stock body version. Just haven't gotten it done yet. As far as working with Ford is concerned, I took the plunge and the guy I talked to was very nice to work with. He asked me for sales projections over a 3 year period, proposed price, etc. He replied and said that for the numbers I was proposing that I have Ford's permission to make and sell them. He asked that if my sales way surpassed my projected numbers to let him know and we may still have to figure out some type of a licensing agreement. That's where things are at at the moment. -
She's looking good Joe! Looking forward to more updates...
-
1/16 Scale Army Vega Funny Car - Finished 10/14/2018
futurattraction replied to Mooneyzs's topic in WIP: Drag Racing Models
No prob, bud... -
Ford Fairmont resin body
futurattraction replied to route66modeler's topic in Car Aftermarket / Resin / 3D Printed
I PM'd you, John. Scott