av405
-
Posts
1,201 -
Joined
-
Last visited
Content Type
Profiles
Forums
Events
Gallery
Everything posted by av405
-
This is your best bet: https://www.tamiyausa.com/shop/124-sports-car-series/toyota-celica-supra-kit/
-
What Mark said.
-
I ordered from him on Tuesday and got a reply back within 2 days. I would send him a follow up email. Maybe yours just slipped through the cracks.
-
 Thank you, Caleb. I'm happy to hear that.
 -
People should get to say what they want regarding interest in upcoming kits. But let's face it, "my wallet is safe" posts have almost become a meme since they pop up on every single one of these threads.
-
Thanks, Carl!
-
Grills for Revell's Stranger Things Blazer
av405 replied to WillyBilly's topic in Car Aftermarket / Resin / 3D Printed
Iceman doesn't make/offer any grills for the Revell Blazer. -
Got it, thank you! I may still grab one.
-
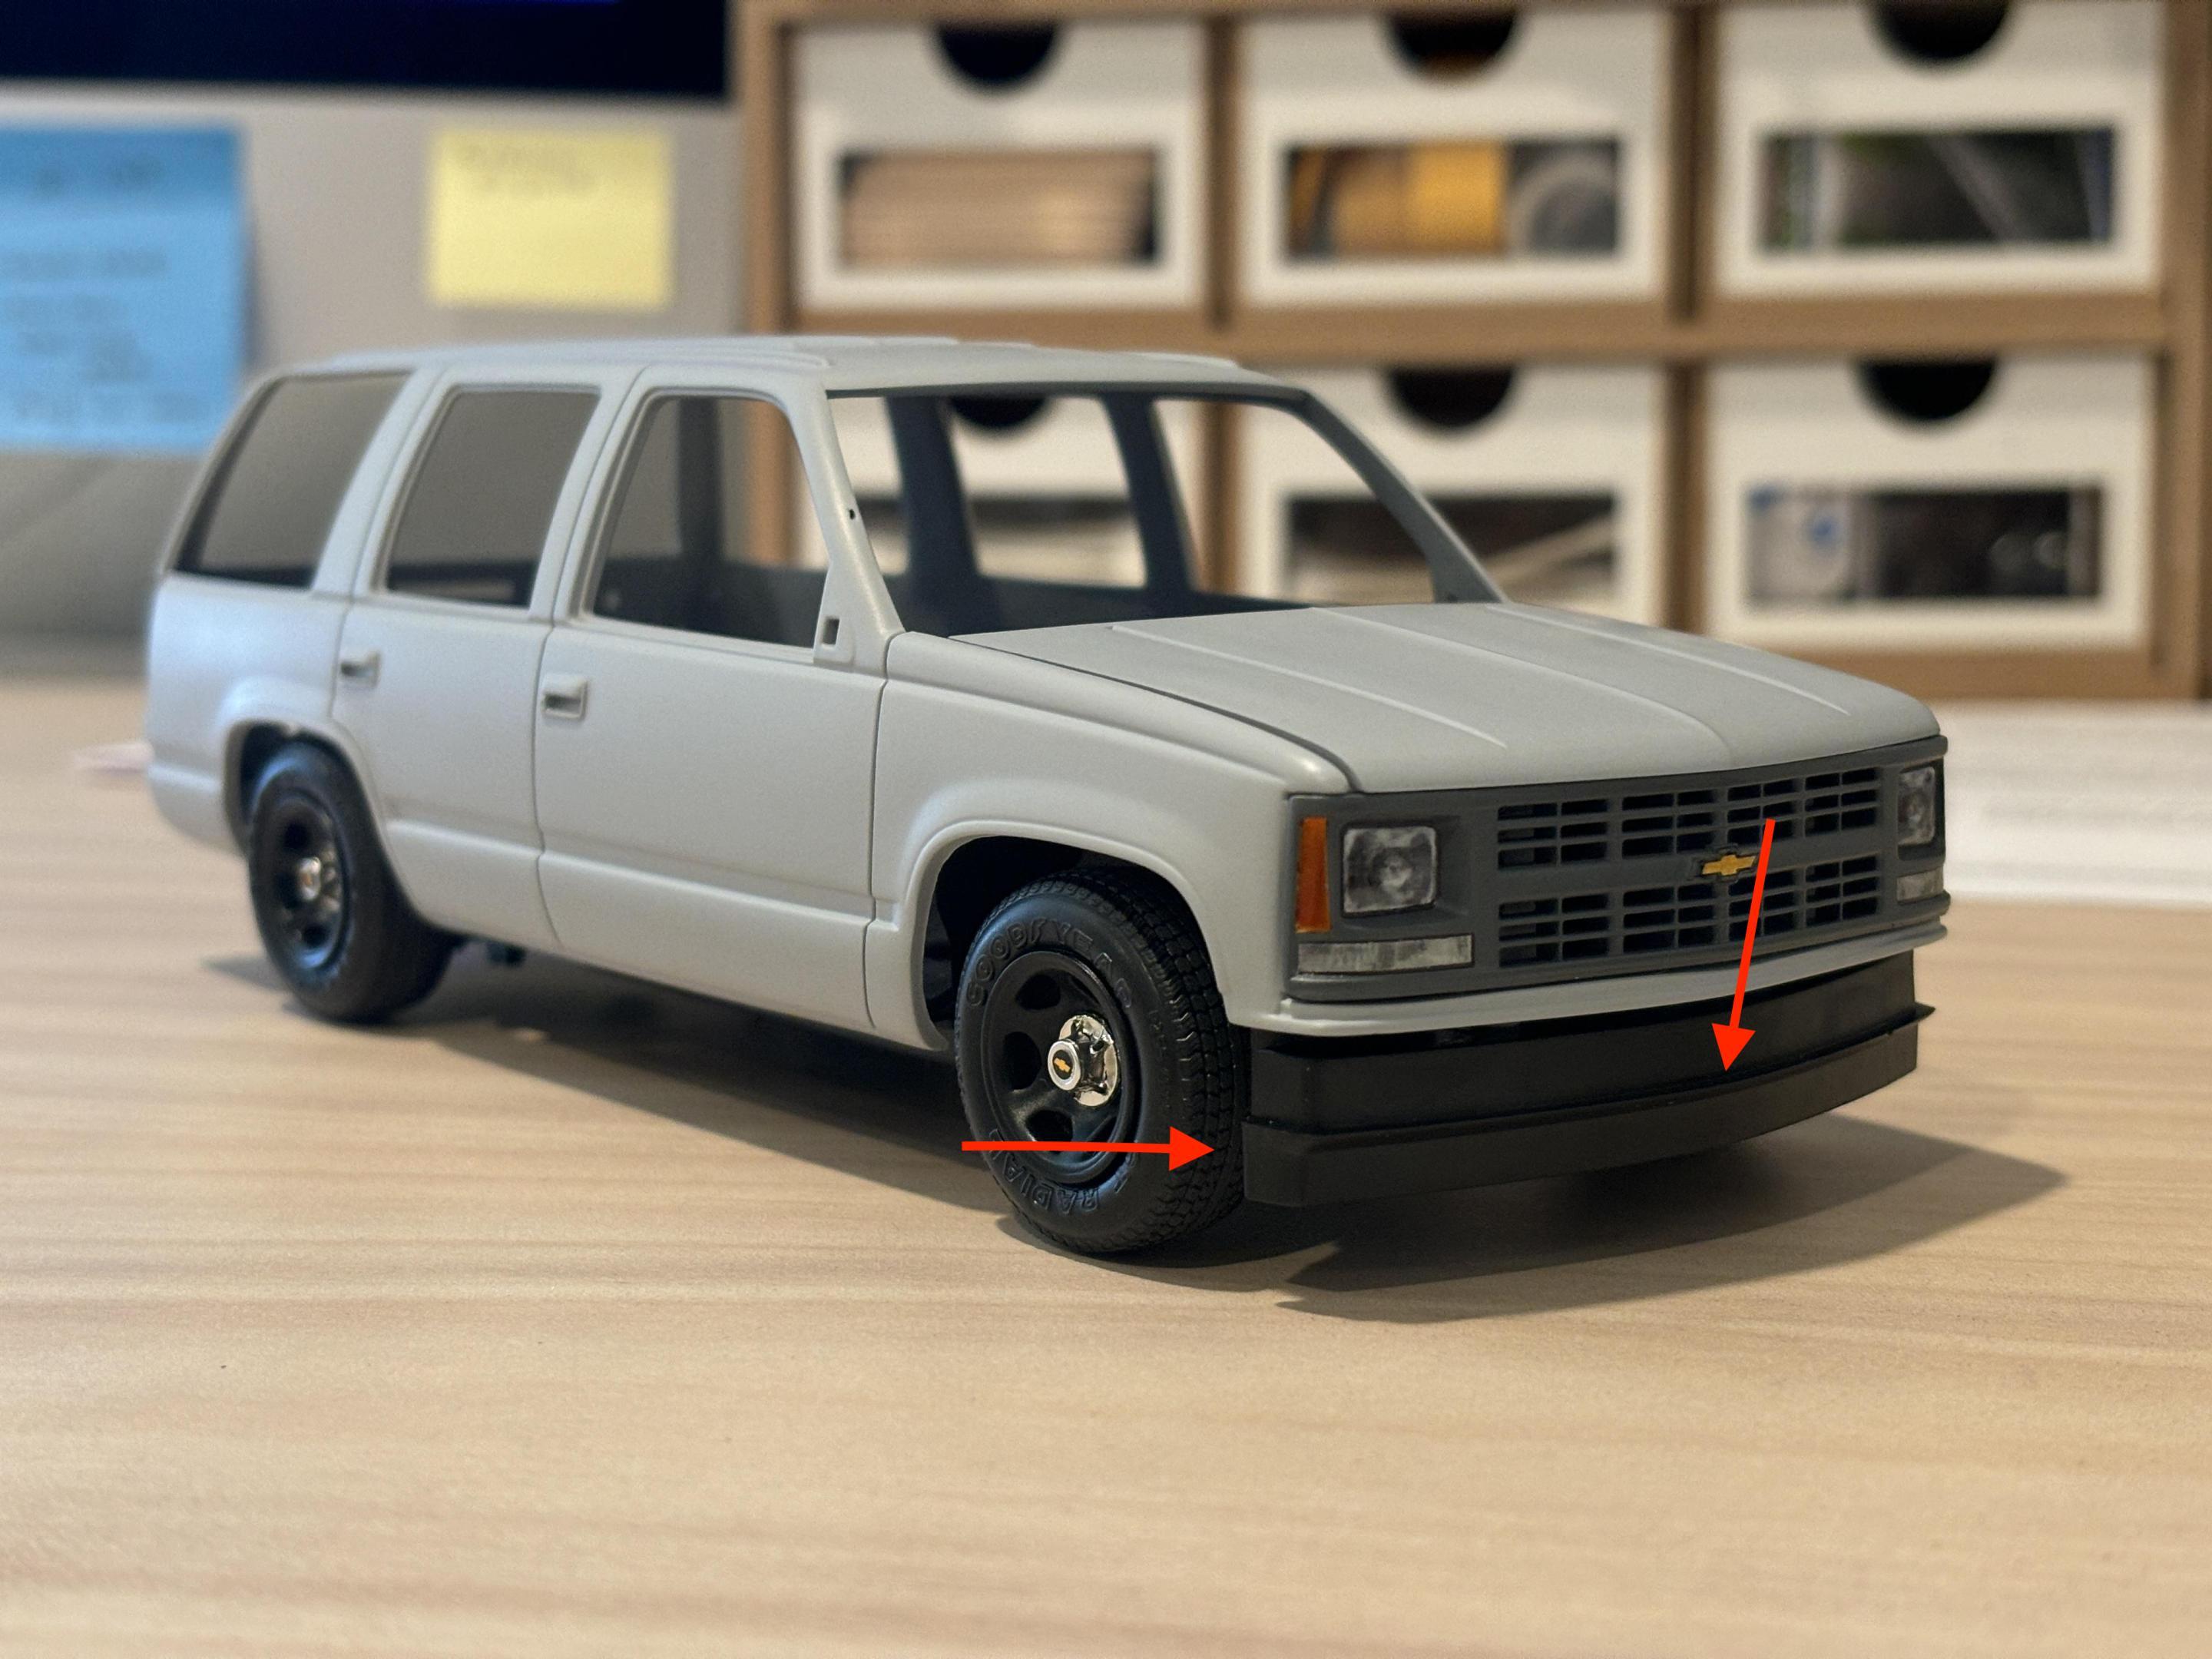
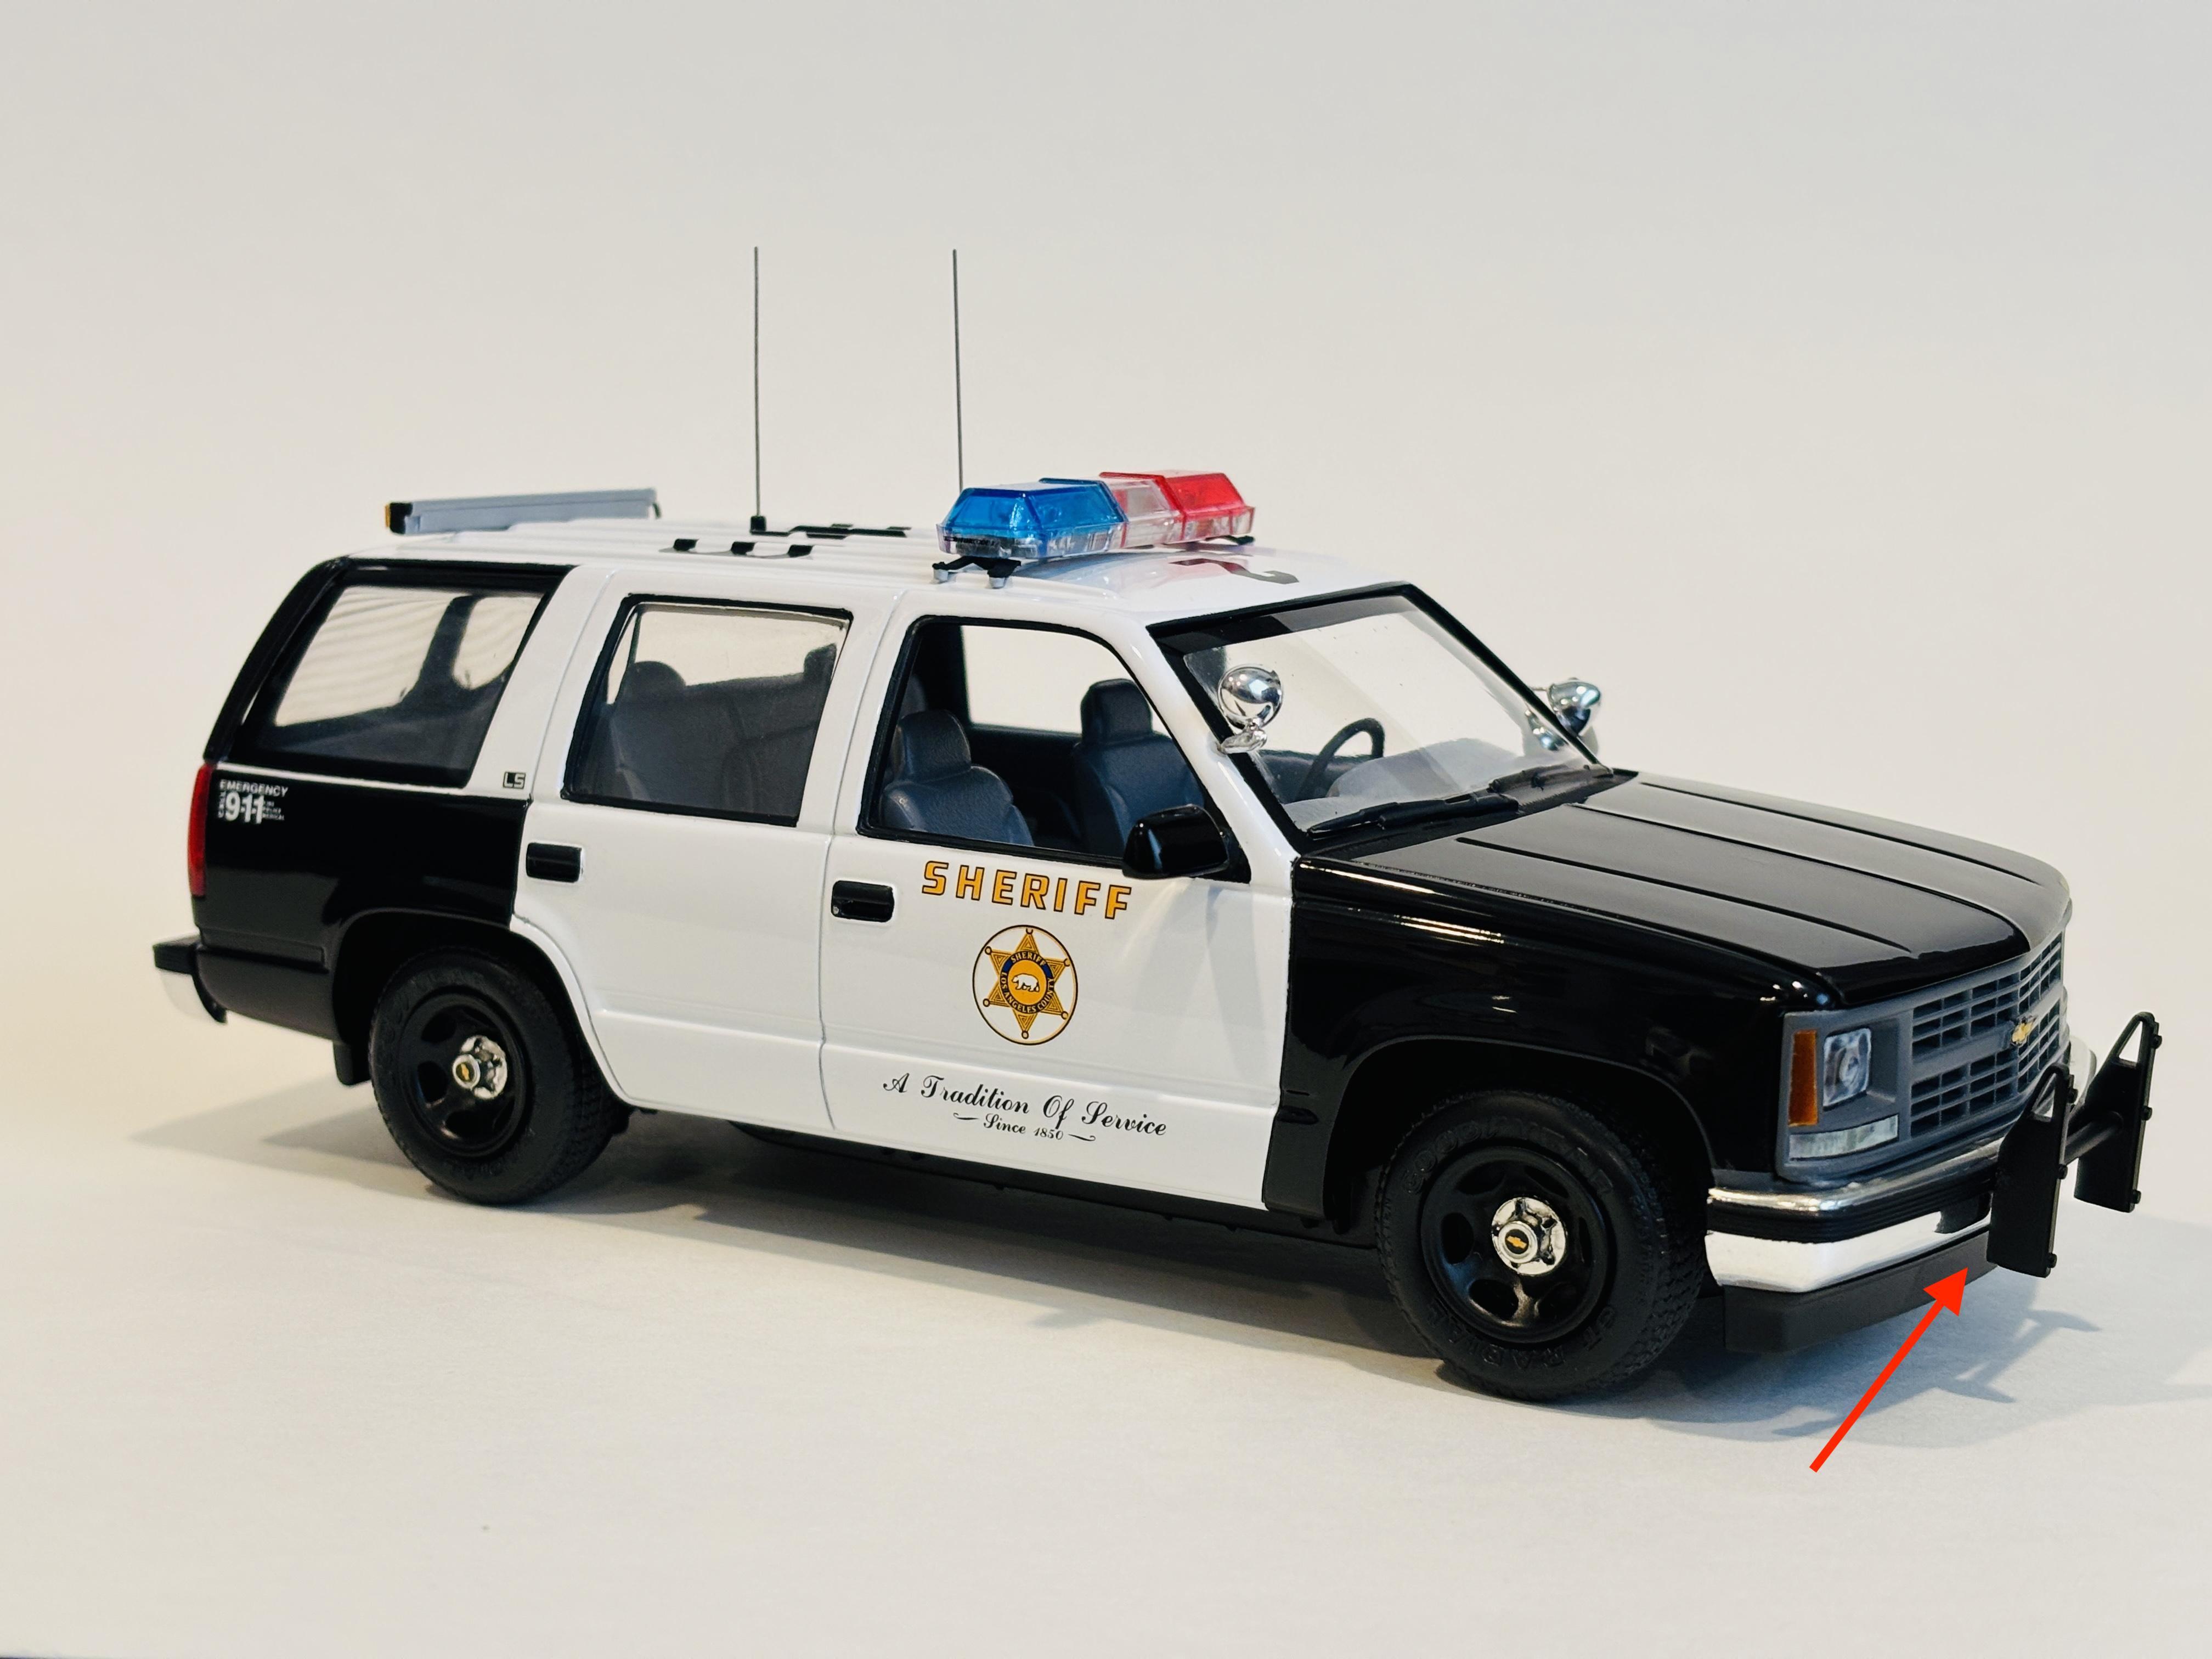
Great work, I'm glad it helped! On an unrelated note, there is something I want to address that I didn't before on this thread. The kit comes with what I have seen described as "front bumper filler trim," which is basically a black plastic strip that runs along the bottom of the front bumper. On the kit, it is a part of the one-piece chassis. This is a piece that the PPV did not have. Or at the very least, it was an option to not have. LASD Tahoes definitely did not have it, and this facilitated the mounting of the front push bar: In order to remove this piece, I would have had to carefully remove the entire chunk of plastic and re-shape it. However, this piece of plastic also covers up the 2 screw holes used to mount the chassis to the interior tub and body. This is where I took a shortcut and simply skipped the process. As a result, I had to cut the mounting tabs from the front push bar and simply glue the push bar to the front bumper. This is the portion of the build that I am least satisfied with as the push bar is pretty much just floating now, but it is what it is: I'm sharing this simply to be transparent.

-
Grills for Revell's Stranger Things Blazer
av405 replied to WillyBilly's topic in Car Aftermarket / Resin / 3D Printed
Canuck3D made a separate line for the Revell kit, which he just posted on his website. So now there are two competing lines of grills for the kit. -
Can this kit be built as a regular/base model S-10?
-
A Suburban variant would be an absolute dream. If you ask me how many I'd buy, my answer would simply be "yes."
-
Grills for Revell's Stranger Things Blazer
av405 replied to WillyBilly's topic in Car Aftermarket / Resin / 3D Printed
I wonder how these compare to canuck3D's offerings. Both produce great products. If anybody has a comparison, please share. -
Thank you all!
-
1992 Chevy Silverado Sport
av405 replied to av405's topic in WIP: Model Trucks: Pickups, Vans, SUVs, Light Commercial
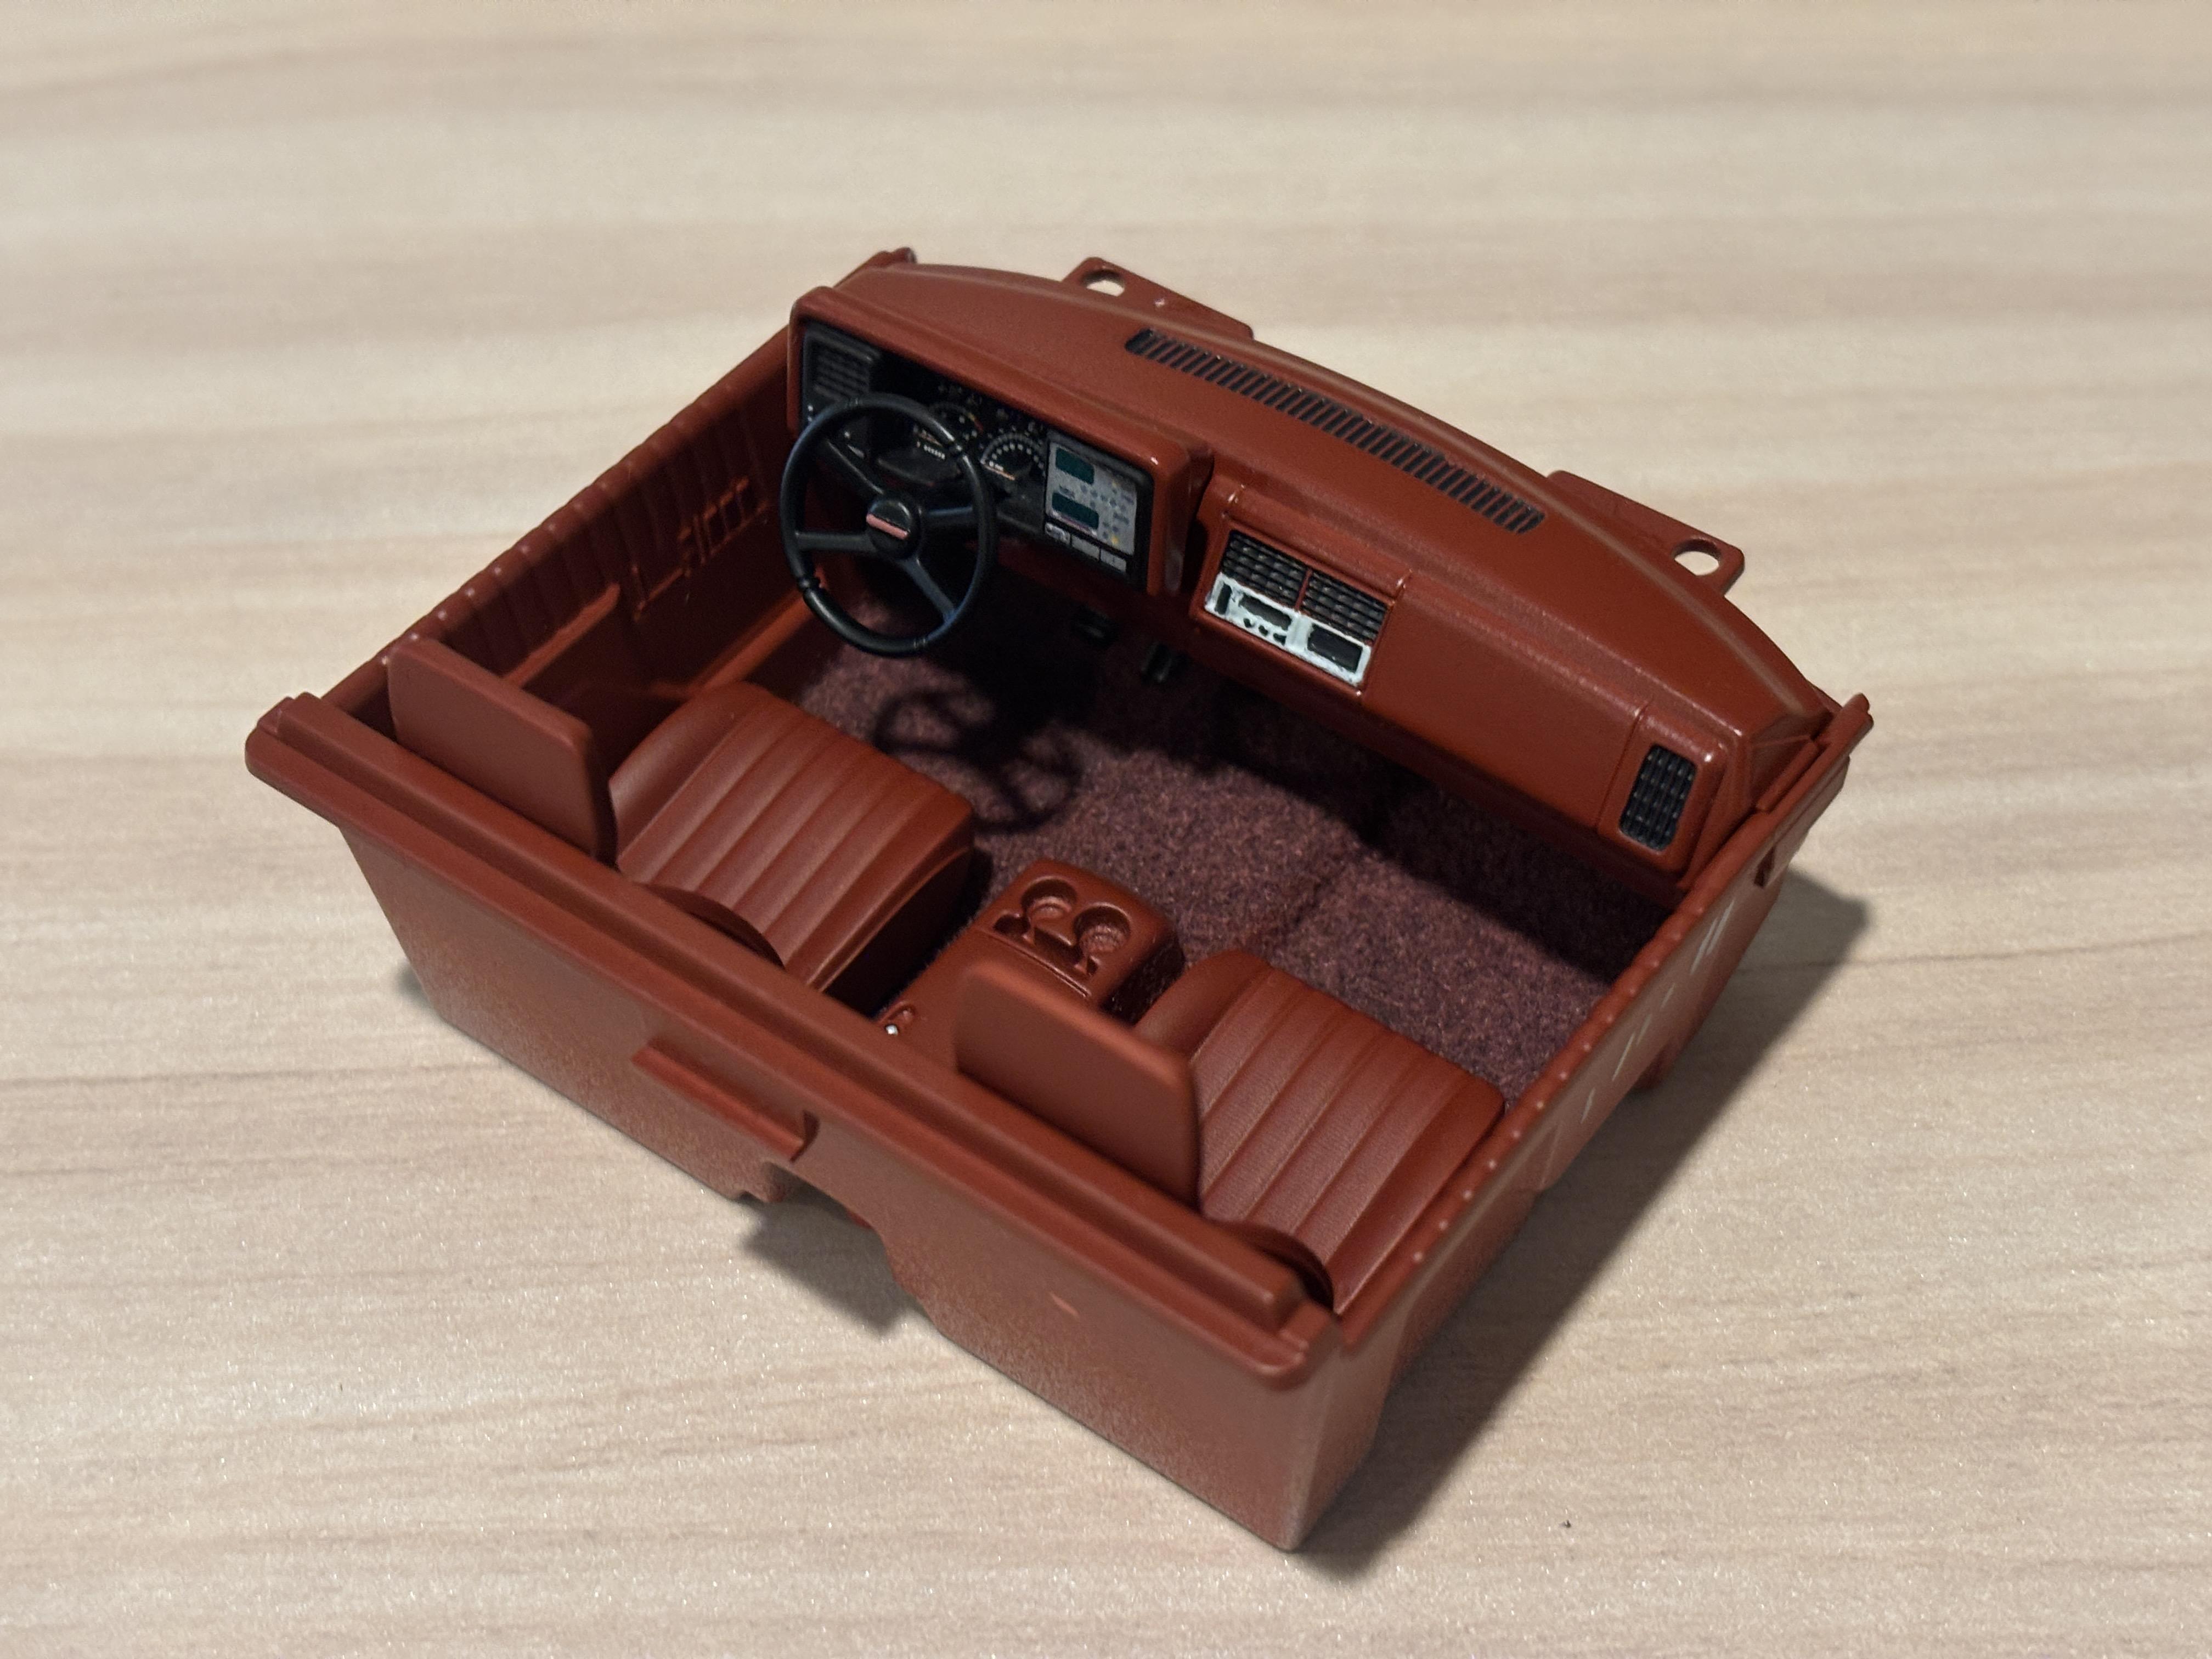
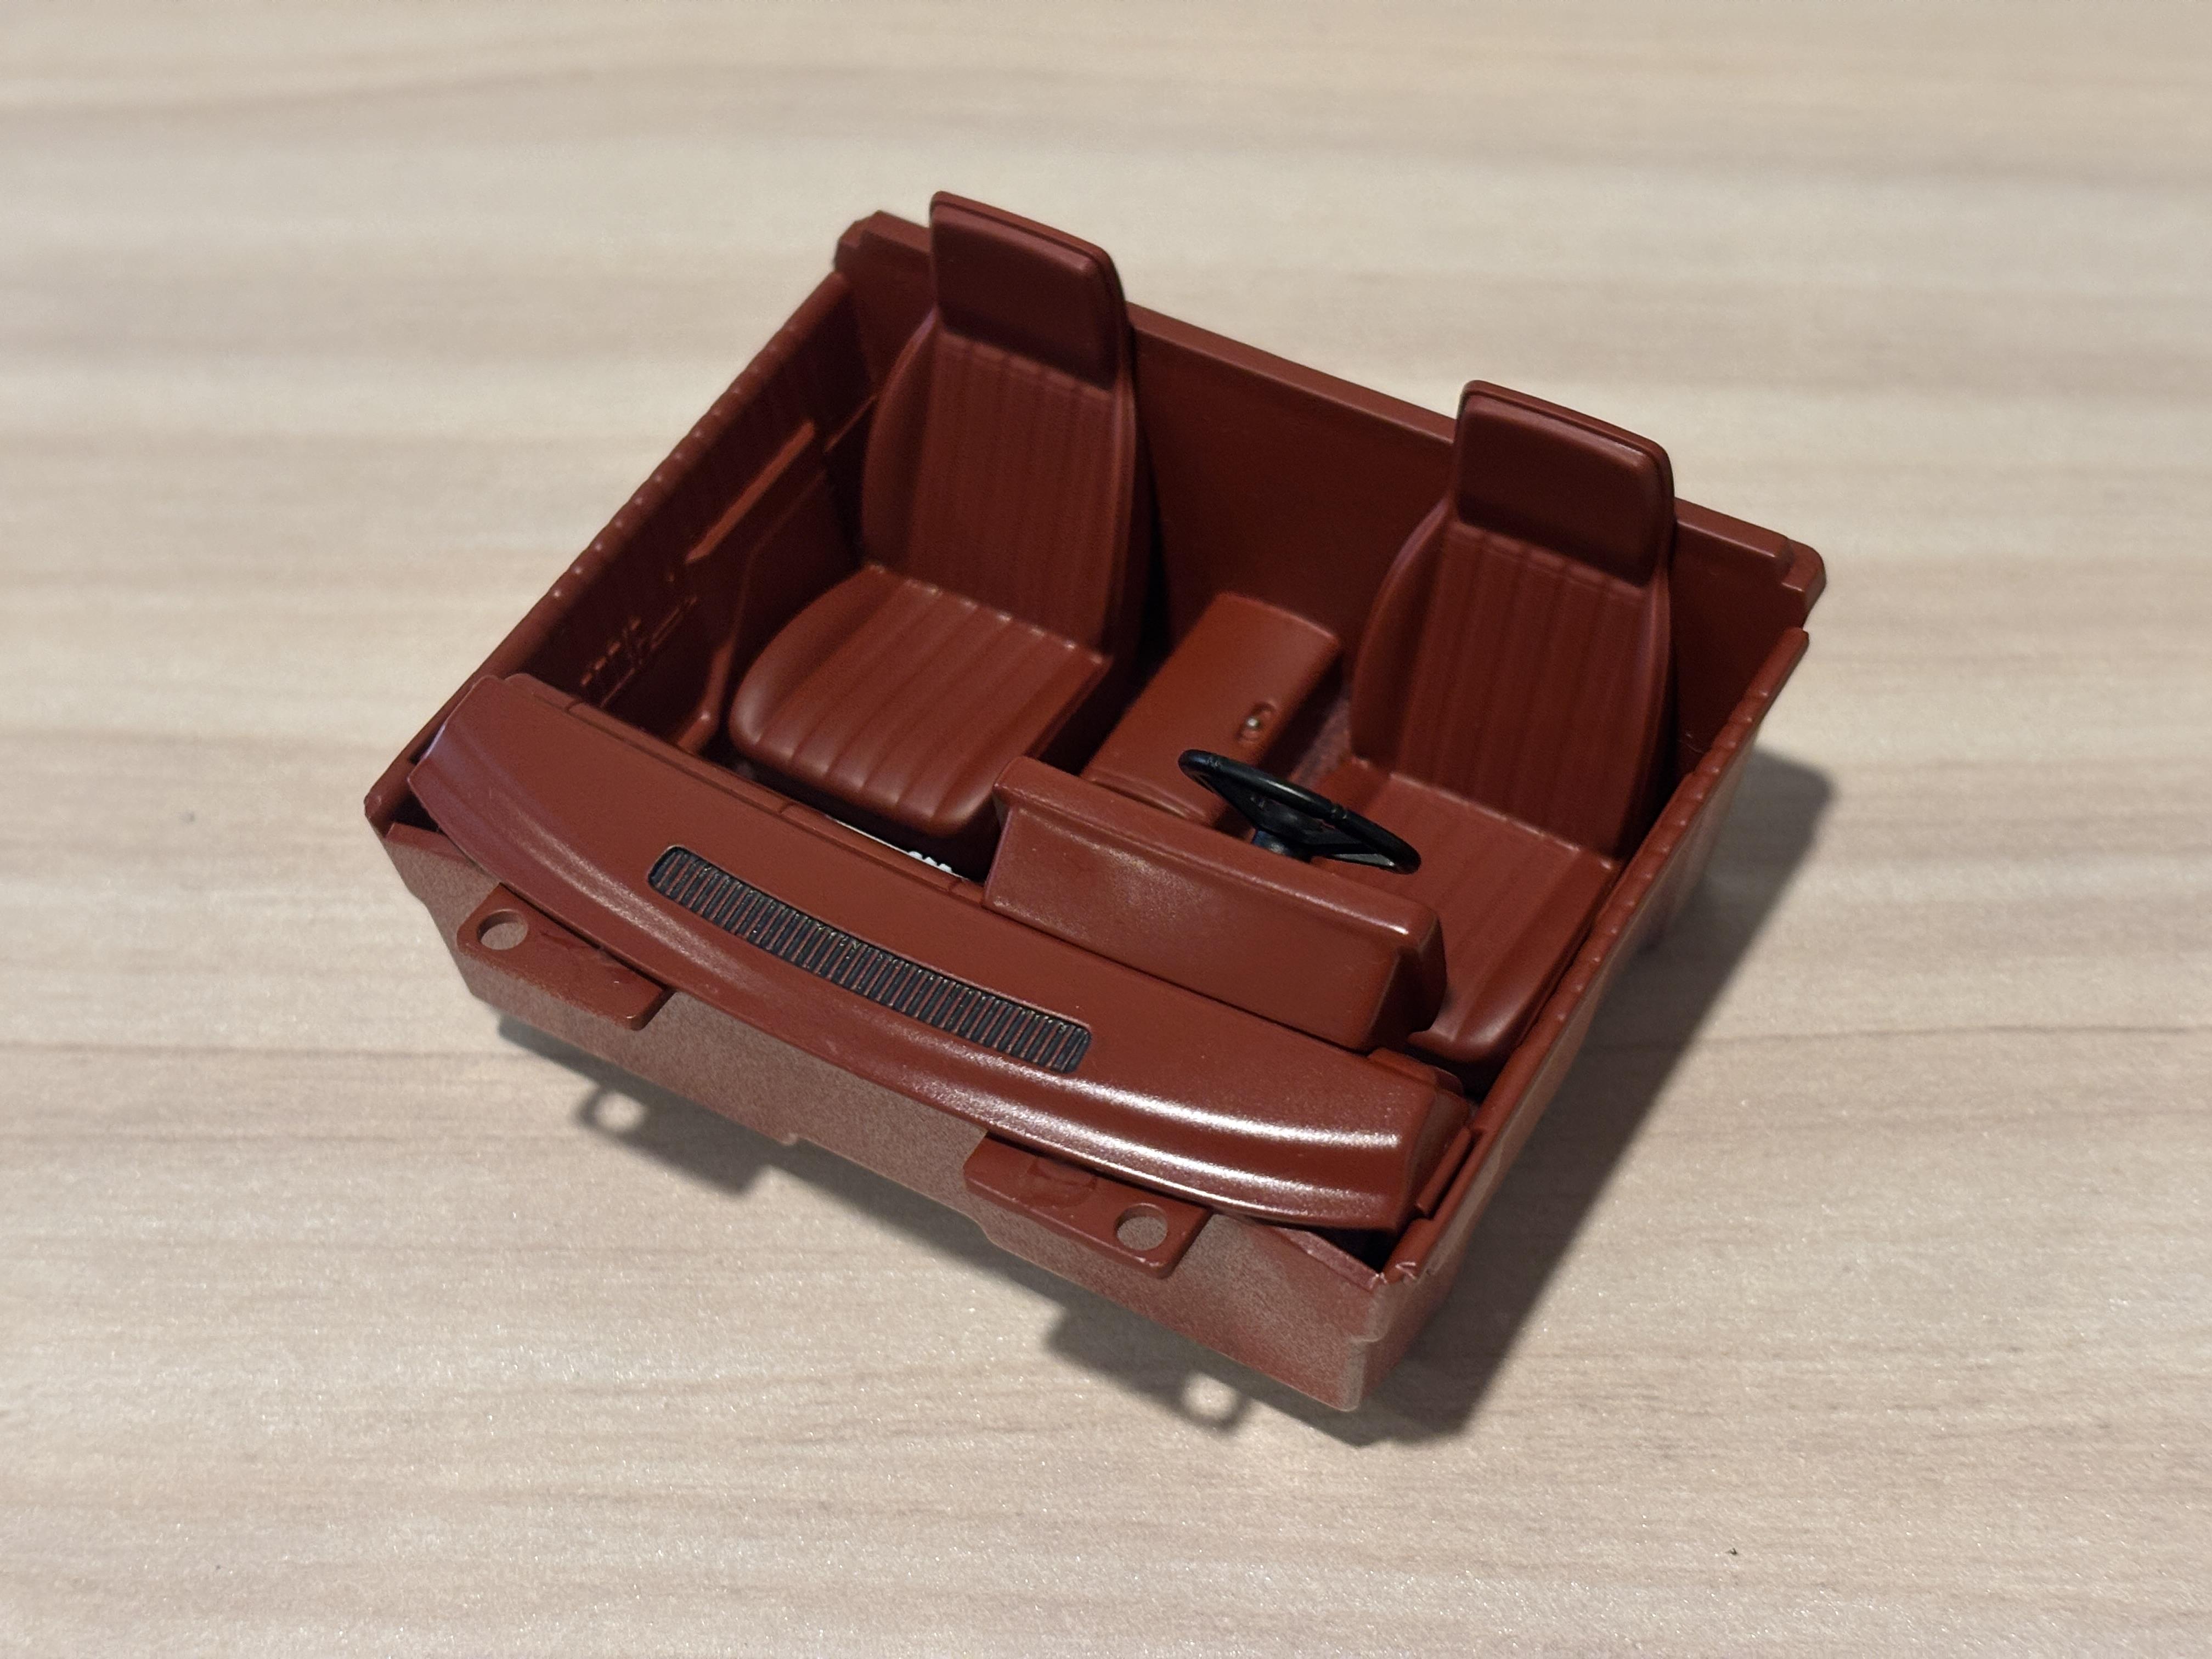
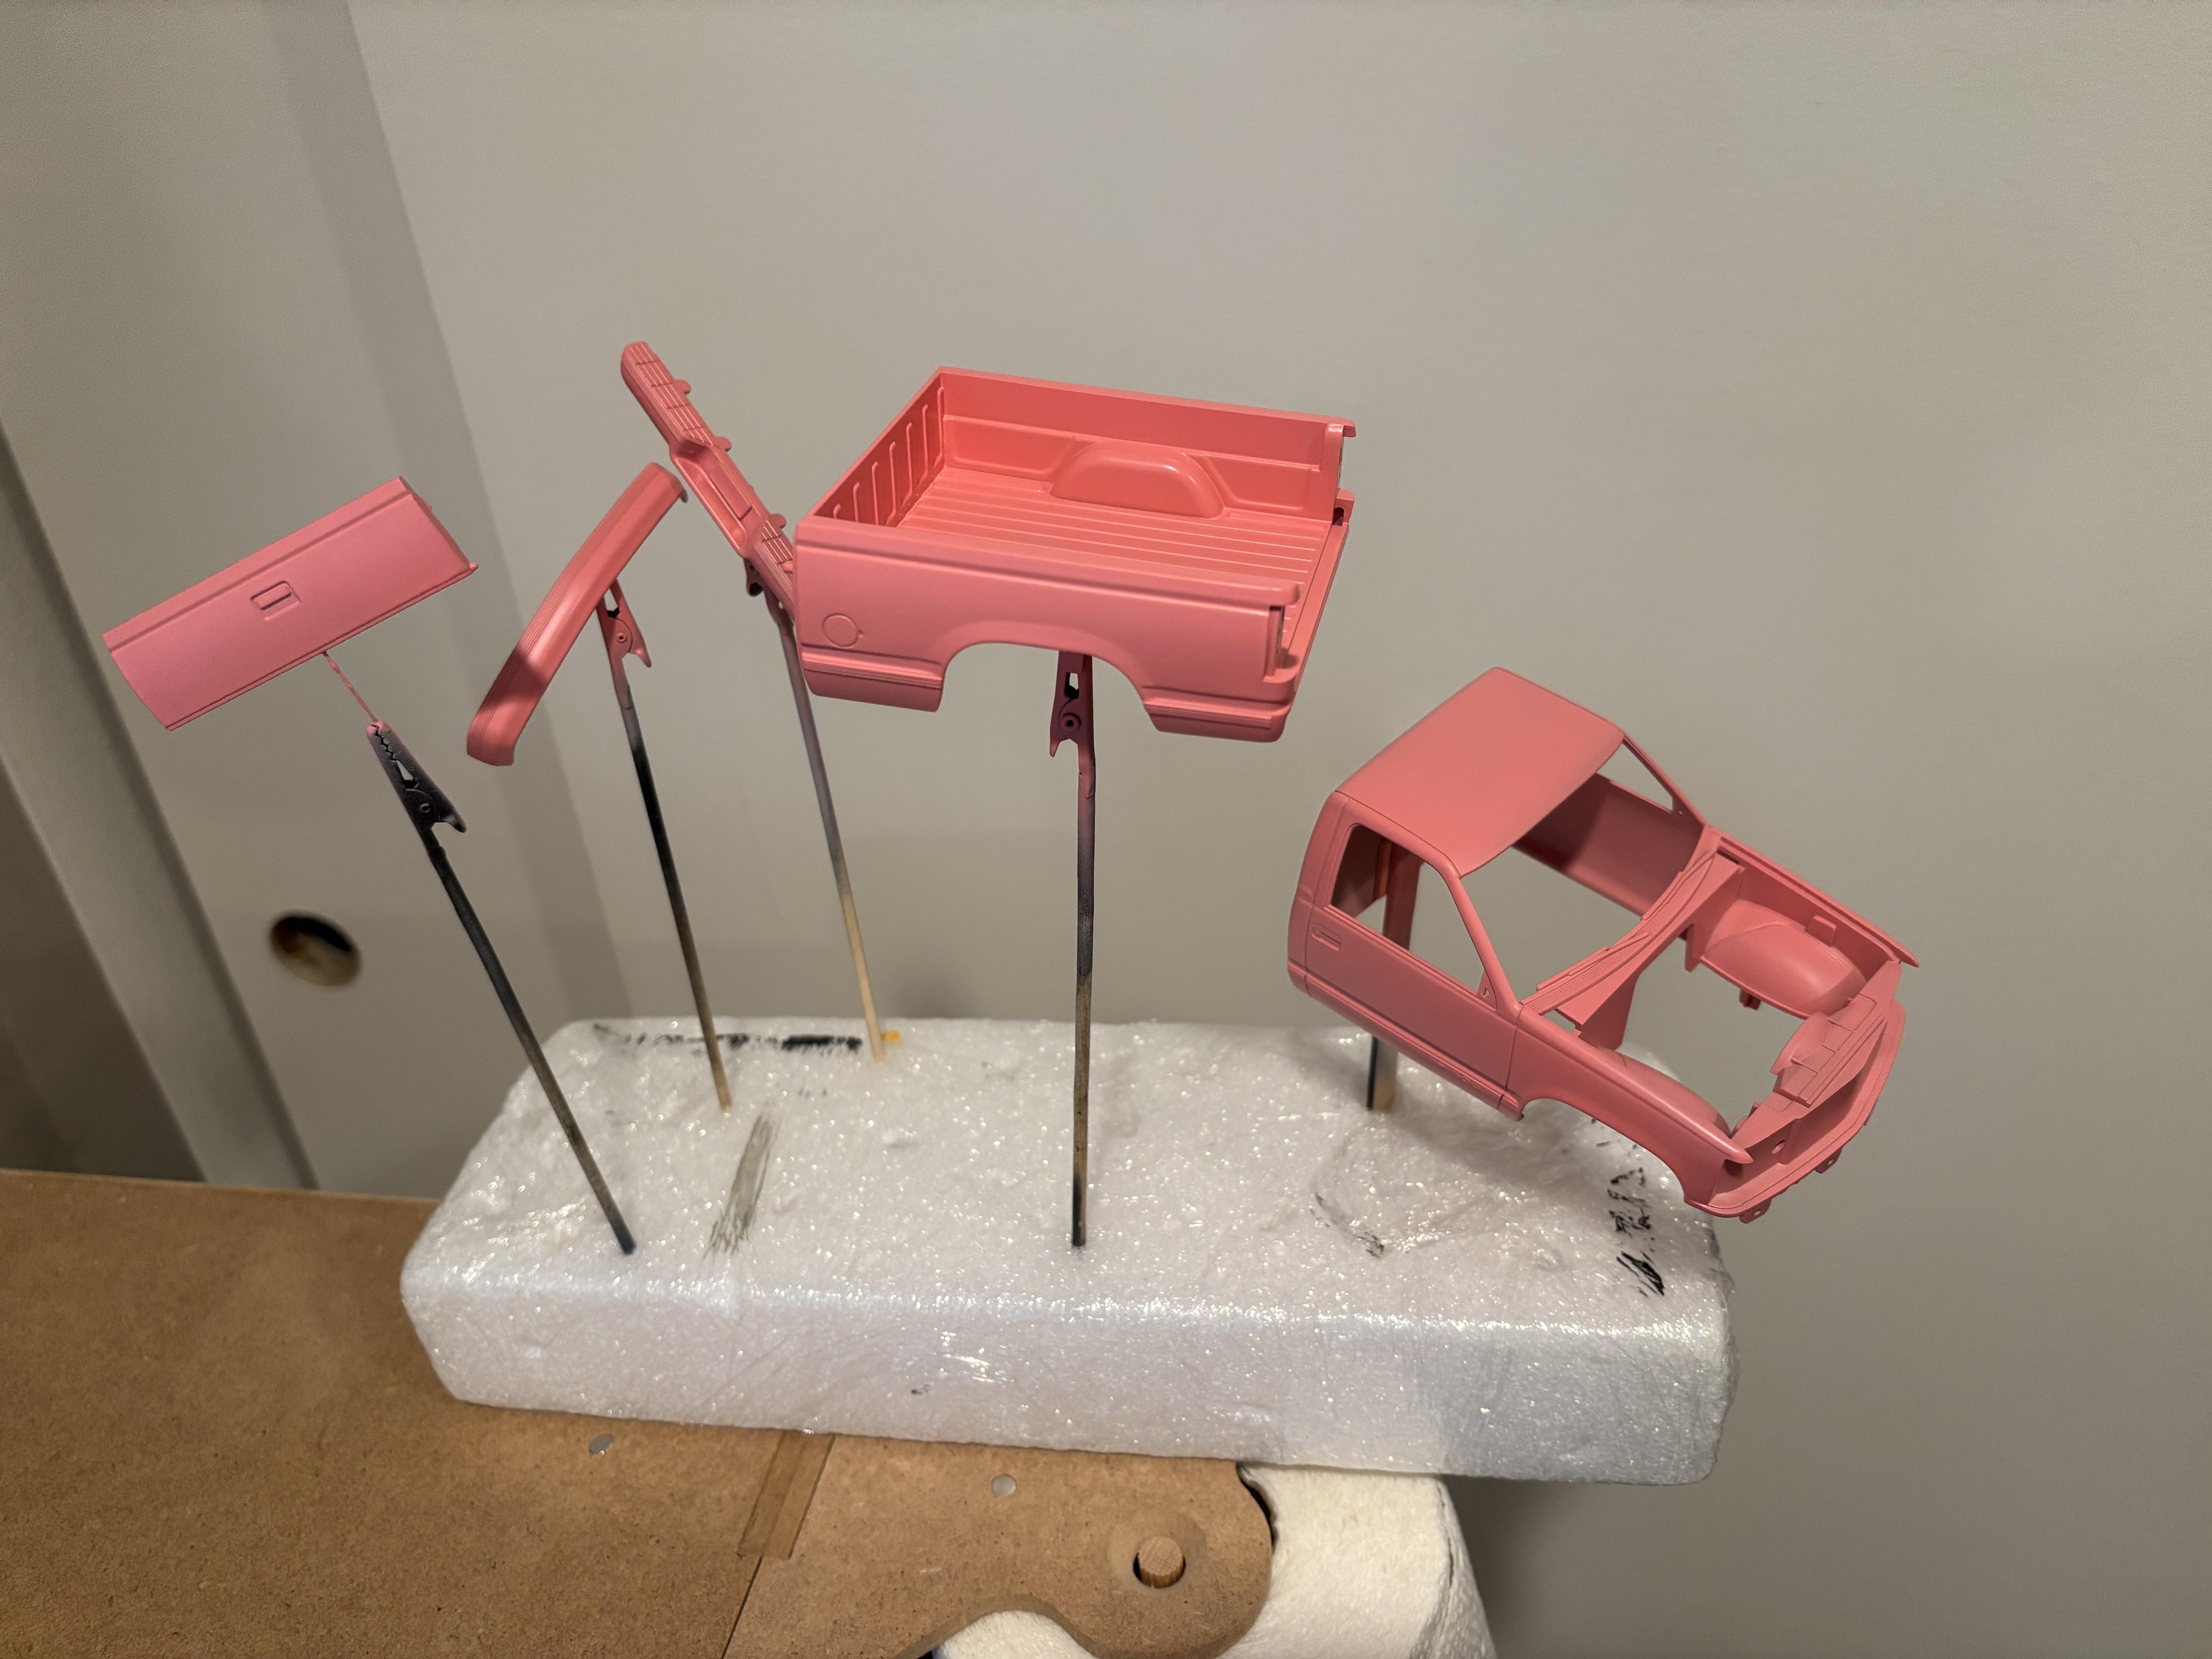
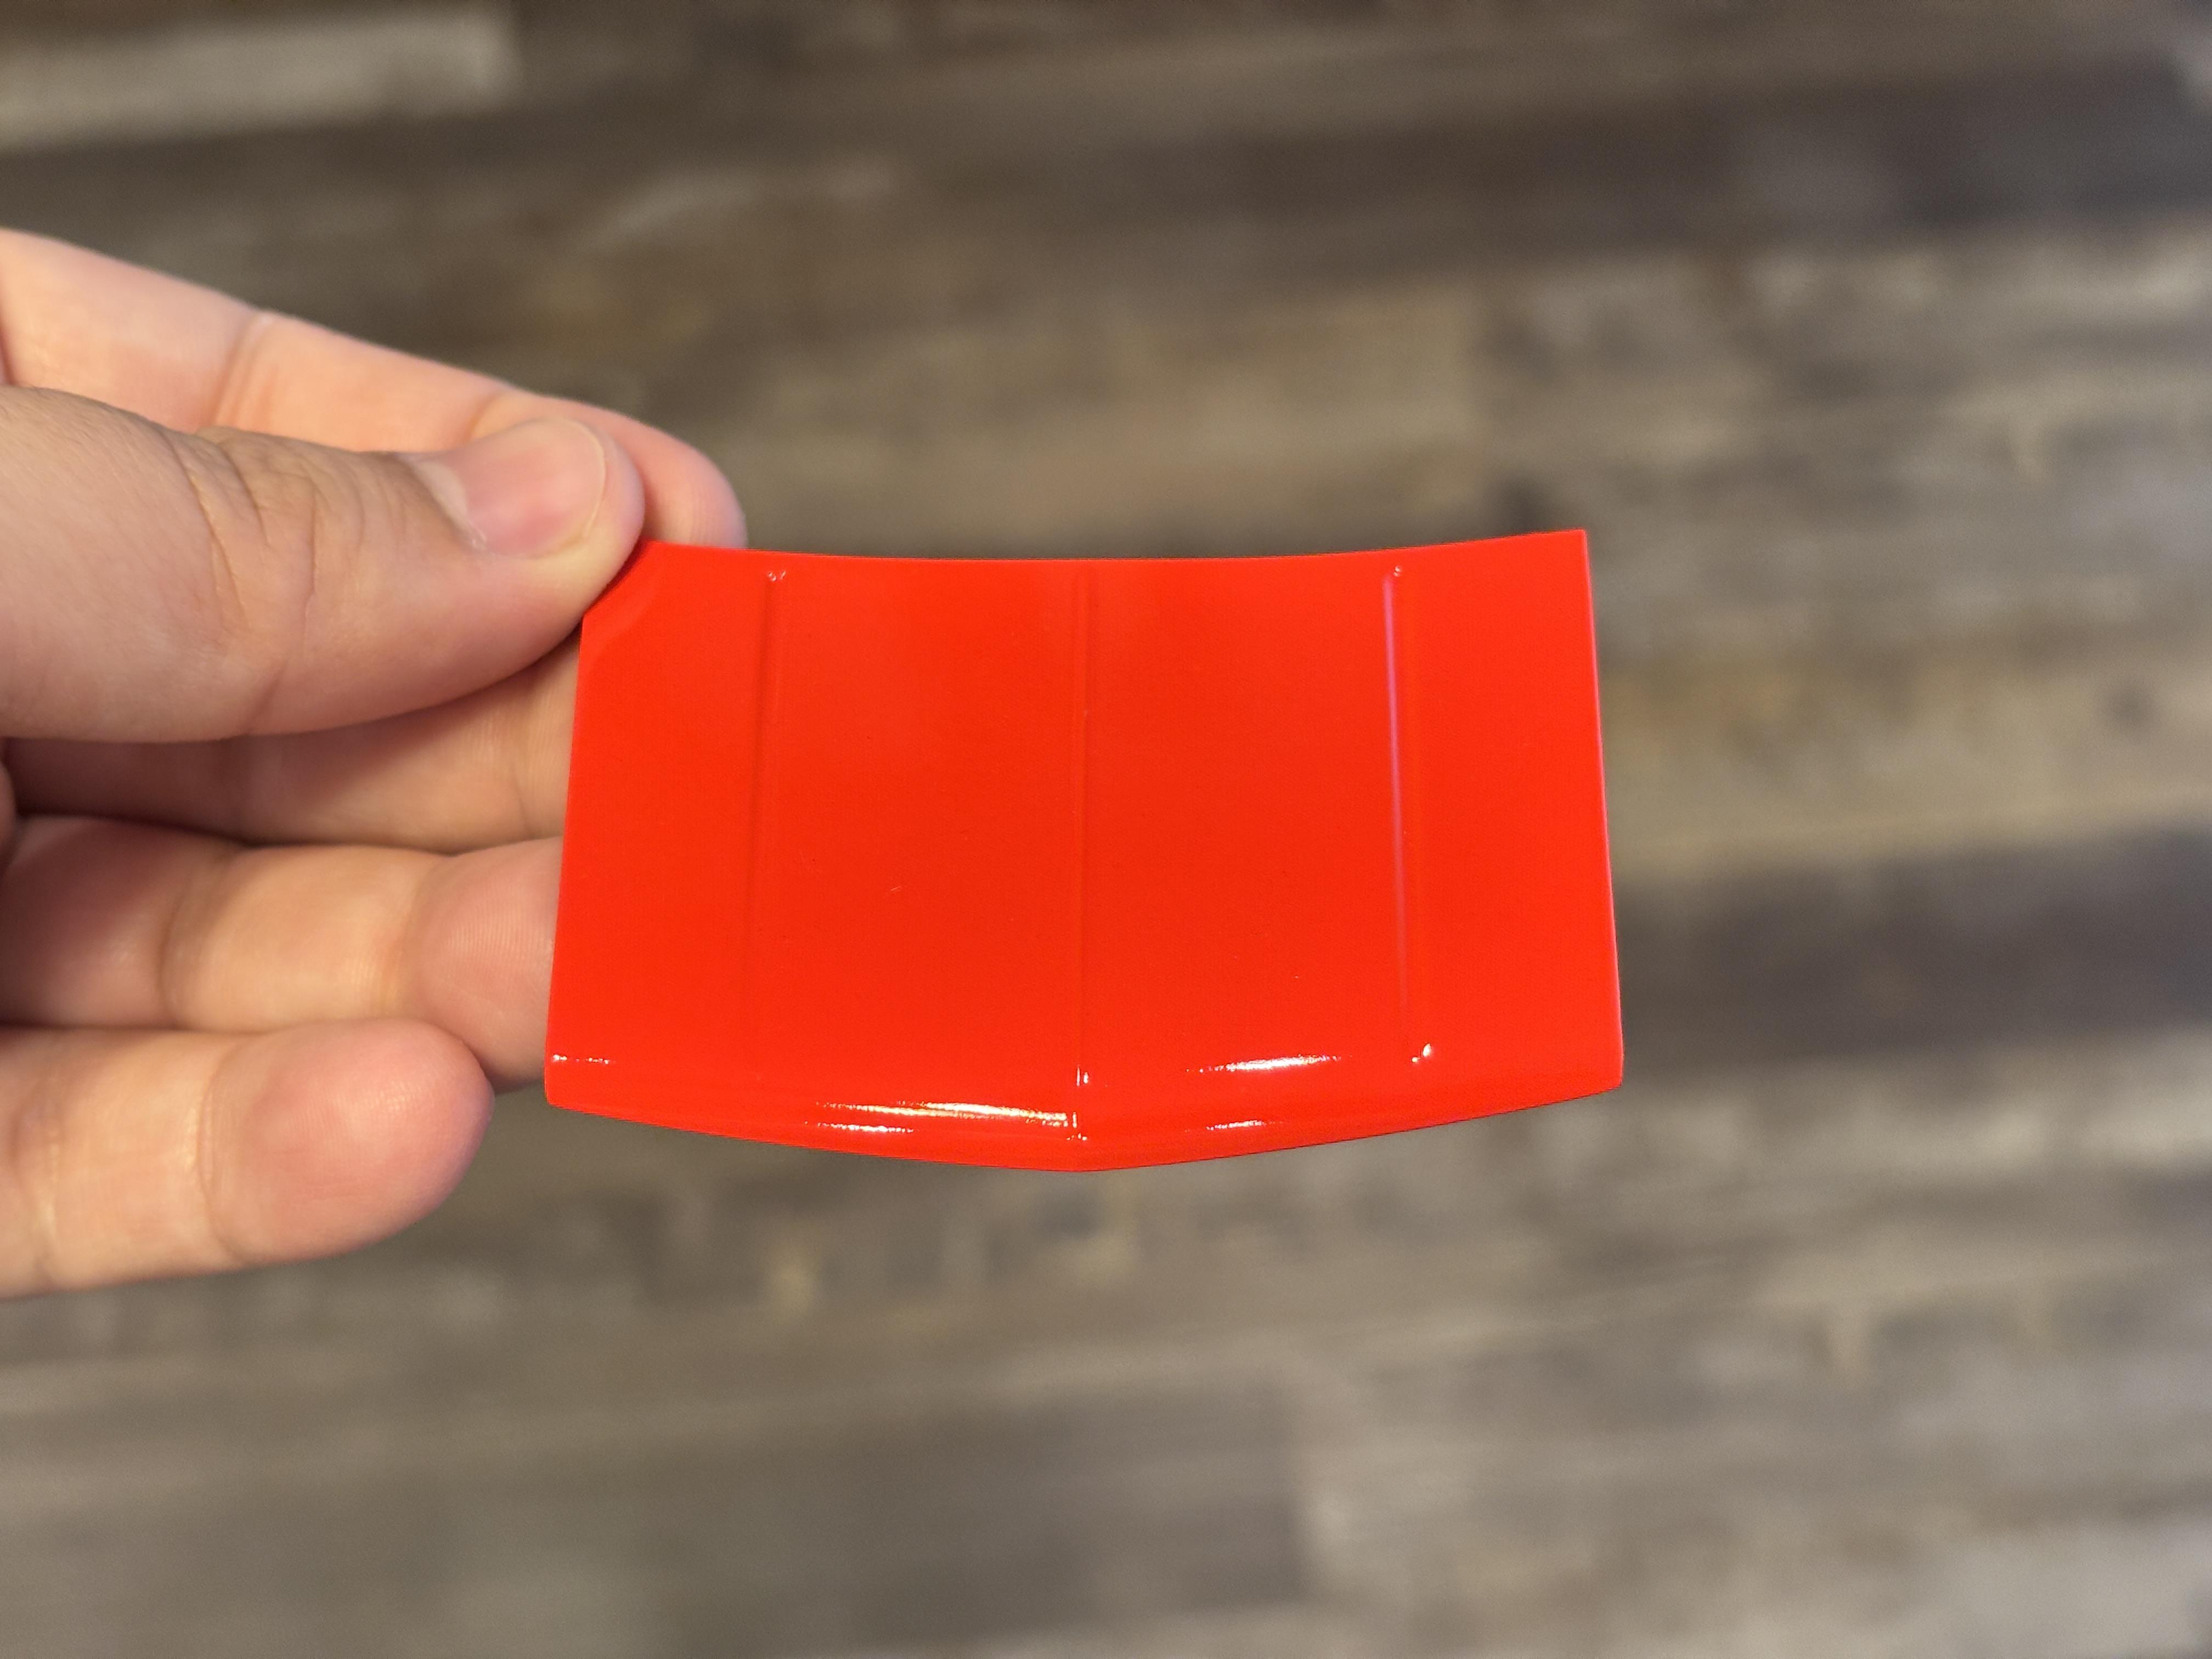
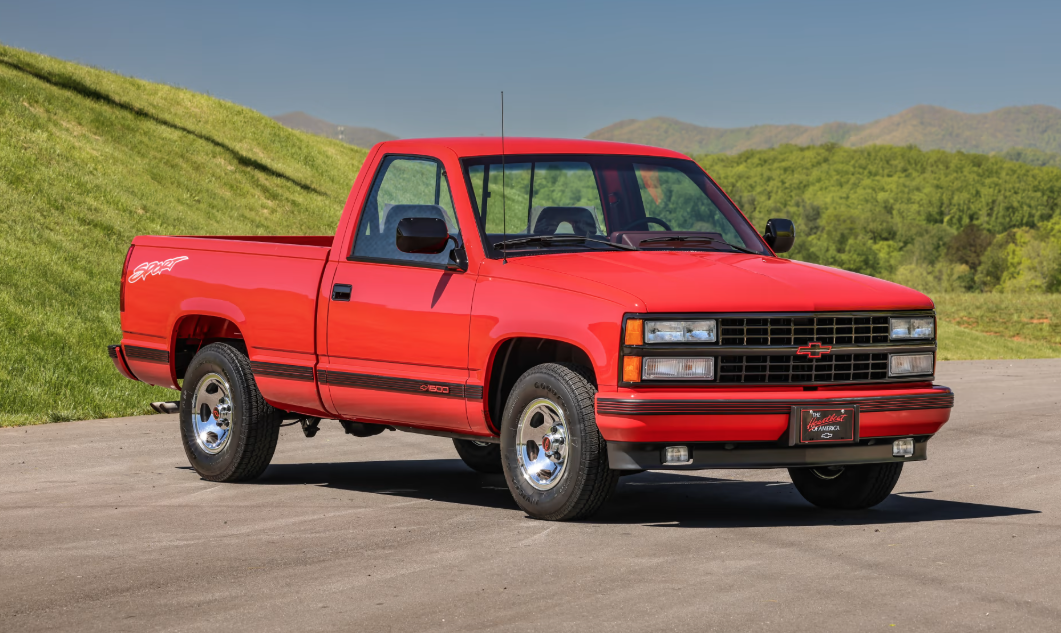
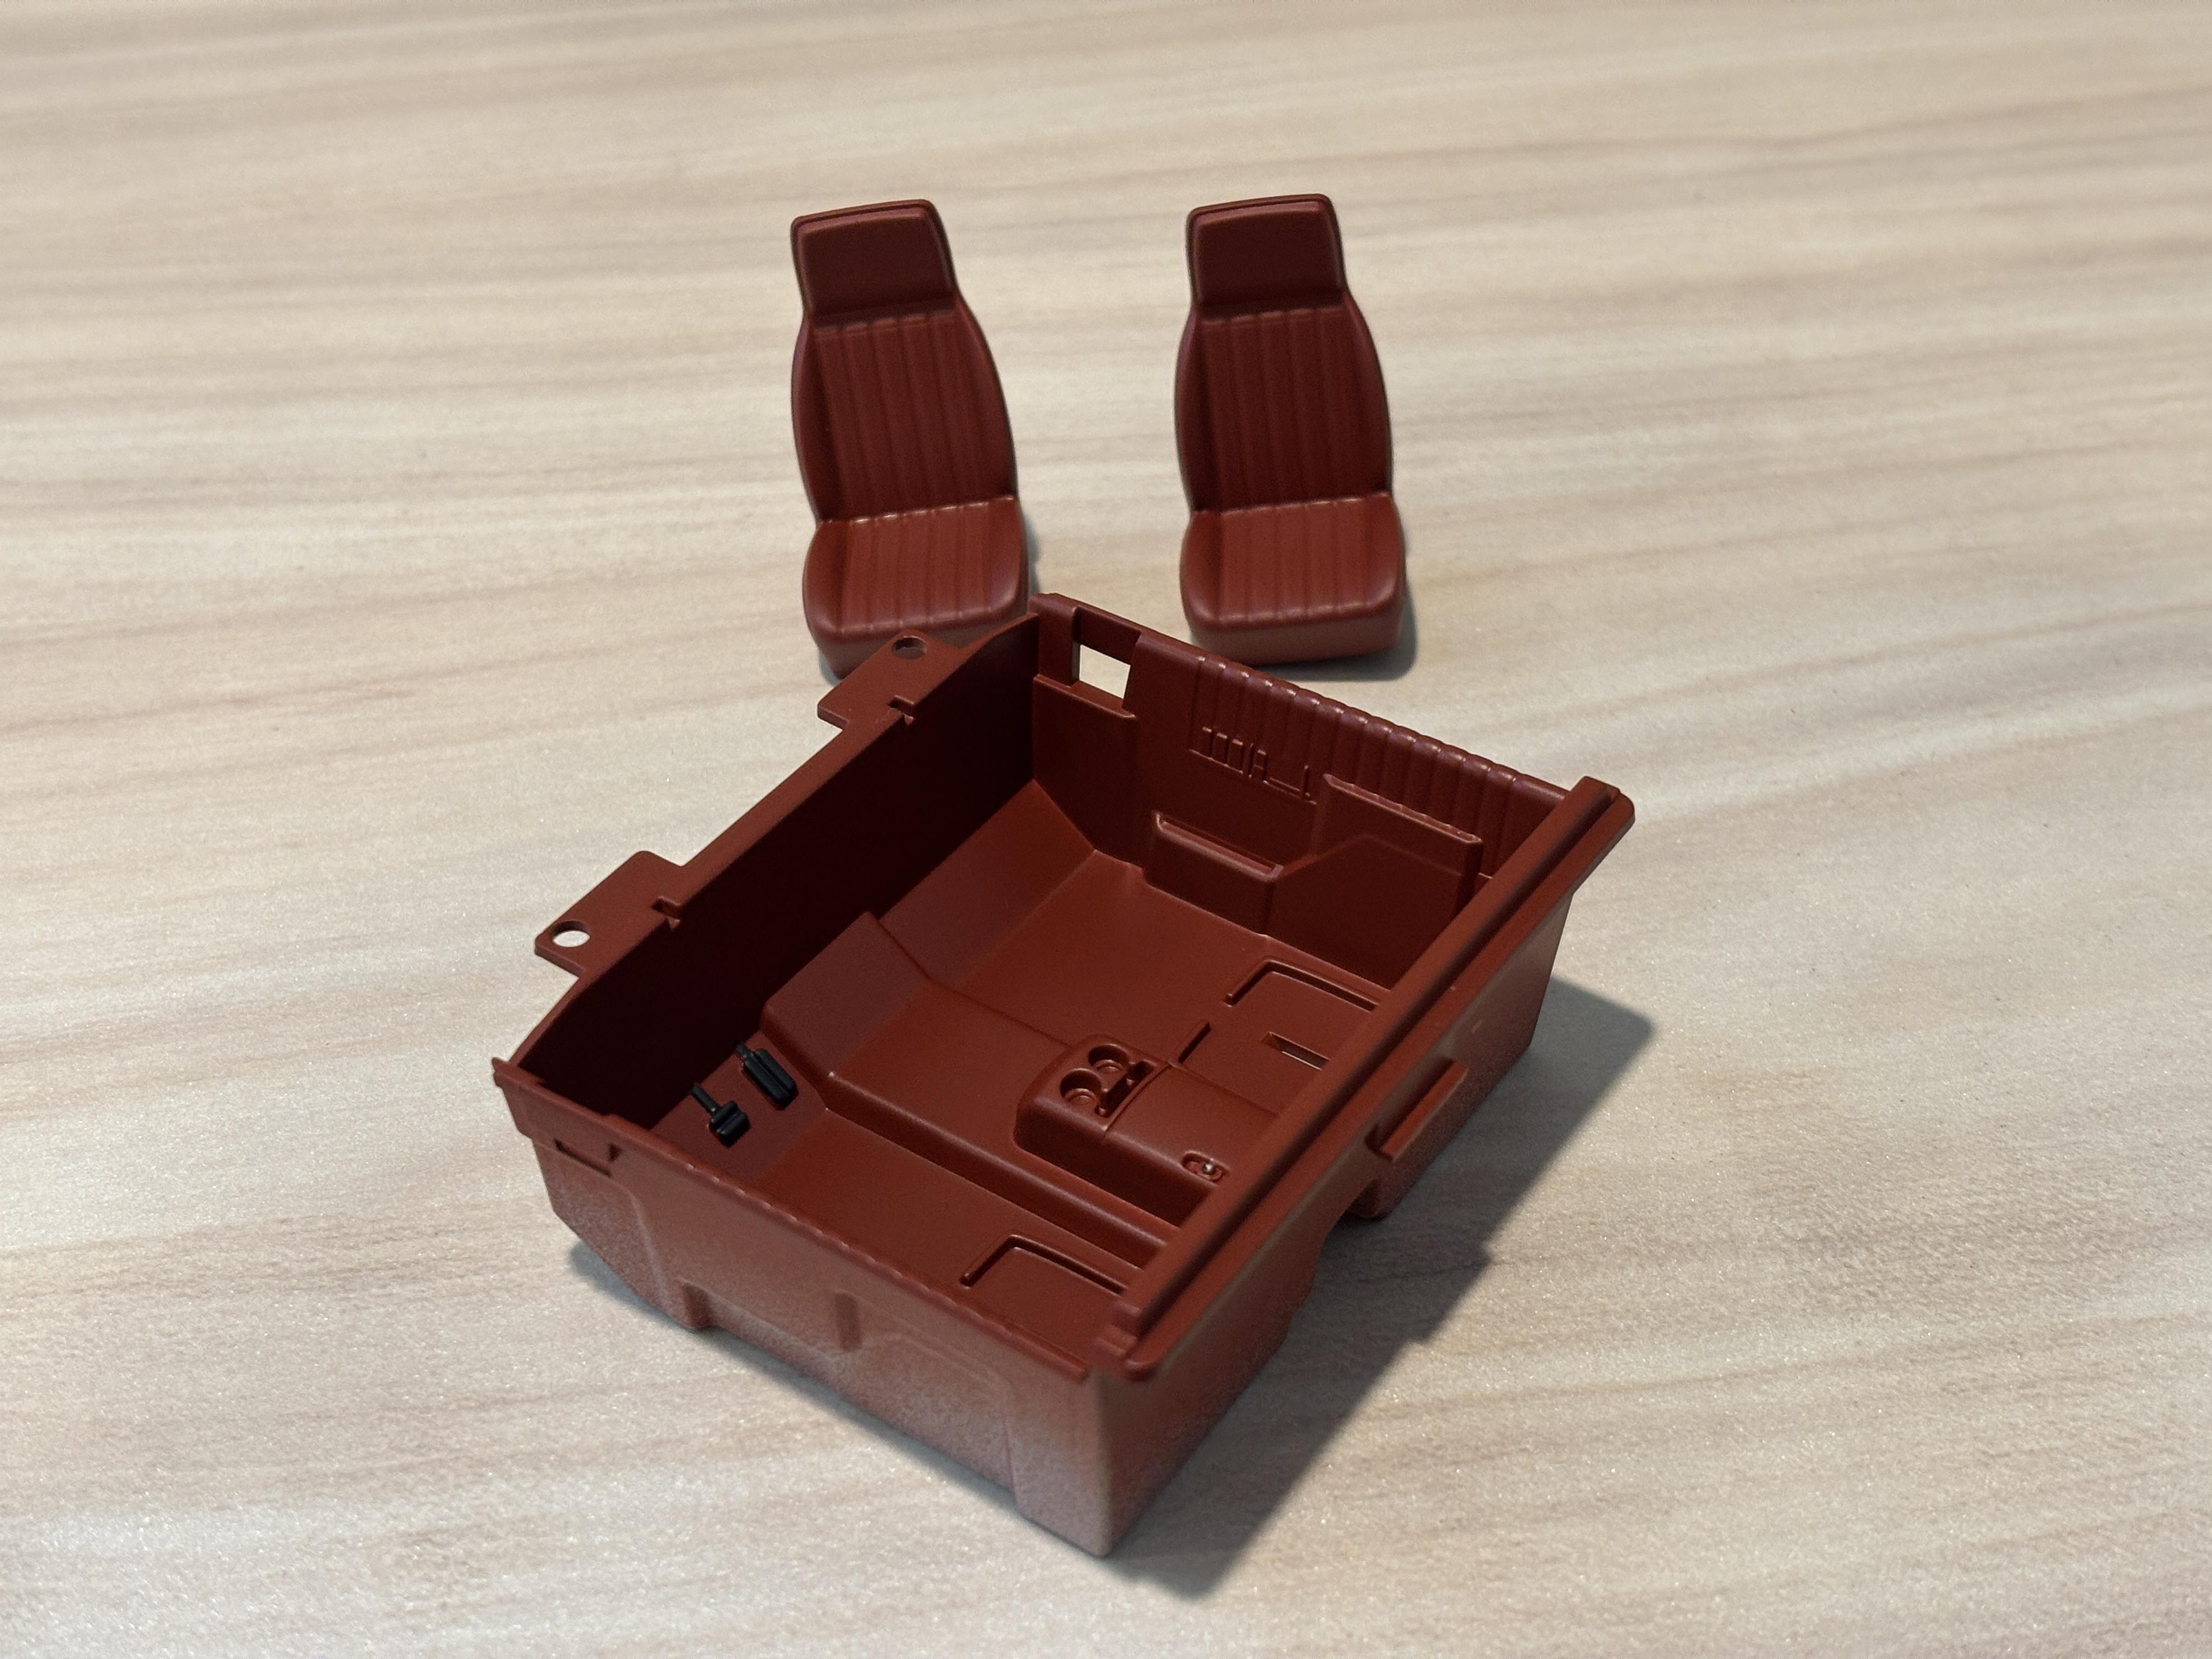
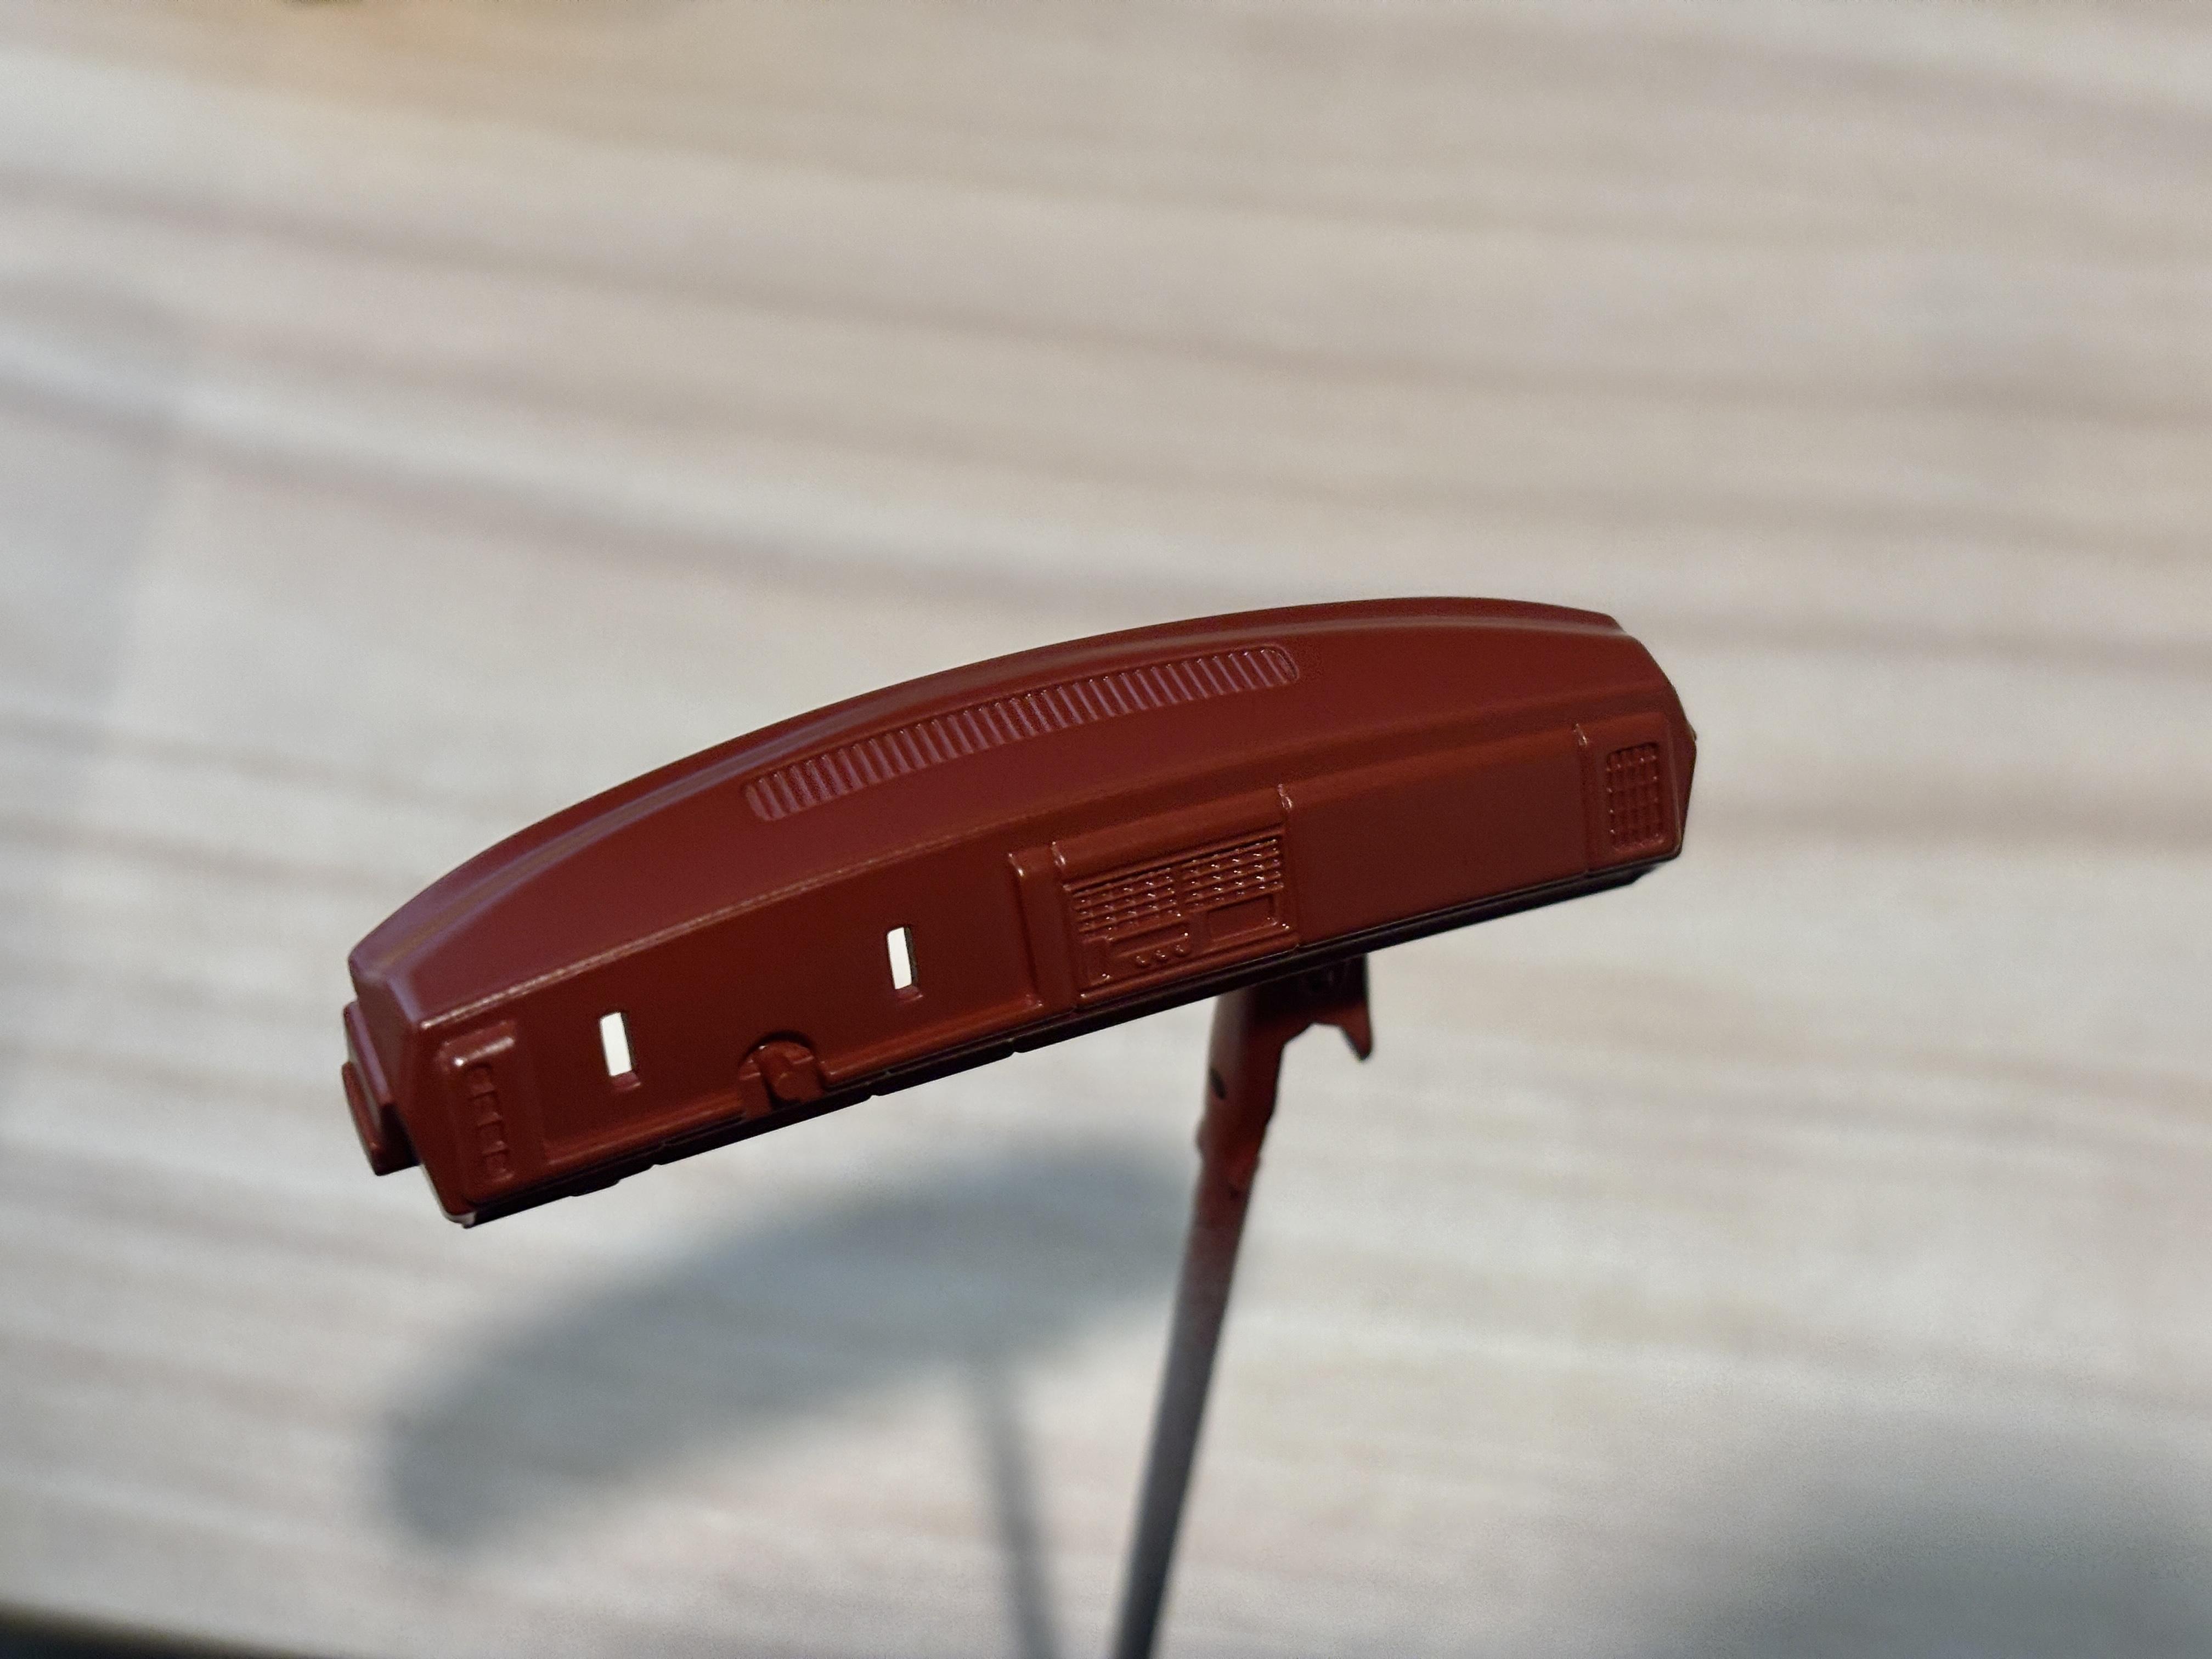
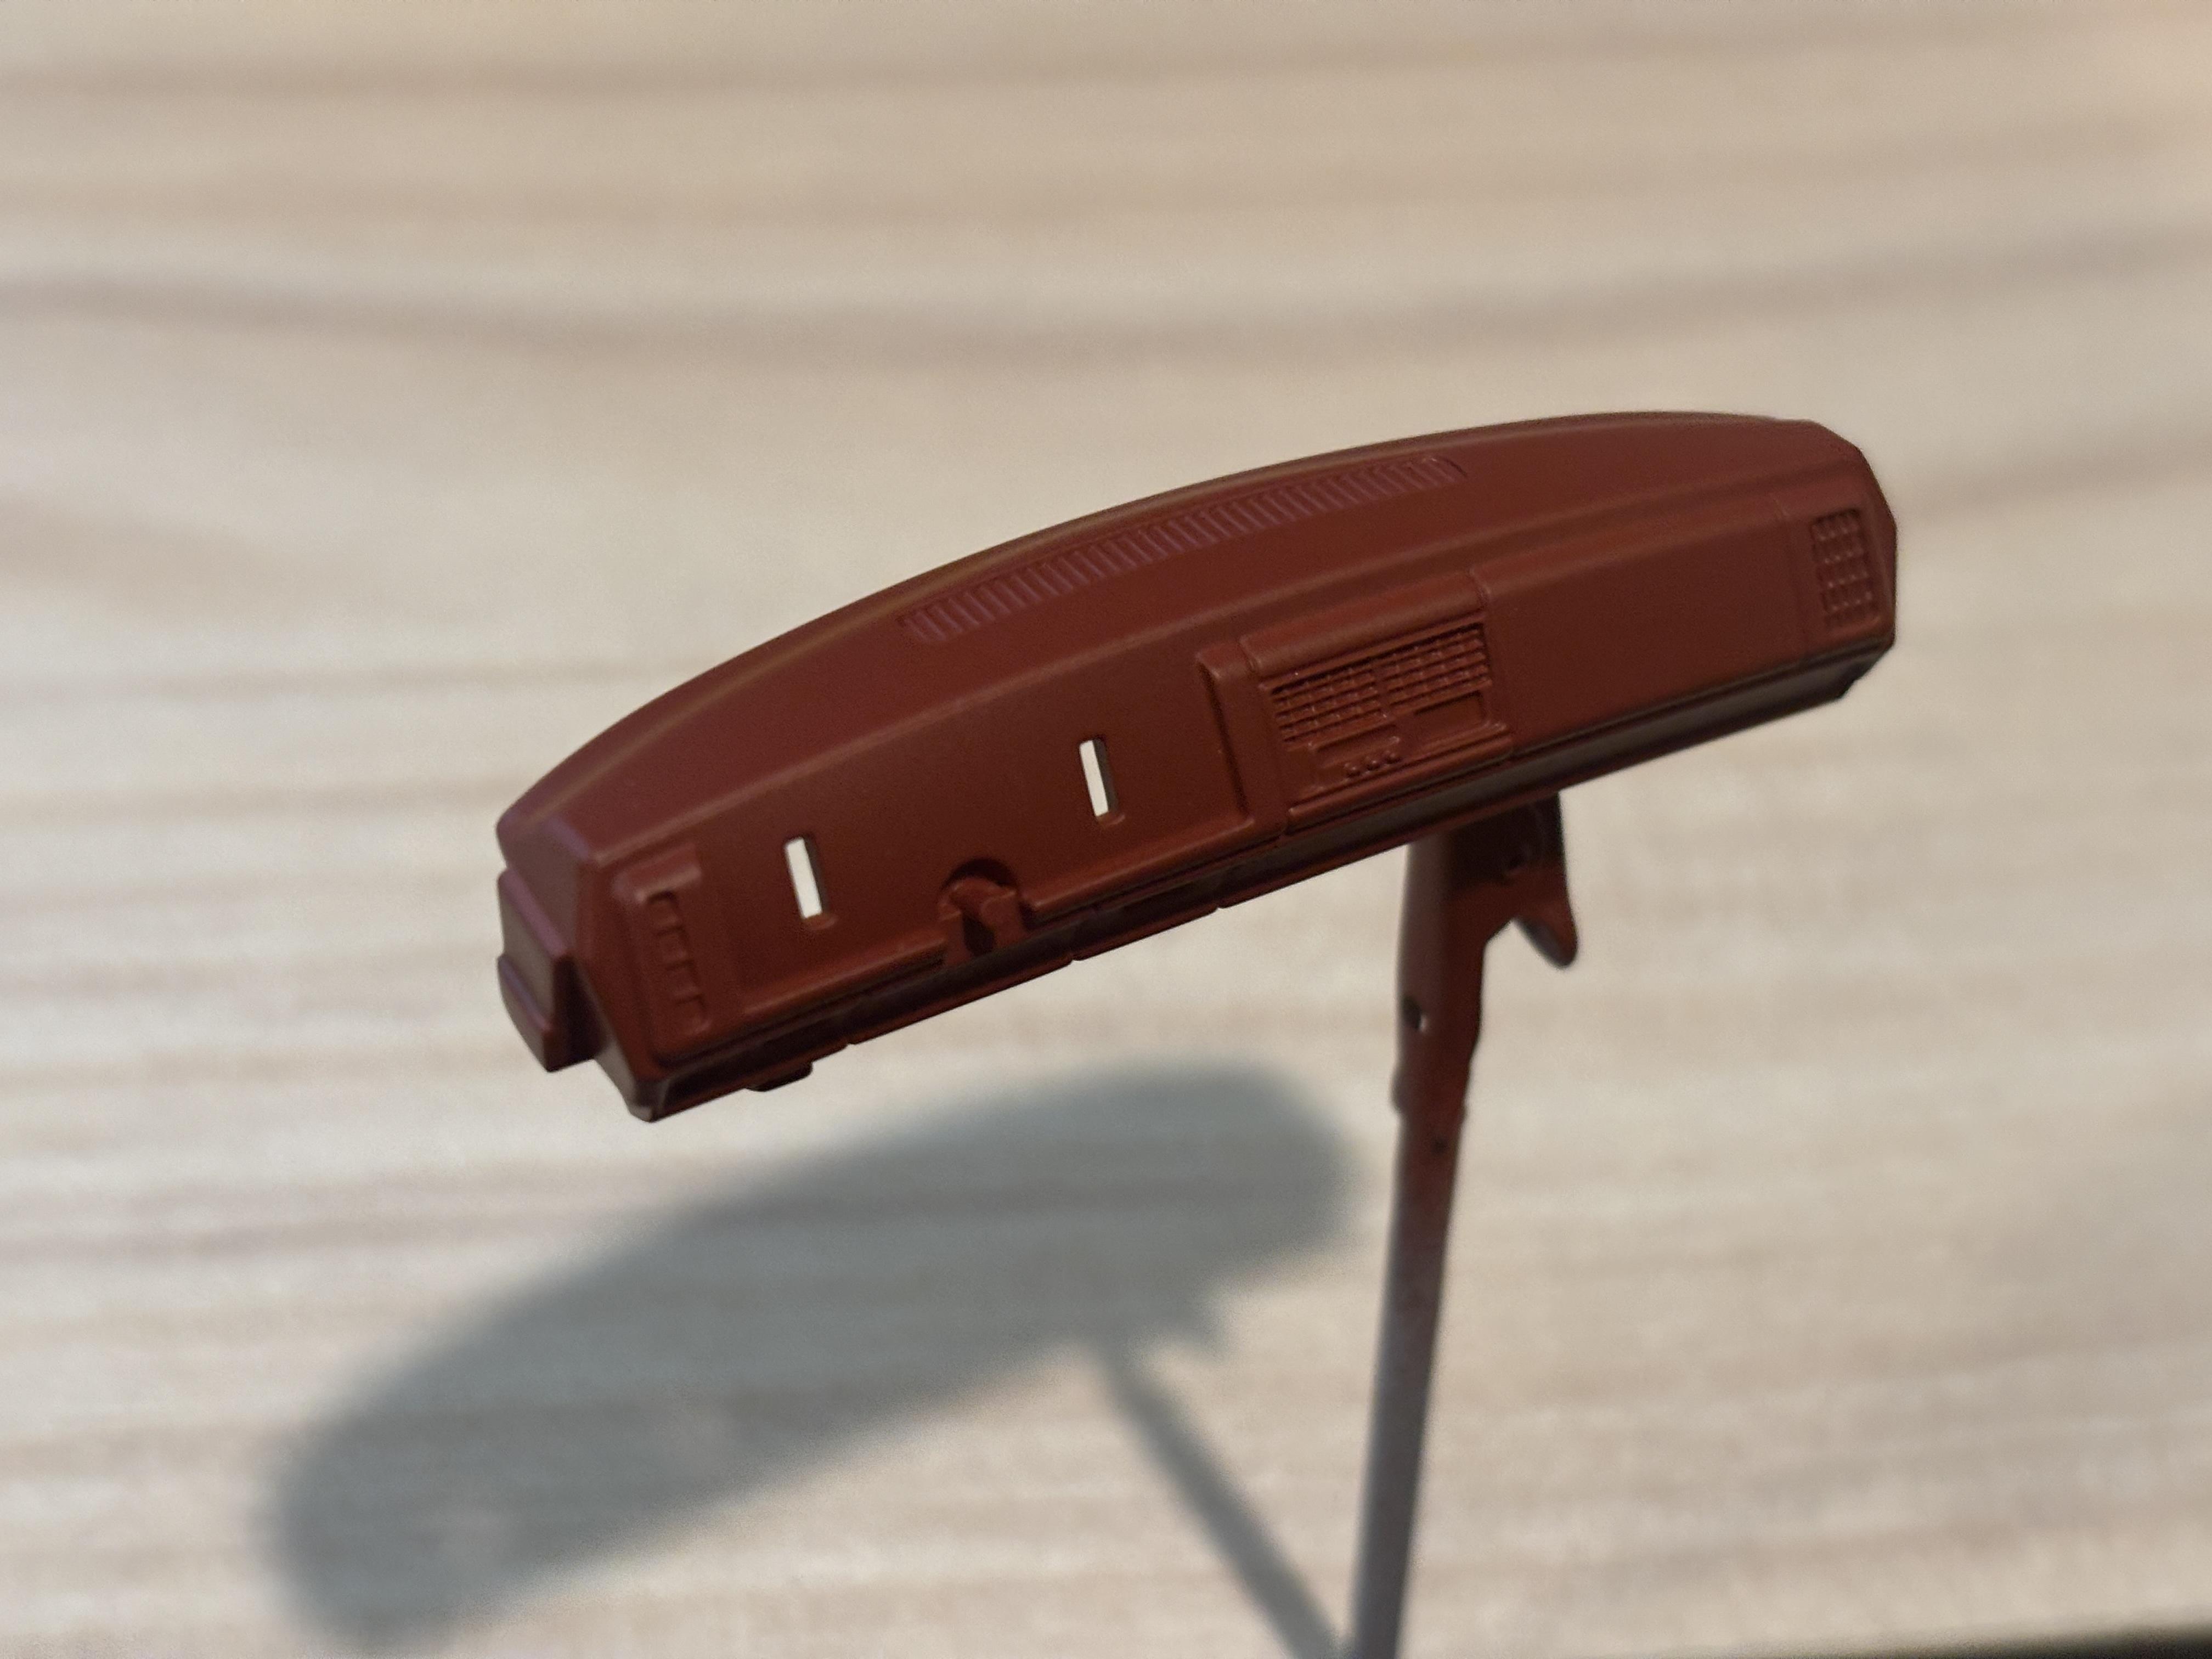
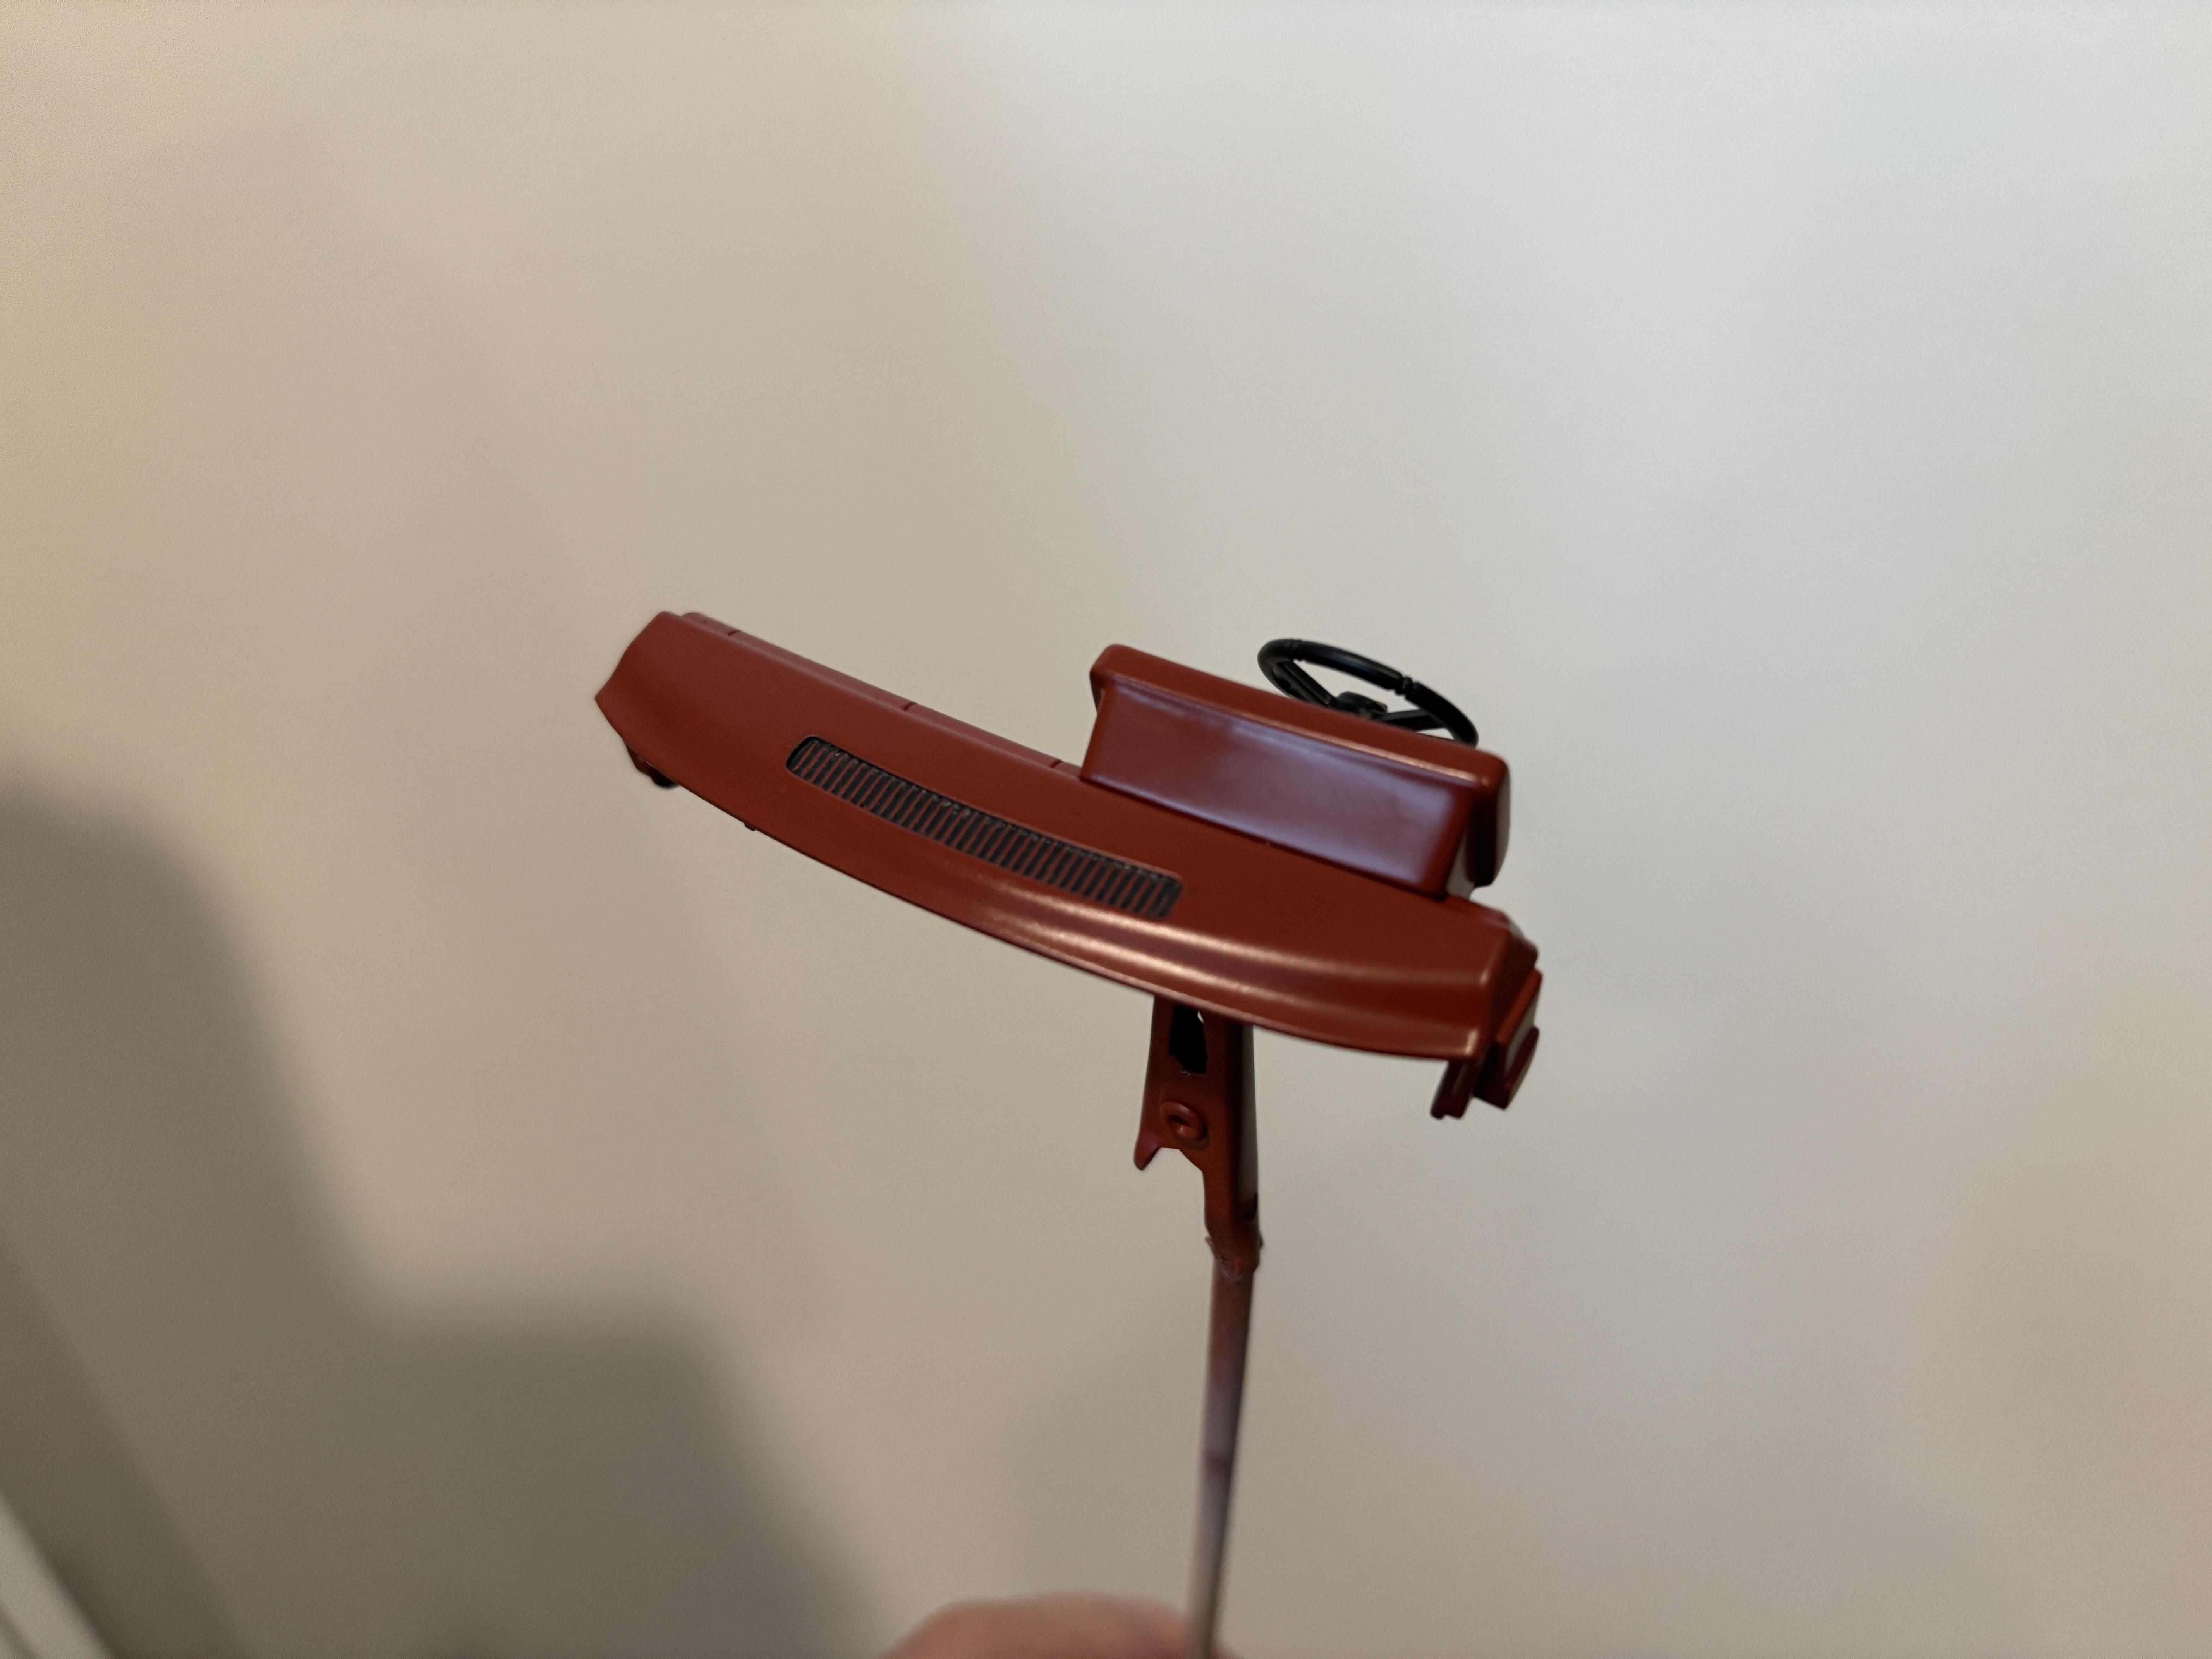
It is definitely browner than the real-life Garnet Red, but it looks redder in person. Maybe next time I'll experiment with a white primer base to see if the dull red pops just a bit more. I've found that if the features are too raised or there are uneven features, the decals look unrealistic. But yes, a product like solvaset does help with dash instrument clusters since the details on those tend to be much more subtle. I ended up using the decal for the AC that goes to the right of the steering wheel, but not the piece on the left side or the radio decal. I agree. TS-33 is about as close as I can get. I also found that spraying some semi-gloss clear makes it pop a bit more, especially on areas like the dash which are plastic in real life. I'm always open to new suggestions regarding paint. I thought about replicating the different shades of red depending on the pattern material, but the detail is just too faint and hard to do for the interior tub. At least for my skill level. Thank you! OBS trucks have really grown on me the last few years. And I say that as a Ford guy! I personally think the GMT800s were the last good looking GM trucks. They rapidly went down hill after that. Thank you! The interior is done. I applied flocking to the floor to simulate carpet. I left the side door panels alone as I just found the detail to be too faint or non-existent to paint. Again, something else that I find disappointing about this kit since it is a new tooling. The interior may be too brown for some when compared to Garnet red, but I don't have a better alternative at the moment. The body parts and bumpers are all primed. I started with Tamiya Grey Primer and moved up to Tamiya Pink primer. I no longer use Tamiya primers as I am now an avid fan of the Mr. Hobby/Mr. Surfacer line of primers, but these are still good and I wanted to run through my old supply. I also wanted to see how the Pink primer would help with getting me close to the real truck's bright Victory Red paint. I'll sand the body down with some 3000 grit sponges before applying the paint coats. Speaking of paint, I will be using Tamiya TS-49 Bright Red to replicate GM Victory Red. I tested it out on the hood and liked the look of it: It looks like a close enough match to the real thing: Up next, I'll be working on the grill and headlights.
-
Thank you, all! I appreciate the compliments.
-
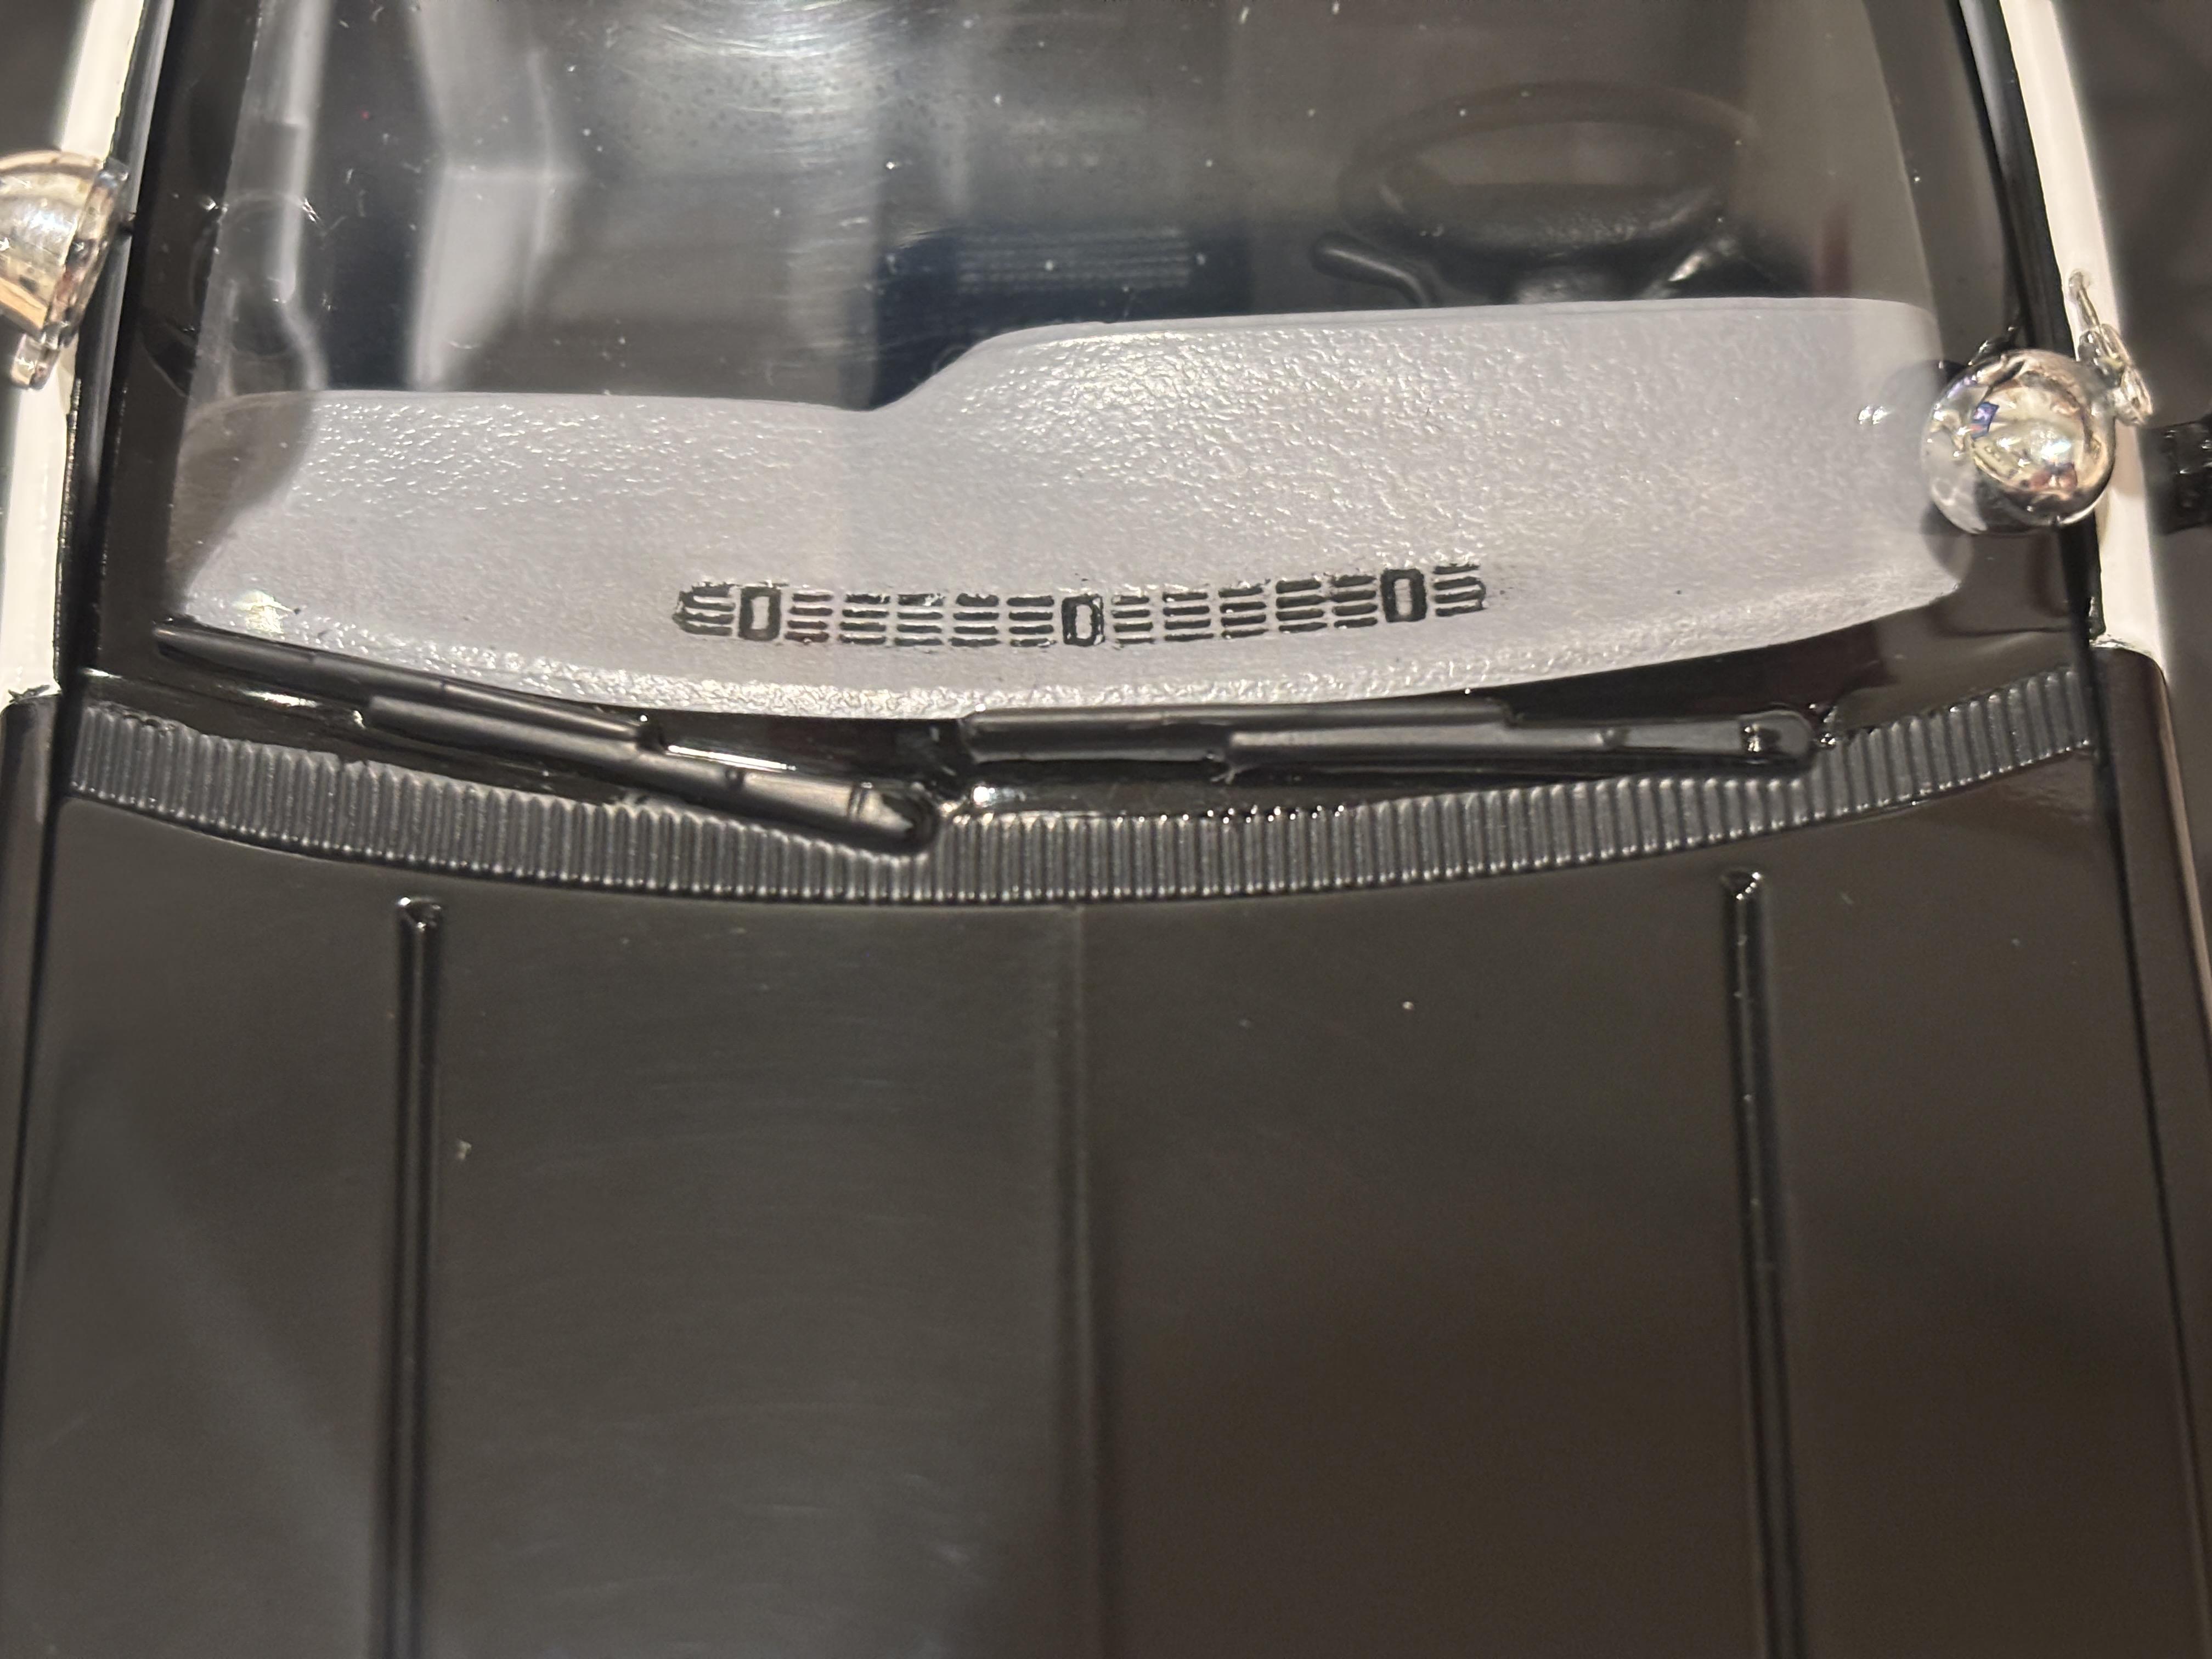
I forgot to mention in my last post that I used my trusty AK Rubber Black marker to paint the windshield wipers and the surrounding area. These paint pens lay on extremely smooth: Here is the completed build posted in the Under Glass section:
-
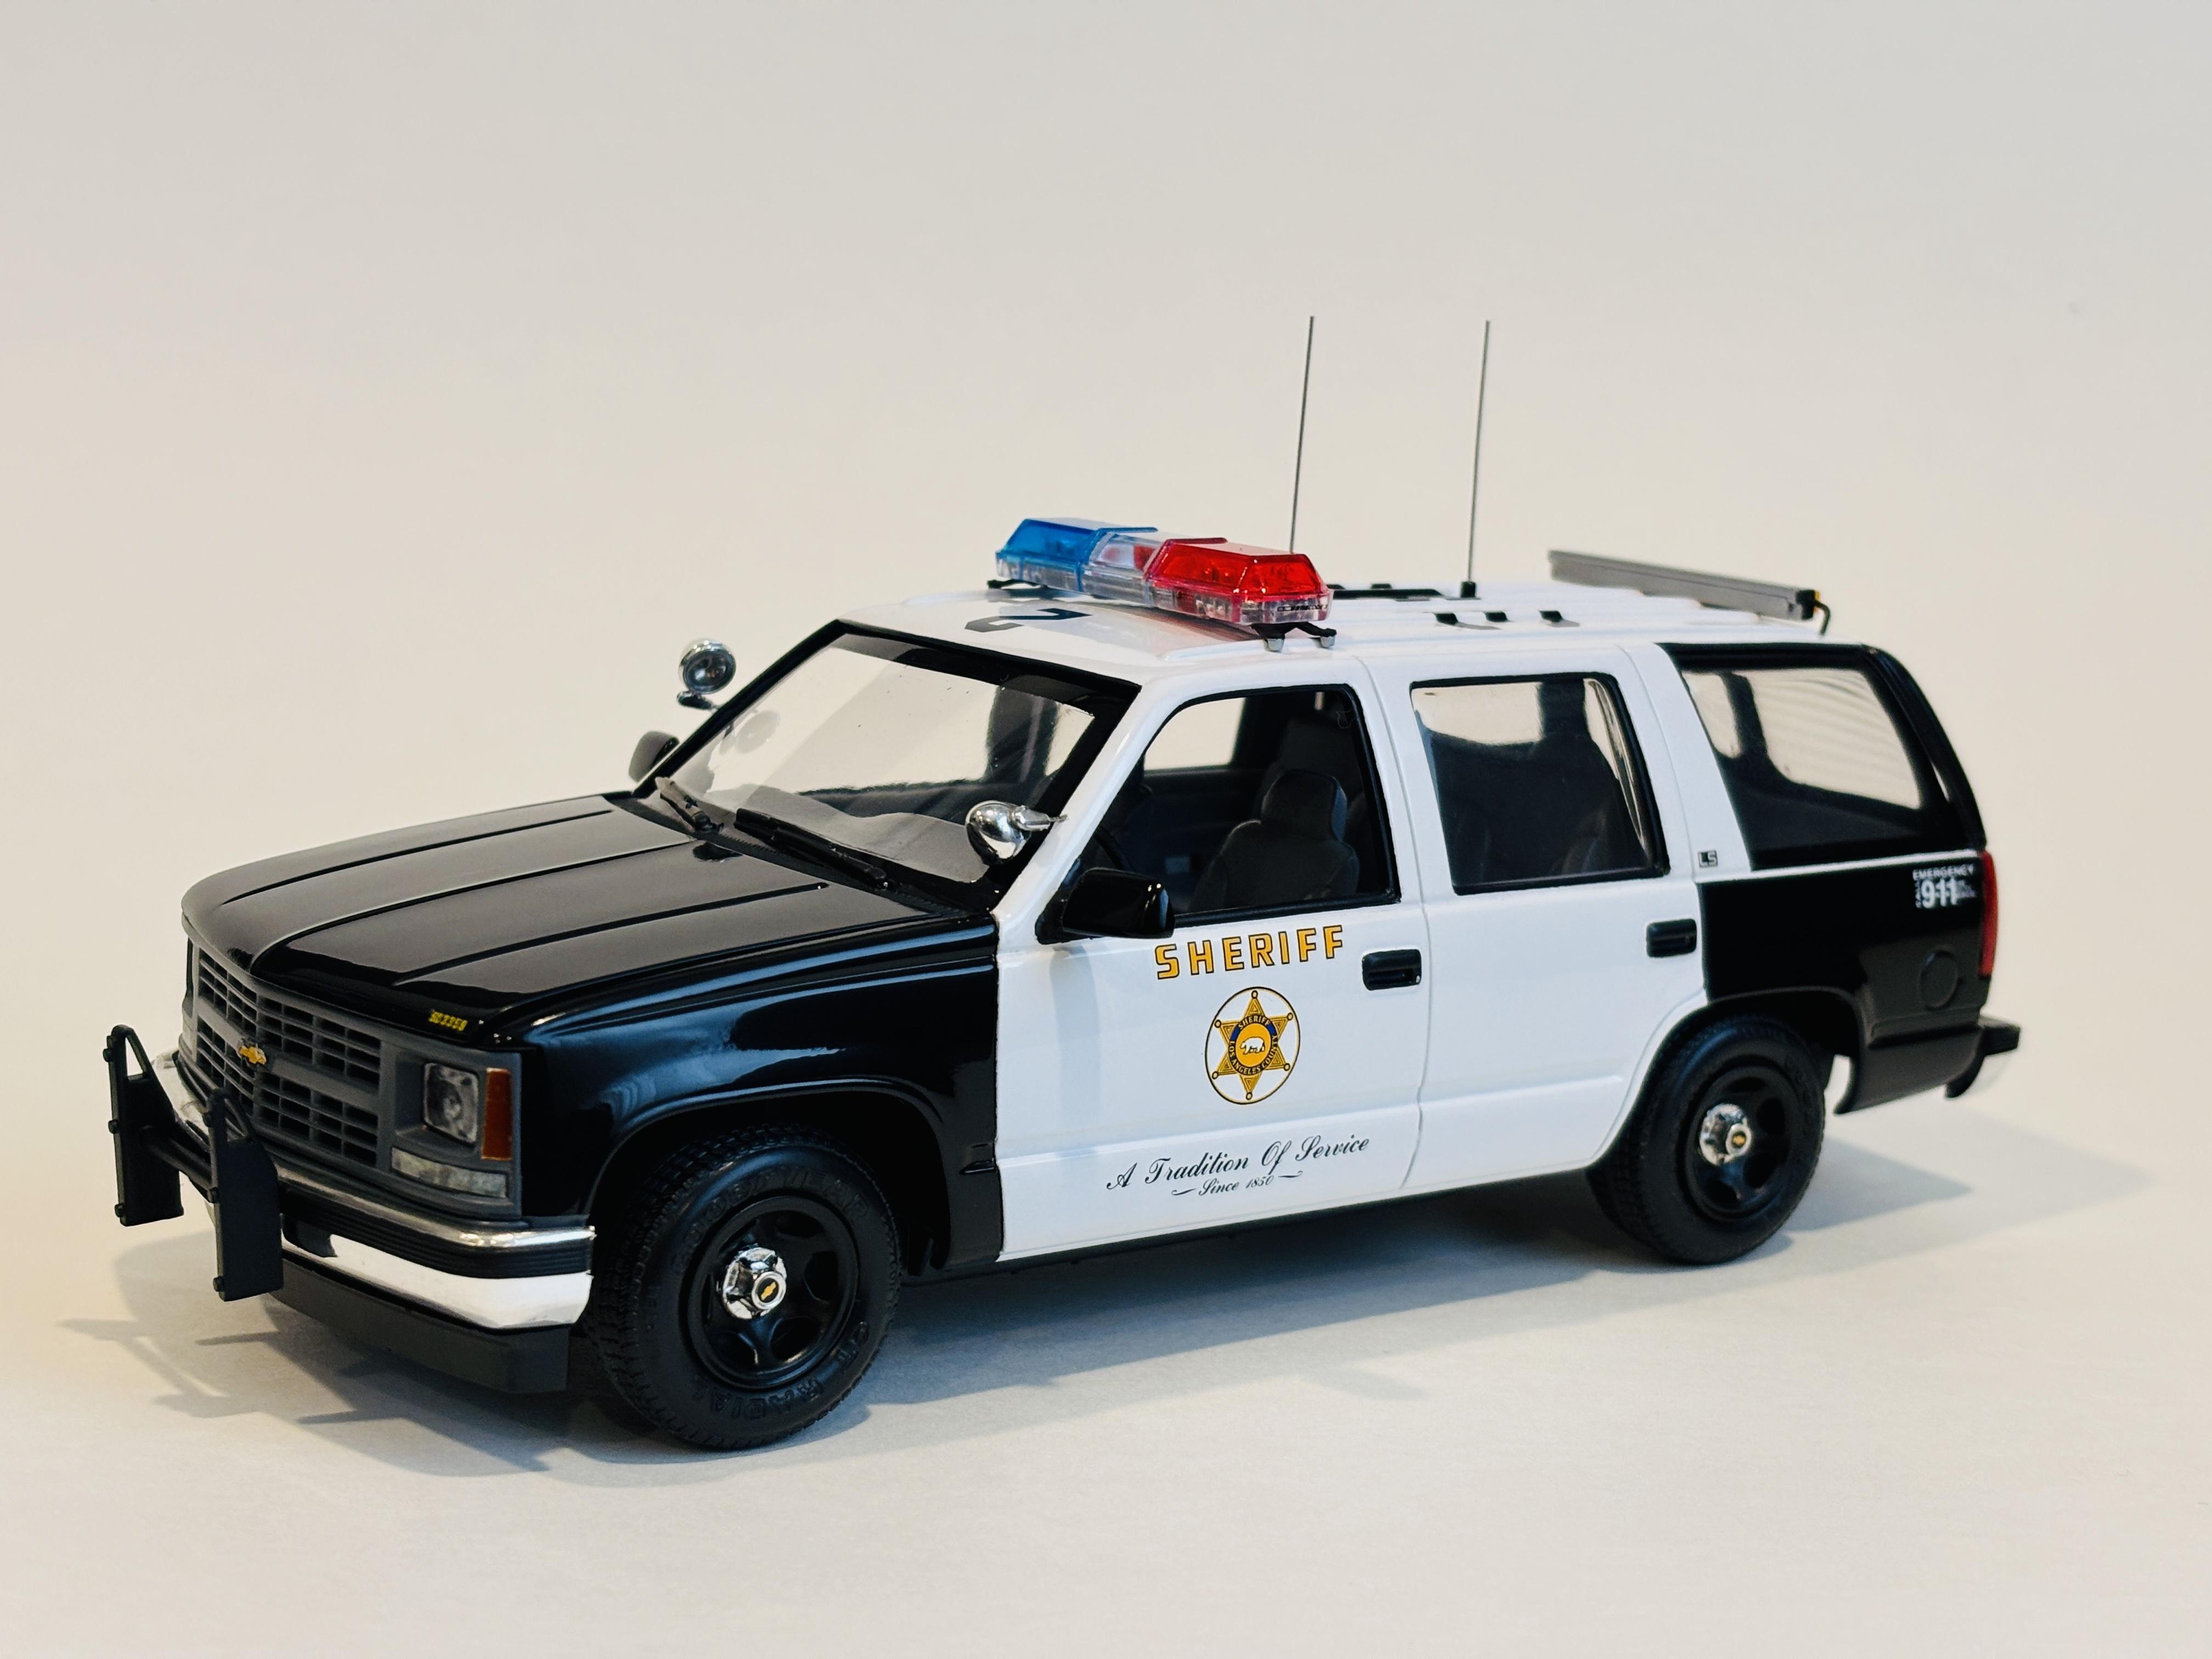
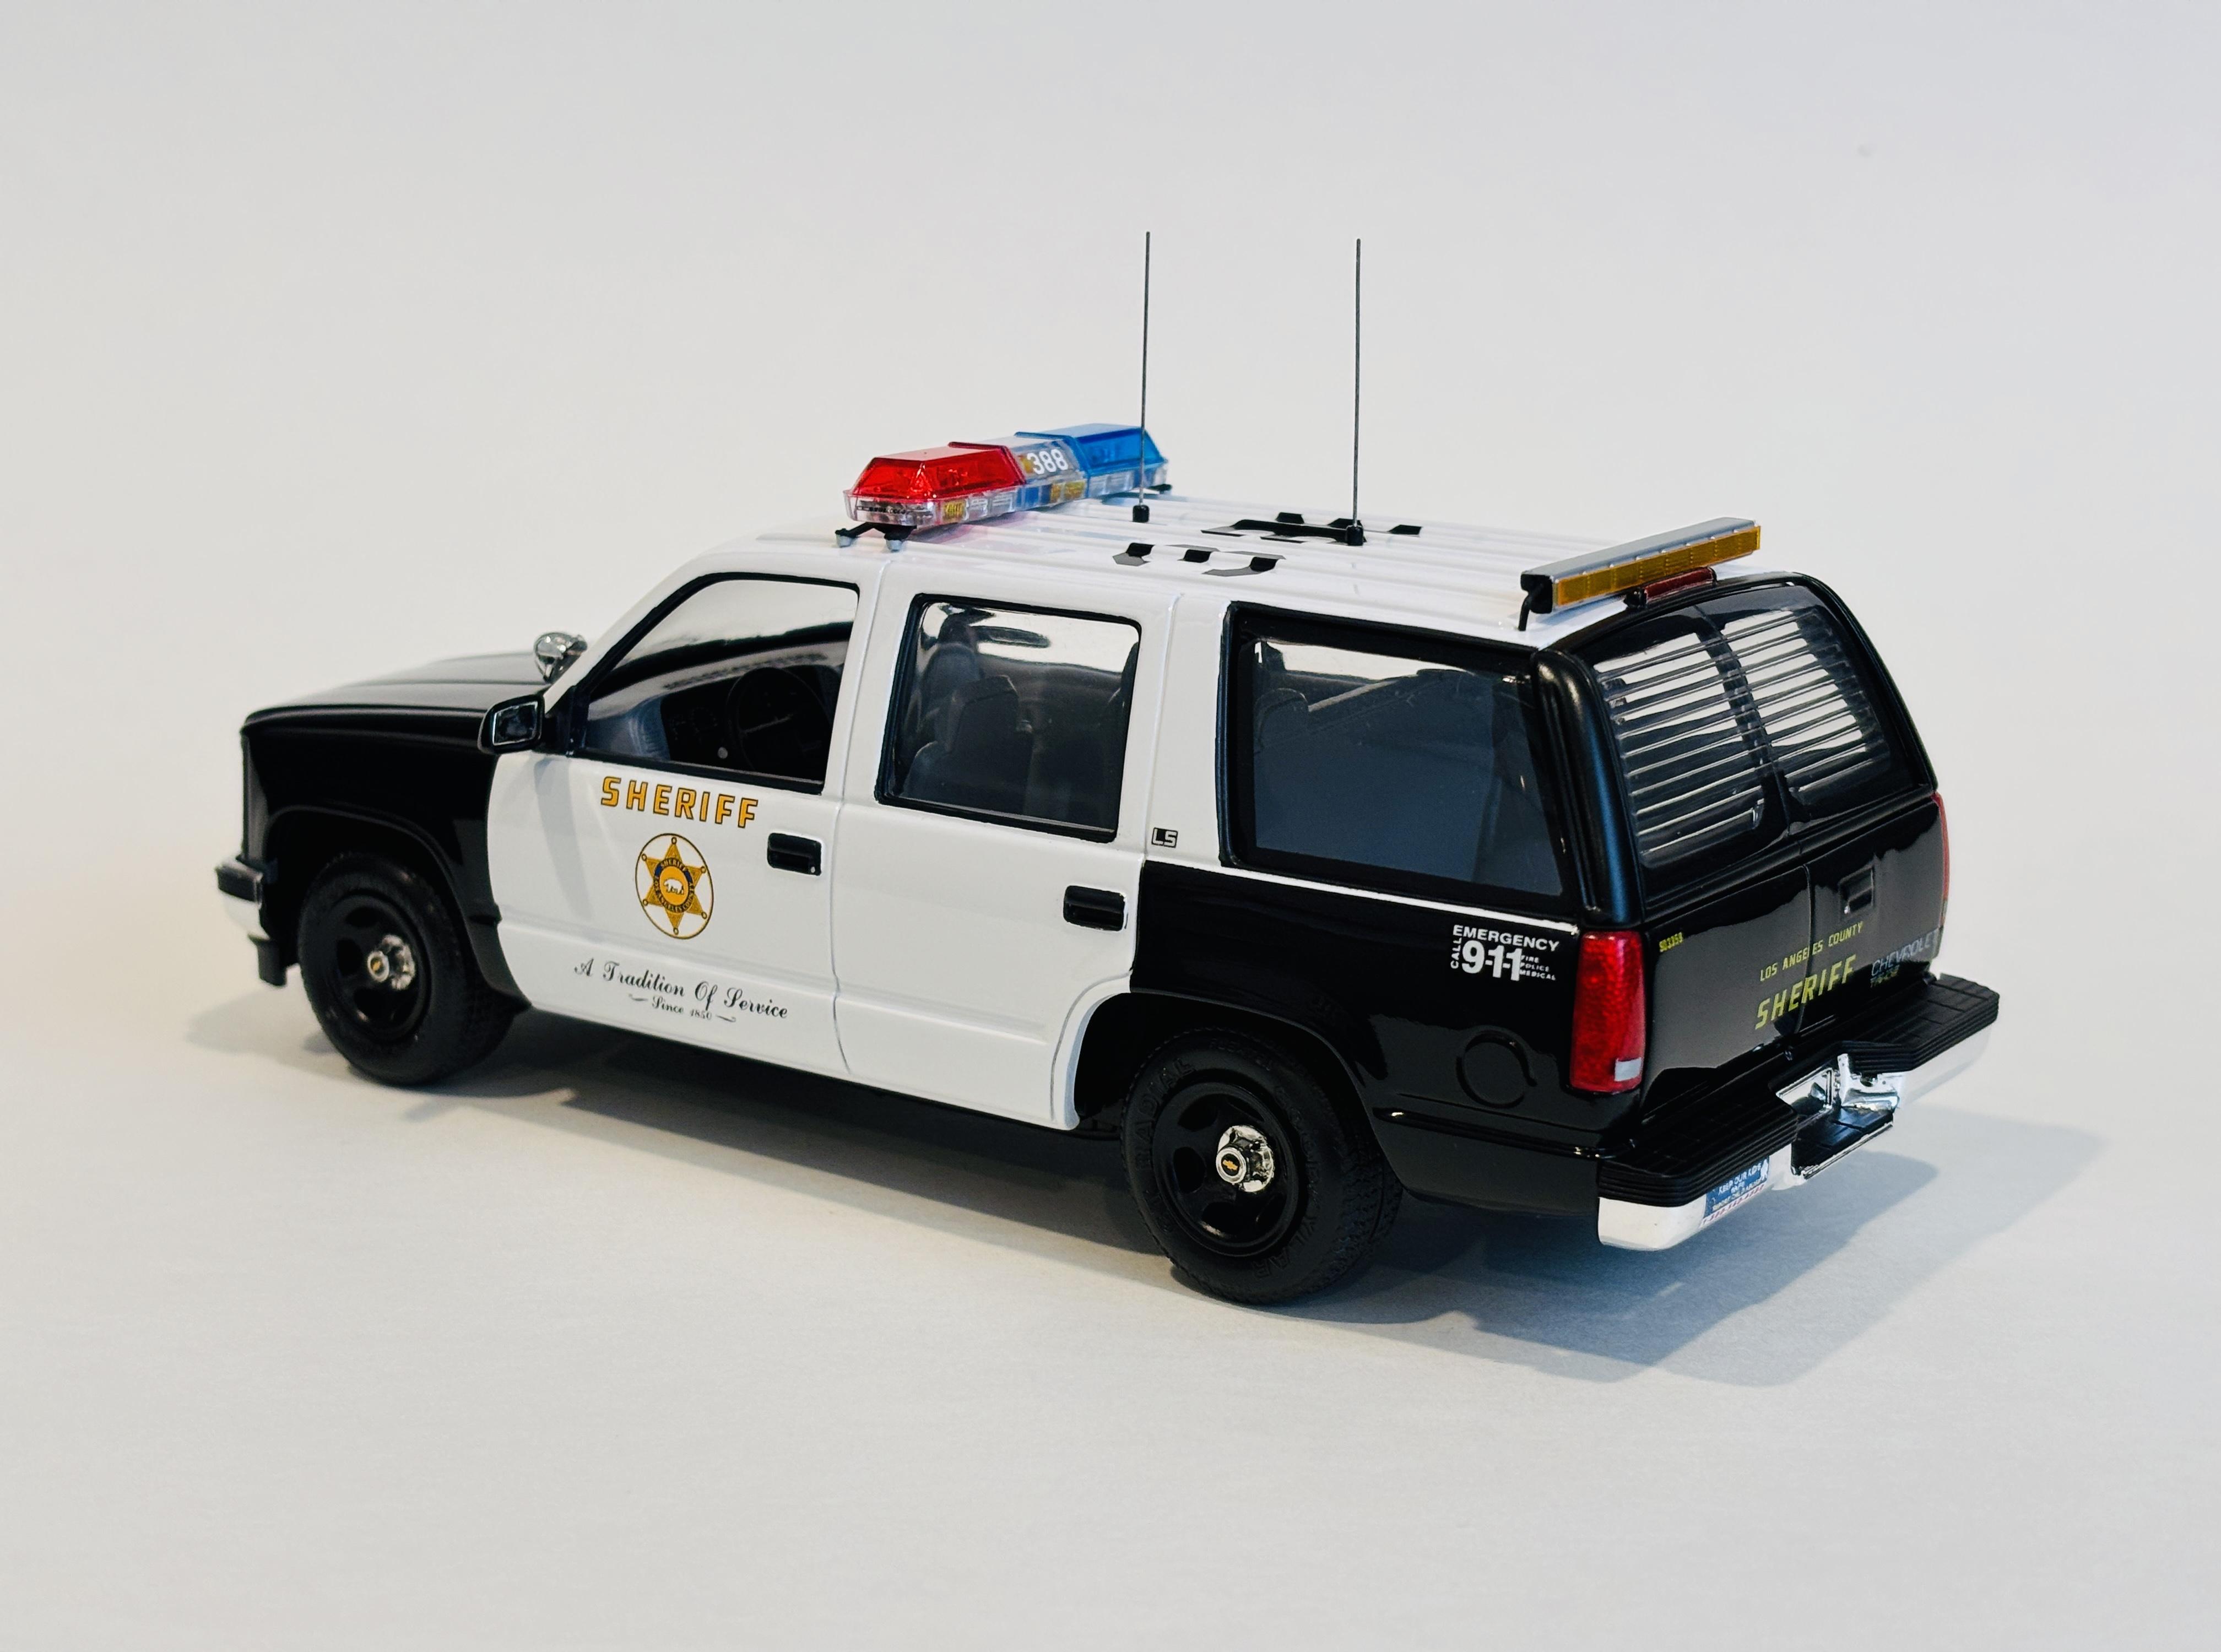
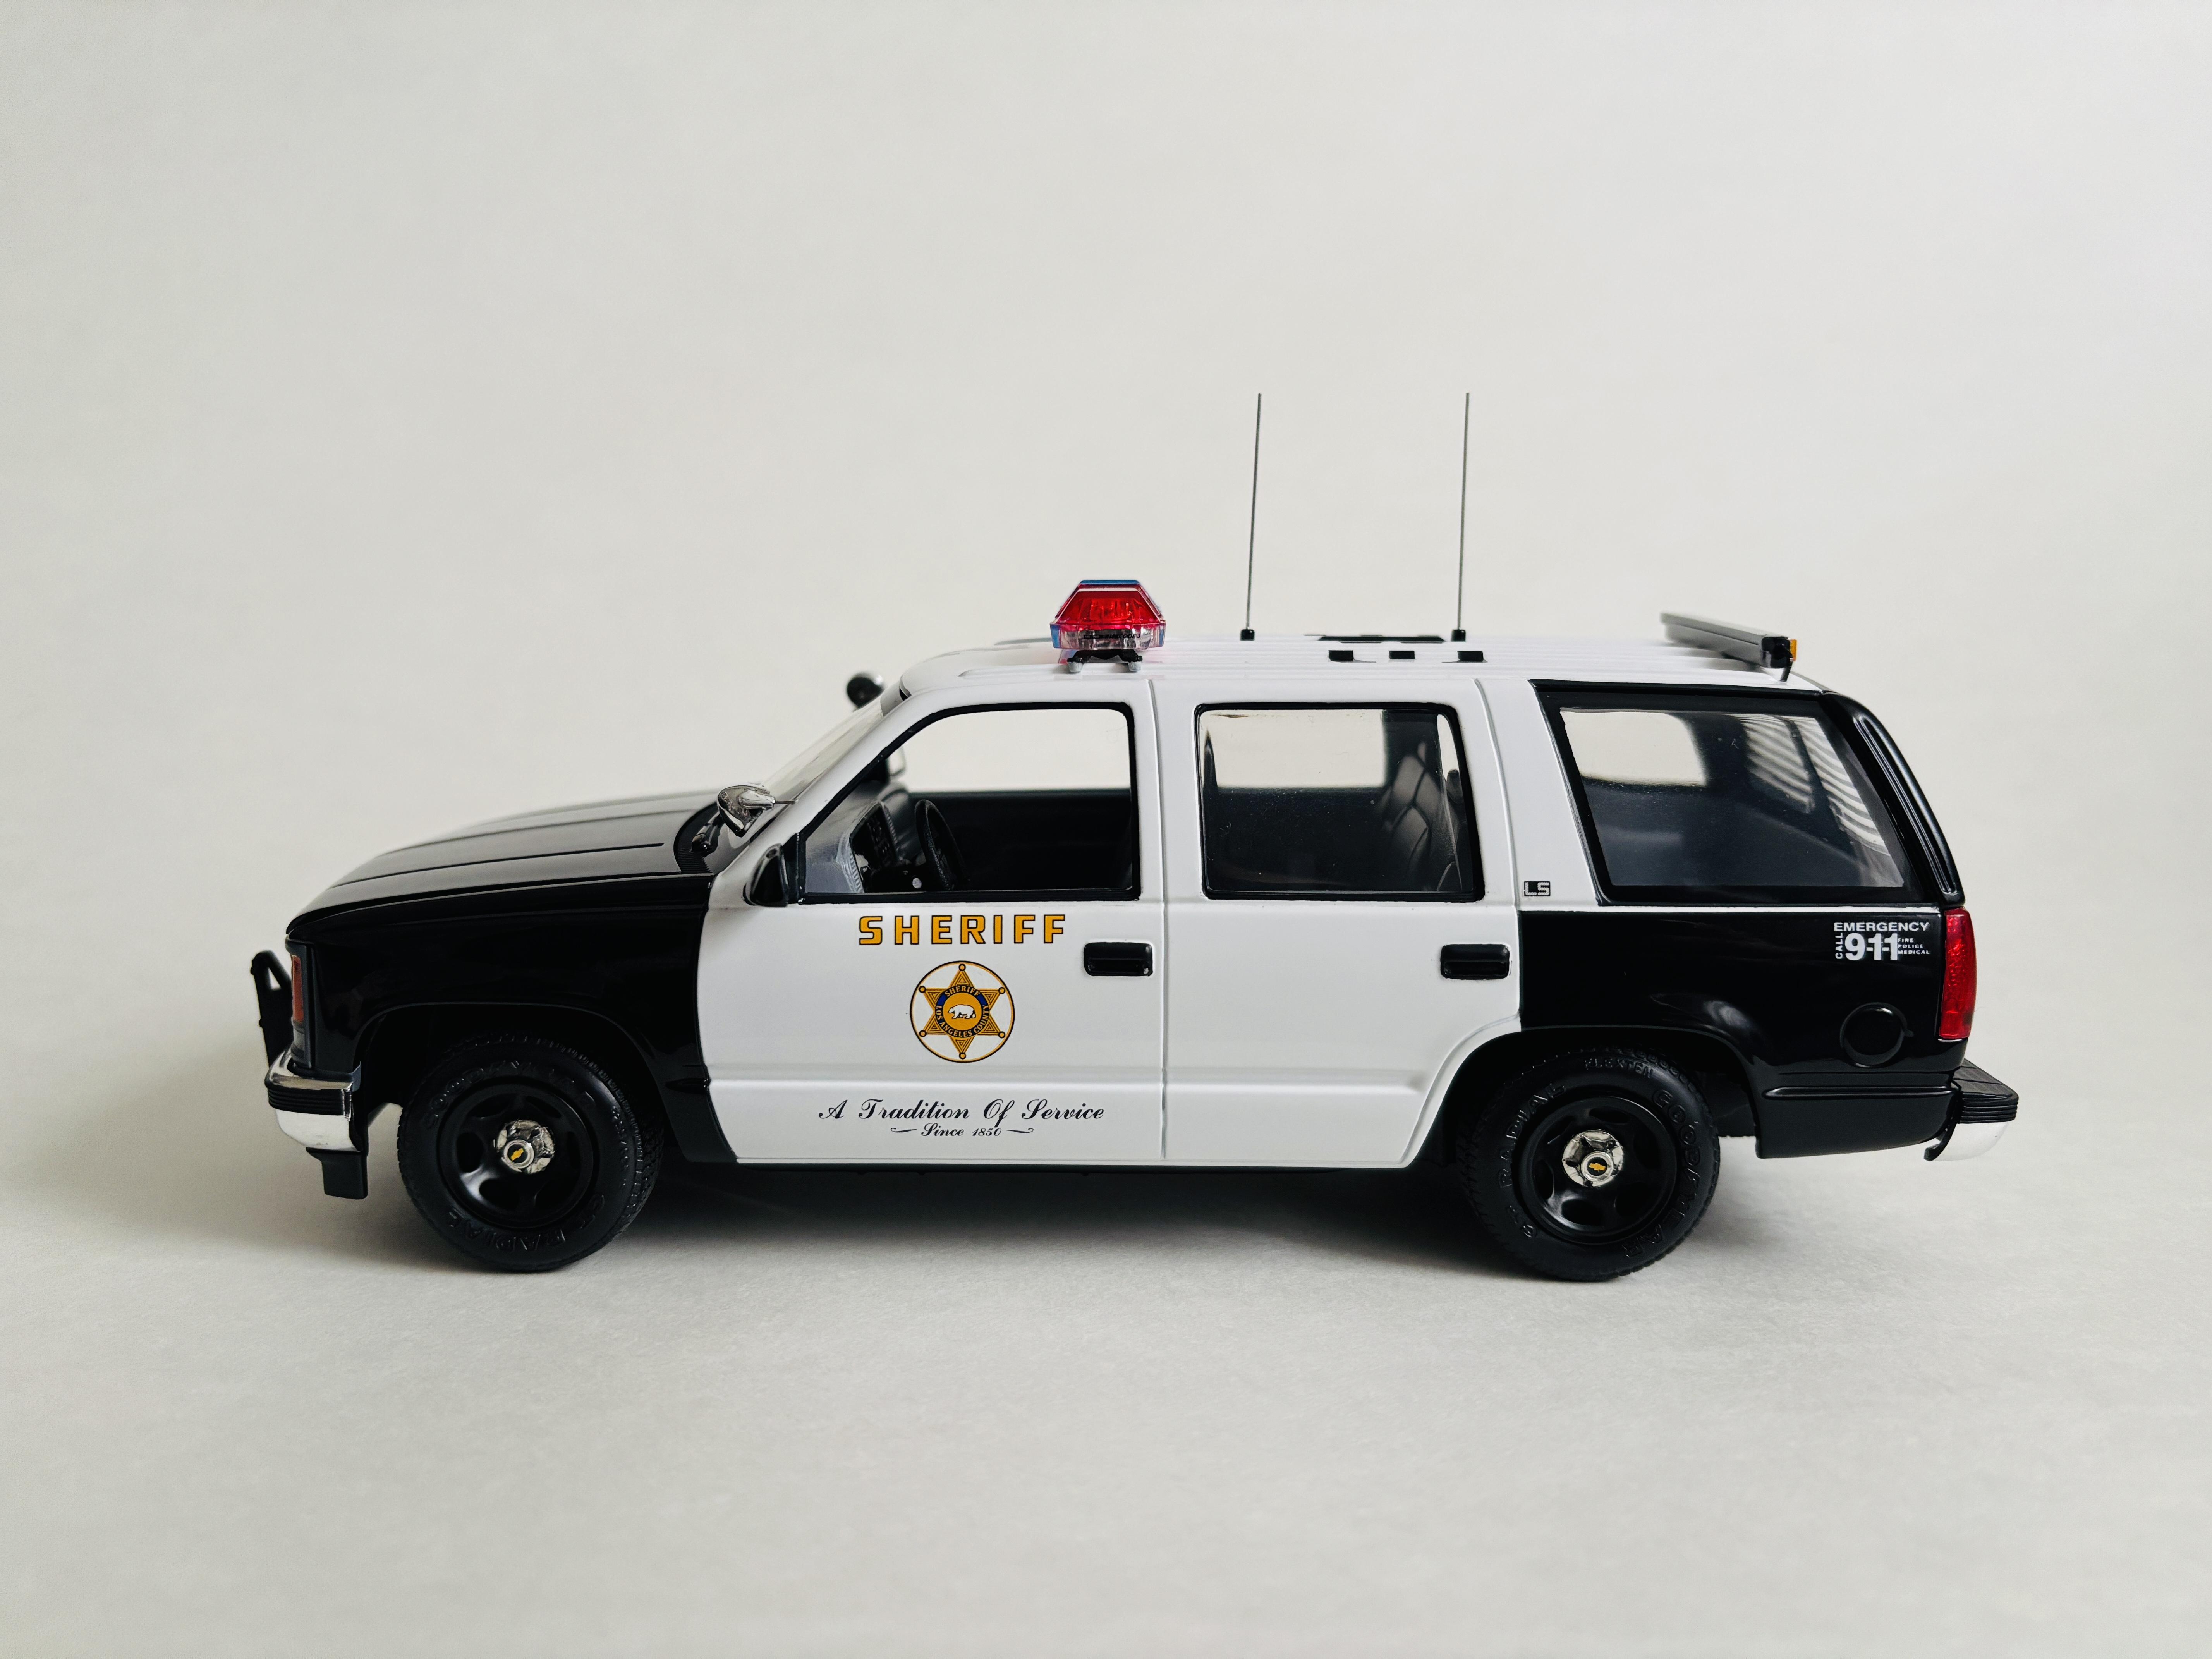
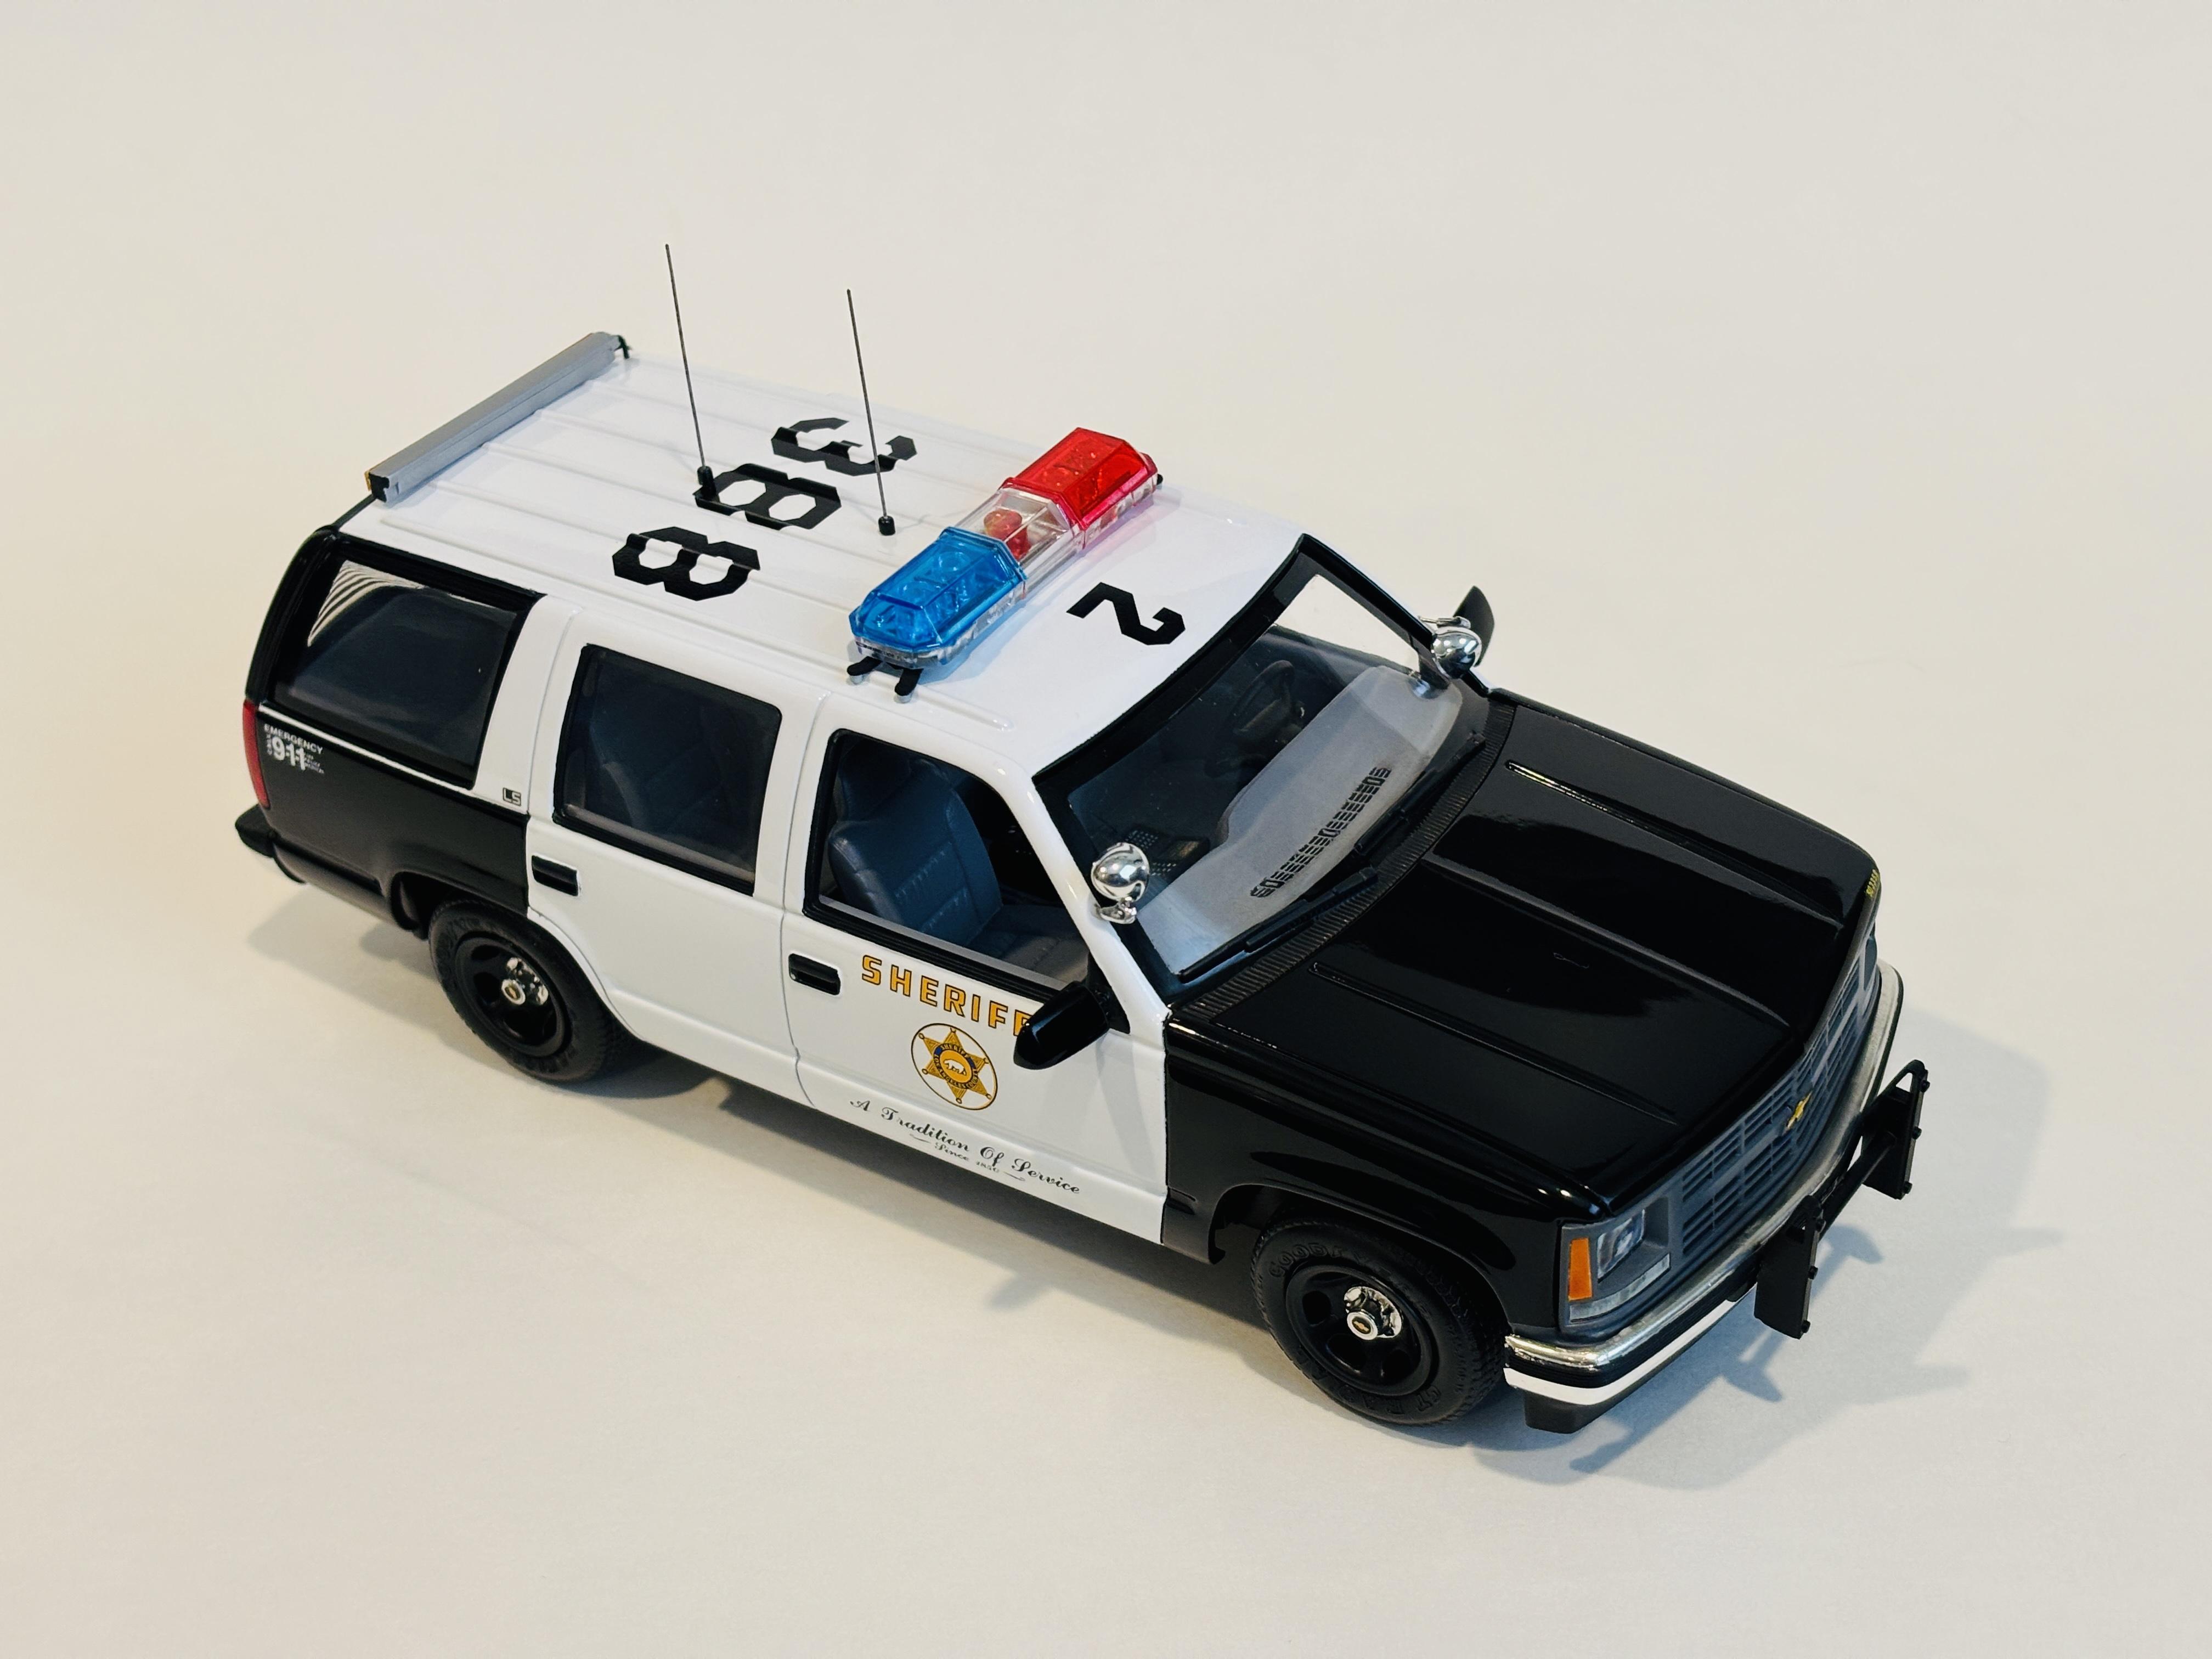
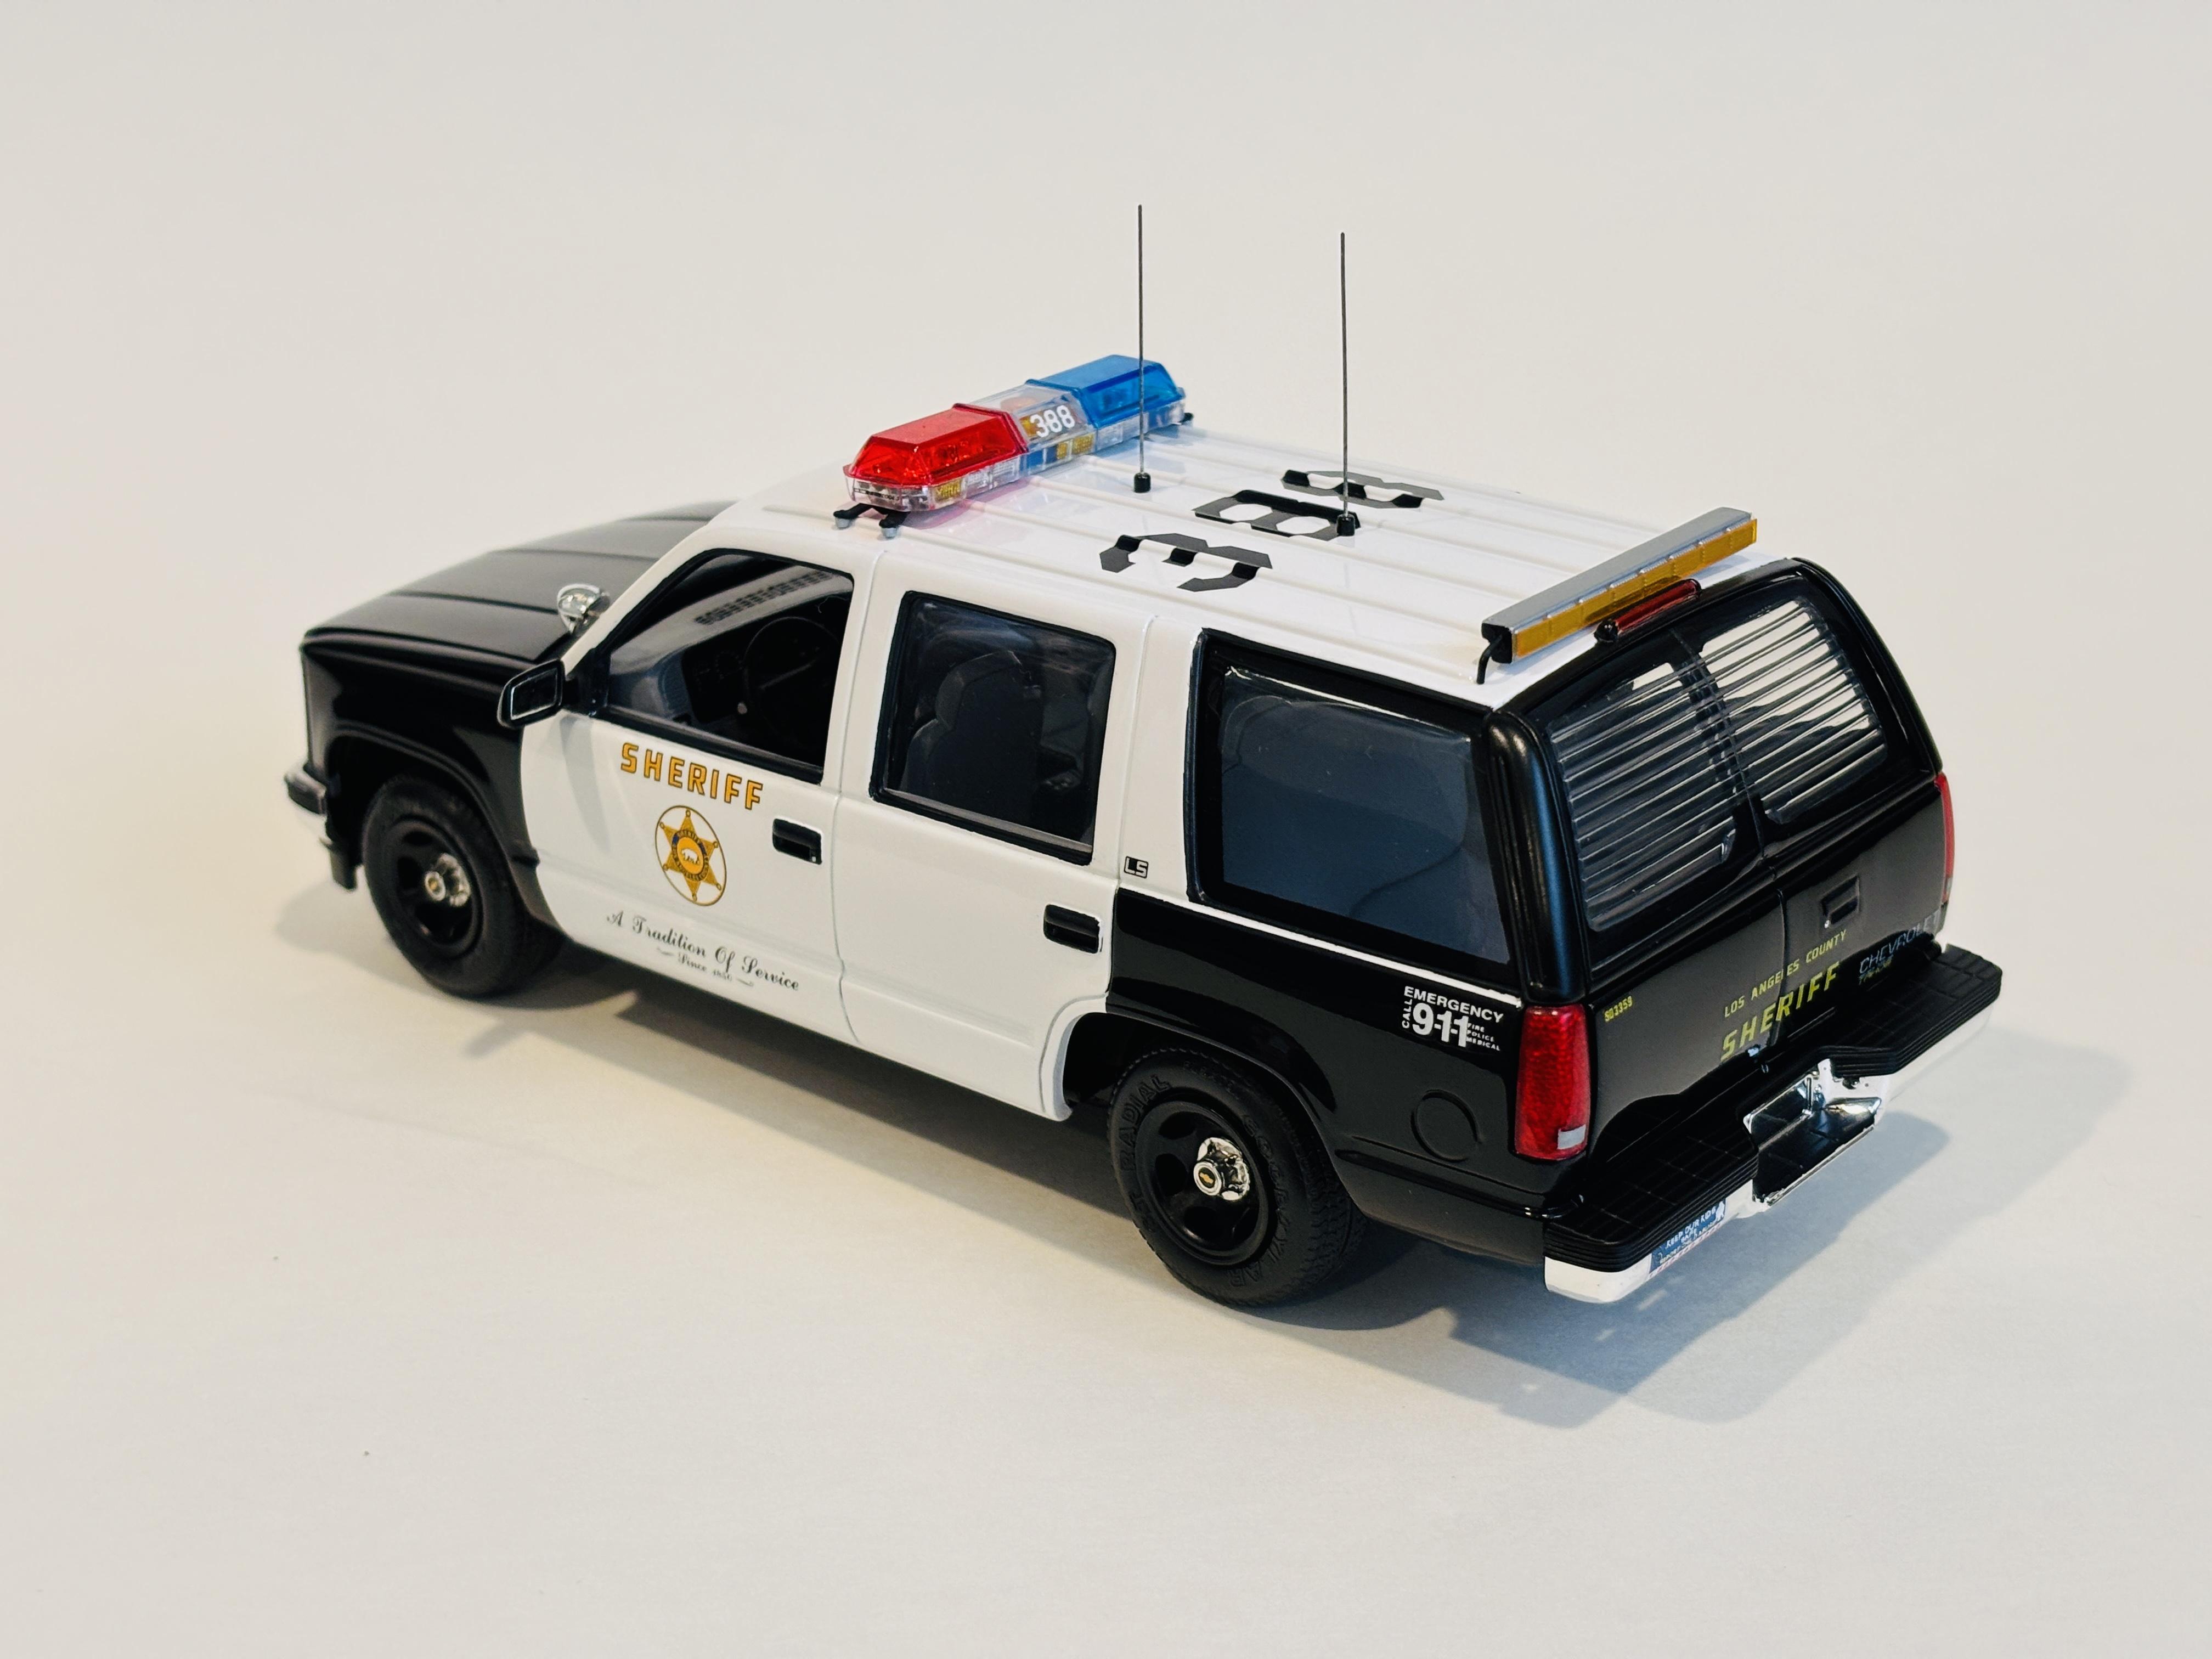
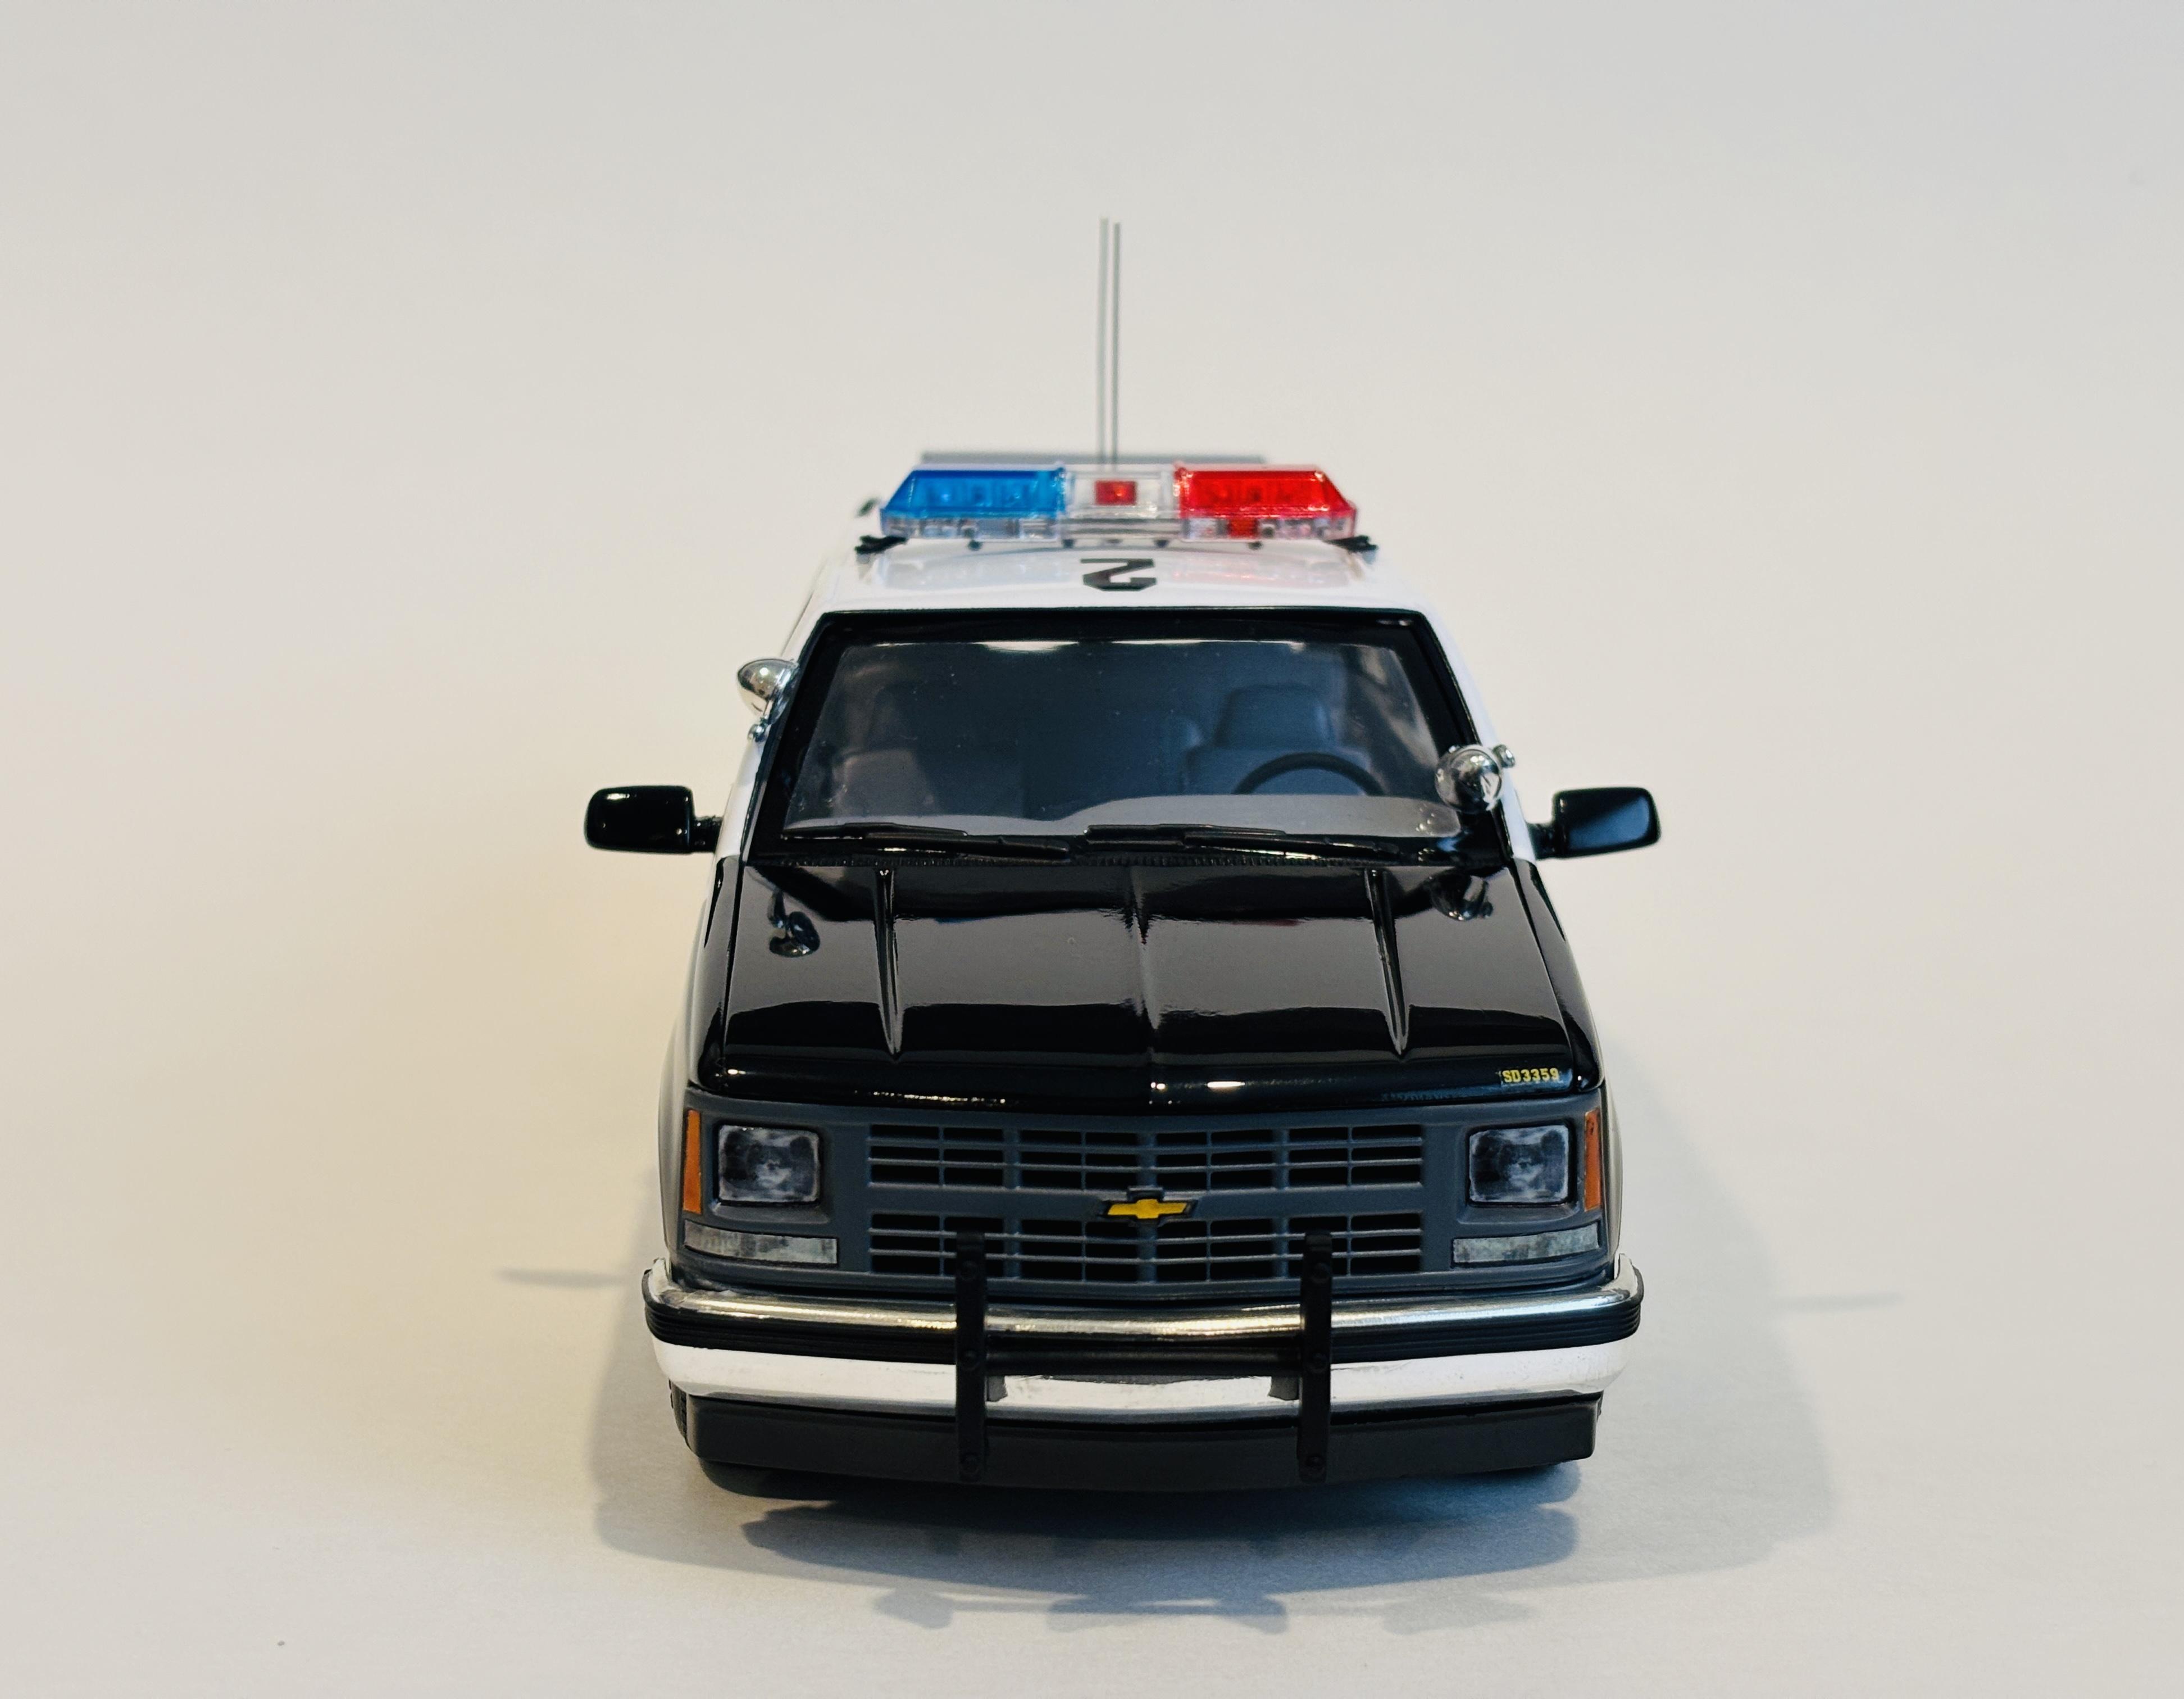
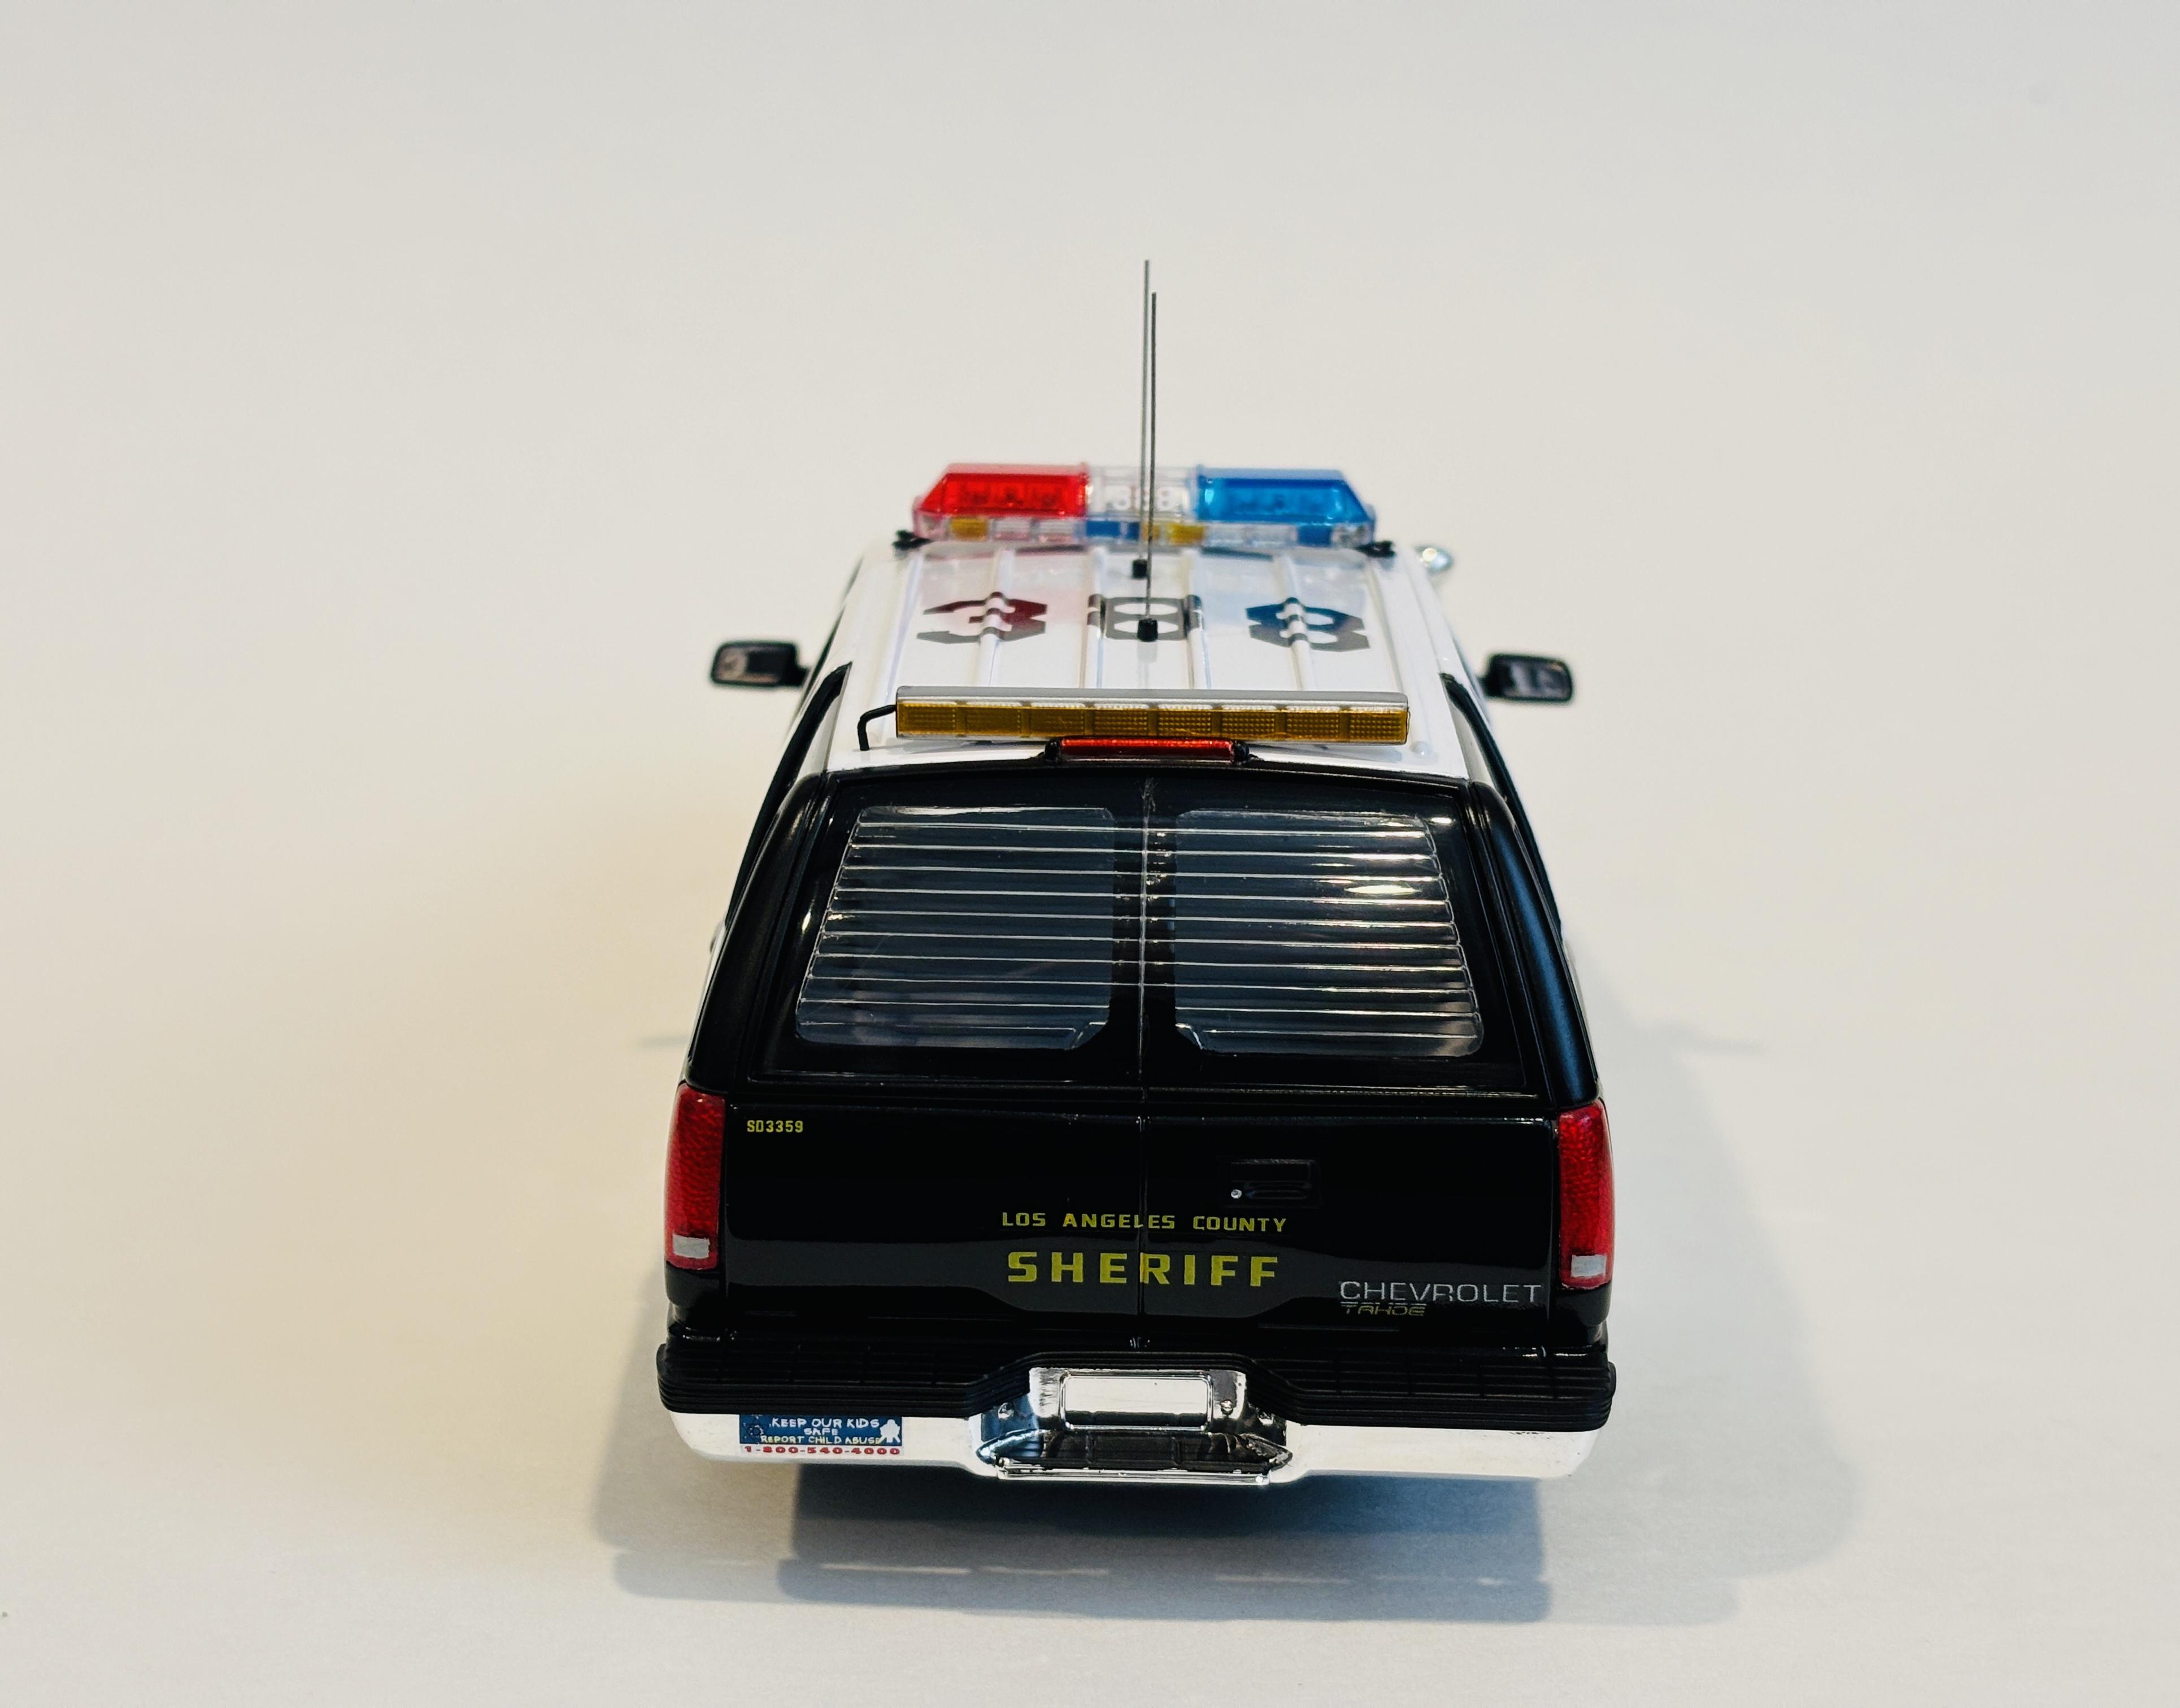
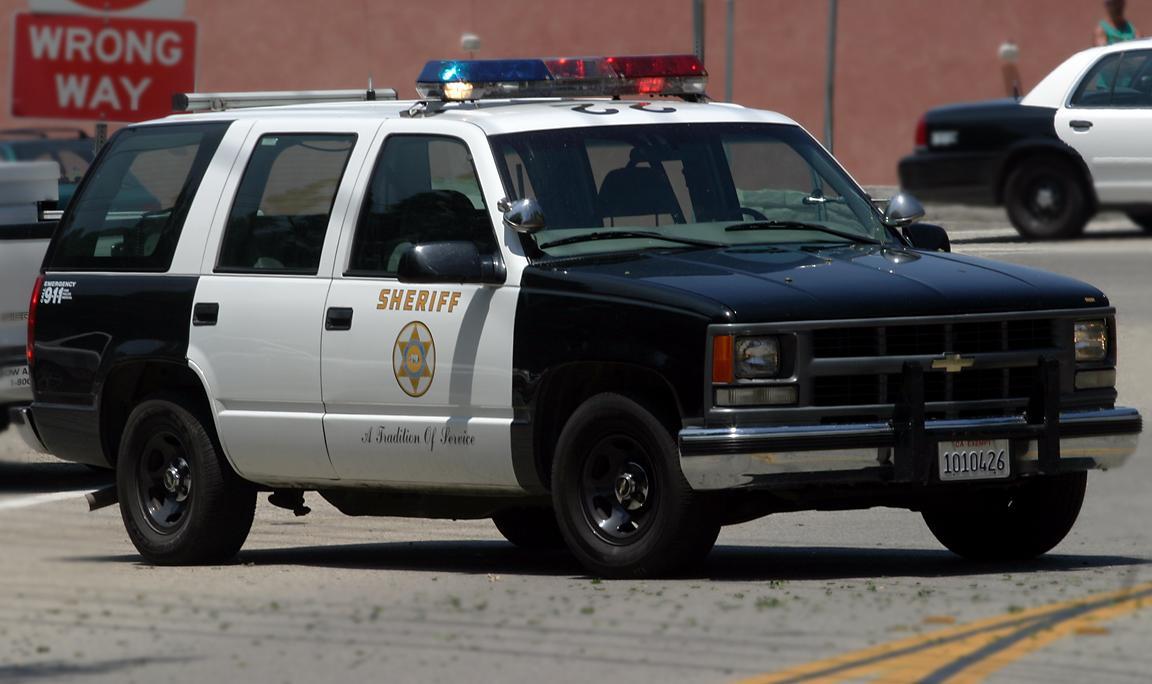
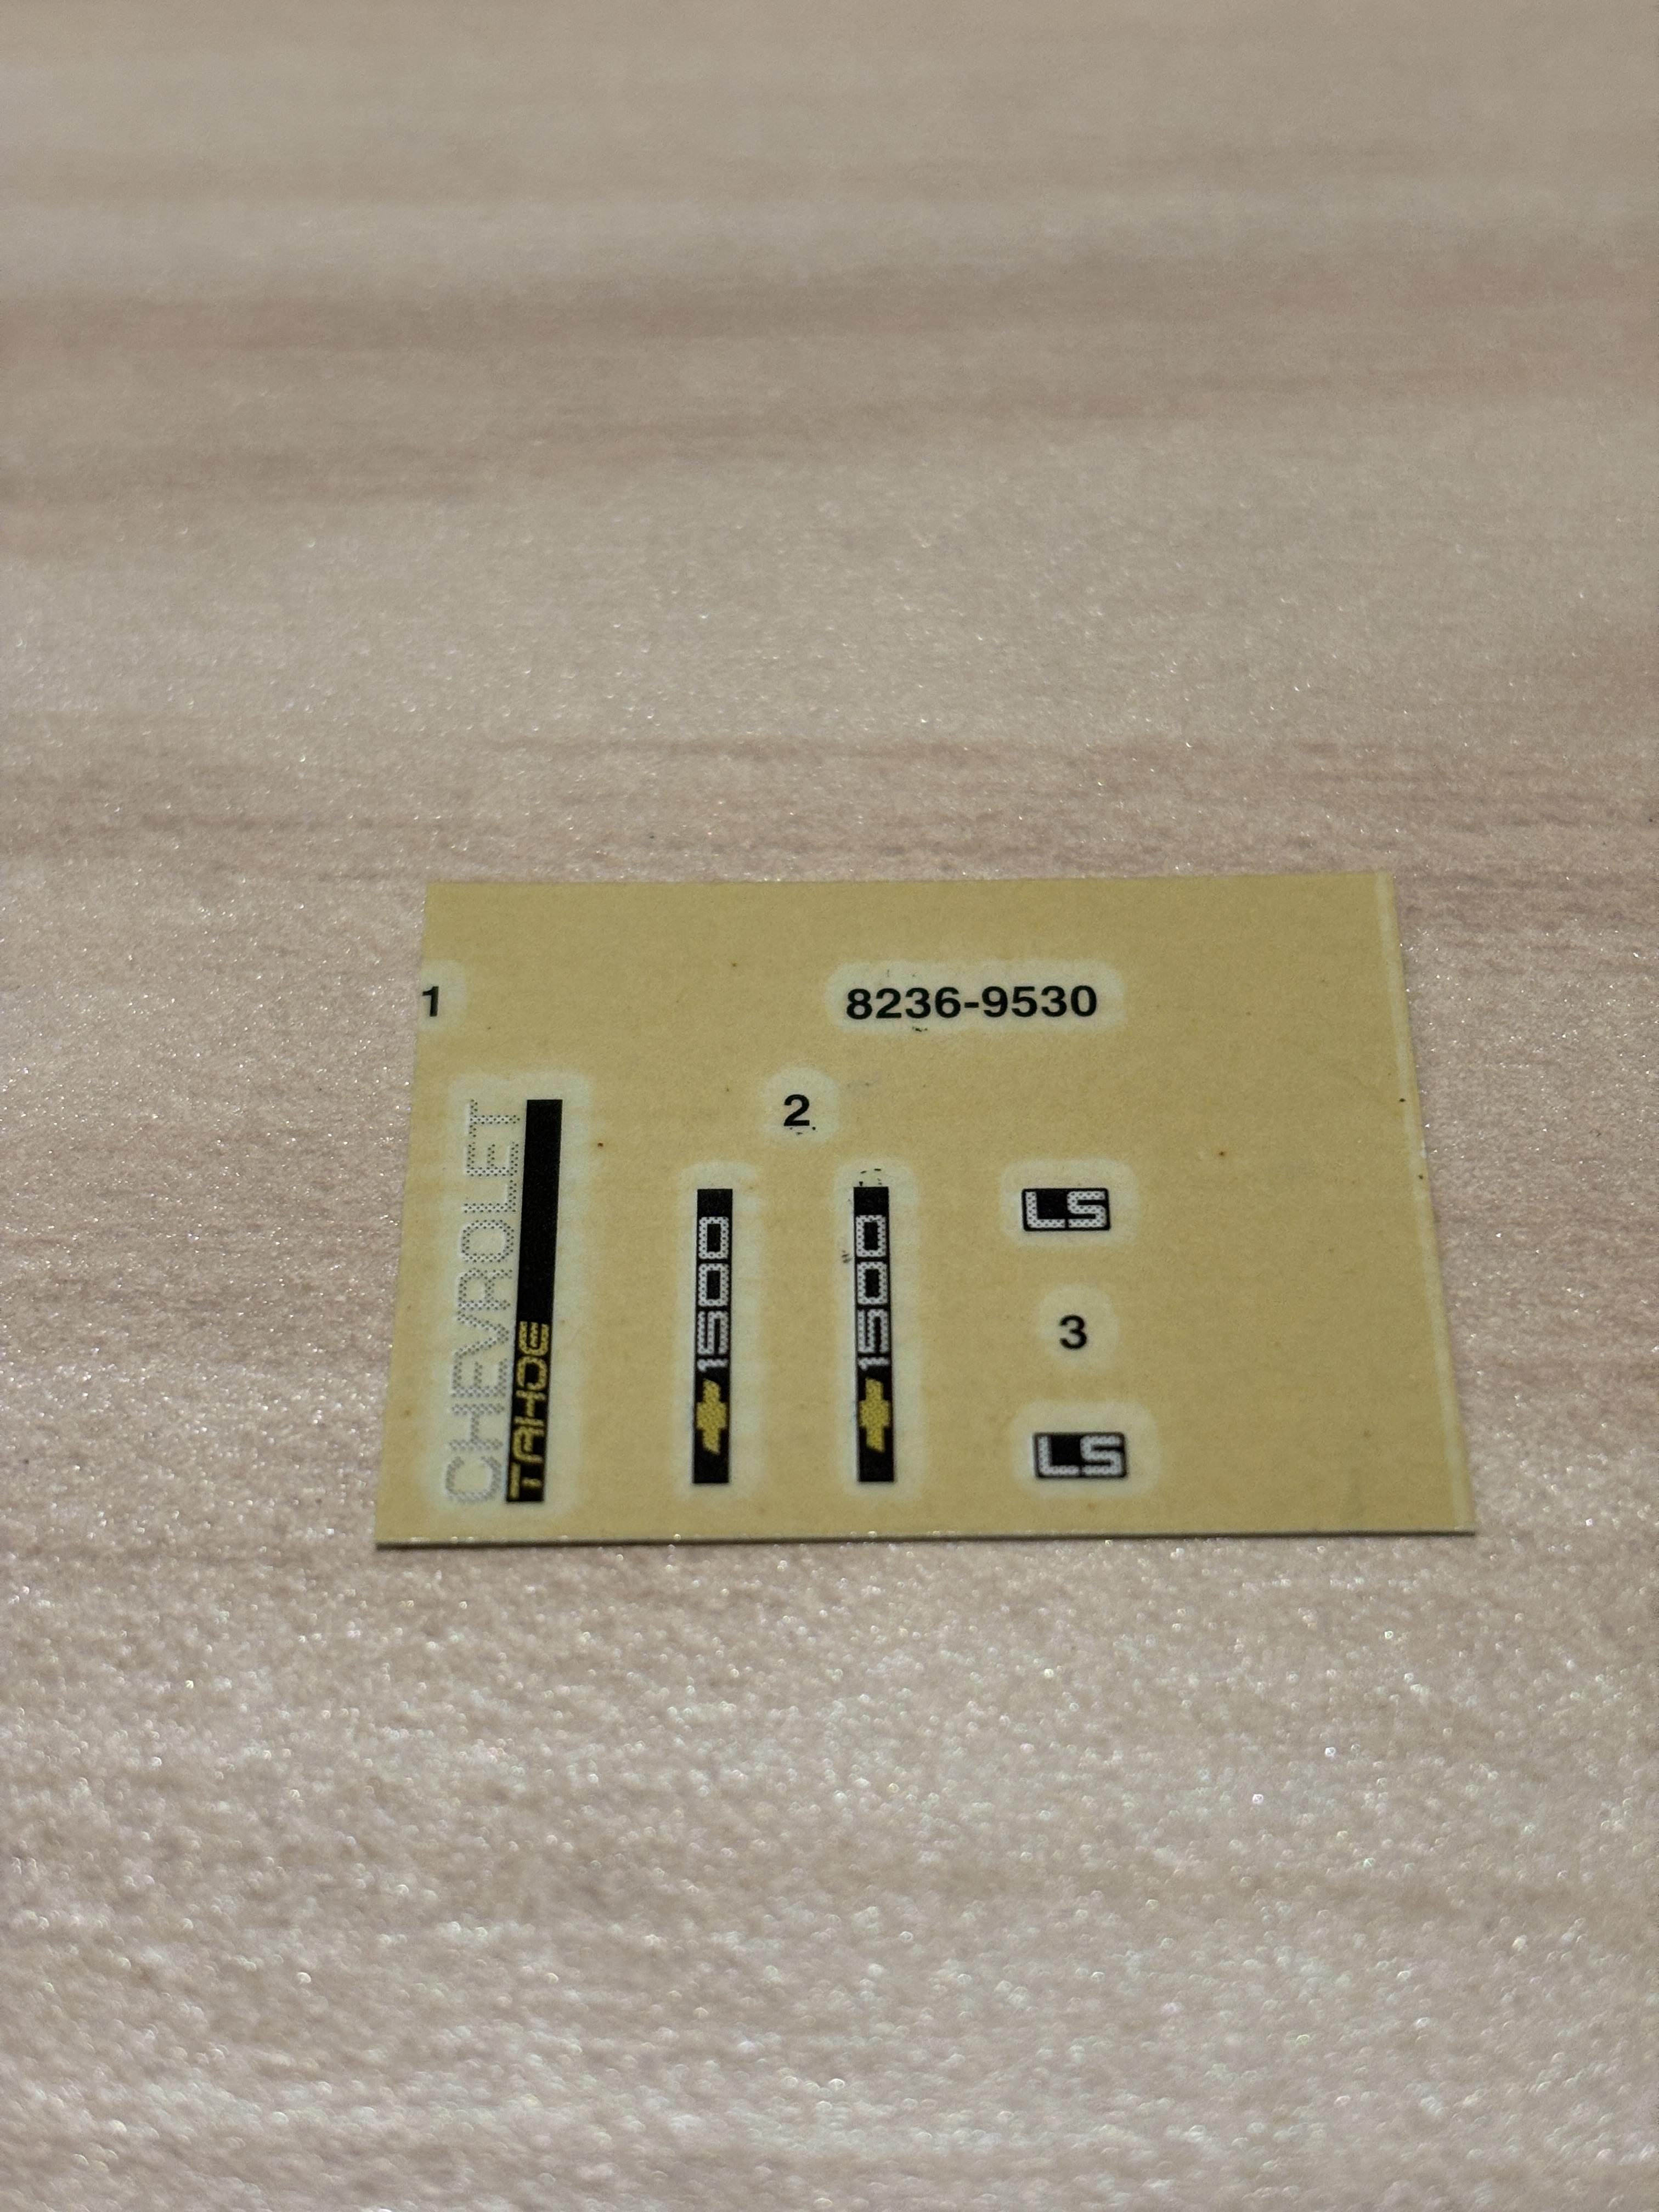
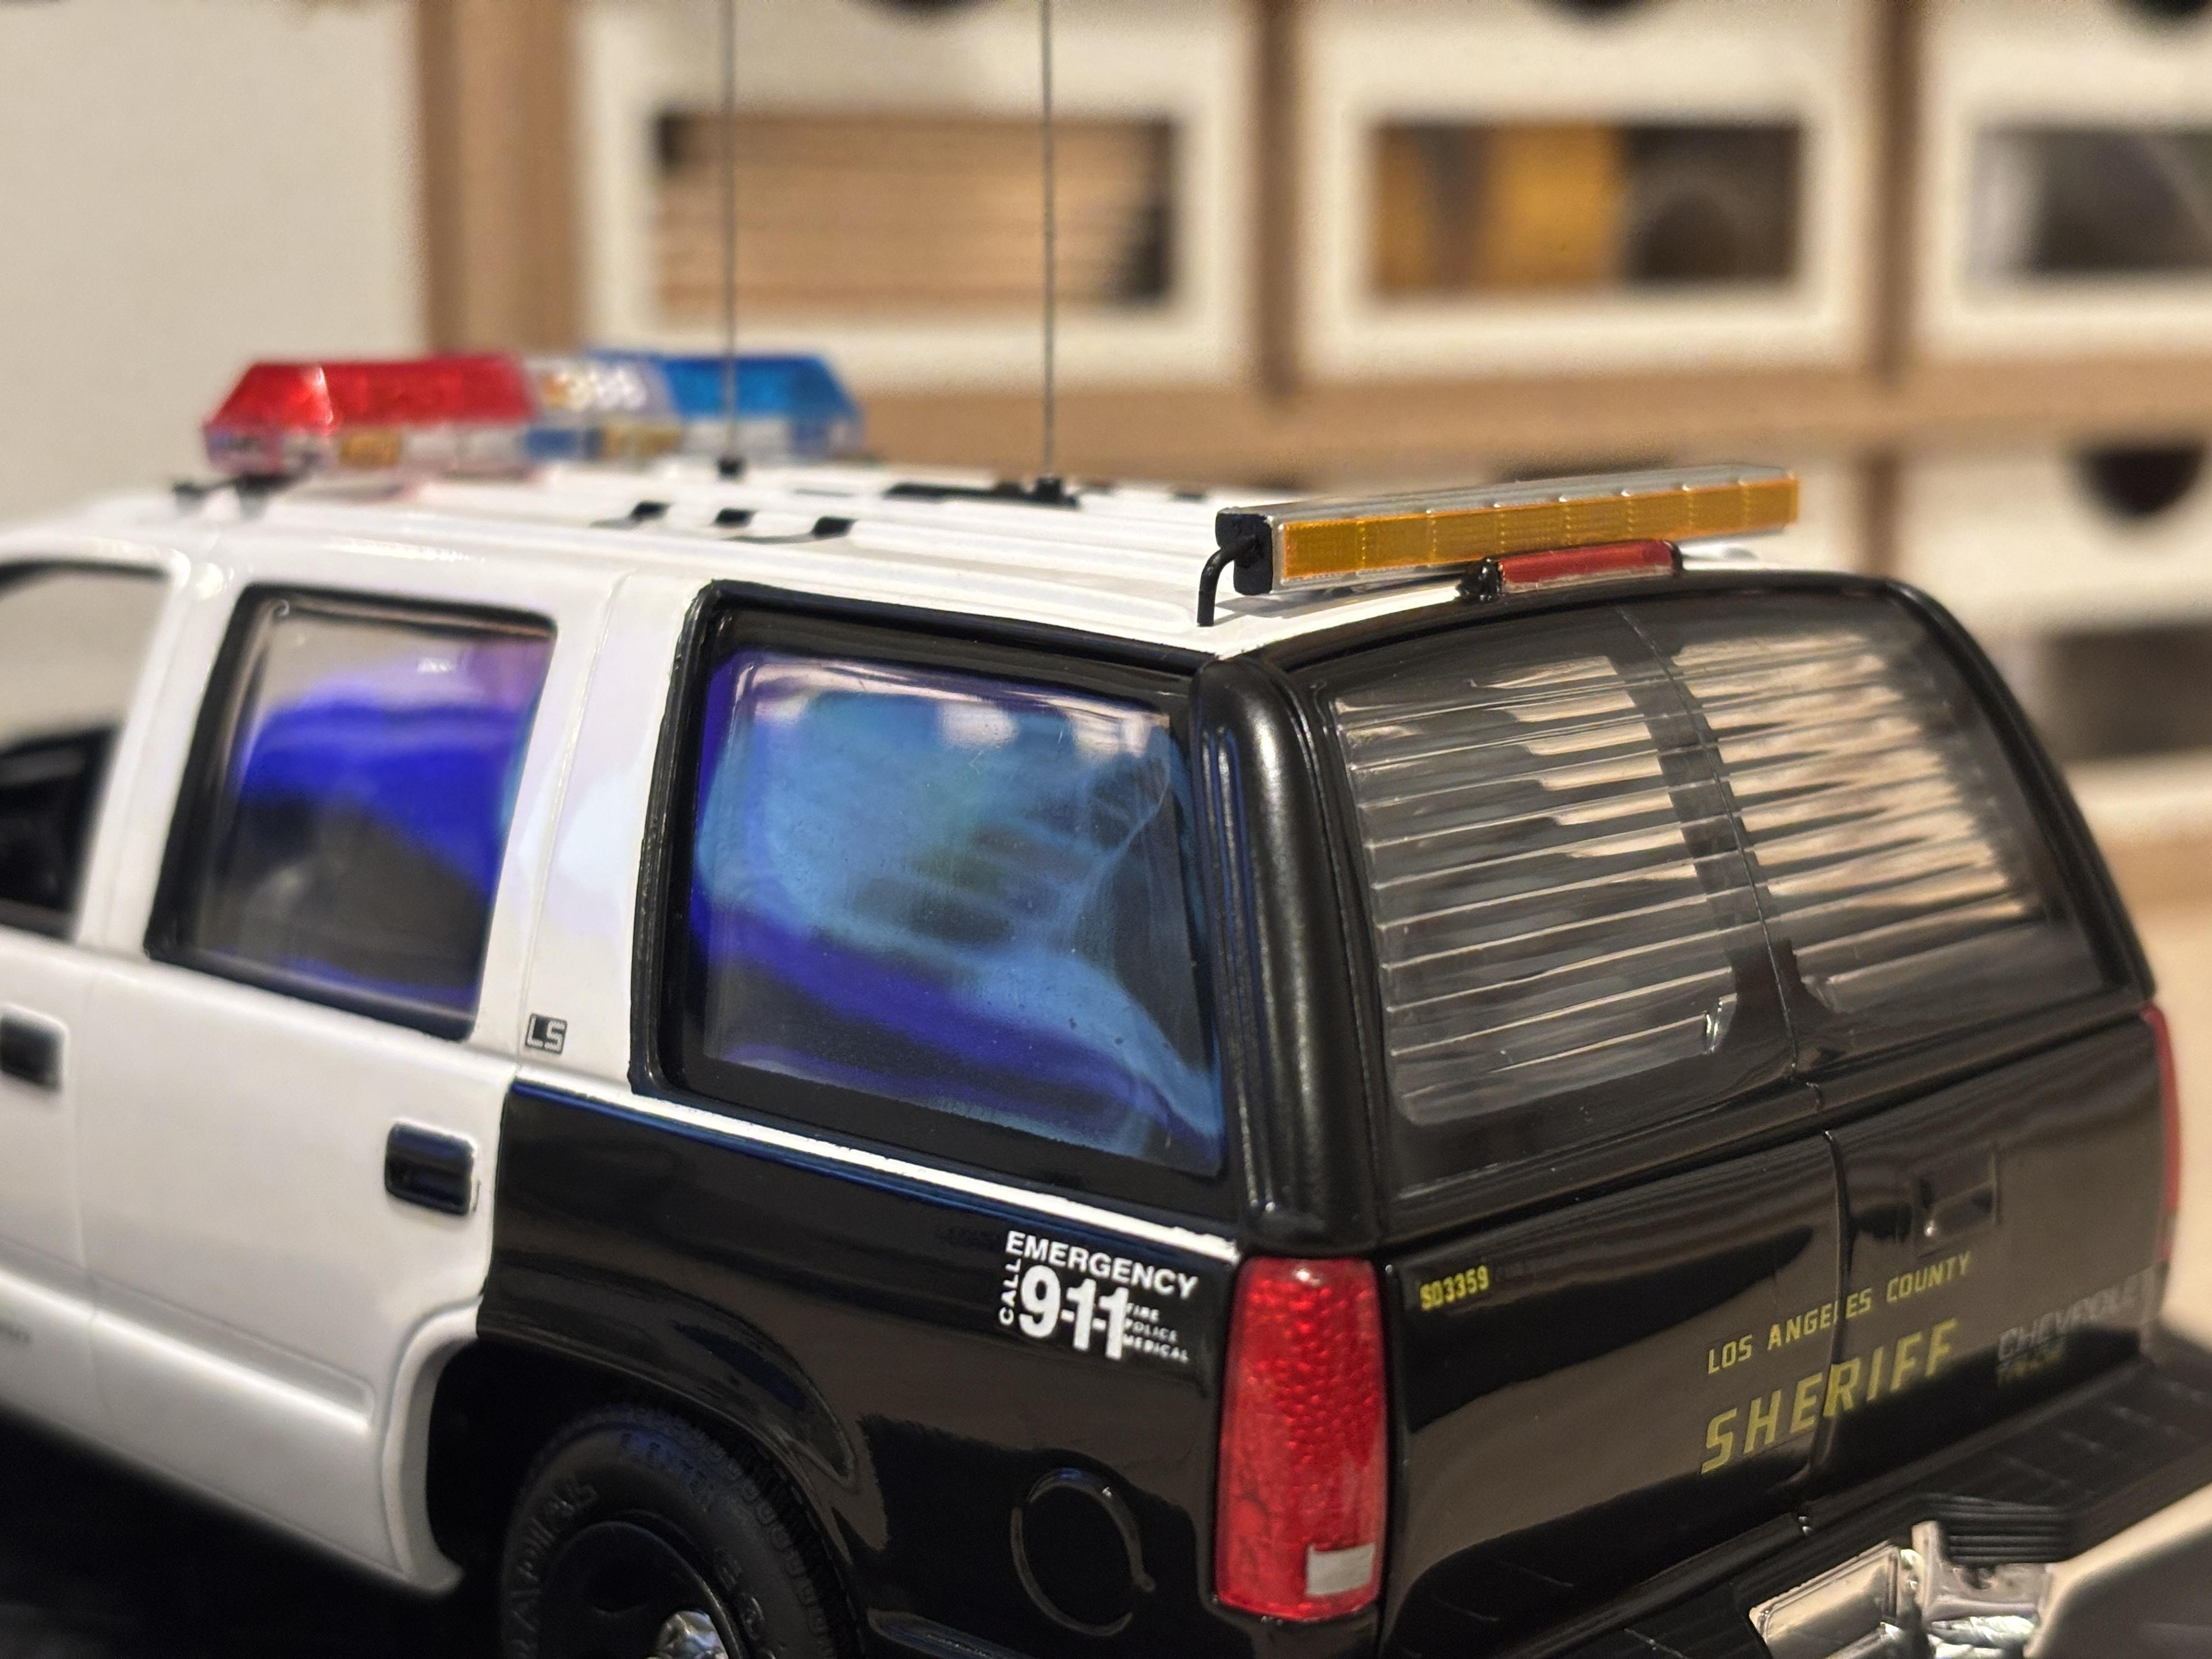
1999 Chevy Tahoe PPV - Los Angeles County Sheriff's Department. The base kit is the AMT 1996 Tahoe snap kit, but parts from 6 different kits were used to complete it. The body was modified extensively, including removal of side trim and running boards and the conversion of the original rear hatch door into barn doors. The front grill/fascia and push bar are 3D-printed pieces. The decals are a combination of various out of production sheets. I am still waiting on an acquaintance to do custom license plates for me, so those will come later. The 2 on the roof in front of the light bar indicates that this is an East Los Angeles Station Sgt.'s vehicle. Here is a link to the WIP thread:
- 16 replies
-
- 11
-

-
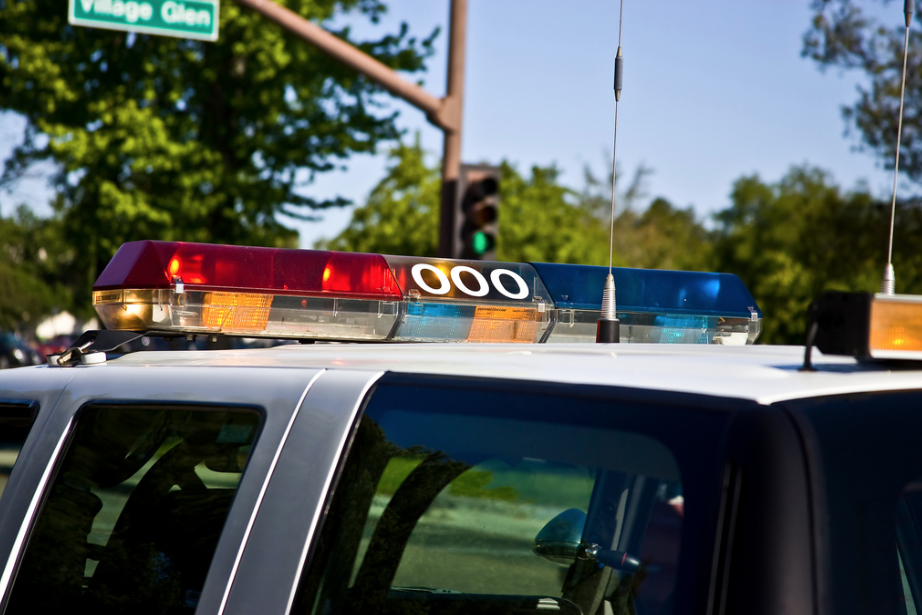
Thank you! No, the Tahoe only ever came with the S10 mirrors. I took the mirrors off of the recently issued AMT 1992 C-1500 Silverado short bed kit. Thank you! Yes it was. I finished the Tahoe last night, but still have to take some photos before it goes in the Under Glass section. In the meantime, here's some final WIP stuff. The kit's decal sheet was in decent shape, but I wanted to experiment a little bit with clear. I sprayed the sheet with Mr. Hobby Mr Super Clear UV Cut Gloss and there were no adverse affects. I felt more comfortable with the clear on just in case some of the decals disintegrated due to age. The LS decals were added to the C-pillars. Looking through reference photos, some of the PPVs had these badges and others did not. I'm assuming this was just a small year-to-year change during the 3-year run of the first generation PPV. Either way, PPVs were LS models, so they are accurate. I also added antennas to the roof and took a small piece of scale black battery cable to replicate the power cable running from the rear arrow stick into the roof. Note the real arrow stick cable: I'll try to post this one Under Glass today and link to that thread here.
-
1992 Chevy Silverado Sport
av405 replied to av405's topic in WIP: Model Trucks: Pickups, Vans, SUVs, Light Commercial
I'm still looking at whether I will go for other wheels after this discussion. I'll advise if I change my mind. In the meantime, I did some work on the interior. I'm replicating the Garnet Red interior option, which will be a nice companion to the bright red exterior color. For this color, I went with Tamiya TS-33 Dull Red. The interior tub will get a flocking treatment to simulate carpet. I attempted to paint the door handles/buttons, but the detail is so faint that I'm choosing not to bother. As the paint's name suggests, the dull red is just a dark flat red color. It was a little too flat for the dash: I sprayed the dash components with Tamiya TS-79 semi gloss clear to give it more of the Armor All look that a plastic dash of this era would have: And here is the completed dash: The pinhole on the dash was filled in: For this release, the decal sheet includes decals for most of the dash (radio, instrument cluster, control gauges, etc. I just want to point out a few things: - The decals are too shiny. I suggest giving them a semi-gloss clear for a more realistic appearance. - Trim the outer edges of the decals for better fitment. Especially with the instrument cluster decal. - In my opinion, these decals will not good on an irregular surface. It is hard to get a good look when they are over already molded-in details on the dash. This is why I skipped using the radio decal (which is black instead of a more correct light grey) and a separate piece that goes on the left side of the steering wheel. My dash is a combination of kit-supplied decals and hand painted details.
-
Thanks. The Jimmy box art officially sold me on it. I'll get at least one, possibly more depending on the exact contents of the kit.
-
1992 Chevy Silverado Sport
av405 replied to av405's topic in WIP: Model Trucks: Pickups, Vans, SUVs, Light Commercial
Thank you. This kit has lots of potential, I really do recommend it. Happy modeling! So the BFG Radial T/A's would be correct for my build? My apologies, I'm not all that well-versed on tires. -
1992 Chevy Silverado Sport
av405 replied to av405's topic in WIP: Model Trucks: Pickups, Vans, SUVs, Light Commercial
Thank you for the technical info, very interesting. I think my biggest gripe about the kit wheels is that the sidewalls just look very flat. More so compared to other AMT OBS truck tires. -
1992 Chevy Silverado Sport
av405 replied to av405's topic in WIP: Model Trucks: Pickups, Vans, SUVs, Light Commercial
It makes me a little more disappointed to hear that this is a common issue with these newly-tooled kits. -
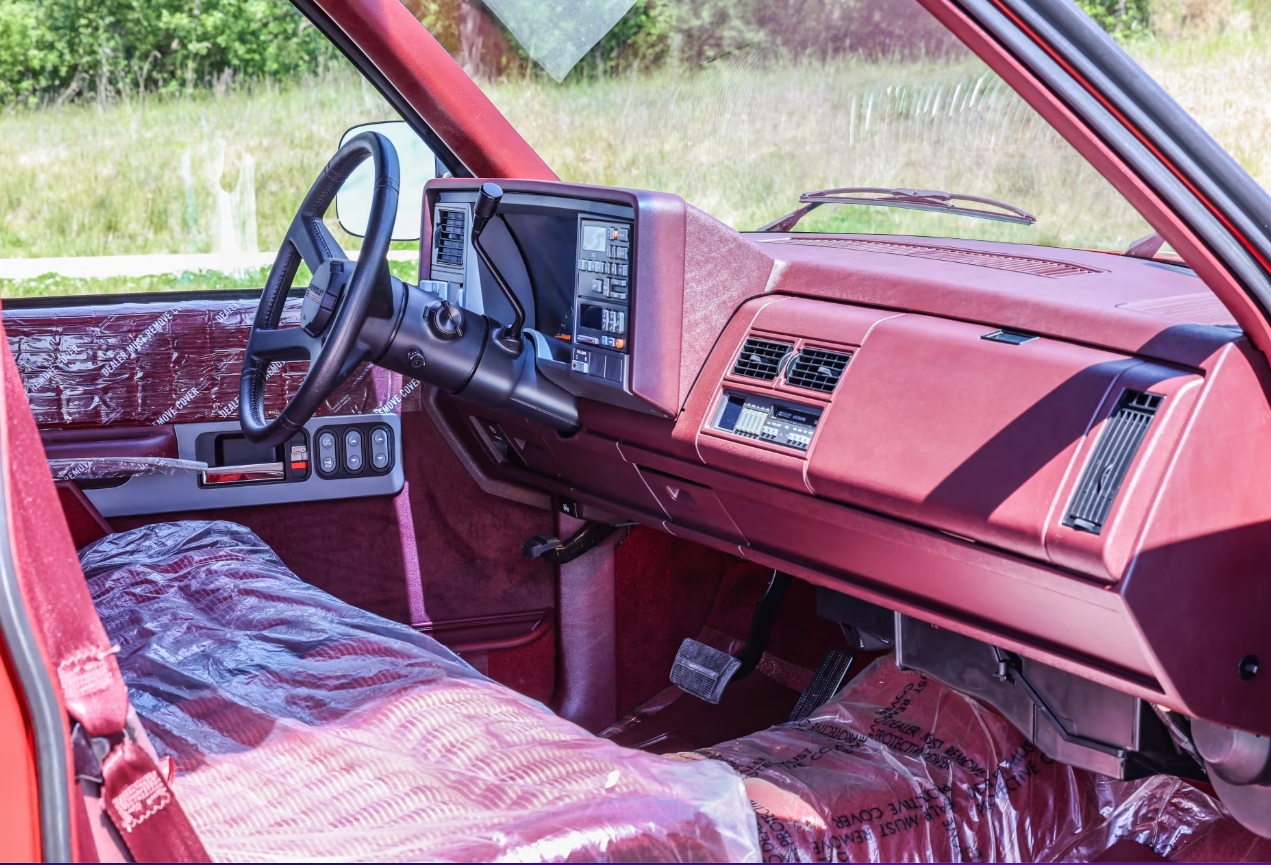
Thank you! That compliment means a lot to me. You'll have to take it off a 1997 C-3500 promo truck as none of the retail kits ever featured this dash. There is at least one on ebay right now.