av405
-
Posts
1,201 -
Joined
-
Last visited
Content Type
Profiles
Forums
Events
Gallery
Everything posted by av405
-

1992 Chevy Silverado Sport
av405 replied to av405's topic in WIP: Model Trucks: Pickups, Vans, SUVs, Light Commercial
Not as far as I can tell, just the yellow film. I left the parts soaking for about 16 hours. By the time I took a toothbrush to the parts to get the last bit of chrome off, everything had pretty much fallen off already. -
1992 Chevy Silverado Sport
av405 replied to av405's topic in WIP: Model Trucks: Pickups, Vans, SUVs, Light Commercial
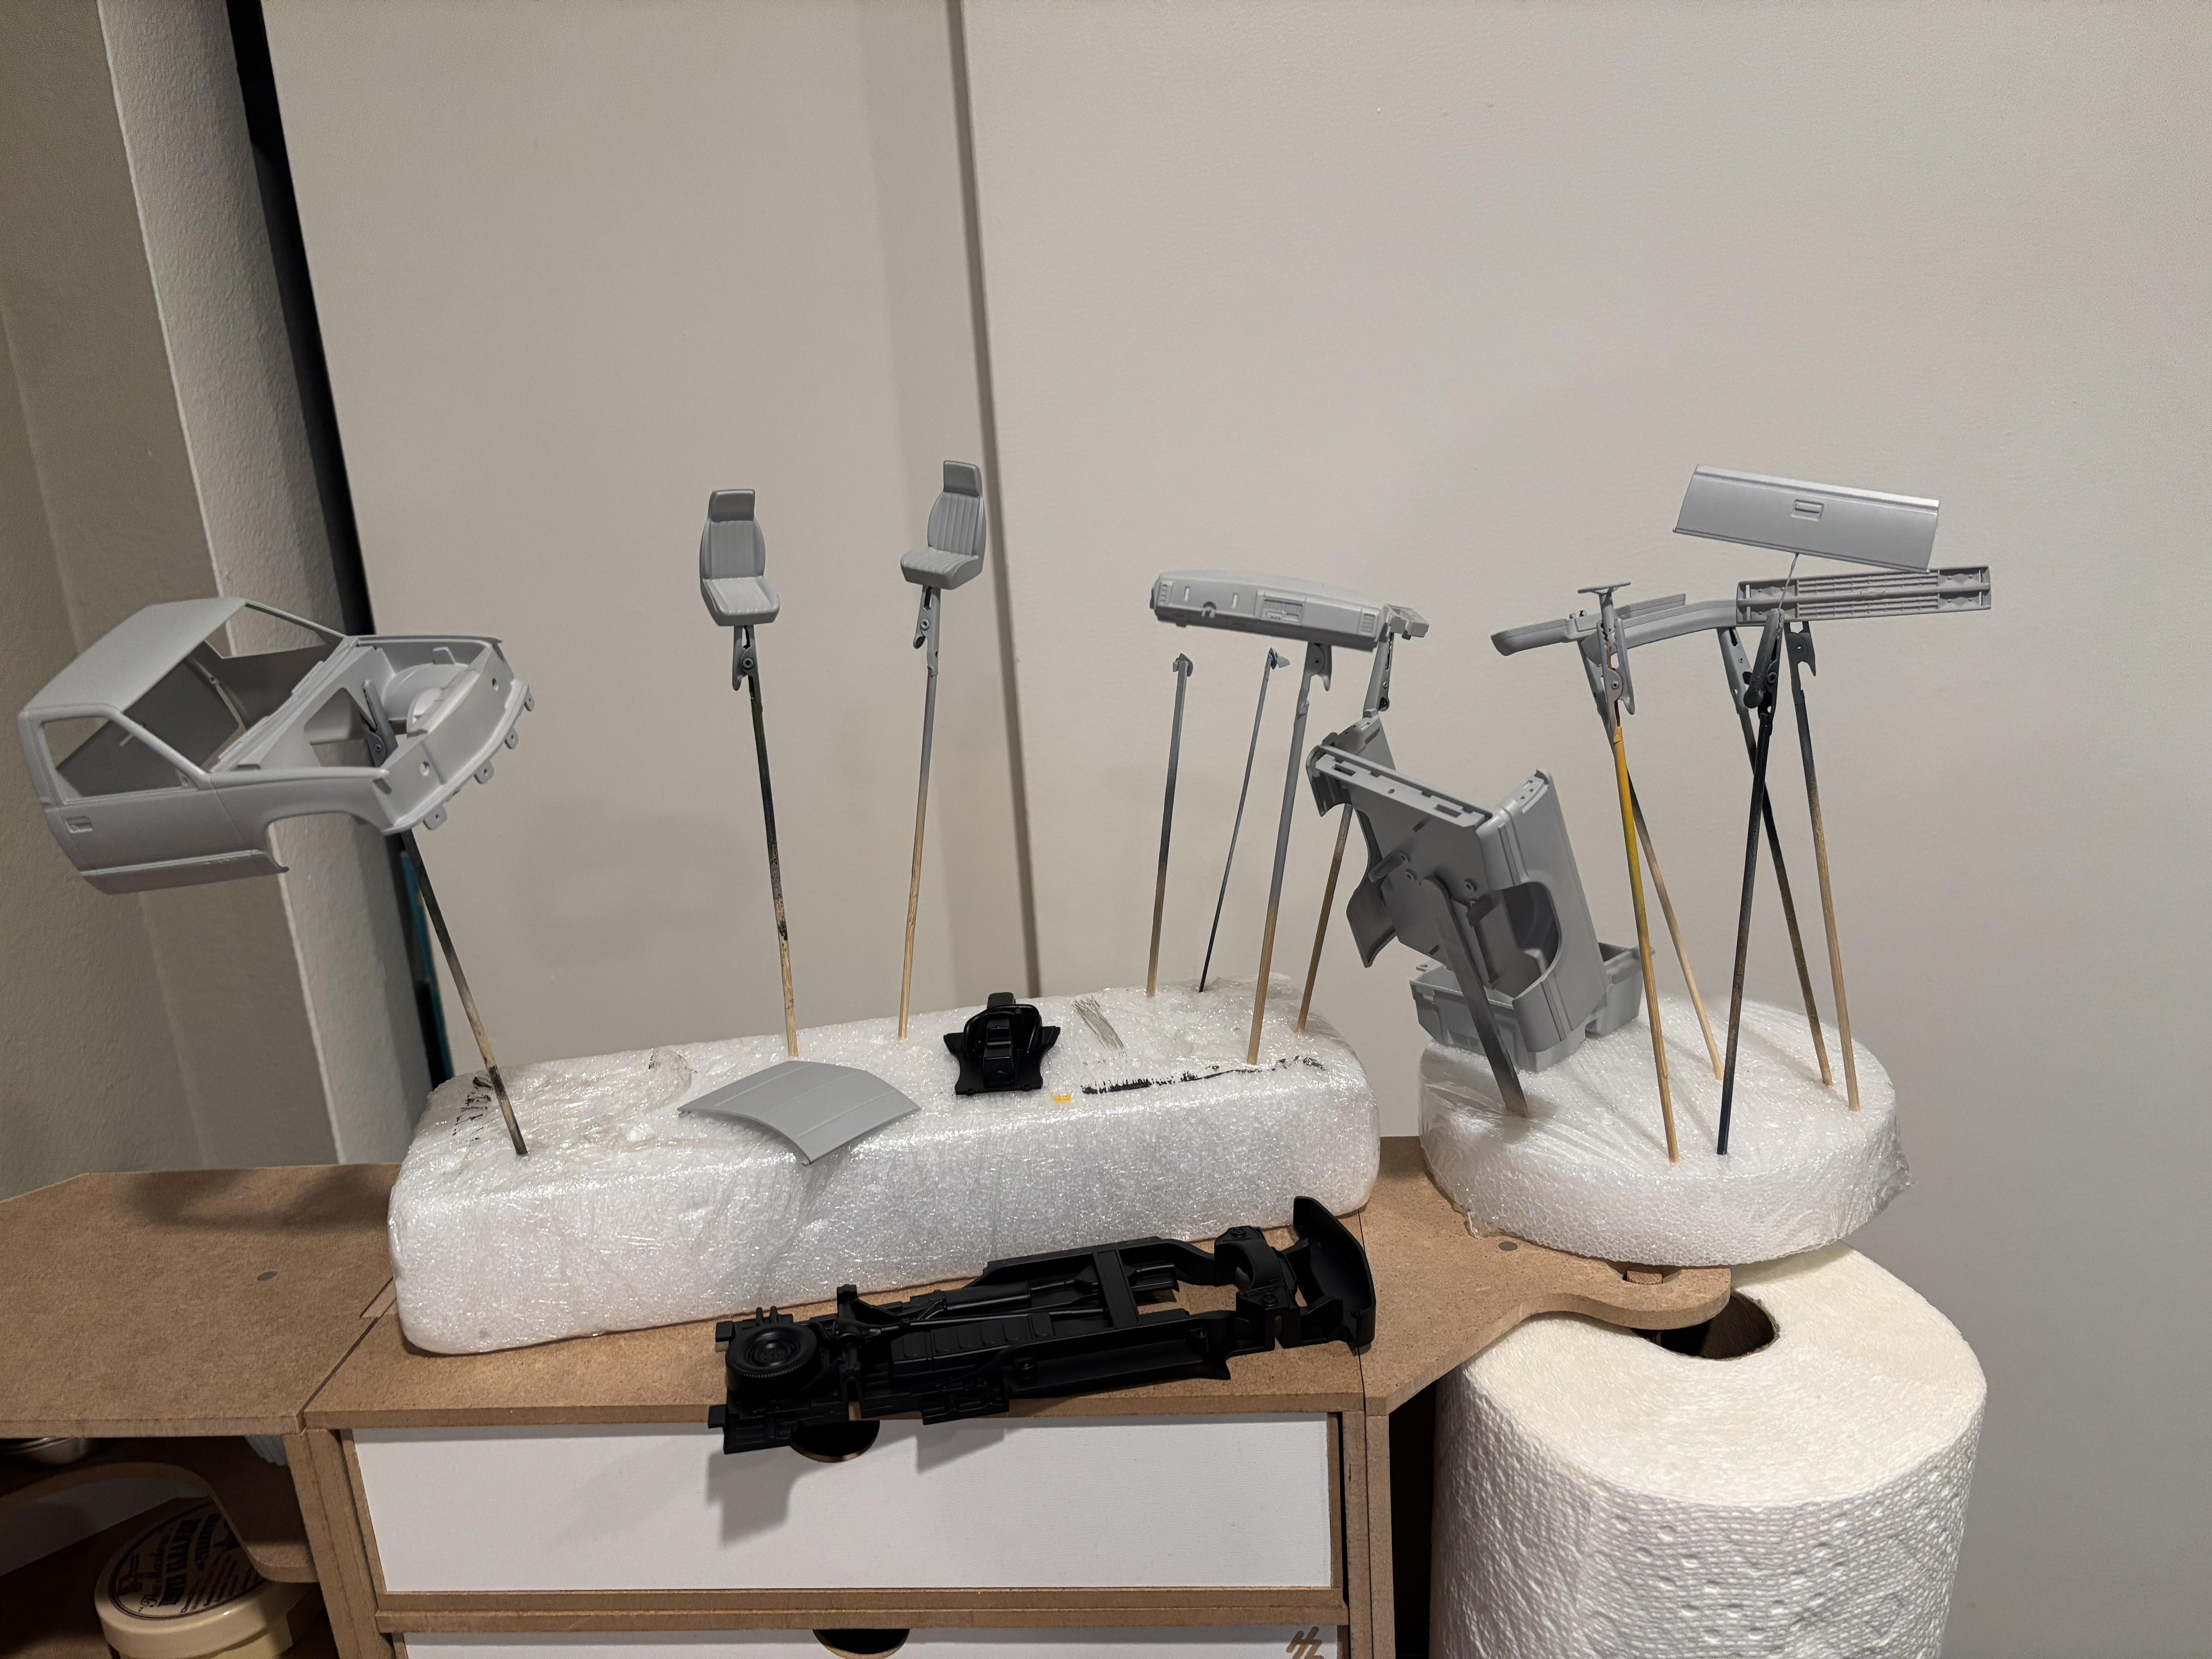
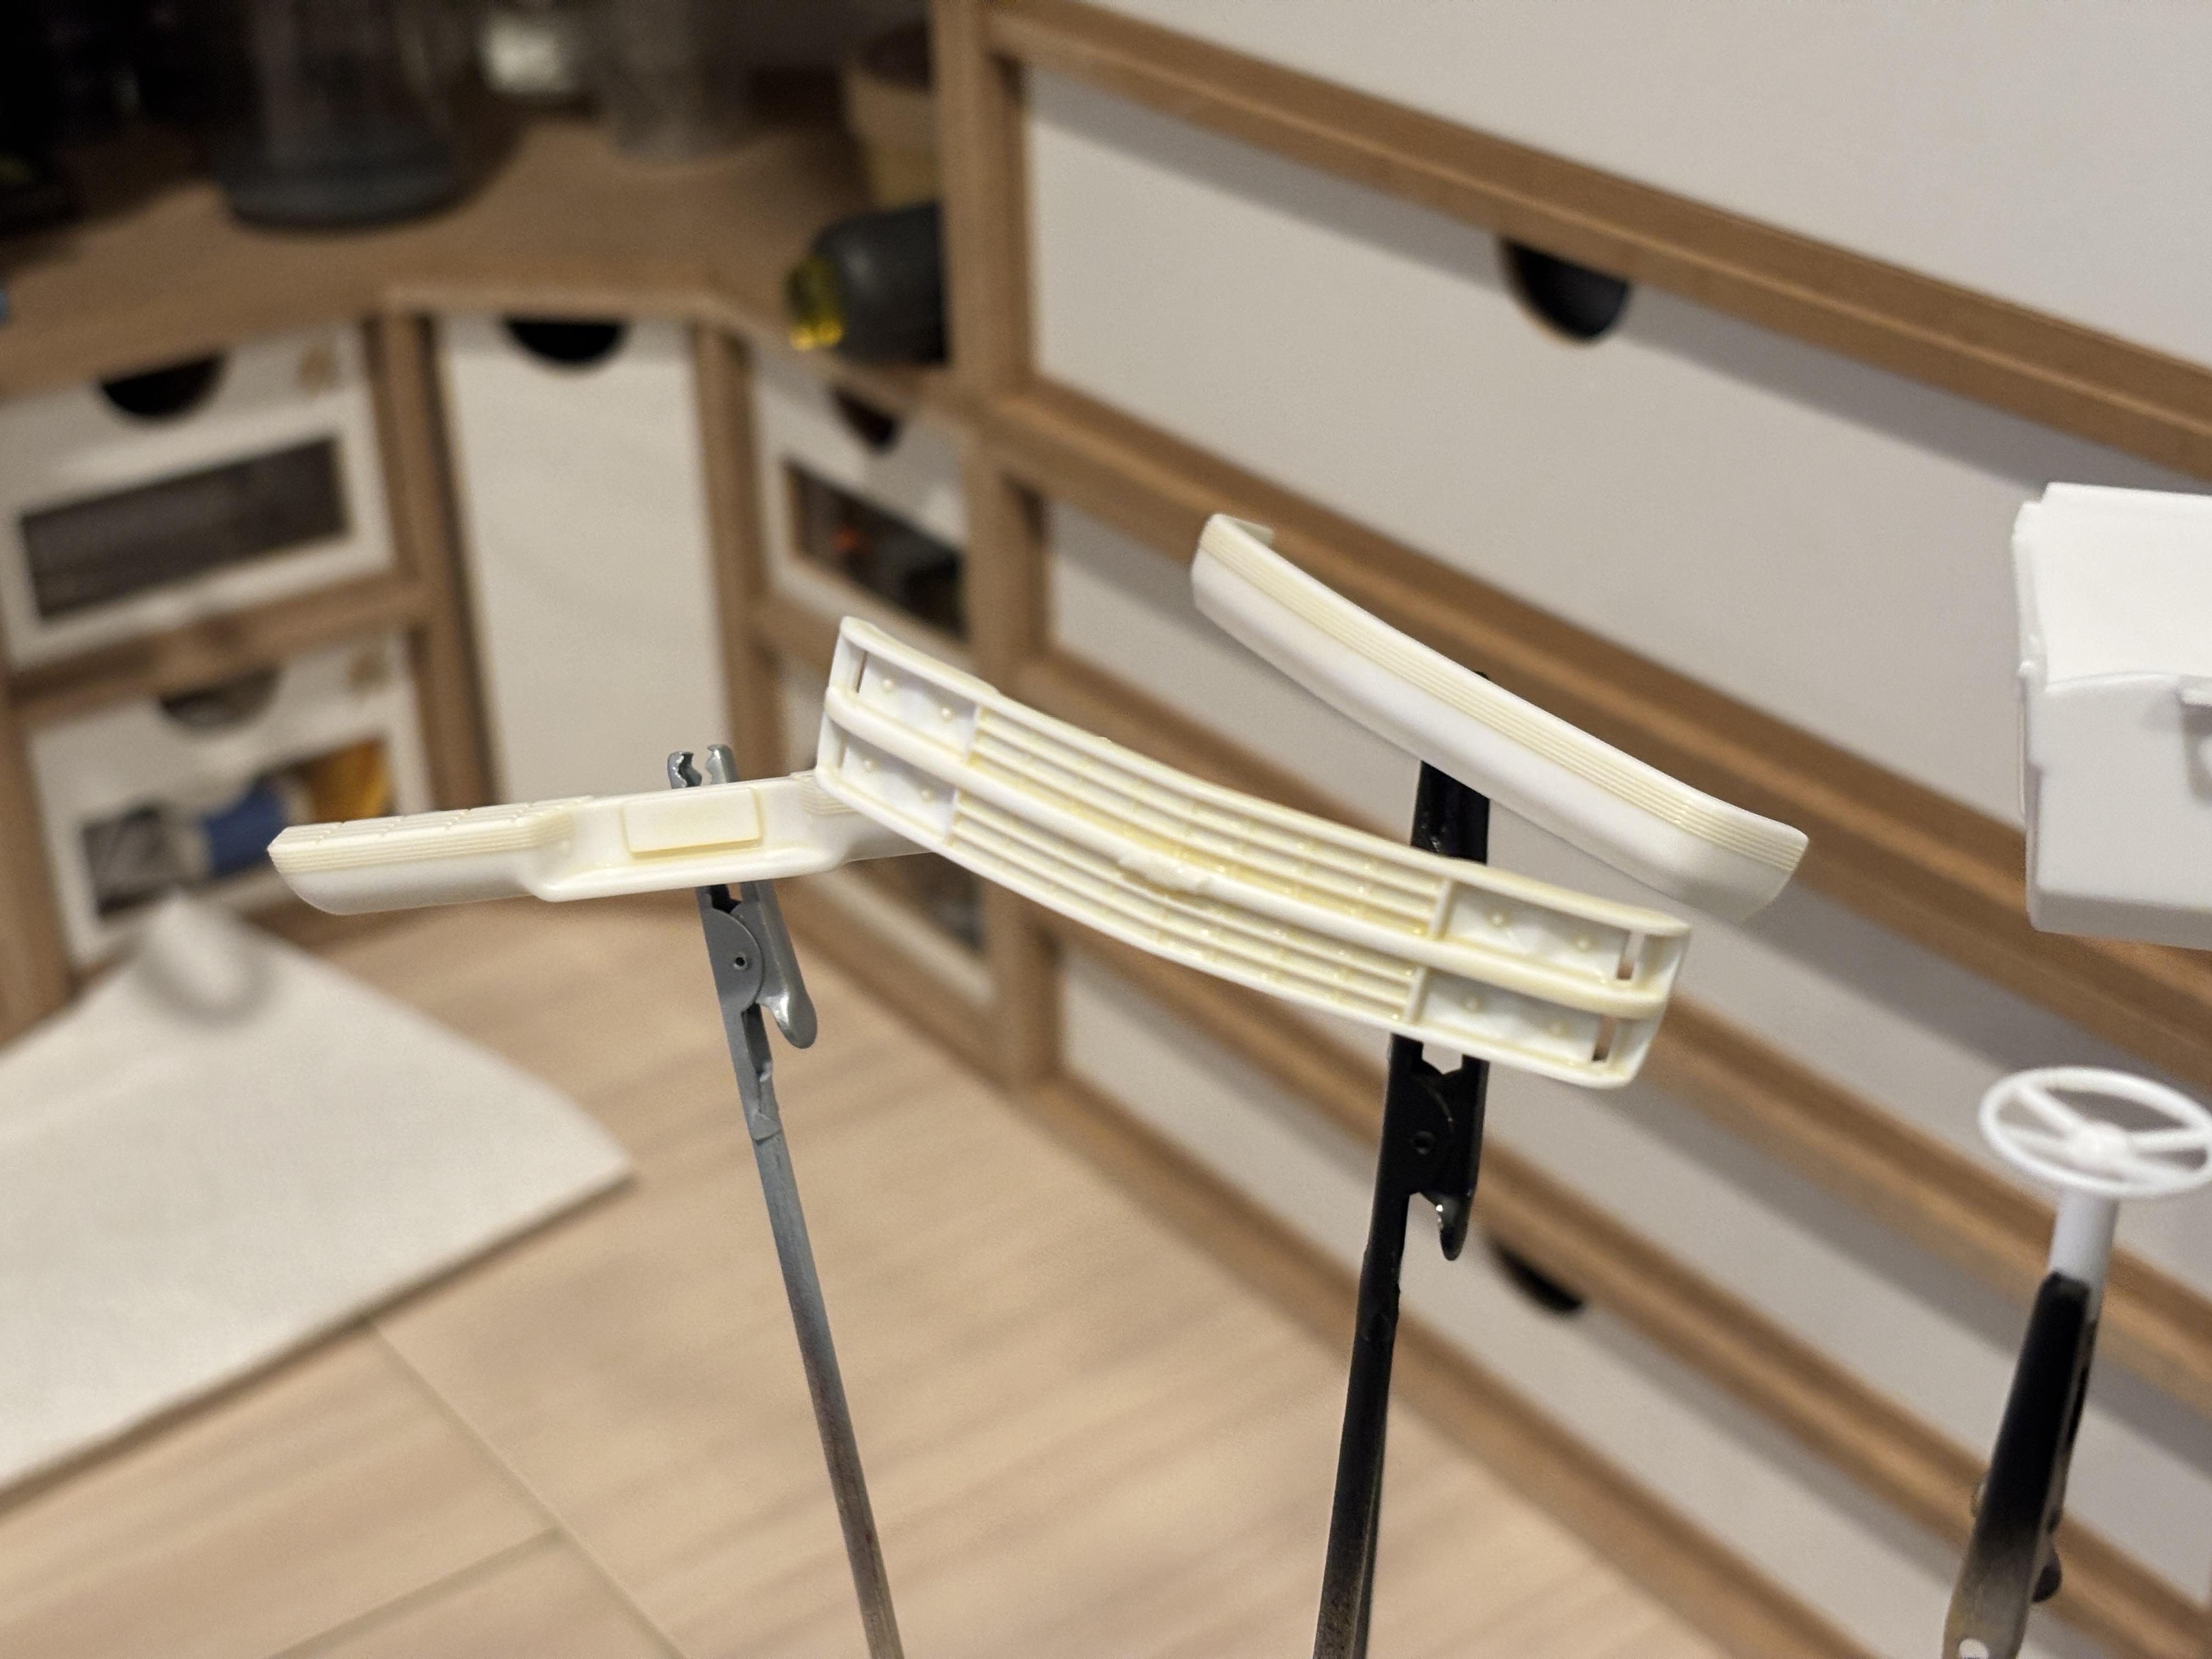
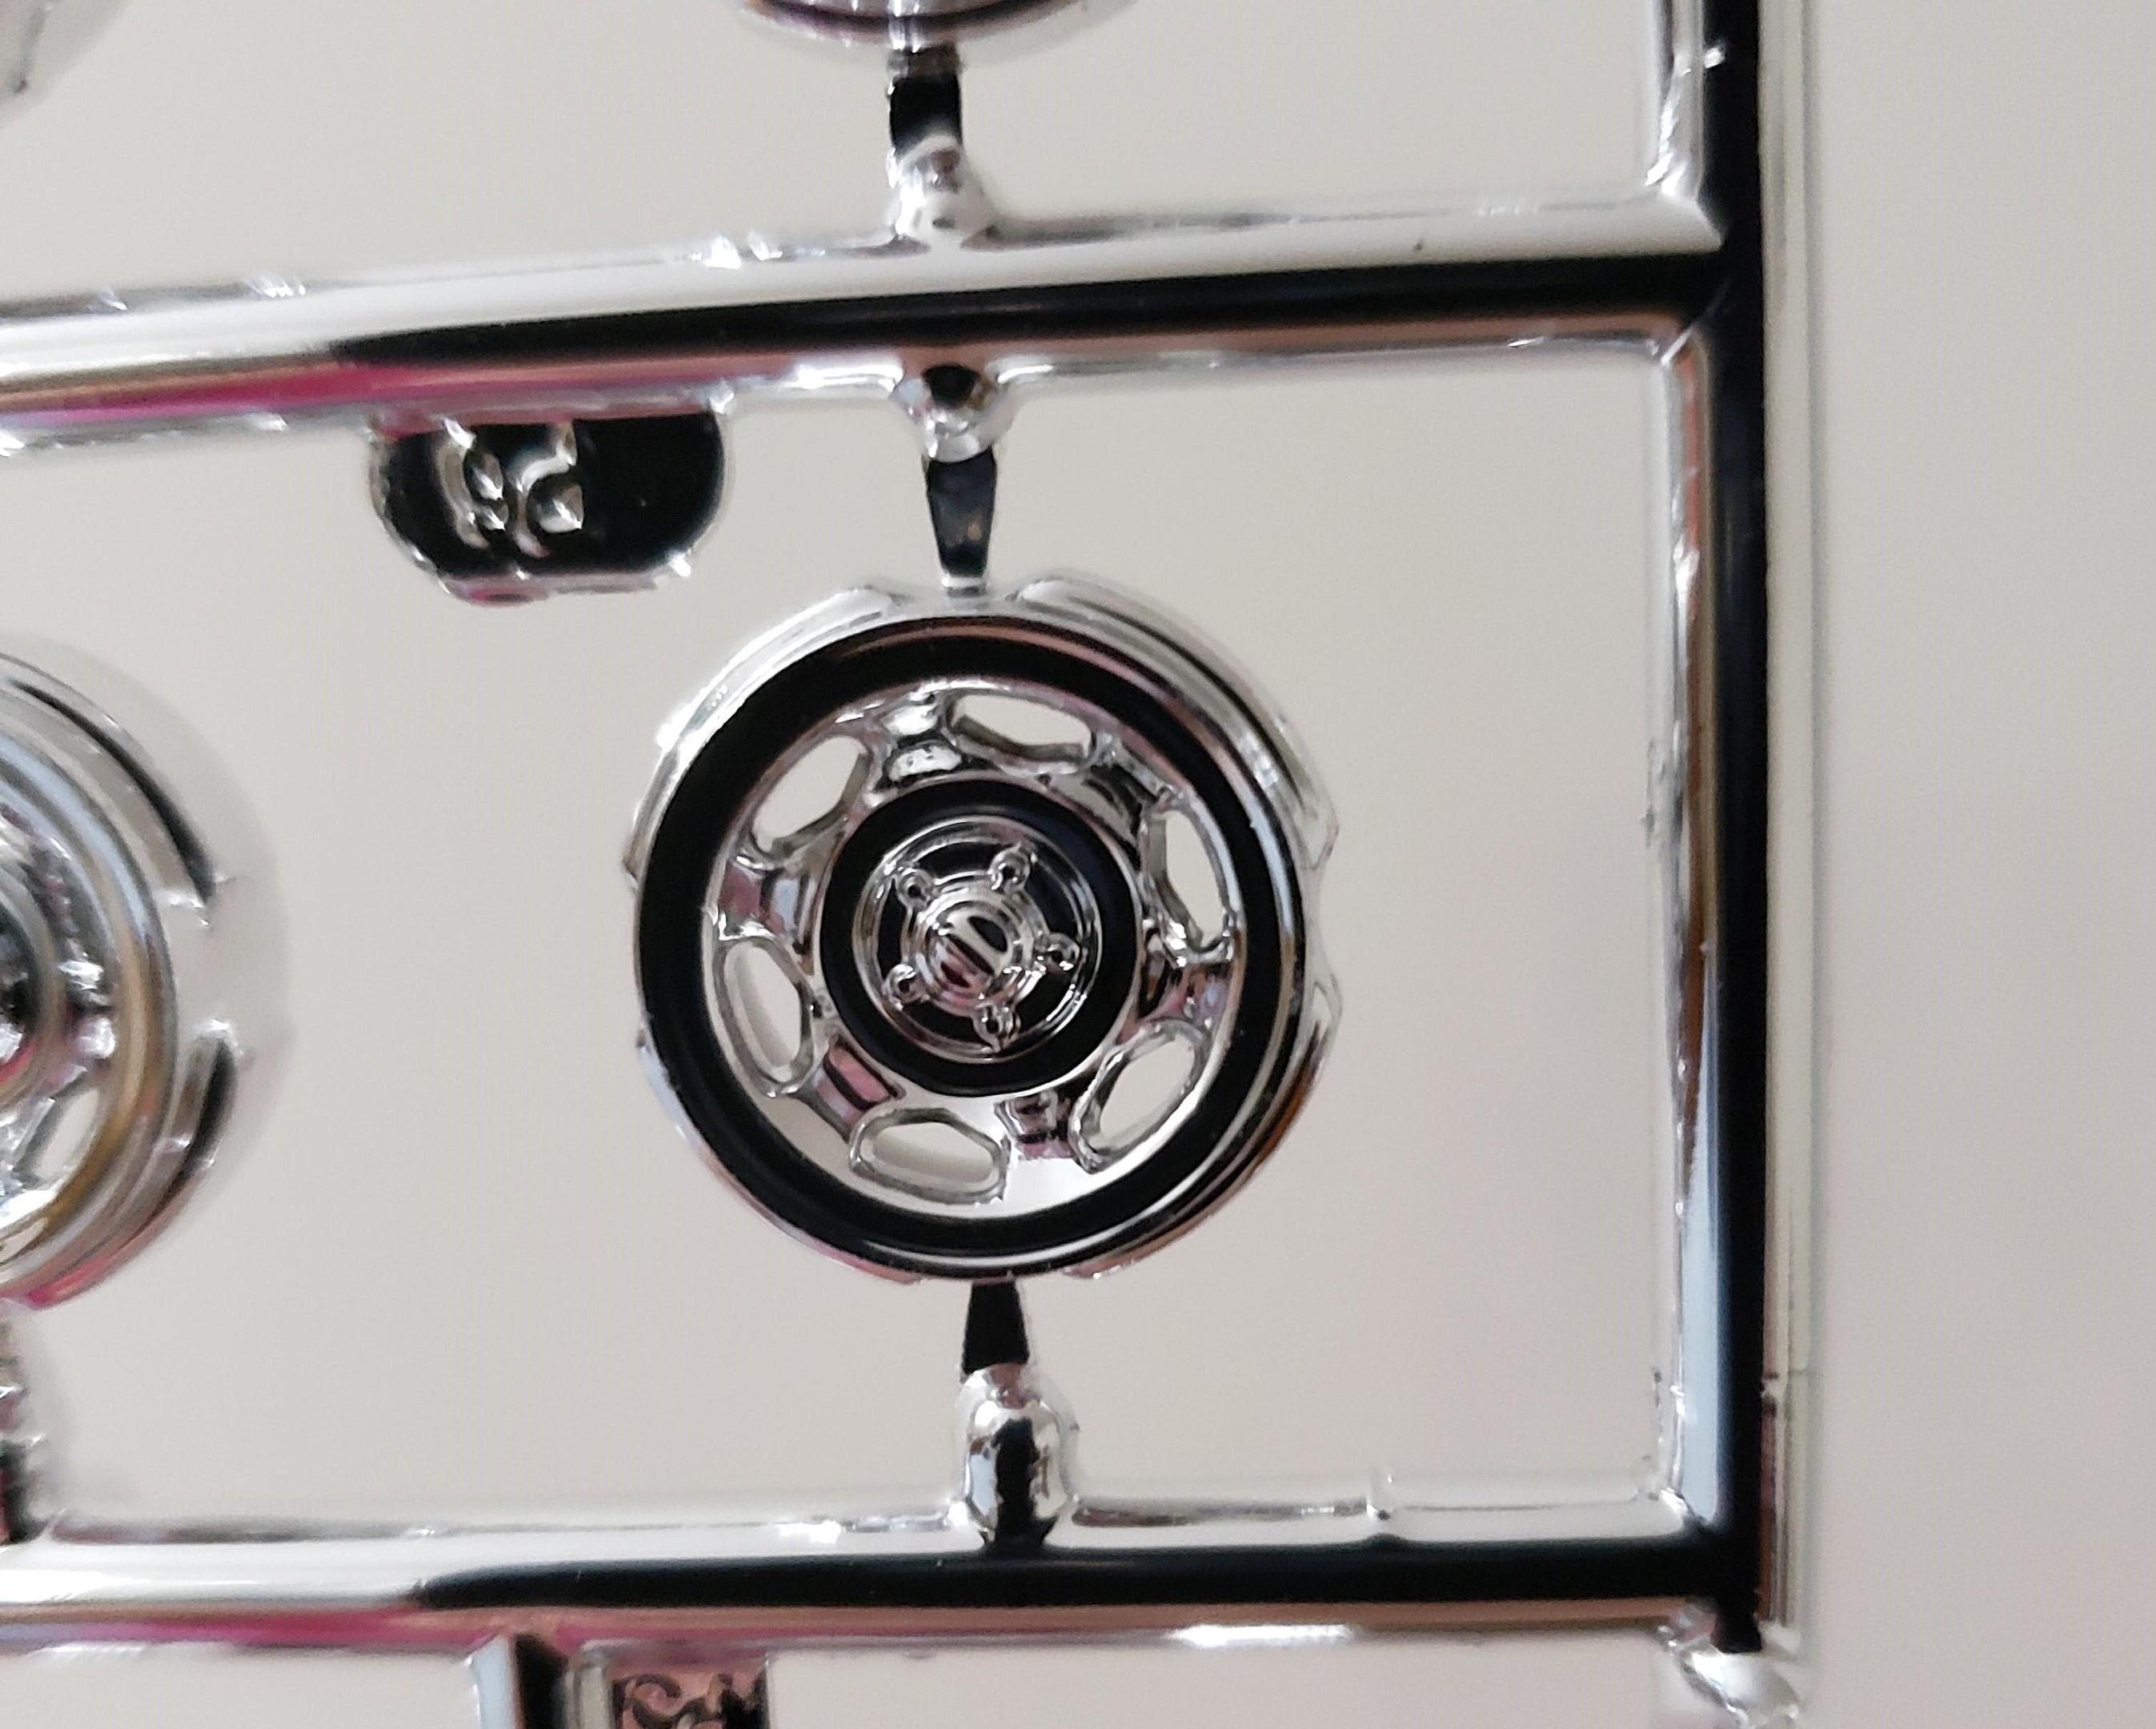
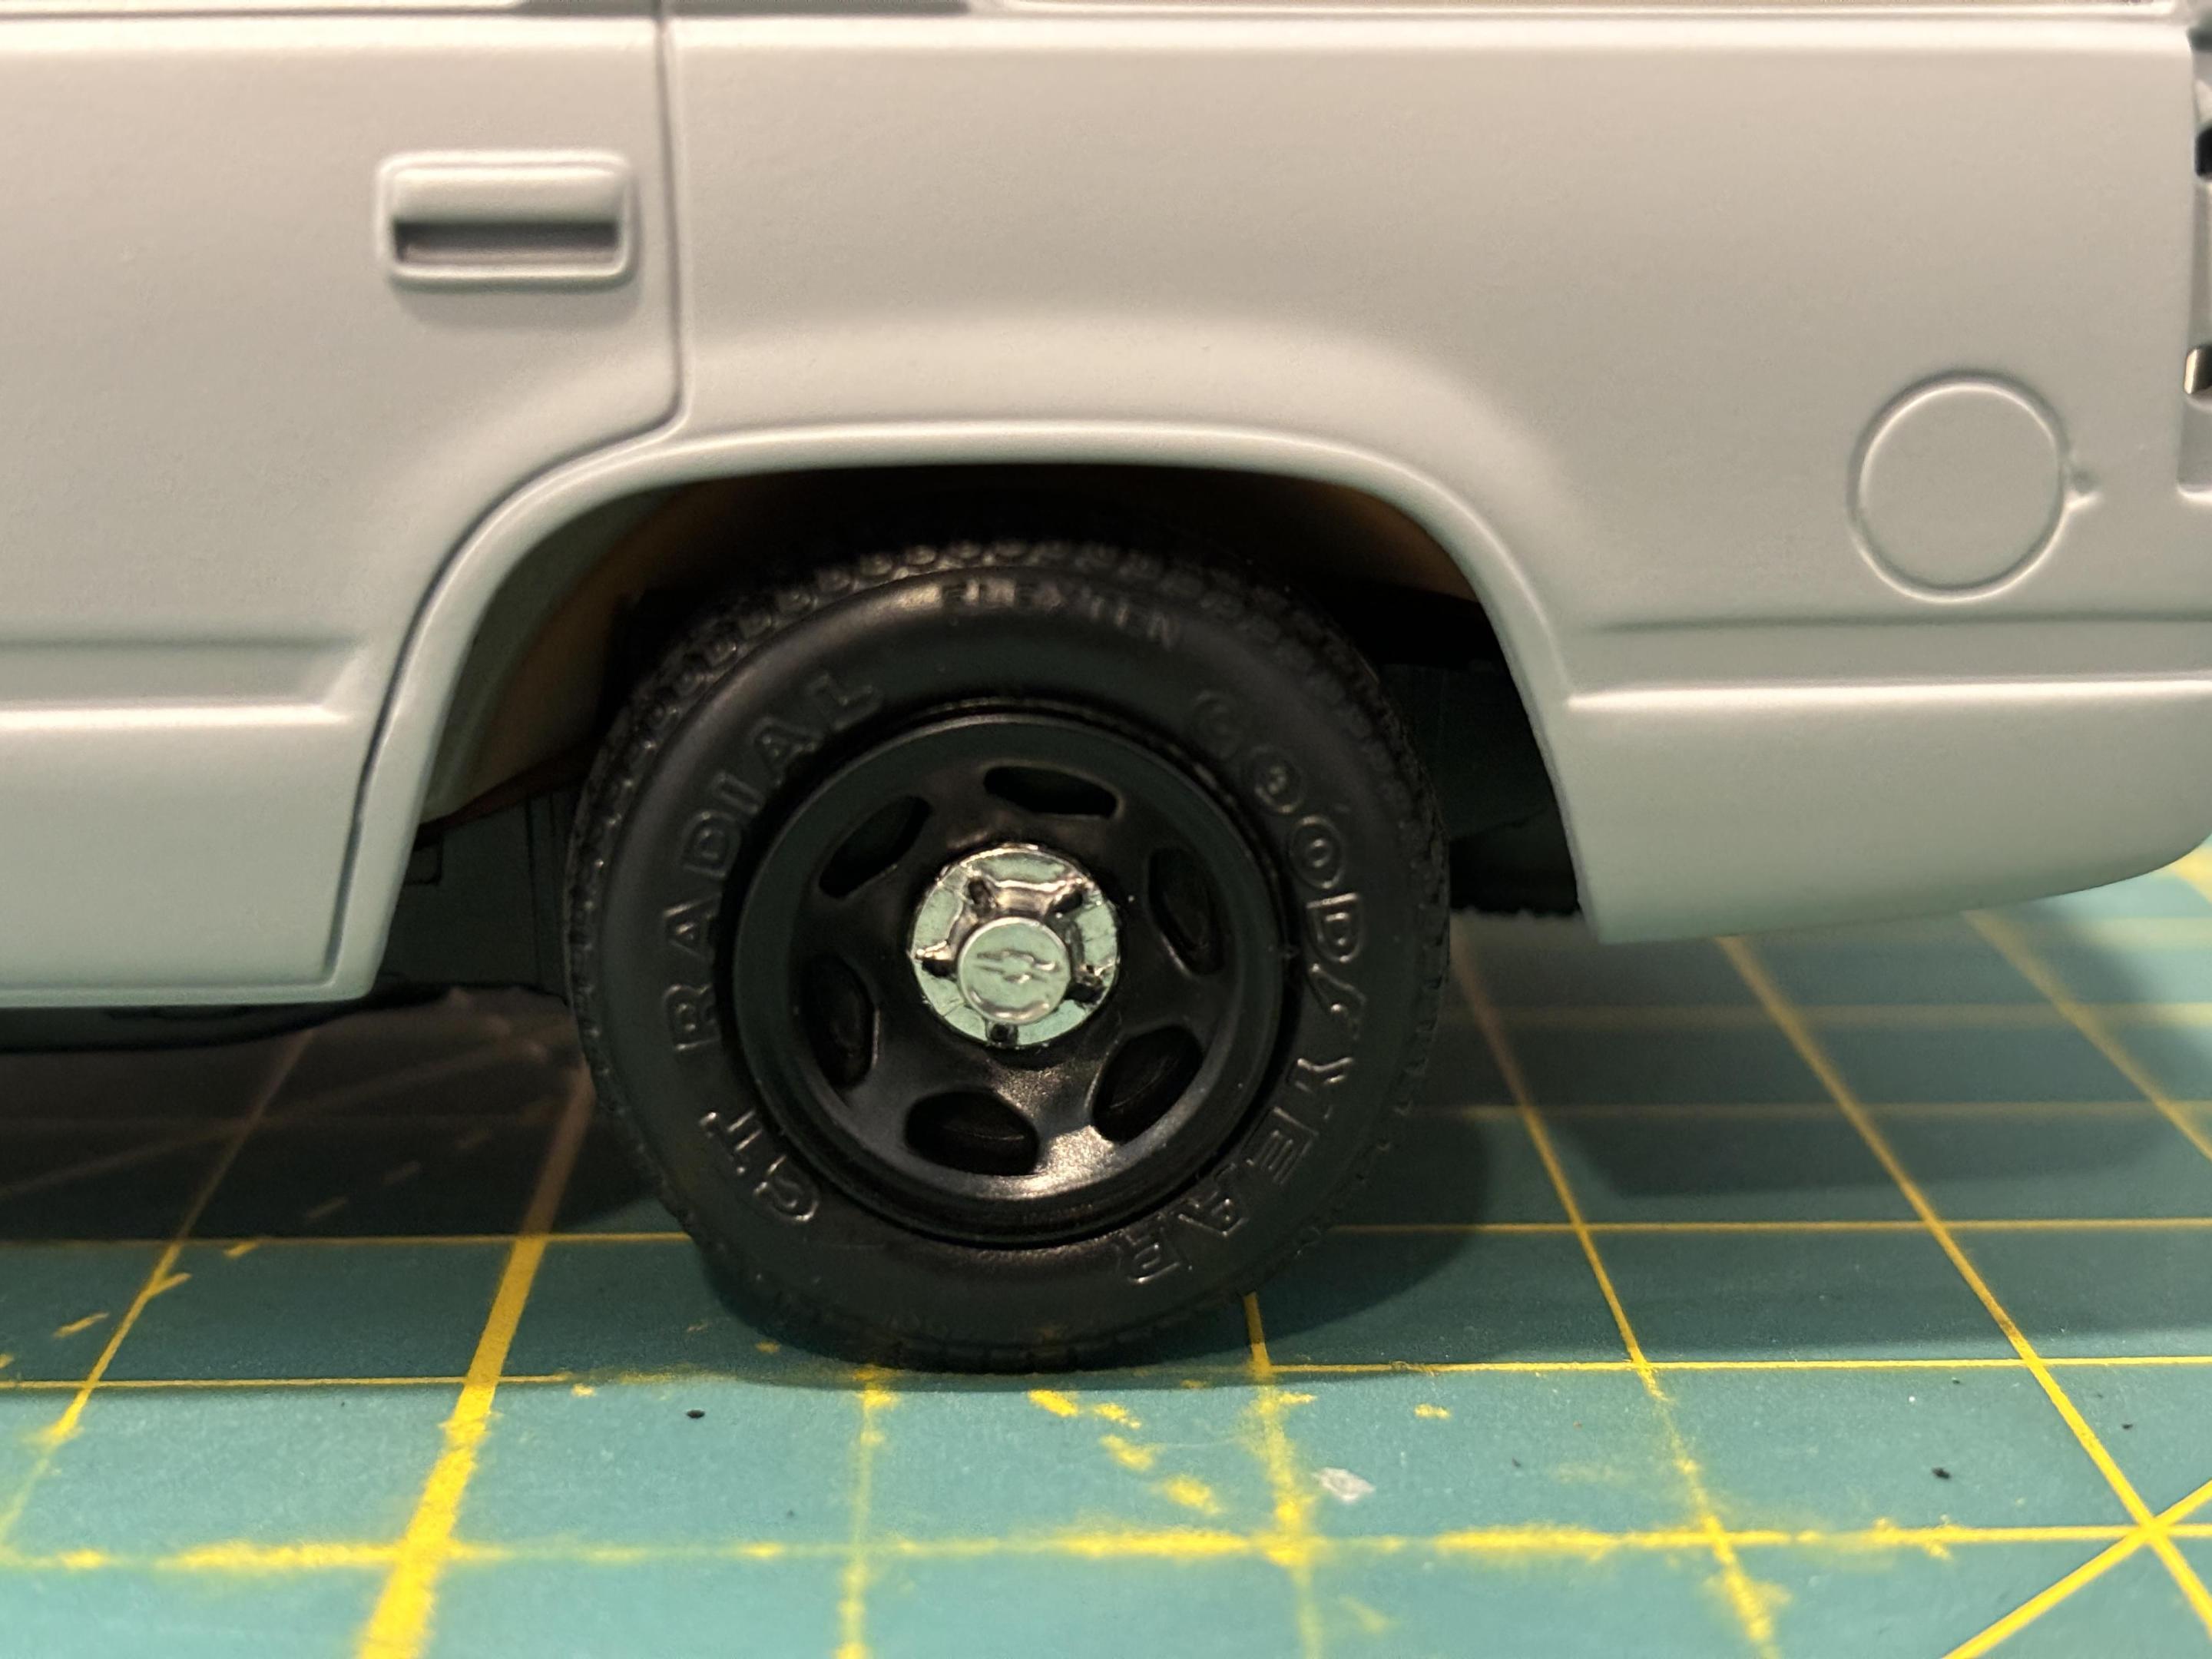
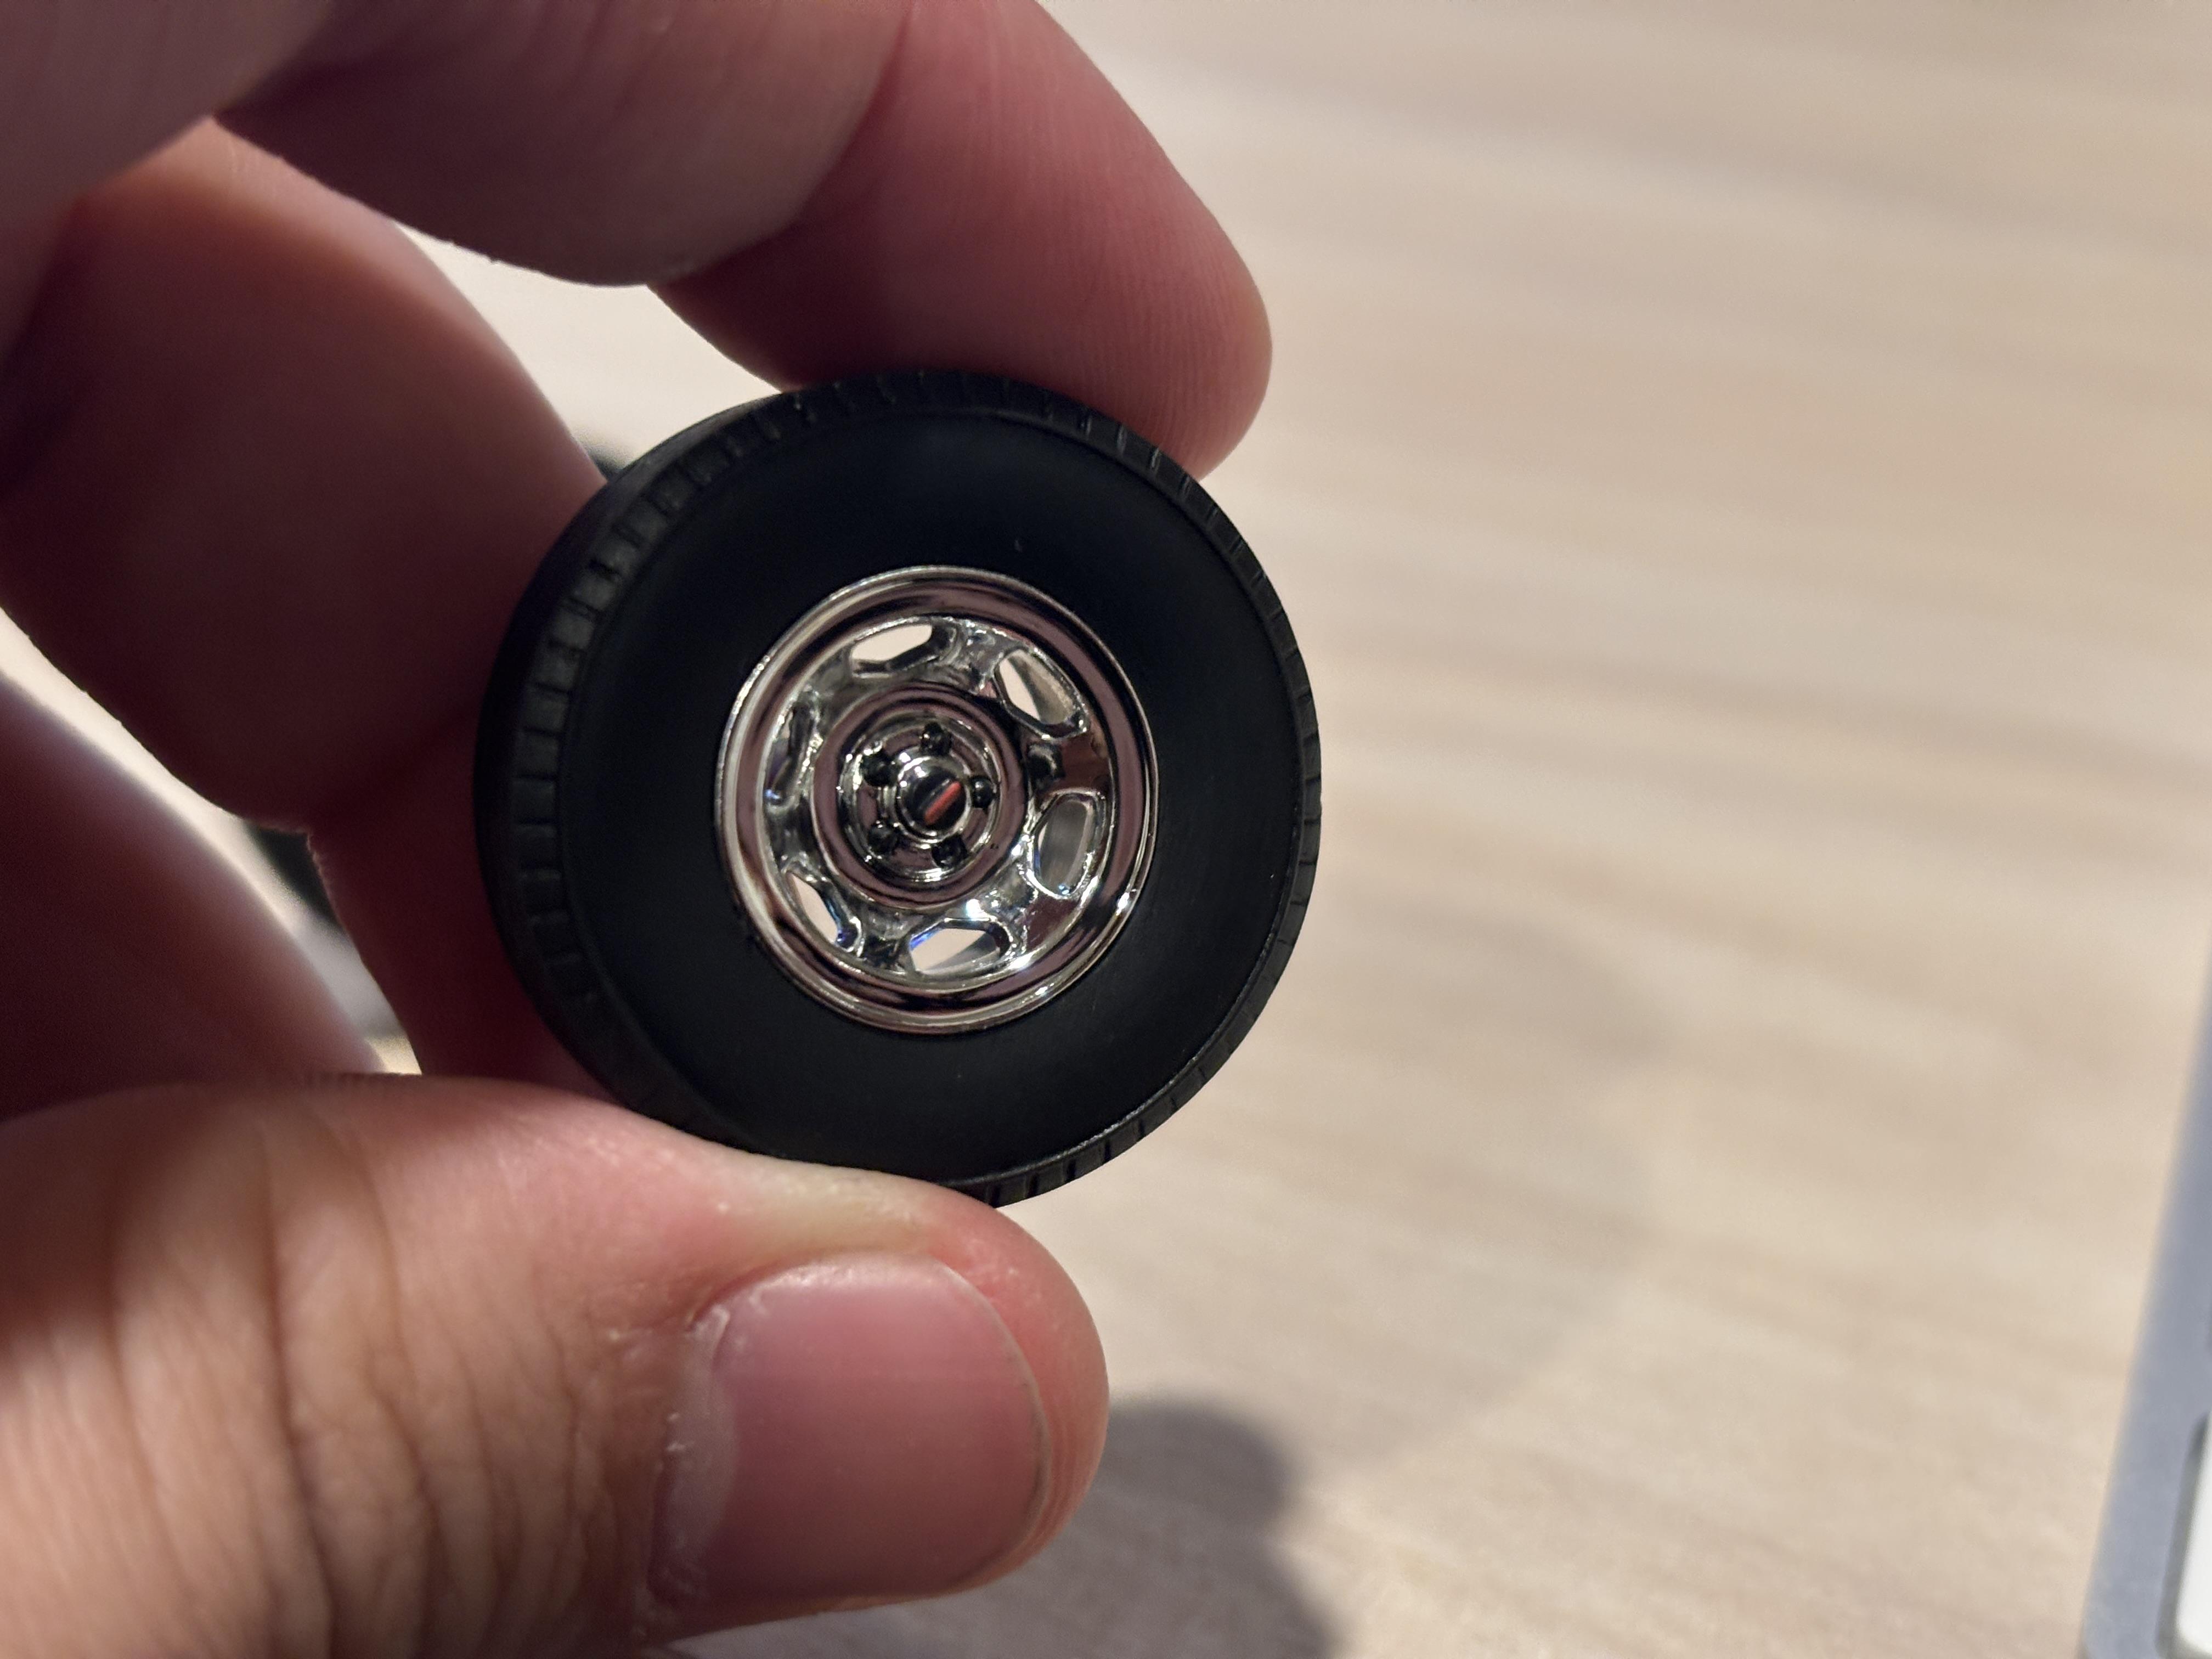
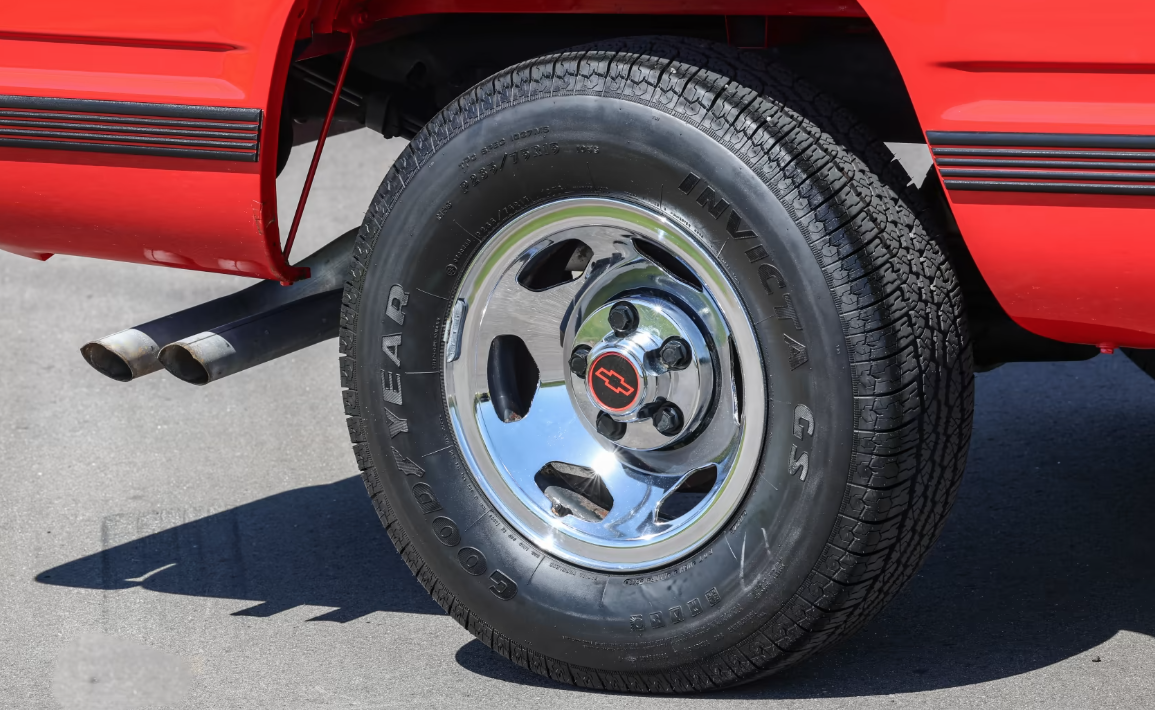
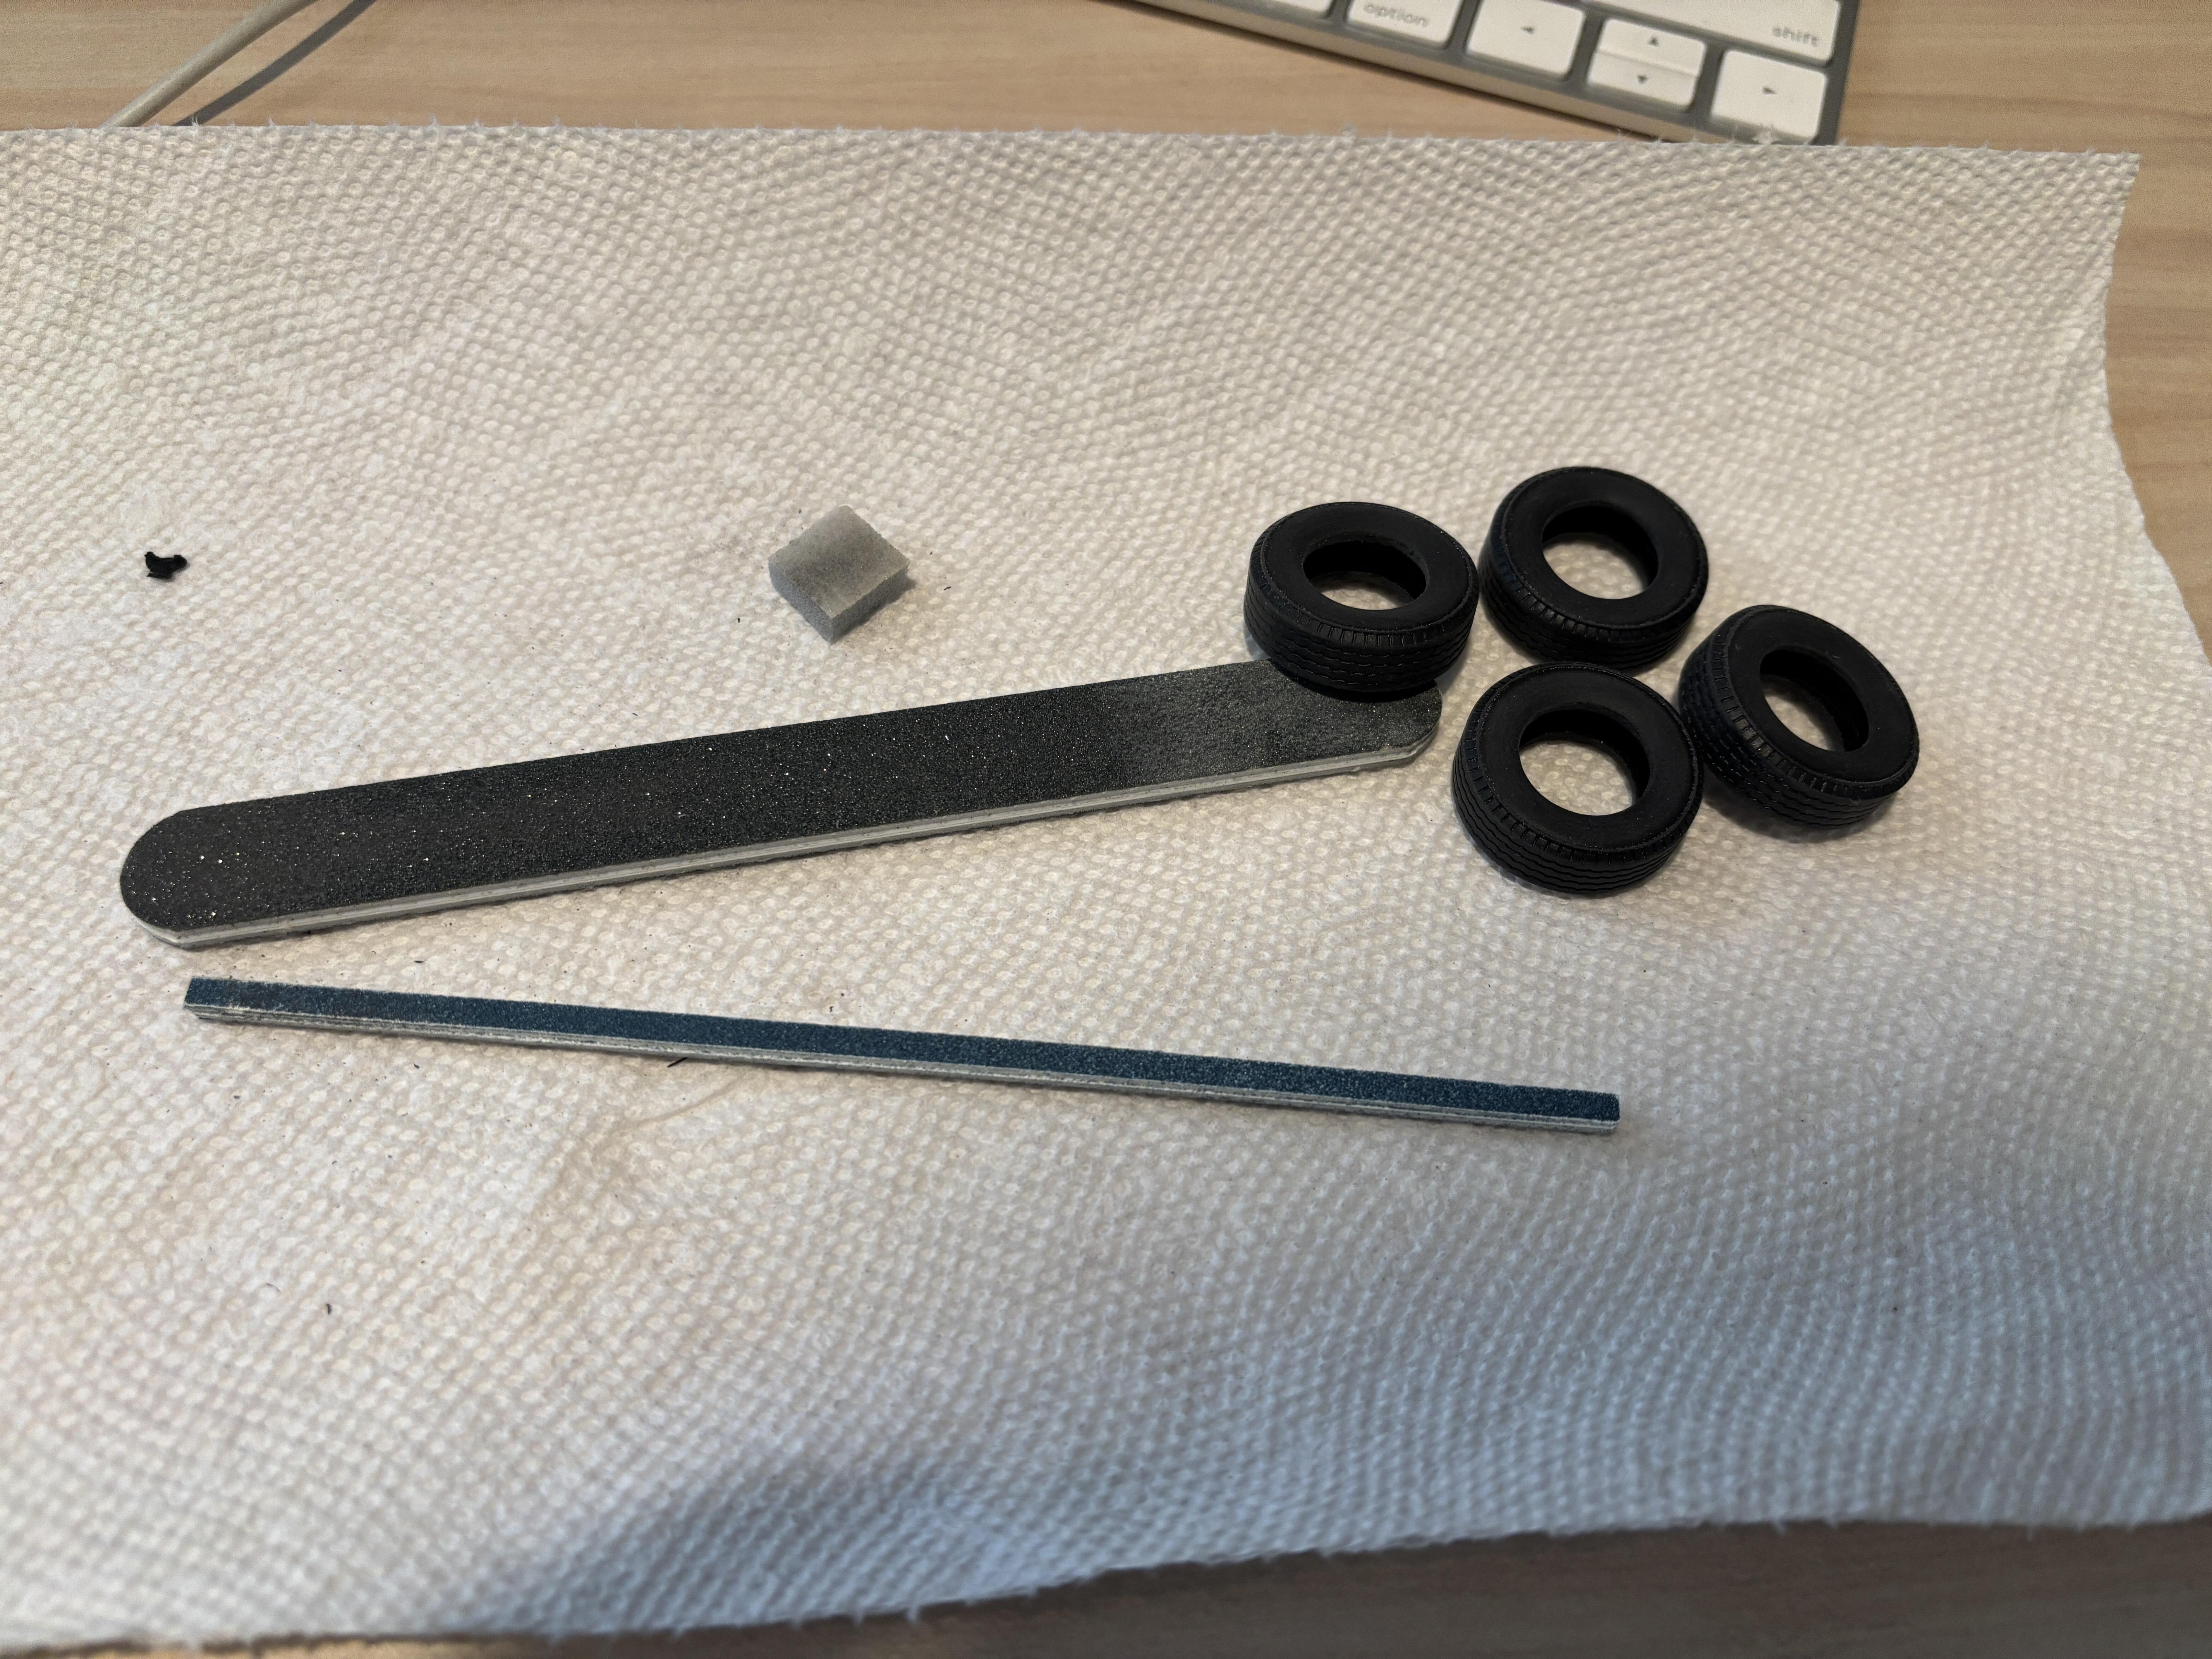
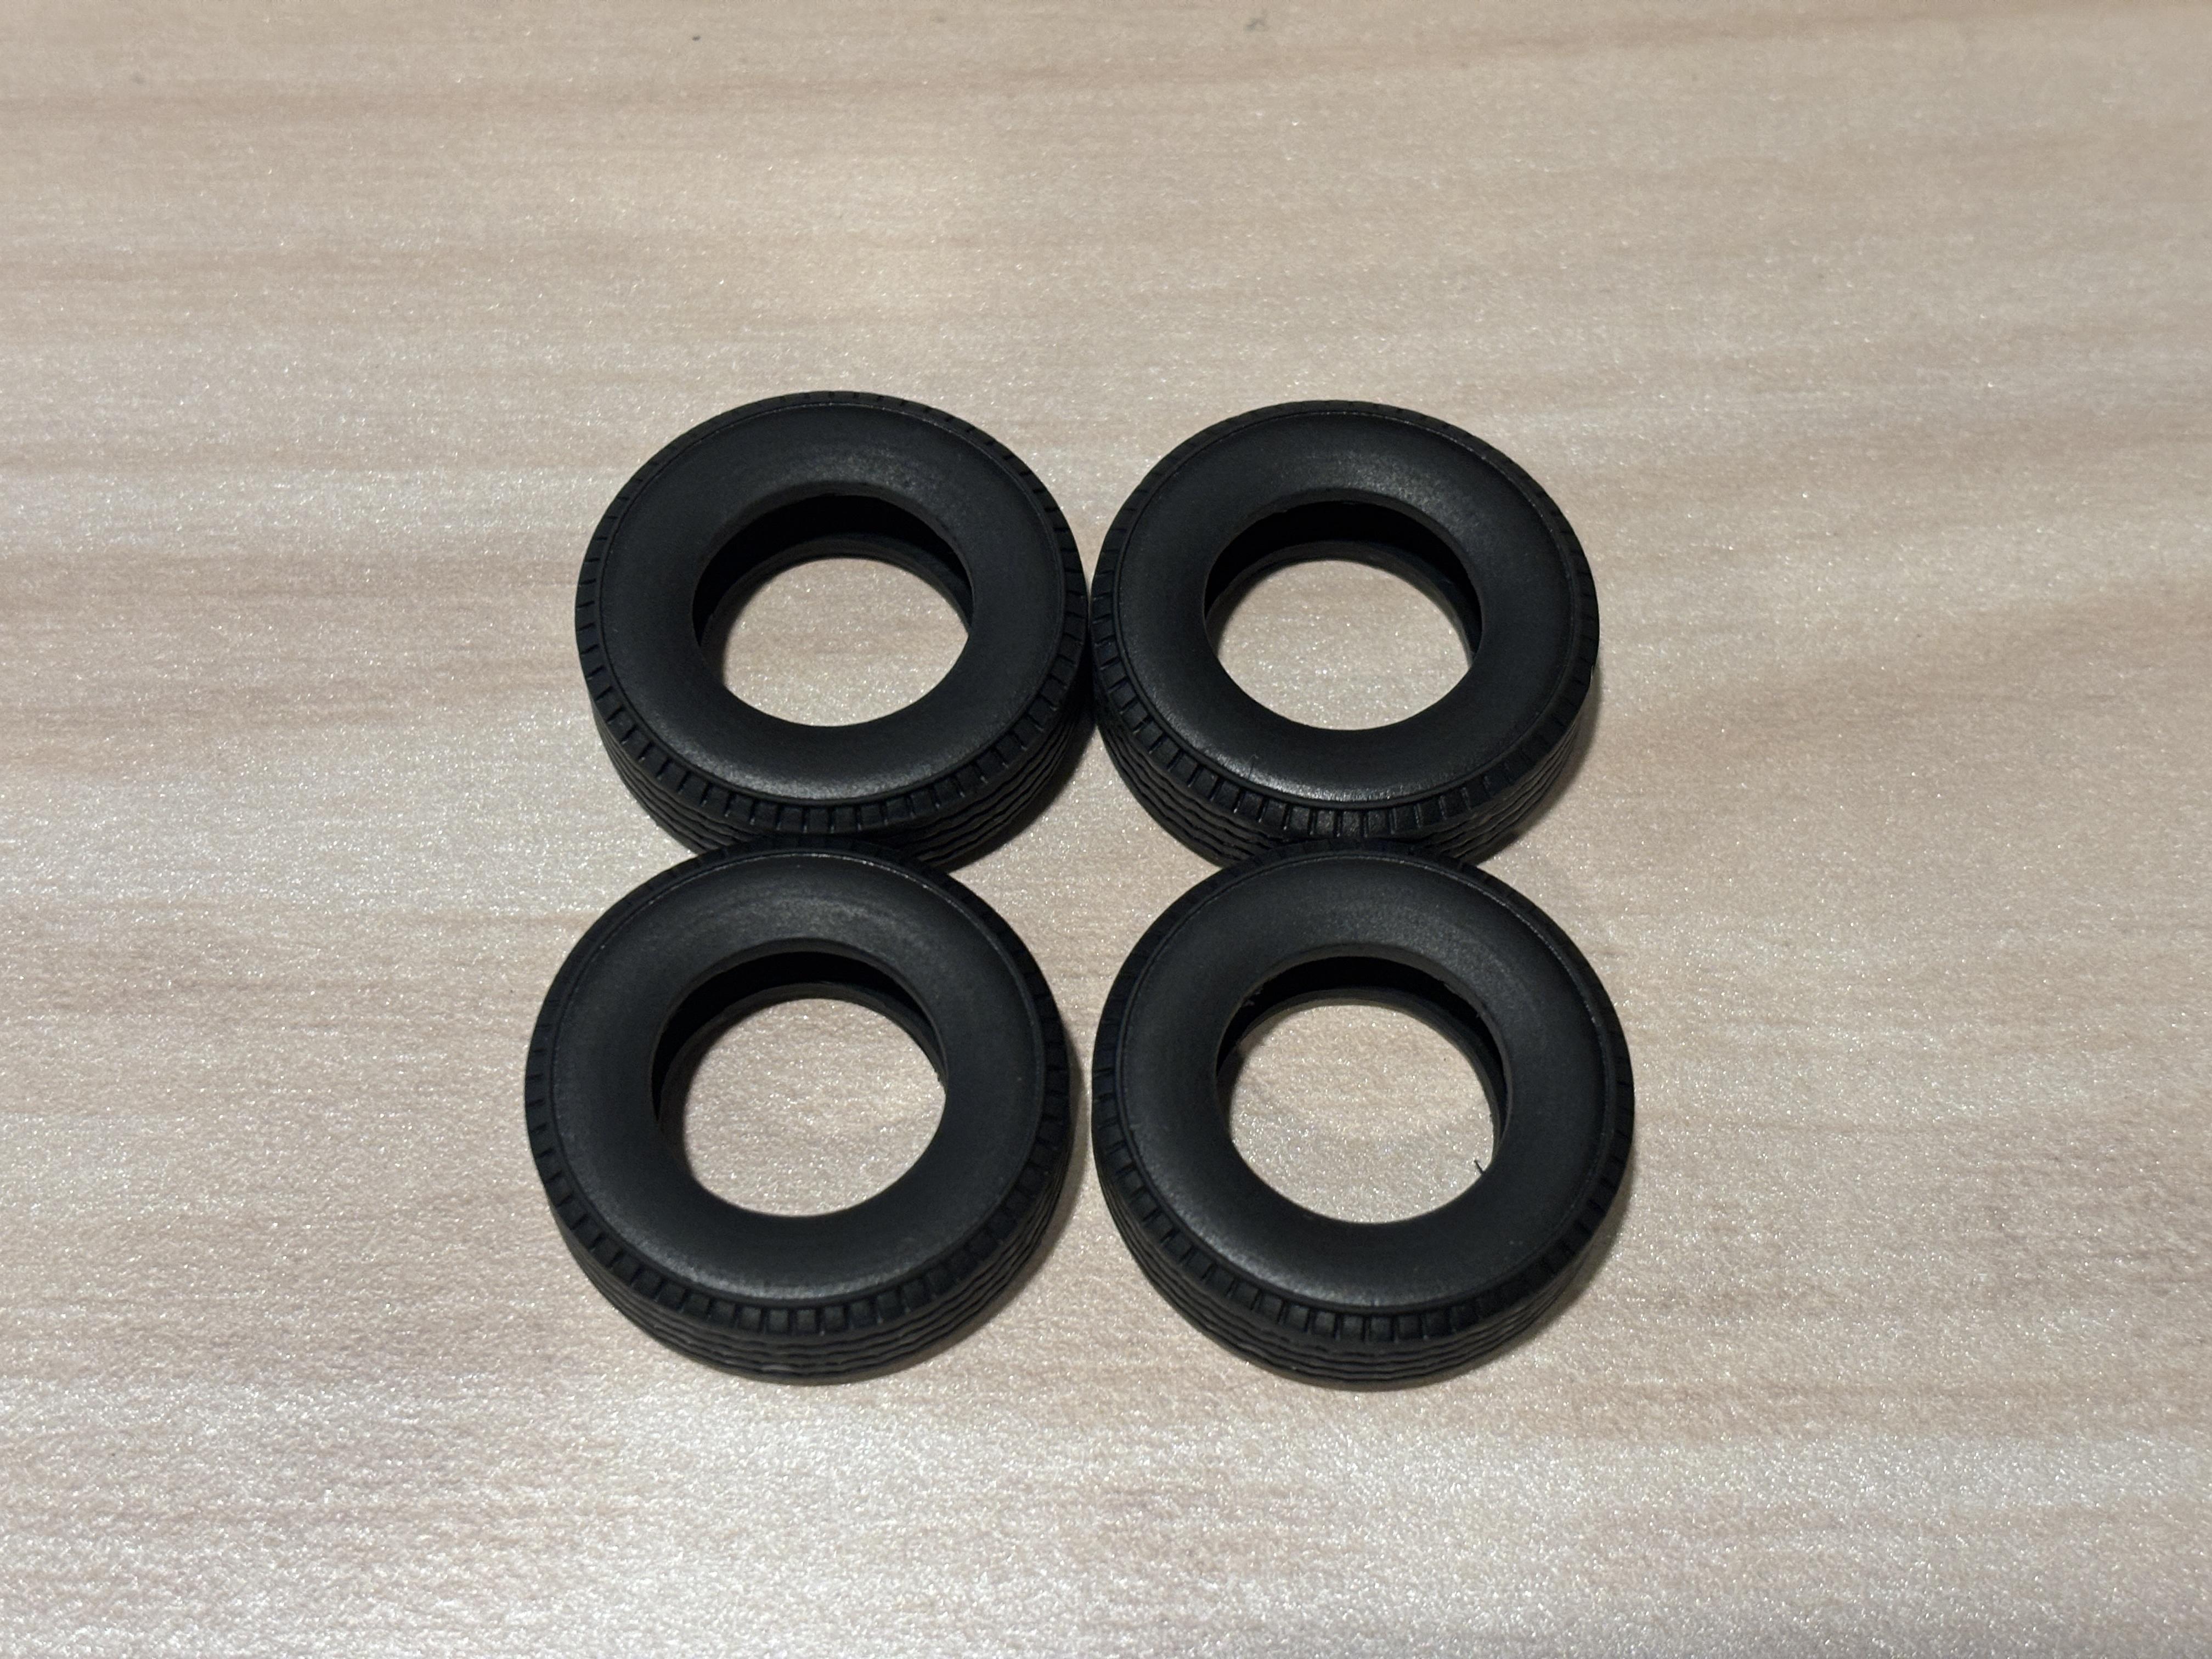
Since the bumpers will be body color and the grill will be black, I stripped the chrome off of these pieces with an overnight soak of Super Clean degreaser: I removed any imperfections, including mold lines and evidence of sprue attachments, and sanded every piece with 600 grit sanding sponges. I then washed every piece with warm water mixed with Dawn and scrubbed with a clean toothbrush. Today, I primed every piece that will be painted and gave the chassis a few coats of black primer. This picture gives a good idea for the low parts count as only the wheels, windows, and headlight/taillight lenses are missing. I then moved on to the tires and wheels. The kit comes with two wheel options, one of which are the Sport 2WD wheels. They are of a different design to the wheels that AMT previously tooled up for the 454SS truck decades ago. The only real improvement is that the wheel vents are open: But it goes downhill from there. In place of the Chevy bowtie, there is only a linear bar on the center caps. The kit's decal sheet comes with center cap decals, but they will have a rough go at staying in place on top of the bar. I recommend snipping off the bar on the center cap and then putting the center cap decal. Compare these to the older 454SS wheels with the Chevy logo: I used a black paint marker with a fine tip to paint in the lug nuts and the center cap: I'm a little disappointed that AMT went through the effort of making excellent Sport decals, but didn't include Sport-style center caps compared to the regular center cap decals they included. It's not a deal breaker for me, but it would have really completed the decal sheet. Since this is such a fine detail, i simply painted the center of the hubcap red to give it some of that pop that the 1:1 version has: And now the wheels. At this point, much has been said about how terrible they are. Especially compared to the wheels that the original line of AMT Chevy truck kits came with. The size isn't right and they just look so plain and flat. But with the absence of better options (and a desire to build as box stock as possible), I used them. I sanded the tread on every tire with 400 grit sanding sticks and sanded the sidewalls with 1000 grit sanding sponges: Since the wheels have outer ribs, I had a hard time getting them into the tires. I shaved off some of the inner sidewall circumference to get the wheels to pop in. I know that maybe it sounds like I'm dumping on AMT a bit, but I mean it as constructive criticism and information for anybody reading this thread. This kit really is a lot of fun to build and a great slump buster due to its simplicity. A lot can be done to improve some of its shortcomings.
-
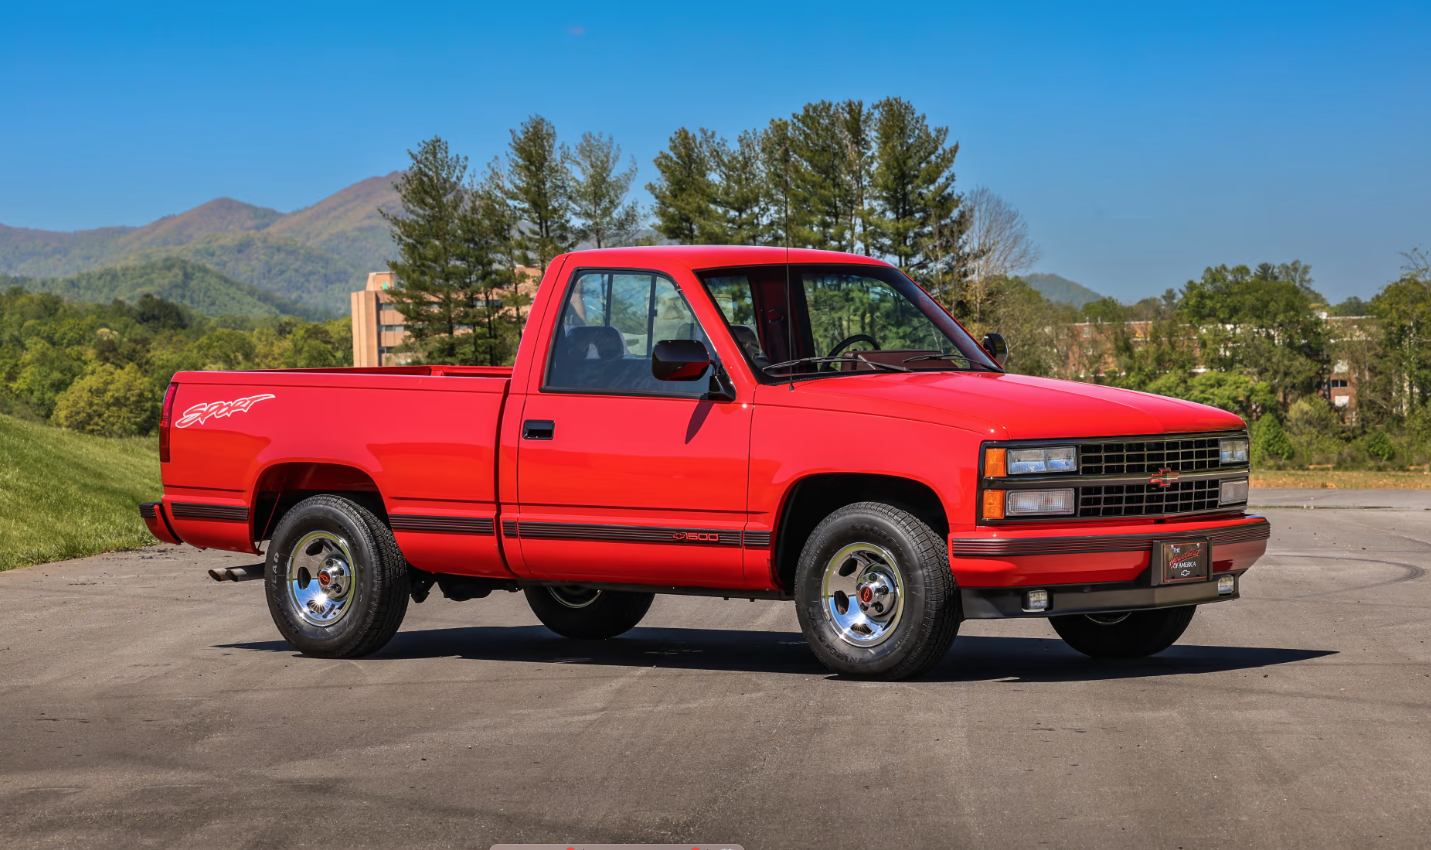
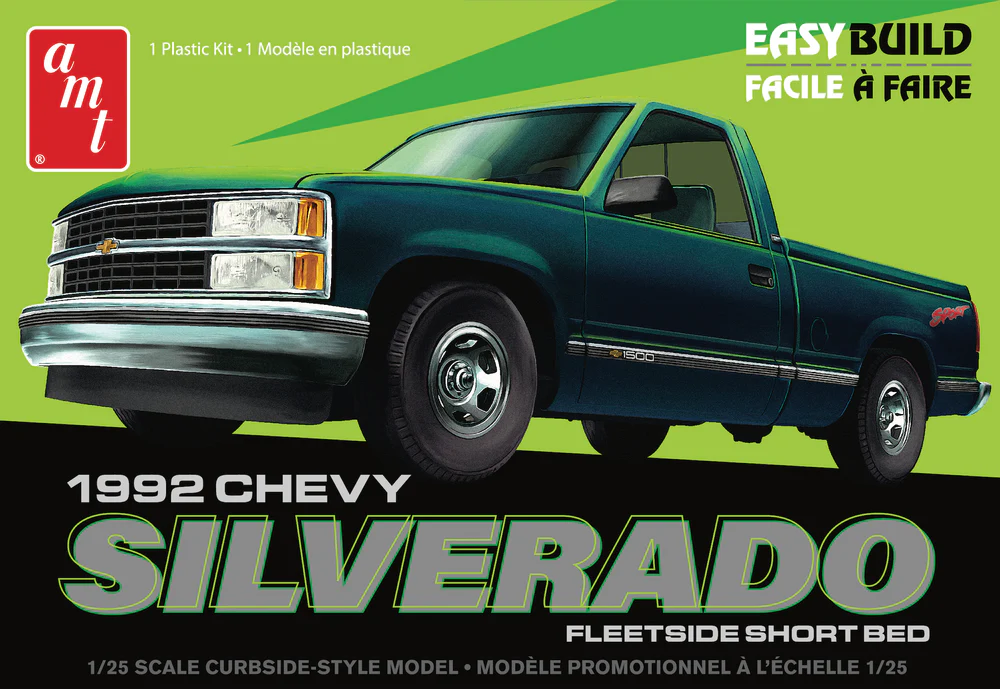
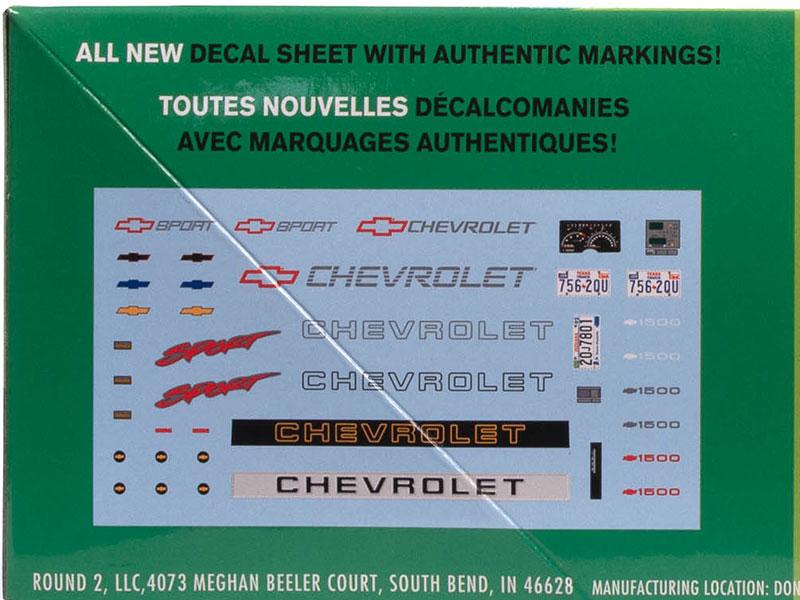
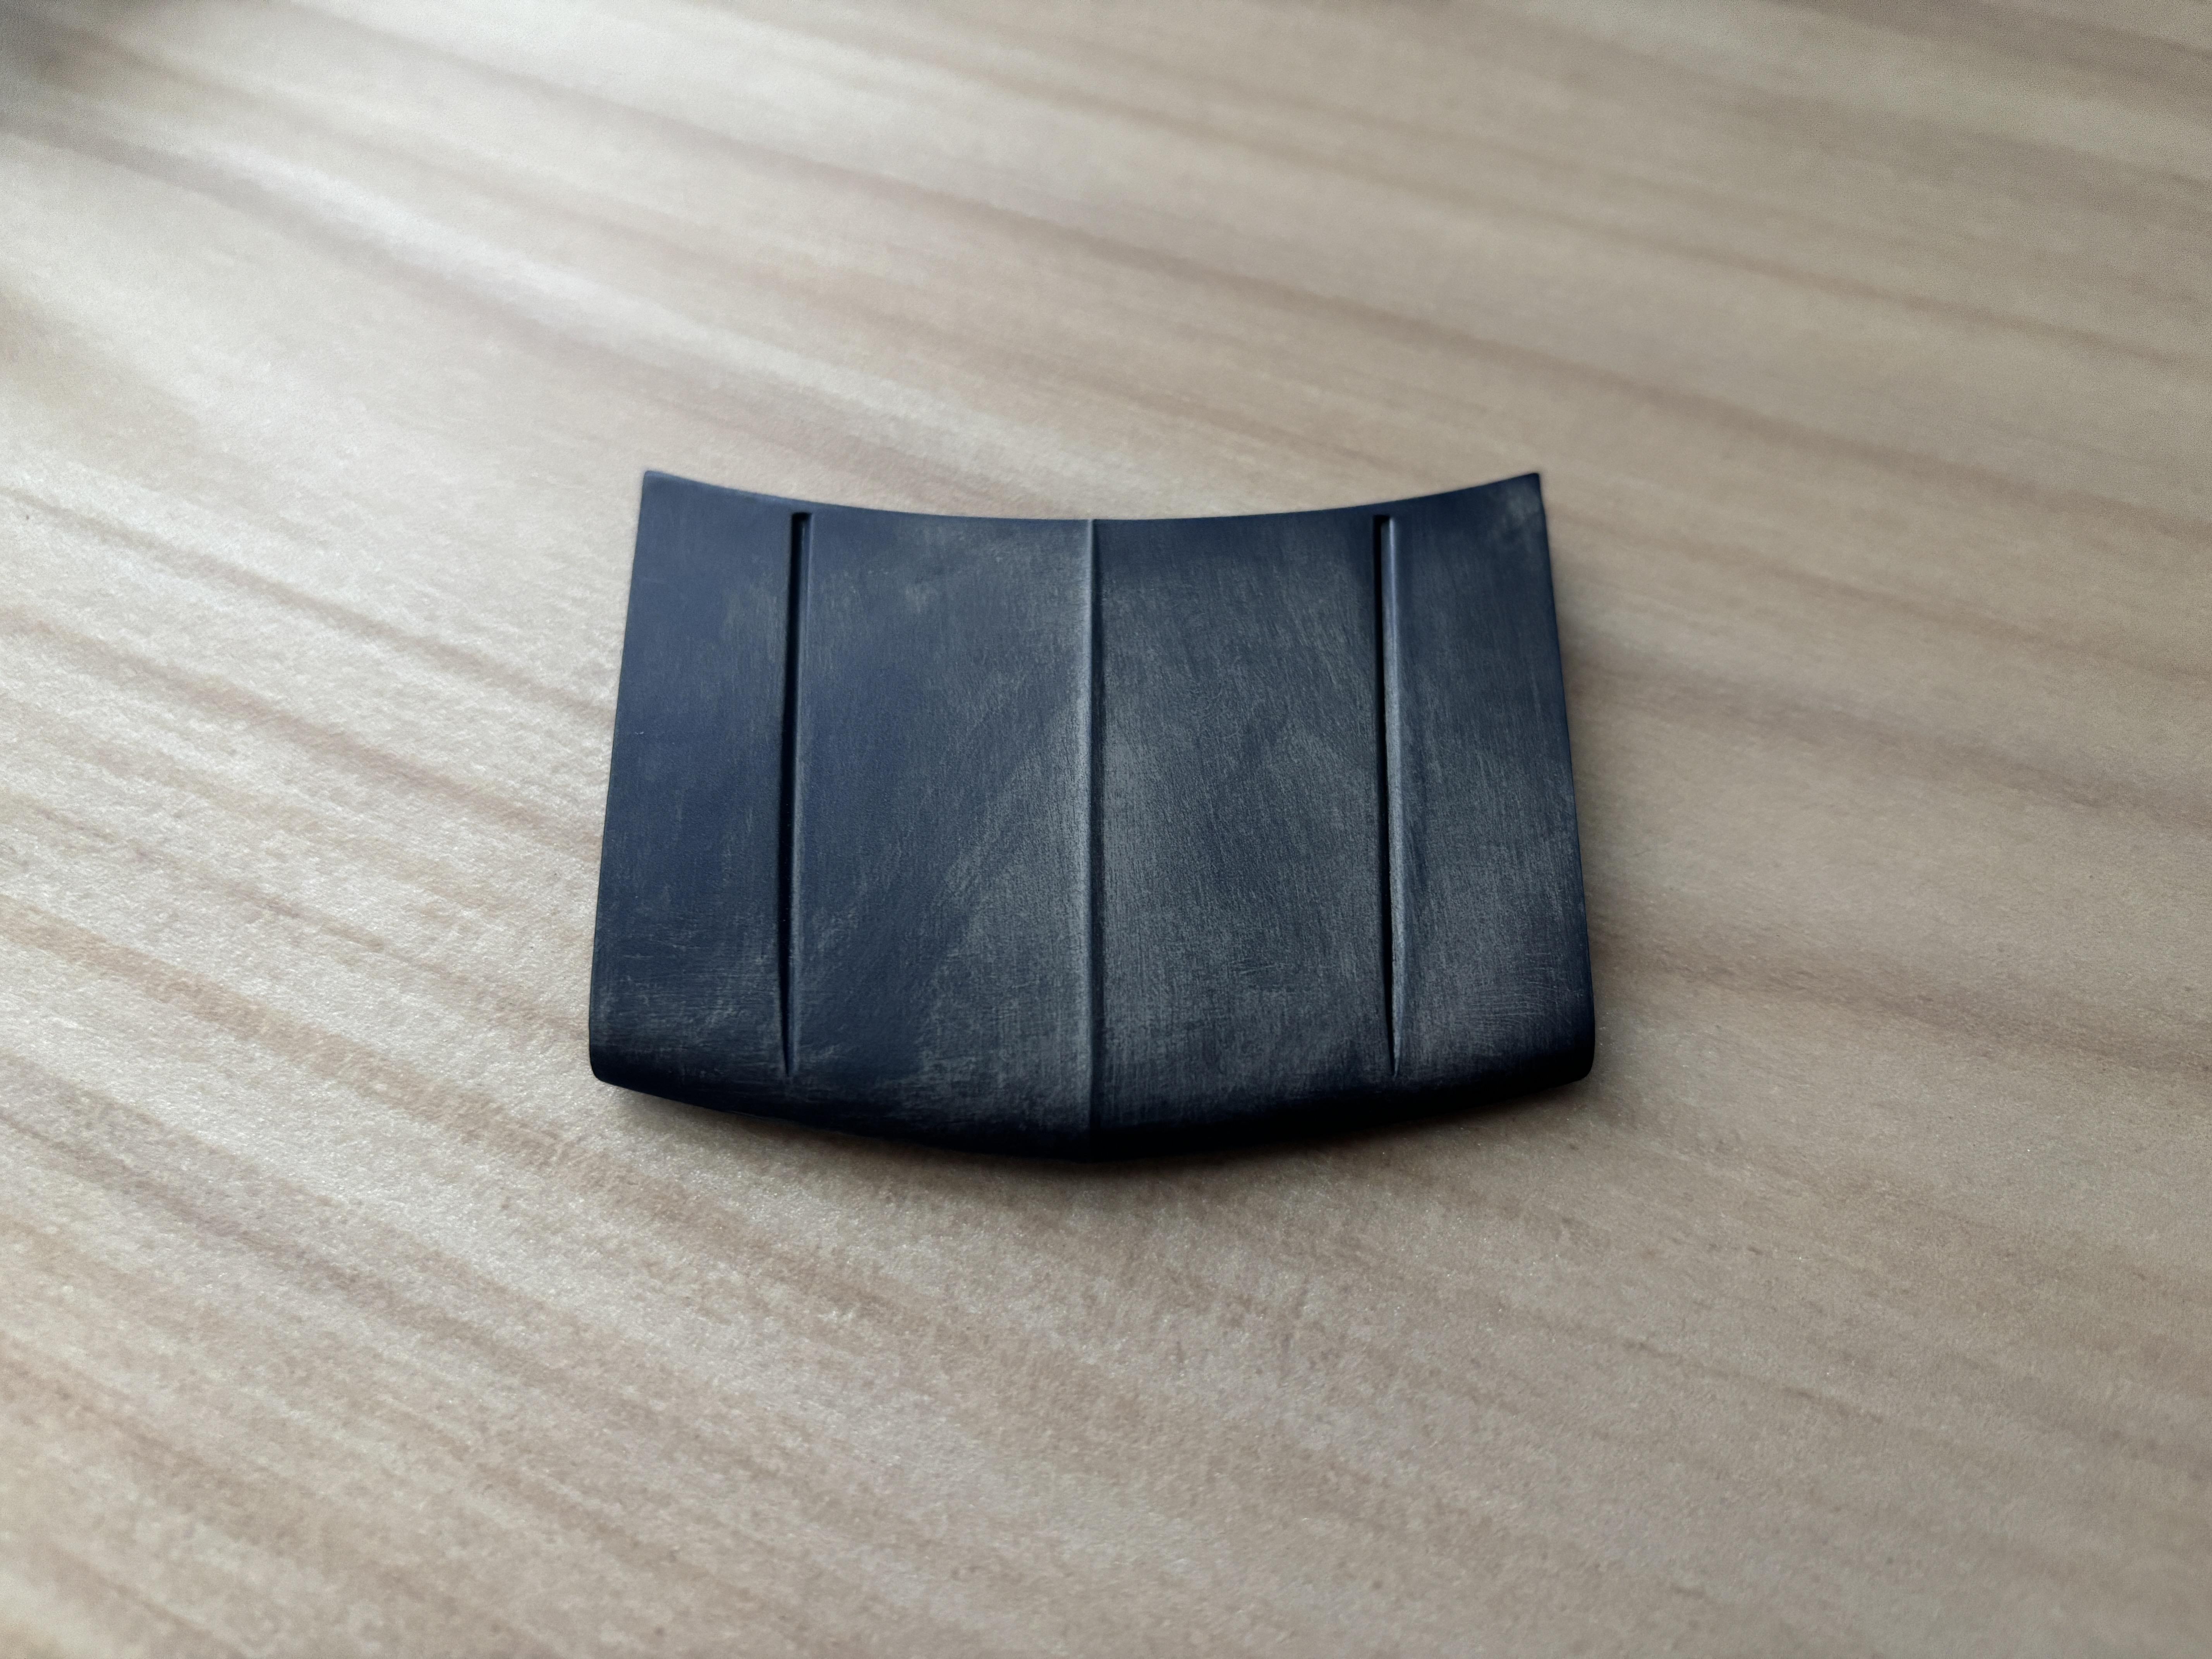
Here's my next project: A 1992 Chevy C-1500 Silverado with the Sport Appearance package. Though the Sport has many visual similarities with the 454 SS performance truck, the Sport was essentially just a regular Silverado model with a sportier shell. This will be a fairly straightforward curbside build, which will be a relief after having spent so much time on the 1996 Tahoe PPV conversion project I'm about to complete. I like to alternate between complicated and simple projects. A little backstory behind my choice: In an effort to keep things as simple as possible, I looked at the recent issue of the AMT 1992 Silverado kit and looked at what I could build with just the box stock options. I simply couldn't pass up the opportunity to use the Sport decal sheets: So why a 1992? I did some research and the Sport package seems to have been offered from 1989-1997, with the Sport exterior decals being changed for 1992. The decal sheet carries both the 1989-1991 Sport decals and the 1992-1997 versions. I like the 1992 version more with the larger canted "Sport" decal on the side of the bed. I opened up the kit and began the initial prepping process, including removing parts from the sprues. Since it's a snap kit, there are minimal parts. I only found two issues with the production of the kit itself. The first one is this pinhole on top of the dash that I'll fix with some putty: The second is the warped hood. Since this will be a curbside build, I'm going to glue the hood shut. But it is a bit annoying that the hood on the AMT C-3500 Dually companion kit that I built last year had the same exact warped hood, even on the same side. Maybe its just my bad luck. Overall, this should make for a straightforward build. Stay tuned.
-
Google Chrome user here - When I try to drag and drop a photo onto a post, I no longer get the maximum limit message. However, I do get the following: You cannot paste images directly. Upload or insert images from URL.
-
My intent was simply to share what I learned based on my own first hand experience with the product and what I've consistently seen on videos and forums online. Did you do any prep on the surface before spraying the chrome? I always sand all of my parts with 600 grit and then wash them in warm water mixed with Dawn before painting.
-
Something to remember is that unlike other chrome paint options, Revell doesn't require a black base coat. You can spray it over bare plastic or primer and it'll look just as good. So you're already able to cut out the cost of buying a black base coat when purchasing Revell chrome. It'll still undoubtedly be too expensive for some, but just food for thought.
-
I'm at 8013 percent. I was going to start a new WIP thread but it's pointless now without the ability to load photos.
-
Thank you. The barn door conversion was definitely a learning opportunity for me. I'm about 80% satisfied it with, but I'm still happy I gave it a shot.
-
Thank you! I'm excited to get this one done.
-
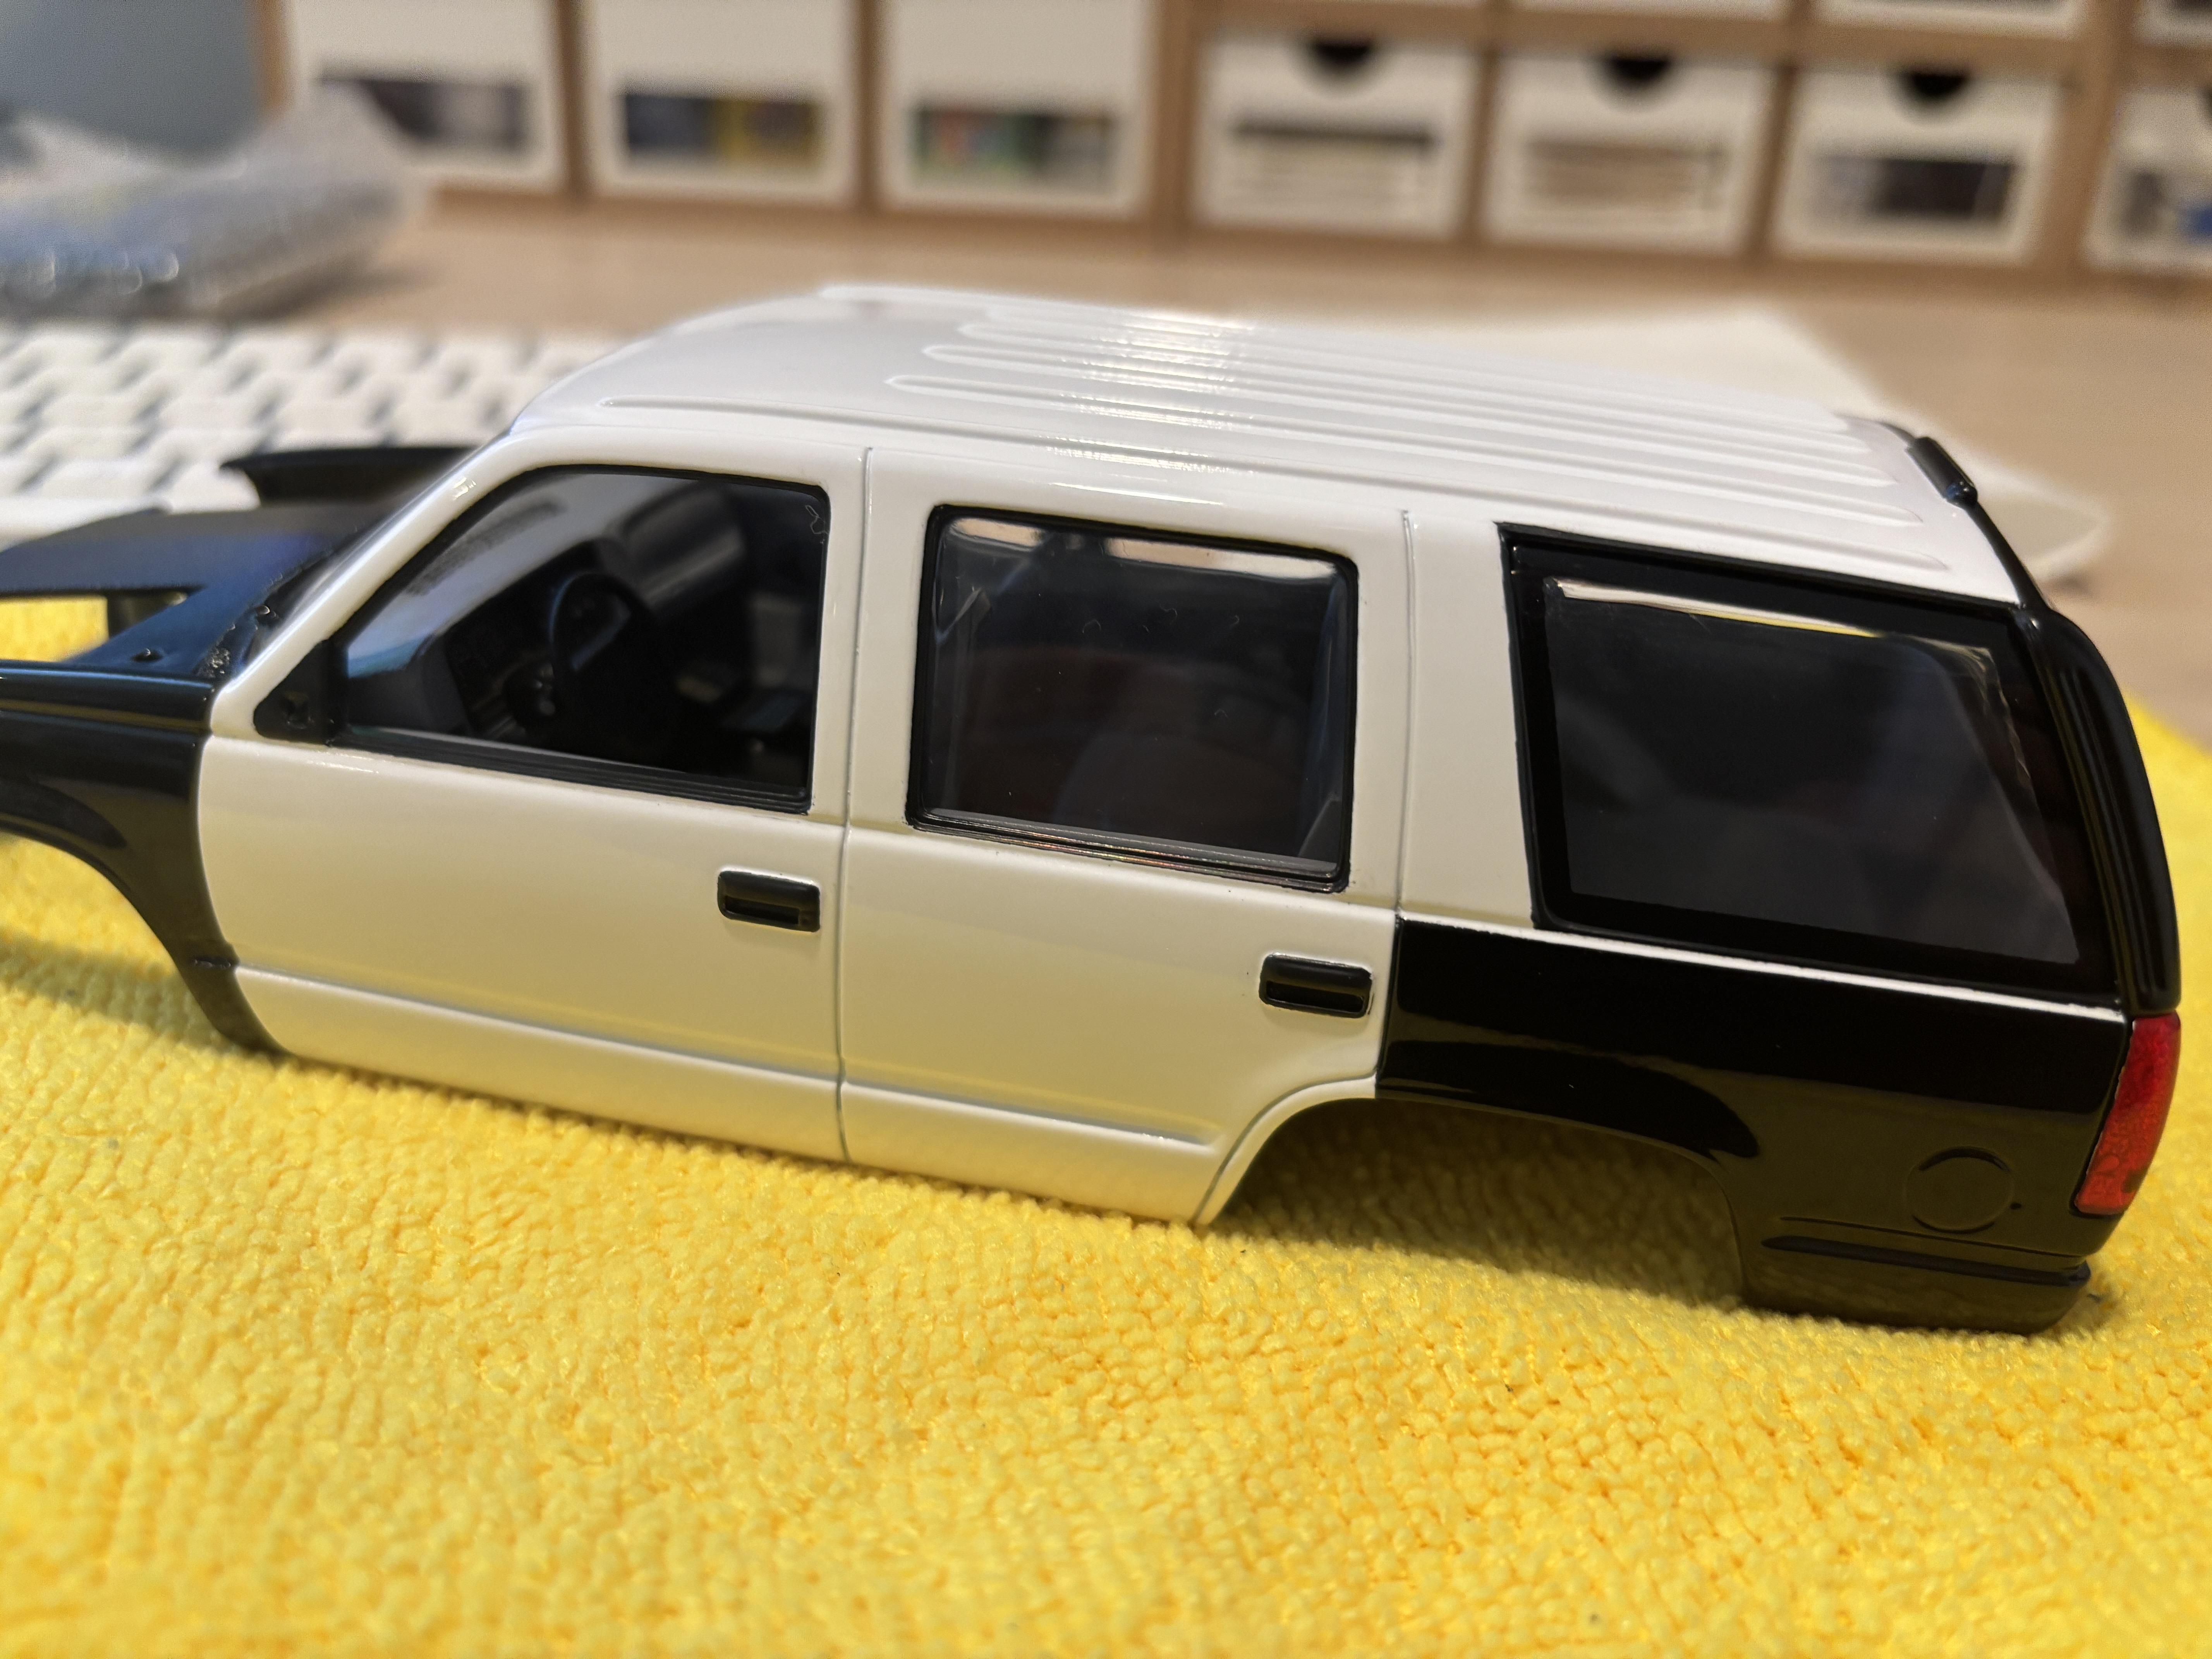
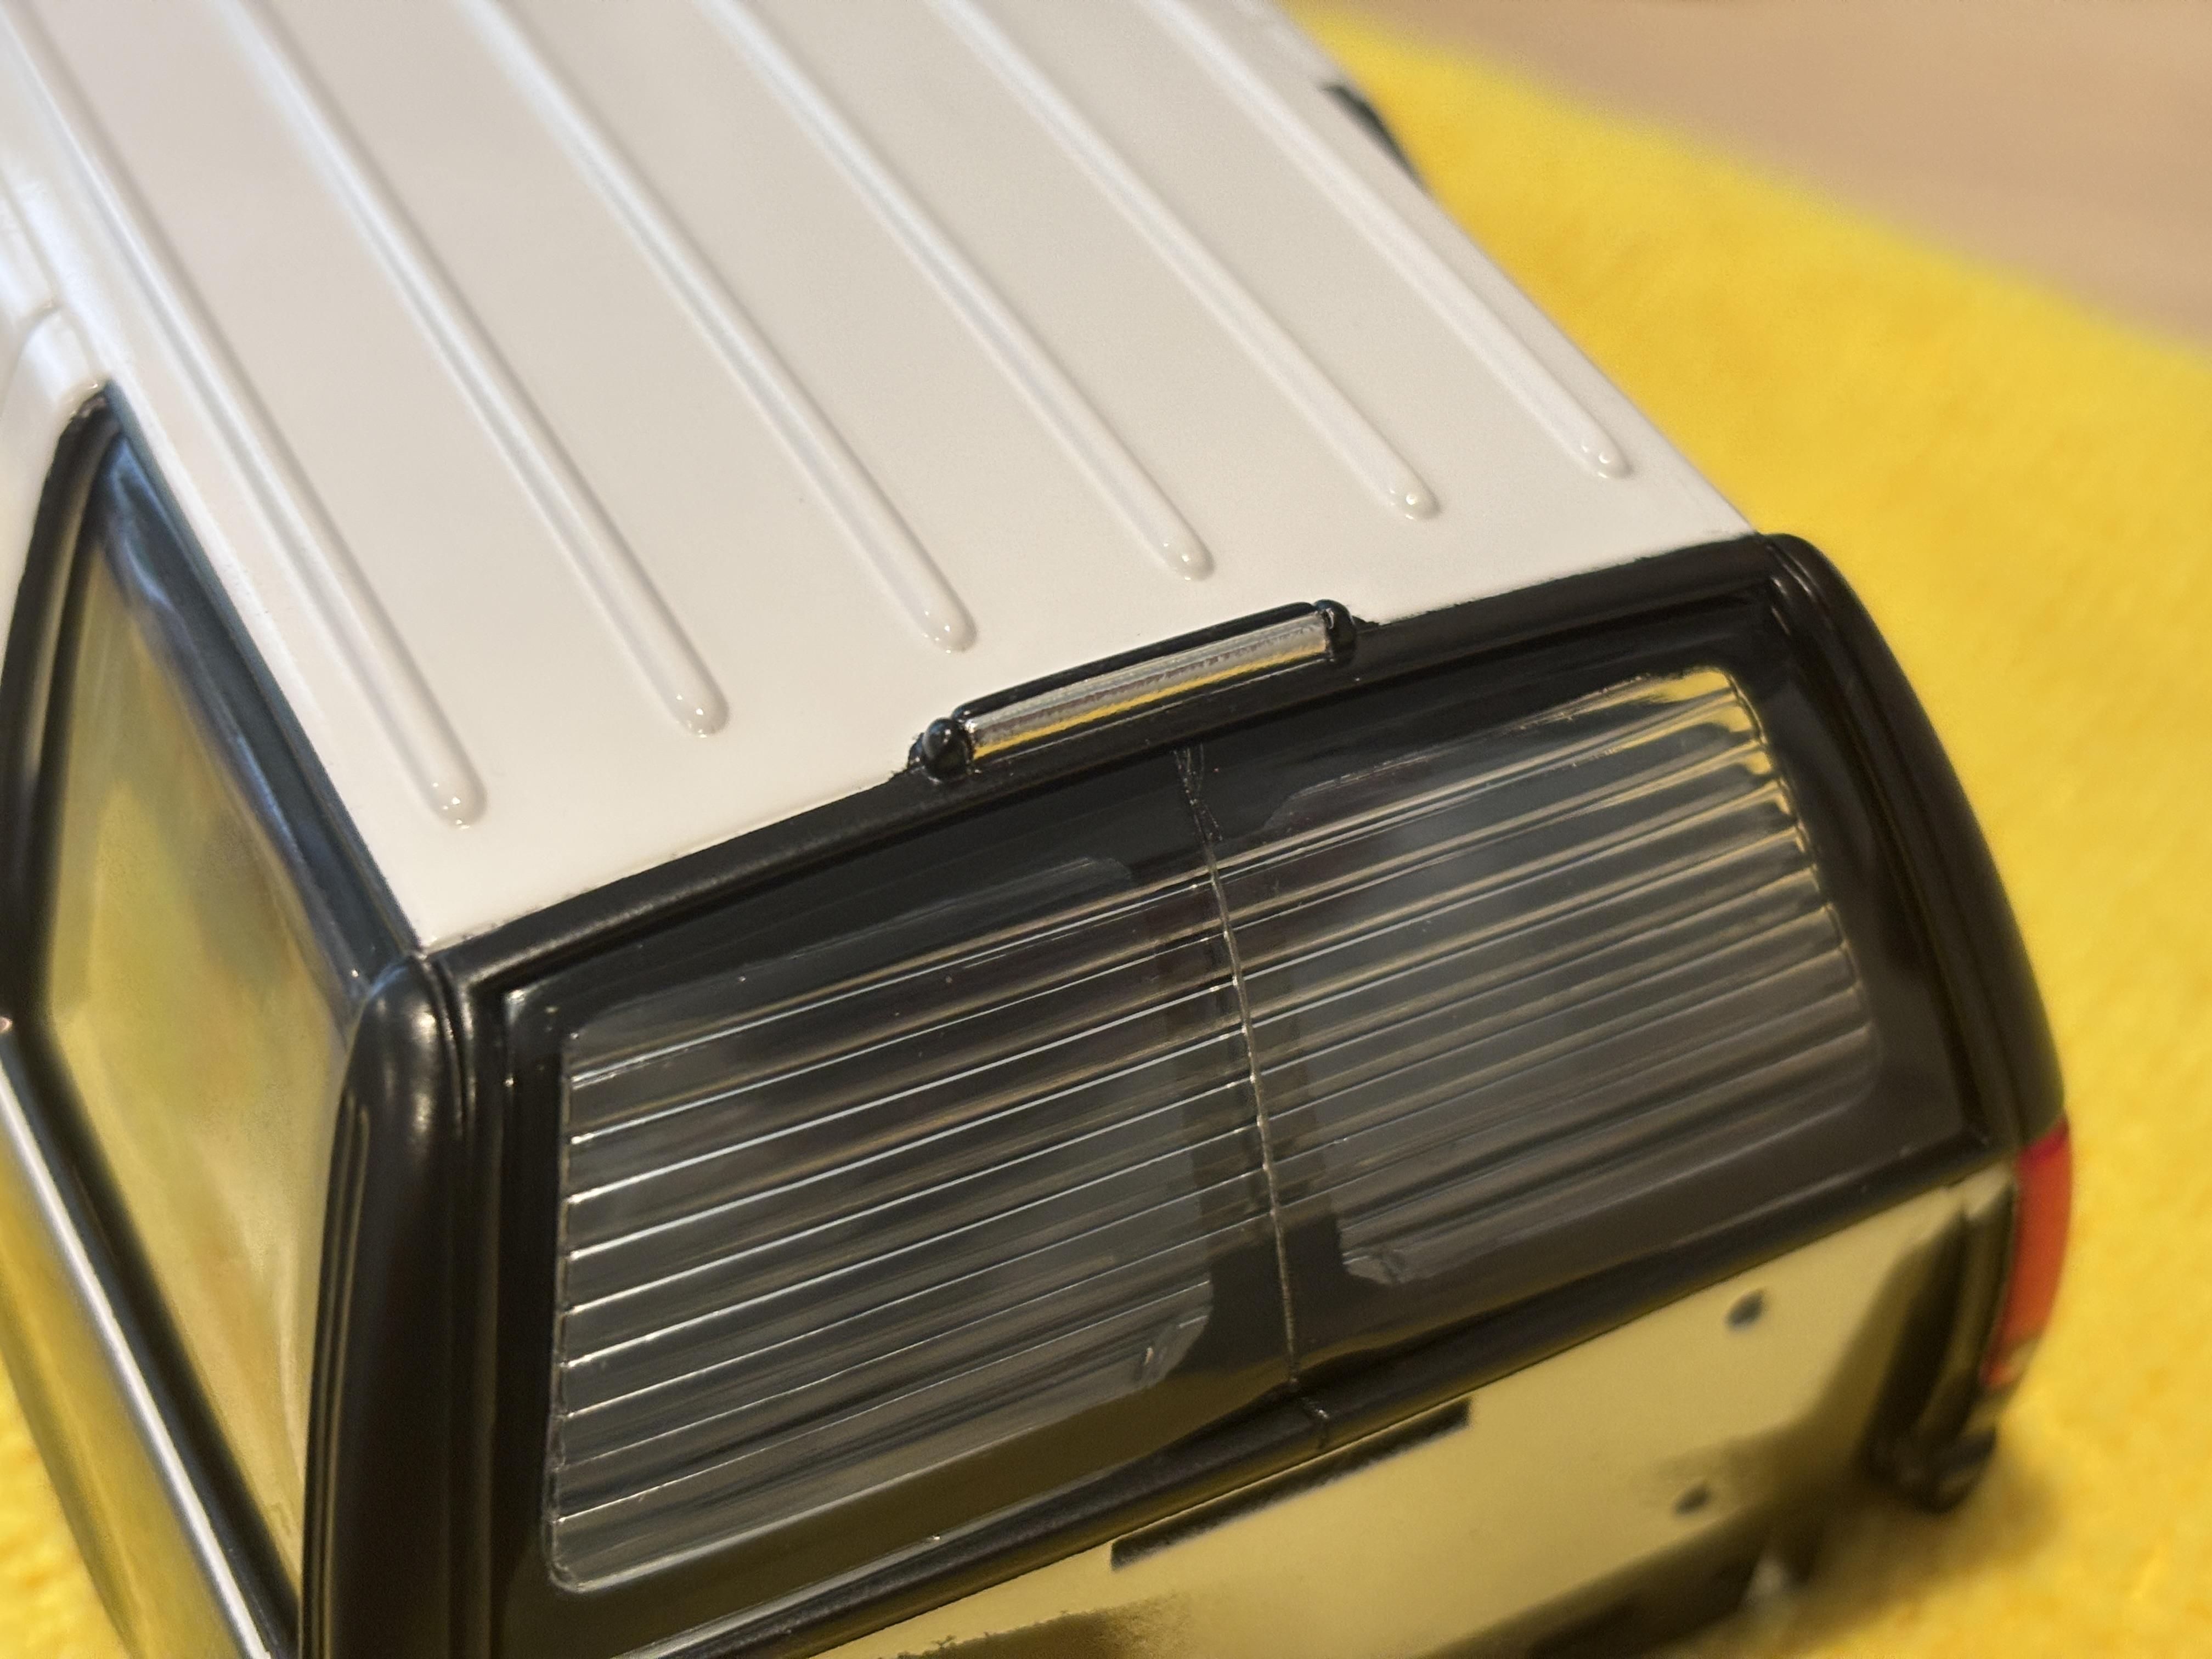
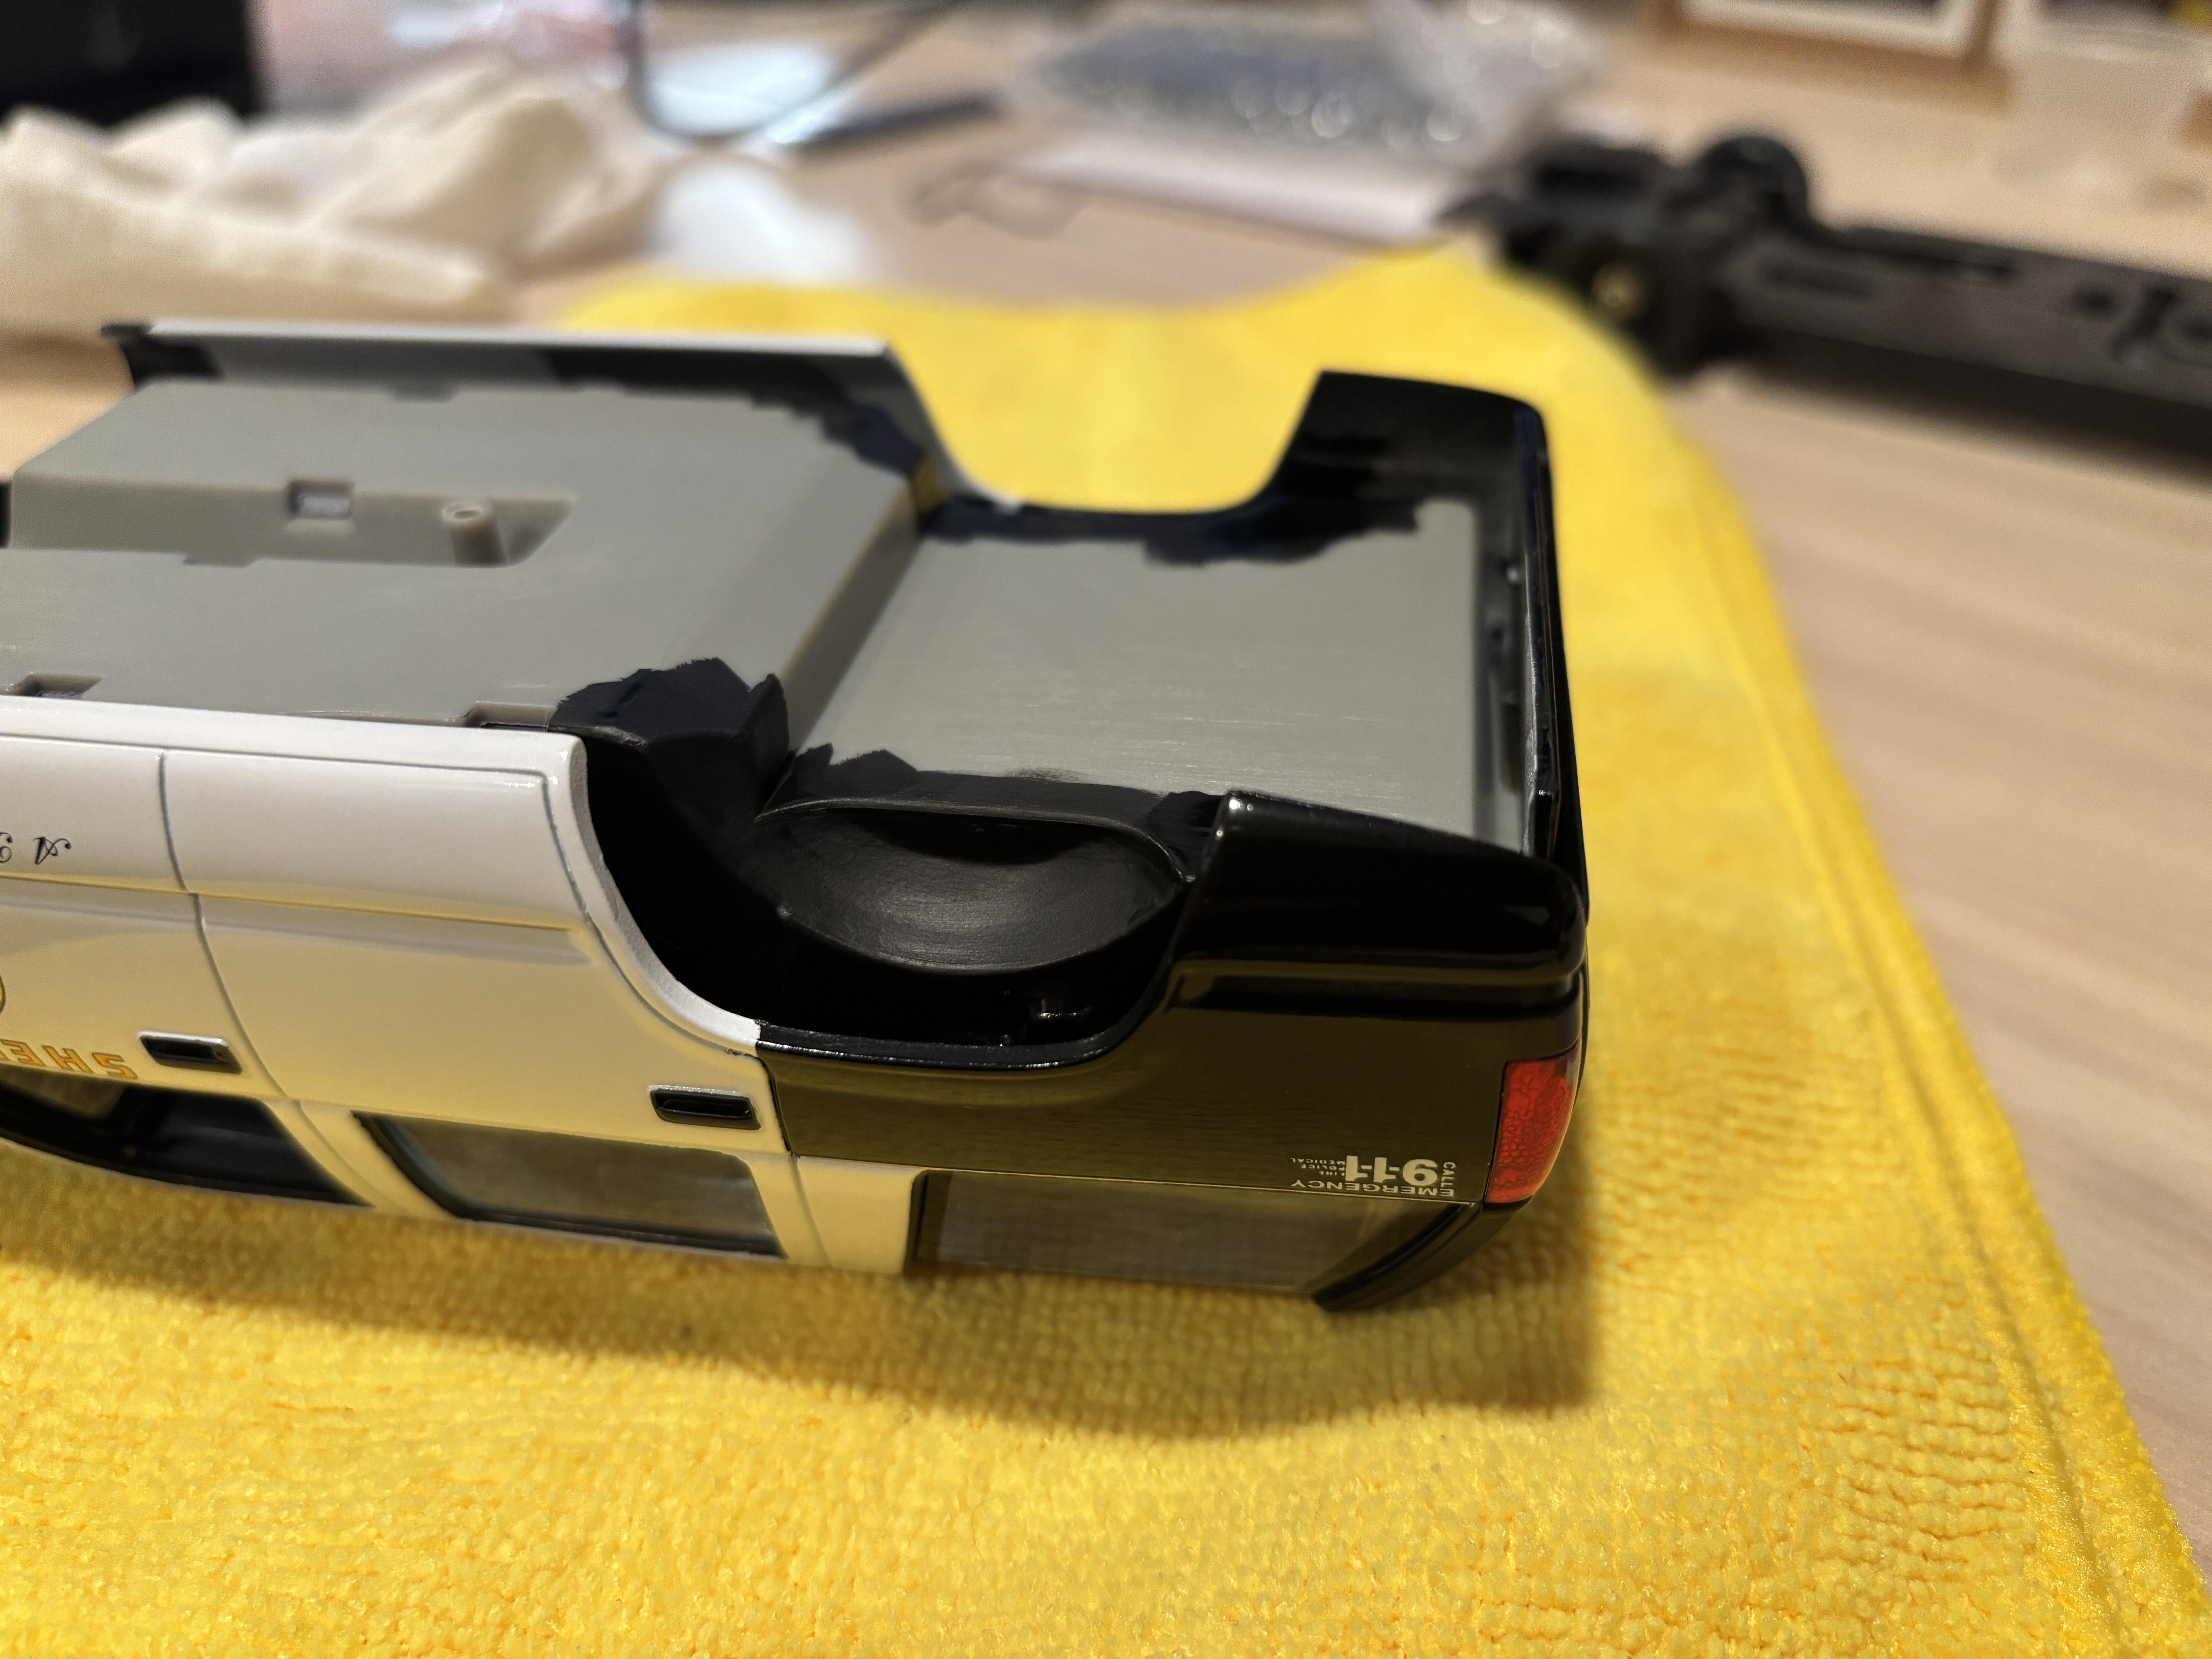
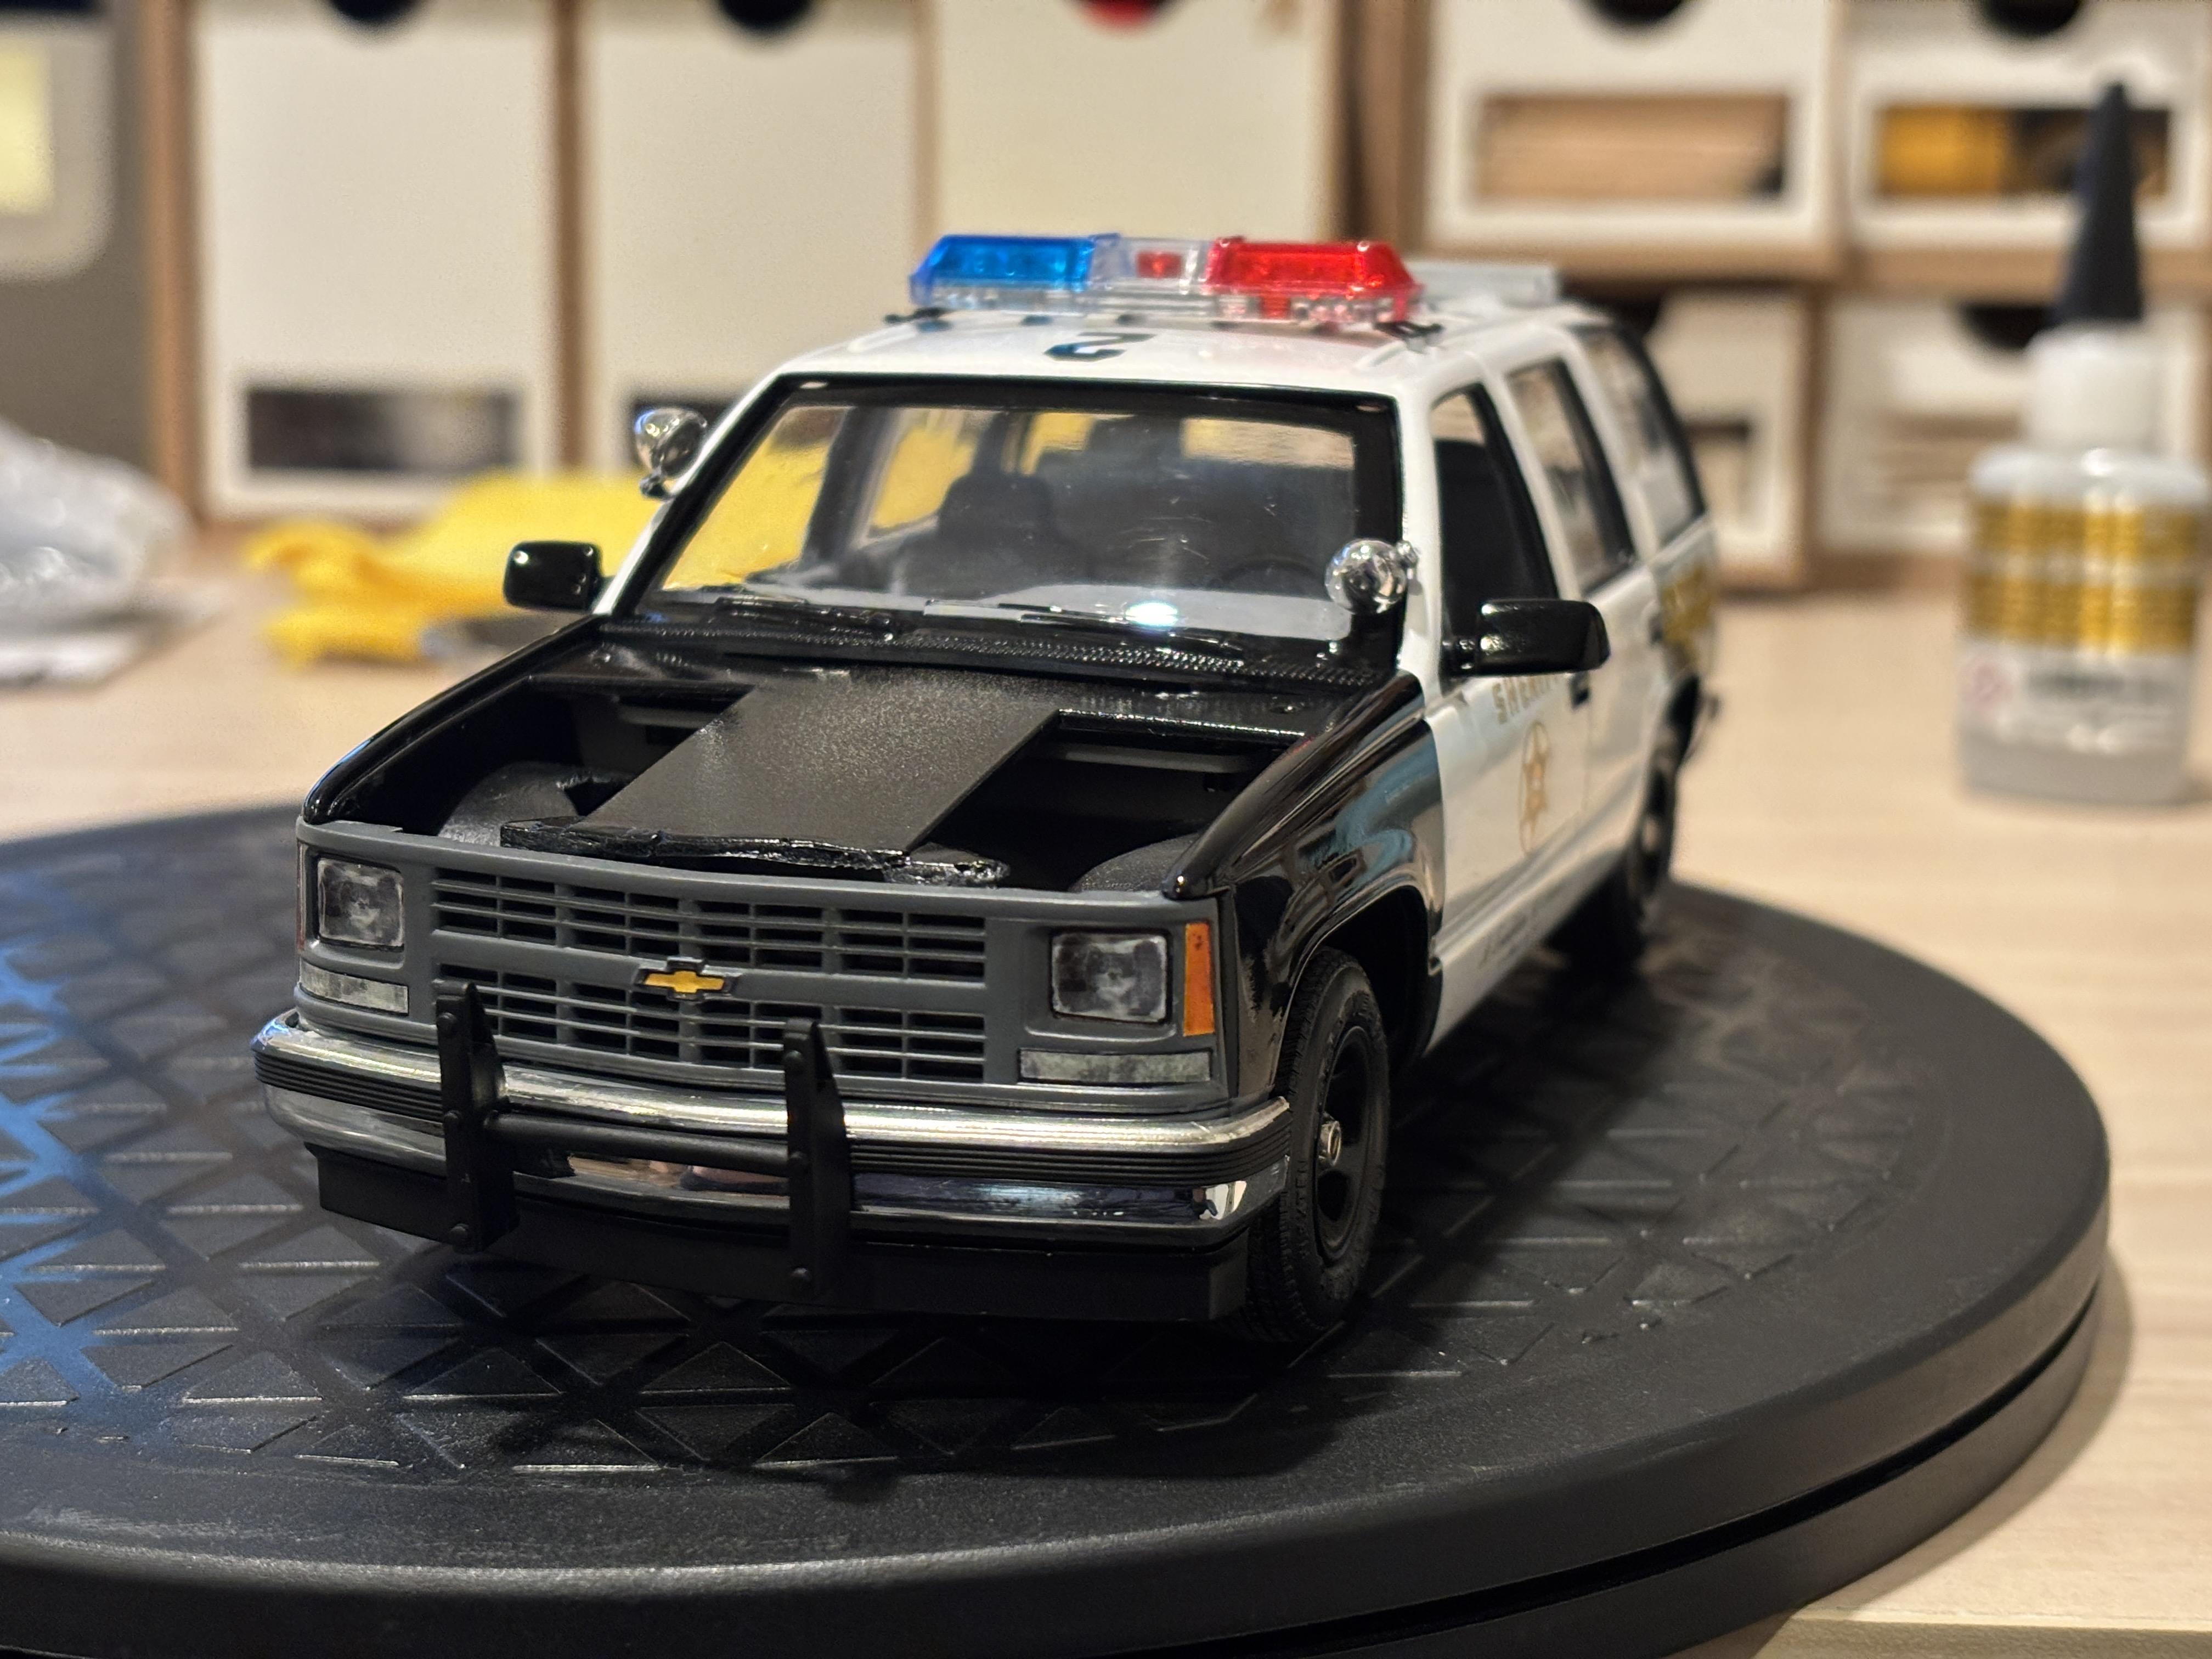
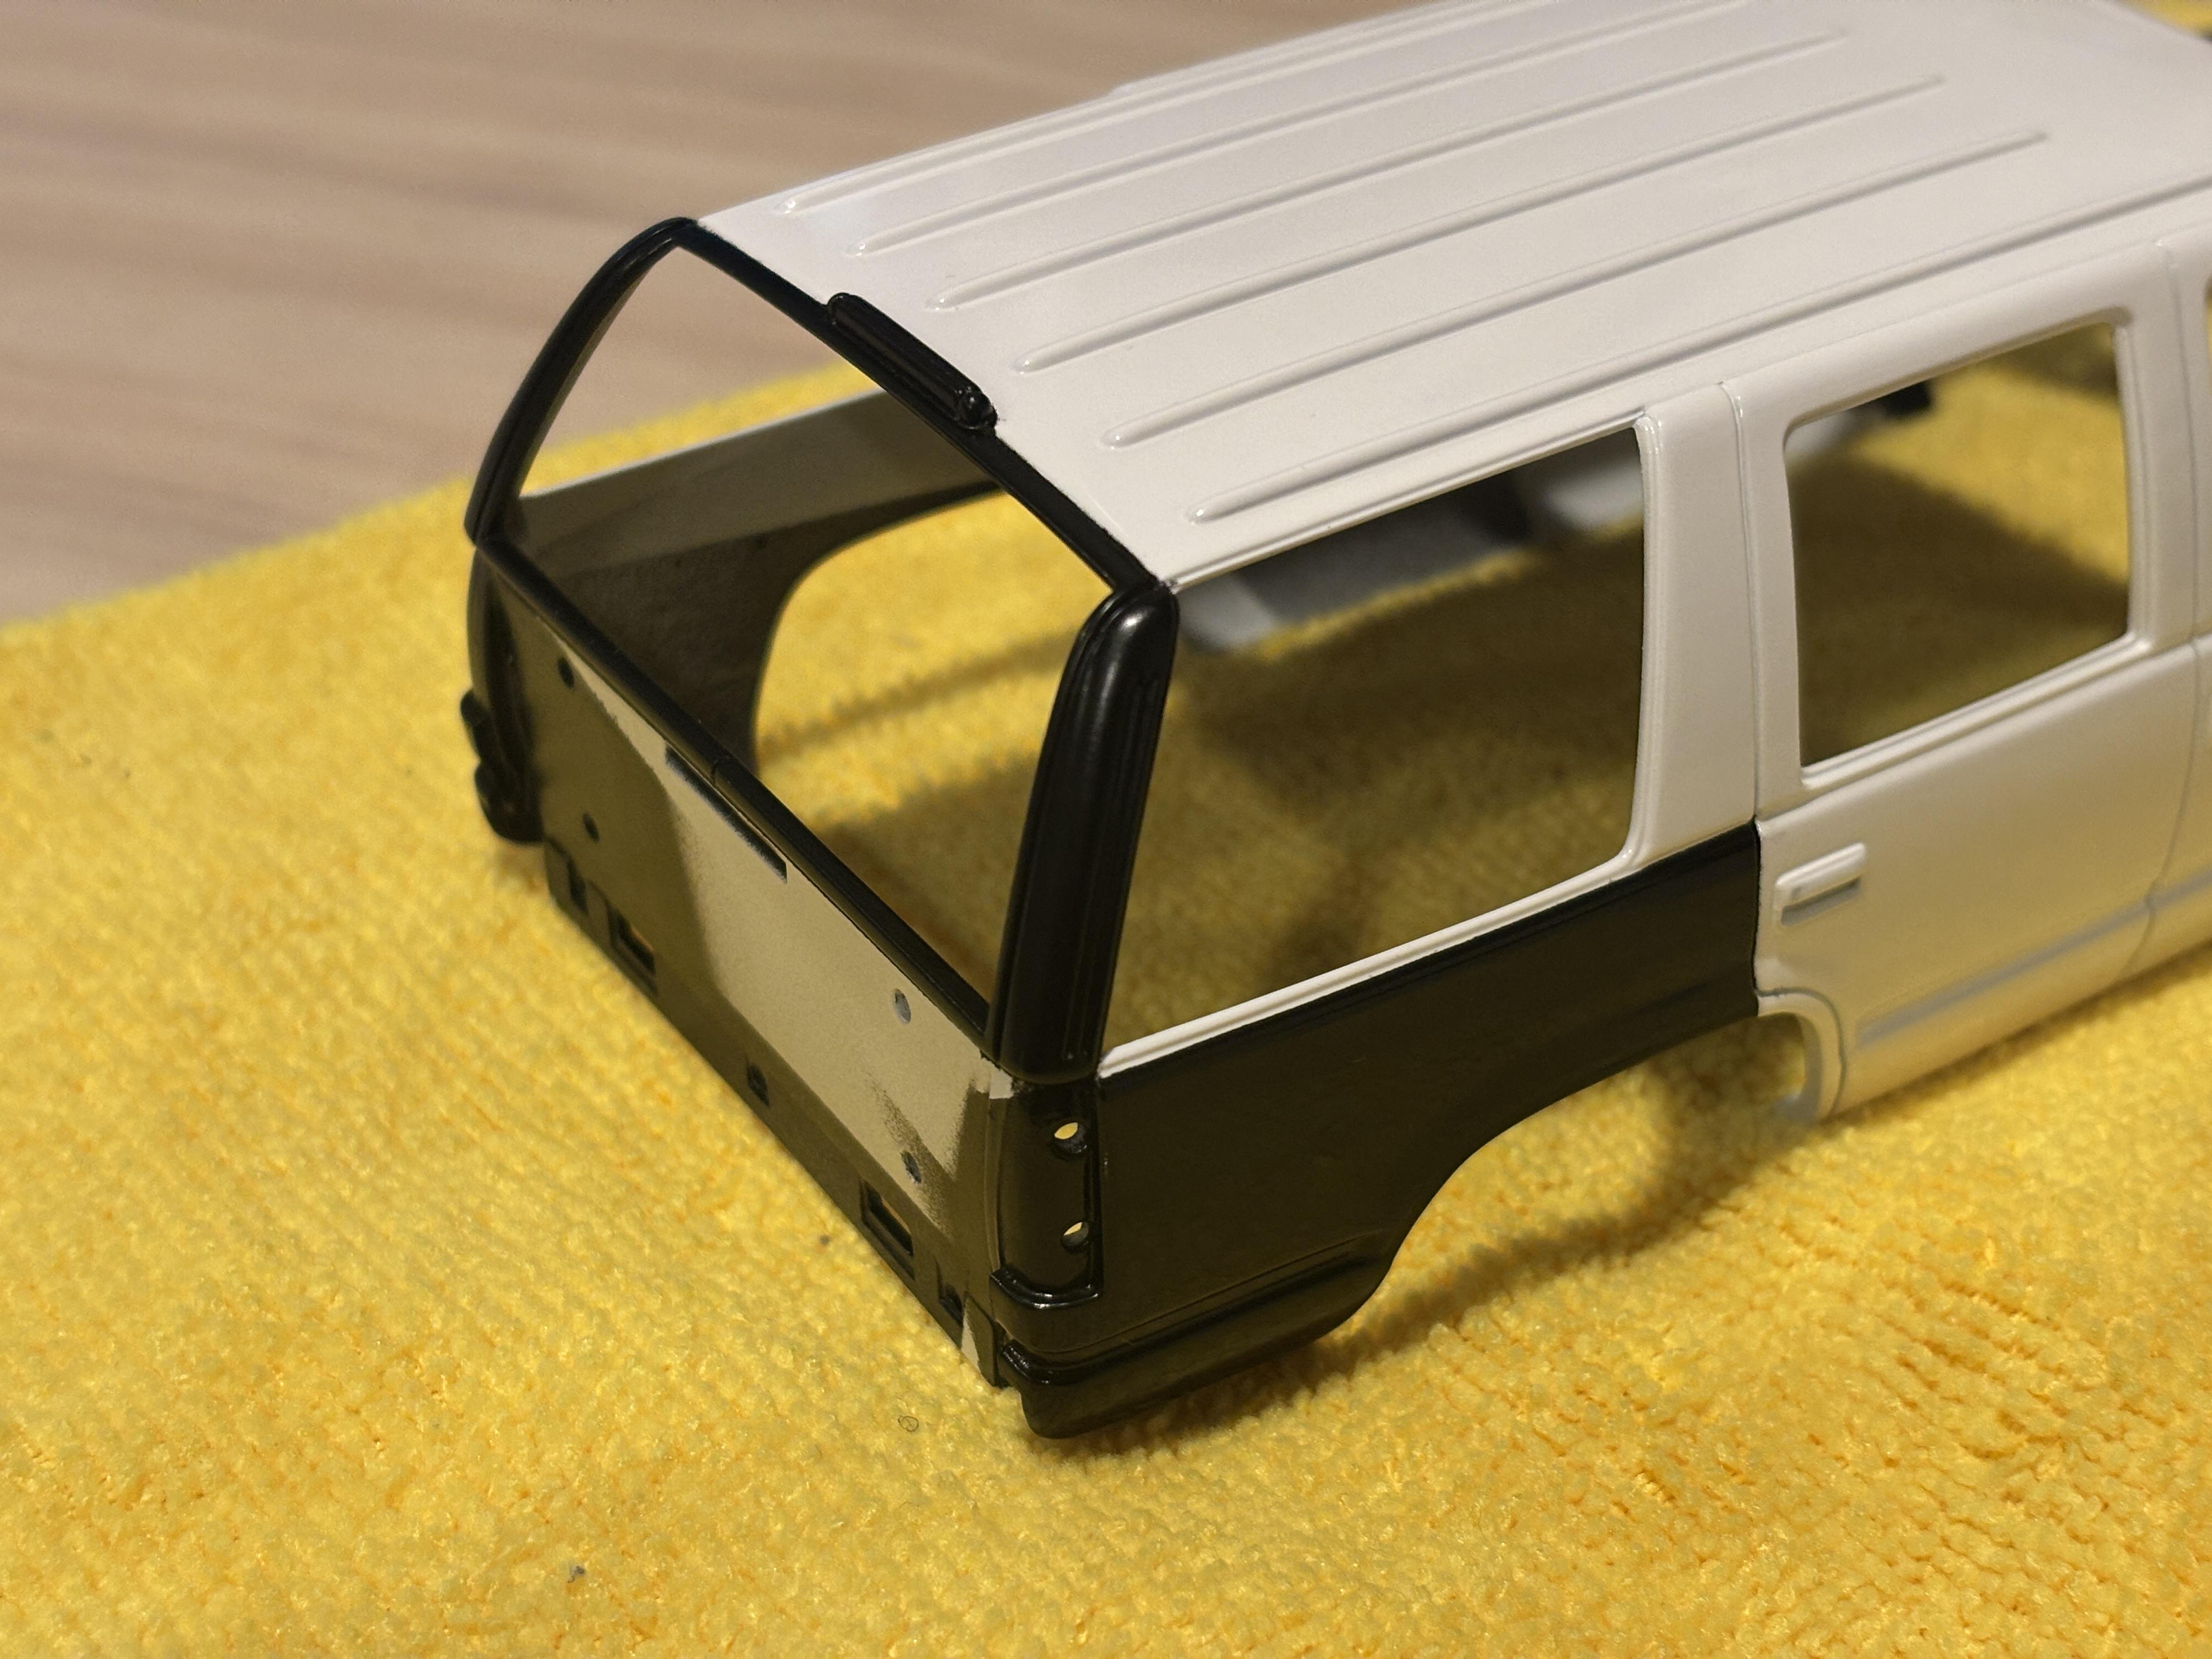
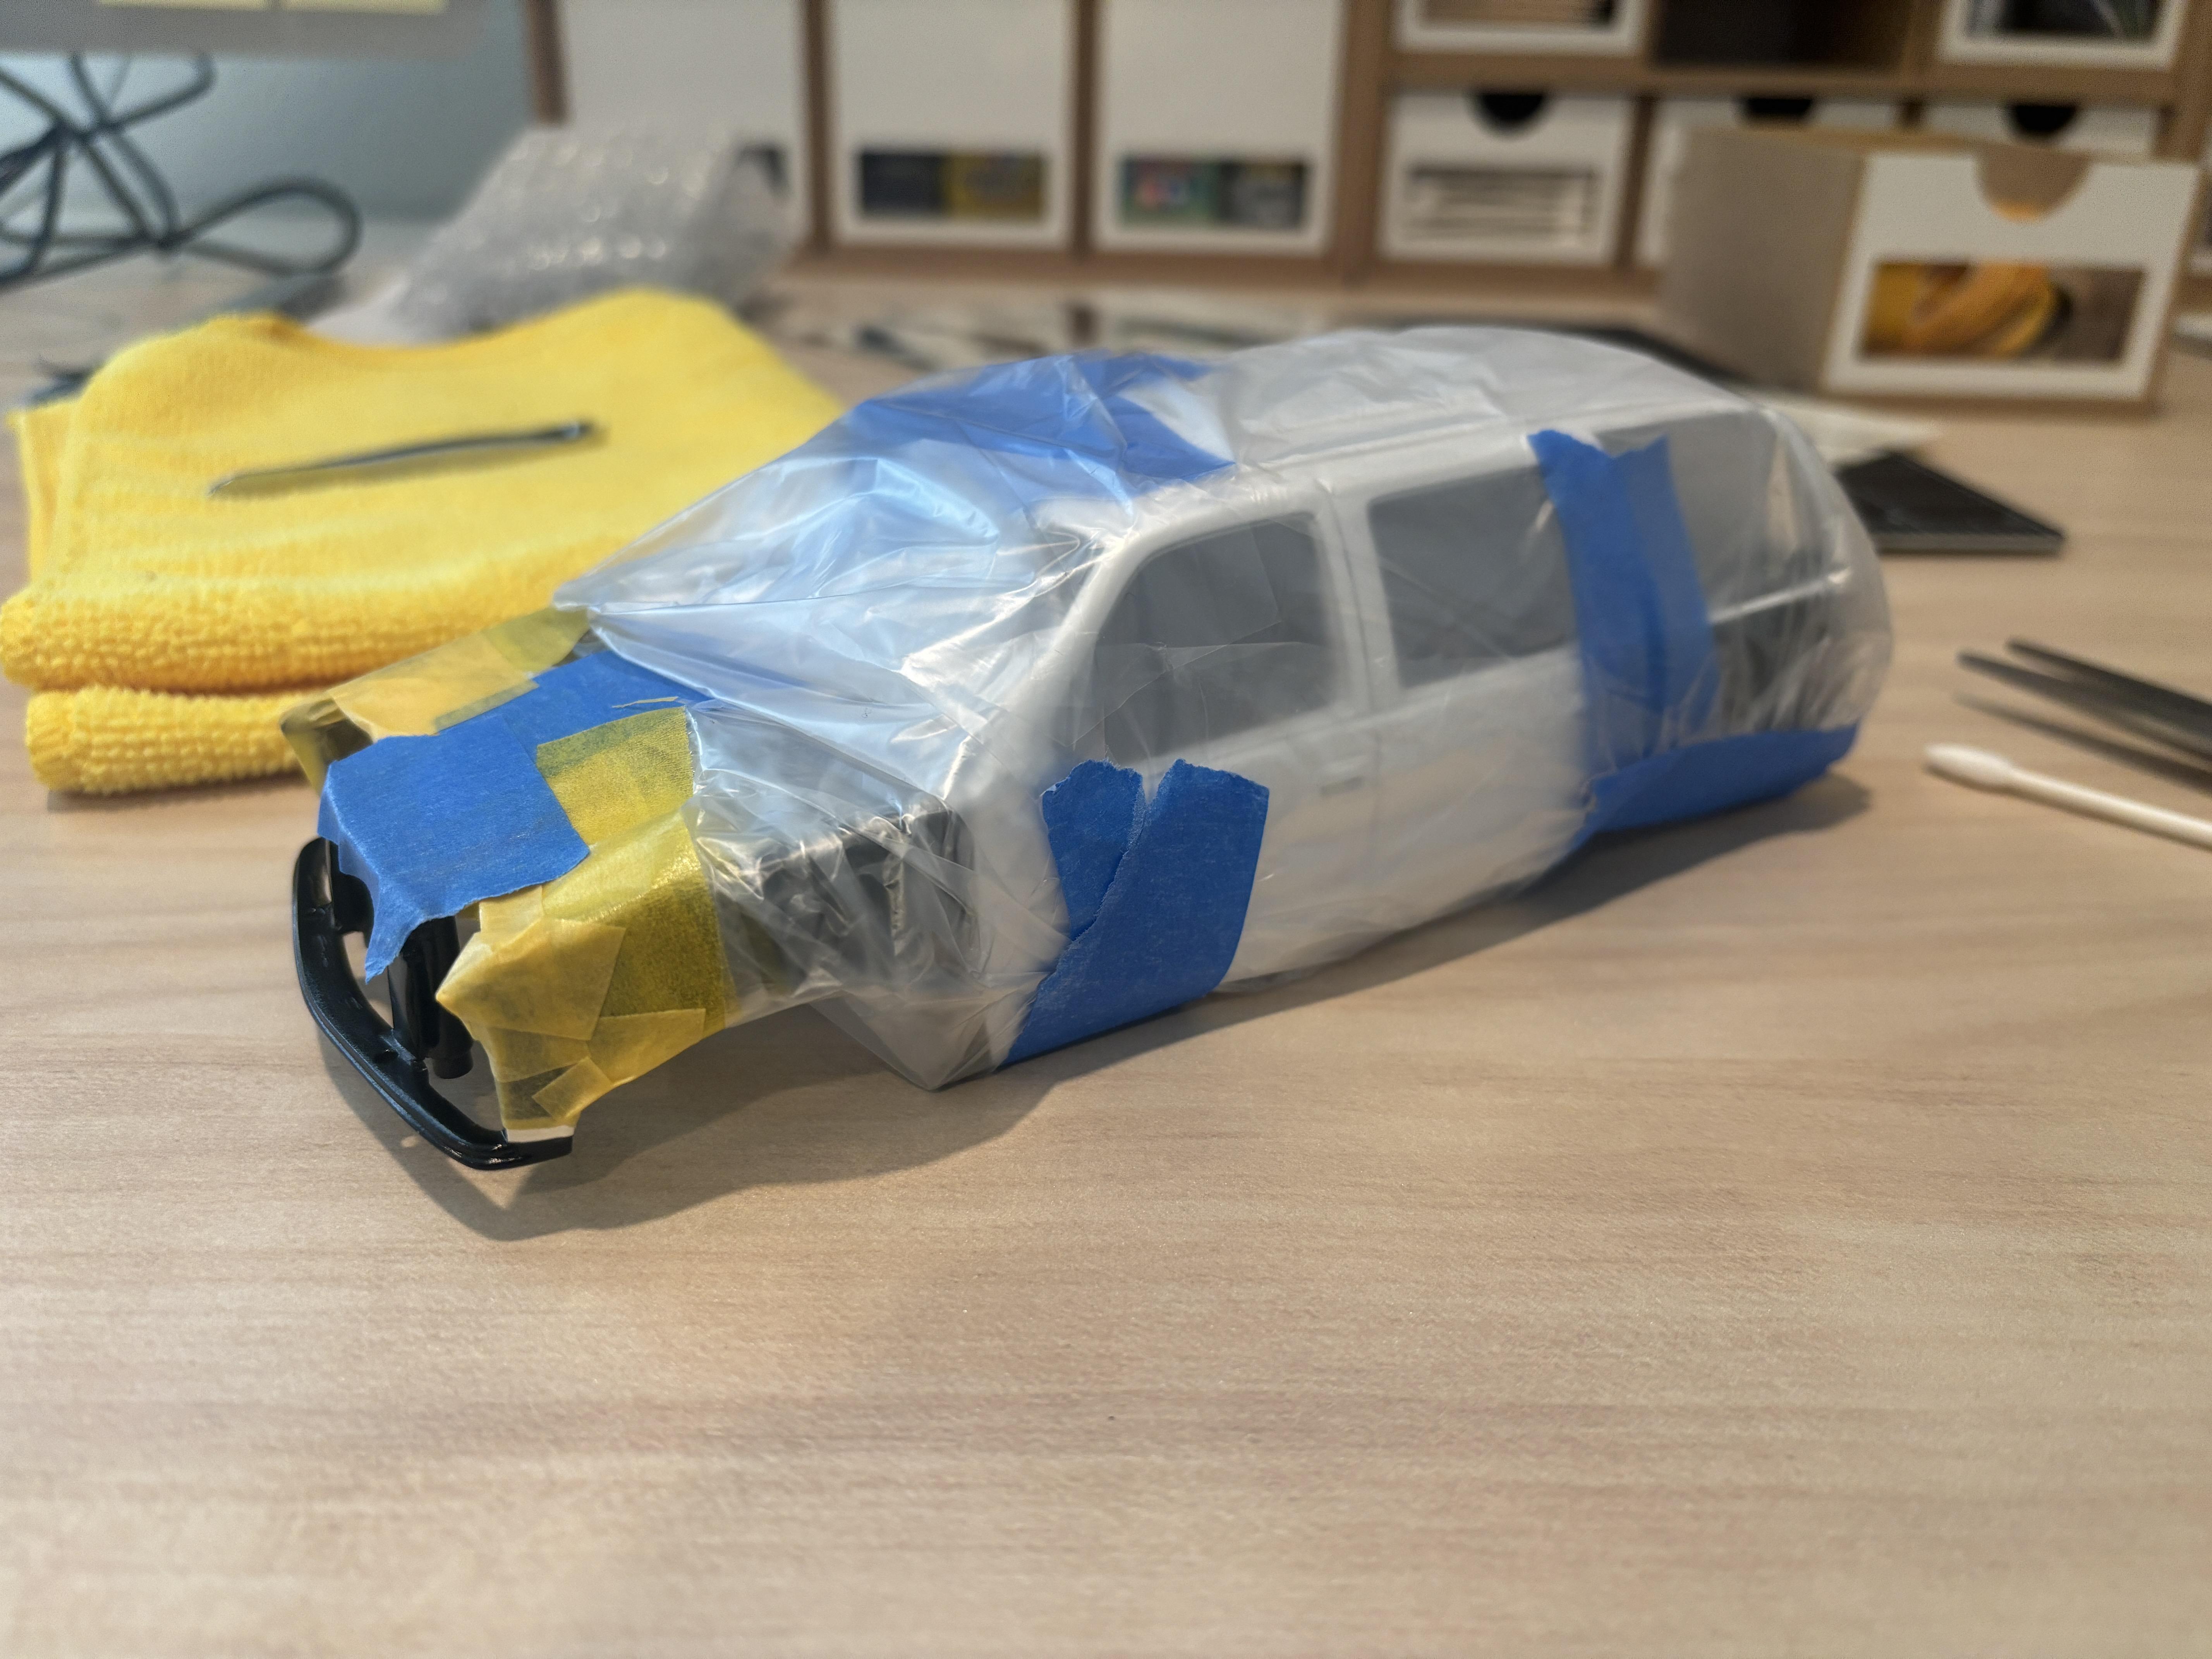
Today I worked on various tidbits, including painting the rubber seals around the windows. I've never liked doing this as it requires precision and I'm too much of a perfectionist. I tried one of the new AK Real Color Paint markers in rubber black and I loved it. The paint flows beautifully and I was able to wipe off excess paint with small triangular cotton swabs. I also used this same method for the door handles. I then made quick work of the third brake light. First I applied some bare metal foil: I then brush painted with Tamiya X-27 Clear Red: As I was beginning final assembly, I realized that the one-piece chassis only contains molded-in inner fenders for the front wheels. The back inner fenders are molded into the interior tub. I quickly brush painted some Vallejo black to make sure that they looked right: I made up my own "ghetto" stand to hold the side mirrors to the body while the glue dried: As of this post, the Tahoe is what I would call 95% done. The hood mishap definitely set me back. Tomorrow I will go through the paint process on it again and then let it dry for a week before I sand and polish it. For now, here's a sneak peek of the nearly final result:
-
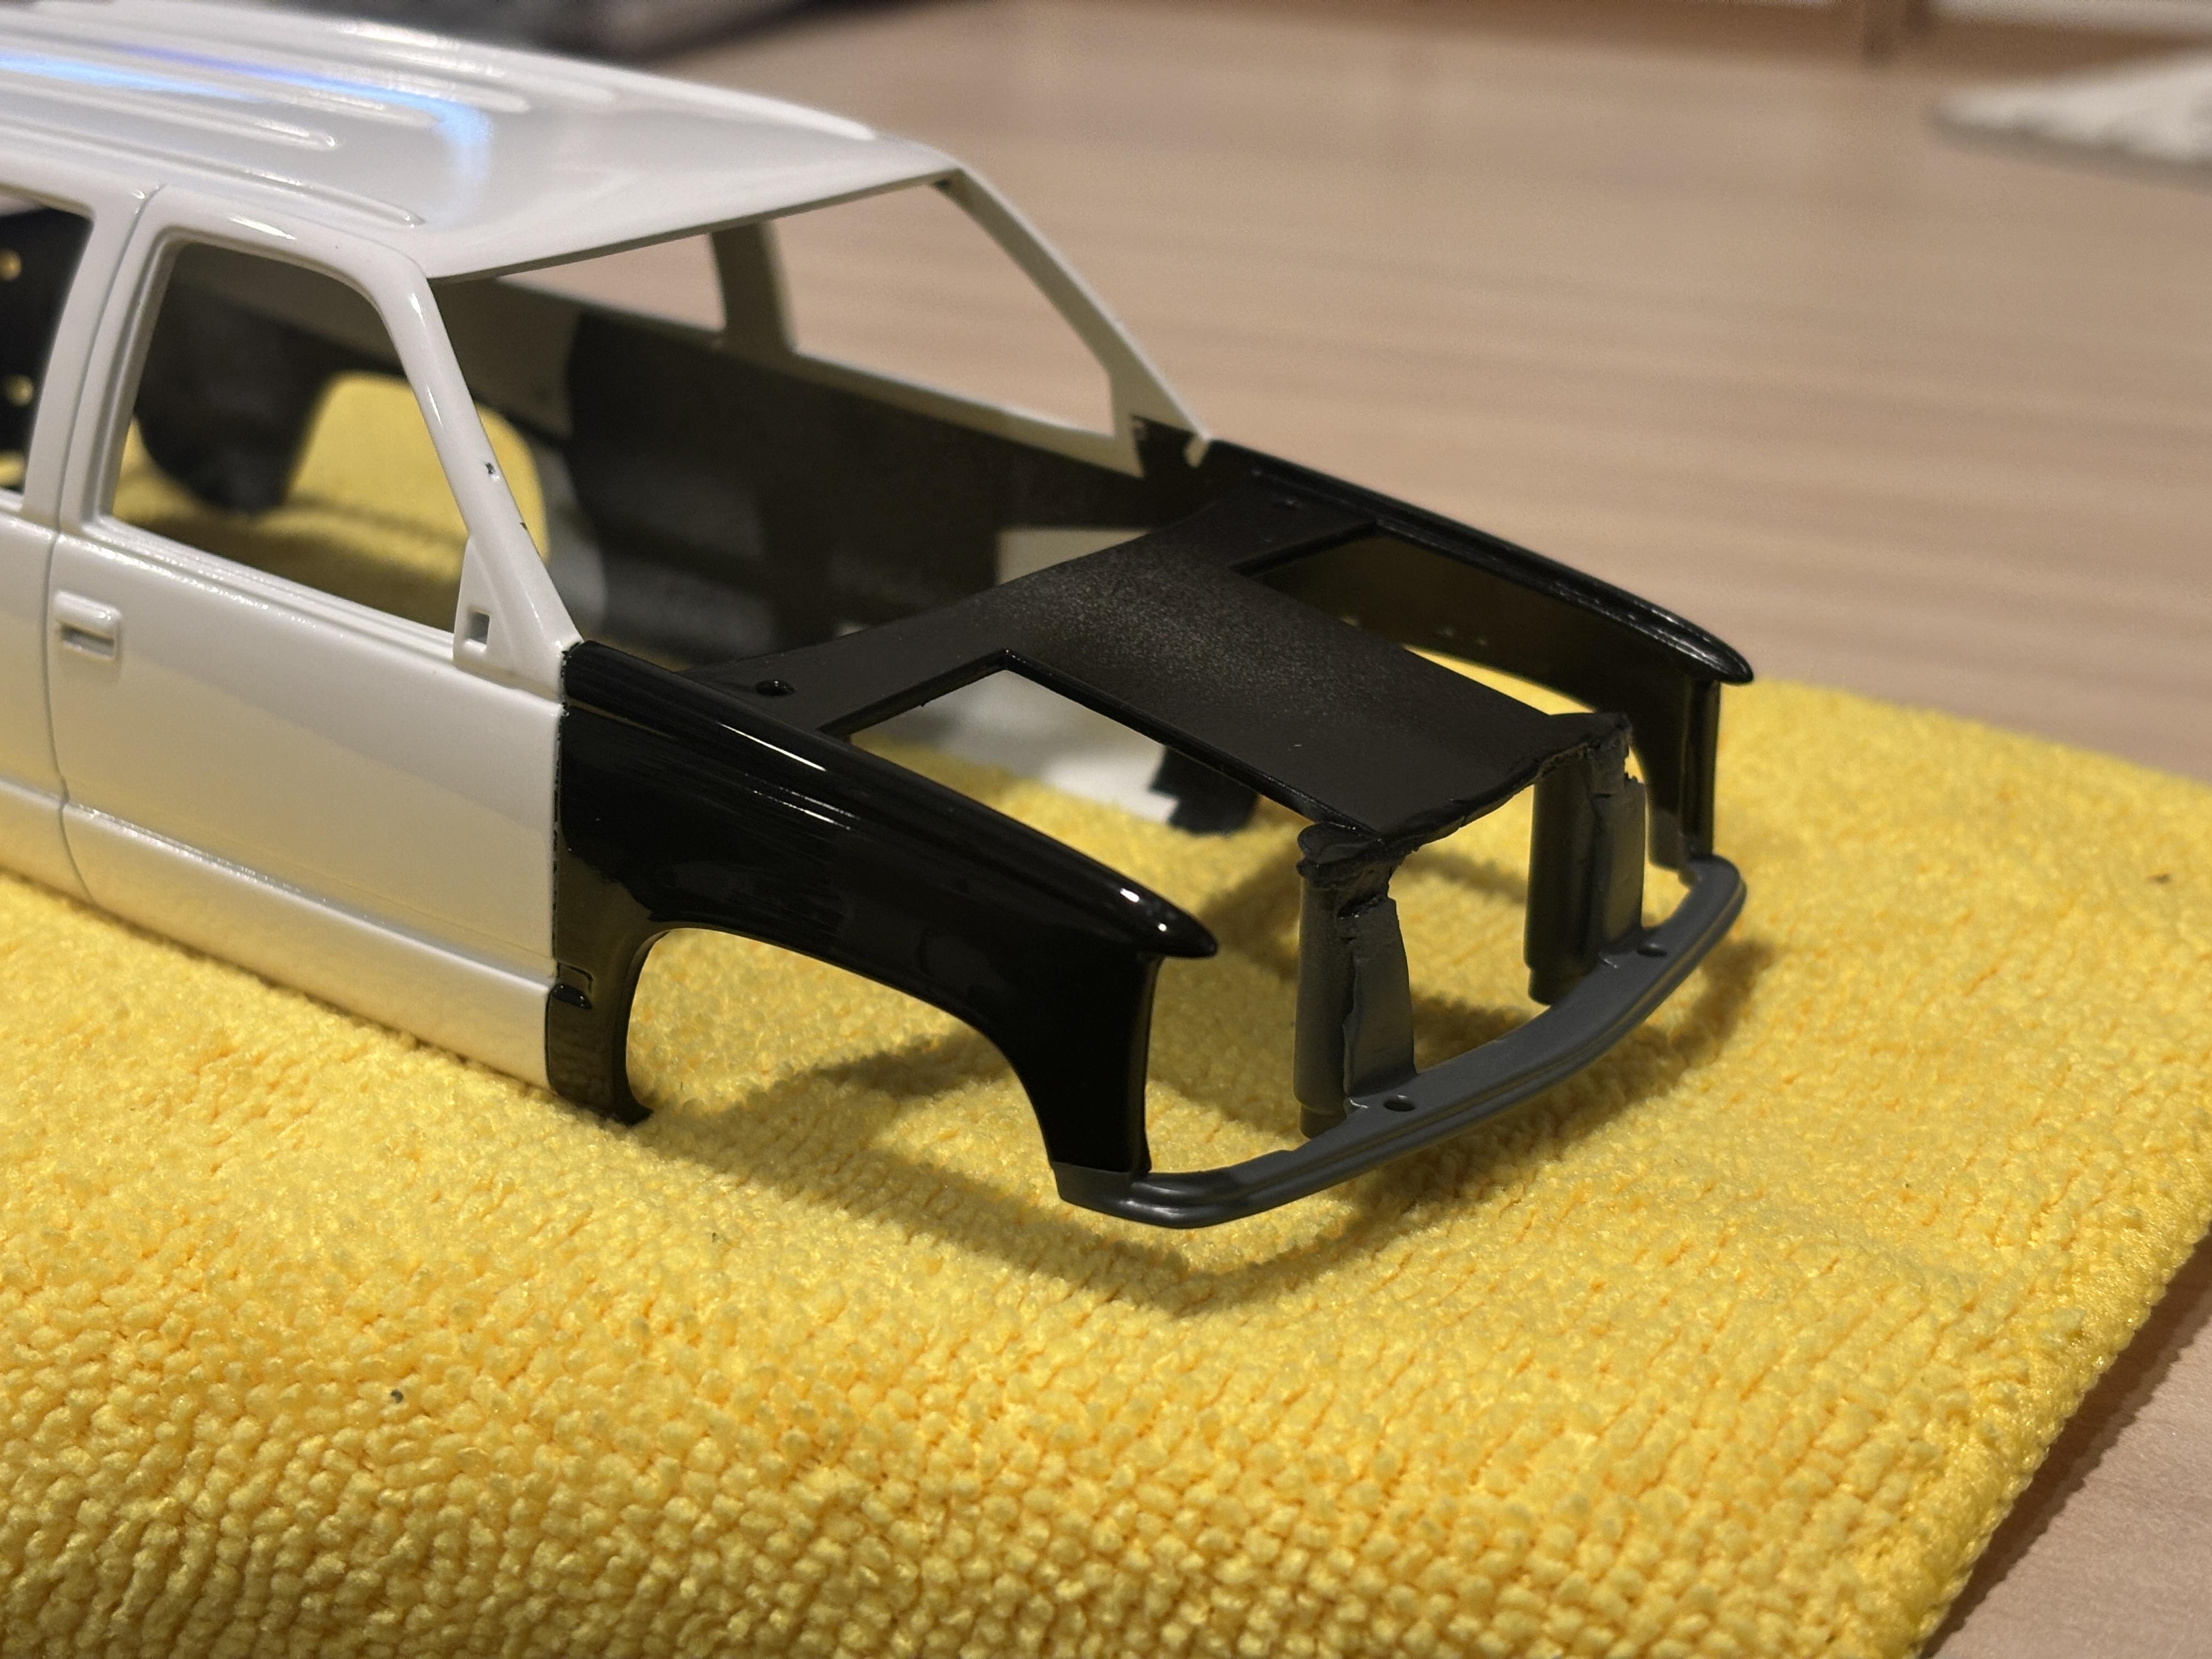
Thank you. A bit more progress today. A lot of masking was done to paint small but important features. Tamiya TS-29 Semi Gloss Black was used to paint the black molding trim around the D pillars and rear hatch: Tamiya TS-4 German Grey was used to depict the plastic molding between the grill and front bumper. Since it is supposed to match the color of the grill, I sanded down the black paint a bit with 1000 grit, hit the area with the same grey primer I used on the grill, and then laid on the German Grey.
-
Revell 1/25 Ford F-250, Regular Cab, Shortbox, Dualie, 4x4 kit
av405 replied to stavanzer's topic in Truck Kit News & Reviews
I think the Ford truck generation brings most of the appeal. Moebius has been covering the 1960s - 1970s pretty well, and AMT has the mid-late 70's version that's been floating around for years. The Revell Monogram "bricknose" 1987-1991 models are still easily found, with various re-releases through the years. And AMT also has the 1992-1996 generation covered. The 1980-1986 generation never got much love. It's pretty much just this and the 1980 Ranger Flareside. I don't love either, but this gives modelers more options if they want to replicate this generation of trucks. -
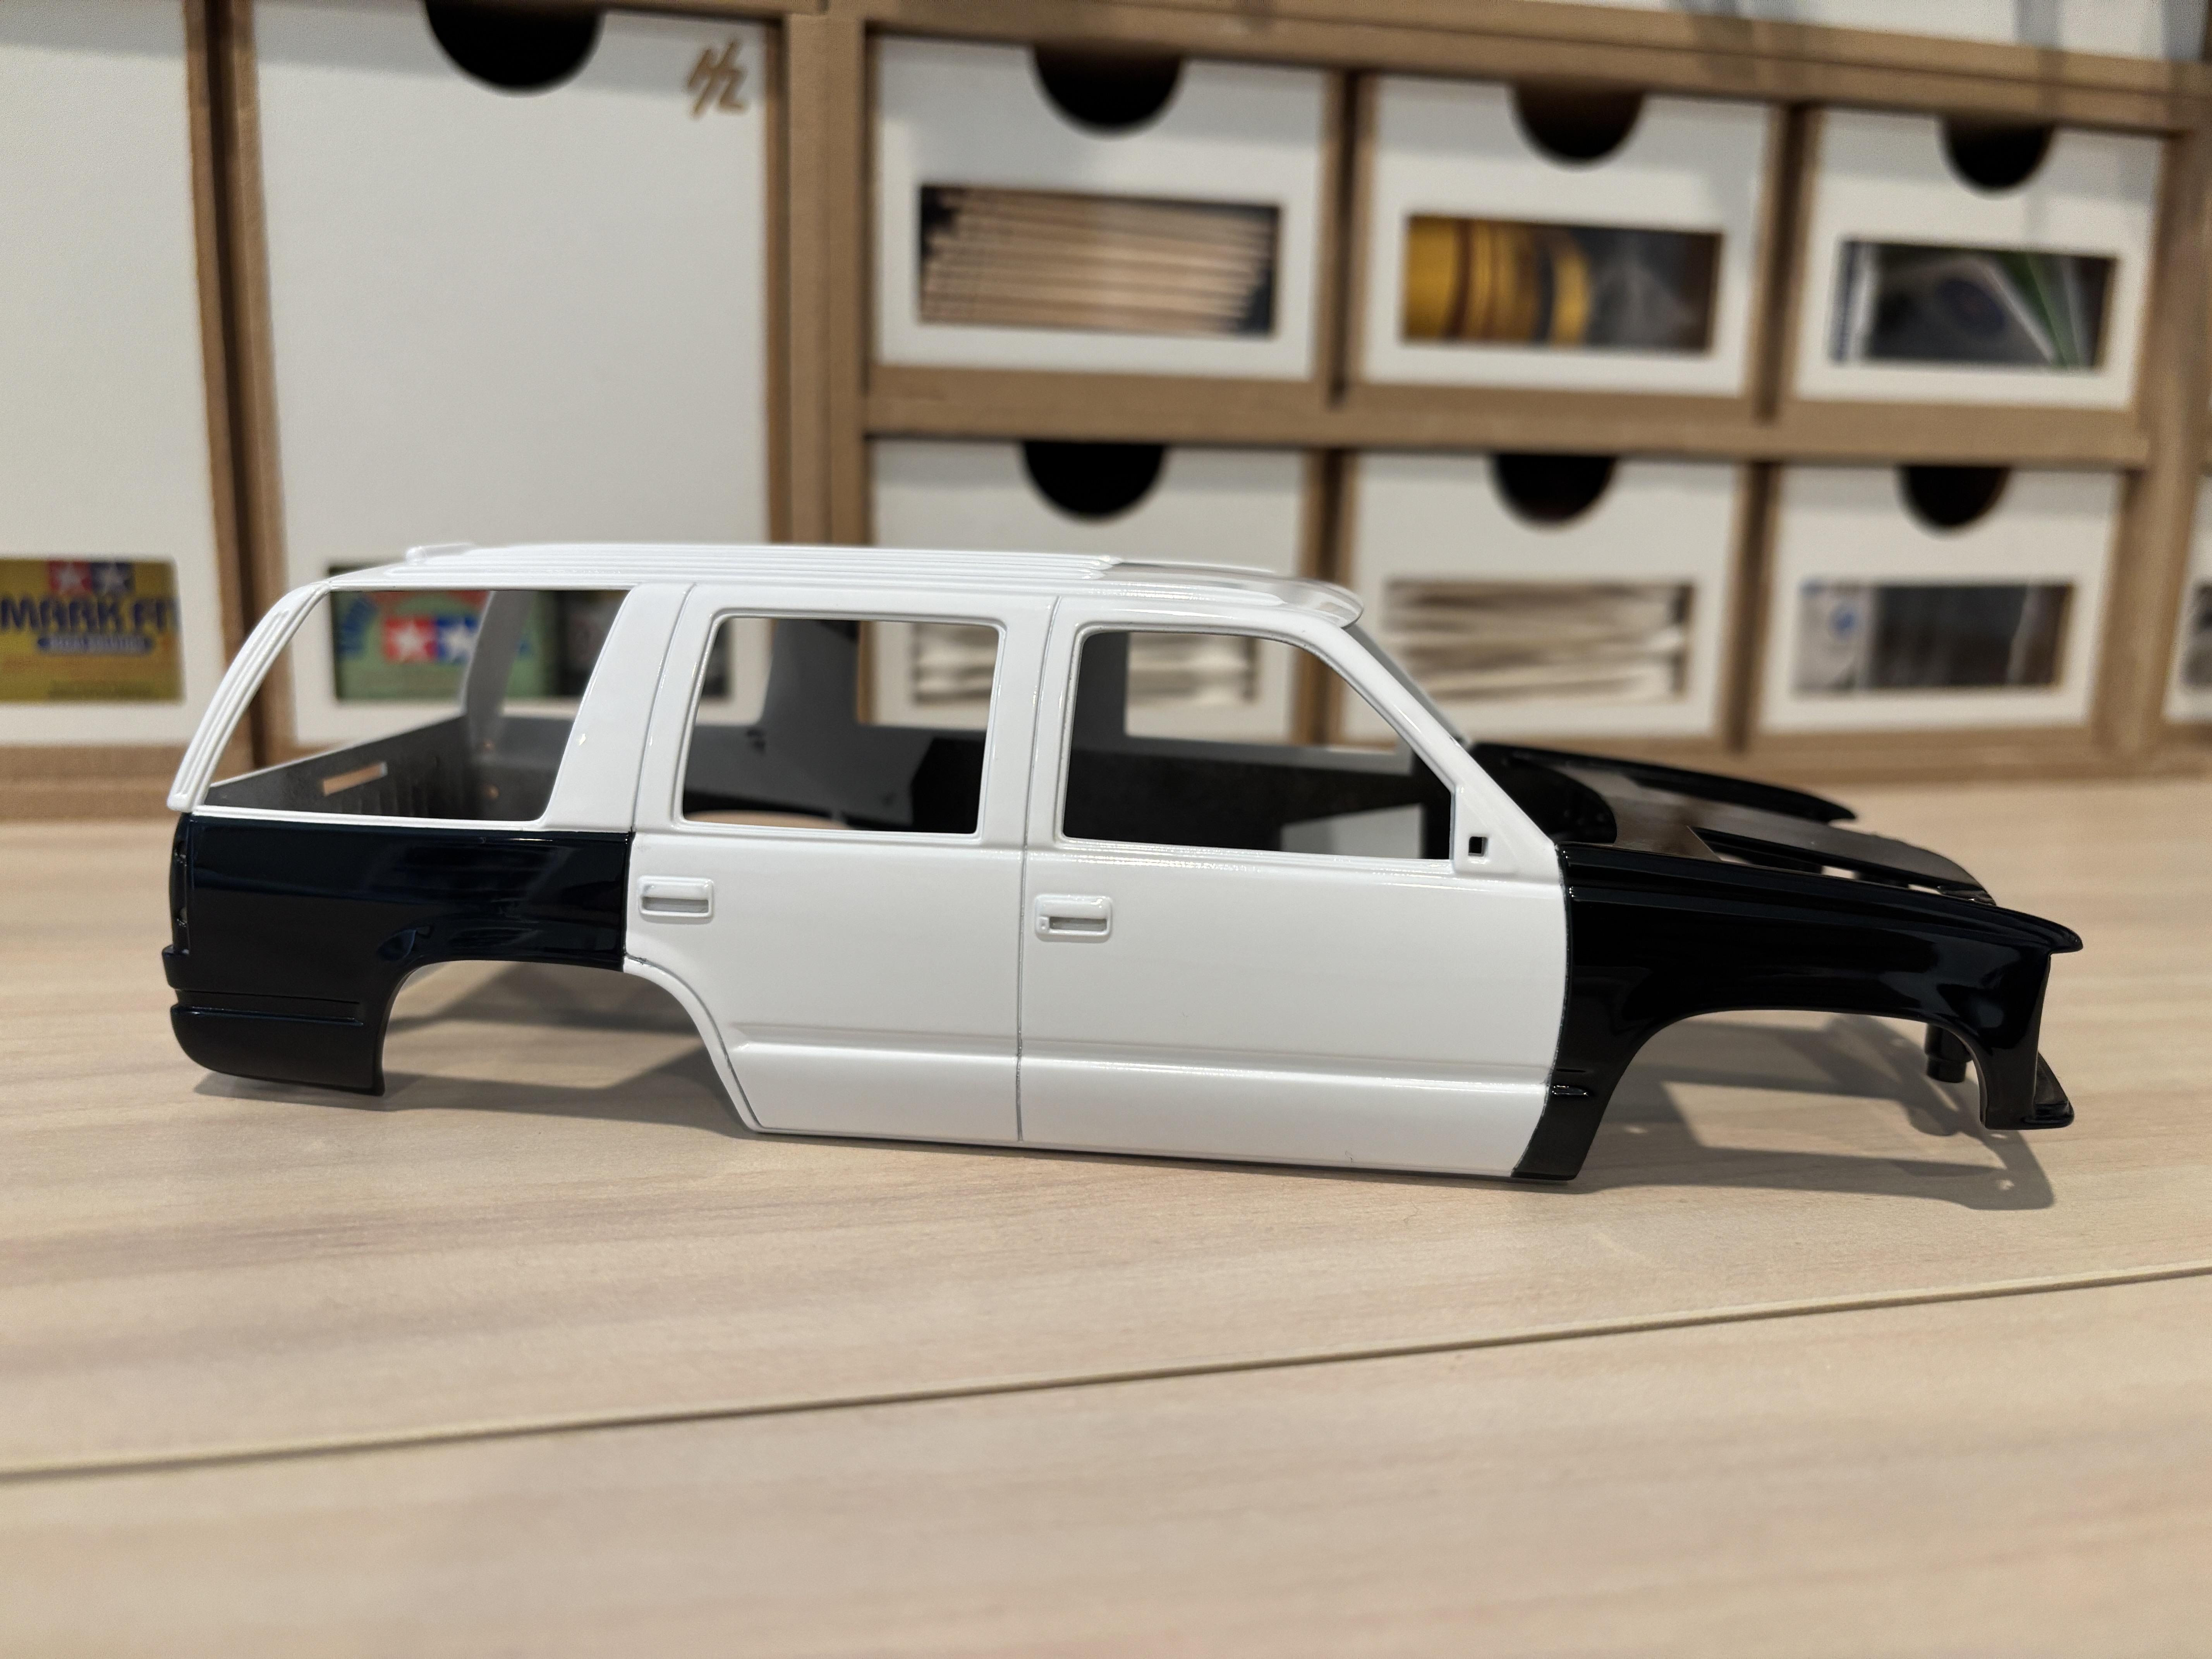
I pretty much set this project aside for the last month and a half due to the baby. But my wife and boy just left on a trip, so I have a week to myself to (hopefully) get this one done. I spent last night and this morning polishing the body. For the first time, I used a dremel rotary tool with polishing attachments I bought on amazon to do this. After reading horror stories about rotary tool polishing, I made sure to set the tool to its lowest speed and to move rapidly to not burn through the paint. I used my trusted Meguiar's products: ScratchX, Ultimate Compound, and Ultimate Polish. I was satisfied with the results, and the multiple coats of clear definitely helped. Still, this is my least favorite part of model building. The ribs on the roof made it particularly hard to remove all of the orange peel. Unfortunately, this photo doesn't give the finishing shine justice. Since the tailgate is a separate piece, I went ahead and finished it. I taped off the rear latch and spray painted it with Mr. Finishing Surfacer 1500 black primer. I then used a toothpick to apply chrome paint to the keyhole. And finally, I applied the decals: The Tahoe name badge came with the kit's decal sheet. AMT kits of this era have a lot of extra decal film around the individual decal pieces. You can clearly see the white around each piece. I used a ruler and xacto knife to cut the excess pieces away. This small step will go a long way. As is typical with me, I ran into a paint issue. Once I started to cut and polish the hood, a small defect came through on the right side. Based on my past experience, this is from surface contamination. Since it was on the hood, I figured I would just strip the whole thing with some 91% isopropyl alcohol and start over. A setback for sure, but I was happy that it didn't appear on the main body. Up next, I will prep and repaint the hood and start detail painting on the main body. Stay tuned, this should be a productive week.
-
Revell 1/25 Ford F-250, Regular Cab, Shortbox, Dualie, 4x4 kit
av405 replied to stavanzer's topic in Truck Kit News & Reviews
Meh. Years ago, I might have bought one to use as a chassis cab project, sort of like AJ's fire truck. But this recent 3D-printed option looks better if one wants an accurate F-350 Dually bed: https://www.cgtrader.com/3d-print-models/hobby-diy/automotive/pickup-truck-f-350-dually-1980 -
Their ebay site is only listing some overstock items they find from time to time in their old storage areas. No replenished stocks.
-
I agree, especially for Custom Squads. A lot of what Policecarmodels had is either readily available through other websites or was old stock that was probably running low anyhow. Still sad to see them gone.
-
Both online stores shut down last year for good. Policecarmodels was due to the owner retiring from the business and Custom Squads was due to health issues. Your best bet for police parts are 3D-printed pieces being offered on ebay or through various facebook groups.
-
revell K5 Blazer
av405 replied to Falcon.Studio's topic in WIP: Model Trucks: Pickups, Vans, SUVs, Light Commercial
Looks great! Can't wait to see more progress. -
If they don't fit, I hope Wylde at Canuck can modify his designs to fit this kit. Revell already announced a 1985 Jimmy, so I wonder how many more grill variants we will get as the years go by.
-
Where is Chad with R2 February news?
av405 replied to Chris in Berwyn's topic in Car Kit News & Reviews
That looks to be the 1983-1984 GMC Deserter kit, with what I imagine will be some new decals. Meh. The Deserter is still easy to find (especially at HL). I'm all for new decals and a refresh, but I was hoping for something updated with new parts. Like what they did with the Sodbuster kit. As far as the larger conversation about Round2, I think they're playing it smart with their high-low mix of reissues and new tooling. As a 34 year-old, I wish they would lean a little more towards my era (1990s and up), but I get the appeal behind the nostalgia factor. If re-releasing a kit for the 100th time will lead to a new tooling of a modern/modern-ish subject, I'm good with that. I just hope that doing so isn't at the detriment of having more modern subjects. Which at this point for Round2, is anything from the 1990s and above. -
He has them re-listed on the ebay page.
-
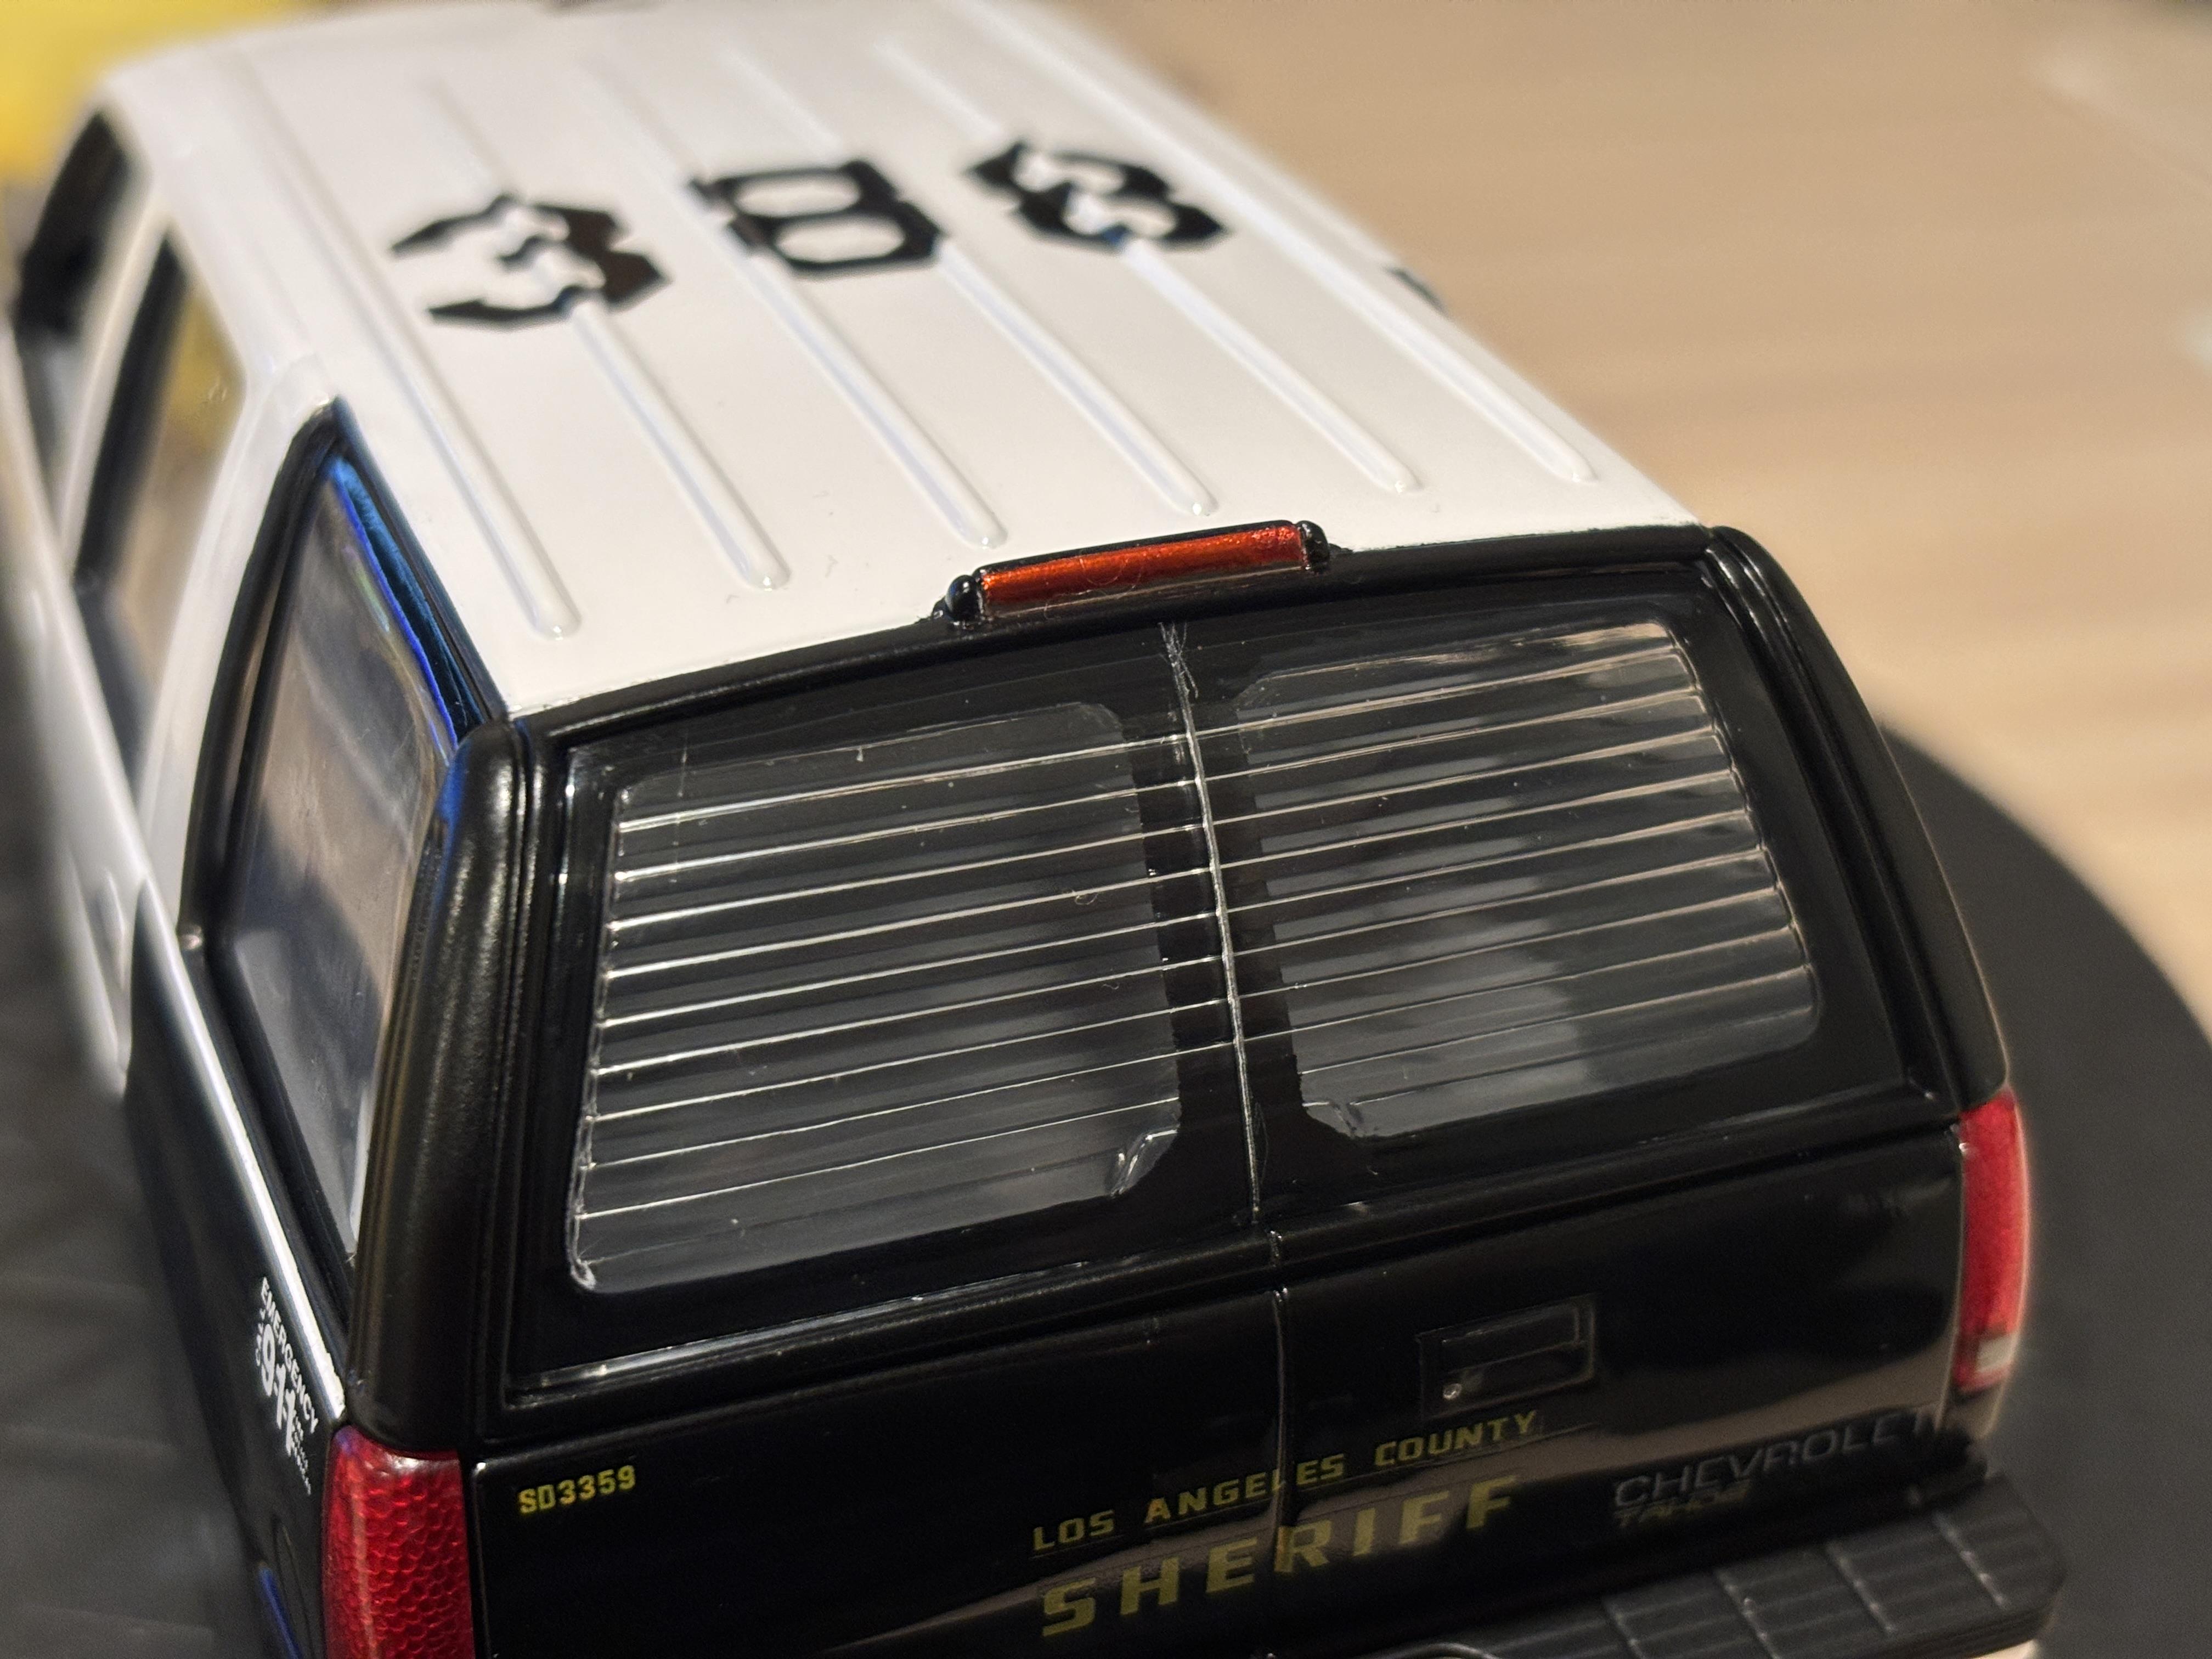
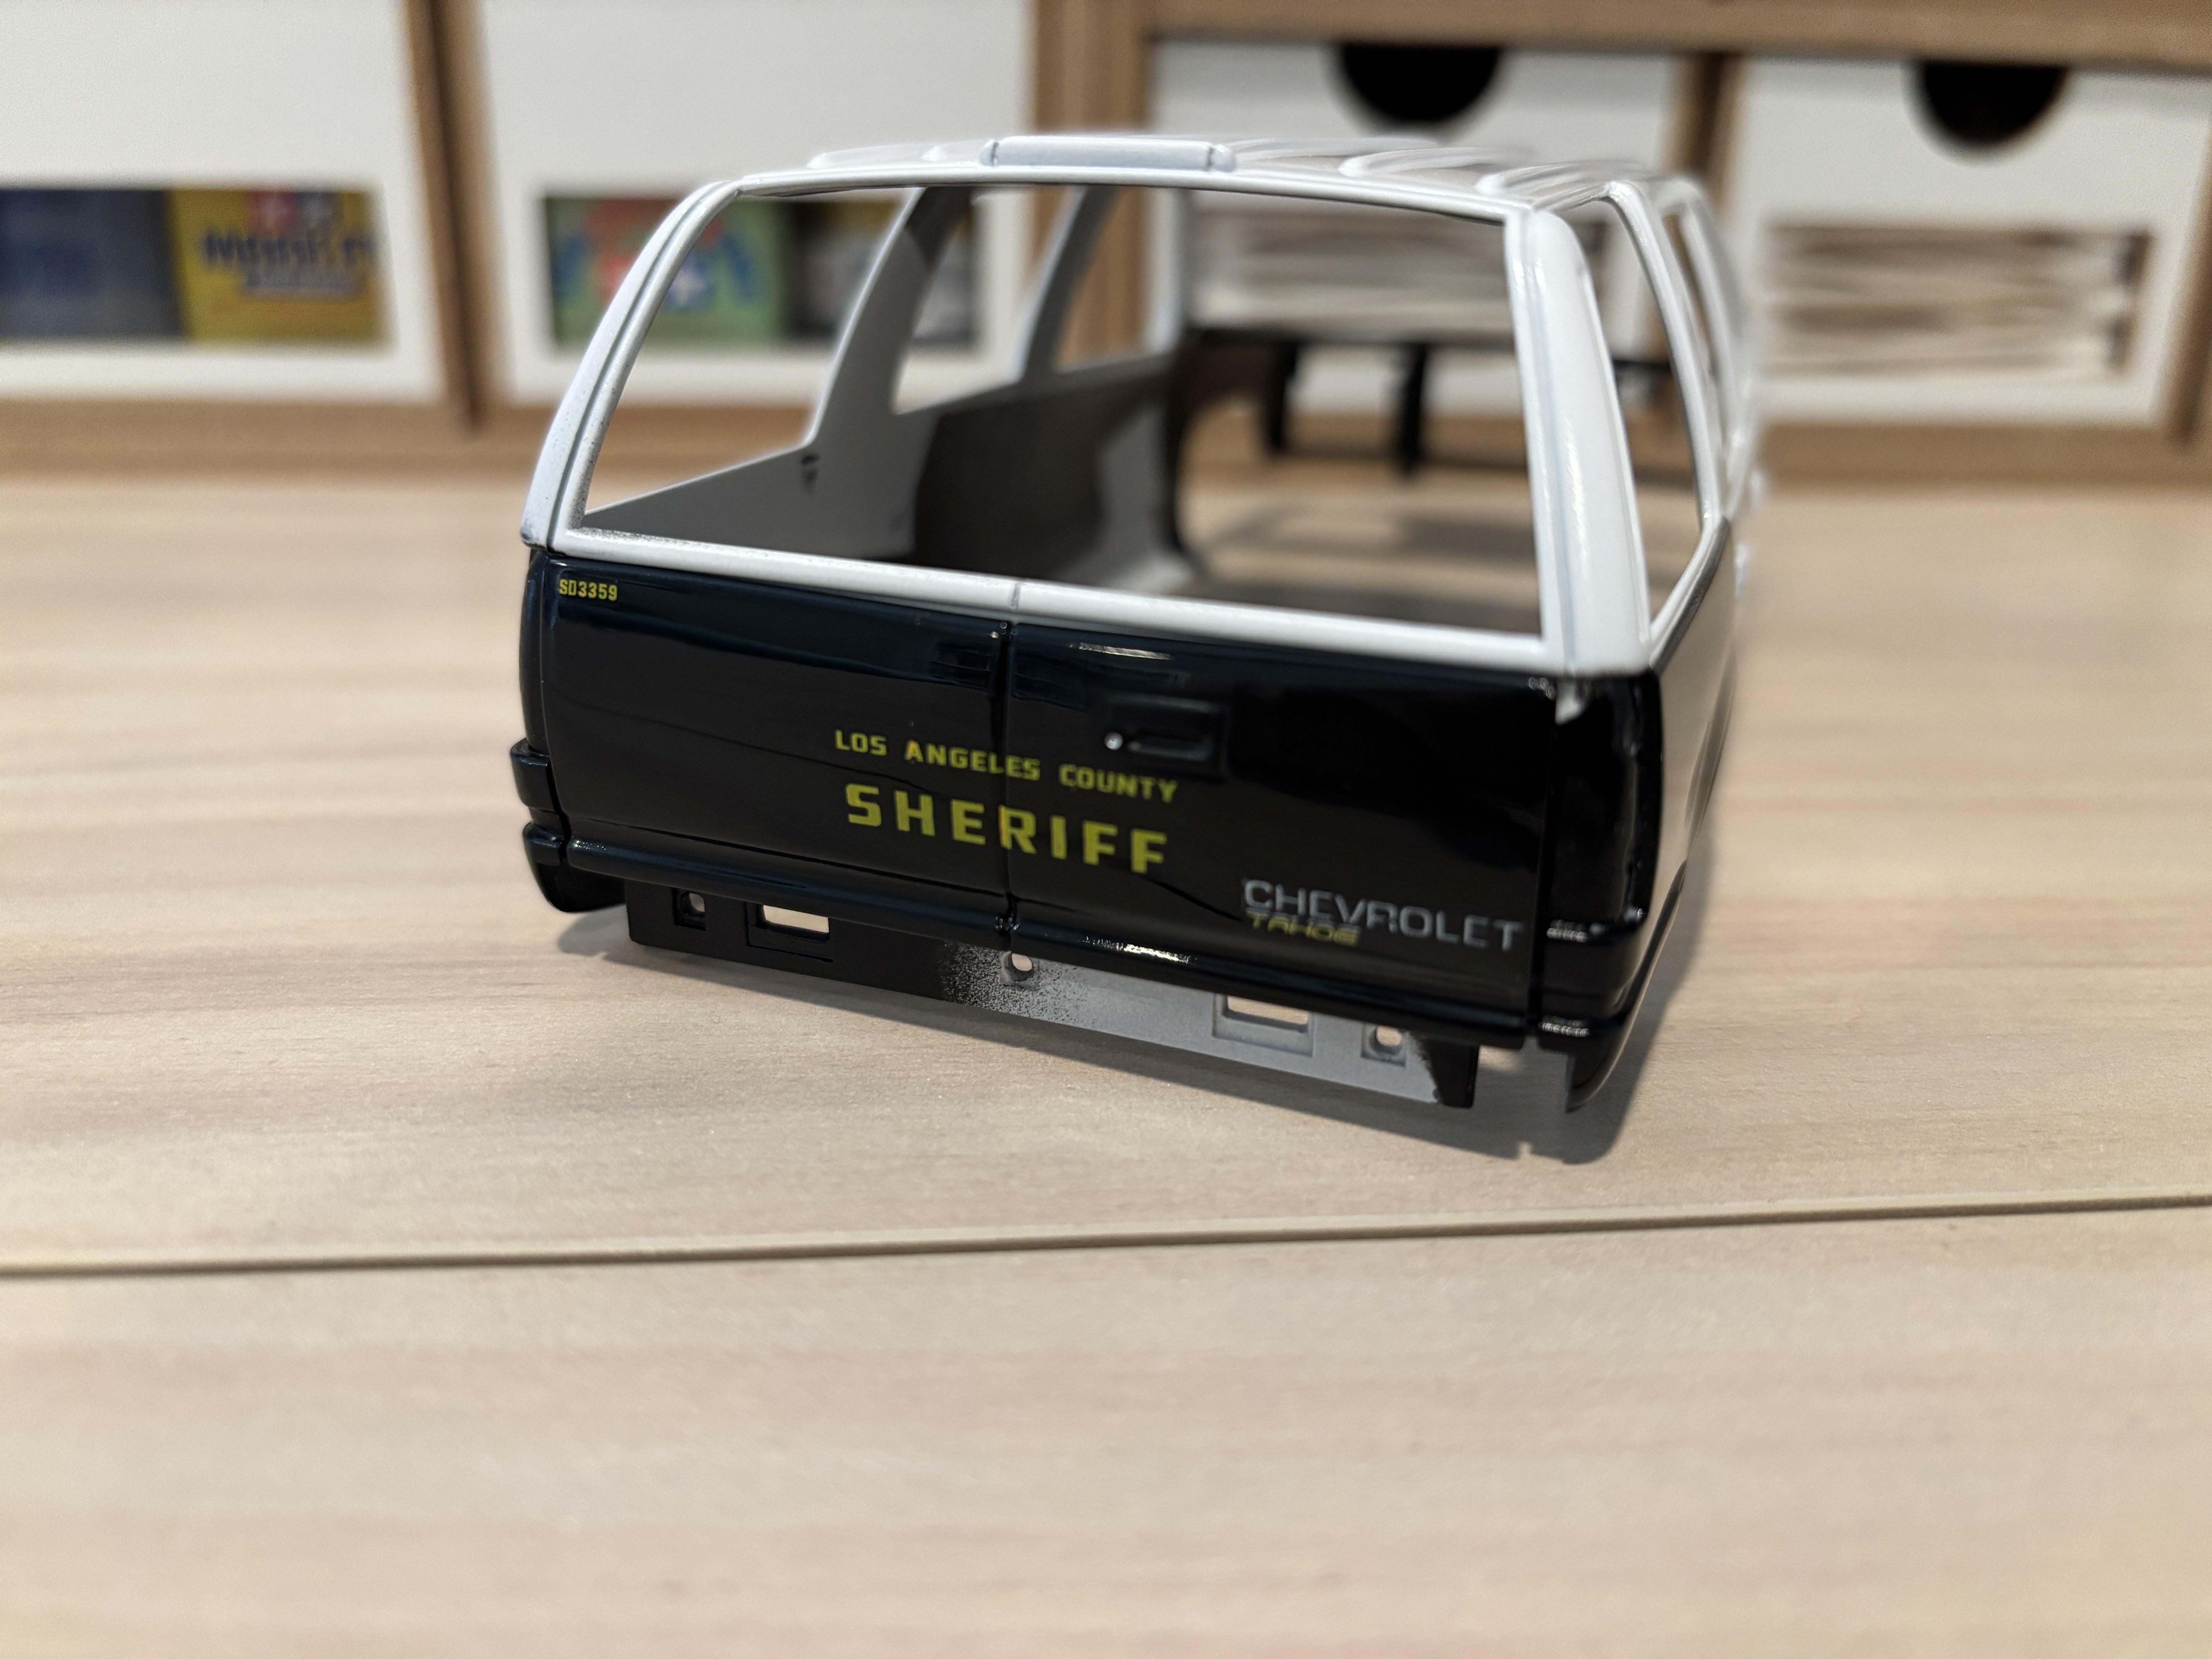
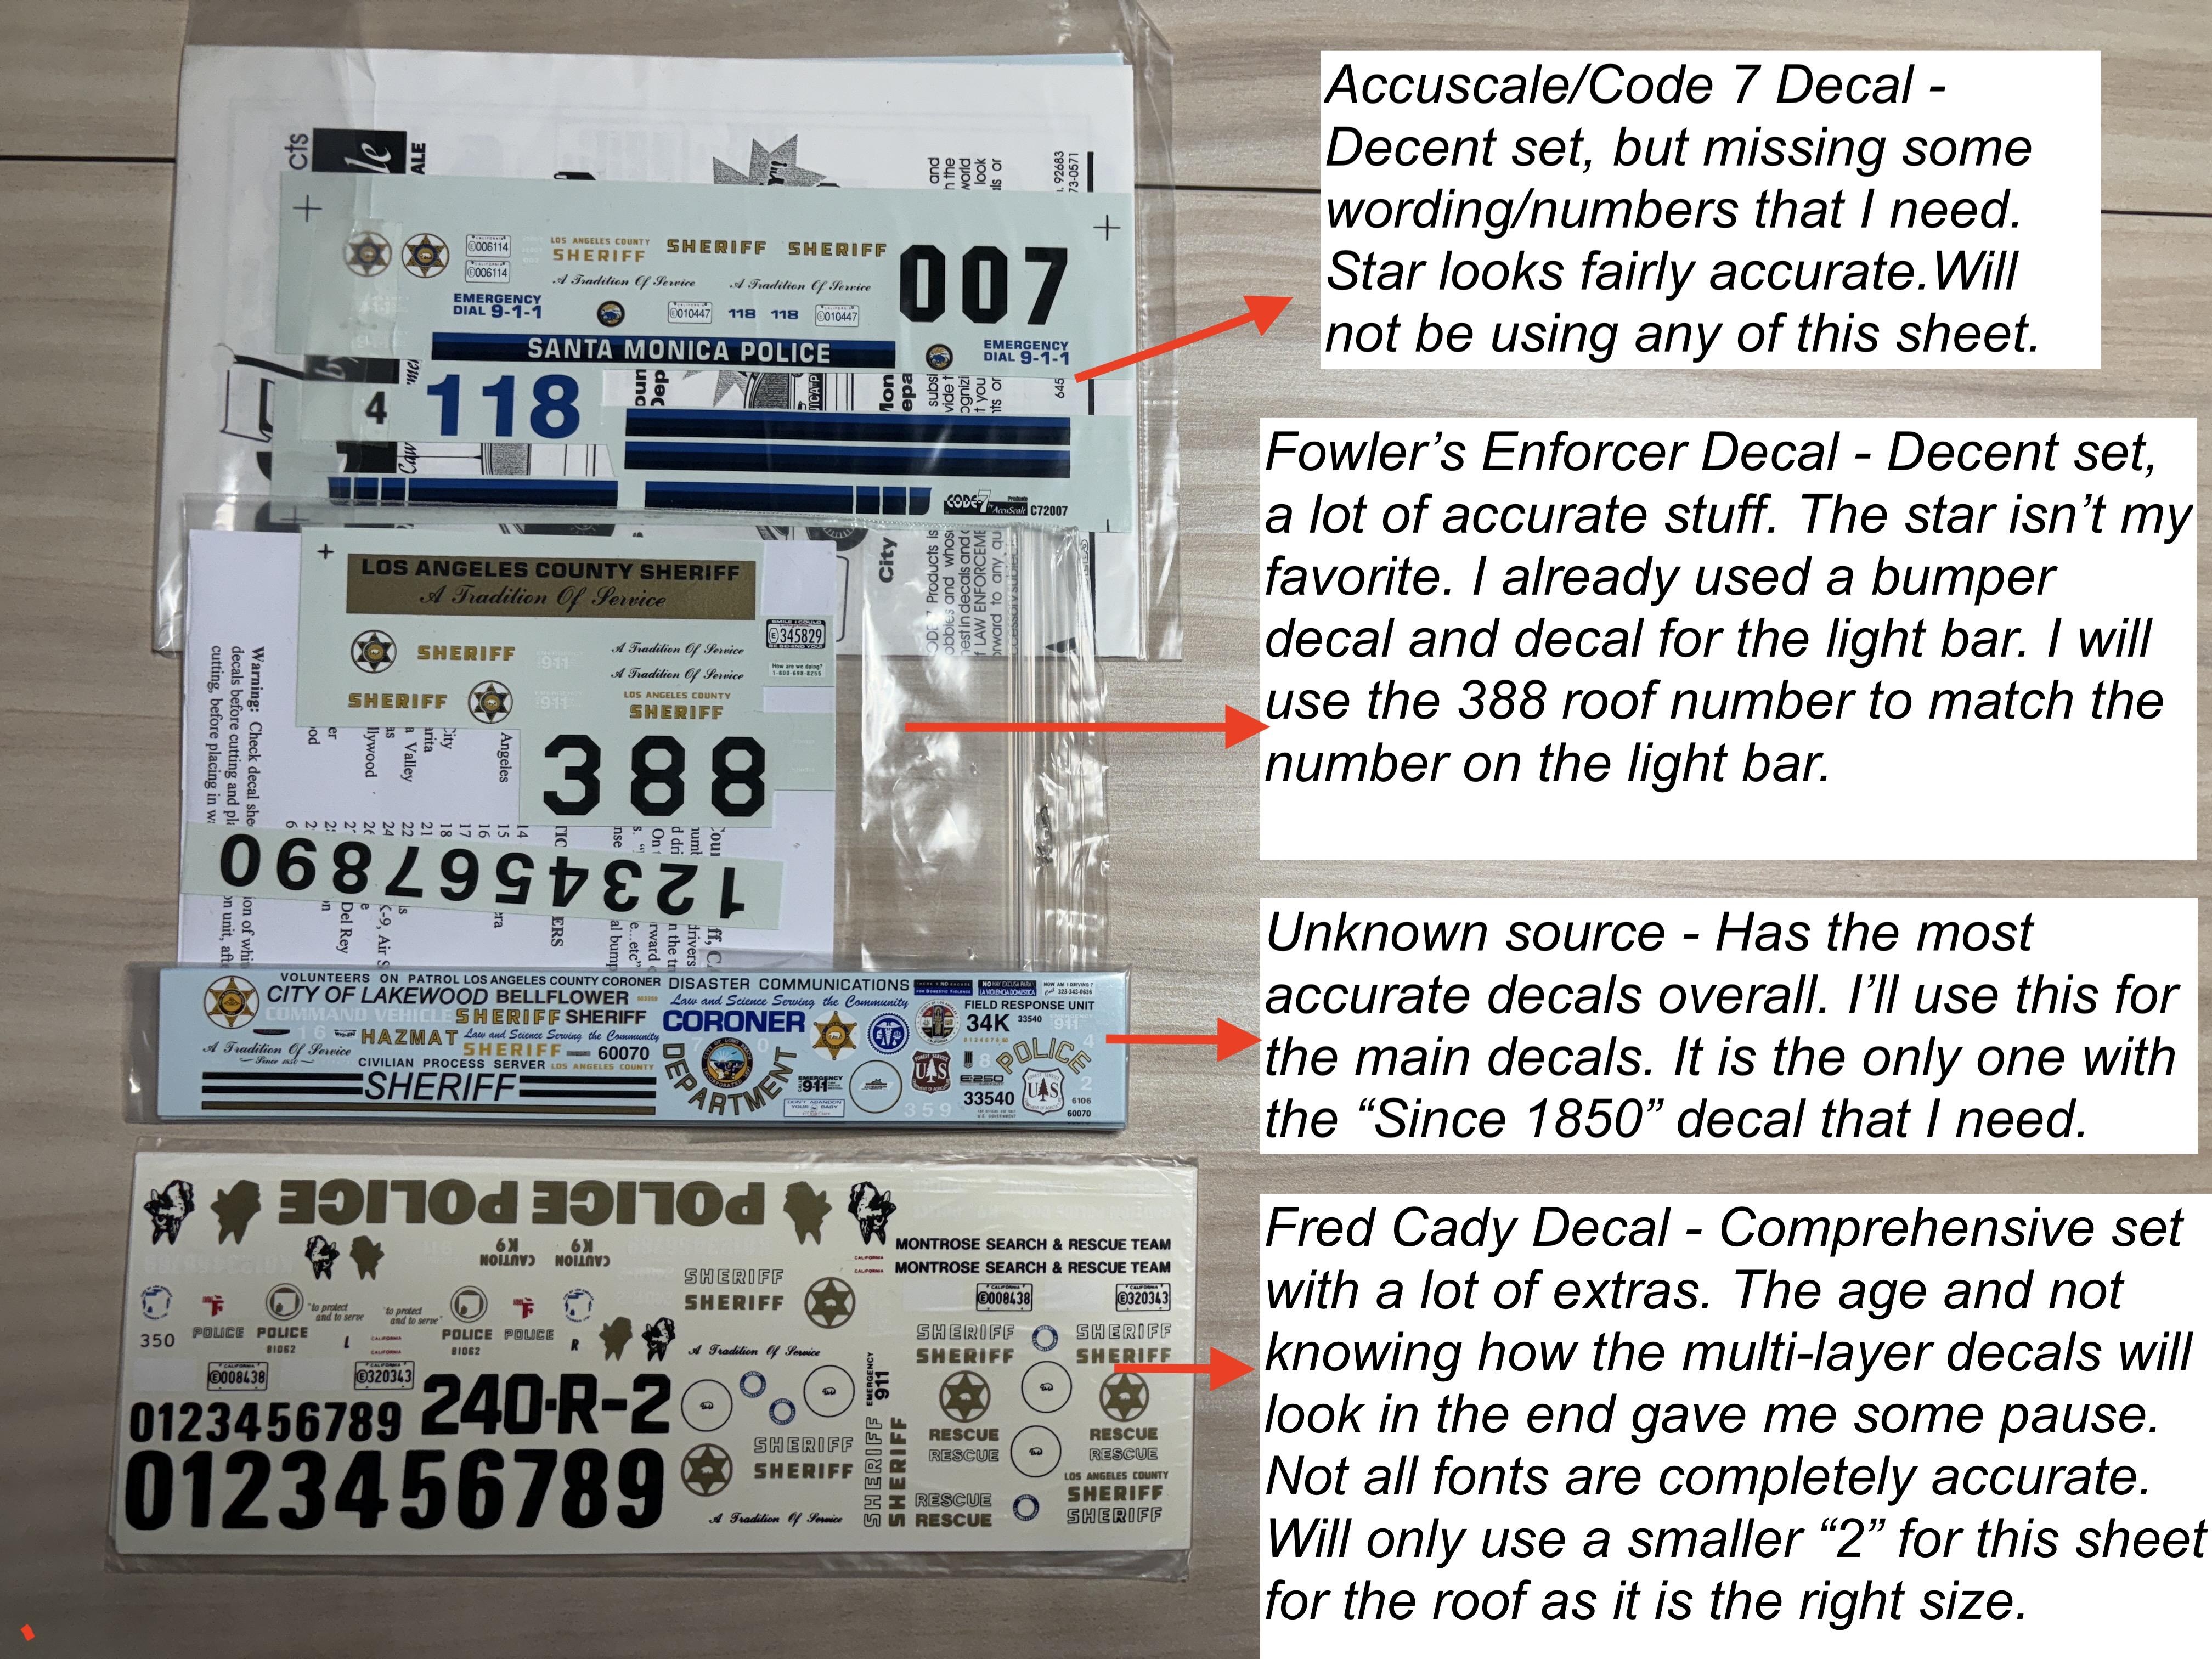
Thank you, Eli. Sounds like a fun project. Since I still haven't had time to sit down and wet sand/polish, I decided to start looking at my decal options. Over the years, I have collected a large collection of police decals for future projects. I've done this especially with LASD decals. LASD markings are trademarked and the department has taken legal action against many decal makers (no matter how small the operation) to have them cease their sales. All of my decals are out of production pieces. For those of you familiar with police decals, Chimneyville also made an LASD set back in the day. That one was the worst of the bunch and I sold it a long time ago. There is also a decal maker on ebay that sells LASD decals under a generic name, but those have inaccurate fonts/colors. So that leaves me with the four sets below. Between them, I have everything I need minus license plates. Looking at the few photos I have found of LASD Tahoes of this era, they all have "1010xxx" series plates. These will be custom made by a friend as a personal favor.
-
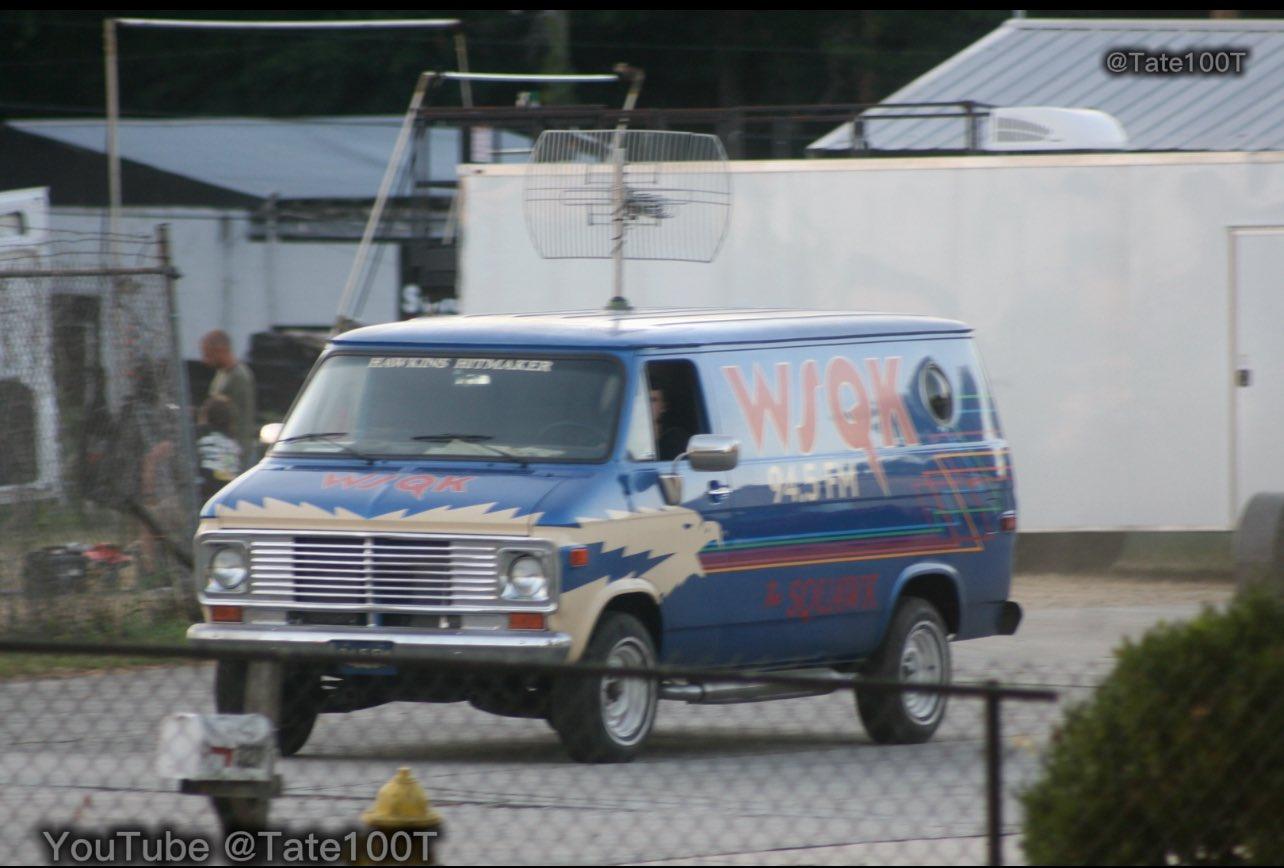
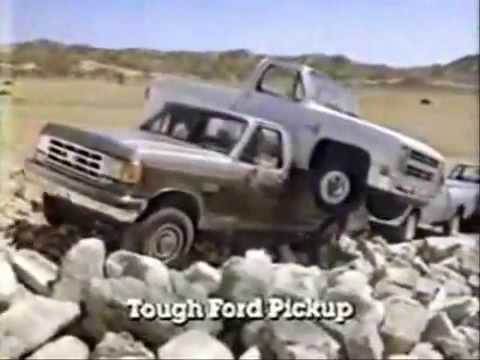
I've been googling behind the scenes filming images for Season 5 and so far have only found the following 3 vehicles: It definitely won't be this truck that's the surprise, but I would love for this to be a future spinoff of the Blazer kit: This radio station van looks like it'll play a big role, but the dimensions don't match what Revell is advertising. This can also be a potential future variant of Revell's Chevy Van. Steve's BMW will be making a return as it's been seen in behind-the-scenes photos. I still think this might be a strong contender to be the new kit.
-
This was my first thought as well. We all called it: Revell is going to milk this new mold for all it's worth, and rightfully so. I just hope the High Roller kit has options to build a stock ride version.