Chief Joseph
-
Posts
650 -
Joined
-
Last visited
Content Type
Profiles
Forums
Events
Gallery
Everything posted by Chief Joseph
-
 No offense taken, Mike If there were a really big demand for tires like this, then I would certainly consider creating them. If someone wants to commission them, then I am open to that option as well.
 -
I don't recast kit parts.
-
Decals for 69 Pontiac GTO
Chief Joseph replied to om617's topic in Car Aftermarket / Resin / 3D Printed
Well, aside from the Royal Bobcat dealer package, there really wasn't any other decal/stripe options for a 1969 GTO. You could get the Judge stripes or normal pinstripes added by a dealer, and there was a "GTO" quarter panel decal option, but the Judge was the "showy" GTO and the regular GTO's were fairly conservative. I'd say the Royal Bobcat would be your best bet, and Fred Cady made them for the Monogram 1/24 kit a long time ago. One of those sheets popped up on Ebay a few weeks ago and sold for just $8.50. It was set #57. There are some drag race schemes that may be available in decal form, but I don't have any knowledge of anything specific. -
Both products soften the decal, but Sol is more aggressive for use on very irregular surfaces like rivets, panel lines, and compound curves. From the Microscale horse's mouth: Micro Set is a very versatile decal setting solution that does several things to Microscale decals to improve application. Micro Set should be applied to the surface of the model where you will be sliding the decal off the paper backing. Micro Set prepares the surface with special wetting agents that cut the oils in new paint and converts the adhesive on the back of the decal to a stronger and longer lasting one. In addition, Micro Set slightly softens the decal film to make it more flexible so that it will conform better to the model's surface. Better adhesion of the decal to the model prevents tiny air bubbles from forming and results in an invisible carrier film for the so-called "painted on look." To apply Micro Set: use a soft flat artist's brush and apply Micro Set where you are going to apply the decal. Then slide the decal off the backing paper using a small pointed tip synthetic bristle brush to carefully position the decal in its proper position. Blot the decal carefully with a tissue or paper toweling, being careful not to disturb its position. Allow the decal to dry overnight. It will then be ready for a protective coat of Micro Coat flat, satin or gloss. Micro Sol setting solution is for the most difficult irregulat surfaces to be found on models. It completely softens the Microscale decal, allowing it to drape down onto the surface of the model, conforming perfectly to surface irregularities without distortion. The most amazing results in seemingly impossible places are possible because Micro Sol actually makes the decal part of the painted surface. For that reason you should coat Micro Sol on for only a few seconds and then leave it alone. It does the work. Do not touch until the decal has dried, as the decal is very soft at this stage and could be easily damaged. For the best results, first apply Micro Sol to prepare the surface and enhance the adhesive. Make sure the surface is free of particles that could get under the decal's film and cause a blemish. Then, when everything is dry enough that the decal will not move easily, apply Micro Sol with a small flat brush. Apply with as few strokes as possible so a not to disturb the decal. Then allow the decal to dry without disturbing it. One application is enough in most cases, but if necessary, a second application of Micro Sol can be helpful. Following these simple instructions will result in a model with professional looking markings.
-
Createx Wicked Colors Paint Questions
Chief Joseph replied to Jc cline's topic in Model Building Questions and Answers
I hit them with a hairdryer on low for a few seconds to flash set them while I'm painting. The W100 reducer will work virtually at any ratio with these paints-- just make them as thin as needed to spray a good coat. Don't use a thick, wet coat because it won't help at all and can lead to cracking. Straight from the bottle, they like to be sprayed at high pressure-- like around 60psi, but as you thin them, the pressure can drop to as little as 8-10. Thinner paint will require more coats, though. A good primer is a must with these paints, and lacquer topcoat works just fine. -
I'm working on a good mold configuration for them, Jose! Won't be much longer.
-
Alien³
Chief Joseph replied to hobbybobby's topic in WIP: All The Rest: Motorcycles, Aviation, Military, Sci-Fi, Figures
Hey, I don't know how I missed this when it was originally posted, but great job! You should show it over at the Clubhouse forum where all the figure modelers hang out. -
Testors Createfx
Chief Joseph replied to Modelcollector's topic in Model Building Questions and Answers
Pretend that it's just plain old Testors Lacquer Glosscote (which it is, just re-branded) and spray it like normal. When in doubt, always do your own test on an old kit or on a plastic spoon with the paints you want to combine. That way any unpleasant reactions won't ruin the model you are building. http://www.testors.com/products/668156 -
Tire Decals or Dry Transfers?
Chief Joseph replied to bigbluesd's topic in Model Building Questions and Answers
Both have their pros and cons... I personally favor waterslide decals A third option is a photoetched stencil, but that's only really useful for some types of racing tires. -
What happened to all the pinned tutorials?
Chief Joseph replied to sjordan2's topic in Tips, Tricks, and Tutorials
My thought has always been that if nobody asked any questions, there would not be anything out there to search. Most discussion forums are based on questions and answers, and in this new age of "somebody tell me what I need to know right now!" it's just the nature of the beast that people will come here and ask before attempting research. Answering questions isn't a requirement for membership and participation here, but I think the members who go out of their way to answer questions (even the ones that have been asked a dozen times before) are performing a great service for the forum community. I sometimes look in on other forums where questions often go unanswered and ignored, and that seems to me to be very cliquish and juvenile and won't do much to grow the hobby. -
A decent-looking gold leaf can be done with certain Alps printer models using the gold foil cartridge. Traditional screen printers use metallic inks that look better, though. Decals can be made from a photograph, but the old "garbage-in-garbage-out" maxim applies to the process. A crappy photo isn't going to magically turn into a good decal just by photocopying it. The best decals always come from using photographs to create new artwork specifically tailored for printing.
-
If the Pegasus wheels are good in every respect except the depth, you can cut the centers out and set them farther back into the rim. You'll probably need a couple of sacrificial wheels.
-
Casting multiple copies?
Chief Joseph replied to Racerchad2's topic in Car Aftermarket / Resin / 3D Printed
$35-$45 will only get you 2lbs of a quality rubber from just about any supplier. If you are comfortable using the 10:1 mix stuff, try the Mold Max 14NV that Mike suggested. It is very good and I get more pulls from a mold with it compared to the older Mold Max formulas, plus it cures in just 4 hours. A 2lb kit is about $38 shipped directly from Smooth-On or one of their distributors. -
Casting multiple copies?
Chief Joseph replied to Racerchad2's topic in Car Aftermarket / Resin / 3D Printed
If cost is your number one concern, go to Hobby Lobby and use their 40%-off coupon on the 1lb Alumilite High Strength 3 kit. It will be $18 plus tax, and that's about the smallest amount you will pay for good rubber. Anything else will be $25 or more if you have get it shipped to you. One pound is not a lot of rubber, but it should get you at least three or four small molds. You need to use a scale to measure the 10:1 ratio, though. -
Envirotex lite ?
Chief Joseph replied to hotrod59f100's topic in Car Aftermarket / Resin / 3D Printed
You could use it to put a really high gloss coating on your workbench... -
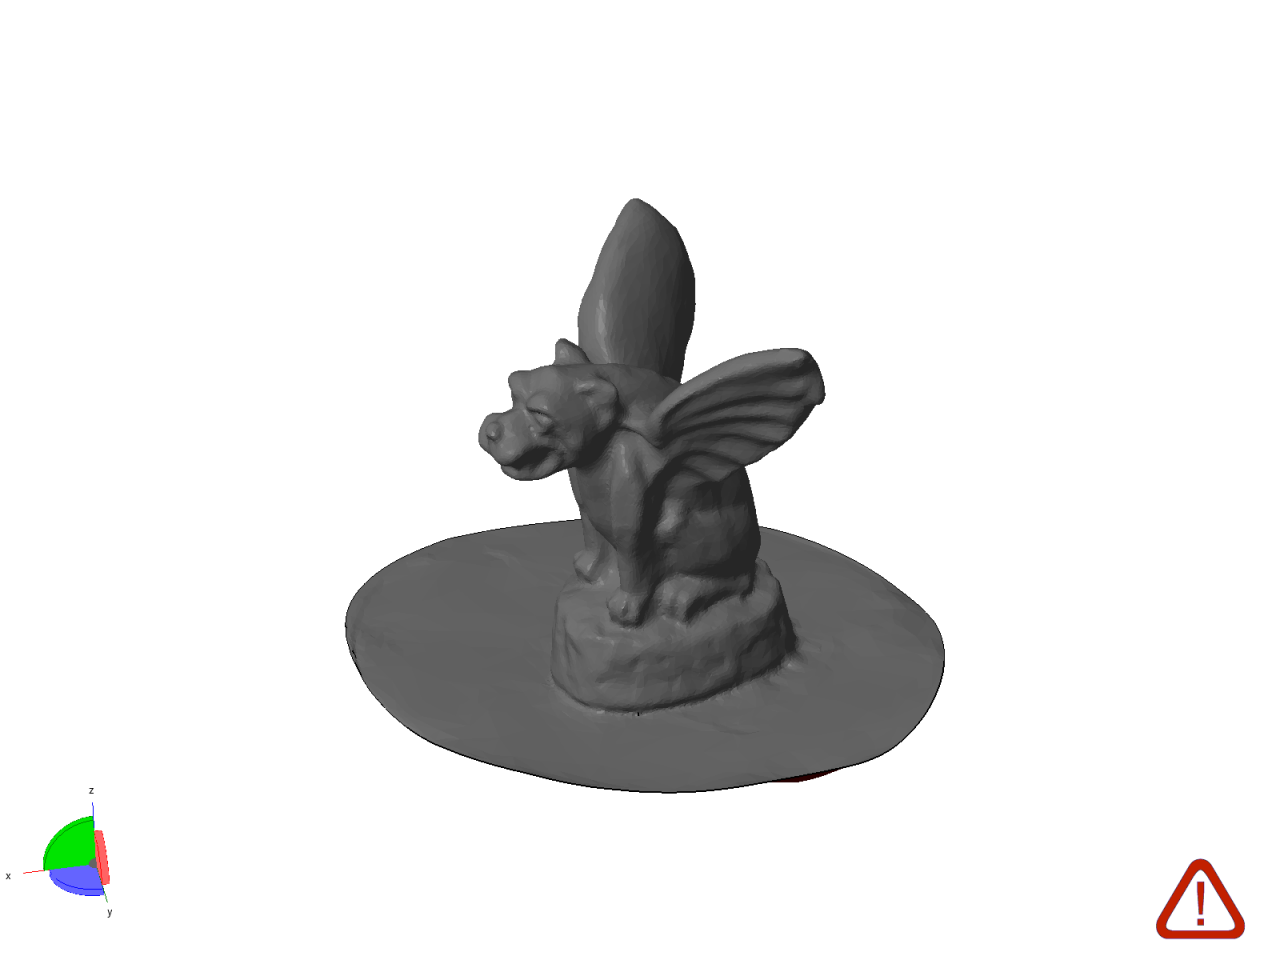
I've designed many 3D parts using just photographs and measurements as reference. With some 3D sampling methods, the photographs are used to construct the 3D model itself. This is a 3D model of a gargoyle bookend I made last year with 123D Catch from Autodesk: About 50 or 60 photos were needed to make this model. This is a surface mesh model and needs to be edited into a watertight shell for 3D printing. This photographic method works okay for organic shapes.

-
Here is a picture of the 3D-printed master for the Krawler. The "real world" size is 35x13.5x15 and it is 1/24 scale. It will go into production soon. For size comparison, here is a kit tire from the Monogram 1/24 Bronco (left), my BFG All-Terrain T/A in the middle, and the new Krawler on the left:
-
I has occurred to me that I'm not giving the 1/25 scale people the love they deserve, so I will try to make up for that starting now Here's a BFG drag radial in 1/25 scale, modeled on a real 325/50R15 size tire: This is the 3D-printed master. I will put it into production soon.
-
3D printing growing as we speak
Chief Joseph replied to bbowser's topic in General Automotive Talk (Trucks and Cars)
You will get a poor-looking 1/8th model because there isn't enough "visual information" in a 1/25th scale part to support the up-scaling. The logical thing to do is find a real original piece and scan it. That's how pattern makers have done things for ages: measure the real thing and then scale it down to the desired size. Truth be told, usually more time is spent editing a 3D scan to make it print-ready than would be spent making a digital model from scratch. But I suppose it all depends on what you want your end result to look like, and how much time, effort, and money you are willing to spend to get there. -
The 3D-printed piece should be here before the end of this week and I will put it into production as soon as I can. It should be available soon after the beginning of 2014. It is 1/24 scale, and will fit scale 15" wheels. I will probably make some truck-type wheels soon to complement these tires. edit: Here's a render of the smaller tire with a 15x8 Pacer wheel I drew tonight:
-
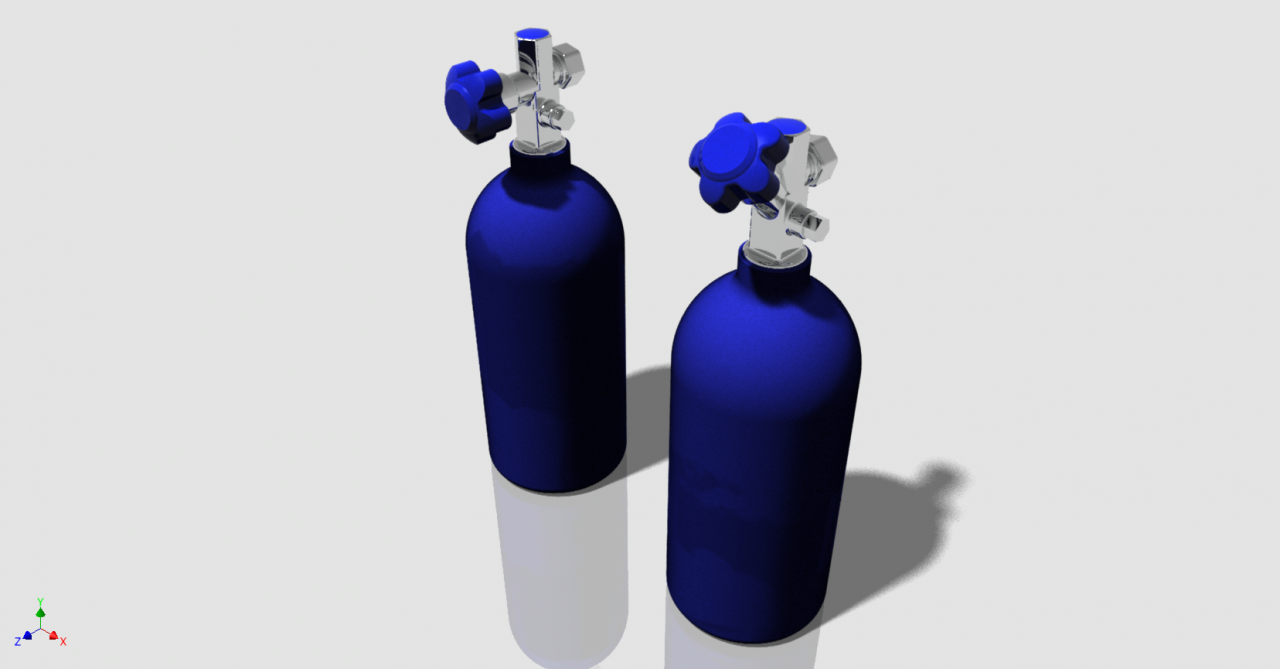
There are two valves for the NOS bottles; a straight-knob and an angled knob.
-
Great job and really nice color combination Did your kit have a funky hood? The hood in mine had a gap of about 1/8" in the center where it was supposed to meet the top of the front clip. I spent a lot of time with hot water trying to get it to lay flat across the front but I still think I'll need to glue it down to make it look right!
-
Rob, that's an Academy/MRC 1/35 OH-58D. It's the "Thugs" issue. http://esm.wikia.com/wiki/MRC_1/35_Bell_OH-58D_Kiowa My buddy Floyd Werner Jr used to fly them and between the two of us, we produced some aftermarket resin and decals for that model.
-
Your Process of Applying Tire Decals
Chief Joseph replied to TedsModeling's topic in Model Building Questions and Answers
Ted, I call a "standard kit tire" the ones that come in most kits-- basically a medium-hard vinyl material that has a little flex, but not much. Some kits have really soft rubbery tires and those things aren't good candidates for decals IMHO because the are so flexible. Resin tires can either be rigid or soft depending on the resin used; they would behave much like a kit tire unless they were cast in a really soft urethane rubber. Some of my aftermarket tires are cast like this, but they are either blackwalls or meant to have the letters painted. -
Your Process of Applying Tire Decals
Chief Joseph replied to TedsModeling's topic in Model Building Questions and Answers
Here's my recommendation for using my tire lettering decals on standard kit tires: first, clean & degrease the tire pieces. Next, spray or brush a light coat of acrylic gloss onto the sidewall. Acrylic is important, because it will dry against the vinyl material and enamel won't. Future is good for this step. After the gloss has dried thoroughly, apply the decals with a decal setting solution such as Micro-set & -sol or Solvaset. After the decals have dried thoroughly, apply another acrylic gloss coat over the sidewall for the "Armor-All" look, or apply a flat clear for a more "normal" look. This is a fairly fool-proof method to get great results, and patience is the key to making it work.