mecklm
-
Posts
174 -
Joined
-
Last visited
Content Type
Profiles
Forums
Events
Gallery
Everything posted by mecklm
-
N-scale 1918 Pierce Arrow flatbed
mecklm replied to mecklm's topic in WIP: Model Trucks: Big Rigs and Heavy Equipment
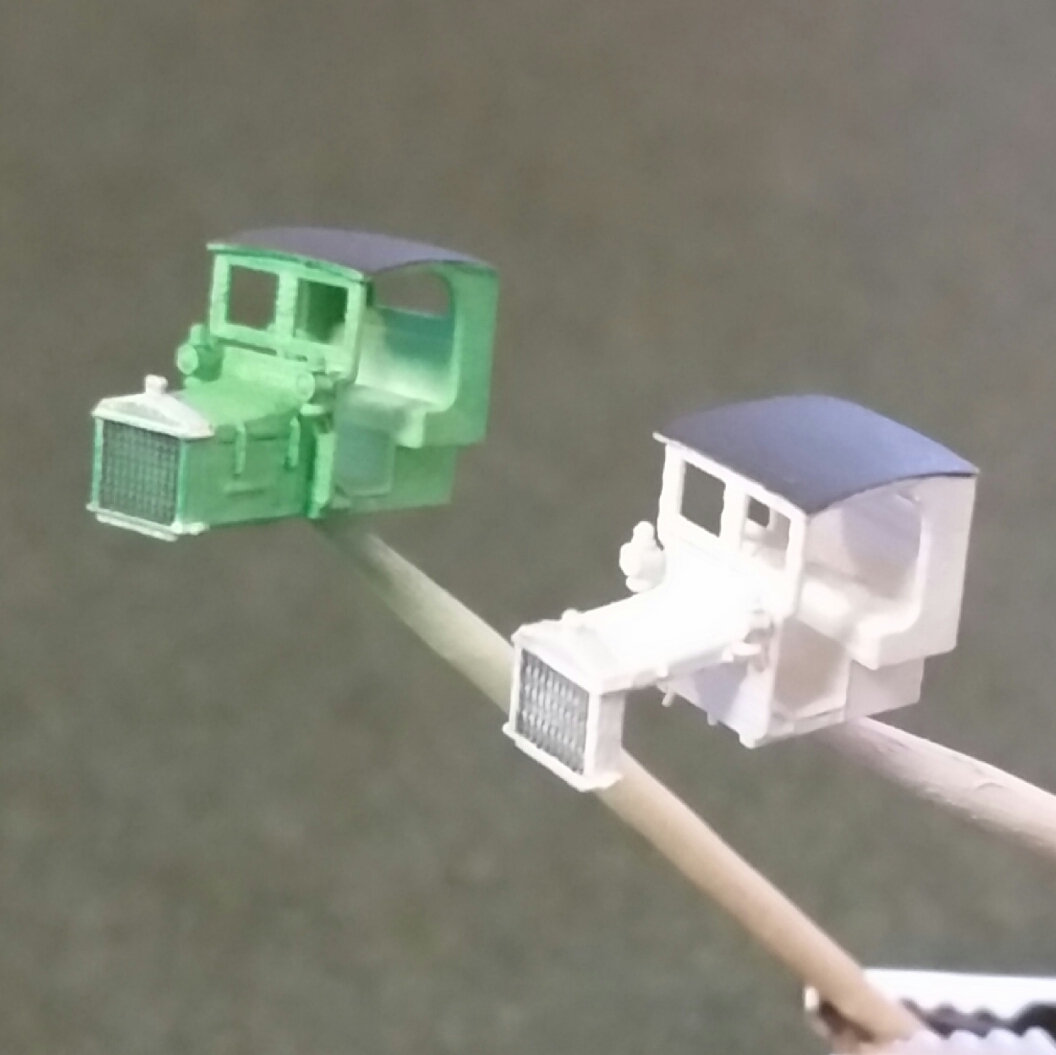
First time fit of cabs and beds on the frames. Clearance is a little tight for the radiators to seat fully in the frame. On the white truck the front locating tabs for the bed must still have some remnants of super glue on them as they don't fully seat either. I wanted to make sure the fit is taken care of before I attempt to mount the fenders and running boards. Mike
-
Cool body color! I think that looks really good with the flat finish. About that engine cover, the throttle bodies would really pop with a little bit of black wash. Keep up the good work! Mike
-
I saw several aero engines in 1/24 scale on Shapeways. There were at least 3 different radial engines and one of the V-12's (can't remember if it was the Allison or Rolls). The radials I stumbled across were multiple identical engines in one file and at least one of the bundles was pretty pricy at around $70 - they may have the same engines as a single item but I didn't happen to see any. Since I was actually searching for something else I certainly didn't do a comprehensive search for these aero engines. Again, going by my failing memory, I seem to recall the V-12 being something like $20-25. Of course there are all sorts of automotive engines in both 1/25 and 1/24 scale so perhaps a passable aero engine could be created with one of those as a basis. Just another option you can look into. Good luck with your project either way! Mike
-
N-scale 1918 Pierce Arrow flatbed
mecklm replied to mecklm's topic in WIP: Model Trucks: Big Rigs and Heavy Equipment
Finally, they're on all fours... Mike
-
N-scale 1918 Pierce Arrow flatbed
mecklm replied to mecklm's topic in WIP: Model Trucks: Big Rigs and Heavy Equipment
A few more pictures... Mike
-
N-scale 1918 Pierce Arrow flatbed
mecklm replied to mecklm's topic in WIP: Model Trucks: Big Rigs and Heavy Equipment
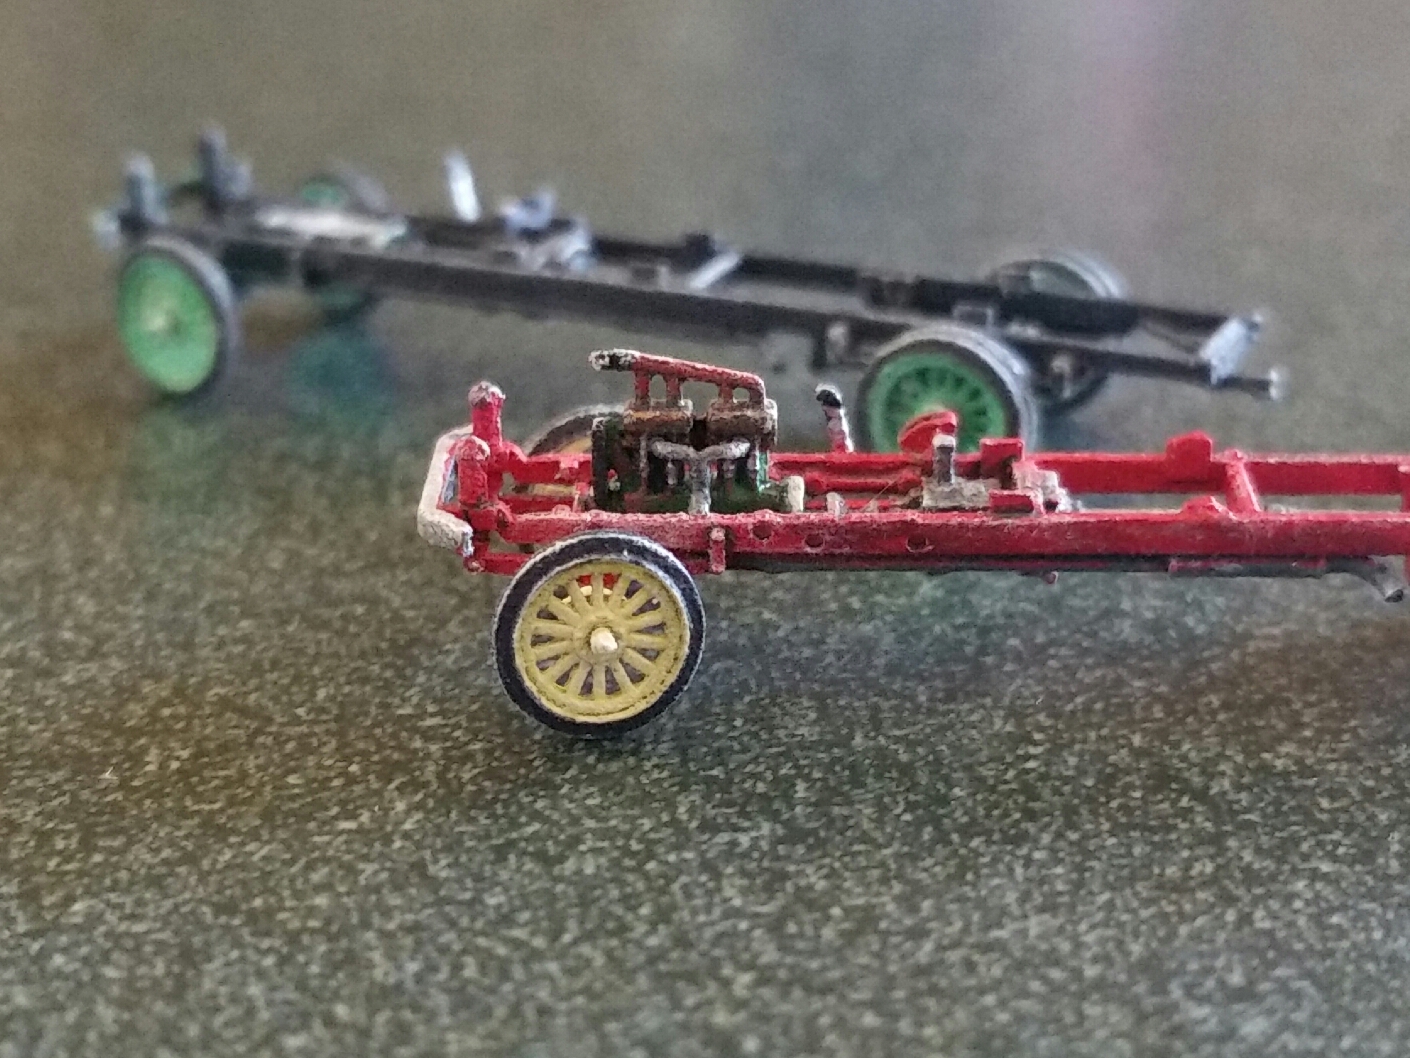
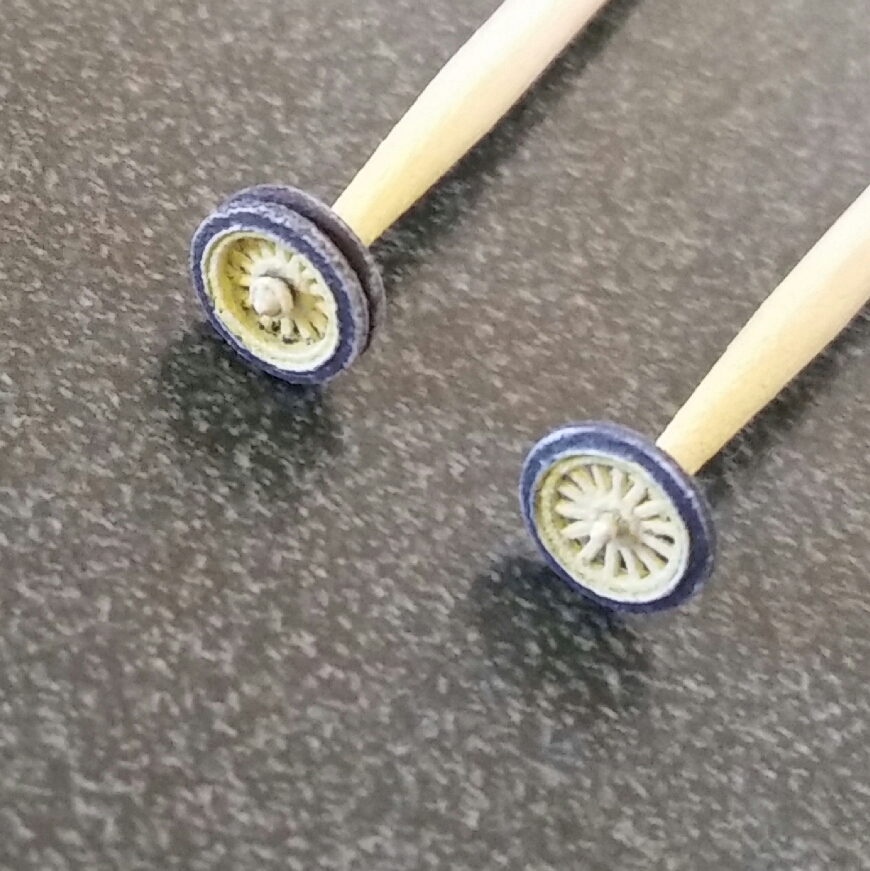
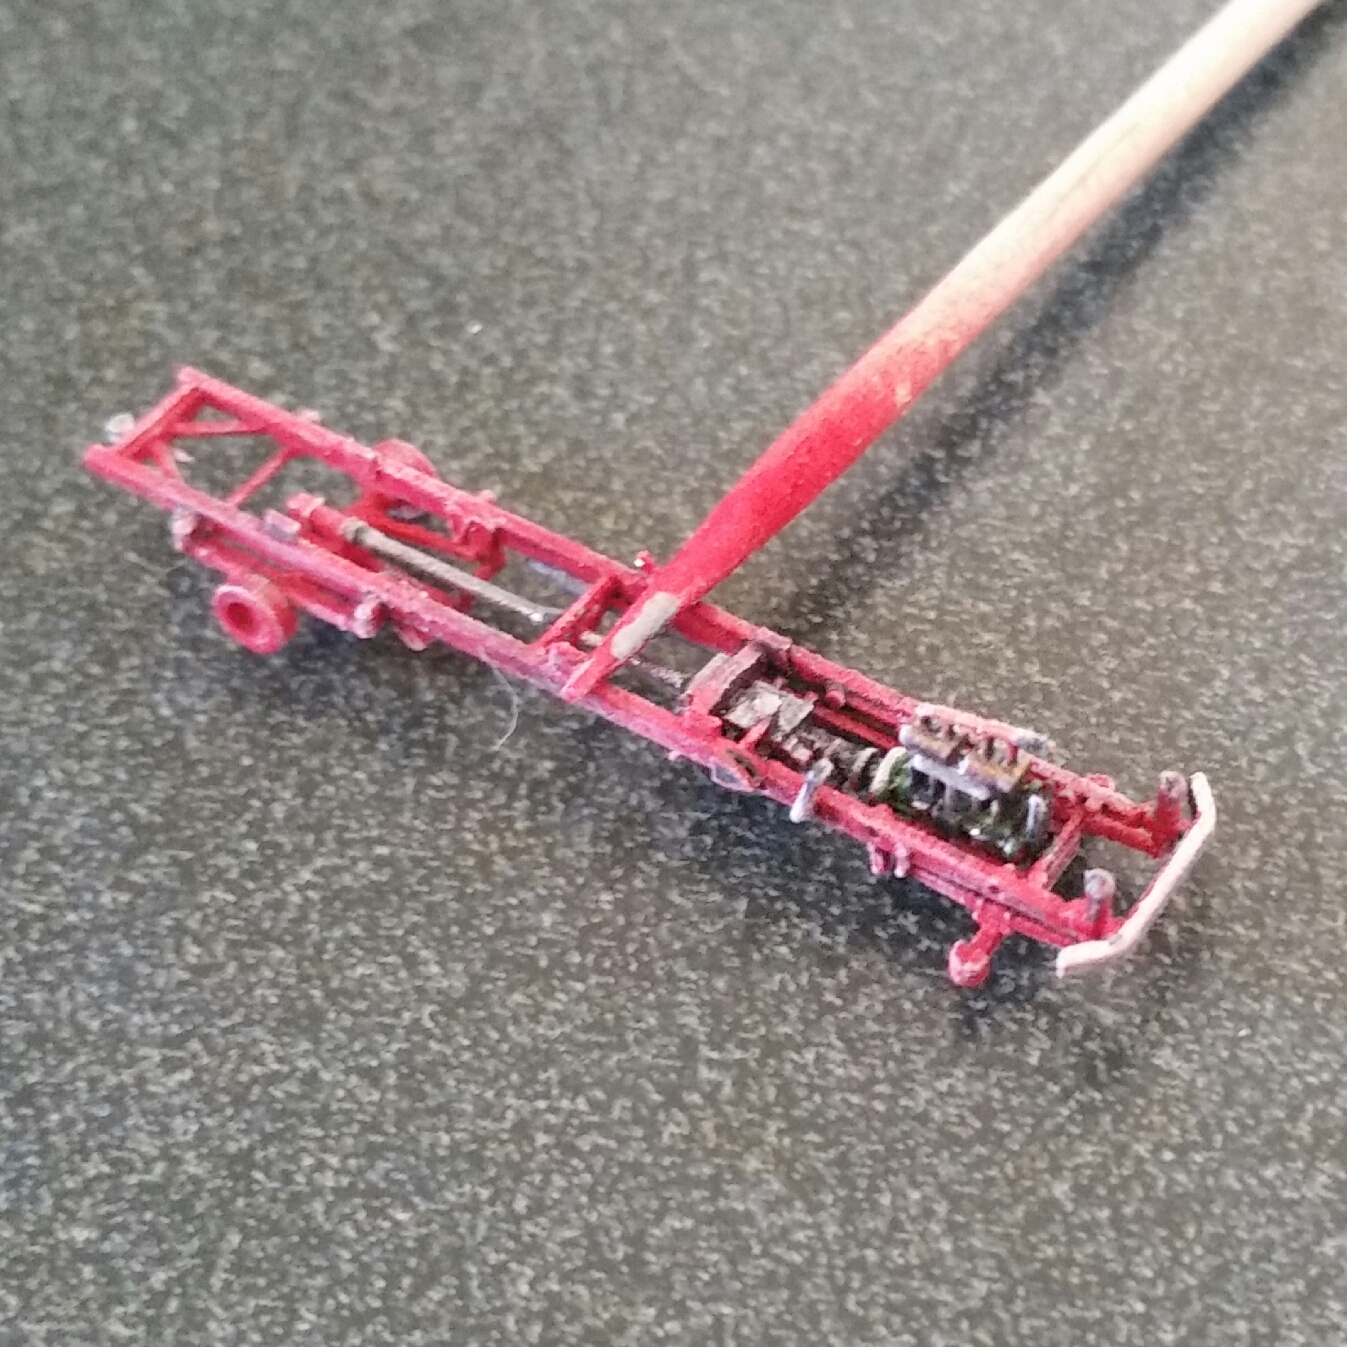
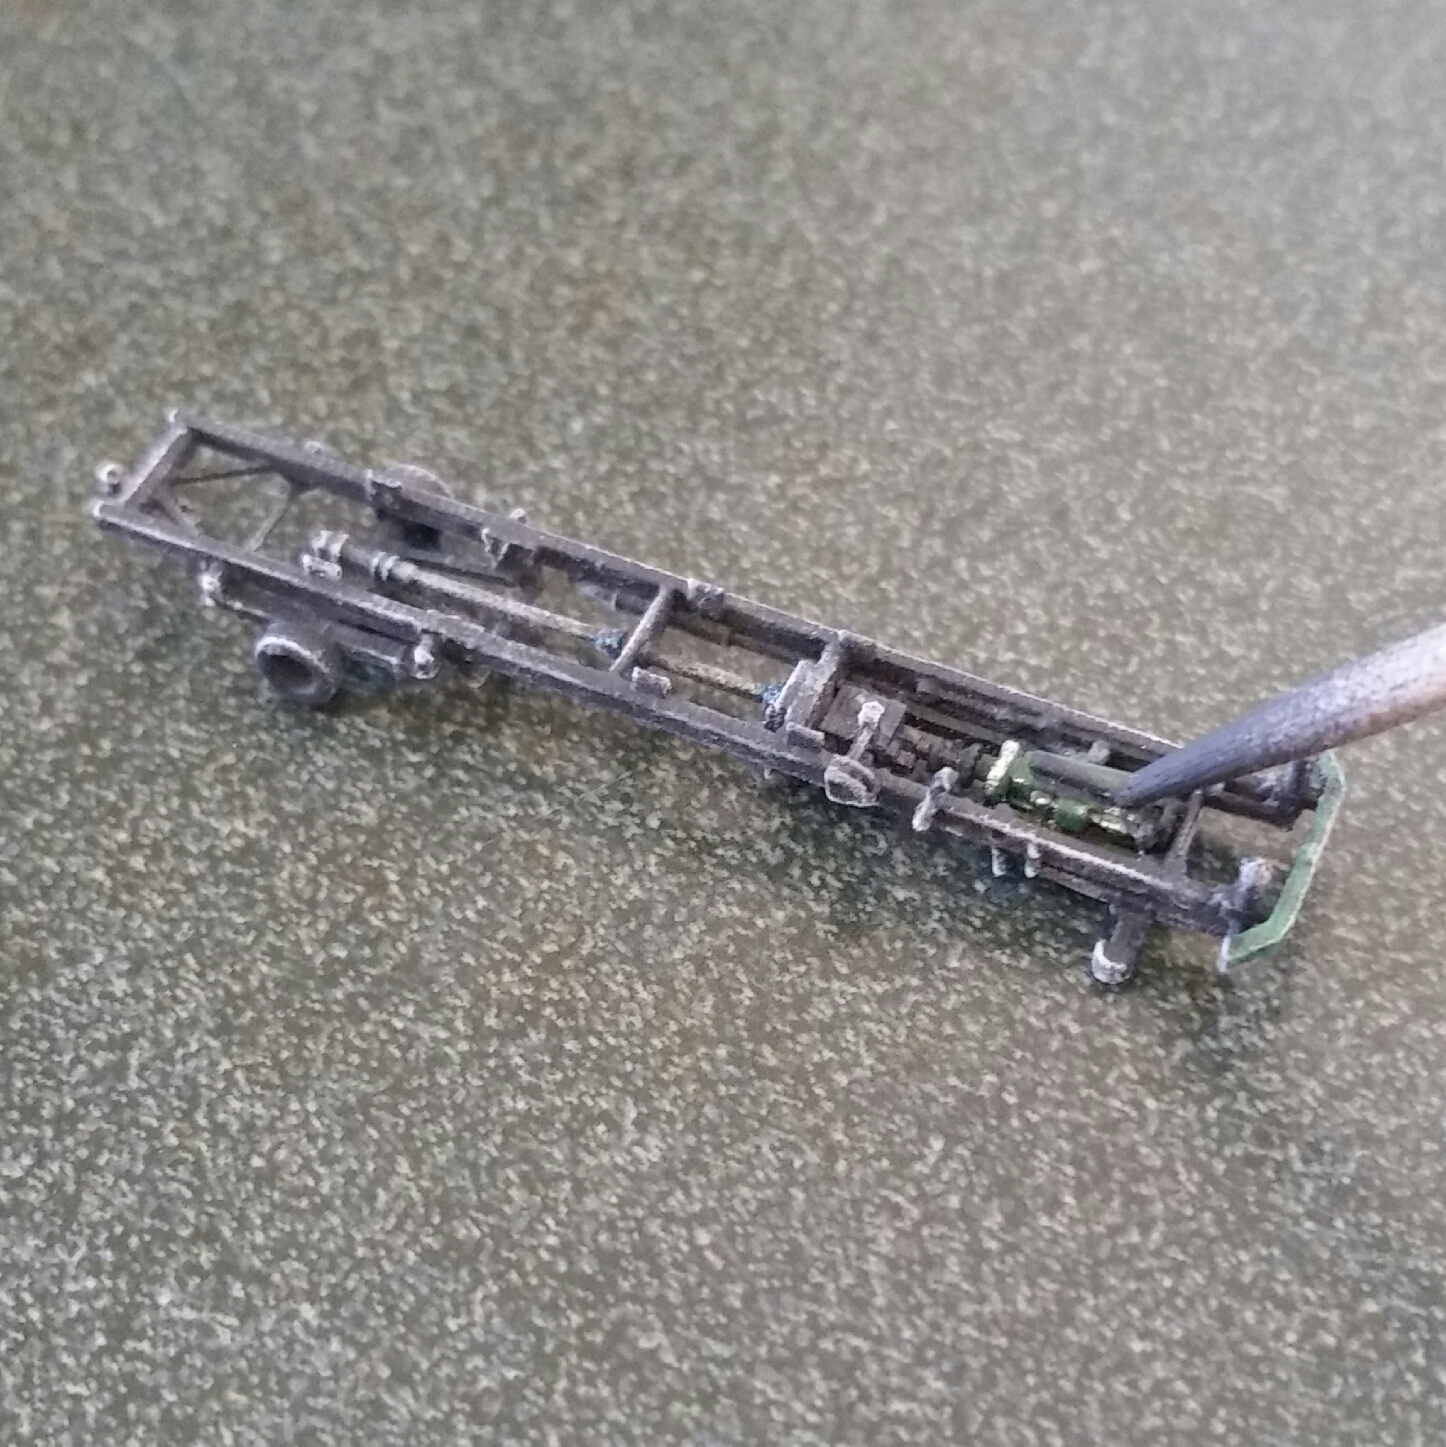
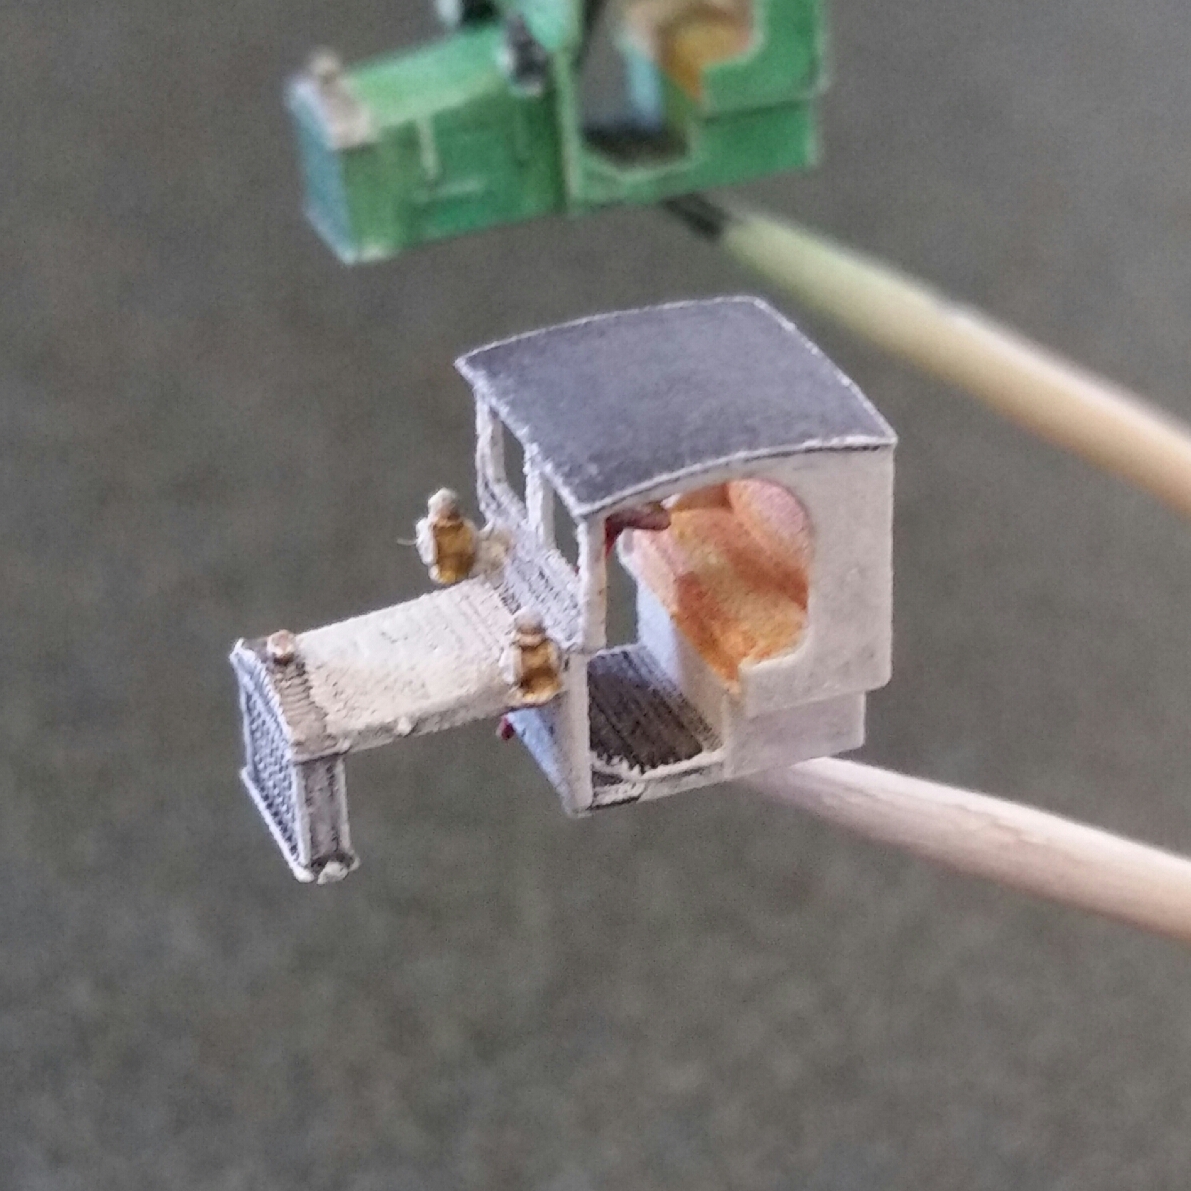
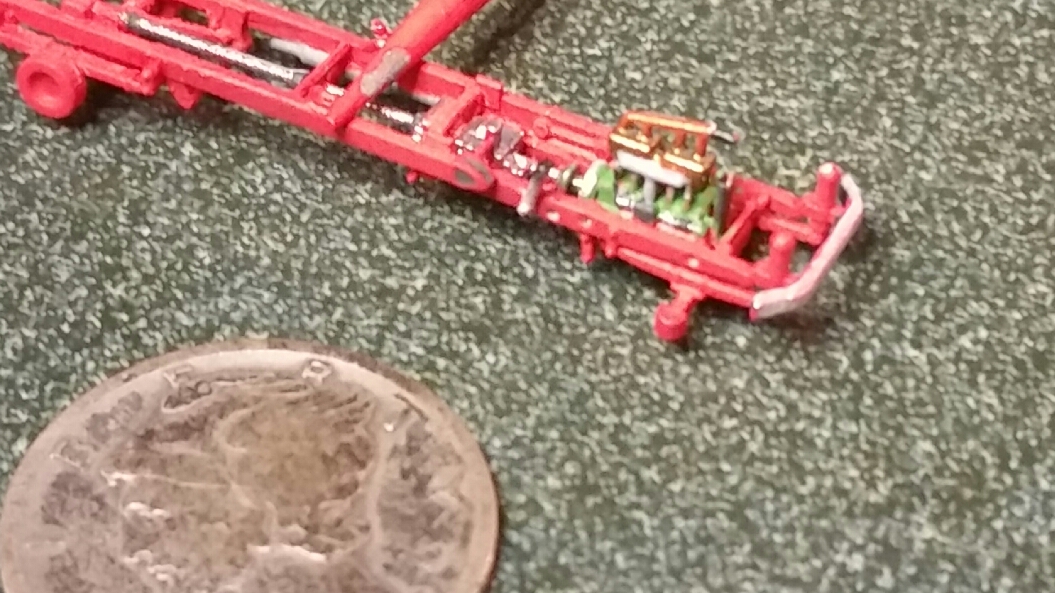
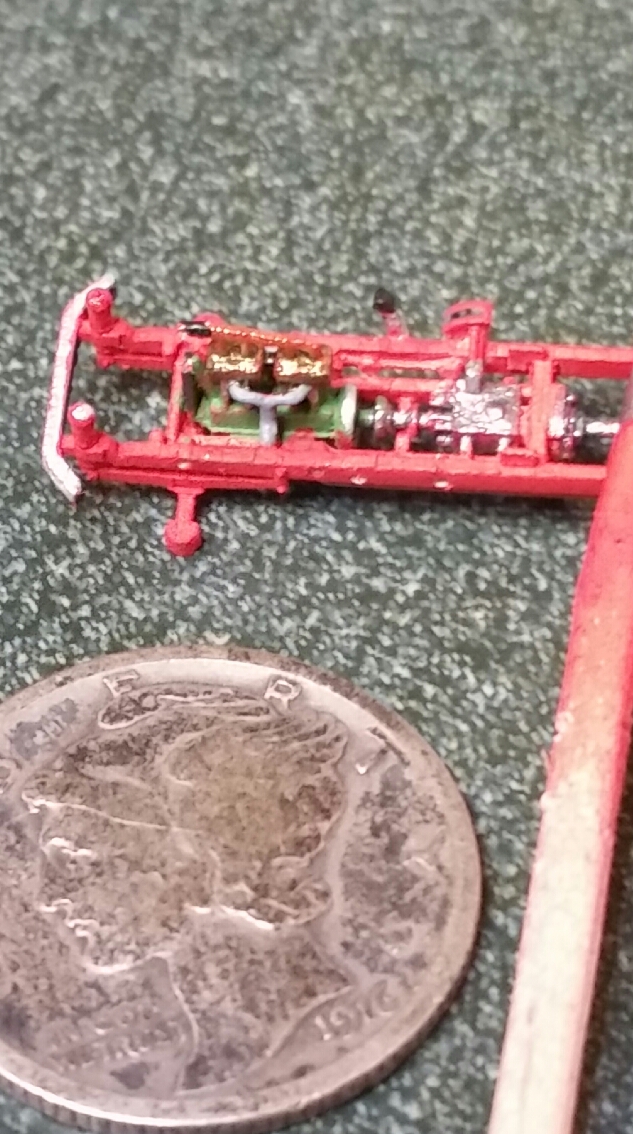
I finished the detail painting, consisting of the seats and tires. I ran into a problem with the seats in that none of my paint brushes had a small enough ferrule to get under the steering column and wheel. What I ended up doing was whittling down two different tan colored pencils and using them in a scraping fashion to get color on all faces of the seat. All the parts were then given a wash - gray for the white, green and yellow items; dark gray for the red items and pure black for the "black" frame. After the washes dried, I dry brushed all parts with a lightened version of their base color. When this set, I dry brushed the high points and edges with pure white. In honor of Harry P., I gave the motor in the red frame a wash of Future tinted with some black. Next step is removing the parts from their toothpicks and touching up those spots. Then comes final assembly. Mike
-
Loadstar Brush Truck
mecklm replied to Chariots of Fire's topic in WIP: Model Trucks: Big Rigs and Heavy Equipment
Charles, you're creating another beauty here! Really nice detail work (and painting) on the engine/pump. Is that detail part of a kit or is that all scratch? By the looks of it, you must be on the home stretch with this. Mike -
my Porsche Diesel Jr
mecklm replied to bbowser's topic in WIP: All The Rest: Motorcycles, Aviation, Military, Sci-Fi, Figures
Very nice! Are the tires molded in black or did you have to paint them? -
Wow, that is fantastic! Different background and it will easily pass for a 1:1. I'd love to see the finished engine compartment with that cool little V8 in it. Mike
-
N-scale 1918 Pierce Arrow flatbed
mecklm replied to mecklm's topic in WIP: Model Trucks: Big Rigs and Heavy Equipment
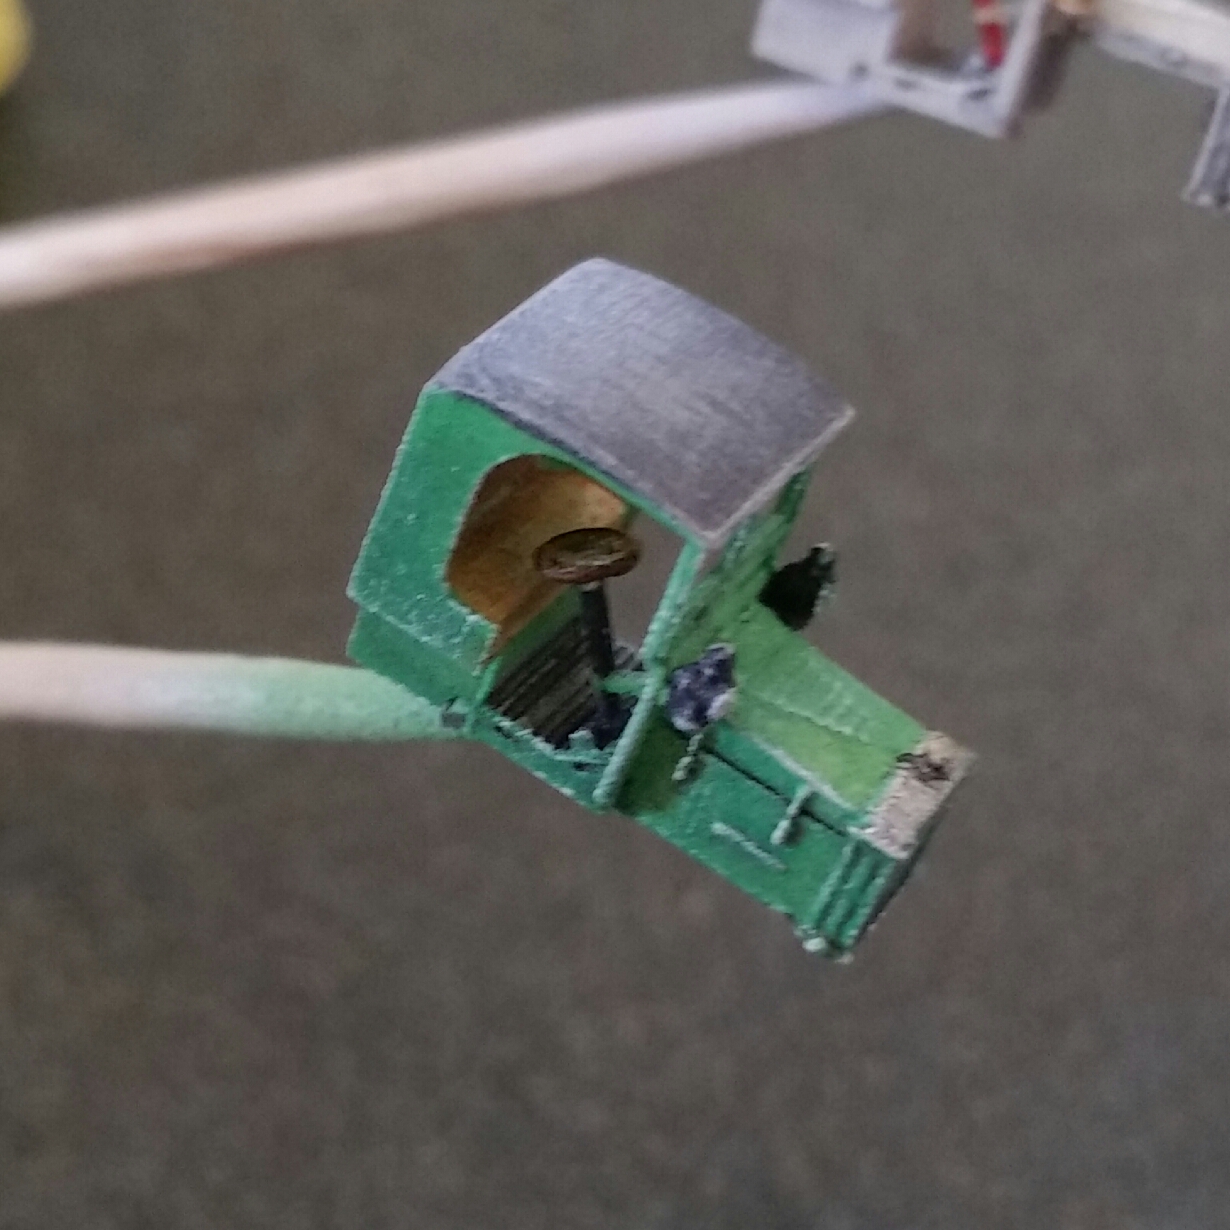
Got some paint on the lights, cab floor, pedals, steering column and several emblems on the cab sides. Also painted the radiator caps brass. Mike
-
N-scale 1918 Pierce Arrow flatbed
mecklm replied to mecklm's topic in WIP: Model Trucks: Big Rigs and Heavy Equipment
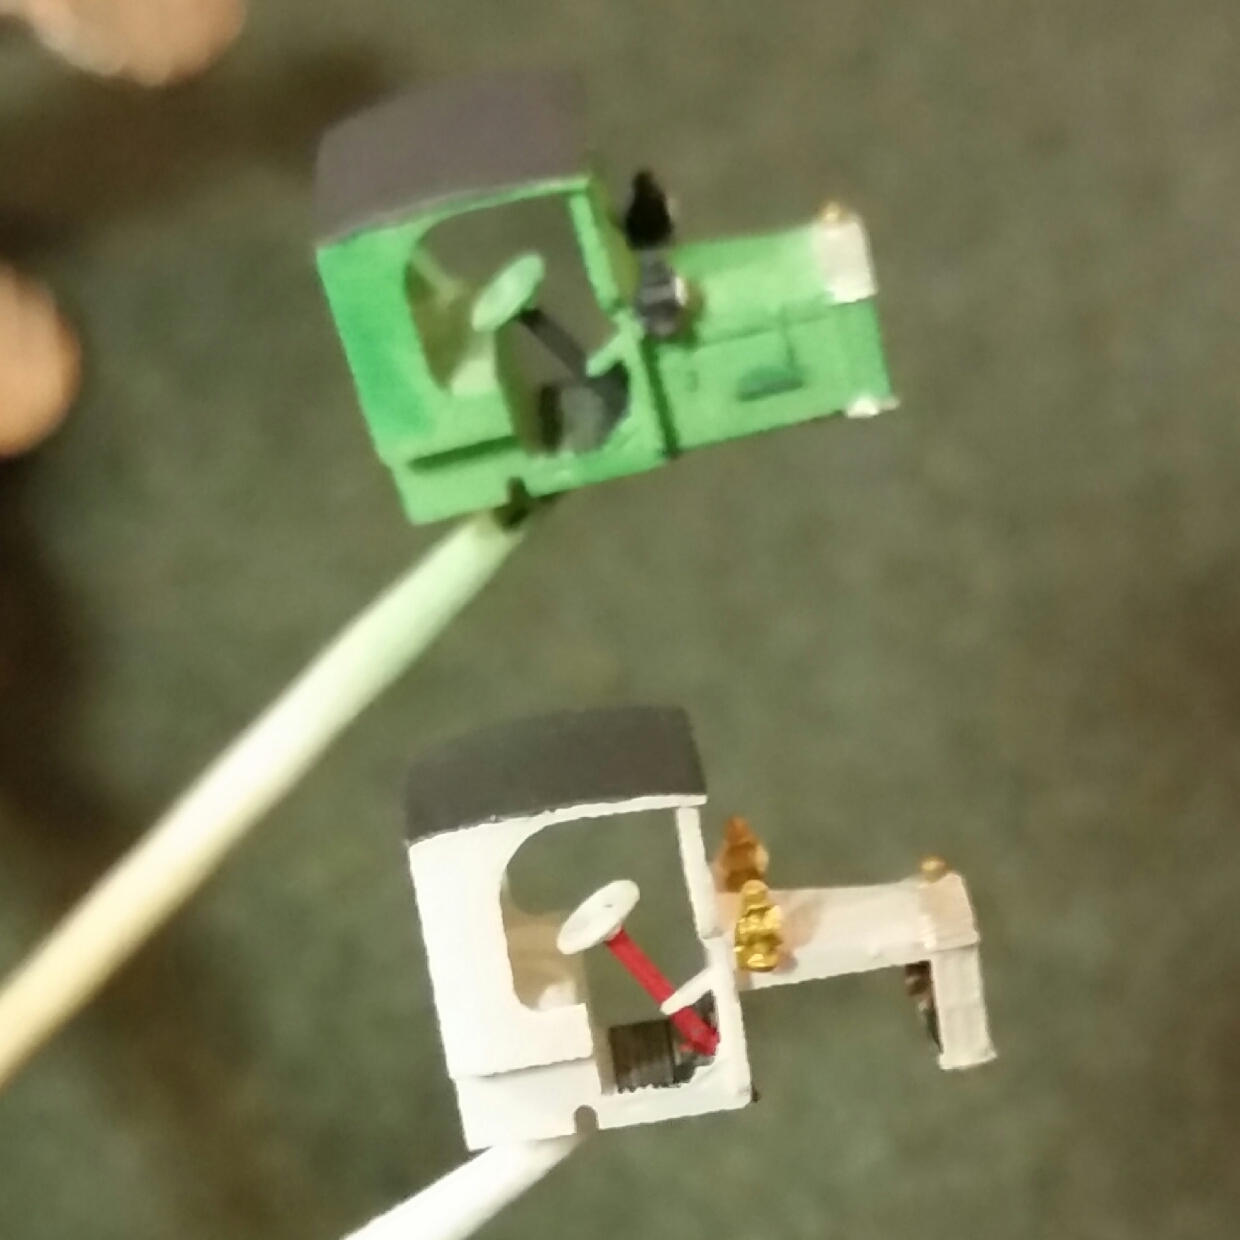
Got the first bit of paint on the cabs - more to come... Mike
-
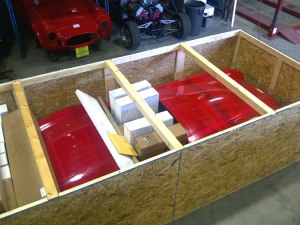
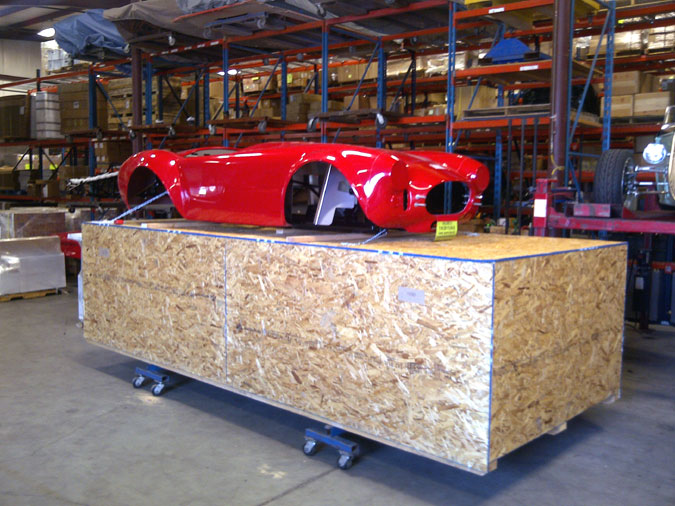
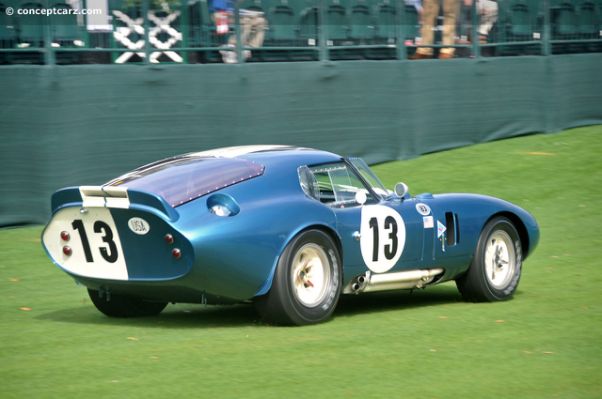
Cool idea! You did a great job capturing the real deal. I found these pics that show a real Cobra in the crate. Mike
-
N-scale 1918 Pierce Arrow flatbed
mecklm replied to mecklm's topic in WIP: Model Trucks: Big Rigs and Heavy Equipment
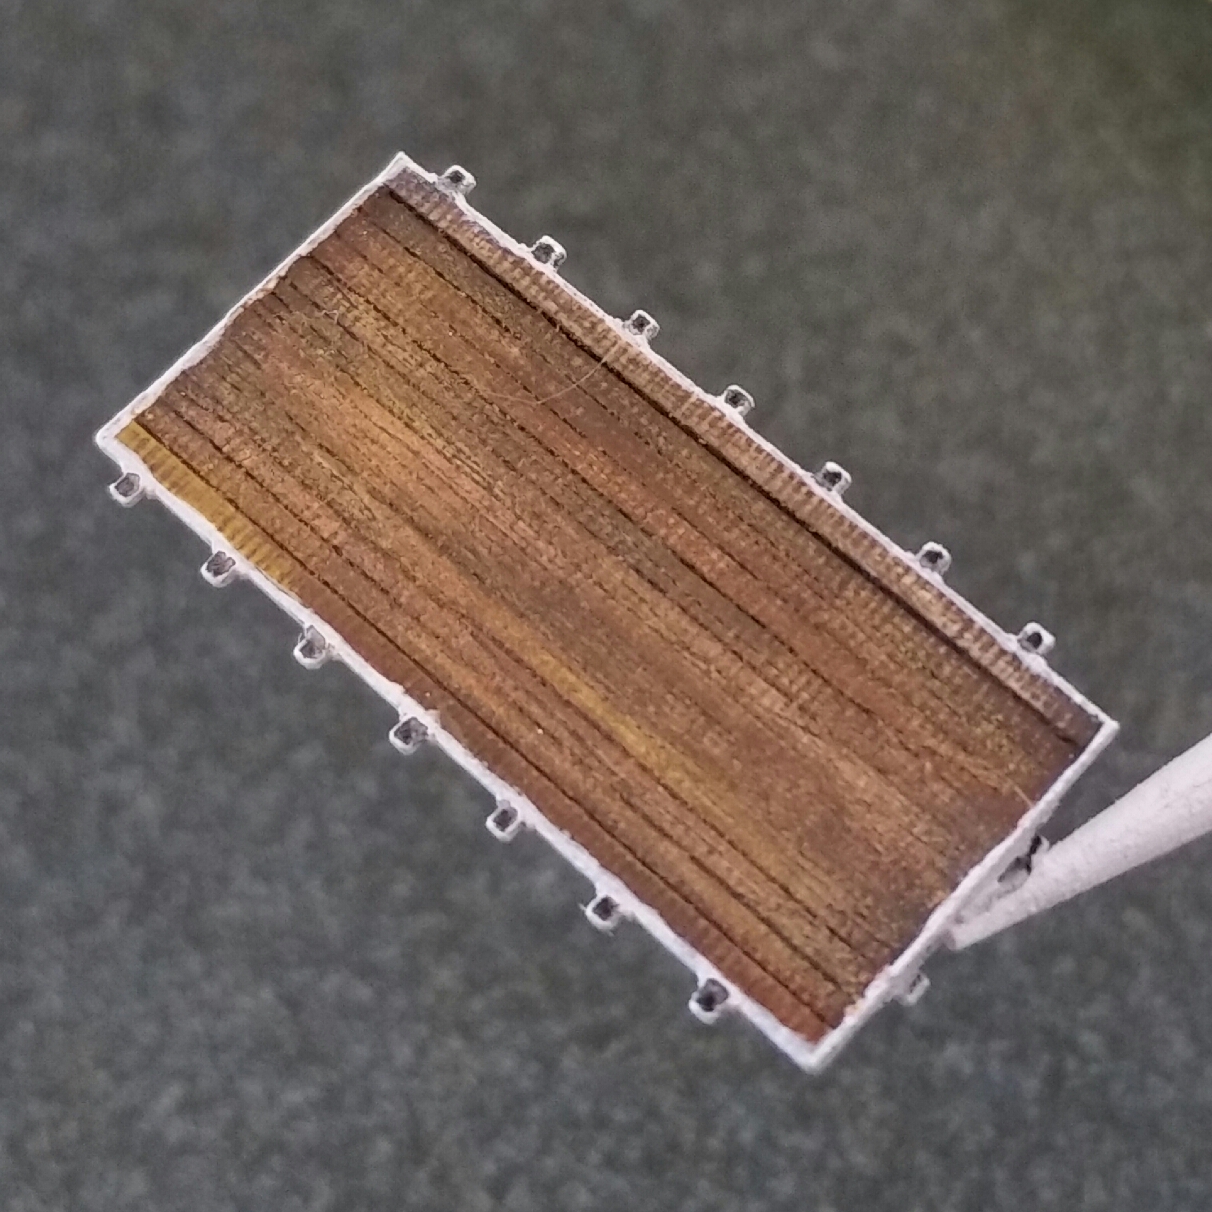
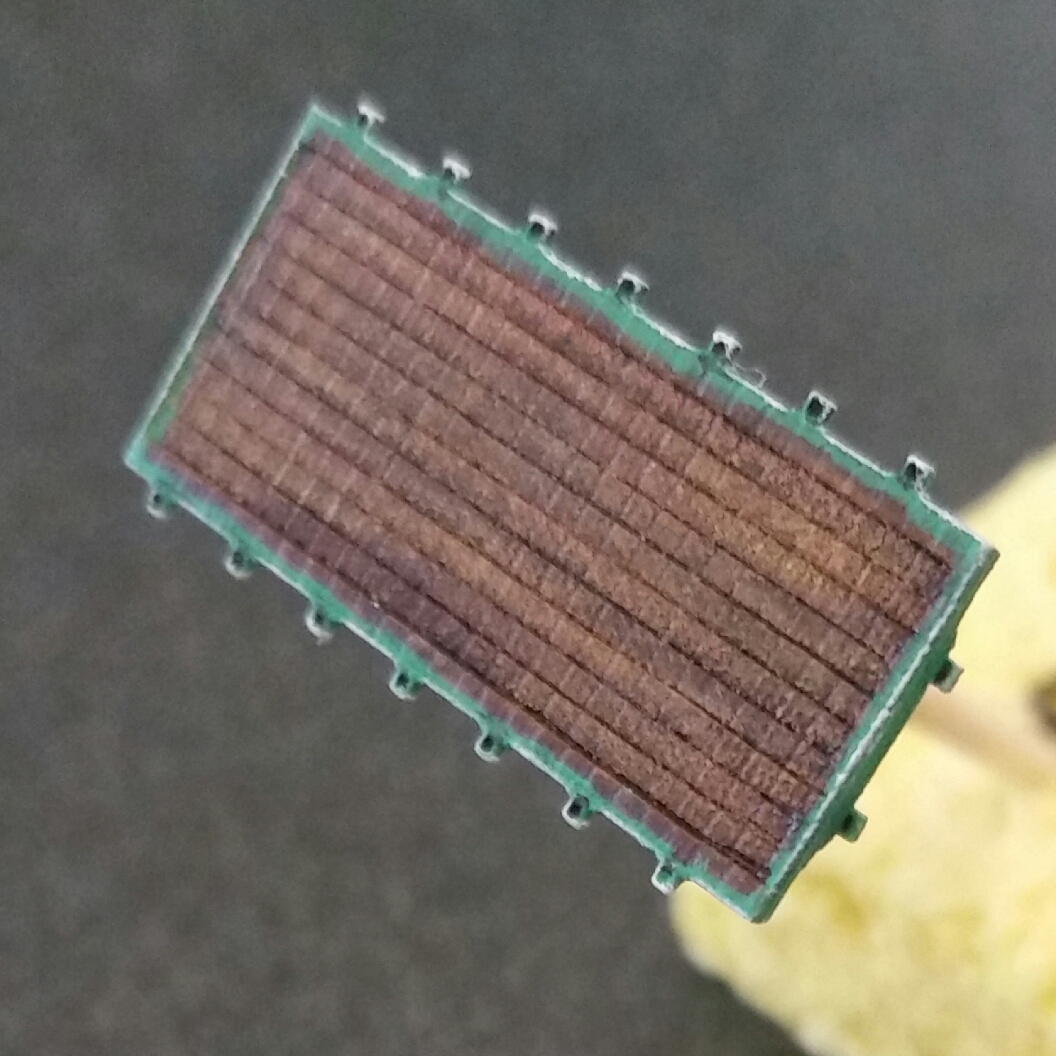
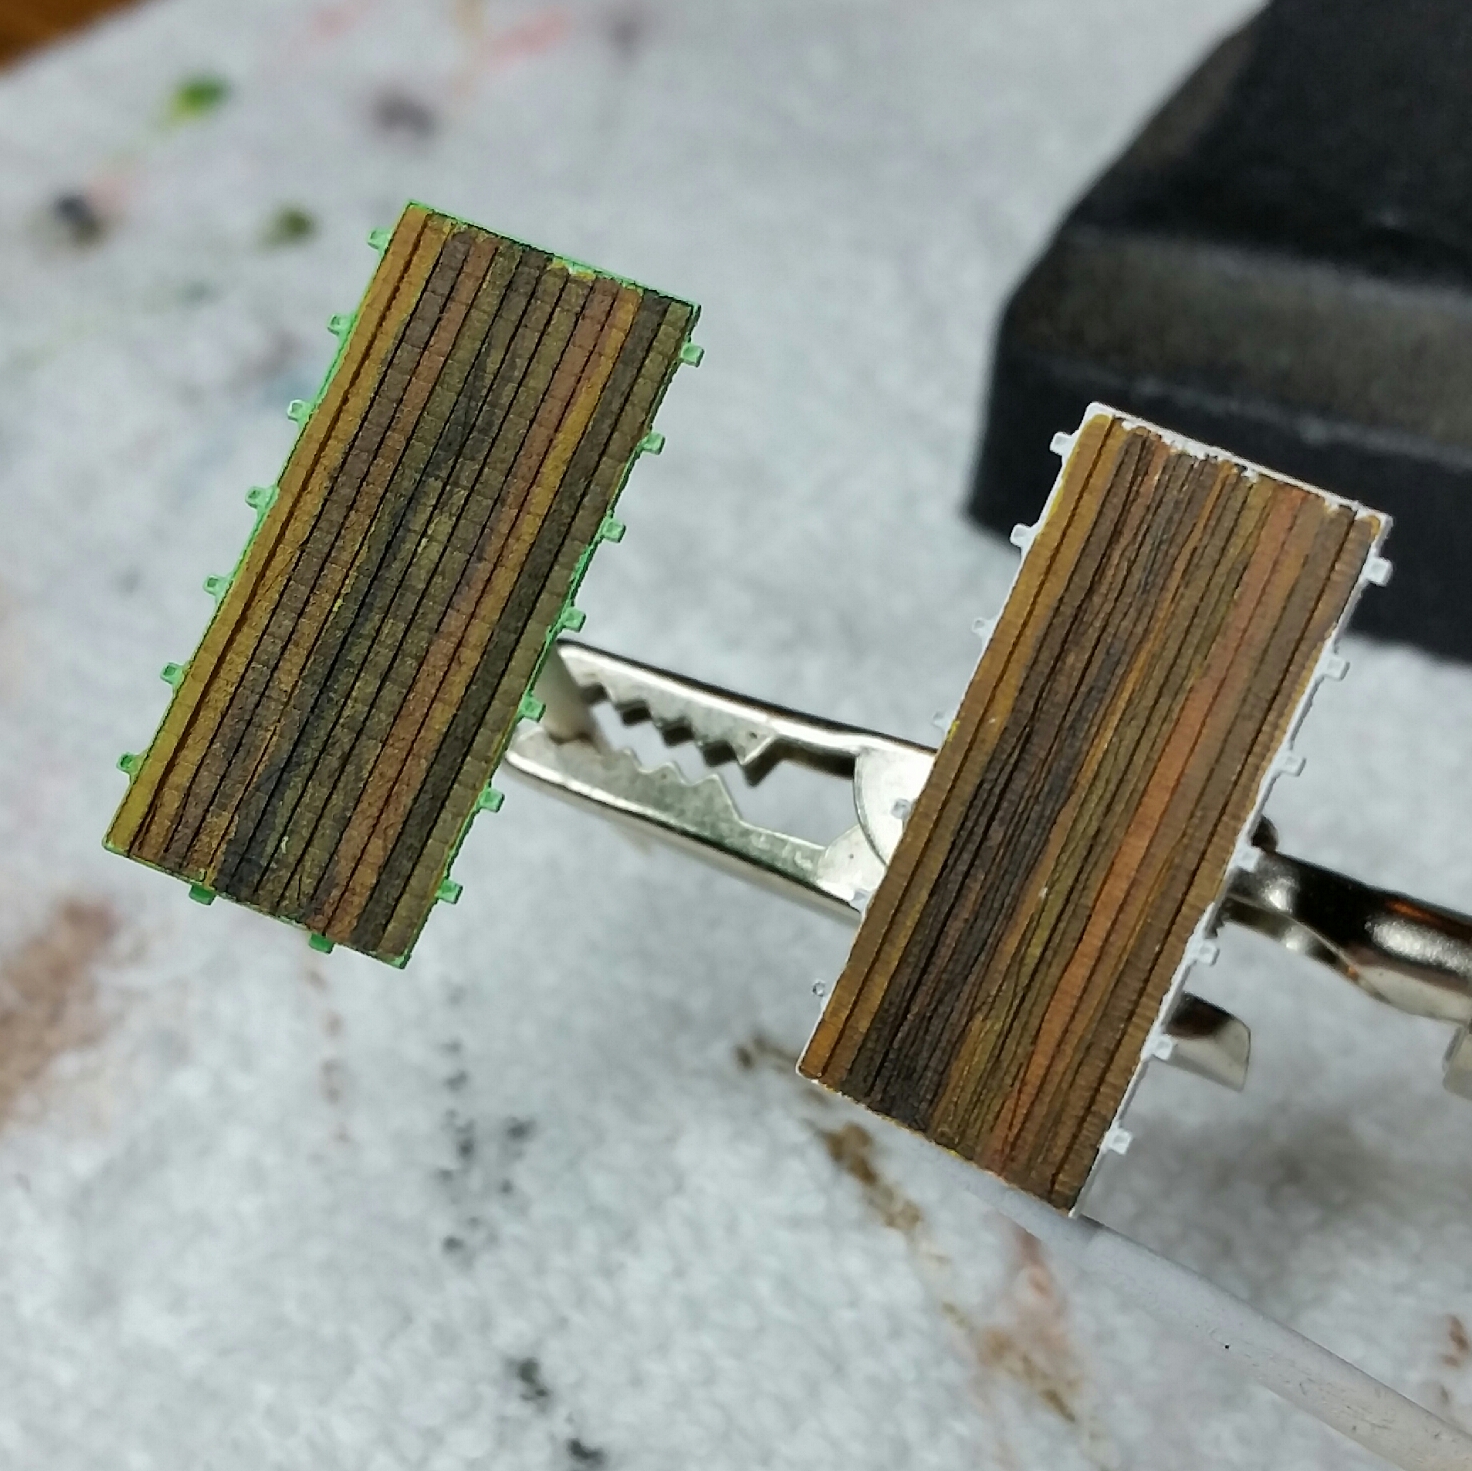
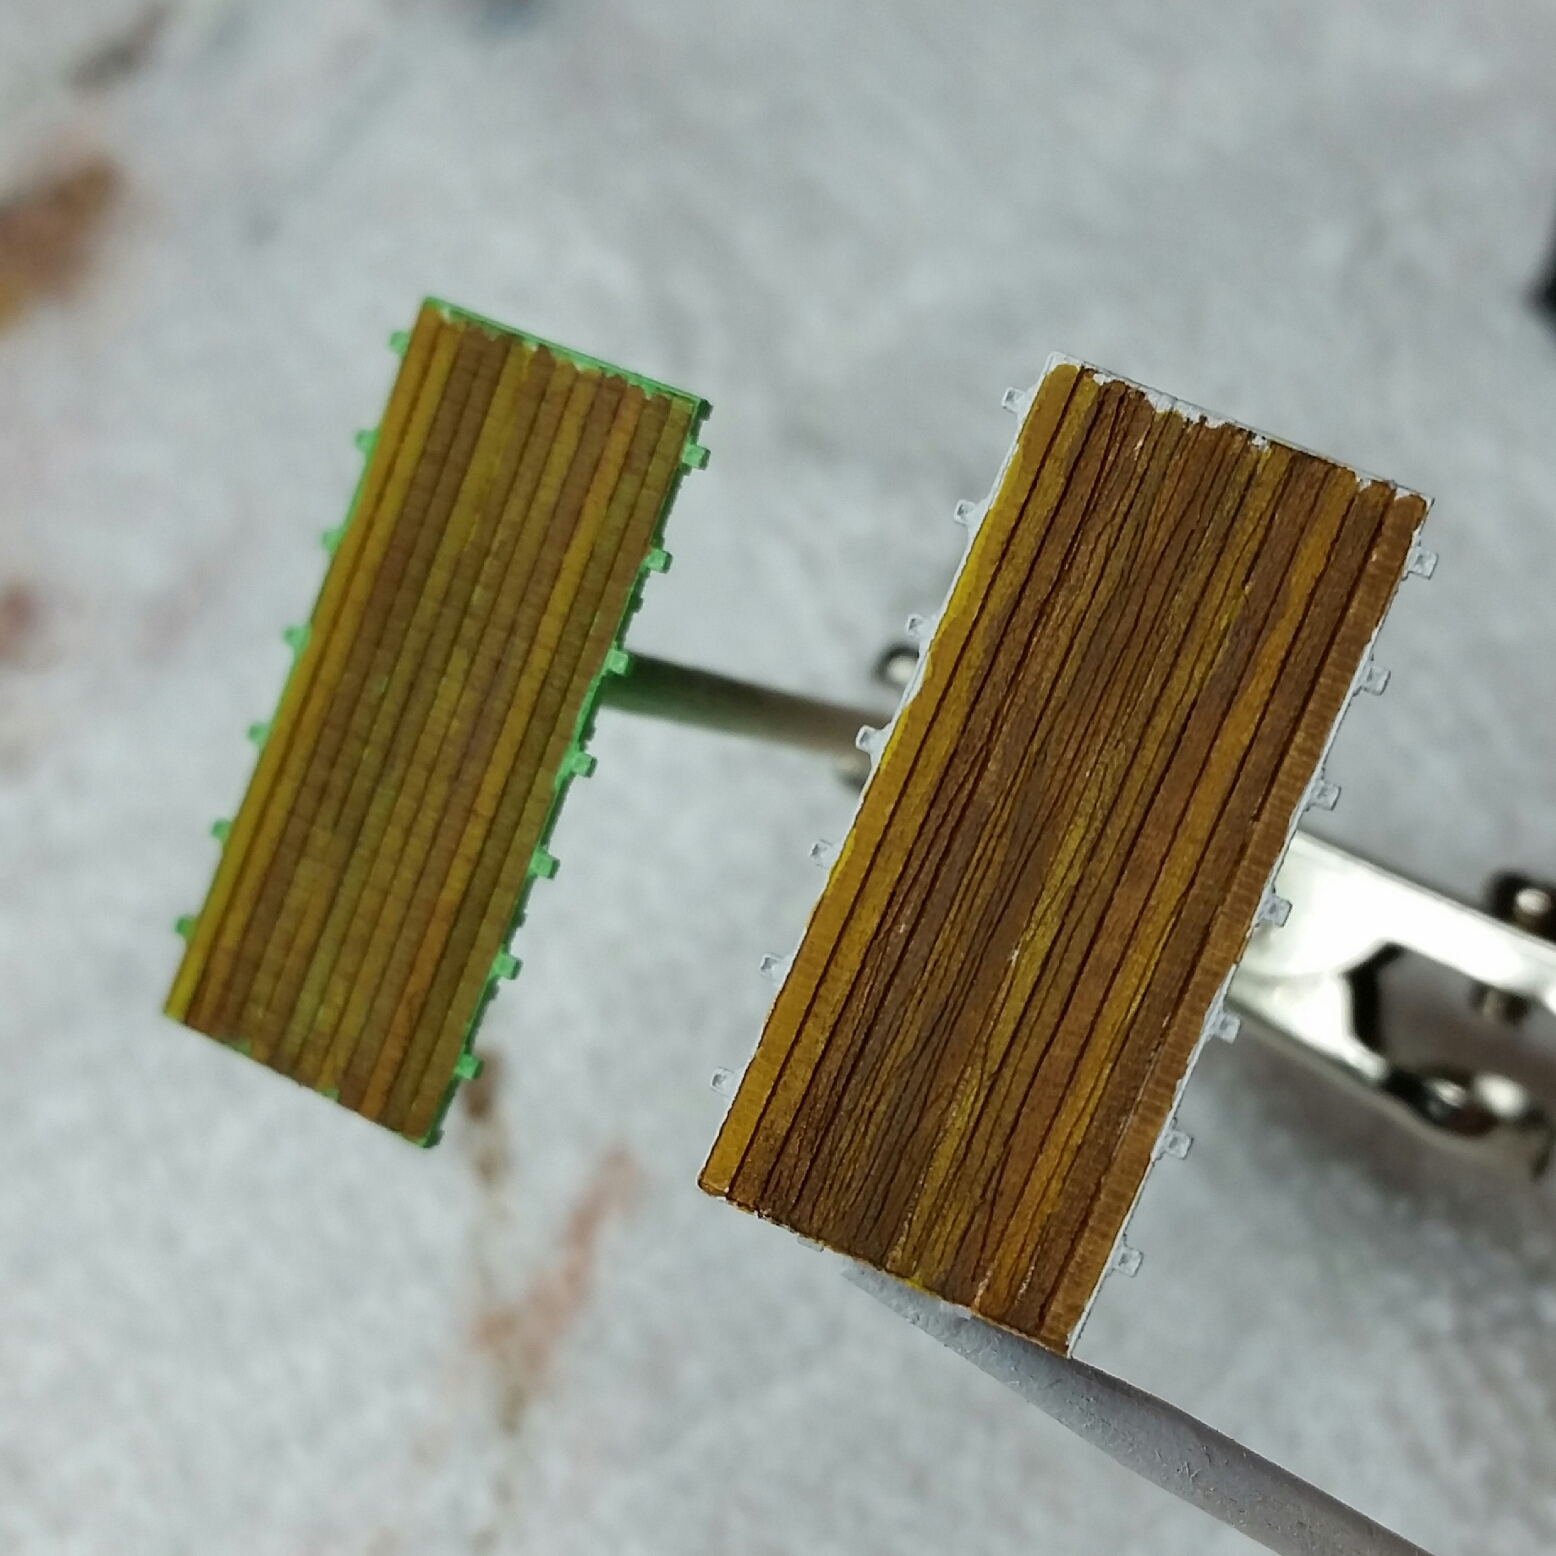
I added the woodgrain highlights using four different colors, depending on the board. Unfortunately I went right to the next step which is an overall wash to blend everything together so I didn't get a picture. This picture shows the state after the final wash. Last thing to do to finish the woodwork is touch up the truck base color around the perimeter of the bed. I might add some distinct stain patches here and there. Mike
-
N-scale 1918 Pierce Arrow flatbed
mecklm replied to mecklm's topic in WIP: Model Trucks: Big Rigs and Heavy Equipment
This is after applying the second round of washes, all different colors from the first round and, again, color is dependent on the particular board. Next up is adding representation of wood grain. Like the washes, there will be four different colors used, depending on the board. Mike
-
N-scale 1918 Pierce Arrow flatbed
mecklm replied to mecklm's topic in WIP: Model Trucks: Big Rigs and Heavy Equipment
First application of wash. Four different colors, depending on the board. Mike
-
N-scale 1918 Pierce Arrow flatbed
mecklm replied to mecklm's topic in WIP: Model Trucks: Big Rigs and Heavy Equipment
Jumping around a bit, I decided to tackle the wood deck on both trucks. Here is the first coat to be followed by multiple washes and some wood grain towards the end. I will post a picture as I complete each step. Mike
-
N-scale 1918 Pierce Arrow flatbed
mecklm replied to mecklm's topic in WIP: Model Trucks: Big Rigs and Heavy Equipment
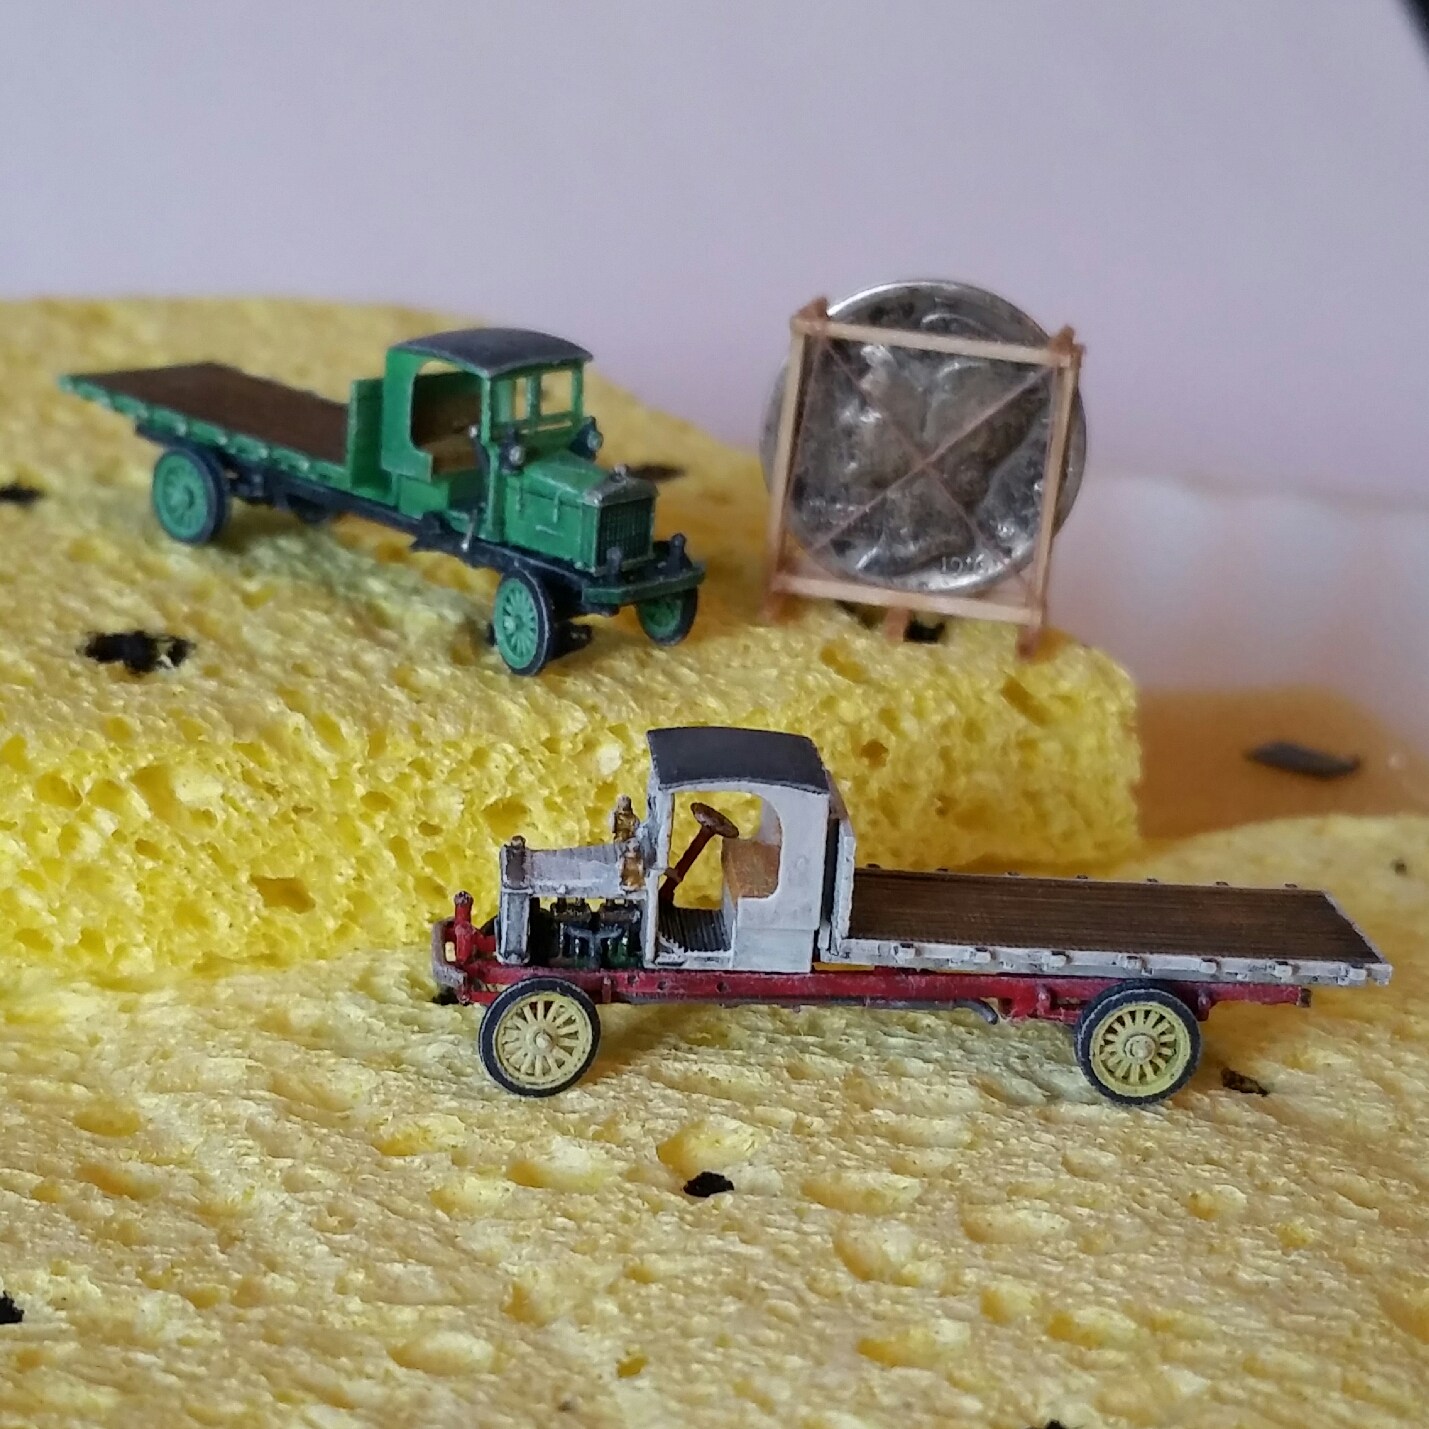
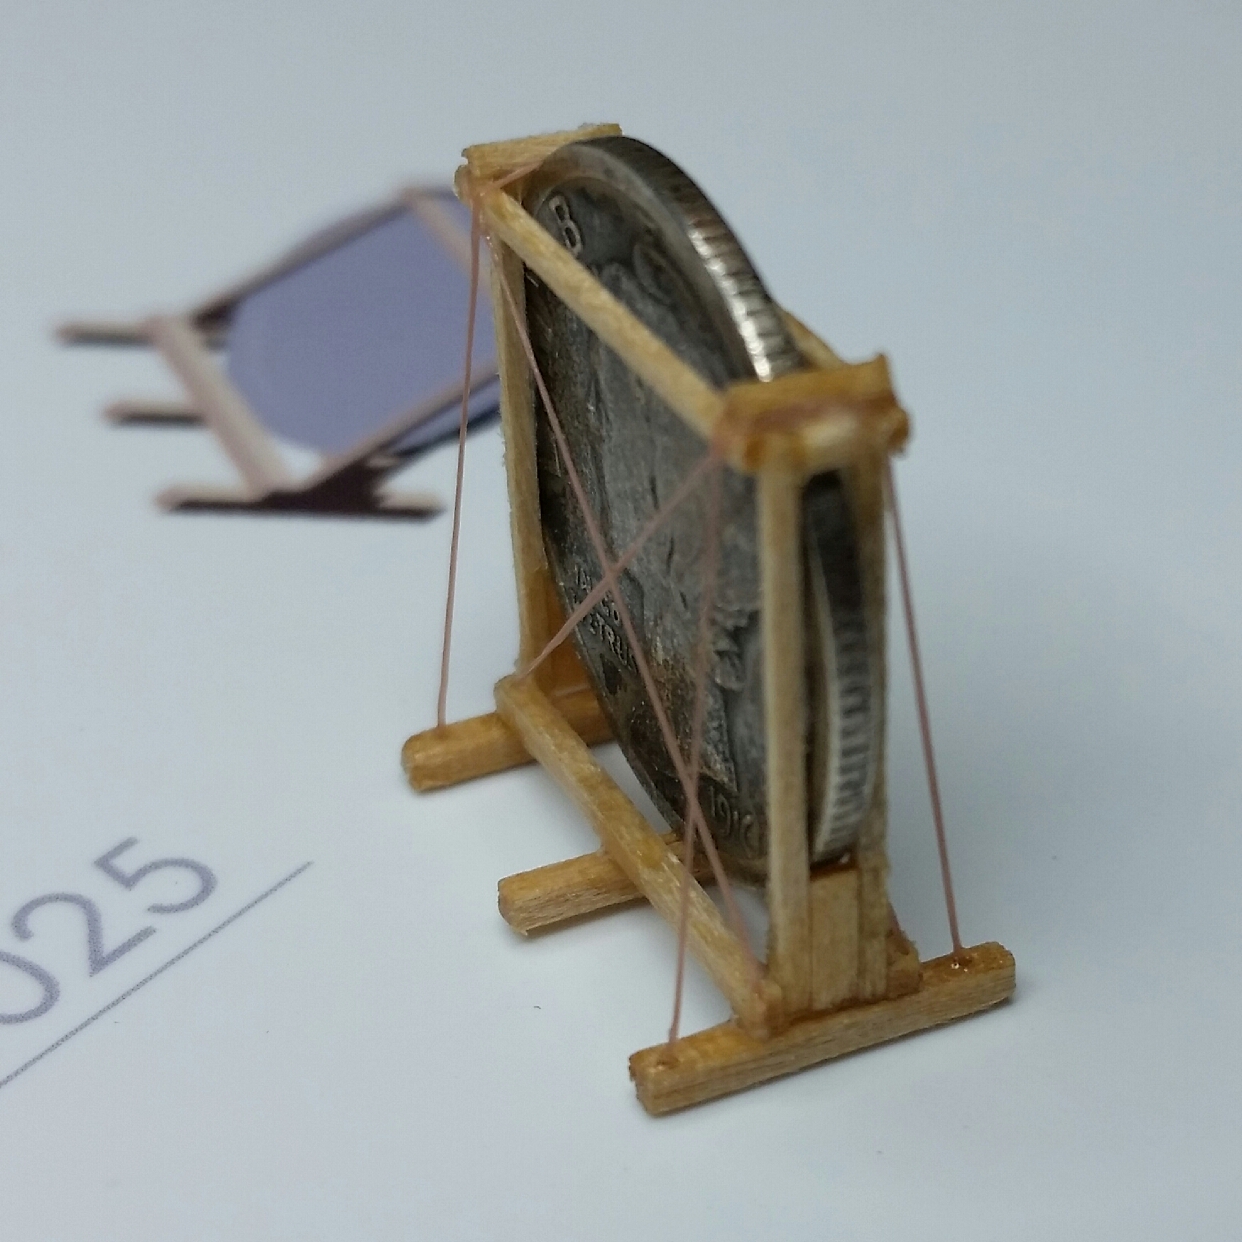
No additional painting but I decided to make my reference dime look like it's packaged for shipping back east. Just some strips of N-scale 4x4, 6x6 and 8x8 lumber, along with "fine" EZ-LINE for the bracing (tan in color). Now when I set my dime into a scene it will actually look like it belongs there. Mike
-
N-scale 1918 Pierce Arrow flatbed
mecklm replied to mecklm's topic in WIP: Model Trucks: Big Rigs and Heavy Equipment
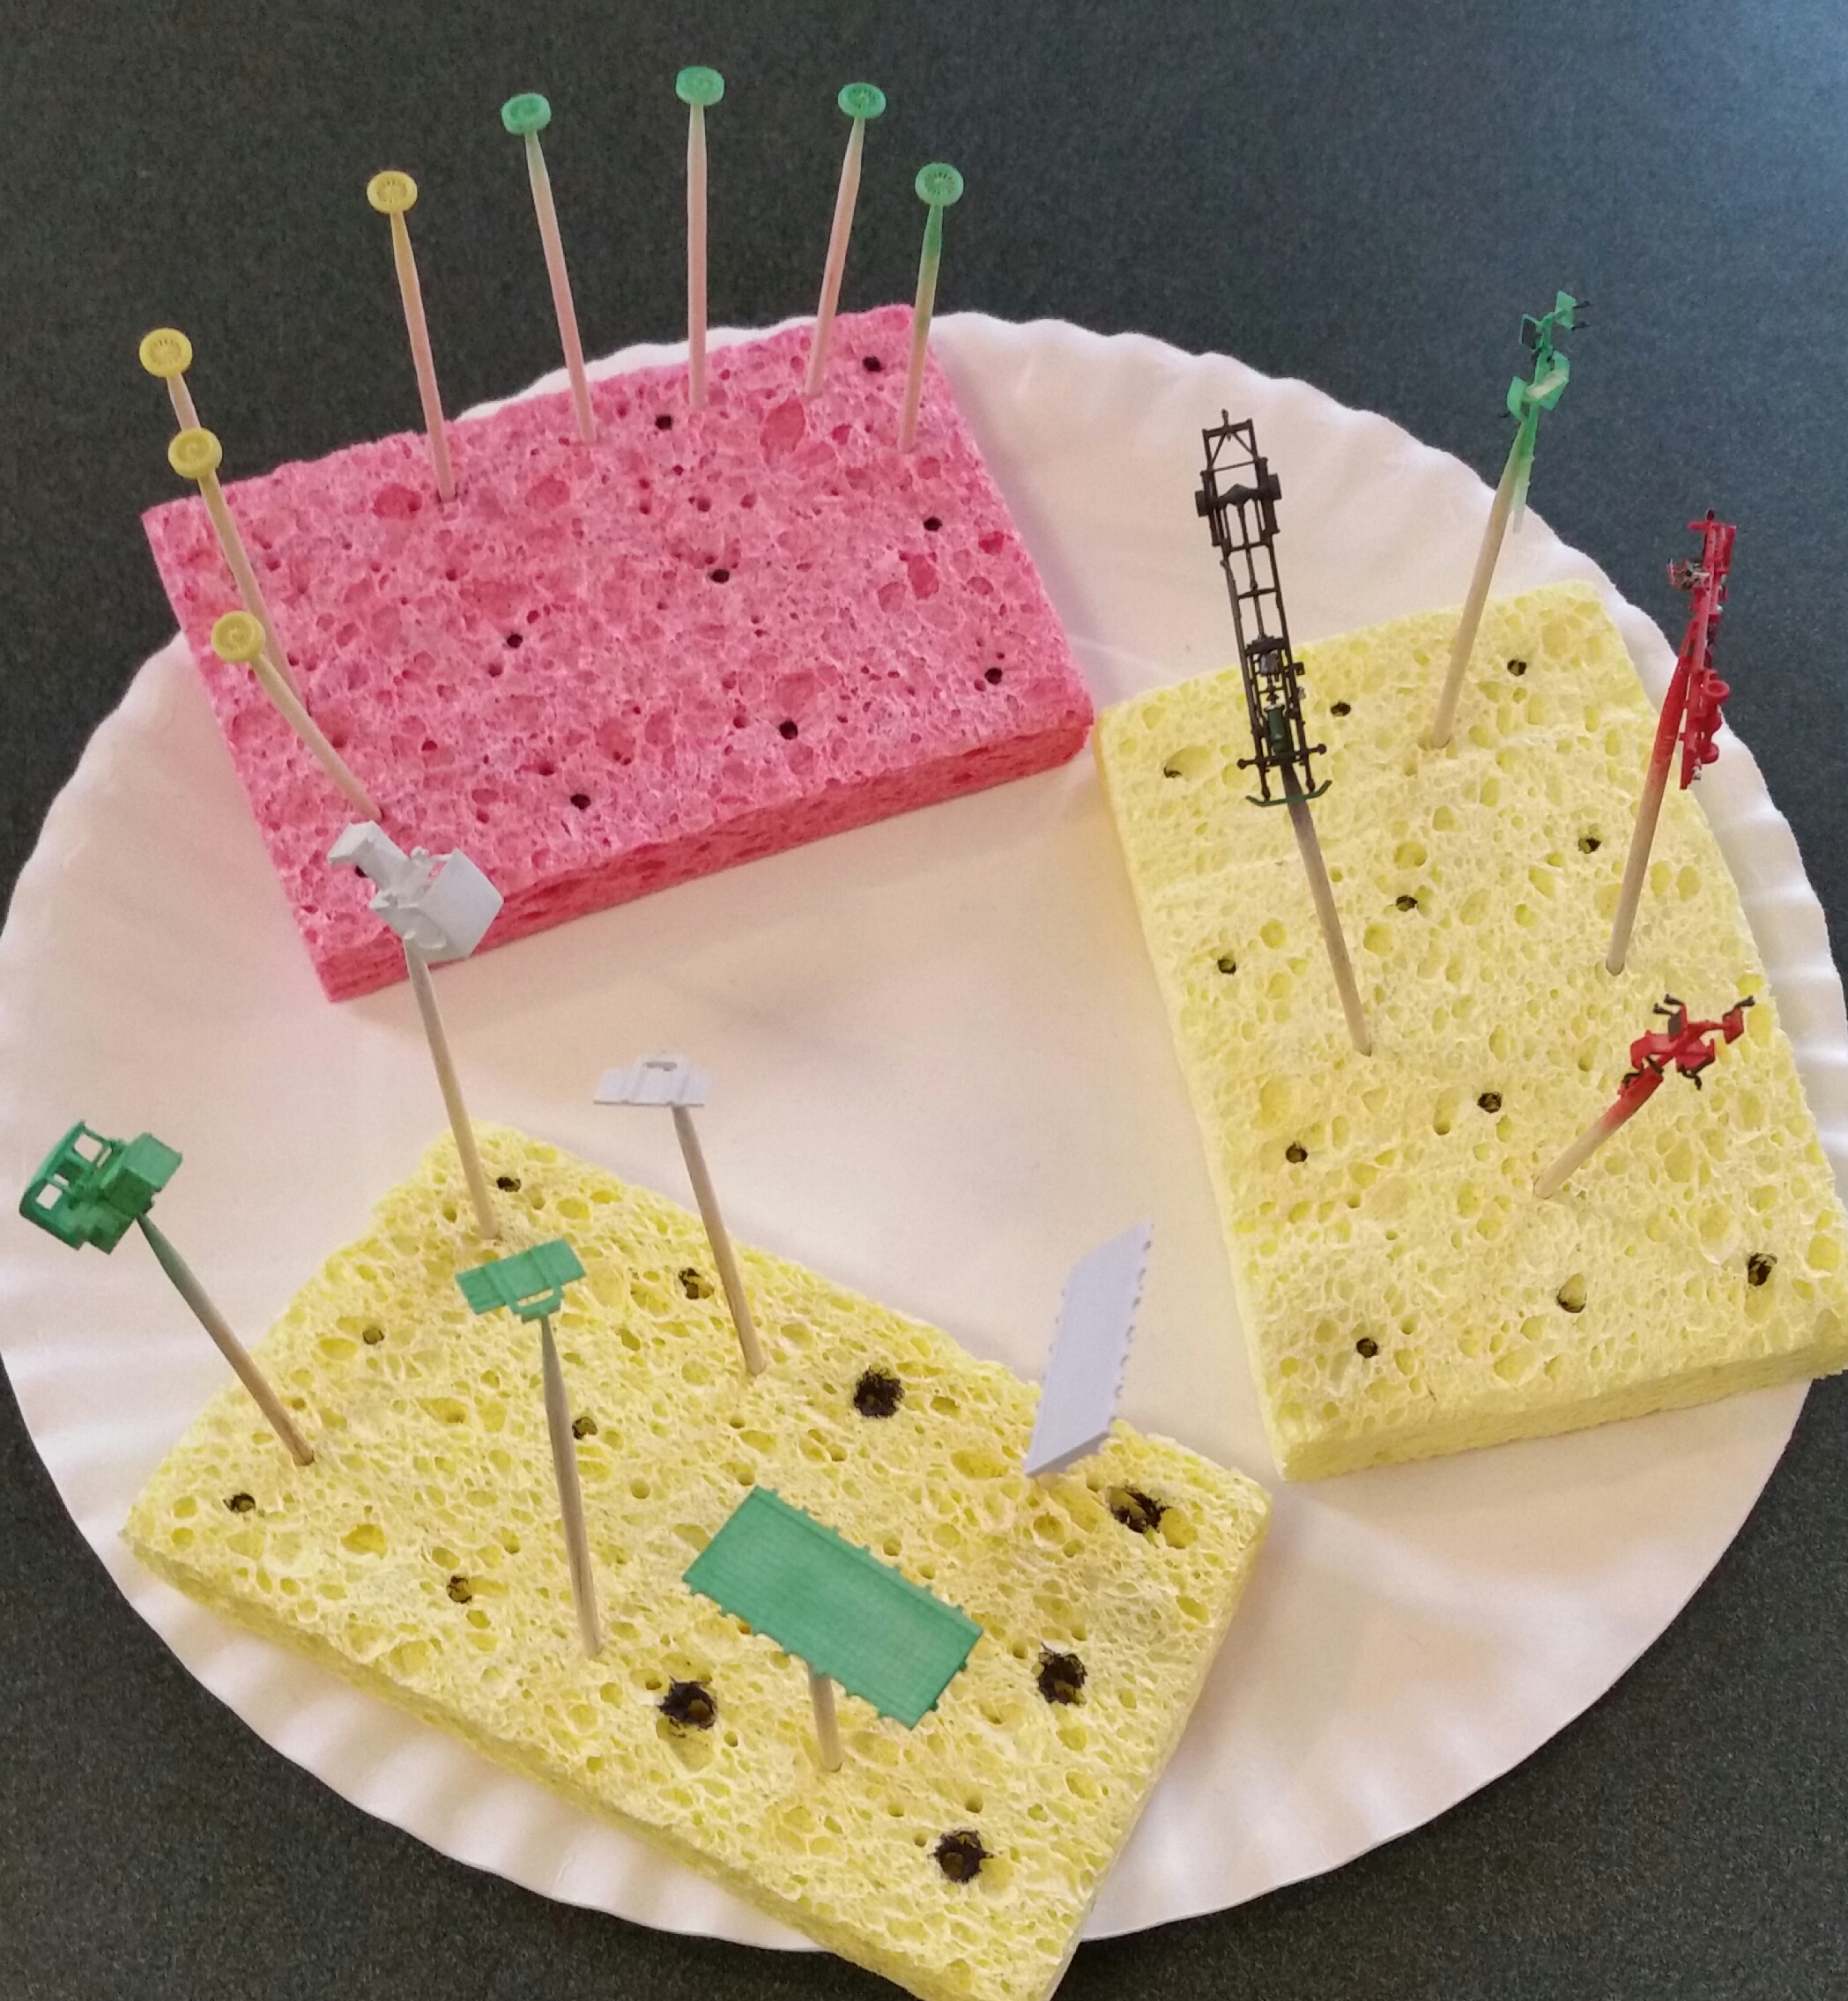
Yes Jim, that's a genuine, full size round toothpick. Kind of looks like a tree trunk in these closeups, lol. Here's the rest of the parts, each on its own toothpick. They make great handles during the prep and paint stages. Mike
-
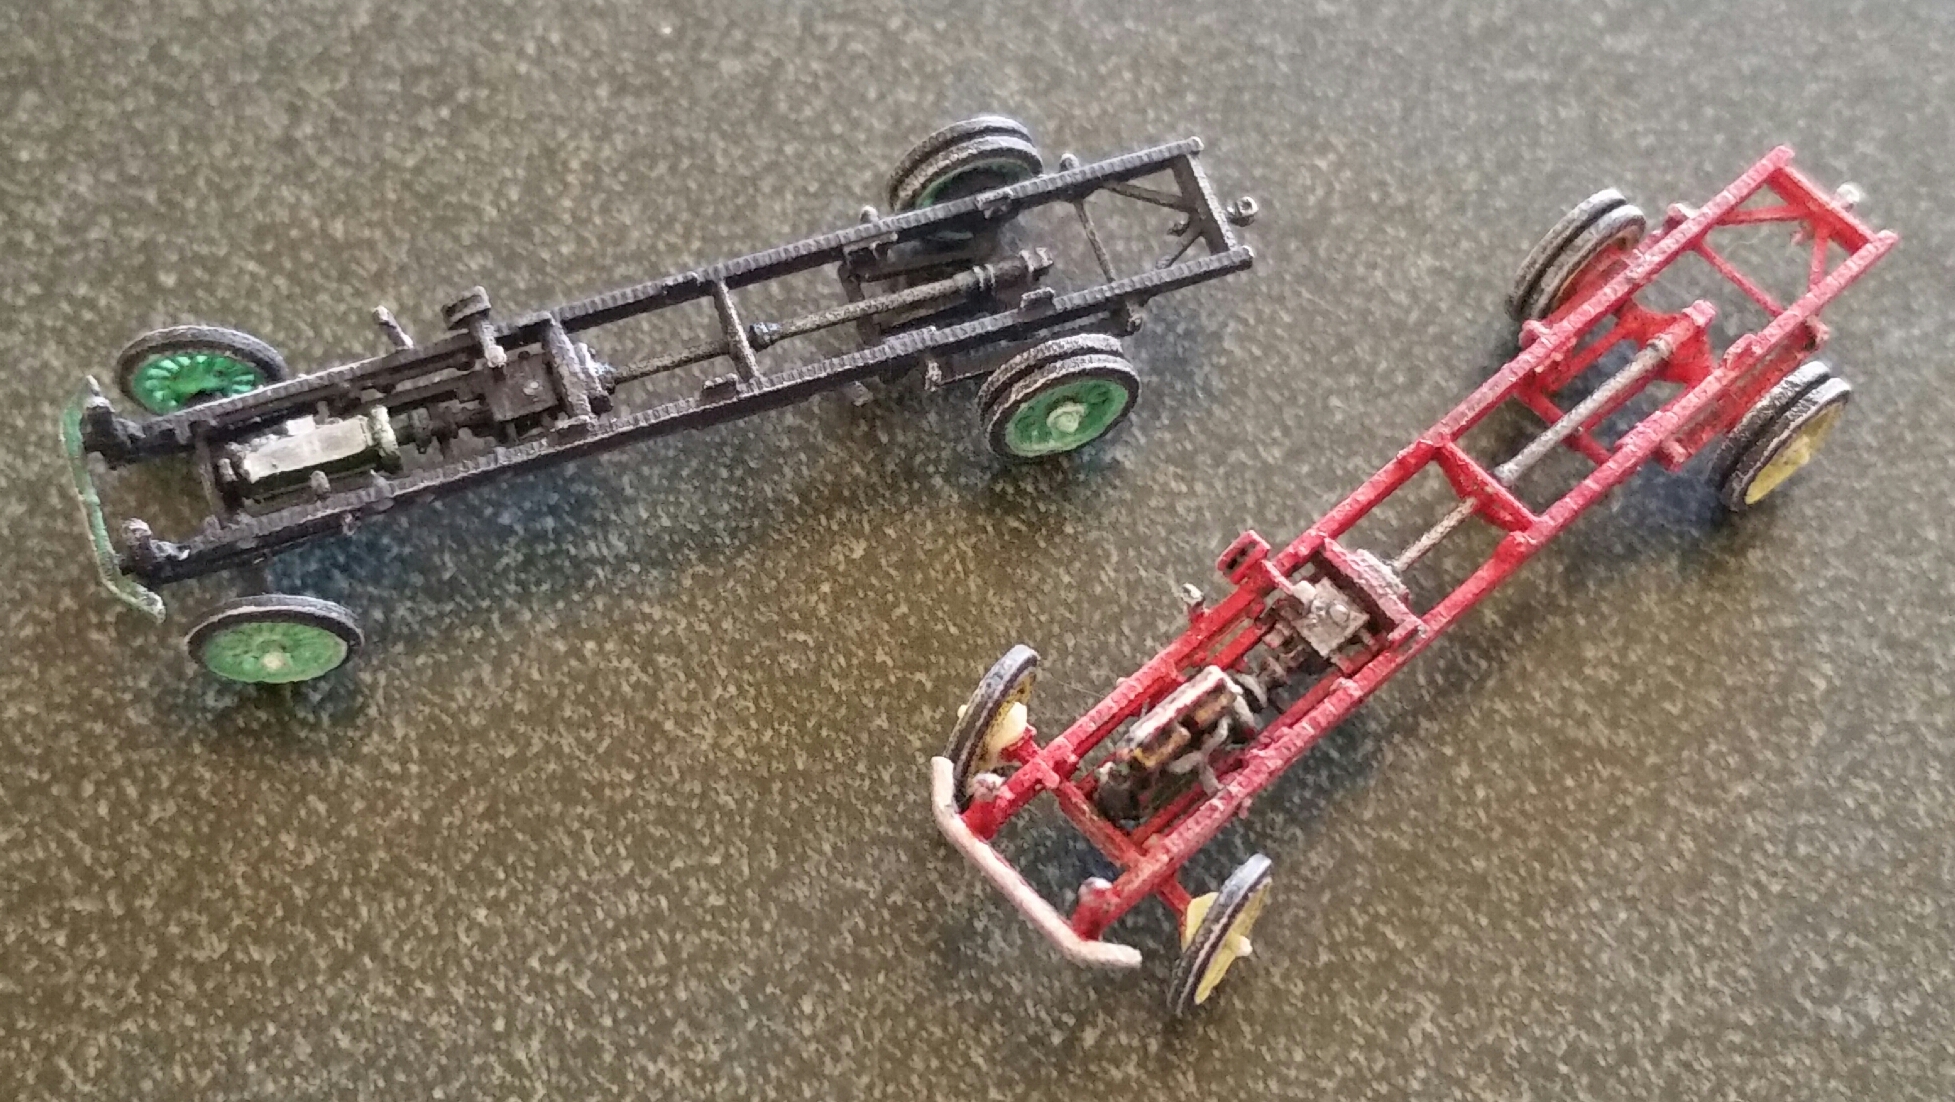
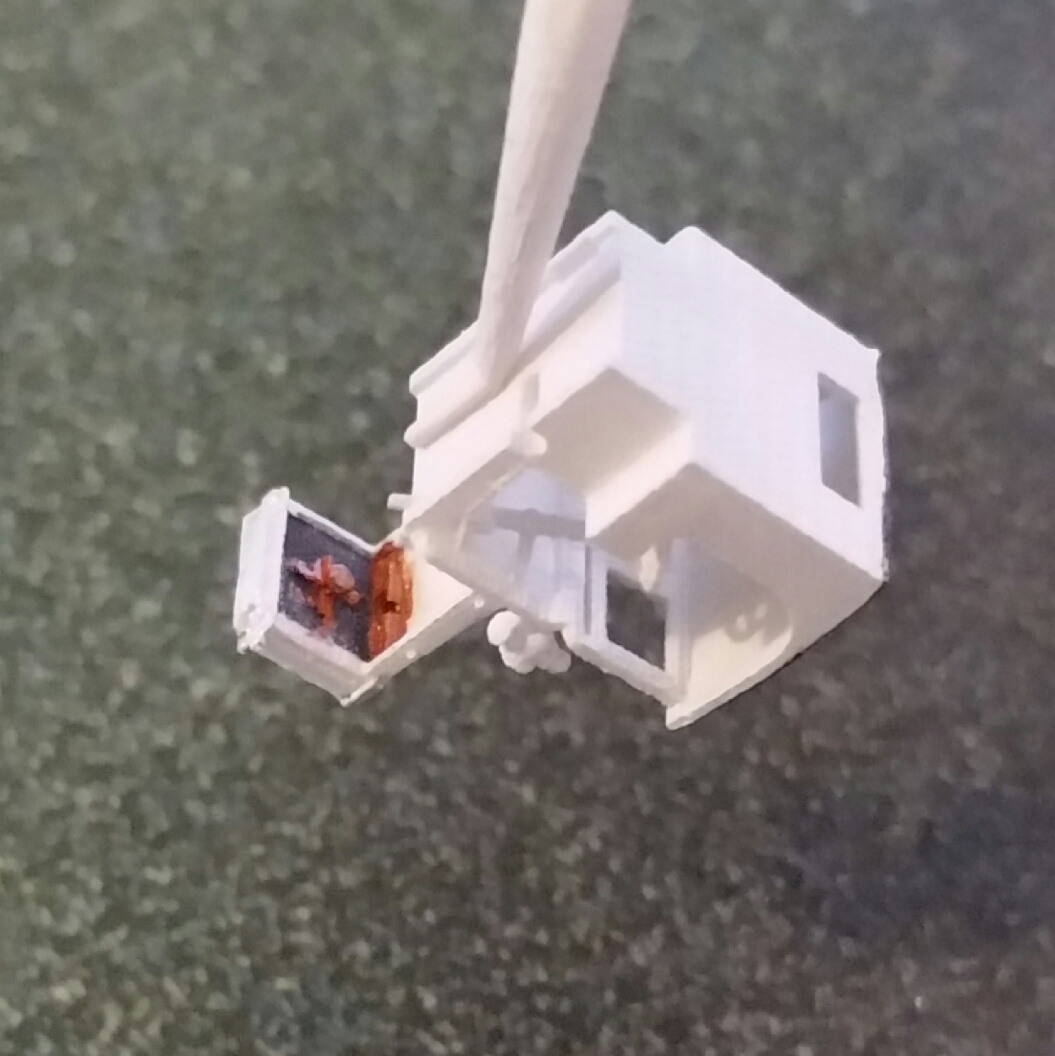
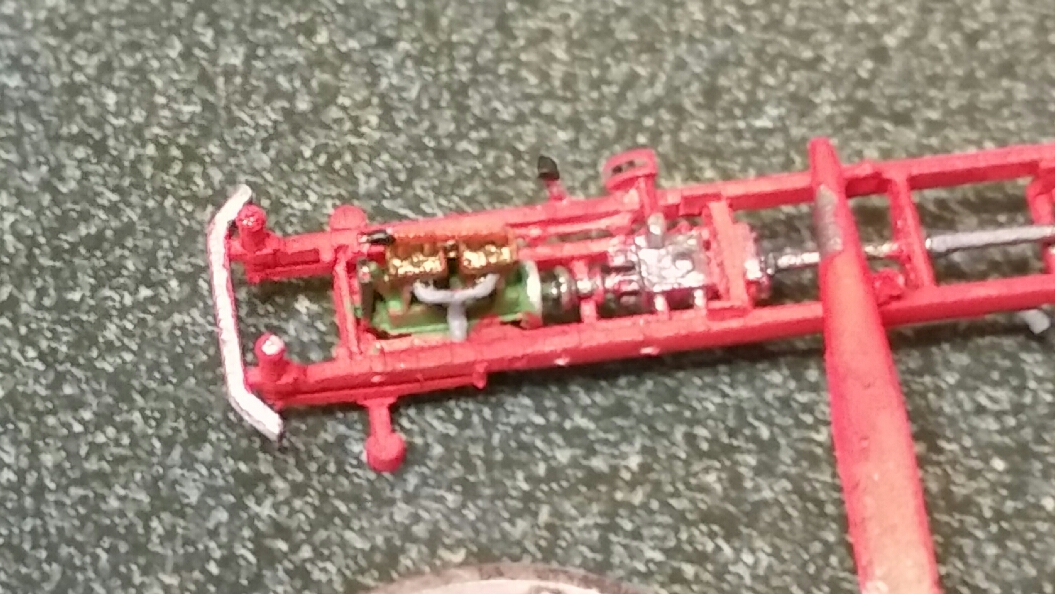
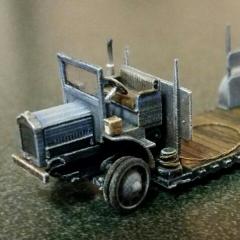
Been a while since I worked on any 3d prints but got around to painting two 1918 Pierce Arrow flatbed trucks. So far, I've got the base color coats applied and the last week I've started the detail painting. This one has open hood sides so I had to model a motor on the frame. By far the most ambitious painting project I've ever subjected myself to. Here is where I am at on the frame painting. The cab and bed are an off-white base coat and the wheels have yellow spokes. The second version has closed hood sides so no motor painting required. It has a light green base coat on the cab and wheel spokes and the frame is black - much simpler to paint but no pictures yet. I'll add various pics as I progress through the painting of both. Mike
-
This was the "it" car to pull into the high school parking lot with back in the mid to late 70's. There were at least a half dozen that I remember that followed this style of customizing back in the day. You nailed the look and stance! Thanks for sharing and for the memories! Mike
-
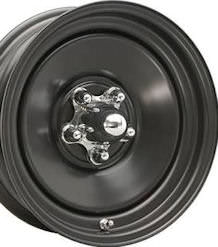
Espo, I think this is what you're referring to. A single chromed dish would be called a baby moon when it's just large enough in diameter to cover the lug nuts. Hope this helps some... Mike
-
"Berlin Buick" ...."Outside" finished pictures 2/7/18
mecklm replied to John Teresi's topic in Model Cars
John, this could very well be the coolest build I've seen since I joined. I'm fascinated how you can create these builds from so many disparate parts and in the end everything fits and lines up perfectly on seemingly your first try! Very, very nice! I have no doubts this build will clean up the awards at any show you enter it. Mike -
Color looks good on that body. I'd suggest if there's any way to incorporate the rear paint treatment as in the attached Google image, it would really drive home the connection to the coupe. But, as curvaceous as the MB is, it's probably too difficult to define a separation line to the body top and sides. Mike
-
Fantastic! Just like your earlier ones, this one really captures the feel of the original Hot Wheels. Very well done! Mike
-
Wow, your new belt looks fantastic! Definitely takes it over the top in realism. Very well done model that captures the essence of the real thing. Thanks for sharing! Mike