
JMChladek
-
Posts
62 -
Joined
-
Last visited
Content Type
Profiles
Forums
Events
Gallery
Everything posted by JMChladek
-
I thought the race was exciting enough and harkened back to the early 1980s (or perhaps the early 90s). Cars could separate and race or at least spread out a little wider in the draft, none of this two by two pack racing stuff from last year (which the Nationwide race had). I think the primary reason for the "boring" (others terms, not mine) was down to the relative newness of the cars and drivers backing off a little to avoid a repeat of yesterday. Biffle said that was primarily why he didn't drop low to do a block of Dale and Mark since Dale got a HUGE head of steam up on the low side. They got the race in clean and no green, white checker was needed (although that one wreck potentially could have brought a caution). But, give it the next plate race or two and I'm sure things will get back closer to what I hate, the tight packs.
-
I've had a growing fear something like this might happen since April 2009 when Edwards' car got catapulted into the catch fencing at Talladega. This tight pack BLAH_BLAH_BLAH_BLAH really sucks big rocks IMHO because we currently have the situation where one car starts to spin and if a second and third (and in some cases a fourth) car hits it right, it IS going airborne. I remember Bodine's truck crash as well since I caught the tail end of it live when watching it on TV and I knew it was bad when the announcer said "we'll be back in a moment" with a slightly choked up voice. A lot of us thought Geoff had died that day. Fortunately he didn't. The old crashes from before restrictor plates were mainly due to one car starting to go backwards and the body acting like an airplane wing, picking up the car and flipping it. The roof flaps have more or less made that obsolete these days as about the only time a single car gets airborne is because it hits a rut in the grass. So as I see it, IF something can be found to get the cars to separate so you don't have a tight pack chain reaction crash like this (or at least lesson the likelihood of it) so much the better.
-
24 Hour Build Project....Tim Richmond's '87 Monte Carlo
JMChladek replied to roadhawg's topic in WIP: NASCAR
Ohhh my, only way I might have tried something like this would have been with a Michael Waltrip Bahari Racing Pennzoil Pointiac since it had fewer contingency sponsors! DANG good job for a 24 hour build. So are you seeing weird mirages now due to the sleep deprivation? -
Actually, I would do the white pinstripe AFTER the blue and red are down so that the white traps the edges of the red and the blue. Typically that tends to be the way it is done anyway even on full size cars. But, if one wanted to, they could primer the body in white, than mask the pin-stripe, than do the red (since it is a dayglo color it should go on white) and finally the blue as long as care is taken not to pull off the pinstripe mask. So when all is said and done, pull off the white stripe mask and if everything went well, a nice perfect white stripe with everything trapped just nice to it. Only problem as I see it is if a lot of blue and/or red is built up, it might produce a bit of a step. Sure, it may seem a bit convoluted, but masking tape is relatively cheap and if one is going to do it, might as well do it right. You know the tape is going to have to be pitched in the trash anyway after use, so it isn't like one is wasting tape all that much as you are still spending more money on paint than anything. Besides, by doing a similar technique, I was able to achieve nice results doing THIS: Yes, it is not a car model. It is a replica of the Moonraker space shuttle from the Bond films (1/72 scale with the completed model standing about 3 feet tall). But, by using a combination of skinny Aizu tape and Tamiya tape, I was able to not only mask perfectly straight stripes that remained at constant widths, I was also able to use Aizu to help mask off a skinny pinstripe that ran parallel to the fatter ones. I did this by laying down the tape next to one another side by side and pulling up the mask for the pin stripe I wanted to spray orange along with the fat lines (and the gray area behind the orange stripes). I also used the same technique to do the black lines on the rudder split for the tail. The results were superior to what I could have achieved with either decals or trying to hand paint that. With a little finesse, I could have given these lines some gentle curves as well. Sharper curves would have been a bit trickier, but still possible. Tape is a tool and it can be used a lot of ways. Sure, doing it this way might mean more work, but believe me the results could look pretty crisp and clean if the time and care is taken to do it properly. The best part about using paint is you don't have to worry so much about dealing with the sometimes translucent nature of white decal stripes. Masking might take a couple hours, but painting on the white stripe might take 20 minutes tops with an airbrush (including cleanup time). A spraycan would be a little trickier due to the high flow nature of the paint, but it would still theoretically be possible.
-
Heck, in the truck series, that could have been ANY race! Nice job!
-
pictures of 1983-85 Thunderbird interiors, seats etc
JMChladek replied to EnviXR8's topic in WIP: NASCAR
As I recall, when Monogram tooled up their Ford Thunderbird kit in 1983, the interior and seat were pretty accurate for that period (same goes for the old square back Monte Carlo, Buick Regan and Pontiac Grand Prix tooled up circa 1981-82). The increase in backrest area and side protection began to come around more in the later 1980s after some of the very serious crashes drivers were getting involved in. If the Monte Carlo pictured is the one I think it is, it would be either Tim Richmond or Ken Schraeder's ride from the late 1980s (86-87 being the earliest). Be aware that if that picture is of the car today as it appears in vintage races (or in a museum), the seat might not be correct for the period since many of those older Monte Carlos got re-purposed for use in the NASCAR Sportsman and ARCA ranks after they became too old for use in Cup and Busch and several of the teams updated their seats to the newer spec equipment for enhanced safety. Several of those Monte Carlos were still being raced through the mid-1990s before NASCAR folded the Sportsman series entirely (partly due to a couple fatal crashes). The Aero-glass Monte Carlos also raced up through about 1989 when the Luminas took over mid way through the season. If there is any period in car camera footage from the old CBS broadcasts of the Daytona 500 up on Youtube, those might be the best place to find imagery of the old seats as CBS started mounting television cameras in stock cars in 1981 (and they became accepted quick when Cale Yarborough proved he could win races with them in his cars). -
I would say if the team was a perenial contender for the Winston Cup year after year it was more likely to have the braided lines. So Petty, Bobby Allison, the Wood Brothers (with Pearson, Parsons and Baker at the wheel)... probably the high end equipment. Somebody like Dave Marcus or J.D. McDuffie... probably the rubber hoses in the early 70s although the more savy independents probably jumped on things pretty quick by about 1976-77-78 when they realized that investing a little more in the lines would help lead to longevity of the motor and oil systems (leading to less rebuilds, in turn leading to having to spend less in the long run). Then you've got some independents like Marty Robbins (the country singer) who weren't opposed to sticking a bigger motor in their car JUST so they could pass Richard Petty once in a race to say they did it.
-
Yellow paint is typically tricky to use no matter WHAT it is (enamel, lacquer or acrylic) because it typically tends to be a little transparent. Shooting it over white primer can help get it nice and bright without too many coats needed compared to gray. Otherwise, I would say things are looking good. Just remember too that given how this is a NASCAR ride and how Dale tended to be a little... ahem... "hard" on his equipment, it won't look out of place to have a little paint chipping here and there from getting sand blasted with trash getting tossed up from the track or Dale putting his front bumper to the rear bumper of another car for a little "love" tap. When it comes to models, mistakes are part of the game. We all try to strive for perfection with our builds, but only way to get close to that is to keep at it often and build experience. Mistakes are part of the experience. Besides, we can always take another stab at doing a proper replica years down the road as we learn more. From what I see though, you are doing a very good job with this model.
-
There is a brand of Japanese tape I like to use called "Aizu" which is just like Tamiya tape, only cut into finer widths (.4mm, .7, 1.5, 2, 2.5 mm). I find it works VERY well for pinstriping. How you use it that way is to use the skinny Aizu tape to place the pin stripe line down that you want to paint, than run some other tape (either Aizu if you still need the flex or something wider like Tamiya) on each edge with no overlap to mask the borders. Once things look good, pull the Aizu tape pinstripe off and viola!... now you have a nicely exposed pinstripe of (hopefully) constant width to spray white into. I admit this probably works best with the long straight pinstripes on the fenders, doors and the back edge of the red going up over the roof. But, with proper care, I don't see why it couldn't be used for all the striping. Some other form of temporary mask could also be tacked down as I see it around the tight corners and the real trick would just be trying to get the widths constant on the curves. Very nice build BTW. I plan to start my own Petty Charger build very soon and will be referencing yours for my approach to certain things. Aizu tape can be found at Hobbylink Japan (HLJ.com). But it can also be found in the states at Starshipmodeler.com (look for it under the "tools" section of the hobby shop).
-
My favorite phantom to date was the Richard Petty 1971 Superbird built by a local modeler named Randy Baker. It took a third at the 2011 IPMS Nationals in Omaha and although it was a curbside (it became that way after an issue with the engine cropped up) it looked SHARP! http://www.indycals.net/blog/?attachment_id=765 And yes, Richard Petty never got a 1971 Superbird into Nascar warpaint as NASCAR pretty much did away with the winged cars before the 1971 season. This model was I believe a kitbash of the Polar Lights Petty Charger with the old MPC kit.
-
Main thing is even if they do it, I don't expect any kits of Gen 6 cars to be out before the fall at this rate due to the amount of tooling needed to do them up properly and the lead time needed for test shots (and they would be stupid to use their older Nascar tooling as a basis, even if they might use the 1990s vintage Lumina based chassis). Round 2 might be better suited since they at least have a COT based kit to start with (not sure if the Gen 6 rides will have that much in common though except possibly for wheel base and roll cage) and they are curbsides rather than full detail kits.
-
Nice work. Who did the decals for this ride? I would guess Slixx, but I thought they were already out of doing NASCAR decals when this car raced. And for the record, I have ALWAYS been a Tony Stewart fan going back to his IRL days. He was the first driver I really got back into being a fan of since the ole Alan Kulwicki days (Tony is no Alan, but he does bring certain other competitive qualities to racing). And yes, these years of Pontiacs were some of the best looking rides in NASCAR warpaint IMHO as they had a nice bit of style to them compared to the rather boring looking Monte Carlos.
-
Clear body kits
JMChladek replied to Greg Myers's topic in General Automotive Talk (Trucks and Cars)
The idea does make sense. Although I've found that the seams in multi-piece clear parts do tend to stick out like a sore thumb somewhat if they are thick. One possible alternative I could see though would be a clear vaccuform body perhaps (even multi-piece since the edges of the parts would be thinner). Still, I would consider that more for an aftermarket supplier to do rather than Round 2. -
1/16 MPC Nascar Petty Charger; a kit change just announced
JMChladek replied to '70 Grande's topic in Car Kit News & Reviews
Clear body would have been cool, but too much of a liability as I see it. AMT/Ertl a few years back was using a different plastic formula for clear parts from what I had seen before on one SF spacecraft model I was building (I believe they were testing a formula to use on a couple all clear SF ships they were designing for their Proshop line) and it seemed about as flexible as opaque styrene, but it had a weird side effect as when I painted and put a wash on the part, it warped. Only way to de-warp it was to gently brush it with some liquid glue on the backside. So I am thinking if Round 2 were to try and use THAT plastic formula and somebody were to try a half and half paintjob (half clear, half painted) the result would have been a warped mess. One piece car bodies are an interesting bit of model kit engineering and require a bit of flex to de-mold properly compared to other kit parts with two piece molds and shallow draft angles. It was a miracle of modern engineering that MPC were able to offer those bodies in clear back then. I am not surprised with altered plastic formulas, changes in some of the ingredients and perhaps stricter EPA guidelines that such a formula for doing it would have been lost. We are talking 40 years of model kit engineering afterall with the ownership of MPC changing hands three times at least. Besides, 40 years ago we also were landing men on the moon and that is another thing we don't do anymore. So, I will get my Petty Blue molded charger and I will enjoy building it. I've waited to get my hands on one of these for years and it sounds like the wait will be worth it. -
MPC Dukes of Hazzard 1/16th scale Charger
JMChladek replied to Dragline's topic in Car Kit News & Reviews
I've got the Dukes kit and I'll be picking up the Petty Charger next weekend after payday as I've been waiting for that kit to come out for quite awhile (its a pity they couldn't do the clear body, but its no great loss as I would have painted it anyway). For my Dukes kit, I plan to convert it into Jim Vandiver's Charger (the white #3 owned by Ray Fox and made famous by Buddy Baker) which finished second at the 1969 Talladega 500. -
Whats the most tooled car ?
JMChladek replied to 57peppershaker's topic in General Automotive Talk (Trucks and Cars)
I believe the Lamborgini Countach is indeed an accurate choice. There were A LOT of kits of this thing released in so many different scales from all plastic Matchbox sized (of which I had four as a kid) up to 1/16 I believe. Most every Japanese kit manufacturer did them (meaning the tooling was unique) as well as some of the European ones and so did some of the American manufacturers. Top Gear's James May said this was the car every pre-teen kid who loved cars back in the 1970s had a poster of in their rooms. Well, chances are they also had a kit of the thing in some form sitting on their workbench (or kitchen table) as well. -
and I'm now broke.............
JMChladek replied to Joe Handley's topic in General Automotive Talk (Trucks and Cars)
A lot of the Neons went bye bye when it became too much to fix them. I heard a few suffered from Head Gasket failures due to warped heads over 100,000 miles. One mechanic I know said he fixed it on one car belonging to a salesman (who put A LOT of miles on his car), by fitting a heavier duty racing head. It was expensive, but so is replacing the head itself (and the guy tended to put close to 100,000 miles on his car each year from all the traveling he did) and it cured the problem enough for it to last another 400,000 miles. The Shadows and Sundances were decent, although the bodies tended to go to pot easily from peeling paint and trim. I almost bought a turbo one, but for a kid like me who was in his mid 20s at the time, the last thing I needed was the potential speeding ticket magnet and high maintenance of the turbo, so I passed (it was fun to test drive though with a five speed stick). I have a feeling some of these cars ended up as victims of the car buy back program from a few years ago. I have to admit, while the Dodges of the 1990s and early 2000s were not what I would call great, the new product line is certainly a major improvement. Next time I am up for a car, I might pay them a visit. -
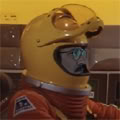
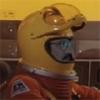
Ole Snake is looking good there (he still looks good enough to climb into a flopper even today, complete with sun tan). Mongoose is looking a little chubby, but hey at least he is still alive and kicking. I would LOVE to meet those guys myself. Nice photo!
-
Here's me from almost two years ago checking out some REAL American made horsepower in a "pickup truck" of sorts. And nope, it is not photoshopped either.
-
For me, I prefer to use Tamiya lacquer sprays when doing car bodies as they lay down Really good glosses compared to what I can do with my airbrush. But, I am still learning how to do glosses with the airbrush and there will come a time when the AB is the best way to go if I can't find exactly the color I need in spray. The airbrush though to me has helped put the fun into sub-assembly building as I can lay down colors rather quickly with it compared to brush painting. So I can get a chassis and engine block base coated in almost no time compared to brush painting. Brush painting still has its uses, don't get me wrong (such as trim and detail painting. But I am always in favor of speeding up a portion of the build. As with anything else, Airbrushes and spray cans are both just tools of the arsenal. They aren't necessarily mutually exclusive as each can do things better than the other.
-
COPO Camaro is Back!
JMChladek replied to Patrick2005's topic in General Automotive Talk (Trucks and Cars)
Even though I am a Ford guy, the new Camaro always makes me turn my head when I see one as it just looks cool. I don't know about this one being called a COPO though as I don't see it necessarily as something in the spirit of COPO (but technically aren't most Camaros coming off the line these days with Corvette engines anyway?). I've always thought of COPO as being a way to get something hotter than your average machine which was not available any other way, but still street legal (which this obviously is not). But, as a badge to distinguish it as being not you normal run of the mill Camaro, sure. As a factory built drag car, it should be quite awsome though. -
Dreaming of a model?
JMChladek replied to jmpsebring's topic in General Automotive Talk (Trucks and Cars)
I've had a couple dreams like that, but usually they are of me finding a brand new kit of some sort and usually the dream ends when I open the box. So I don't really have a chance to inspect the contents. -
What are the best types of airbrushes?
JMChladek replied to Kaleb's topic in Model Building Questions and Answers
Just remember, a good brush is only HALF the equation. Make sure to invest in at least a decent compressor as well. Hobbico has a nice compressor from "Model Maker" that comes with a pressure regulator and a moisture trap. For its price (I've seen them sell for about $130) it is a good unit considering the regulator and trap alone can sell for about $45.00 by itself. -
It helps a little. Looks like vinyl black, some obnoxious dark red vinyl or cloth dark blue or dark green I guess. I suppose black is going to be the best "sleeper" option. Thanks!
-
In my case, I have a Paasche H series I got as a gift about 25 years ago, a Testors Aztek 470 I acquired about 12 years ago (I need to send it off for servicing) and a Neo CN by Iwata gravity feed brush I acquired last year. I had a chance to try out the Neo and actually, for the price it isn't a bad brush (I use all three brushes with an Iwata Smartjet compressor, which helps them ALL to spray well). Sure I've heard things about it being not really an Iwata because it is the "cheap" Iwata made in China, but you give it a little TLC, keep it clean and back off the trigger spring pressure a bit, it seems to spray like a Revolution and I can do freehand airbrush stuff with it that I couldn't do with my Aztek (mainly because the Aztek is too light and doesn't dampen my hand motions like a heavier metal brush can). The Paasche H I pull out when I need to do high flow stuff, such as clear coats. I may use the H series for spraying Mr. Surfacer as well since the finer tips on my Aztek and Iwata get clogged to hell by Mr. Surfacer and I haven't invested in any larger oriface tips or needles for my Neo yet. I've not used any of these to spray car body colors as Tamiya spray cans still do the job better than I can airbrush (WHEN I can find the colors I need that is).