

PatW
-
Posts
4,524 -
Joined
-
Last visited
Content Type
Profiles
Forums
Events
Gallery
Posts posted by PatW
-
-
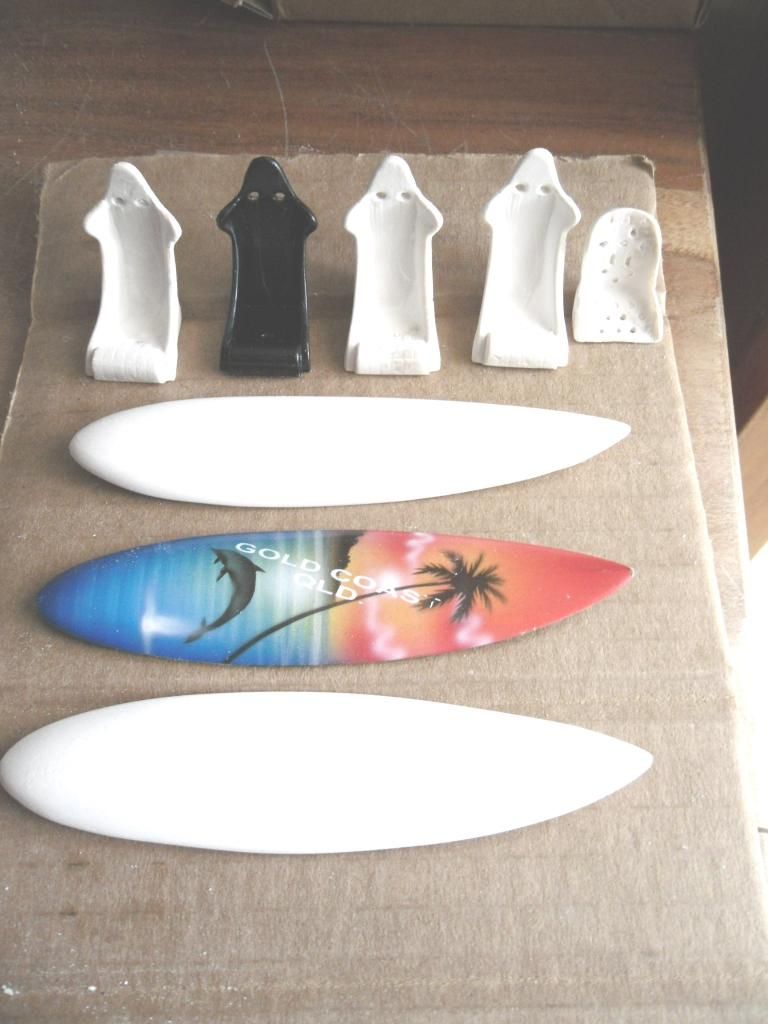
Whilst I'm waiting for a box of plastic cups to come to use in standard resin casting I thought I'd try a to master casting with resin plaster.
The moulding medium for this is called Siligum which is a hand mix rubbery material, the blue is the mould and the white is the hardener.
As I'm into beach/dune buggies I thought I would try some surfboards as I found a fridge magnet we bought from the Gold Coast in Australia.
Plus a few seats I need for another scratchbuilding project.

As I've just started printing my own decals, I've found a number of palm tree/beach scenes and I have some HellaFlush sticker bombs I'm going to try on the boards.
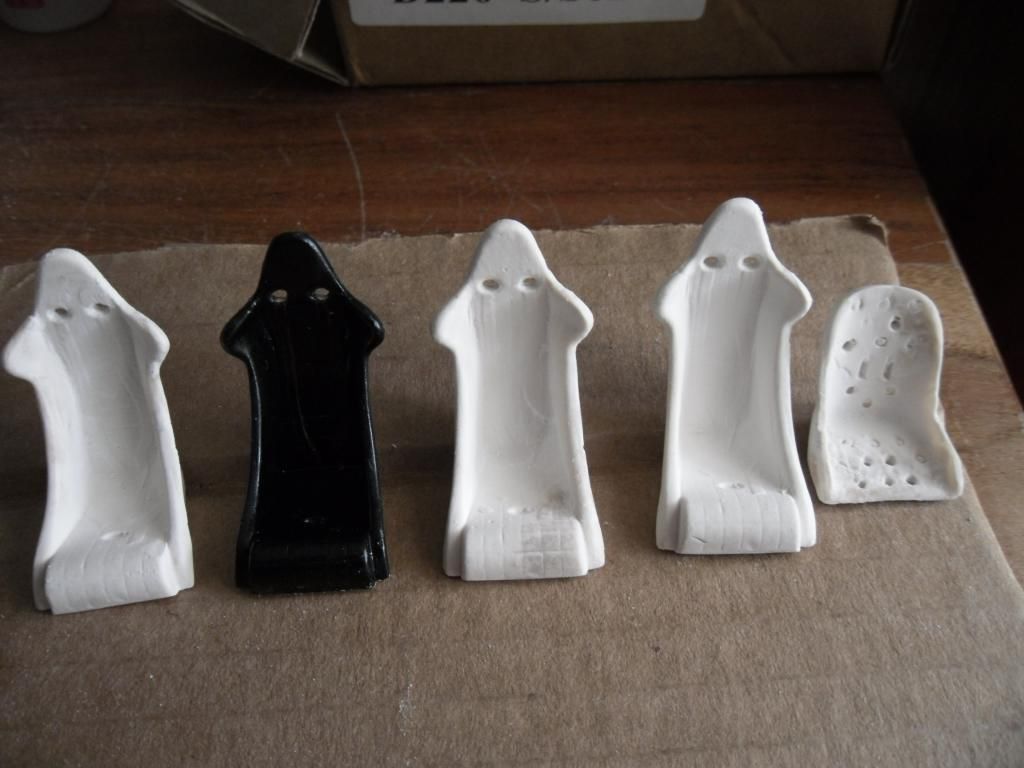
The black high back seat is plastic from my spares box, the resin ones have had a very small amount of flash sanded off and the seatbelt holes opened up with a fine point file. The bomber seat needs cleaning up after casting.
The moulds set in five minutes and the plaster is very fine and smooth and can be sanded if required and is set in an hour. Remember though that the plaster is a bit heavier than plastic or standard liquid type resin.
-
-
Hey Mike your work impresses me no end. Your another one who has been to Italy, I was out in Florence not long ago. I also read your link to Duncan Hamilton. I sometimes go to Le Mans and have seen the Hamilton clan there. I couldn't go this year but I noticed whilst watching the whole 24 hours on our Eurosport satellite channel that his grandson Archie was there with his own team!
Keep up the good work.
-
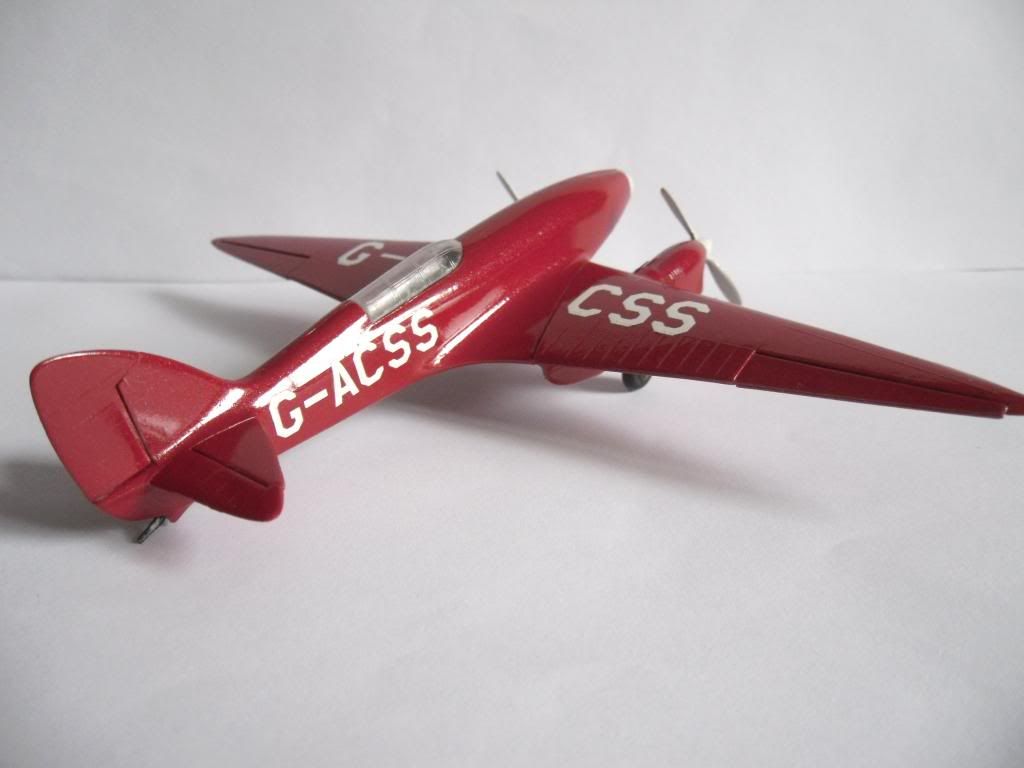
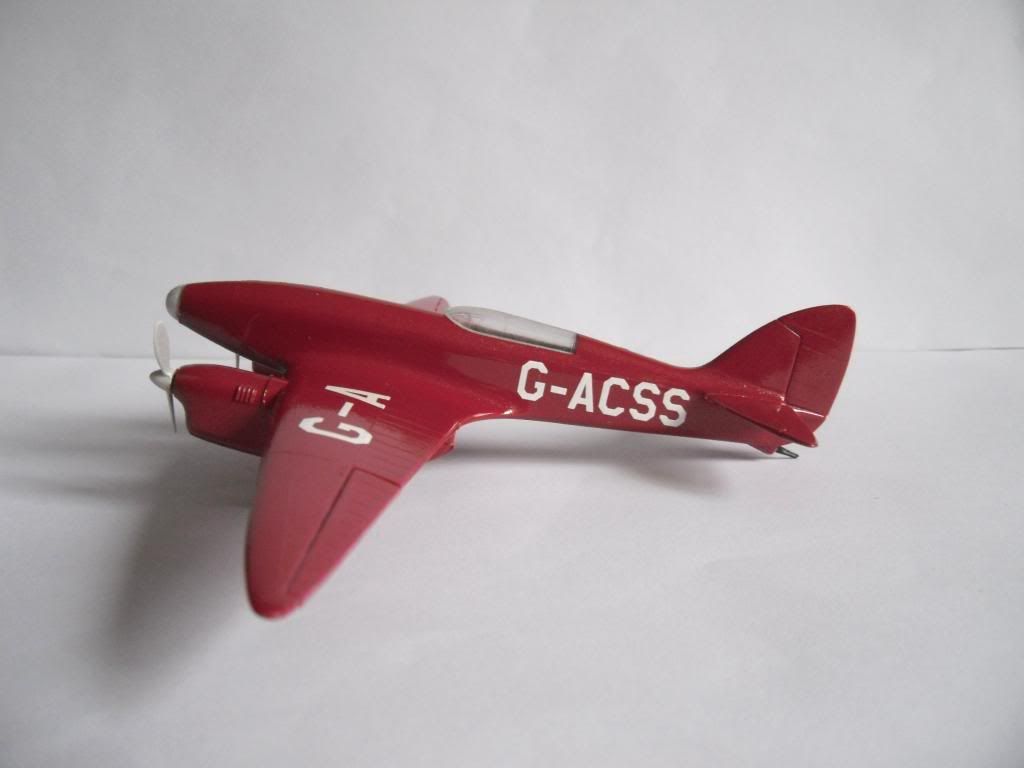
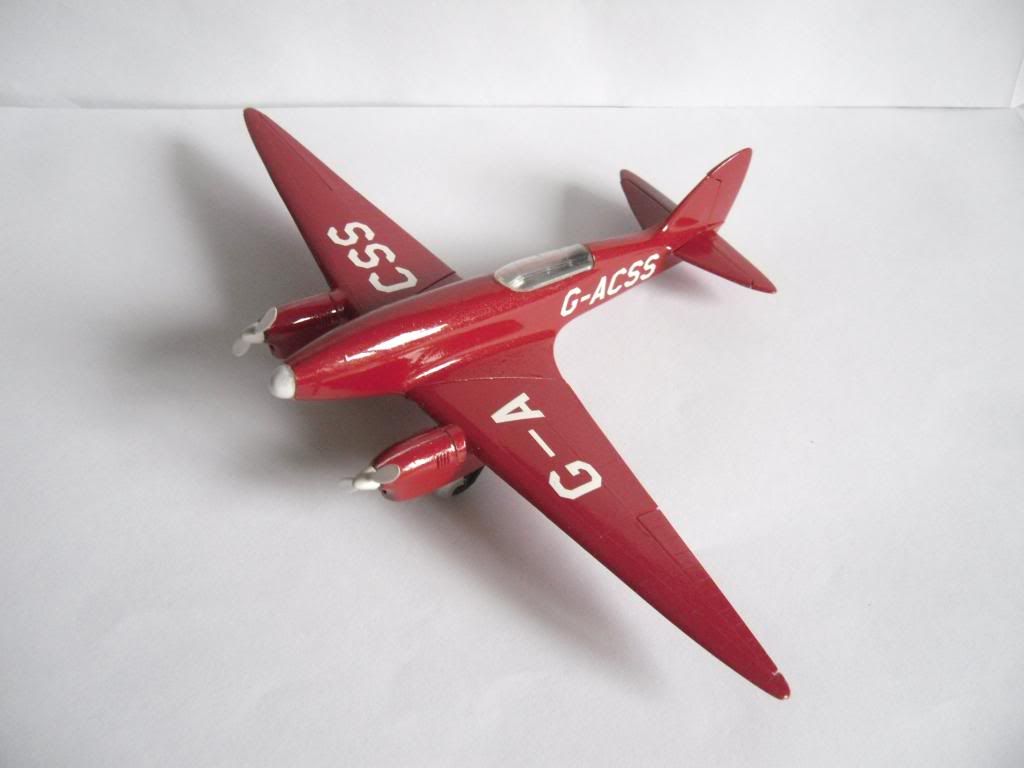
Thanks guys, It was me who didn't want purists offended by my use of a metalic finish rather than a solid Red.
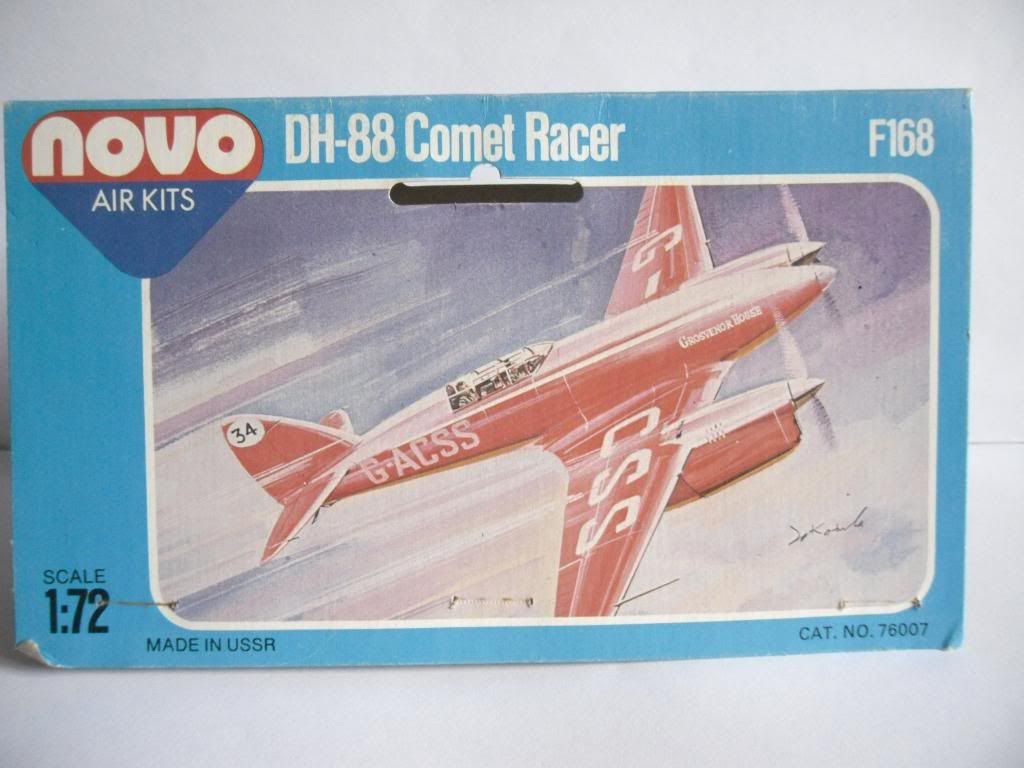
I understand that it was originally a Frog kit, and for some unknown reason the Russian kit manufacturer Novo bought the rights.
There is also information here in the UK that this was the forerunner design for the famous Spitfire fighter aircraft of WW2!
-
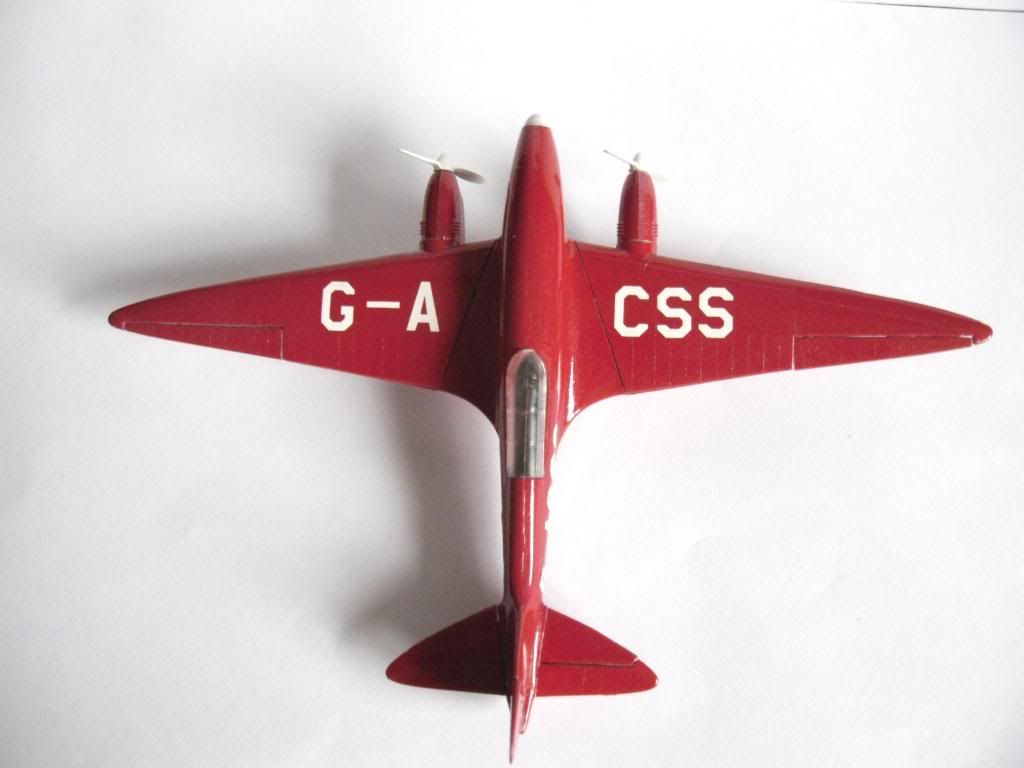
Thanks guys. No Scott it was built the the British planemakers De Havilland in 1934 for the MacRobertson_Air_Race. Three took part in the race and one of the three factory planes won it!
-
-
While I was waiting for my resin casts to set up I found this old Novo kit in a plastic bag with a coloured instruction card stapled to it................
When I put the old decals in warm water they collapsed so I looked in my decal box and found a couple of sheets of Colorado brand mixed alphabet and numbers for aircraft (although I use the larger numbers for racing cars). After they dried I sprayed on two coats of Plasti-Kote clear gloss.
I hope I don't offend any of the purists as the only red spray I have is Plasti-Kote metalic red and it's turned out great!
-
I have an 18 speed hardtail mountain bike and my two sons who are in their 40's both have full suspension mountain bikes. The older of the two does downhill and the younger one cross country. They firstly started when they were 10 & 12 respectively in BMX here in the UK. I was our local club chairman for 3 years.
The oldest more of a leisure racer but the youngest top of his class in age groups from 11 to 16 and number 4 in the UK in his final year od racing. He retired at 16 when he started work.
Since then he has organised BMX racing and show and shine meetings.
It keeps us all fit. And for me more fit to drop!
-
Yes superb build Sven.
We have various workshops near here on the Silverstone race circuit site. A number of teams prepared and sold cars to USA based teams for that series.
-
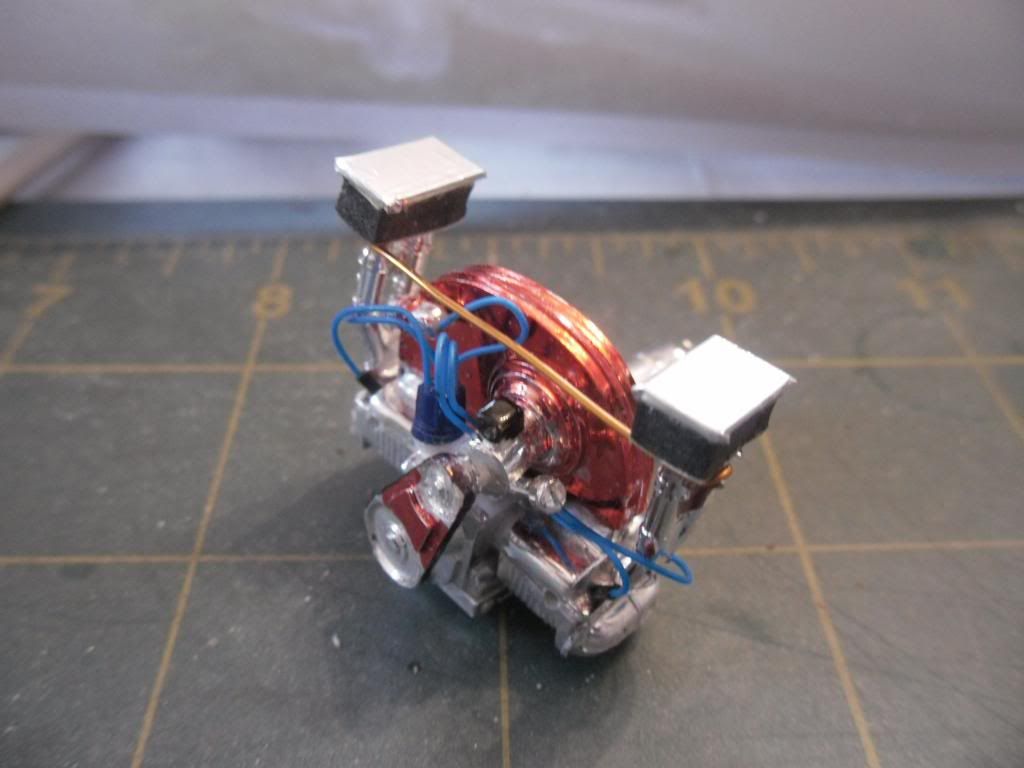
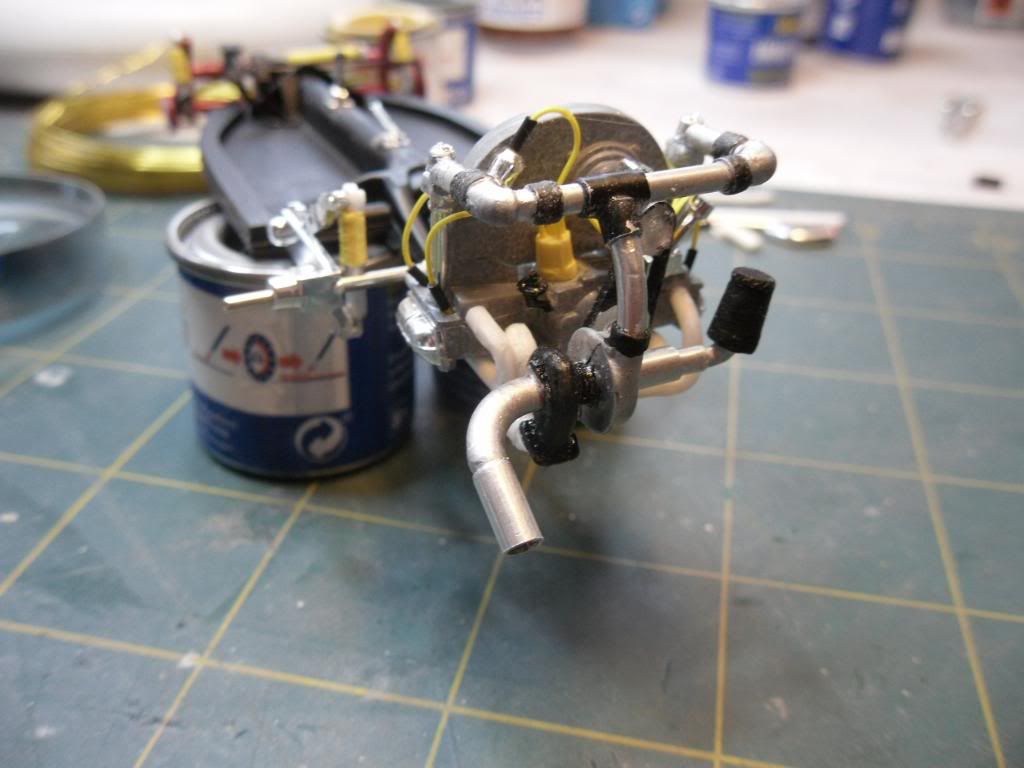
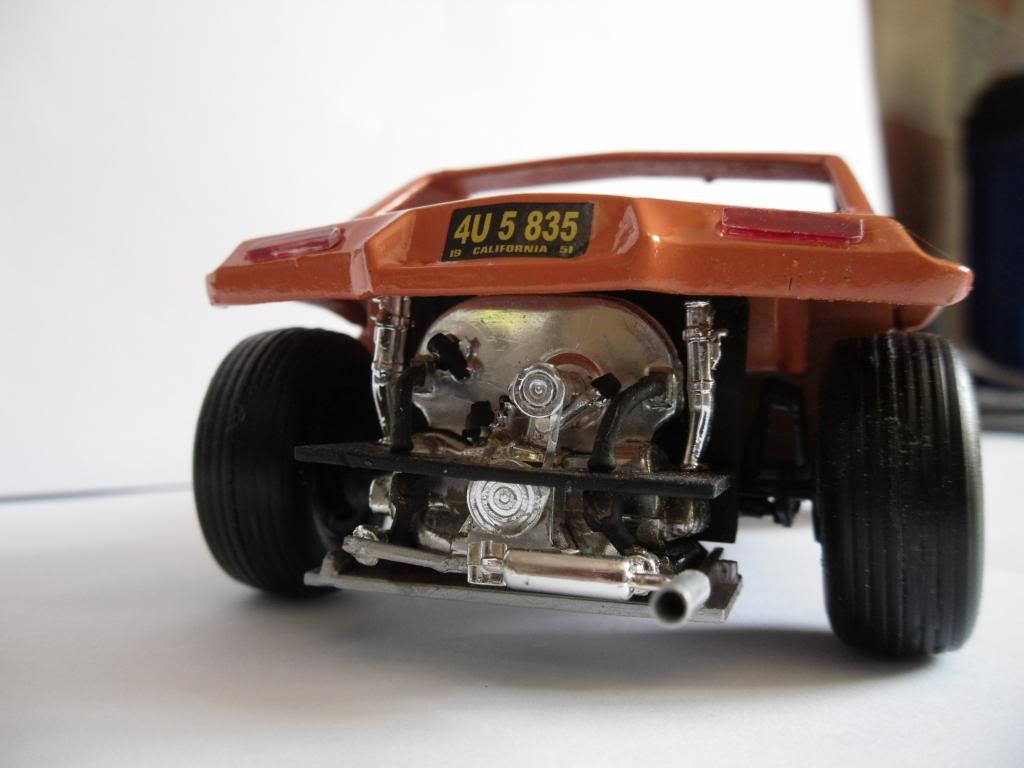
Thanks guys, the only thing I forgot that I normally do is wire the spark plugs!
Like this previous one where I made the airfilters as well out of sponge.........
Or this one that I scratchbuilt a turbo installation...................
And another......................
But whilst I built my Flintstone resin bodied 4X4 (Mitsubishi Dakar 4X4 system) I used a Corvair motor over the back axle...........
And then had to scratchbuild an exhaust silencer after running the candle shaped pipes over the cylinder heads to keep the exhaust away from rocks, deep water crossings etc........................
Being that my favourite vehicles are Beetles (we had 5 in the family), buggies and air-cooled Porsches yes I like air-cooled engines!
-
It's good to see a true British sportscar! Superb build well done.
-
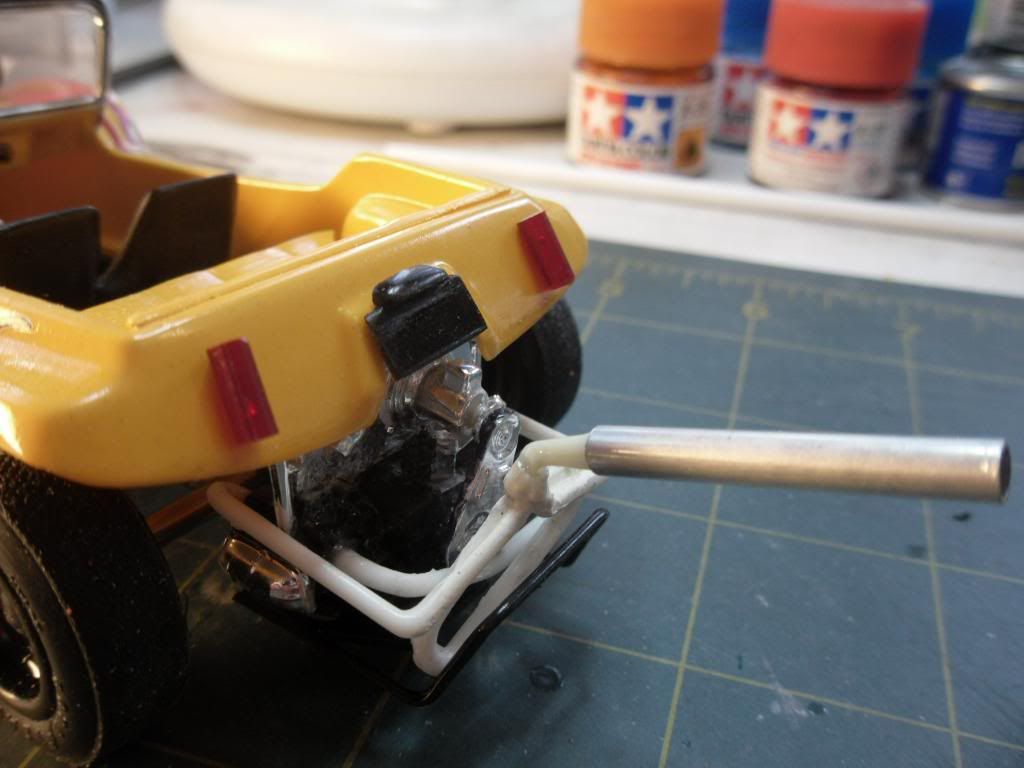
Thanks guys, yes midnightprowler one engine pic...........
Exhaust extended with alloy tubing.
OR...
-
Well done Jim, tasty motor there!
-
Well done, great build. Here in the UK we don't see any but when we out last Sunday we followed a German registered saloon. I believe the two stroke engine was two cyinders where as a friend has an early SAAAB 96 which had the three cylinder two stroke engine.
-
Great build ShawnS, being a five time owner of the real thing (including a '59 'vert) I appreciate a good Beetle build up well done!
-
Superb build afx. I've had a few fit problems with mine but it's my favourite real car, having had a number of Beetles over the years.
-
Thanks all!
Yes problems firstly with the yellow enamel paint not setting properly, and then when trial fitting the shell to the chassis the front tyres touched the bodywork so after a bit of filing I moved the body forward, bringing the tyres nearer to the centre of the wheel arches. Then a few sliced Manx decals and finish.
-
I've just finished this on 'On the Workbench'.............
I used the Meyers Manx rear window as the front window on this. But as I wasn't totally happy with it, I found a plastic case and as the thickness of the plastic is scale correct, I used the damaged one from the kit as a template to cut another flat screen, with a bit of black sharpie around the edge................
-
As I'm not totaly happy with the Manx screen, I found a plastic case with the thickness of the plastic nearer scale. So using the original as the template made a new flat screen added with a touch of black sharpie round the edge.......................
Is that better or what?
-
Yes just a couple more....................
There we go all done!
-
And some more pics>
What more pics?............
-
Here We are Finished (I couldn't change the heading!)
Firstly I couldn't use the flat upright windscreen as it was scratched in the box, so being resourceful (use what you've got) I found a new rear windscreen from a Meyers Manx.................
I couldn't pull the screen back along the sides of the body as it wasn't wide enough..........
More pics >
-
As a visitor to Le Mans (not this year but watching it live on Eurosport) it's nice to see a Porsche 962 build up. They were and still are an iconic car. I watched the Le Mans Classic race yesterday morning befor the great race.
Most of the grid was Porsches of different ages. But most were the other iconic car the 956 and the 962.
Good luck with the build, it looks very good so far!
-
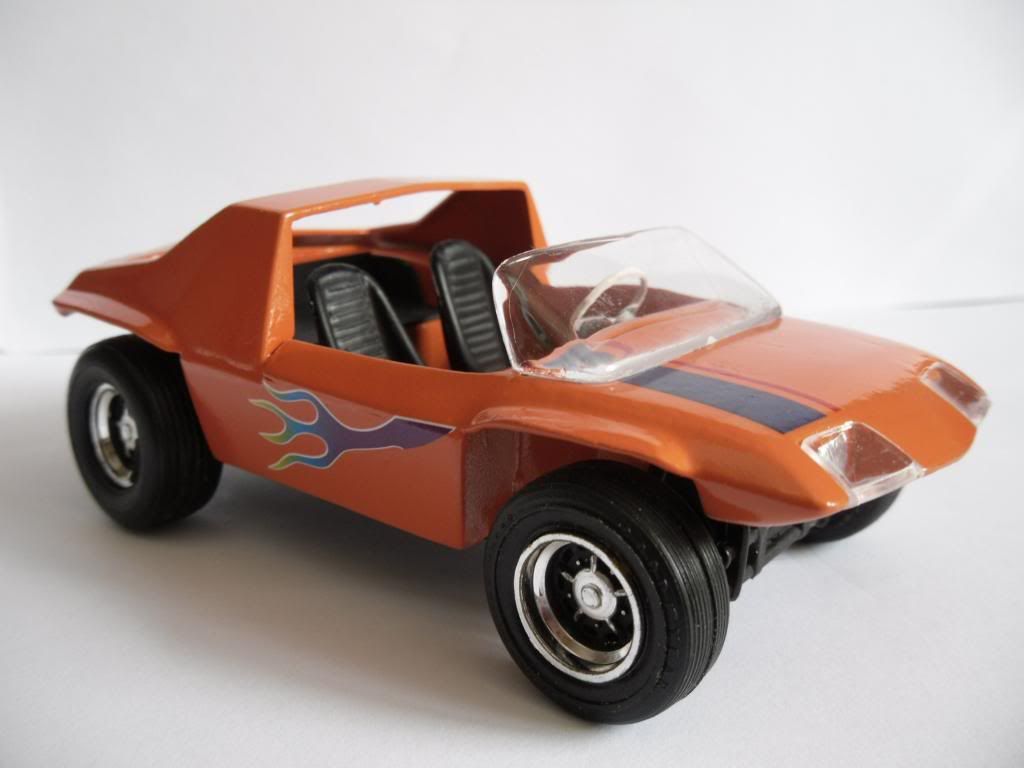
The final coat of the yellow didn't dry/cure at all so I've stripped the enamel paint and given it a coat of grey undercoat but in acrylic.
I could'nt find another yellow at the LHS, so I've buckled under the strain and found a Humbrol gloss Orange.
I know it's the same as the boxtop but all my other colours are on the darker side, Crimson , Green etc.
So I've just put a second coat on. I'm resin casting bomber seats today, as an utter novice I tried casting some sidepods for a Manx yesterday and surprisingly they came out OK.
When the paint has dried fully (fingers crossed) I can finish this one off.


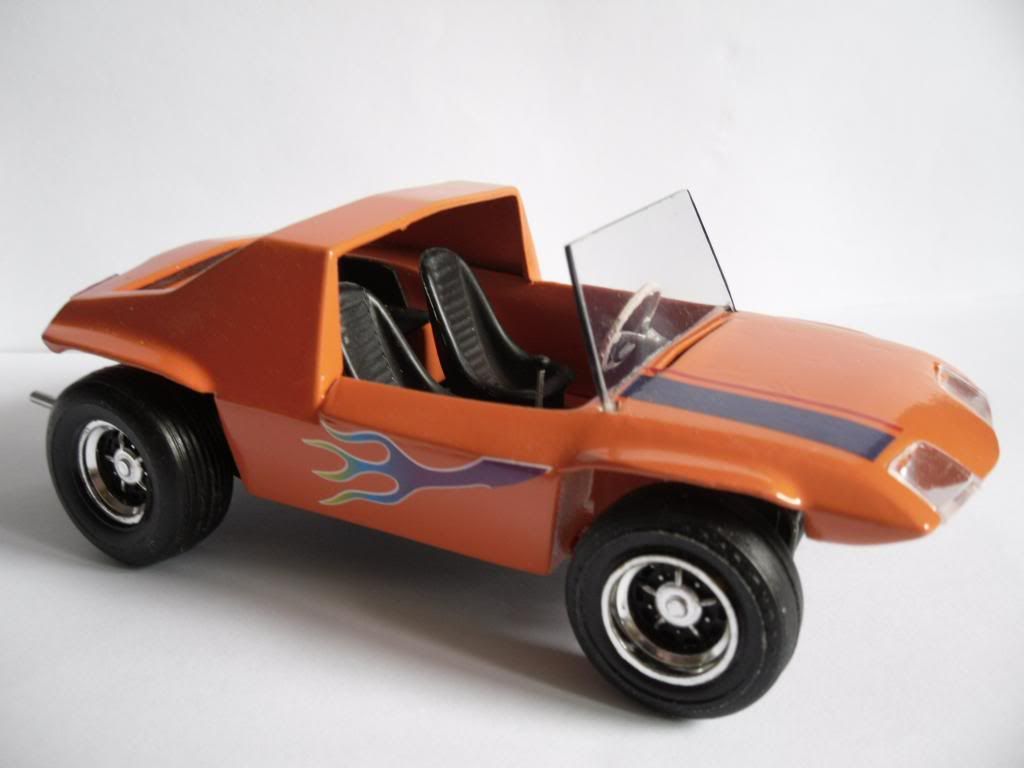


Revell Gypsy Dune Buggy.
in WIP: Model Cars
Posted
Cheers Glen. I'm trying to design (as I go along) and build a future buggy, still with an aircooled motor (perhaps it should be hydrogen?) Scratchbuilt body/chassis with bits from an old beetle.