Monty
-
Posts
3,249 -
Joined
-
Last visited
Content Type
Profiles
Forums
Events
Gallery
Everything posted by Monty
-
Background: I've got a Lindberg '67 442 with a subassembly that's got me annoyed. Some brainiac designer apparently decided it would be a great idea to mold the rear sway bar to the axle. He then compounded the problem by making the sway bar indistinct and filling the gap between it and the axle in solid plastic. It looks more like some kind of differential bracing you might see in NASCAR than a standard Olds rear end. (See pic) I've ground off the "sway bar" and removed all traces of its existence. Now I want to create a more accurate sway bar out of solder. It has the right diameter and I doubt I could bend styrene to the required angles. I've never worked with solder before so I want to know the best way to attach it to the styrene without making a mess. (The left and right ends of the sway bar attach to the insides of the trailing arms). TIA for all helpful replies.

-
I have a fairly new computer with MS Vista and I use this board's "Comfy" mode when I want to post here. If my post is comprised entirely of text, everything works just fine. However, if I want to create a post with text, an attached thumbnail and then more text, I can't figure out how to put a caption below the picture because there's no indication where the picture begins or ends. Caveats: I'm not terribly adept when it comes to computers, and I haven't even gotten to the "electronic camera/uploading/etc" stage yet, hence the attached thumbnails of other people's pictures. Thanks! Monty (King of the Luddites)
-
Trendy kits = goodby original
Monty replied to Greg Myers's topic in General Automotive Talk (Trucks and Cars)
I'd love to have the original back instead of this turd.
-
I keep about five different kinds of glue in my work area. Due to its slower drying speed, Testors tube glue is useful for situations where you may want to reposition the parts before they're fully bonded. It also has decent strength once fully dry. Liquid glues (Model Master, Tenax, Ambroid etc) are great for things like engine block halves. Model Master's version has a thin steel tube that helps prevent excess glue from being applied. The others, if still available, have a built-in brush to apply the glue. CA type glues (crazy glue) are extremely popular, although I only use mine for difficult-to-bond issues. From what I've seen, they don't "weld" the plastic together like regular model glues, but they have the advantage of creating an almost instant bond. They also come in thin, medium and gap-filling formulas, which comes in handy too. IIRC, they may cause fogging on plated parts and model glass. Canopy glue - this is the stuff to get for model glass applications. If you've ever felt the disappointment that comes from a glue smudge on a windshield or had a headlight lens turn solid white from glue fumes, this is the stuff to buy to prevent it from happening again. Some say Elmer's glue works, but I'd be concerned about bond strength on windshields and back glass. Heavy white craft glue (Basically a thicker Elmer's glue). This is the stuff to use when you're just mocking up an assembly. It has enough "hold" to keep things together while you're contemplating your decision, but comes apart easily. Fortunately, none of these glues are expensive, so it wouldn't hurt to have at least a couple of them on hand. HTH (Wow, I spent so much time editing my reply Charlie beat me with virtually the same answers)
-
What primer(s) do you recommend for water-based acrylics?
Monty replied to Monty's topic in Tips, Tricks, and Tutorials
Interesting. I was under the assumption that the primer would need to be chemically similar to the paint for best adhesion etc. -
I'm considering using some of my water-based acrylics for painting bodies, something I haven't done before. I've used these acrylic paints (Testors, Tamiya & Gunze Sangyo) for just about everything else, without primer, and gotten good results. Now I want to take advantage of their wide array of shades for use on bodies. I'm well aware that using primer can result in a better paint job, but I'm curious which primer would work best with any/all of these these water-based paints. One of the main reasons I haven't used these paints for bodies was an article in SA(E) years ago comparing various brands of acrylics. As I recall, some of the paints took forever to harden, which is the last thing you want when painting model bodies. I'm hoping someone has figured out a solution for that by now. Any other tips and pics of paintwork would be appreciated.
-
I'm going to be using Detail Master's stock disc brakes (solid rotors - no slots or drilled holes). The instructions say to leave a "tab" when cutting off the middle piece that goes between the outer rotor surfaces, but doesn't explain why. Any ideas? Also, the instructions call say to use an epoxy for assembly. Lacking that, will super glue or any other type of glue work? Any other tips and suggestions are welcome.
-
Here's the one I want. If there's one out there without the pressure toggle, I'll take that and modify it.
-
1) I'm looking for the most accurate radiator cap available for a car manufactured in 1980. If you have pics and vendor names for one of these in Photo Etch, machined aluminum or resin, I'd appreciate it if you'd post them. 2) I'd also like your ideas on creating an oil dipstick and tube as well as the dipstick and tube for the automatic tranny fluid. (Dipstick does not need to be removable)
-
Very nice work on the paint and detailing. Great stance too. I haven't built any Lindberg kits yet - did you have any issues with this one, or was it pretty much like any recent AMT or Revell kit?
-
what type of airbrush do you use?
Monty replied to DrewCfromSC's topic in Model Building Questions and Answers
I gravitated to airbrushes years ago because I had too many projects ruined by Testors rattle cans. After hours of body prep, I would proceed to get the paint ready (shaking the can, heating it in warm water, etc). Then, depending on the whims of the model gods, the infamous Testors nozzles would do one of the following: a ) ejaculate viscous globs of paint in a pattern that only Jackson Pollock could appreciate b ) allow a trickle of runny paint to spurt out 1/2 inch from the can. To get a proper visual of this, imagine trying to stop a bout of dysentery with half a cork. c ) spray paint in a usable manner. I can't recall if this ever actually happened on one of my projects, but a few of my friends say they had some success, and they don't lie very often. That said, I couldn't seem to manage varying the pressure on rattle cans. To me, they were the virtual equivalent of trying to sketch with a log. I'll take the extra effort of the airbrush any day. -
Doing some Google searching for some specific paints that I can't seem to find on the internet. 1) Polly Scale "Graphite" P/N 501999 from their Metalline Series. I bought the original bottle about 10 years ago, and it's about empty. There don't seem to be many places who carry Polly Scale paints, and I haven't found any that had this P/N. The Floquil version looks much too dark. 2) Polly S "Gray" P/N 500817 (label also shows 36622) These are specific shades that I've become accustomed to using for specific purposes over the years, so I'm hoping to find them again. All helpful responses appreciated.
-
Graphite Metallic as a detail paint? Interesting. I don't have access to the magazine. Can someone link me up to this article? (I tried a couple Google searches but only found older SA articles on grille detailing).
-
In addition to making the actual bracket, I'd like to know: 1) How can I make a realistic slot in the bracket for the tensioning nut? 2) What's the most realistic way to mount this bracket to the cylinder head? The goal is to make the bracket look like it's supporting the alternator (as opposed to the "magic fan belt"). I know there are P/E units out there, but in this case I'd rather build than buy.
-
I'm inclined to go with Brandywine, but I'm trying to figure out why you'd want to paint over flat black. While it will darken the top color, which I assume is what you want, it also typically dries with a much rougher surface than, say, a dark primer. IIRC, Bluemoose does most of his "red" paint jobs over gloss black.
-
what type of airbrush do you use?
Monty replied to DrewCfromSC's topic in Model Building Questions and Answers
Hmmm, something weird's going on. Hobby Lobby's online site still shows some service parts for Paasches, but no airbrushes. They used to sell Iwatas, and like an idiot, I never used the coupon to take advantage of it. The 40% off coupon is offered every other week in their Sunday ad. It's down on the bottom right hand side of the page. What are you going to run the brush off of? C02 tank? Air compressor? -
what type of airbrush do you use?
Monty replied to DrewCfromSC's topic in Model Building Questions and Answers
The first airbrush I ever bought was a used Paasche VL (dual action). To me, being able to control the amount of air and paint simultaneously make it a far better choice than a single action. If you have a Hobby Lobby and one of their 40% off coupons, that same VL can be had for a ridiculous amount of money. A little internet shopping will uncover some fantastic bargains as well. -
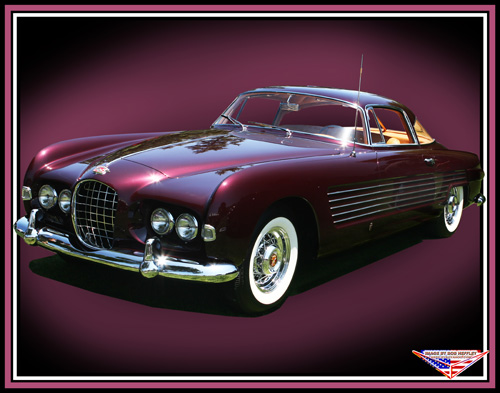
Honduras Red is a beautiful color, but it definitely leans toward the red end of the spectrum. My goal is finding something close to this:
-
In theory, it should be a beautiful color. In practice...well, I wish I could show some of the cars the guys on Spotlight Hobbies posted in regard to this subject. I want it to work. Between rods, customs, street machines and luxury cars, there's a need for a good burgundy paint. Best of luck with your project. Consensus seems to indicate the need for a very dark primer.
-
The model in question is MPC's 1982 Corvette, so no "chrome" is involved.
-
Originally - (1973?) Testors rattle can. More recently - Model Masters Jar. My point was that I wasn't thrilled with either "burgundy". I posted this same question over on the Spotlight Hobbies board and some people acknowledged that they'd had similar problems - ie the original Testors burgundy was too light in color and the MM stuff didn't cover well. I've airbrushed these metallics for years now, and this is the first one I haven't had a good experience with.
-
Actually, it's kind of a nice change to see one of those that isn't painted some shade of red. Got any more pics of the body/paint? It's looking good so far.
-
My most recent attempts were with the MM bottle stuff. I've always been leery of shooting a lighter color over black, but Bluemoose occasionally does it with Tamiya sprays and they always turn out nice. Looking at the pic you posted, it's hard to argue with the evidence. That's much closer to what I call burgundy. (Beautiful truck, BTW).
-
I tried a can of this stuff when I was a kid and was very disappointed because "burgandy" would've looked great on the kit I was painting. Instead, despite doing all the proper shaking and warm water preparation, the end result was more of a boat flake strawberry color. More recently, armed with my favorite airbrush, I grabbed a jar of the paint, reduced it per normal and shot it over white primer (looks weak) and gray primer (slightly more burgundy, but cloudy). I don't recall having problems with any of their other metallic enamels, so I'm puzzled. I'd appreciate any tips and accompanying pics of results.
-
I couldn't fathom working in that scale. Kudos to you for being able to do it so well. May I ask what color you used for the seats in the black one?