Lowlife ! !
-
Posts
748 -
Joined
-
Last visited
Content Type
Profiles
Forums
Events
Gallery
Everything posted by Lowlife ! !
-
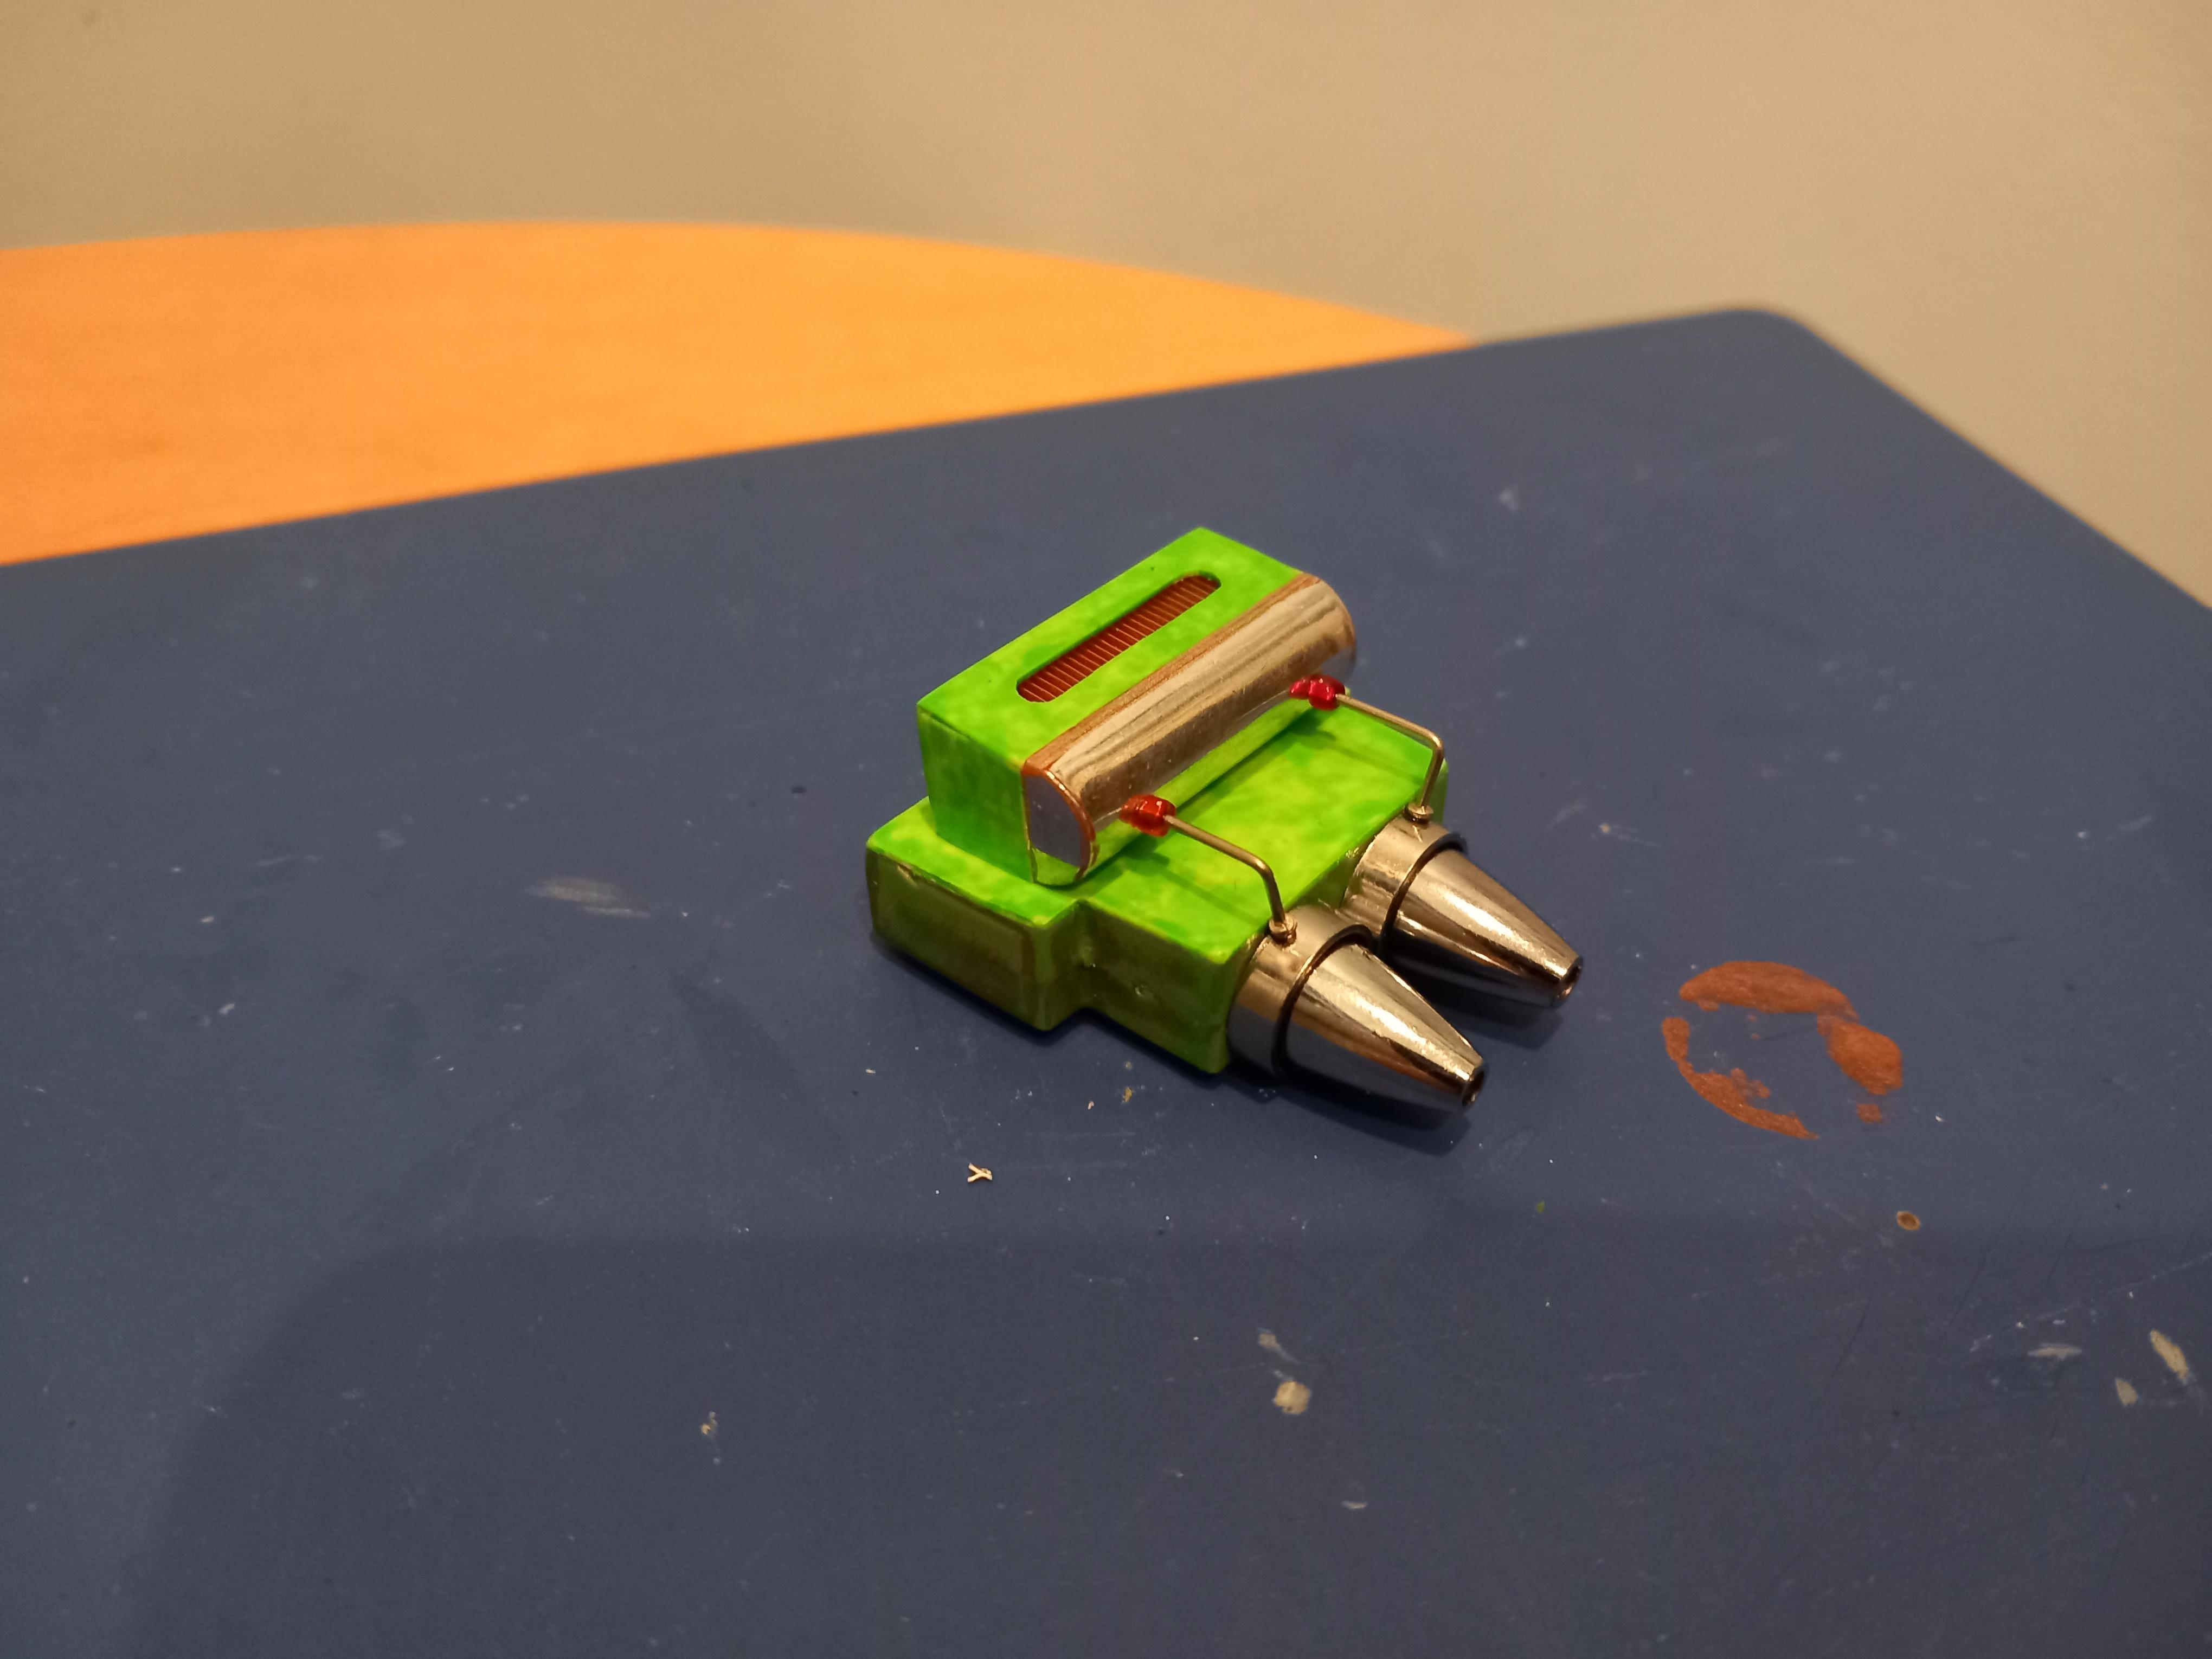
Next up the engine, thought you wouldnt see much of it, so built it out the box, with wiring etc... Yep, hated this one too, so cut it in half, threw the top part away and made this, mainly out of 2 ball point pens ! Needs a bit more wiring maybe but its got the look i want .... Crazy !! Oh and ive just found some wheels... there actually rubber bouncy balls but i think they might just work.... More soon...

-
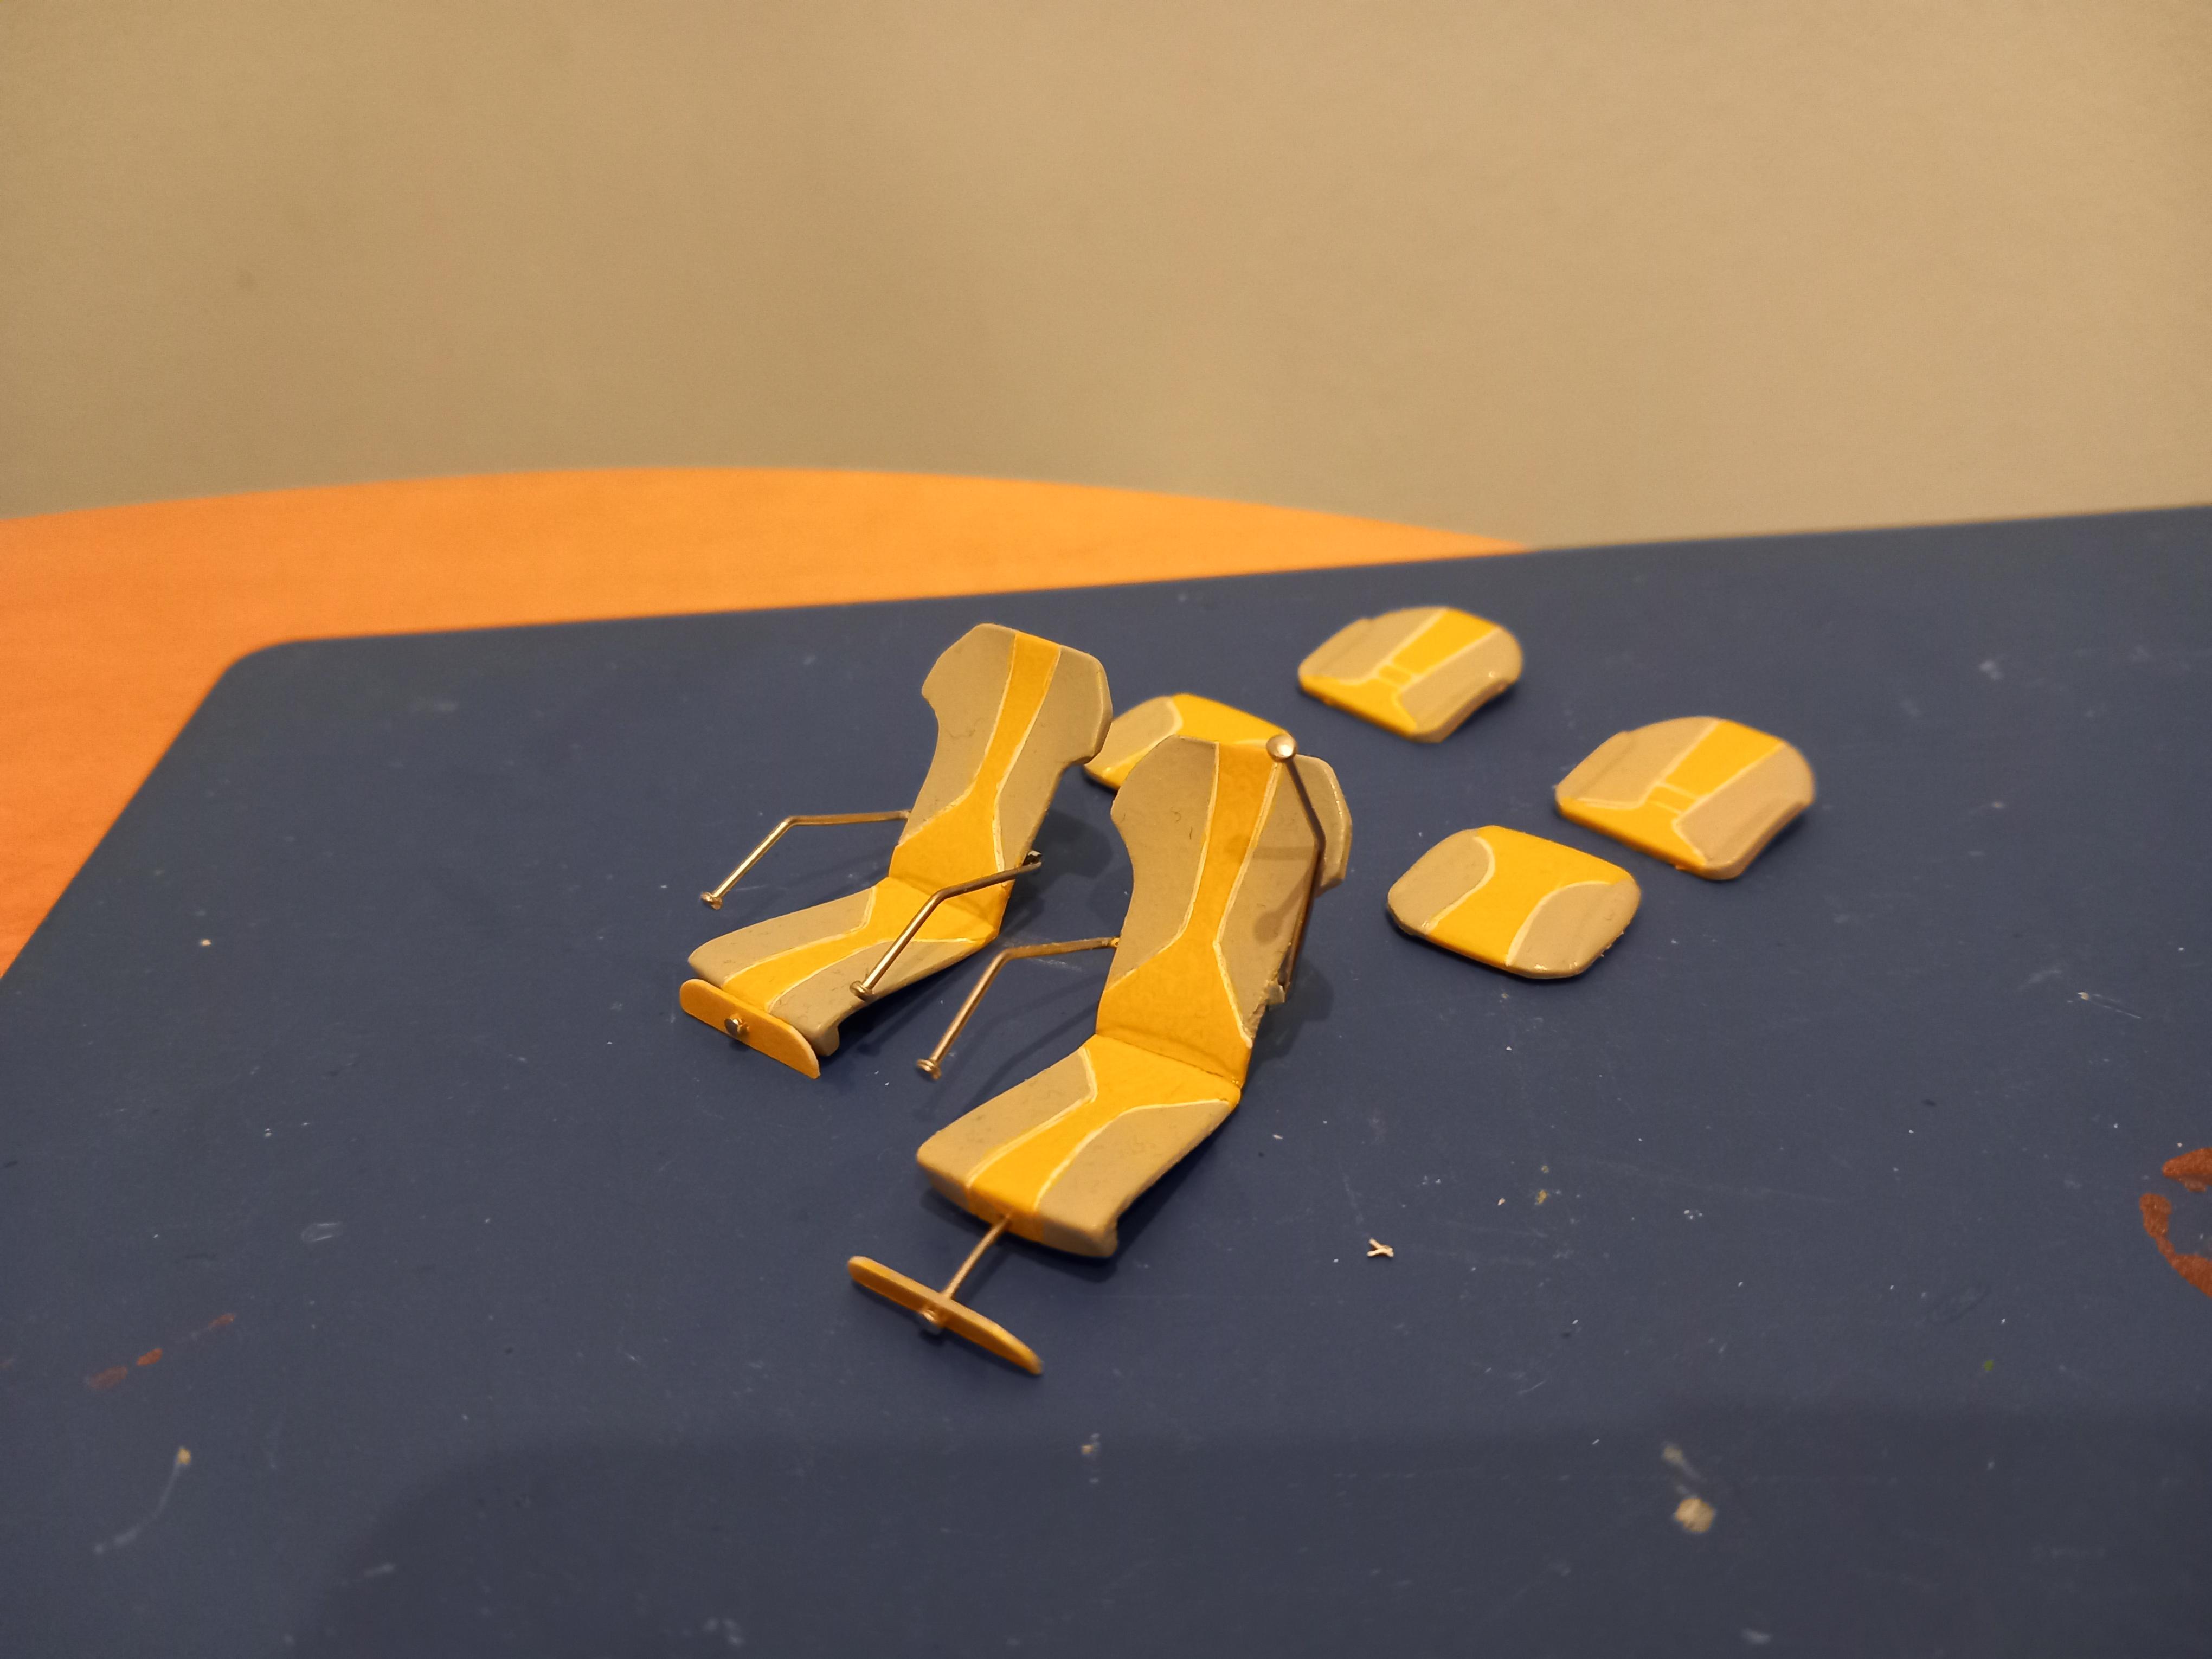
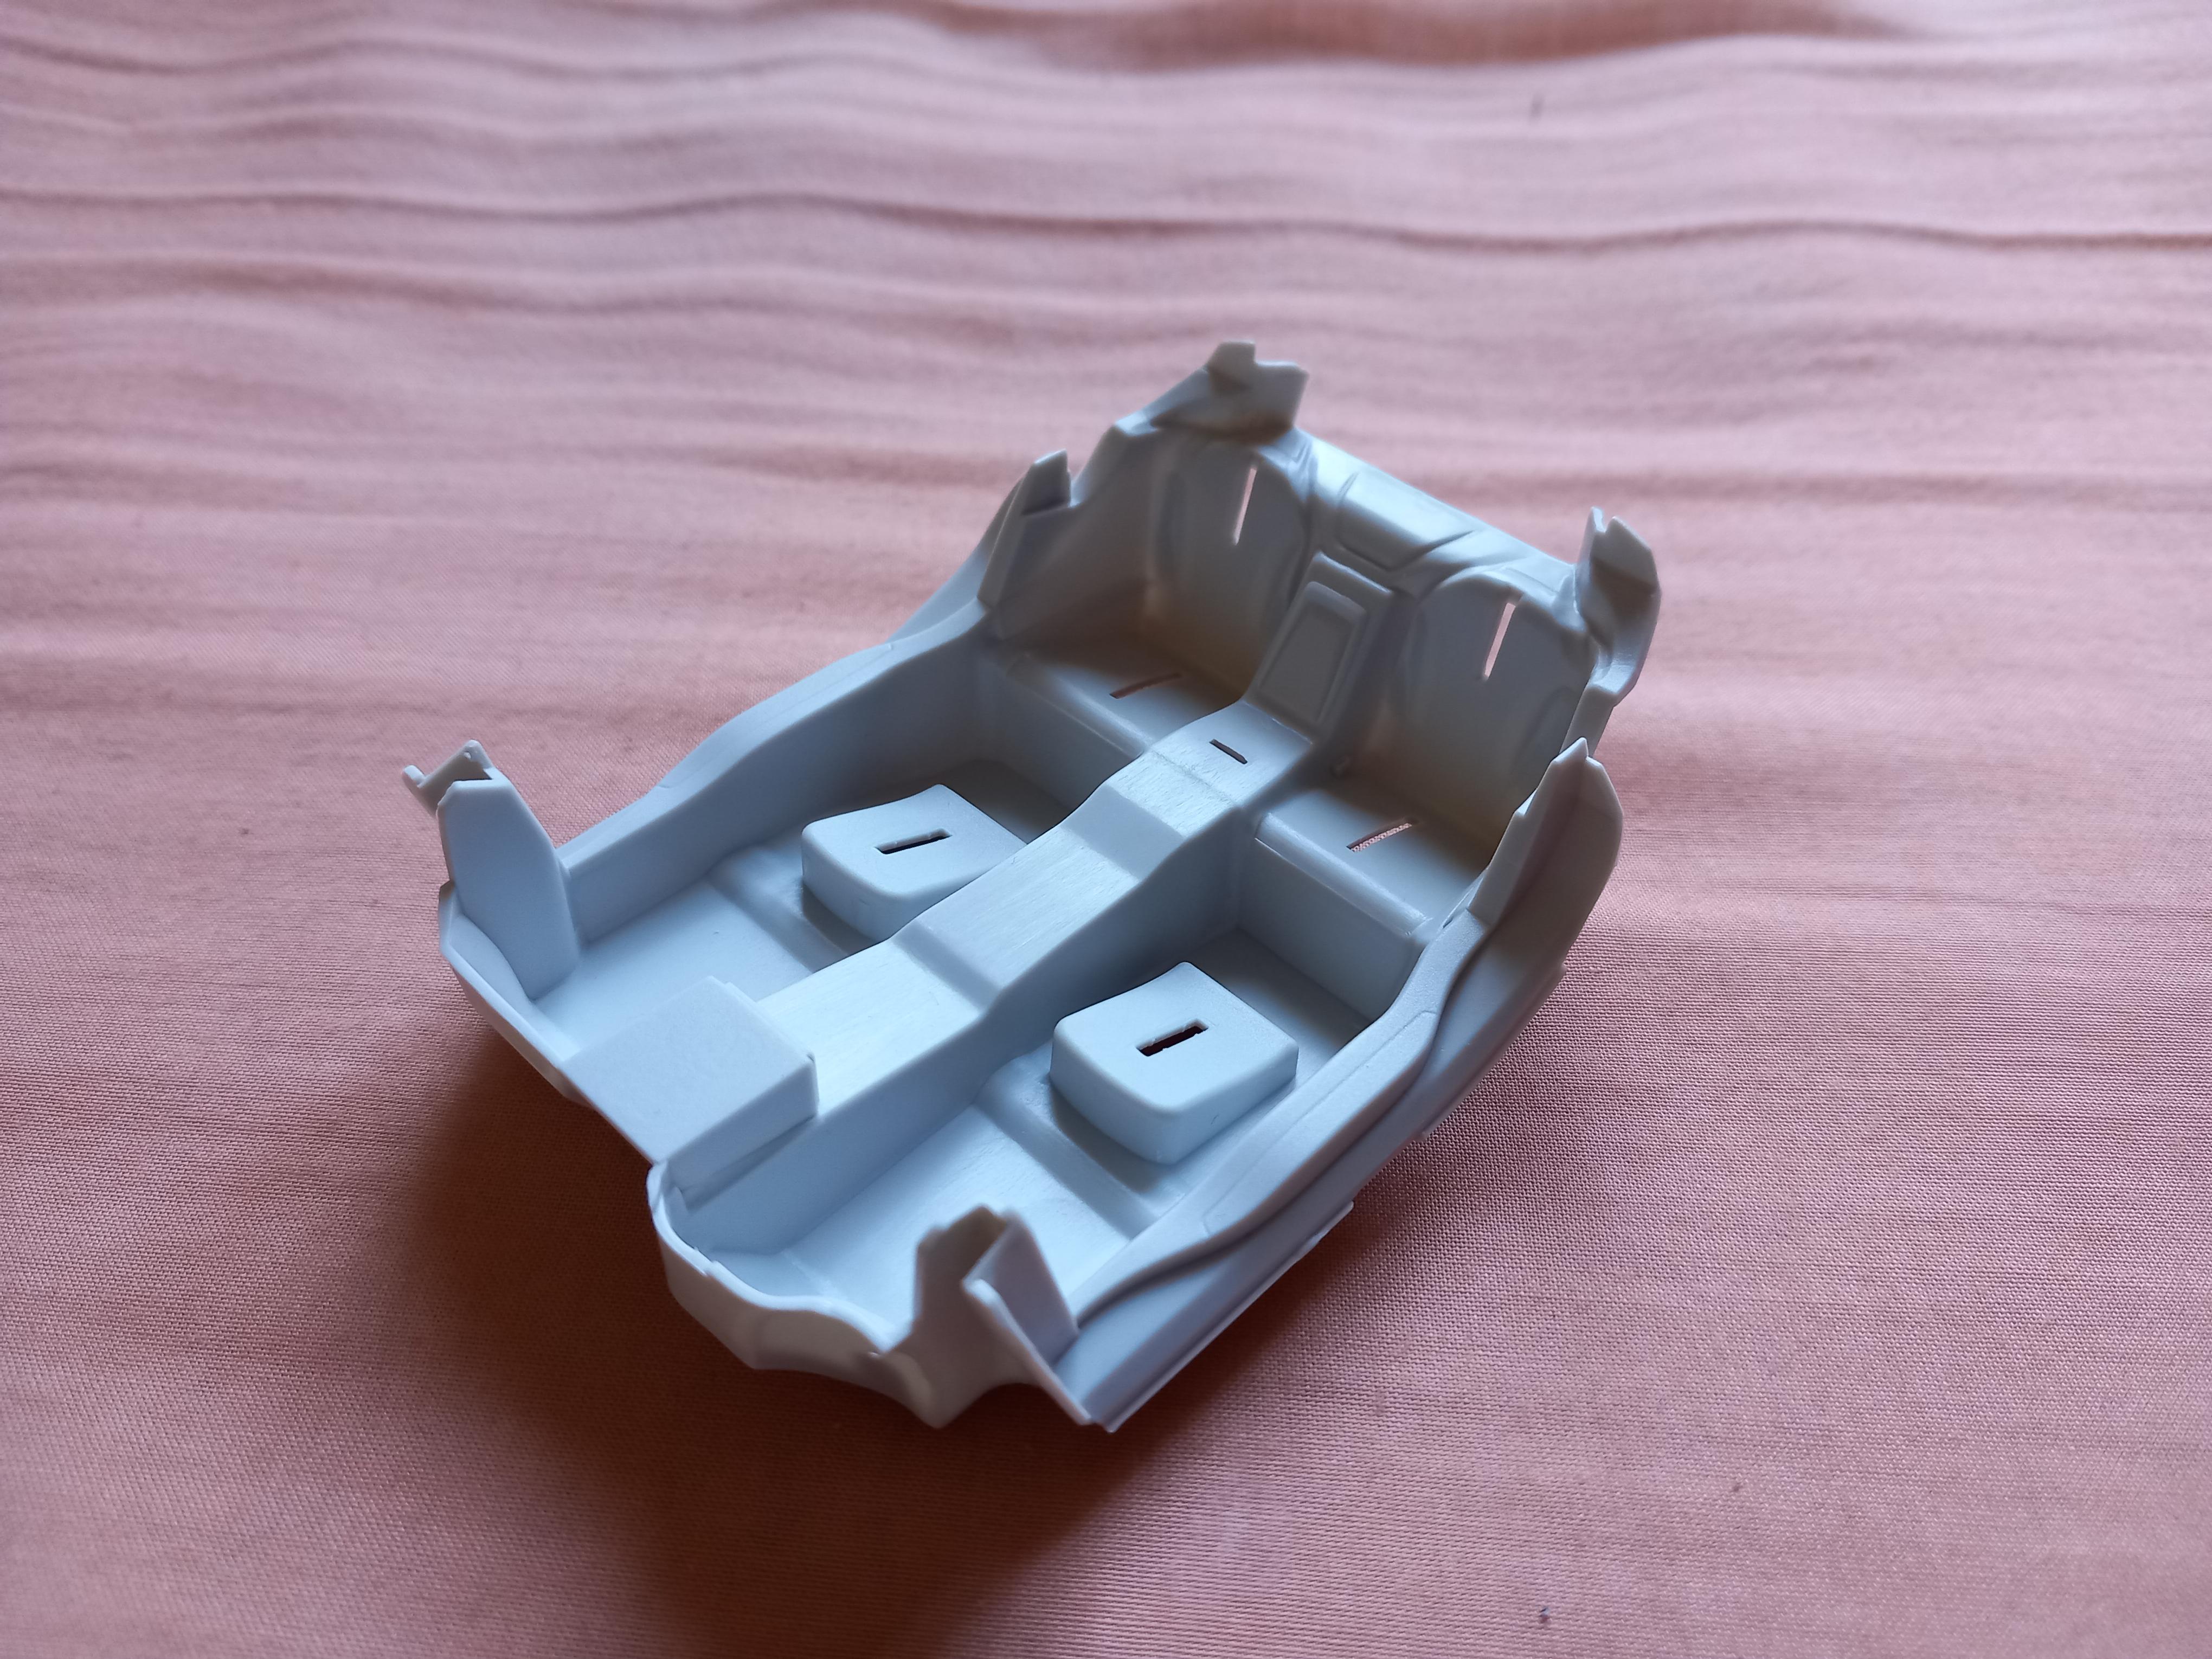
Finally.... Progress ! ! Well kind of, I enjoy these builds where its all make believe, but the problem is I build stuff, then a few days later I dont like it ! So first a couple of pics of mistakes that i threw away ! Original seats were slimmed down, cut apart, added movable arm rests and adjustable foot pads, all painted then a week later decided they were just too normal so binned them ! New seats from the parts box are crazy things that i really like, they are `floating` with no visible supports . Rear seats deleted so a 2 seater now !
-

1:16 Scale 1962 Ford Consul Cortina by FROG kits
Lowlife ! ! replied to Anglia105E's topic in WIP: Model Cars
Coming along great David, I can't imagine there's a car builder in the whole UK that wouldn't want to build this Cortina ! Looks tricky but your dealing with the build well, will certainly be a great reminder of your Dad when complete. -
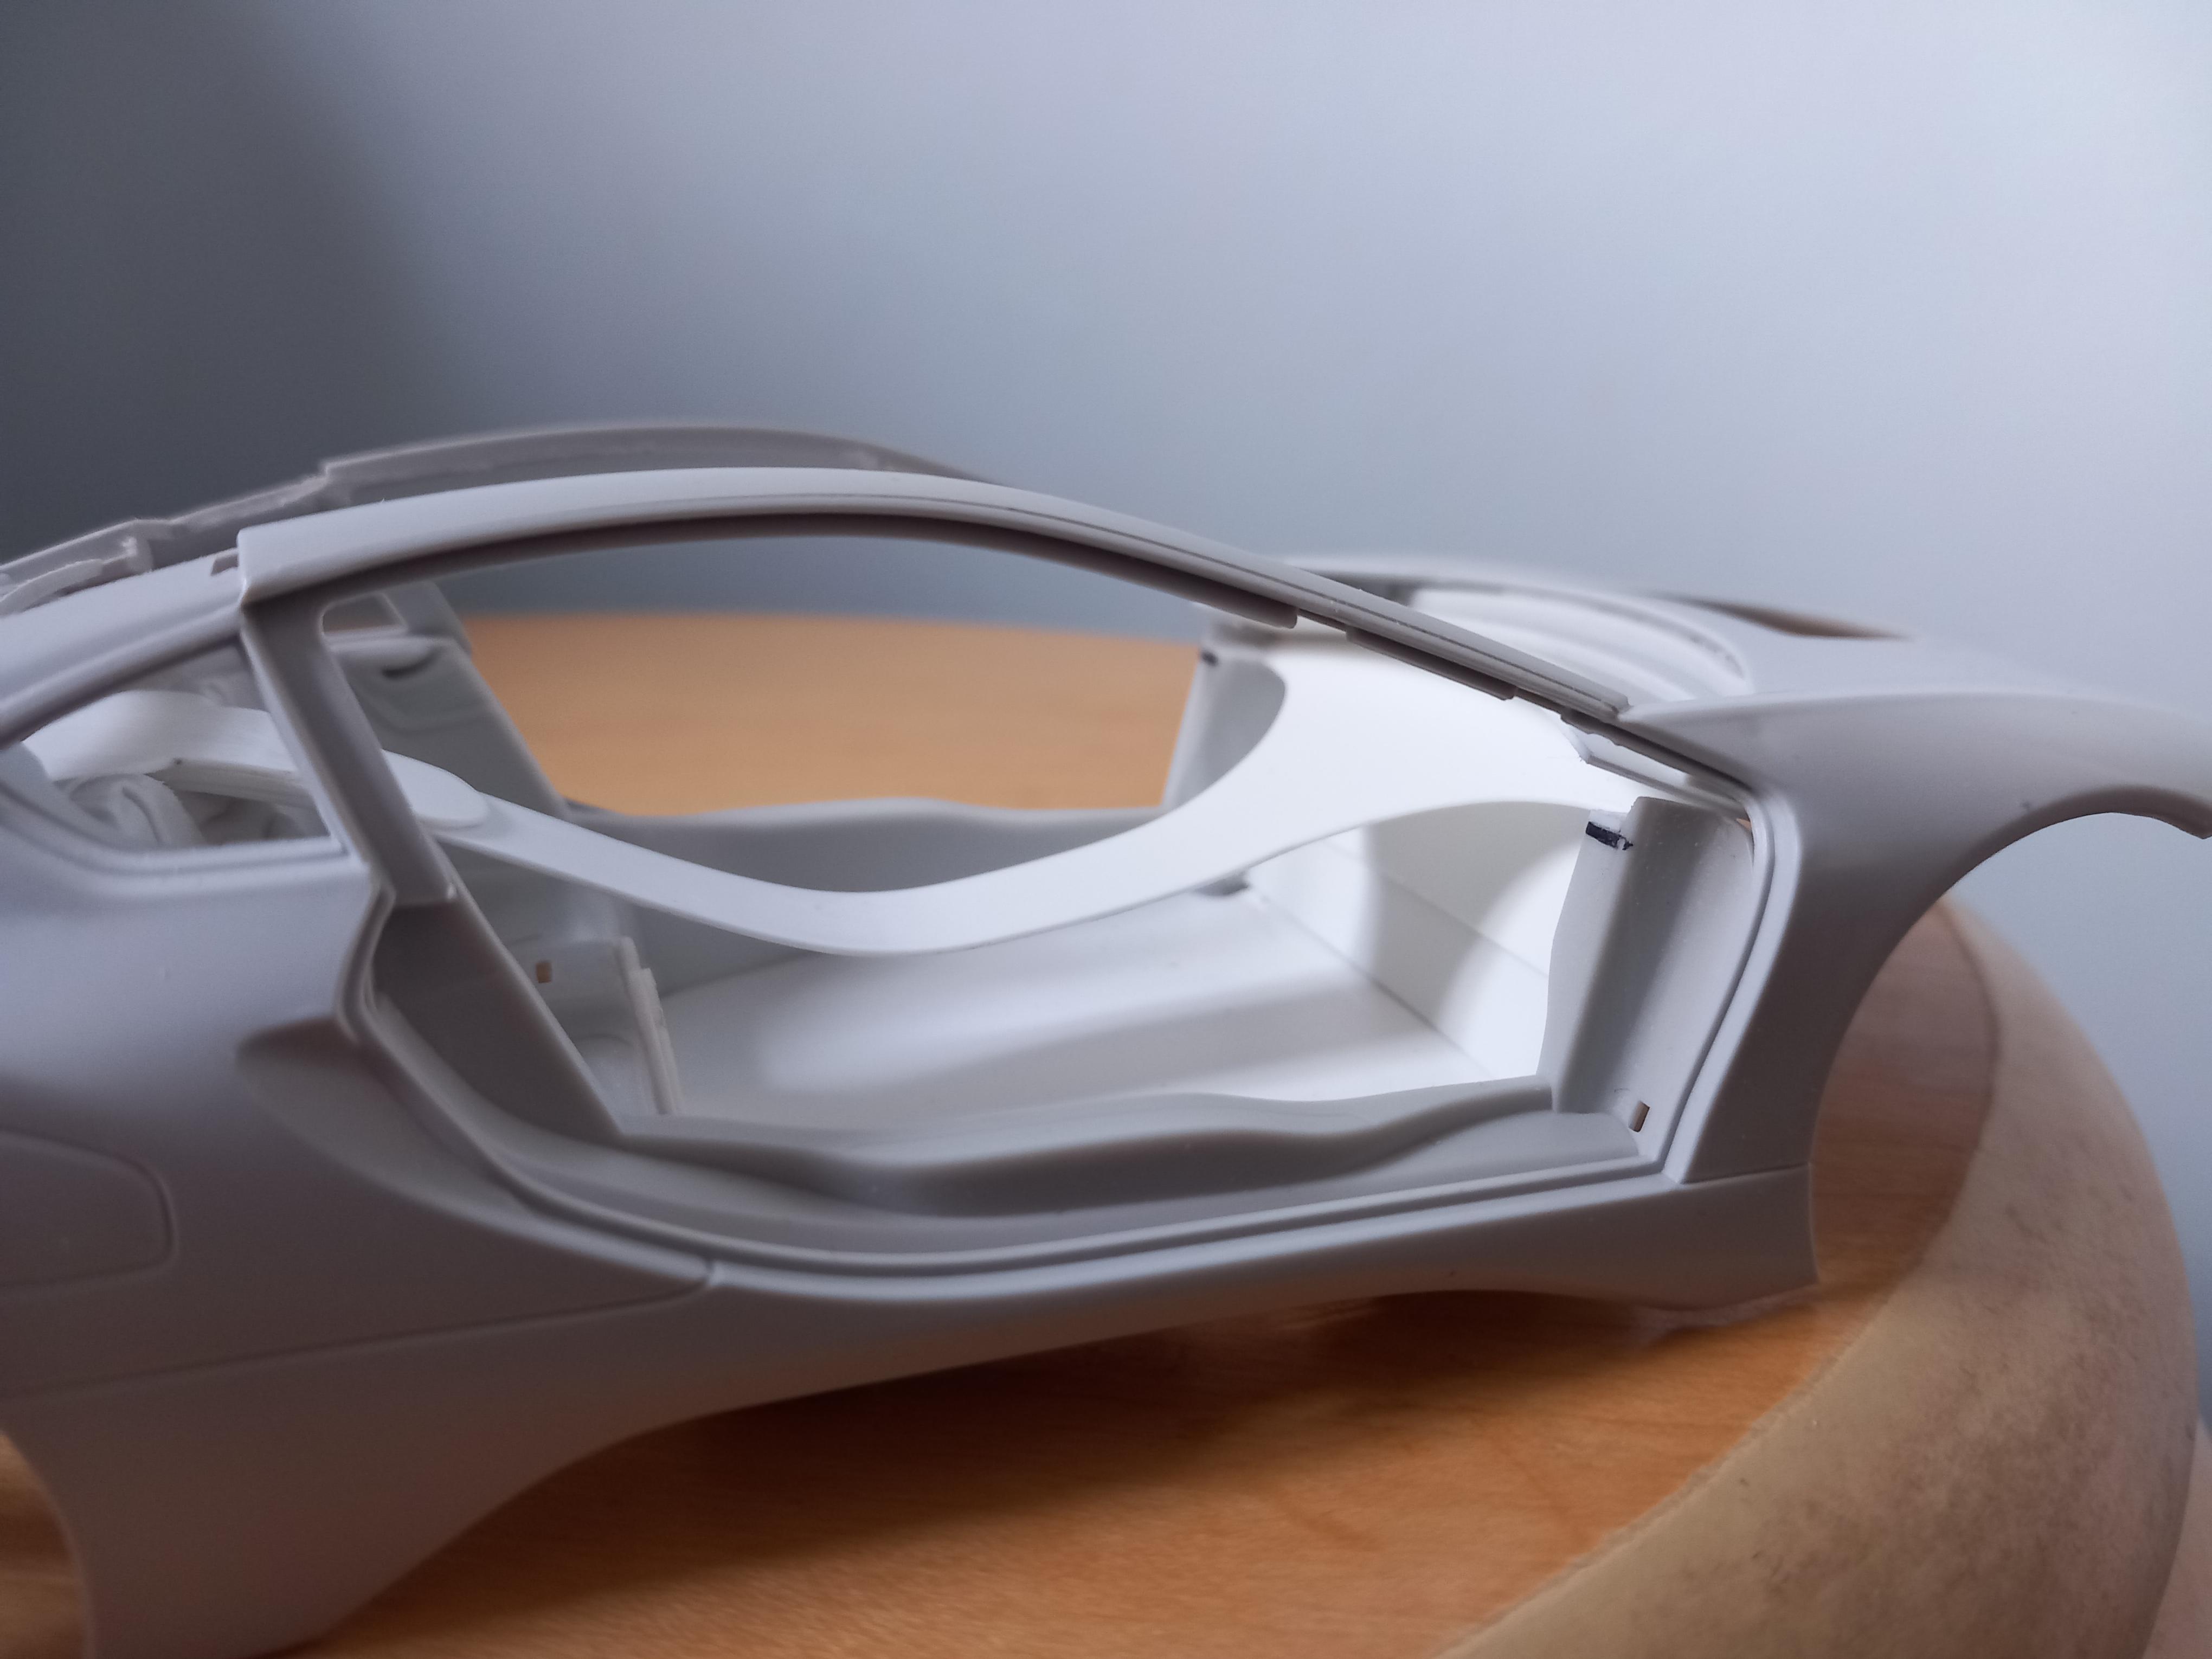
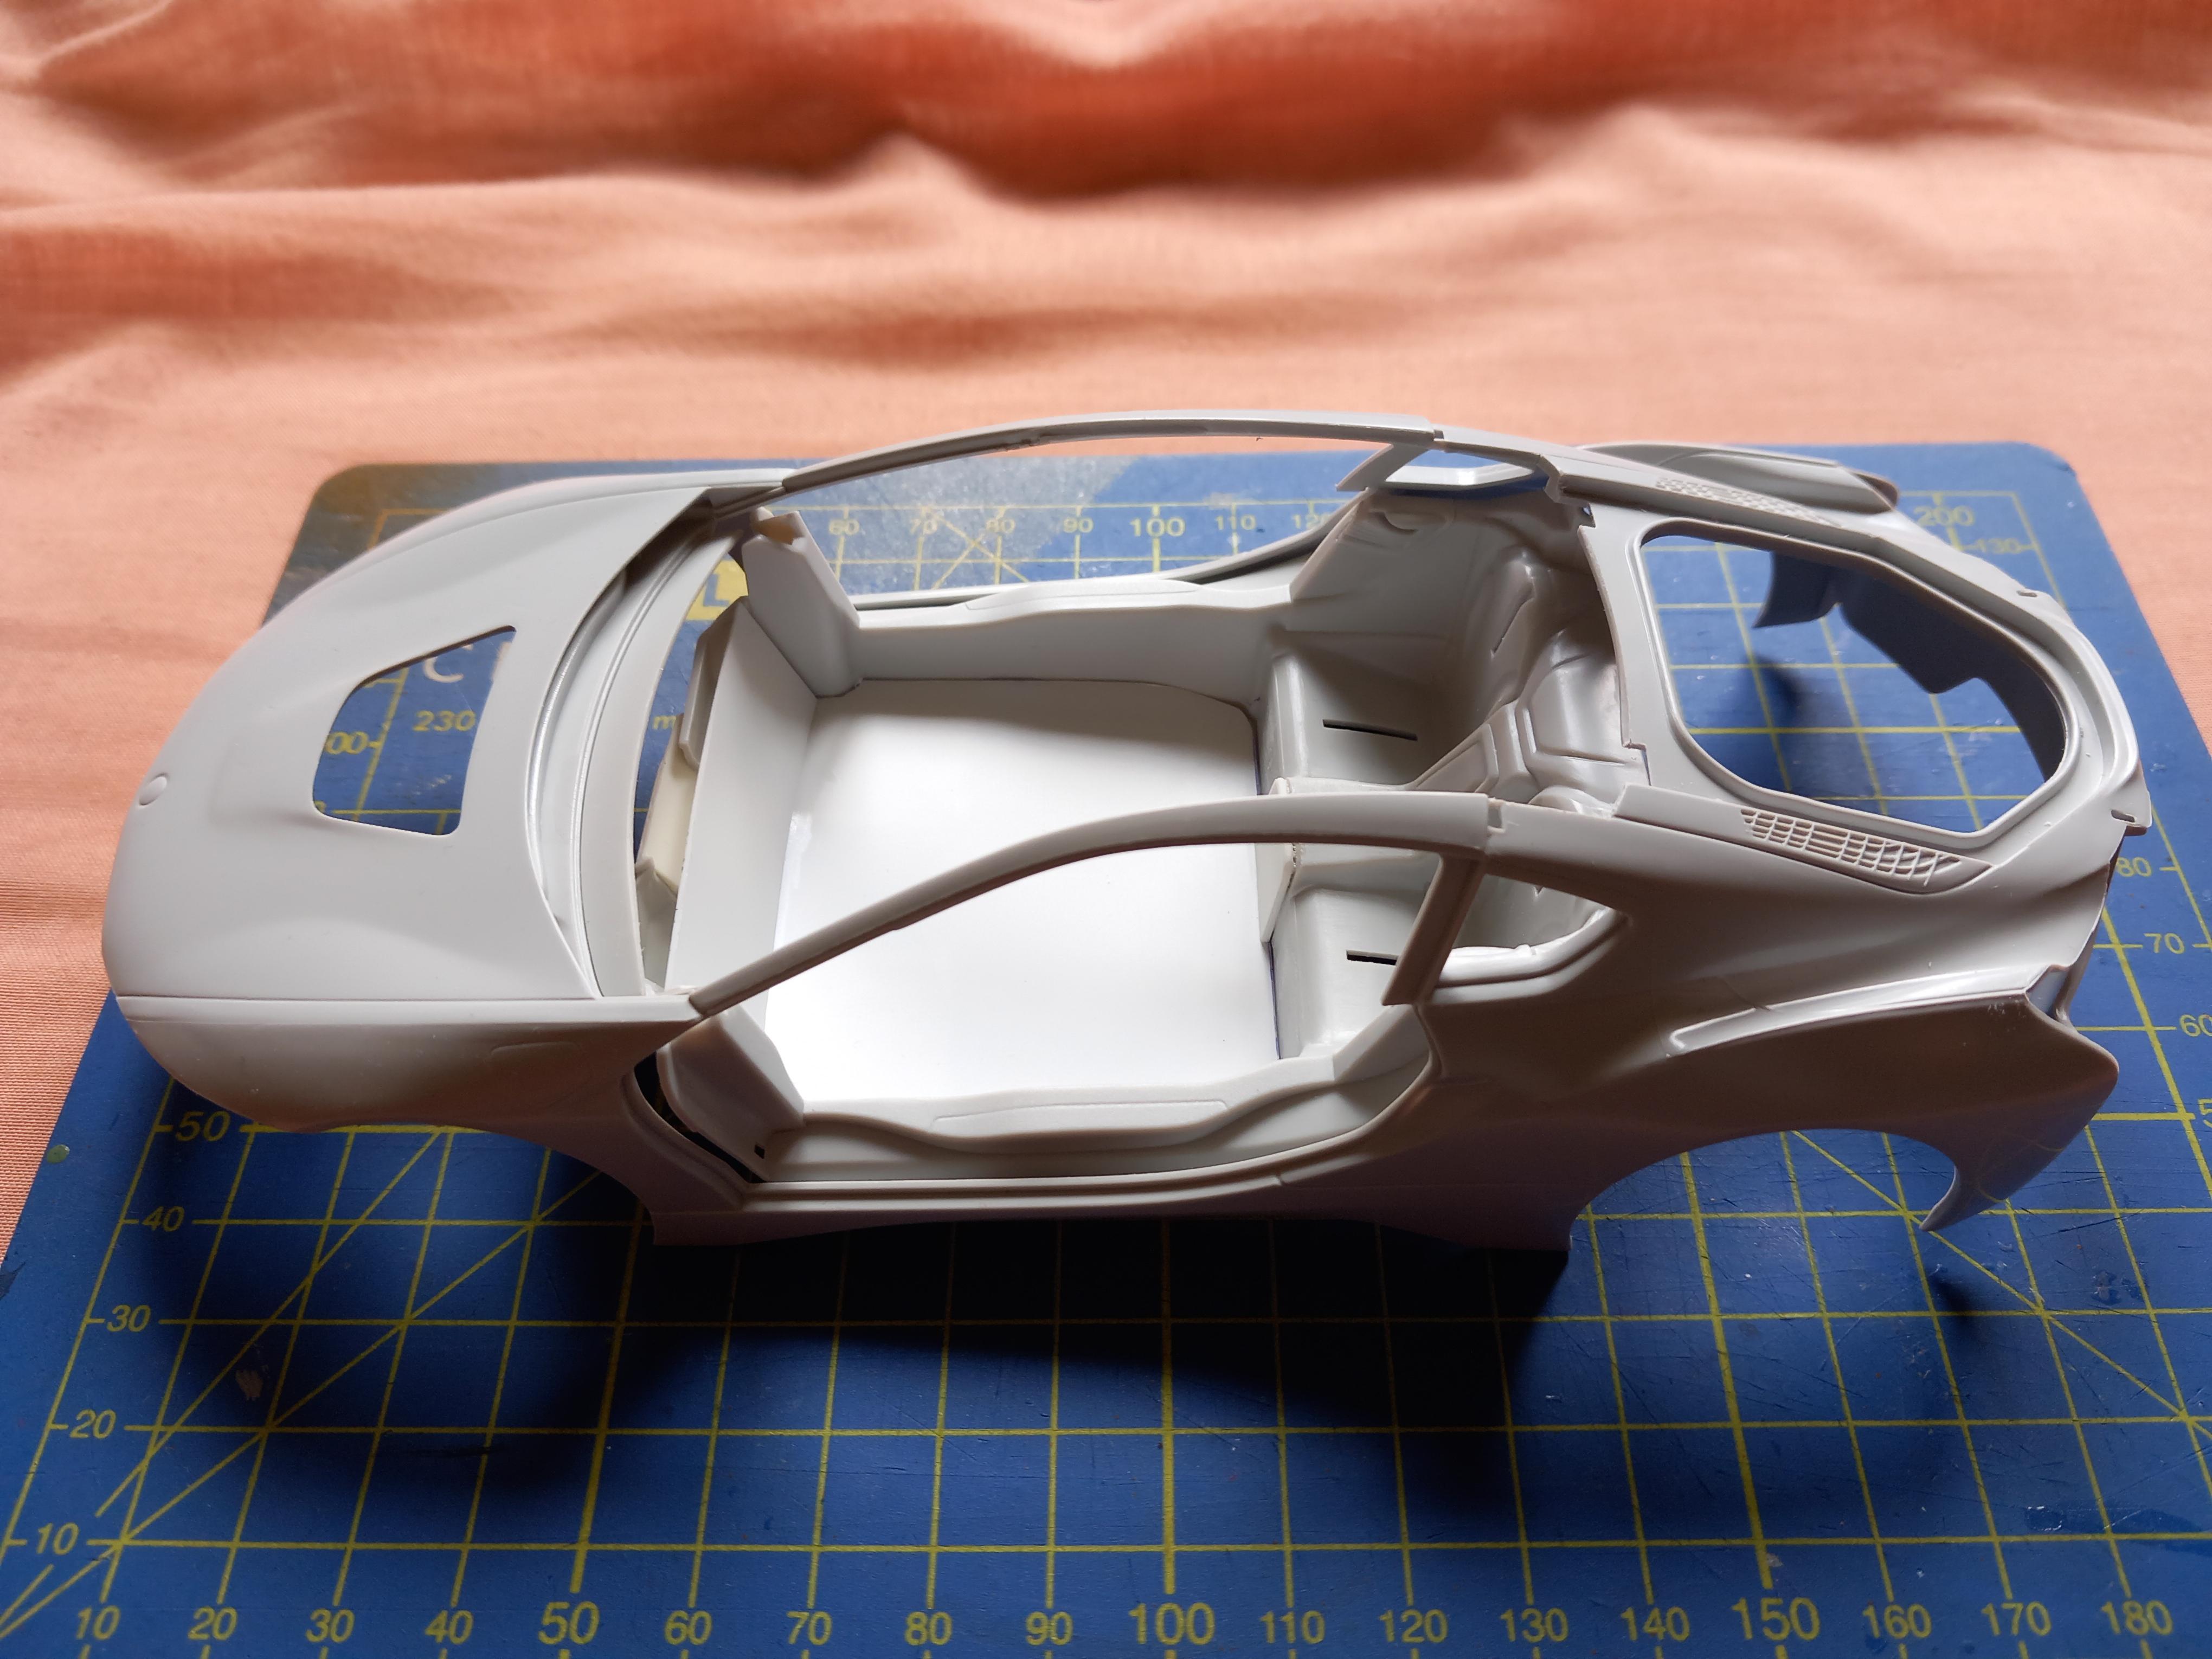
Thanks guys ! Dashboard was a pain as it mounts to the bodywork, not the interior. So i had to devise a way for the dashboard to fit to the interior bucket, and still line up with everything ! Think i like this idea, a floating dash that runs through to the back ! Had to cut out the original dash mounts etc out and cut a wedge from the back seat to fit it .. And by accident initailly, im following the dash styling with layered pieces overlapping too ! heres some pics.....
-
Super clean job on this, should look stunning when it's complete and give you some enthusiasm to get back to your usual mega detailing ! !
-
Thanks bill, Funny I meant to ask for suggestions about doing this , I've no idea... Anyone done this before ? Ideally I'd like to make glass for the windscreen and roof in one piece, but maybe that's a bit adventurous !
-
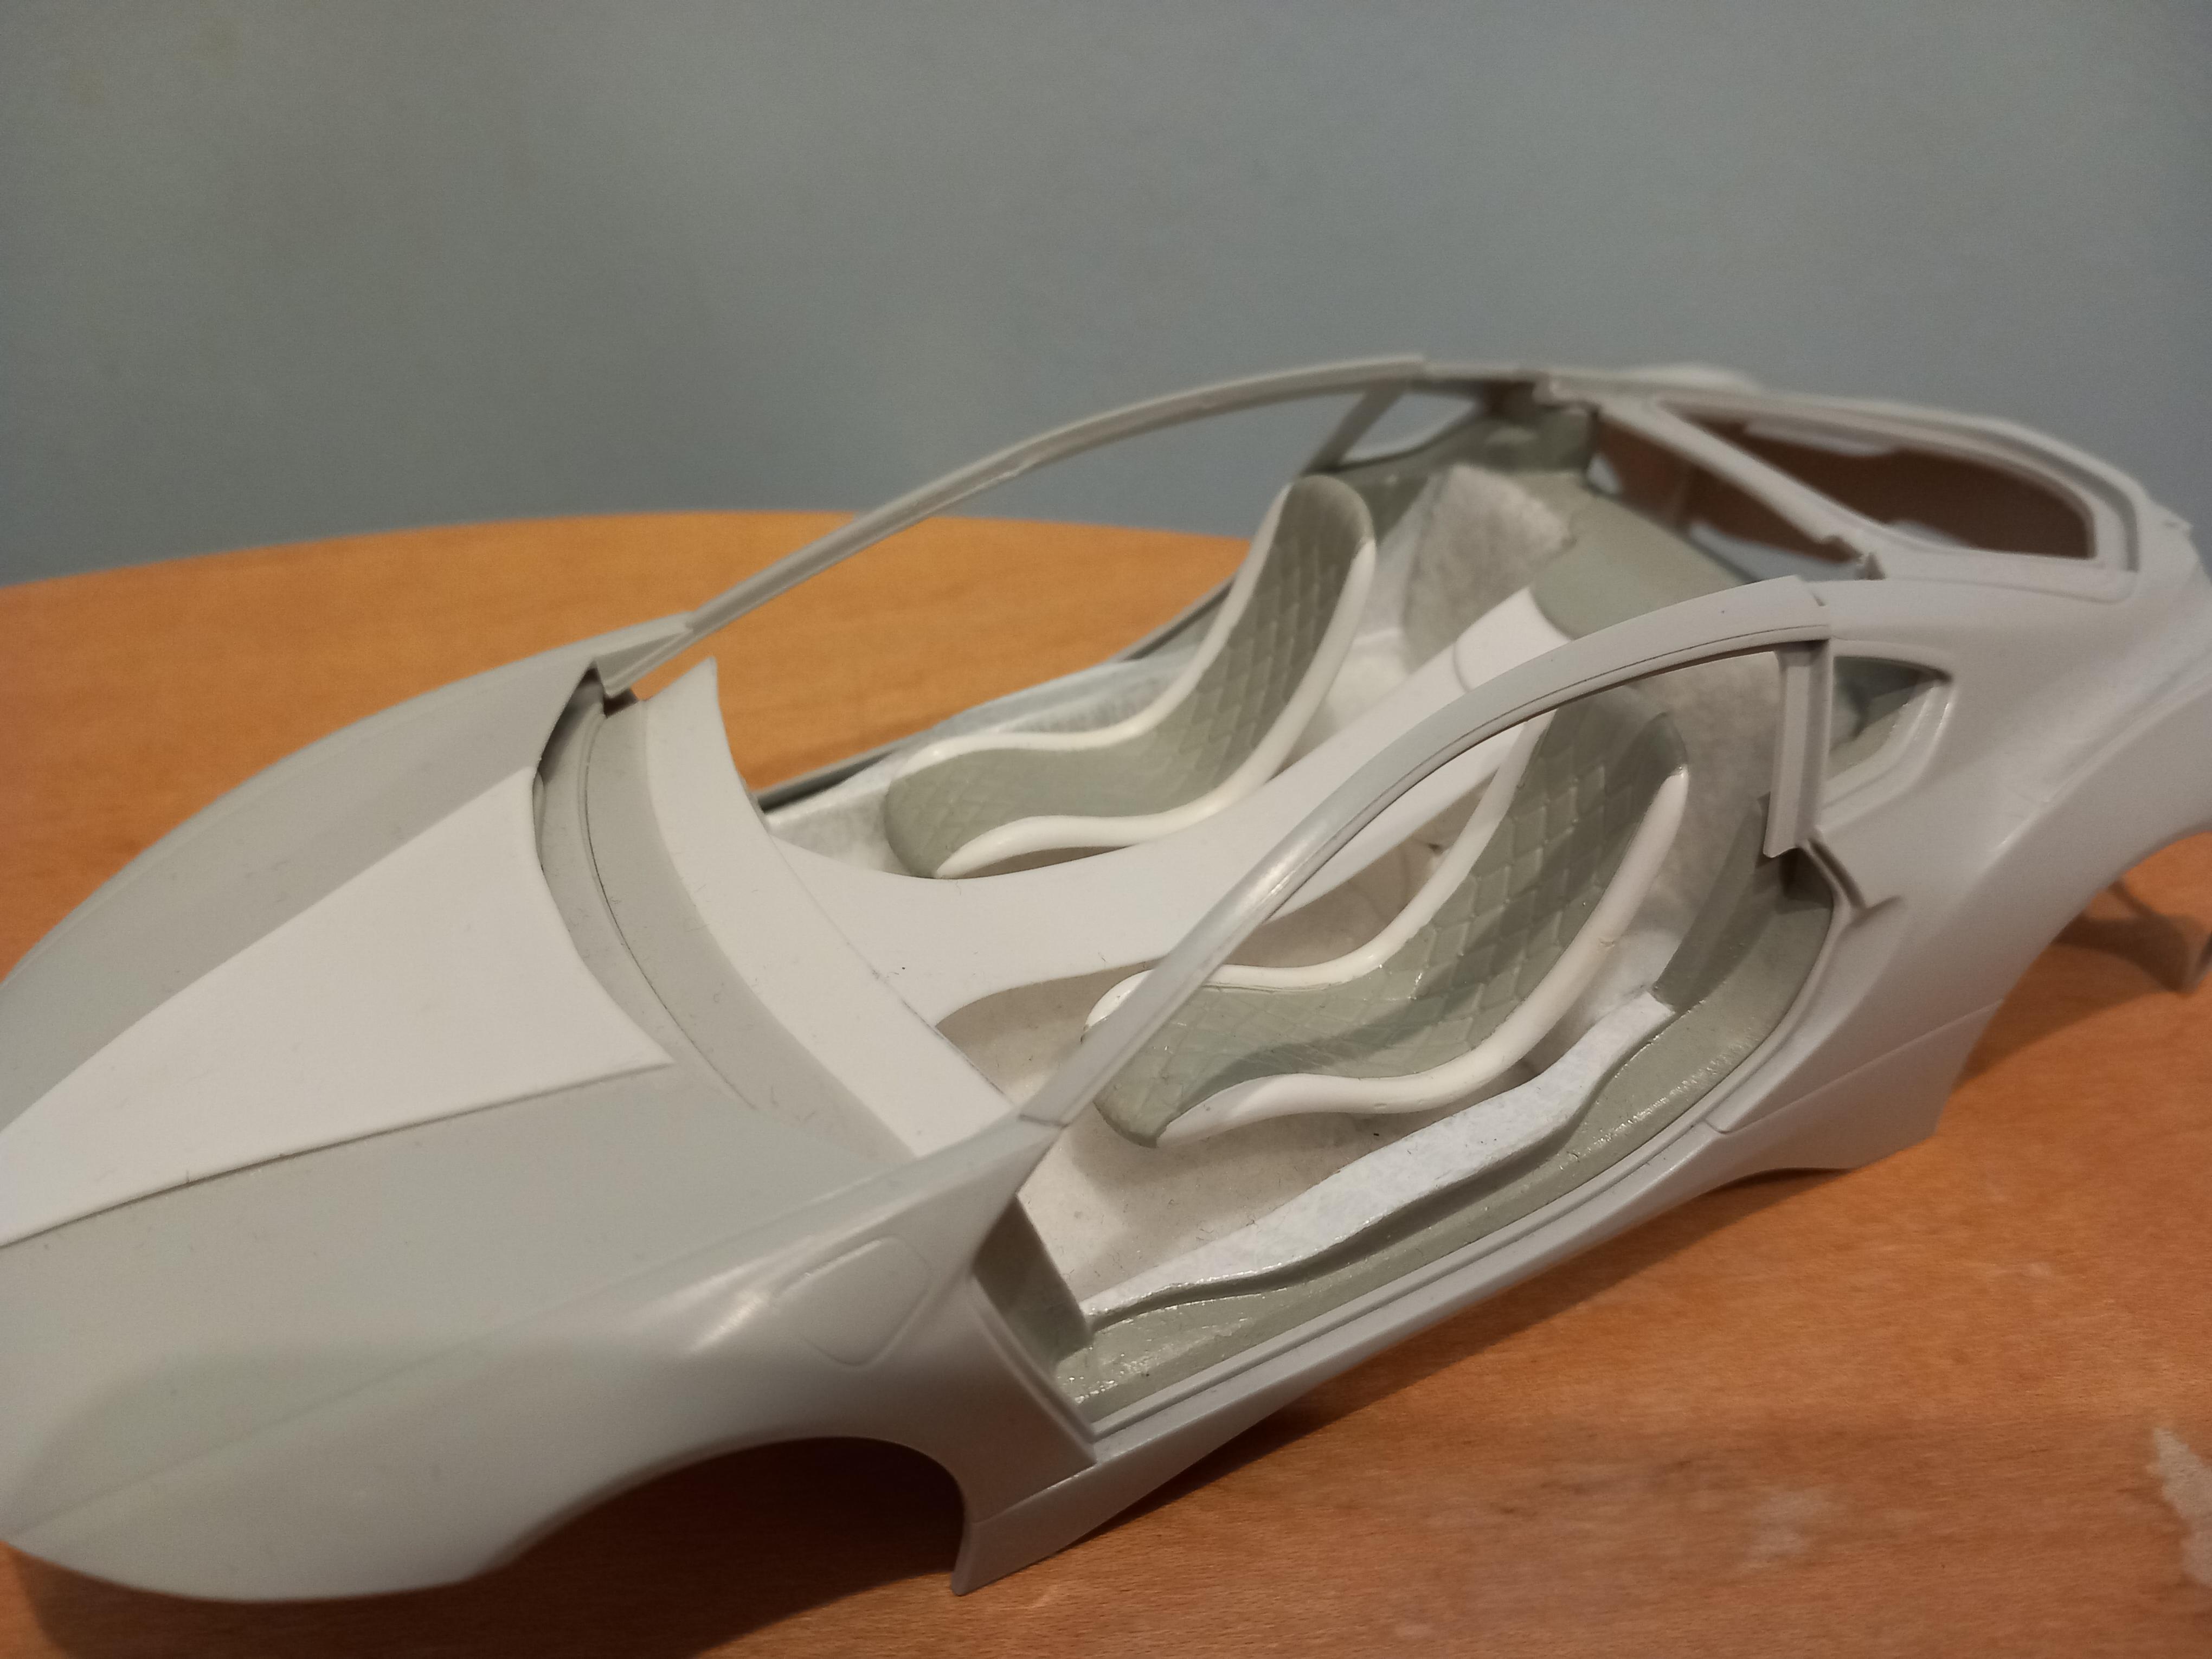
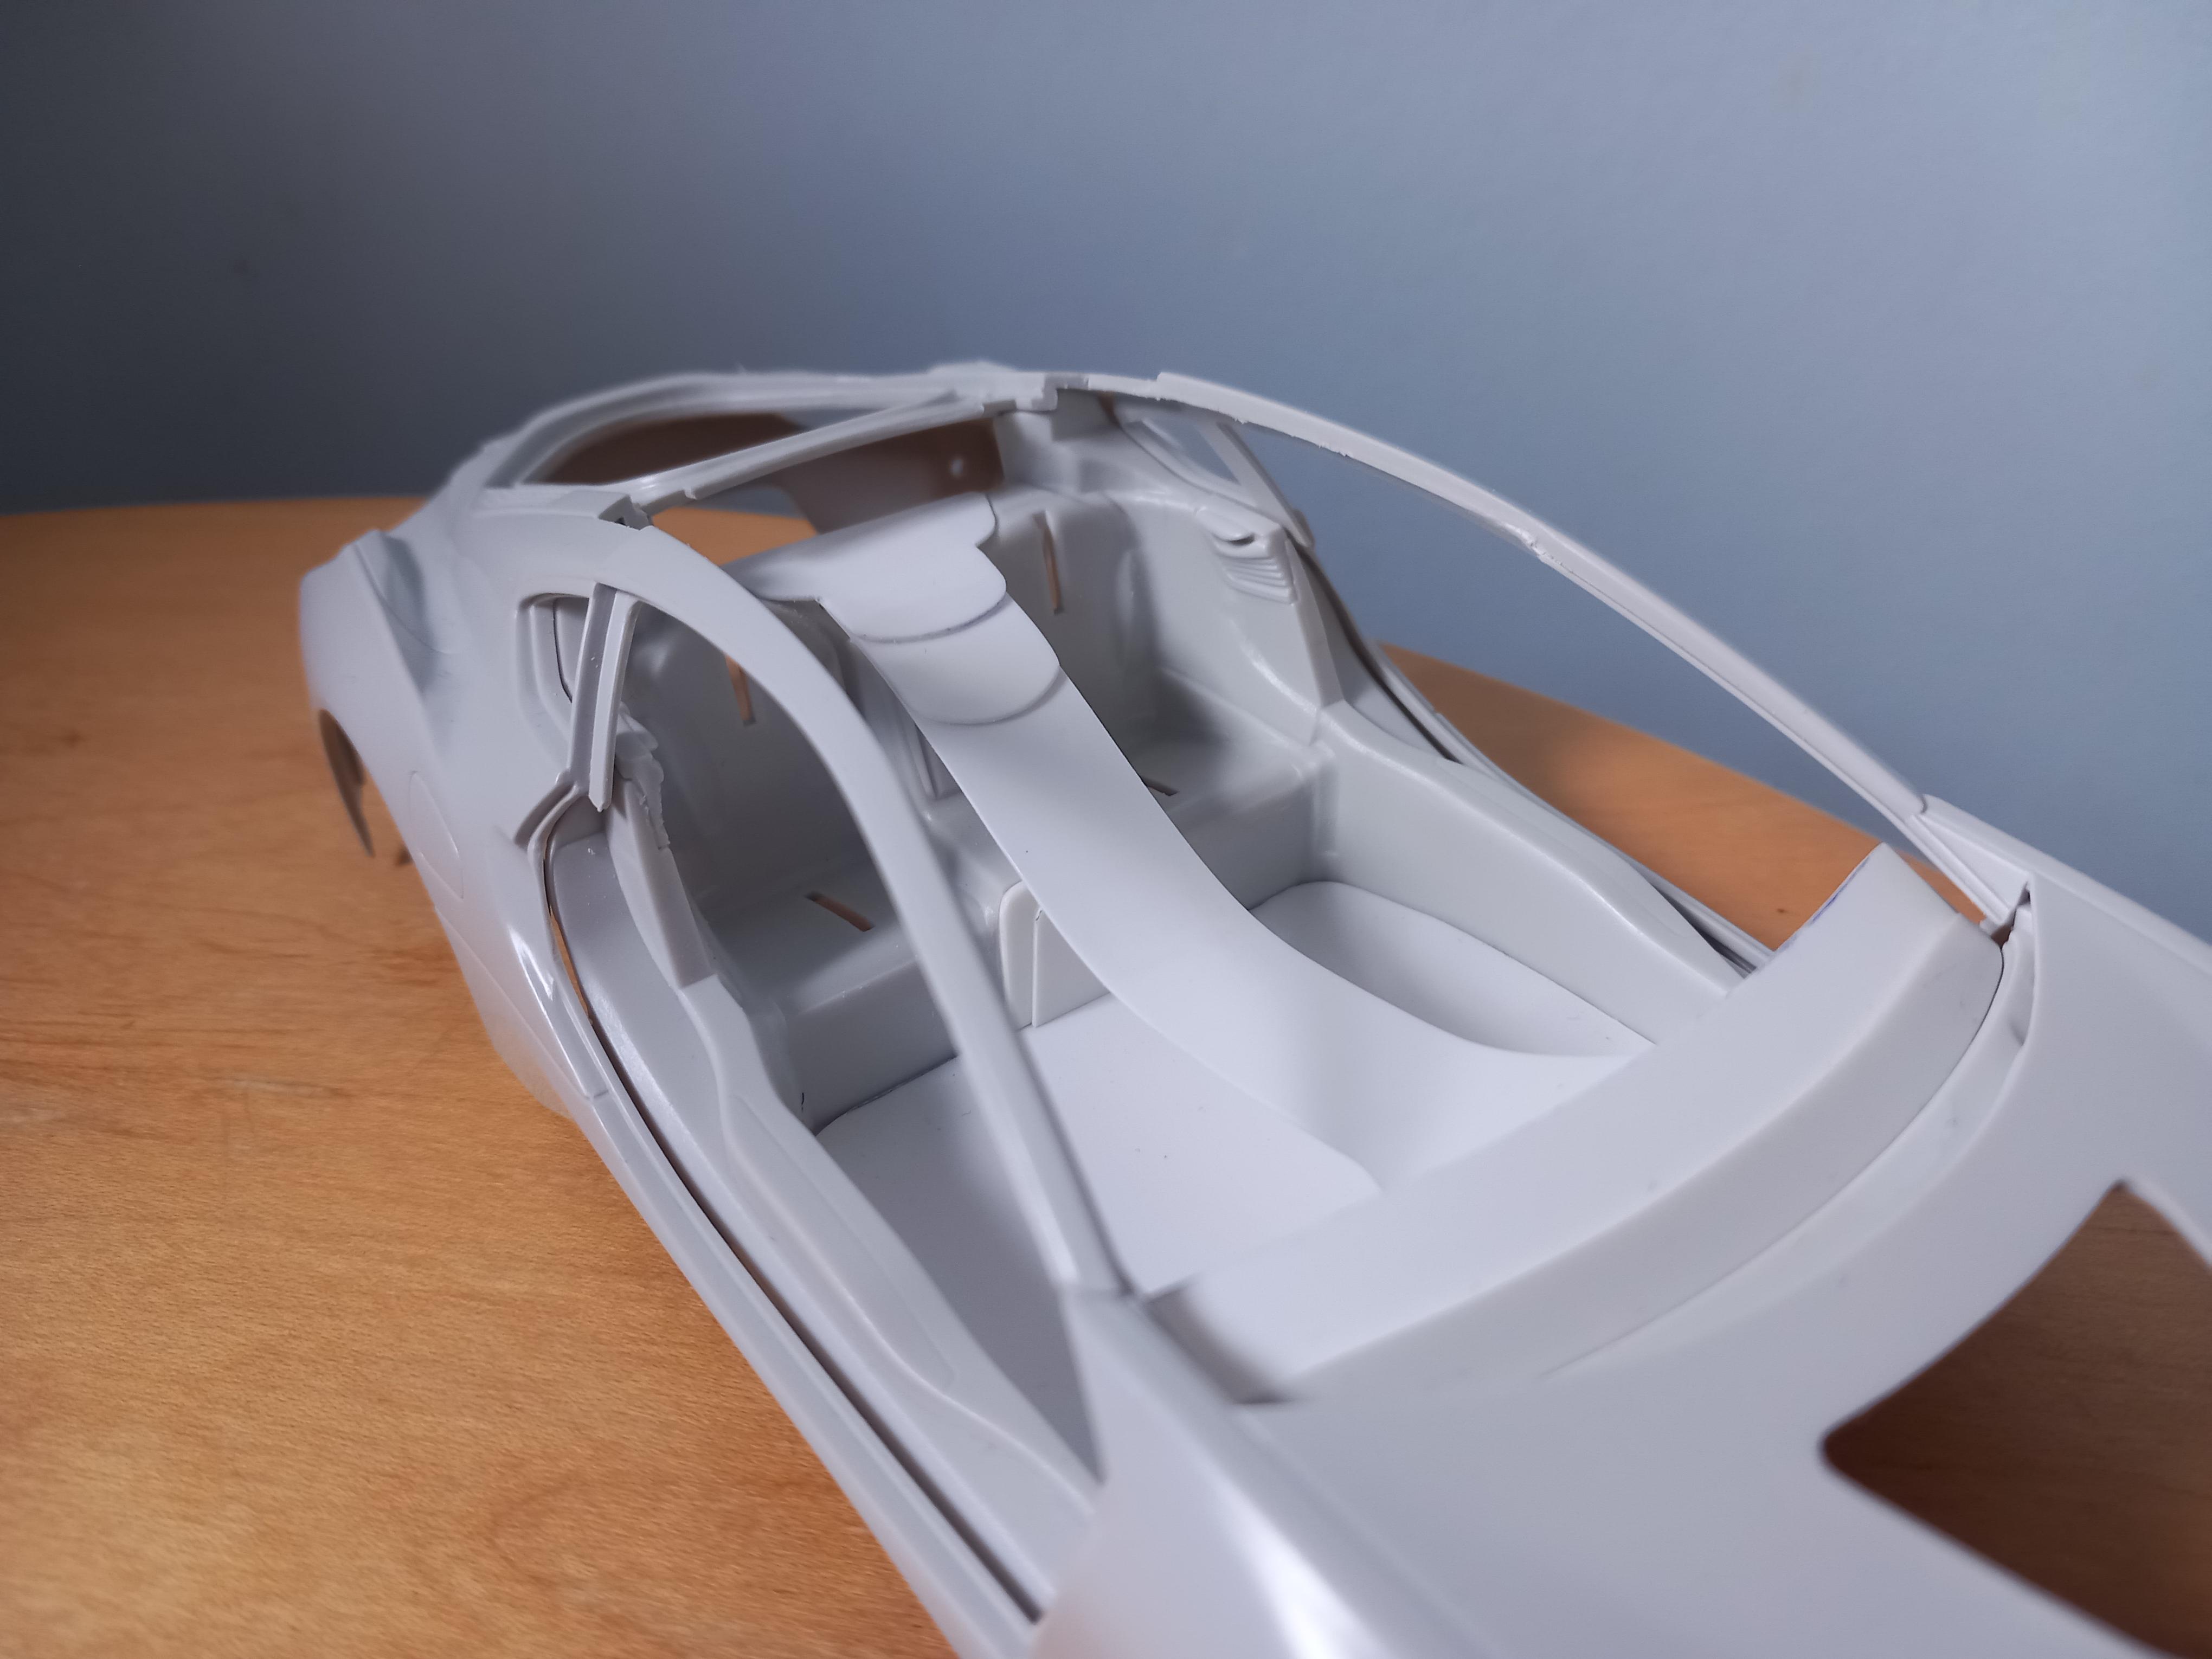
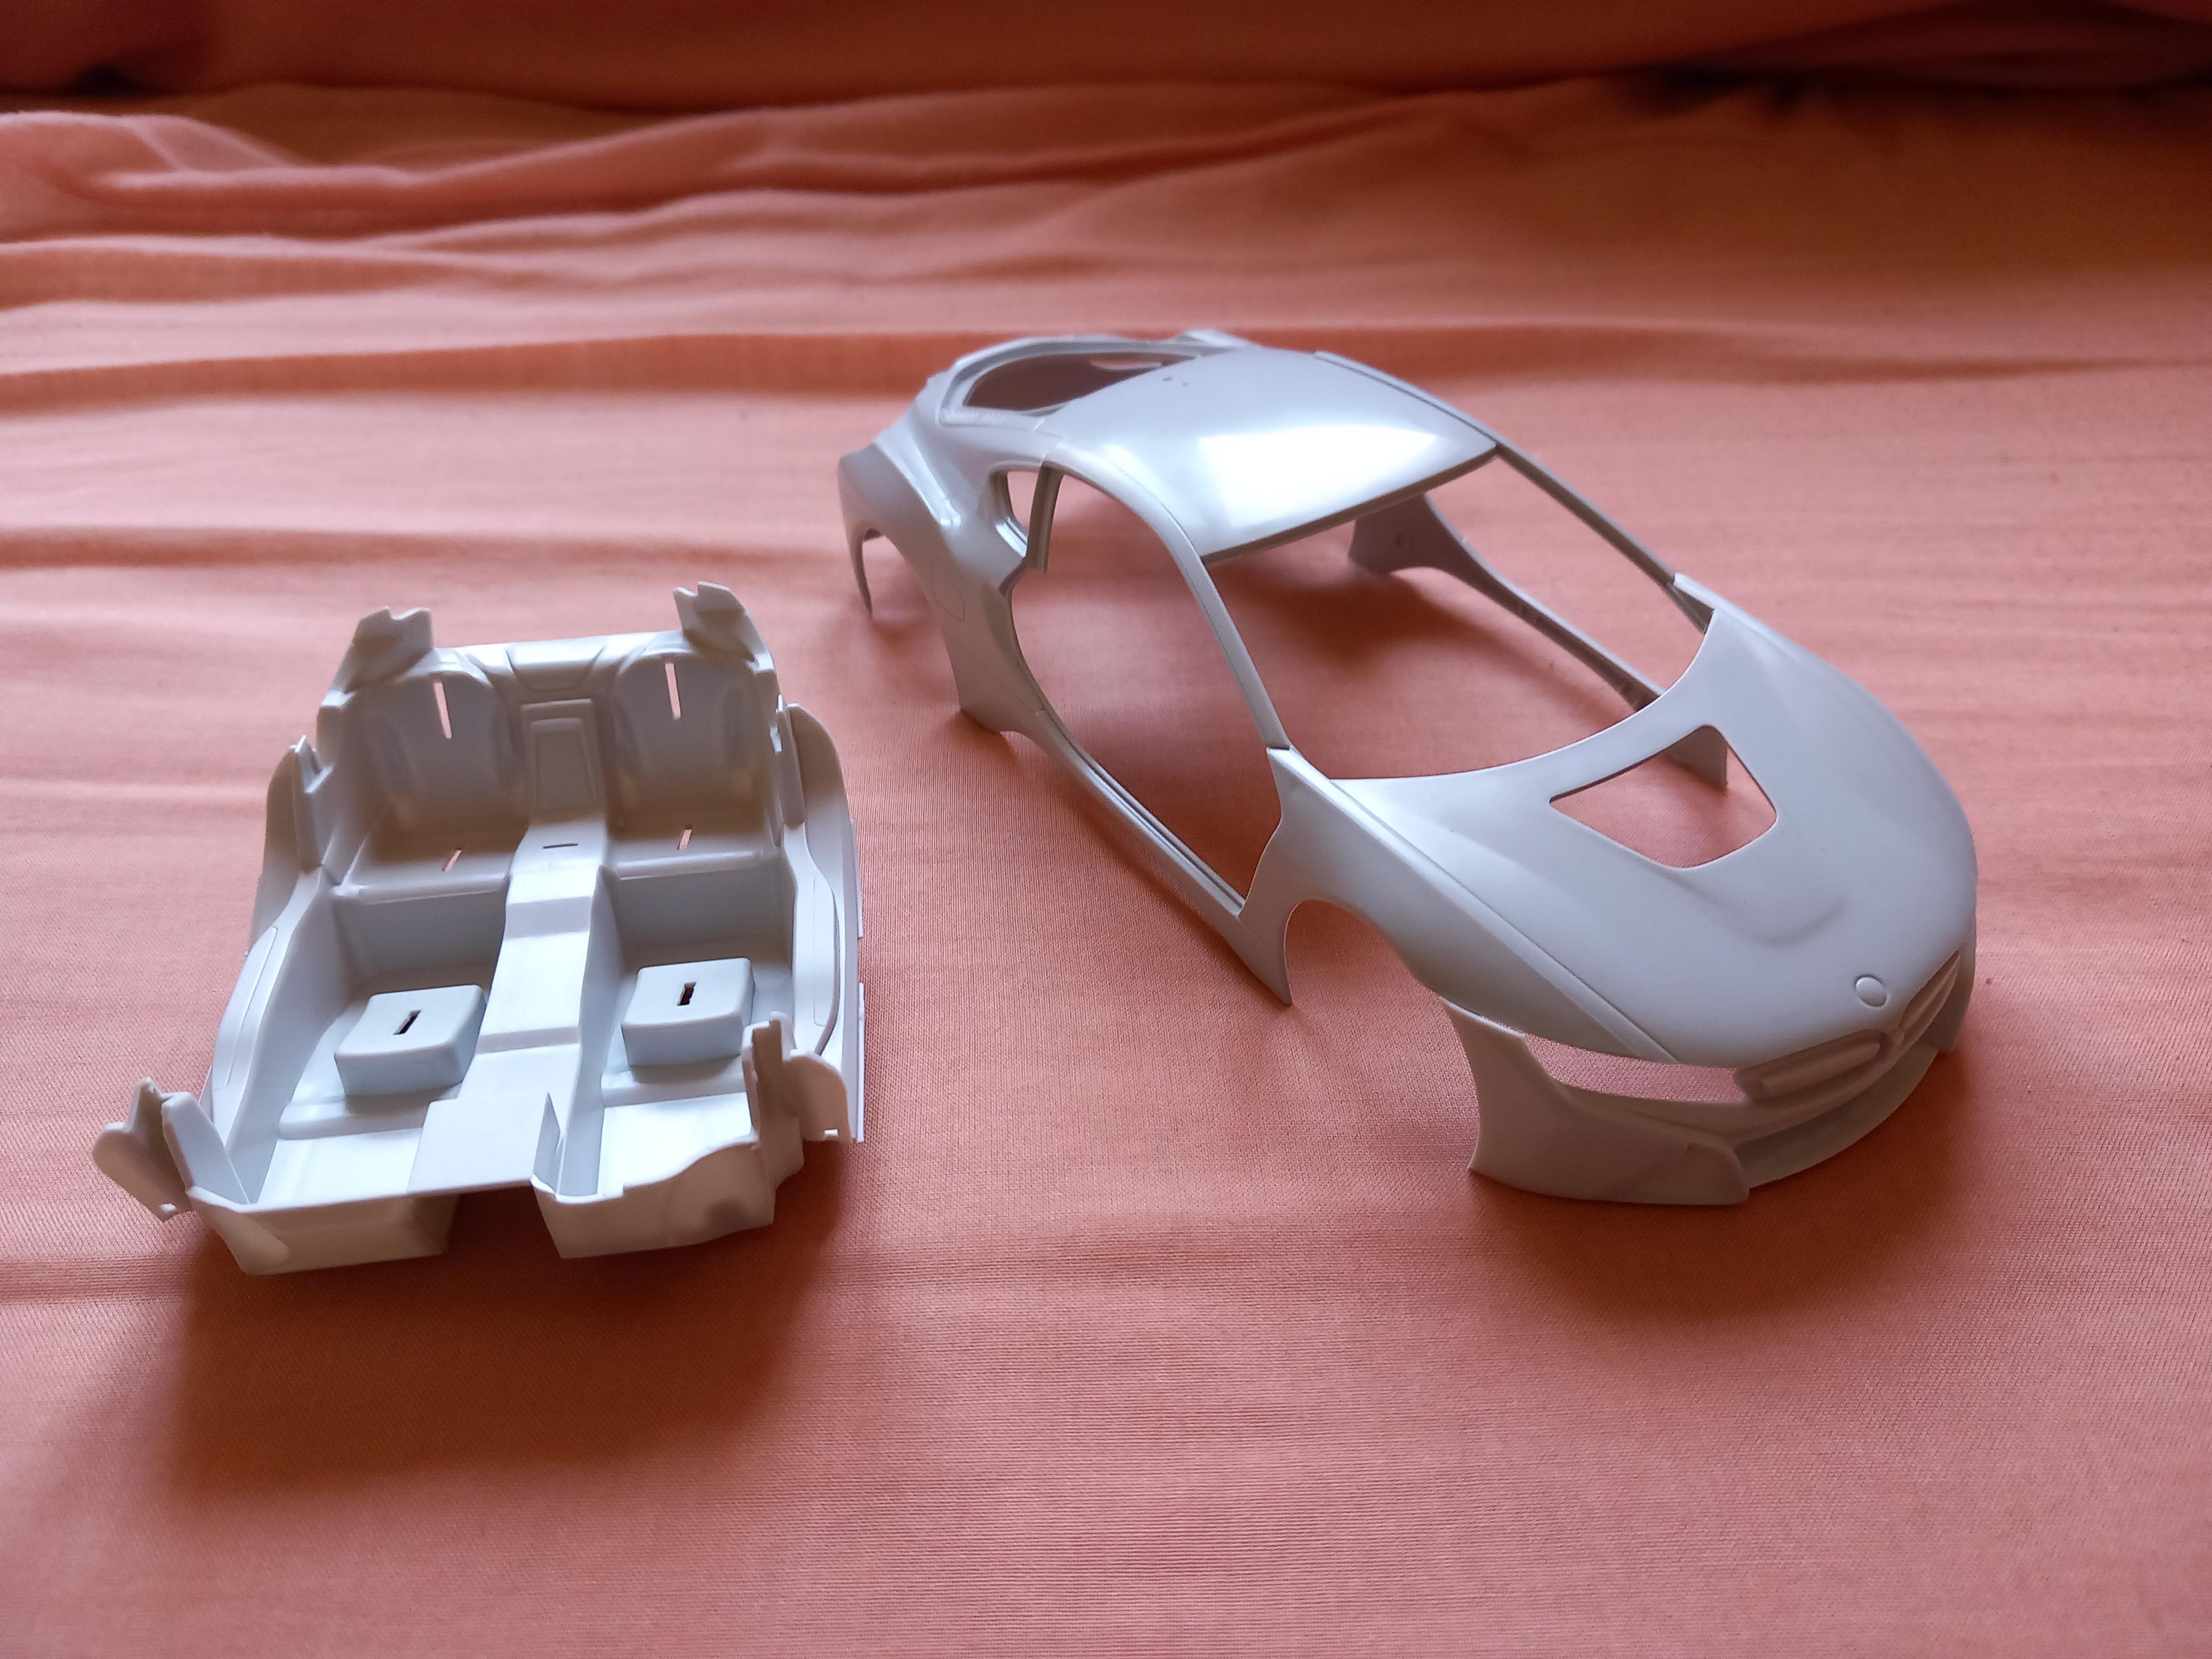
Thanks Steve ! Interior time ! Been looking forward to this bit, the interior is the main showpiece as its all glass above, so its gotta be crazy ! First thing was to cut out the horrible bits, centre console, seat bases and a hump running across the floor. Make up some templates in card and replace with plastic sheet. Now i have a clean space ! Ive cut a strip off the standard dash and added this to support the window correctly. Next is a centre console that runs from the top of the rear seat, curving through the interior and ending up forming the new dashboard ! More soon ! Before... Bits cut out and new templates... And a clean space, with a bit of original dashboard added to !
-
Well its arrived, took some bits out to mock up and ive been staring at it ever since. Problem is you dont want to rush in and chop bits up, so im coming up with ideas slowly as i build a picture in my head of the finished thing ! I keep looking at the AVTR by Mercedes, its my favourite car ever, so im trying not to get too carried away ! One thing was the roof top, i love the look of a glass one, so very carefully removed mine. The idea is to heat a clear piece of plastic over the roof i removed, to make a clear panel with the right curves. I scribed it out then used a Tamiya photoetch saw blade to finish. Highly recommend these, they bend easy but are great for thin cuts ! Anyway some pics, more soon ! Before.... And after...
-
Time for a new project ! I always liked concept cars, although the I8 is pretty futuristic, i plan to make it more so, get a bit crazy and see what happens... No ideas what the plan is yet, just make it up as i go along....hopefully i can come up with something a bit unusual.... Heres a pic from the Net as im waiting to take delivery of mine !
-
Oh yeah, enjoy seeing builds like this ! Really like the inspirational drawing, don't like the six wheels though so glad your not copying that version ! Personally, I'd leave the 57 bullets off, they only appear on the six wheeler and look out of place .. Be watching your progress !
-
Thanks for the comments guys ! Jim, that glitter paint is pretty thick to use in a decent airbrush, make sure you really shake it well so the glitter comes out even. I thinned it with future floor stuff I think. I bought a cheap airbrush with a compressed air can just to spray this paint. It clogged up less than my usual airbrush and was easier to clean. Don't try sanding it after as it rips the flake out, just build up the clear coats and it should be fine !
-
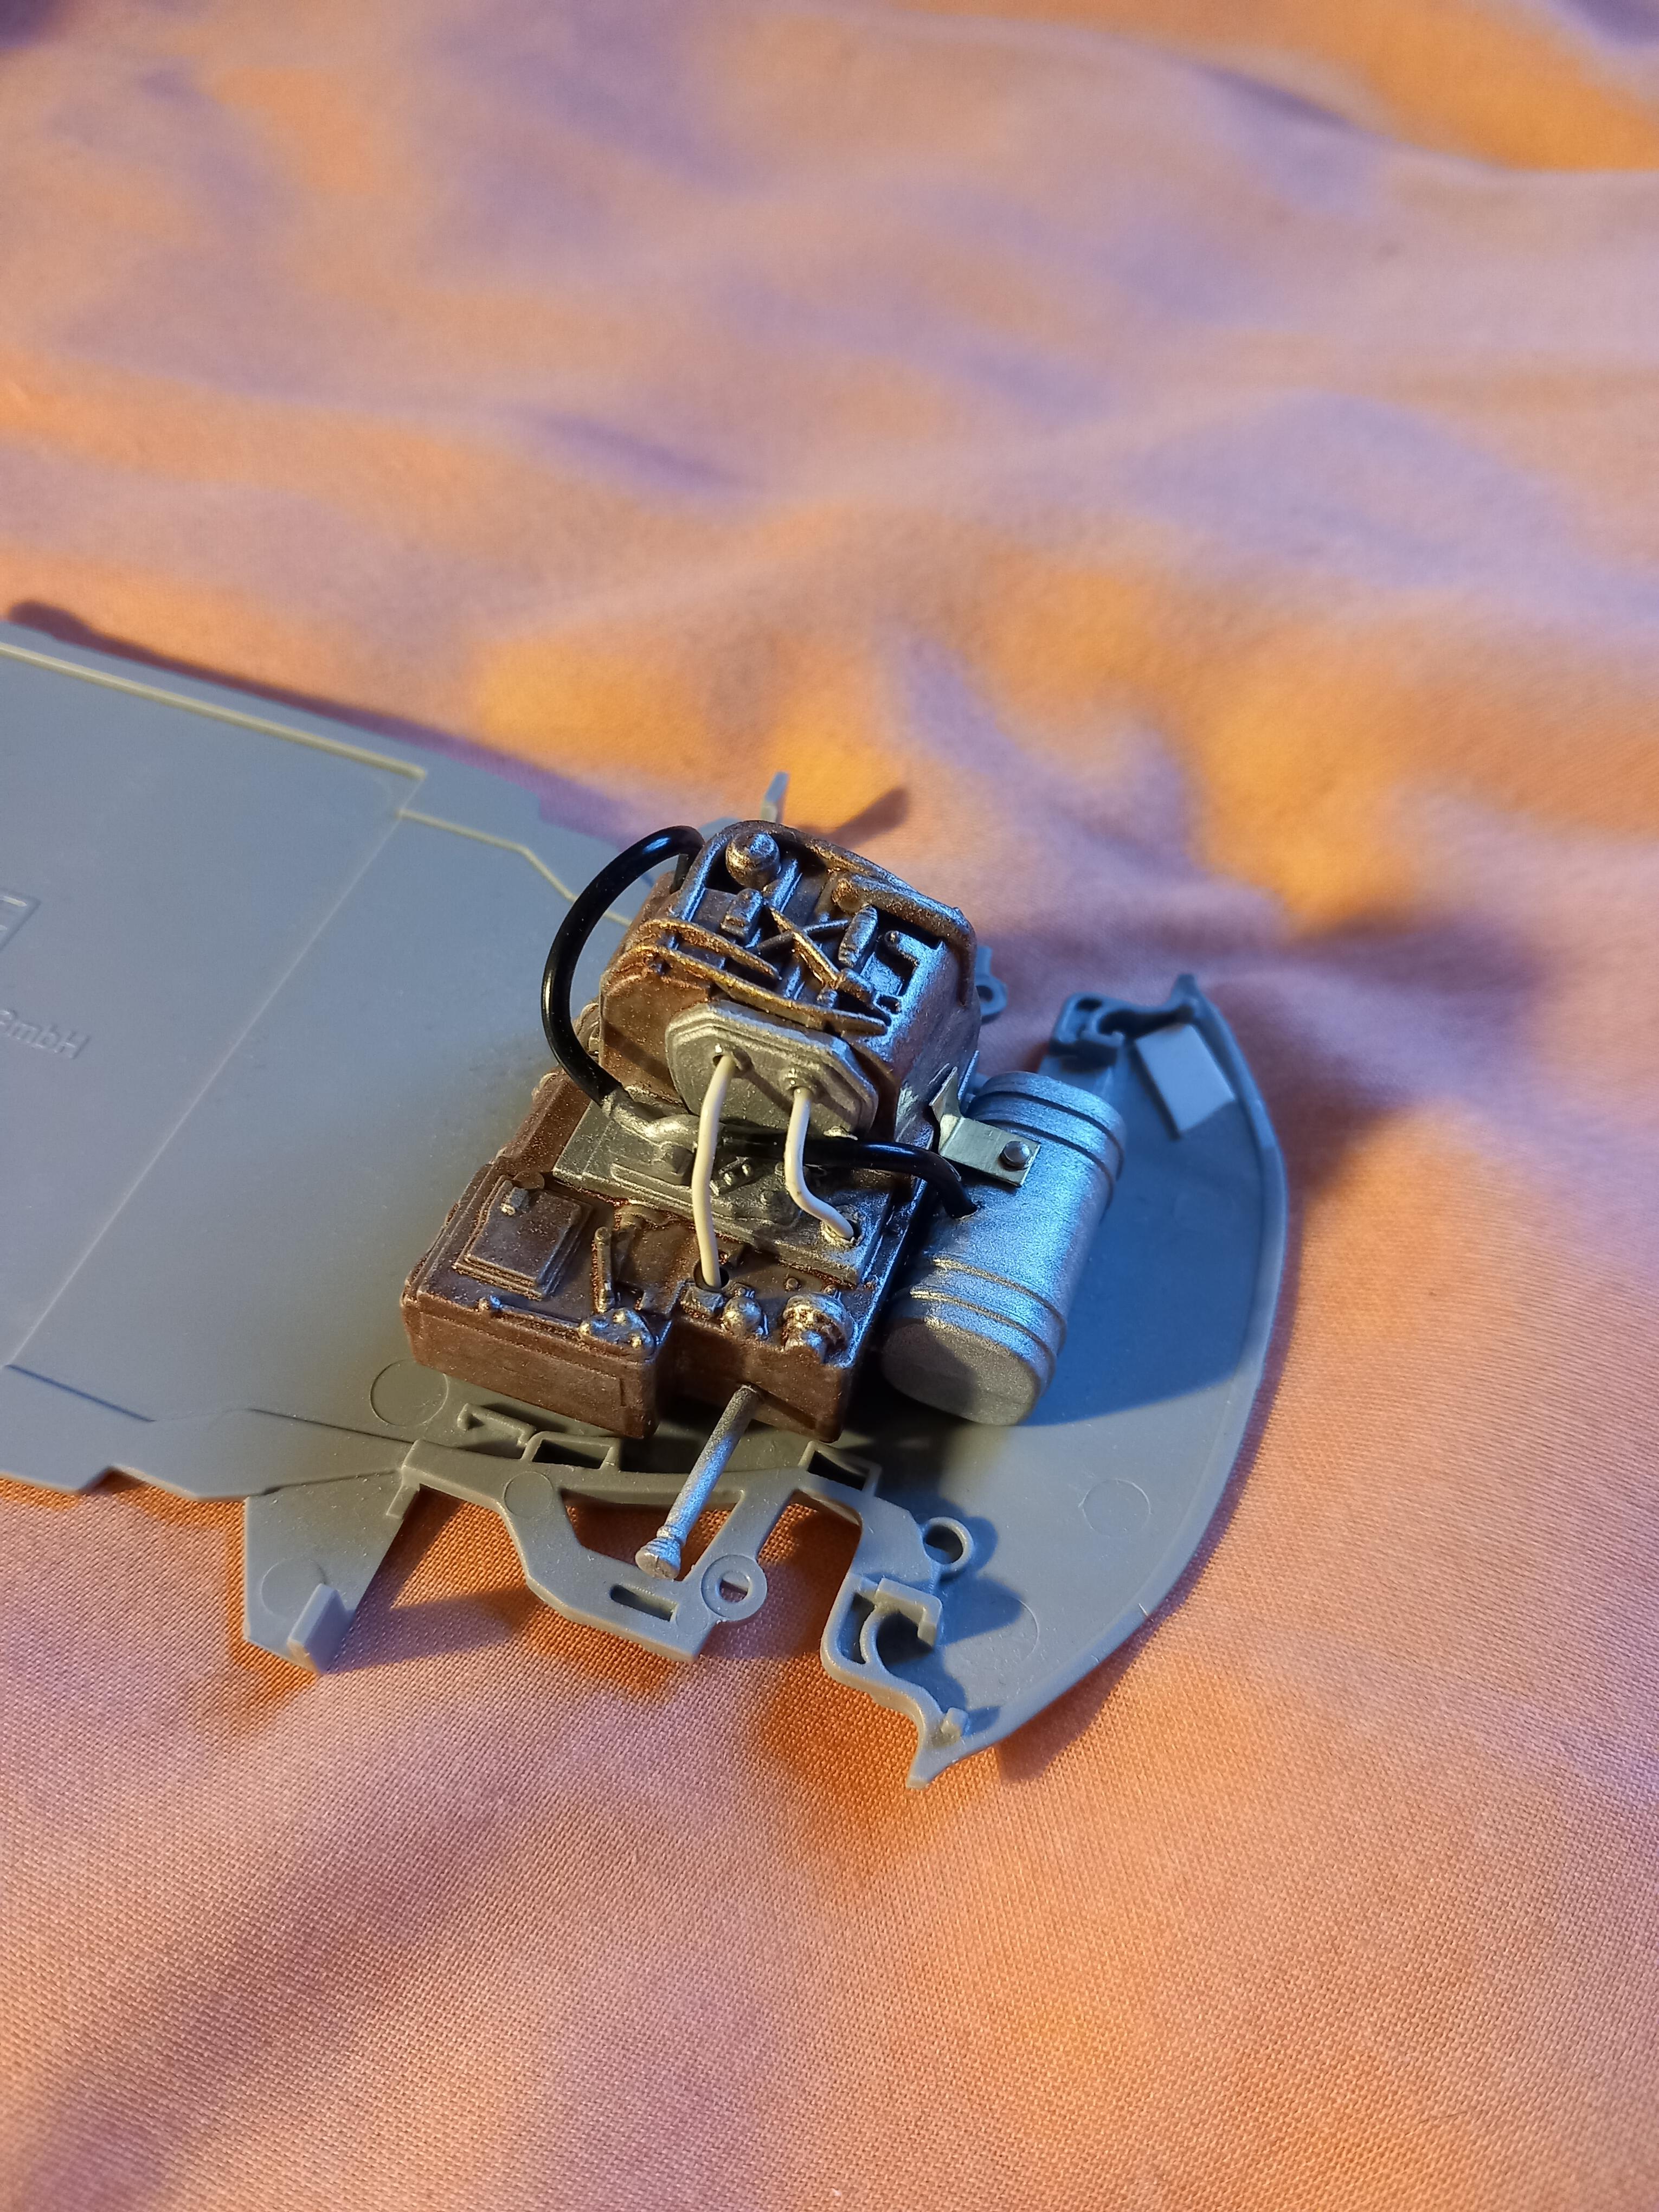
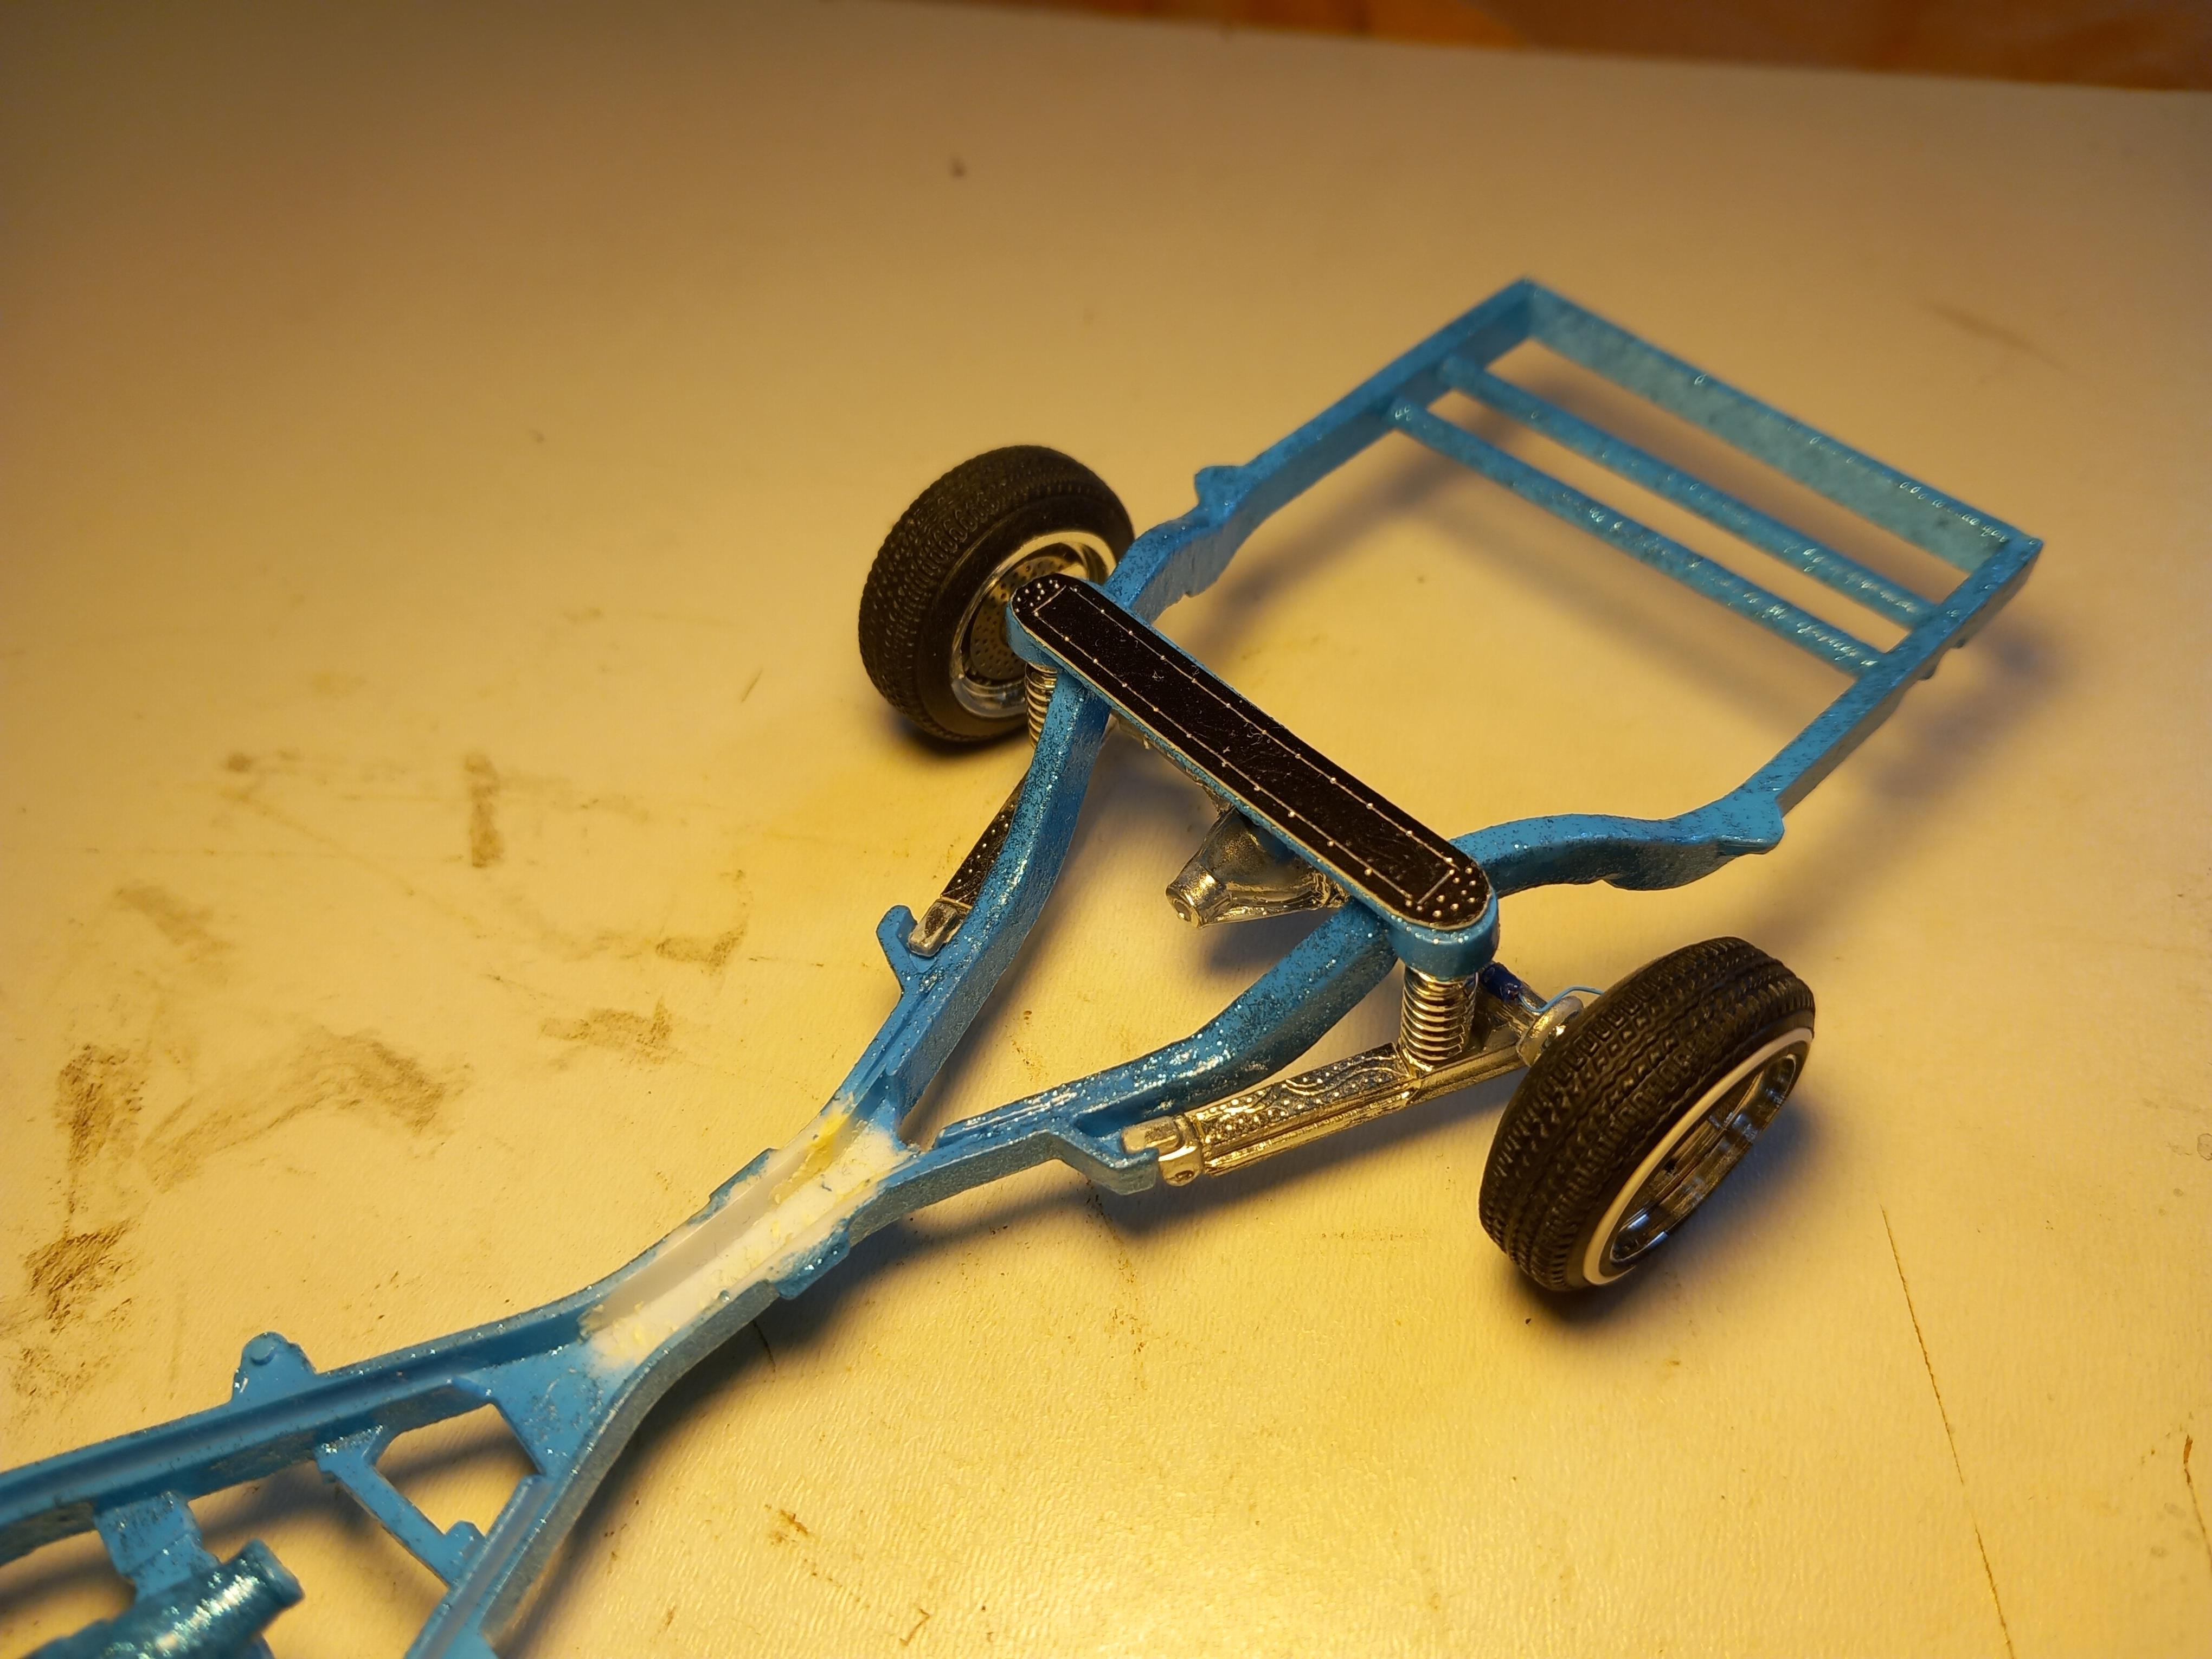
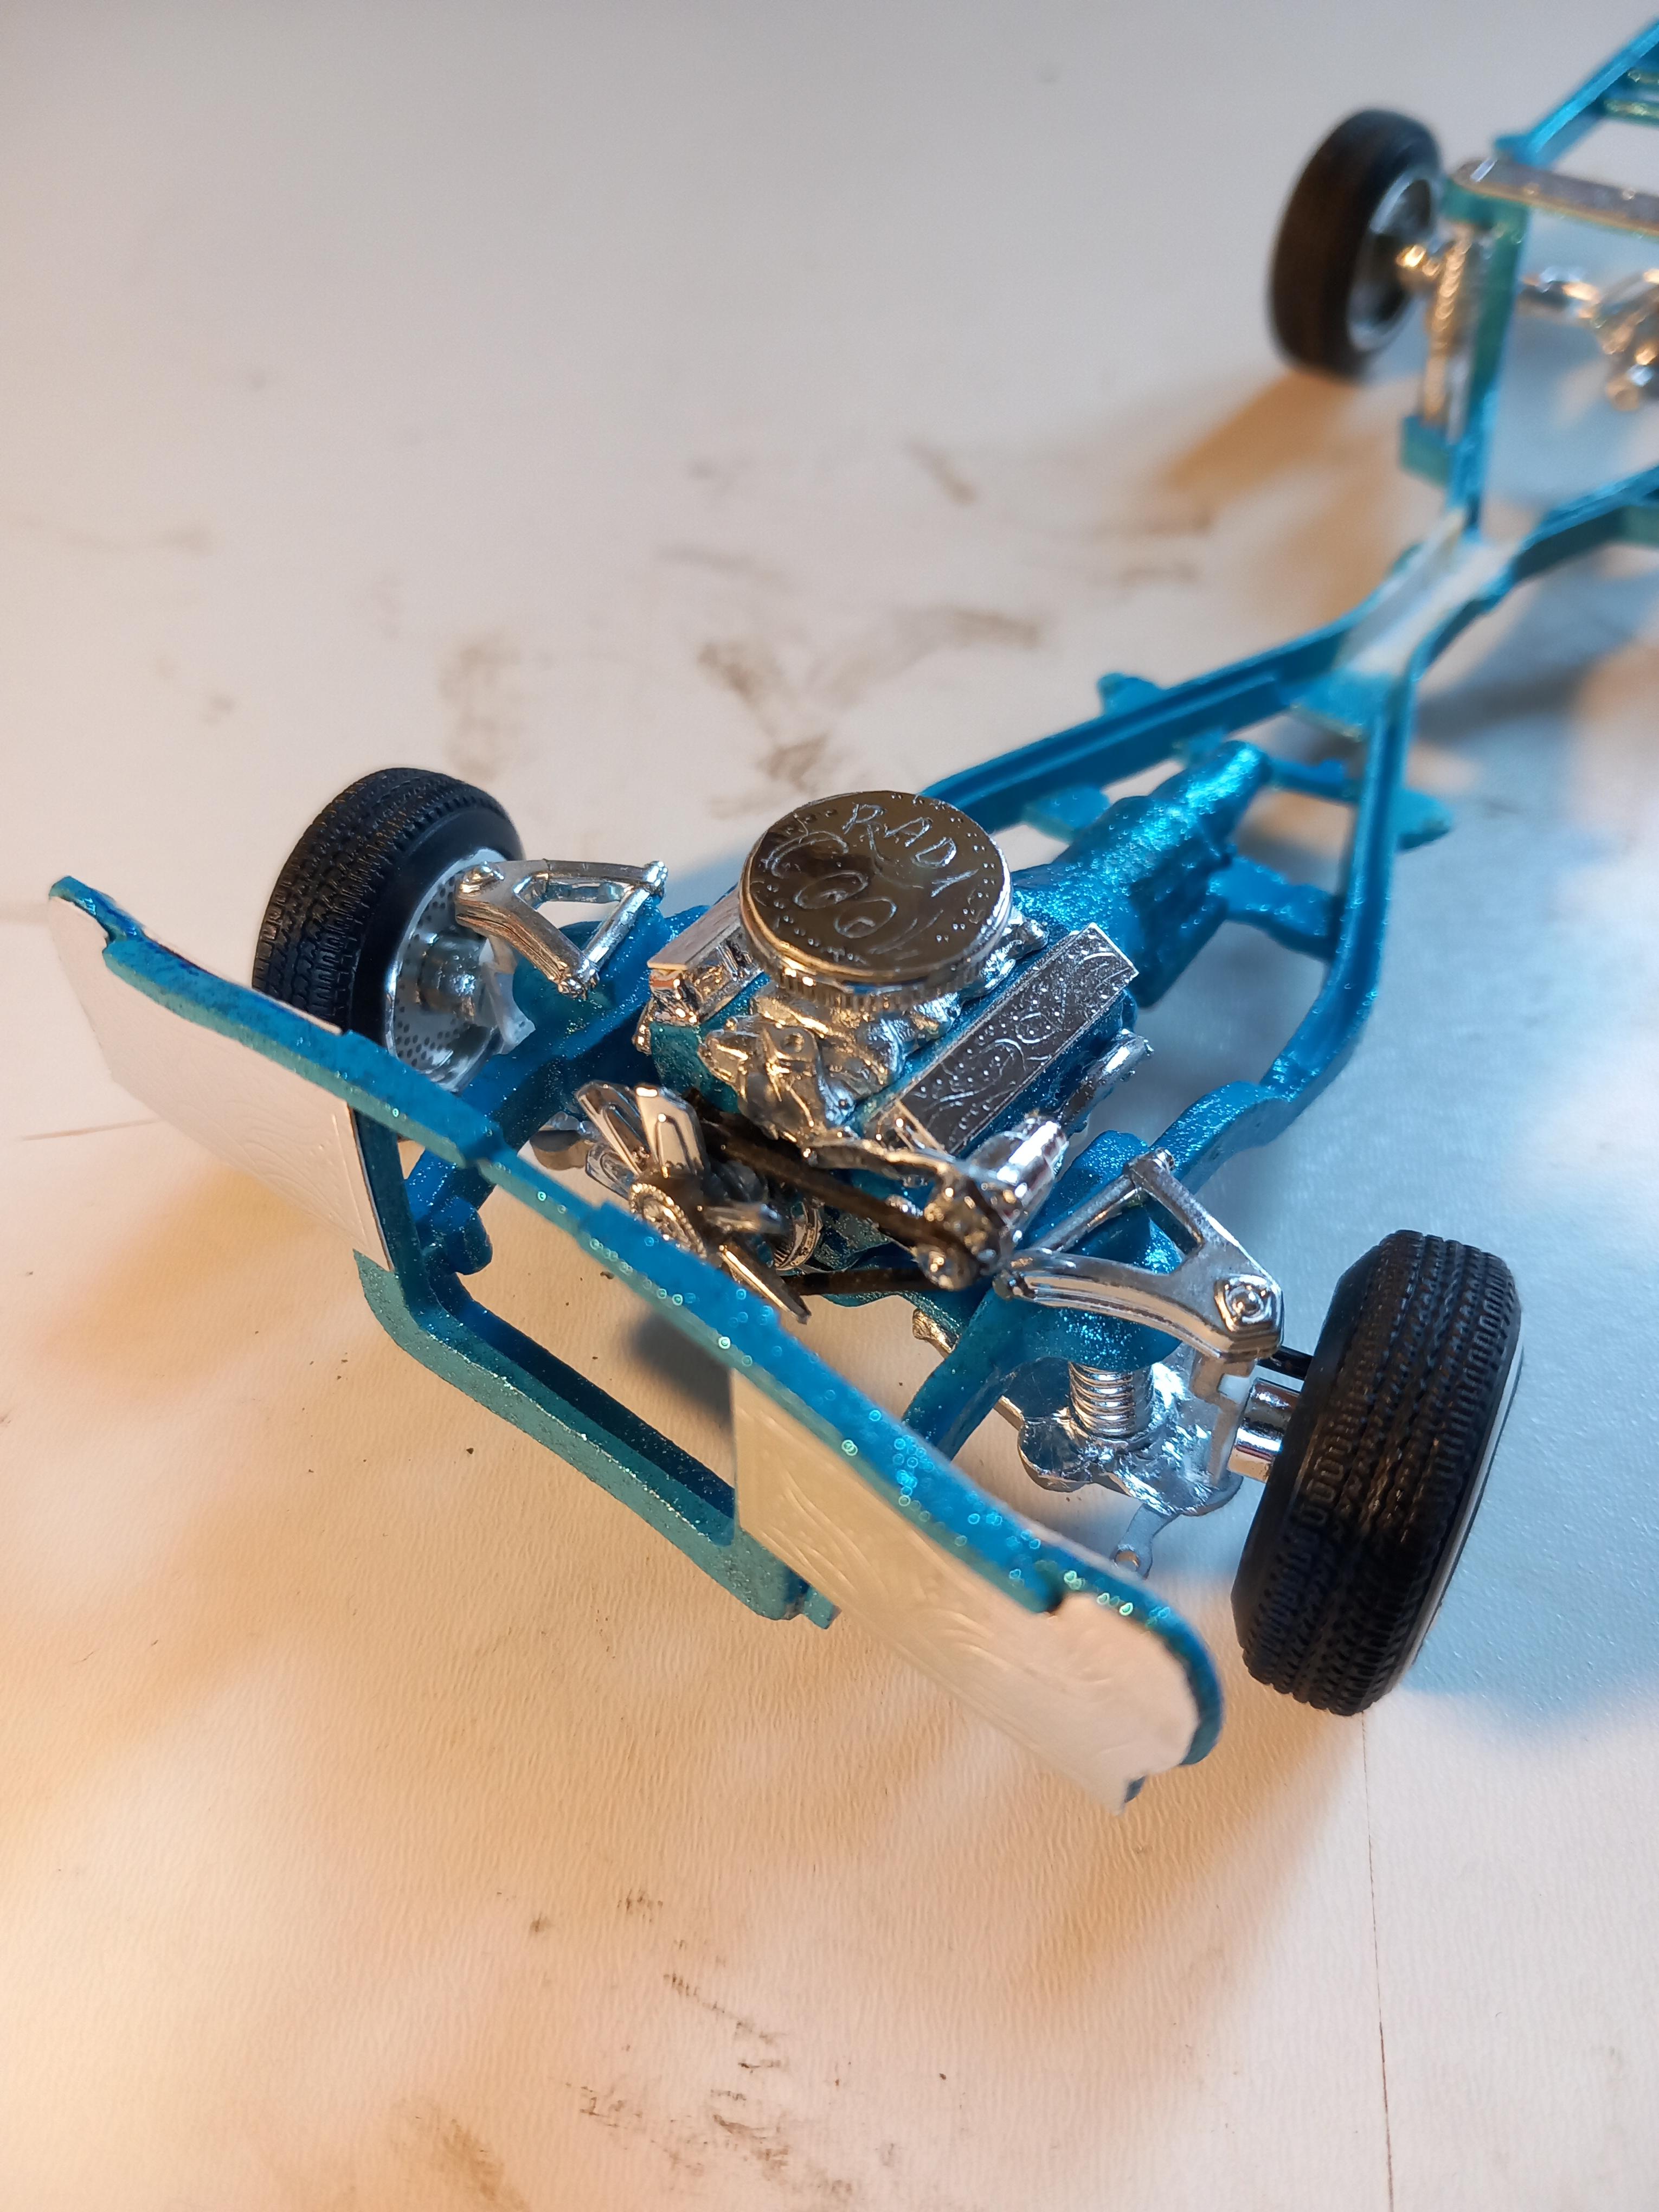
Bob, David, thanks guys ! Glad to be back on this , its all getting a bit crazy, but i guess thats the idea ! ! Basic suspension and engine together, adding engraving everywhere i can, but im going crossed eyed ! Got the cars name on the air cleaner too ! Also added p/e discs and chrome upper A arms, cut the standard Revell hubs apart and theres new chrome springs all round ! Wheels are tires are Pegasus chrome D`s... More soon !
-
Ok so it's been quite a time eh ? Was going through some model boxes recently and found this, and thought.... I've got to get it finished ! So I'm concentrating on finishing the chassis first, suspension, engine, wheels, exhaust etc Then back to the bodywork, paint and interior ! Adding lots of chrome and engraving, i should have pics up soon !!I
-
Lumina..
Lowlife ! ! replied to Lowlife ! !'s topic in WIP: Stock Cars (NASCAR, Super Stock, Late Model, etc.)
Thanks David, change of scene in making a start on the bodywork next ! -
Great work Bob, the interior is looking fantastic and thanks for showing the window net how to ! Might have to nick this idea !
-
2022 NextGen Camaro part deux
Lowlife ! ! replied to MarkJ's topic in WIP: Stock Cars (NASCAR, Super Stock, Late Model, etc.)
Looks like you had to struggle with this one Mark, but I thought the finished car looked great ! It's a pain when kits won't go together OOB, instead of detailing you spend all your time fixing errors the manufacturer made ! Hopefully you saved some time with the paintjob, you wouldn't notice it's not been sprayed black ! -
Lumina..
Lowlife ! ! replied to Lowlife ! !'s topic in WIP: Stock Cars (NASCAR, Super Stock, Late Model, etc.)
Thanks Bob, I usually build lowriders so I do try to keep them clean ! Nascars are a complete change to anything I've built before, but with research and watching builds like yours I'm learning a lot ! -
Lumina..
Lowlife ! ! replied to Lowlife ! !'s topic in WIP: Stock Cars (NASCAR, Super Stock, Late Model, etc.)
Interior is complete ! Still plugging away om this, ive been messing about making aluminium panels and finally came up with some i liked (that actually fit ! ) Added scratchbuilt electrics, cold air pipes (from hair bands) fire extinguisher, steering wheel, and the steering box that ive wired up ! Front A arms have nuts n bolts now, and lots of little bits like the aluminium bracket to hold the mirror, thats bolted on ! More soon, thanks for looking in !
-
Please don't laugh..
Lowlife ! ! replied to Stocks05's topic in Stock Cars (NASCAR, Super Stock, Late Model, etc.)
Great job Blake ! For a first model it looks terrific, oh and welcome to the forum ! -
Lumina..
Lowlife ! ! replied to Lowlife ! !'s topic in WIP: Stock Cars (NASCAR, Super Stock, Late Model, etc.)
Thanks again Wes ! And thanks Bob, years ago I came across some purple ribbon which I thought I'd save for seatbe!ts. I coloured it black and luckily it fitted the photoetch buckles perfectly ! Sorry that's probably not a lot of help to you ! The seat padding is wet n' dry sandpaper by the way ... More soon, once I've finished the electrical bits for the interior ! -
Lumina..
Lowlife ! ! replied to Lowlife ! !'s topic in WIP: Stock Cars (NASCAR, Super Stock, Late Model, etc.)
Bit more done, dash was something i wanted to do better than the last one... Dials were ground down so the decals fitted better, and this now has switches and warning lights ! Steering column made, the wheel will be added later to sit on the dash ! New oil lines, the bar for holding the window net, and the rest of the cage is in . Need to add the electric box on the floor and im nearly done with the interior ! More soon, thanks for looking in !
-
Lumina..
Lowlife ! ! replied to Lowlife ! !'s topic in WIP: Stock Cars (NASCAR, Super Stock, Late Model, etc.)
Thanks Mark, appreciate your comment ! Wes, thanks, id love to say they were specially printed , but their just decals ! -
Lumina..
Lowlife ! ! replied to Lowlife ! !'s topic in WIP: Stock Cars (NASCAR, Super Stock, Late Model, etc.)
Thanks Anton, glad to have you along ! We have paint ! Just straight grey Tamiya TS81 with clear, and the roll cage padding in matt black. Added my seat,fuel cell and floor mat from the previous build, still need a couple of bars added after the interior is finished ! Added the hood pin brackets too so all four holes now line up with the hood, for when i add hood pins ! More Soon !
-
2022 NextGen Camaro part deux
Lowlife ! ! replied to MarkJ's topic in WIP: Stock Cars (NASCAR, Super Stock, Late Model, etc.)
Hi Mark ! Sorry can't help with switch panel ! Nice build coming along, is the dash a kit part ? -
Very nice build so far Bob, I'm learning a lot so far ! Looks like a great kit I might try building one myself ...