gtx6970
-
Posts
7,940 -
Joined
-
Last visited
Content Type
Profiles
Forums
Events
Gallery
Everything posted by gtx6970
-
" THE " ugly duckling of the early sixties. 1962 Dodge Dart
gtx6970 replied to gtx6970's topic in WIP: Drag Racing Models
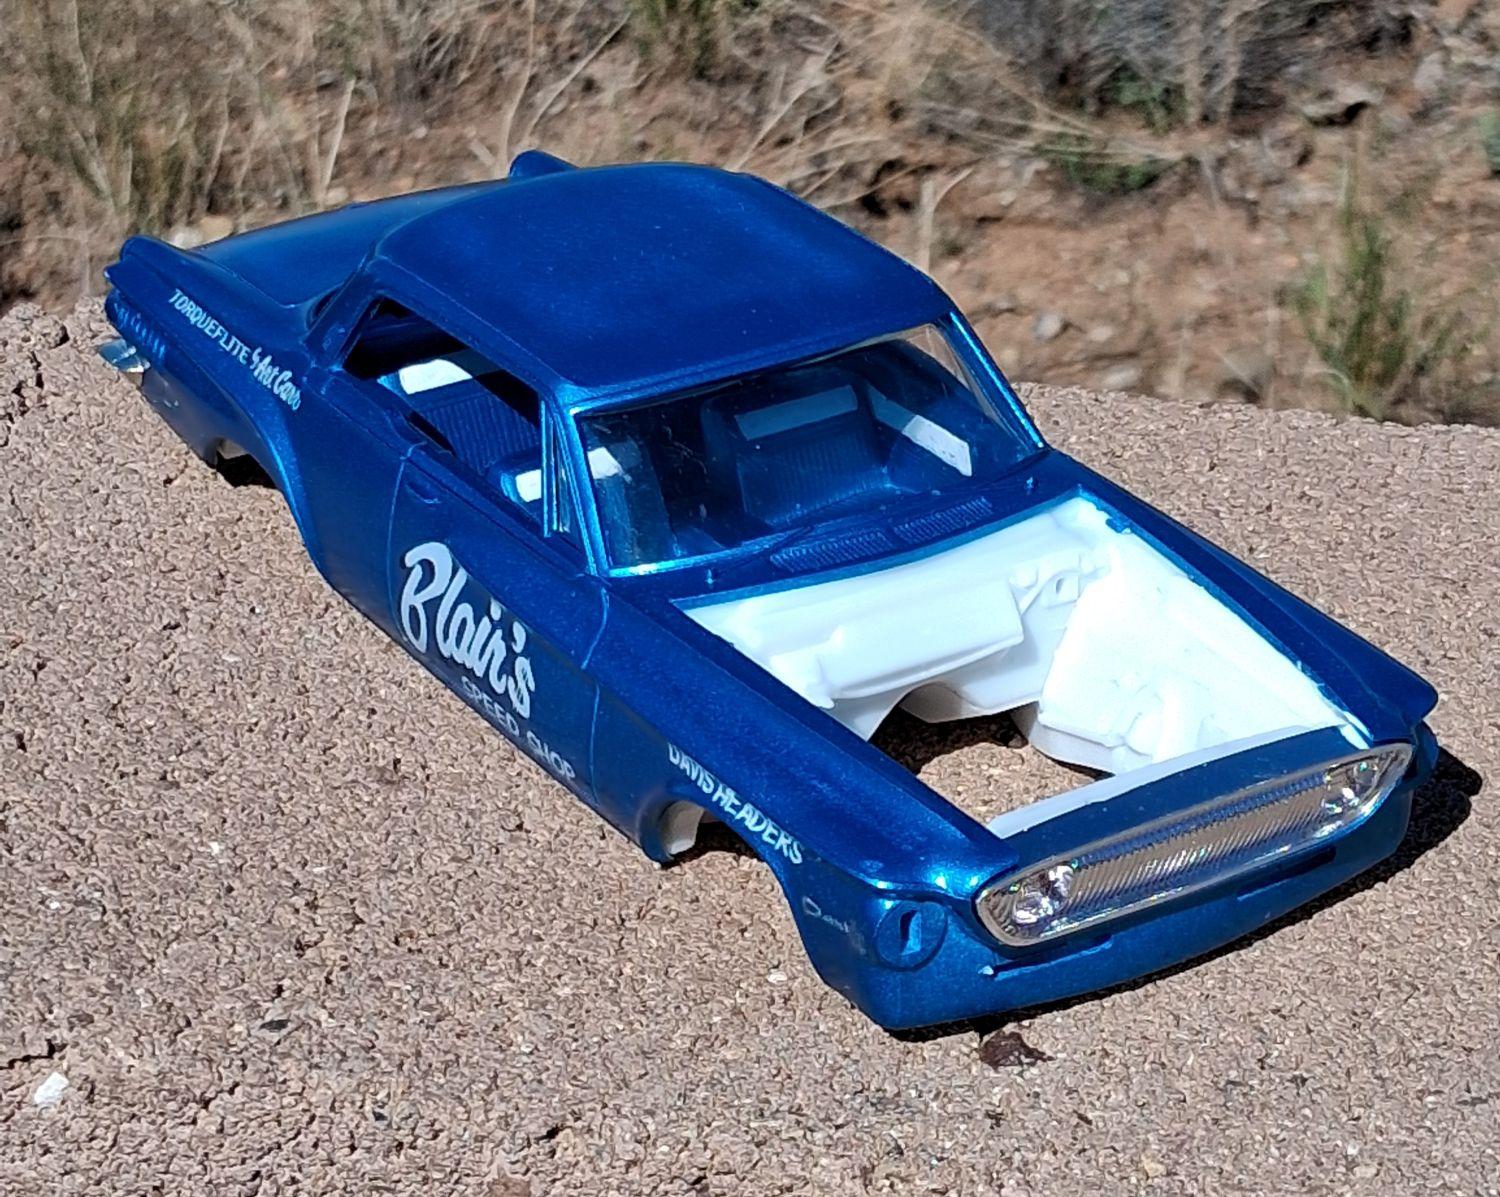
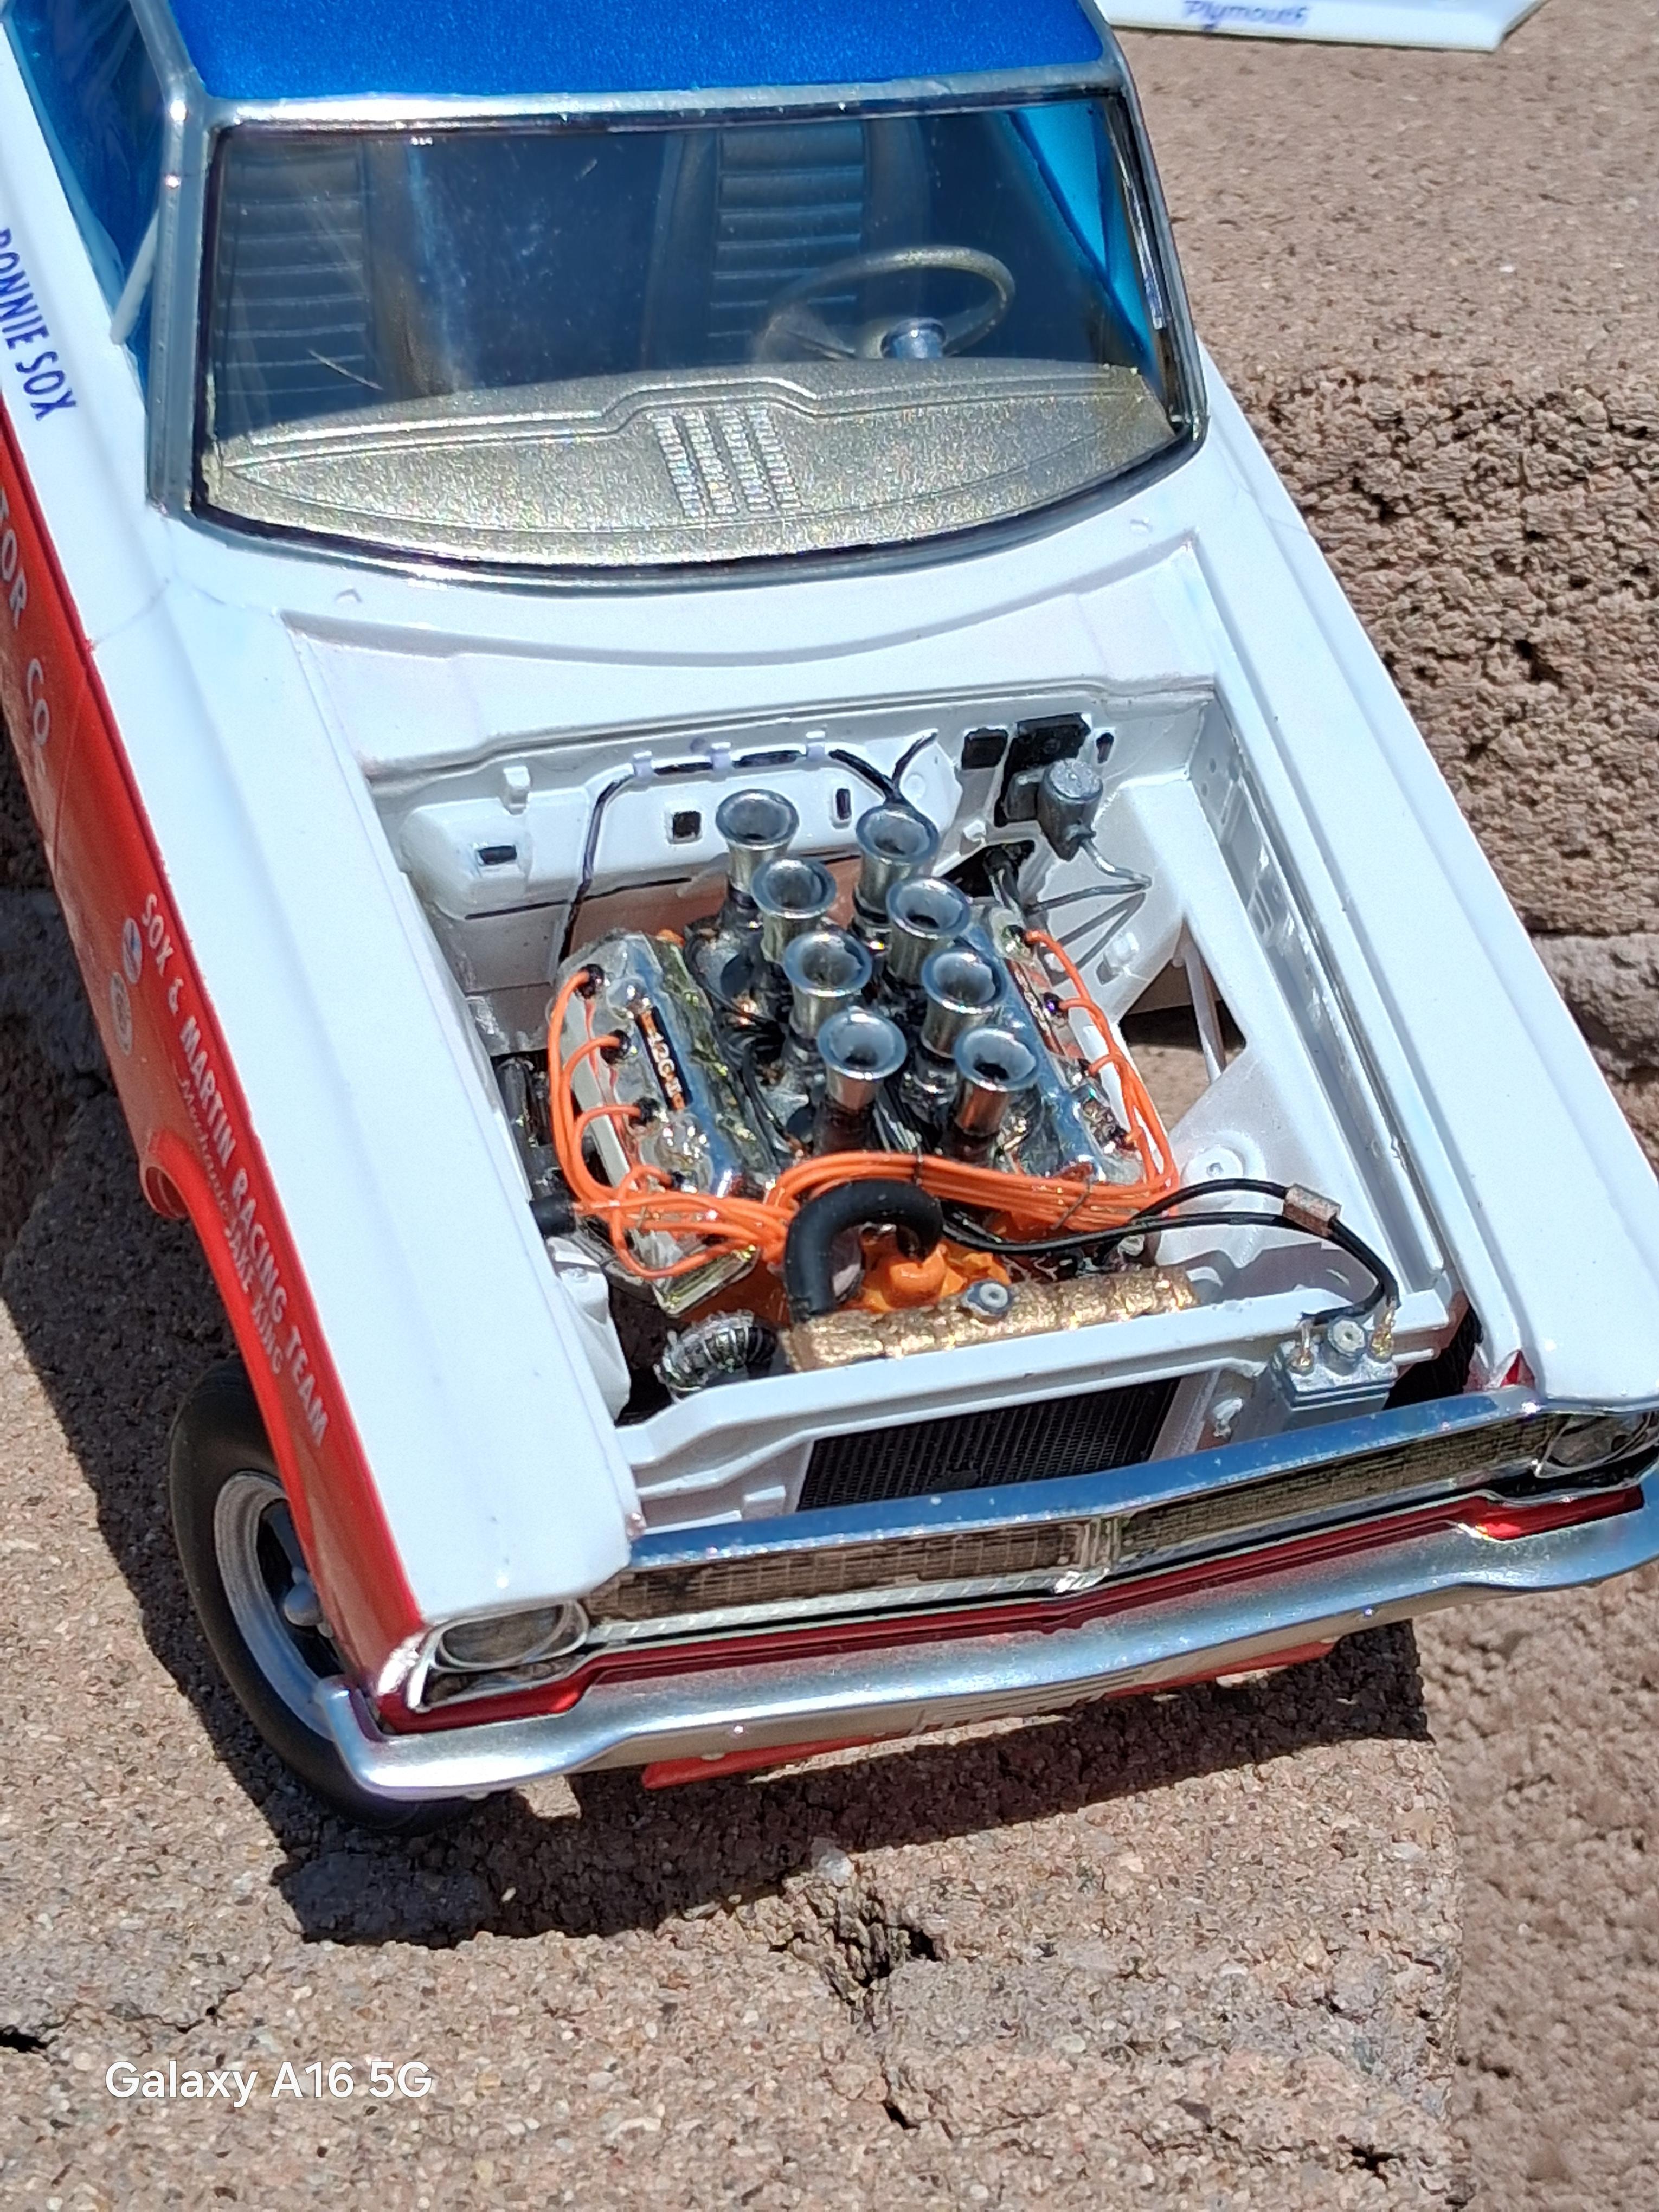
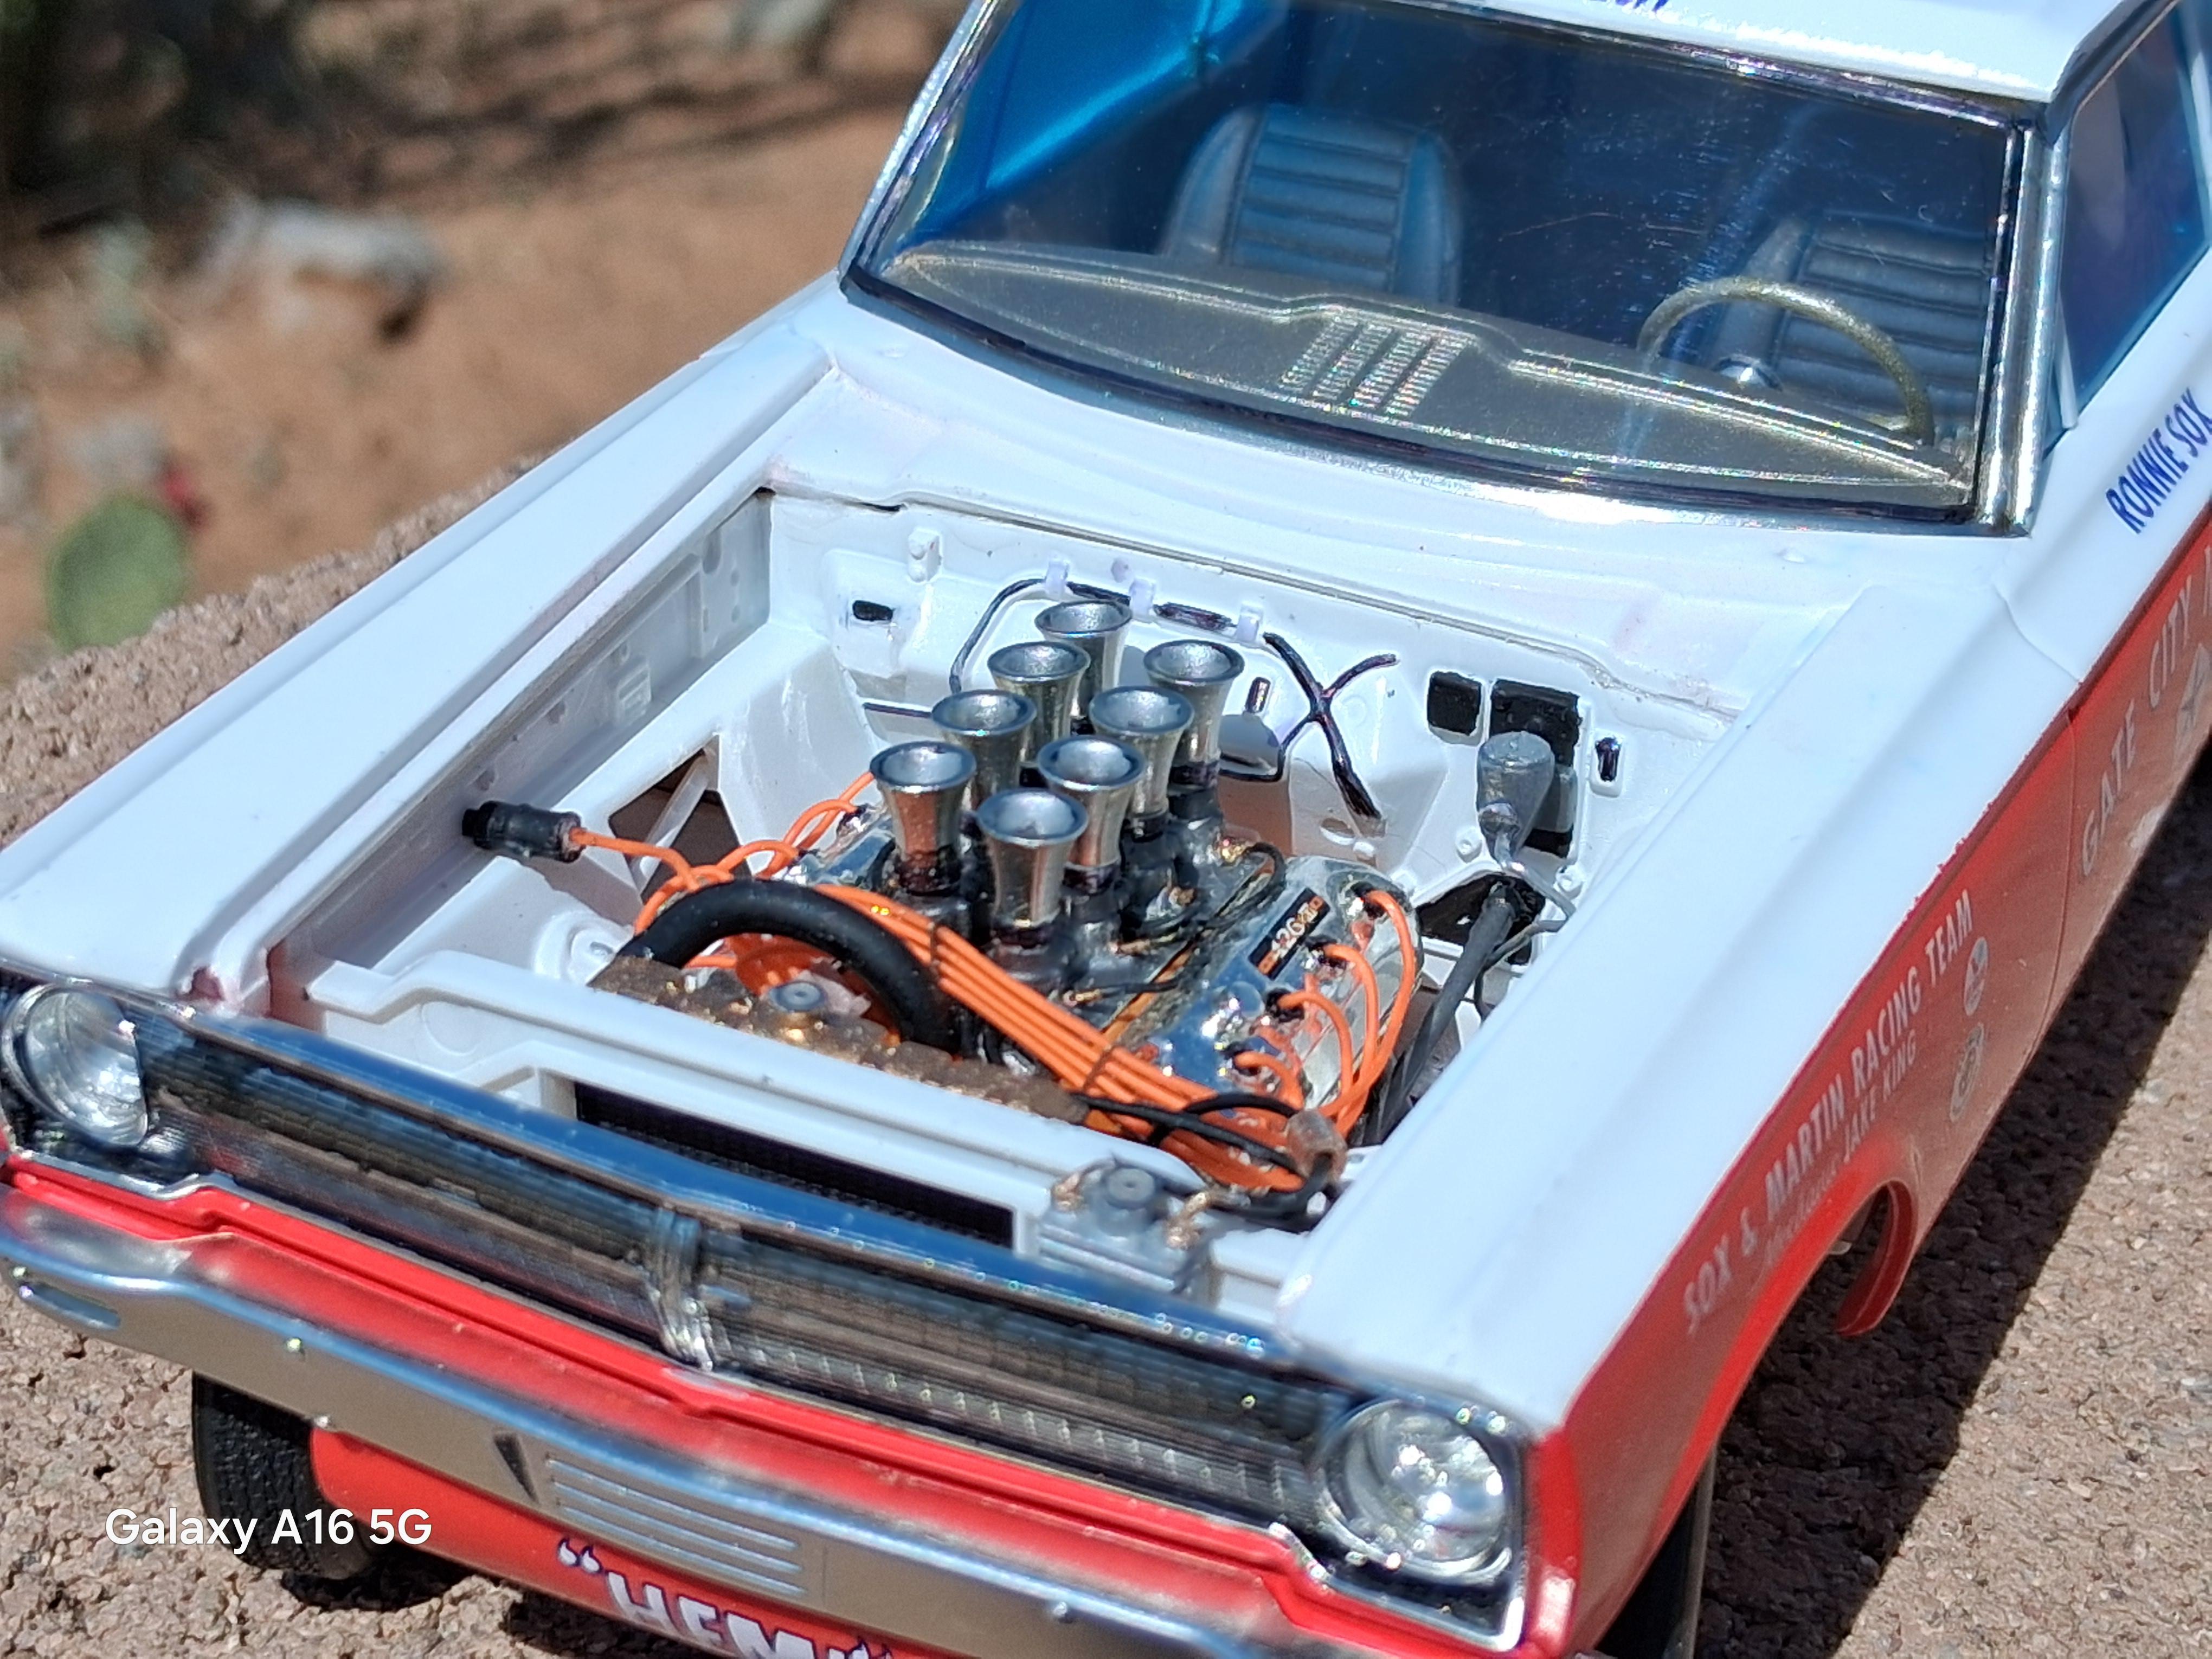
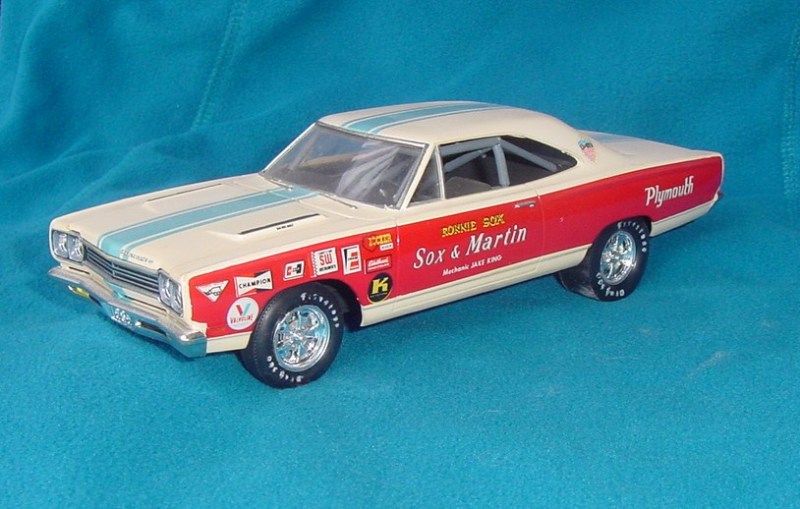
Sprayed some TS54 over a real dark blue base. Yields me a color REALLY close to the exterior Almost dead on . Used the Fusion Chrome on valve covers Imo. They are as good as kit chrome pieces
-
" THE " ugly duckling of the early sixties. 1962 Dodge Dart
gtx6970 replied to gtx6970's topic in WIP: Drag Racing Models
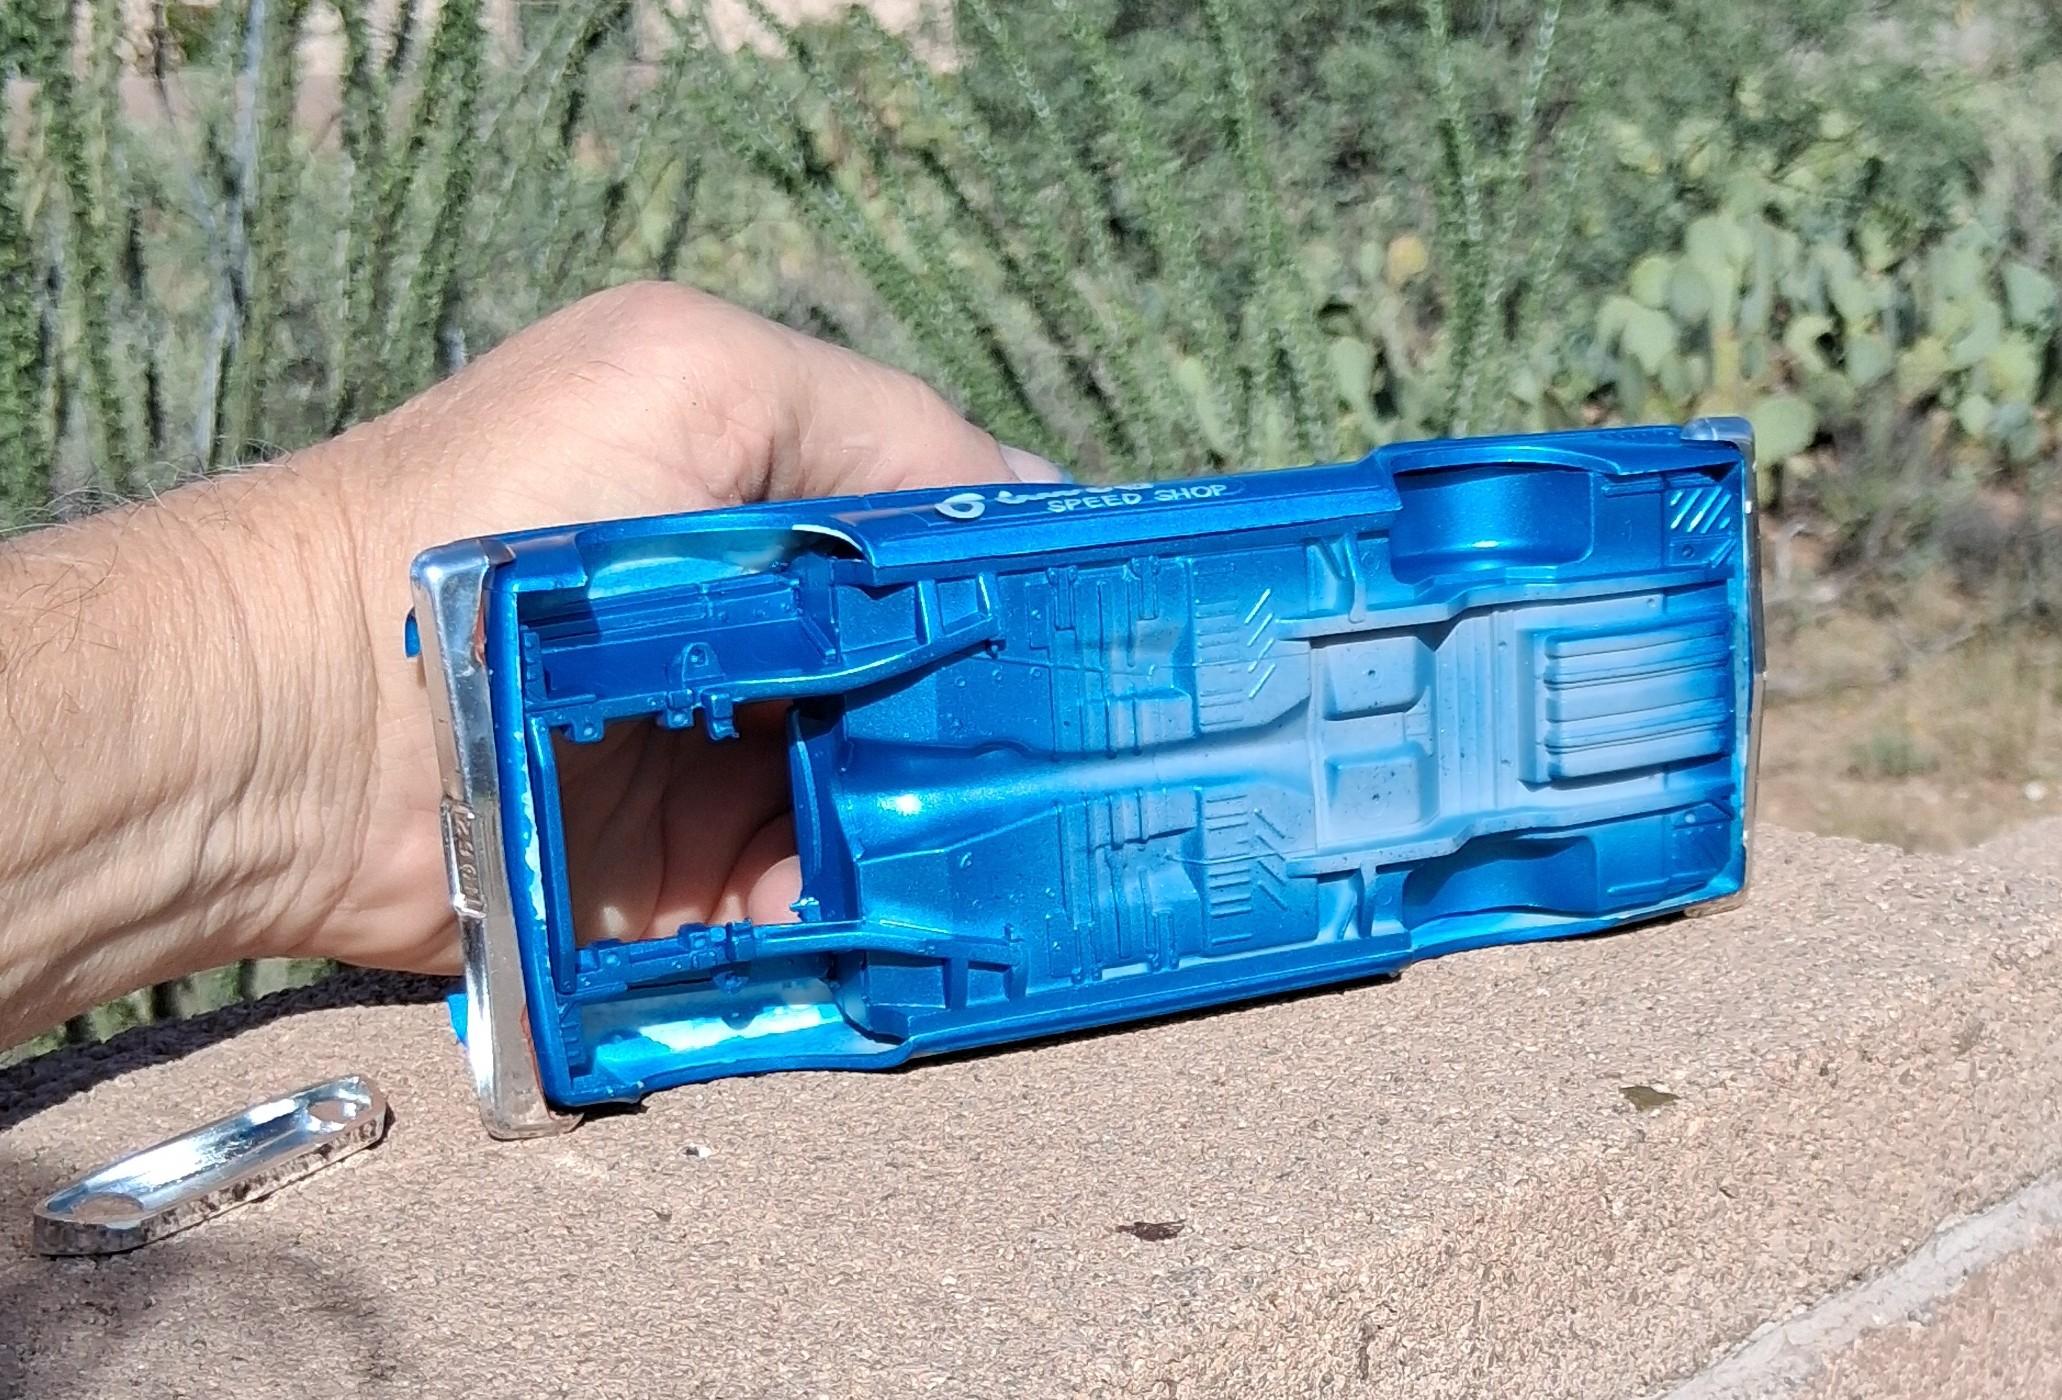
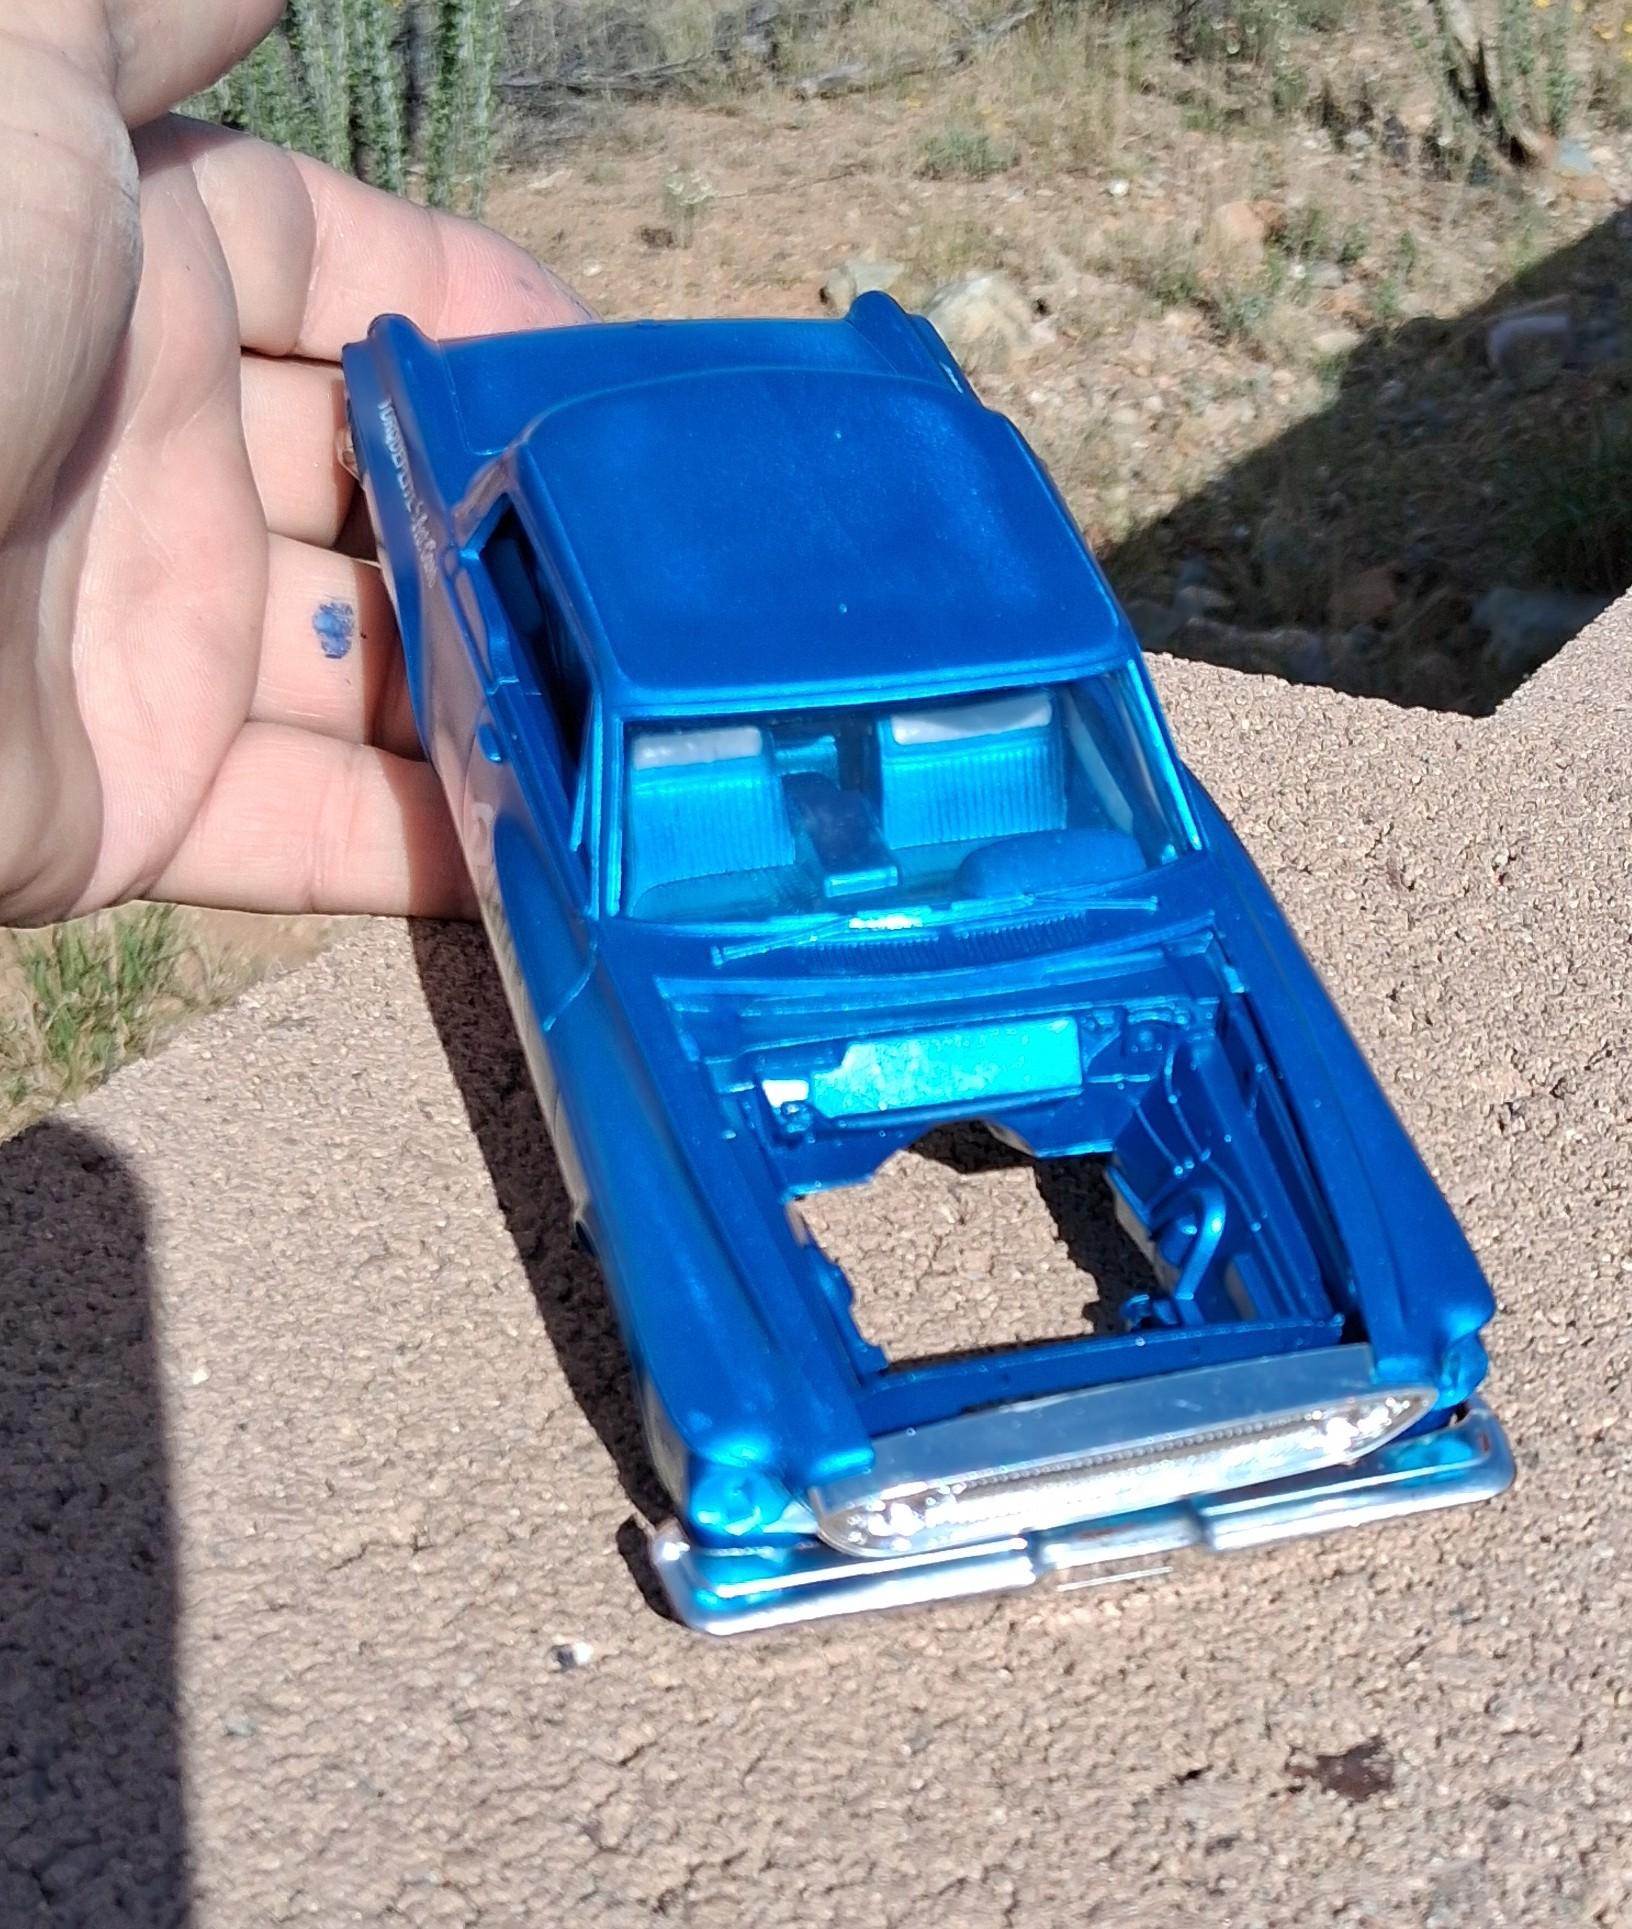
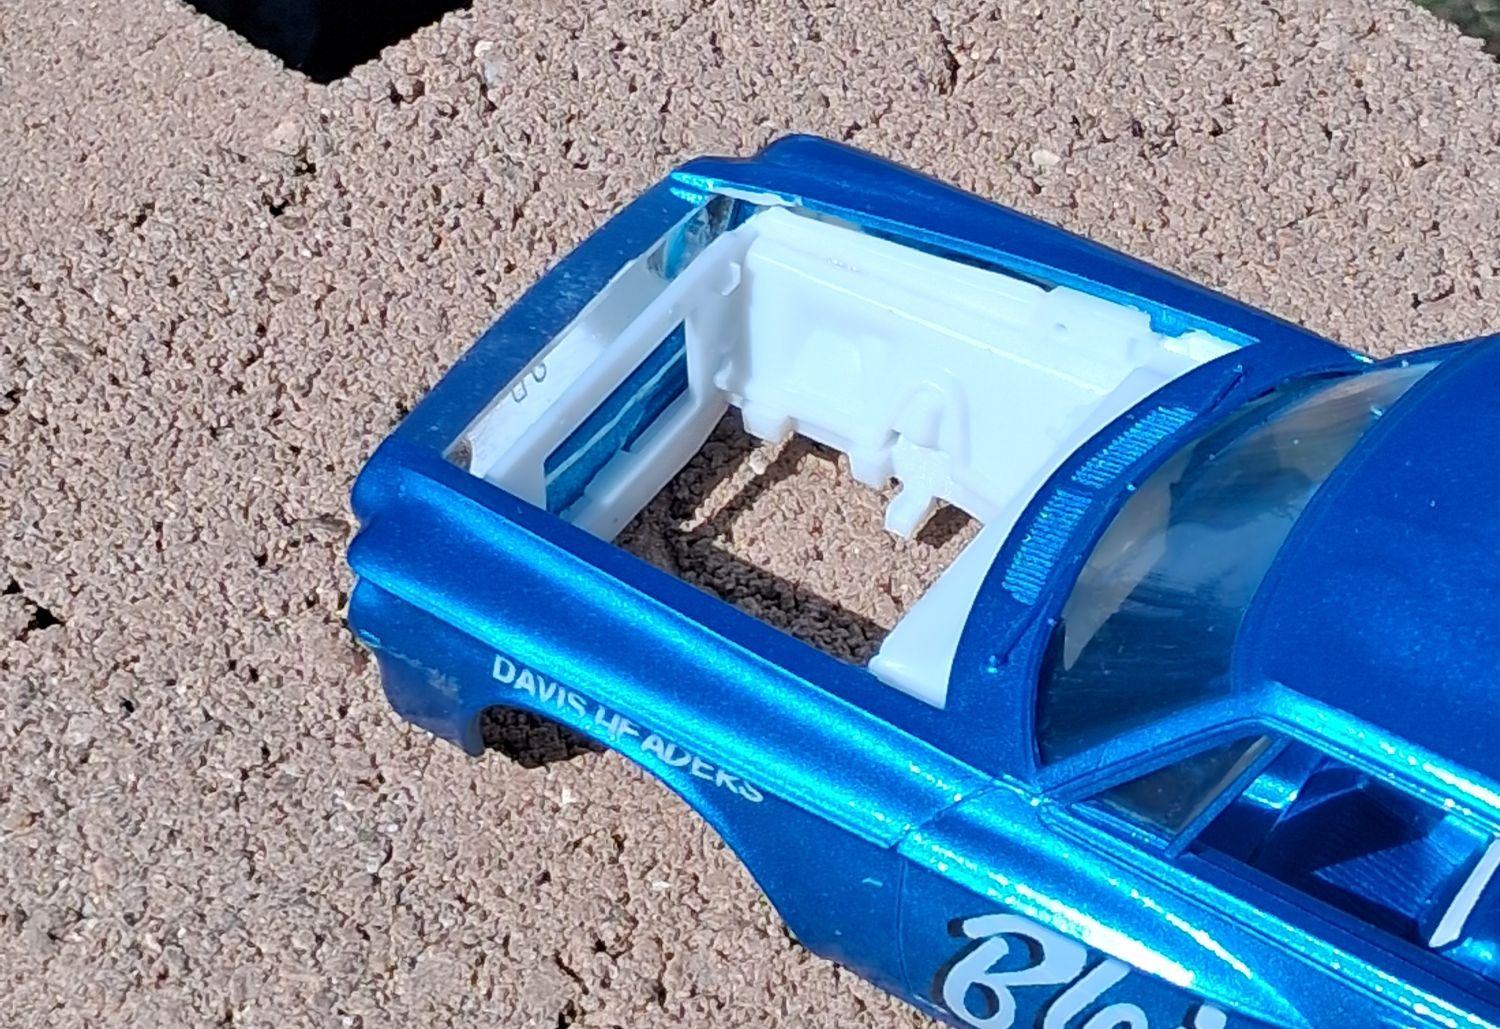
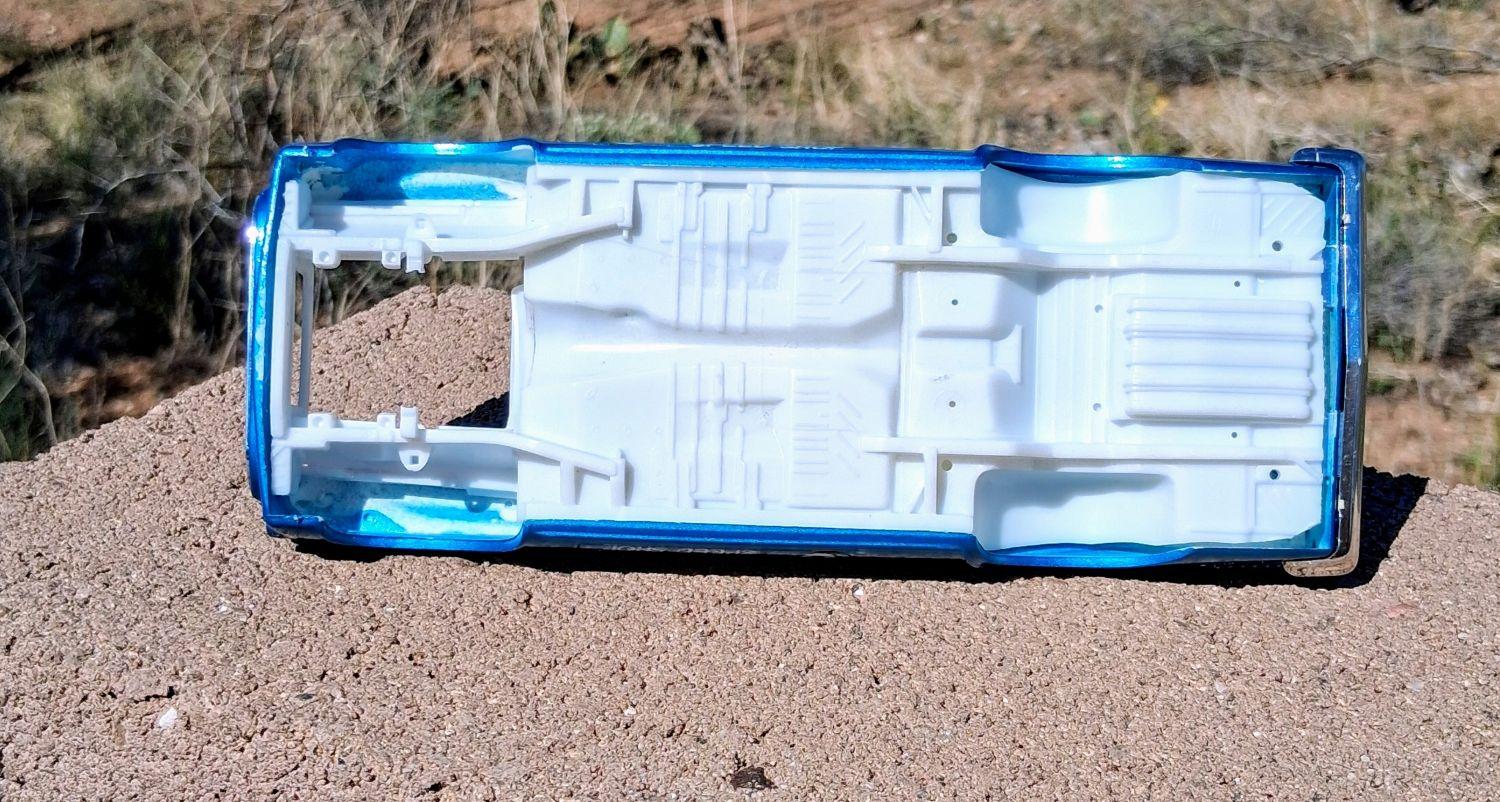
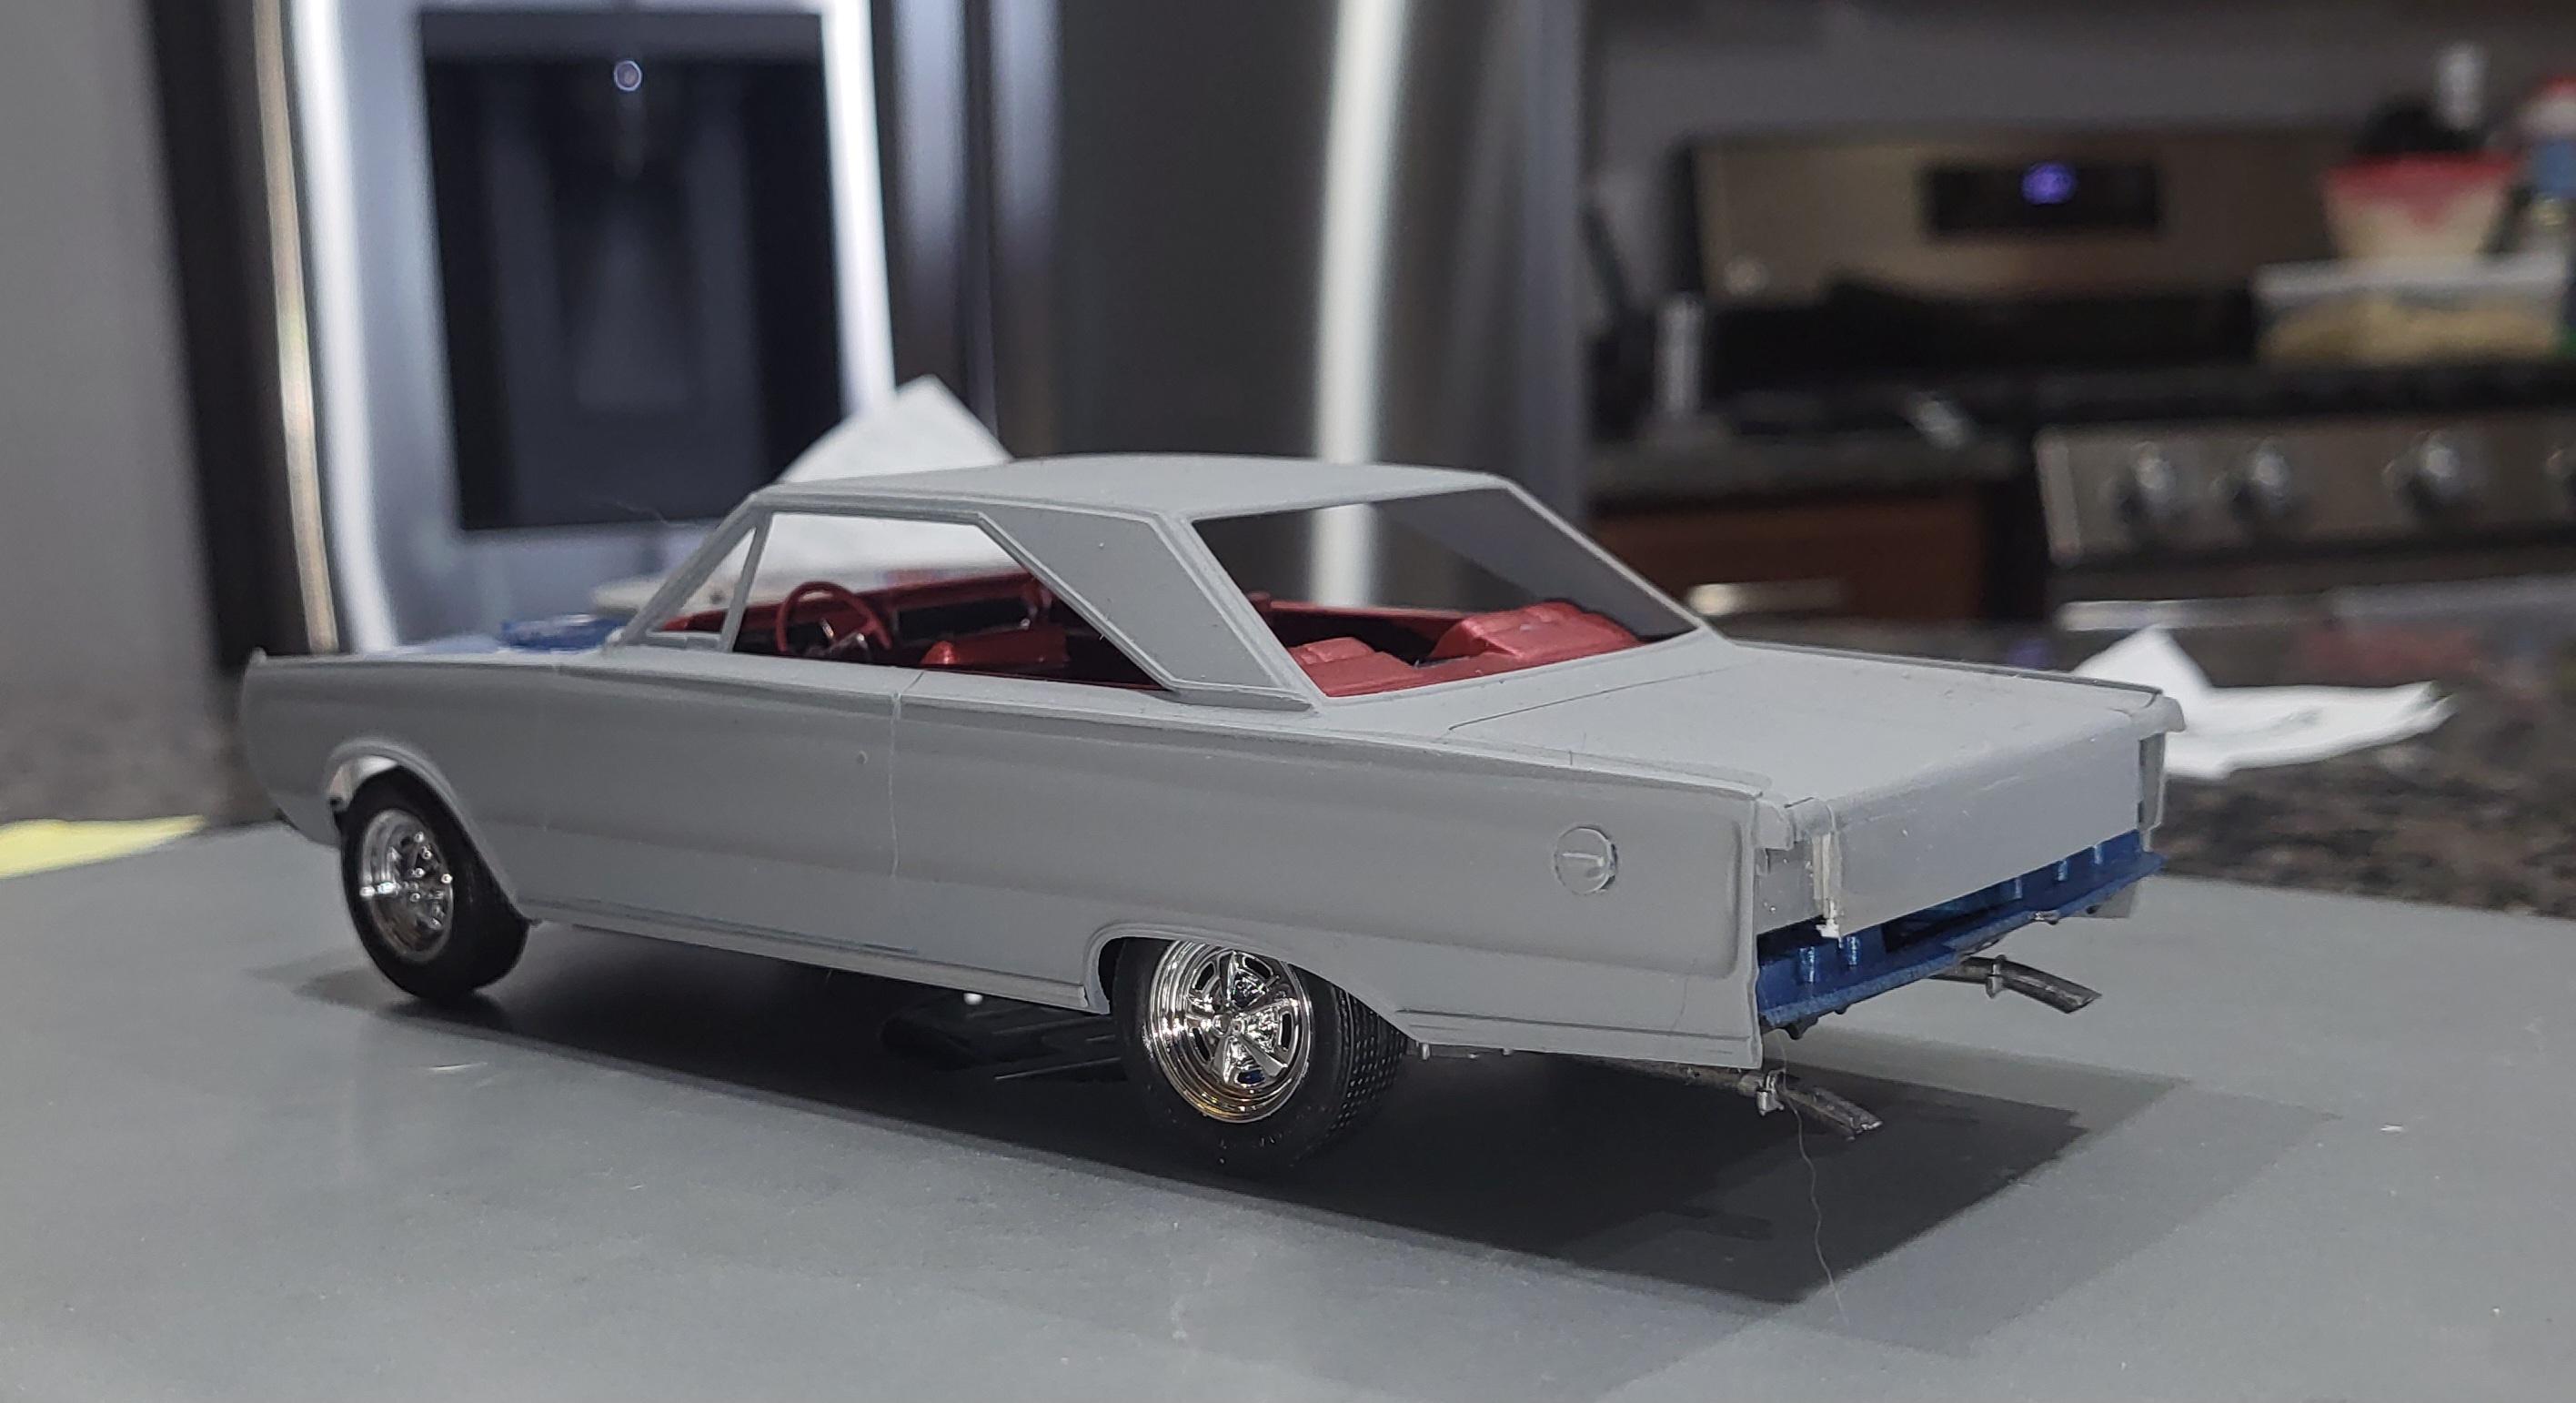
After messing with the stock kit chassis I saw no real way to get the car to sit ' right' So I jumped in both feet to modify the body ( very scary feeling ) and a Lindberg chassis from one of the SS Dodge / Plymouth kits Taking a knife and grinder to a kit that was painted many years ago was scary as I have no idea what I used to paint it back then But all in all. It went well and with a bunch of mods to both chassis and body. It fits . Pretty well I think. In all honesty. This one was a test to see if I could do similar mods to a Johan 1963 Dodge kit I have Even though the kit has a Dana rear axle. which is wrong for this car, I'll live with it as I do nt have any spare 8-3/4 rear axles to give up for this car I haven't decided fully if I will try to make or use Johan fender well headers,,,,OR just use the Lindberg pieces. Chassis required I cut A lot off the ft and some trimming on the back. Otherwise it fits decent I had to remove everything behind the kit body grille to make it fit , ( that was scary )
-
i have him making me 2 different sheets right now He did mention he was 10 weeks backlogged . Im in no hurry
-
I have that kit and this is THE very car I plan to replicate FY1 Yellow, Tan interior sunroof and trunk mounted luggage rack
-
What is your usual recipe for painting bodies?
gtx6970 replied to JollySipper's topic in Model Building Questions and Answers
Smooth primer is a must, Been using Tamiya's white primer the most lately . And Most time I dont even sand it Light coats of color, built up over a hour or two Same goes for clear if I do it. Let that sit a few days and usually just a light wet sand with maybe a progressive sanding pads from about 3000 to maybe a 10,000 grit then polish with microfiber cloth and Meguires cream polish Now, That said is my stuff flawless ? absolutely not. I build for me not a show judge, So paint perfection is a trait I rarely try to achieve. This one just happened to turn out pretty darn nice , IMO You can not feel the transition from one color to the other. Best part is, Its all rattle cans
-
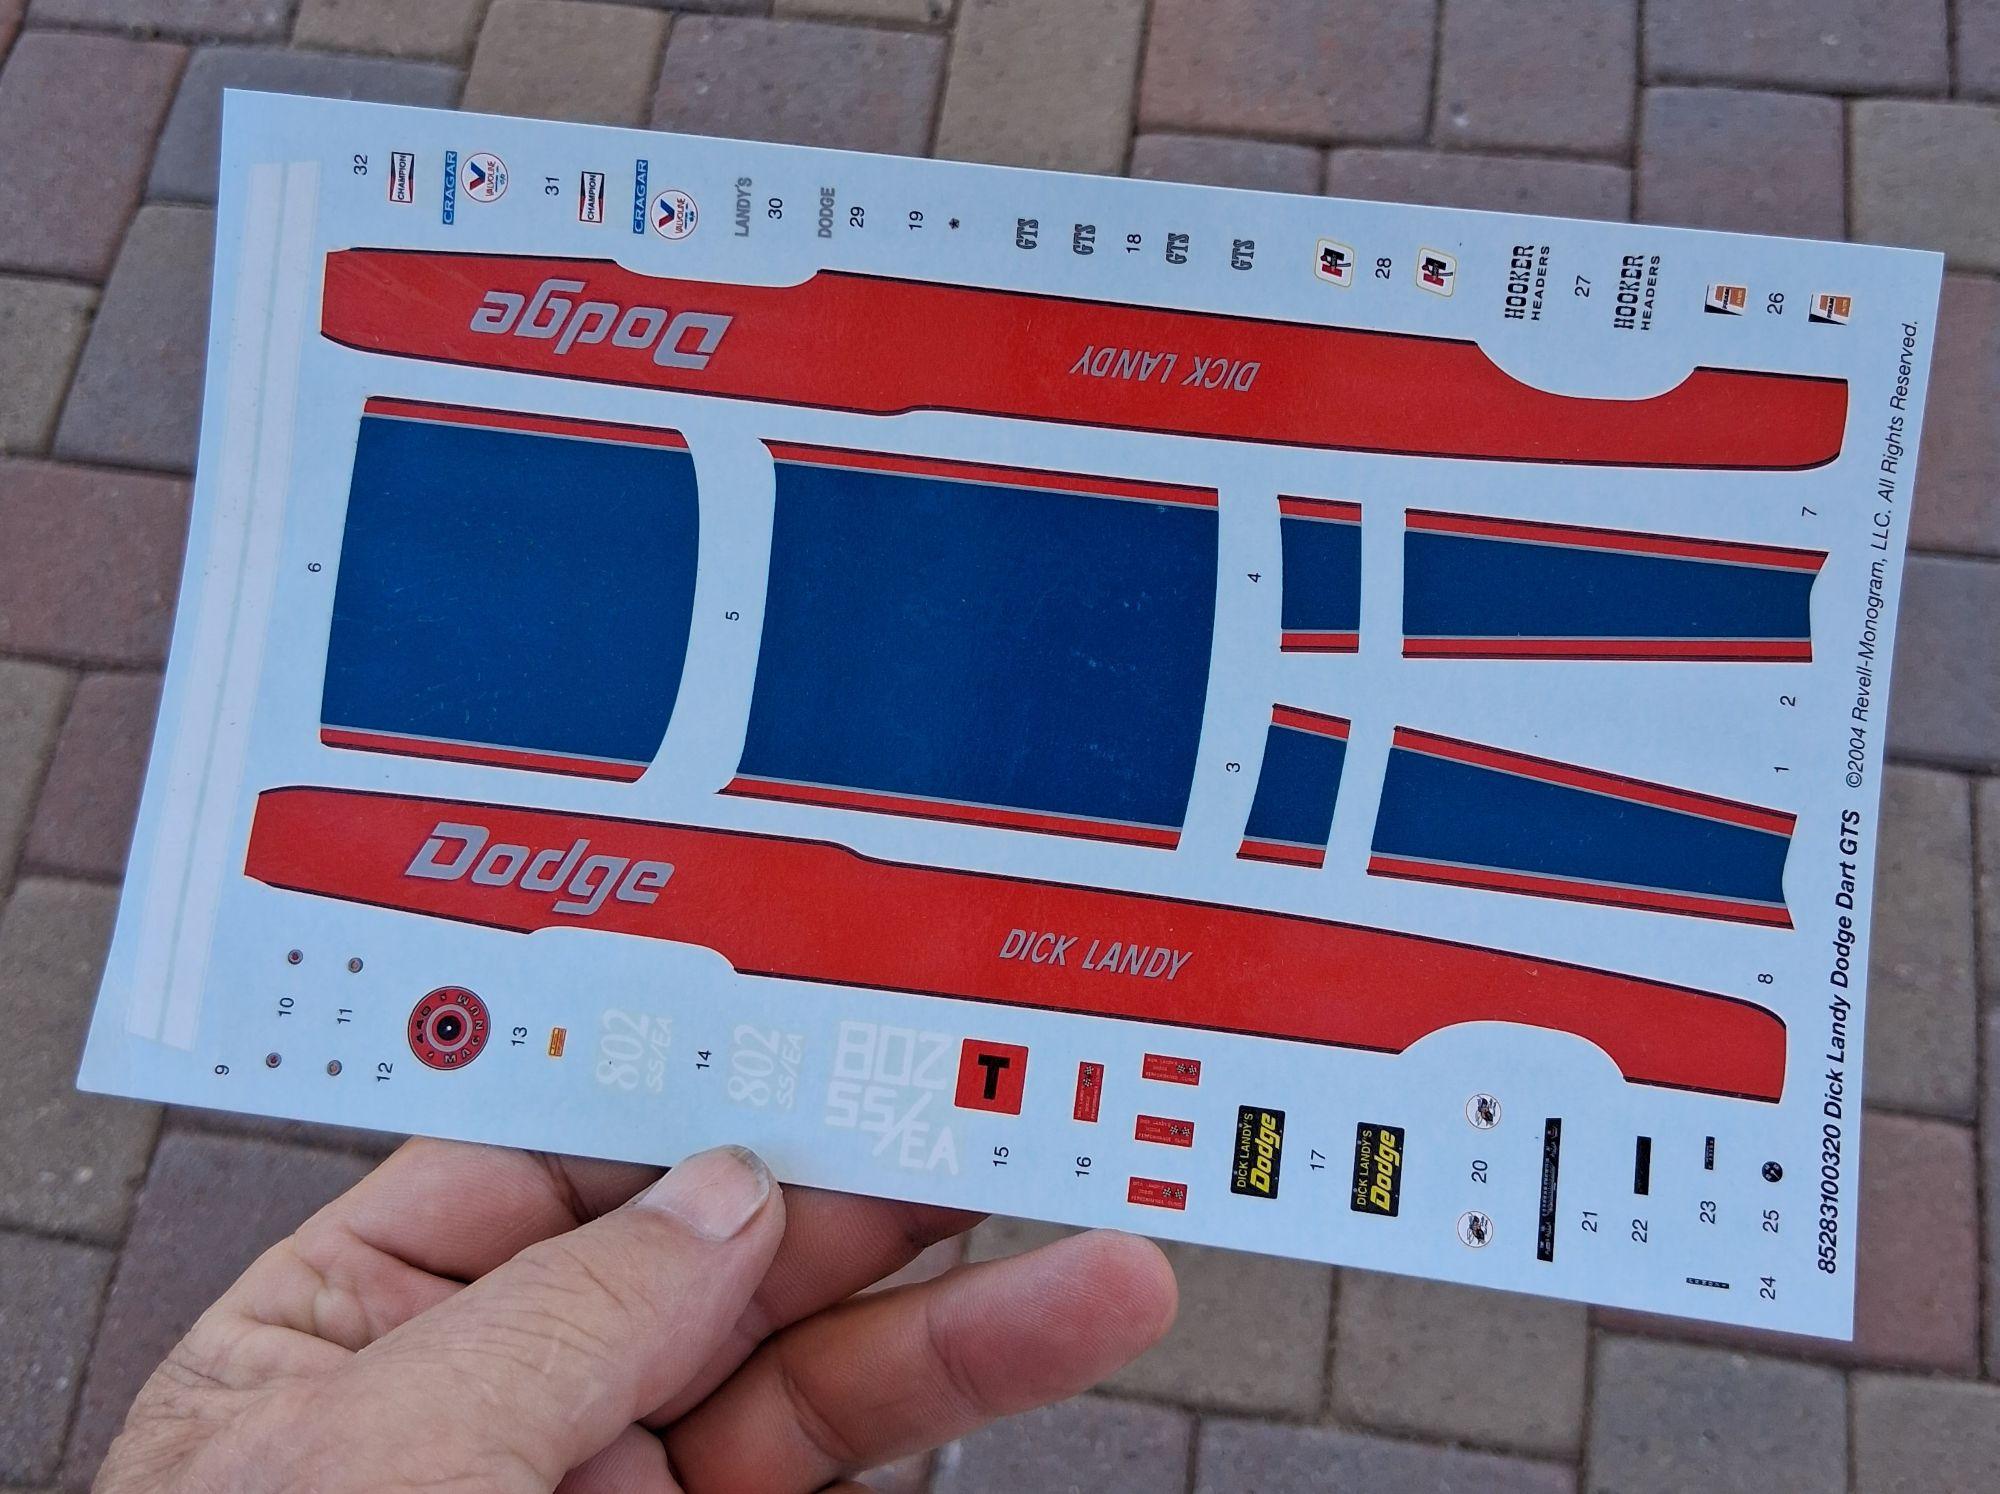
update I have ONE spare sheet out of a kit I bought a while back that will not be built as the Landy car . This kit isnt cheap I'll be honest It looks like maybe the clear coat has / had issues ? Hard to describe or show in photos So that said , IMO the only way I would attempt to use it is clear coat it first If thats ok, PM me, we can talk But it makes for very cool build on the shelf
-
Im guessing the 65 barracuda is close to store shelves Svens World of Wheels has one in process I will be getting a couple of these for myself
-
I might Will ck tomorrow
-
One of my favorites And probably one of the most detailed ive done is a loooong time
-
Looking good. Ive been playing with colors to try and replicate this car As it is on my short list, VERY short list to do
-
Moebius 1/25 1964 Mercury Comet K-code
gtx6970 replied to Justin Porter's topic in Car Kit News & Reviews
Agreed -
Making gold pinstripes Ideas ?
gtx6970 replied to gtx6970's topic in Model Building Questions and Answers
Thanks for the offer But too wide for my needs I have .5mm wide decals on order -
Making gold pinstripes Ideas ?
gtx6970 replied to gtx6970's topic in Model Building Questions and Answers
Thanks all. I have the 1/64th decals stripes ordered Gonna be after the 1st of the year before I get started on this one Ive gotta find the right color paint fingers crossed it goes ok -
Traded Mods can delete if desired
-
Another one from the early 80s timeframe I think All Johan kit build I have a few of these Johan kits and plan/want to do another one someday . Only hopefully It will turn out much better I will not take this one apart for any reason Im actually quite surprised it has survived all these years intact. After multiple moves including one across country move
-
I think they're cool as
-
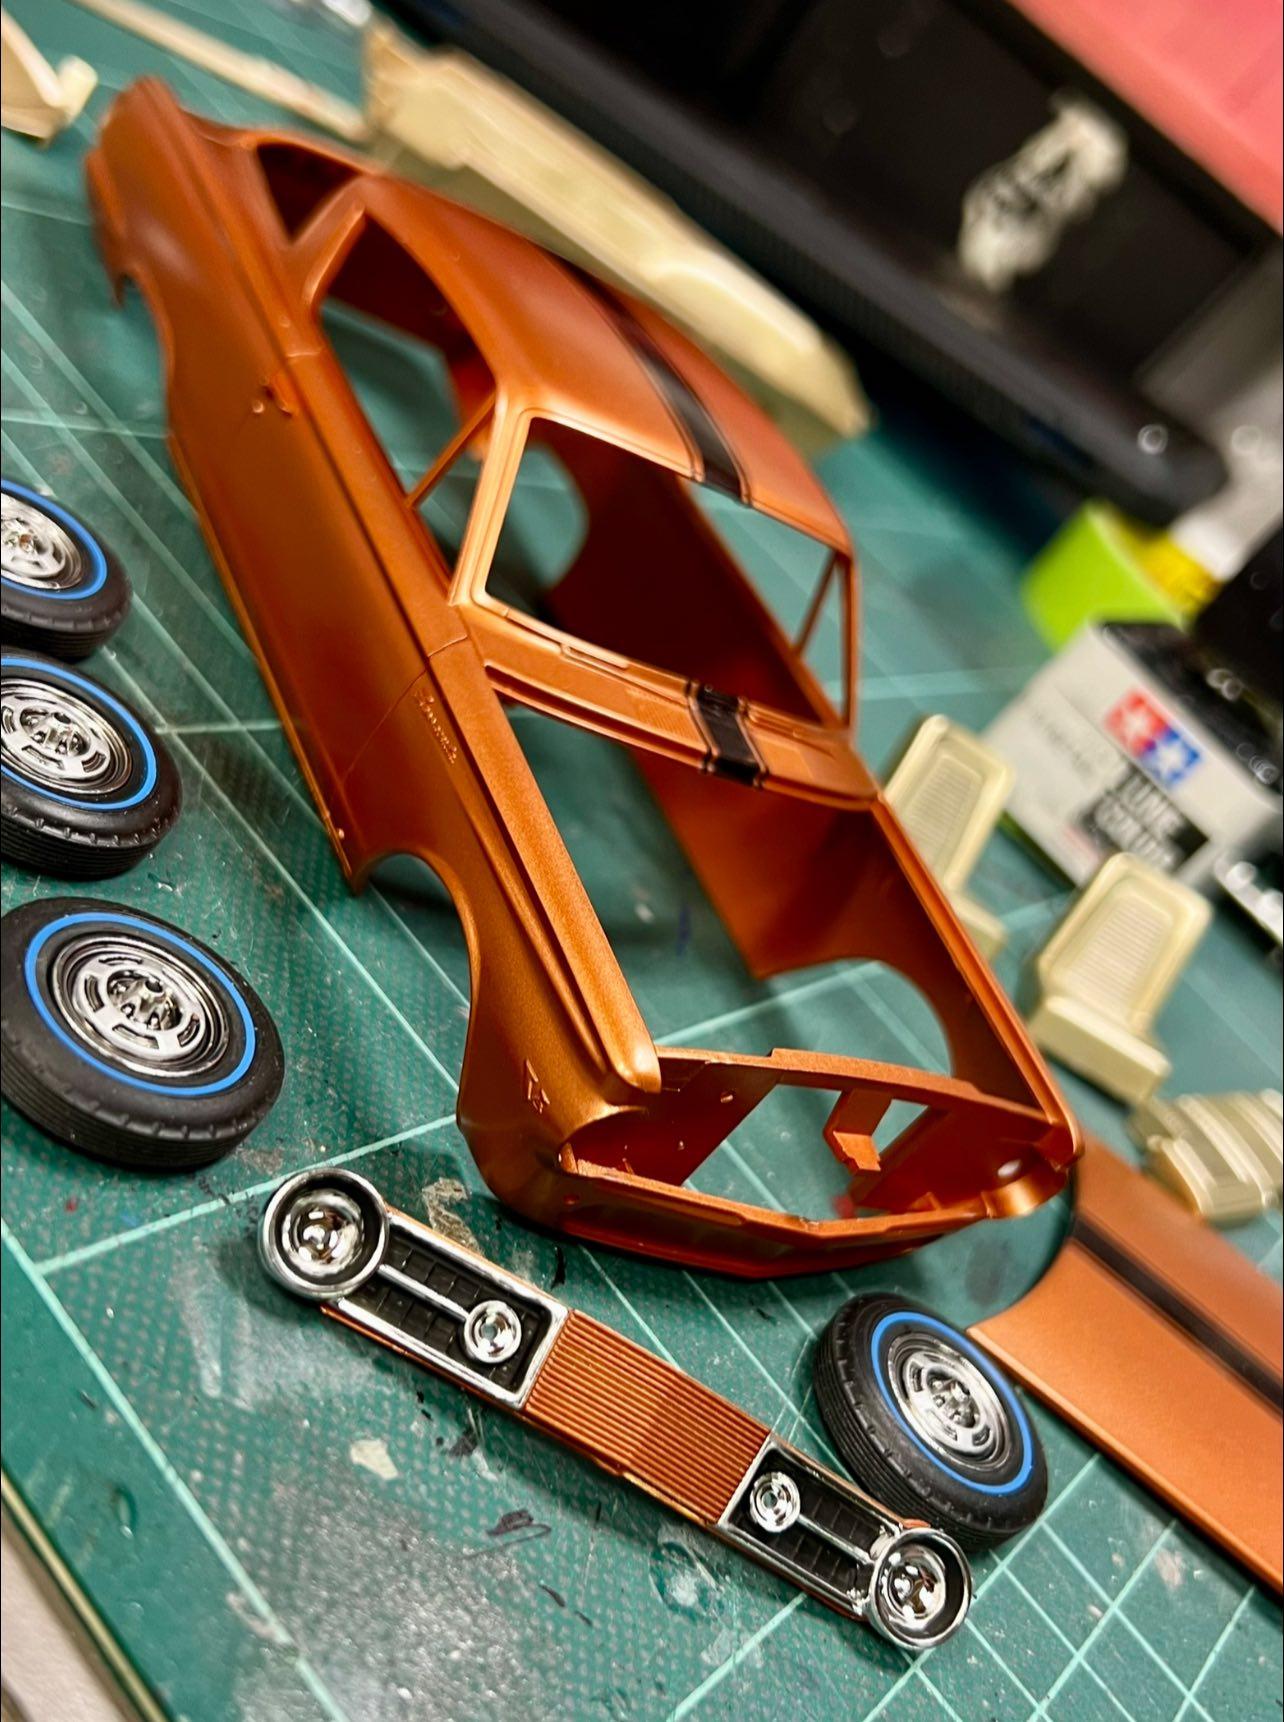
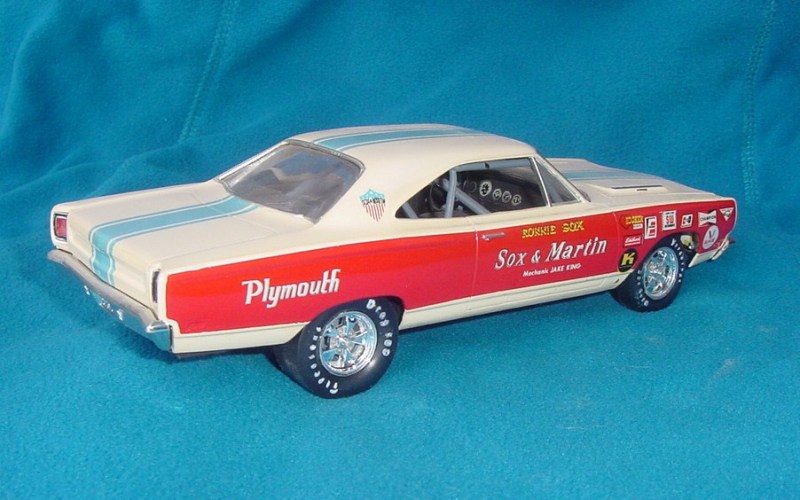
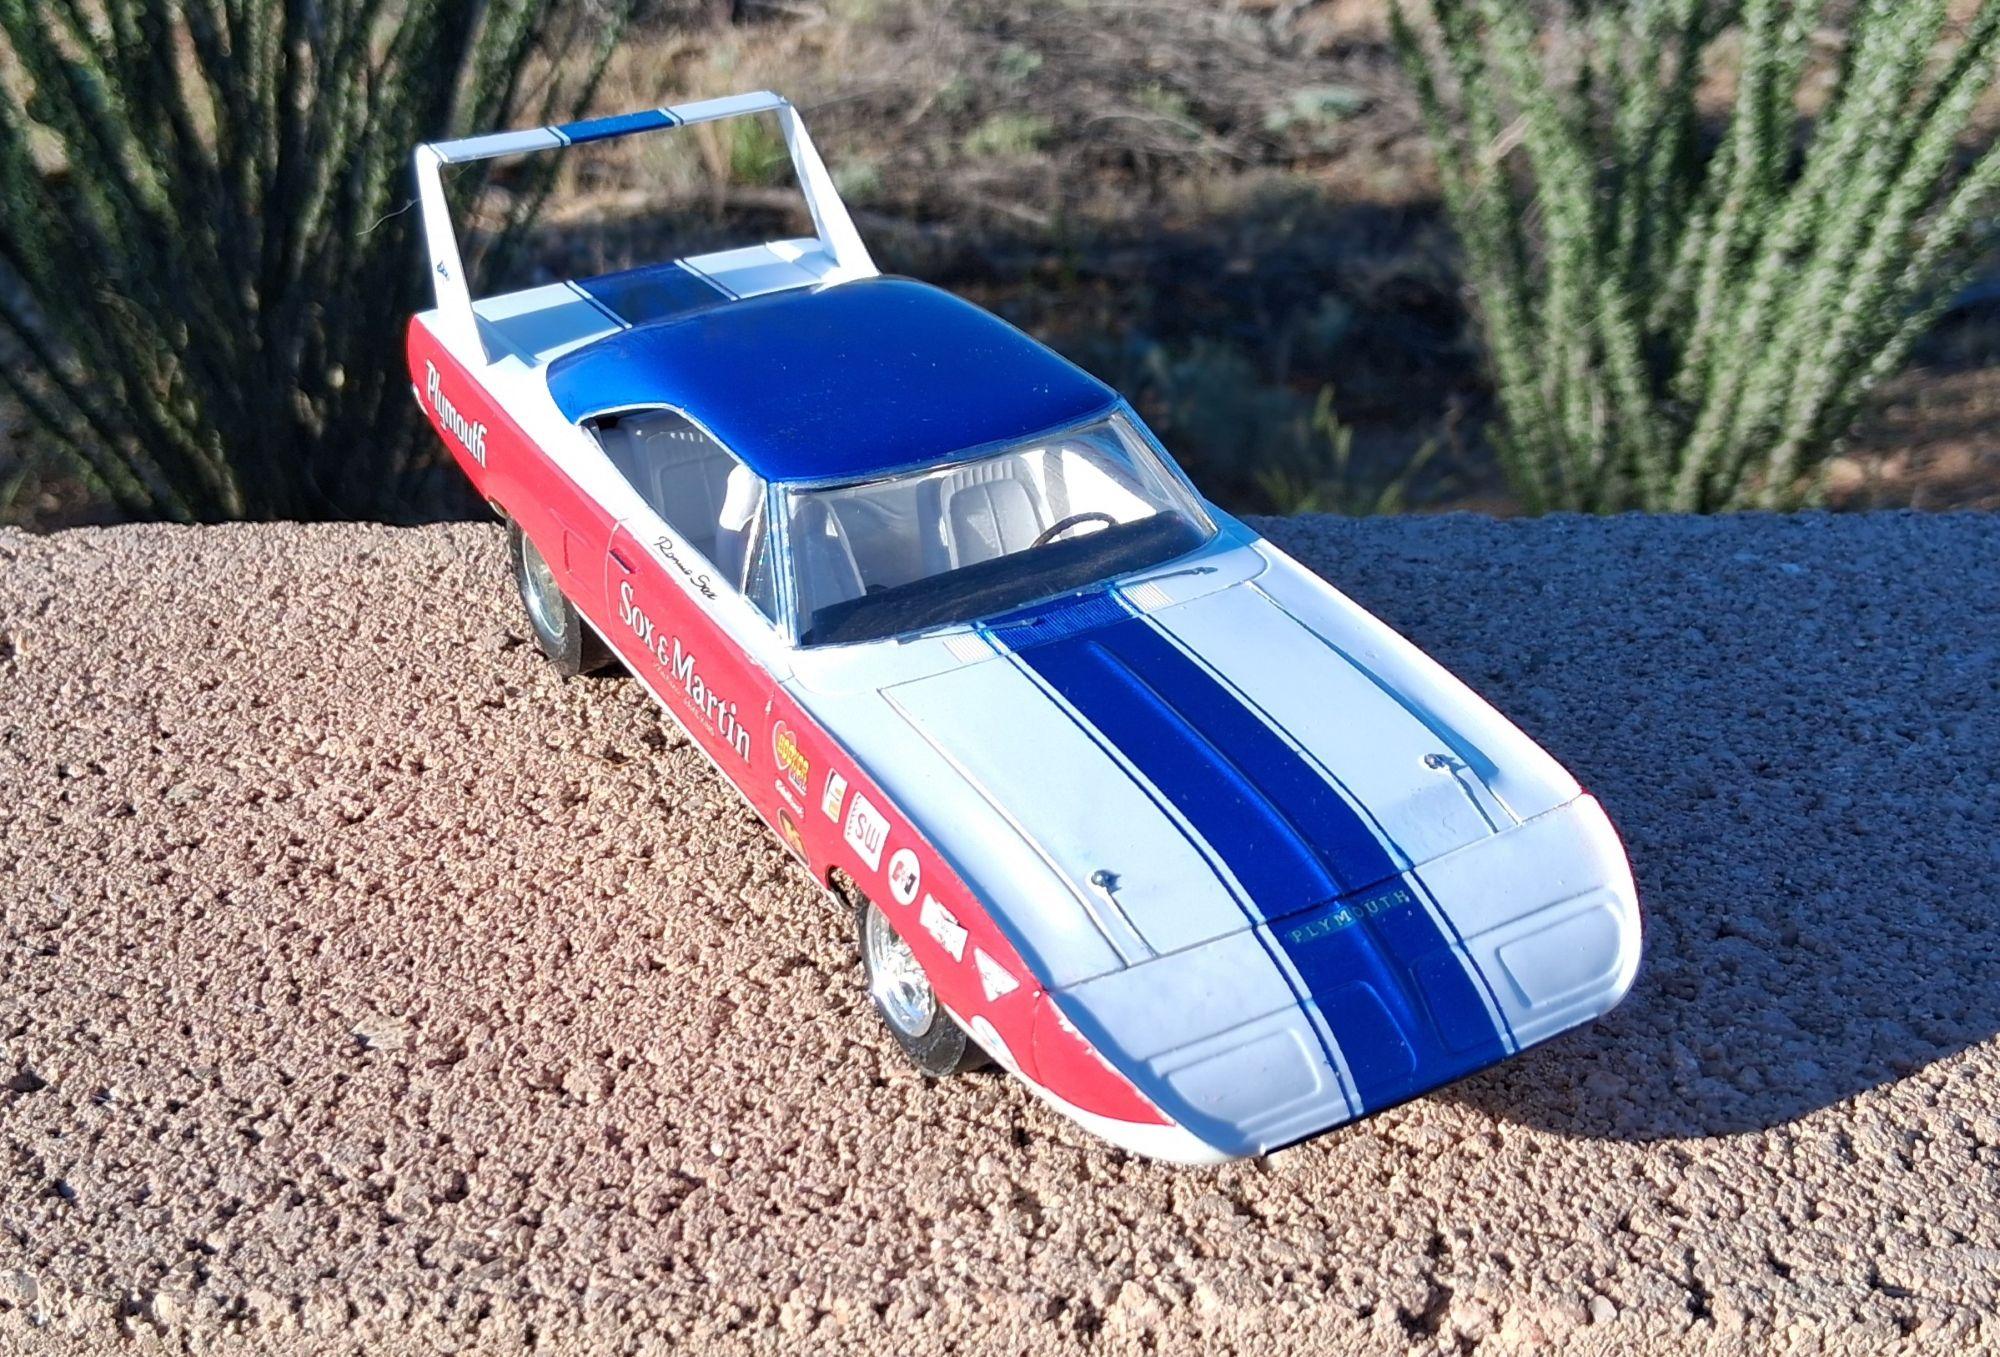
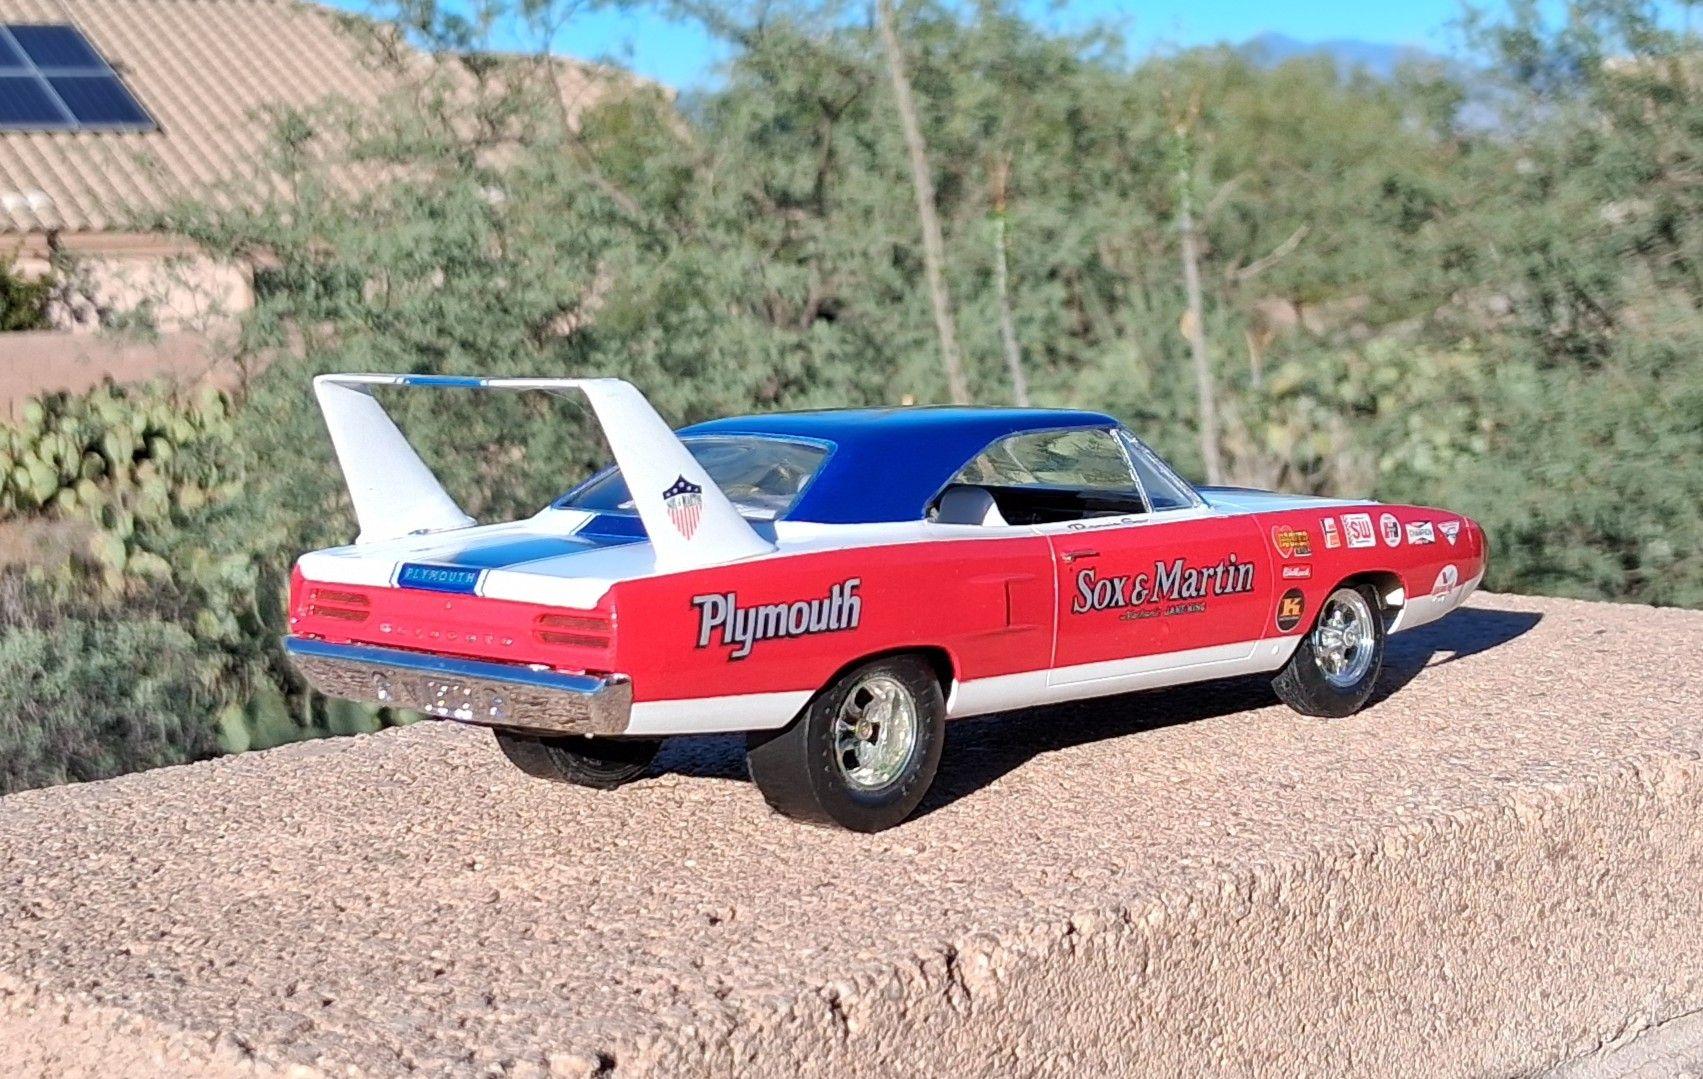
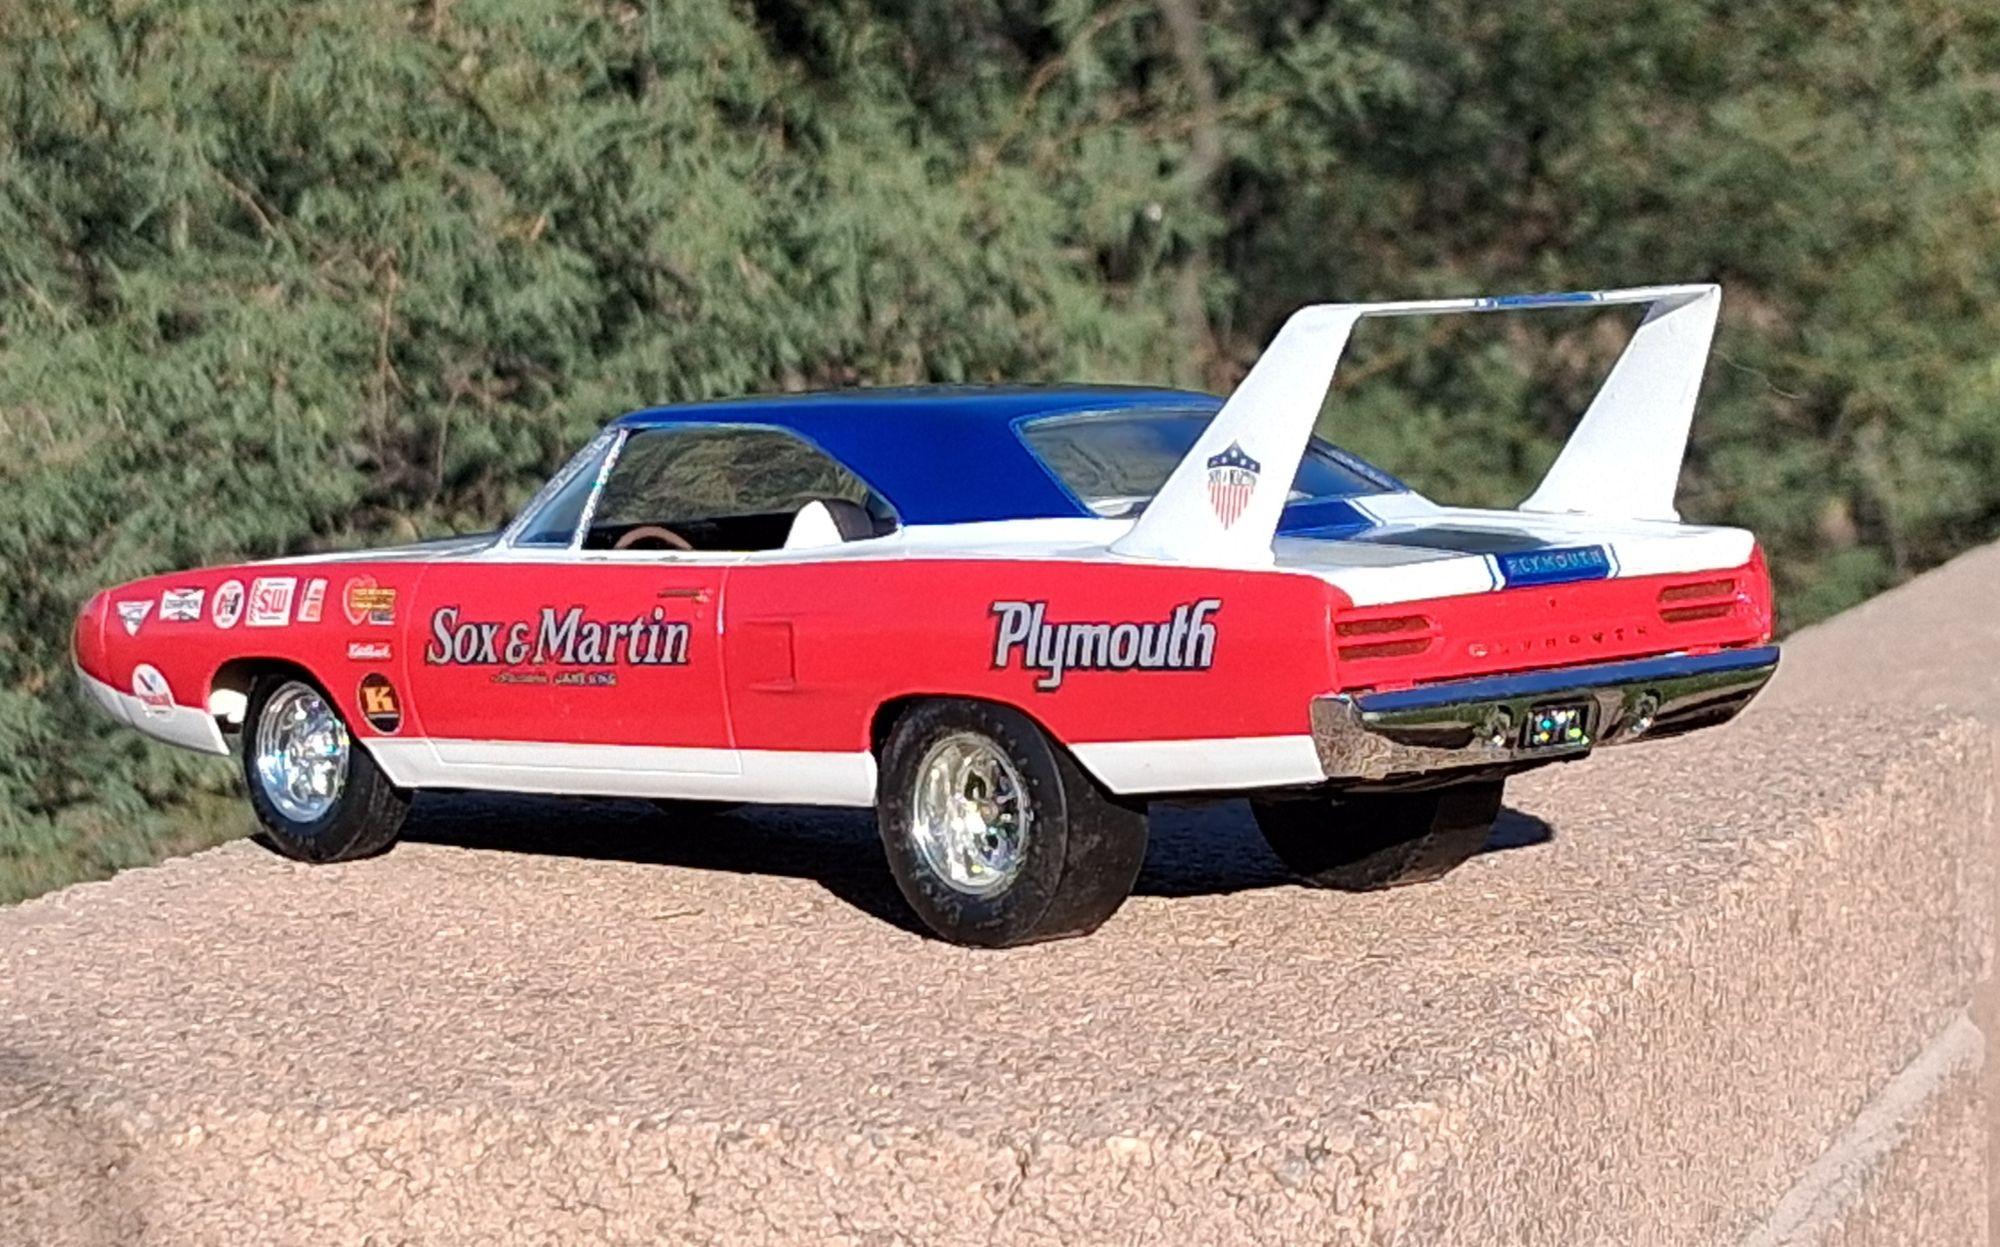
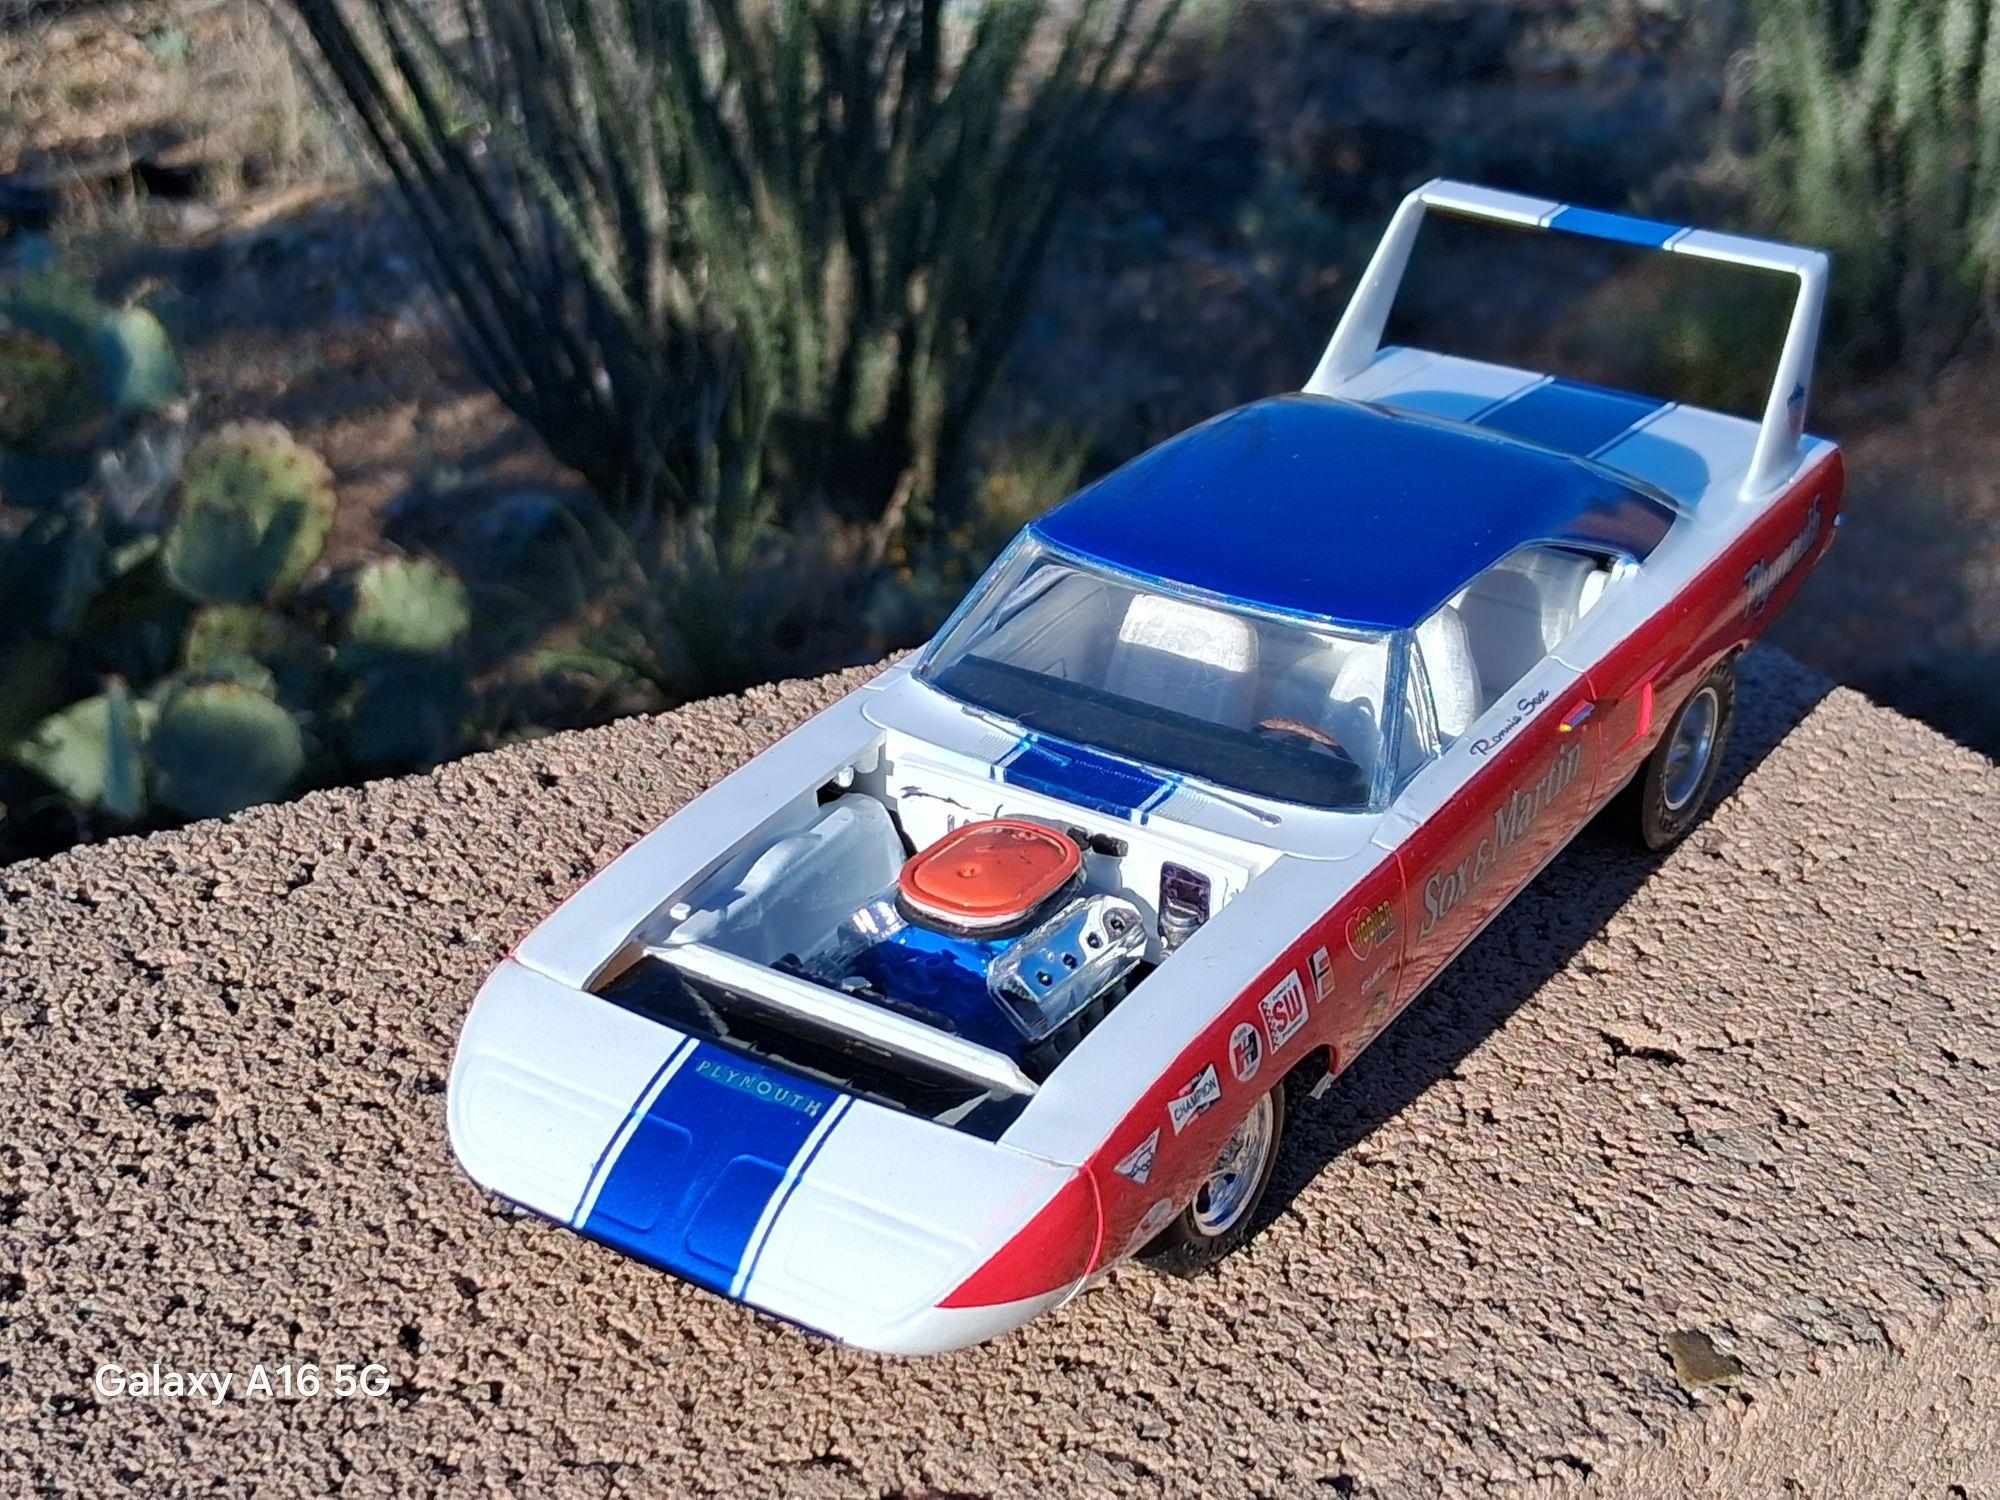
Ive had this Johan kit in the stash for a LOOOOOONG time . And felt it was time to make something of it Basic stock box build ( kinda sorta ) Rear rims are from the Johan 71 Cuda kit Decals are from the Revell 67 GTX kit Tamiya rattle cans for all 3 colors with Tamiya clear on top of it I need to find the radiator hose and Dist cap. But overall, Its done I bought the resin sixpack hood several years back so no idea who made it. This way I can display it both ways with it or the stock hood SS/E car was flat hood. MP class car had the sixpack hood Comments or critiques are much appreciated and more than welcome either way !
-
Mine is in limbo at the moment But I am as far as making all the trim for the 66. Chassis is done , power train is in and that where I stopped
-
Making gold pinstripes Ideas ?
gtx6970 replied to gtx6970's topic in Model Building Questions and Answers
Thanks all, I think I have enough info I can move forward with for sure -
Making gold pinstripes Ideas ?
gtx6970 replied to gtx6970's topic in Model Building Questions and Answers
I think these might work price is right any way to make an attempt https://www.ebay.com/itm/197615194057 -
Making gold pinstripes Ideas ?
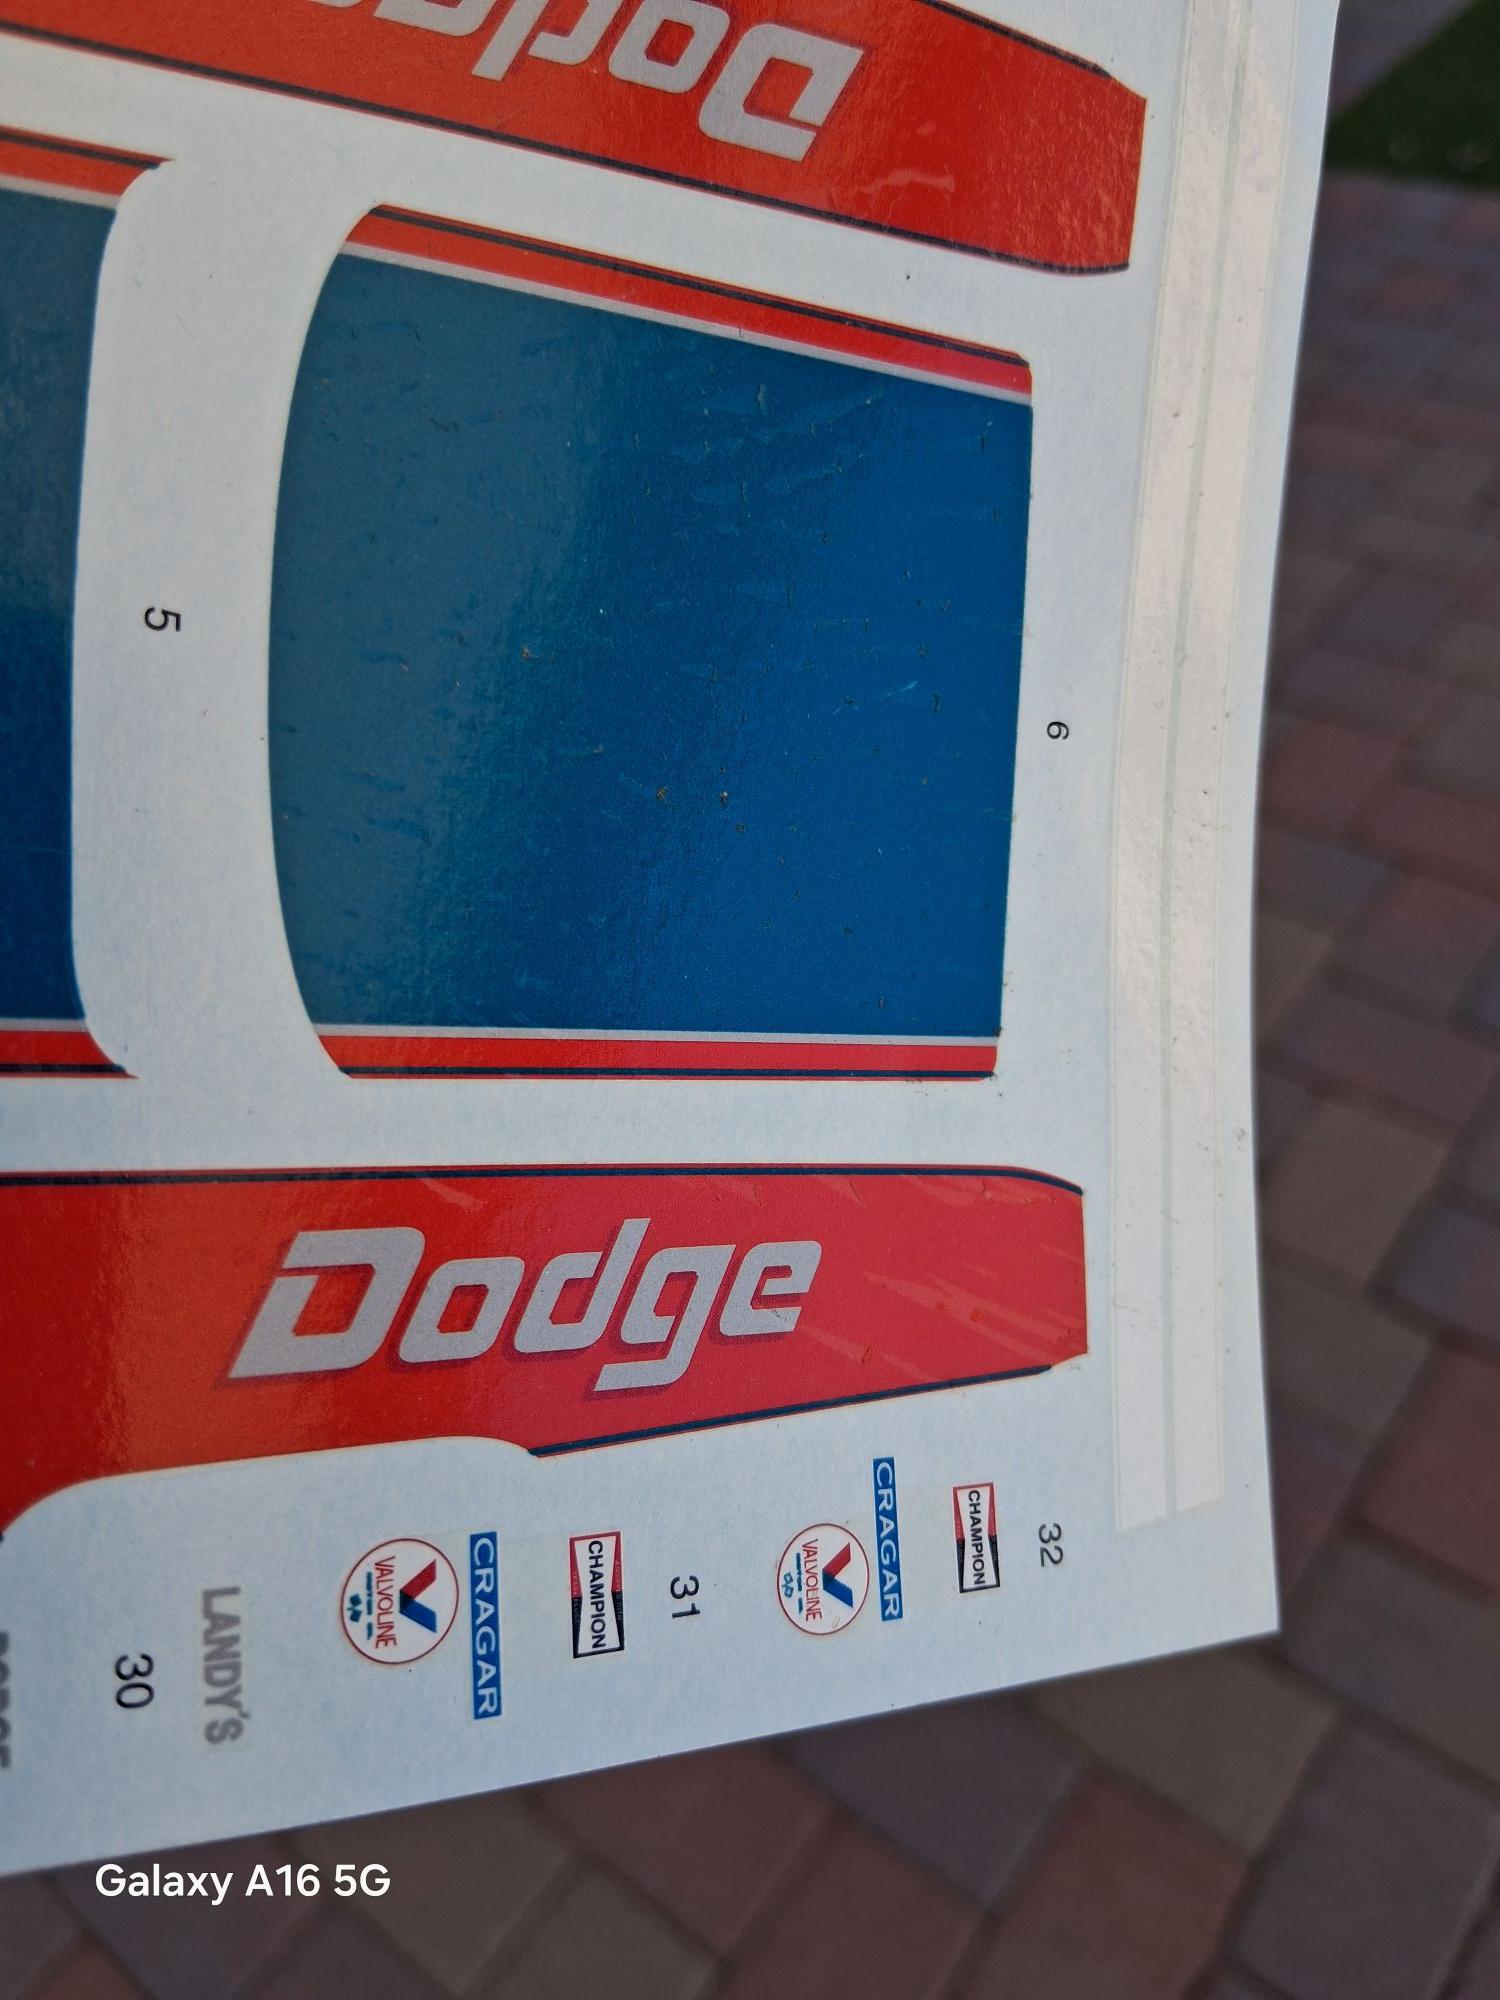
gtx6970 replied to gtx6970's topic in Model Building Questions and Answers
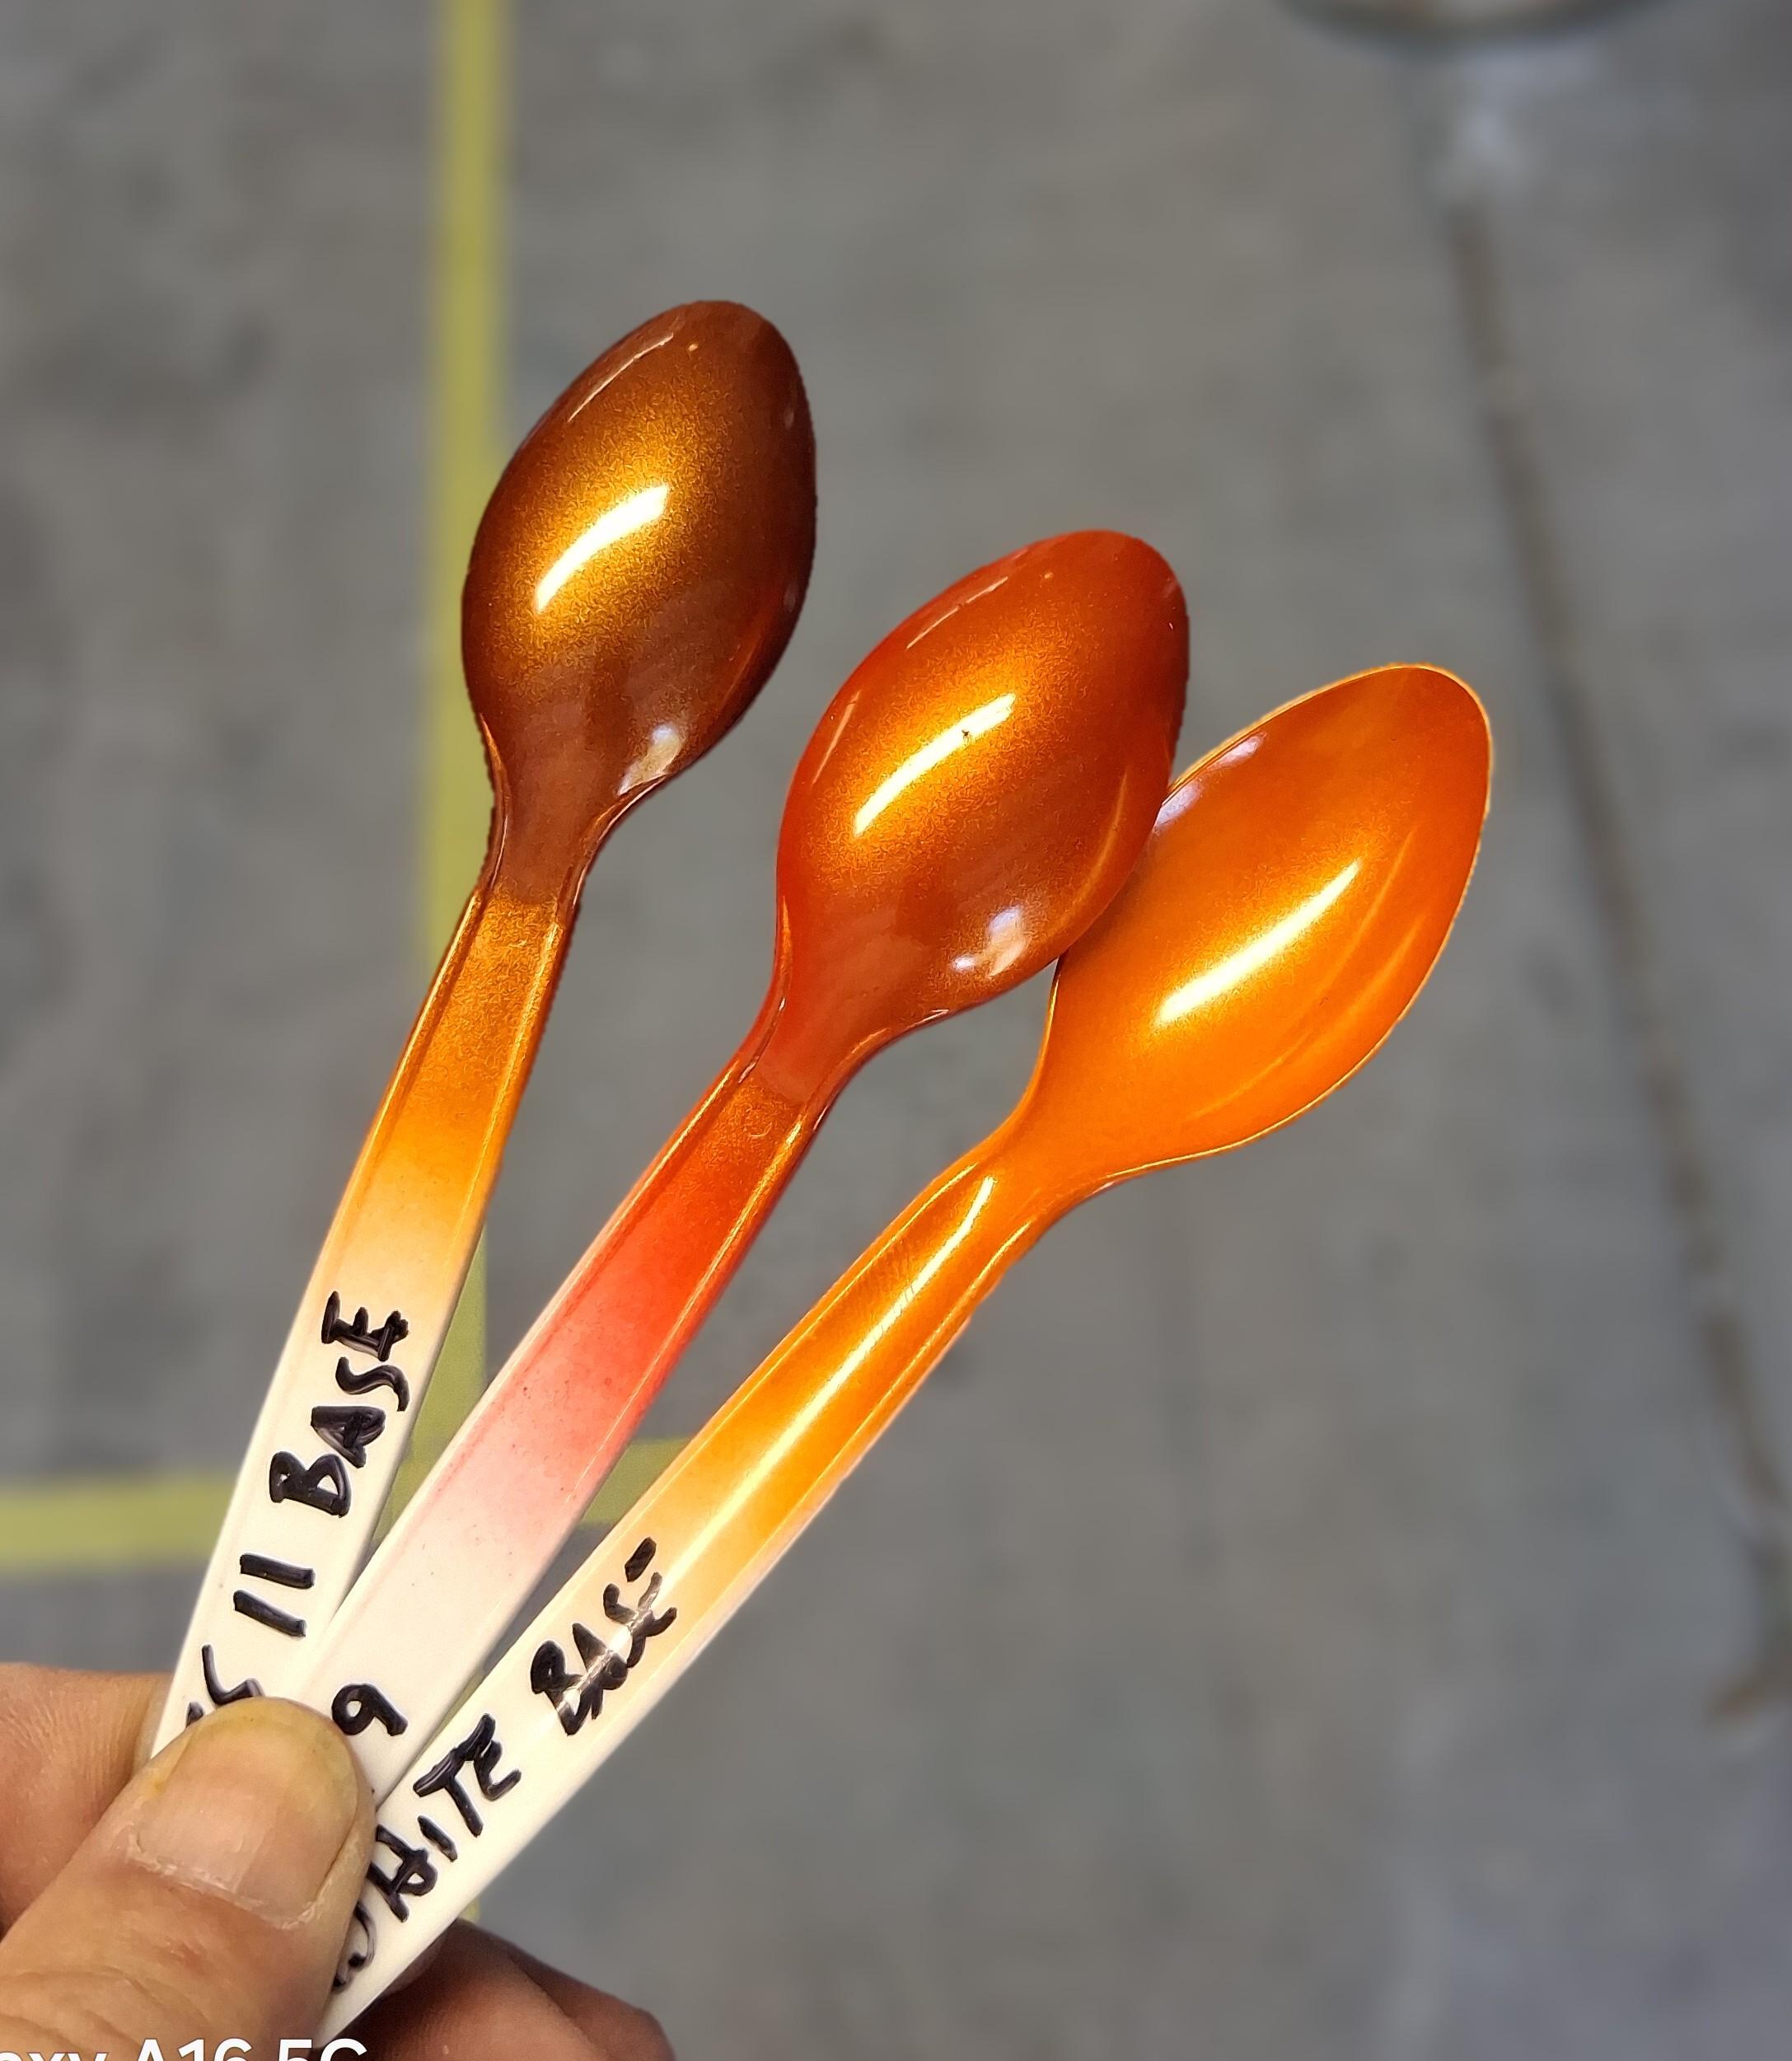
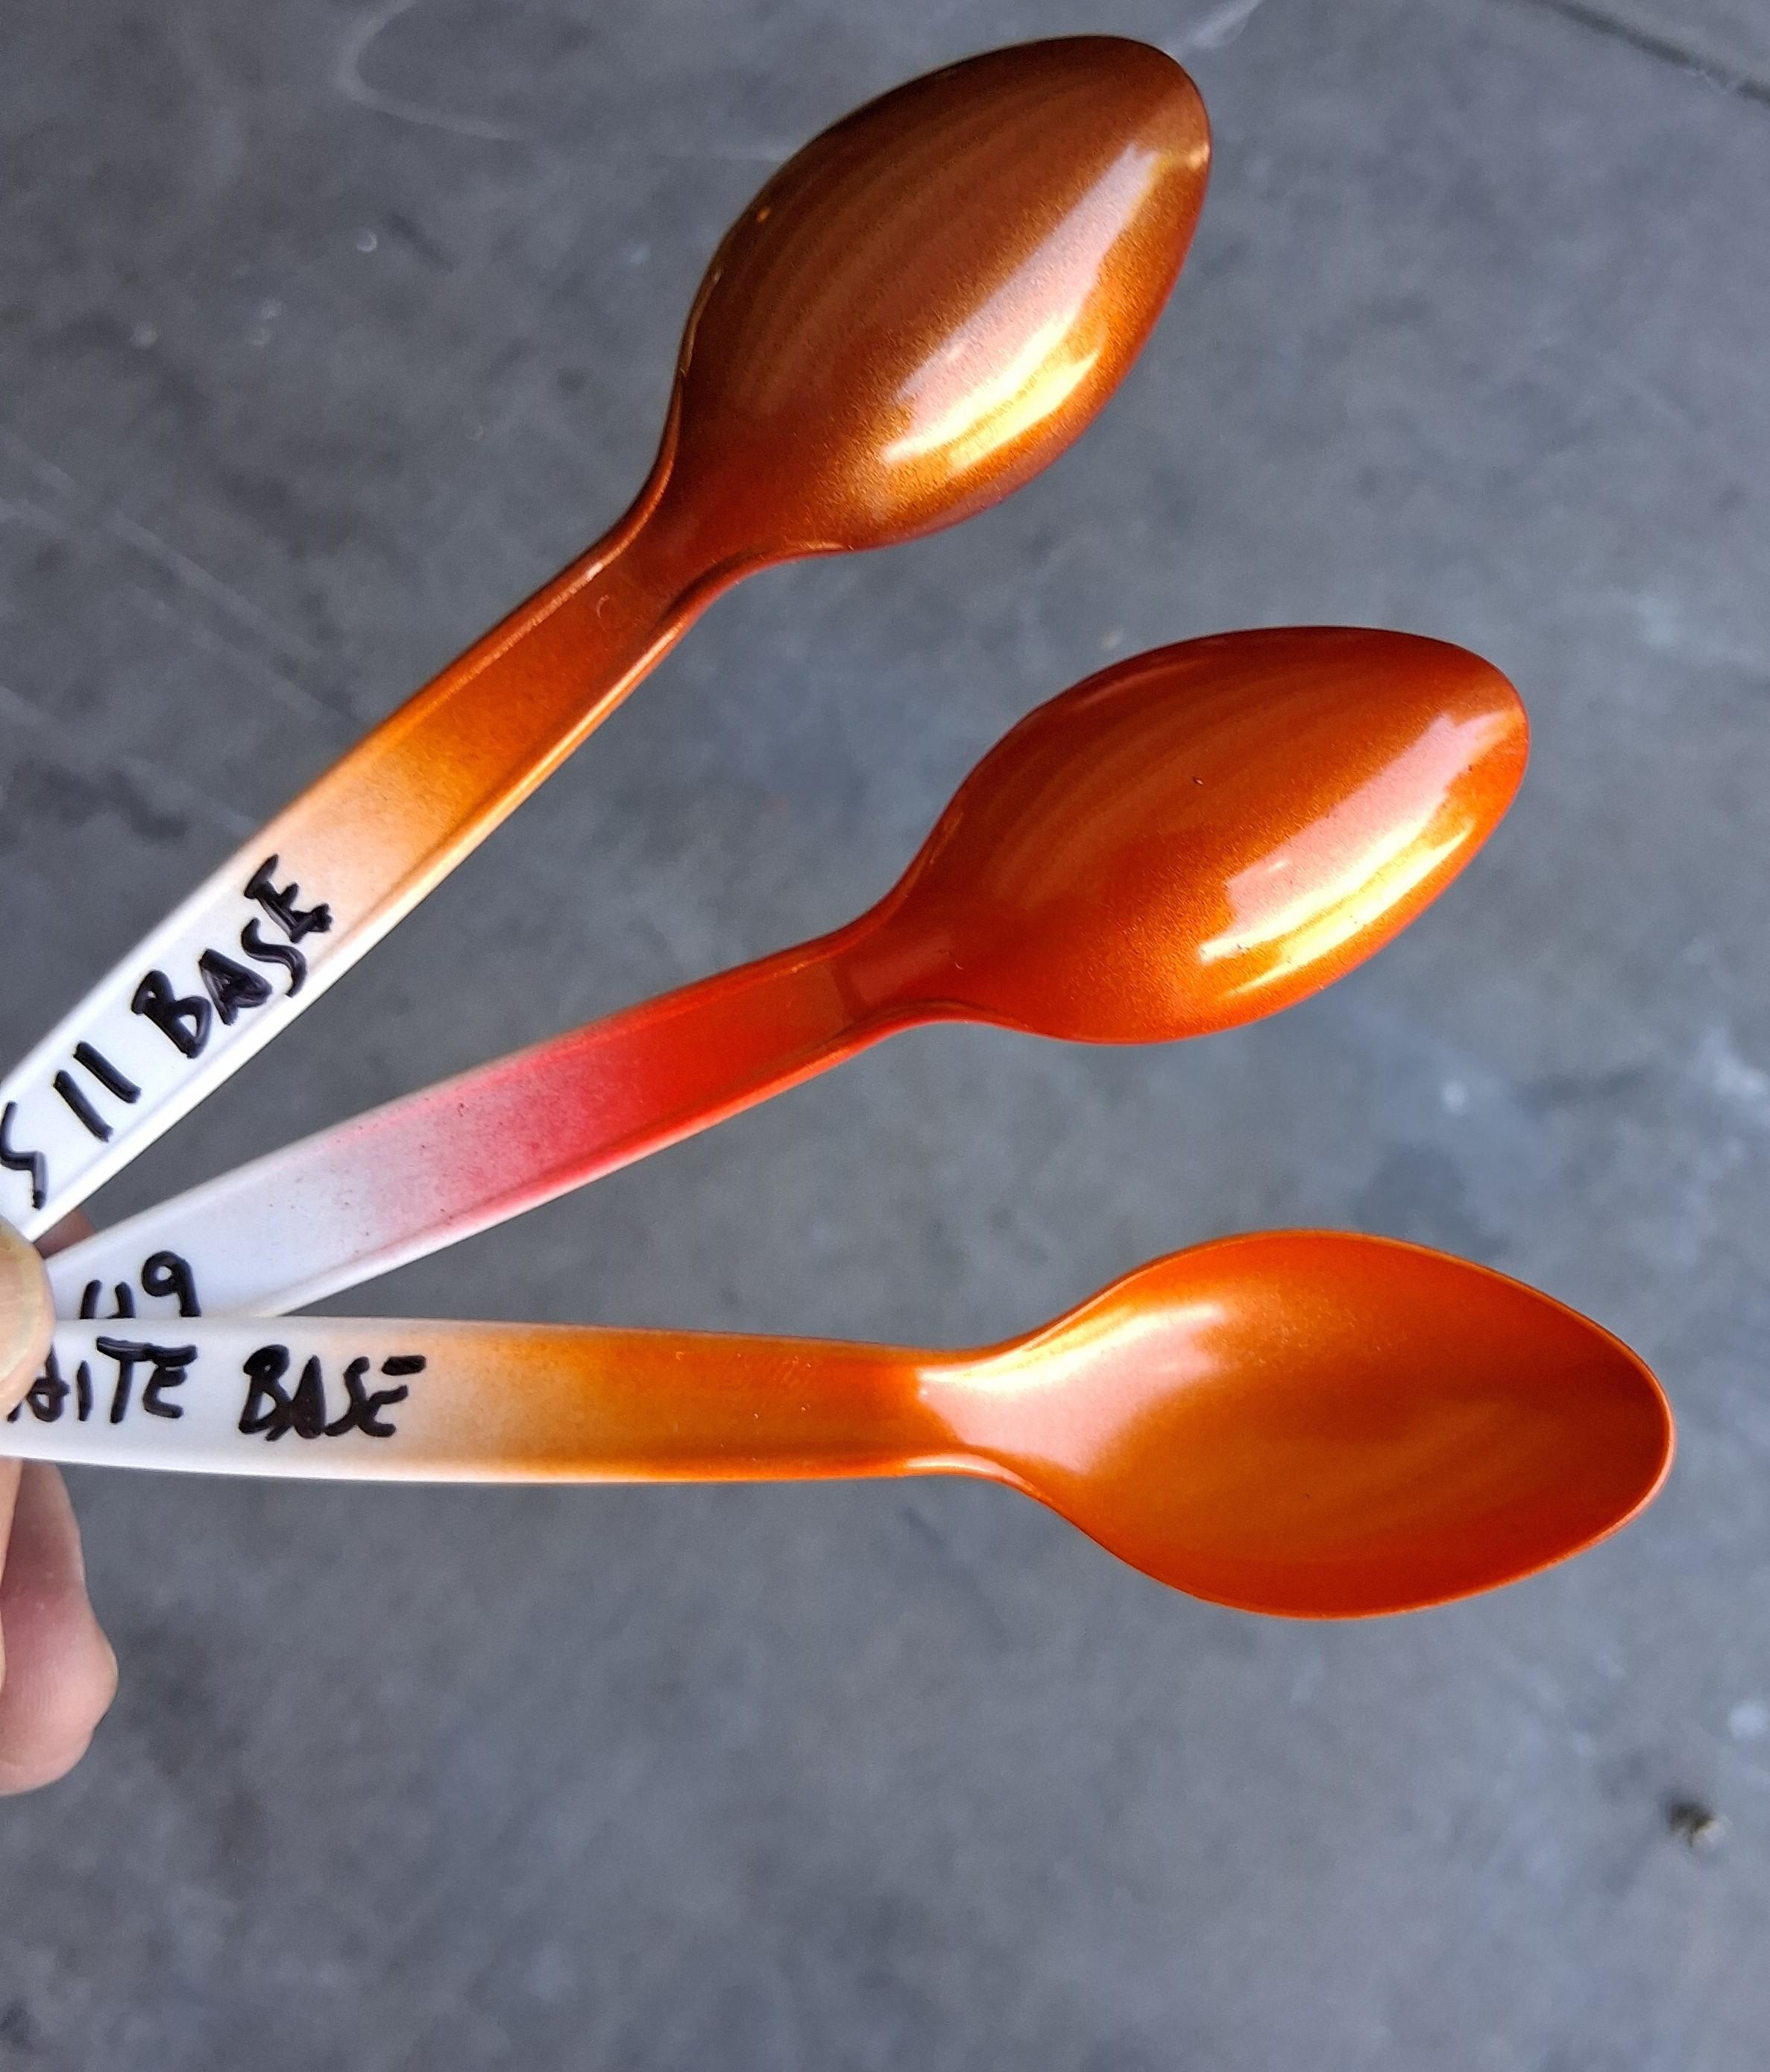
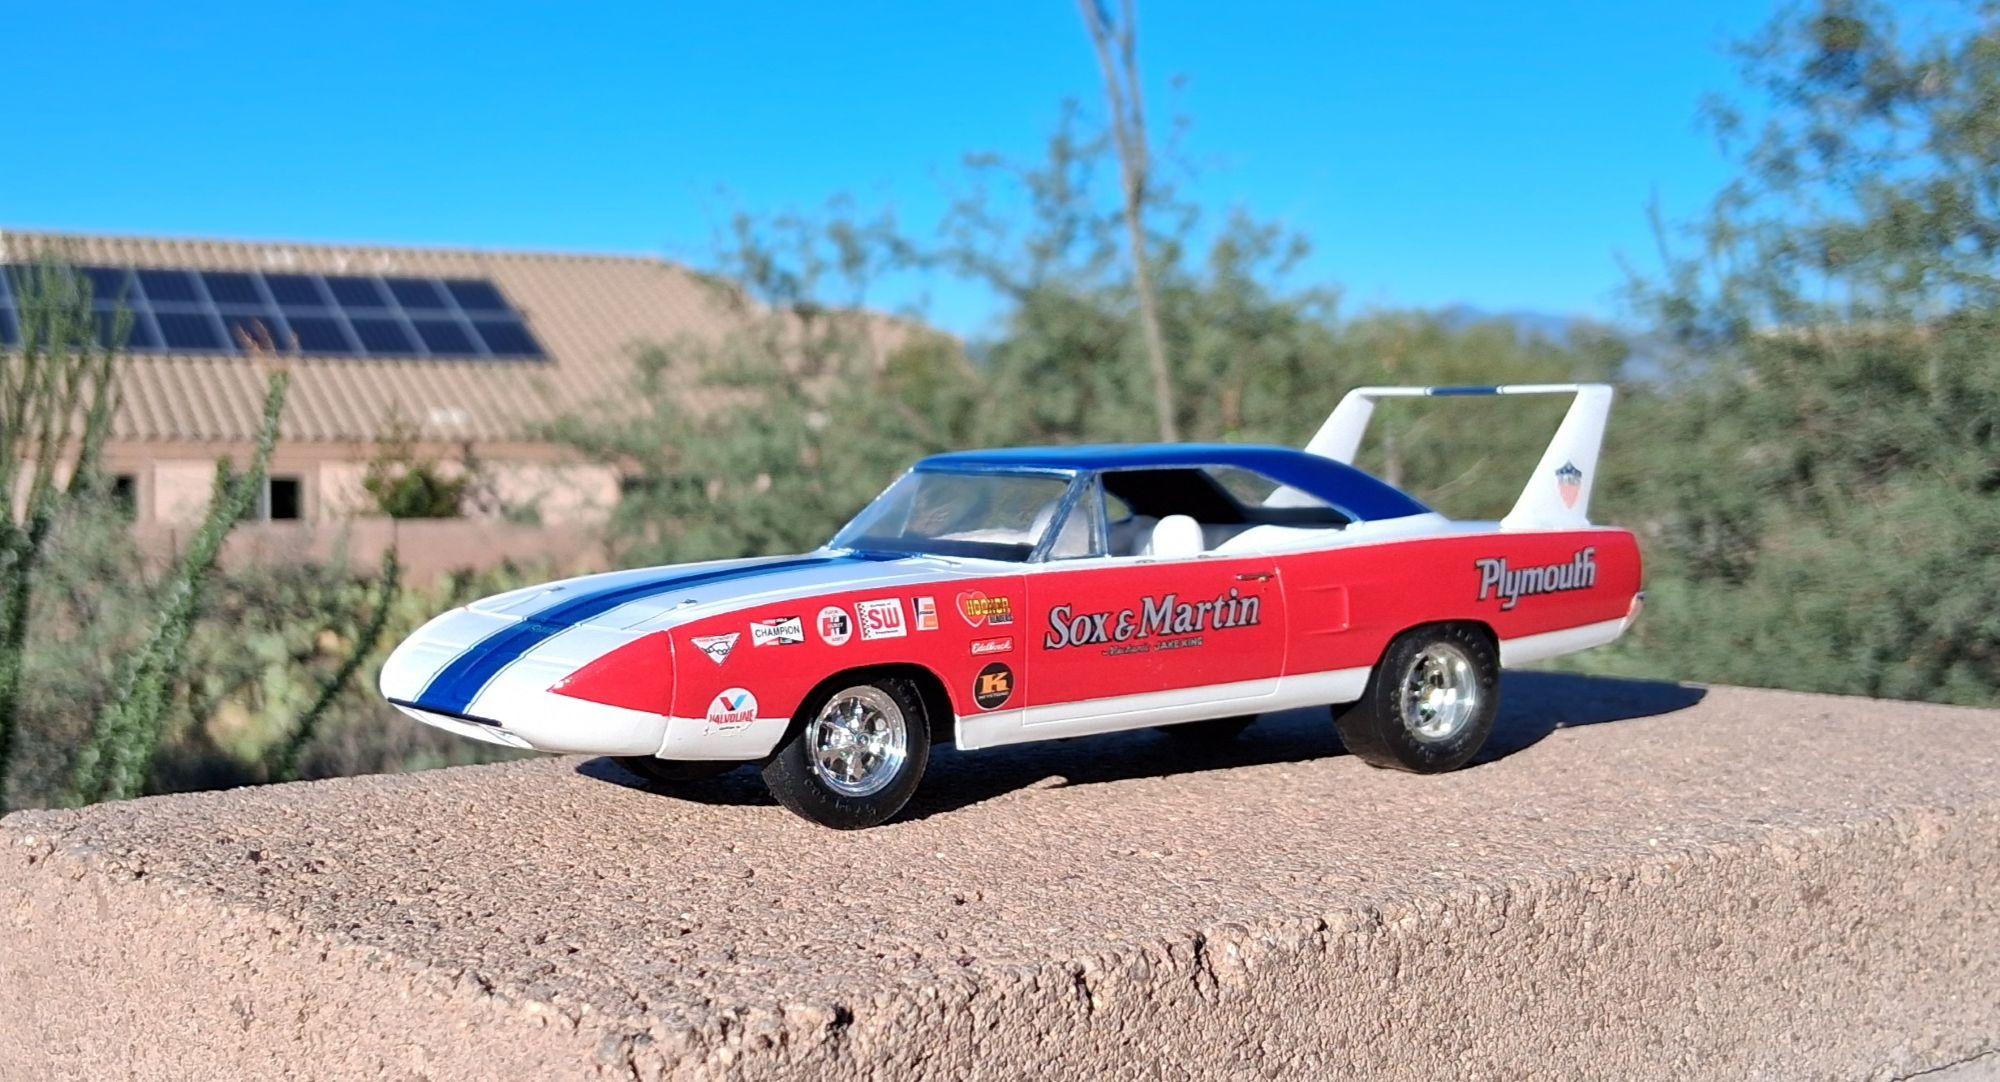
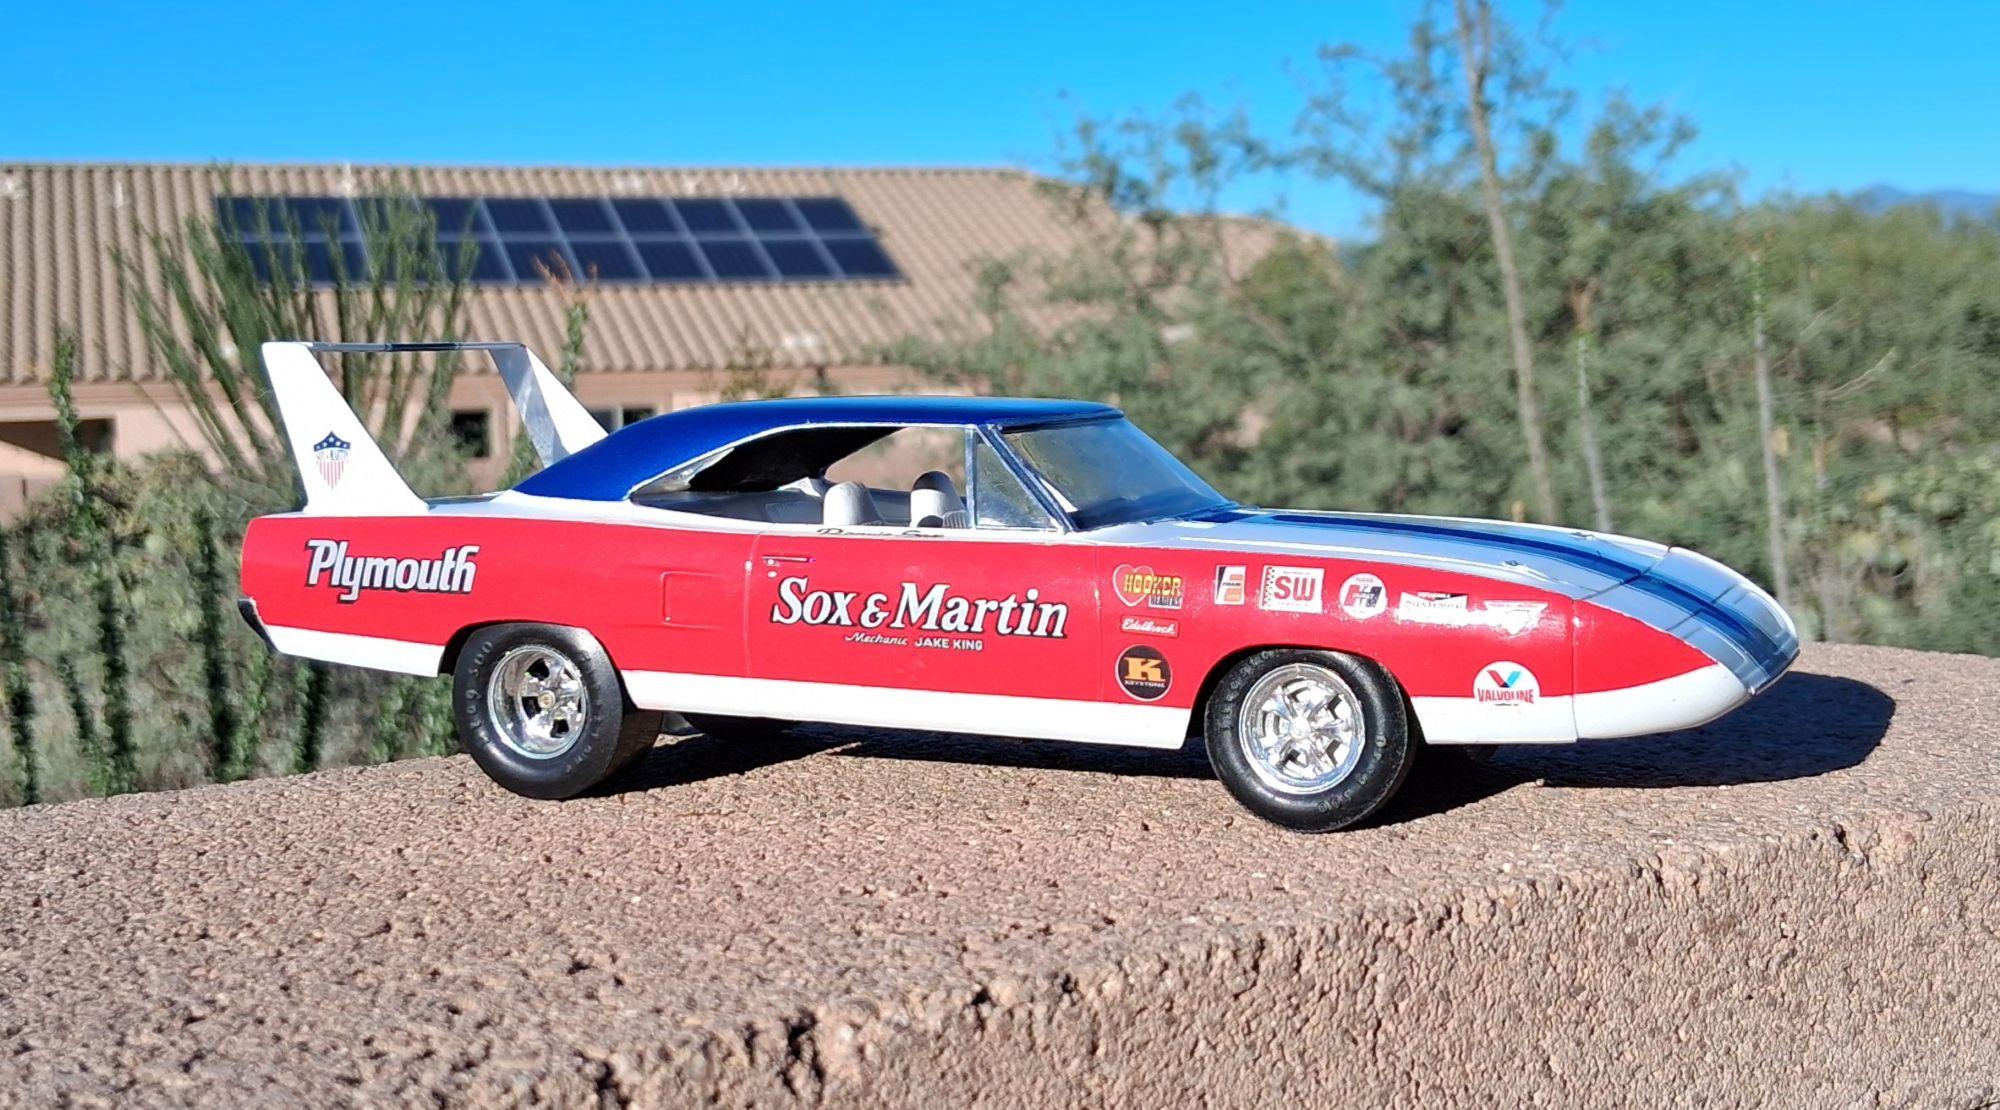
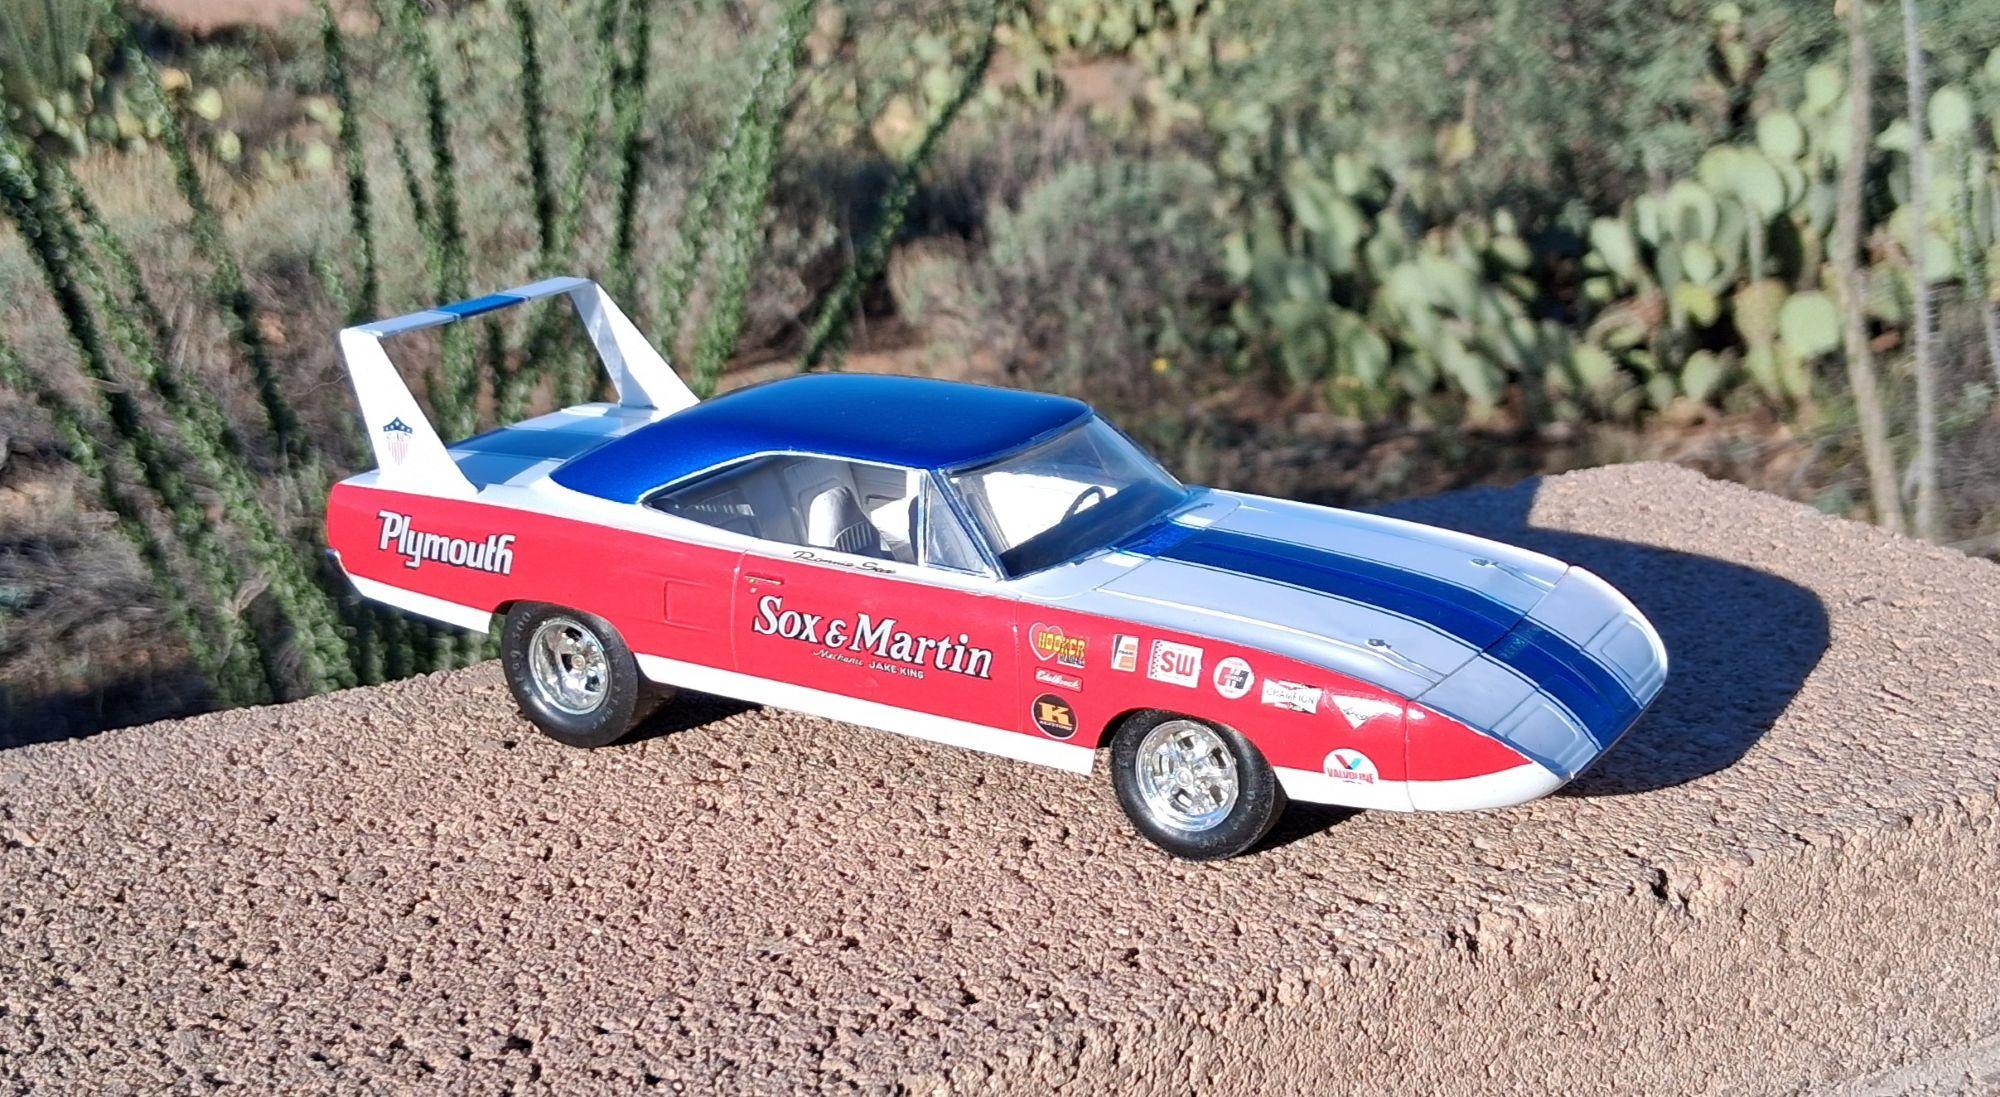
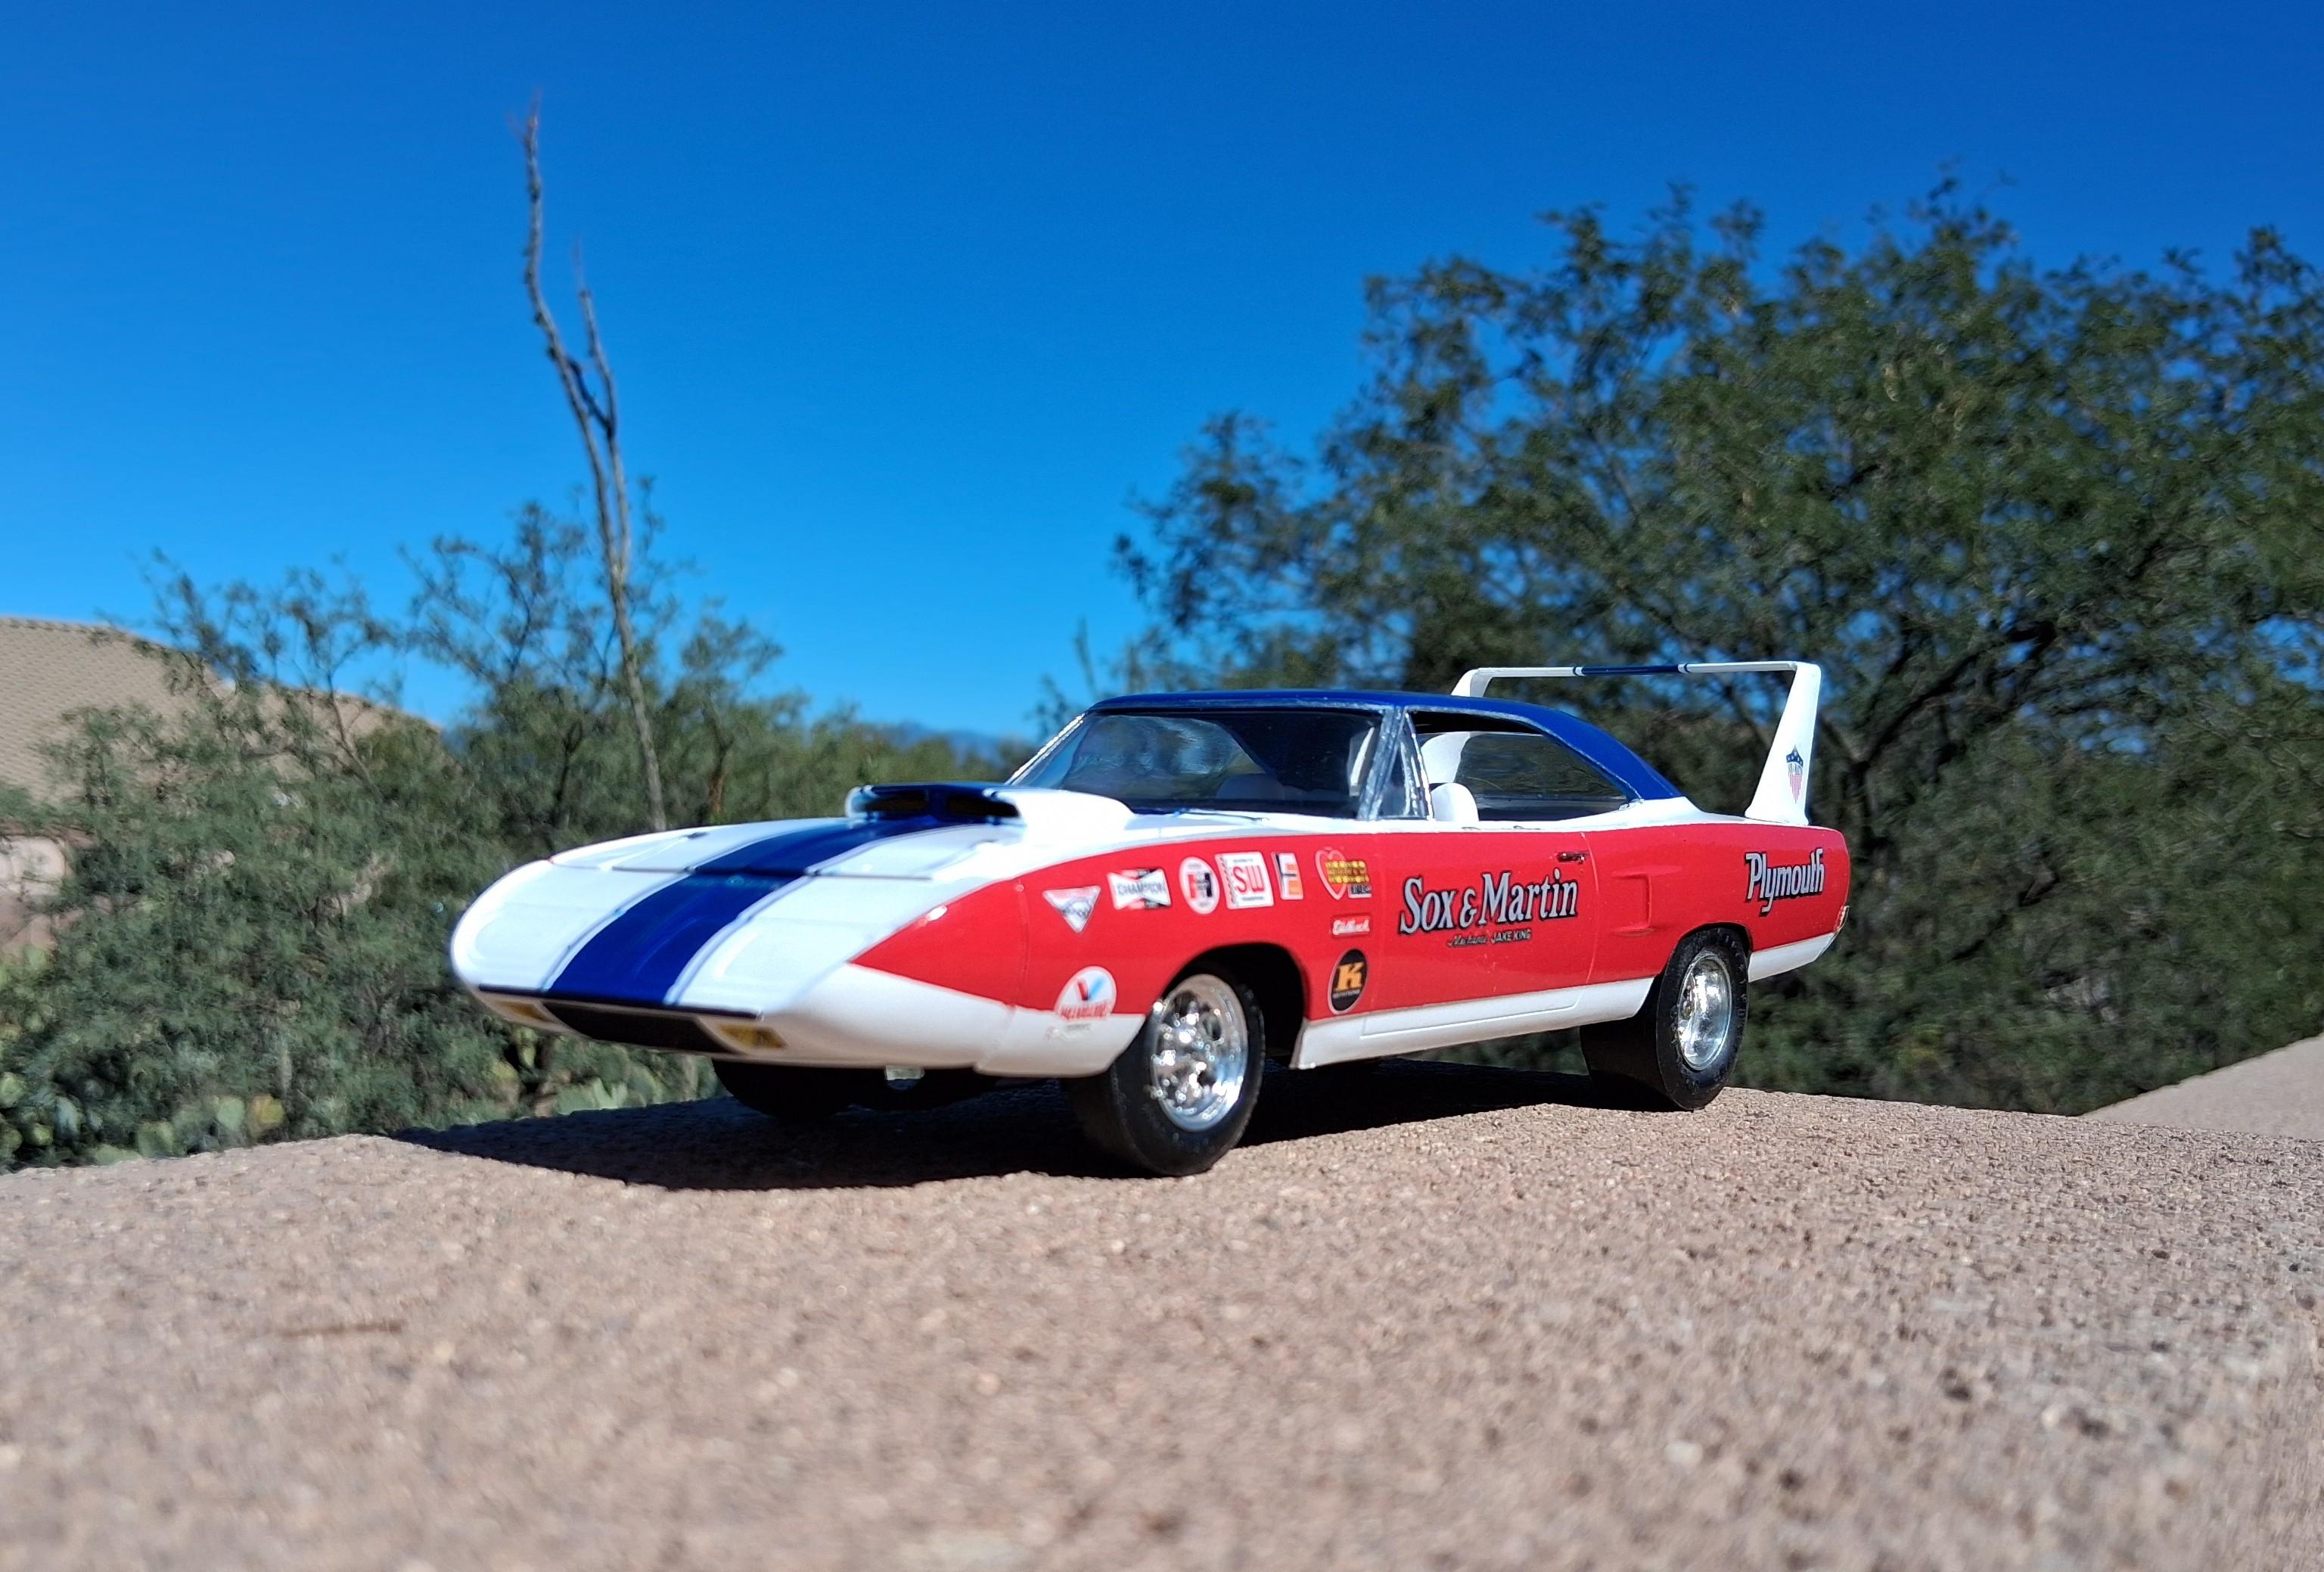
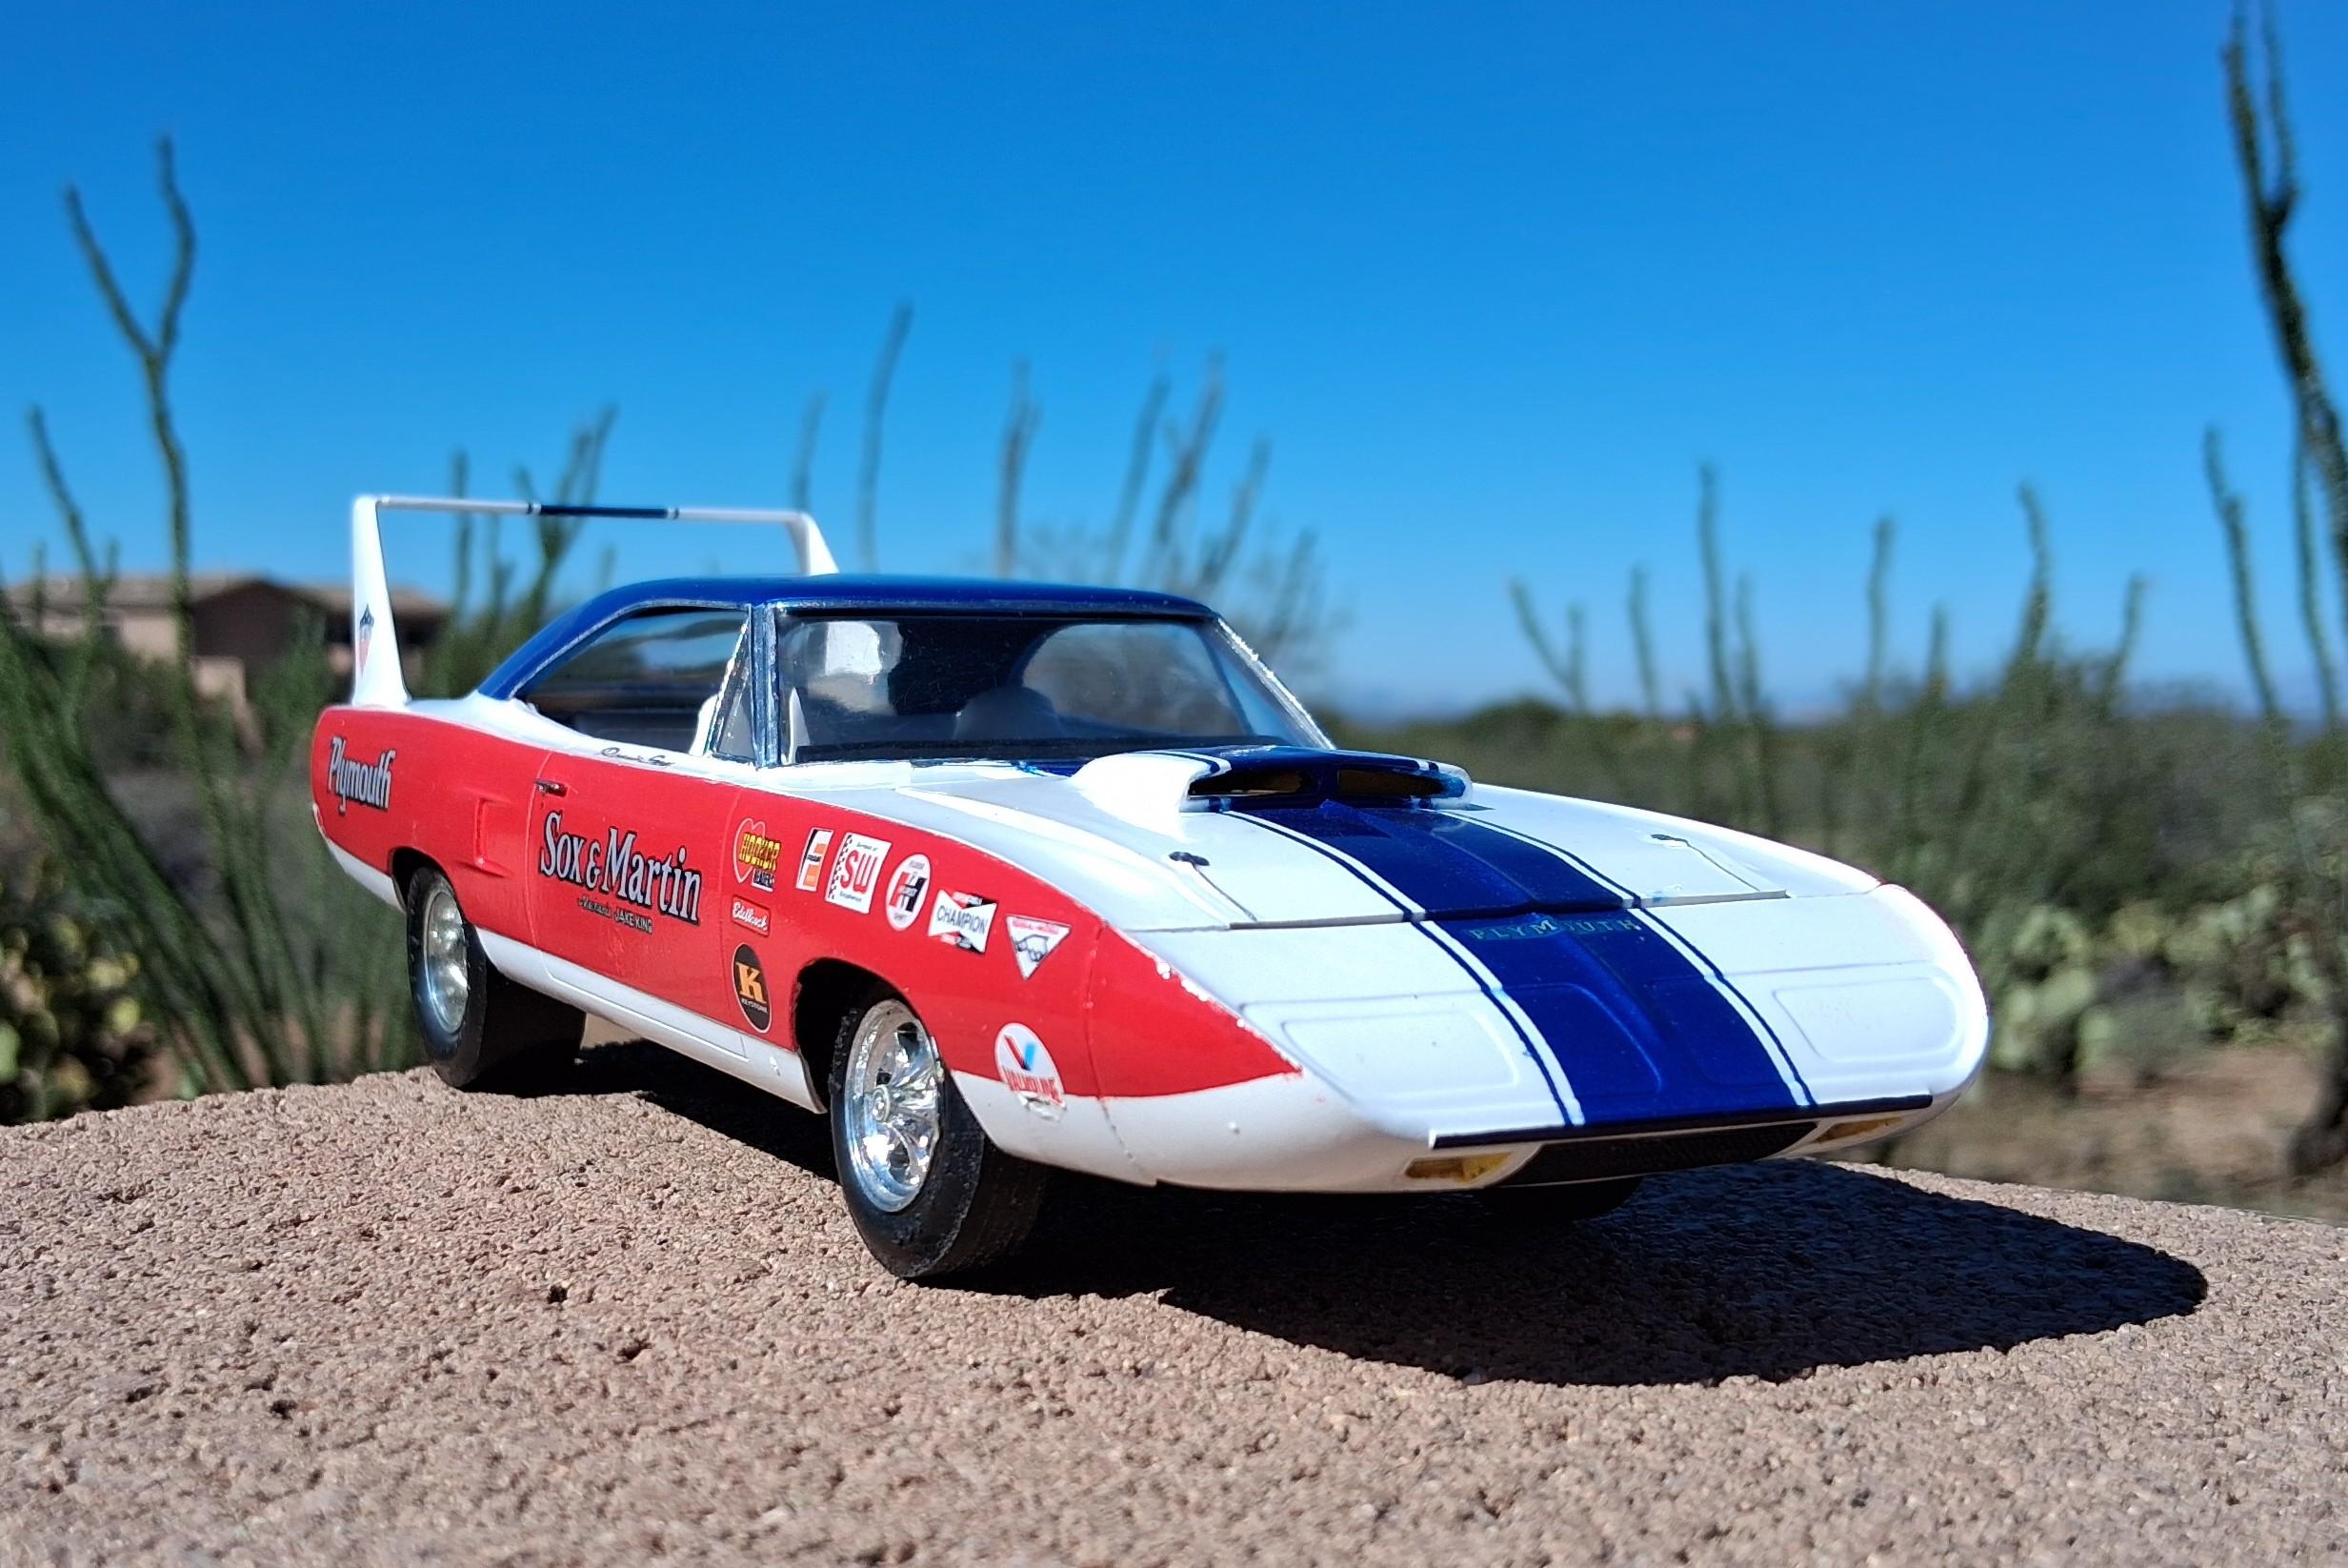
On the 1/1 I think the gold is painted pinstripe on top of the blue Appears to be about a 1/2inch maybe wide I;ll be cking out Microscale later today . I did see they had this one / but need to see what scale they say it is I did lay out some 1mm wide Tamiya tape and it MIGHT work , but deep down would prefer something just a touch narrower I have a pinstripe decal sheet from The Last Detail . but there's not enough stripes to do the entire car all the way around on the sheet . IF its even still any good I will try to take 2 exacto blades in one tool in an attempt to make my own and see what it comes out to as well -
Wonding if anyone has ideas on how , if even possible to replicate this gold pinstripe in between the 2 blue stripes Im thinking a .5mm wide tape if that is a size even avail take two Exacto blades mounted side by side and make my own from a gold foil type tape maybe? will even that be narrow enough?
-
I have them as well , And I will say they are NICE
-
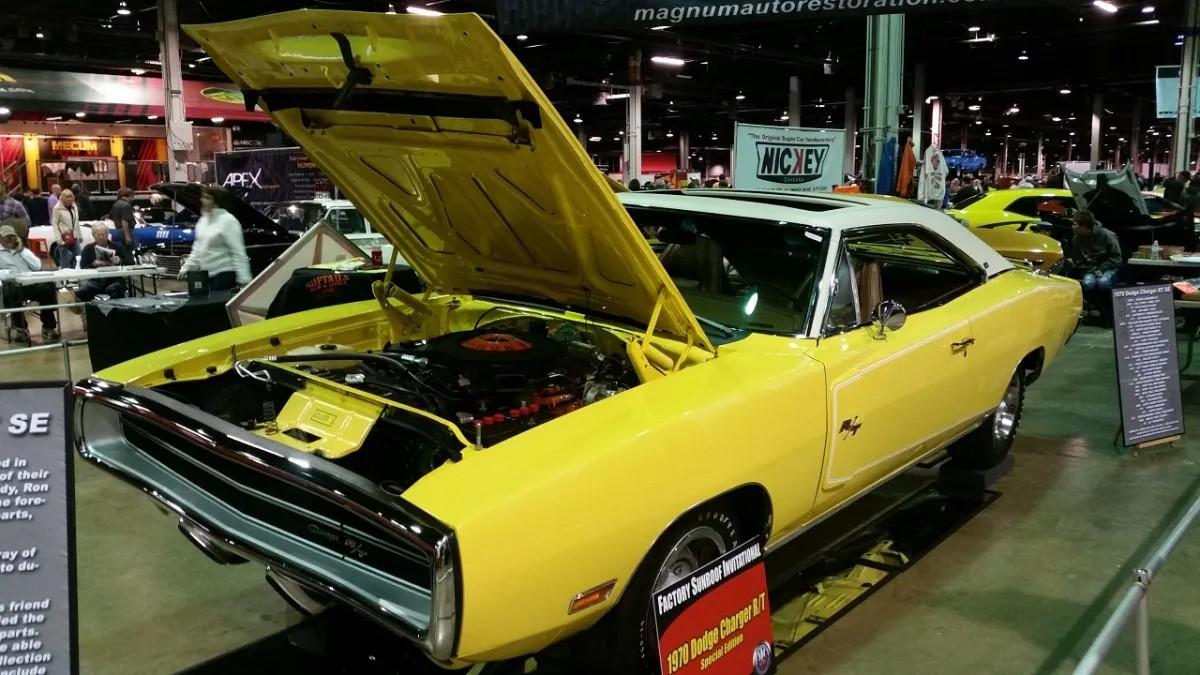
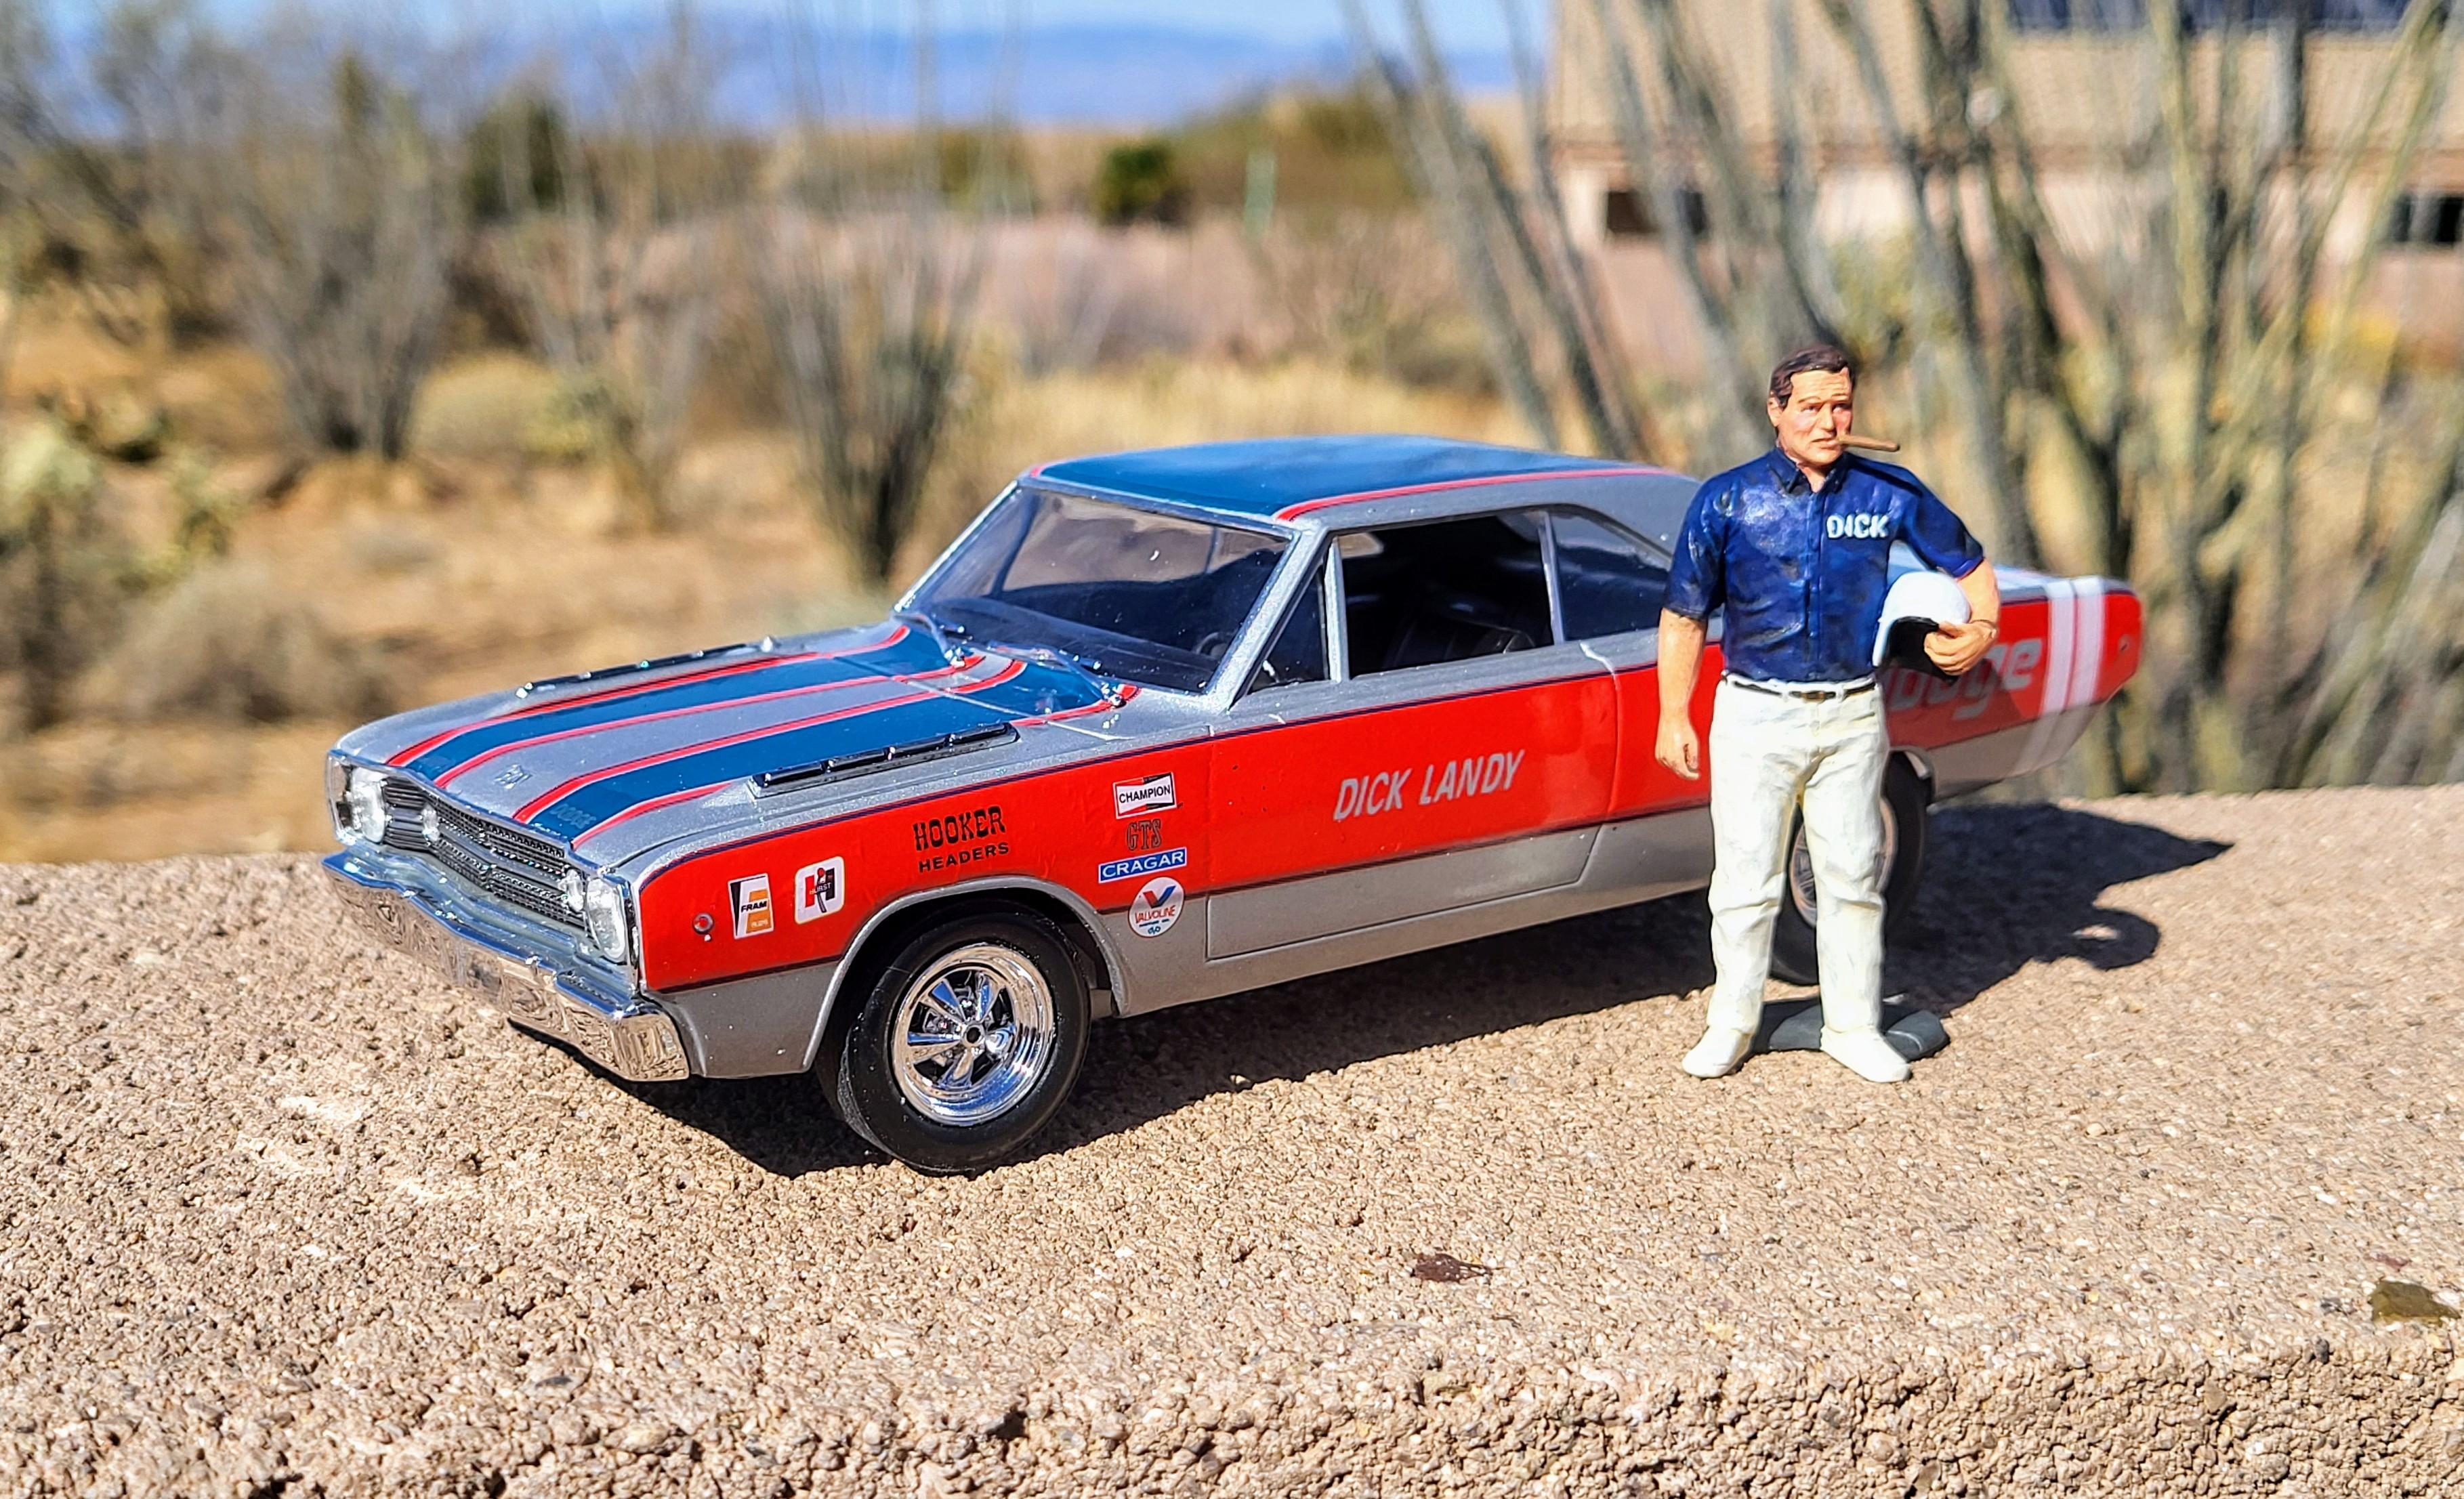
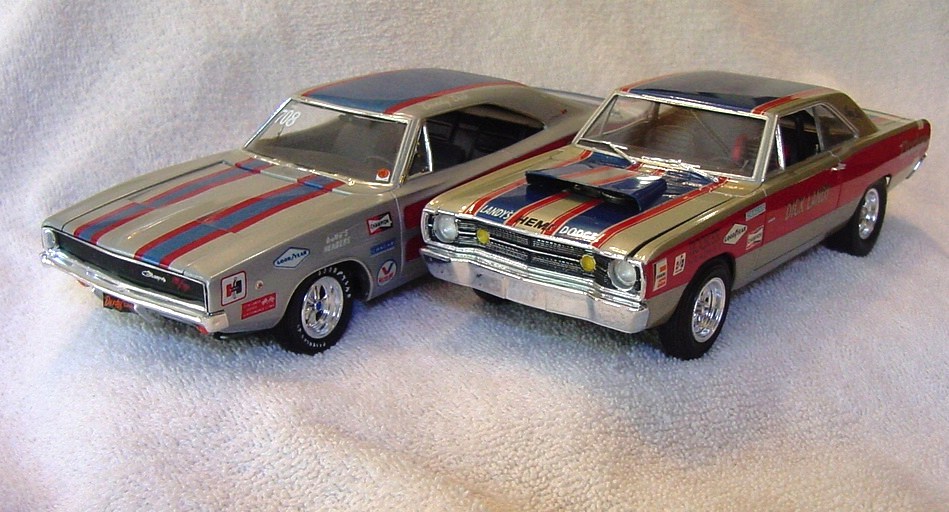
My Landy Charger is from an MPC annual IMO the door scallops on the MPC body are more accurate versus the Revell kit. But overall the Revell kit is much better
-
silver sharpie