Search the Community
Showing results for tags 'monogram'.
-
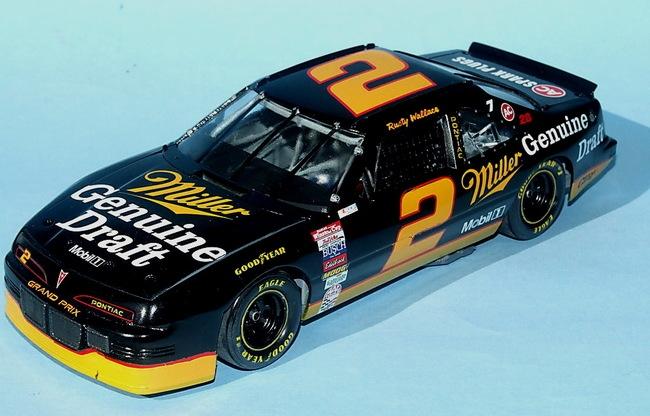
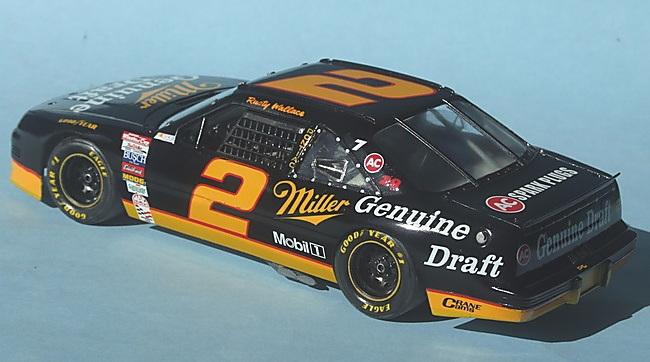
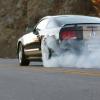
Monogram 'Dirt Devil' kit built straight from the box with the superb Powerslide decals. The 'Harvest Yellow' was mixed by eye with Tamiya acrylics and several light coats sprayed with my Iwata at low pressure, the black is (again) Tamiya acrylic but blasted straight from the rattle-can. Working still on the Wright Brothers Chevy, but also started stripping and re-working a '98 Taurus aswell, not sure which you'll see finished first out of those two. Thanks for taking the time to look and/or comment. Ian.

-
Well, I guess tonight I have some time, so it is catch-up time on a few things I have done over the past 18 months or so. As most of you agree, the venerable Revell / Monogram 427 Cobra kit is hard to beat. I have built many and I know if I live long enough, I will build many more. This car epitomizes raw unbridled power....what a thrill it must have been to drive one on the track in anger.....wind in your face, bugs in your teeth and huge amounts of power under your right foot. Sports Car road racing at its peak in the later 1960's. As much as I love the kit, I grow board easily with the same old colors and markings....so I thought what if I built a couple in the livery's of cars I loved from the era? First up is the Ferrari 250 GTO.....I love the look of chassis number 4153....in it's classy silver paint with the yellow hood stripe and numberless white rondals.......I built a replica of this car a few years ago and here is a shot of it at the 2014 NNLeast So here is the Cobra roadster done in the same style and color combination.....kind of like, if the team wanted to have a Cobra roadster in their stable......... This is the kit with opened doors and trunk done in colors of the team. Next, one of my favorite team color schemes from the 1960's were the Gulf Racing cars......I have the Fujimi Porsche and Ford GT in these scheme's, I have yet to build them though. I started, but haven't finished the McLaren MP4-12C GT3 The kit is the in the factory colors, but I have the Studio 27 decal sheet to turn the car into the light blue and orange striped Gulf car which I prefer. So here is the Cobra roadster done in the Gulf Racing colors.....Maybe some one raced one in this scheme, I don't know, but this is how I interpret how it would look done as a Gulf Car. I painted on the stripe and had all of the decals except the Gulf logo on the door......the first picture of the car without the hood on was taken before the Gulf logo decal arrived, so it is missing, but the decals arrived from Japan in time for the bulk of the pictures. And lastly, this is a shot of the McLaren MP4-12C with paint and decals, but a long way from complete.....but the colors just look so great on the car Thanks for looking.............
-
Hello. This is on my bench next.. To be another quick box stock, Posting to show how the kit looks and for tips and trick and just to get feedback I like the colour its molded in. I think I will keep it the way it is.. not perfect but its going to be a quick build. I any of you guys had any issues with this kit. a heads up would be great. Time to paint the chassis . Thanks for looking.
-
The old Classic cruiser kit, they can come out nice even if my plug wires are about to get burnt on the exhaust..
-
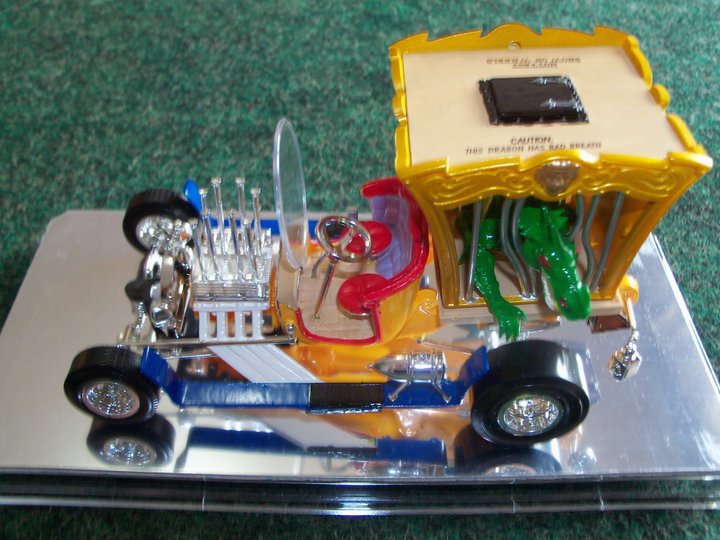
Hi all,,its that time of year,,back to school,,,when I was in school,,I always wanted to go on a bus like this. Used notebook liner from the dollar store for the windows,,added a bit of wiring/plumbing. Kit went together well. Thanks for looking.
-
 Hey guys this is my first post in a long time, but does anybody know where I could source some 8 lug dually wheels to go on the monogram f250 kit. I am looking to turn his into some sort of service truck or something, and I certainly can't use the 5 LUG wheels that came with the kit. Seriously what were they thinking. Anyways would a dually cab and chassis truck like the one I plan to build have a solid front axle, or the independent suspension that came on the truck. If it is supposed to be solid axle could I just fabricate one from styrene? Thanks.
 -
I picked up this kit of Monogram's '48 Ford Woody at a swap meet some time ago. Although opened, the guy assured me all the parts were there. Wrong! Thanks to Barkster for the tires, and I'm trying to make do with everything else. I should have known when I saw "wood" contact paper in the box for the sides. Anyway, I'm loving the detail of this kit, and it's going together nicely. I did make the mistake of gluing the frame parts together before I painted. Found out later I had cut the exhaust up to make it fit between the rails. When will I learn? Wired the engine, thanks to a good wiring discussion in the Q & A section. It's not perfect, but I enjoyed the challenge More later!
-
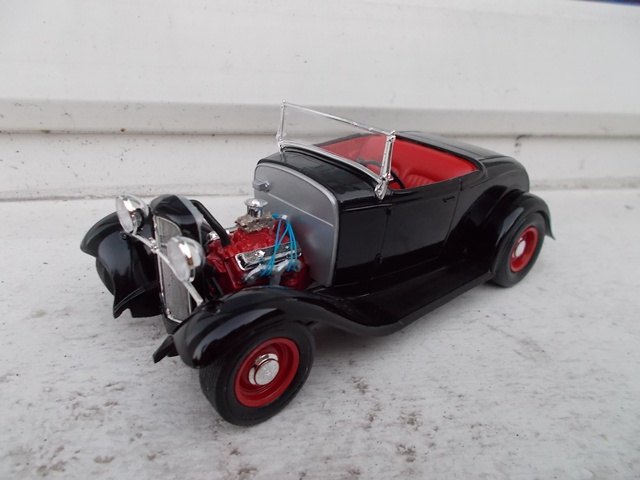
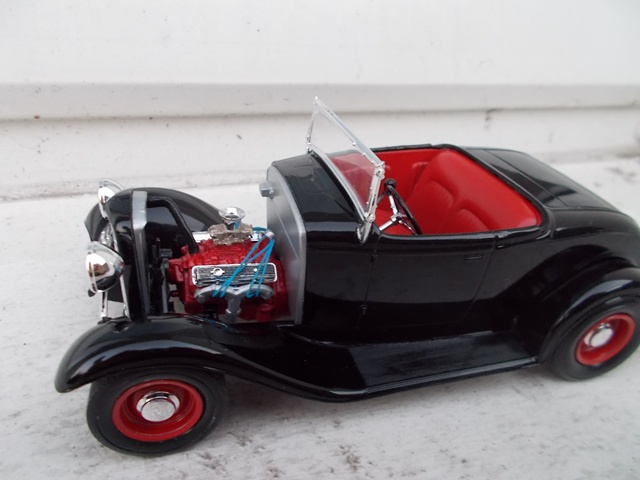
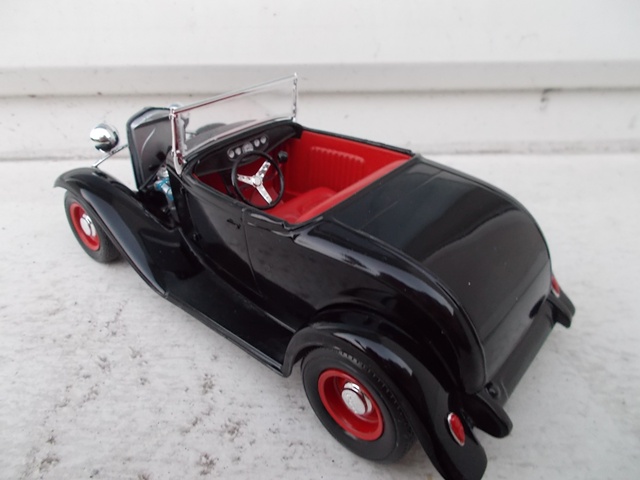
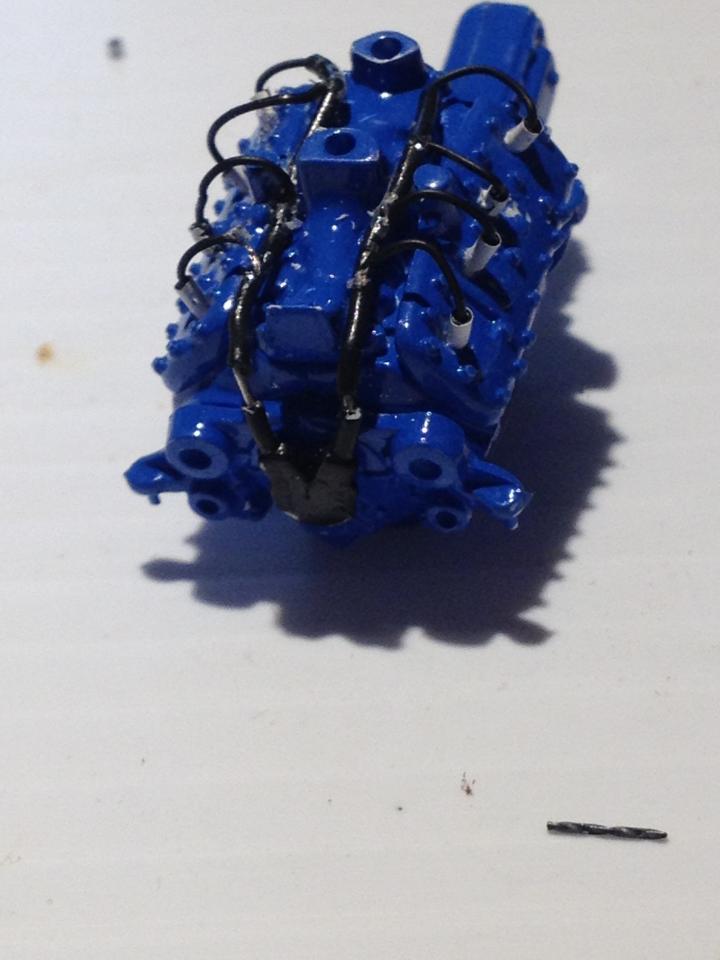
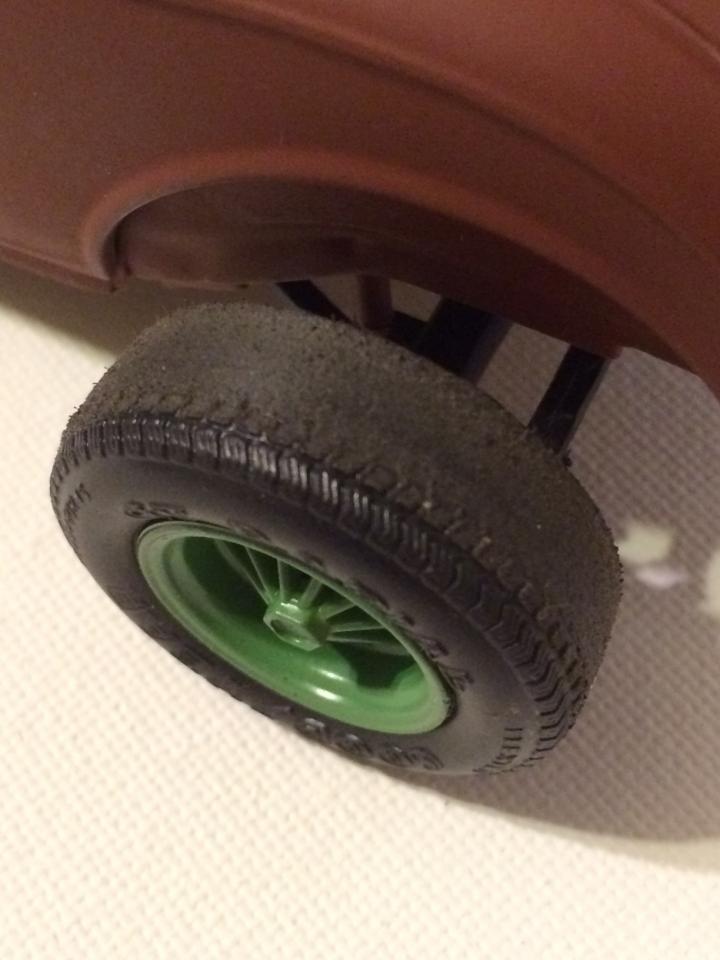
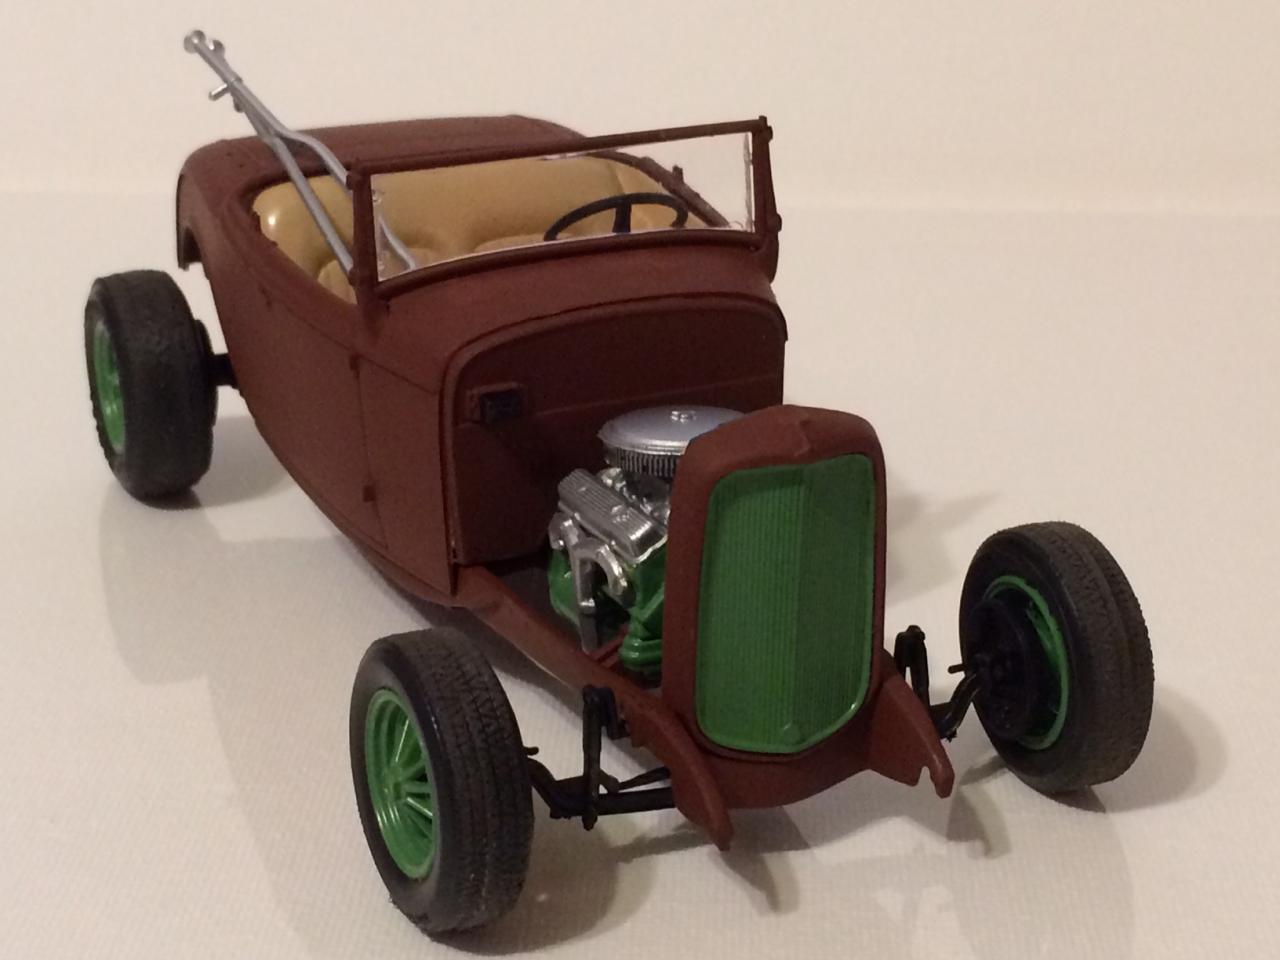
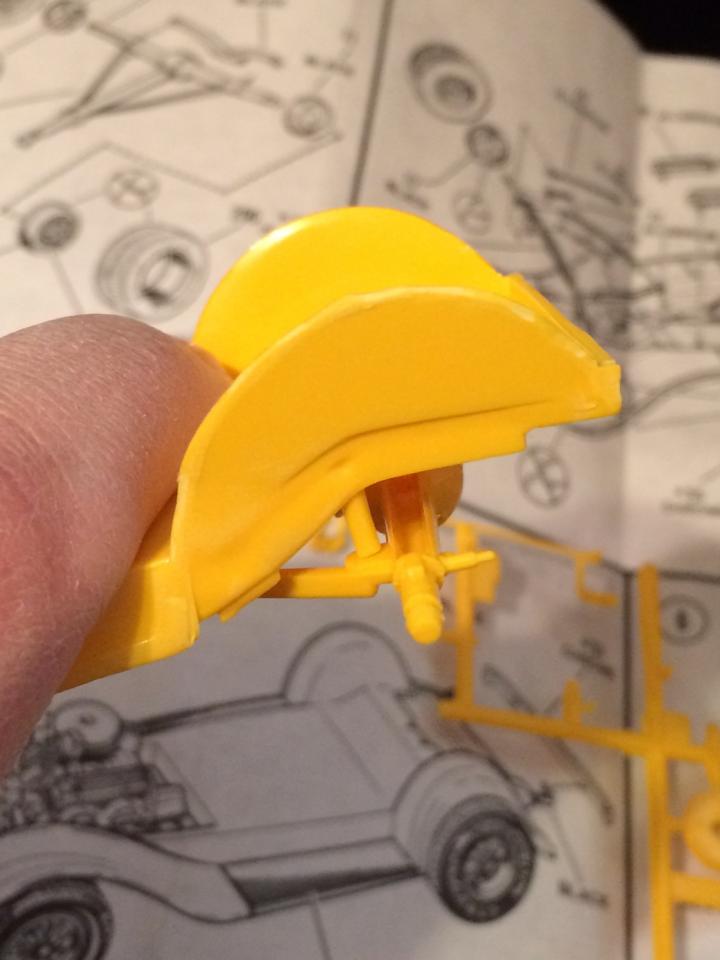
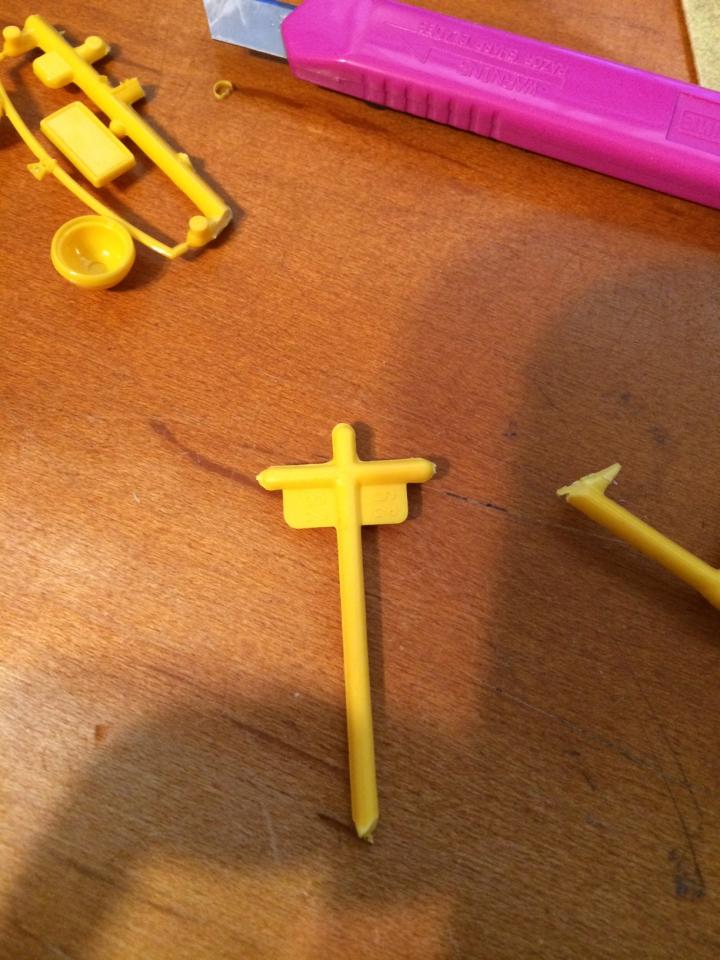
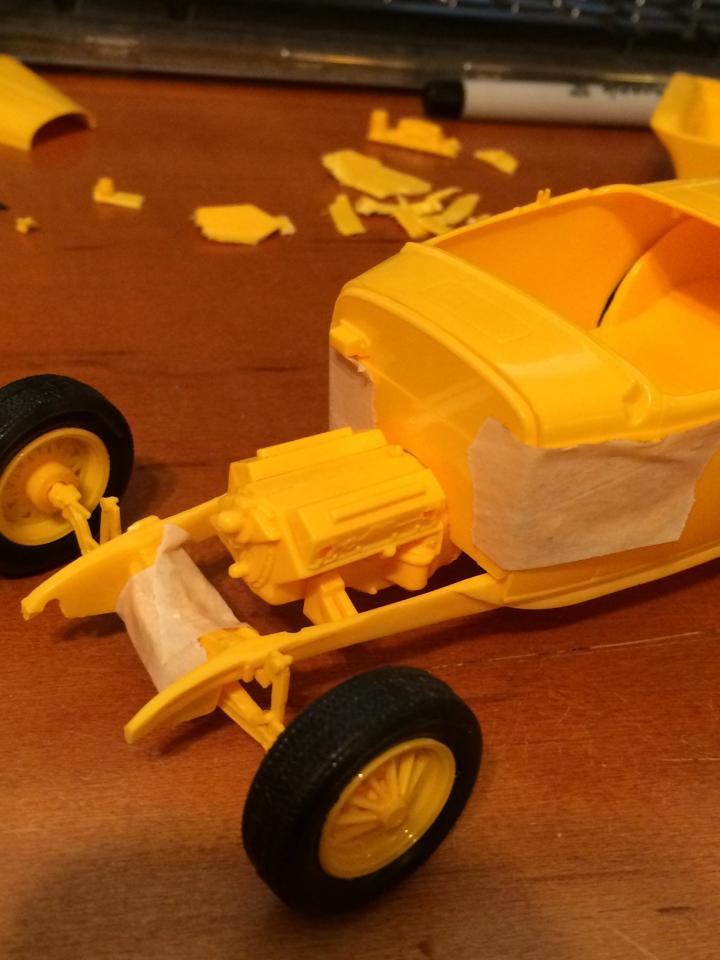
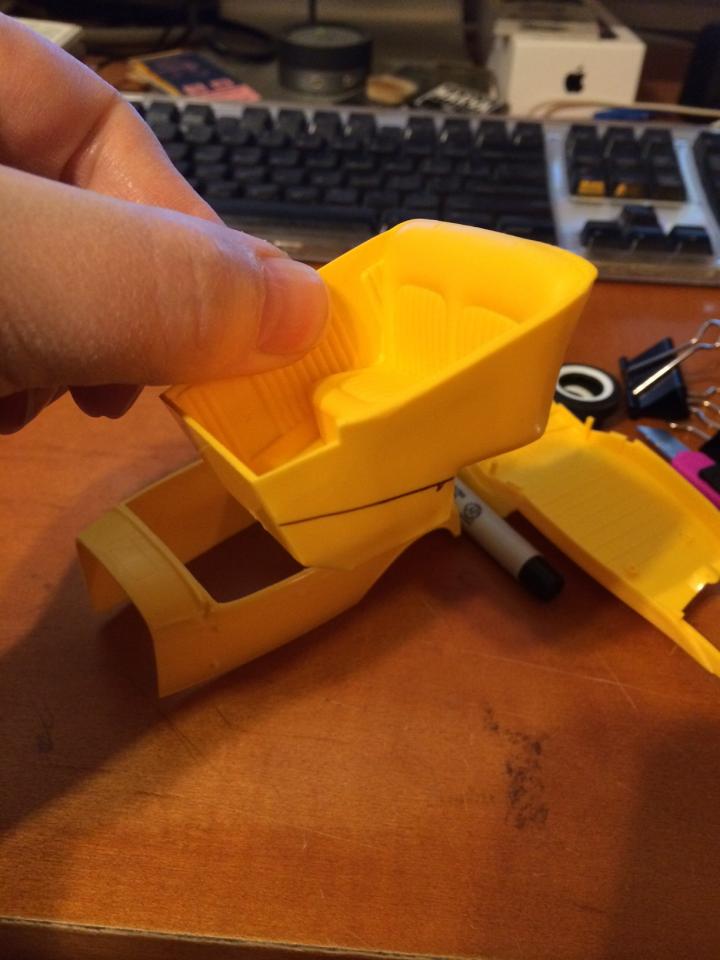
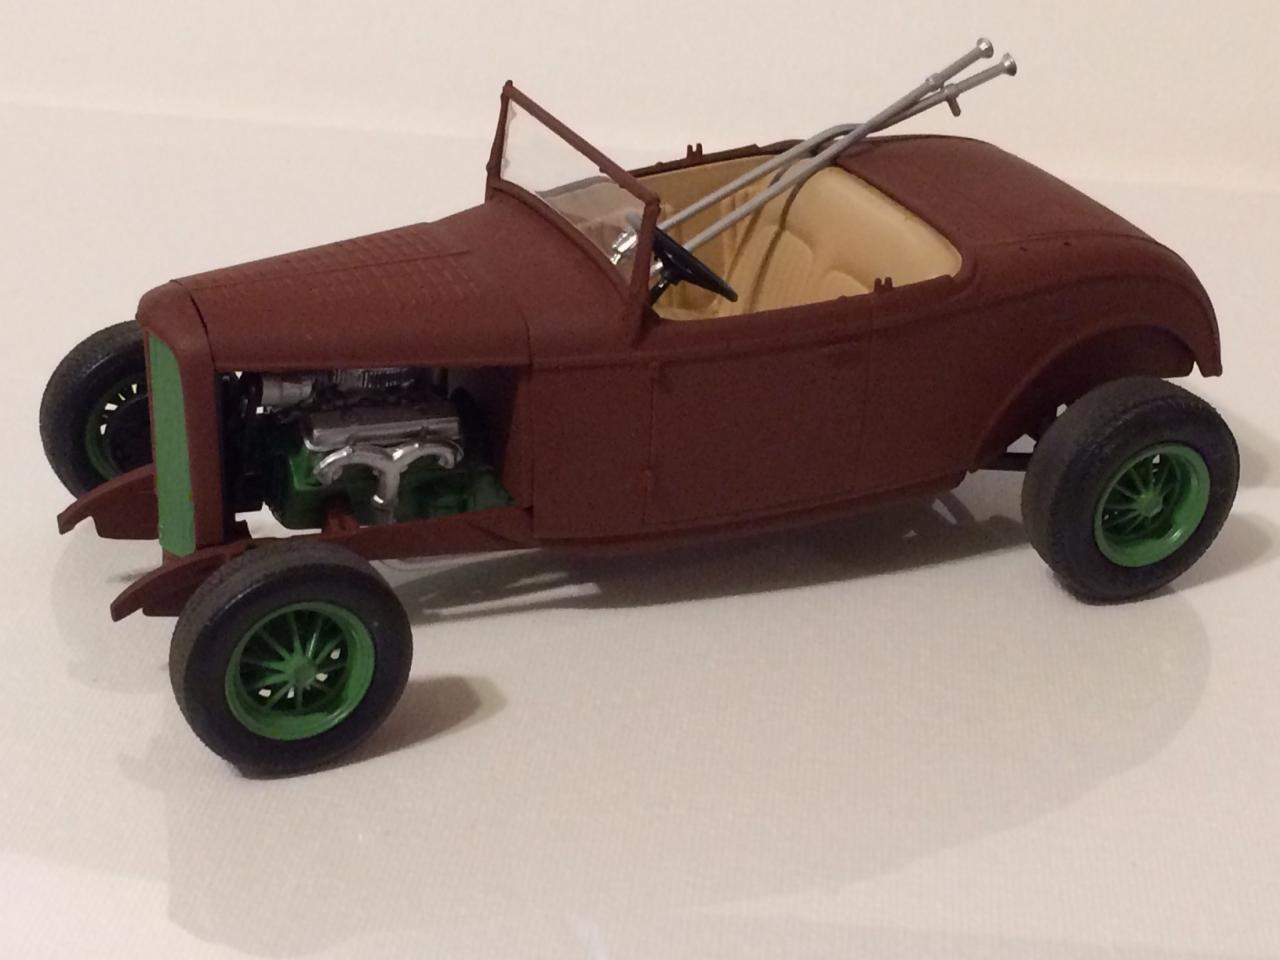
 This is an update to my original post of last year ( http://www.modelcarsmag.com/forums/index.php?showtopic=77263&page=2 ) OK, nearly a year later, I'm here to finish this Monogram 32 Ford project, and finish it in a day nonetheless. First off, I finally realized that the chromed tree of parts was included, however they have never been chromed. So I retract the statement in my original post that seller had clear coated them. You can see in the photo, below, it does look that way. I know that I'll need to trim the firewall and open up the area for the transmission and engine to fit through. So I clipped a little more than a 1/4 inch off the bottom of the firewall (the same amount of space the body is being lowered onto the frame) with nippers and enlarged the hole where the transmission will go through with a sanding drum bit on a Dremel tool. The body is set where I want it over the frame and the engine now fits through the firewall. Note that the seat tub is not in place yet. The seat tub will not fit since the ride has been lowered, so that will need to be modified. I used nippers to clip out the area I didn't want and cut around the tub. I saved the boot area where the shifter sits and will place it on the new floor. After trimming out the seat tub I sanded down the underneath so it was level and smooth. This is going to be a rat rod, so it doesn't have to be fancy. Below, the seat tub is cut and sanded all the way down tot he base of the bench seat. I made a new floor out of Evergreen sheet, glued it together and let it sit for about an hour. After the glue dried I trimmed out the excess Evergreen sheet, glued in the shifter boot and painted it.. I replaced the box shifter that was way too tall and replaced it with an older parts box one. I don't know where this kit originated from, but some things about it just didn't make sense; they went through the trouble to add a very nice cut glass design to the side mirrors (see below) but added a horrible pad and pin system for the rear suspension that just sits on top of each other, it doesn't even pop into it, it juts sits (see below). So in general, this kit was terrible, but it was a fun way to spend an afternoon on Easter Sunday. The distributor was molded in to the manifold and I honestly didn't feel like drilling it out then drilling out spark plug holes and putting a nice, pre-wired distributor in it. I would have liked to use the AMT Firestone whitewalls, but could not get anything to fit. The kits rims are ugly, yes. The wheelbacks were the type that snap onto the axle and I just didn't have anything else to make it work. The convertible top was missing when I purchased it, but I wouldn't have used it anyway. So this trash heap of a kit was built essentially in a day and there's a few parts missing, but I kinda dig the way it came out. Anyway, off to paint, well primer, it went. Since the parts that should have been chromed weren't, I just painted them what I wanted. Here's the finished product. [ attachment=61694:side.JPG] I bald the tires by attaching them to a variable speed drill and pressing them onto a sanding block. The exhaust pipes wouldn't stay glued in place so I thought why not just put them in the passenger seat like the owner just bought them down at the auto parts store. And yeah, the owner didn't get around to getting headlights or license plates either. Happy Easter, folks.
-
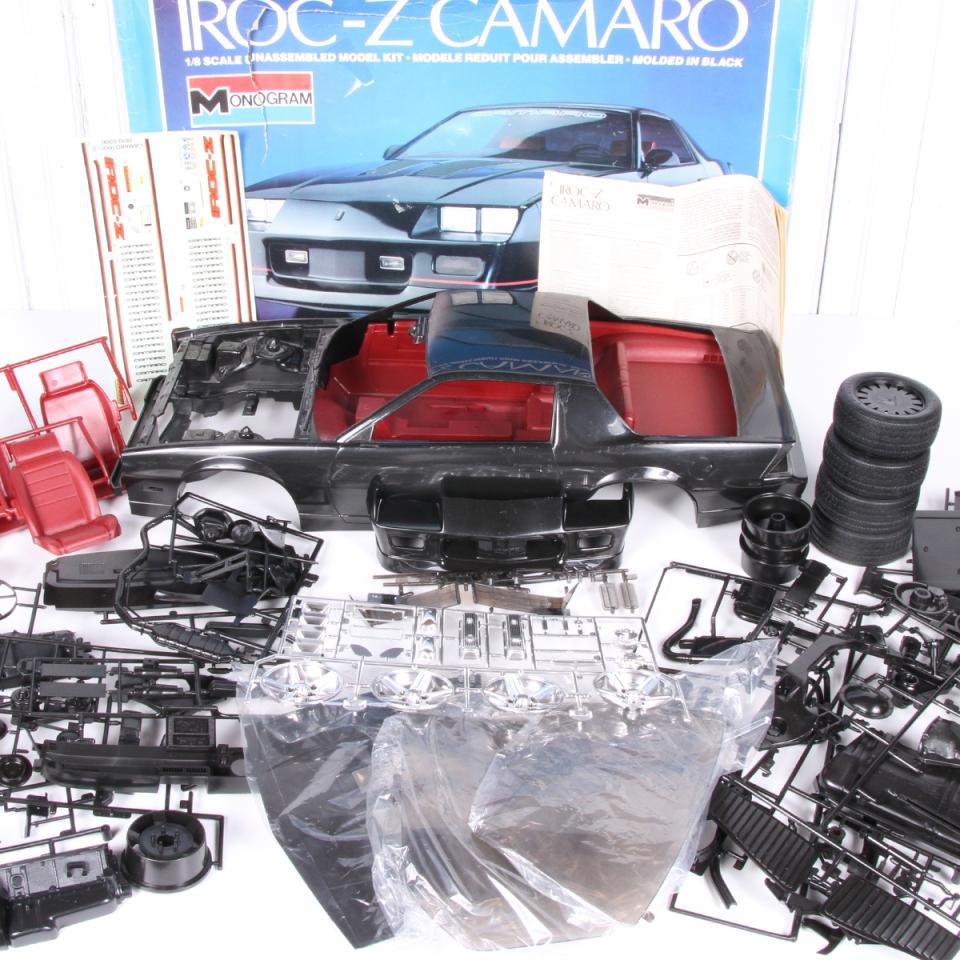
Just picked up a IROC-Z Camaro made by Monogram in 1985. The kit # is 2610. Don't see many out there. Anyone had this or know value?
-
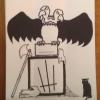
Whoa , this blew my brain up... I http://blogs.hotrod.com/monograms-badman-1955-chevy-gasser-comes-alive-at-sema-2013-94171.html
-
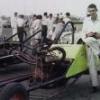
Does any caster do parts to build a clone of the blue beetle
-
This is the ancient Aurora kit, re-issued by Monogram in the 90s. It's actually pretty good plastic, with plenty of detail to work with. The opening doors, bonnet and boot bring their own issues, but the end result is rather nice compared to today's buttoned-up kerbside kits with aerodynamic under trays. As you can see, there's a fair bit of work to fine-tune the kit into a more accurate representation of the original classic, which is a truly beautiful, and very purposeful looking GT car. The windscreen is still not right -- it should be more upright, and the base is much more semi-circular, not the large rectangular cut-out Aurora gave us. Personally, I think all the shape issues in this area come from placing the firewall to make room for the operating door hinges, which mean that it's too far forward. The engine is nice, and a bit of time with wiring pays big dividends. Many thanks to Skip Jordan who has been nudging me to give this a try for a couple of years, provided invaluable reference resources, and acted as chief cheerleader along the way. I'm now going to go away and build something from a state of the art kit, out of the box, before I even THINK about tackling the Singer 911 kit-bash... bestest, M.
-
this gonna be stock may be ohter rims, have to make a cab cover for it
-
2012 is now here and I decided I better get going on a new fresh build. I picked up the old 1940 Ford Pickup which is an old tooling repop. The kit sure shows its age with molded in exhaust, pleated interior panals, and an old school engine. I decided to update this build kitbashing several parts from the 1937 Ford Good Guys kit. I stole the wheels, engine, interior panels, and complete chassis from the 37 kit. I have started test fitting parts together and have built the chassis to see how it lines up with the body of the truck. It looks like I will need to extend the frame a little to line up the wheel properly. I am removing the louvers from the hood. I prefer the a smooth look. Lots of filling to do on the inside of the truck bed.
-
It's now finished. It took bit over an year to complete, and original idea was to build it as simple and fast build... Well, something went wrong and it's now bit more detailed as the idea was... But anyway, it's painted with Revell's Enamel paint and spray gun. A bit of polishing, and BMF... Interior is built box stock, but otherwise there are some details added. Well, on to the pics, here is a link to WIP topic. http://www.modelcarsmag.com/forums/index.php?showtopic=37260&hl= More pics....
-
One more today, becaus i have time this T-Bird was a bad try to remove paint. From the beginning. i wanted to make this old monogram kit with opening doors in a color like biscuit. I think, that i have always bad luck with red plastic. after more than three color layers, always red will come thru the paint. "What doing, little Dominik?" I ask my self. straight in a bath of oven cleaner to remove the paint and wait 24 hours, there was the result: in places departed paint down to the primer. Bad, bad result. so i took my gun and painted like van Gogh a rusty, old look. Some dust and paint for rust and - ready.Put some new wheels and windshields in, new licenceplates and up for it on the track. It is tooo heavy i think, looks like a old ship in the ship graveyard...but it was a experiment and has also a place in my showcase. What do you think about? ...
-
this was a good kit. parts all fit well. was fun,not frustrating. i like these kind of kits. working on bathtub buggy now )