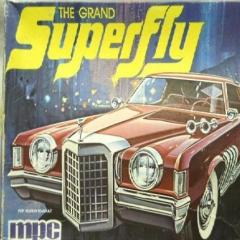
doorsovdoon Posted September 27, 2021 Posted September 27, 2021 Very basic kit this one so couldn't help doing some changes to it. I cut out the old screw bottom radiator support and found a better one in my spares, the radiator that comes with this kit is paper thin. The grill and bumper wasn't a great fit so I had to trim and clean up the front of the car to get it fitting nice. Being a one piece interior tub I've already got that painted up and finished. The clocks are decals I had in my spares stash which I stuck to some wood effect sticky back Fablon, and I've added some redlines to the tyres which came from the Revell '68 Charger, they were a nightmare to work with and almost got destroyed when applying them. Colour will be white with the blue decal stripes that come with the kit.
wrenchr Posted September 27, 2021 Posted September 27, 2021 Nice progress, I have one I want to build here soon as an altered wheelbase car.
1972coronet Posted September 27, 2021 Posted September 27, 2021 You've really got your work cutout for you with that ancient kit , @doorsovdoon ! Haha . Ne'er-the-less , you're building a fine example from that sow's ear - the thoughtful painting and careful choice of colours you've elected to employ certainly exhibit themselves wonderfully on this older-than-dirt kit . I like the revised / replaced core support & radiator combo ( looks like you've found a use for the pieces from the equally-ancient MPC et al. 1969 Charger / 500 / Daytona / Duke of Prunes kit . That Pontiac 400 looks quite nice as well . Funny how the interior-side shows an automatic brake pedal and console / shifter for the Super Turbine 300 ( air-cooled 2-speed automatic ) , with a 4-gear behind the actual engine ( an MPC trademarque of yore ) . The white-blue-blue combo is going to look fabulous !
Can-Con Posted September 27, 2021 Posted September 27, 2021 Gareth, here's a tip for you not many may know about. Those raised lines down the body of the car are not meant to be chrome trim. MPC actually molded them into the body so after paint, they could be scraped down to bare plastic to represent the dual pinstripe that was very common on this car. Looks like the body was molded in blue so if you sand down to reveal the strips before clearing or polishing it would go well with the blue interior. , , and people will be asking how you did those tiny pinstripes down the body. ?
doorsovdoon Posted September 27, 2021 Author Posted September 27, 2021 1 hour ago, 1972coronet said: You've really got your work cutout for you with that ancient kit Tell me about it! I spent a good hour or two re-shaping the front panel to fit the grill and bumper. The exhausts/prop shaft/suspension legs unit are so badly worn and full of flash I had a hard time working out what was part and what was sprue! Yeah, one thing that does bug me on older kits like this is the automatic setup interior with manual box, and the convertible tub in a hardtop. Yep, those old MPC '69 Charger kits are basically a box of parts for other kits, lol! The engine and box are probably the worst I've ever come across in a kit, basic doesn't come close, it's like Lego but someone shaved off the locking studs, Lol! 1
doorsovdoon Posted September 27, 2021 Author Posted September 27, 2021 (edited) 14 minutes ago, Can-Con said: Gareth, here's a tip for you not many may know about. Those raised lines down the body of the car are not meant to be chrome trim. MPC actually molded them into the body so after paint, they could be scraped down to bare plastic to represent the dual pinstripe that was very common on this car. Looks like the body was molded in blue so if you sand down to reveal the strips before clearing or polishing it would go well with the blue interior. , , and people will be asking how you did those tiny pinstripes down the body. ? ah, thanks Steve, I never noticed that! I wasn't planning on foiling the rubbing strips, now I see they never had them to start with! Thanks for the heads up, I'll sand them off completely, the kit is moulded in white. Edited September 27, 2021 by doorsovdoon
Zippi Posted September 28, 2021 Posted September 28, 2021 Great looking start. Crisp & clean looking intrior.
ozmodeler Posted September 28, 2021 Posted September 28, 2021 great detail work on the interior tub in what's a very basic kit. Looking forward to the finished article ,good work so far Gareth.
doorsovdoon Posted September 28, 2021 Author Posted September 28, 2021 Thanks guys. Yeah, the interior is actually pretty darn nice for such an old kit. The front seats actually look like seats and not a block of styrene with just the seat pattern on top. The dash is nicely detailed too, though I chose to put sticky back wood over it to look more real than just painting it brown. The steering wheel looks to be from the '69 to '71 model though.
doorsovdoon Posted September 28, 2021 Author Posted September 28, 2021 This kit has instructions in six different languages because it's important we all understand what looks like a piece of the sprue tree is actually a part for the build! xD "Part number 22 will look like sprue tree due to ridiculous amounts of flash, Don't Throw It Out!" Lol
doorsovdoon Posted September 28, 2021 Author Posted September 28, 2021 Got all my paint coats on today, just need to wait a few days for it to cure properly and I can polish it and add the decals. One small mod I did before paint was to open the intake vents up on the hood. 1
1972coronet Posted September 29, 2021 Posted September 29, 2021 5 hours ago, doorsovdoon said: This kit has instructions in six different languages because it's important we all understand what looks like a piece of the sprue tree is actually a part for the build! xD "Part number 22 will look like sprue tree due to ridiculous amounts of flash, Don't Throw It Out!" Lol And not a single one of the six is in Cymræg nor in Gælic ! Haha !
slusher Posted September 29, 2021 Posted September 29, 2021 Sweet interior and nice Chassis, Gareth..
doorsovdoon Posted September 29, 2021 Author Posted September 29, 2021 12 hours ago, slusher said: Sweet interior and nice Chassis, Gareth.. Cheers mate, I'll probably have this one in underglass by tomorrow.
doorsovdoon Posted September 29, 2021 Author Posted September 29, 2021 14 hours ago, 1972coronet said: And not a single one of the six is in Cymræg nor in Gælic ! Haha ! It's an outrage I tell you, outrage! xD 1
FLHCAHZ Posted September 30, 2021 Posted September 30, 2021 You've made a huge improvement to the hood. Looks so much better!
doorsovdoon Posted October 1, 2021 Author Posted October 1, 2021 On 9/30/2021 at 12:11 PM, FLHCAHZ said: You've made a huge improvement to the hood. Looks so much better! Thanks Chaz. It might have been open originally when the kit was new as it was very thin there, like flash almost.
doorsovdoon Posted October 1, 2021 Author Posted October 1, 2021 Engine bay detail added. I stuck a wiper motor, steering box and heater hoses in there along with a "better" radiator support.
doorsovdoon Posted October 2, 2021 Author Posted October 2, 2021 11 hours ago, TimJ said: Great job so far Gareth. Thanks, Tim.
doorsovdoon Posted October 2, 2021 Author Posted October 2, 2021 Finished this one up last night. Decals make it look more 70's than 60's so I'm guessing the real car never came with these stripes, but they do look good. Thanks for following along, I'll post more pics in underglass.
David G. Posted October 12, 2021 Posted October 12, 2021 I've already seen this in the "Under Glass" section but it's nice to see an unobstructed view of all the wonderful interior detail. David G.
doorsovdoon Posted November 1, 2021 Author Posted November 1, 2021 On 10/12/2021 at 12:28 PM, David G. said: I've already seen this in the "Under Glass" section but it's nice to see an unobstructed view of all the wonderful interior detail. David G. Thanks, David. Yeah, the interior is surprisingly very well detailed for such an old kit, especially for an MPC.
Recommended Posts
Create an account or sign in to comment
You need to be a member in order to leave a comment
Create an account
Sign up for a new account in our community. It's easy!
Register a new accountSign in
Already have an account? Sign in here.
Sign In Now