DrKerry Posted February 14, 2015 Posted February 14, 2015 Yeah, it really stinks, b/c I had really been planning to go 'til I realize this conflict had come up... We'll be thinking of ya!!!!!! Like I say, there's always next time. We ain't going anywhere!!!!! LOL
GoatGuy Posted February 15, 2015 Posted February 15, 2015 Great progress Scott. Looking forward to more of this.
Red rocket 10 Posted February 15, 2015 Posted February 15, 2015 Very nice Scott , I can't wait to see more.......... Leonard
futurattraction Posted February 15, 2015 Author Posted February 15, 2015 Thanks for the thoughts, Kerry. I also sing in a men's barbershop chorus and our annual show is that same day/night (two performance) that we've been practicing for, for the past several months... Thanks Dave! More to come. Thank you, so much, Leonard. It's great hearing from you. I'm glad to see you're back on your SS Camaro build.
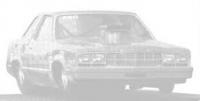
futurattraction Posted February 15, 2015 Author Posted February 15, 2015 To continue progress on my wheelie bars, I need to check fit under the car. To do that, I had to reattach the chassis-side 4-link brackets, which I prematurely installed quite some time back, only to discover that they really needed more gluing surface than what the cast-in-place guides offered. Last night added some thinned-down .040"x.040" strip to provide more surface and strength. Sorry the pic isn't a little more in focus but I think you get the idea. With the brackets installed. As I said earlier, there's no room at the inn under here. The tire/wheel assemblies are just floating on the rear end so there's actually a bit of latitude in spacing everything, but not much... While it's not bad, I'm not 100% happy with where the ride height is at at the present time. I am thinking about building another set of shocks with shorter springs, then space the mounting as necessary to get me where I want it to be. Wall to wall tire... Thoughts/comments welcome. Later!
DrKerry Posted February 15, 2015 Posted February 15, 2015 Looking good Scott, I agree with just a tad lower ride height..... All in all looking great!!
gasser59 Posted February 15, 2015 Posted February 15, 2015 So glad you're back at this one Scott. Keep it going.
Mooneyzs Posted February 15, 2015 Posted February 15, 2015 Oh my!!! This is looking great. I love seeing the rear end in. That is some mighty fine work brother. Glad to see more progress on this. Can't wait to see what you show us next.
Nitrozilla Posted February 17, 2015 Posted February 17, 2015 Scott, that just looks plain ol' flat out mean to the bone. I see how shortening the shock springs might help as long as the wheel wells cooperate. It looks like the top of the wheel center would be at the same level as the bottom of the fender too. I look forward to the next installment.
futurattraction Posted February 17, 2015 Author Posted February 17, 2015 (edited) I'm glad we see eye to eye, Kerry! Thanks Brad. I'm glad to be back on it, too. Hey Chris... Thanks brother. I'm pretty stoked about how it's shaping up. I totally understand what you're saying Joe. There's a fine line between settling the body down over the tires a bit more without contacting the inside of the quarters, while still maintaining at least a smidge of separation between sidewalls and the frame/suspension. I've probably got a max of about .080" to work with before the tires are touching the tubs. IF I can get it down .060" I'd be very happy. Don't know if it'll happen or not. Haven't had much time to work on it the last couple nights but did succeed in finishing the ends of what would be the axles on a 1:1, so you can't see the aluminum tubing and raw end of the axle/hat assembly any more. Looks much better and will post a pic of that next time. Edited February 17, 2015 by futurattraction
Blake Posted February 18, 2015 Posted February 18, 2015 OMG.... what great job on that Fairmont. First I was surprised to even see a Futura, then as I look through the pages, I became painfully aware of just little I know about building model cars. Thanks for sharing this build, I am truly in awe! Can't wait to see it finished.
cobraman Posted February 19, 2015 Posted February 19, 2015 I am really liking this build. Can't you just let some air out of the rear tires ? : )
Magic Photos Posted February 21, 2015 Posted February 21, 2015 Scott great work on the car glad to see you building on this again. I need to talk to you about a few things later.
futurattraction Posted March 24, 2015 Author Posted March 24, 2015 I’ve made a bit more progress since I last posted. I got “caps” added to the ends of the axles so the aluminum tubing of my axles will no longer be visible and represents a much more finished appearance. And this pic shows the wheel studs and nuts I've added. The wheels will unbolts from the axles - at least at this point. As you may recall, I had worked on the upper tubing for the wheelie bars. As it turned out, I had to reduce the distance between the upper and lower tubes to create clearance between the underside of the trunk floor and the upper tubes. No wheelie bar tunnel, here... Thankfully, it wasn’t a major undertaking to remove the spanners between the two, thought I've now got some extra cleanup to do on the tubes. Interestingly, it wasn't until I looked at my pictures that I realized that I either hadn't glued the spanner to the upper tube or it was so lightly glued that it came loose, as seen here. I'm much happier with the ride height, as seen in this shot. These two shots also show a detail I added to the rear deck spoiler that I'm very happy with. I had some photo-etch brackets made that help support the underside of the spoiler. This underside shot shows how closely things fit and also the coil-over shock spacers I used to establish the ride height. This is just kind of a cool angle. I have photo-etch spill plates that I will add when I'm much closer to being finished with the body. And another: I plan to fab some 1/16th aluminum tubing 4-link bars that will taper at the ends to replicate the weld-in threaded tubing adapters. Those, and getting repairs made to the front of the chassis so I can actually get this contraption to set on all fours are a couple of my upcoming projects. Comments welcome!
tyrone Posted March 24, 2015 Posted March 24, 2015 Just looked at this again..... the 2nd pic and the last pic are just deal breakers..... keep it coming...
cobraman Posted March 24, 2015 Posted March 24, 2015 Very nice. One of my favorite builds that are going on now.
Magic Photos Posted March 24, 2015 Posted March 24, 2015 Wow Scott looks great. Love the stance great work thanks for sharing.
Mister Twister Posted March 24, 2015 Posted March 24, 2015 You're knocking it out of the park Scott....Looks great!
Recommended Posts
Create an account or sign in to comment
You need to be a member in order to leave a comment
Create an account
Sign up for a new account in our community. It's easy!
Register a new accountSign in
Already have an account? Sign in here.
Sign In Now