Bennyg Posted August 27, 2013 Posted August 27, 2013 Very cool. I plan to build an aoshima version so it like my own 1-1 version. Cool back story as well. Ben
heptoman Posted August 28, 2013 Author Posted August 28, 2013 Okay, next step: I need to tint the windows. I was a good forum member and searched, and found the Big Three suggestions: RIT, Spray, and real window tint. But, Tamiya has provided a mask for the window framing, and that adds to my situation and concerns. 1. RIT dyes the WHOLE piece of plastic, unlike a 1:1 tint job which coats the inside of the glass only (I'm a striving perfectionist...want it to be just like the real one). 2. I'm not confident with my spray painting skills - I'm afraid I'd botch it with overspray (and I've also read the comments about Testor's not-so-great quality). I don't have spare windows hanging around to test, either. 3. Real window tint: too thick???? So - what to do, and what order? Should I mask and paint the trim, then tint, or opposite? Your thoughts?
Bill Eh? Posted August 28, 2013 Posted August 28, 2013 I love the story-telling style that you have used to convey your build progress. Everything looks super thus far. As far as window tint. Try "Future" or as it is now called in Canada, "Pledge with Future Shine". This could be coloured with food colouring and brushed or sprayed on the interior of the window parts. If sprayed on, just make sure to clean out the airbrush immediately after. Test it out on a clear section of sprue runner from the kit. If you are unhappy with the result, it will clean off with Isopropyl Alcohol. Worth a try. Good luck with the rest of the build. And as Tom said, there are a number of individuals on the Forum who appreciate all good builds. I am kind of a Tamiya fanatic myself.
nhra1625 Posted August 28, 2013 Posted August 28, 2013 I have a can of VHT Nite Shades and I used it on my 1:1 cobalt tail lights and it is nice. I can try it on some spare model class and show you how it comes out
Foxer Posted August 28, 2013 Posted August 28, 2013 It's good to see this getting built to see how the kit is. You're doing a great job .. on the build and documenting the kit. Building a kit of a car you own is really fun ... what I get hung up on most of the time. You'll have to throw us a shot of your 1:1 BRZ.
heptoman Posted August 28, 2013 Author Posted August 28, 2013 It's good to see this getting built to see how the kit is. You're doing a great job .. on the build and documenting the kit. Building a kit of a car you own is really fun ... what I get hung up on most of the time. You'll have to throw us a shot of your 1:1 BRZ. Thanks! Don't worry - I'll have some comparison shots with the two together once I'm done, which should be about two weeks.
heptoman Posted August 29, 2013 Author Posted August 29, 2013 Update 29.08.2013 An update. Sorry for the blurry pictures - I'm now using an actual camera and trying to figure out settings. The camera also doesn't give a review of the picture once you take it, and I didn't notice it was blurred until I had moved on. Oh well. So I researched a bit for window tinting, and just decided to use Tamiya Smoke spray on the tint. I tested it on an old Countach model that I'm planning on redo-ing and it came out better than I thought. So, step one for windows, masking. Here is the rear window masked and ready to go. After painting and removing the mask. A couple of bleed through spots but that's easy to clean up. Cleaned up: Another shot (better): Front/side windows masked part one: Complete masking: Painted, mask removed. A couple more bleed throughs but it was better than the back window - until I noticed that the mask covered the top too much. I'll have to do some fine touch ups tonight. I thought I took more pictures but apparently that was it. I'll take more this afternoon. On the docket for today: finish window trim edging and then first light coat of smoke (of a great many).
heptoman Posted September 1, 2013 Author Posted September 1, 2013 Update 01.09.2013 Hey everyone, sorry about the lack of updates. I wasn't able to pull pictures off the camera on my laptop for some reason. Problem resolved, for now. So this update is a few days worth of work. Here is the exterior, masked for painting the weatherstripping trim. Windshield and side windows, after painting and masking the rearview mirror connection. Both windows, masked for tint job. Interior. Windows after coat one of tint: More updates after church.
jrherald420 Posted September 1, 2013 Posted September 1, 2013 Is the body painted a Flat or Semi-gloss?
heptoman Posted September 1, 2013 Author Posted September 1, 2013 The factory color is "Dark Grey Metallic" so yes, it's SUPPOSED to be glossy. Earlier I expressed my doubts at Tamiya's suggestion to use "Dark Blue Silica" to replicate the color. I might do a wet sand, mask up the engine bay and do another few shots of Mr. Super Clear.
Stanislove Posted September 1, 2013 Posted September 1, 2013 Great detail on the engine part. Keep up the good work!
niteowl7710 Posted September 2, 2013 Posted September 2, 2013 The possible reason the paint didn't come out the right color is that Tamiya Mica paints have to be put over a base coat of gloss aluminum TS-17, painting it over just primer causes the flat blah you've come up with here. The Micas (there are a whole slew of them) are sort of a tinted metallic rather than an actual paint color.
heptoman Posted September 4, 2013 Author Posted September 4, 2013 Great detail on the engine part. Keep up the good work! Thanks! Work's been a bit slow though the past few days. Hope to pick it up again tonight or tomorrow.
heptoman Posted September 4, 2013 Author Posted September 4, 2013 The possible reason the paint didn't come out the right color is that Tamiya Mica paints have to be put over a base coat of gloss aluminum TS-17, painting it over just primer causes the flat blah you've come up with here. The Micas (there are a whole slew of them) are sort of a tinted metallic rather than an actual paint color. Ugh. Well, lesson learned for the second one. (I think I decided last week to go ahead and make another one later). Although the paint doesn't look like the real version, I do think it's pretty cool looking, in its own right. Update 01.09.2013 #2 (I wasn't able to get this copied from my other forum on Sunday, but here it is....) Rear view mirror. Small and blurry, sorry...but painted, ready for metal transfer for the mirror. After metal transfer: Same process for side mirrors: And after: Body with mirrors: Rear view: Top of body masked for more trim painting: Tonight: painting headlights and rearlights, detailing engine bay, touching up body. Tomorrow: possibly final assembly!
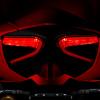
heptoman Posted September 4, 2013 Author Posted September 4, 2013 Update 04.09.2013 Hey everyone, update time. Got some detail painting done last night. Front and rear lights, painted, assembling tonight. Windshield with antenna decal. And body after a few touch ups. Going to wet sand tonight and apply last coat of clear. Also, working on wheels tonight. Getting near the end!
Tom Geiger Posted September 4, 2013 Posted September 4, 2013 I love this build. Tamiya kits go together really well, so this should be a superb build. I love that they gave you paint masks for the glass. I remember having that on a Fujimi Samurai to mask off the glass on a clear convertible top. They worked very well. And now I'm working on a Lindberg Dodge Caravan that doesn't come with masks, so I'm struggling with making my own. A bit more work than I signed up for on a snap kit! As far as the shine on your paint job, take the body outside and compare to your 1:1 car. Many modelers are looking for a shine that's way beyond what a real car reflects. If it matches your 1:1's shine, it's perfect.
niteowl7710 Posted September 7, 2013 Posted September 7, 2013 (edited) Seeing that the wheel painting was going to take place a couple of days ago, this might come too late, but Tamiya gave advice for replicating the alternating silver and black of the wheels here (page is for the Toyota 86, but the BRZ has the same wheels)http://www.tamiya.com/english/products/24323toyota86/index.htm The same technique would also work for the wheels in the Aoshima kits should you find yourself getting into a "Boxer Twins" building frenzy - with 6 kits out there, and three more pending these may be the most kitted vehicles in recent history. Edited September 7, 2013 by niteowl7710
martinfan5 Posted September 7, 2013 Posted September 7, 2013 Seeing that the wheel painting was going to take place a couple of days ago, this might come too late, but Tamiya gave advice for replicating the alternating silver and black of the wheels here (page is for the Toyota 86, but the BRZ has the same wheels)http://www.tamiya.com/english/products/24323toyota86/index.htm The same technique would also work for the wheels in the Aoshima kits should you find yourself getting into a "Boxer Twins" building frenzy - with 6 kits out there, and three more pending these may be the most kitted vehicles in recent history. Plus five more in the stash
Modelbuilder Mark Posted September 10, 2013 Posted September 10, 2013 Well, I am waiting to start my Tamiya FRS after I get the Aoshima version as well, that way I can cast a LHdrive for the Tamiya as well. Looks great so far.
niteowl7710 Posted September 10, 2013 Posted September 10, 2013 Well, I am waiting to start my Tamiya FRS after I get the Aoshima version as well, that way I can cast a LHdrive for the Tamiya as well. Looks great so far. The Aoshima kits, particularly the ones with the engine, so thoroughly stomp the Tamiya kit in every way conceivable, it's not even worth bothering IMHO.
Modlbldr Posted September 10, 2013 Posted September 10, 2013 That is simply a beautiful job you are doing on the BRZ. I can't wait to see it completed. Later-
heptoman Posted September 11, 2013 Author Posted September 11, 2013 (edited) Thanks for the comments everyone! Hey everyone, sorry about the lack of updates - it's been busy around here and I've been forgetting to snag pictures of the small amount of work we've been doing. Anyway, here are the wheels, which were a huge PITA (I did use the method Tamiya suggested but the process still sucked): You have to paint the whole wheel and scrape the paint off where you want chrome. Mind numbing, tedious work. Here's the 95% completed engine bay (battery is missing a decal). Headlights are assembled also, but it's hard to see that in the pic. The model is about 99% complete - two more decals, one paint spot, and a quick polish. I should be able to post last pics tonight. Edited September 11, 2013 by heptoman
heptoman Posted September 12, 2013 Author Posted September 12, 2013 Update 11.09.2013 Part 2 - 99% complete Hey everyone, just finished up on this thing (mostly). Another view: Bonnet open: Rear quarter panel: Back: And compared to the real one: I will work on getting some better comparison and close up shots. The last 1% is body line painting and obviously the rear license plate. I'm holding off on that to make a custom one that matches the real one.
Modelbuilder Mark Posted September 12, 2013 Posted September 12, 2013 The Aoshima kits, particularly the ones with the engine, so thoroughly stomp the Tamiya kit in every way conceivable, it's not even worth bothering IMHO. Yeah, but when the Tamiya kit came out, I could not pass it up so I already have it, but just held off building it because I do not want the RHD. SO...once I get the Aoshima, I will cast the parts needed for the LHD, and build them both.
Recommended Posts
Create an account or sign in to comment
You need to be a member in order to leave a comment
Create an account
Sign up for a new account in our community. It's easy!
Register a new accountSign in
Already have an account? Sign in here.
Sign In Now