All Activity
- Past hour
-
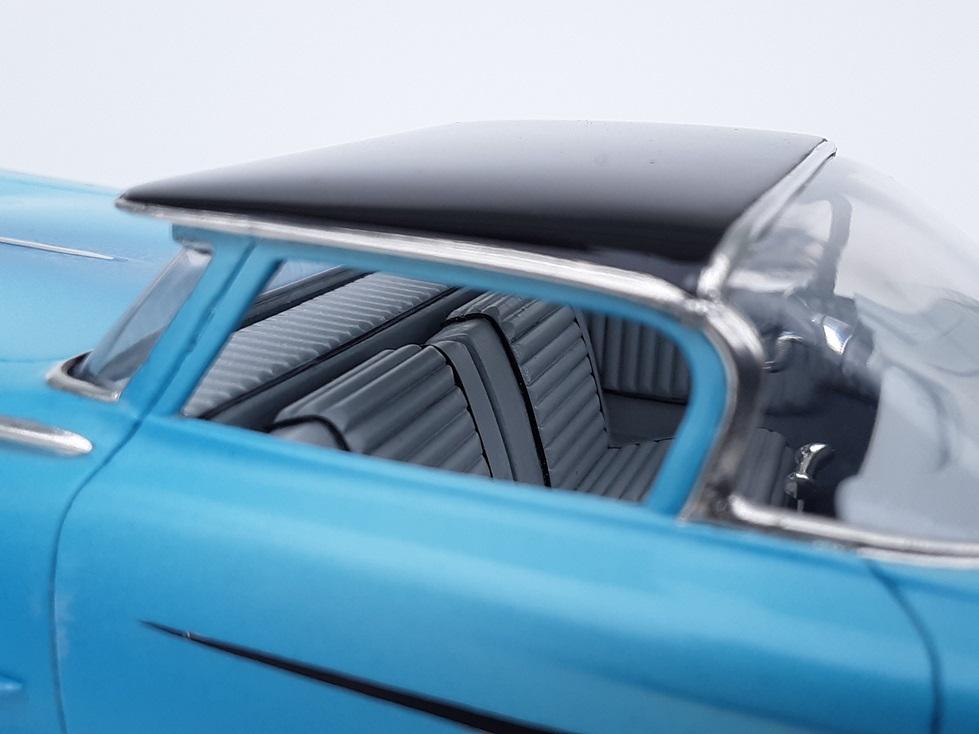
I've used 1.5mm, 2mm, even 2.5mm Evergreen half round for tuck and roll. I prefer the larger 2mm and 2.5mm size as it makes for a little less work 🤪 You can be precise with your build if you like and choose the size based on what custom car era you're going after with your build. I think in general that early 50s tuck and roll was larger than in the later 50s/early 60s? For any particular area, cut as many of your rods first to get them as close as you can to the same length. Then sand all the ends to curve them down giving them that 'sewn in' look once they all get glued down. I also use spark plug wire for piping along the edges. This gets glued down after all the painting is done. Here's the tuck and roll work I did on my custom 59 El Camino:

-
I like the Atlantic a lot. Thanks for sharing.
-

Revell '41 Willys "Feelin Groovy!" gasser
plasticprime replied to the60falcon's topic in Drag Racing
Super nice! -
1971 Blue Max Mustang Funny Car and the Summer Battle Royale...
plasticprime replied to Coyote_6's topic in Drag Racing
Beautiful build! Very nicely done! MPC kits always seem to be a hassle, so you've displayed great perseverance to end up with such a great finished product! -
 Jawa approved!
-
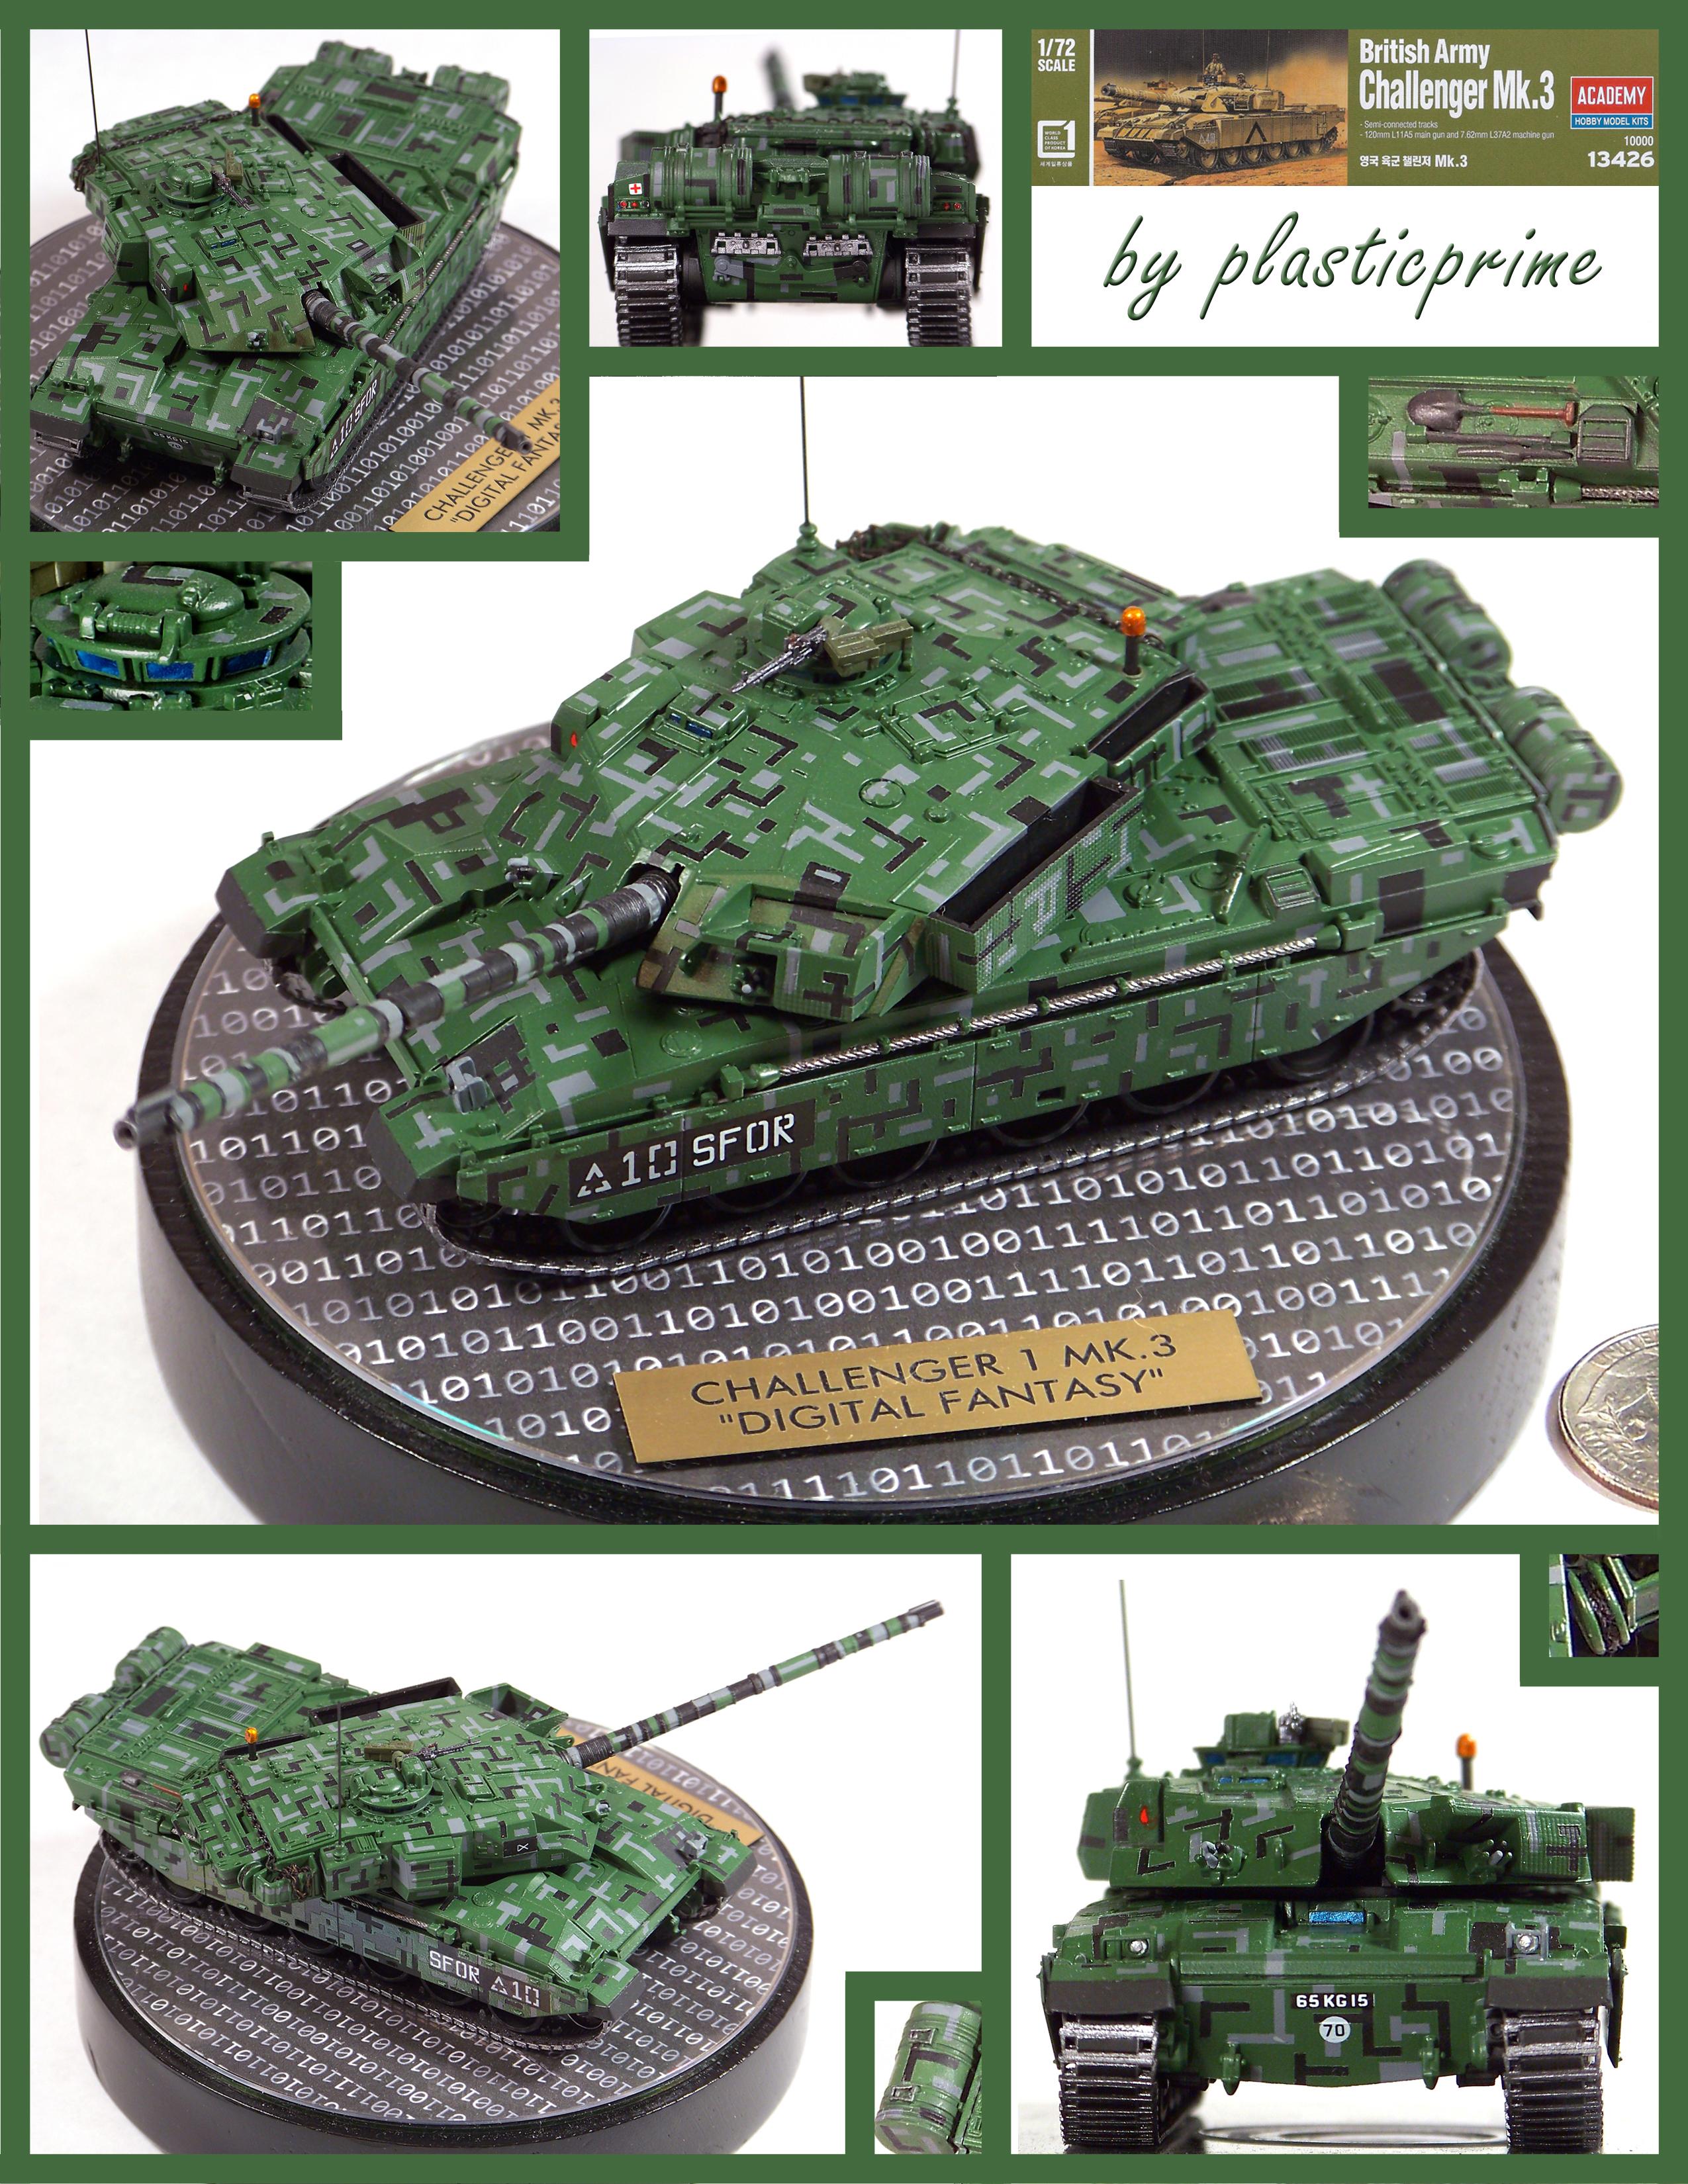
1/72 Academy challenger 1 Mk. 3 = This build was inspired by photos of an experimental digital camouflage scheme painted on a Challenger 2 and depicts what an early prototype scheme might have looked like on a Challenger 1 Mk.3 – which to the best of my knowledge, never had such a scheme applied to it – thus the “Digital Fantasy” aspect. It was accomplished using rattle cans (no airbrush) and required the cutting and masking of many hundreds of tiny little pieces of Tamiya 1mm masking tape which were applied with tweezers and a toothpick. This is what the tank might have looked like, in more or less pristine shape, from the paint workshop prior to field testing. The turret antenna, beacon light, and vision ports forward of the commander’s hatch were scratch built, and I filled the communication cable spool with fine black thread. Binary artwork was turned into a CD label, which was then applied to an actual CD and mounted onto the wooden base. A protective clear CD blank was applied over the CD. The circular wood base was purchased unfinished from a craft store and then sanded and painted semi-gloss black.
-
Hi all Thank you very much I almost gave up long ago But I just loved the design of this car too much to really give up, so I just paused its build several times. Exactly three years ago today, I started building the McLaren Senna. At the time, I thought it would be a challenge with a kit, a set of PE parts, and two decal sets to be applied on top of each other. But I never would have dreamed back then that I would still be working on it three years later. A lot of things turned out the way I had hoped, but I had to make quite a few compromises and couldn't stick to the original model completely. Overall, however, I'm still happy with how it's turned out so far. Today, there is only small progress to show you, but one that brings me a step closer to completing this build. Now I just need to finish the seats (and seat belts), and then the wedding can take place soon. After that, all that's left to do is sand, polish, and assemble the spoiler. But now to the pictures. First, the two door panels were completed. There were actually etched parts for the speakers (as a replacement for the decals), but I like them better with decals. Then the dashboard was also completed. Once again, I realized that parts I thought I had already painted were still on the sprue. I also had to deviate from the original again with the steering wheel, as the parts that I have now simply painted black would have been made of green carbon fiber. That's it for the birthday post Now I'm going to continue sweating and maybe finish the seat belts Urs
-
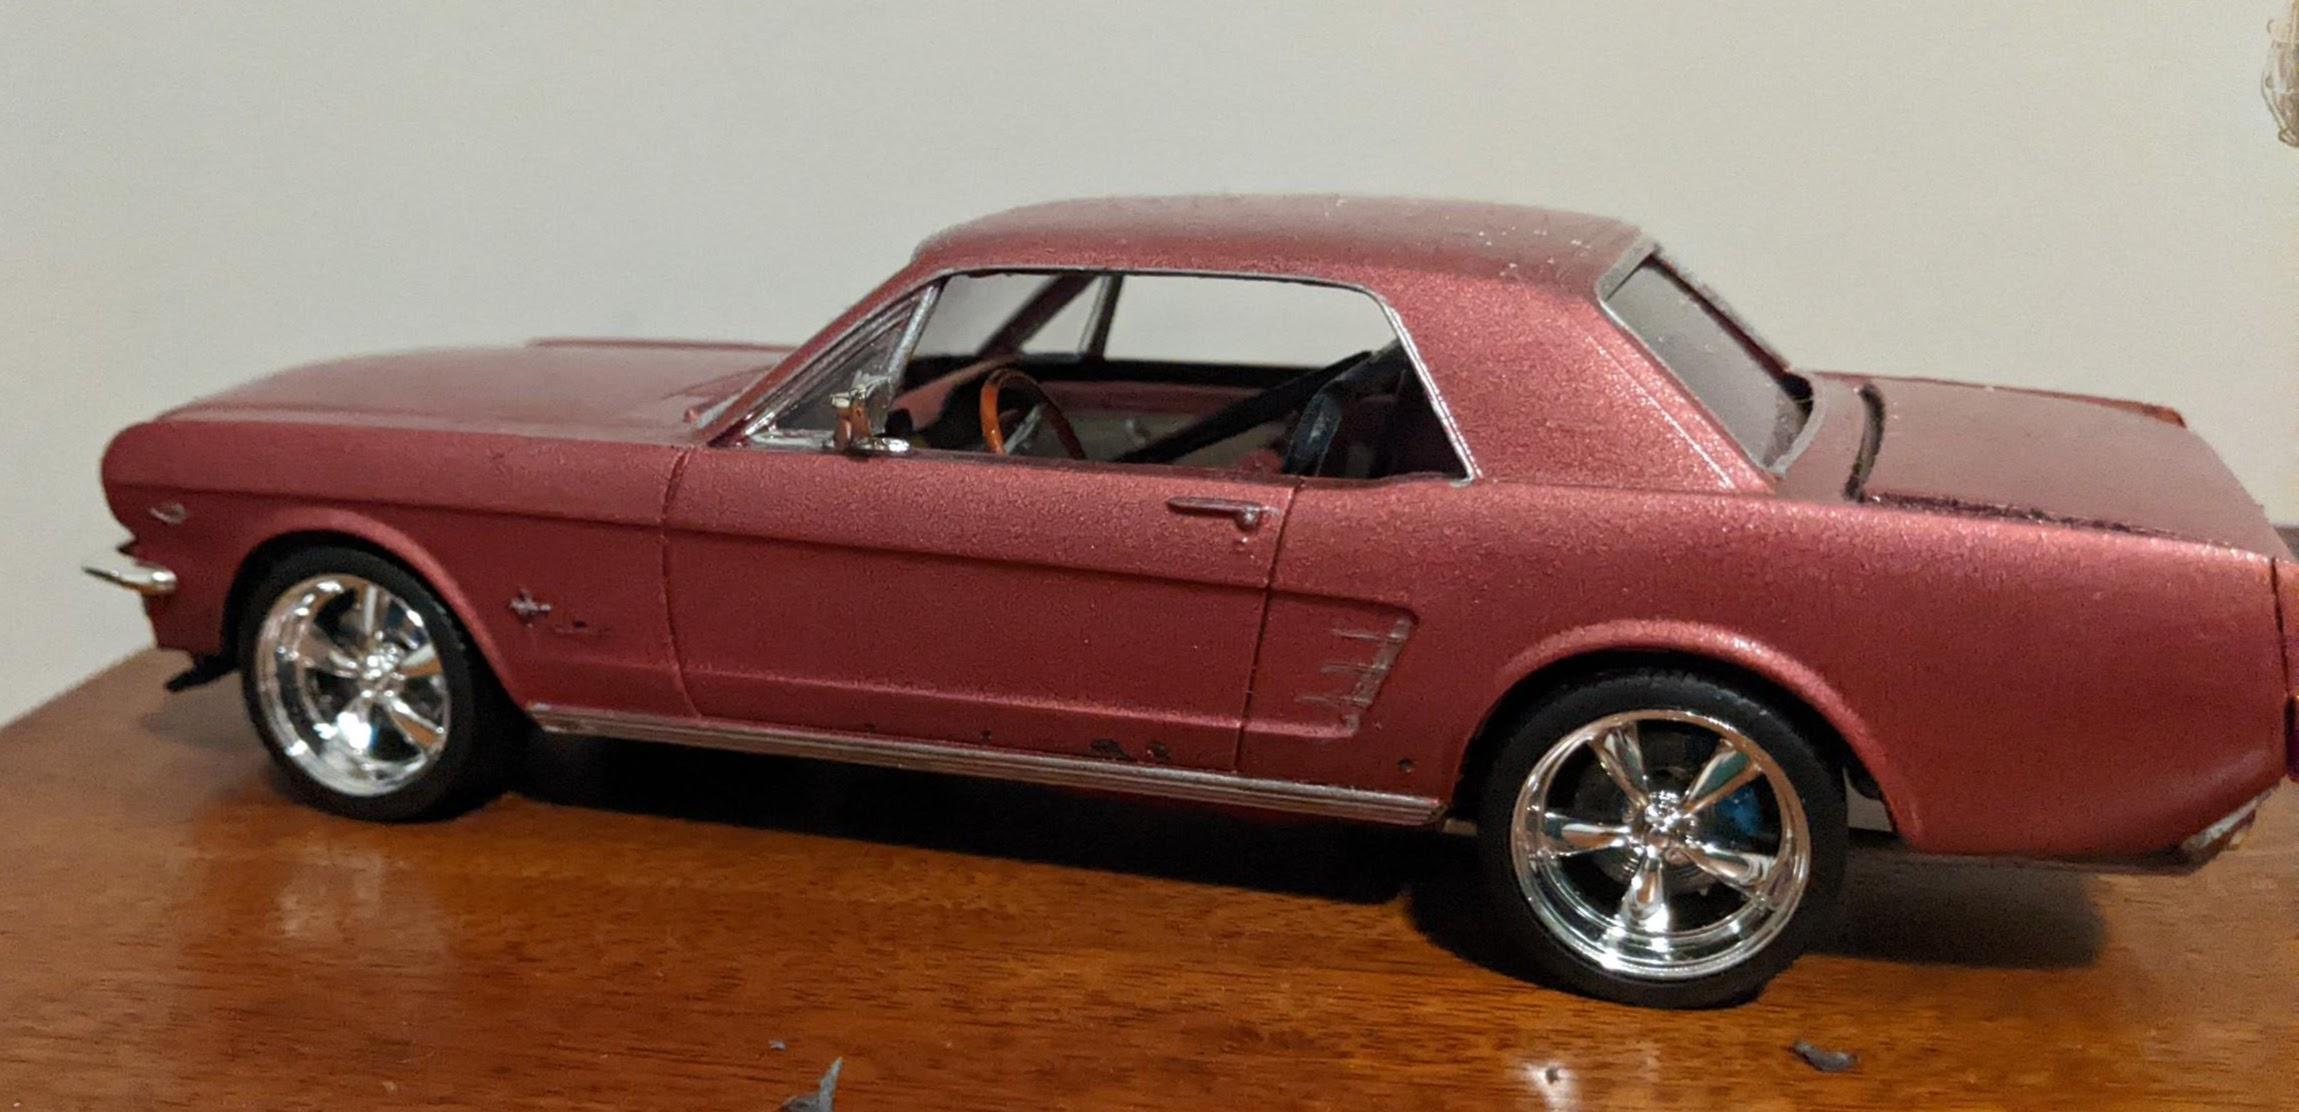
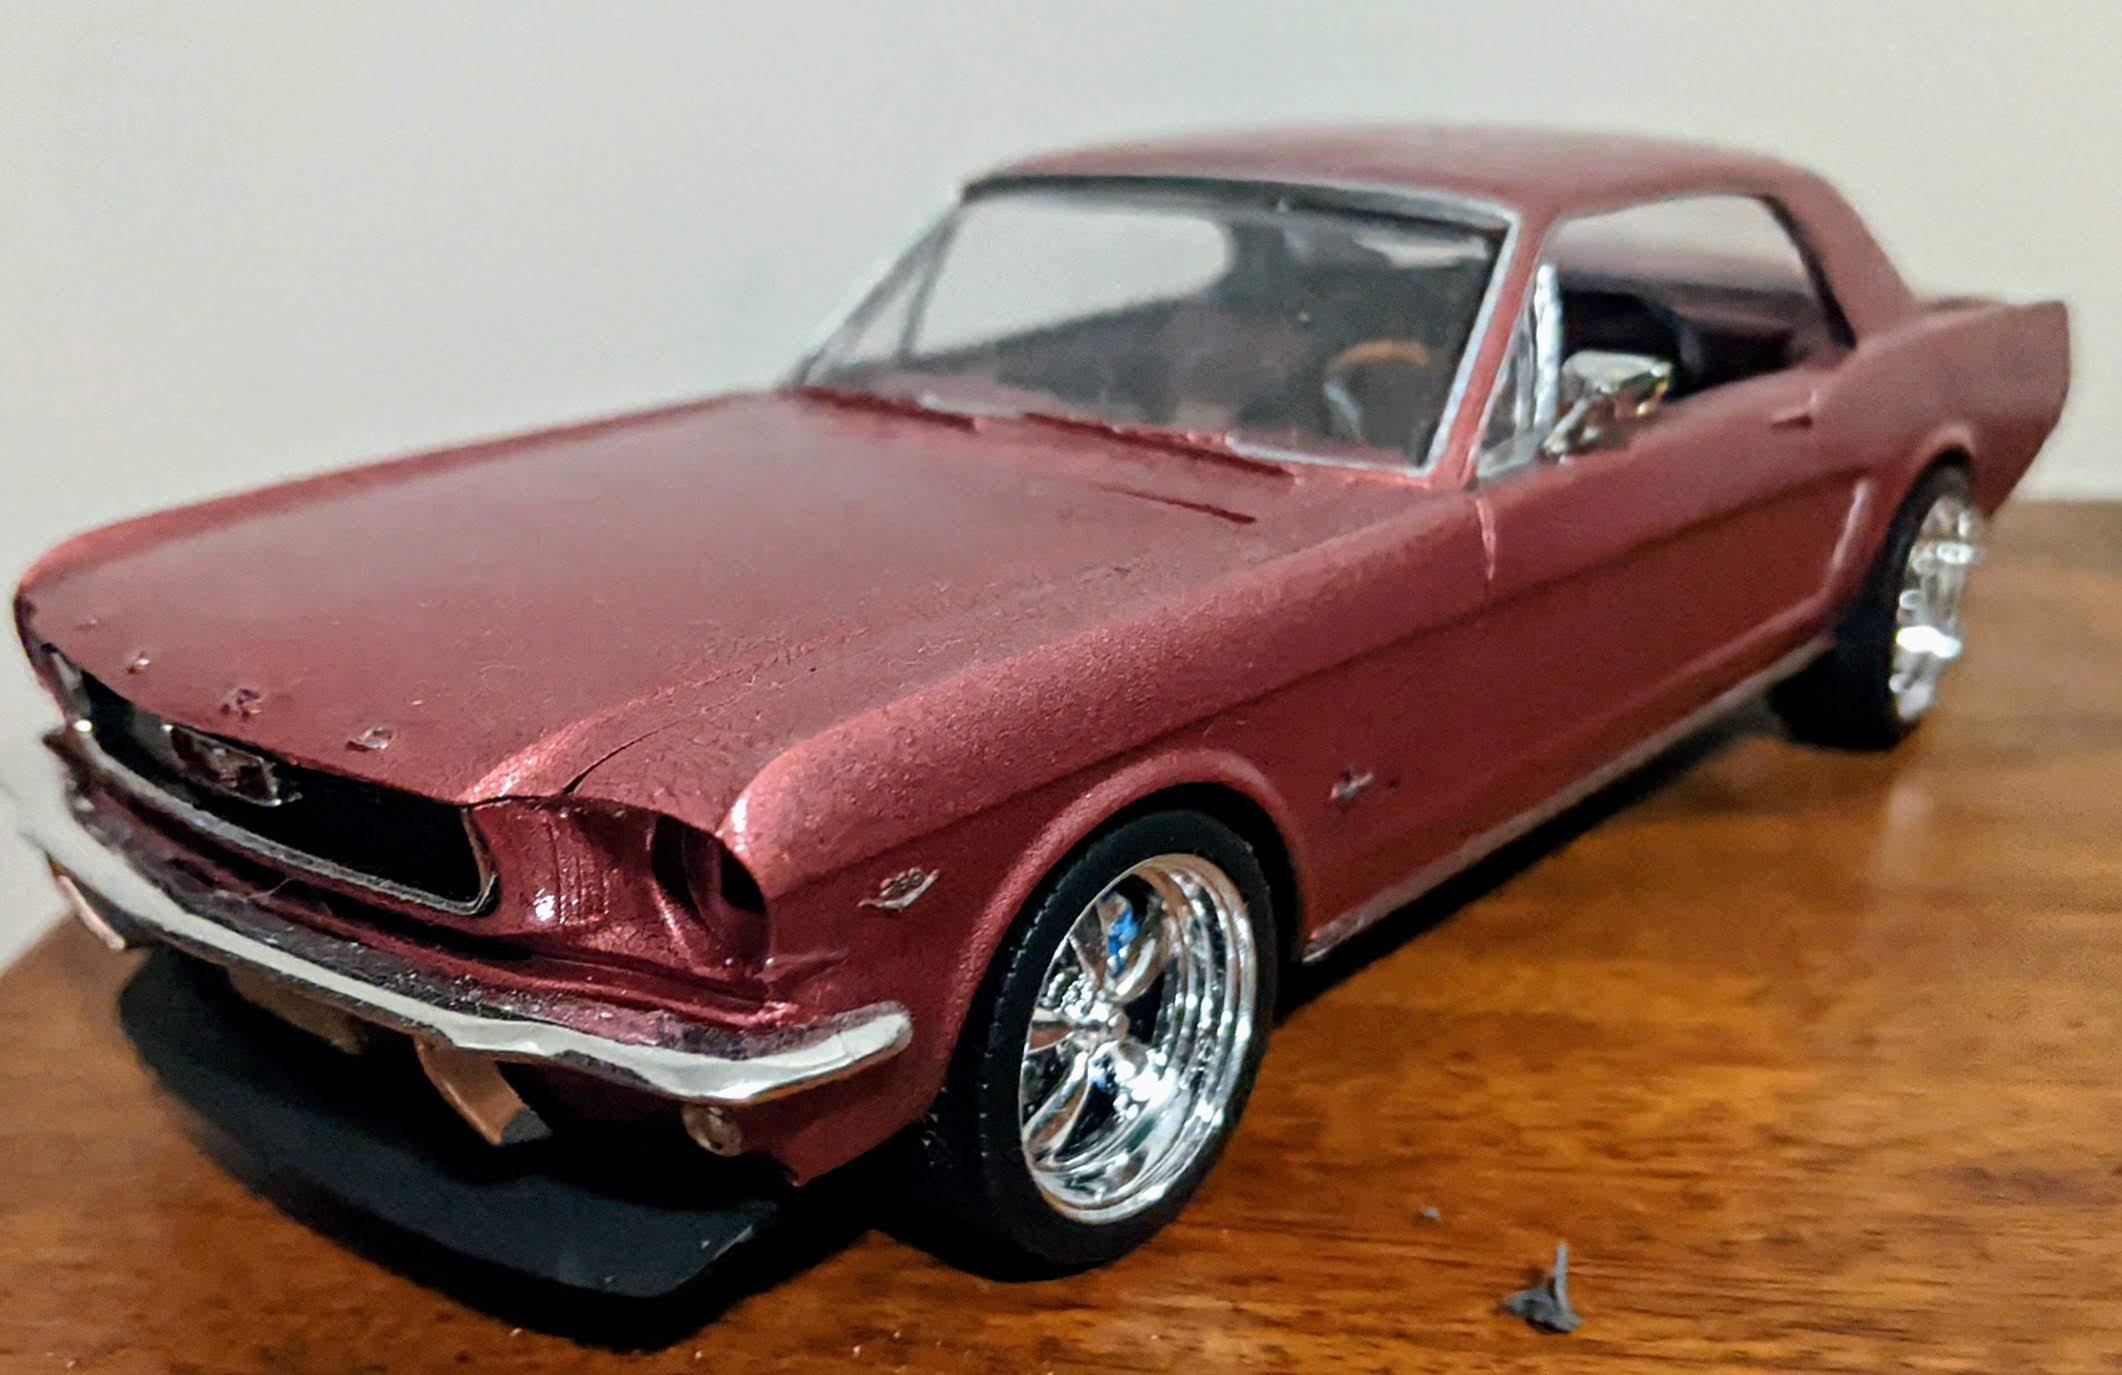
A mustang I never finished because I rushed the paint job and it turned to cracked BLAH_BLAH_BLAH_BLAH.
-
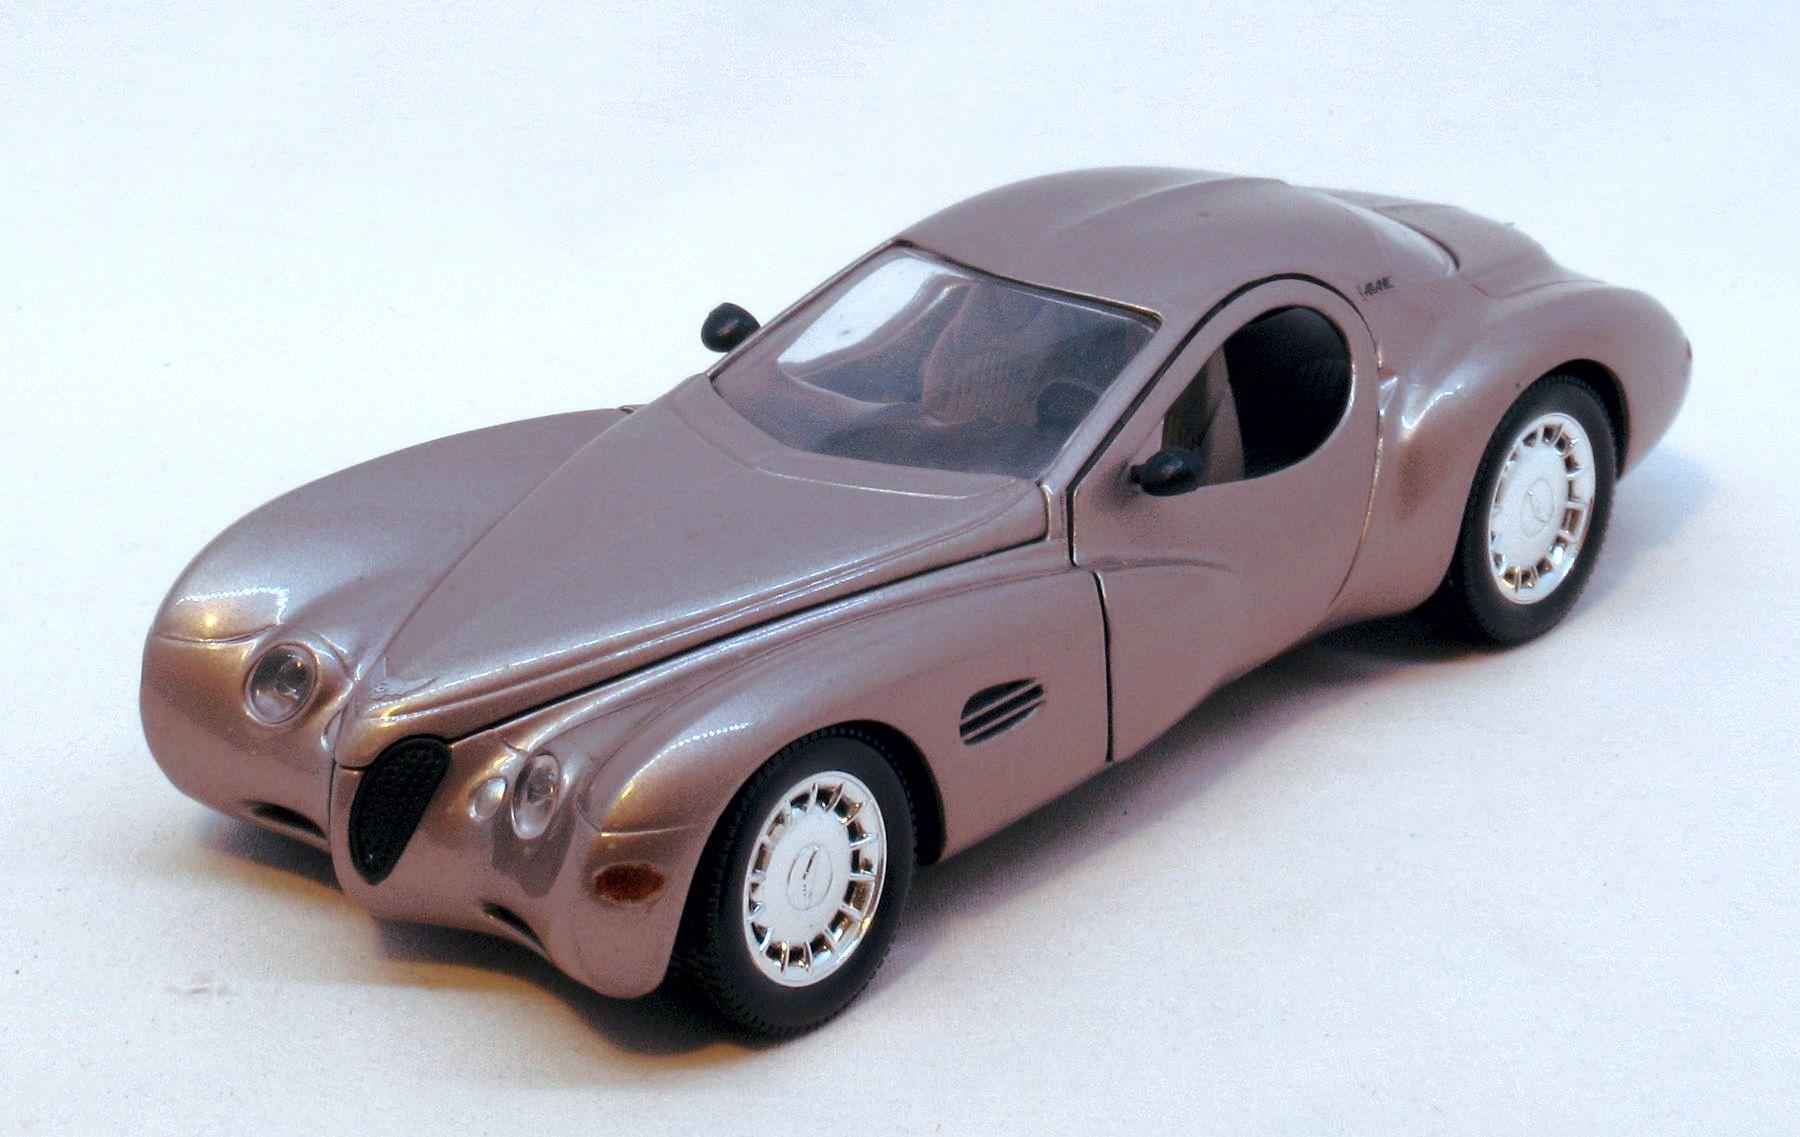
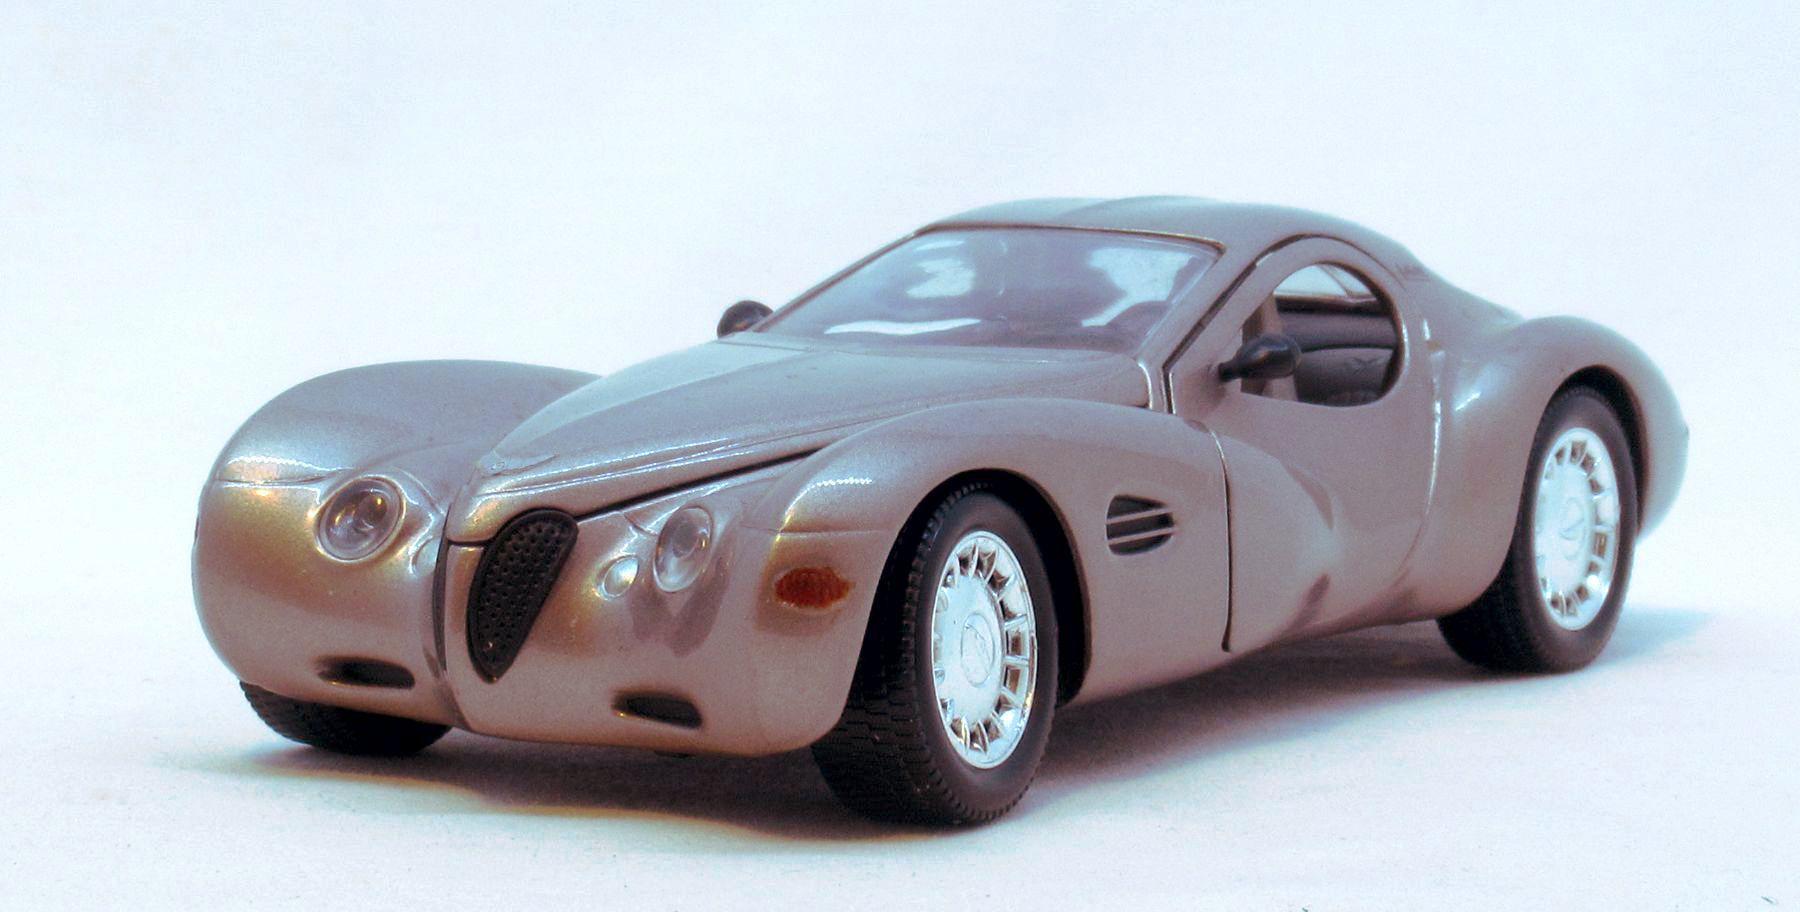
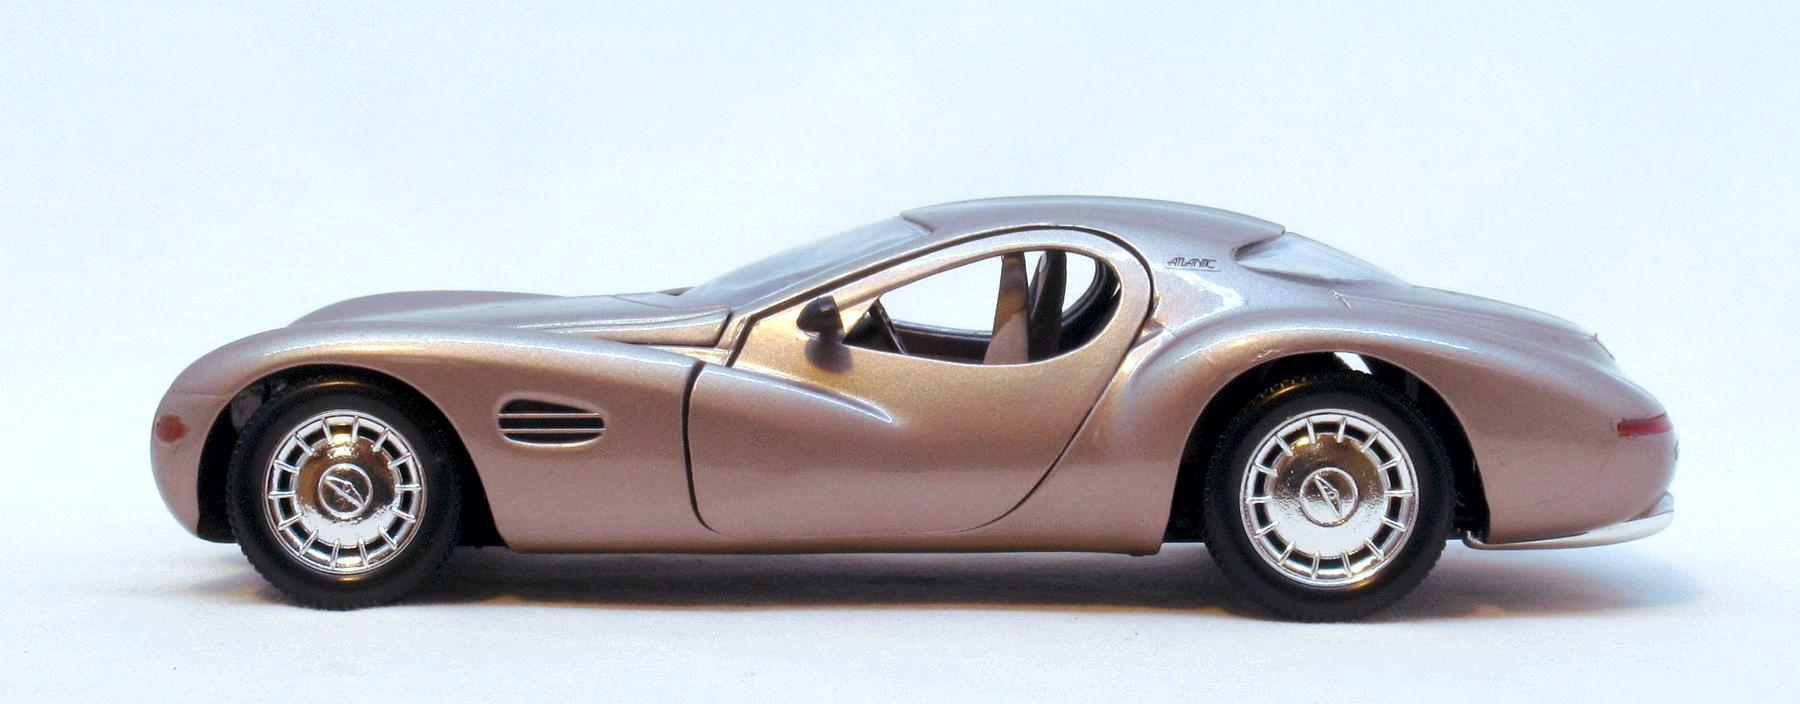
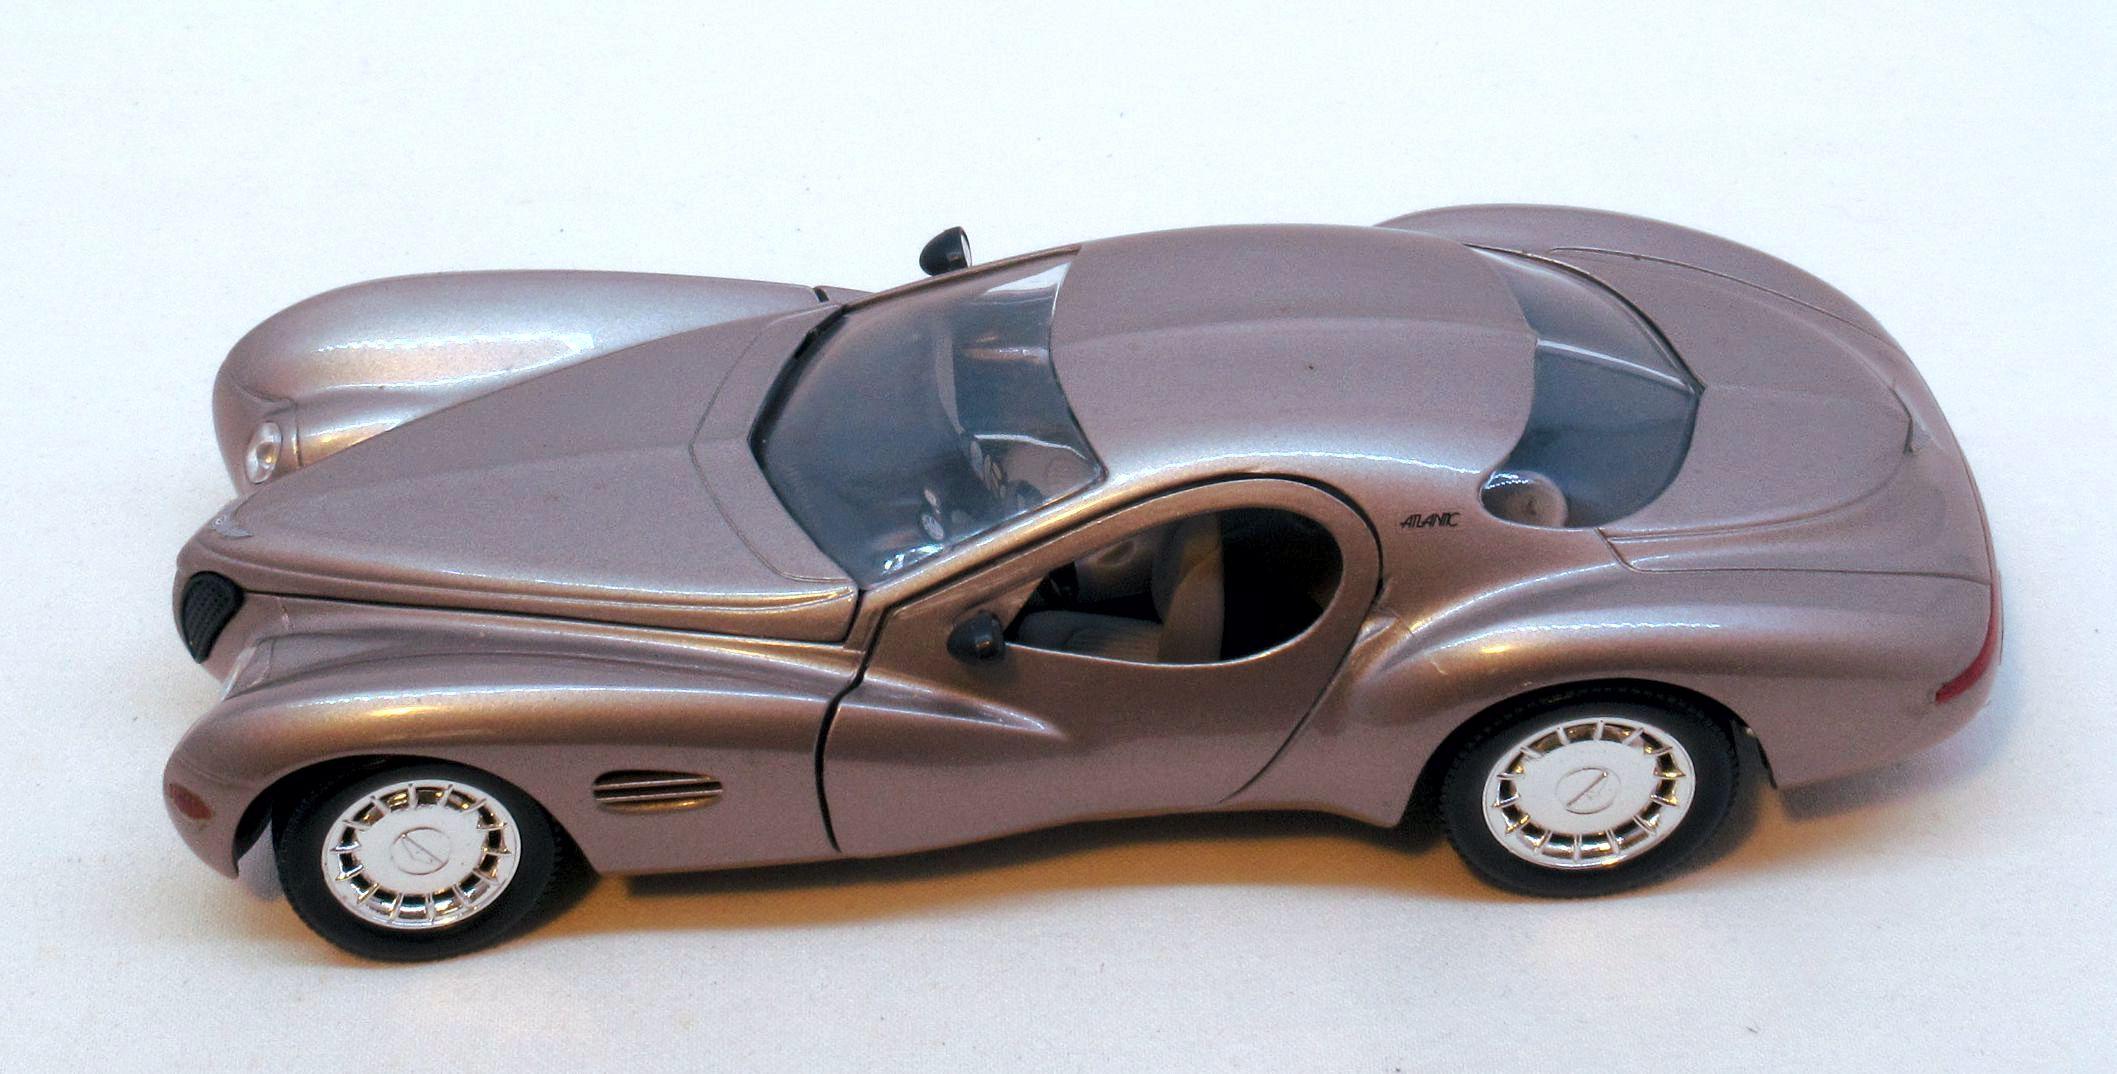
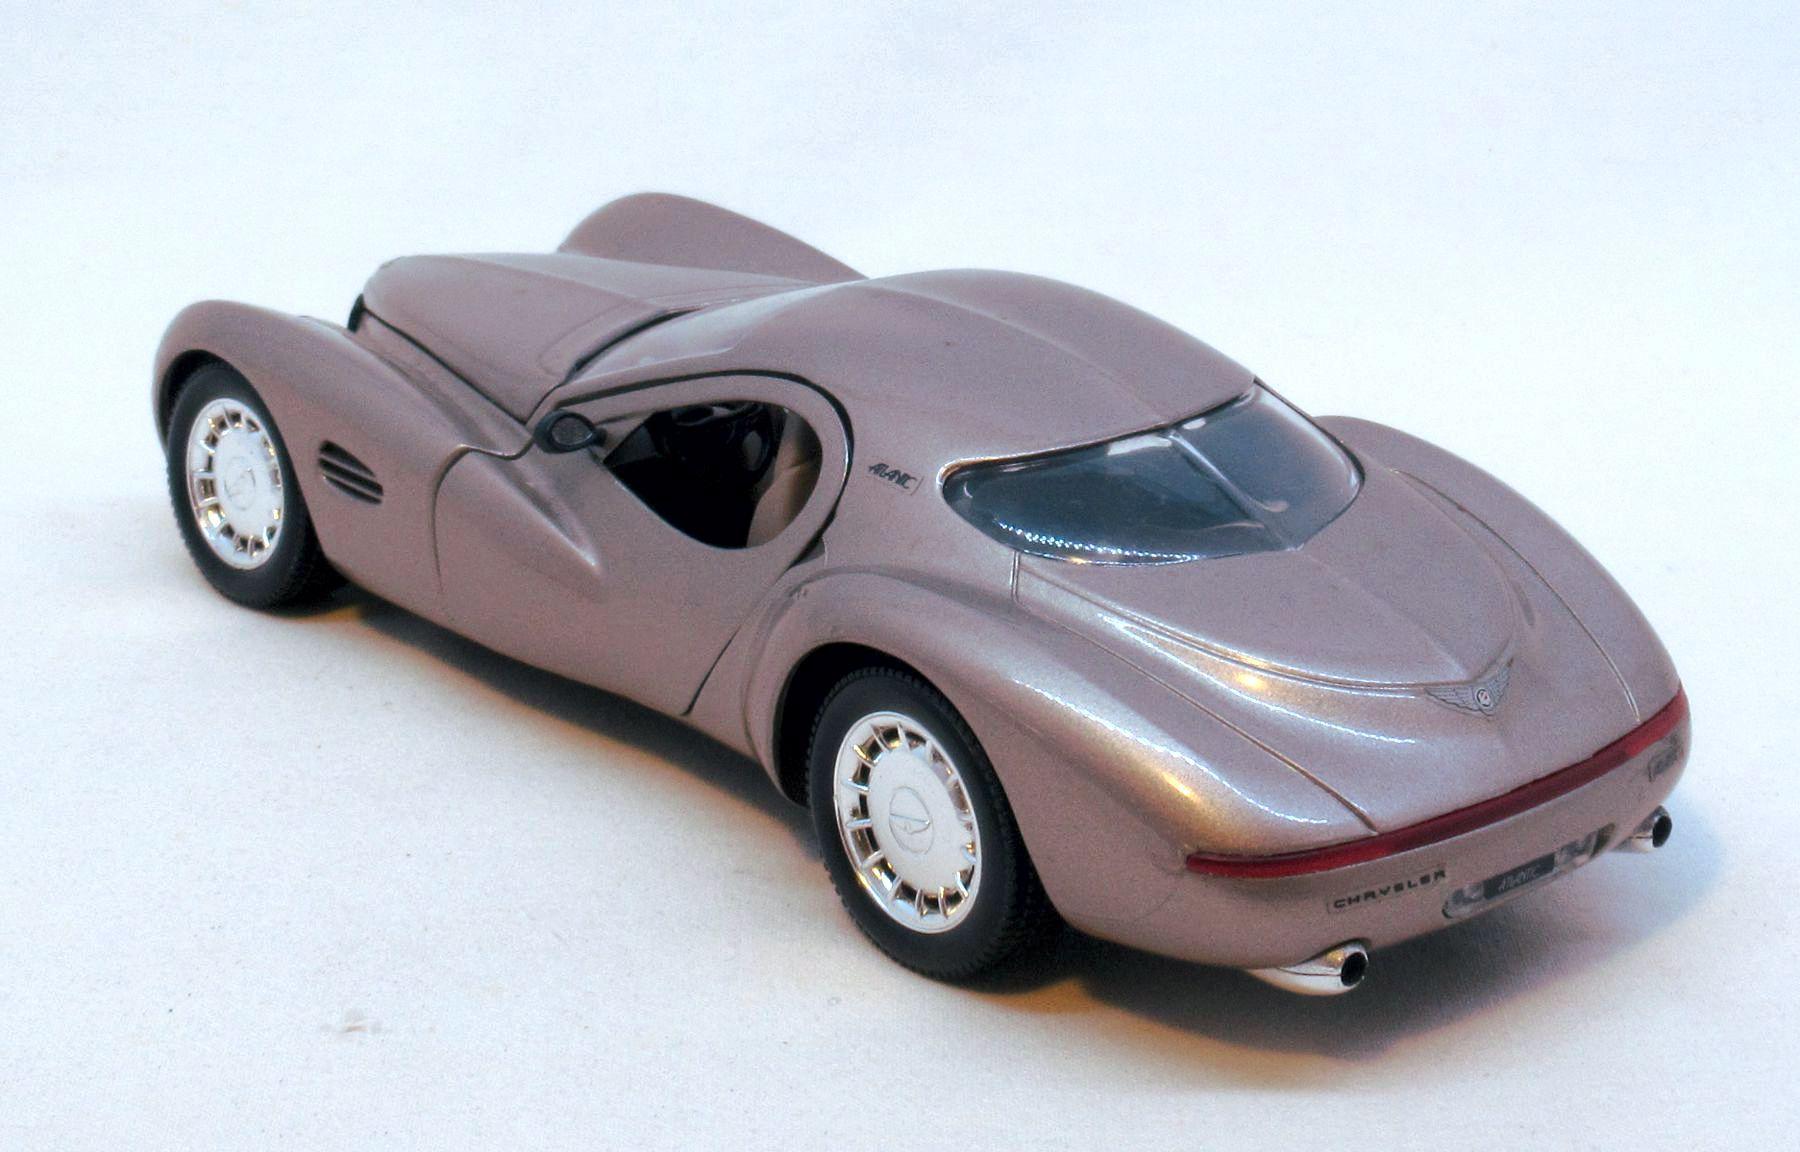
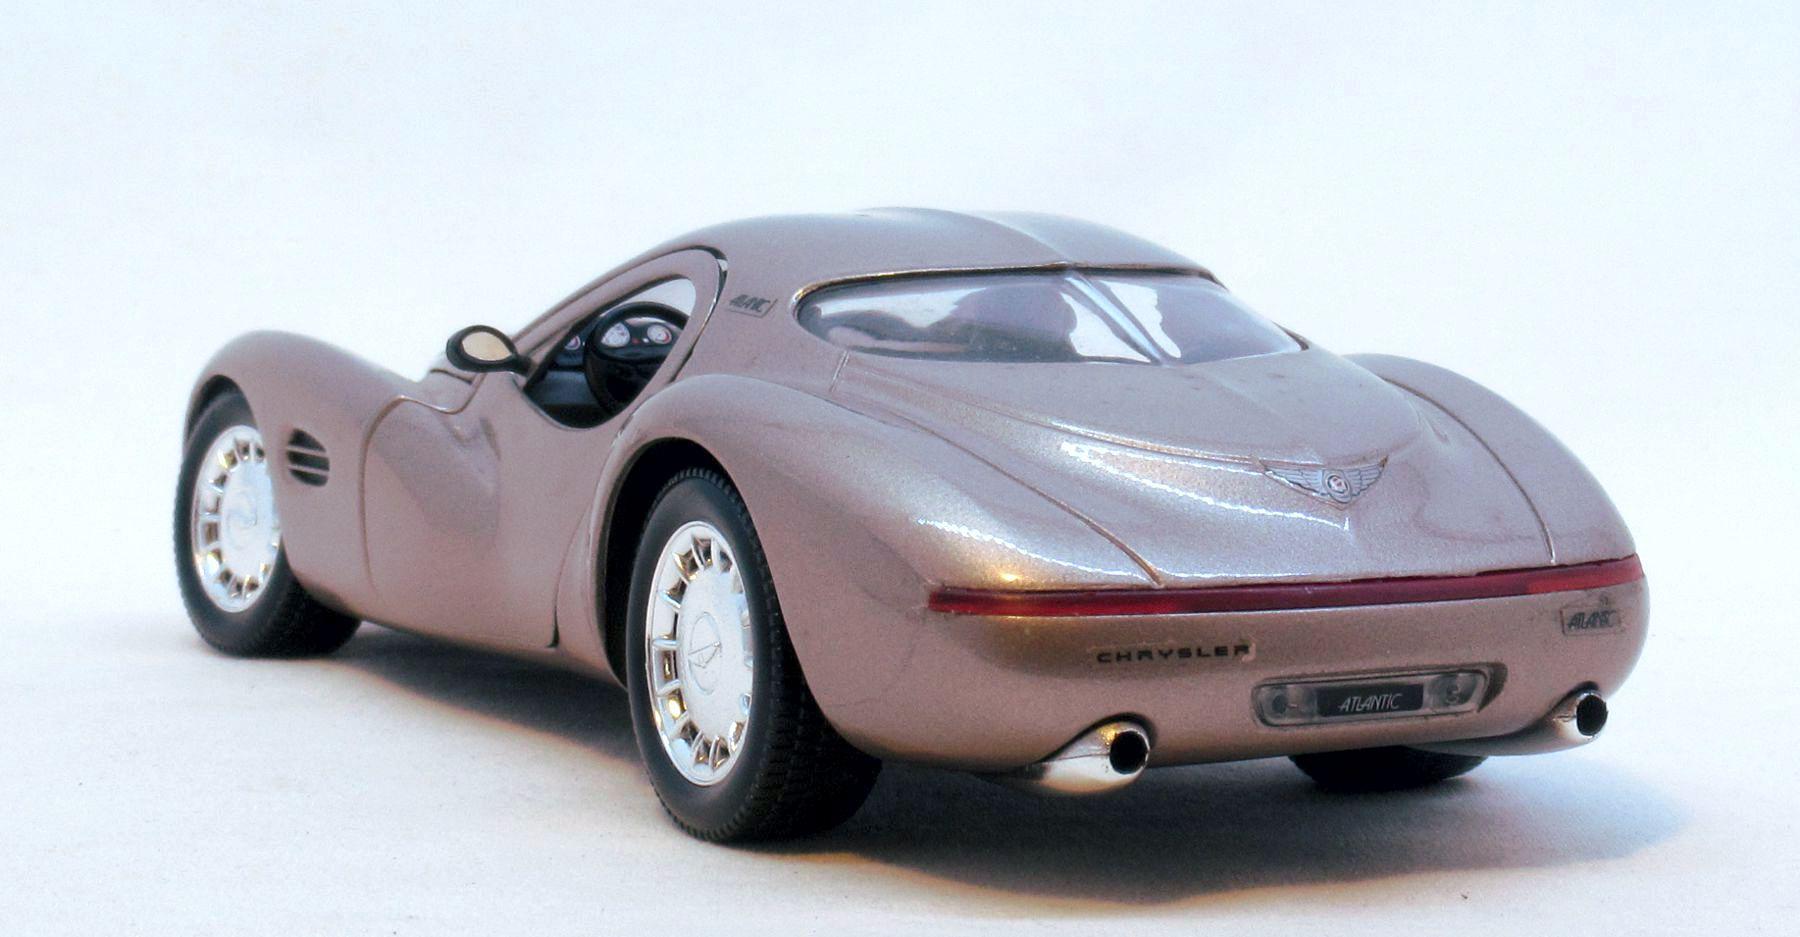
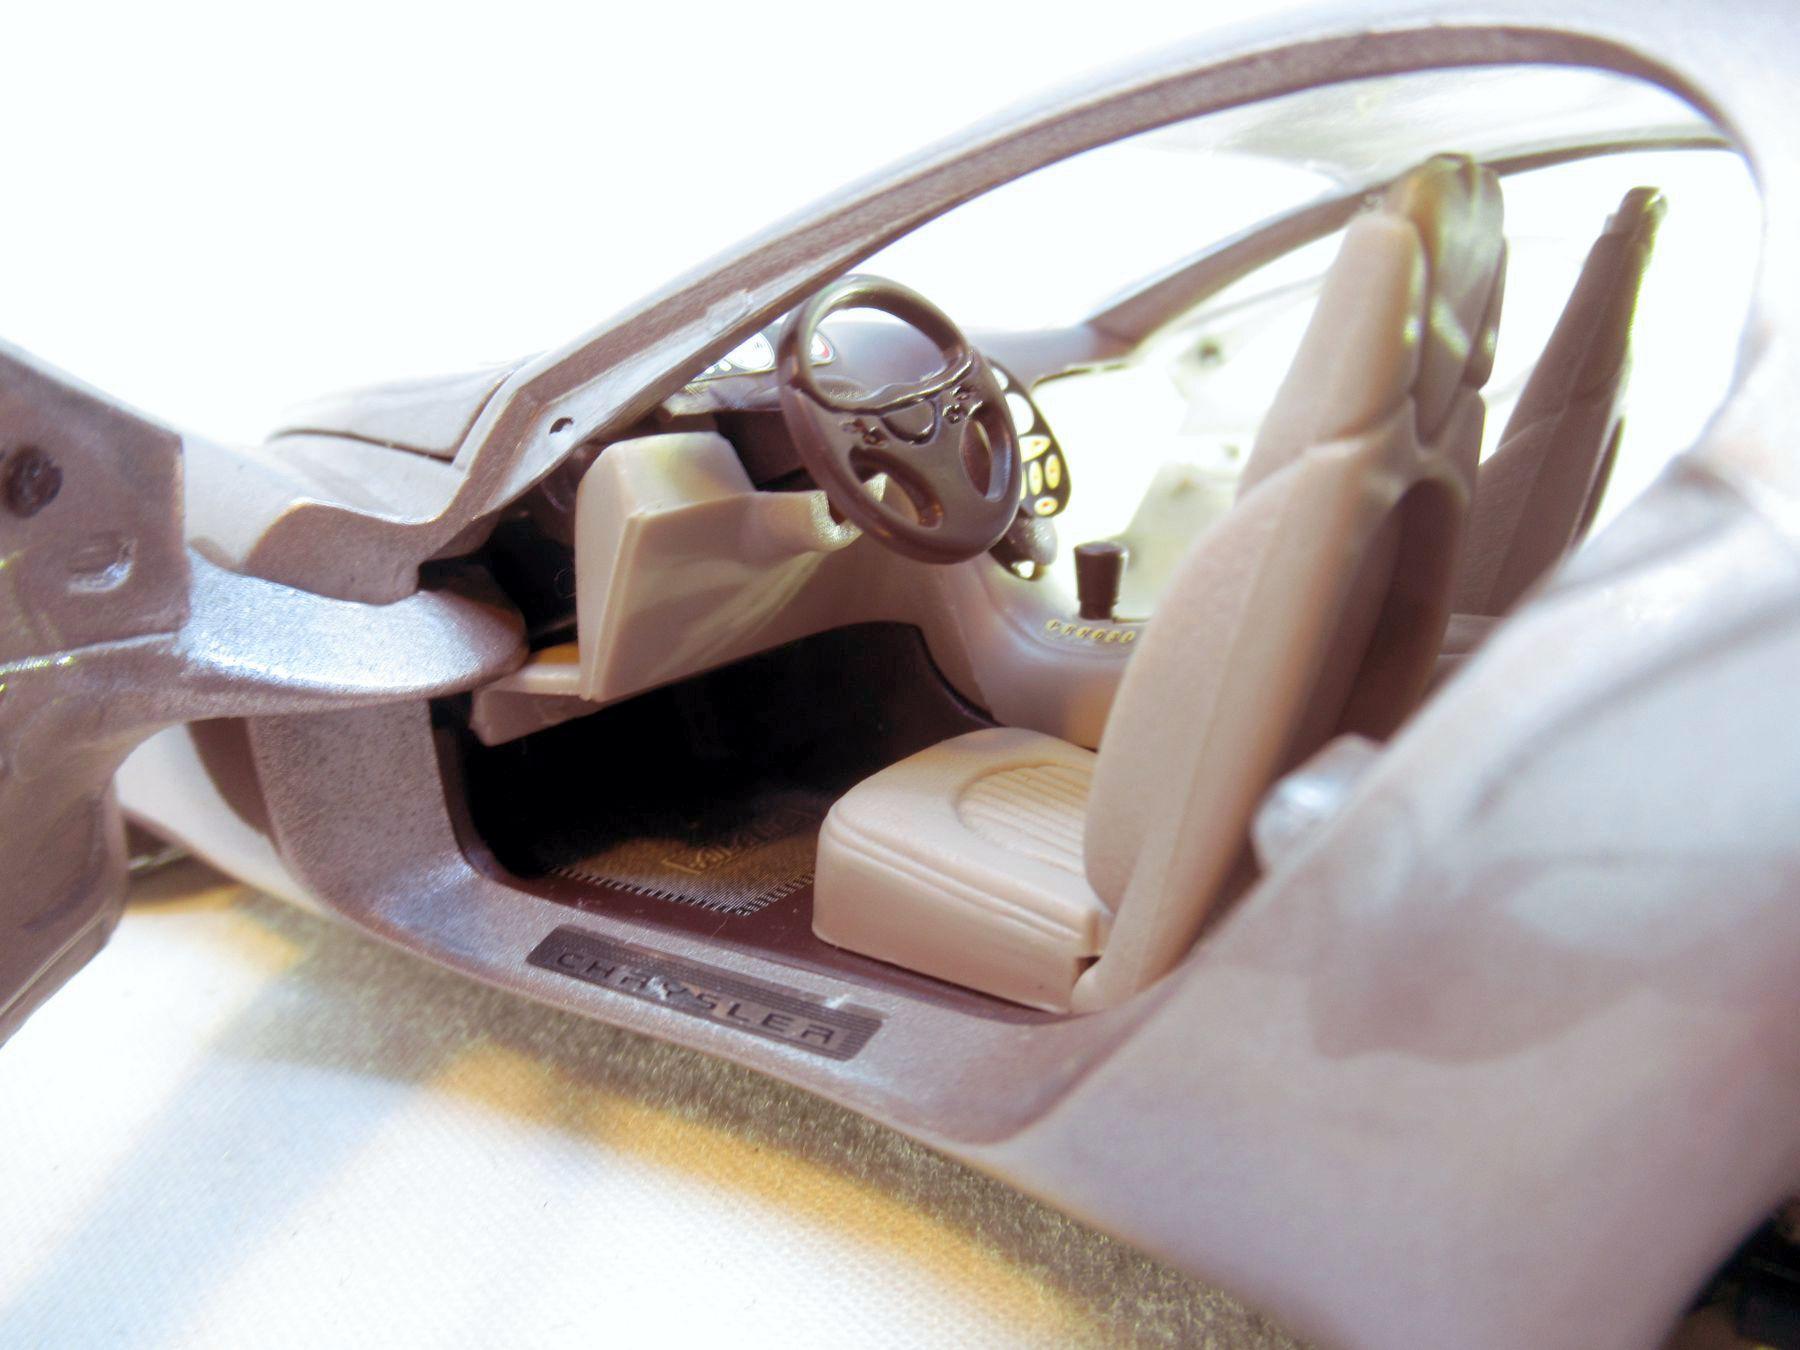
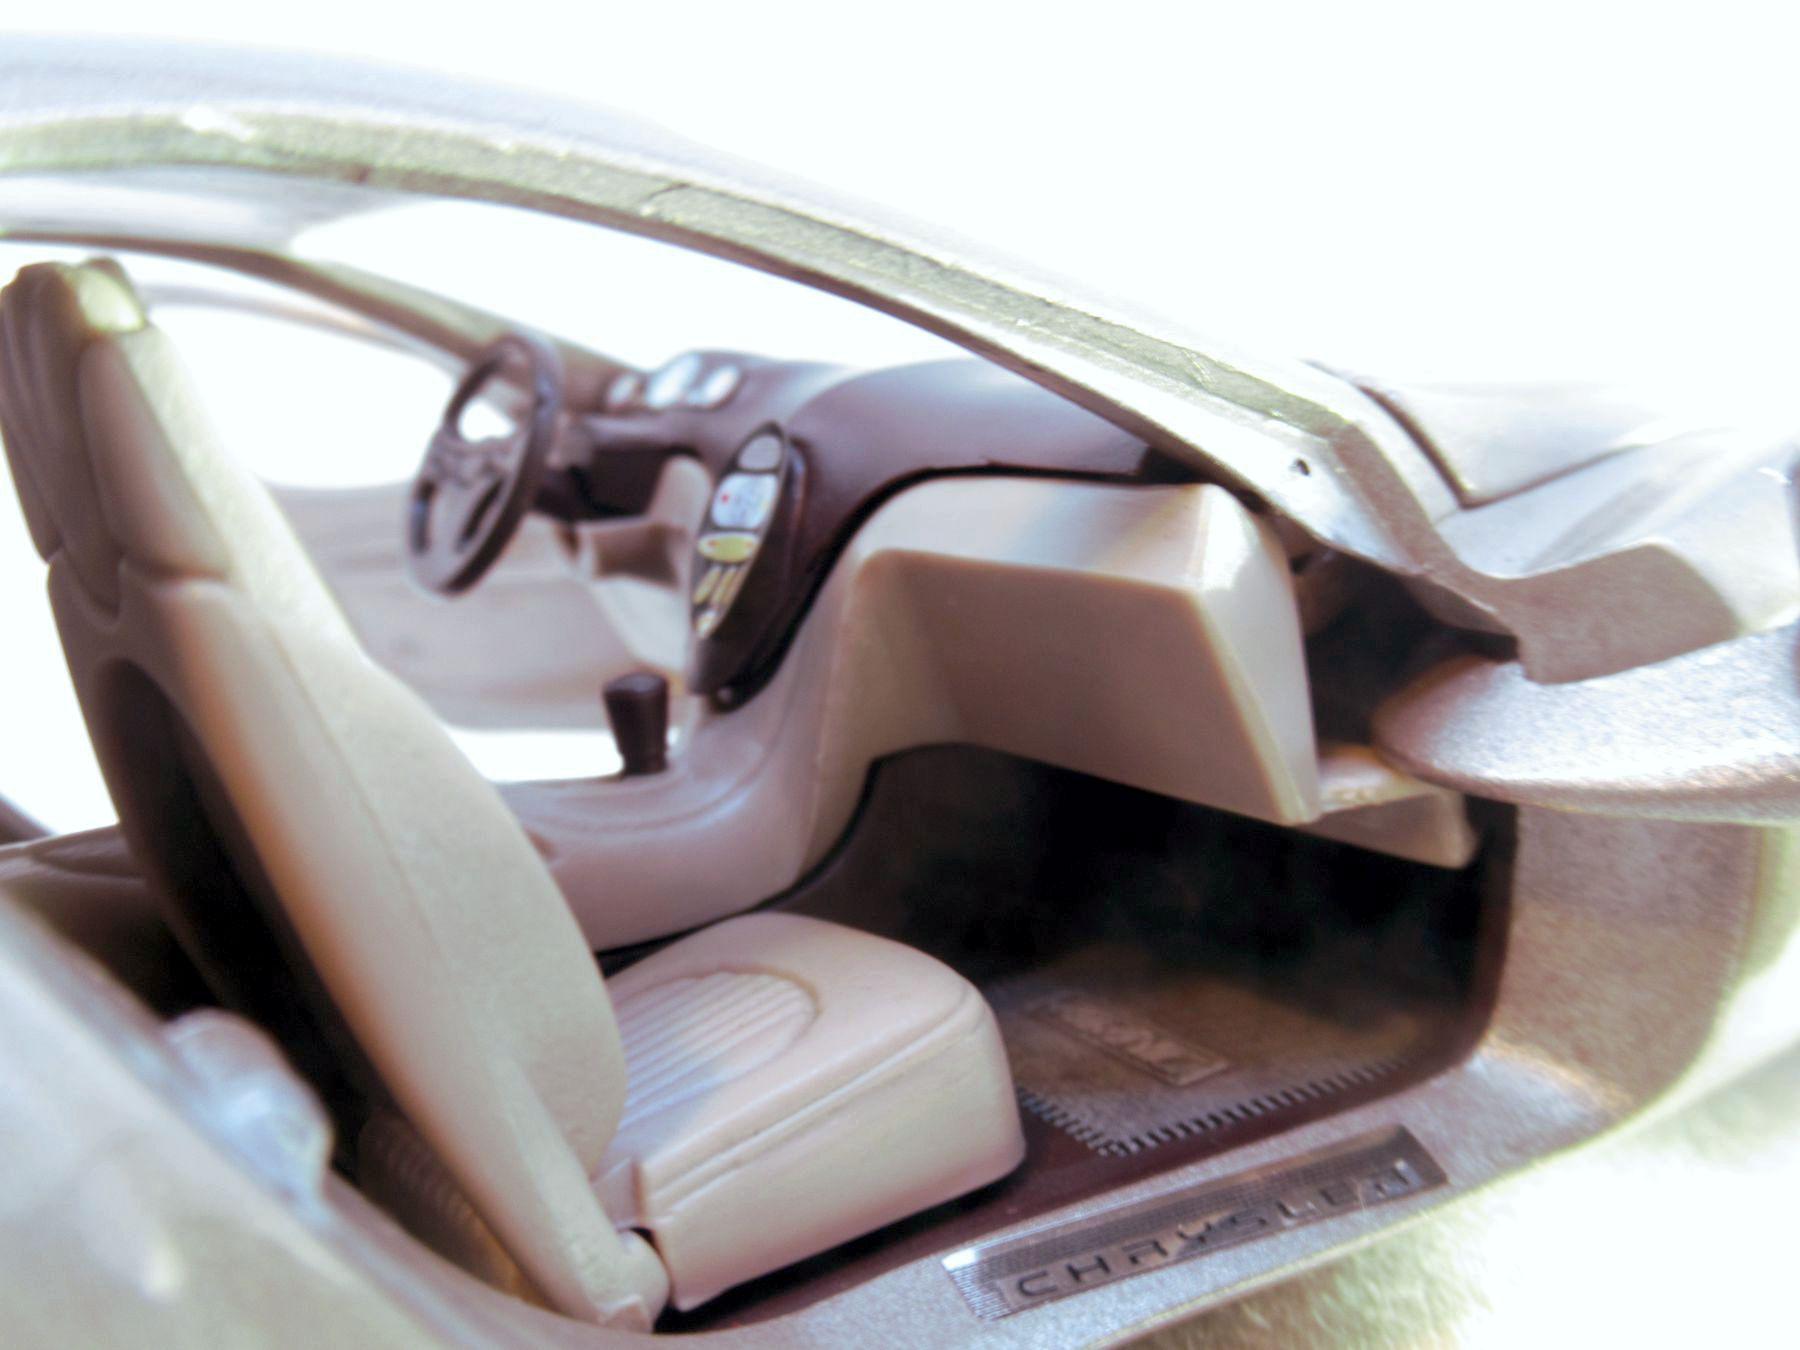
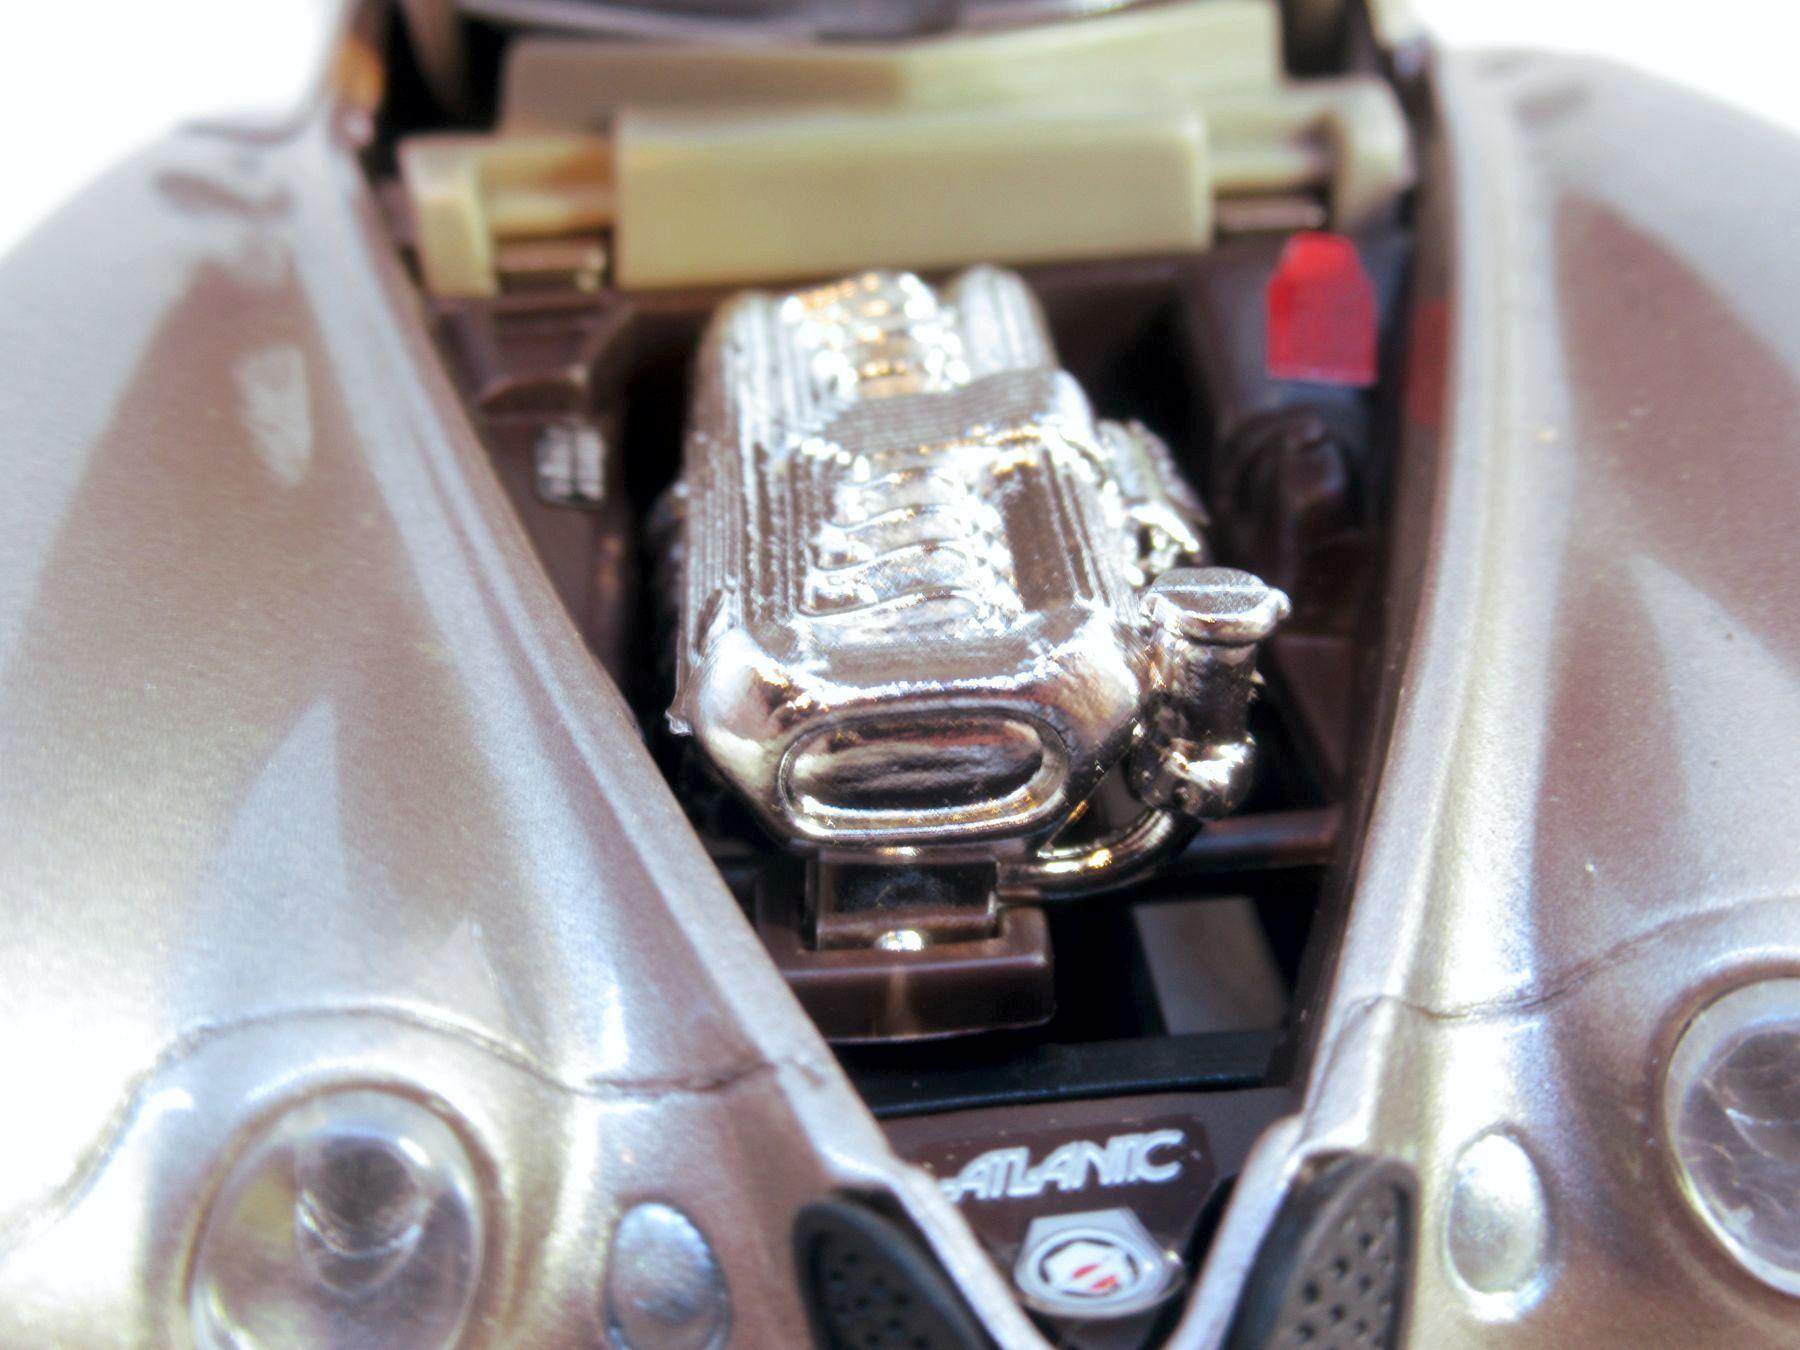
Crysler Atlantic Concept 1995 The Crysler Atlantic concept was one of the most popular concept of Chrysler and is making apperences still today. The idea – as in some other cases too – was born on a napkin by company`s then-president Bob Lutz and design chief Tom Gale during on flight to home from the Frankfurt Motor Show 1993. The design was inspired by the Bugatti Type 57S Atlantic. Echoing the French original, the Atlantic concept featured a straight-eight engine with a capacity of four litres. This was achieved by joining a pair of Chrysler Neon 2.0-litre 16-valve four-cylinder engines with a total of 360 bhp It wasn`t very much but according that time professional opinion for any show car that could be driven at 80 kmh is enough. The transmission to the rear wheels was by a four speed automatic transaxle-gearbox. The interieur was trimmed in cream leather. When John McCormick drove the Atlantic for Autocar in 1995, he wrote: „. . . the engine sounds suitably potent at idle, but as soon the revs rise a horrible barking cacophony takes over.” Well, the car was designed for auto-shows and the sound was good for this enviroment. The model is made by Guiloy in 1:24 scale. Enjoy the pictures.
-
I would definitely try sanding that down with some very fine grits (2000, 2500, 3200 and up) to see if you could get the paint spill off. If the Tamiya paint underneath is fully cured, you might be able to remove most of it without too much damage to the blue underneath. Go slow, use a gentle touch and see what happens. You can always go back and use more aggressive grits if the finer stuff isn't working. Then, a trunk repaint. I wouldn't use paint thinner at all in this case.
-
If the blue is a lacquer and the white is enamel, you should be able to remove the white with possibly some mineral spirits without damaging the lacquer. Chances are high that even if that works, you may at least have to clear coat to even the color. By the way, you have the same problem at the base of the B-pillar where the white bled under the tape. Steve
-
That's a nice return on the investment, I hope.
-
Great looking corvette.
-

How to do tuck n roll?
sidcharles replied to FoMoCo66's topic in Model Building Questions and Answers
the RC airplane guys have been using it for eons: Special adhesives for foam & plastic – deluxematerials.com i have used Deluxe Foam Sealer for model railroad terrain made from pink xps foam. worked fine, but i don't think for model railroad of cars [non-impact models] it's any more beneficial than Liquitex mediums. this is a whole line of stuff to stoke the imagination: Golden makes a similar line: https://youtu.be/tlHrrtMhwCI?si=Ag_Ue4LAI1bjPM2b -
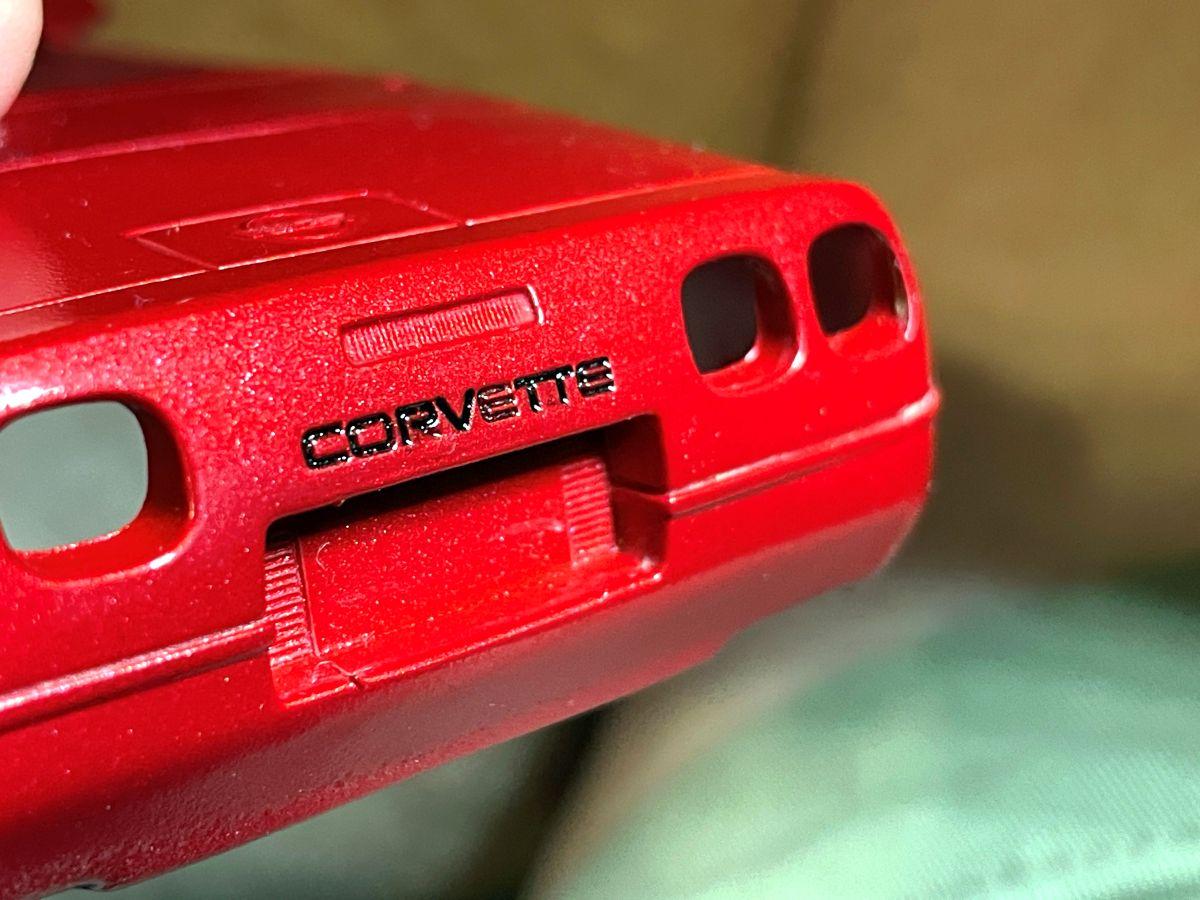
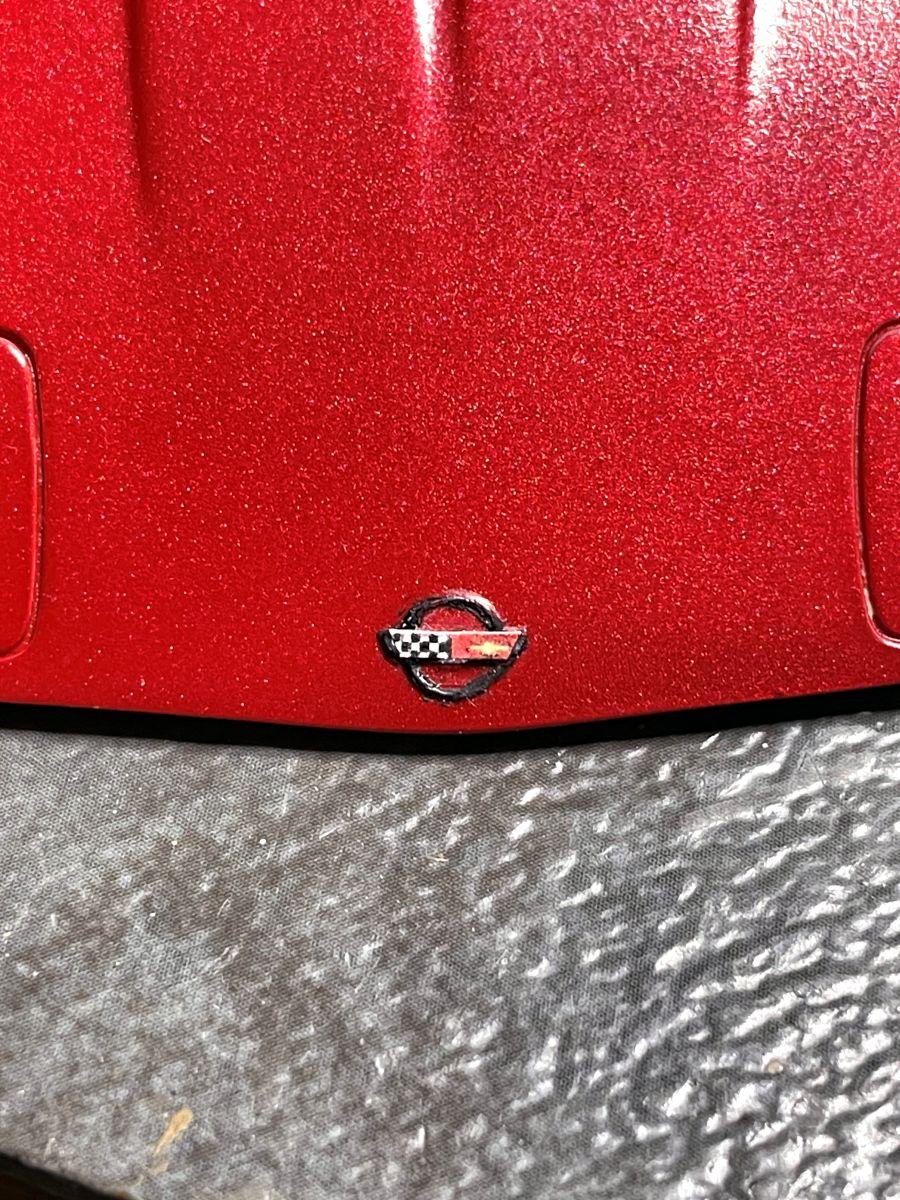
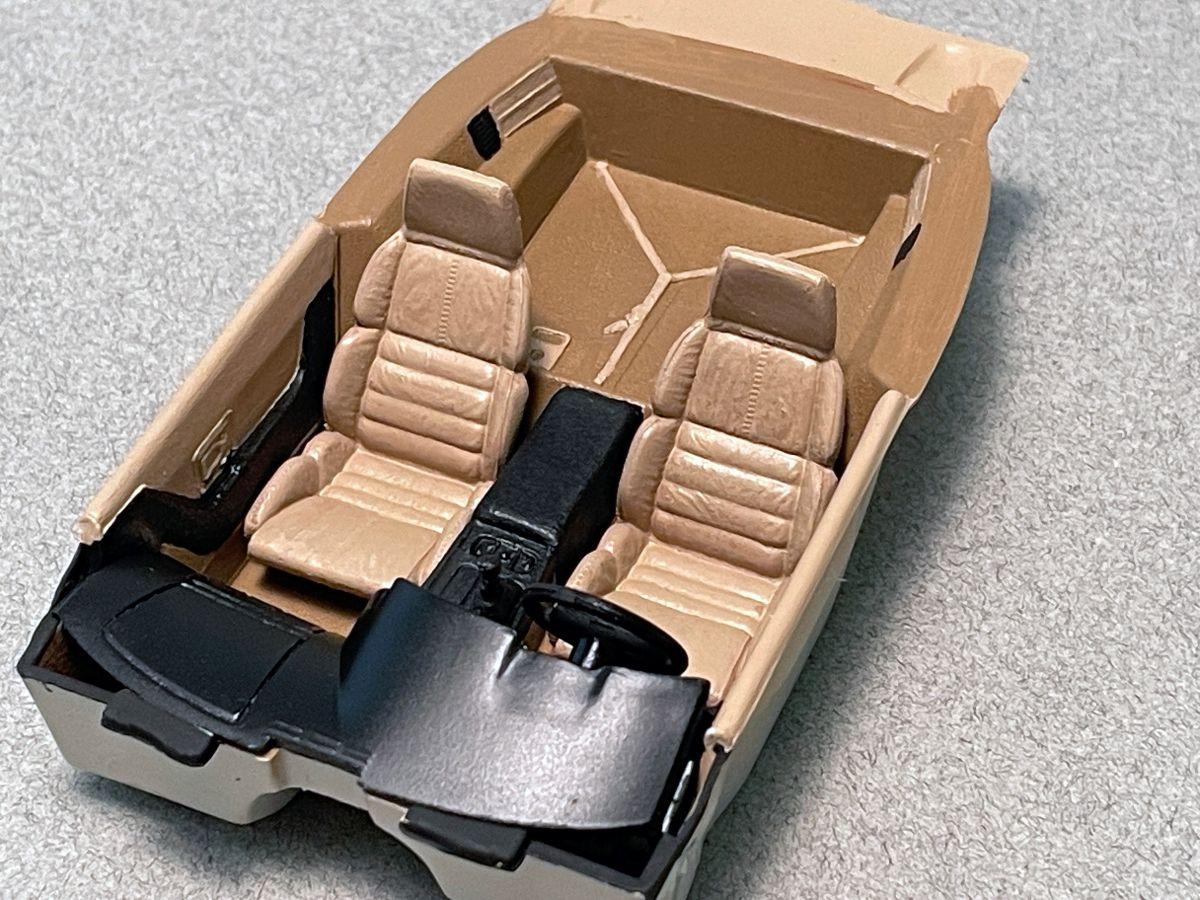
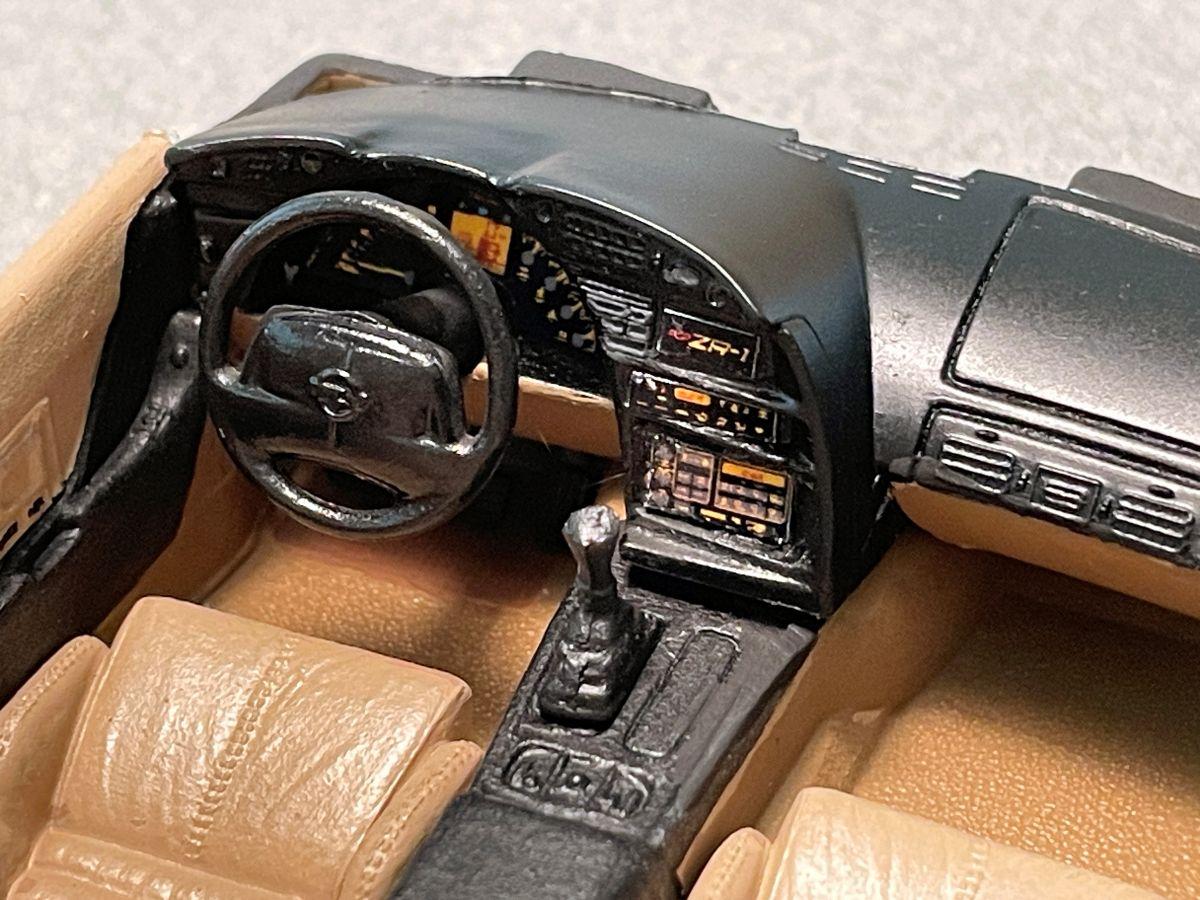
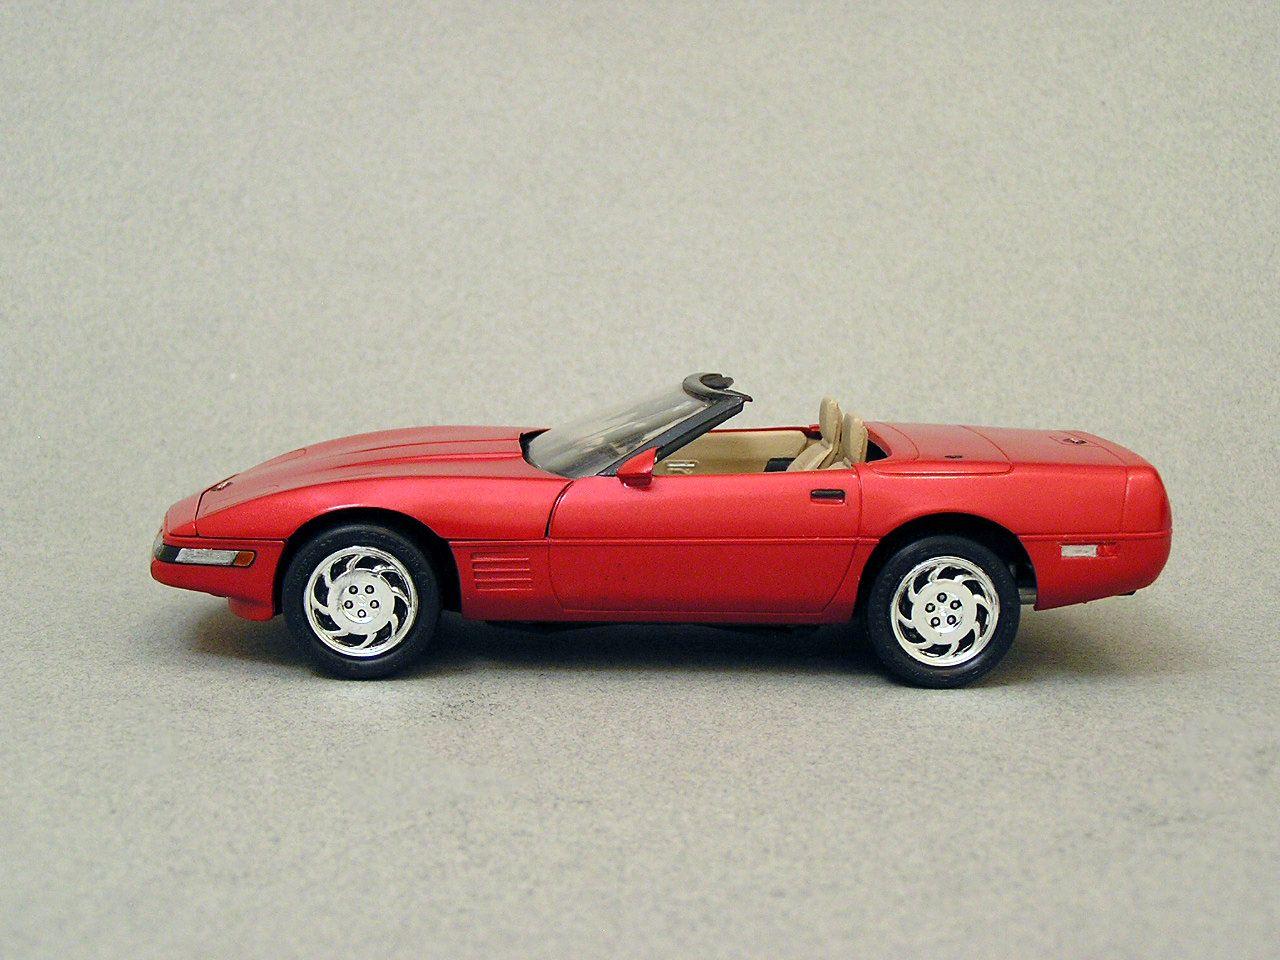
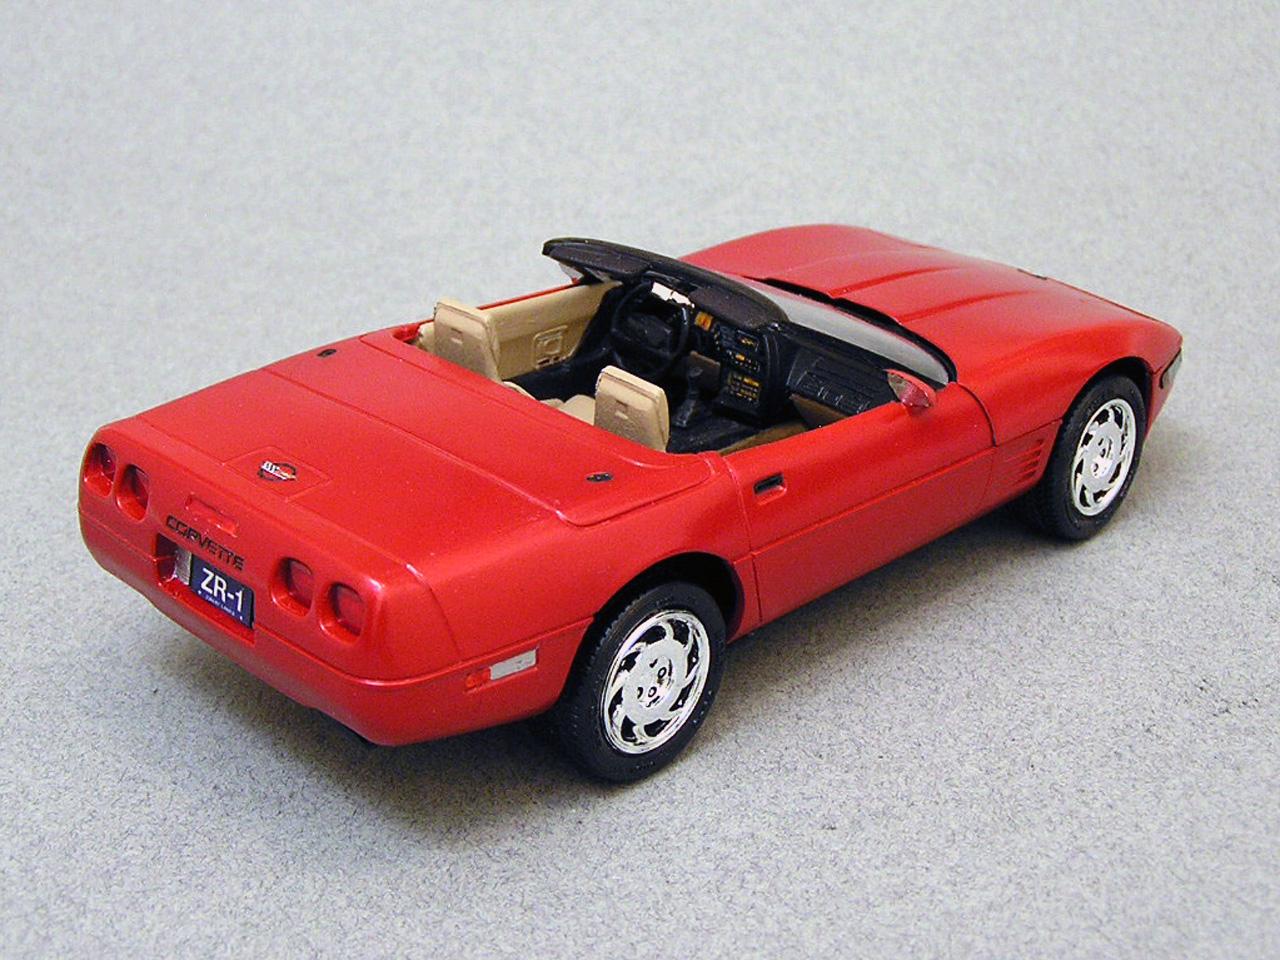
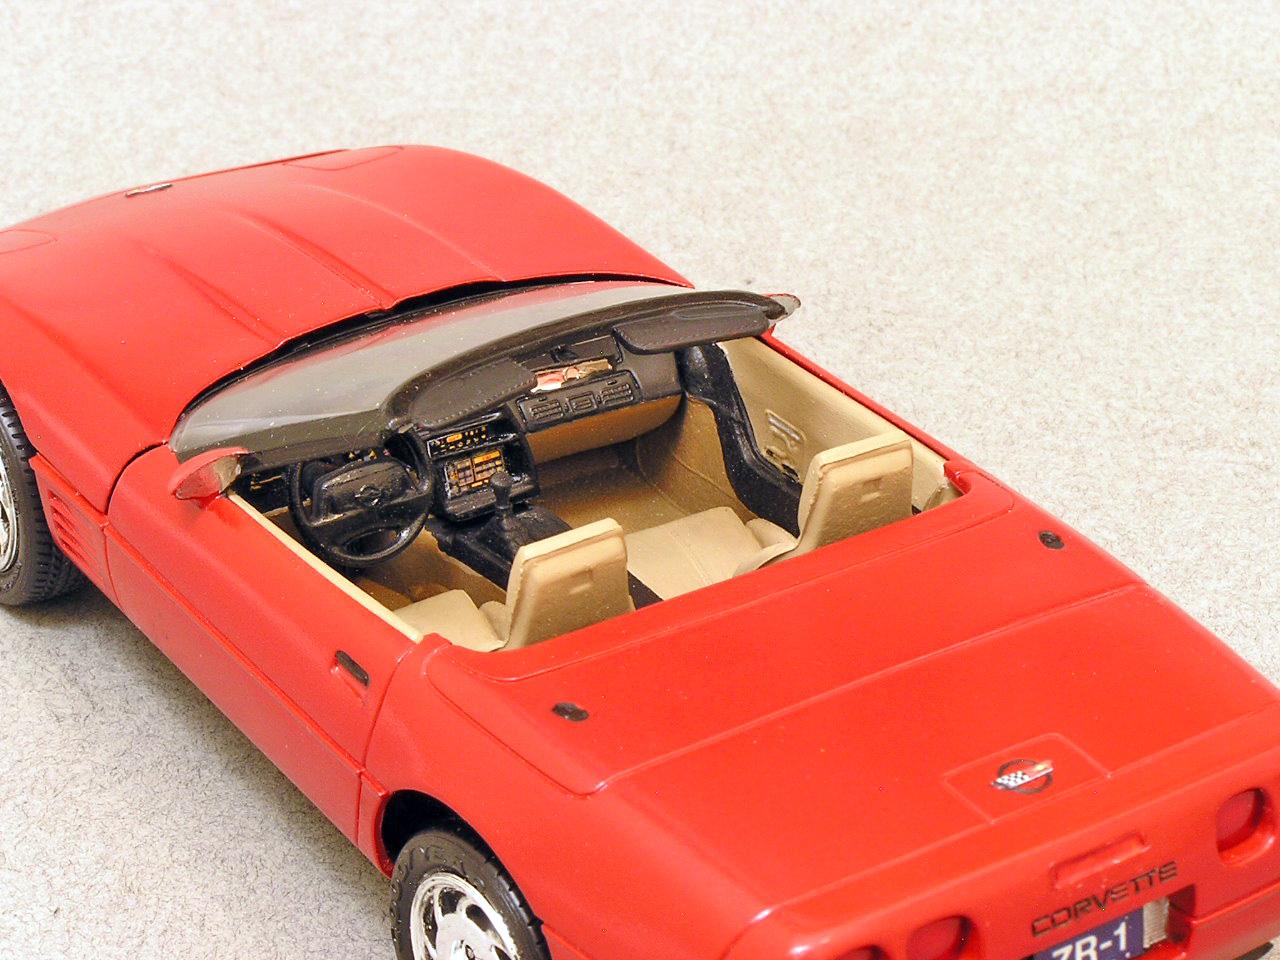
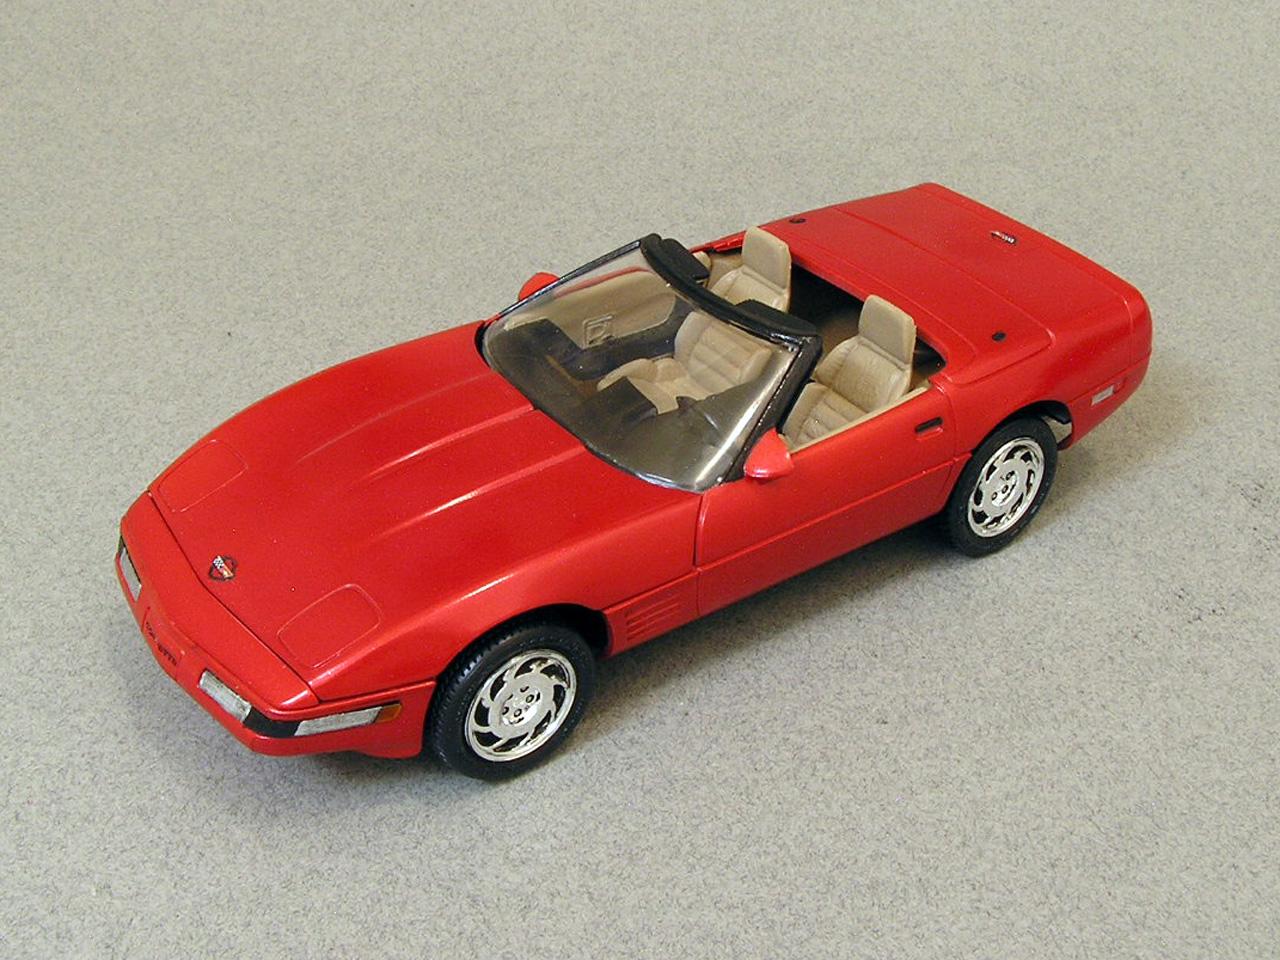
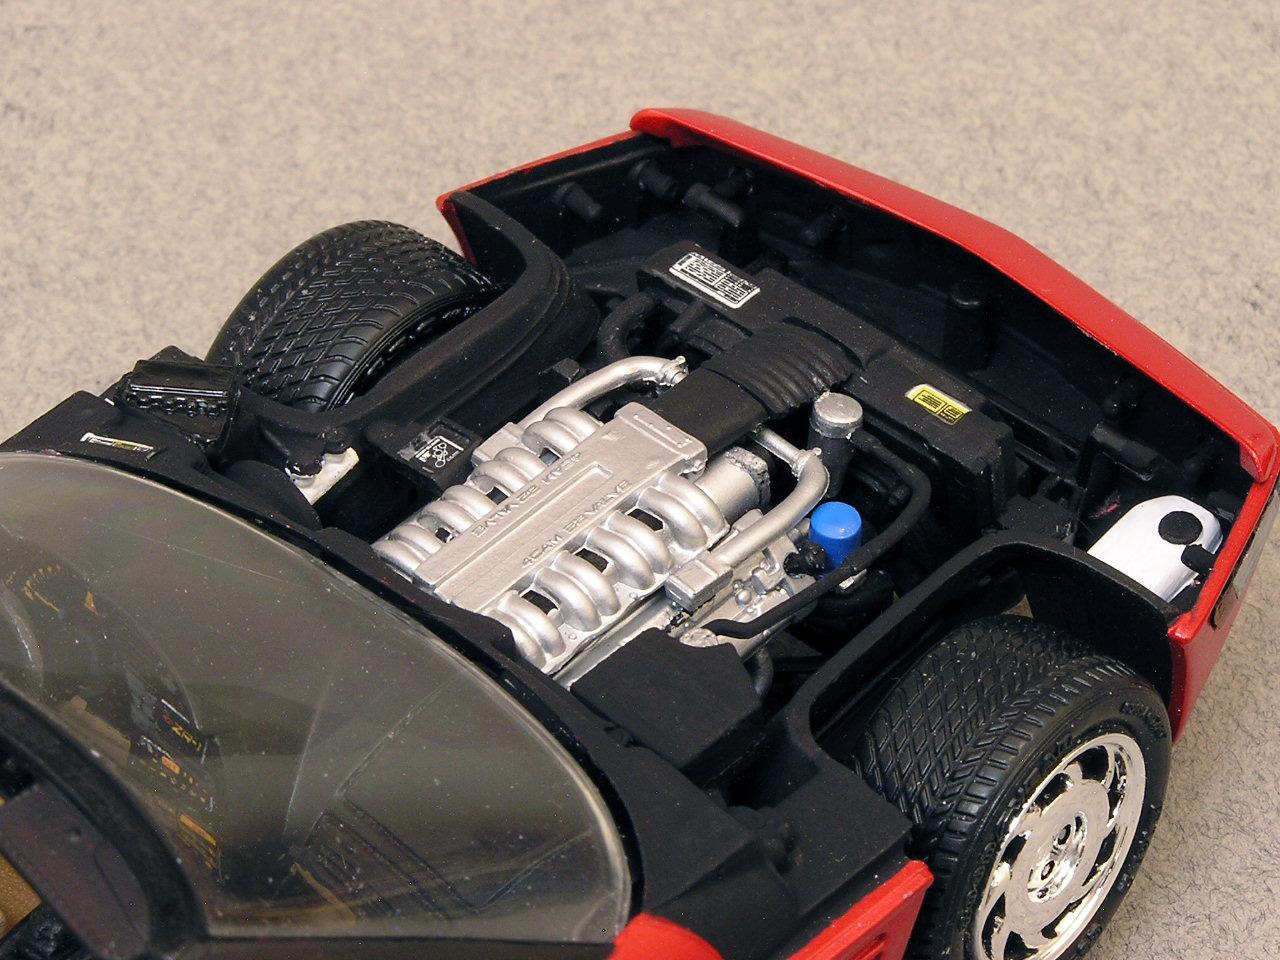
Here is my latest build - a 1994 Corvette! Exterior is Tamiya's Mica Red. Corvette logos for the hood and rear were printed from images I found and were glued on. The recessed Corvette lettering was done using Tamiya's Black Panel Line Accent Color. Dash gauges are from BestModelCarParts. This is actually a bit of a Franken-Vette. In the mid 90's, I built a model of my brother's Corvette. I had to get 3 kits in order to get the right seats, engine, and wheels for it. That meant I had enough parts left over to build 2 more models. I finally got around to putting one of these together - not sure all of the parts are necessarily from the same kit. I picked and chose what I liked best from all the parts I had! Thanks for checking this out! Bart
- 1 reply
-
- 2
-

-
I would be worried the thinner would end up making more of mess than fixing the issue. I would sand it and repaint the trunk.
-
Just a heads up, FYI, etc. for y'all. I'm not sure this has been mentioned before, but I just ran into this issue yesterday. If you are hosting photos on imgur.com, and then linking them in your posts here, it's possible that some users may not be able to see them. Some ISPs have throttled and/or blocked access to that website and all its content. When I first encountered the issue, I thought it might be my browser security configuration, so I tried several different browsers with no change. After a little searching and hair pulling, I realized my main ISP (Comcast/Xfinity) was blocking site access and giving back 409 conflict errors. Luckily, I also have secondary internet because of work (T-Mobile), and I was able to see everything just fine using it. Ditto on access via my phone (Verizon). This isn't an issue with the MCM board, obviously, but if any mods want to add their thoughts on this issue, feel free. I understand that posting photos from outside sites saves space on the forum end of things.
-
I feel pretty dumb right now as i did not know this. Not a mopar guy so i don't follow much.
- Today
-
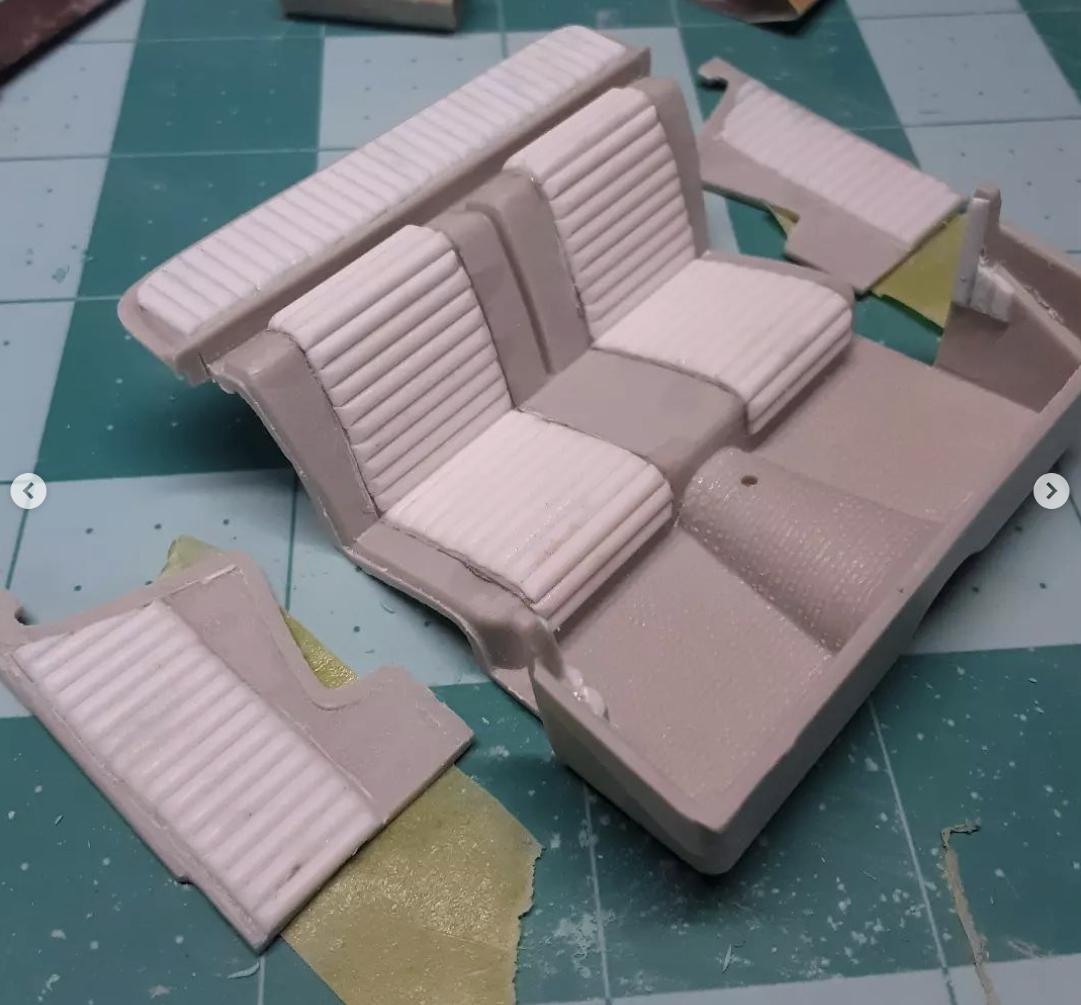
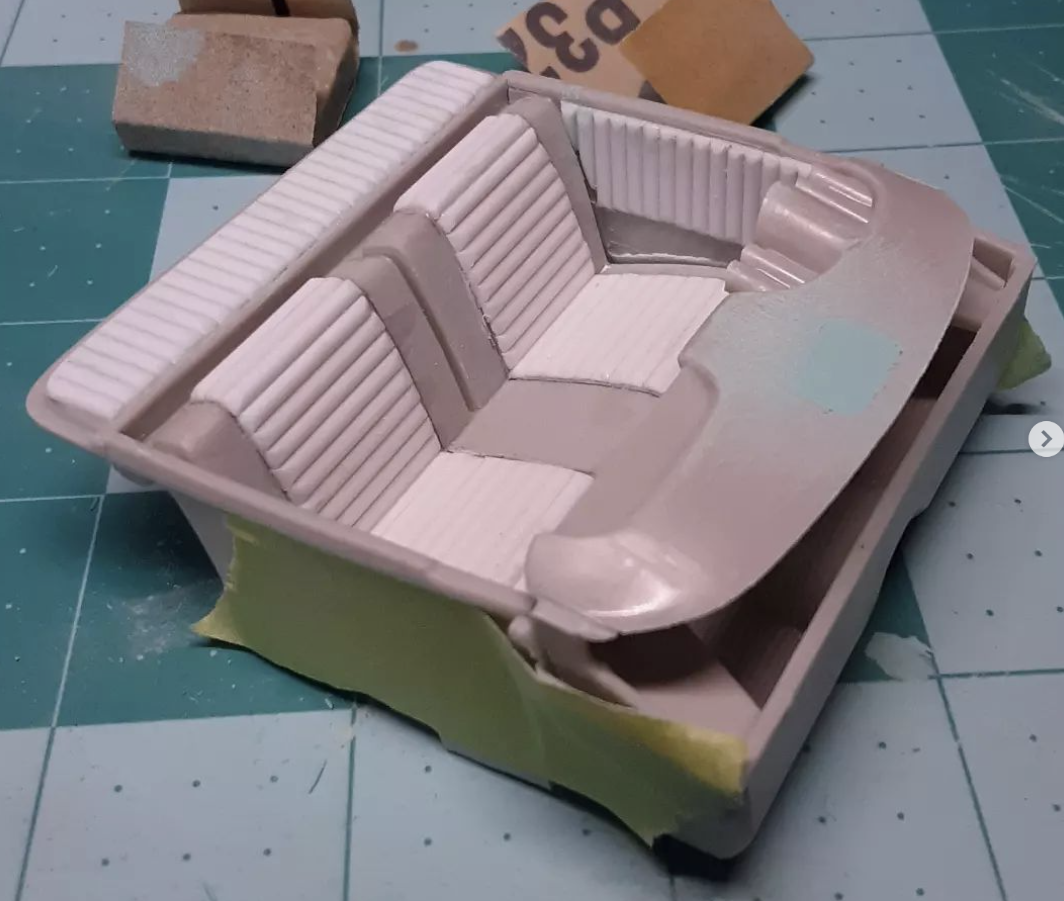
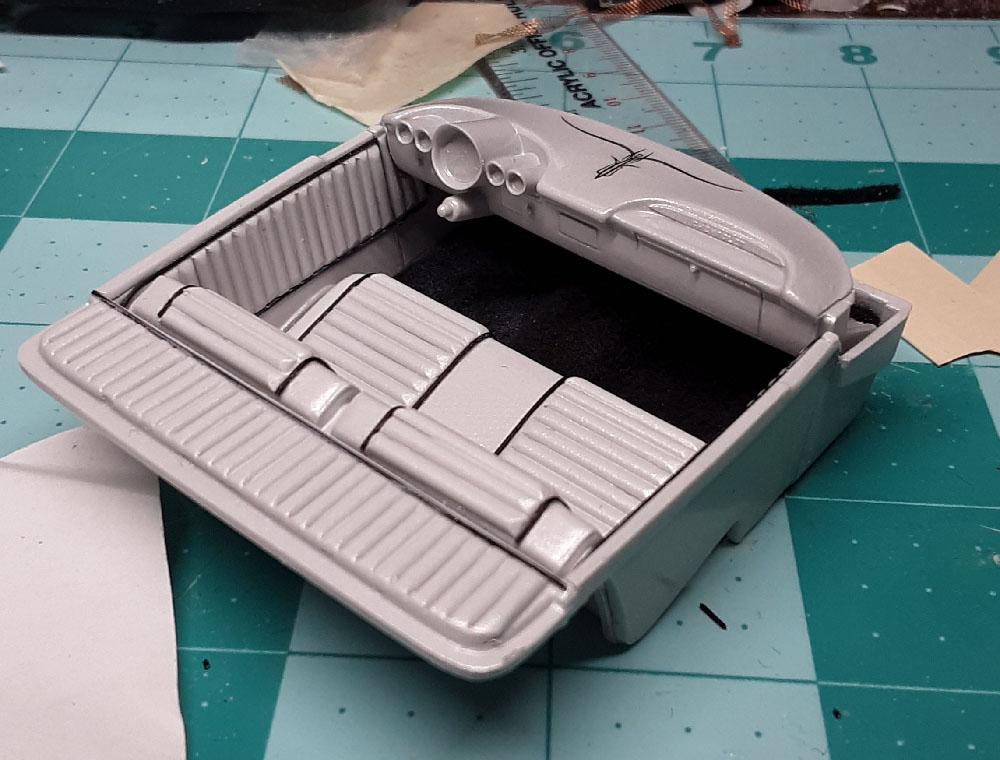
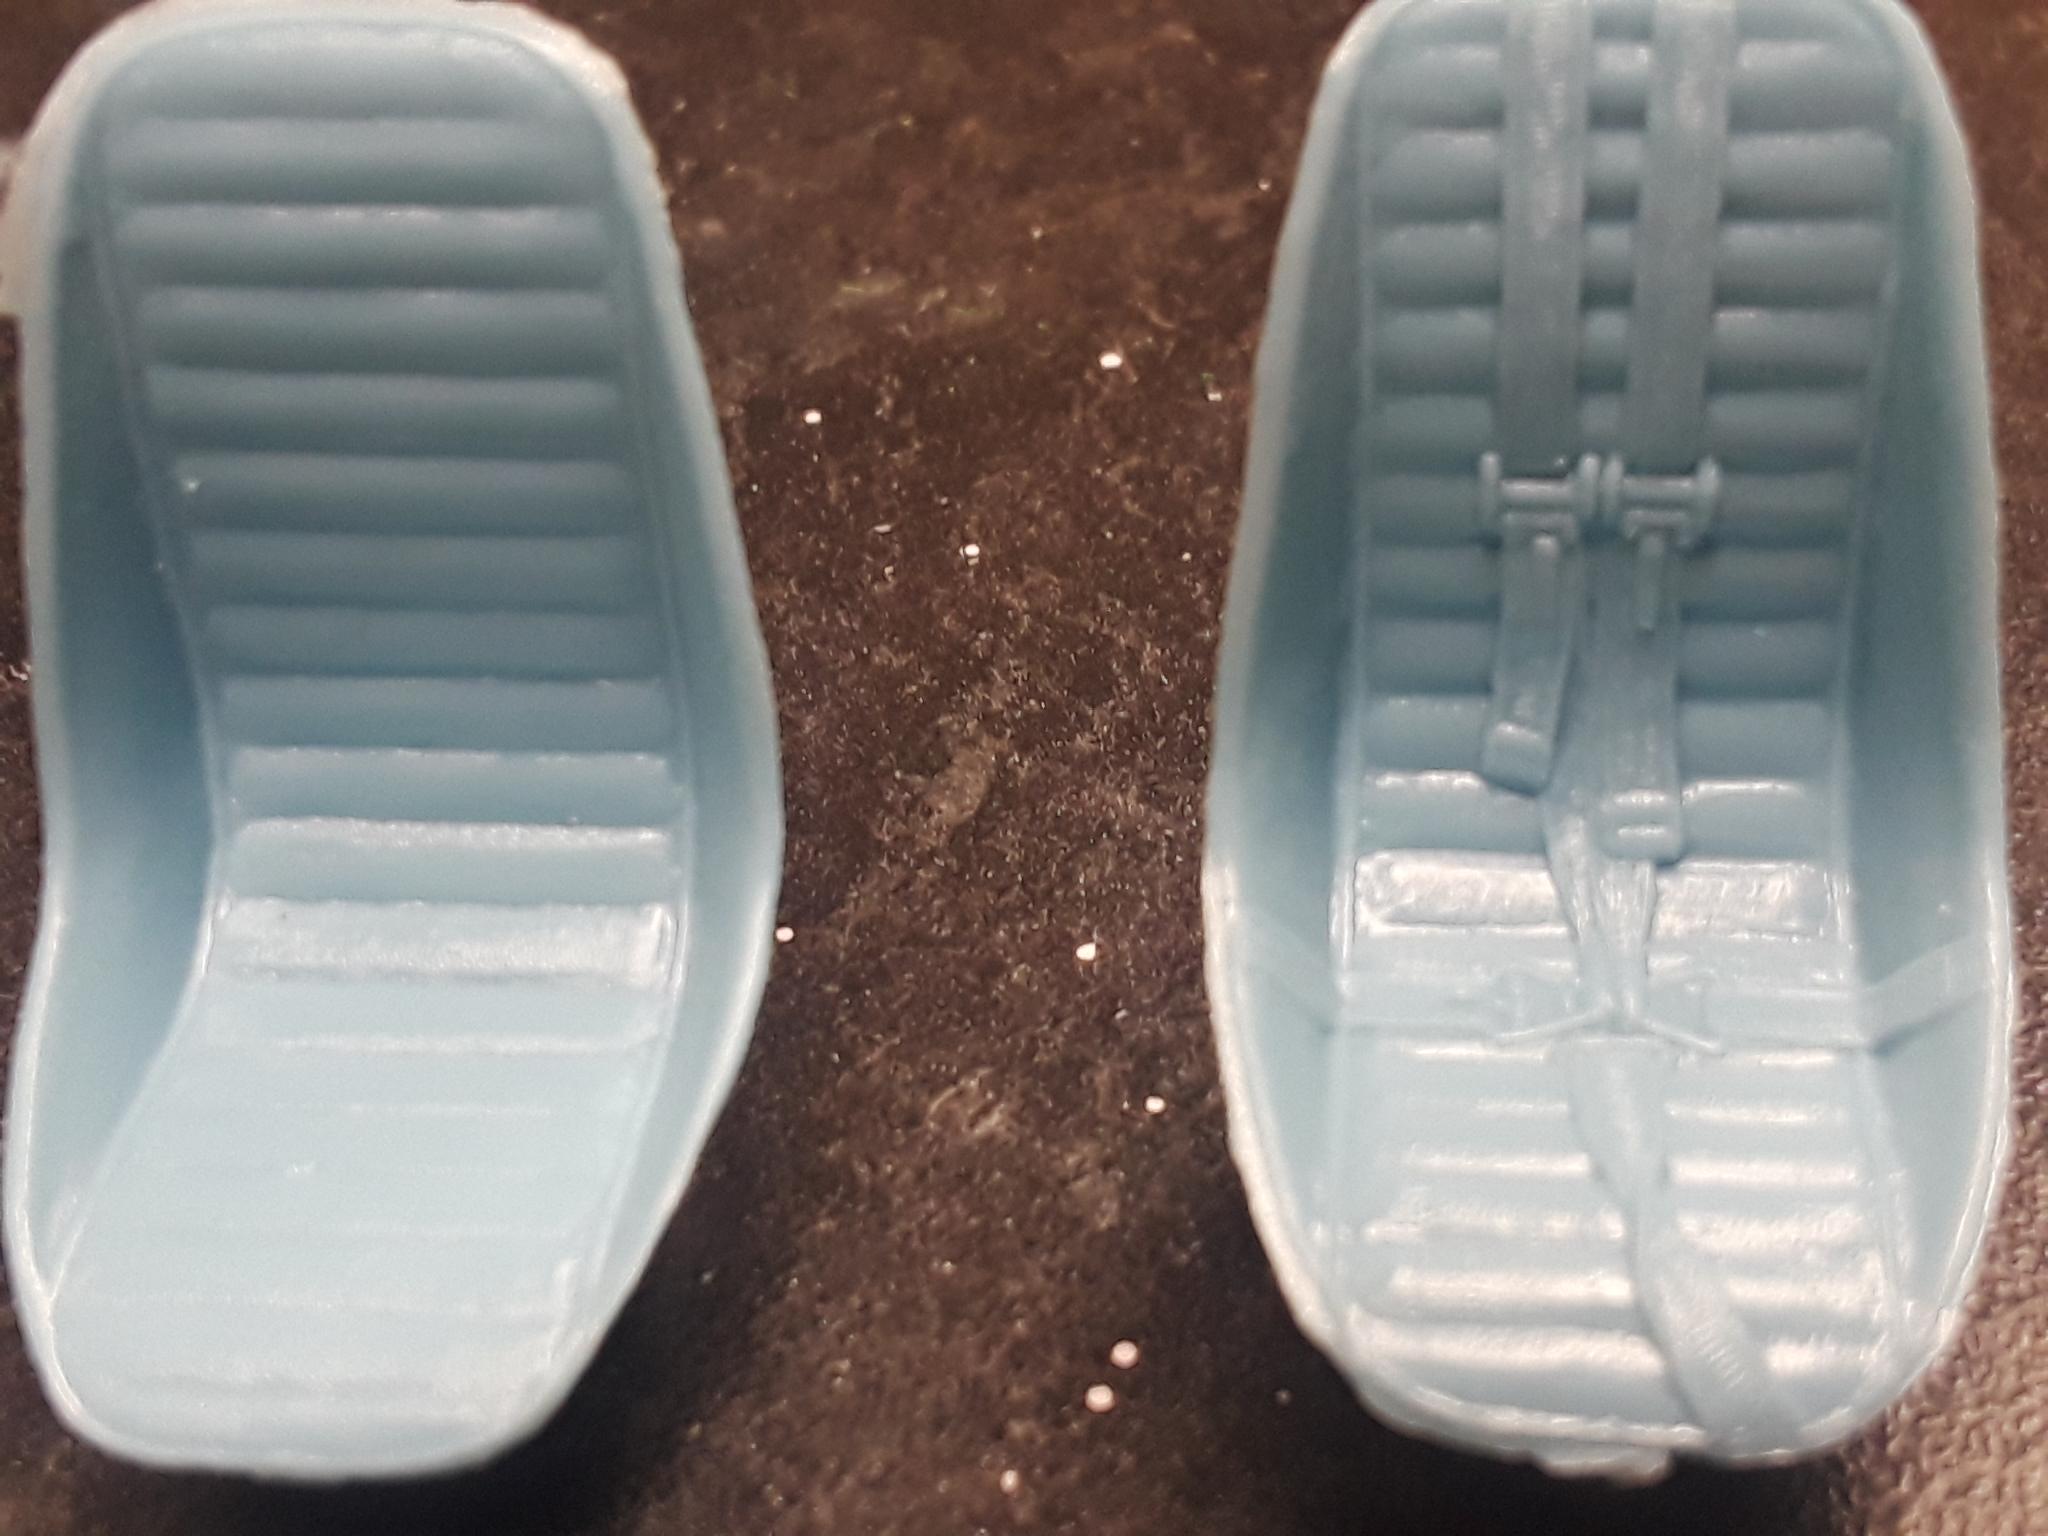
Here is a pic of the seats Would these work for you?
-

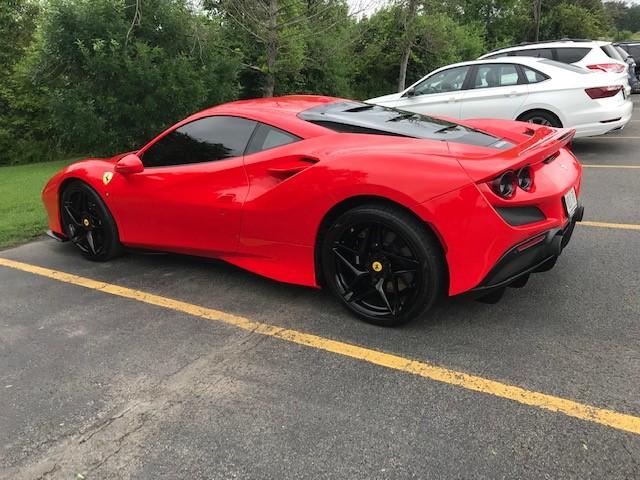
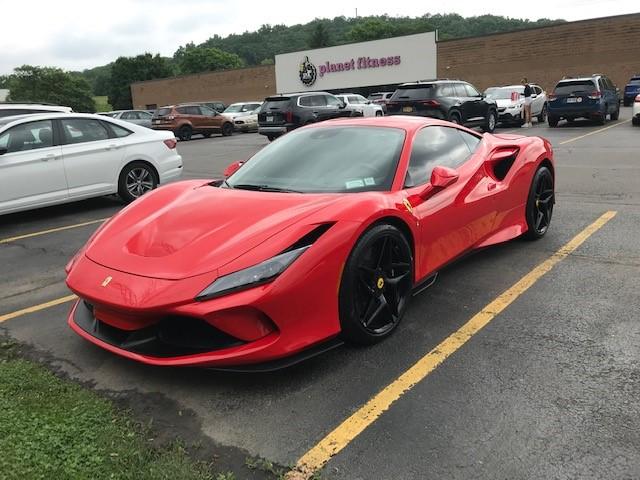
What did you see on the road today?
ModWrench replied to Harry P.'s topic in General Automotive Talk (Trucks and Cars)
Came out of my gym and found this Ferrari F8 parked 4 spots away from me. Later saw it ripping down the main drag in my town with a young lad in the passenger seat looking totally terrified!
-
Not the monogram kit this is the new Revell 1:25 scale kit
-
They Look Great, so your painting skills are awesome.
-
82 Dodge van Good Time
Leica007 replied to Leica007's topic in Model Trucks: Pickups, Vans, SUVs, Light Commercial
Thanks Gary, Check out the WIP photos, I did modify the rear suspension a bit and yes she has a yellow bikini bottom on (veeery small). Lei -

Moebius 1964 Mercury Comet Pro Touring
RancheroSteve replied to Justin Porter's topic in Car Kit News & Reviews
True, but this pro street version looks to have a Mustang II type front suspension, which eliminates the shock towers and frees up a lot of width in the engine bay. -
thank you and haven't been polished