Spottedlaurel
-
Posts
1,966 -
Joined
-
Last visited
Content Type
Profiles
Forums
Events
Gallery
Everything posted by Spottedlaurel
-
Very nicely done, you've really captured the period look of it.
-
You're building my stash! Nice one.
-
Tamiya 1/24 Nissan 240Z (street custom?)
Spottedlaurel replied to Bennyg's topic in Car Kit News & Reviews
Good news! -
You've captured the typical modified look of one nicely. Good work on the bumper delete and the colour looks just like a 1:1 shade which was common on them.
-
Very nice work Mario. You've done a particularly nice job on the brightwork and window trims.
-
Very, very nice! Some useful pointers for things to watch for when I eventually get around to mine.
-
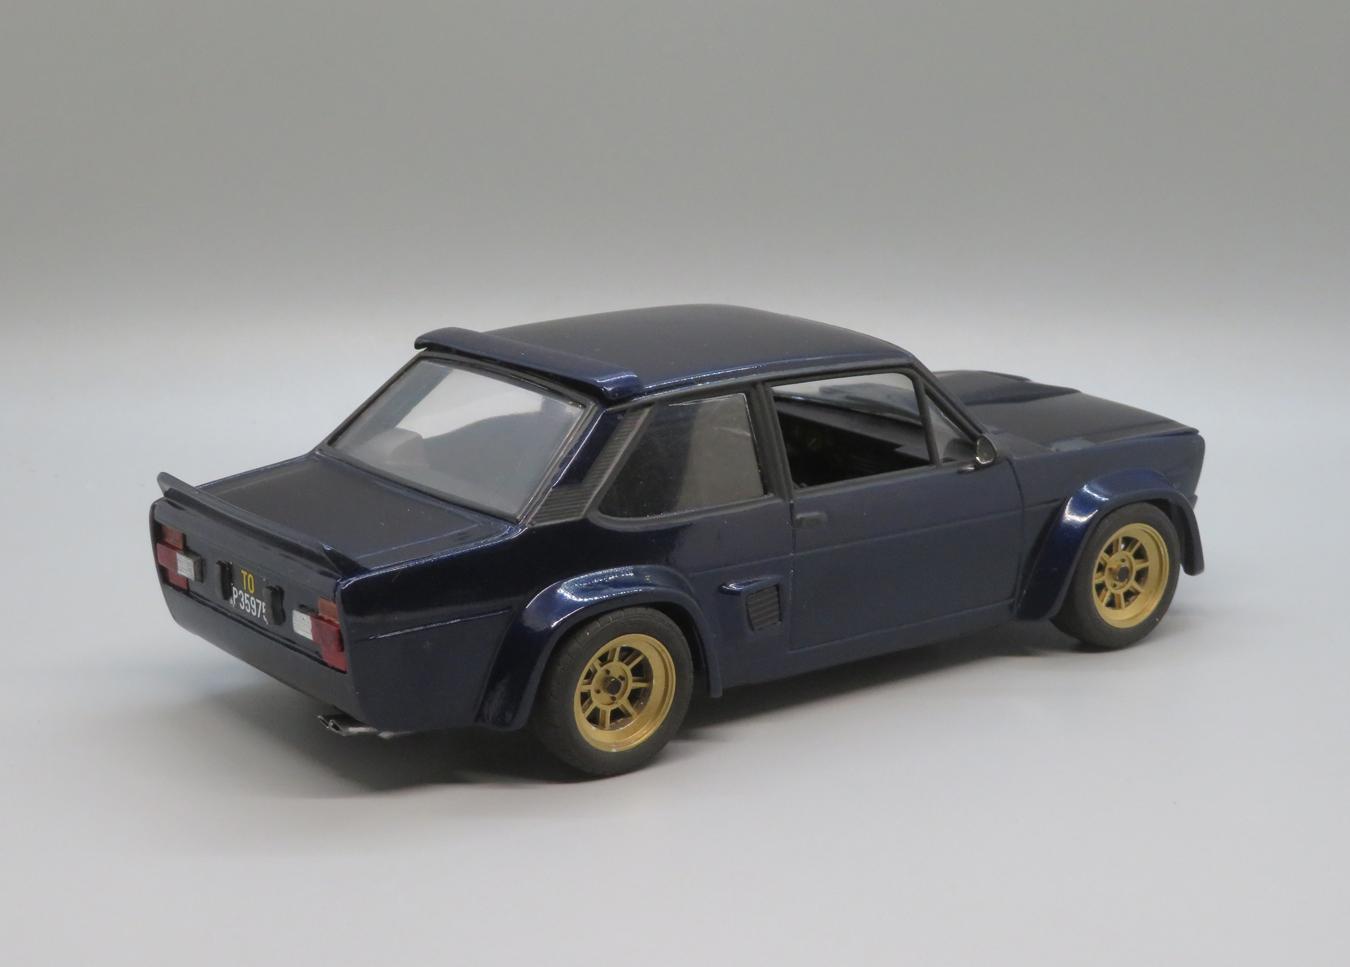
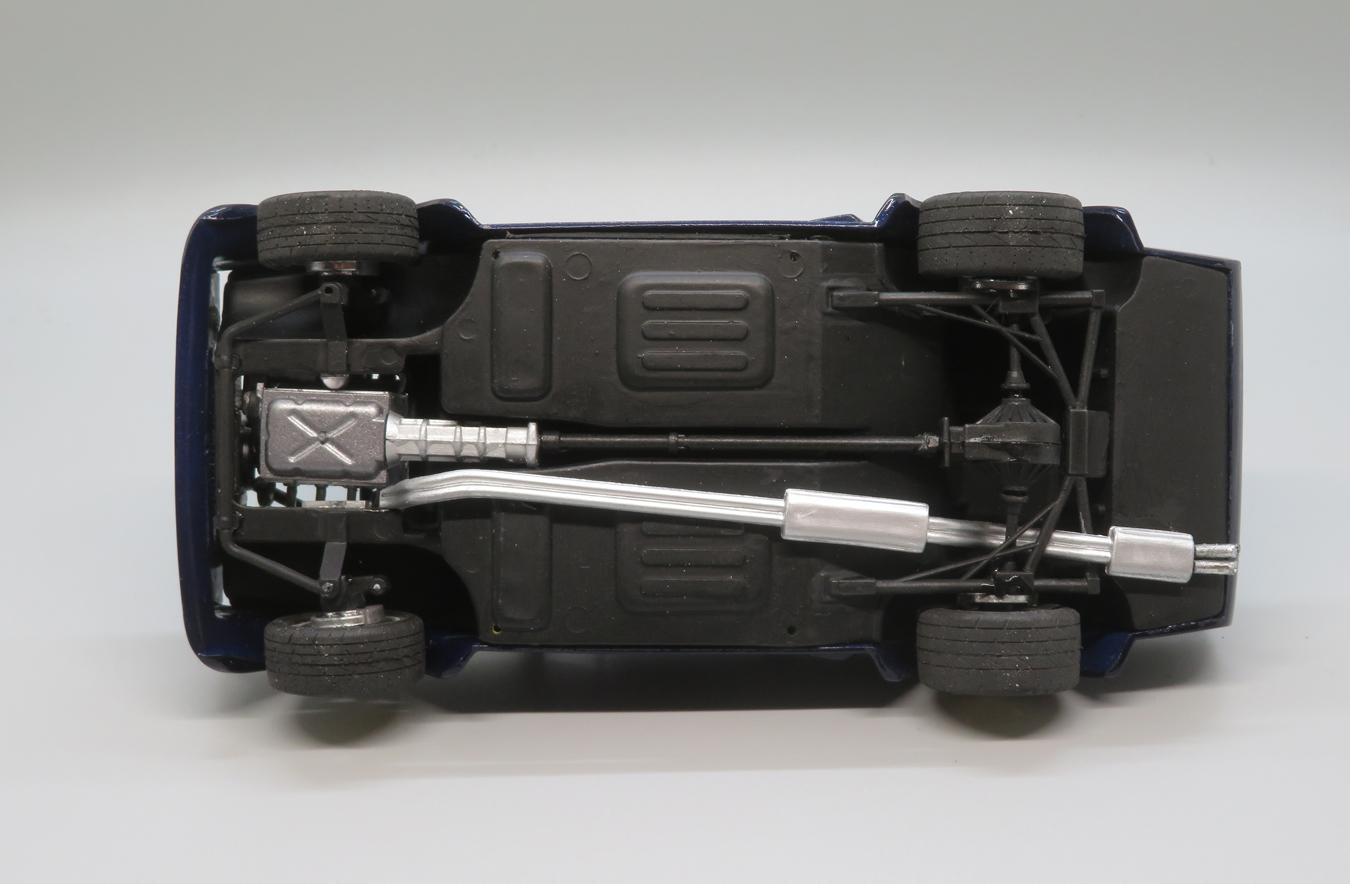
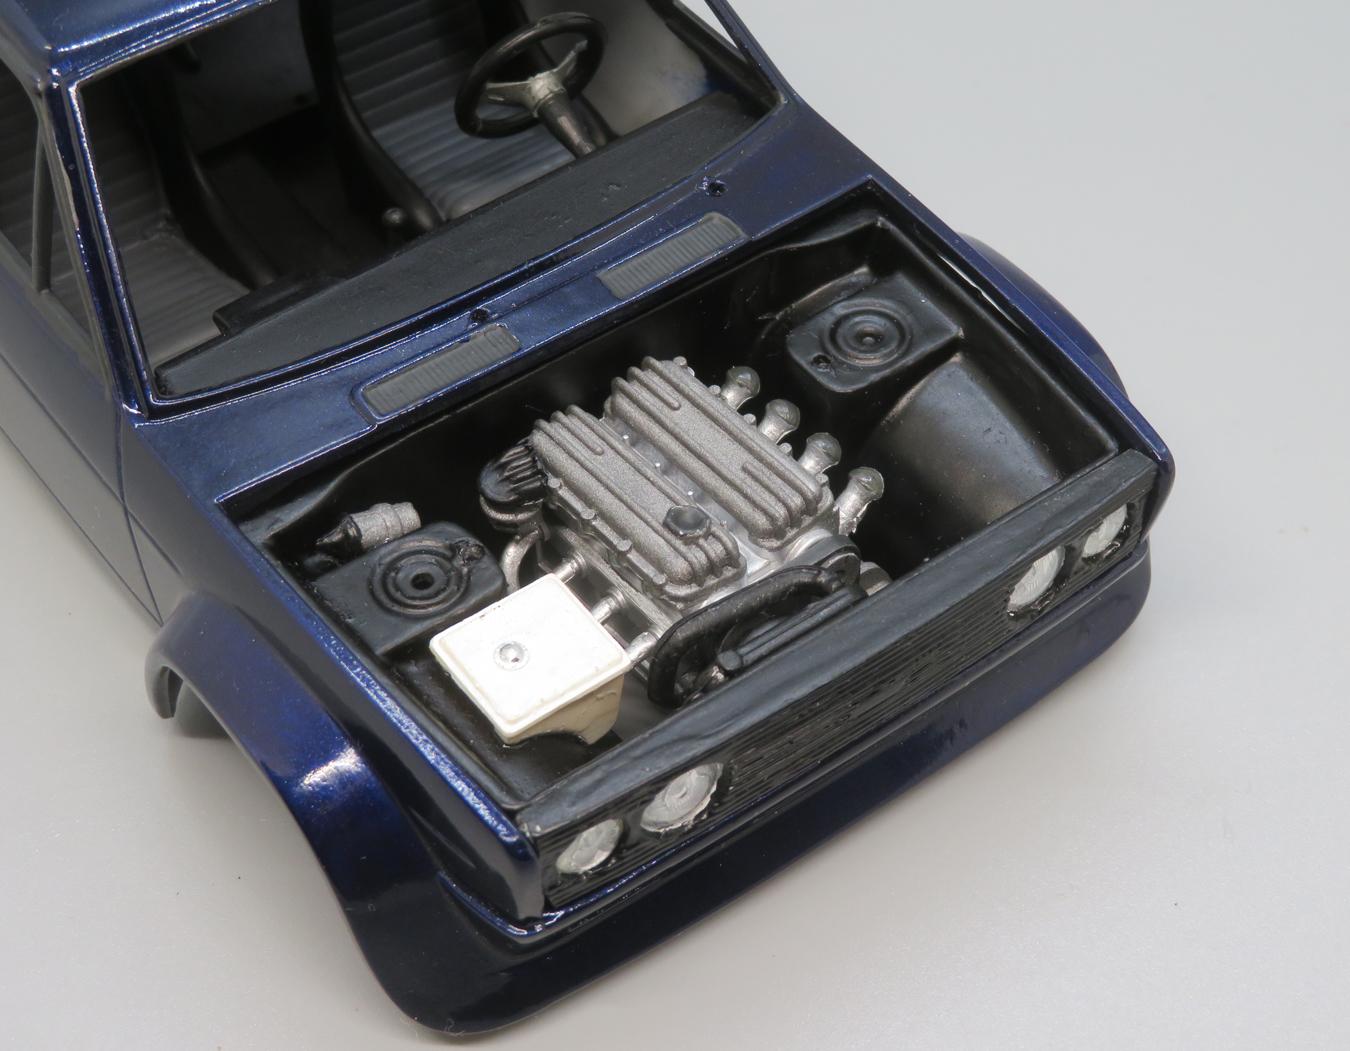
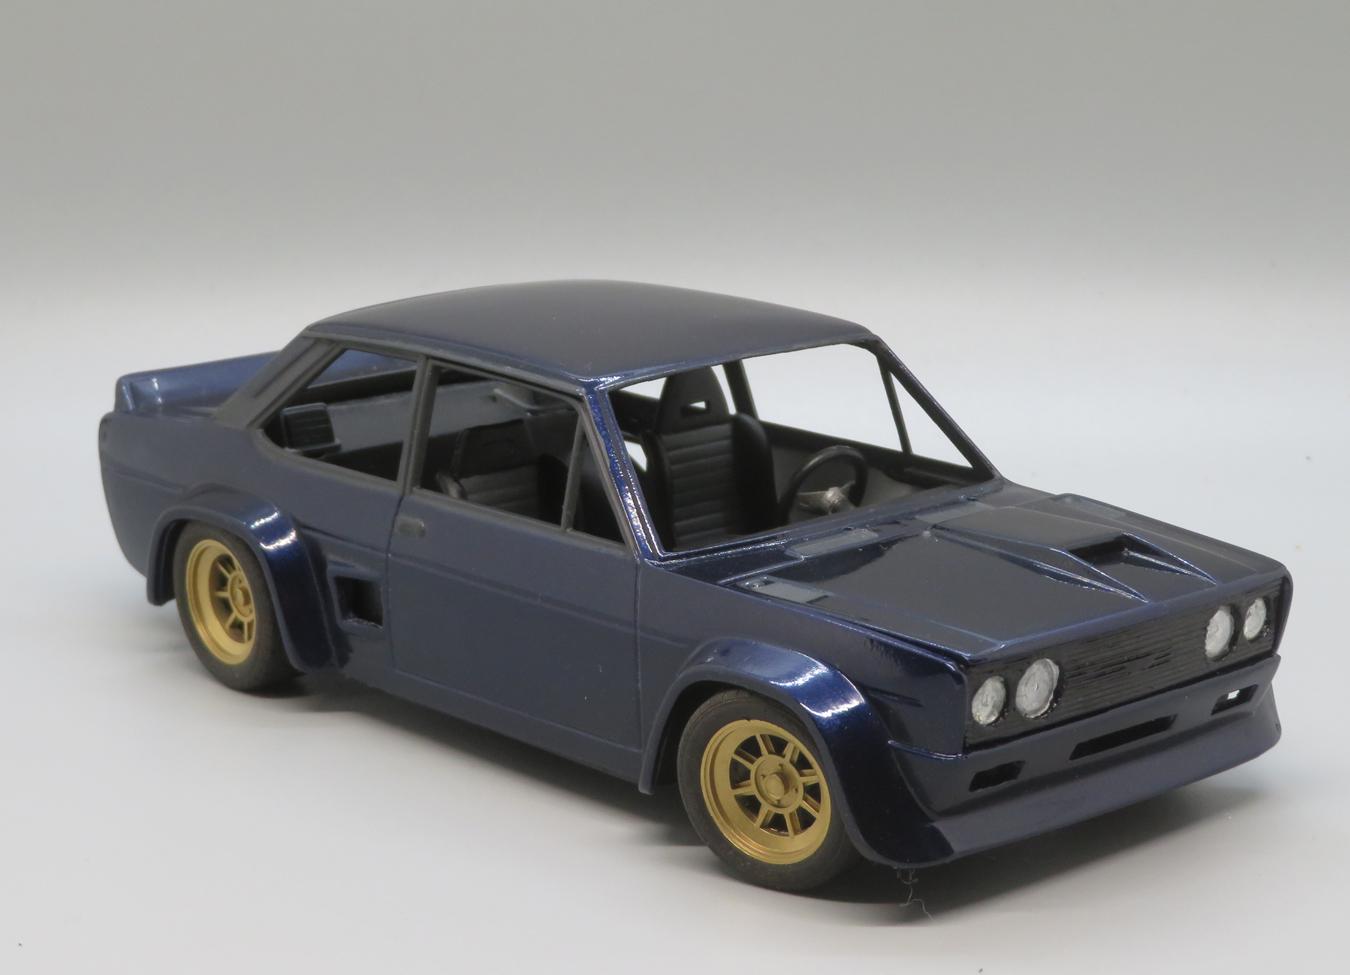
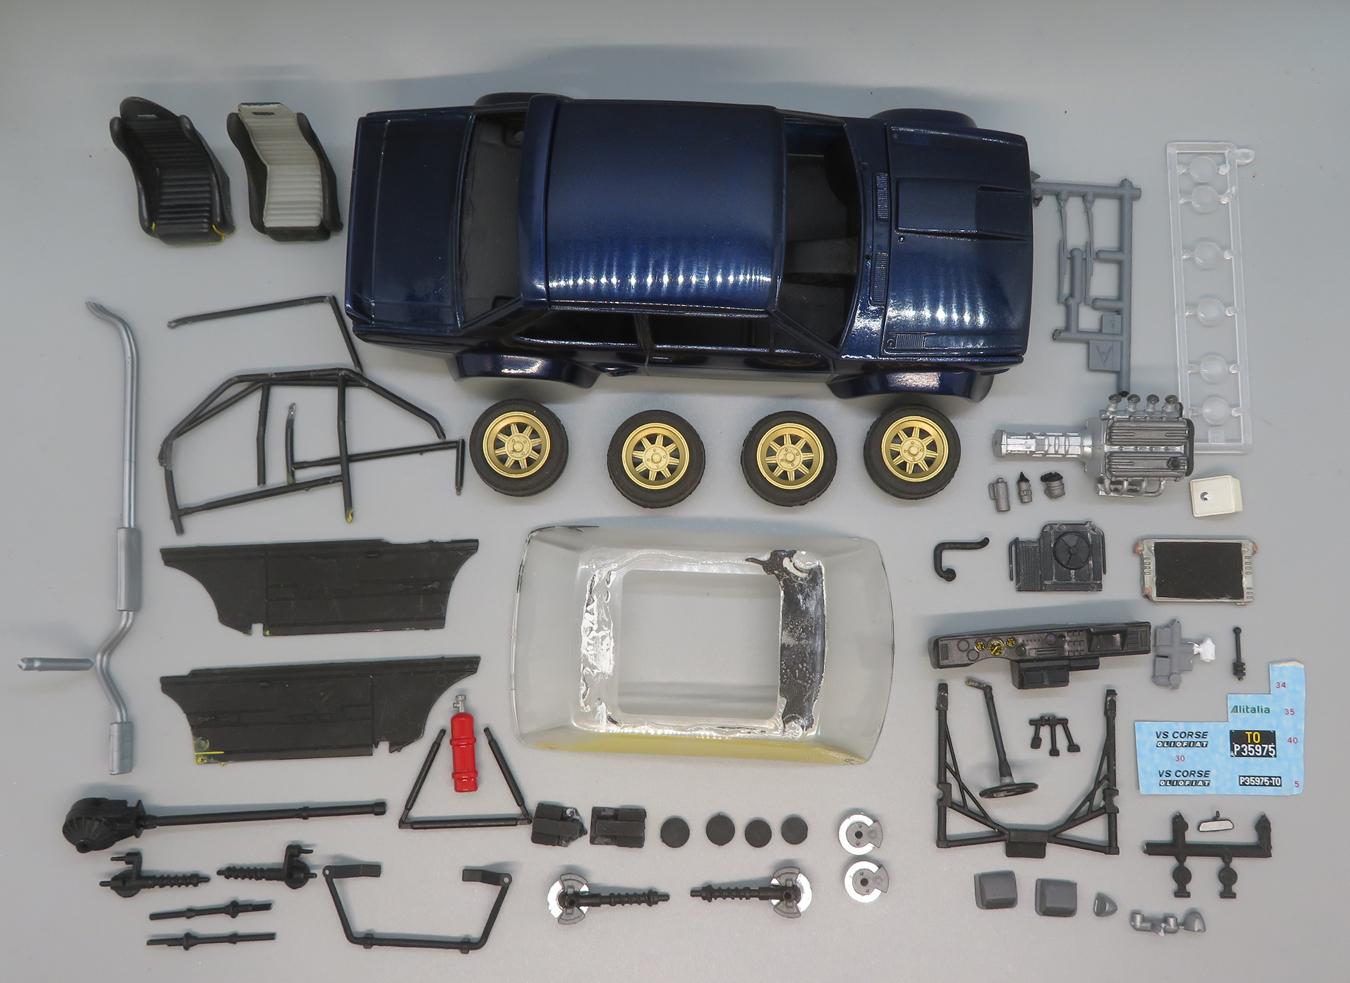
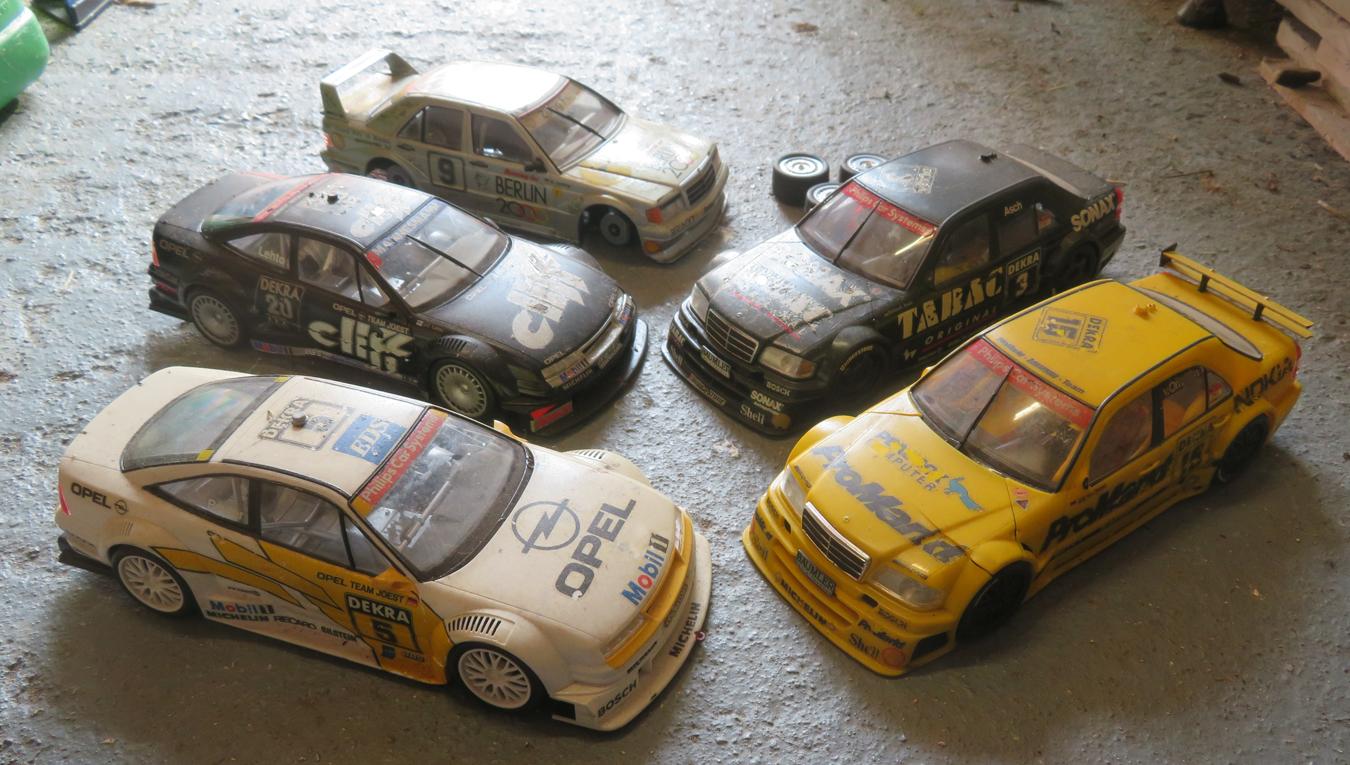
Started this rebuild/resto back in 2020 after I first built it back in 1983-ish..... WIP thread here: Only took me 40+ years to get it looking respectable! Tamiya TS-53 Deep Metallic Blue with Mr Hobby Gloss Clear, TS-21 Gold on the Fujimi "Hayashi Street" wheels (which look awfully like the period Campagnalo rims). Tried to use as many of the original parts as I could - managed to rescue the front and rear glass but had to cut the sides from clear sheet. Suspension lowered to better suit its role as a fast road car. Front spotlight holes filled, various parts taken from other kits or fabricated to suit. Fairly basic engine bay and underside detailing, to be honest I didn't spend much time on them. With companions of similar sporting nature. Doing this as a rebuild gave me a few challenges, and there are some areas where the finished result suffers because I didn't have a good replacement, but overall I'm pretty pleased with how it turned out. I don't remember it being out on display for long after I first built it, so it's good that it's time has finally come. Thanks for looking.

-
Mazda RX-3 Bathurst 1974
Spottedlaurel replied to ShawnS's topic in Other Racing: Road Racing, Salt Flat Racers
Very nicely done! -
Probably my last WIP update on this one, it's coming together nicely and there's a vague possibility I could get it finished tomorrow (a public holiday here in the UK, so no work for me). Fairly basic interior is done, engine is installed along with what I could find of the ancillaries. Made a start on the body trim detailing. Before and after on the rear end: I'd painted the lights black because I had in my mind it was a rallycross car and that was a quick, easy way for me to blank them out. Fast forward 40+ years and I have to make them look like lights again. I went over the black with Gundam Chrome Marker, then painted a couple of coats of clear red and amber (and leaving the reverse lights). The black slightly bled through, a happy accident which seems to give them a bit of depth. Sorry, no detailing here. One day, but not on this build. Final mock-up, still without suspension - that's one of several jobs I have tomorrow. I have fitted headlight lenses, but they're not easily visible. Some years ago I saw aftermarket grille and light sets for this kit, now wishing I'd bought one.....
-
Tribute to Snake45
Spottedlaurel replied to bobthehobbyguy's topic in General Automotive Talk (Trucks and Cars)
Got to be that, and also include Snake-Fu for anyone who doesn't have longstanding WIP (?!). Not a full rebuild, but a bit of extra detailing and TLC of a 'pre-loved' kit? -
Thanks David. With more coats the colour has got quite a bit darker, I'm keen to see what it looks like sunlight. Thank you Noel. The spares box is still being raided, just this morning I managed to locate the radiator, fire extinguisher, steering wheel, gearlever and pedals. For whatever reason I hadn't found them first time round, maybe it helped as I knew what I was looking for this time.... Current state of play, with pretty much everything I need to complete it prepped, in progress or at least located. Front and rear screens will be separated from the side glass, and I'll cut the latter from flat clear sheet. Pleasing to see an engine in place again. I built this up from one of the 5x spare sprues. Bodywork fully painted and polished, have made a modest start on the black trim detailing. Crude mock-up, with no suspension. I suspect I'm going to have to lower the rally car suspension for it to look good as a hi-po road car.
-
Tamiya 1/24 Nissan 240Z (street custom?)
Spottedlaurel replied to Bennyg's topic in Car Kit News & Reviews
Something we can try in 1/24 at least! I don't want to distract myself from the RB26 conversion I'm currently doing on a Tamiya ZG build, but I think I do have one of those engines somewhere..... -
Tamiya 1/24 Nissan 240Z (street custom?)
Spottedlaurel replied to Bennyg's topic in Car Kit News & Reviews
That's very nice! Another option for slot mags would be the old Monogram 280Z road car kit, and they're 4-stud too. Is there also a Lotus Esprit that has them too? From memory they're a bit wider. As I think has probably been mentioned the Hasegawa nosecone appears to fit the Tamiya shell very nicely, so with a bit of mixing and matching and the availability of the Tamiya Z with LHD that now gives scope to build pretty much any variant with full engine and underbonnet detail without going too far into the aftermarket/conversion world. -
2024 Cannonball Run Restomods Build Thread
Spottedlaurel replied to White Rabbit's topic in Community Builds
The red and black paint combo is lookig sharp @avidinha -
It's coming together nicely Atin, the way it's turned out slightly darker looks good to me. Polishing should be a fairly minimal exercise?
-
Nice work Tom! And certainly a fitting tribute to Snake.
-
Thanks Atin! And yes it did, been here for over 2.5 years now, so pretty much settled in. Still don't have quite as good a modelling set-up as I used to have, but I found room to store all the unbuilt kits and I keep messing about with the WIPs whenever I can. No photos, but I gave the first couple of colour coats a wet sanding and then applied another two coats followed by the Mr Hobby Gloss Clear. That looks to have gone down nicely, should just need minimal polishing which I'll do at the weekend. Have also made a start on a new engine and 'box from one of the spare sprues. Should go together pretty simply from this point onwards.
-
Picked this batch of built Tamiya kits at a 1:1 car show and autojumble yesterday: Have no idea what I'm going to do with them, but it seemed a shame to let them continue to get carted around and sustain damage and loss until they were no good to anybody. Maybe restore one or two and use the others as basis for hi-po road cars?
- 38,041 replies
-
- 4
-

-
- johan
- glue bombs
- (and 1 more)
-
Great to see the Silvia S110 done by Hasegawa! Now for the uglybug S10 to be offered by somebody..... Any shots of the sprues for the Tamiya 240Z? Interesting to know what options there might be with it, like a standard front end without spoiler?
-
Thanks Helmut, looks like he was enjoying himself! Really useful to see a road car photo, and it's reminded me I'd forgotten about the spoiler above the rear window. No rollcage, so that's something I don't necessarily have to find and repair. Got the colour down on it today, Tamiya TS-53 Deep Metallic Blue as I thought it would be reminiscent of the dark blue used on the Olio Fiat cars. It needs clearcoat, but I'm happy with it so far. Strange to see it properly in colour after 40+ years.
-
Looks great, and I'm in agreement about the window tint looking just right. Certainly sits nicely with your '70s Japanese car builds. I think some Aoshima kits have an opening hood to house a battery compartment for the electic motor and/or lights which were common on older Japanese kits.
-
Practice makes perfect! Looks great, the black trim defines many cars of that time but it can be a challenge to get right and you certainly pulled it off.
-
Nicely done. The 2-tone must have been a challenge with quite a contrast between the colours and some places where you can't rely on the trim to break it up, but you got it down just right. Great work on the badges and tail lights with the Molotow.
-
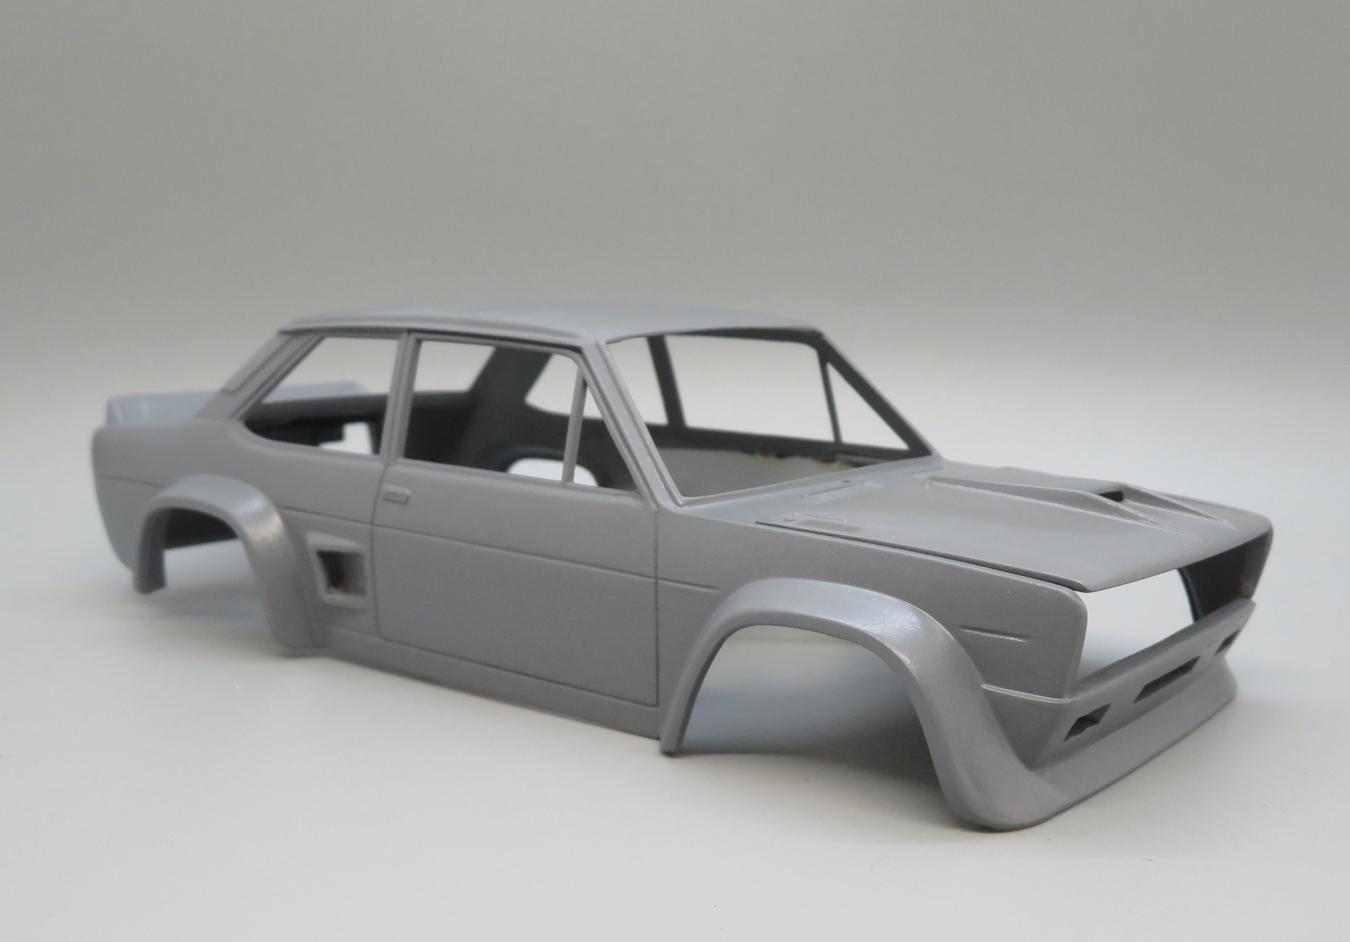
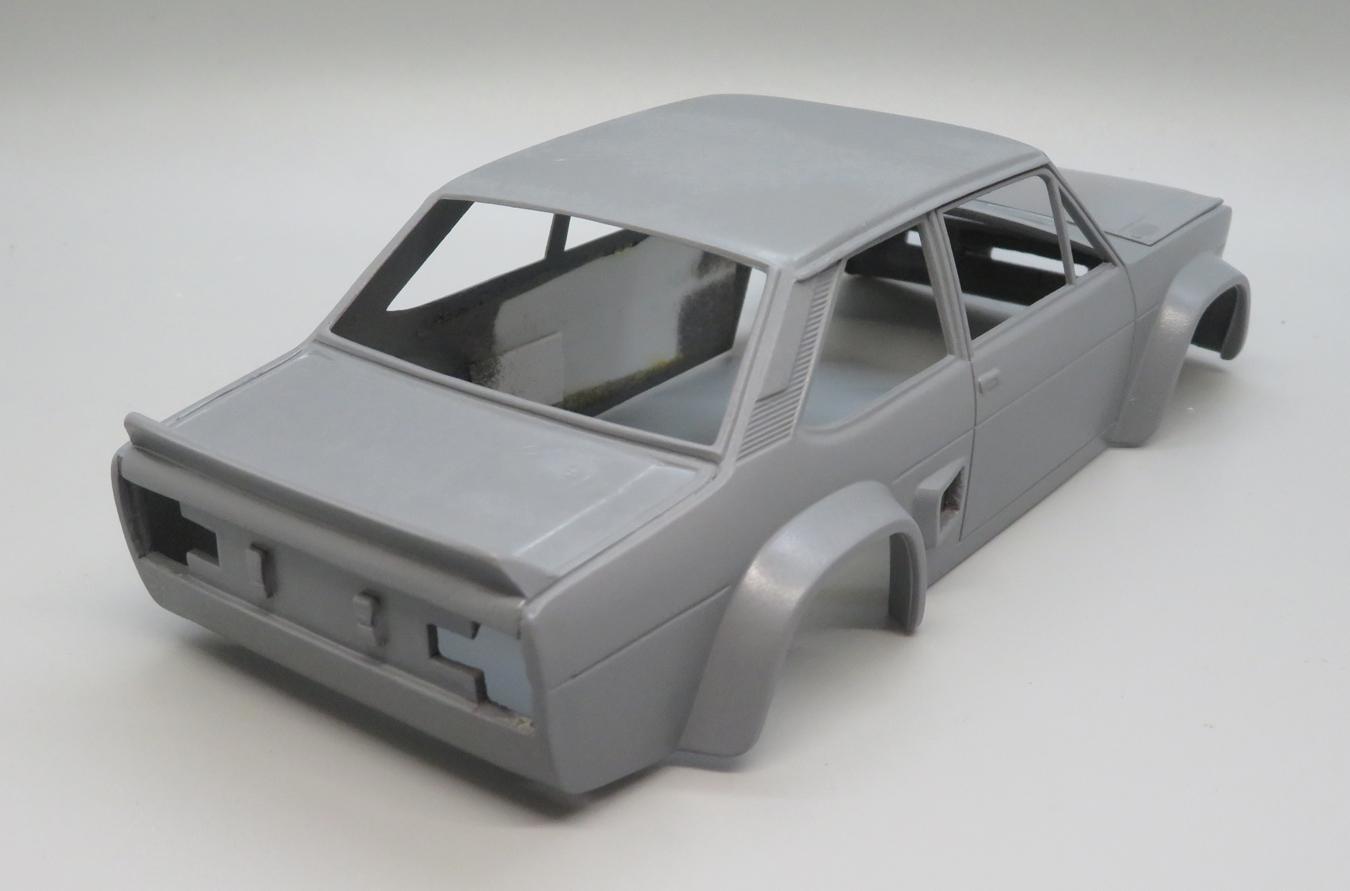
I thought this had been hanging around for too long, and the filler should be about ready to sand after three years! I'm going through repeated cycles of fill, sand and prime, but hopefully I'm now on the last one of those before I can can get some colour down, maybe later today as we have a public holiday here. Most traces of the old spotlight holes gone. Nearly there with filling of the bootlid fuel filler. I'm hoping it should now move forwards quite quickly, as I'm using as much as I can of my orignla 1980s build and the new detailing is fairly simple, plus as a road car it won't have many decals.
-
2024 Cannonball Run Restomods Build Thread
Spottedlaurel replied to White Rabbit's topic in Community Builds
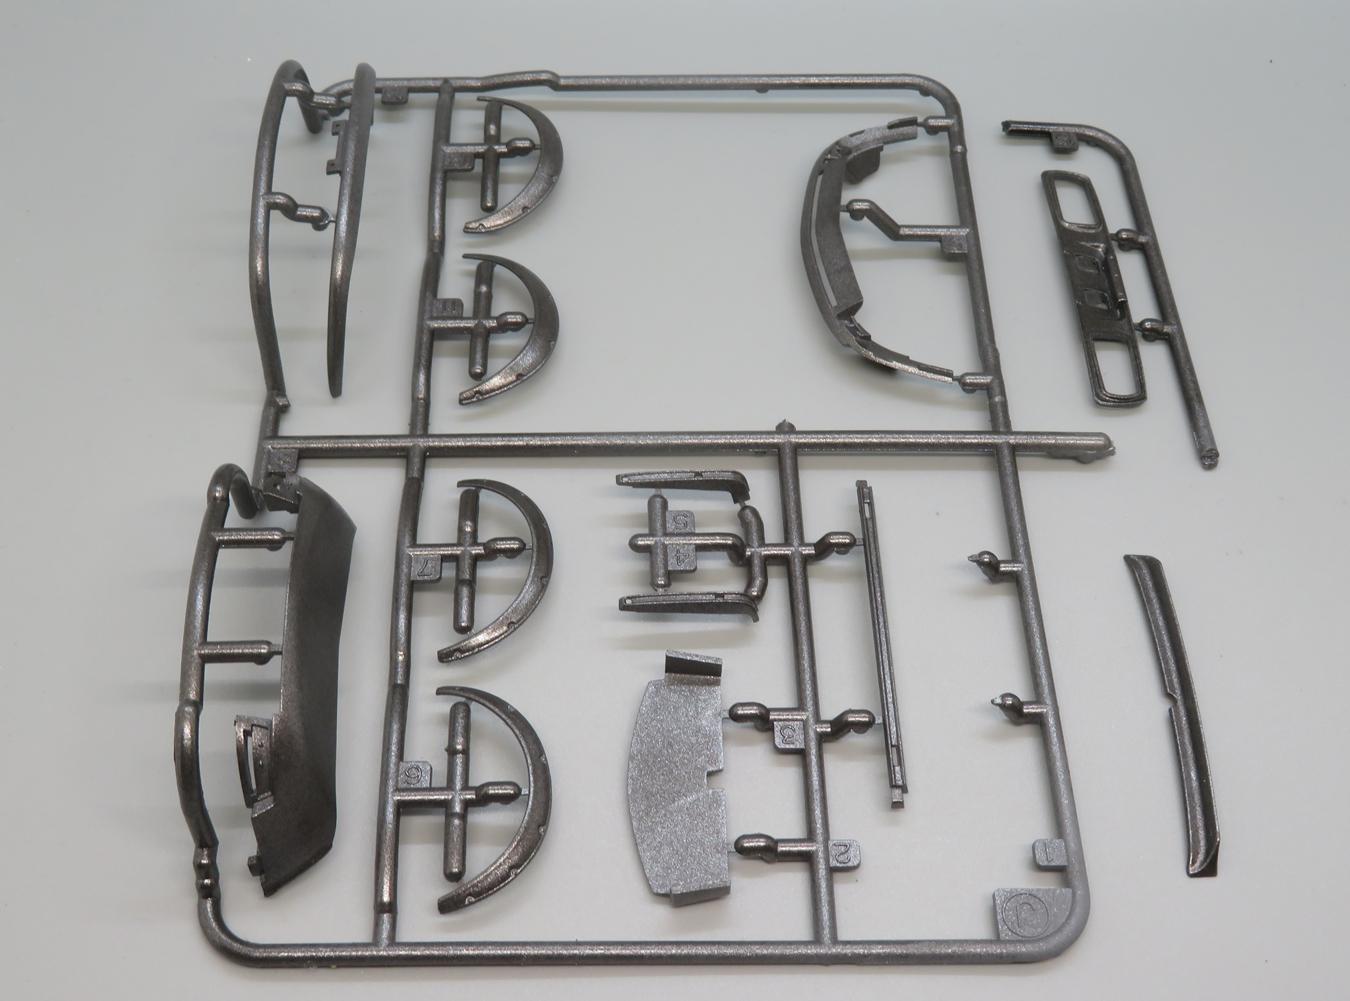
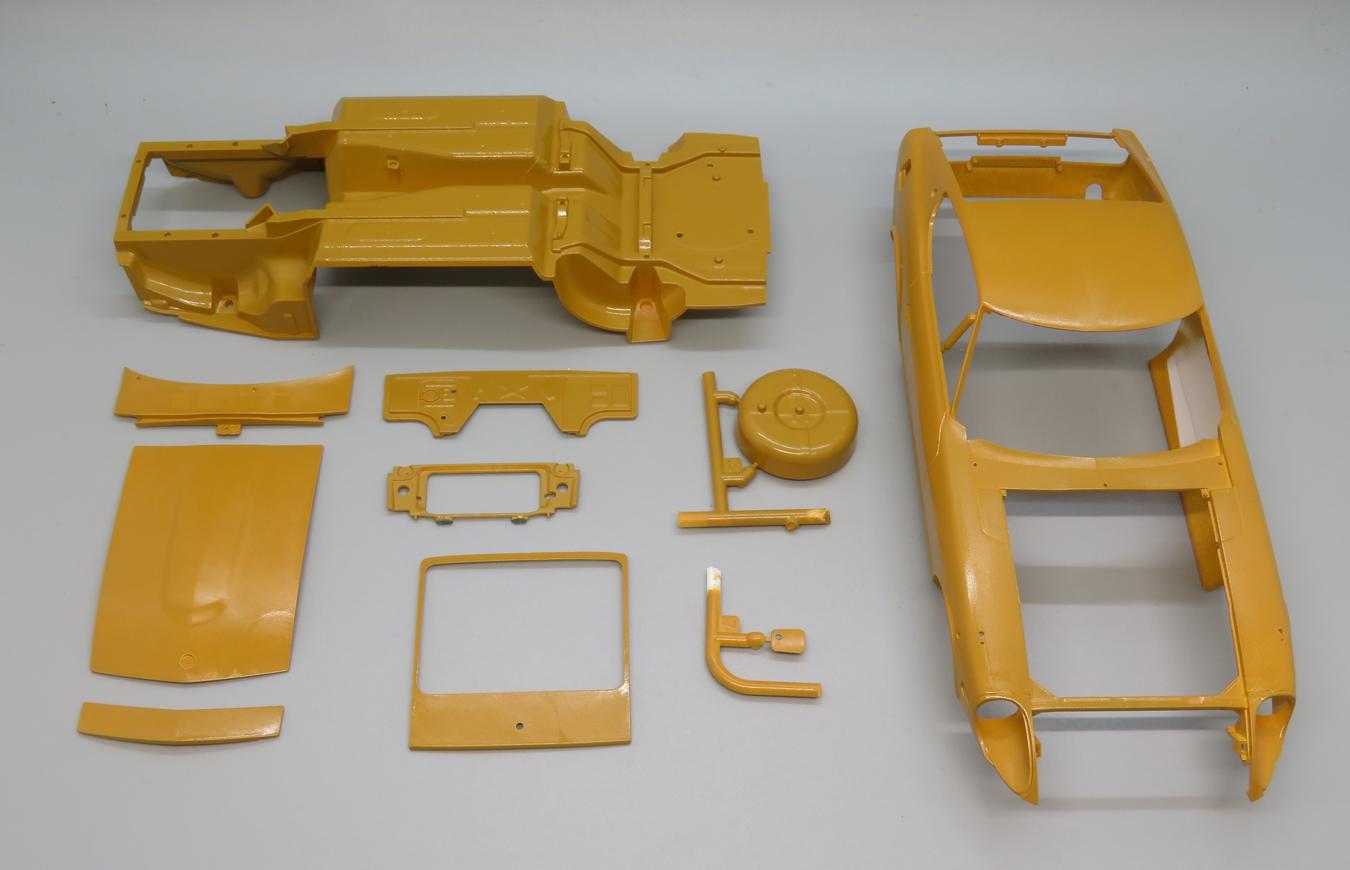
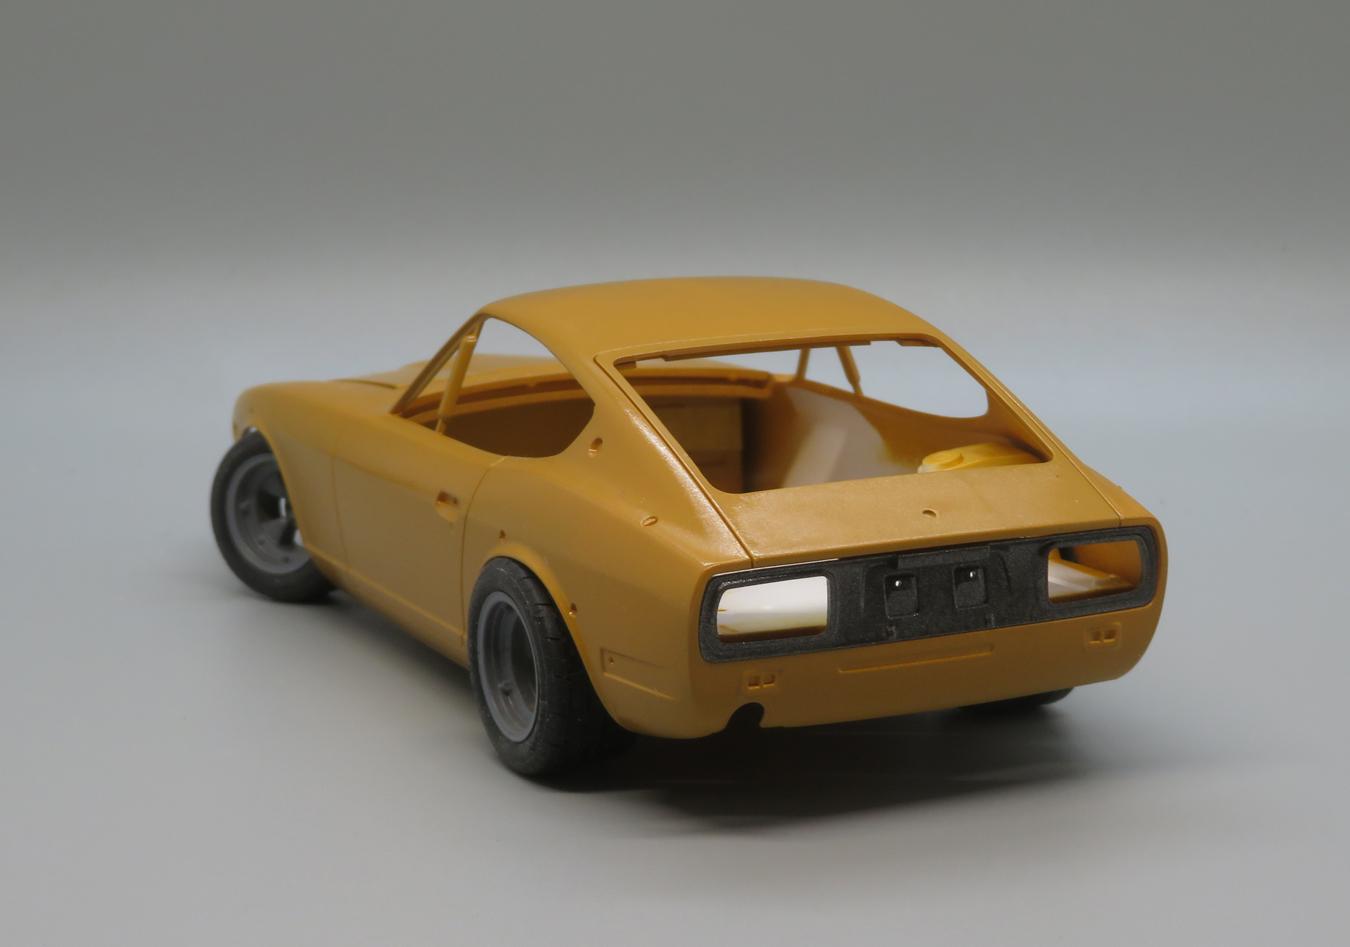
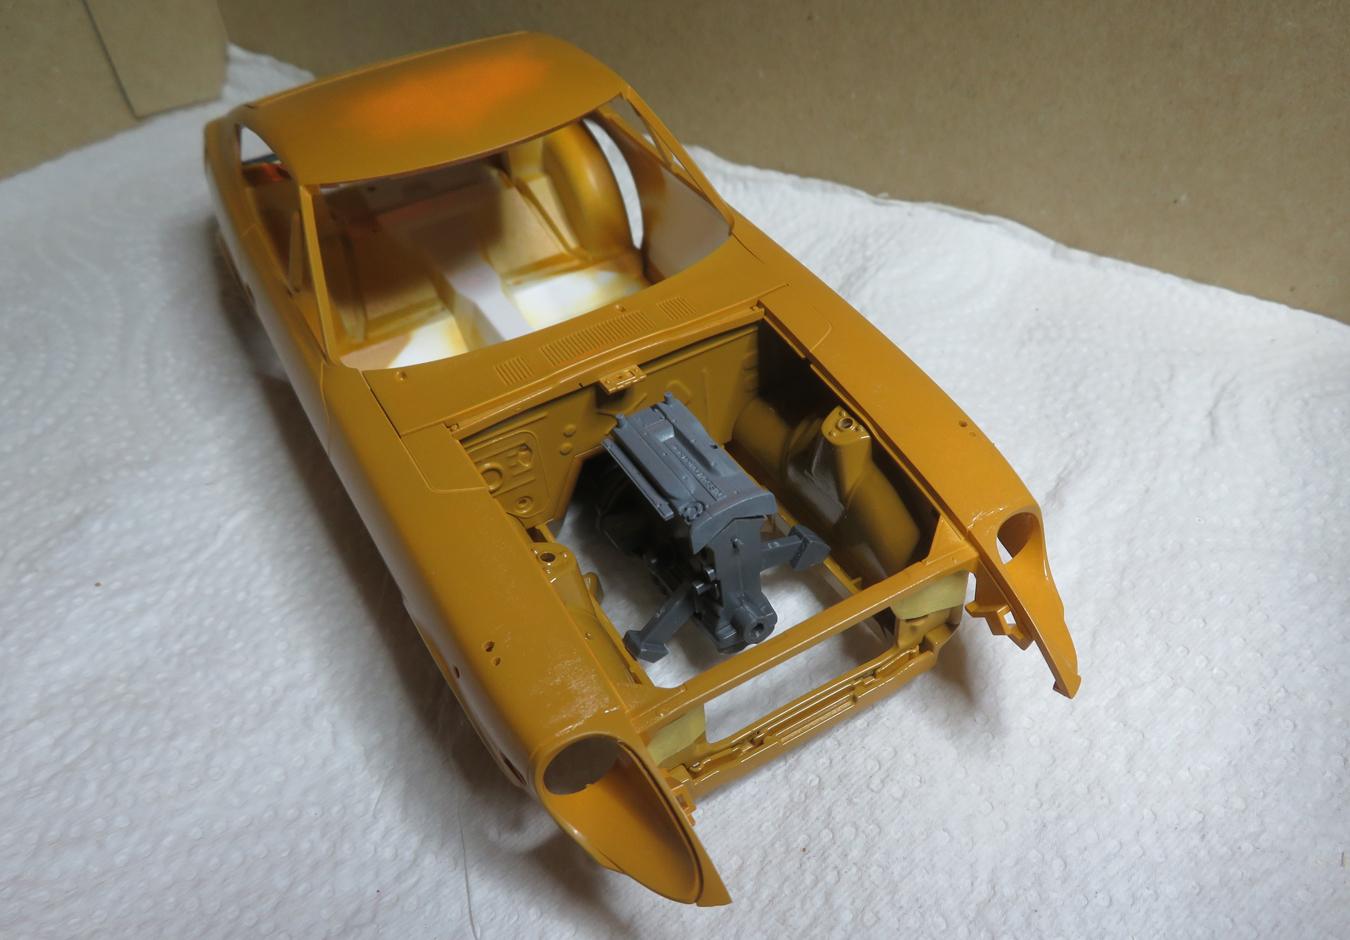
Made use of some rare fine weather plus a more leisurely weekend thanks to having a public holiday today (Monday) to get some primer and paint on my 240ZG + RB26 build.... Tamiya TS-94 Metallic Grey (with no clear) on the various arch flares, spoiler, bumpers etc. It worked well on the 'practice' Fujimi kit build. Colour painted (over white primer) on everything needing it, albeit just a couple of thin coats so far on the outer bodywork. It's an original 1970s Datsun colour 931 Ochre which I had mixed-up by the local1:1 car parts shop. Technically this is probably not quite correct but I wanted it for another Datsun kit and it's very close to 920 Gold which I believe was used on 1970/71 240Zs, plus I wanted to do something different to the three standard colours of white, red and maroon which were all they offered on the ZG. The important thing is it looks right for the period. Possibly the first kit I've ever built with a separate fuel filler lid! Quick mock-up. the grey looks good with the body colour. Not sure yet on the wheel colour, maybe gunmetal or a dark bronze. The body needed some faint mould lines sanding down and a few holes drilling for the mirrors and arch flares. I think I still need to do two more for the rear spoiler. First time with the bulkhead and radiator support panel in place. I know the overall engine and 'box length is about the same as the original, so I think I'm going to be fairly quick at getting the rear suspension, diff and propshaft in place, and I'll then see where that puts the engine relative to the radiator. The newer RB26 engine will have more 'stuff' on it than the old L24, so I need to keep an eye on that. I can see from this shot that I need to do a little clean-up and scribing where I attached the headlight cowls. It wasn't so easy to see that in the white primer. However, I'm happy to get a bit of colour laid down - it's given me a useful motivation boost and I can get on with building-up the interior, chassis and running gear.