Alba
-
Posts
39 -
Joined
-
Last visited
Content Type
Profiles
Forums
Events
Gallery
Everything posted by Alba
-
So I’ve placed this puppy back in the box for a while. In doing more and more test fitting I ran into an issue in which the dash just doesn’t seem to want to fit in correctly underneath the bottom of the window. If I leave the dash out, the interior and chassis fits together perfectly. If I leave the back part off the dash it all still fits but if I attach the back/top of the dash it just doesn’t want to fit in. If anyone has come across that with this kit and could share a fitment tip that would be great. I’ve definitely done some damage to the glass with all this messing around so that’s a bummer.
-
Absolutely stunning.
-
I’ve narrowed down the issue to how the windows need to fit in behind the interior tub - it’s a very, very tight fit. Basically as I try to push the interior all the up so that the dash and package tray meet the body, the bottom of the vent windows and rear windows are interfering with the side of the interior. Tough thing is that the windows are all individual which I’m sure is a plus for a lot of folks, but in this instance is a PITA as the lip allotted for gluing is extremely thin, especially on the vent window - never mind that they weren’t molded 100%. Anyway, here’s a quick update shot after my battle. Notice the vent windows have yet to be reinstalled haha. Did a little BMF last night and this morning - definitely gotta work on improving that skill. Oh well, each one is a lesson (or a million) learned!

-
I have to say this has been the kit from Hell - definitely a ton of learning opportunities here haha. I’m in the process of mating the interior, body and chassis and woo boy is it rough. I swear this whole kit was molded slightly askew - not to mention the unskilled builder working on it hahaha. Taking a little break with hope that the next attempt will go better. Wish me luck!
-
Looks awesome. I love the underside detail!
-
Just wow! That is the paint job of my dreams - like glass! Amazing job and more inspiration for me to keep working to get better at this hobby.
-
Thanks for the kind words! I could be wrong but the wheels may have come with the kit. Though it’s not on the box, this was sort of a 2n1 kit - one more stock with the fuel injection 283 and then how I built it.
-
I just re-purchased the Monogram 55 Street Machine and 56 Chevy - neither hood fits right. Love these old kits but man sometimes they’re a bit off fitment-wise.
-
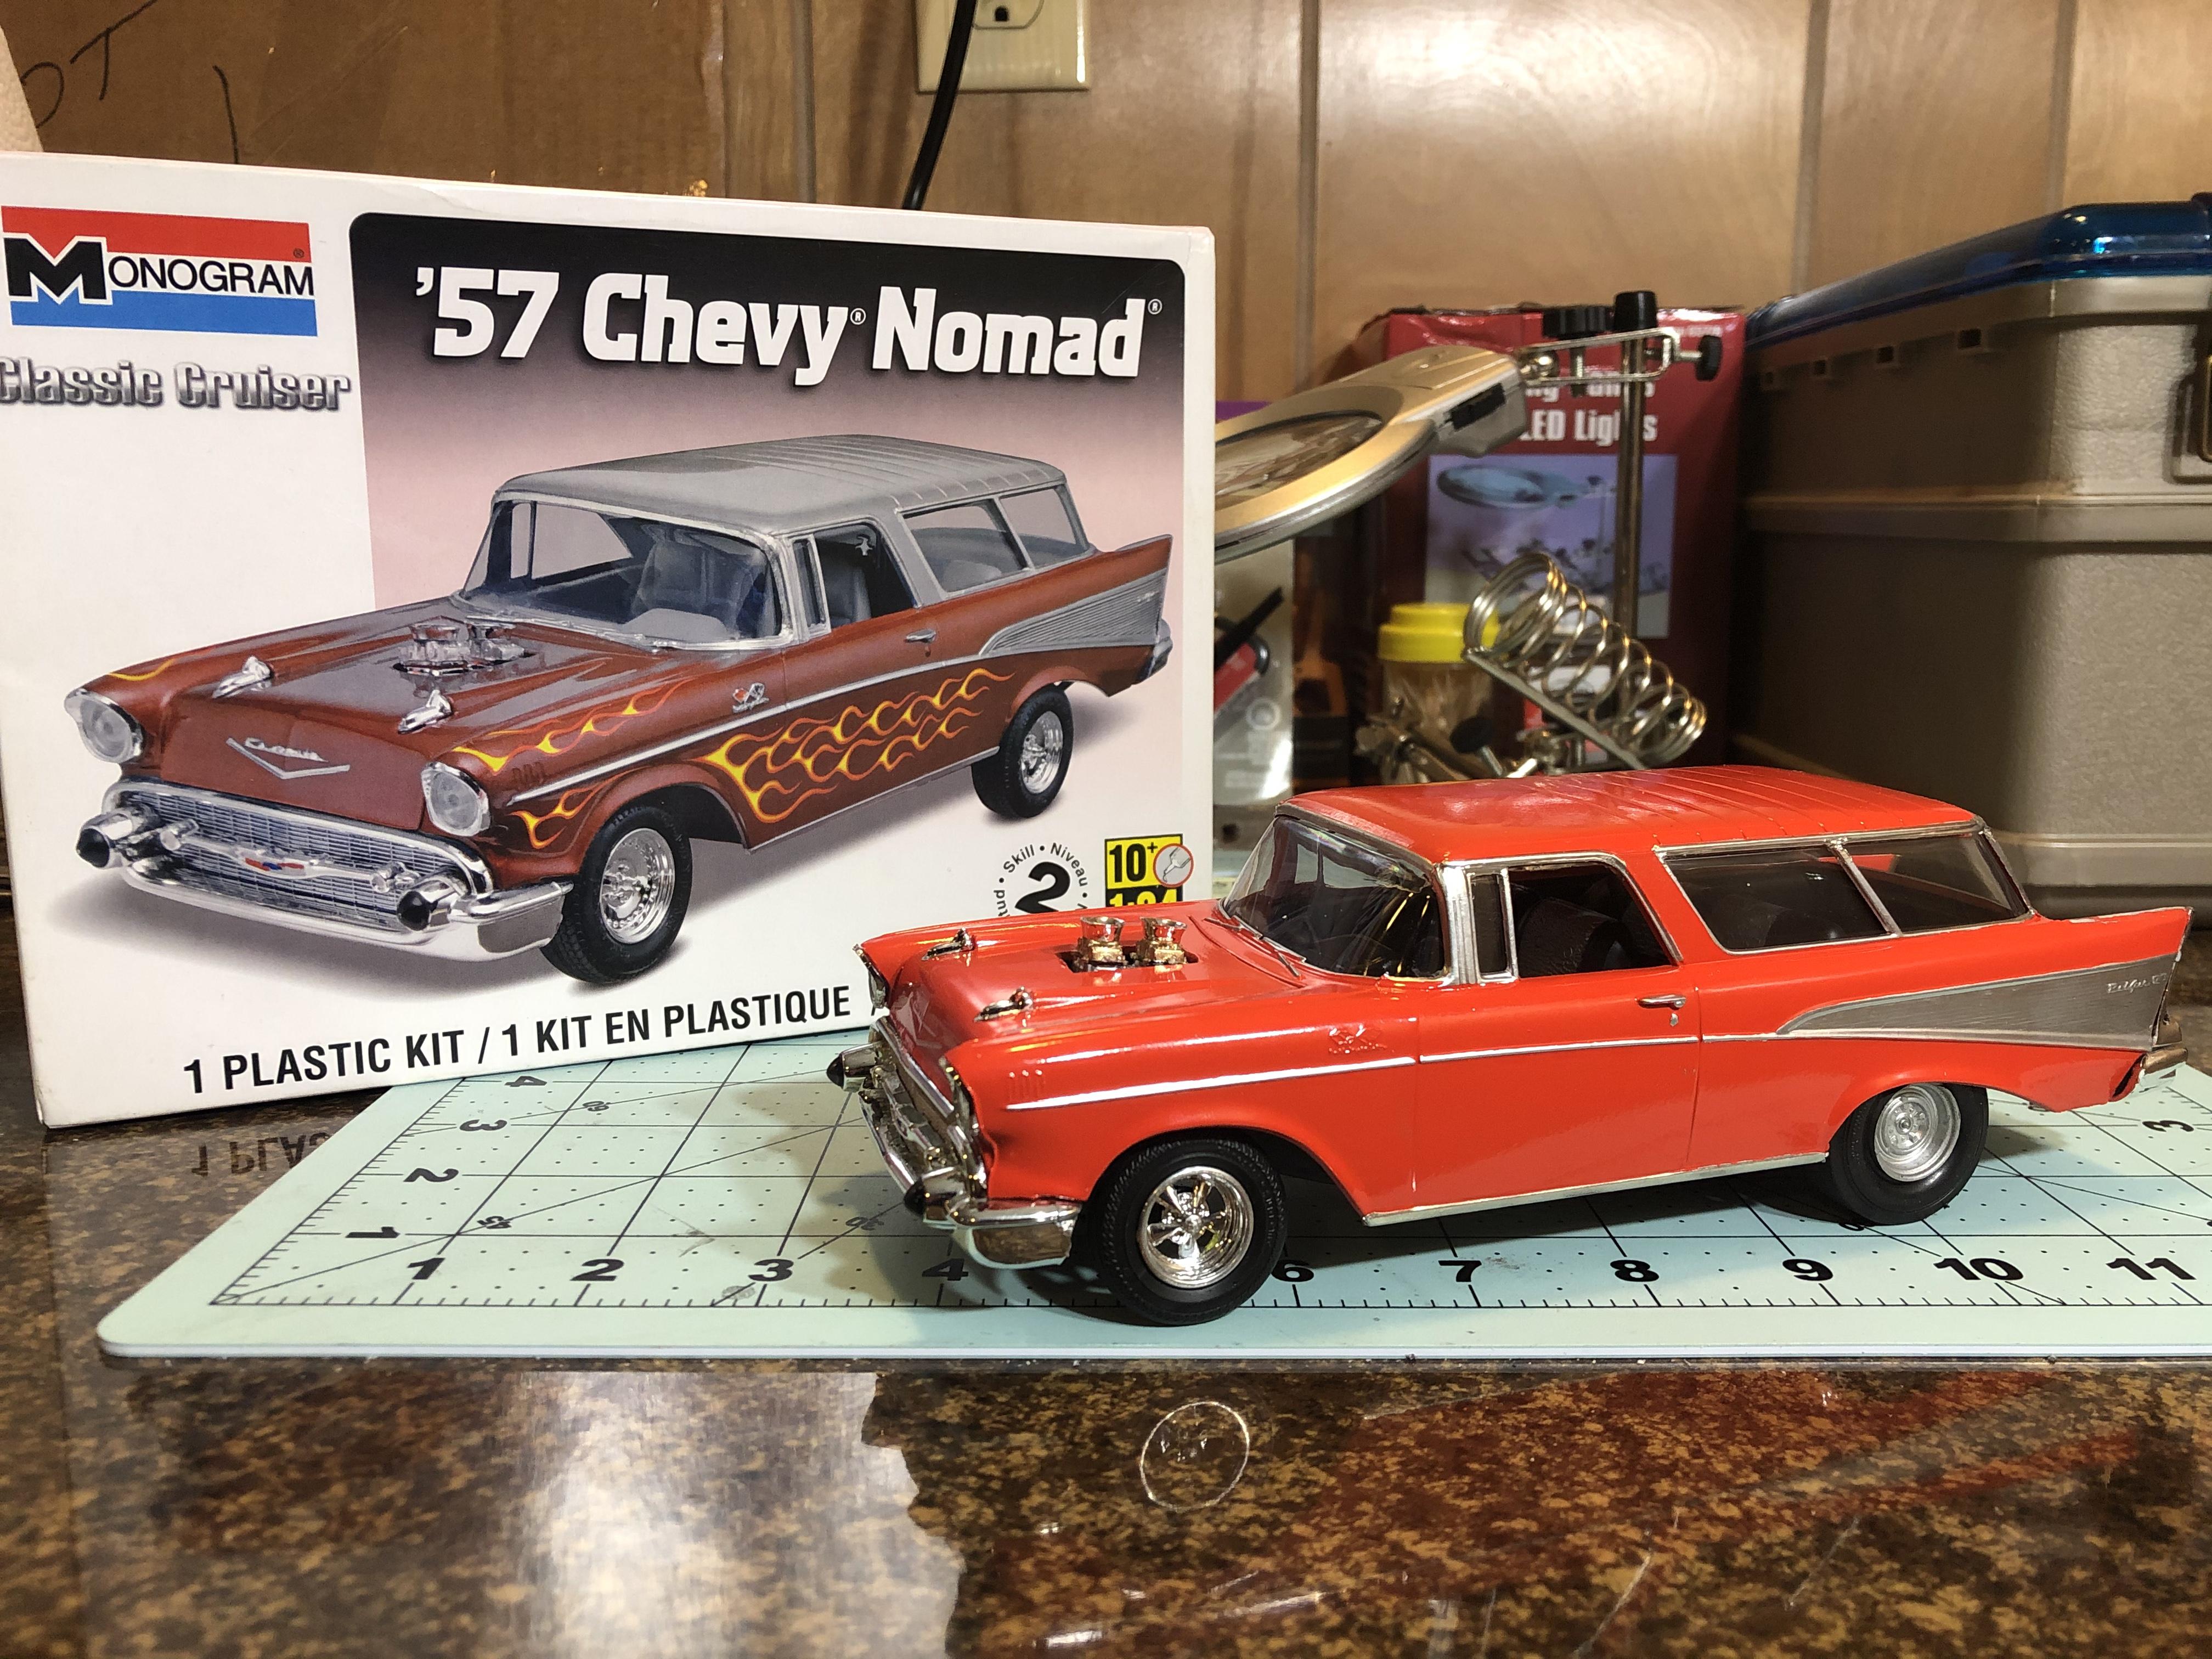
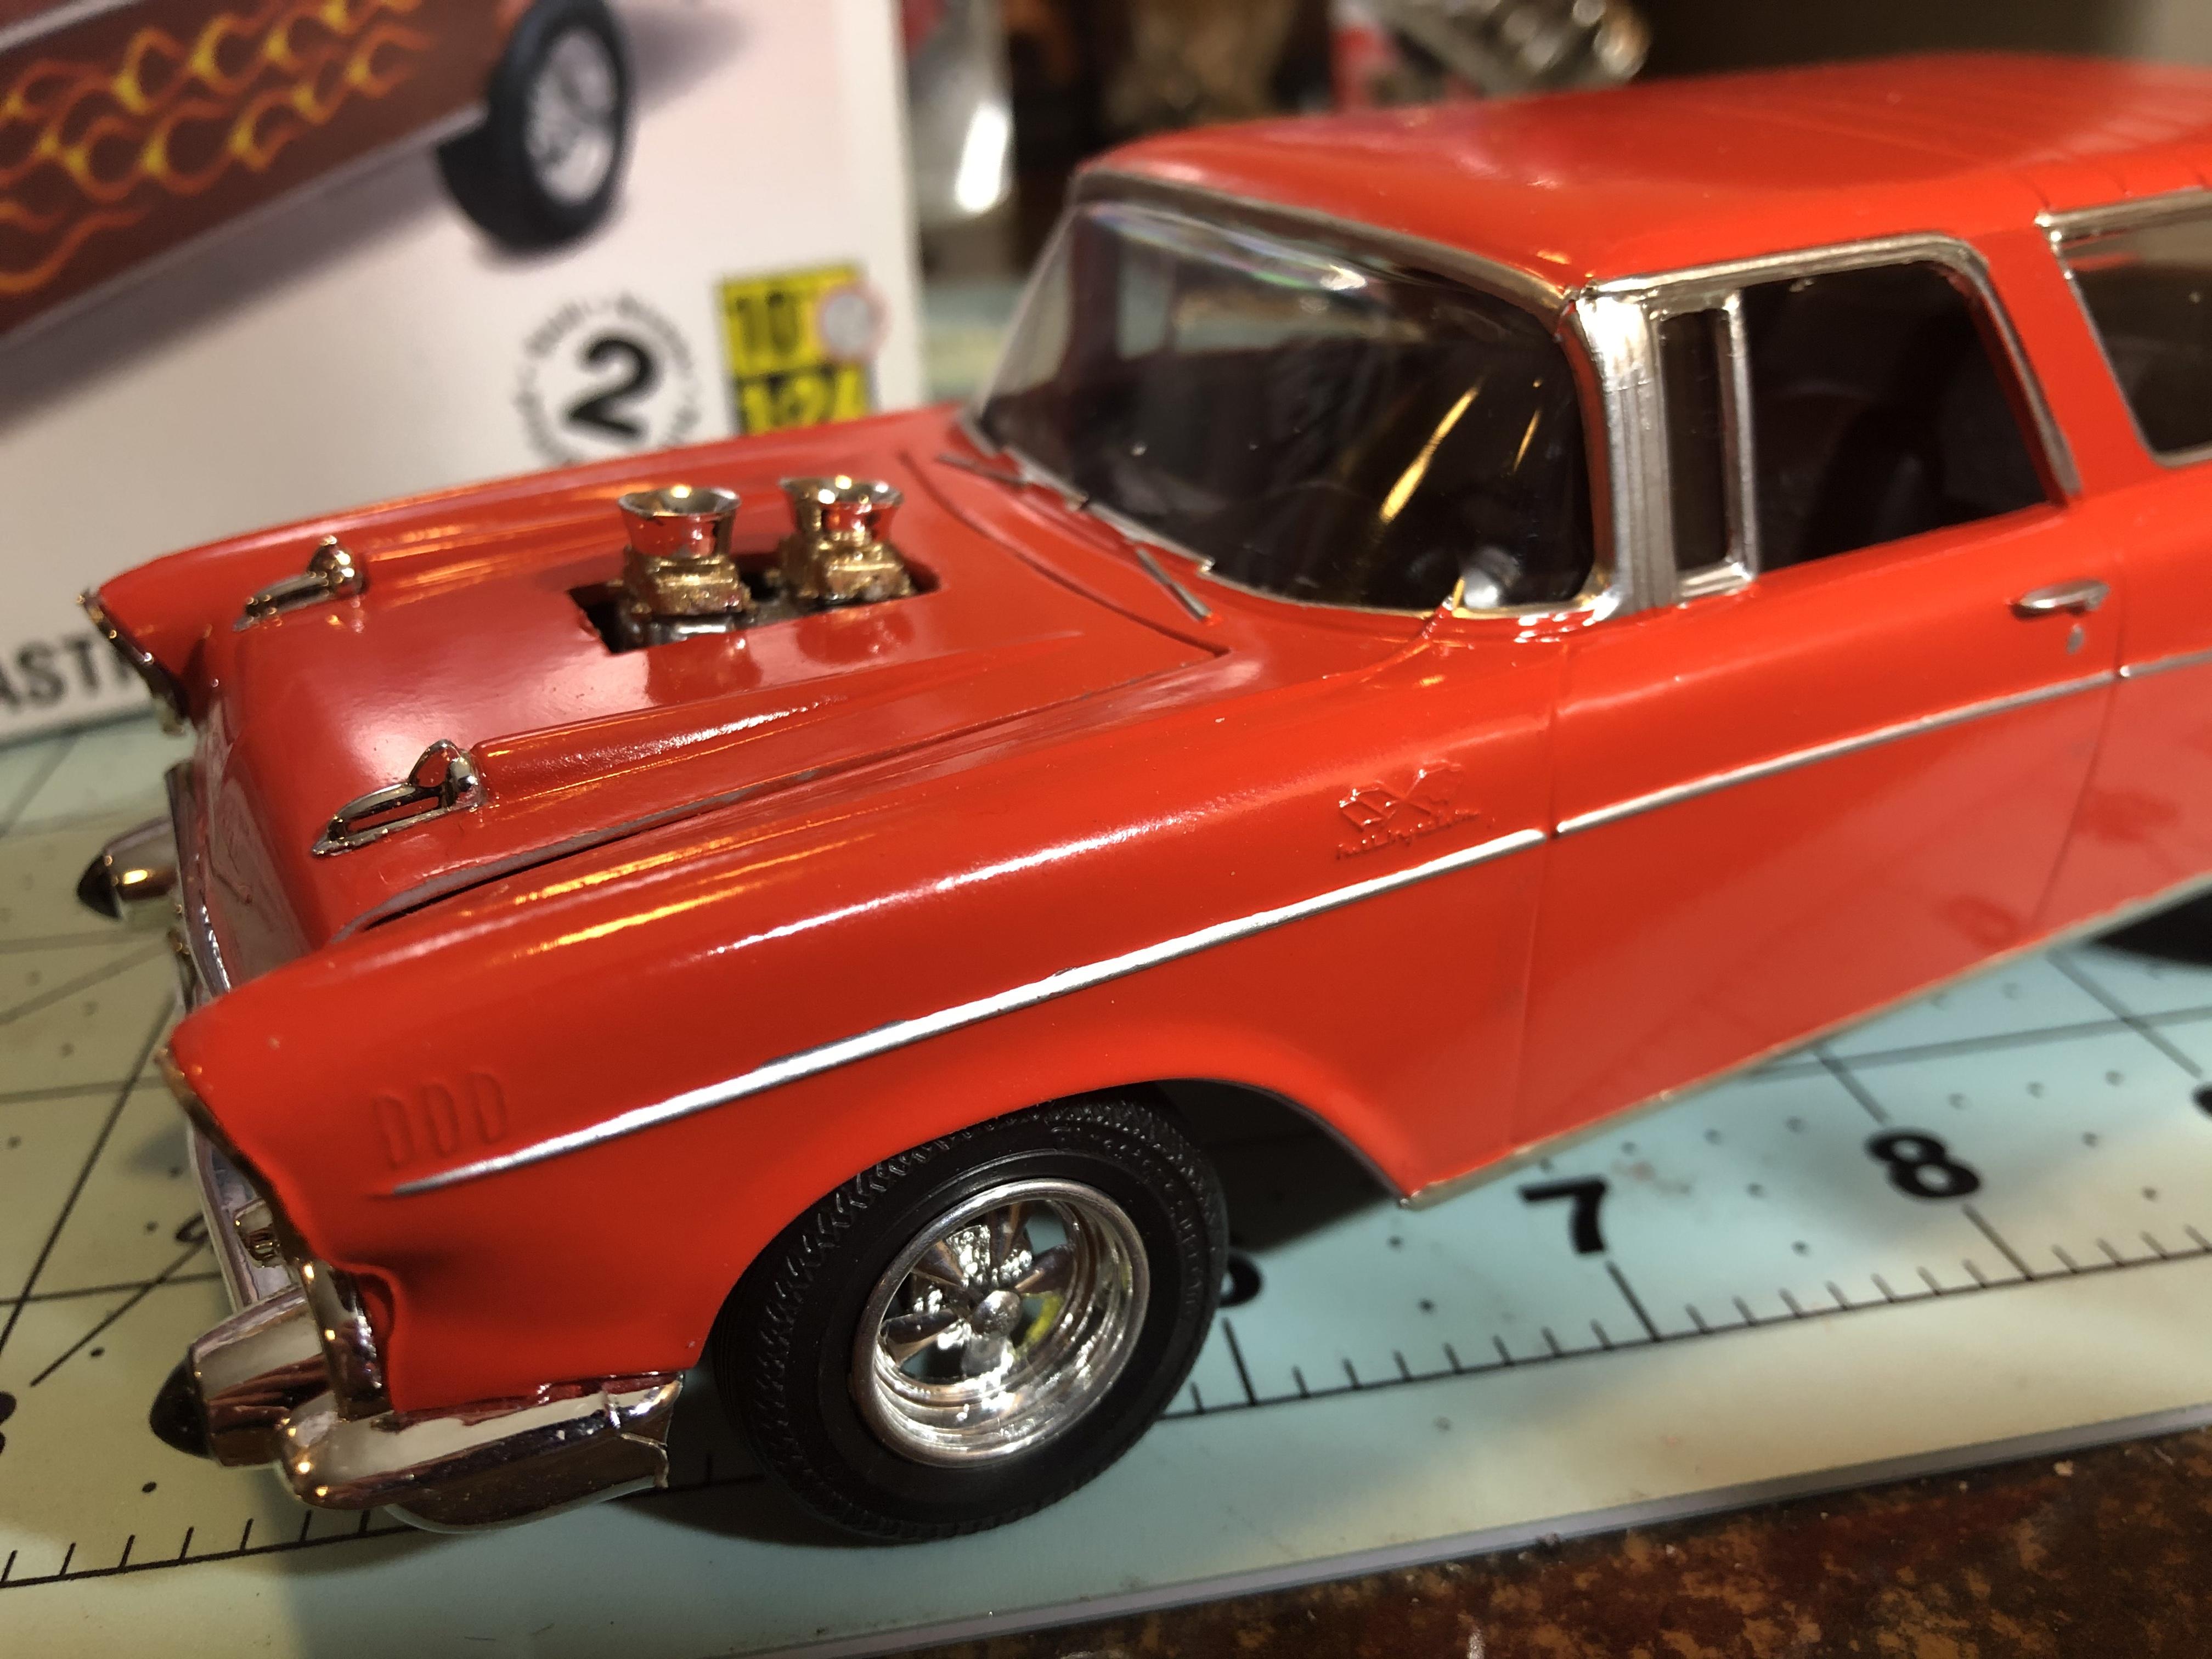
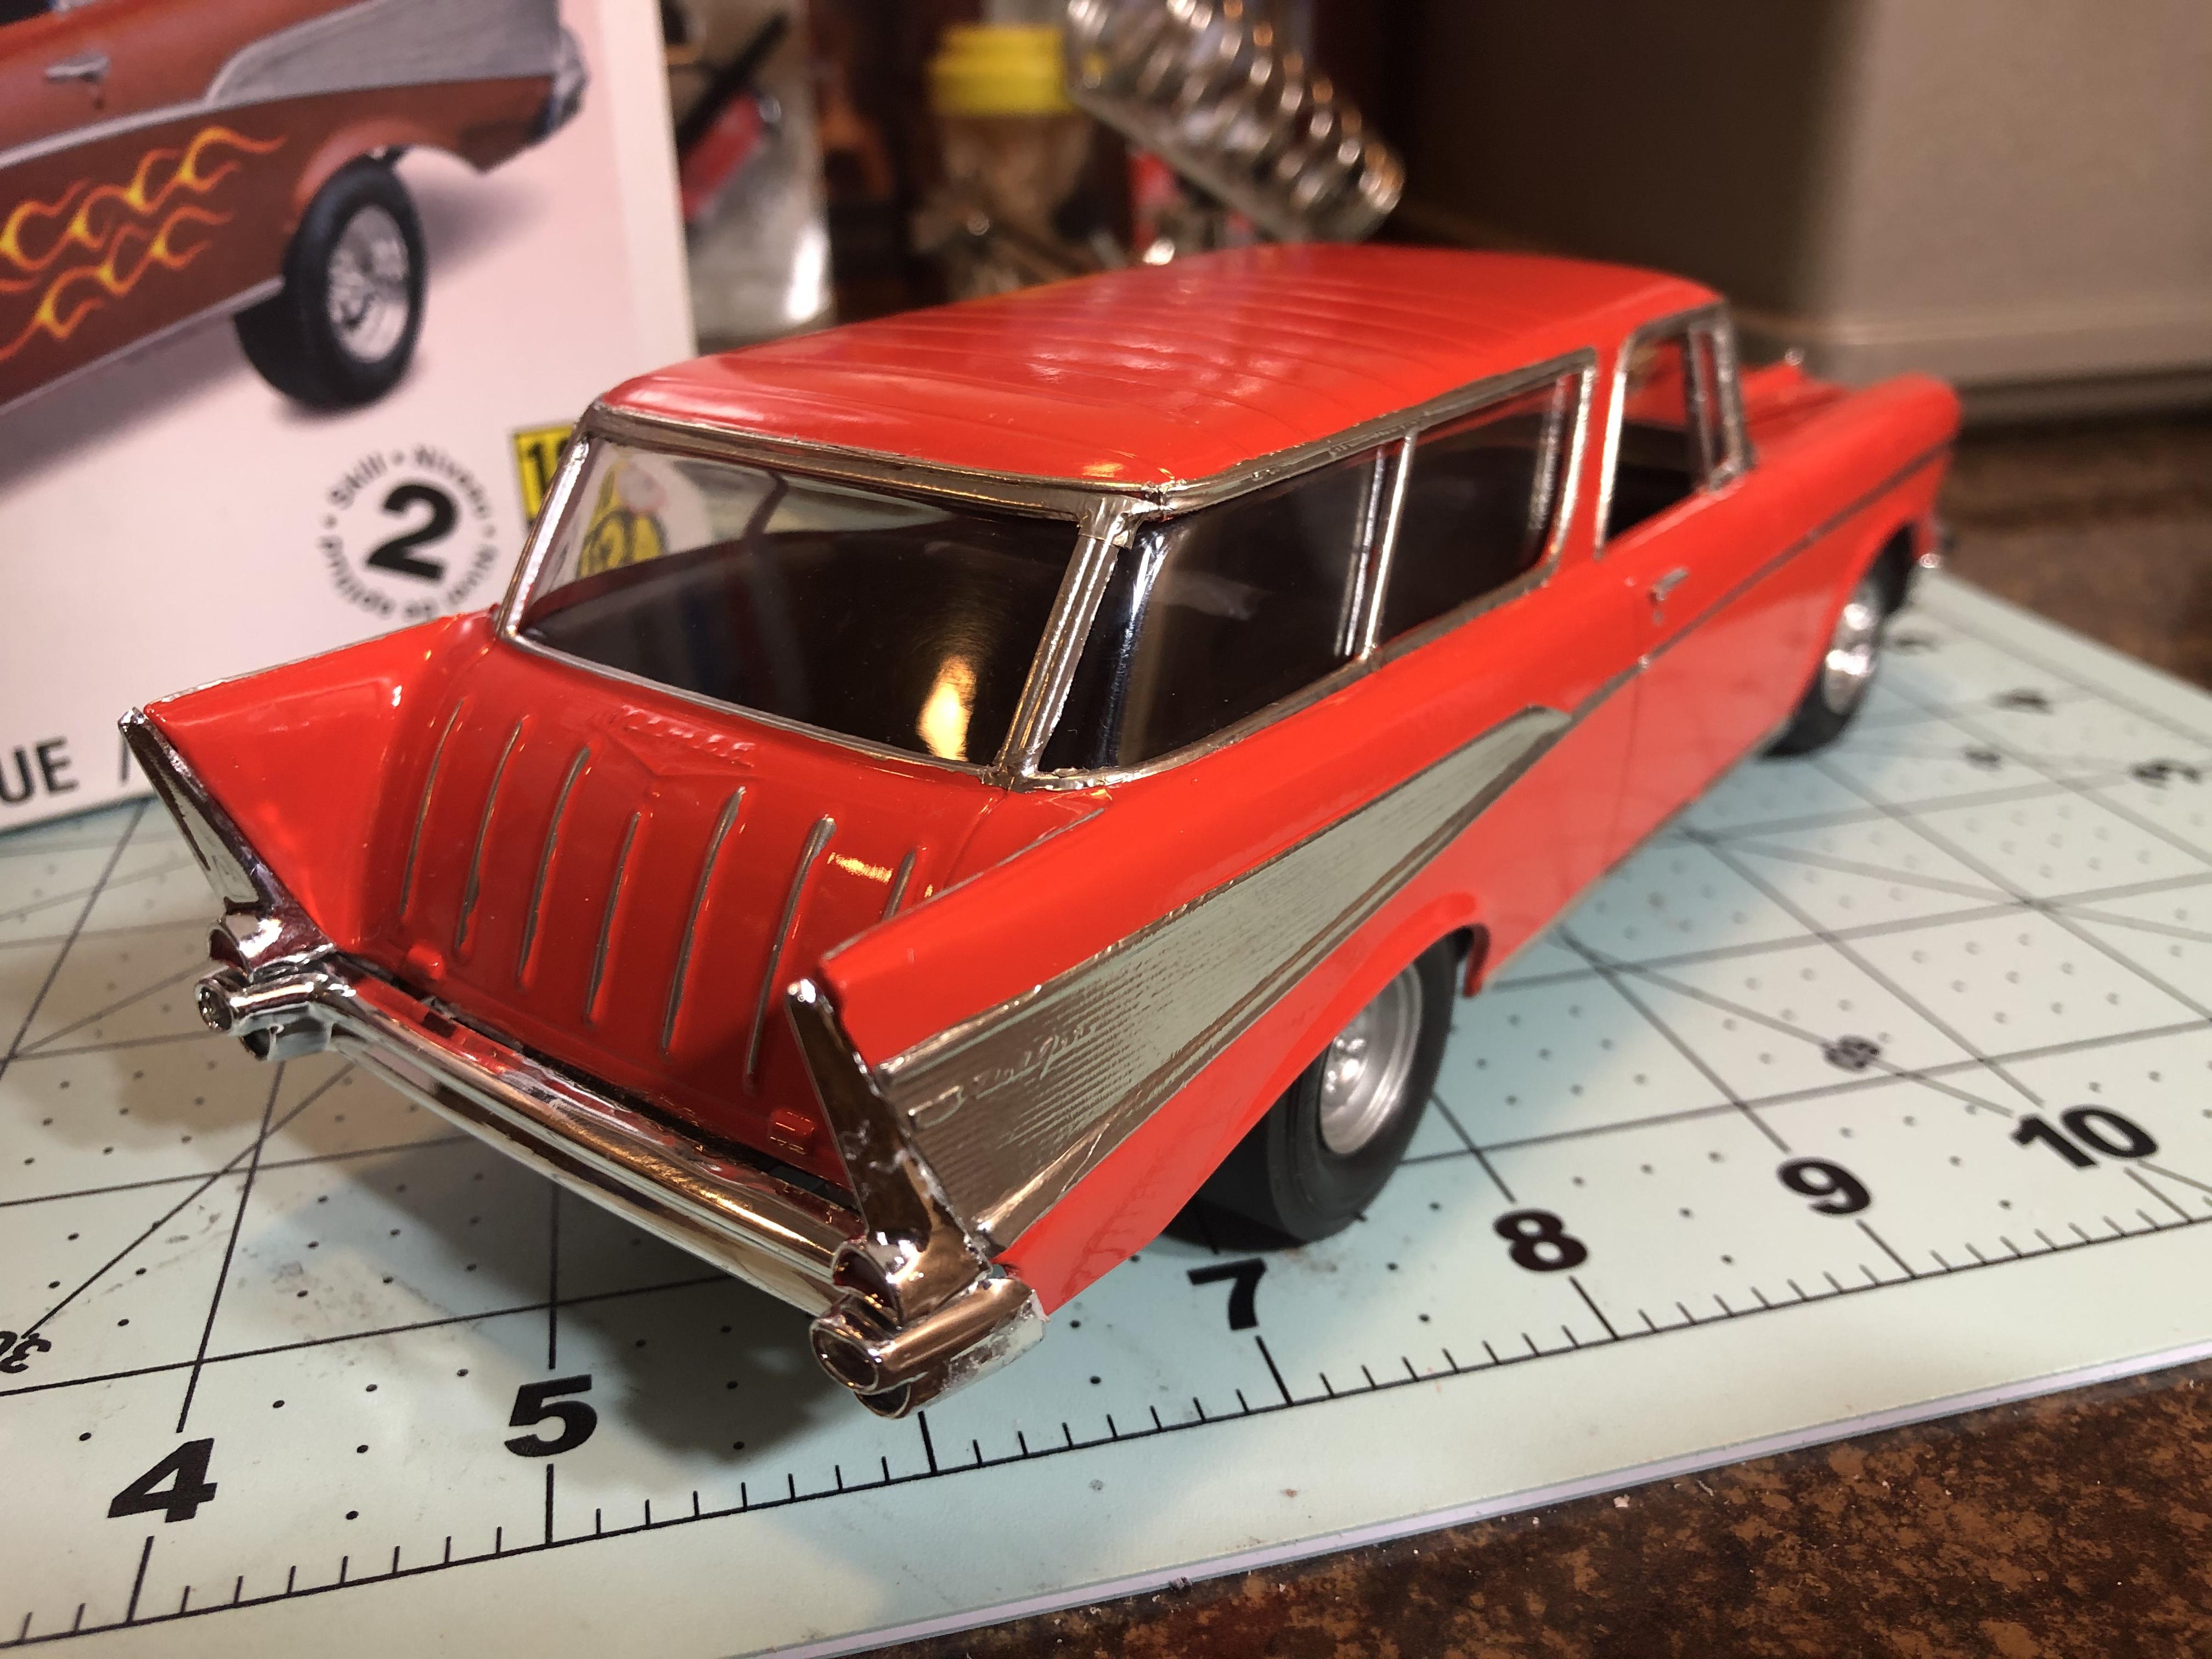
I started this model 8 years ago as documented in this thread: I finally just wrapped it up after having it kicking around it its box all this time. Definitely not the best job ever but all things considered I’m pretty happy. I even made a small mod by cutting the front grille so that the chrome hood bar is actually attached to the hood rather than one piece with the grille and bumper. Was kind of a pain but gives me peace of mind haha!
-
I’ve been waiting for the new paint to cure so I got started on some other projects but I circled back to this and started the decals. To the person who said they don’t line up with the wheel wells - you were very right!
-
Looks awesome - glad you hung in there. Love the color combination.
-
Pumped to see how this progresses. Nice work so far!
-
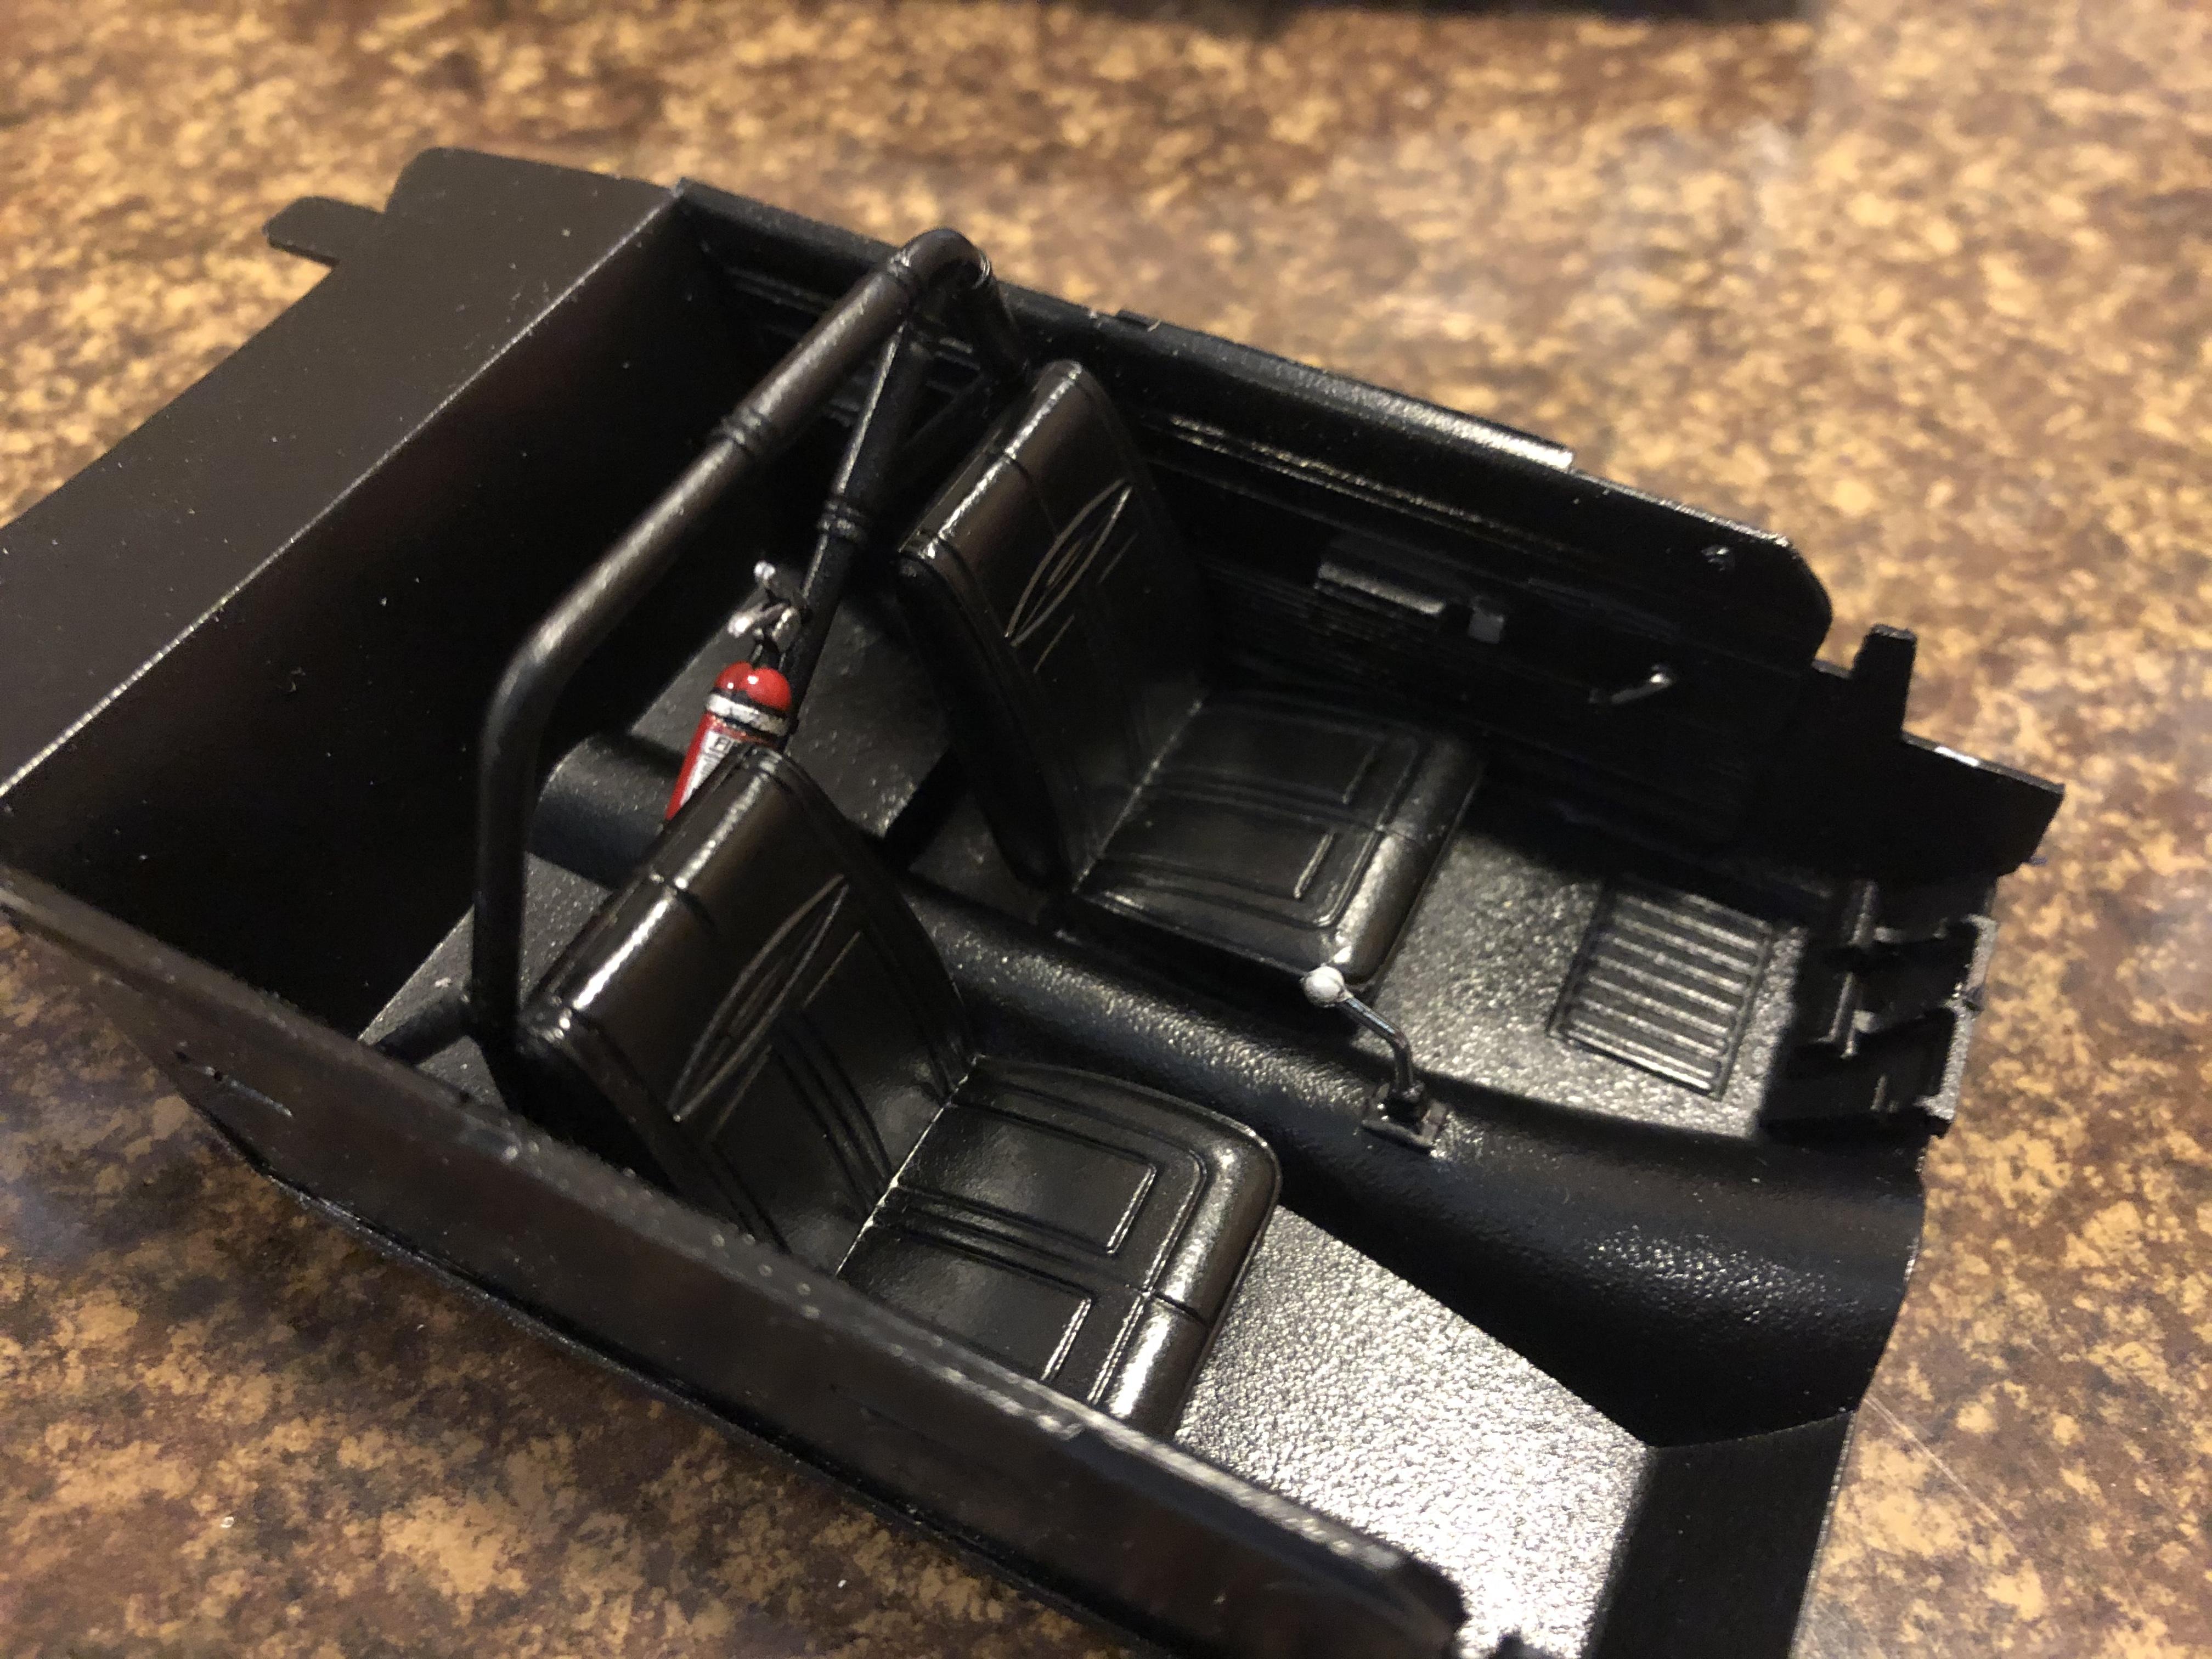
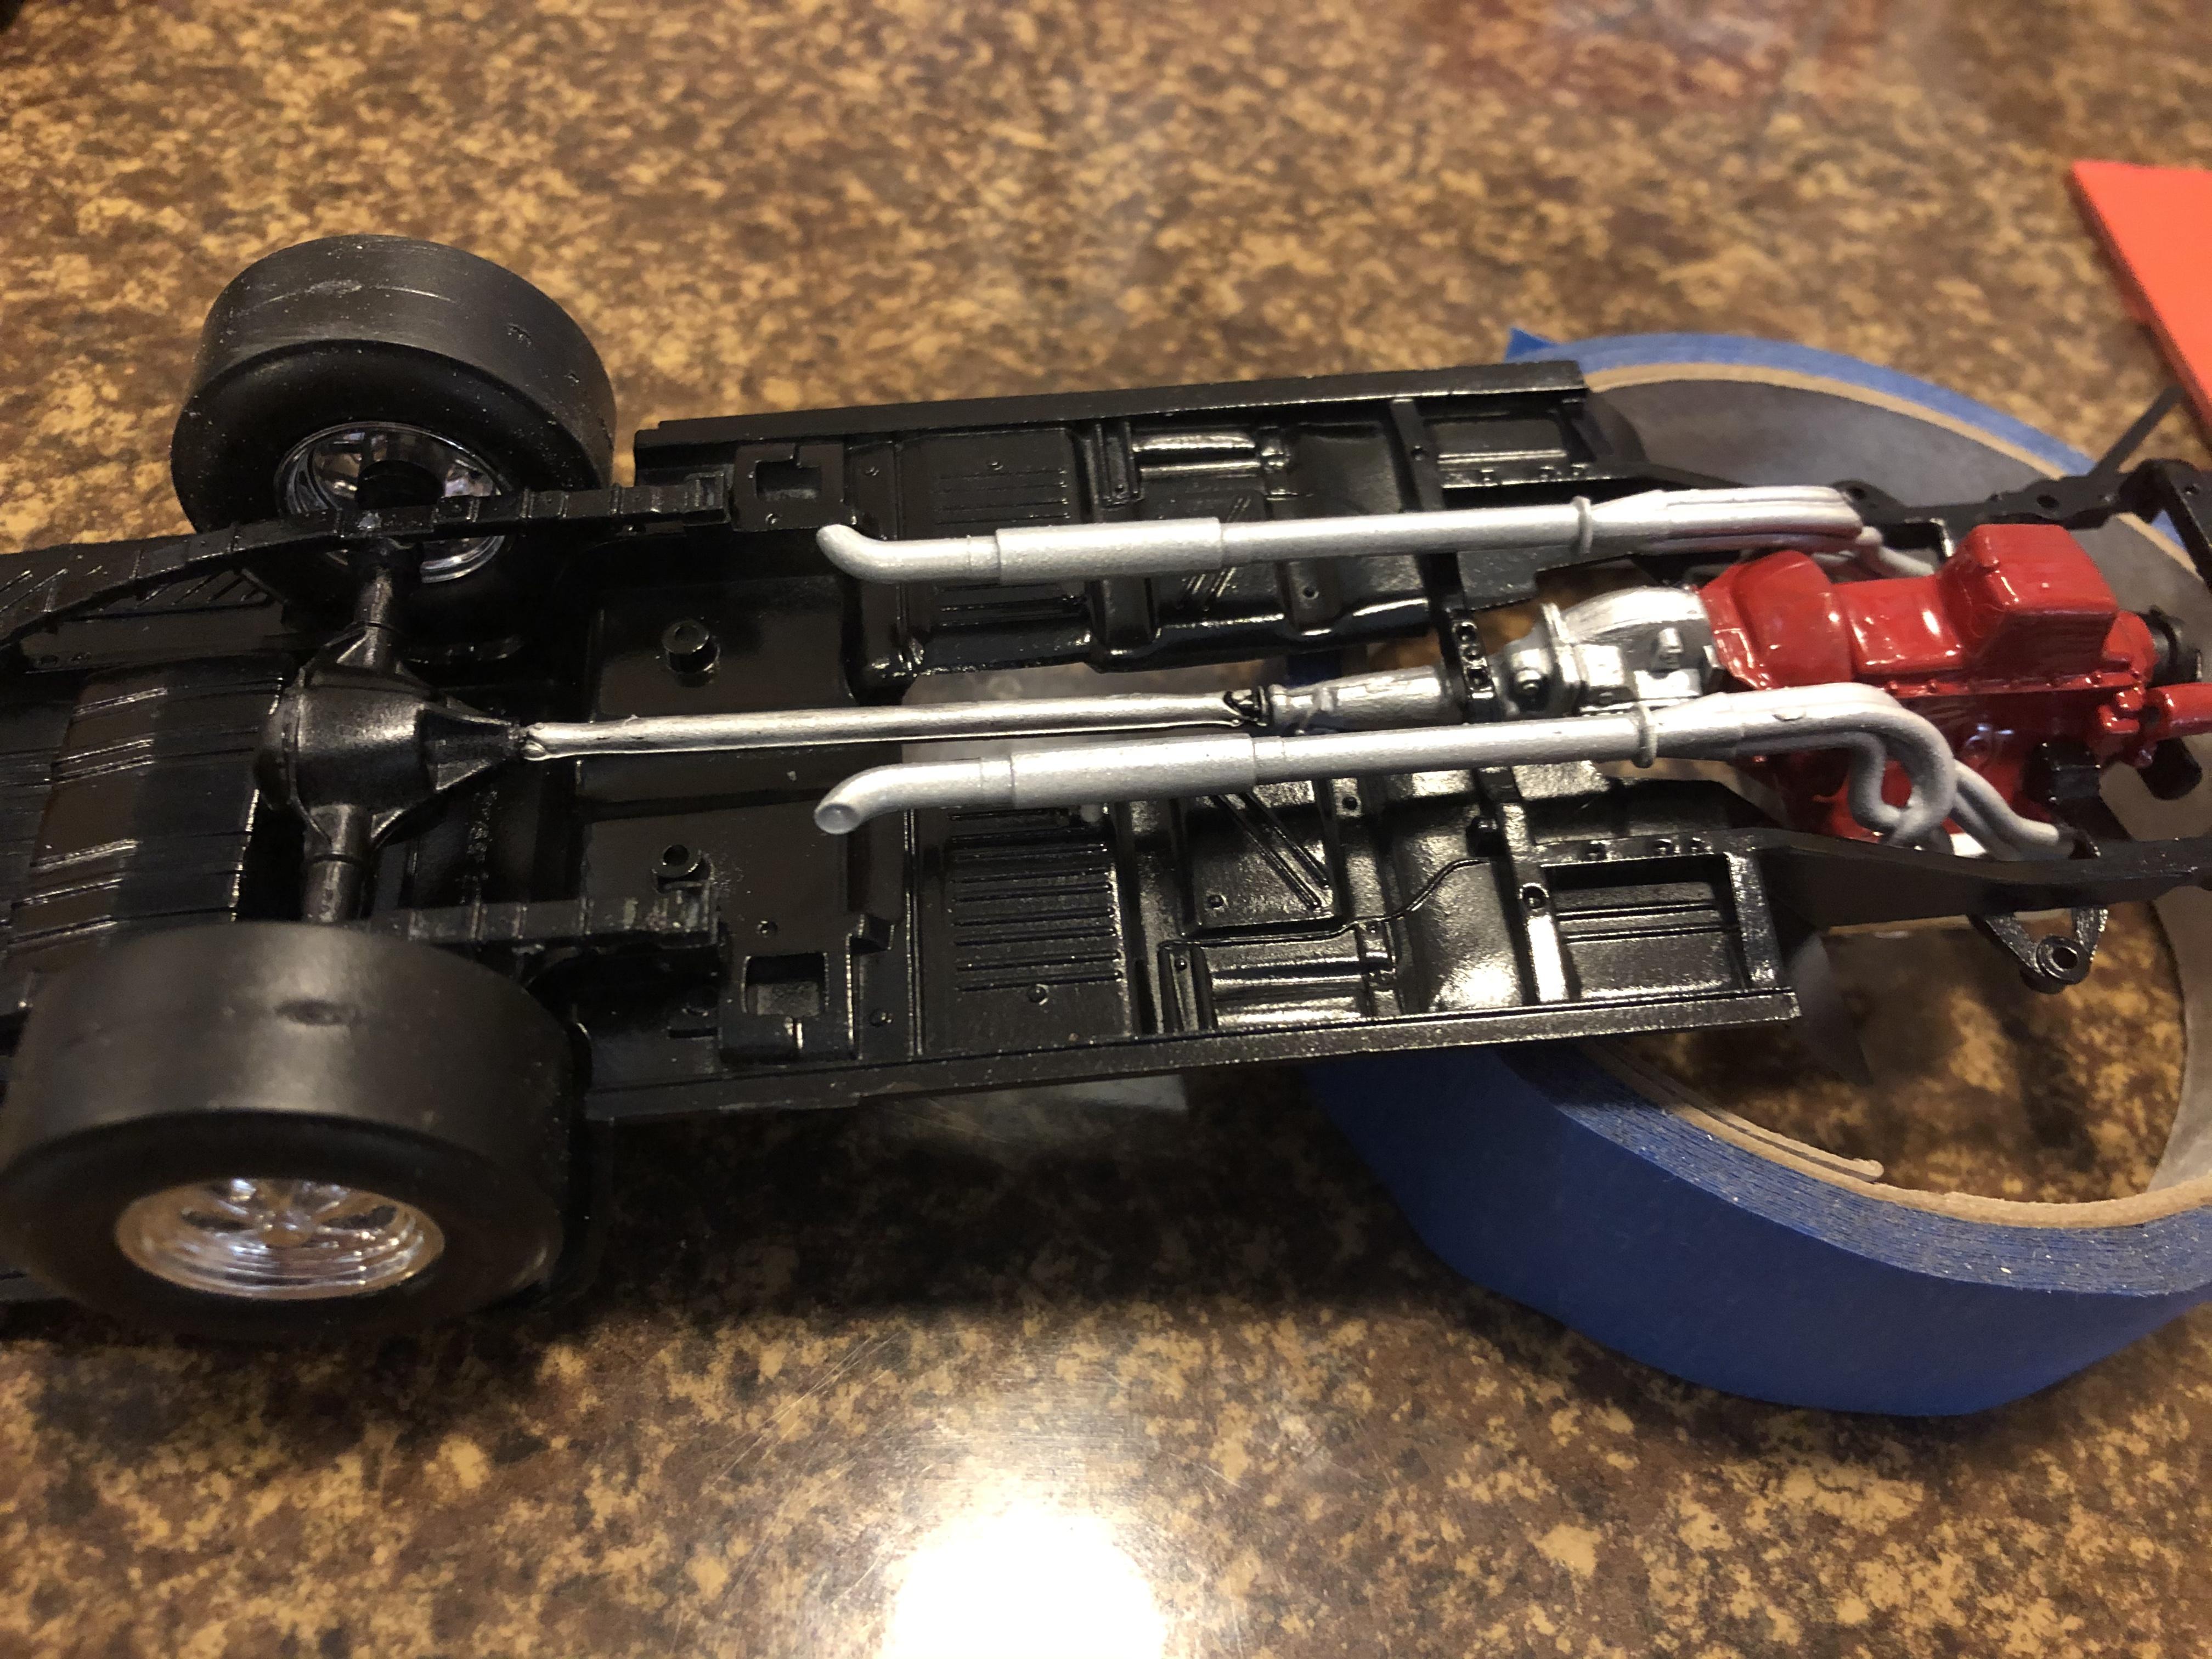
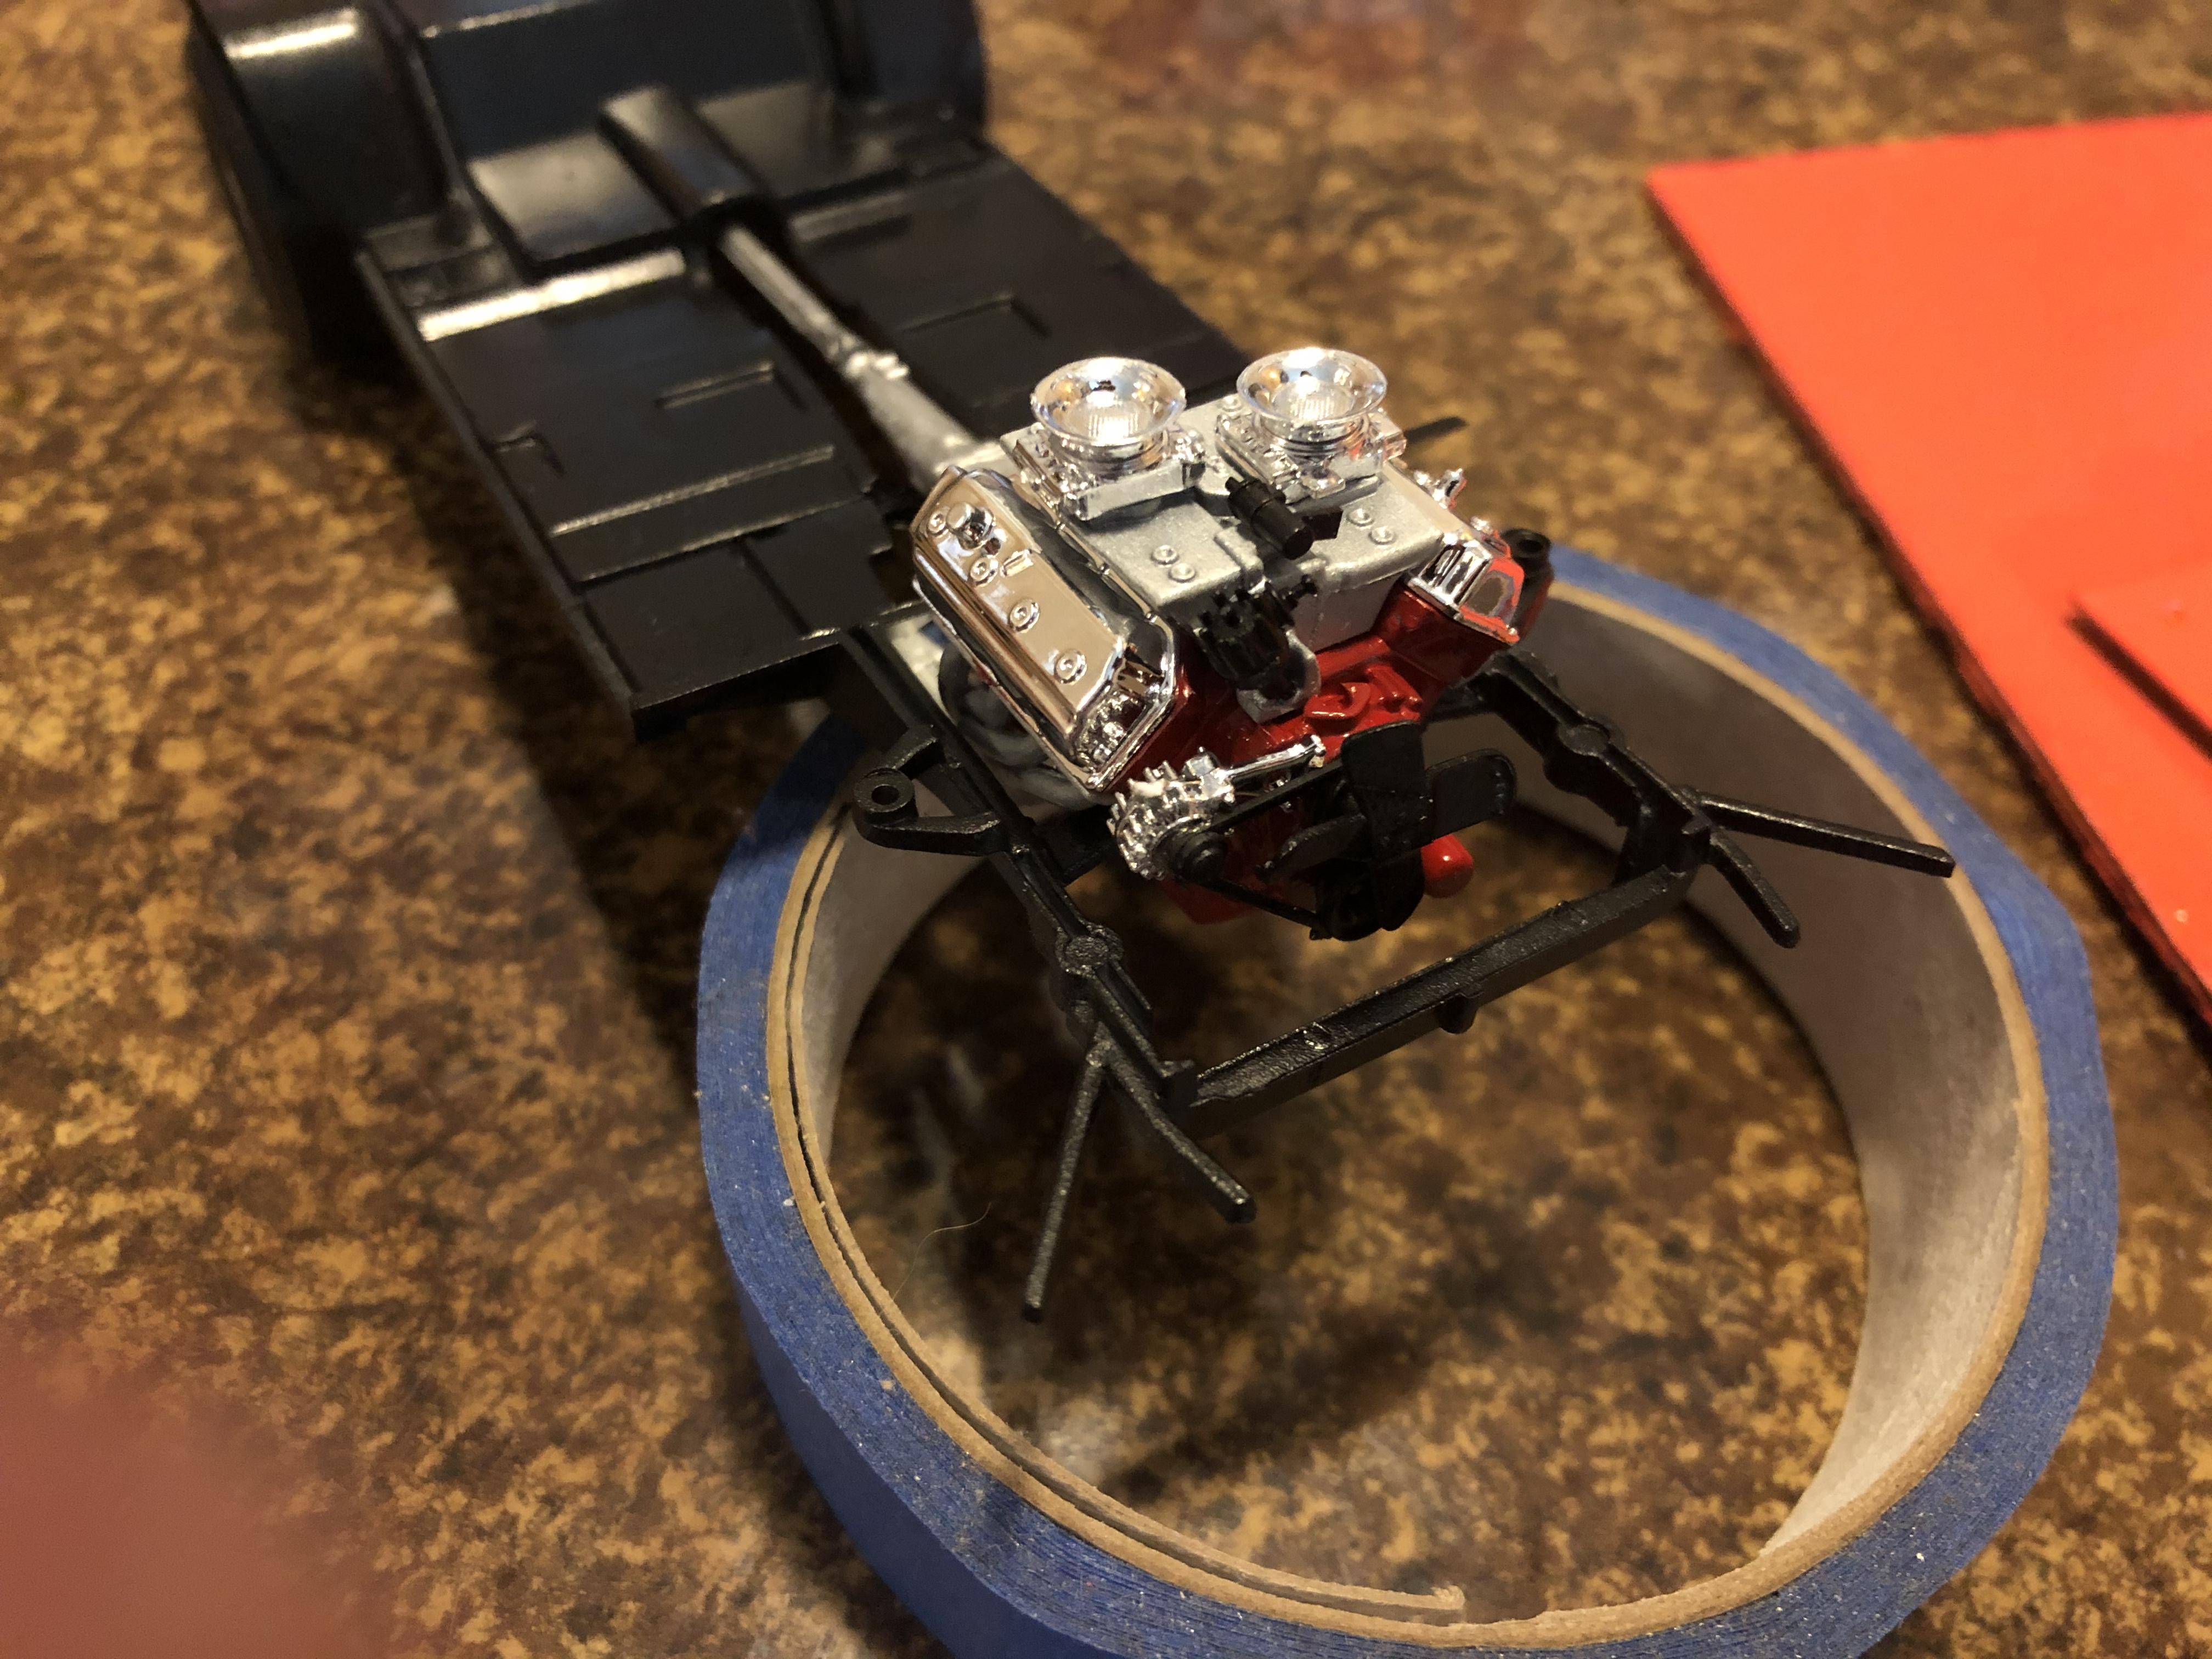
Quick little update here. I stripped the body and other body color panels over the last few days. I just sprayed on some Testors Competition Orange. I’ve attached a few progress pictures showing the interior, underside of the chassis, updated spray job and the motor.
-
Awesome work! I’m definitely envious that’s for sure.
-
Ridiculously underrated car in real life - love them. Great job on the build!
-
Thanks for the heads up. In a coronavirus world it was impossible to find isopropyl alcohol to strip the lacquer but mouthwash seems to be working pretty good after a few hours.
-
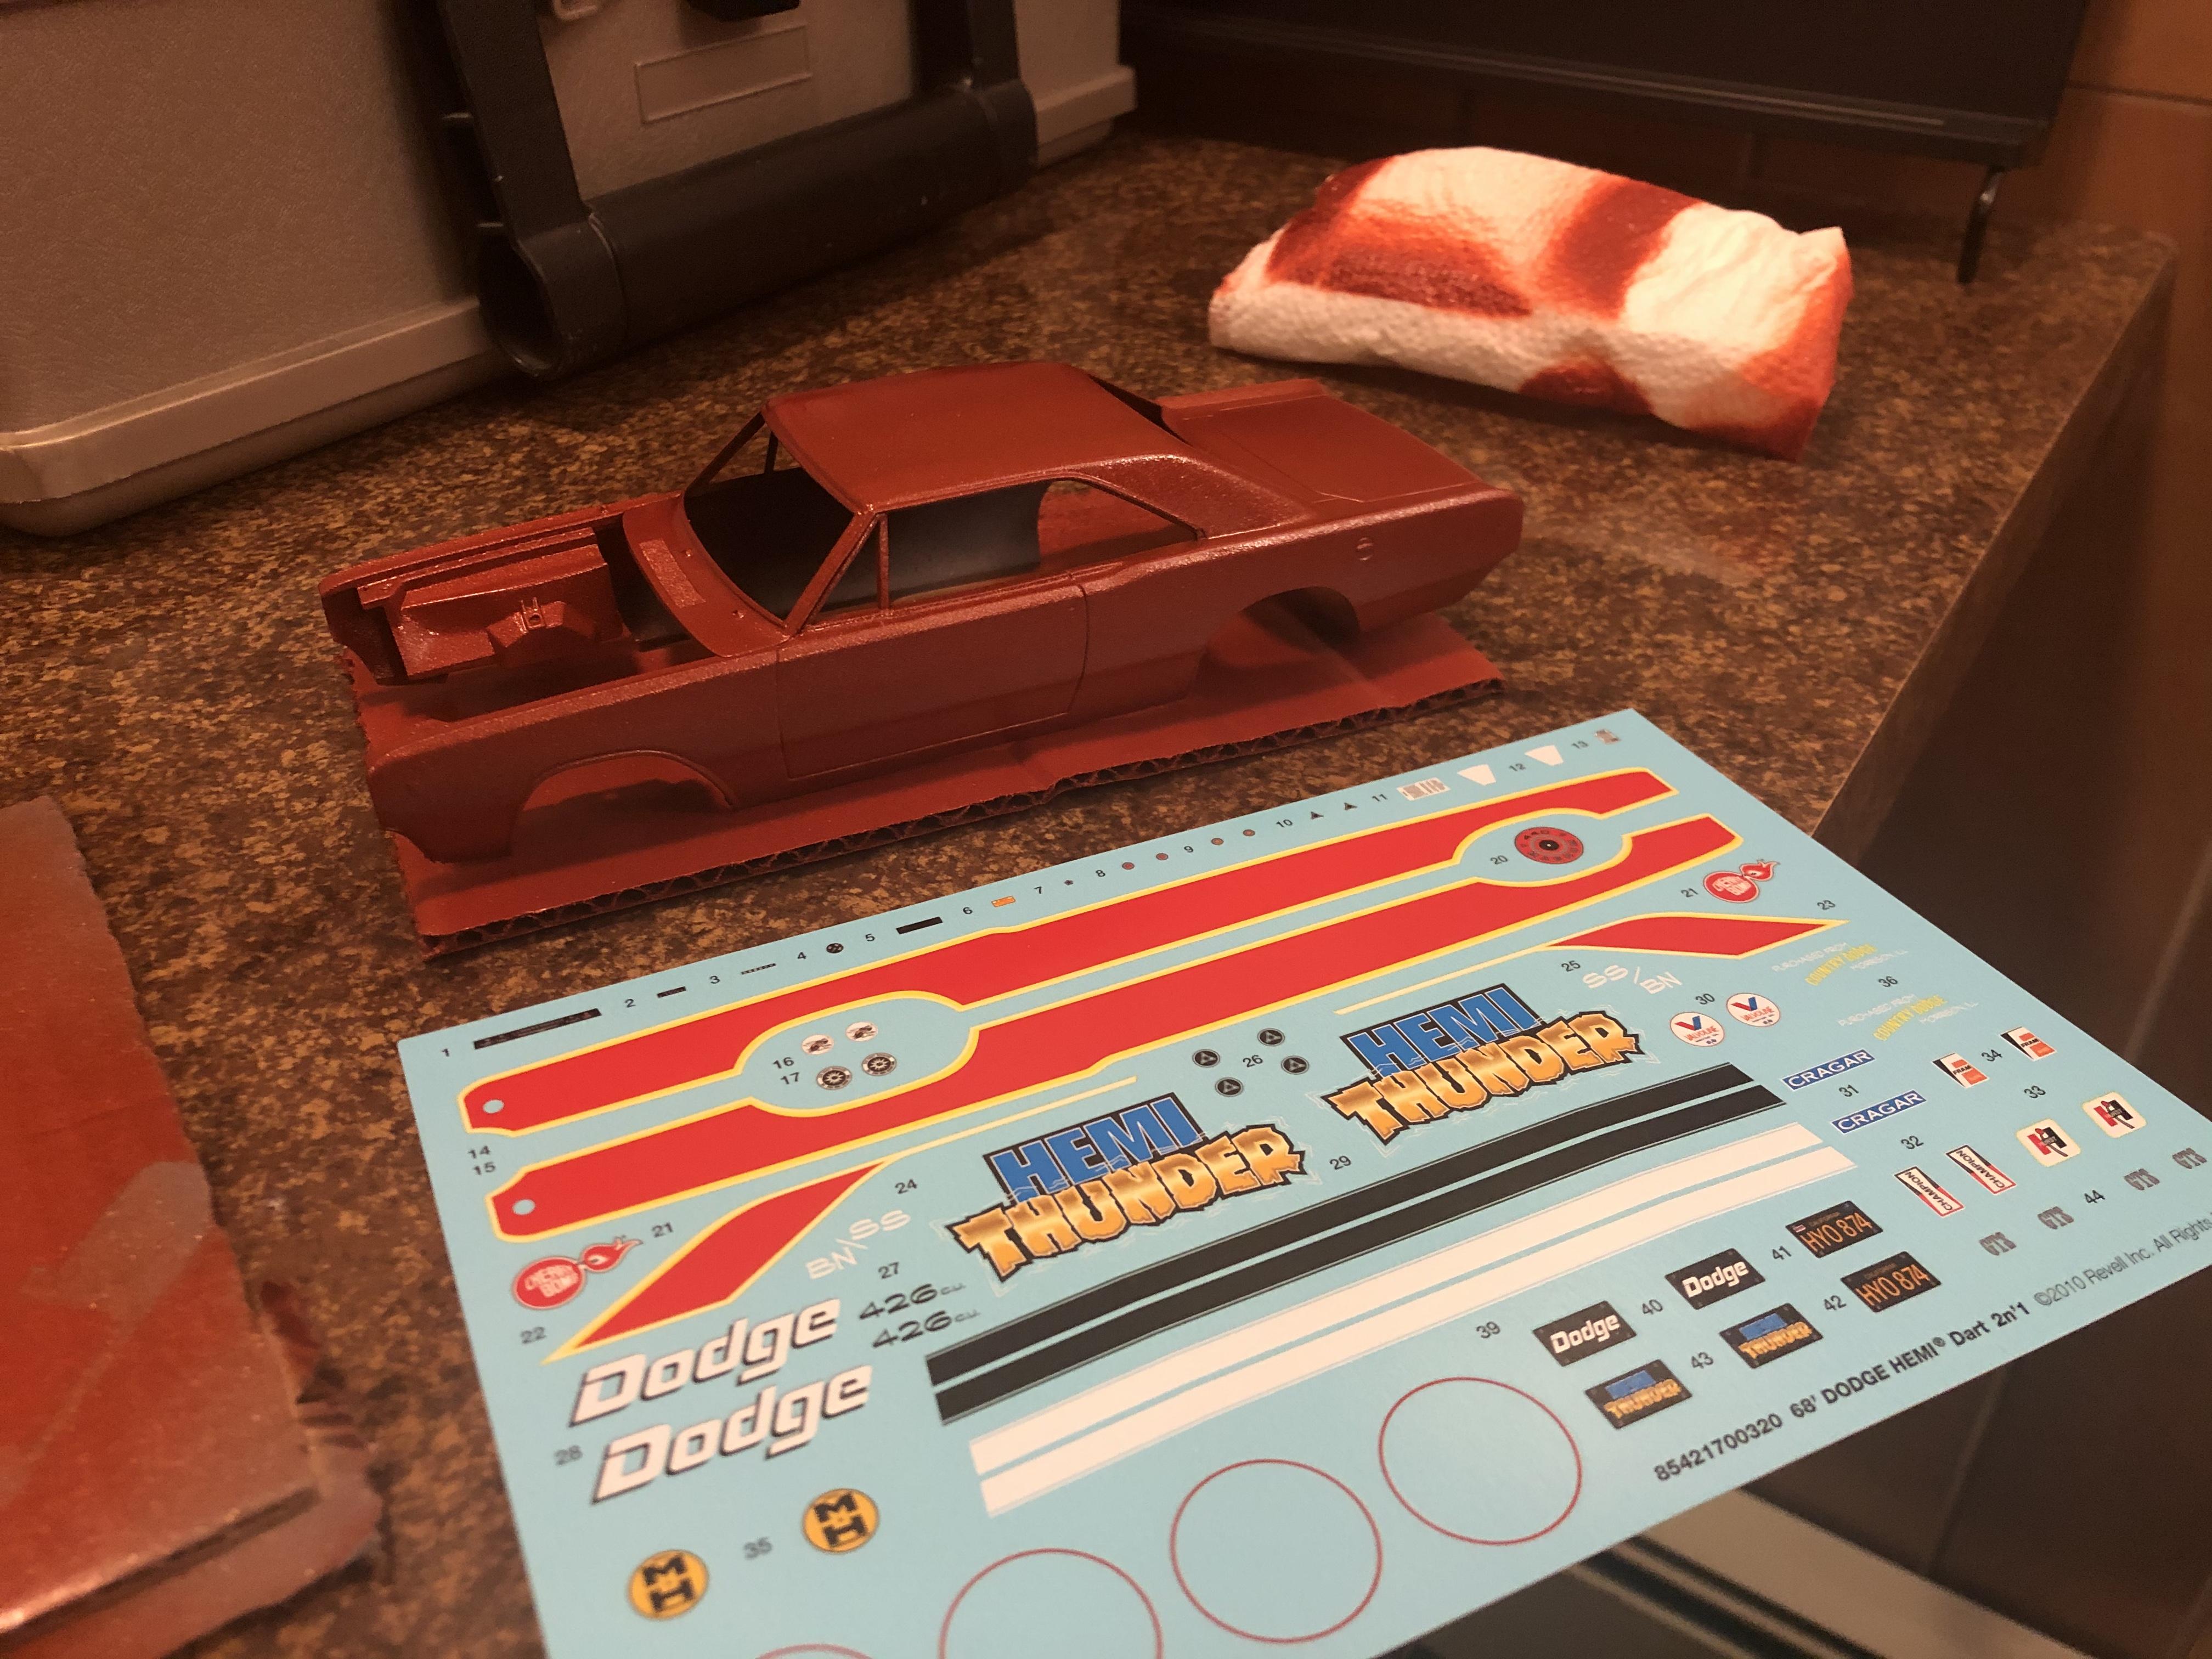
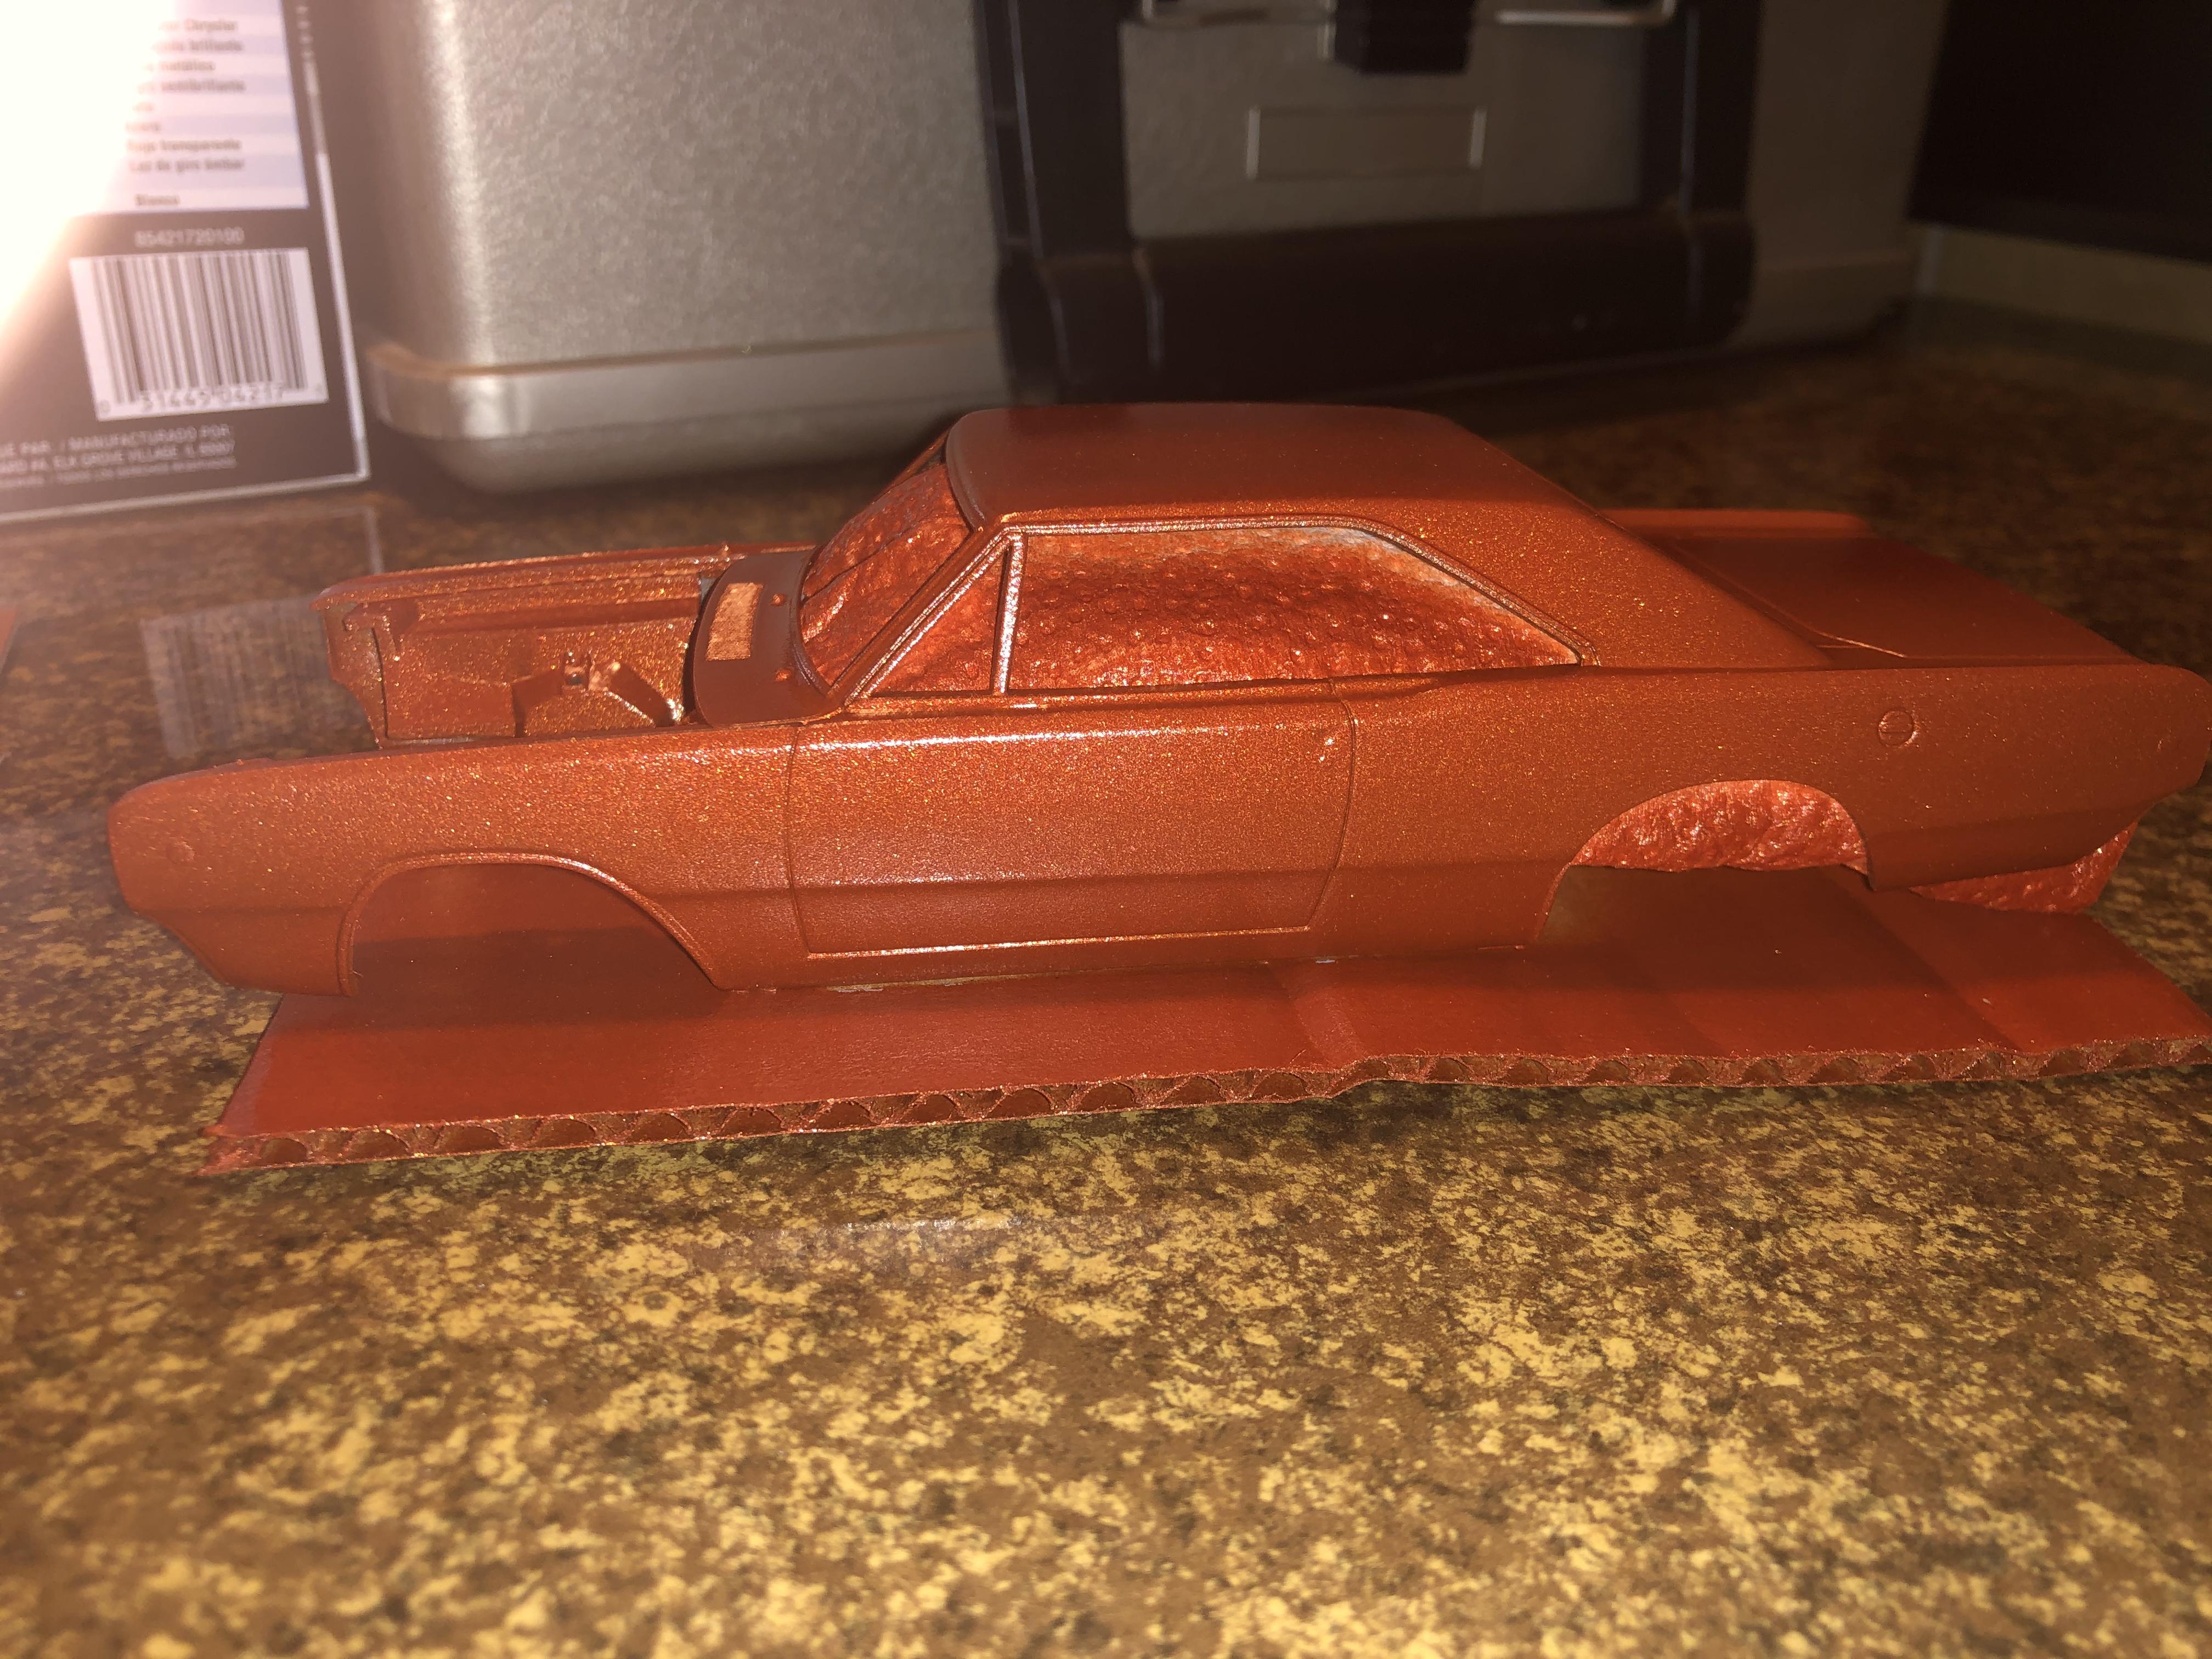
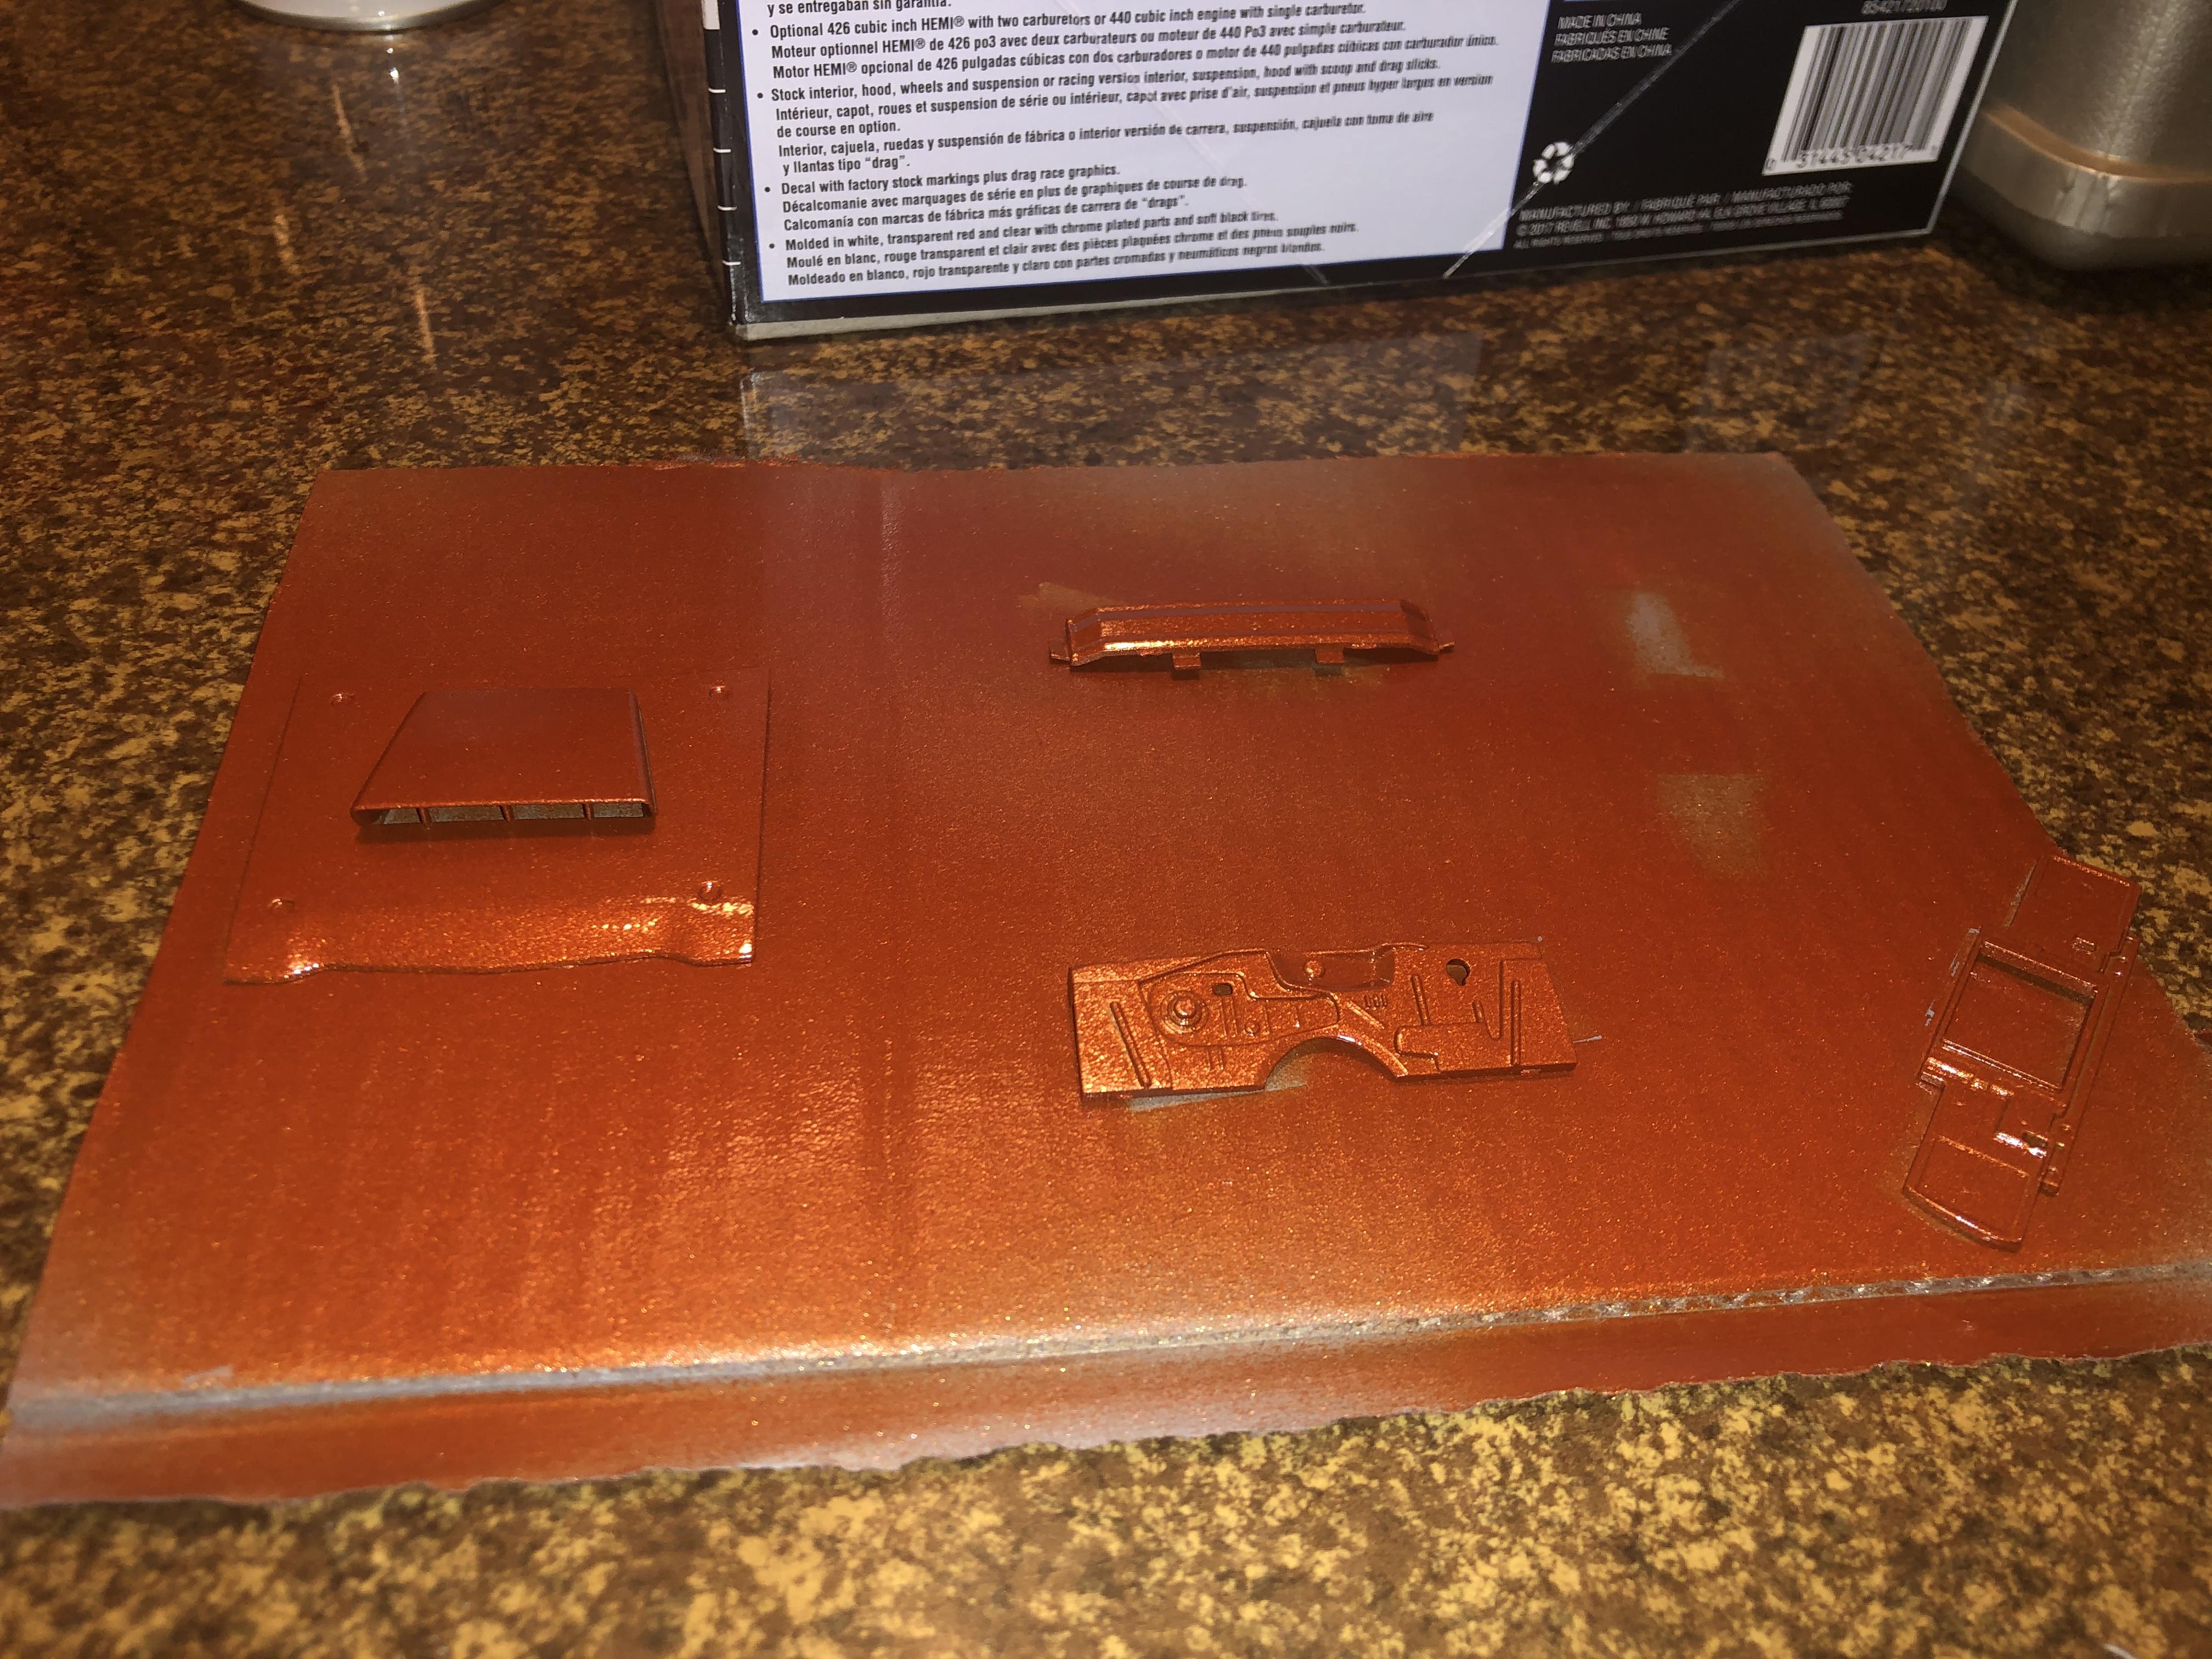
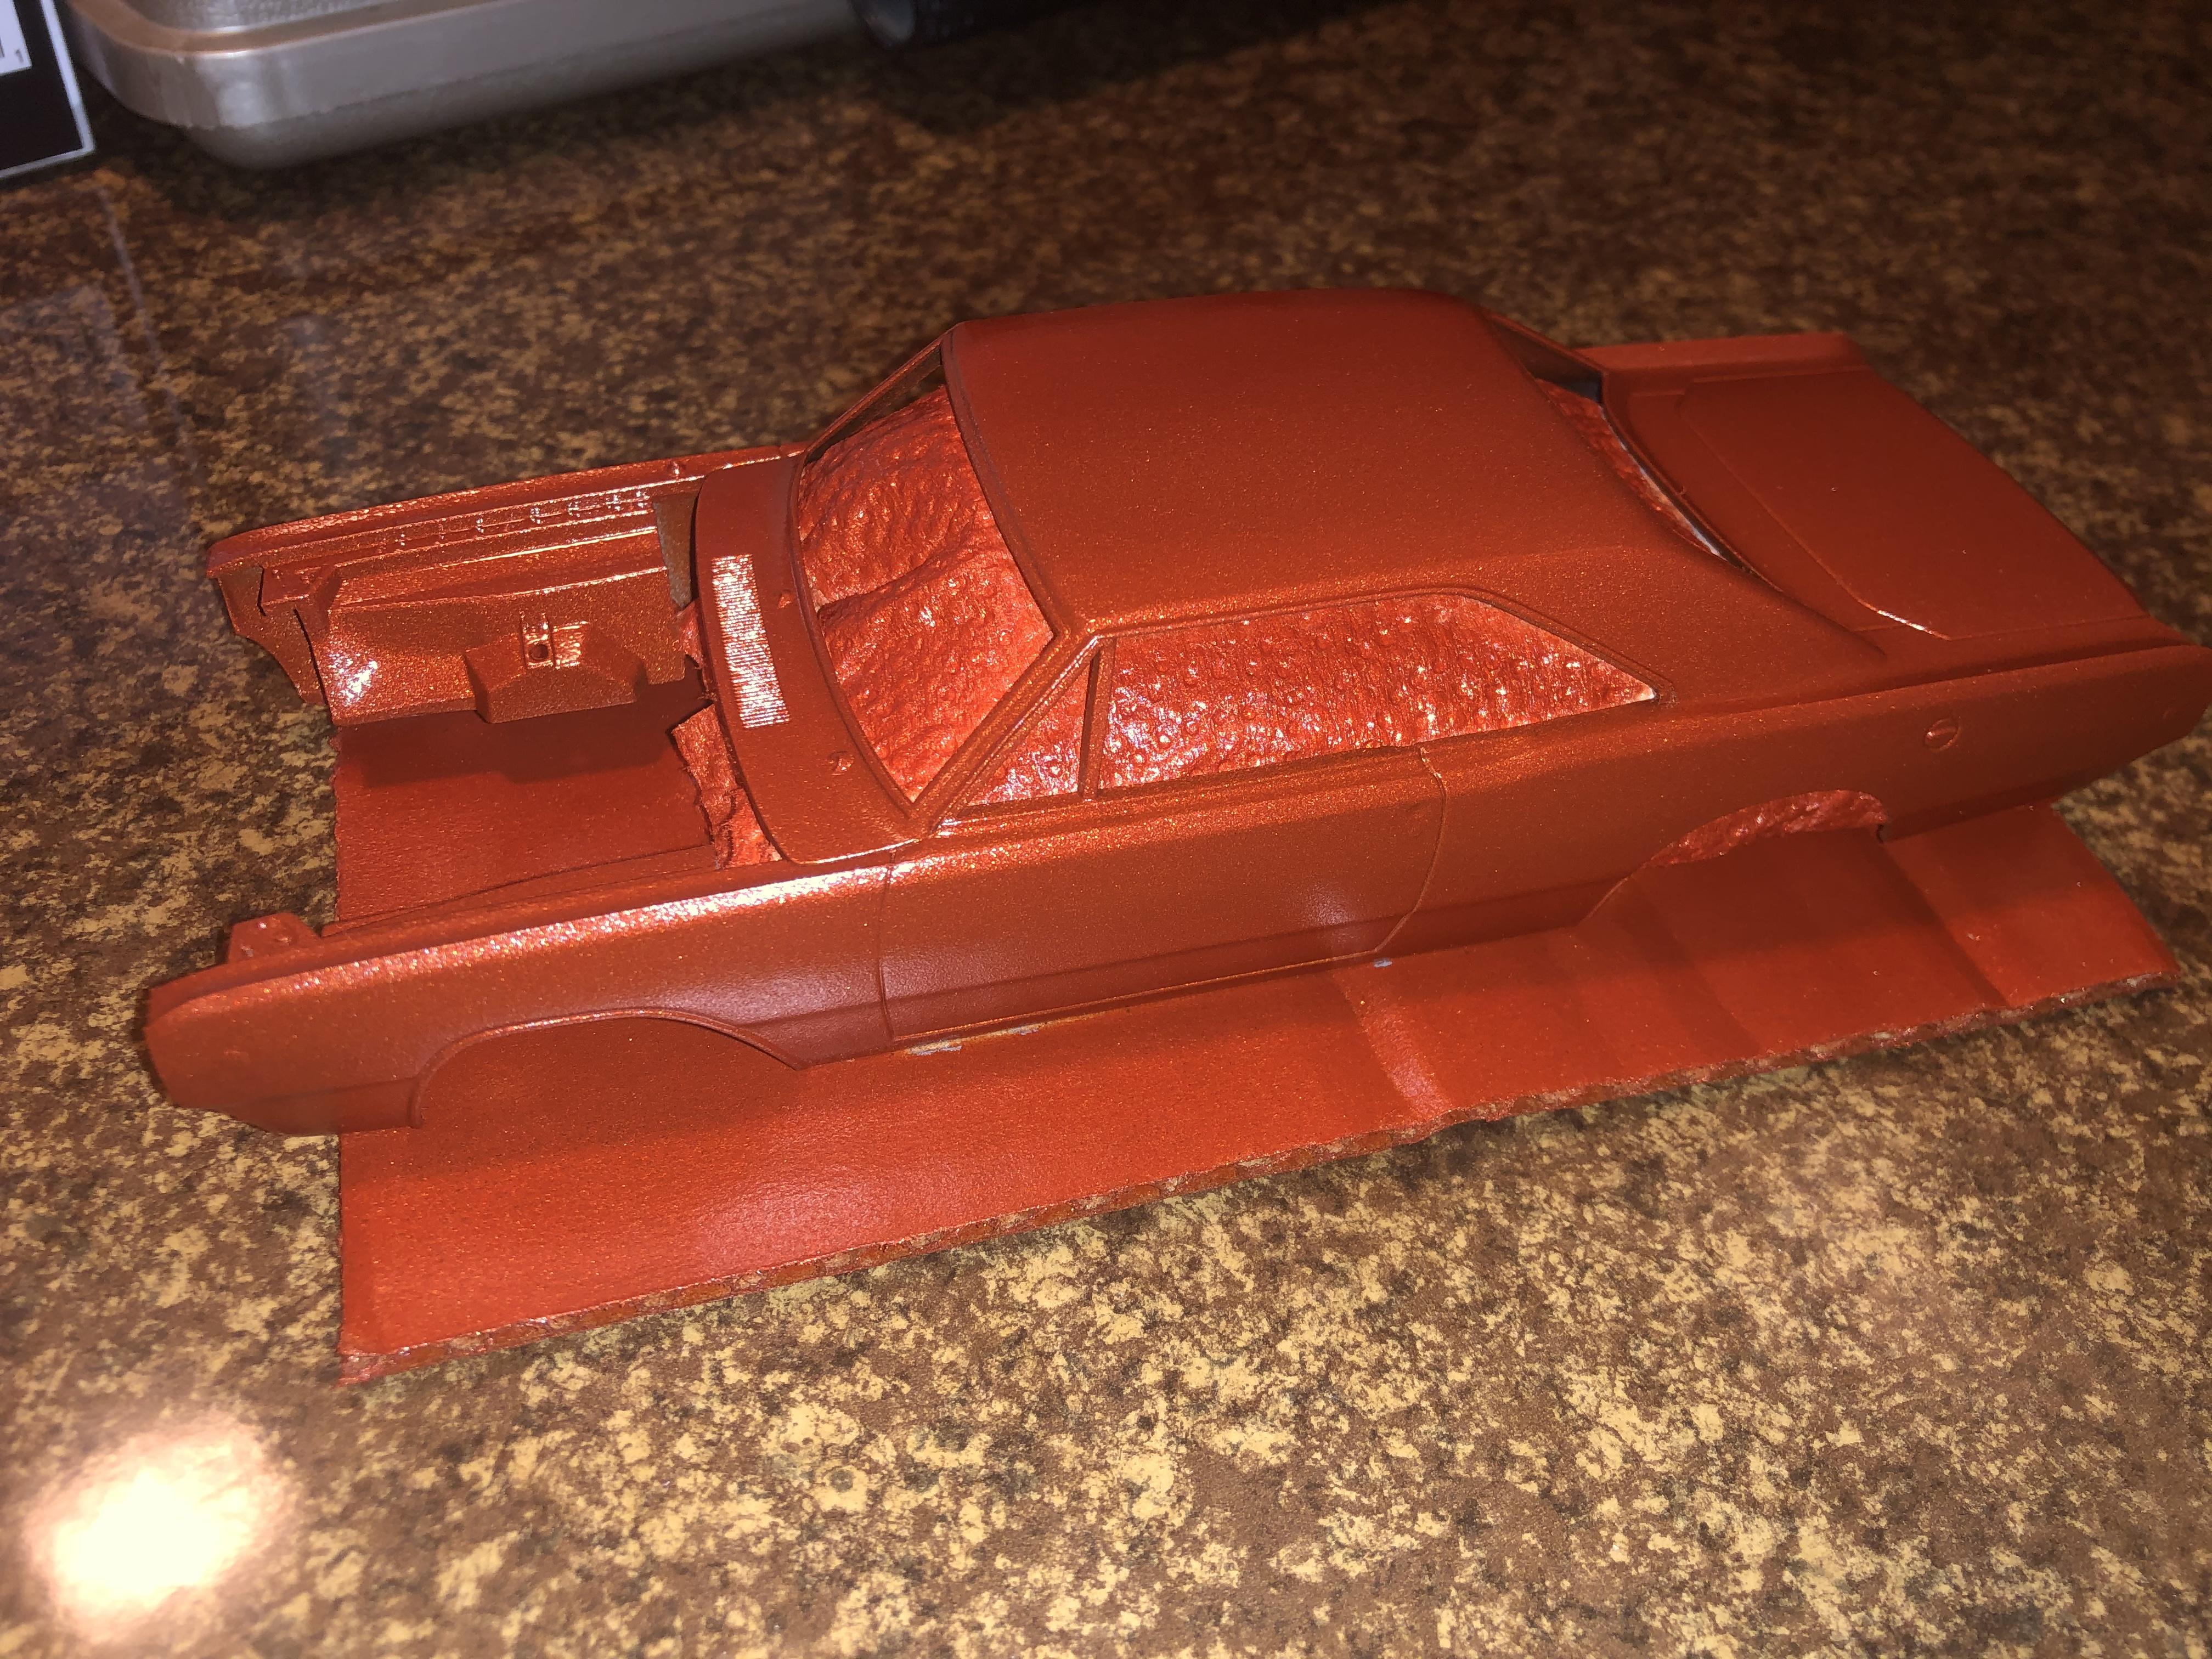
Sitting with the painted body I’m not loving how dark the orange came out. I used Testors Flaming Orange Lacquer which went on nicely but the final finish is much darker than I anticipated in looking at the cap. I have included a picture below of the body next to the decal sheet. I’m not loving the look of the dark orange compared to the long side decals that I plan on using. You can also see how dark the orange is just on the white paper towel. I think I’m going to strip the body and other orange parts and refinish in the recommended gloss orange.
-
Here are a few progress pictures of the parts in primer and the body color. Still waiting on the black semi-gloss parts to dry so I can flip ‘em and grab the other side (definitely gotta throw together a little spraying rack). The lighting isn’t the best but I’ll work on that before posting any additional pics.
-
I wish my real car looked that good!
-
Great work. Awesome job on the interior detailing!
-
Nice job - as others have said the interior looks fantastic!
-
In complete honesty it’s not a style I usually go for but that looks beautiful. So tastefully done - great work!
-
Looking great!!
-
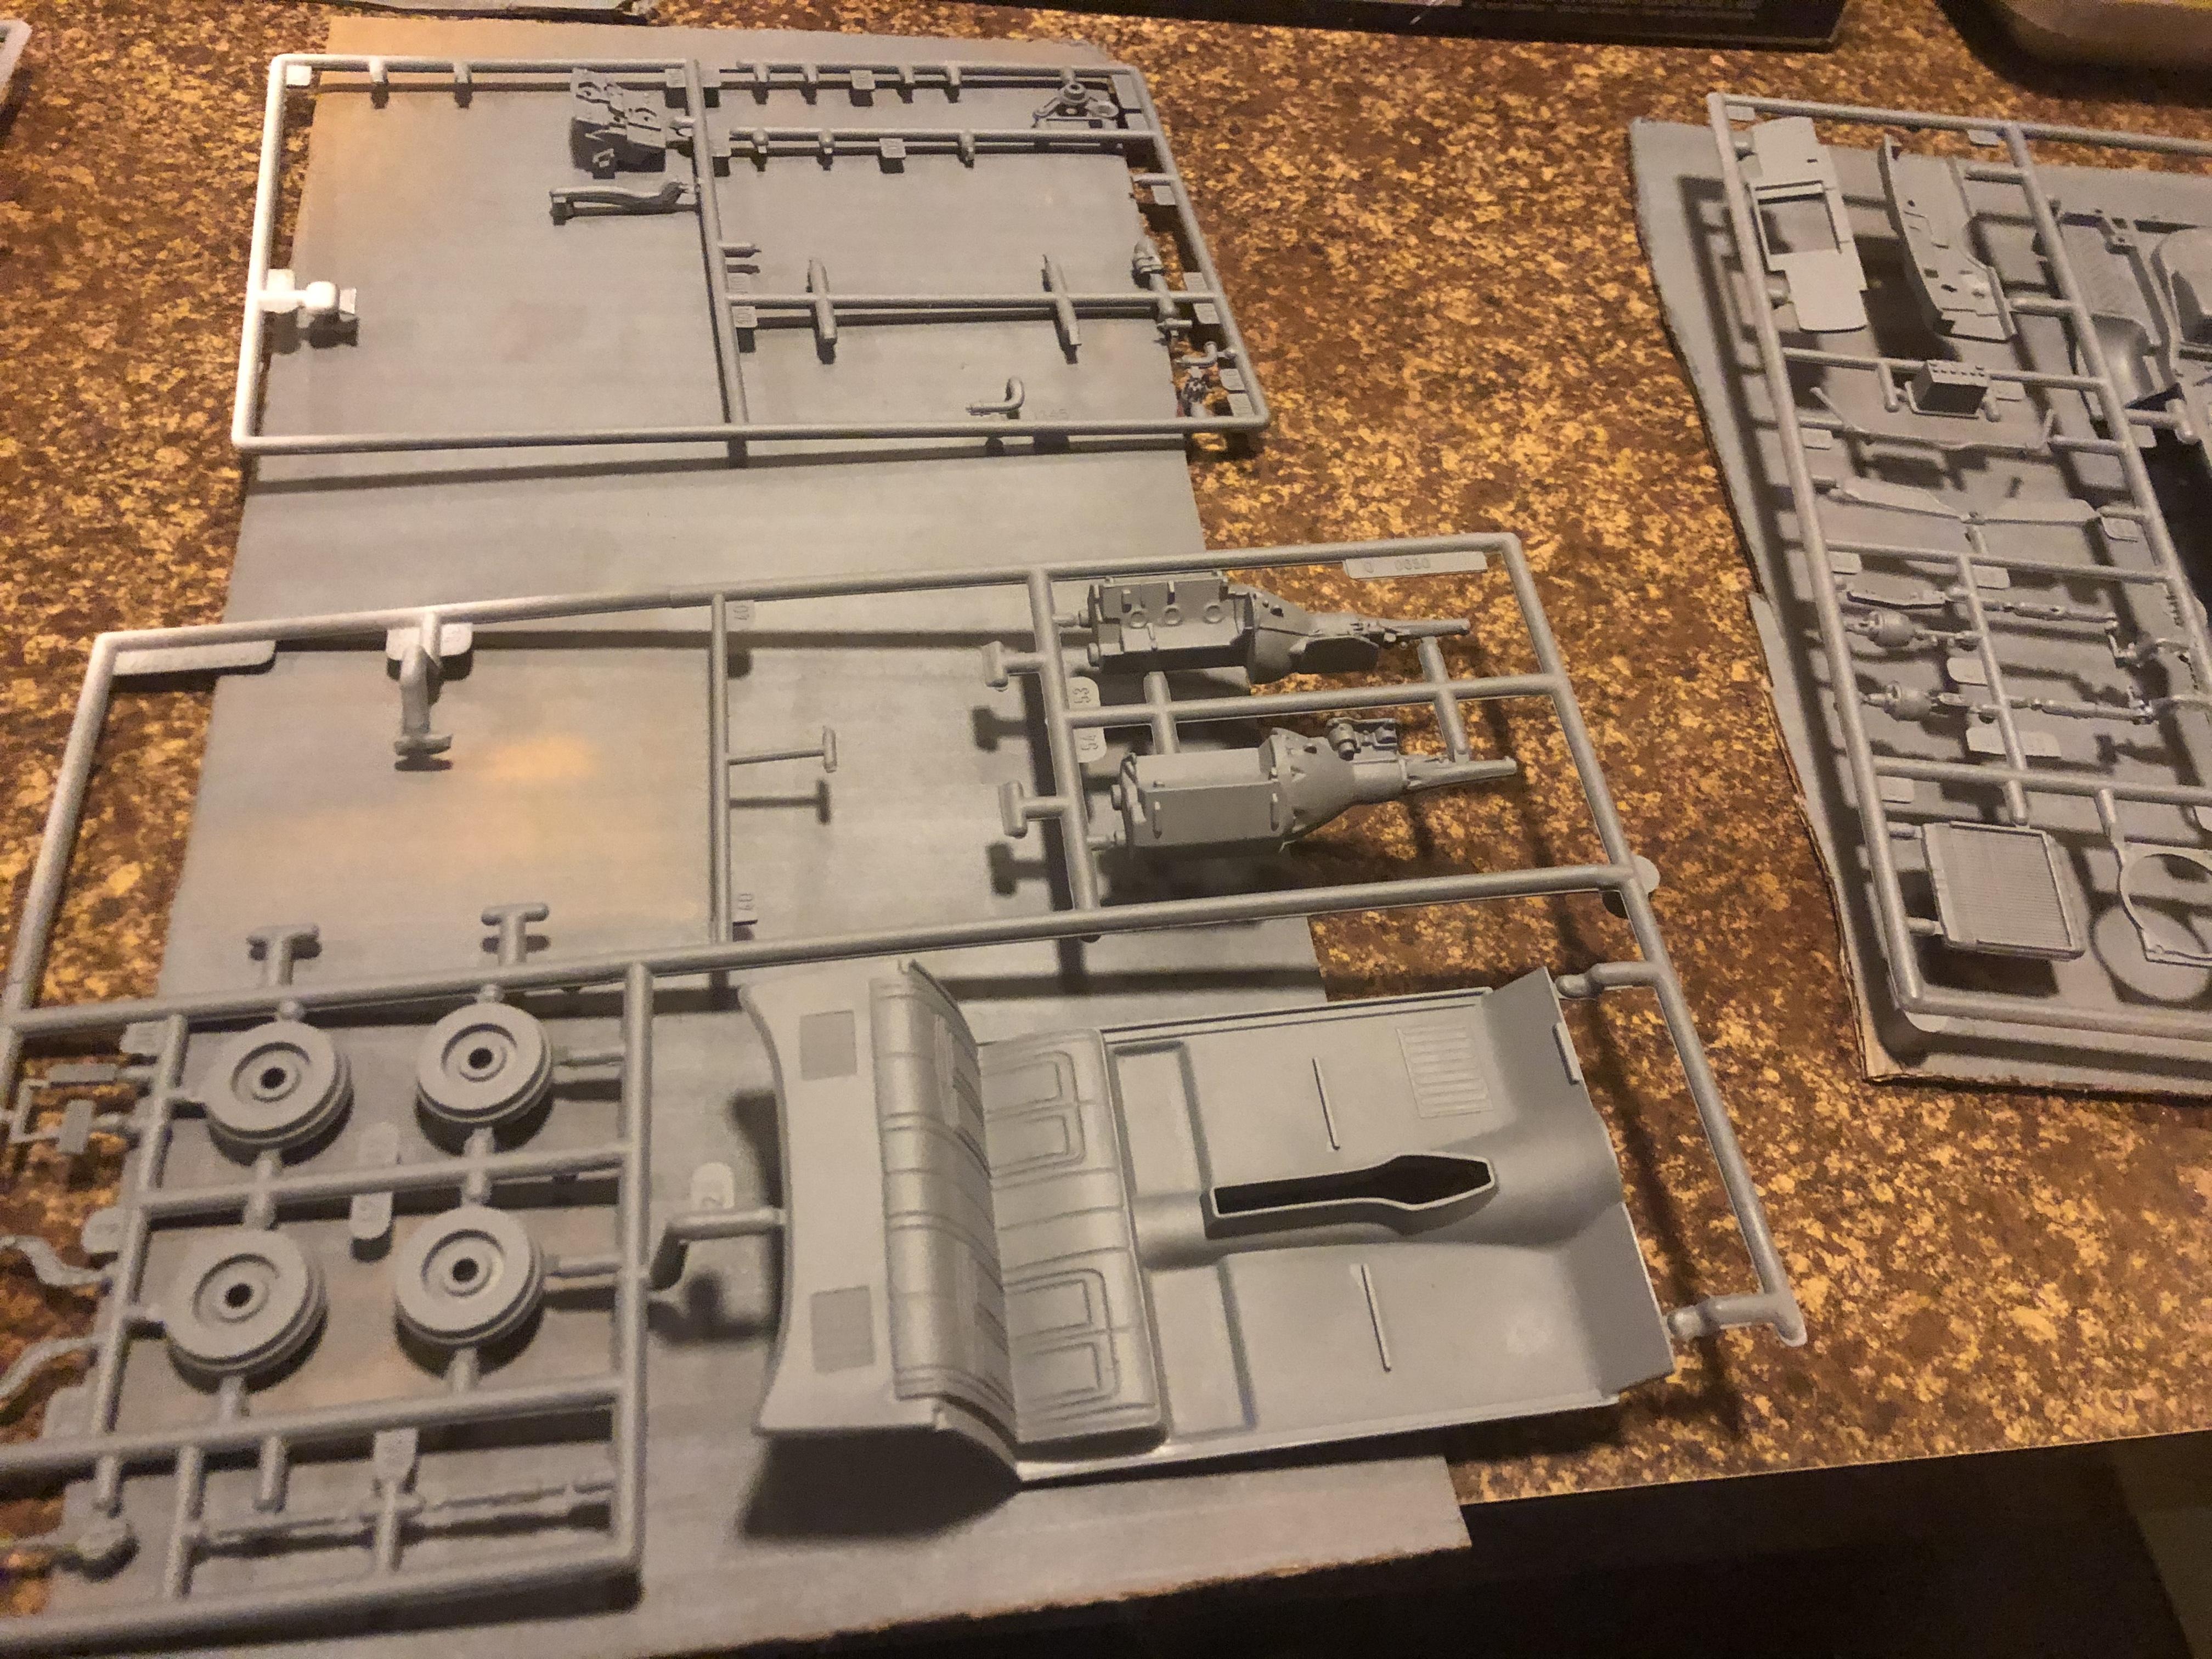
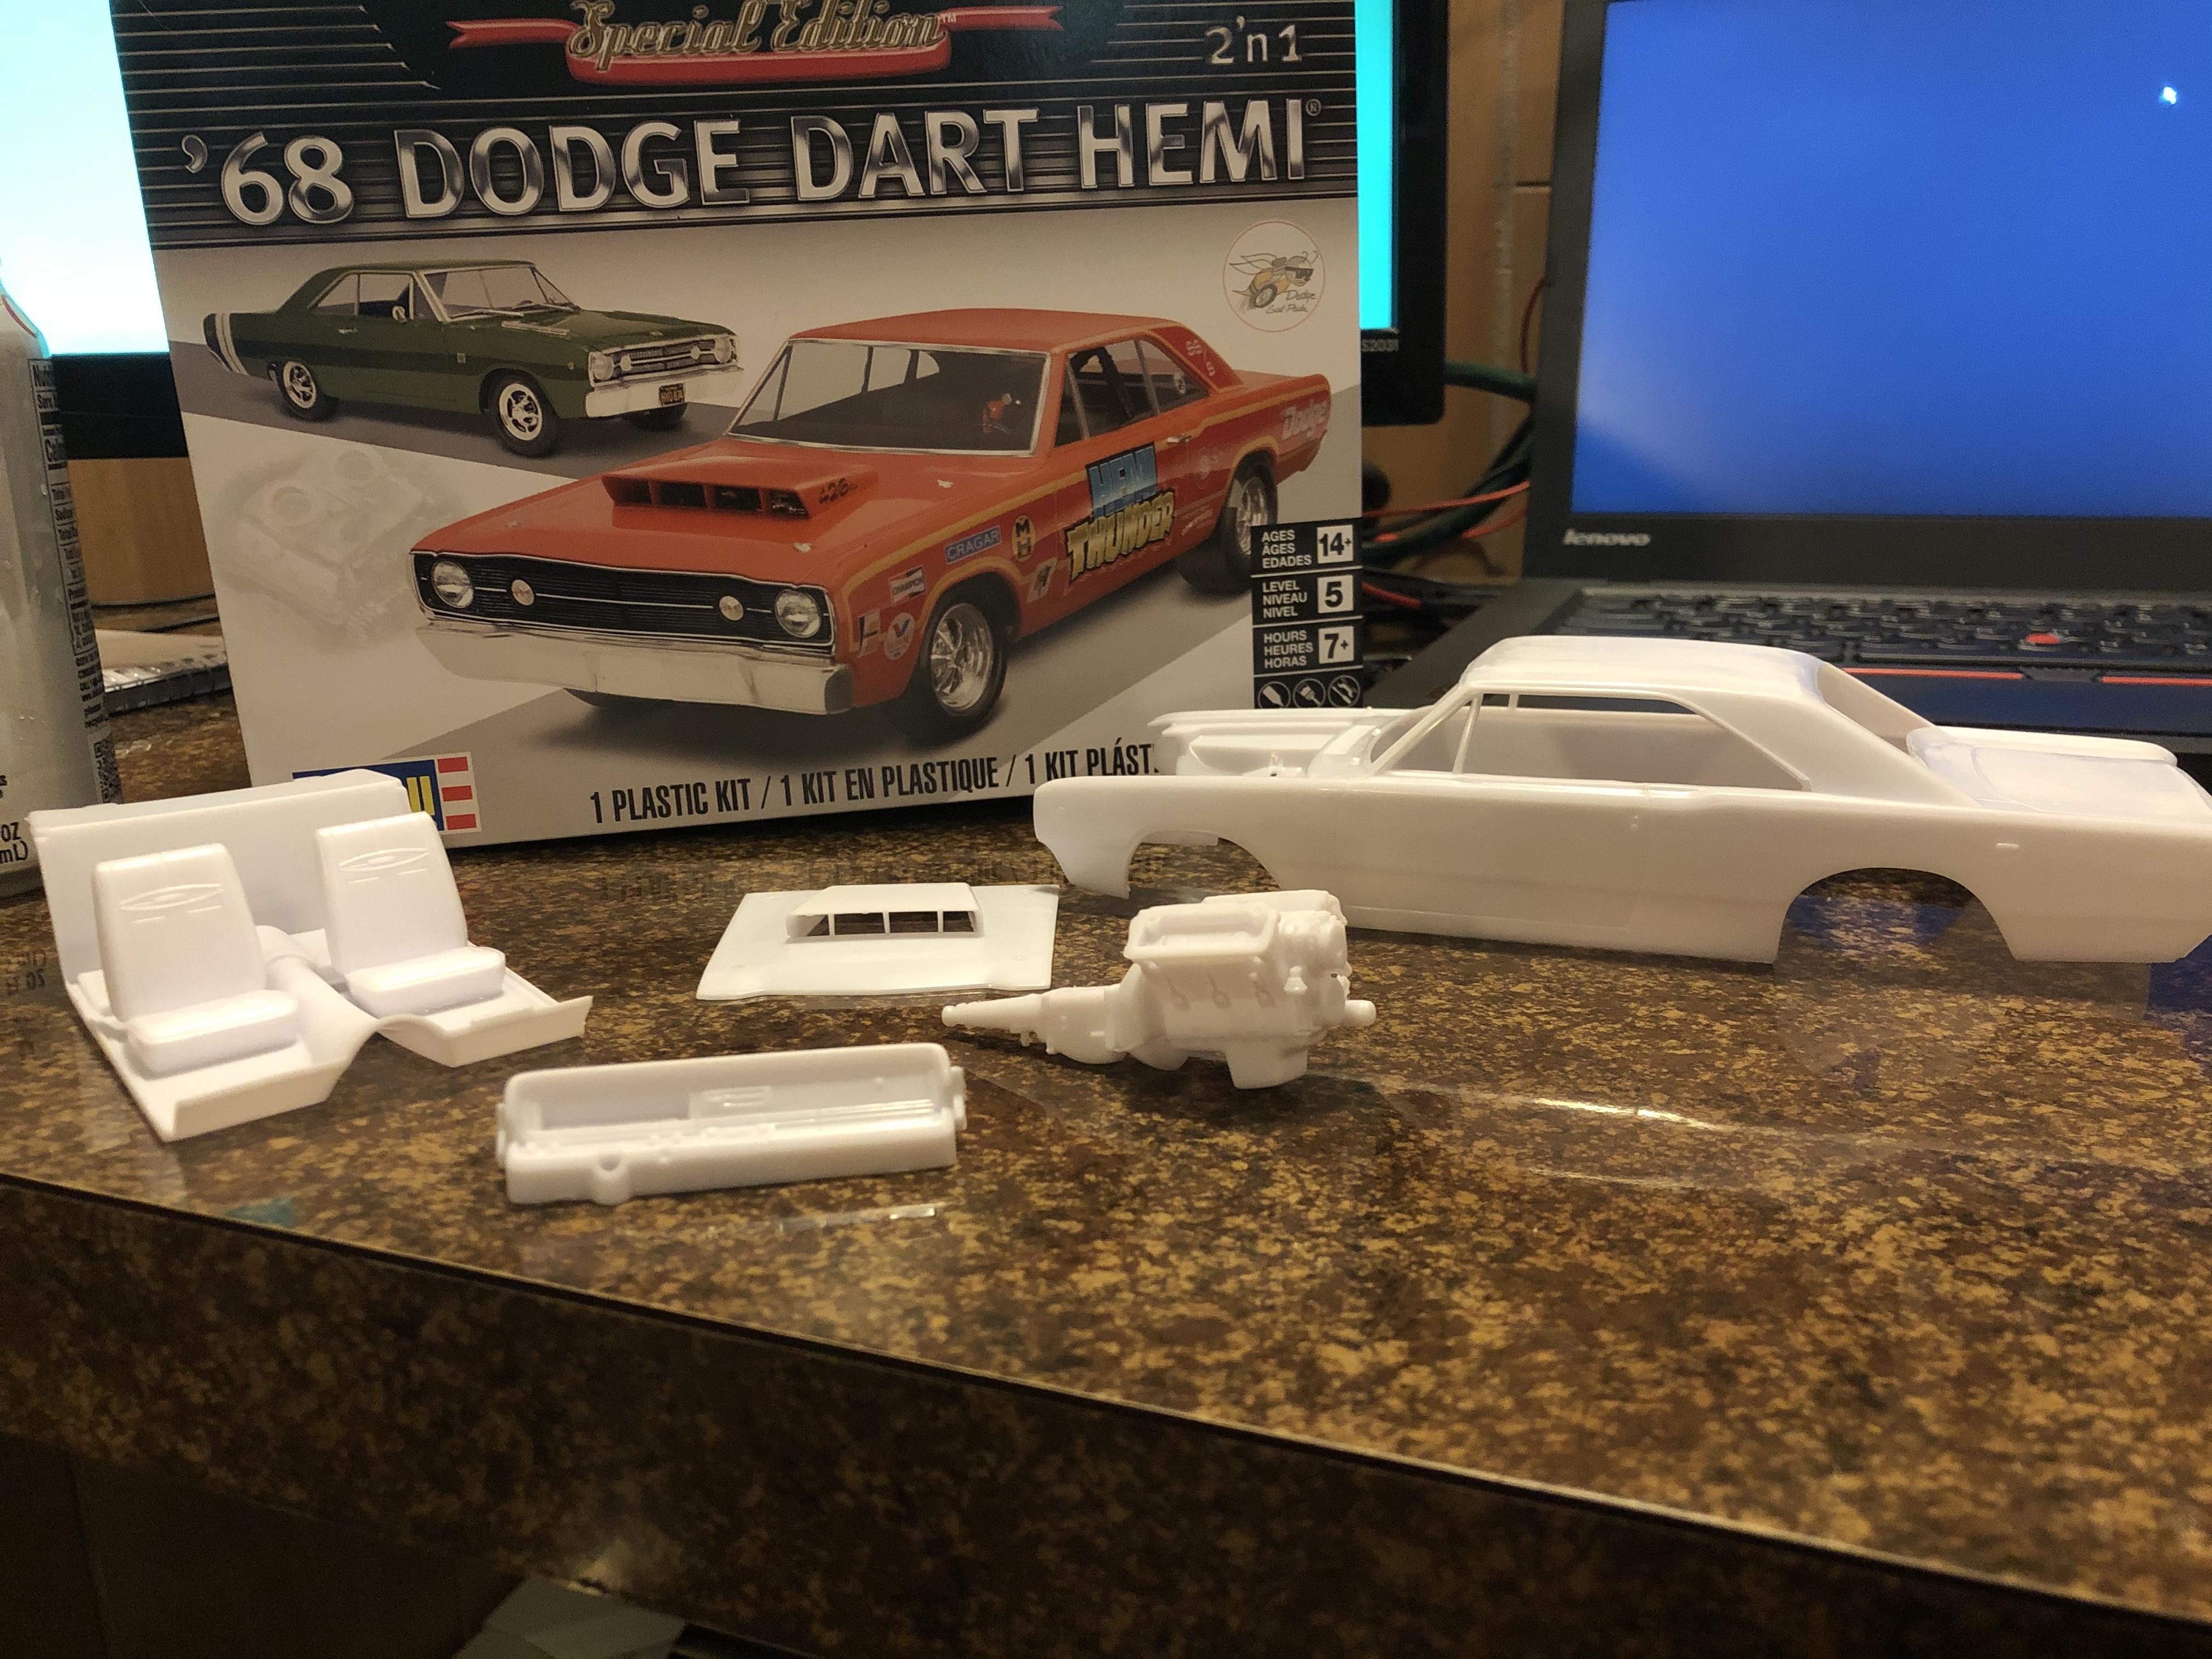
So far I have been really impressed with the kit. It appears I have all the pieces needed to build both the 440 and the HEMI motors which I think is great. I’m going with the HEMI but it’s nice that I can put together the 440 in full and have it as a spare for a future build.
-
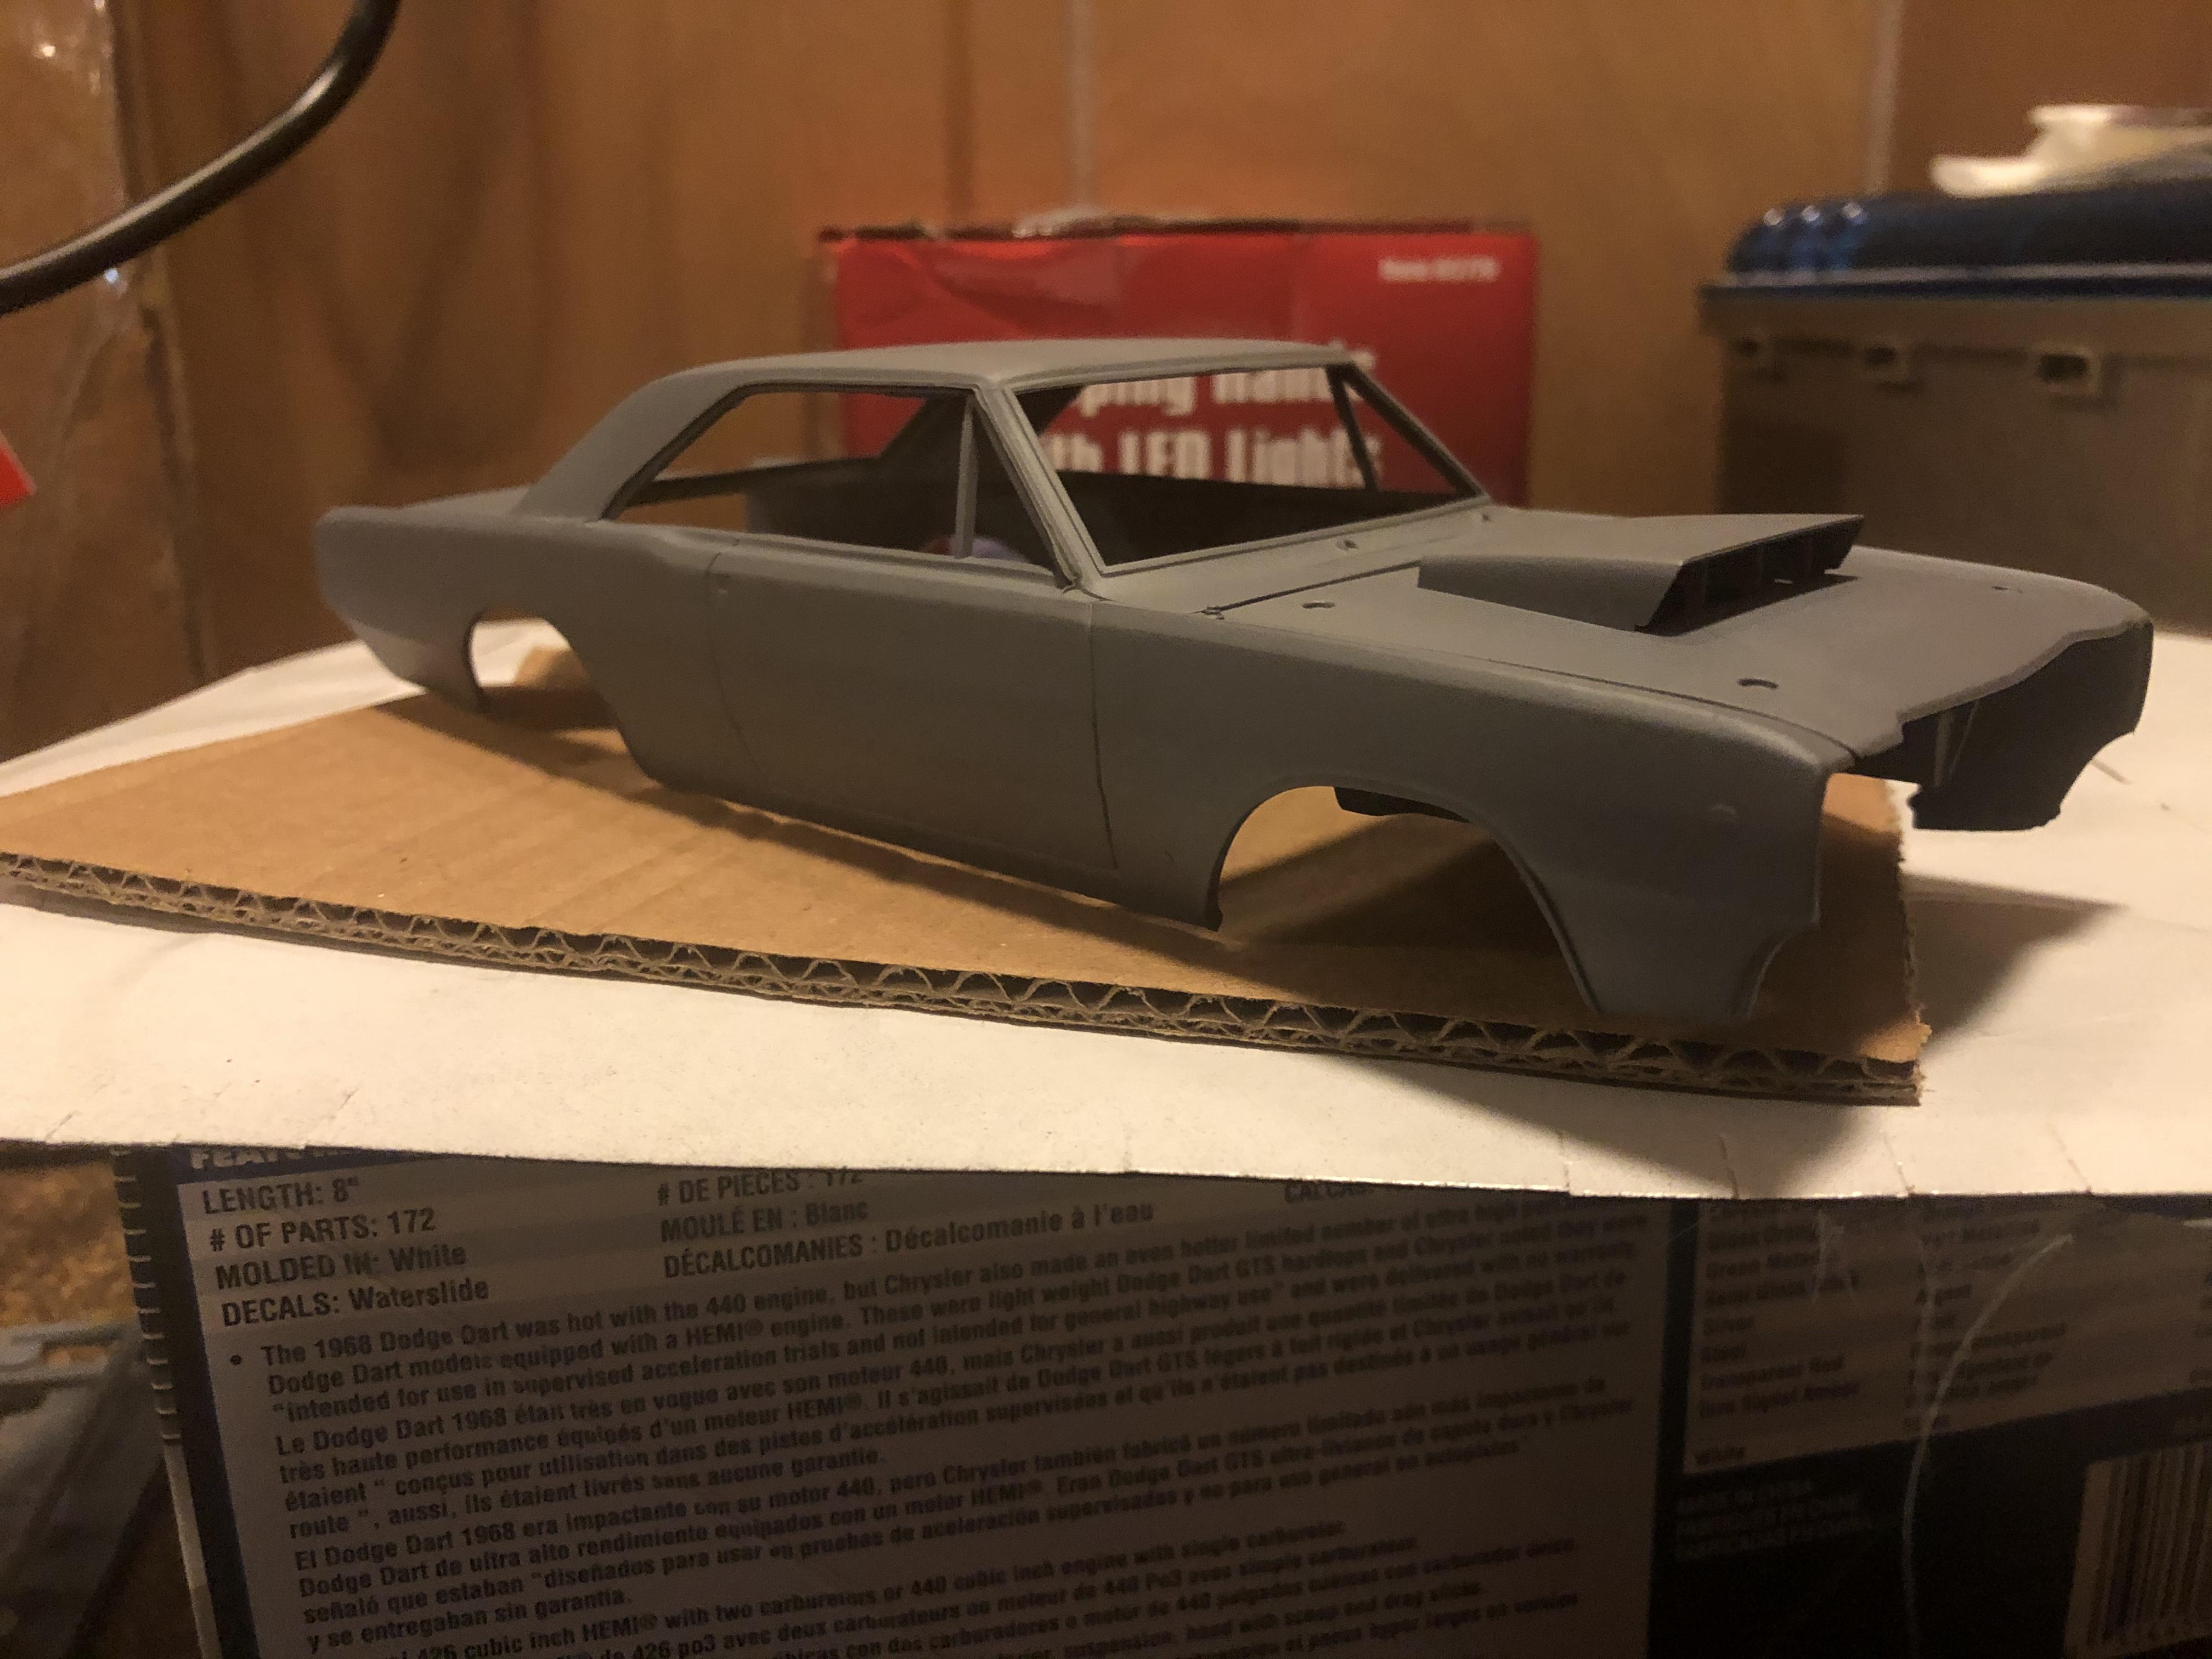
So I mentioned in my last thread that I just finished up my first kit in about 8 years - Revell’s ‘57 Ford Wagon Gasser. Since that kit was so much fun I’m already jumping into a new one - Revell’s ‘68 Dodge Dart Hemi. This kit is in the same lineup as the gasser ‘57 so it should be a great build. I’ve done some preliminary work including cutting the rear fenderwells. Hoping the weather changes soon so I can get this one in primer. I will post updates as they happen!