Furiousgeorge
-
Posts
307 -
Joined
-
Last visited
Content Type
Profiles
Forums
Events
Gallery
Everything posted by Furiousgeorge
-
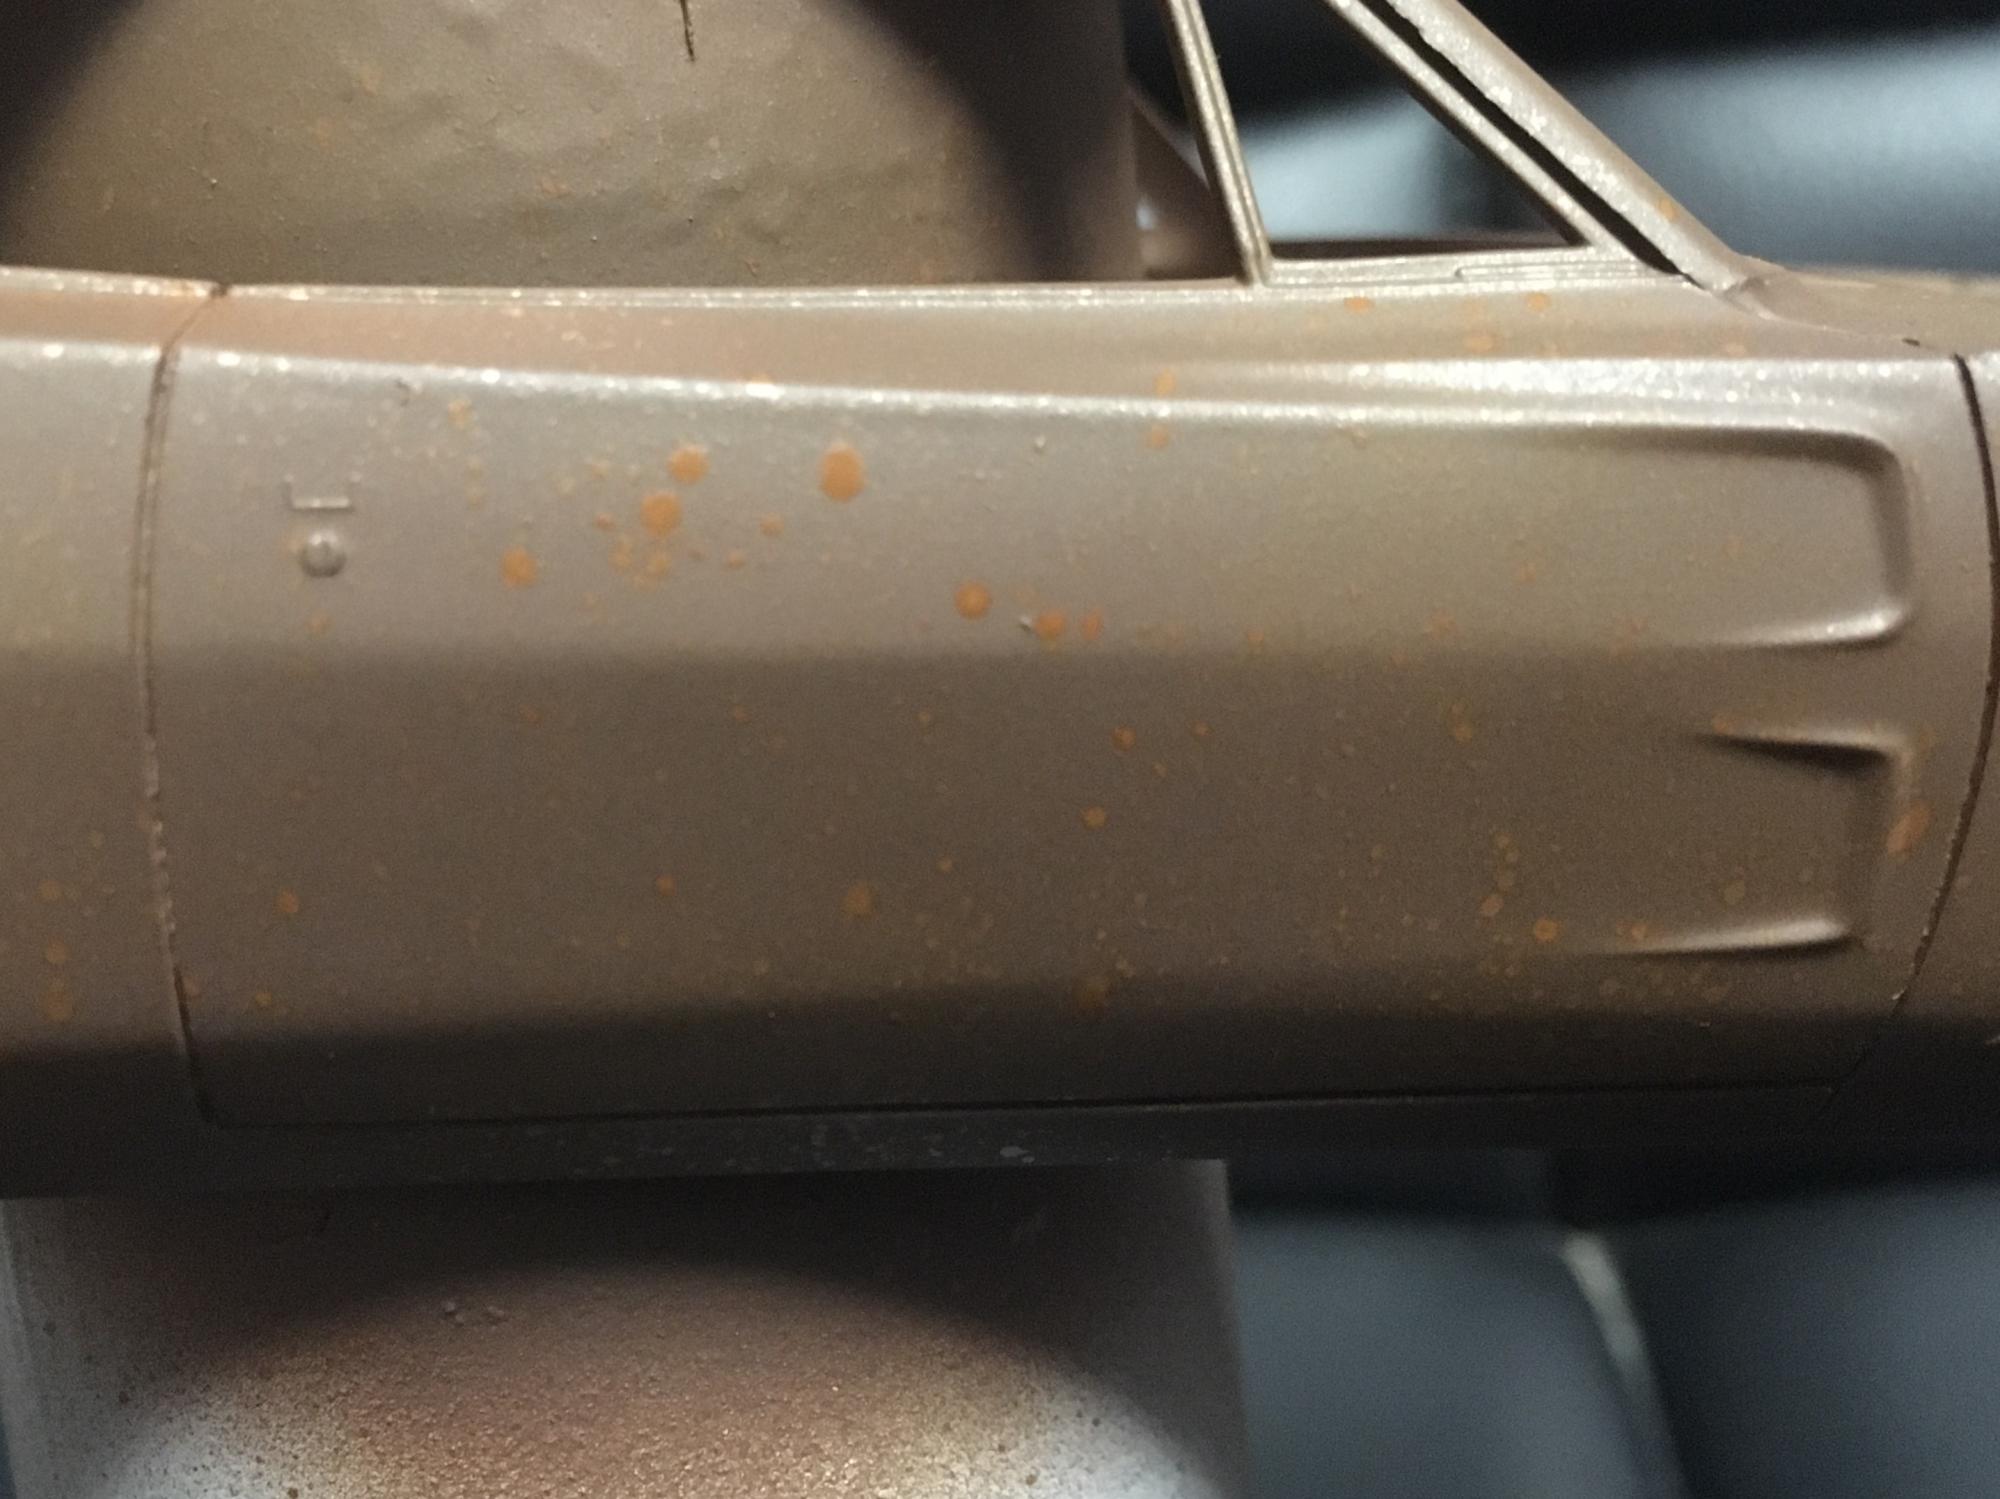
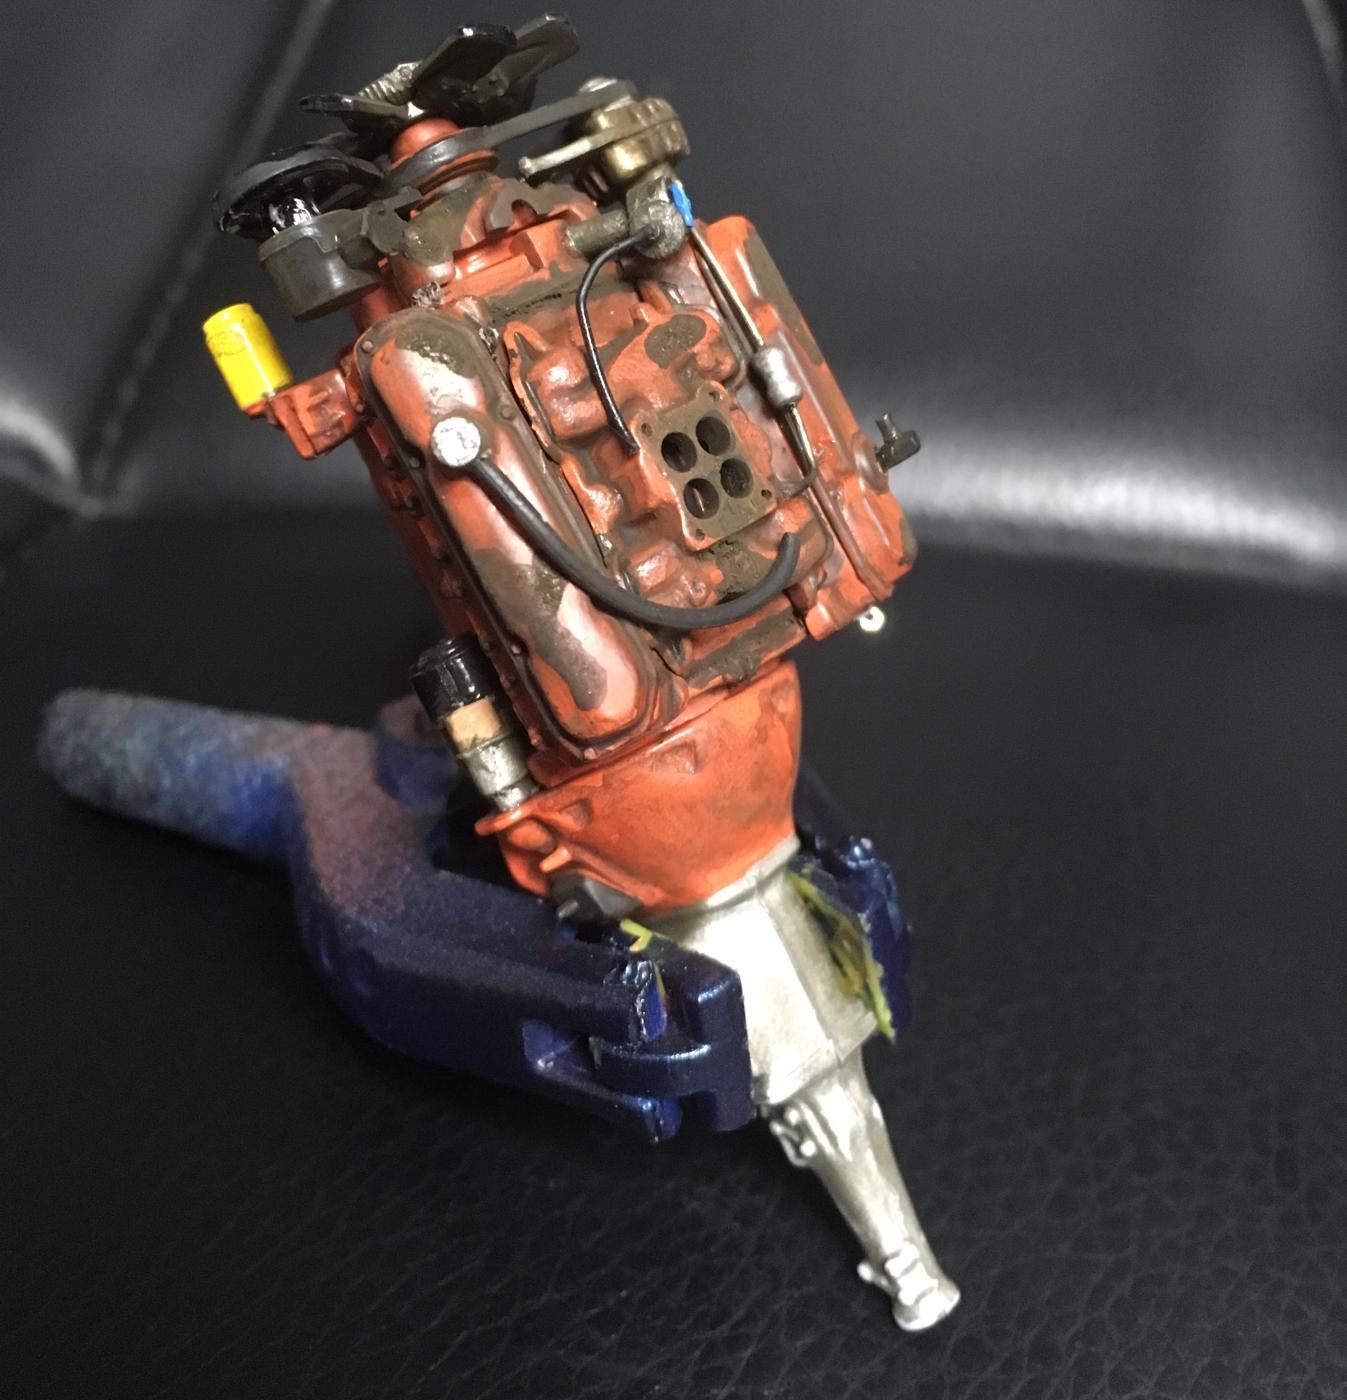
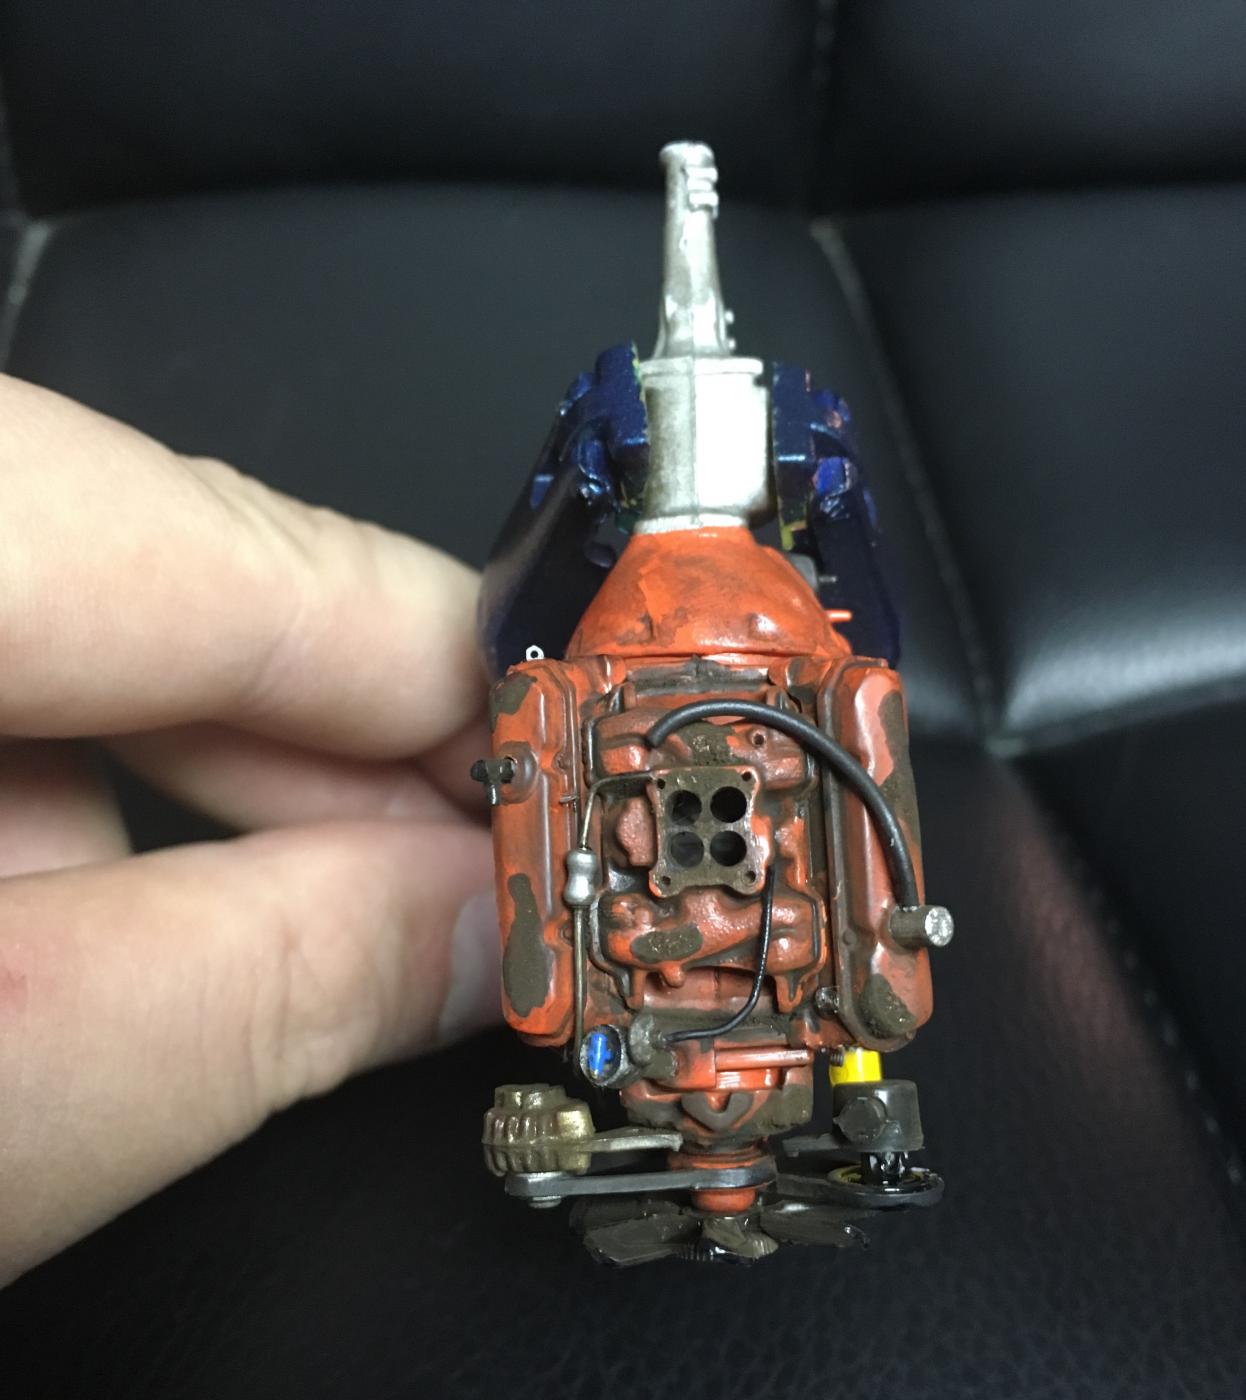
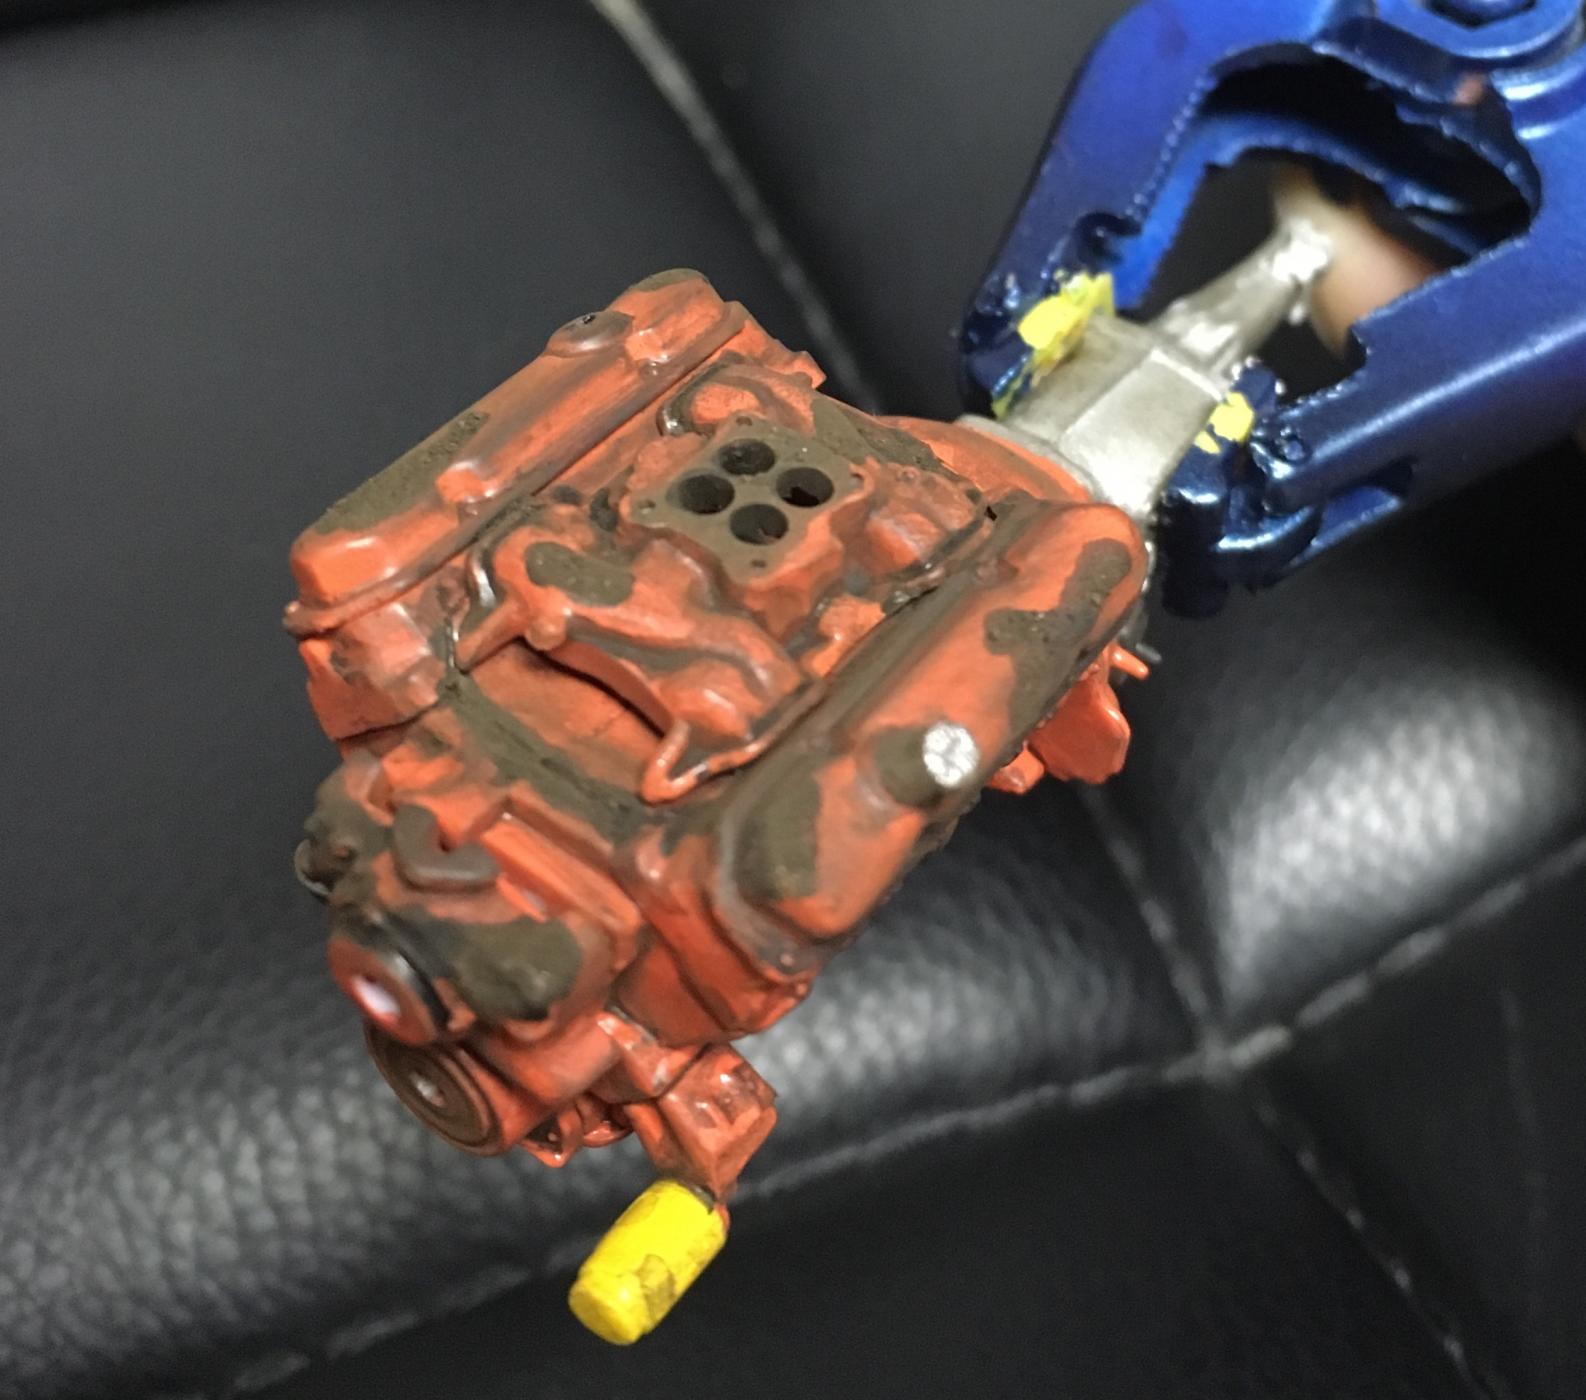
Got this one back off the wait pile and got some initial paint on he body and related parts. The engine is nearly done, just have to touch up a few spots and add the distributor cap and wires. I made a PCV valve and opened up the distributor. I also have the throttle spring to add yet. The body was done with Tamiya flat brown with a mix of hull red and orange splattered over it. I think it'll look alright peaking through the paint (I'm thinking light green). Any comments or criticisms are welcome!

-

Fireball AFB Max Wedge Carbs
Furiousgeorge replied to BobbyG's topic in Car Aftermarket / Resin / 3D Printed
I just got these today, as well as the street Hemi carbs, bare MoPar steelies and the MoPar steelies with hubcaps. The carb detail is mind blowing! There are details like fuel mix screws and vacuum ports. If anyone is thinking about getting these, pull the trigger! You won't be disappointed! -
Got to work on the 440, I'm fairly pleased with how it worked out for my first try. The next step is the hull red on the body/chassis and related parts hopefully tonight.
-
Would anyone want to see 70 Charger pics?
Furiousgeorge replied to mod3l Lover's topic in Car Kit News & Reviews
Or better yet, do a wip with it. It'd be great to see one built so we'd have a heads up on any issues. -
69 nova revell > barnfind > fully detailed engine bay
Furiousgeorge replied to crazyrichard's topic in WIP: Model Cars
This is looking fantastic! Excellent work! I read through the entire post again and didn't see this mentioned, how did you weather the glass like that? -
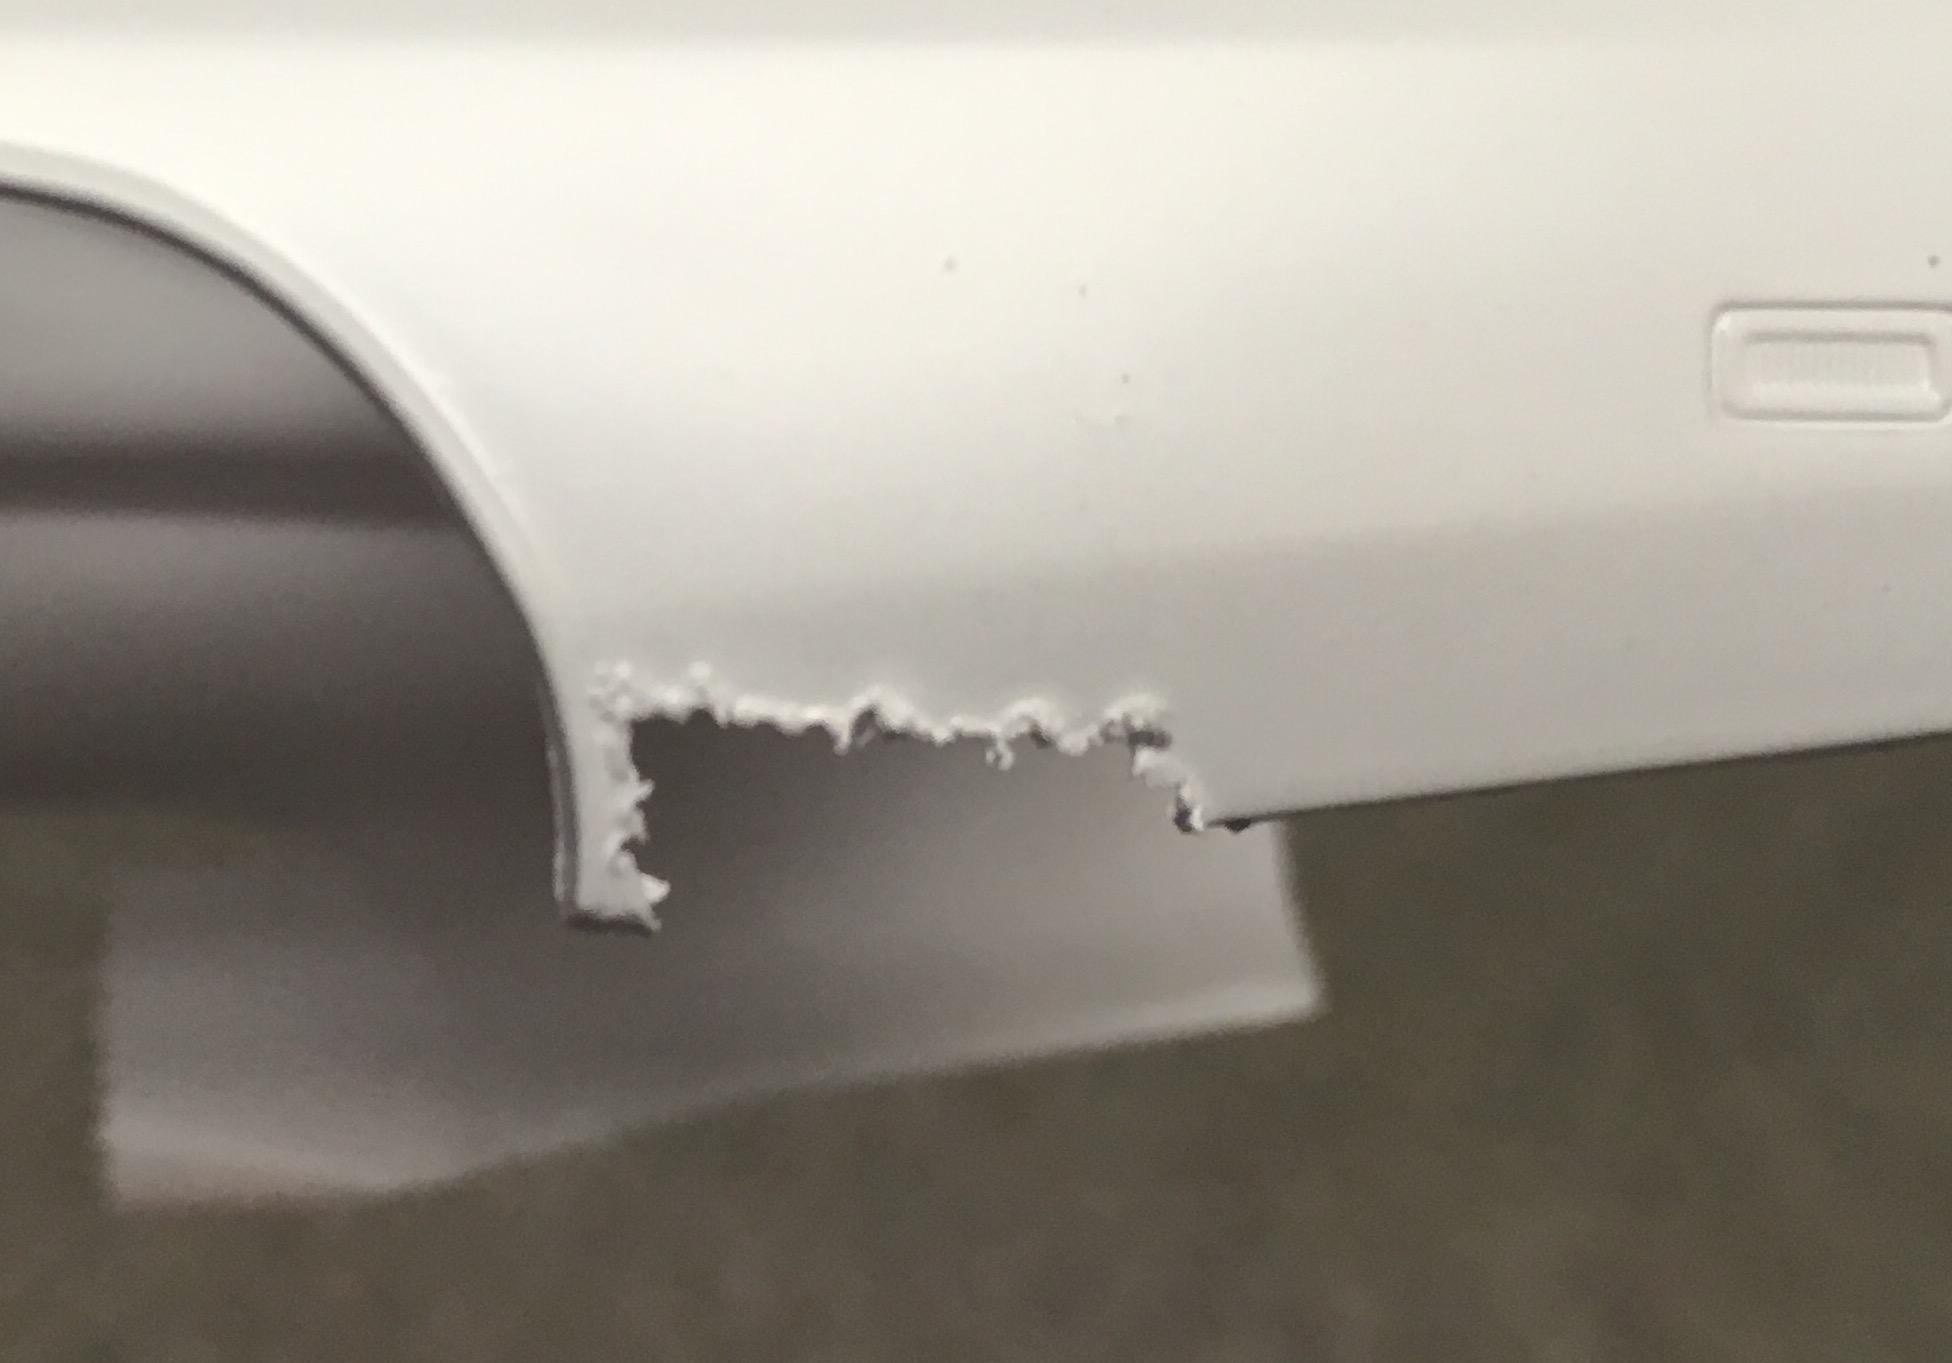
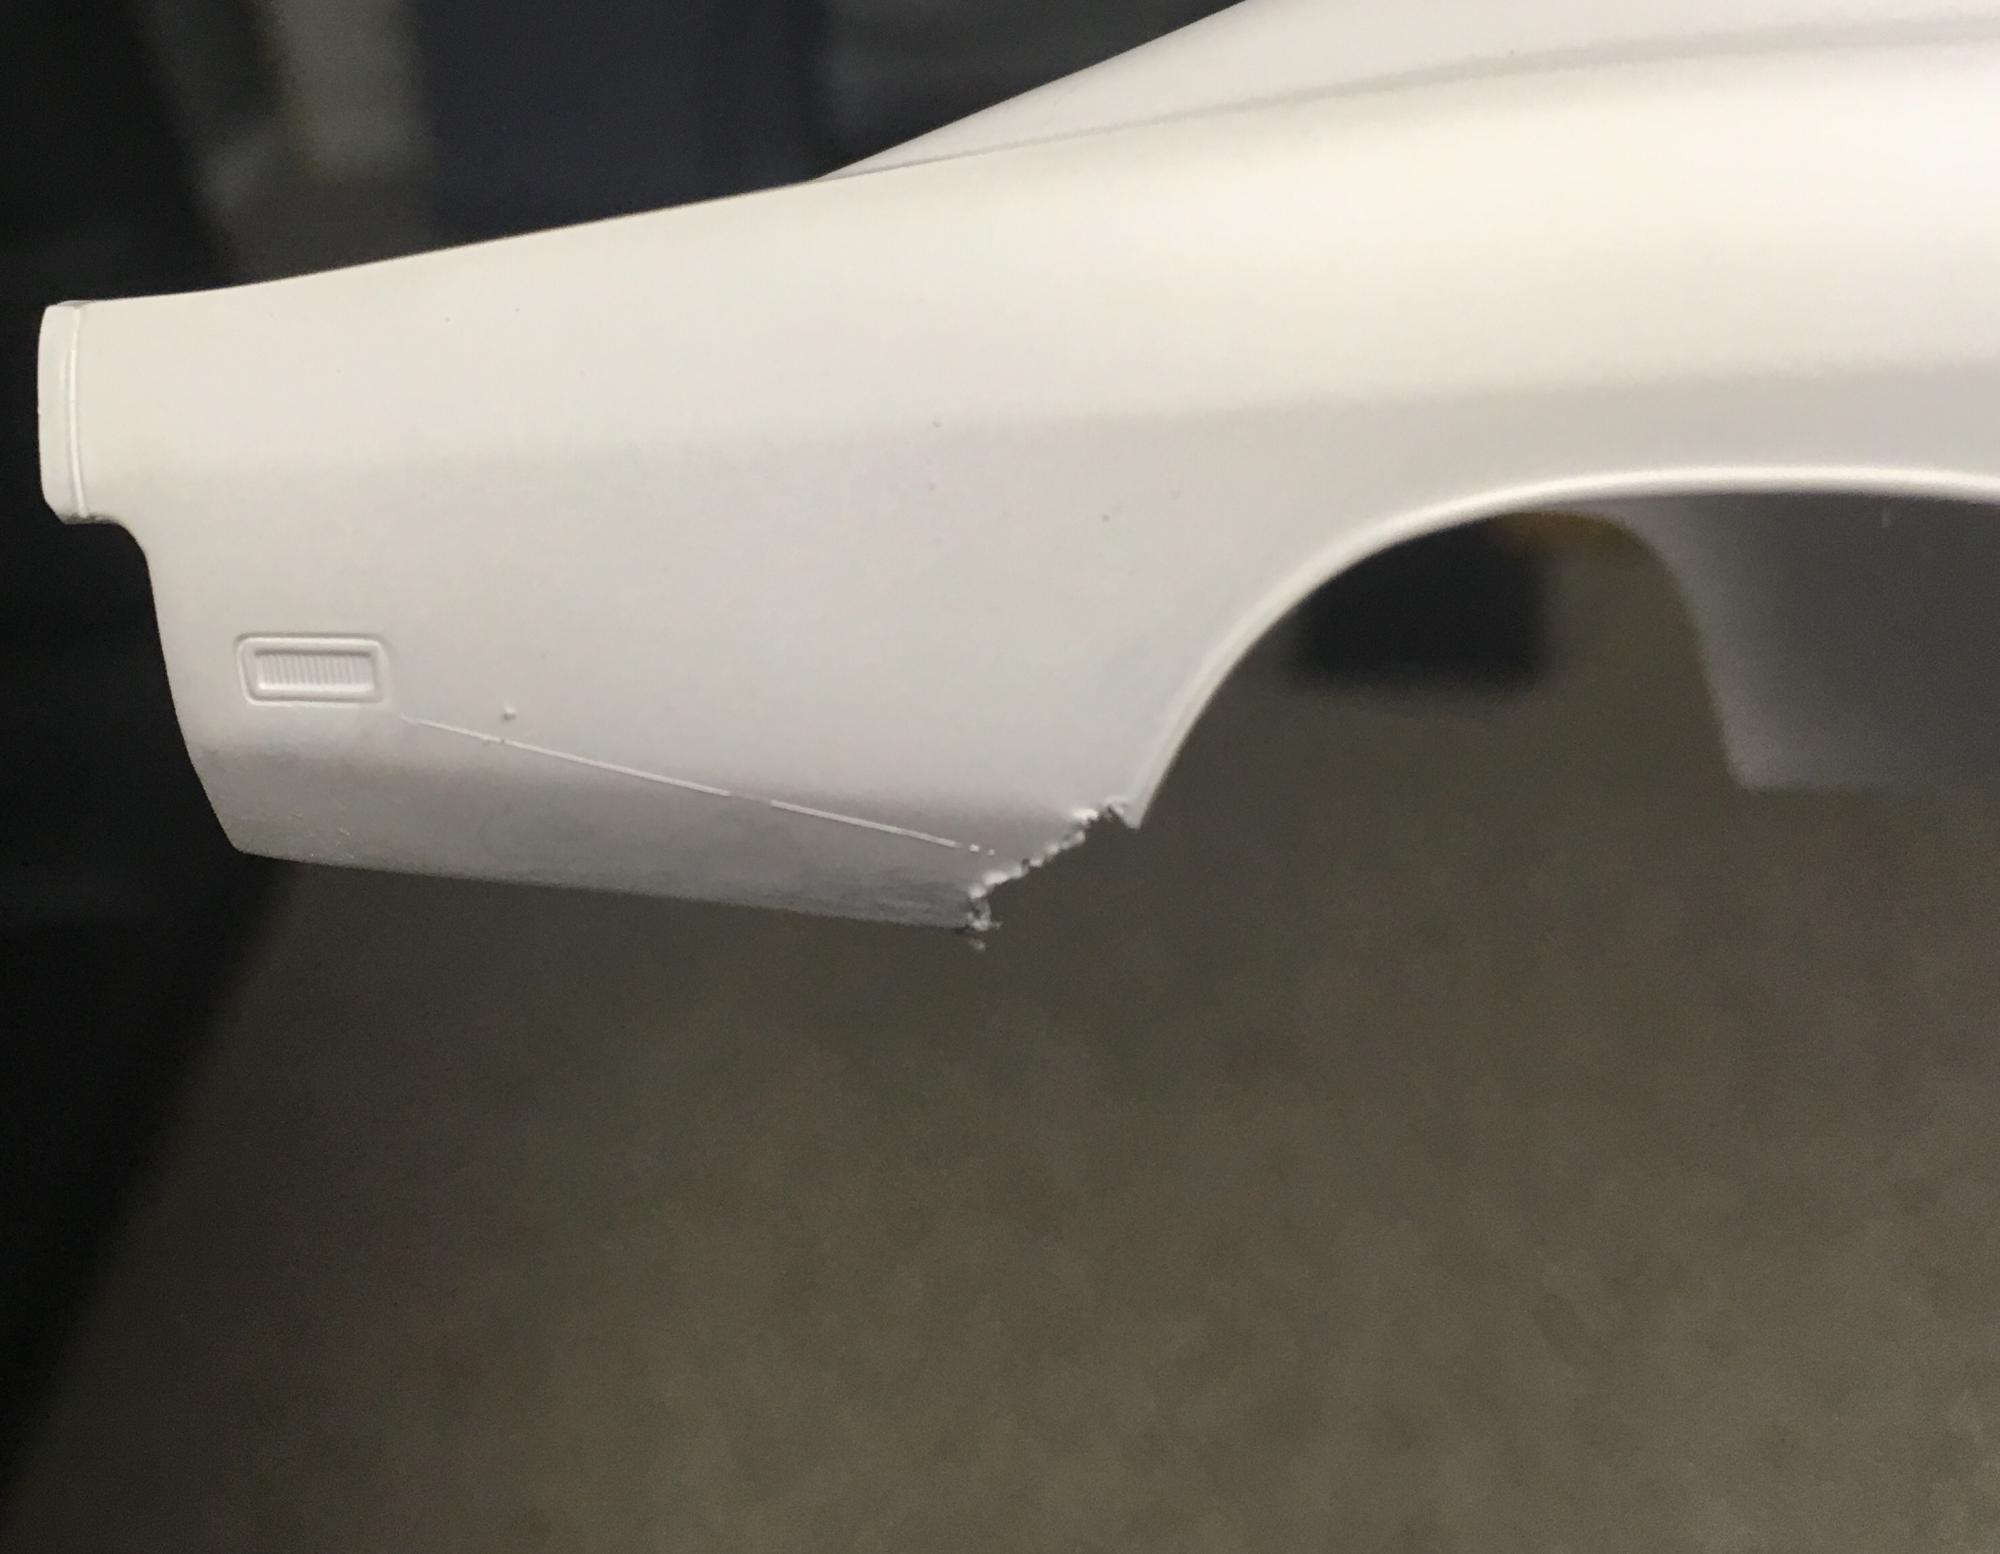
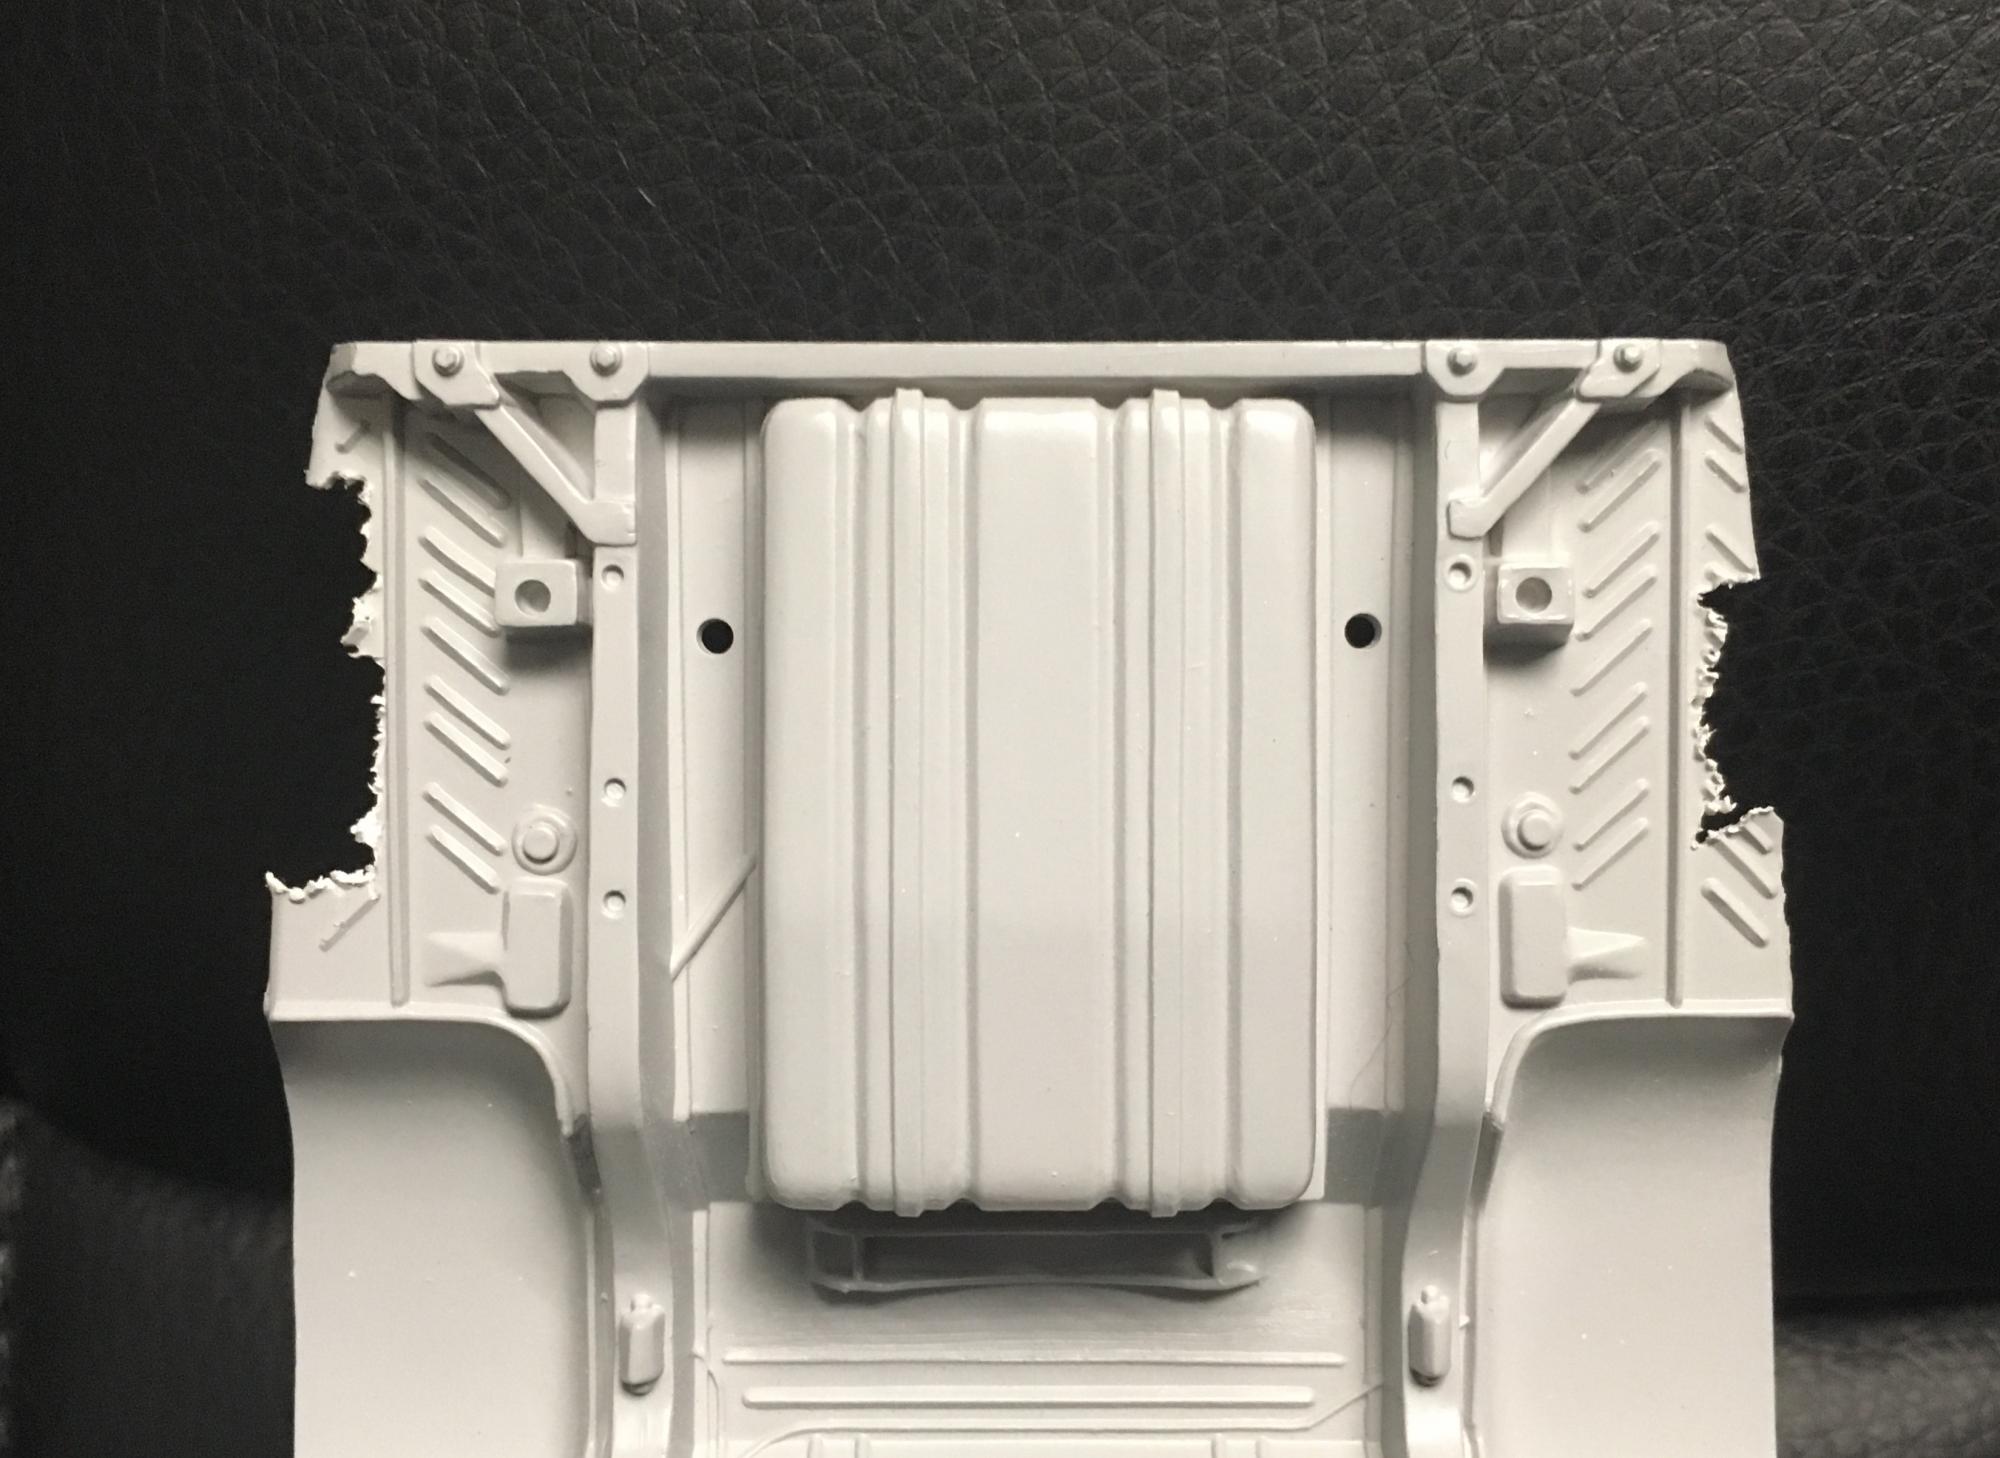
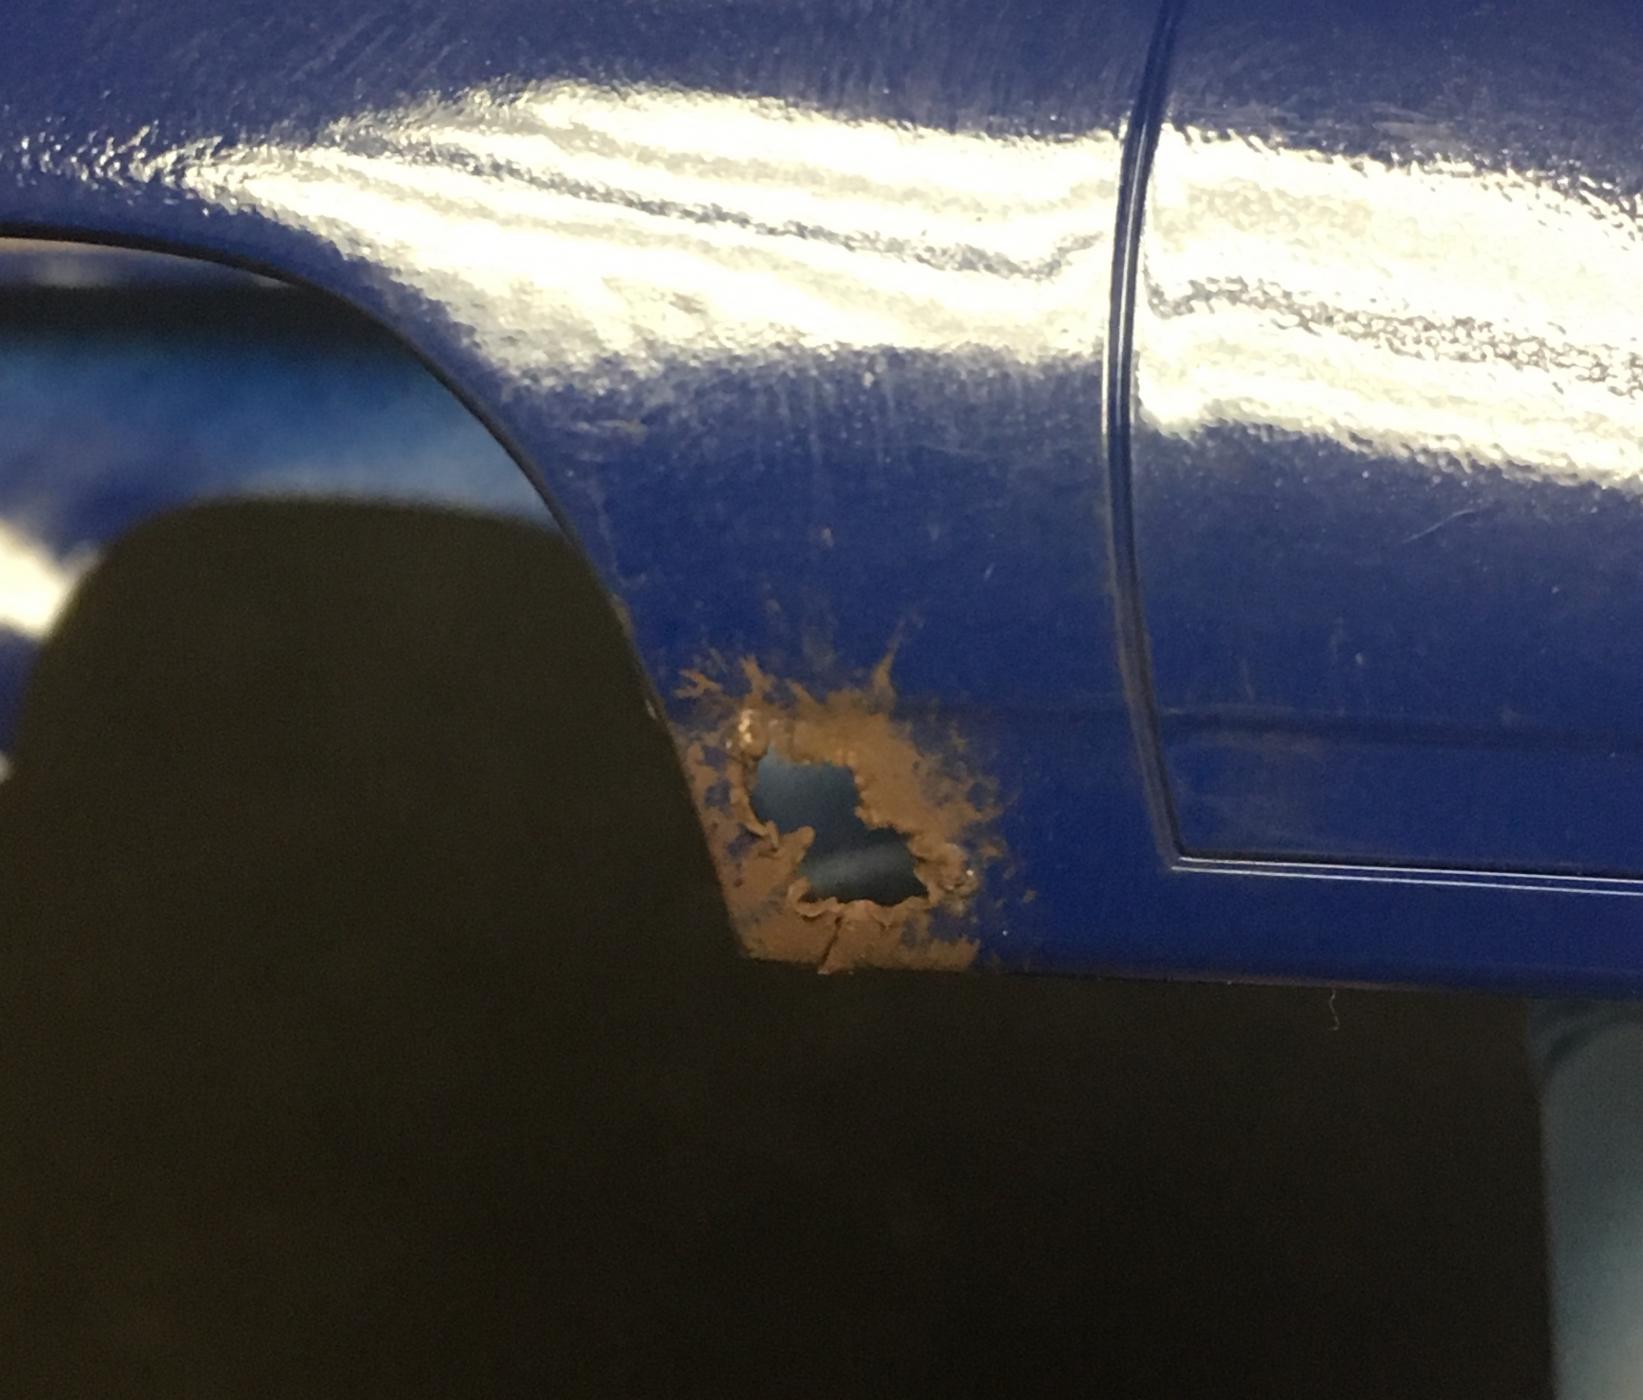
I got working on getting a few rust holes in the rear fenders and trunk extensions on the chassis. They need a bit more thinning, but are getting close. I've also drilled a hole in the passenger fender for the missing scoop, as well as a missing wiper arm (I'll have the post sticking out of the hole after paint) and drivers door handle. I drilled out a hole for the fuel fill tube and put a bit of aluminum pipe there, it'll have a rag plugging it in the end. I also got a start on opening up the headlights, and more practice work on gunking up the engine.
-
A great build of a great car! I had a '66 Sport Fury a few years back, though it was the most terrible green you've ever seen inside and out, it drove and rode like a dream! Good job!
-
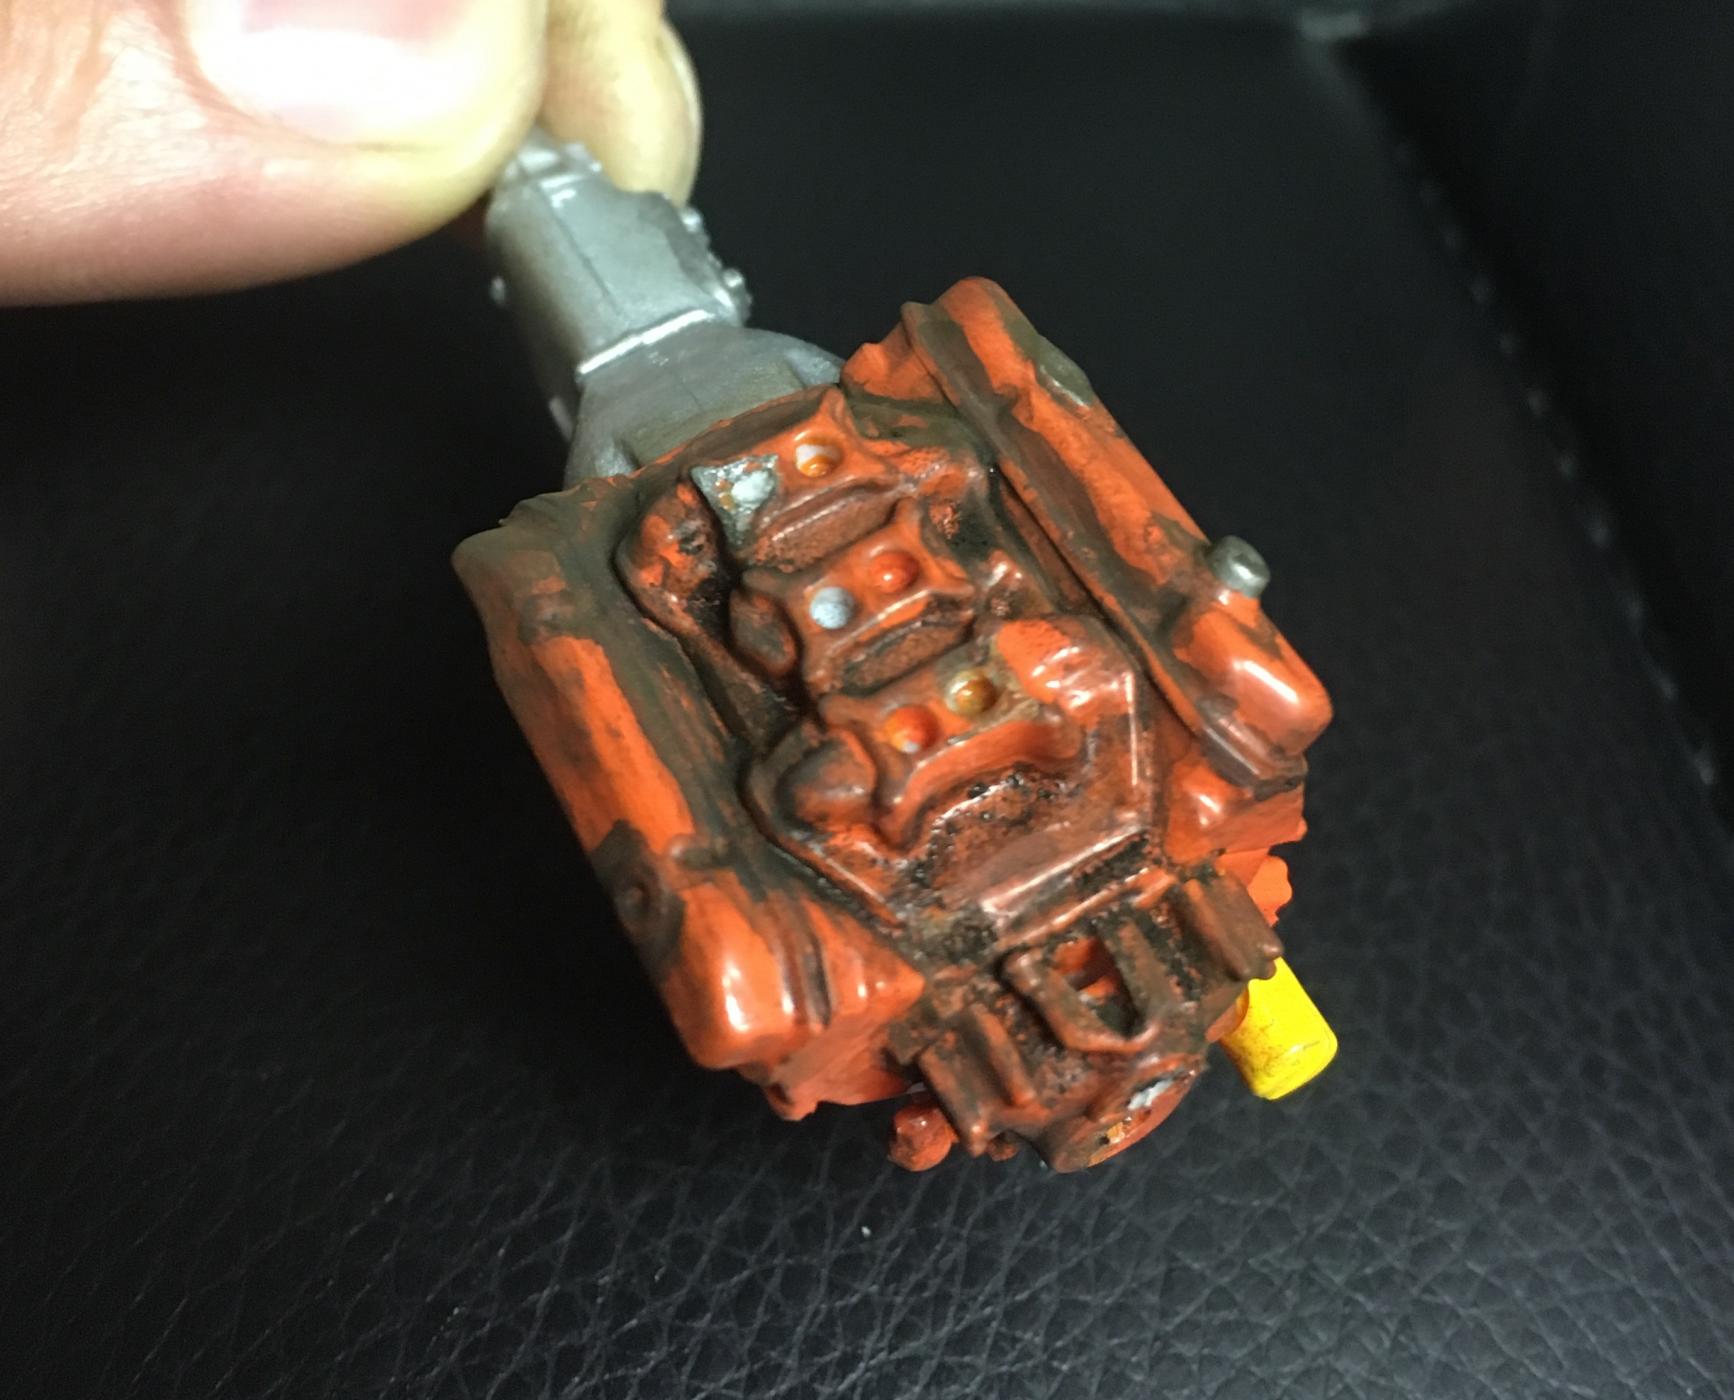
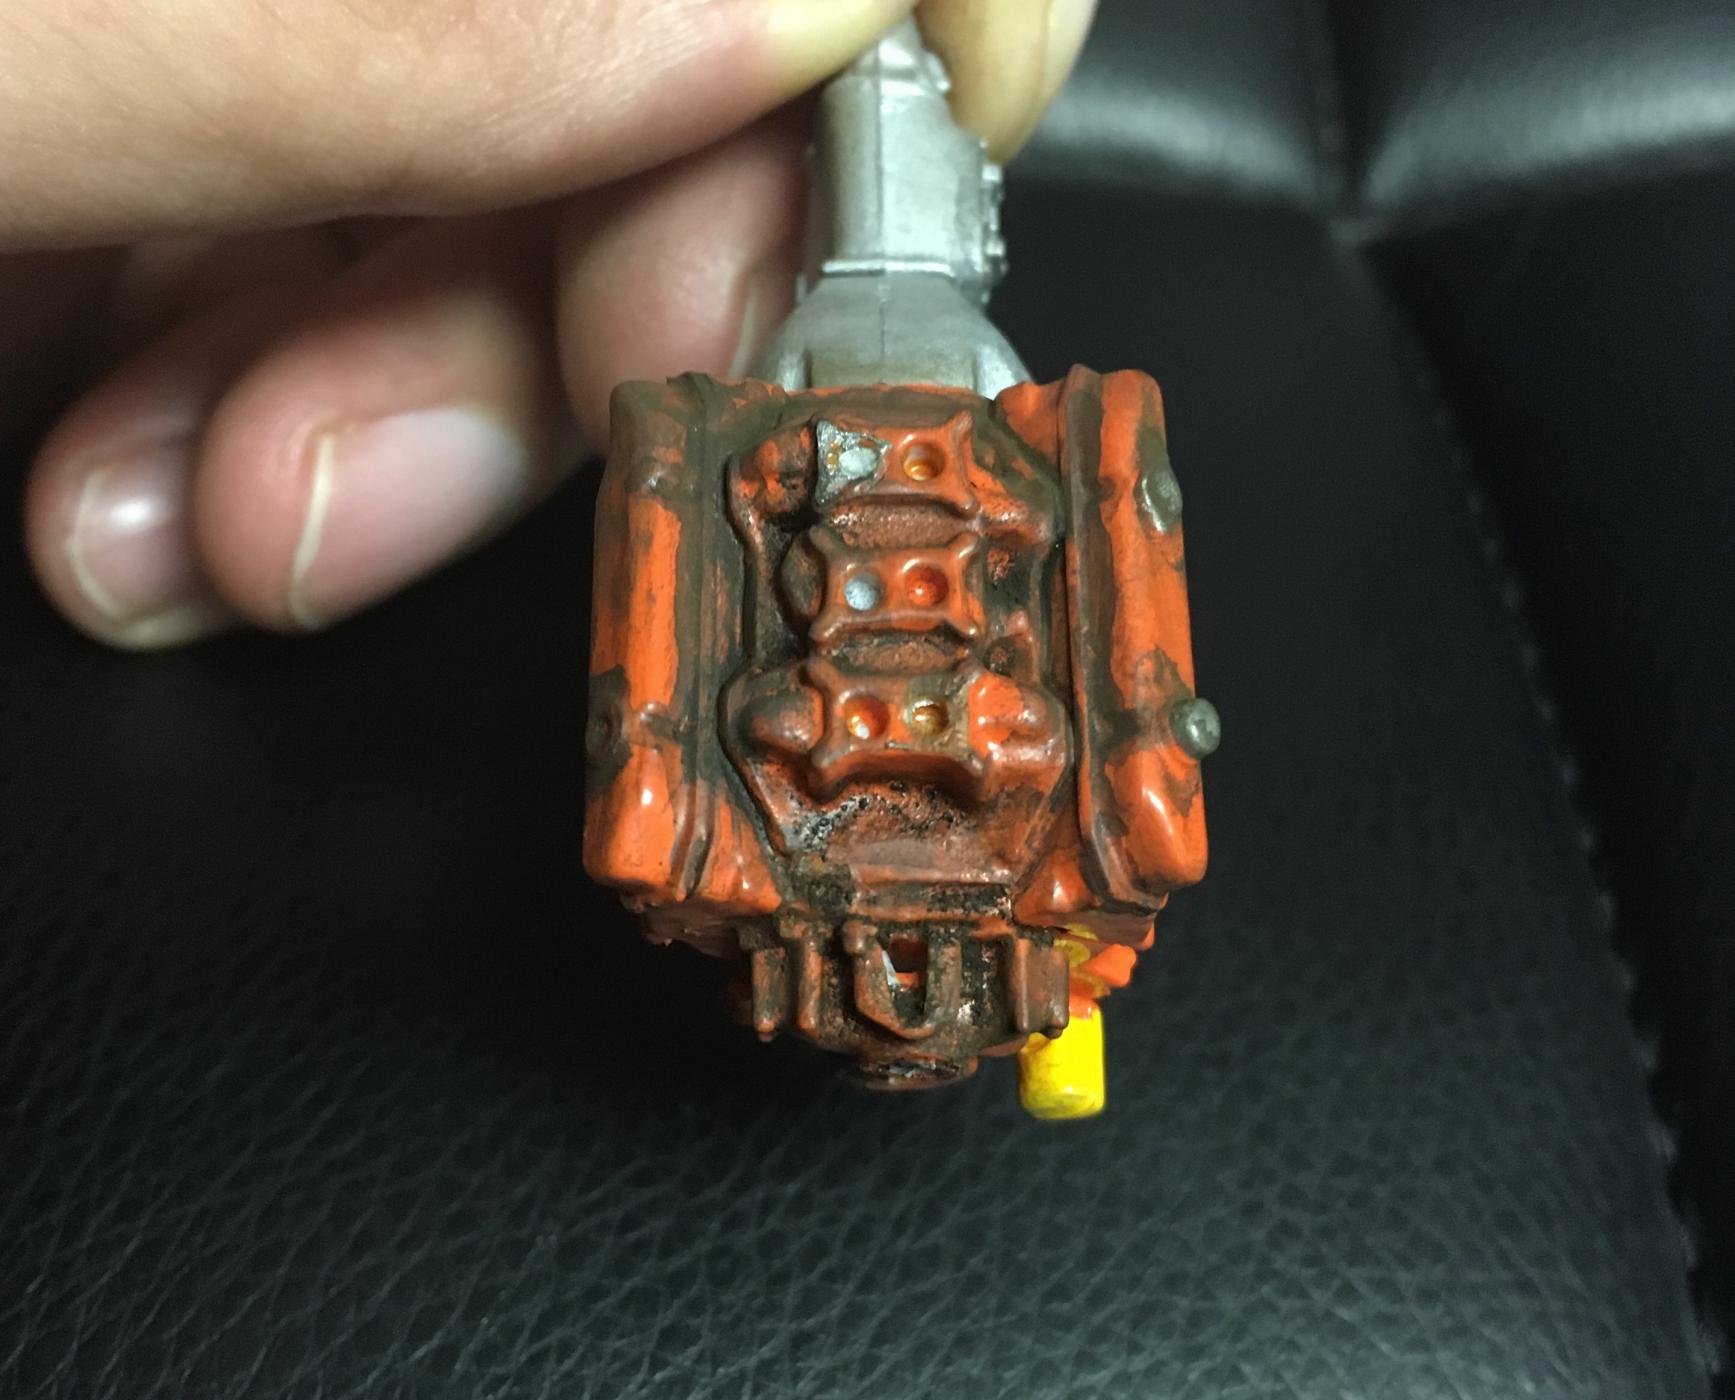
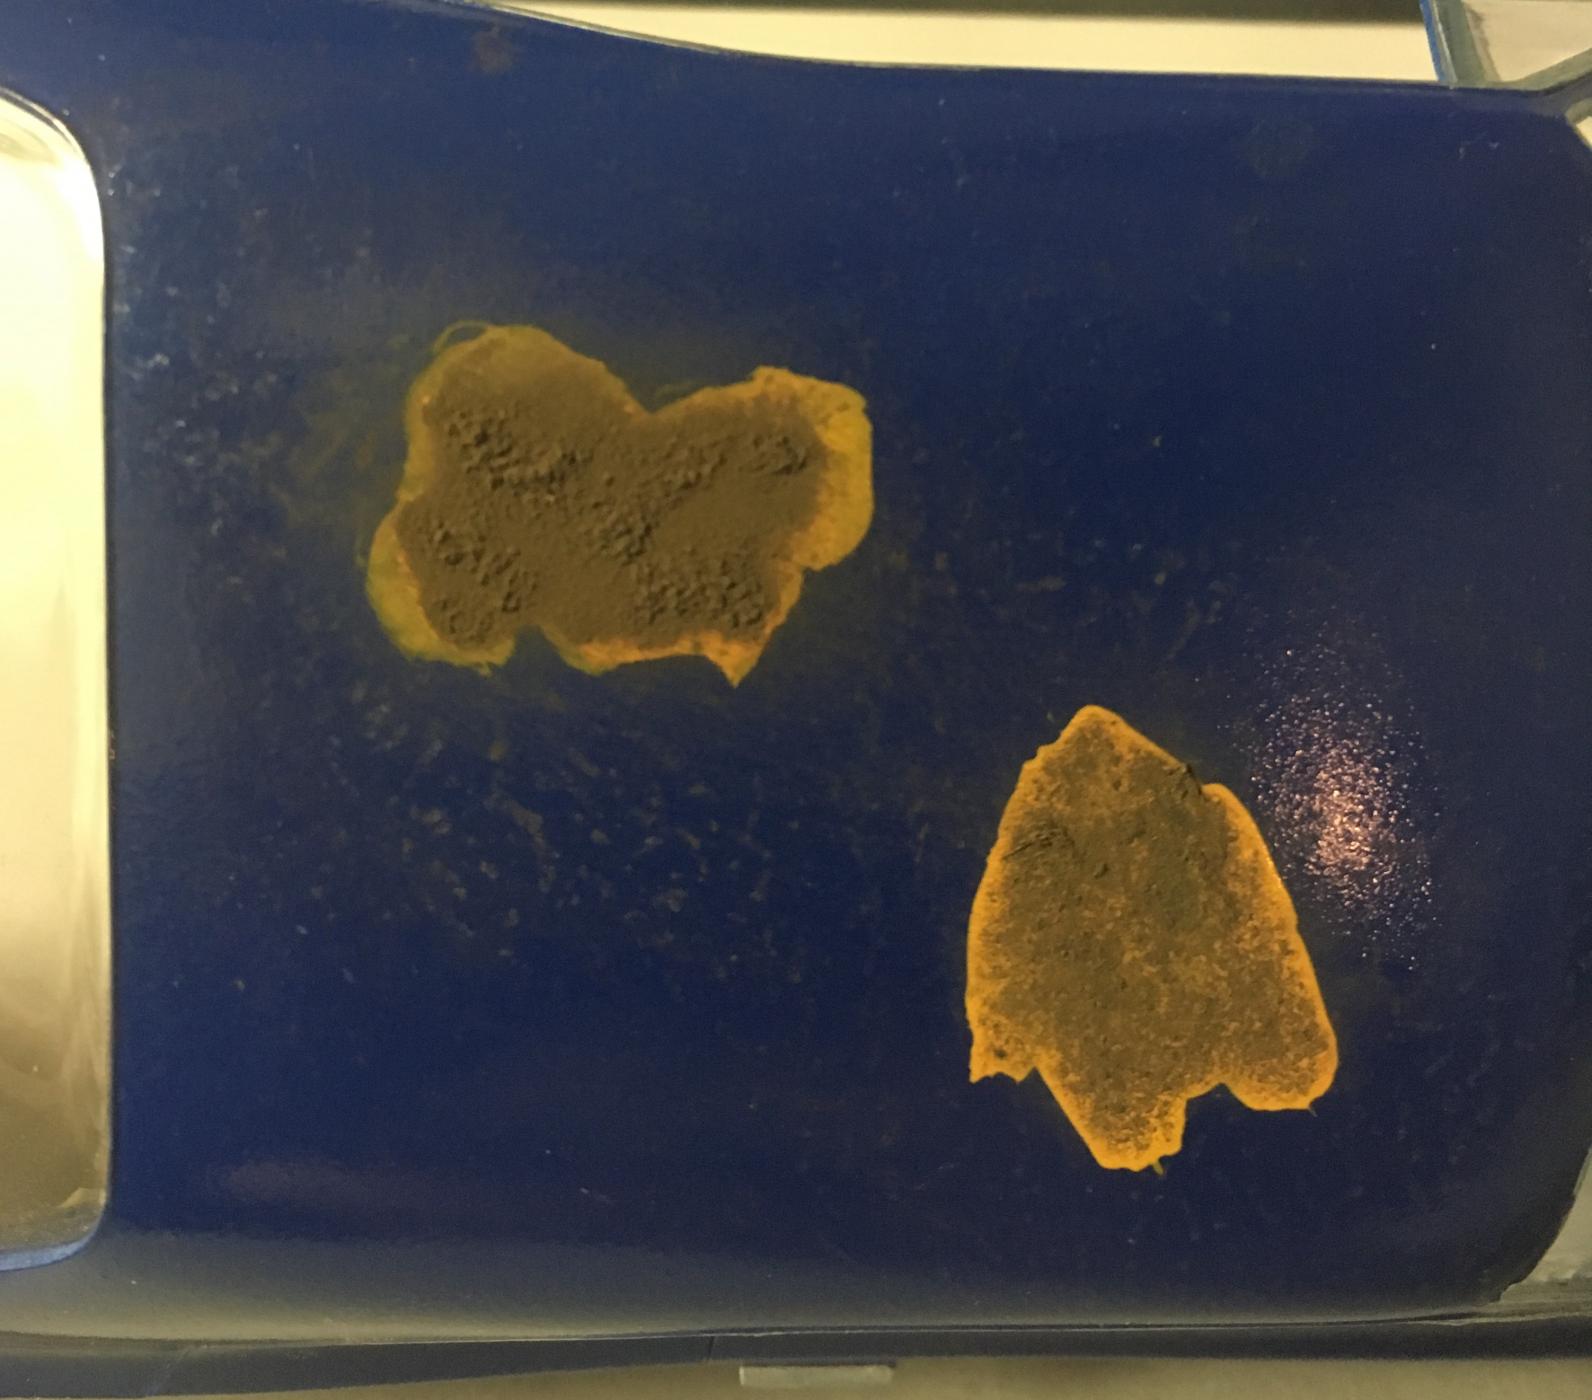
Spent some time playing around with the rust and I think I've got what I'm going to go with. I made a mix of Tamiya hull red and Tamiya orange (around 1/3 red to 2/3 orange). I'll spray the body in straight hull red, then do the salt method on the areas I'm rusting, then the final paint (not sure on final colour yet). Once that's done, go over the rusted spots with the mix, sprinkling and lightly press the real rust powder into it. Once that's all dry, lightly scrub the access off with a toothbrush. I played about on a test body (just the mix and powder) and it looks good enough for me. I also dry brushed a spare 440 with the powder and it looks good, with a wash added it'll work fine. Also tried making a rust hole, turned out ok, but I'll practice a bit more before going at the Daytona. The trunk shot is the paint mix and powder, I got it a bit thick on the left side. The roof shot was a few test spots with the powder over straight orange, the right one just sprinkling the powder on, and the left pressing in into the paint a bit. The hole is just hull red to give me a decent idea of how it'd look, the powder will help a lot there (also not cracking the plastic).
-
Thanks for the tips! I do have the testors rubber, and enough various other grays, blacks and browns to do some experimenting on making my own washes. A good plan or the afternoon!
-
I do have a set of Tamiya weathering power, but I've never used them. What colours do you suggest to use to make the wash?
-
Ok, not much of an update here. I've been laid off since July and have been busy doing interviews, tried a job working in the shop for the local GM dealer, but that didn't pan out. I've got the basic engine painted, and I'm looking into what ways there are for weathering it. I've got rust (real rust from #0000 grade steel wool), I just need to settle on a wash for oiling up the engine. I've got more time now, so hopefully I can put more time into this.
-
1961 Chrysler 383
Furiousgeorge replied to MrObsessive's topic in General Automotive Talk (Trucks and Cars)
If I recall correctly, the B series engines ranged from 350 to 440 cubic inches, and began production in the late '50's. Any MoPar big block engine will work, as the difference in scale between a 383 and a 440 are (I think) indistinguishable to the naked eye. Since you already have the cross ram set up, you're nearly there. I'd recommend the 440 from the Revell '68/9 Chargers and Daytona, if you need a 1/25. Love those kits! -
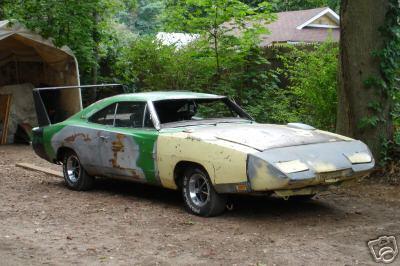
That one shows up for me, anyone else? This is another of the Daytona's I found for inspiration.
-
-
Good! I've never had troubles posting pictures before, not sure why it went sideways this time? I'd prefer the picture in the post over the link, but I guess I'll take what I can get.
-
http://i86.photobucket.com/albums/k107/saltyyellowdodge/B7647C7A-7FF3-4849-8DEB-9005B7613FD2_zpsmrvtvn6f.jpg http://i86.photobucket.com/albums/k107/saltyyellowdodge/EB651F65-7B13-46DE-A51D-1A38A6772476_zpswrtafugl.jpg lets see if it works this time...
-
I'm not sure what's going on with the pictures, they were there at first, now nothing? I'll try using the laptop once I get home and see if they works. I did come across that car in my research, it's one of my main sources.
-
Alright, I got the inspiration for this from seeing Crazyrichards barn find Nova. I've never done weathering before, so this should be interesting! I'm using the Scenic Rust kit, I've tried a quick bit on a junk body to see how well it works. Should know by morning. I'm using the Revell Daytona, and plan on all kinds of bent/damaged/missing stuff. I've got a start on the 440, I drilled out the intake since the carb will be missing, and drilled out the hole for the PCV. I'm going to try to replicate rags stuffed in the intake to keep junk out of it. If anyone has any suggestions for what to add or forget, let them fly!
-
1965 Plymouth Fury. Update, 7/27, WHEW!
Furiousgeorge replied to StevenGuthmiller's topic in WIP: Model Cars
Great job so far! I used to own a '66 Sport Fury with a 4bbl 383 Commando, and that car could move like you wouldn't believe a big car like that could! Wish I'd been able to keep the old girl... I'll be watching this build for ideas to build my Johan '66 Fury! Keep up the good work! -
Amazing work! I've got a Daytona I'd like to rust out like this, but I lack the supplies and courage! This is definitely driving me closer though! Fantastic!
-
Had a great trade with Brent! Well packed and arrived quickly! Thanks again!
-
Thanks! The headlamps I painted with Tamiya acrylic smoke.
-
Pic as promised.
-
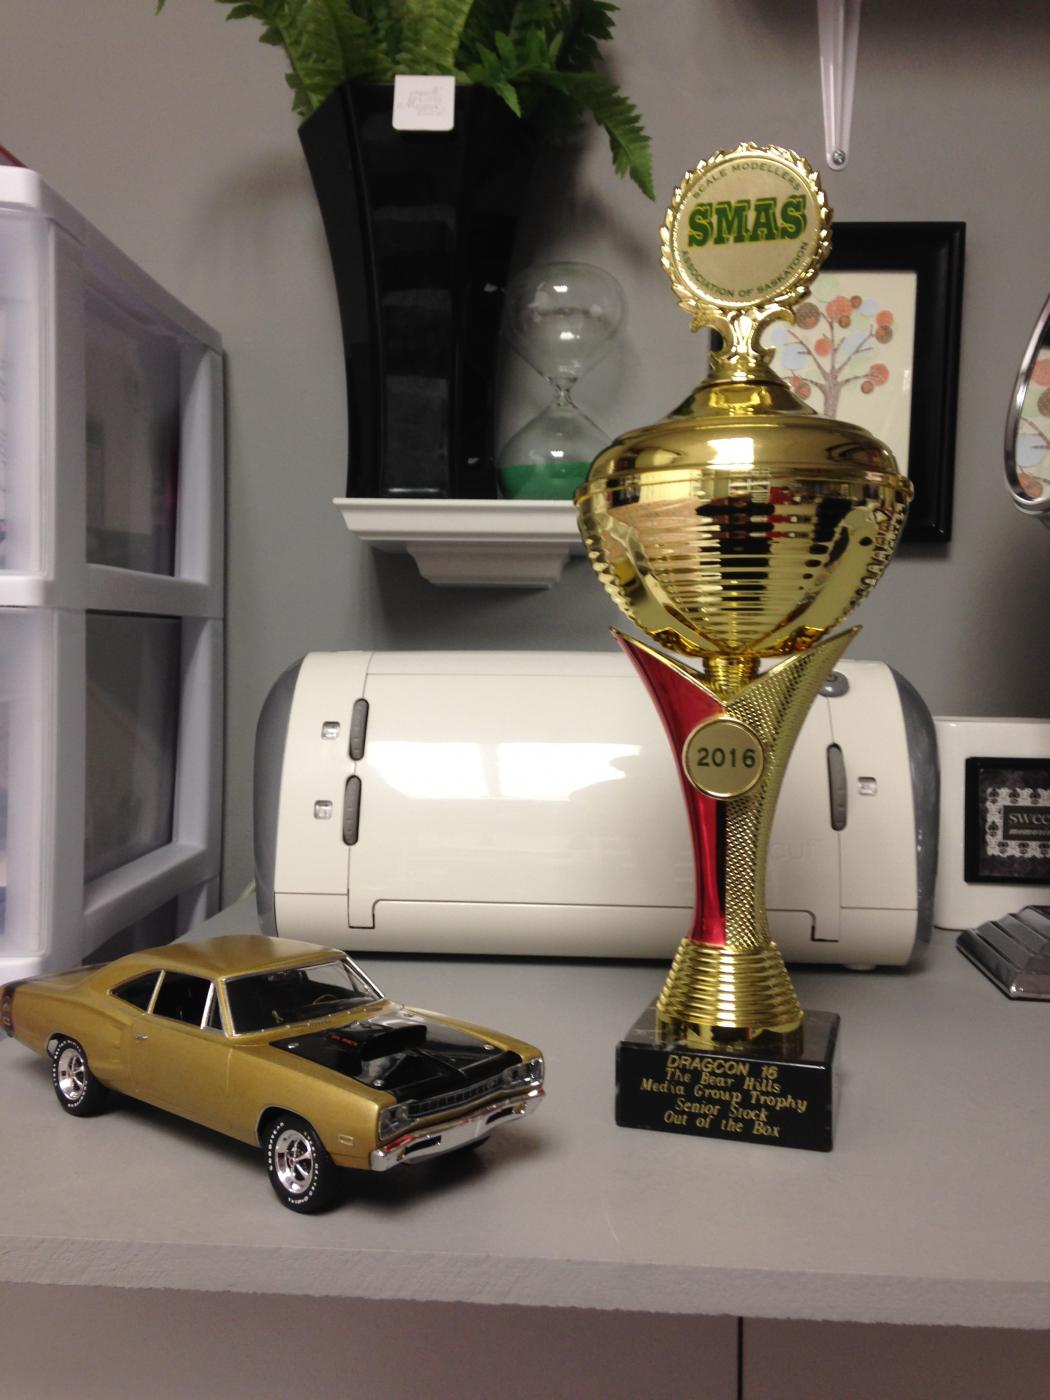
Thanks for all the comments guys, means a lot! Like I'd said, I built this car for a local contest that went over Friday and Saturday. Not huge, there was about ten or eleven tables. A few tables were for military and oddball scaled stuff, but the bulk were 1/24 and 1/25 automotive. I won a trophy with this car for best box stock! The kids went nuts! A great experience that hopefully I can expand upon next year. I'll get a picture of it up as soon as I get a chance.
-
I don't know for sure, but I'd assume not, since they didn't bother masking it any other time. That's one of the things I never thought about. Oh well, next time I guess.